1
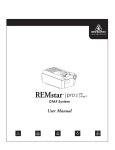
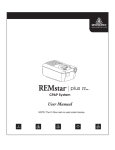
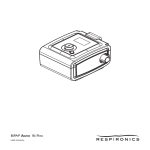
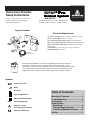
BiPAP® Pro
Home Care Provider
Setup Instructions
Bi-level System
With Bi-FlexTM
Always use these instructions along with
the User Manual when assembling or
adjusting this equipment.
www.respironics.com
The BiPAP Pro Bi-level system is intended for the
treatment of adult obstructive sleep apnea only.
System Contents
Electrical Requirements
User
Manual
BiPAP Pro
With
SmartCard
Power
Cord
SmartCard
Carrying
Case
Pollen
Filters
Filter
Cap
Optional
Ultra-fine
Filter
AC Power Consumption: 100 to 240 VAC, 50/60 Hz, 1.0 A max.
DC Power Consumption: 12 VDC, 4.0 A max.
Type of protection against electric shock: Class II Equipment.
Degree of protection against electric shock: Type BF Applied Part.
Degree of protection against ingress of water: Ordinary Equipment (IPX0).
Pressure Range: 3 to 20 cm H2O (in 1 cm H2O increments).
Mode of Operation: Continuous.
Flexible Tubing
6 ft. (1.83 m) x 22 mm I.D.
Sleep
Solutions
www.respironics.com
Included with the BiPAP Pro is the Encore Data Management software SmartCard
feature that records device usage. Another feature is the FOSQ “Quality of Life”
questionnaire. Your patients can periodically complete this questionnaire and send either
you or their health care professional their answers (recorded on the SmartCard). The
FOSQ questionnaire is detailed in the enclosed “Sleep Apnea Solutions” brochure.
Symbols
Pressure ON / OFF
Ramp
DC Power
Table of Contents
Type BF Applied Part
Class II (Double Insulated)
IPX0
Ordinary Equipment
Attention, consult
accompanying documents
0123
European CE Marking
Warnings & Cautions ......................... 2
Contraindications ............................... 2
Accessories ........................................ 3
System Setup SmartCard ........................................ 4
Therapy Display Screens ................ 6
Pressure Adjustment Screens ..... 10
Service .............................................. 11 1
Warnings & Cautions
CAUTION!
• US federal law restricts this device to sale by or on the order of a physician.
WARNING!
• This device is intended for adult use only.
Indicates the
possibility for
injury to the user
or the operator.
• This device is not intended for life support.
• CPAP and bi-level devices have the potential to allow rebreathing of exhaled air. To reduce this
potential, observe the following:
- Use Respironics circuit accessories.
- Do not wear the mask and headgear for more than a few minutes while the device is
not operating.
- Do not block or try to seal the vent holes in the exhalation port.
As with most CPAP and bi-level devices: At low CPAP pressures, some exhaled gas (CO2) may
remain in the mask and be rebreathed.
• Do not use this device if the room temperature is warmer than 95° F (35° C). If this device is
used at room temperatures warmer than 95° F (35° C), the temperature of the airflow may
exceed 106° F (41° C). This could cause irritation to your airway.
• This equipment is not suitable for use in the presence of a flammable anesthetic mixture in
combination with oxygen or air, or in the presence of nitrous oxide.
• To avoid electrical shock, disconnect the power cord before cleaning. DO NOT immerse the
BiPAP Pro in any fluids.
CAUTION!
Indicates the
possibility of damage
to the device.
• If you notice any unexplained changes in the performance of this device, if it makes unusual or
harsh sounds, if it has been dropped or mishandled, if the enclosure is broken, or if water has
entered the unit, discontinue use and contact your home care provider.
• Tobacco smoke may cause tar build-up that may result in the BiPAP Pro malfunctioning.
• The BiPAP Pro must be positioned on its base for proper operation.
Contraindications
When assessing the relative risks and benefits of using this equipment, the clinician should understand
that this device can deliver pressures of up to 20 cm H2O. Also, in the unlikely event of certain fault
conditions, a maximum pressure of 30 cm H2O is possible. Studies have shown that the following preexisting conditions may contraindicate the use of positive airway pressure therapy for some patients:
• Bullous Lung Disease
• Pathologically Low Blood Pressure
• Pneumothorax
• Pneumocephalus has been reported in a patient using nasal Continuous Positive Airway
Pressure. Caution should be used when prescribing CPAP for susceptible patients such as
those with cerebral spinal fluid (CSF) leaks, abnormalities of the cribriform plate, prior
history of head trauma, and/or pneumocephalus. (Chest 1989; 96:1425-1426)
The use of positive airway pressure therapy may be temporarily contraindicated if the patient exhibits
signs of a sinus or middle ear infection. This therapy is not for use with patients whose upper airways are
by-passed. Should your patient have any of these conditions, a physician will determine if Bi-level
therapy is appropriate.
2
Accessories
WARNING!
Do not connect any equipment to the BiPAP Pro unless recommended by Respironics or the health care
professional. Verify that an exhalation port is present to exhaust CO2 from the circuit. If circuit accessories other than those recommended by Respironics are connected to the BiPAP Pro, then pressures must
be verified. Use of these accessories may alter the pressure received, reducing the effectiveness of
treatment.
Recommended Patient Circuit
• Respironics Nasal Mask with integrated exhalation port
(or Respironics mask with separate exhalation port such as the Whisper Swivel® II)
• Respironics 6 ft. (1.83 m) reusable, flexible tubing
• Respironics Headgear (for the mask; not shown)
DC Power
The Respironics DC Power Cord can be used to operate the BiPAP Pro
system in a stationary recreational vehicle, boat, or motor home.
Flexible
Tubing
The Respironics DC Battery Adapter Cable enables the BiPAP Pro
system to be operated from a 12 VDC free-standing battery only.
CAUTION!
DC Power is not intended to be used as battery backup. DO NOT connect the DC Power System
while the BiPAP Pro is operating on AC power. System damage may occur.
Using an Ultrafine Filter
You can use the optional ultra-fine filter in addition to the pollen filter for more complete filtration of
very fine particles. The ultra-fine filter will be most beneficial to those who are sensitive to tobacco
smoke or other substances with small particles.
Supplemental
Oxygen
Please note the warnings that appear next when the patient is using oxygen with the BiPAP Pro
system.
WARNING!
Oxygen should be administered only on the order of a health care professional.
WARNING!
The oxygen supply must comply with local regulations for oxygen use.
WARNING!
When using oxygen with this system, a Respironics Pressure Valve (part number 302418) must
be placed in-line with the patient circuit.
WARNING!
When using oxygen with the BiPAP Pro system, turn the BiPAP Pro on before turning the
oxygen on. Turn the oxygen off before turning the BiPAP Pro off. This will prevent oxygen
accumulation in the BiPAP Pro.
WARNING!
Oxygen accelerates fires. Keep the BiPAP Pro and the oxygen container away from heat, open
flames, any oily substance, or other sources of ignition. DO NOT smoke in the area near the
BiPAP Pro or the oxygen.
3
Accessories/SmartCard
WARNING!
If administering fixed-flow supplemental oxygen, the inspired oxygen will vary depending on the IPAP and
EPAP settings, the patient breathing rate, and the leak rate. Substantial leaks around the mask may also
reduce the inspired oxygen concentration. The oxygen flow into the patient circuit must not exceed 15 L/
min., and the oxygen pressure must not exceed 50 psi.
WARNING!
When using the Respironics Pressure Valve, place the valve in-line with the patient circuit and connect the
oxygen as shown here.
To Controlled
Oxygen Source
O2 Enrichment
Attachment
Using the
SmartCard
Pressure
Valve
The BiPAP Pro is delivered with applicable Respironics software and SmartCard installed.
The SmartCard is a plastic card similar in size and shape to a normal credit card. However, instead of
holding information on a magnetic stripe, it holds it in a small silicon chip embedded in the card.
When installed into a BiPAP Pro device, the SmartCard
records the date, time, ramp usage, and duration of each
use (minimum storage capacity: 9 months). When capacity
is reached, the oldest data is overwritten. Using the
Encore software (version 3.0 or higher), the usage data
can be downloaded and viewed. If the card is not
installed, the device usage will not be recorded. When
a SmartCard is installed, an arrow will be displayed in
the upper right corner of the screen.
¤
¤
SmartCard™
¤
The SmartCard can also be programmed with the patient’s
prescription by using applicable Respironics software and
the SmartCard reader/writer (available from Respironics). When the programmed SmartCard is inserted
into the BiPAP Pro, the prescription settings are automatically transferred into the device and erased from
the SmartCard. The SmartCard will then start to collect patient data.
4
System Setup - SmartCard
Downloading
Data
You can download data from the SmartCard by one of two methods:
1. Connect the BiPAP Pro (with the SmartCard installed) directly to a Windows-compatible computer using the
Encore software Communications Cable (available from Respironics). Connect one end to the
Communications connector on the back of the BiPAP Pro. Connect the remaining end to the computer’s
communication port.
2. Open the patient’s file in the Encore software (or create a new patient file). Choose “Extract Data” from the
“Communications” menu. You can view the extracted data using the Encore software.
- or 1. Connect a Respironics SmartCard reader/writer directly to a Windows-compatible computer following the
instructions included with the reader/writer. Remove the SmartCard from the BiPAP Pro and insert it into the
reader/writer.
2. Open the patient’s file in the Encore software (or create a new patient file). Choose “Extract Data” from the
“Communications” menu. You can view the extracted data using the Encore software.
Programming
a SmartCard
To program the SmartCard with a patient’s prescription:
1. Connect a Respironics SmartCard reader/writer directly to a Windows-compatible computer following the
instructions included with the reader/writer. Remove the SmartCard from the BiPAP Pro and insert it into the
reader/writer.
2. Open the patient’s file in the Encore software (or create a new patient file). Choose “SmartCard Wizard”
from the “Communications” menu. Following the prompts, complete the patient’s prescription. The
patient’s name and prescription will be saved to the SmartCard.
3. Remove the SmartCard from the reader/writer. If desired, write the patient’s name on the front of the card.
Changing Settings To change the settings in the BiPAP Pro using a programmed SmartCard:
Using a SmartCard 1. Make sure the BiPAP Pro unit is plugged in. Insert the programmed
SmartCard into the slot on the left side of the BiPAP Pro (logo side
facing up). When the “Blower Off” screen displays, there will also be
an arrow in the upper right corner indicating that the card is inserted
correctly.
2. Turn the airflow on to verify the new prescription setting. The card can
now be removed or you can leave the card in the BiPAP Pro to record
device usage. Once the prescription settings have been transferred to
the BiPAP Pro, they will be deleted from the SmartCard.
Blower Off
Usage
Blower On
Usage
Menu
P=12
This section provides detailed instructions for the Therapy Menu Display Screens and the Pressure
Adjustment Menu Display Screens.
WARNING!
DO NOT use the BiPAP Pro if the display is erratic. Contact Respironics.
Prescribed therapy settings can only be set using the Therapy Menu and the Pressure Adjustment Menu. To
prevent patients from tampering with the settings, the directions to access these menus should not be
revealed to the patient.
5
System Setup - Therapy Menu Display Screens
The green signal light will come on when the unit is
ready for use. The light goes out when the airflow is
turned on. A flashing light signals a system error.
Check the “Routine Use / Screen Messages” section of
the user manual for further instructions.
Setup Tip: During System Setup, press the left user
button to confirm a correct setting; press
the right user button to change an incorrect
setting. Holding the right user button down
will cause the values to change more
quickly.
Signal
Light
Display
Screen
User
Buttons
©Respironics
2001
v.x.y
Pressure
On/Off
Button
Ramp
Button
Therapy Menu Display Screens
1. Enter the Therapy Setup Menu by holding the two top user
buttons down while plugging in the power cord. Hold the buttons
down until the unit beeps. You cannot turn the airflow on when
you are in this Menu. When you exit this menu, the Patient Setup
Menu will be displayed.
Choose the
Display
Language
a. Choose the display language.
If the language setting is correct, press the button below
“Yes.”
To change the language, press the button below “No” until
the correct language is displayed. Press the button below
“Yes” to confirm the setting.
Choose the
Mode
Choose the
Comfort Control
Parameter
6
English?
Yes
b. If the mode is correct, press the button below “Yes.” To
change the mode, press the button below “No” until the
correct mode appears. Press the button below “Yes” to
confirm the setting.
c. If you chose the Bi-level mode, the Comfort Control
feature will appear. It allows you to set the transition
time from EPAP to IPAP. Because Comfort Control is
not a prescribed setting, this parameter is adjustable so
that the patient can find the most comfortable setting.
Comfort Control parameters appear in the diagram to
the right. A setting of “Off” will result in normal BiPAP
transition from EPAP to IPAP. Settings of “1,” “2,” and
“3” will progressively increase the amount of time
between EPAP and IPAP. You may change this parameter at any time.
If the setting is correct, press the button below “Yes.” To
change the setting, press the button below “+1” until the correct
setting appears. Press the button below “Yes” to confirm the
setting.
NOTE: The user can also adjust the Comfort Control parameter. See the BiPAP Pro User Manual for more information.
No
Mode=Bi-level
Yes
No
1 2
IPAP
3
Off
EPAP
Time
Comfort=1
Yes
+1
System Setup - Therapy Menu Display Screens
-orChoose the
Bi-Flex
Level
d. If you chose the Bi-Flex mode, the Bi-Flex level will
appear. The Bi-Flex feature adjusts bi-level therapy
by inserting a small amount of pressure relief during
the latter stages of inspiration and during active
exhalation (the beginning part of exhalation). In the
diagram to the right, the bold lines represent Bi-Flex
in comparison to the dashed line representing normal
BiPAP therapy. Bi-Flex levels of 1, 2, or 3 progressively reflect increased pressure relief that will take
place at the end of inspiration and at the beginning of
expiration.
IPAP
BiPAP
EPAP
If the setting is correct, press the button below “Yes.”
To change the setting, press the button below “+1” until the
correct setting appears. Press the button below “Yes” to
confirm the setting.
Bi-Flex
1
2
3
Time
Bi-Flex=1
Yes
+1
NOTE: If the Bi-Flex setting chosen does not correspond to the patient’s breathing rate, adjust the
setting for a more natural breathing rate.
NOTE: The user can also adjust the Bi-Flex level setting. See the BiPAP Pro user manual for more
information.
Set the IPAP
and EPAP
Pressures
e. The IPAP and EPAP pressure settings will be displayed.
If the pressure setting is correct, press the button below “Yes.”
To change the pressure, press the button below “+1” until the
correct pressure is displayed. Press the button below “Yes” to
confirm the setting.
IPAP Range: 3 to 20 cm H2O (1 cm H2O increments)
EPAP Range: 3 to IPAP setting (1 cm H2O increments)
IPAP Pres.=12
Yes
+1
EPAP Pres.=10
Yes
+1
NOTE: If CPAP therapy is desired, set the IPAP and EPAP to the
same pressure setting.
NOTE: The IPAP setting cannot be set lower than the EPAP setting. Once the IPAP setting has reached
20 cm H2O, pressing the “+1” button will return both the IPAP and EPAP setting to 3 cm H2O.
Choose the
Ramp Style
f. Choose the ramp style: “Bi-level,” “Linear,” or “None.”
If the ramp style is correct, press the button below “Yes.”
Ramp=Bi-level
Yes
No
To change the ramp style, press the button below “No” until the
correct style is displayed. Press the button below “Yes” to confirm
the setting.
NOTE: If the ramp style is set to “None,” the following ramp settings will not appear. Go to step i.
7
System Setup - Therapy Menu Display Screens
Airflow
Turned On
Ramp Button
Pressed
IPAP
Pressure
EPAP
Pressure
Airflow
Turned On
Ramp Button
Pressed
IPAP
Pressure
EPAP
Pressure
Minimum
Ramp
Pressure
Minimum
Ramp
Pressure
0 cm H2O
Ramp Time
0 cm H2O
Minutes
Ramp Time
Minutes
Bi-level Ramp
Linear Ramp
Recommended for patients with higher EPAP
settings. Maintains the pressure differential
between the IPAP and EPAP settings.
Recommended for patients with lower
EPAP settings or when there is a large
differential between the IPAP and EPAP settings.
Set the
Ramp Time
g. “Ramp Time” will appear.
If the Ramp Time is correct, press the button below “Yes.”
To change the Ramp Time, press the button below “+5” until
the correct time is displayed. Press the button below “Yes”
to confirm the setting.
Range: 5 to 45 minutes (5 minute increments)
Set the
Minimum
Ramp
Pressure
h. The minimum ramp pressure will be displayed.
Ramp Time=15
Yes
+5
The patient also has
access to this setting in the Patient Setup Menu.
If the minimum ramp pressure is correct, press the button
below “Yes.”
Min Ramp P.=5
Yes
+1
To change the minimum ramp pressure, press the button below “+1” until the correct pressure is
displayed. Press the button below “Yes” to confirm the setting.
Range: 3 cm H2O to EPAP pressure setting (1 cm H2O increments)
Mask Alert
Setting
i. The mask alert setting will be displayed. When turned “On,” the
mask alert will sound whenever a large, continuous leak (such as
mask removal) has been detected in the circuit, and the correct
pressure cannot be delivered to the patient. The patient also has
access to this setting in the Patient Setup Menu.
If the setting is correct, press the button below “Yes.”
To change the setting, press the button below “No.”
Press the button below “Yes” to confirm the setting.
8
Mask Alert=On
Yes
No
System Setup - Therapy Menu Display Screens
Auto-On
Setting
j. The Auto-On setting will be displayed. The Auto-On feature
allows the airflow to automatically turn on when the patient
Auto-On=On
begins breathing through the connected circuit. Some mask types
Yes
No
and circuit configurations may prevent the BiPAP Pro from
automatically turning on. The Pressure On/Off button can always
be used to turn the airflow on.
If the setting is correct, press the button below “Yes.”
To change the setting, press the button below “No.” Press the button below “Yes” to confirm the
setting.
Auto-Off
Setting
k. “Auto-Off” will appear. The Auto-Off feature allows the airflow
to automatically turn off when the BiPAP Pro does not detect
Auto-Off=Off
Yes
No
breathing through the connected circuit. This is usually because
the mask has been removed or the tubing has become disconnected. Some mask types and circuit configurations may prevent
the BiPAP Pro from automatically turning off. The Pressure On/Off button can always be used to turn
the airflow off.
If the setting is correct, press the button below “Yes.”
To change the setting, press the button below “No.” Press the button below “Yes” to confirm the
setting.
NOTE: During setup, if you are using a water column manometer to verify the pressure setting, make
sure this setting is in the “Off” position. Otherwise, the airflow will automatically turn off unless
it detects breathing through the circuit.
Therapy
Hours
Setting
l. The therapy hours will be displayed. This screen displays the
total number of hours the patient has used the BiPAP Pro at
Thp Hrs=12345.6
pressure (including ramp time). Like a trip meter in a car, the
Keep
Erase
therapy hours can be reset to give a detailed look at patient
usage. This data may be useful in tracking patient compliance.
Resetting the therapy hours will not erase the total operation time or other patient data.
To continue adding therapy hours to the current total, press the button below “Keep.” To erase
the therapy hours, press the button below “Erase.” The total therapy hours will now read
“0.0.” Press the button below “Yes” to confirm the setting.
Save and Exit
Settings
m. You have completed all of the settings.
To exit the Therapy Setup Menu, press the button below “Yes.”
To make further changes to the settings, press the button below
“No.”
You will return to the beginning of the Therapy Setup Menu.
IMPORTANT!
If a power interruption occurs before you exit the Therapy Setup Menu, the changes will not be
saved. To make further setting changes after you have exited the Therapy Setup Menu, you must
unplug the power cord from the BiPAP Pro for a few seconds and repeat the instructions.
Save and Exit?
Yes
No
9
System Setup - Therapy Menu Display Screens
2. Prepare the BiPAP Pro for delivery.
a. Verify the settings. Optional: Pressure Verification via Manometer - A water column manometer
can be connected at the end of the 6 ft. patient tubing for additional pressure verification. When the
blower is turned on, the current pressure will be displayed in the upper right corner of the screen.
b. Follow the instructions in the BiPAP Pro User Manual to install the filter(s), and connect the
patient circuit.
c. Fill out the information form in the back of the BiPAP Pro User Manual, and review the manual
with the patient.
FOSQ
The BiPAP Pro is programmed to allow the users to take a “Functional Outcomes of Sleep Questionnaire”
(FOSQ). FOSQ is a “quality of life” test designed specifically for people with sleep disorders. The results allow
health care professionals to see how therapy has improved the quality of their patient’s life. By having the
patients complete the questionnaire periodically, they can provide valuable information about the effectiveness of
their treatment. Using the BiPAP Pro device to answer the questions, the SmartCard will record the answers. The
card can then be removed from the device and mailed to the doctor for evaluation using the Encore software.
Refer to the “Sleep Apnea Solutions” brochure (included with this package) for further information.
NOTE: The user has access to the FOSQ test. See the BiPAP Pro User Manual for more information.
Pressure Adjustment Menu Display Screens
Adjust the
IPAP and
EPAP
Pressures
The Pressure Adjust Menu enables the medical
provider to adjust the IPAP and EPAP Pressure
settings while the airflow is turned on. The ramp
button is disabled while you are in this menu.
After the airflow is turned on, enter the Pressure
Adjustment Menu by holding the two top user
buttons down until the IPAP pressure screen is displayed.
Press the button below “+1” or “-1” to raise or
lower the IPAP Pressure. After several seconds, the
bottom line of the display screen will flash “Ramp =
EPAP.” You can now press the ramp button to
change the display to the EPAP setting.
Press the button below “+1” or “-1” to raise or lower the EPAP
pressure. After several seconds, the bottom line of the display
screen will flash “Ramp = Exit.” You can now press the Ramp
button to exit the Pressure Adjustment Menu.
IPAP Range: 3 to 20 cm H2O (1 cm H2O increments)
EPAP Range: 3 to IPAP setting (1 cm H2O increments)
10
IPAP Pres.=12
-1
+1
System Setup - Pressure Adjustment Menu Display Screens
NOTE: If CPAP therapy is desired, set the IPAP and EPAP
to the same pressure setting.
NOTE: The IPAP setting cannot be set lower than the EPAP
setting. Once the IPAP setting has reached 20,
pressing the “+1” button will return both the IPAP
and EPAP setting to 3 cm H2O.
EPAP Pres.=10
-1
+1
NOTE: The delivered pressure will increase (or decrease) as the setting is increased (or decreased).
Service
The BiPAP Pro system does not require routine servicing.
CAUTION!
If you notice any unexplained changes in the performance of this device, if it makes unusual or harsh
sounds, if it has been dropped or mishandled,if the enclosure is broken, or if water has entered the unit,
discontinue use and contact your homecare provider.
Total Operation
Time
To display the total operation time, press the button below
“Usage.” The usage hours will be displayed for 10 seconds and
then return to the main screen.
Blower Off
Usage
Menu
Total Operation Time Display
M=100% T=12345.6
Exit
B=12345.6
M=
The amount of memory space available. The SmartCard records patient usage information (e.g., a
history of pressure settings, times the system was used for therapy). Some health care professionals
and home care providers record this information to assist in the patient’s CPAP treatment. When
“000%” is displayed, the memory is full and the current data will start to overwrite the oldest data.
Remind your patient to check this number periodically if you wish to download the stored data
before it is overwritten. The data can be downloaded using the Respironics Encore software,
version 3.0 or higher.
NOTE: The SmartCard must be installed for the patient usage to be recorded. If the
SmartCard is not installed the screen will display “M=---%.”
11
Service
T=
The therapy hours are the total number of hours the BiPAP Pro has operated at therapeutic
pressure (including ramp time). Like a trip meter in a car, the therapy hours can be reset to give a
detailed look at patient usage.
B = The total blower time is the number of hours the BiPAP Pro has been in use. This total includes
factory testing time.
Exit = Returns the display to the main screen.
If the BiPAP Pro begins to function incorrectly, refer to the “Troubleshooting” section of the User Manual
or contact Respironics. Repairs and adjustments must be performed only by trained personnel fully
acquainted with this equipment. Service performed by unqualified personnel or installation of
unauthorized parts could cause personal injury, invalidate the warranty, or result in costly damage.
If you need technical assistance, call
Respironics’ Technical Service Department
1-800-345-6443 (US Customer Service) or 1-724-387-4000
(International Customer Service)
12
1007221
LG 5/25/01