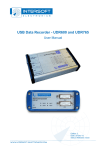
Download USB Data Recorder - UDR600
Transcript
USB Data Recorder - UDR600
User Manual
Edition: 1
Date: 23-Mar-10
Status: Draft Issue
USB Data Recorder - UDR600
Edition Date: 23-Mar-10
DOCUMENT CHARACTERISTICS
General
USB Data Recorder - UDR600
User Manual
Edition:
1
Edition Date:
23-March-2010
Status:
Draft Issue
Keywords:
User manual, USB Data Recorder, UDR600
Abstract:
This user manual describes the use of the UDR600.
Contact Information
Author:
Elke Vanuytven
Editor:
Elke Vanuytven
Contact Person:
Niels Van Hoef
Tel:
+32 14 23 18 11
E-mail Address:
[email protected]
Document Control Information
Document Name:
IE-UM-00170-001 UDR600 User Manual.odt
Path:
C:\Documents and Settings\elke\Desktop\RASS-S User
Manuals\UDR600\
Host System:
Mac OS X 10.5.6
Software:
OpenOffice.org 3.0.1
Size:
821021Bytes
IE-UM-00170-001 UDR600 User Manual.odt
2/20
USB Data Recorder - UDR600
Edition Date: 23-Mar-10
DOCUMENT CHANGE RECORD
Revision
Date
Reasons for change
Pages
Affected
Approved
by
001
10-Mar-10
New document
All
EV
IE-UM-00170-001 UDR600 User Manual.odt
3/20
USB Data Recorder - UDR600
Edition Date: 23-Mar-10
TABLE OF CONTENTS
1. TECHNICAL MANUAL UDR600......................................................................................8
1.1. General Introduction...........................................................................................................................8
1.2. Key Features.......................................................................................................................................8
1.3. Supported Protocols..........................................................................................................................8
1.4. Hardware Description.........................................................................................................................9
2. UDR600 DATA RECORDING: BIT OR SERIAL PROTOCOL RECORDING..................................11
2.1. Introduction.......................................................................................................................................11
2.2. Recording Software..........................................................................................................................11
2.2.1. Getting Started............................................................................................................................11
2.2.2. Making a Recording....................................................................................................................12
2.3. Conversion Software........................................................................................................................14
2.3.1. Convert Bit Recording.................................................................................................................14
2.3.1.1. Single Conversion....................................................................................................................14
2.3.1.2. Batch Conversion....................................................................................................................16
2.3.2. Convert Data Recording.............................................................................................................17
2.3.2.1. Single Conversion....................................................................................................................17
2.3.2.2. Batch Conversion....................................................................................................................18
3. DATA ANALYSIS.........................................................................................................18
4. ANNEXES.................................................................................................................19
4.1. Annex 1: Data Recording Connection Diagram.............................................................................19
4.2. Annex 2: Configuration List: UDR600.............................................................................................20
IE-UM-00170-001 UDR600 User Manual.odt
4/20
USB Data Recorder - UDR600
Edition Date: 23-Mar-10
TABLE OF FIGURES
Figure 1: UDR Control software..................................................................................................................11
Figure 2: UDR Recording.............................................................................................................................13
Figure 3: Convert Bit Recording software..................................................................................................14
Figure 4: PPI Display....................................................................................................................................15
Figure 5: Hexadecimal display of converted data.....................................................................................16
Figure 6: Batch Process section of Convert software..............................................................................16
Figure 7: Convert Radar Data software......................................................................................................17
Figure 8: Hexadecimal display of converted data.....................................................................................18
Figure 9: Data Recording Connection Diagram.........................................................................................19
TABLE OF TABLES
Table 1: UDR600 Connectors........................................................................................................................9
Table 2: Serial Data 1/2 DB15 connectors pin layout................................................................................10
Table 3: RS 232 C Receivers (compatible with RS232C standard)...........................................................10
Table 4: RS 232 C Drivers (compatible with RS232C standard)...............................................................10
Table 5: RS422 Receivers (compatible with RS422 standard)..................................................................10
Table 6: RS422 Drivers (compatible with RS422 standard)......................................................................10
IE-UM-00170-001 UDR600 User Manual.odt
5/20
USB Data Recorder - UDR600
Edition Date: 23-Mar-10
CONVENTIONS USED
G
Note: This icon to the left of bold italicized text denotes a note, which alerts you to
important information.
%
Caution: This icon to the left of bold italicized text denotes a caution, which alerts you to the
possibility of data loss or a system crash.
M
Warning: This icon to the left of bold italicized text denotes a warning, which alerts you to t
he possibility of damage to you or your equipment.
IE-UM-00170-001 UDR600 User Manual.odt
6/20
USB Data Recorder - UDR600
Edition Date: 23-Mar-10
GLOSSARY OF TERMS
ACP
ARP
CPU
FL
FRUIT
GPS
ICD
IE
I/O
IP
LAN
MSSR
Plot extractor
PPI
PSR
Radar
Radome
RASS-R
RASS-S
RDP
SAC
SIC
SSR
TCP
TIS-B
UTC
Azimuth Change Pulse
Azimuth Reference Pulse
Computer Processing Unit
Flight Level, unit of altitude (expressed in 100’s of feet)
False Replies Unsynchronized In Time, unwanted SSR replies
received by an interrogator which have been triggered by other
interrogators
Global Positioning System
Interface Control Document
Intersoft Electronics
Input/Output
Internet Protocol
Local Area Network
Monopulse Secondary Surveillance Radar
Signal-processing equipment which converts receiver video into
digital target reports suitable for transmission by land lines
Plan Position Indicator
Primary Surveillance Radar
Radio Detection And Ranging
Radio-transparent window used to protect an antenna principally
against the effects of weather
Radar Analysis Support Systems – Real-time measurements
Radar Analysis Support Systems – Site measurements
Radar Data Processing (system)
System Area Code
System Identification Code
Secondary Surveillance Radar
Transmission Control Protocol
Traffic Information Services, Broadcast
Coordinated Universal Time
IE-UM-00170-001 UDR600 User Manual.odt
7/20
USB Data Recorder - UDR600
Edition Date: 23-Mar-10
1. TECHNICAL MANUAL UDR600
1.1. General Introduction
A vital part of the radar chain is the data processing unit, with at its output a data stream containing radar
plots or tracks in a specific format. The most common format is ASTERIX, some radars use other formats
like RDIF, AIRCAT, CD, etc. If we want to analyse this data, it must first be recorded and converted into a
uniform format that can be displayed and analysed by dedicated RASS software tools. Generally the data is
produced on serial lines, because it needs to be transmitted to one or more remote centres. This serial link
can use protocols like HDLC, LAP-B or X25. Other formats use a unique protocol such as the 13-bit
formatted CD.
The USB Data Recorder (UDR600) allows to record 2 lines of serial radar data passively (spy-mode). We
currently support unnumbered HDLC or LAP-B connections and a wide range of radar data formats (such as
ASTERIX, RDIF, Aircat, EUROCONTROL, CD ...). Tools are provided to analyse the recorded data for
protocol errors or convert the data directly into a display format.
Since the UDR600 only allows to record passively, the connection itself is spied upon by the UDR600. If
more than two channels are required, multiple UDR600s can be "stacked". The additional inputs azimuth and
time make it a real radar evaluation tool. This allows for example evaluating the extraction delay.
The recordings made by the UDR600 can then be converted into a suitable data format for further
evaluation: this can be a SASS-C compatible format or the RASS-S data format (.S4). Furthermore, since
the full communication protocol is recorded together with the radar data, an analysis of the line quality and
communication protocol syntax is possible.
1.2. Key Features
•
•
•
Passive recording of a multitude of radar protocols: ASTERIX, RDIF, EC, ECKlu, Alenia, Aircat,
AustroControl, BMIL, CD xxx, ERICSSON, FPS, SVE, Toshiba, TRS
Simultaneous recording of 1 or 2 lines
Possibility to connect a GPS for UTC time of recording
1.3. Supported Protocols
The UDR600 can handle 4 basic protocols in passive mode, meaning that the UDR600 “spies” on the data
without participating to the actual protocol:
• U-HDLC: Passive recording of HDLC based protocols, including LAP-B and X25.3 Passive
monitoring (E.g. ASTERIX, RDIF)
• LINK 1: Passive recording of Military LINK 1 protocol
• SYNC 13: Passive recording of most bit protocols as implemented on US radars (CD1, CD2, ASR9,
etc...)
• BISYNC: Aircat 500: passive recording of Thales specific protocol, TVT2 military protocol
Using the Bit Recording function the following protocols are supported:
◦ AIRCAT 500
◦ ALENIA
◦ AUSTRO
◦ BMIL
◦ ERICSSON
◦ EUROCONTROL
◦ FPS 117
IE-UM-00170-001 UDR600 User Manual.odt
8/20
USB Data Recorder - UDR600
◦
◦
◦
◦
Edition Date: 23-Mar-10
HUGHES
SVE
TOSHIBA
CUSTOMER SPECIFIC
1.4. Hardware Description
The UDR600 has 2 serial communication channels for active and passive recording. They can handle
transmission speeds up to 128 Kb/s. Two electrical standards are supported: RS232 (single ended) and
RS422 (differential). The serial data is fed to the recorder using a female DB15 connectors (alike X.21
connections). The unit is supplied with 2 RS232 Probe modules for connection of the DB15 to DB25
standard RS232 connection. A whole range of synchronous protocols is supported and others can be
programmed upon request.
The UDR600 connectors are described in the following table:
Table 1: UDR600 Connectors
Connector Type Value
Name
Specification
CH1/2
Serial Data 1/2
2x DB15 female
Radar Timing
ACP/ARP
Radar Timing ACP/ARP signals
DB15HD female TTL
USB Data
USB data
USB
USB2.0
GPS
GPS450 interface for UTC time stamping
RJ45
Intersoft proprietary
GPS Power In
Connector for power supply for GPS450
IE-UM-00170-001 UDR600 User Manual.odt
Synchronous serial input
RS232/RS422
9/20
USB Data Recorder - UDR600
Edition Date: 23-Mar-10
The pin layout of the Serial Data 1/2 DB15 connectors is shown in the table below:
Table 2: Serial Data 1/2 DB15 connectors pin layout
Name
DB15(f)
Gnd
1,8
TxD+
9
TxD-
2
RxD+
11
RxD-
4
RxC+
13
RxC-
6
TrxC+
14
TrxC-
7
TxC+
/
TxC-
/
-10Volt
12
+10Volt
5
+5Volt (USB4.2V)
15
The specifications of the serial inputs/outputs are listed in the following tables:
Input resistance
Table 3: RS 232 C Receivers (compatible with RS232C standard)
3kΩ min. , 5kΩ typ. , 7kΩ max.
Low threshold
1.2V typ. , 0.8 min.
High threshold
1.7V typ. , 3.0 max.
Impedance
5kΩ typ. (+15V to -15V)
Table 4: RS 232 C Drivers (compatible with RS232C standard)
High Level Output
+5V min. , +15V max.
Low Level Output
-15V min. , -5V max.
Short Circuit Current
± 100mA
Power off Impedance
300Ω
Slew Rate RL=3K, CL=50pF
30V/µs
Table 5: RS422 Receivers (compatible with RS422 standard)
Input resistance common mode
15kΩ typ. (-7 to +12V)
Receiver sensitivity
± 0.2V typ.
Common mode range
-7.0V min. , +7.0V max.
Table 6: RS422 Drivers (compatible with RS422 standard)
Short Circuit Current
150mA
Transition Time
40ns max. (10-90%)
Output Current
28mA min. (RL=54Ω)
IE-UM-00170-001 UDR600 User Manual.odt
10/20
USB Data Recorder - UDR600
Edition Date: 23-Mar-10
2. UDR600 DATA RECORDING: BIT OR SERIAL PROTOCOL RECORDING
2.1. Introduction
The UDR600 supports 2 types of recording:
1. Bit Recording: format independent bitwise recording
2. Serial Protocol Recording
Both recording types can be selected through the Serial Data button of the RASS-S toolbox. The user will
notice that the same recording software will open up, however a different software is loaded into the
UDR600. The conversion of the recorded files depends on this selection as well (bit recording or serial
protocol recording).
2.2. Recording Software
2.2.1.
Getting Started
The Bit Recorder and the Serial Protocol Recorder tool can be opened from the Serial Data
on the RASS-S toolbox. Both selections will open the same UDR Control vi.
button
Figure 1: UDR Control software
Create the set-up shown in Annex 1: Data Recording Connection Diagram.
IE-UM-00170-001 UDR600 User Manual.odt
11/20
USB Data Recorder - UDR600
2.2.2.
Edition Date: 23-Mar-10
Making a Recording
1. The UDR600 has a factory default transport layer protocol configuration. Yet at any time the UDR600
can be reprogrammed by the user to any of the following transport layer protocols: HDLC, SYNC-13,
AIRCAT, LINK1.
To perform a format independent bit recording you select here 'Bit Recording' from the list.
Now reprogram the UDR600 transport layer protocol (if necessary) by clicking the Reboot
button and following the instructions .
G
Note: Notice that upon power loss the UDR600 will always return to its default transport
layer protocol configuration.
2. Upon startup of the UDR Recording tool, the preferences window will automatically pop up. This
window can also be called by clicking the Preferences
button. Three tabs are selectable. The
tab General is used to specify the number of ACP pulses per revolution connected to the UDR600.
Notice that ACP/ARP signals are not strictly required for the UDR recording tool.
◦
12 bit = 4096 ACP per revolution
◦
14 bit = 16384 ACP per revolution
◦
16 bit = 65536 ACP per revolution
The preferences window is also used to configure the different channels individually. Each of the two
channels can have its own settings. Select a channel by clicking on its respective tab. According to
the Line settings, some controls can be disabled.
It is most convenient to enter the settings left to right, starting with the Line Settings:
◦
Specify the Type of recording: None or Passive. None means that this channel is not used. No
further settings need to be entered. Passive means that this channel is recorded in spy mode
(listening only).
◦
Select the Line Type (electrical standard): RS 232 or RS 422.
◦
Select the Rx and Tx Clock generation: internal or external. If internal is chosen for one of both,
specify the Baud rate .
◦
Select the Data format and Layer. This is important, since it will allow the serial convert program
to automatically perform a convert with the correct data format setting. Notice that some
transport layer protocols can handle several data formats.
Click OK to save these settings (or click Cancel to discard them) and return to the recording tool.
3. Click the Record
button to start the actual recording. The recorded data is stored in a temp file.
Beware, a new recording will always overwrite the data stored in the temp from a previous
recording. While recording, the HD position indicator will count the Kilobytes file size used. A time
indication shows the current time. The PPI indicator will show the radar timing information
(ACP/ARP) during the recording (if connected). This timing information is also recorded together with
the serial data and can be used for analysing the data in a later stage.
4. The Connection panel indicates the integrity of the recording for each of the channels and the GPS
information individually (if connected). For each hardware channel and for the timing information
IE-UM-00170-001 UDR600 User Manual.odt
12/20
USB Data Recorder - UDR600
Edition Date: 23-Mar-10
(GPS, ACP, ARP) there is a LED display that indicates the general status of the recording for that
particular channel:
◦
grey: hardware channel NOT IN USE
◦
red: channel NOT OK
◦
yellow: intermitted failure
◦
green: the channel is OK.
Notice that a red or yellow LED does not necessarily mean that the recording has failed. A poor line
quality also results in a temporary red/yellow light. A green light indicates that the recording is
functioning in an optimal way for the respective hardware channel. The synoptic text displays more
details of the current status of the recording. For each channel the number of transmitted frames and
the number of good and bad received frames are counted. These counters are updated continuously
during the recording.
During the recording the raw data is logged to disk (temporary file), displayed and updated in the
Data Messages window.
Figure 2: UDR Recording
5. Once the recording has been stopped using the Stop
button, the tool will automatically prompt
the user to save the temporary file to disk. One can also use the Save
button to save the data.
In case a GPS450 is used for UTC time stamping, the GPS450 can be directly connected to
the RJ45 GPS input port of the UDR600. Since the DC Power for the GPS cannot be supplied
through the USB bus, it is necessary to connect the power supply to the DC power input
connector of the UDR600. In the Preferences window one should check the “Use the GPS for
time stamping” selector in the “General” tab, to activate the GPS time stamping function. The
UDR GPS init window will pop-up when you push the OK button of the preferences window.
Next you have to wait until the GPS450 is synchronized (OK button is enabled), then push the
OK button to return to the UDR Control software. More information regarding the use of the
GPS450 can be found in the GPS450 User Manual.
IE-UM-00170-001 UDR600 User Manual.odt
13/20
USB Data Recorder - UDR600
Edition Date: 23-Mar-10
6. By opening the Auto Save
window, the Auto Save function is automatically enabled. The auto
save function is a kind of endless loop recording function with a limited archive size. The Period
setting defines the length of each individual file and the Archive setting defines how many of these
files are kept on the disk. Once the archive size is reached, each new recording will replace the
oldest one. The auto save function is disabled by closing the auto save window.
2.3. Conversion Software
2.3.1.
Convert Bit Recording
The Convert Bit Recording tool can be opened from the Serial Data
button on the RASS-S toolbox.
Figure 3: Convert Bit Recording software
The recorded data can be converted to another format using the Convert tool. The convert program also
allows you to see the data in a PPI or Hex format. This comes in handy to check the recording process while
it is being performed.
2.3.1.1. Single Conversion
1. Load the recorded file (source file) using the Select Folder
using the Browse Folder
button and select destination file
button. The destination file format can be one of the following:
◦
S4RD : the convert tool will create a .S4RD file which can be visualised in the Inventory tool and
further analysed in RASS-S. The use of the Inventory tool is explained in the Data Analysis User
Manual.
◦
IOSS: the recording is converted into a SASS-C compatible Mayer-IOSS or FINAL format (IOSS
format selector).
◦
None: no file outputs is required.
2. Verify the Site File settings or Load a Site File using the Site File
IE-UM-00170-001 UDR600 User Manual.odt
button.
14/20
USB Data Recorder - UDR600
Edition Date: 23-Mar-10
3. When the PPI selection is clicked the user can see the converted data in a PPI display.
Figure 4: PPI Display
The positions of the aircraft can be viewed in the PPI graph. The history length of the track is fixed at
5 scans. A small checkbox in the upper right corner of the window ( default True) enables labeling
on all tracks.
In the right hand side of this window, a list is presented with the A codes of all the aircraft present on
the PPI. There are 3 ways to select a target:
◦
By clicking one of these items in the rigth list, a query is performed on this particular aircraft.
◦
The user can also enter manually a particular A code to be searched for in the AC ID field. To do
this first unlock the field, fill in the A code and lock the field again.
◦
The last way to select an aircraft is to move the red cursor using the cross mouse pointer.
The data (Range, Azimuth, A code, Altitude, Track number, etc...) of the selected target is presented
in a text field in the right upper corner of the PPI graph. Also the red cursor will be positioned on the
current position of this aircraft. The selected A code will be copied in the AC ID field. When the user
zooms around a selected target, the X and Y scales will automatically be updated such that the
selected target always remains in the middle of window.
The selected A code will be tracked continuously by the red cursor if the lock selector is set .
By clicking the Pause
button the PPI screen will be “frozen”.
4. Use the Info checkbox to enable the information field.
IE-UM-00170-001 UDR600 User Manual.odt
15/20
USB Data Recorder - UDR600
Edition Date: 23-Mar-10
5. Check the Hex checkbox to view the hexadecimal display of the current conversion process.
Figure 5: Hexadecimal display of converted data
6. The Scan
button scans a few blocks from the data source and colours the line check boxes in
the Line Selection field green if the recording holds data from that line. Make sure to check the
correct line as source for the data convert. If multiple lines are checked, the converted data from
those lines will be merged into the same output file.
7. Click the Start
button to start the conversion. The progress bar will show the status of the
conversion process. The converted file is stored at the destination location and can now be further
analysed.
2.3.1.2. Batch Conversion
The user can also run a batch of multiple conversions by following these instructions:
1. Press the triangular button
Process section.
in the lower left corner of the Convert vi to show or hide the Batch
Figure 6: Batch Process section of Convert software
2. Running a conversion can be a time consuming process therefore if you want to run several
conversions in a row you may wish to put them in a batch process. The following buttons are
available:
◦
◦
◦
◦
Copy the single conversion selected by the green rectangle in the “Batch List” to the
controls in the “RDR functions” section.
Load a "Batch list" from disk.
Add a single conversion at the position of the green rectangle to the "Batch list" or
remove a single conversion at the position of the green rectangle from the "Batch list".
Run the batch, this will successively starts the specified conversion.
IE-UM-00170-001 UDR600 User Manual.odt
16/20
USB Data Recorder - UDR600
Edition Date: 23-Mar-10
◦
Abort a running batch procedure.
◦
Save the "Batch list" to disk for later use or reference.
Once the required data is converted in to the same format it can be used for comparison or analysis
in the selected radar analysis tool.
2.3.2.
Convert Data Recording
The Convert Data Recording tool can be opened from the Serial Data
button on the RASS-S toolbox.
Figure 7: Convert Radar Data software
The recorded serial data can be converted to another format using the Convert tool. The convert program
also allows you to see the data in a PPI or Hex format. This comes in handy to check the recording process
while it is being performed.
2.3.2.1. Single Conversion
1. Load the recorded file (source file) using the Select Folder
using the Browse Folder
button and select destination file
button. The destination file format can be one of the following:
◦
RASS-S S4 file: the convert tool will create a .S4RD file which can be visualised in the Inventory
tool and further analysed in RASS-S. The use of the Inventory tool is explained in the Data
Analysis User Manual.
◦
SASS-C data: the recording is converted into a SASS-C compatible Mayer-IOSS or FINAL
format
◦
None: no destination is required
◦
Replay of EDR: the recording is converted into an EDR replay file such that it can be replayed
using the RDR or the LAN replay tool (outside the scope of this manual)
2. Open up the Preferences window using the Preferences
button to check the settings of the
recording and to set the conversion settings. Click OK to return to the Convert program.
3. Select the line to be used as source for the data convert. If multiple lines are checked, the converted
data from those lines will be merged into the same output file.
IE-UM-00170-001 UDR600 User Manual.odt
17/20
USB Data Recorder - UDR600
4. Verify the Site File settings or Load a Site File using the Site File
Edition Date: 23-Mar-10
button.
5. When the PPI
button is clicked the user can see the converted data in a PPI display. In fact the
Inventory tool is opened when the PPI button is clicked (more information regarding the Inventory
tool can be found in the Data Analysis User Manual).
6. Use the Stats
button to view the converted data statistics such as number of messages,
number of errors, etc...
7. Check the Hex checkbox to view the hexadecimal display of the current conversion process.
Figure 8: Hexadecimal display of converted data
8. Click the Start
button to start the conversion. The progress bar will show the status of the
conversion process. The converted file is stored at the destination location and can now be further
analysed.
Note: When you selected the PPI button, the data can be viewed in the Inventory tool. You
G
need to load the converted file in the Inventory first (by clicking the Load
Inventory does not display the converted date in a live manner.
button) as the
2.3.2.2. Batch Conversion
See section 2.3.1.2. Batch Conversion for more information.
3. DATA ANALYSIS
More information regarding the possible data analysis functions of RASS-S can be found in the Data
Analysis User Manual.
IE-UM-00170-001 UDR600 User Manual.odt
18/20
USB Data Recorder - UDR600
Edition Date: 23-Mar-10
4. ANNEXES
4.1. Annex 1: Data Recording Connection Diagram
Figure 9: Data Recording Connection Diagram
IE-UM-00170-001 UDR600 User Manual.odt
19/20
USB Data Recorder - UDR600
Edition Date: 23-Mar-10
4.2. Annex 2: Configuration List: UDR600
Check
Qty
Description/Item List
USB Radar Data Recorder - UDR600
O
1
USB Radar Data Recorder UDR600
O
1
USB cable A to B - 3m
UDR Accessories - P601
O
1
15pHD to 5 BNC(m) cable - 1.8m
O
2
DB15(f) to RJ45 cable - 2.5m
O
2
RS232 Probe module
IE-UM-00170-001 UDR600 User Manual.odt
20/20


