1
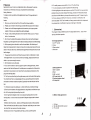
Disital Photo Frame
-.-=Er
IIfIIIII
I..
I:TI
tnf,flllr.
To make sure the long lifetime of the digital
photo frame, PLS pay attention to reading this user manual!
I
I
DIRECTORY
PREFE RENCE
SUMMARIZE
APPEARANCE INTRODUGE
REMOTE CONTROLLER INTRODUCE
USE'S GUIDE
LANGUAGE SET
TROUBLE SHOOTING
PRODUCT SPECIFICATION
Preference
16. For safety reasons,never watch or turn on TV while driving.
17, lt is very dangerous to watch or operate TV while drivingl
18.A few highlights or dark spots may occur on the LCD screen.lt is a very common
Appreciate for your choice to our digital photo frame. We prepare the service
manual for your reference so that you can operate this machine easily.
Safety &Maintain
problem to the active matrix display technology, and does not necessarily means
any defects or faults.Never try to repair this machine by youself. ln case of any fau
It or failure, please turn off the TV set at once, and notify our Company or the
authorized dealer.The TV set is made up of many precision electronic components
To make sure the long lifetime of the digital photo frame, PLS pay attention to
following
factors:
Any disassembly or modification may leada to damage or breakage.
1. When you use this machine firstly, PLS read the manual carefully.
2. Please pay att ention to the warning and follow the instruction in the manual.
3. Please use the AC Adapter together with the machine, don't use any other
I
adapter. Otherwise your digital frame Will be damaged.
the water on the m achine. When you use it, Please
from the water.
5. Don 't press the digital frame greatly, otherwise the product will be damaged.
4. Please avoid sprinkling
be
(Summarize)
This chapter introduce different parts of the digital photo frames, please know
well the unit before oPeration.
far
l.Envisage appearance
Alsoplease put the digital frame on the flat and steady surface to avoid the damage.
6 . All the opening hole or the slot is used for the ventilation. Don't block up all
o
'1
. LCD TFT screen
2. Frame
3. Plastic cabinet
4. lR window
these hole to disperse the hot. Also don't put and store the product near to the heat
object or the place full of dust. Otherwise the digital frame will become very hot and
@
@
@
lead to danger.
7.
Please paymore attention and follow the power criterion in the bottom or back
of the digital frame. lf you are not sure the local voltage, please consult the local
dealer or your power supply comp any.
8.
Don't trample or press the cable.
9. lf you use the extension cable to supply the power to the digital frame, please
make sure that the totalAmpere
of
l.
2 Rear appearance
1. Built-in speaker
the total power consumption for all the electric
equipment in one extension is not more than the max Ampere of extension or the
plug on the wall stipulated.
o@-
2. Stand
@@_
3 USB host slot
4 DC power input slot
5 Function has been closed
6 AVoutputslot
10. Don't put any other thing but the right memory card into the slot of the machine.
You should know there is a large danger when you put anything into the machine
and touch the inverter inside the machine. Especially warn the child don't do like
that.
panel is easy to be destroyed, please don't press or bump it strongly.
12. Don't touch the bottom of the digital frame for a long time to avoid the burn your
1
't
. LCD
skin. As the long-playing frame will get very hot.
t.3 Bottom Side appearances
13. Don't put the AC Adapter on the n non-ovenproof surface when it is in the
working status. lt is the normal circs that the AC Adapter disperse the hot when it
works
.
14.Before clean the product, please cut offthepower and pull out the plug firstly.
Then use the soft and clear fabric to clean. Please be c areful that you can not use
1
USB slot
2 SD, MS, MMC,SM XD card
any king of sp rayer solvent or the other cleanser.
15. Before you move it , Pleasemake sure that you have cut off the power
3
2
CF card slot
slot
,T[K
III.
1.4 Top slde appearance
User's guide:
3.1.Operatlon lnterface
o
lnsert the power supply then turn on the power switch will be display the following
menus: (lf you insert card of SD/MSiMMC/SM/CF,lt can display like following,if not
it only display "setup"and "calendar"functions.)
POTER Sf,ITCH
ENTEN
I
STOP
@)
^r<>
: UP,
DoIN, LEFT, RIGHT
@
3. 1. 1 "Cardsselect"----enterintoplayingmode.
3. 1. 2 "Setup"----enter into basic setup.
3. 1. 3 "Calendar"----enter into calendar,alarm and time display.
l!
o@@
enter or starting controlcolunn,
:stop and return to the main nenu.
ENTER:
ST0P
UP :stop state:up.
starting control colunnstate: close control
i
?
column.
photo vi ew state : startingbri ghtness, contrast, hue/CoIor
Tenperature control colunn.
D0IYN :
LEFT
:
RIGHT :
.
II
1
4
3
7
6
10
I
13
12
't6
15
19
18
\
stop state: dorn.
stop.state: left/return;
stop state : right/enter.
3.2 Functions to select
Remote controller introduction
the menu:
Ybu can enter into'MOVIE"/"MUSIC"/"PHOTO"
1.MUTE:Press this key to sound off in playing
mode,press again to sound on.Or press
VOL+/VOL- to sound on in the mute mode.
2.POWER:Press one time to powor off,press
one lime to power on again.
S.PHOTO:Enler the photo file playing mode
directly.
4.MUSlC:Enter the music file playing mode
directly.
S.MOV|E:Enter the movie file playing mode
directly.
6:PLAY/PAUSE:Play or pause current playing
progrem,it can b€ used to "enter" sometimes.
7.UP:Move the cursor up.
8.MENU:Stop the current playing and returns.
9.LEFtMove the cursor left.
1 0.ENTER:Confim and play.
11.RlGHT:Move the cursor right
12.SETUP:Enter tho basic setup function.
13.DOWN.Move the cursor down.
3.
3 UBDOWN,LEFT,RIGHT select then press ENTER button to enter the
Playing mode.
I
J
I4.BACKMUSlC:Enter into playing photo with the background music.
(Note:1 .Slideshow can not be playing in the SETUP mode.
2.The photo can not be ratate in slideshow mode.)
1 5.VOL+:Adjust the volume+
1 6.Fast backward.
l T.Previous key.
18.Adjust the volume-.
19.Fast forward.
20.Next key.
21. When you uesed COPY or DELETE,iI can help you do.
Explain:
a)A / Vsetect file and press
ENTER button to confirm.
o)Al VSetect file and press
ENTER button to play.
c)MENU Return to the last menu
4
or "FlLE" MODE
Mainly information function
:
3. 4 File management
Press REPEAT the control interface.
Copy file
oEstate display(PlaV' pause or stop)
oPlay time
oPlay or pause
a)ln the file edit: on need copy files to
press )and can select your wanted file
(Chart 1).
b)Press REPEAT to select your purpose
rStoF
.Return to previous movie
.Fast backward
rFast forward
eEnter to next movie
COPY or DELETE. (Chart2)
)Select the COPY then select the
destination. (Chart 3)
d)Press ENTER button to confirm.
c
e )Seiect
the DELETE item
oZoom on
in this
Chart 5. Movie play & information
mode and can delete the file(Chart 4),
3. 6 Play photo
Malnly lnformation function
:
oEstate display
.Play or pause
.Stop to play
rPrevious song
.Next photo
oDisplay files name
Chari o. Music play& information
Chart
1
Chart 2
3. 7, Clock menu introduce:
Mainly disply information:
oEach monthly calendar
.Picture display
oTime display
oAlarm time
3. 8,
Chart 3
3. 5
.Press ENTER to confirm
oPress MENU to return
Movie
{ /}on
the screen information to select and press ENTER to finish related
function when play(Chart 5).
Press MENu to return menu
used
SETTINGS introduce'
.PressA / Vto select
oPress) or{ to select subdirectory
Chart 4
6
7
V
IV. otners set
Background music
play the picture of speedy
Picture convert mode
.
Troublec and shootlng
Problcms
Analysis
No sound
2.
No background music
Slide Music is off
Can't power on
1. AC plug does not connect well
2. AC adaplor can not wori
Can't copy
Memory card does not insert correctly.
No response when
connectino comouter
Remote controller does
not work
1. The Mute button
is on
The volume is in the lowest level.
1. System version
2.
is too low
USB port has problem
No battery, no power
VL Product specification
lnput Formate: Compact
Flash@ (CF type I & ll), Micro Drive TM (MD), Memory
Stlck@(MS), Memory stick DUO@, MultiMedia Card TM(MMC), Secure DigitalTM
(SD), Mlni-SD TM, USB Pen Drive
Supported File Formats: JPG, MP3, AVI
Music Playing Mode Set
Movie Playing Mode Set
Supported Built-in Flash: 2GB NAND FLASH
Support: Windows Me/2000SP 4|XPSP2
Clock set
Alarm set
Default Set
g
q