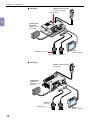
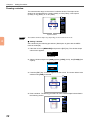
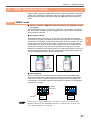
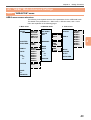
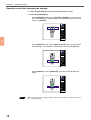
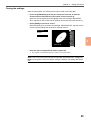
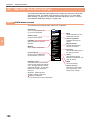
1
96M0568
User’s Manual
High-speed, High-accuracy, Color Vision System
CV-700 Series
AFFILIATED COMPANIES
KEYENCE CORPORATION
1-3-14, Higashi-Nakajima,
Higashi-Yodogawa-ku,
Osaka, 533-8555, Japan
Phone: 81-6-6379-2211
Fax: 81-6-6379-2131
KEYENCE CORPORATION OF AMERICA
Phone: 201-930-0100 Fax: 201-930-0099
KEYENCE (THAILAND) CO., LTD
Phone: 02-369-2777 Fax: 02-369-2775
KEYENCE DEUTSCHLAND GmbH
Phone: 06102-36 89-0 Fax: 06102-36 89-100
KEYENCE TAIWAN CO., LTD
Phone: 02-2627-3100 Fax: 02-2798-8925
KEYENCE (UK) LIMITED
Phone: 01908-696900 Fax: 01908-696777
KEYENCE (HONG KONG) CO., LTD
Phone: 3104-1010 Fax: 3104-1080
KEYENCE FRANCE S.A.
Phone: 01 47 92 76 76 Fax: 01 47 92 76 77
KEYENCE INTERNATIONAL TRADING
(SHANGHAI) CO., LTD.
Phone: 021-68757500 Fax: 021-68757550
KEYENCE SINGAPORE PTE LTD
Phone: 392-1011 Fax: 392-5055
KEYENCE (MALAYSIA) SDN BHD
Phone: 03-252-2211 Fax: 03-252-2131
KEYENCE KOREA CORPORATION
Phone: 02-563-1270 Fax: 02-563-1271
© KEYENCE CORPORATION, 2000 CV700-UM-3-0202 Printed in Japan
CV-700 Series User’s Manual
Specifications are subject to change without notice.
Preface
This instruction manual describes the setting procedures, adjustment, preparation,
operation procedures, and precautions for the High-speed, High-accuracy, Color
Vision System CV-700(P) Series. Before starting operation, please read this
manual carefully to get the most from your CV-700(P) Series.
Keep this manual handy for future reference.
Please make sure that the end users are provided with this manual.
Symbols
The following symbols are used for the list of precautions to ensure safety and to
prevent personal injury and/or property damage when using the CV-700(P) Series.
The following symbols alert you to important messages. Be sure to read these
messages carefully.
DANGER
Failure to follow instructions may lead to death or serious
injury.
WARNING Failure to follow instructions may lead to injury.
CAUTION
Failure to follow instructions may lead to product damage.
(product malfunctions, etc.)
Important:
Provides important precautions and restrictions on proper
operation.
Note:
Provides additional information on proper operation.
Tips
Reference:
Provides useful information on proper operation.
Provides reference pages.
General precautions
1. No part of this manual may be reprinted or reproduced in any form or by any
means without the prior written permission of KEYENCE CORPORATION.
2. The content of this manual is subject to change without notice.
3. KEYENCE has thoroughly checked and reviewed this manual. Please contact
the sales office listed at the end of this manual if you have any questions or
comments regarding this manual, or if you find an error.
4. KEYENCE assumes no liability for damages resulting from the use of the
information in this manual, item 3 above notwithstanding.
5. KEYENCE will replace any incomplete or incorrectly collated manual.
i
•
Windows is a registered trademark of Microsoft Corporation of America.
•
CompactFlashTM is a registered trademark of SanDisk Corporation of America.
•
All company names and product names in this manual are registered trademarks or
trademarks of their respective owners.
Safety Precautions
General precautions
•
At startup and during operation, be sure to monitor the functions and performance of the CV-701(P)/751(P).
•
We recommend that you take substantial safety measures to avoid any damage
in the event of a problem.
•
Do not modify the CV-701(P)/751(P) or use it in any way other than as described in the specifications. Its functions and performance are not guaranteed
under said conditions.
•
When the CV-701(P)/751(P) is used in combination with other instruments, its
functions and performance may be degraded, depending on the operating
conditions and surrounding environment.
•
Do not use the CV-701(P)/751(P) for the purpose of protecting the human body.
•
Do not expose the CV-701(P)/751(P) and peripheral devices to sudden temperature change, as this may cause condensation.
Precautions
WARNING
Do not use the CV-701(P)/751(P) with a voltage other than 24 VDC, as this
may cause fire, electric shock or equipment failure.
• Do not disassemble or modify the CV-701(P)/751(P). This may cause fire or
electric shock.
CAUTION
■ Usage
• Be sure to turn off the power to the CV-701(P)/751(P) and any connected
devices before connecting or disconnecting the cables. Otherwise, the camera
and connected devices may be damaged.
•
Do not turn off the power while setting a parameter. Otherwise, the settings
may be partially or completely lost.
•
Do not block the ventilation slots on the CV-701(P) and peripheral devices. A
rise in inner temperature may cause equipment failure.
•
Note: The CV-701(P)/751(P) conforms to CE regulations in Europe; however,
please make sure to keep the wiring for the power and the I/O within 30 m.
Otherwise, it will not conform to EN61326-1.
ii
WARNING
■ Proper environment and conditions
To use the CV-701(P)/751(P) properly and safely, do not install the CV701(P)/751(P) in locations with the following conditions. Use of this equipment in an improper environment may cause fire, electric shock, or equipment failure.
•
Locations with high humidity, a large amount of dust, or poor ventilation
•
Locations where the temperature rises excessively due to direct sunlight, etc.
•
Locations where corrosive or flammable gas exists
•
Locations where the CV-701(P)/751(P) is directly subjected to vibration or
impact
•
Locations where water, oil or chemicals may splash the CV-701(P)/751(P)
•
Locate the cables as far as possible from high-voltage lines and power lines.
Otherwise, generated noise may cause a malfunction or equipment failure.
•
The CV-701(P)/751(P) and peripheral devices are precision machines. Avoid
any vibration or impact to these devices.
•
Locations where static electricity is easily built up
■ When abnormal conditions are encountered
If the following conditions are encountered, immediately turn off the power.
Continuing to use the CV-701(P)/751(P) under abnormal conditions may
cause fire, electric shock or equipment failure.
Contact your nearest KEYENCE sales office for repairs.
•
When water or foreign matter enters the controller.
•
When the CV-701(P)/751(P) is dropped or the housing is damaged.
•
When the controller produces smoke or an abnormal smell.
Note 1: Maintenance
Do not wipe the CV-701(P)/751(P) with a damp cloth or a cloth moistened with
benzine, thinner, or alcohol. This may cause discoloration or deformation of the
unit. If there is a large amount of dust or dirt on the CV-701(P)/751(P), remove it
using a tightly squeezed cloth moistened with a dilute solution of a neutral detergent, and then wipe the unit with a soft and dry cloth.
Note 2: Camera
The CV-701(P)/751(P) uses a specially designed camera. A commercially available camera should not be substituted. (However, any commercially available Cmount lens can be used.)
Symbols
The following symbols are used in this manual to represent the menu items and
keys.
iii
Symbol
Description
[ ]
Menu item. Select from display.
[ ]
Switches and keys.
How This Manual is Organized
1
Chapter 1
Overview
Describes the package contents check and the features and applications of the
CV-701(P)/751(P).
Chapter 2
2
Preparation
Describes how to connect and mount the CV-701(P)/751(P), how to select lenses,
and gives information about illumination.
Chapter 3
3
Mode Selection
Explains the types and details of the measurement modes.
Chapter 4
4
Setting Procedure
Describes how to use panel keys or the remote control console to set the CV701(P)/751(P). It covers everything from basic settings to the advanced settings.
Chapter 5
5
Operation
This chapter describes RUN mode and the controls available during RUN mode
operation.
Chapter 6
6
I/O Timing and Analog Output
Explains the input/output timing and analog output.
Chapter 7
CompactFlash Memory
7
Explains how to use CompactFlash memory with the CV-701(P)/751(P).
Chapter 8
RS-232C Interface
8
Describes the connection between the CV-701(P)/751(P) and a personal computer, and the RS-232C communication used to operate the CV-701(P)/751(P)
with a personal computer.
Chapter 9
Specifications
9
Describes the specifications and dimensions.
WARRANTIES Appendices
Appendices
Describes typical troubleshooting procedures, a list of optional parts.
WARRANTIES
iv
Contents
Preface ............................................................................................................... i
Safety Precautions ........................................................................................... ii
How This Manual is Organized ...................................................................... iv
Contents ............................................................................................................ v
Menu Hierarchy ............................................................................................. viii
Special Features .............................................................................................. ix
Chapter 1
Overview
1.1 Checking the Package Contents .......................................................... 2
1.2 Part Names and Functions .................................................................... 3
1.2.1 Part Names and functions of a basic system ............................................ 3
Chapter 2
Preparation
2.1
2.1.1
2.1.2
2.1.3
2.1.4
2.1.5
2.2
Chapter 3
Preparation
3.1
3.1.1
3.1.2
3.1.3
3.1.4
3.1.5
3.2
Chapter 4
Measurement Modes and Typical Applications ................................ 18
“ARE/CON” (Area continuous) ................................................................ 18
“INS/TRG” (Inspection trigger) ................................................................ 19
“INS+POS” (Inspection + position).......................................................... 22
“ABS.POS” (Absolute position) ............................................................... 23
“REL.POS” Mode .................................................................................... 25
Selecting the Measurement Mode by Application ............................ 27
Setting Procedure
4.1
4.1.1
4.1.2
4.2
4.2.1
4.3
4.3.1
4.3.2
4.4
4.4.1
4.4.2
4.4.3
4.5
4.5.1
4.5.2
4.6
v
Mounting and Connection ..................................................................... 6
Mounting the controller ............................................................................. 6
Mounting the camera ................................................................................ 8
Selecting a lens ......................................................................................... 9
Cable connection and wiring ................................................................... 11
Checking the connection ......................................................................... 13
Illumination ........................................................................................... 15
Names and Functions of Control Keys and Monitor Screen ........... 32
Controller ................................................................................................ 32
Screen page layout ................................................................................. 34
Preparations ......................................................................................... 35
Preparations before settings ................................................................... 35
Basic Settings ...................................................................................... 36
Basic setting procedures ......................................................................... 36
Using two cameras ................................................................................. 42
“AREA” Mode Basic Settings ............................................................. 57
“AREA” mode .......................................................................................... 57
Initial menu screen .................................................................................. 58
Basic setting flow .................................................................................... 59
“AREA” Mode Advanced Settings ..................................................... 65
“AREA/CON” menu ................................................................................. 65
Advanced color settings .......................................................................... 69
“INS” Mode Basic Settings ................................................................. 70
4.6.1 “INS” Mode.............................................................................................. 70
4.6.2 Initial menu screen .................................................................................. 72
4.6.3 Basic setting flow .................................................................................... 73
4.6.4 Basic setting procedure for the measurement mode .............................. 75
4.6.5 Basic setting procedure for COUNT ....................................................... 80
4.6.6 Basic setting procedure for the POINT (Point sensor) mode .................. 84
4.6.7 Basic setting procedure for the STAIN mode.......................................... 87
4.6.8 Basic setting procedure for the GRAVITY mode .................................... 91
4.7 “INS” Mode Advanced Settings .......................................................... 96
4.7.1 “INS/TRG” menu ..................................................................................... 96
4.7.2 Sensitivity adjustment for edge detection ............................................. 100
4.7.3 Adjustment for the COUNT and GRAVITY modes ............................... 101
4.7.4 Advanced COUNT setting ..................................................................... 102
4.7.5 Adjusting the color extraction ................................................................ 103
4.8 “INS+POS” Mode Basic Settings ...................................................... 106
4.8.1 Initial menu screen ................................................................................ 106
4.8.2 Basic setting flow .................................................................................. 107
4.8.3 “INS+POS” menu .................................................................................. 108
4.9 “Position Detection” Mode Basic Settings ...................................... 109
4.9.1 Initial menu screen ................................................................................ 110
4.9.2 Basic setting flow .................................................................................. 111
4.10 “Position Detection” Advanced Settings ....................................... 118
4.10.1 “ABS.POS” Menu ................................................................................ 118
4.10.2 “REL.POS” Menu ................................................................................ 124
4.10.3 Advanced position adjustment setting (Pattern search) ...................... 125
4.10.4 Advanced position adjustment setting (Edge detection) ..................... 127
4.10.5 Advanced position adjustment (Tolerance setting) ............................. 129
4.10.6 Sensitivity adjustment for edge detection ............................................ 130
4.10.7 Adjusting the color extraction .............................................................. 131
4.11 Optional Settings .............................................................................. 134
4.11.1 Saving the running images .................................................................. 134
4.11.2 Illumination adjustment function .......................................................... 136
4.11.3 Unit conversion .................................................................................... 137
4.12 Operation Check of the Setting Status ........................................... 140
4.12.1 Saving the setting status ..................................................................... 140
4.12.2 Comparing with the saved setting status ............................................. 141
4.13 Initialization ....................................................................................... 142
4.13.1 Initialization of all settings .................................................................... 142
4.13.2 Initialization by program number ......................................................... 142
4.14 Input/Output Operation in PROGRAM Mode .................................. 143
4.15 Environmental Settings ................................................................... 144
4.15.1 Changing the environmental settings .................................................. 144
4.15.2 Environmental setting list .................................................................... 145
4.15.3 Useful functions ................................................................................... 146
Chapter 5
Operation
5.1
5.2
Chapter 6
Entering RUN Mode ........................................................................... 152
Controls Available in RUN Mode ...................................................... 153
I/O Timing and Analog Output
6.1
6.2
6.3
6.4
I/O Terminal Names and Functions .................................................. 156
Input/Output Timing Diagrams ......................................................... 160
I/O Circuit ............................................................................................ 165
Analog Output .................................................................................... 166
vi
6.4.1 Analog output terminals ........................................................................ 166
6.4.2 Changing analog output settings .......................................................... 166
6.4.3 Scaling the analog output ..................................................................... 167
Chapter 7
CompactFlash Memory
7.1
7.1.1
7.1.2
7.2
7.3
7.3.1
7.3.2
Chapter 8
RS-232C Interface
8.1
8.1.1
8.2
8.3
8.3.1
8.3.2
8.3.3
8.3.4
8.3.5
8.3.6
Chapter 9
Mounting and Dismounting the CompactFlash Memory ............... 172
Mounting the CompactFlash memory ................................................... 172
Dismounting the CompactFlash memory .............................................. 172
Reading of Data to a Personal Computer ....................................... 173
How to Use CompactFlash Memory ................................................ 174
Parameter descriptions ......................................................................... 174
Saving the setting in CompactFlash memory ....................................... 175
Overview ............................................................................................. 180
Specifications ........................................................................................ 180
Connection ......................................................................................... 181
Commands and Data Formats .......................................................... 182
Commands in PROGRAM mode .......................................................... 182
Commands for CompactFlash memory ................................................ 187
Commands in RUN mode ..................................................................... 188
Output data format ................................................................................ 189
Command list ........................................................................................ 193
Applications of RS-232C communication setting .................................. 194
Specifications
9.1
9.2
Specifications ..................................................................................... 196
Dimensions ......................................................................................... 198
Appendices
Appendix A
Appendix B
Appendix C
Appendix D
Appendix E
General Troubleshooting ...................................................... 206
Optional Parts List ................................................................. 208
Index ....................................................................................... 210
Sample Sheets for Setup Menu ............................................ 213
Sample Sheets for Testing .................................................... 215
WARRANTIES
WARRANTIES AND DISCLAIMERS ............................................................ 217
vii
Menu Hierarchy
The following is the layered structure of the menu of the CV-701(P)/751(P). Parameters vary slightly depending on the measurement.
No.00
➮ page 36
(Allows program selection.)
MODE
➮ page 37
ARE/CON
(Allows selection from five
measurement modes.)
ARE/CON
INS/TRG
INS+POS
ABS.POS
REL.POS
SHUTTER
➮ page 38
(Allows selection of shutter speed.)
SCRN REG
➮ page 39
(Registers the reference screen for
measurement.)
WIND•1
➮ page 41
(Sets the details of the
measurement area.)
WIND•0
INSPECT
ARE/CON
SEL SCRN
WIND•1
WIND•2
WIND•3
WIND•4
WIND•5
WIND•6
WIND•7
WIND•8
COLOR
➮ page 44
(Extracts the colors
to be detected.)
DATA
DET
TOL
H=
L=
MEASURE ➮ page 50
(Sets the
measurement area.)
MASK
➮ page 134
OPTION
(Allows optional settings.)
DATA
SAVE
T=xxxxxx
RAW SCR
TOL
H=
L=
viii
Special Features
Implements the highest detection power possible with the KEYENCE
pioneered “Color gradation processing” (Patent pending).
• Reliably detects only the designated colors.
Enables the reliable extraction of targets that are hard to differentiate with
conventional monochromatic processing. (e.g. differentiation of yellow on white,
dark blue from black, and gold plate from silver plate, etc.)
A change of background colors does not require a change of settings, because the
CV-701(P)/751(P) detects the registered colors exclusively.
• Shadows on the target surface do not cause malfunctions.
Detection is unstable with conventional monochromatic processing, which detects
the brightness of the target, because it is affected by shadows given by the shape
of the targets and by the varied illumination distributions. Color concentration
processing enhances stability dramatically because detection is based on the color
differences.
■ Operating principals
Camera
A/D
conversion
Subtraction
operation
Extraction
judgment
Image
processing
R
G
B
R–G
B–G
R–B
Margin
setting
Judgment/
Output
Judgment
output
Data output
The CV-701(P)/751(P) converts the color signal of the image captured by the
camera into R/G/B/ digital data using an A/D converting circuit.
Color
extraction
area
It obtains the data of R-G, G-B, R-B based on the
Levels of gray
converted digital data. The measurement area for
255
the color extraction is set based on six parameters.
The [AREA] mode (color binary conversion processing) operates detection by judging whether the
measured values are within or outside the color
0
extraction area. The colors within the color extracColor (16,770,000 colors)
tion area are of the maximum gradation level (255
levels of gray) with color concentration processing. The CV-701(P)/751(P) operates gray processing by converting the color data into a monochromatic image so
that the level is reduced as the color falls outside the area.
This processing method realizes stable detection for colors with different values
but with the same hue, and for colors without a hue such as white, black, and
gray.
Simple operation for highly sophisticated image processing functions.
Saves boot-up time dramatically.
•
Simple “click extraction”: Simply place and click the cursor on the color
area to be detected to set the colors for extraction. No complicated
parameter settings are necessary.
Setting is simple enough for first-time use for sophisticated image processing.
Loaded with special features
•
•
•
ix
The screen-saving function allows you to go back and check a former
detection screen.
The CompactFlash memory comes standard with the CV-701(P)/751(P).
Back up of the detection hysteresis and multiple programs, and copying
between controllers can be operated easily without using a personal
computer.
The measurement result can be output in analog voltage (0 to 4 V).
Chapter 1
Overview
This section describes the package contents check and the features and
applications of the CV-701(P)/751(P).
1.1
Checking the Package Contents ......................................... 2
1.2
Part Names and Functions .................................................. 3
1.2.1 Part Names and functions of a basic system ........................... 3
Chapter 1
Overview
1.1 Checking the Package Contents
1
The CV-701(P)/751(P) packages include the following parts and equipment. Check
that all parts and equipment are included in the packages.
■ CV-751(P)
Controller (CV-751(P)): 1
Panel-mounting brackets: 4
Users’ manual: 1
Ferrite cores: 2
■ CV-701(P)
Controller (CV-701(P)): 1
Remote control console: 1
Users’ manual: 1
Monitor cable (RCA-RCA): 1
Ferrite cores: 2
Plastic fitting: 1
Mounting bracket: 1
■ CV-070
Camera (CV-070): 1
M3 x 6 screws (2)
Washer (2)
M3 x 6 plastic screws (2)
Plastic washer (2)
2
Chapter 1
Overview
1.2 Part Names and Functions
This section describes the part names and functions of the CV-701(P)/751(P) and
an example of a complete system.
1.2.1
Part Names and functions of a basic system
■ CV-751(P)
Panel keys
Power indicator
Illuminates when power is supplied.
Monitor
Controller selector
Switches control between
the panel keys and the
remote control console.
Modular connector
Connection for the remote control
console or the RS-232C communication cable.
Compact Flash memory slot
I/O connector
I/O terminal
Used to input and
output signals.
Analog output
terminal
Video output
terminal
Connection for
the monitor.
Monitor adjustment trimmer
Adjust the brightness and
color of the monitor.
Power input terminal
(24 VDC, 0 V)
The input terminal of the 24
VDC (1.4 A) power supply.
Control selector
Camera connector
Connection for the
camera cable.
Remote control console
(Option: OP-30938)
24 VDC power
supply unit
(Option: KV-U3 or
KV-U6W)
Camera 1
(CV-070)
Monitor (Option: CV-M30)
Lens (Option)
Camera 2
3
1
Chapter 1
Overview
■ CV-701(P)
Modular connector
Connection for the remote control
console or the RS-232C communication cable.
1
Power indicator
Illuminates when
power is supplied.
Compact Flash memory slot
I/O connector
Analog output
terminal
Video output
terminal
Connection for a
monitor.
Camera connector
Connection for the
camera cable.
I/O terminal
Used to input and
output signals.
Power input terminal
(24 VDC, 0 V)
The input terminal of the 24
VDC (700 mA) power supply.
Remote control console
(Accessory)
24 VDC power
supply unit
(Option: KV-U3
or KV-U6W)
Camera 1
(CV-070)
Lens (Option)
Camera 2
4
Monitor
(Option: CV-M30)
Chapter 2
Preparation
This section describes how to connect and mount the CV-701(P)/751(P),
how to select a lens, and gives information about illumination.
2.1
Mounting and Connection .................................................... 6
2.1.1
2.1.2
2.1.3
2.1.4
2.1.5
Mounting the controller ............................................................ 6
Mounting the camera ............................................................... 8
Selecting a lens ....................................................................... 9
Cable connection and wiring .................................................. 11
Checking the connection ....................................................... 13
2.2
Illumination .......................................................................... 15
Chapter 2
Preparation
2.1 Mounting and Connection
This section describes how to mount the controller and camera, connect cables,
and select a lens.
2.1.1
2
Mounting the controller
CV-751(P) (Built-in-monitor type)
■
1.
2.
3.
Panel mounting
Insert the controller from the front side of the panel.
Attach the resin caps to the mounting brackets.
Fit the mounting brackets into the four mounting slots on the side of the
controller. Tighten the screws with a Philips screwdriver.
Panel
Slots for mounting
brackets
1. Controller
2. Resin cap
3. Fit the mounting
brackets into the
slot.
Mounting
bracket
Slots for
mounting
brackets
CAUTION
Excessive tightening of the mounting bracket screw may deform the
controller housing. Limit the tightening torque to a maximum of 0.4 N•m.
■ Mounting to the stand (Option: OP-35481)
Contents: Stand: 1, M4 x l 8 screw (3)
1. Fix the stand to a panel with two M6 screws.
2. Insert the controller into the stand.
3. Fix the controller to the stand from both sides with the two supplied M4 screws.
3. M4 screw
2.
3. M4 screw
1. M6 screw
6
Chapter 2
Preparation
4. Fix the controller with the supplied M4 screw as required.
Fix the controller with the
supplied M4 screw according
to the desired angle.
CAUTION
•
•
2
Do not place the controller upside down.
Do not block the ventilation slots. High temperature inside the controller
may cause malfunctions.
CV-701(P)
■ DIN rail mounting
The controller is designed to be mounted
to a DIN rail. To mount or dismount the
controller, move the claw at the bottom of
the controller in the direction of the arrow.
Retractable
mounting claw
■ Screw mounting
Mount the controller using four M4
screws for the four holes on the
controller.
■ Mounting position
• Mount the controller with the front facing the operator, facing up, or vertically
with the front facing the operator.
CAUTION
Horizontally with front
facing the operator:
With front facing
up:
Vertically with front
facing the operator:
Correct
Correct
Correct
Upside down with
front facing the
operator:
Incorrect
•
Allow sufficient space (approx. 30 mm) for ventilation around the controller.
•
•
Do not place the controller upside down.
Do not block the ventilation slots. High temperature inside the controller
may cause malfunctions.
7
Chapter 2
2.1.2
Preparation
Mounting the camera
1. Mount a lens to the camera.
Select a lens based on the target size and the distance between the lens and
the target. ➮ See the next page.
2
Lens
2. Secure the camera.
Secure the camera using the supplied screws and plastic fitting.
M3 screw holes
Plastic fitting
The plastic fitting has three screw holes;
1. Screw holes for tripod (1/4-20 UNC),
2. M3 screw holes, 3. M4 screw holes.
Use the appropriate ones to secure the camera.
2. M3 screw holes
3. M4 screw
holes
Included screws
(M3 x 6) and
washers
CAUTION
8
1. Screw holes for tripod
(1/4-20 UNC)
Provide insulation upon mounting. Otherwise, the camera may suffer internal
damage.
Chapter 2
Selecting a lens
Select a lens based on the target distance (field of view: Y) and the distance
between the lens and the target (working distance). Refer to the chart below to
select the lens best suited for your application.
CAM1 CAM2
PROGRAM
No.00
MODE
ARE/CON
SHUTTER
SCRN REG
WIND•1
2
DATA
Y
001216
TOL
H=002500
L= 000000
WD (Working
distance)
OPTION
SAVE
T= 000034
RAW SCR
Y
CV-L3* CV-L6* CV-L16*
1000
CV-L50*
100
5
0.
1.0
1.
5
0
0.5
1.0
10
5.0
20
10
1.5
15
1.0
5
1.
5.
0.5
40
30
Y: Field of View (mm)
10
15
50
2.1.3
Preparation
1
1
10
100
WD: Working distance (mm)
•
1000
10000
*Model of optional lens
The line between the dots (●–●) indicates the range provided by a close-up
adapter. The close-up adapter is placed between the lens and the camera.
■ How to read the chart
Using the CV-L16 with a working distance of 400 mm provides a field of view of
approximately 90 mm. Combining the CV-L50 with a 5 mm close-up adapter
provides a field of view of approximately 30 mm. The values in the chart serve
as a guide. Adjustment may be necessary upon mounting.
Close-up adapter
9
Chapter 2
Preparation
Note: When an external monitor is connected, some monitors may not show the
frame of the screen. Although this does not affect measurement, use an underscanning type monitor if you need to see right to the corners of the screen.
CAM1 CAM2
PROGRAM
No.00
MODE
ARE/CON
SHUTTER
SCRN REG
WIND•1
CAM1 CAM
PROGRAM
No.00
MODE
ARE/CO
SHUTTER
SCRN REG
WIND•1
2
DATA
DATA
Over-scanning type monitor
10
00121
TOL
H=00250
L=00000
001216
TOL
H= 002500
L= 000000
OPTION
SAVE
T=00003
RAW SCR
OPTION
SAVE
T= 000034
RAW SCR
Under-scanning type monitor
Chapter 2
2.1.4
Preparation
Cable connection and wiring
CAUTION
•
•
Be sure to turn off the controller before connecting the cables. If you
connect the cables while the controller is turned on, the camera or
peripheral device may be damaged.
The CV-701(P)/751(P) conforms to CE regulations in Europe; however,
please make sure to keep the wiring for the power and the I/O within 30 m.
Otherwise, it will not conform to EN61326-1.
1. Insert the connector for the camera cable.
When using only 1 camera, insert the connector for camera one into the camera
1 slot only.
Camera 2
Camera 1
Camera 1
Camera 2
2. Insert the modular connector for the remote control console cable.
With the CV-751(P), insert the modular connector only when using the optional
remote control console. When using the console, slide the control selector to
the right.
Control selector
Right: When using the console
Left: When using the panel keys
3. Insert the video output terminal (RCA connector) for the monitor cable.
With the CV-751(P), insert the RCA connector only when using an external
monitor.
4. Connect the cable for the power supply unit.
•
•
Connect the cable for the 24 VDC power supply unit to the controller’s input/
output terminals 1 and 2.
Use a Philips screwdriver to connect the cable to the terminal. Do not turn on
the power until the mounting procedure is complete.
1: DC24V
2: 0 V
1 2 3 4 5 6 7 8 9 10 11 12 13 14 15
11
2
Chapter 2
Preparation
■ CV-751(P)
Remote control console
(Option: OP-30938)
Control selector
2
24 VDC power
supply unit
(Option: KV-U3
or KV-U6W)
Monitor
(Option: CV-M30)
Camera 1 (CV-070)
Lens (Option) Camera 2
■ CV-701(P)
Remote control console
(Accessory)
24 VDC power
supply unit
(Option: KV-U3 or
KV-U6W)
Camera 1
(CV-070)
Lens (Option)
Monitor
(Option: CV-M30)
Camera 2
12
Chapter 2
2.1.5
Preparation
Checking the connection
1. Turn on the power.
Turn on the connected 24 VDC power supply.
2. Check the monitor.
•
•
A raw (unprocessed) screen is displayed.
When two cameras are connected, the image from camera 1 is displayed.
➮
See page 42 to display the image from camera 2.
CAM1 CAM2
PROGRAM
No.00
MODE
T= 000000
RAW SCR
*
A raw screen is a screen that is seen through the camera without any
processing.
3. Adjust the diaphragm and focus of the lens.
1) Turn the diaphragm ring and focus ring to
adjust the diaphragm and focus while
watching the monitor.
Focus ring lock screw
2) After the adjustment is complete, secure
the lock screws to lock the rings.
Diaphragm ring lock screw
● Diaphragm adjustment
Adjust the diaphragm so that the target can be easily distinguished from the
background.
● Focus adjustment
Adjust the focus until the target contour becomes clear.
Note: Check the following items if nothing appears on the monitor.
• Is the proper type of 24 VDC power supply (CV-751(P): 1.4 A, CV-701(P): 700
mA) used? Are the “+24 V” and “0 V” power supply terminals properly connected?
• Is the camera cable properly connected?
• Are the cables for the remote control console and monitor properly connected?
(with the CV-701(P) only)
• Is the lens cap removed?
• Is the lens diaphragm opened wide enough?
• Is the monitor turned on?
• Is the video input terminal for the monitor properly connected?
13
2
Chapter 2
Preparation
4. Adjust the monitor. (with the CV-751(P) only)
The monitor for the CV-751(P) is factory-adjusted so that adjustment is unnecessary under normal conditions. If you need to make adjustments due to ambient light or the viewing angle, follow the procedure below.
2
*
The initial setting is for setting all trimmers to the middle position.
1) Adjust the color depth using the COLOR adjustment trimmer.
COLOR
Light
Deep
2) Adjust the hue using the HUE adjustment trimmer.
HUE
Greenish
Reddish
3) Adjust the brightness using the BRIGHT adjustment trimmer.
BRIGHT
Bright
Dark
5. Adjust the time and date.
The CV-701(P)/751(P) comes standard with a built-in clock function.
The time and date on the clock are used when writing the data on the
CompactFlash memory, etc.
Adjust the time and date using the [CLOCK] on the configuration menu.
➮
See page 149.
Note 1: The secondary battery for backing up the clock function is not factorycharged.
The battery can be fully charged by applying power to the controller for 24 hours.
Note 2: With the power off, the time between battery recharges is approximately
two months (at a temperature of 25 °C (77°F)). When it becomes low in capacity,
the date and time are reset to the initial setting. (00 YEAR 01 MON 01 DAY 00 MIN
00 SEC)
14
Chapter 2
Preparation
2.2 Illumination
Use illumination for more stable detection.
If you install the CV-701(P)/751(P) in a location with the following conditions,
detection may not be accurate. Change the location or use the specially designed
illuminator.
•
•
•
Locations directly exposed to sunlight
Locations in which the ambient light varies greatly depending on the time of day
Locations in which the illumination level changes according to the movement of
a machine or people
Illuminator
■ Ring lamp
Mount the ring lamp around the lens to illuminate the target evenly. The ring lamp
is available as an option. (CV-R11)
Ring lamp
Target
Note: The illumination lamp has a recommended service life. When the light
intensity changes, detection errors may result. Replace the lamp before this
problem occurs.
White balance
Adjust the white balance when discoloration occurs in the target image after the
lens and illumination are adjusted.
➮
See page 148.
15
2
Chapter 2
Preparation
MEMO
MEMO
2
16
Chapter 3
Mode Selection
The CV-701(P)/751(P) features five measurement methods called “measurement modes”.
This section describes the functions and applications of each mode. A list
of applications and modes is provided to help simple mode selection.
3.1
Measurement Modes and Typical Applications ............... 18
3.1.1
3.1.2
3.1.3
3.1.4
3.1.5
“ARE/CON” (Area continuous) ............................................... 18
“INS/TRG” (Inspection trigger) ............................................... 19
“INS+POS” (Inspection position) ........................................... 22
“ABS.POS” (Absolute position) .............................................. 23
“REL.POS” Mode ................................................................... 25
3.2
Selecting the Measurement Mode by Application ........... 27
Chapter 3
Mode Selection
3.1 Measurement Modes and Typical Applications
The CV-701(P)/751(P) features five measurement modes: “ARE/CON” (Area
continuous), “INS/TRG” (Inspection trigger), “INS+POS” (Inspection + position),
“ABS.POS” (Absolute position), and “REL.POS” (Relative position). This section
gives an overview and describes the typical application of each mode.
3.1.1
“ARE/CON” (Area continuous)
Use “ARE/CON” mode to continuously measure the area in the window for selected color data.
➮ See“4.4 “AREA” Mode Basic Settings” on page 57 for the setting procedure.
3
Functions
•
•
•
Extracts the selected color data of the window.
Sets a window and measures the area of the selected color data and the
background color of the window.
Up to eight windows can be drawn for a single program. The measured data
and detection result for each window are output sequentially.
Sample: Detection for the number of pixels
ABC
Window
Acceptable (3,000 pixels)
ABC
Unacceptable (2,000 pixels)
Typical applications
Use the “AREA” mode for detection of the presence or absence of a target, a
missing target, and for the shape or area of a target.
18
Detecting a chip on building
plywood
Checking the application quantity
of the magnetic substance on
magnetic films
Detecting uneven coating on an
optical disk surface
Detecting uneven curtain coating in
the resist process of a PC board
Chapter 3
Tips
3.1.2
Mode Selection
Basic Unit of Area: “Pixel”
The sensing element CCD of the camera forms a
square grid pattern, and each minute area corresponds
with a pixel. Each pixel recognizes R, G, and B as a 256level brightness signal.
“AREA” mode allows you to set a window on a desired
part of an image on the monitor screen and count the
number of pixels matching the selected color data.
You can detect the area of a target, whether it is small
or large, and the presence or absence of a target.
Pixel
“INS/TRG” (Inspection trigger)
Use “INS/TRG” mode to measure the selected color data in the window at every
trigger input.
➮
See “4.6 “INS” Mode Basic Settings” on page 70 for setting procedure.
•
•
Selects the measurement parameter by the inspection mode.
The following ten inspection mode types can be selected from the inspection
mode.
Setting an inspection mode for each window allows for multiple detections with
one target.
Functions
•
AREA
Detects the presence or absence of a target, whether it is small or large, a missing
target, and the area of a target as with “ARE/CON” mode.
OUTER (Outer edge)
Measures the distance between the outermost edges in the window.
OUTER measurement
Window
INNER (Inner edge)
Measures the distance between the innermost edges in the window.
INNER measurement
Window
GAP
Measures the distance between the odd-numbered edges and the even-numbered
edges counted from the left (in horizontal scanning) or top (in vertical scanning) of
the window. The maximum, minimum, and average values can be obtained.
GAP measurement
Window
19
3
Chapter 3
Mode Selection
PITCH
Measures the pitch values to obtain the maximum, minimum, and average values.
PITCH measurement
Window
EDGE NO (Edge count)
Use this mode to count the number of pins.
Counts the number of edges in the window. (Specify the edge with [WH ➞ BL] or
[BL ➞ WH].)
3
1
2
3
4
5
Window
COUNT
Counts the number of clusters of extracted colors in the window. Up to 256 clusters
can be counted.
8
1
2
3
7
6
5
4
POINT (Point sensor)
Detects the presence or absence of the extracted colors of the set point. Up to 8
points can be detected in a window.
Absence
Presence
STAIN
Use this mode to detect stains and defects. The four types that can be used for a
window: square, circle, ring, and arc.
GRAVITY
Detects the center of gravity and the angle of principal axis (the longitudinal angle)
of a target.
GRAVITY center
20
Chapter 3
Mode Selection
Typical applications
Detecting missing products in a
packaging process
Measuring paper sheet width
3
AREA
Determines if there are
any products missing in
each carton.
Measuring lead pitch
PITCH
Inspects the bend in IC
leads.
Detecting missing balls of bearings
COUNT
Counts the number of
balls to determine if any
are missing.
OUTER
Measures the width of a
paper sheet with two
cameras after the slitting
process.
Detecting missing cables
EDGE
NO
Counts the number of
cables wired to connectors.
Lighting inspection of an LCD
POINT
Inspects unlit segments of
LCD displays.
21
Chapter 3
Mode Selection
Detecting the stains or pinholes on
sheet material
3
STAIN
Tips
Detects any stains or
pinholes on sheet material.
Detecting the center of gravity of
alignment marks
GRAVITY
Detects the center of
gravity of alignment
marks.
Unit Conversion Function
The CV-701(P)/751(P) processes an image and obtains data with the number of
pixels. For example, measuring a target with an outer size of 3.25 mm may give
65.0 pixels. The unit conversion function converts the number of pixels into other
units such as mm.
65.0
3.25
➮ See page 137.
x0.05
3.1.3
“INS+POS” (Inspection + position)
Use the “INS+POS” mode to adjust the position and angle of the window. Use this
mode for trigger detection when the “INS/TRG” mode can’t be used because the
position of the target is not constant.
➮
See “4.6 “INS” Mode Basic Settings” on page 70 and “4.9 “Position Detection” Mode Basic Settings”
on page 109 for the setting procedure.
■ Position adjustment
Use this function when detection cannot be operated at the same position in a
window because the position of a target is not constant in field operation. Using
the position adjustment function allows the inspection window to adhere to the
motion of targets.
The position adjustment, like the “ABS.POS” mode, uses either “pattern search”
or “edge detection” to recognize the distinctive image and edge of a target.
It then adjusts the inspection window to adhere to the target. This function allows
the CV-701(P)/751(P) to constantly detect the same position of targets regardless
of the movement of targets. Also, the rotation adjustment function allows the CV701(P)/751(P) to automatically tilt the inspection window when the target makes a
rotating movement.
REG SCR
(Registered screen)
Inspection window
(Edge pitch)
Position adjustment
window
22
Without position
adjustment
With position
adjustment
PROG
PROG
PROG
WINDOW 1
COLOR
MEASURE
248,168
378,236
MASK
– – –, – – –
– – –, – – –
DETECT
MEASURE
001329
TOL
H=000000
L=000000
WINDOW 1
COLOR
MEASURE
248,168
378,236
MASK
– – –, – – –
– – –, – – –
DETECT
MEASURE
001329
TOL
H=000000
L=000000
WINDOW 1
COLOR
MEASURE
248,168
378,236
MASK
– – –, – – –
– – –, – – –
DETECT
MEASURE
001329
TOL
H=000000
L=000000
T=000017
RAW SCRN
●
T=000017
RAW SCRN
●
T=000017
RAW SCRN
●
Chapter 3
Mode Selection
Functions
•
•
•
Inspects every trigger input.
Inspection functions are similar to those of “INS/TRG” mode.
The position adjustment function is the same as “ABS.POS”.
Typical applications
Use this mode when the position of a target is not constant for applications described in the “INS/TRG” section.
➮ See page 21.
3.1.4
“ABS.POS” (Absolute position)
Use the “ABS.POS” mode to detect the position and angle of the target, and judge
the result with the position adjustment function.
➮ See “4.9 “Position Detection” Mode Basic Settings” on page 109 for the setting procedures.
Functions
•
•
•
•
•
Detects the position and angle of a target.
“Pattern search” and “edge detection” can be selected for the measurement
mode.
Detects up to four windows, which can be drawn to measure the position of four
points simultaneously.
The judgment, coordinates, angle, and correlation ratio can be output.
The camera can be set to trigger mode only.
■ Position detection method
Pattern Search
Register a screen as a reference that includes the position of the pattern to be
searched, and save the pattern to the pattern window. The saved pattern window
is searched through the arbitrary-set search window from the upper-left corner to
the lower-right corner for the position of the most similar pattern.
Reference
image
Registered
image
Search
Detection
Pattern window
Search window
23
3
Chapter 3
Mode Selection
Edge Detection
Register a screen as a reference that includes the position of the pattern to be
searched, and register an X window and Y window as illustrated. The windows
are searched for points to show a change in color to be recognized as the edge,
and then the X- and Y- coordinates of the edge are detected. Position detection
of the X-coordinate alone using the X window is also available.
Y window
Edge
3
PROG
PROG
WINDOW 1
COLOR
MEASURE
248,168
378,236
MASK
– – –, – – –
– – –, – – –
DETECT
MEASURE
001329
TOL
H=000000
L=000000
WINDOW 1
COLOR
MEASURE
248,168
378,236
MASK
– – –, – – –
– – –, – – –
DETECT
MEASURE
001329
TOL
H=000000
L=000000
T=000017
RAW SCRN
●
T=000017
RAW SCRN
●
X-window
Edge
Typical application
Detecting the misalignment of an IC
chip to lead frames
Positioning of a PC board
Controlling robotic handling
Positioning of glass substrate
Presswork
24
Chapter 3
3.1.5
Mode Selection
“REL.POS” Mode
Use the “REL.POS” mode to detect the position and angle of two or more targets,
and judge the result with the position adjustment function.
➮ See “4.9 “Position Detection” Mode Basic Settings” on page 109 for the setting procedures.
Functions
•
•
•
•
•
•
Detects the position of two of more targets, measures the distance between the
two points, and judges the result.
“Pattern search” and “edge detection” can be selected for the measurement
mode.
The relative distance between up to three measurement windows and one
reference window can be measured simultaneously.
The positions of the search window, pattern window (when pattern search is
used), and X/Y windows (when edge search is used) are adjusted (X, Y, and θ)
according to the detection result of the reference window position.
The judgment, coordinates, angle, and correlation ratio can be output.
The camera can be set to trigger mode only.
Y-coordinate
X-coordinate
Typical applications
Detecting misaligned labels and
loose caps
Detects simultaneously the position
and angle of labels and loose caps.
Detecting the relative position of a
PC board and IC
Detects the correlation between the
edge of a PC board and IC
25
3
Chapter 3
Mode Selection
Detecting electrodes of lithium-ion
batteries
Detecting the molding position of
laminated film
Detects the position of an electrode
using the edge of the battery as the
reference.
Detects the molding and width of
laminated films using two X-edges.
3
Tips
Use “REL.POS” mode to measure the relative position of [REF WND] and [REL 1/2/3].
Use “REF WIND” to detect the rotation angle. “WIND1/2/3” will be tilted by the amount
of the angle deviation for detection.
WIND2
REF WIND
“WIND2” rotates in conjunction
with “REF WIND”.
Use [REL.POS] mode to measure the
relative position of [REF WND] and
[REL_1/2/3].
26
Chapter 3
Mode Selection
3.2 Selecting the Measurement Mode by Application
Inspection items and checkpoints are listed below. Refer to the following chart to
select the measurement mode best suited for your application.
Inspection item
Presence/absence
detection
(e.g. stains, defects)
Check point
The target is a long sheet.
Measurement mode
Continuous
detection
ARE/CON
3
The target is an individual
product.
Area detection
(e.g. missing print)
The target position is
constant.
The target position is not
constant.
Position detection
(e.g. misaligned labels)
The reference point is
fixed.
Individual
detection
No position
adjustment
INS/TRG (AREA)
Position
adjustment
INS+POS (AREA)
Absolute
position
ABS.POS
Select either pattern search
or edge detection.
➮ See page 118.
The reference point is not
fixed.
Relative
position
REL.POS
Select either pattern search
or edge detection.
➮See page 124.
27
Chapter 3
Mode Selection
Inspection item
Dimensional measurement
(e.g. bend in pins)
Check point
The target position is
constant.
Measurement mode
No position
adjustment
INS/TRG
Select from the following
modes.
➮ See page 70 for details.
The target position is not
constant.
Position
adjustment
• OUTER
• INNER
• PITCH
• GAP
INS+POS
Select from the following
modes.
3
➮ See page 106 for details.
• OUTER
• INNER
• PITCH
• GAP
Angle detection
(e.g. dial indication)
ABS.POS
(Angle adjustment)
Edge counting
(e.g. number of connector
pins)
The target position is
constant.
The target position is not
constant.
28
No position
adjustment
INS/TRG
(EDGE NO)
Position
adjustment
INS+POS
(EDGE NO)
Chapter 3
Inspection item
Counting
(e.g. number of bearing
balls)
Check point
The target position is
constant.
The target position is not
constant.
Mode Selection
Measurement mode
No position
adjustment
Position
adjustment
INS/TRG
(COUNT)
INS+POS
(COUNT)
3
Presence/absence of
multiple points
(e.g. lighting inspection of
an LED)
The target position is
constant.
The target position is not
constant.
Presence/absence of
defects or stains
(e.g. black spot on resin
caps)
The target position is
constant.
The target position is not
constant.
Gravity detection
(e.g. alignment marks of a
PC board)
The target position is
constant.
The target position is not
constant.
No position
adjustment
Position
adjustment
No position
adjustment
Position
adjustment
No position
adjustment
Position
adjustment
INS/TRG
(POINT sensor)
INS+POS
(POINT sensor)
INS/TRG
(STAIN)
INS+POS
(STAIN)
INS/TRG
(GRAVITY)
INS+POS
(GRAVITY)
29
Chapter 3
Mode Selection
MEMO
3
30
Chapter 4
Setting Procedure
This section describes how to use the panel keys or the remote control console to
set the CV-701(P)/751(P). It covers everything from basic settings to the advanced
settings.
4.1
Names and Functions of Control Keys and
Monitor Screen .......................................................................... 32
4.2
Preparations ......................................................................... 35
4.3
Basic Settings ...................................................................... 36
4.4
“AREA” Mode Basic Settings ............................................. 57
4.5
“AREA” Mode Advanced Settings ..................................... 65
4.6
“INS” Mode Basic Settings ................................................. 70
4.7
“INS” Mode Advanced Settings ......................................... 96
4.8
“INS+POS” Mode Basic Settings ..................................... 106
4.9
“Position Detection” Mode Basic Settings ..................... 109
4.10
“Position Detection” Advanced Settings ........................ 118
4.11
Optional Settings .............................................................. 134
4.12
Operation Check of the Setting Status ........................... 140
4.13
Initialization ....................................................................... 142
4.14
Input/Output Operation in PROGRAM Mode .................. 143
4.15
Environmental Settings .................................................... 144
Chapter 4
Setting Procedure
4.1 Names and Functions of Control Keys and Monitor Screen
Set each parameter using the panel keys or the remote control console.
4.1.1
Controller
Panel keys (CV-751(P))
[WINDOW] key
[SCREEN] key
Press this key to select the screen type. The following
five screen types appear sequentially: “RAW SCR” and
“PROCES1/2/3/4”. ➮ See page 55 for details.
[RUN/PROG] key
Press this key to select either
RUN or PROG mode. The mode
switches with each press.
SCREEN
WINDOW
RUN
PROG
PROGRAM No.
4
[PROGRAM No.] keys
Press these keys to change
programs.
ESC
[ESC] key
Press this key to exit each
setting.
ENT
[Cursor] keys
Press these keys to move a
cursor or change a preset value.
CLEAR TRIG
POWER
[ENT] key
Press this key to confirm a
setting.
[TRIG] key
Press this key to input a
trigger signal. Hold the key
down for at least 2 seconds
for continuous trigger input.
Press it again to cancel it.
▼
■ How to use the cursor keys
The cursor keys include four keys: “▲, ▼,
following purposes.
, and
▼
[CLEAR] key
Press this key to
clear the setting.
”. Use these keys for the
•
To enter the “TOL” (tolerance) value.
•
To move the arrow cursor on the monitor.
•
To change the size of a window or move a window.
•
To lock the panel key operation temporarily. (Hold down the“ and ”keys
simultaneously for at least 2 seconds to lock the panel keys. Hold them down
again for at least 2 seconds to cancel.
Move up
Move left
Move right
Move down
32
▼
To move through menu items.
▼
•
Chapter 4
Setting Procedure
Remote control console (CV-701(P)/751(P))
Tips
The remote control console is optional with the CV-751(P). (OP-30938)
[ENT] key
Use this key to move the
cursor or to confirm a setting.
RUN
PROG
ENT
ESCAPE
[ESCAPE] key
Press this key to exit each
setting.
SCREEN
TRIGGER
[TRIGGER] key
Press this key to input a trigger
signal. Hold this key down for at
least 2 seconds for continuous
trigger input. Press it again to
cancel it.
CLEAR
[SCREEN] key
Press this key to select a screen
type. The following five screen
types appear sequentially:
“RAW SCR” and “PROCES1/2/
3/4”.
[Mode selection slide switch]
Slide this switch up or down to
select either RUN or PROG
mode.
POWER
4
[CLEAR] key
Press this key to cancel the
setting.
➮ See page 54 for details.
■ How to use the ENT key
● Press the center of the key
• To select a menu item.
• To confirm a setting.
EN
T
Press
● Move the key to the direction of an arrow
The key can be moved up, down, right, left, and diagonally.
Move the key for the following purpose.
• To move through menu items.
• To enter values such as “TOL” (tolerance).
• To move the arrow cursor on the monitor.
• To change the size of a window or to move a window.
Move up
Move left
ENT
Move right
Move down
33
Chapter 4
4.1.2
Setting Procedure
Screen page layout
The cursor position is displayed as highlighted on the menu screen.
The menu screen has a layered structure. Use the following keys to move through
the layers. For the layered structure of menu items, refer to the “Parameters”
sections for each measurement mode.
● With the panel keys
Use the [ENT] key, [Cursor] keys, and [ESCAPE] key.
● With the remote control console
Use the [ENT] key and [ESCAPE] key.
■ Screen page layout
Image screen
4
Menu screen
CAM1 CAM2
PROGRAM
No.00
MODE
ARE/CON
SHUTTER
SCRN REG
WIND•1
RUN/PROG display
Shows the current
operation mode:
“RUN” or “PROG”.
DATA
000000
TOL
H=000000
L= 000000
OPTION
SAVE
T=
RAW SCR
The menu screen above is displayed when [ARE/CON]
is selected from the [MODE] menu.
34
Menu screen
Displayed items vary
depending on the
selected measurement mode.
Chapter 4
Setting Procedure
4.2 Preparations
This section describes the preparations before settings.
4.2.1
Preparations before settings
Preparations before turning on the power
Check the cable connections.
➮ See page 11.
Preparations for turning on the power
1. Turn on the power.
An unprocessed screen will be displayed on the monitor.
2. Aim the camera at a target and adjust the lens and illumination.
➮ See page 13.
4
Illumination
35
Chapter 4
Setting Procedure
4.3 Basic Settings
This section describes the common settings for each mode. Be sure to read all
instructions carefully.
4.3.1
Basic setting procedures
This section describes the setting procedures, basic information for changing
settings, and how to perform the major functions.
Selecting the program number
Select a program number before changing the settings. The CV-701(P)/751(P) can
save up to 16 measurement parameters. Each measurement parameter is called a
“Program No.”. By saving two or more parameters in advance, selection can be
performed with a shift of program numbers upon target changeover.
To save the previous settings, select an unused program number.
4
Note: When two cameras are connected, the available program numbers are
limited to 00 through 07.
Tips
Use a CompactFlash memory (➮ page 171) or RS-232C communication function (➮ page
179) to save more than sixteen sets of parameters to a personal computer.
■ Panel keys
Press the PROGRAM number keys to select the program number. Pressing the
“▲” key increases the number, and pressing the “▼” key decreases the number.
SCREEN
WINDOW
RUN
PROG
PROGRAM No.
■ Remote control console
1. Place the cursor on [No.].
CAM1 CAM2
PROGRAM
No.00
MODE
36
Chapter 4
Setting Procedure
2. Press the [ENT] key to display the program number selection menu.
3. Move the [ENT] key up or down to place the cursor on the desired
number.
PROGRAM
No.00
No.00
No.01
No.02
No.03
No.04
No.05
No.06
No.07
No.08
No.09
No.10
No.11
No.12
No.13
No.14
No.15
4
4. Press the [ENT] key to confirm the selection.
CAM1 CAM2
PROGRAM
No.00
Tips
• A program number with “●” indicates that the number is already being used.
• Selecting the program number can also be done by using the input terminal in RUN
mode.
Setting the measurement mode
The CV-701(P)/751(P) allows you to select a measurement mode best suited for
the application from the following five measurement modes: “ARE/CON”, “INS/
TRG”, “INS+POS”, “ABS.POS”, and “REL.POS”. For an overview of each measurement mode, see “Mode Selection” (➮ See page 17).
1. Place the cursor on [MODE].
PROGRAM
No.00
MODE
2. Press the [ENT] key to display the mode selection menu.
3. Press the [ENT] key up or down to place the cursor on the desired mode.
MODE
ARE/CON
INS/TRG
INS+POS
ABS•POS
REL•POS
37
Chapter 4
Setting Procedure
4. Press the [ENT] key to confirm the selection.
The cursor will move onto [SHUTTER].
No.00
MODE
ARE/CON
SHUTTER
Tips
To change a set measurement mode, place the cursor on “Y” and press the [ENT] key
when the message <ERASE SETTINGS N/Y> appears on the screen.
Selecting a shutter speed
Select a shutter speed according to the speed of the target movement. When the
screen is too bright or too dark, the brightness of the screen is adjusted by changing the shutter speed. Select a shutter speed from 11 settings: 1/30 through
1/10000 of a second.
4
1. Place the cursor on [SHUTTER] and press the [ENT] key to display the
shutter menu.
No.00
MODE
ARE/CON
SHUTTER
2. Place the cursor on the desired shutter speed and press the [ENT] key to
confirm the selection.
SHUTTER
1/30
1/50
1/60
1/100
1/125
1/250
1/500
1/1000
1/2000
1/4000
1/10000
Tips
38
• When the image on the screen is blurred because the target moves too quickly, select a
faster shutter speed.
• Be sure to readjust the lens after changing the shutter speed, because the brightness
has been changed.
Chapter 4
Setting Procedure
Register a screen
Save the image to be registered on the memory. Set measurement parameters
based on the reference image.
1. Place the cursor on [SCRN REG] and press the [ENT] key to display the
camera selection menu.
SHUTTER
SCRN REG
WIND•1
2. Press the [ENT] key when using only one camera. The message
<REGISTER SCREEN N/Y> appears on the monitor screen. (When two
cameras are connected, select one camera to be registered.)
➮ See page 42.
SHUTTER
SCRN REG
CAM1
4
3. Move the [ENT] key to the right to select “Y”. To cancel the screen
registration, press the [ENT] key while “N” is highlighted.
CAM1 CAM2
PROGRAM
No.00
MODE
ARE/CON
SHUTTER
SCRN REG
CAM1
DATA
000000
TOL
H=000000
L= 000000
REGISTER SCREEN N / Y
Tips
OPTION
SAVE
T=
RAW SCR
Pressing the [TRIGGER] key while “Y” is highlighted updates the screen image.
4. Press the [ENT] key. The message <CHANGE POS N/Y> appears on the
screen. Move the [ENT] key to the left to select “N”, and go to step 5.
When using the position adjustment function in “INS+POS” or “ABS.POS”
mode, go to the next step in the bracket.
CAM1 CAM2
PROGRAM
No.00
MODE
ARE/CON
SHUTTER
SCRN REG
CAM1
DATA
000000
TOL
H=000000
L= 000000
CHANGE POS N / Y
Tips
OPTION
SAVE
T=
RAW SCR
• The position can be changed when using the position adjustment function. If the target
is projected at an angle on the screen, it can be adjusted to the proper position.
• In position detection, angle detection or angle adjustment operation, the origin point is
specified with the registered screen. Therefore, adjust the position and angle of the
target on the registered screen to determine the origin point.
39
Chapter 4
Setting Procedure
Position and angle setting procedure
1. The position of the target can be changed when the target is projected at
an angle on the screen while the message <CHANGE POS N/Y> appears
on the screen. Move the [ENT] key to the right to select “Y”. When the
target is projected as straight, select “N” and press the [ENT] key.
CAM1 CAM2
PROGRAM
No.00
MODE
ARE/CON
SHUTTER
SCRN REG
CAM1
WIND•1
INSPECT
AREA
DATA
000000
TOL
H=000000
L= 000000
CHANGE POS N / Y
OPTION
SAVE
T=
RAW SCR
2. When “Y” is selected, the message <ARROW KEY MOVE> appears on the
screen. You can scroll the screen horizontally or vertically. Adjust the
position and press the [ENT] key.
4
CAM1 CAM2
PROGRAM
No.00
MODE
ARE/CON
SHUTTER
SCRN REG
CAM1
WIND•1
INSPECT
AREA
DATA
000000
TOL
H=000000
L= 000000
ARROW KEY MOVE
OPTION
SAVE
T=
RAW SCR
● With the panel keys
Scroll the screen by pressing the [Cursor] keys.
● With the remote control console
Scroll the screen by moving the [ENT] key.
3. The message <UP/DOWN ROTATE> appears on the screen. Adjust the
angle of the target so that the pattern to be searched is projected as
straight in a horizontal or vertical position, and press the [ENT] key.
CAM1 CAM2
PROGRAM
No.00
MODE
ARE/CON
SHUTTER
SCRN REG
CAM1
WIND•1
INSPECT
AREA
DATA
000000
TOL
H=000000
L= 000000
UP/DOWN ROTATE
● With the panel keys
Adjust the angle by pressing the cursor keys.
[▲]: Rotates the target counterclockwise.
[▼]: Rotate the target clockwise.
● With the remote control console
Adjust the angle by pressing the [ENT] keys.
[▲]: Rotates the target counterclockwise.
[▼]: Rotate the target clockwise.
40
OPTION
SAVE
T=
RAW SCR
Chapter 4
Setting Procedure
4. The message <ARROW KEY MOVE > appears again on the screen. Readjust the position if necessary.
5. Press the [ESCAPE] key to exit the position change operation.
The message <REGISTER POS N/Y> appears on the screen.
CAM1 CAM2
PROGRAM
No.00
MODE
ARE/CON
SHUTTER
SCRN REG
CAM1
WIND•1
INSPECT
AREA
DATA
000000
TOL
H=000000
L= 000000
CHANGE POS N / Y
OPTION
SAVE
T=
RAW SCR
6. Press the [ENT] key. The message <REGISTERING> appears on the
screen. Registration is complete when the message disappears. To cancel
the position change operation, select “N” and press the [ENT] key to go
back to step 1.
CAM1 CAM2
PROGRAM
No.00
MODE
ARE/CON
SHUTTER
SCRN REG
CAM1
WIND•1
INSPECT
AREA
DATA
000000
TOL
H=000000
L= 000000
REGISTERING
OPTION
SAVE
T=
RAW SCR
5. Press the [ENT] key. The message <REGISTERING> appears on the
screen, and the image is saved in the memory. When registration is
complete, the screen returns to the main menu.
Select a window number
Set different targets, measurement parameters, and result values for each window.
Select window numbers when measuring two or more points with one measurement mode.
1. Place the cursor on [WIND•1] and press the [ENT] key. The window menu
appears.
SHUTTER
SCRN REG
WIND•1
2. Place the cursor on the desired window number, and press the [ENT] key.
(Window 1 is selected here.) The selected window menu appears.
WIND•1
WIND•1
WIND•2
WIND•3
WIND•4
WIND•5
WIND•6
WIND•7
WIND•8
41
4
Chapter 4
Setting Procedure
Tips
A window number shown with “●” indicates that the number is already being used.
4.3.2 Using two cameras
Selecting a camera image
When two cameras are connected, the screen registration should be done for
each camera.
Battery
AA
4
Camera 2
Camera 1
Note 1: When two cameras are connected, the available program numbers are
limited to 00 through 07.
Note 2: When the vertical/horizontal split screen (1/2) is selected, both screens of
the two cameras should be registered.
1. Place the cursor on [SCRN REG] and press the [ENT] key.
SHUTTER
SCRN REG
WIND•1
2. Place the cursor on the camera to be selected, and press the [ENT] key.
SHUTTER
SCRN REG
CAM1
CAM2
Select a window
When two cameras are connected, you can select one of the registered screens
to set a window.
Battery
AA
Camera 1
42
Camera 2
Camera 1 ❘ 2
Camera 1/2
Chapter 4
Setting Procedure
1. Place the cursor on [SEL SCRN] and press the [ENT] key.
WIND•1
SEL SCRN
COLOR
2. Place the cursor on one of the four registered screens and press the
[ENT] key.
SEL SCRN
CAM1
CAM2
CAM1/2
CAM1I2
Note 1: In the “INS+POS” (Inspection+ position) mode, select the screen that is
used for “POS ADJ” (Position adjustment) for WIND•1 (Window 1). When
“CAM1❘2” or “CAM1/2” is selected in “WIND•1”, position adjustment is operated
by using the image from Camera 1.
Note 2: In the “INS+POS” mode, “POS ADJ1” uses the image from Camera 1,
and “POS ADJ2” uses the image from Camera 2 for position adjustment.
Selecting an Inspection Mode (“INS/TRG” and “INS+POS” modes only)
The “INS/TRG” and “INS+POS” modes offer 10 inspection modes. You can
select different inspection methods for each window. The inspection method is
referred to as “INSPECT” mode. (➮ See page 74 for the menu hierarchy.)
1. Place the cursor on [INSPECT] and press the [ENT] key. The inspection
mode menu appears on the screen.
WIND•1
INSPECT
AREA
2. Place the cursor on the inspection mode to be selected, and press the
[ENT] key. The AREA mode is confirmed.
INSPECT
AREA
OUTER
INNER
GAP
PITCH
EDGE No
COUNT
POINT
STAIN
GRAVITY
43
4
Chapter 4
Setting Procedure
Selecting Colors
The CV-701(P)/751(P) measures registered patterns by measuring the “color” of
the area.
Define the target objects that are to be measured.
Limit the measurement
Before the setting
After the setting
<Sample: AREA mode>
1. Place the cursor on [COLOR] and press the [ENT] key. The menu is
switched to the color setting menu.
4
Refer to the chart below to select [CLR TYPE] (Color type) if
necessary.
Use this setting when copying color extraction settings of
other windows, or when the color density extraction is not
extracted properly. Place the cursor on the desired color
type and press the [ENT] key. The color type is selected.
Setting
COLOR
COLOR1
COLOR2
GRAY
POS ADJ *
WIND1/2/3/
4/5/6/7/8
Description
Displayed with AREA and POINT modes.
Processes color-binary conversion.
Extracts the target color to process the color
density. Select COLOR1 for most operations.
Select COLOR2 if the color is not extracted properly
with COLOR1. (When both the target and
background are dark colors.)
Select this mode when the targets are similar colors
or black and white. Converts the
brightness/darkness into monochromatic images.
Appears when "INS+POS" mode is selected.
Copies the set color data when a position
adjustment window is set. (When it is not set, the
window names are shown in red color.)
Copies the set color data when a window is
selected. (When it is not set, the window names are
shown in red color.)
[AREA]
CLR TYPE
COLOR
WIND•1
WIND•2
WIND•3
WIND•4
WIND•5
WIND•6
WIND•7
WIND•8
[ABS.POS]
CLR TYPE
COLOR1
COLOR2
GRAY
WIND•1
WIND•2
WIND•3
WIND•4
* Go to page 49 when selecting this color type.
Tips
The color data can easily be set by copying the color data from one window to
another. The processing speed is reduced when, by selecting the already extracted
colors from previous windows, the same color data is used for all windows.
2. Place the cursor on [SELECT] and press the [ENT] key. An arrow cursor
appears on the screen.
CAM1 CAM2
PROGRAM
CLR TYPE
COLOR
SELECT
SEN =5
BACK
IGNORE
AUTO
SCRN REG
TRG
ZOOM
MOVE
PUSH
SELECT
ESC
END
RAW SCR
44
Chapter 4
Setting Procedure
3. Move the arrow to the position of the color to be extracted by using the
[ENT] key.
CAM1 CAM2
PROGRAM
CLR TYPE
COLOR
SELECT
SEN =5
BACK
IGNORE
AUTO
SCRN REG
TRG
ZOOM
MOVE
PUSH
SELECT
ESC
END
RAW SCR
4. Press the [ENT] key. The highlighted area is extracted. Extend the extraction area by repeatedly pressing the [ENT] key. To optimize the detection,
repeat the color extraction procedure until the images shown in the
sample below appear.
CAM1 CAM2
PROGRAM
CLR TYPE
COLOR
4
SELECT
SEN =5
BACK
IGNORE
AUTO
SCRN REG
TRG
ZOOM
MOVE
PUSH
SELECT
ESC
END
PROCES2
<Sample: AREA mode>
Inspection mode
AREA/POINT mode
Raw image
Extract the color until the desired area of extraction is shown
clearly. The extracted color is shown in colors.
Extracted image
(COLOR)
EDGE mode (OUTER/
INNER/PITCH/GAP/
EDGE NO/SEARCH)
Raw image
Extract the color until the edge (the boundary between the
area of extracted color and the rest) becomes clear. The
extracted color is shown in white.
Extracted image
(COLOR1)
COUNT/GRAVITY mode
Raw image
Extract the color until the clusters of extracted colors become
isolated from the background.
Extracted image
(COLOR2)
45
Chapter 4
Setting Procedure
Inspection mode
STAIN mode
Extract the color until the defects and stains become isolated.
Raw image
Extracted image
(COLOR1)
PATT
Extract the color until the whole image to be searched
becomes isolated.
Raw image
Extracted image
(COLOR1)
*
4
Tips
When “PROCES2” is displayed (except AREA and POINT modes), the 255th level is shown in
yellow. Be sure that the yellow color is not displayed except in the target area.
• When some areas of the target color have not
been extraced, move the cursor to the nonextracted area and press the [ENT] key.
• To go back to the previous step, press the
[CLEAR] key. The extraction procedures go back
to the previous step by the number of times you
press the key (9 times max.).
5. Press the [ESCAPE] key. The cursor returns to [SELECT].
Tips
46
When detecting the same color for two or more windows simultaneously, color data can
easily be set by copying data.
Chapter 4
Setting Procedure
■ Zoom in on the image
You can zoom in on the image for easy color extraction.
1. Press the [TRIGGER] key upon [SELECT]. The zoom function is enabled.
2. Every time the [ENT] key is pressed upward, the image is zoomed in. Every
time the [ENT] key is pressed downward, the image is zoomed out. Select the
desired image size.
3. Press the [TRIGGER] key. The zoom function is canceled and you can continue operation with the [SELECT] menu with the selected image size.
4
CAM1 CAM2
PROGRAM
CLR TYPE
COLOR
CAM1 CAM2
PROGRAM
CLR TYPE
COLOR
SELECT
SEN =5
BACK
IGNORE
AUTO
SELECT
SEN =5
BACK
IGNORE
AUTO
SCRN REG
SCRN REG
TRG
ZOOM OFF
TRG
ZOOM OFF
ZOOM
ZOOM
RAW SCR
RAW SCR
Auto Color Extraction
The [AUTO] mode stabilizes the color extraction against the color variation of
targets and the fluctuation of illumination. Setting the [AUTO] function after color
extraction is recommended.
1. Place the cursor on [AUTO] and press the [ENT] key repeatedly. The color
selected with [SELECT] is extracted. To cancel, press [CLEAR]. The
extraction procedures go back to the previous step by the number of
times you press the key (9 times max.).
BACK
IGNORE
AUTO
2. Press the [ESCAPE] key. The cursor returns to [COLOR].
CAM1 CAM2
PROGRAM
CLR TYPE
COLOR
CAM1 CAM2
PROGRAM
CLR TYPE
COLOR
SELECT
SEN =5
BACK
IGNORE
AUTO
SELECT
SEN =5
BACK
IGNORE
AUTO
SCRN REG
SCRN REG
T=
PROCES2
T=
PROCES2
47
Chapter 4
Setting Procedure
Adjust the [SEN] (Color sensitivity)
The range of selection is 0 to 9. (5 is the initial value).
•
•
•
Select the color sensitivity for color extraction with [SELECT].
Smaller numbers indicate higher identifying sensitivity for colors. Color extraction can be operated in stages with [SELECT].
Larger numbers indicate lower identifying sensitivity for colors. Use this setting
for approximate color extraction when a target has a limited number of colors.
1. Place the cursor on [SEN] in the color menu and press the [ENT] key.
The cursor moves to the number.
SEN = 5
BACK
IGNORE
2. Select a number with the [ENT] key.
•
With the panel keys
Press “▲” or “▼” cursor.
•
With the remote control console
Press the [ENT] key up or down.
4
Pressing the [ENT] key up increases the number, and pressing the [ENT]
key down reduces the number.
SEN = 5
BACK
IGNORE
3. Press the [ENT] key.
The [SEN] is confirmed.
Ignore an unwanted extracted color
Set to ignore unwanted colors from the extracted colors.
1. Place the cursor on [IGNORE] and press the [ENT] key.
An arrow cursor appears on the screen.
BACK
IGNORE
AUTO
2. Move the arrow cursor to the unwanted color using the [ENT] key.
CAM1 CAM2
PROGRAM
CLR TYPE
COLOR
SELECT
SEN =5
BACK
IGNORE
AUTO
SCRN REG
T=
PROCES2
48
Chapter 4
Setting Procedure
3. Press the [ENT] key. The color of the arrow-selected area will not be
extracted.
CAM1 CAM2
PROGRAM
CLR TYPE
COLOR
SELECT
SEN =5
BACK
IGNORE
AUTO
SCRN REG
T=
PROCES2
■ Clear the color extraction
You can clear the extracted color data and resume the setting from the beginning.
1. Place the cursor on [SELECT] or [AUTO] by using the [ENT] key or
[ESCAPE] key.
2. Hold down the [CLEAR] key for at least two seconds. The message <ERASE
SETTINGS N/Y> appears on the screen.
3. Press the [ENT] key to the right to select “Y”.
4. Press the [ENT] key. The selected color data is cleared.
CAM1 CAM2
PROGRAM
CLR TYPE
COLOR
SELECT
SEN =5
BACK
IGNORE
AUTO
SCRN REG
ERASE SETTINGS N/Y
TRG
ZOOM
MOVE
PUSH
SELECT
ESC
END
PROCES2
Screen coordinates
The monitor screen defines the upper left corner as the reference point and is
composed of more than 240,000 pixels: 508 pixels in the X-axis direction and 480
pixels in the Y-axis direction.
The tolerance and position are presented using pixels as the units.
(0, 0) 1 2 3 ...
X-axis
1 pixel
...
1
2
3
(507,0)
243,840 pixels
(0 ,479)
(507,479)
Y-axis
A pixel is a basic unit in image processing. The length and area are presented in
pixels.
49
4
Chapter 4
Setting Procedure
Drawing a window
The measurement range on the screen is called a window. The shape of the
window can be selected from a square (SQR), a circle (CIRC), a free square
(F.SQR), a ring (RING), or an arc (ARC).
CAM1 CAM2
PROGRAM
WIND•1
SCRN REG
COLOR
DET
MEASURE
200, 200
300, 300
DATA
000000
TOL
H=000000
L= 000000
ANALOG
T=
RAW SCR
Square window
Tips
4
The available window shapes vary depending on the measurement mode.
■ Setting a window
Set a window by the following procedures. (Description is given with the AREA
mode as a sample.)
1. Place the cursor on [MEASURE] and press the [ENT] key. The window shape
select menu appears.
COLOR
DET
MEASURE
2. Select a window shape from [SQR] (square), [CIRC] (circle), and [F.SQR] (free
square).
MEASURE
SQR
CIRC
F SQR
3. Press the [ENT] key. A window appears on the screen. The screen below is the
window when [SQR] is selected.
CAM1 CAM2
PROGRAM
WIND•1
SCRN REG
COLOR
DET
MEASURE
200, 200
300, 300
DATA
000000
TOL
H=000000
L= 000000
ANALOG
T=
RAW SCR
4. Draw a window. The drawing procedure for each window shape is described in
the following section.
CAM1 CAM2
PROGRAM
WIND•1
SCRN REG
COLOR
DET
MEASURE
200, 200
300, 300
DATA
000000
TOL
H=000000
L= 000000
ANALOG
T=
RAW SCR
50
Chapter 4
● Drawing a square [SQR] window
1. With the cursor placed on point A, move it in
the desired direction. Point A moves in this
direction to change the shape or size of the
window.
A
2. Press the [ENT] key to set the position of
point A.
3. With a cursor placed on point C, move it in
the desired direction. Point C moves in this
direction to change the shape or size of the
window.
4. Press the [ENT] key to set the position of
point C.
Setting Procedure
D
C
D
B
A
B
5. With the cursor placed on a corner of the
window, move it in the desired direction. The
window moves in this direction. Pressing the
[ENT] key repeats the steps above.
A
6. After setting the size and position of the
window, press the [ESCAPE] key to complete
the drawing of a window.
B
C
D
4
C
● Drawing a circular [CIRC] window
1. With the cursor placed on point A, move it up
or down to move point A in the desired
direction.
A
2. Press the [ENT] key to set the position of
point A.
3. With the cursor placed inside the window,
move it in the desired direction to move the
window. Pressing the [ENT] key repeats the
steps above.
A
B
4. After setting the size and position of the
window, press the [ESCAPE] key to complete
the drawing of the window.
● Drawing a free square [F.SQR] window
1. With the cursor placed on point A, move it in
the desired direction. Point A moves in this
direction to change the shape or size of the
window.
2. Press the [ENT] key to set the position of
point A.
D
C
A
D
B
C
3. Set the positions of points B, C, and D using
the same procedure above.
4. With the cursor placed on the corner of the
window, move it in the desired direction. The
window moves in this direction. Pressing the
[ENT] key repeats the steps above.
51
Chapter 4
Setting Procedure
5. After setting the size and position of the
window, press the [ESCAPE] to complete the
drawing of the window.
● Drawing a ring [RING] window
This window is available only when “STAIN” is selected
for the measurement mode.
1. With the cursor placed on point A, move it in the
desired direction. Point A moves in this direction to
change the shape or size of the window.
A
B
C
D
2. Press the [ENT] key to set the position of point A.
B
3. With the cursor placed on point B, move it in the
desired direction. Point B moves in this direction to
change the shape or size of the window.
4. Press the [ENT] key to set the position of point B.
4
5. With the cursor placed inside the window, move it in
the desired direction. The window moves in this
direction. Pressing the [ENT] key repeats the steps
above.
6. After setting the size and position of the window,
press the [ESCAPE] key to complete the drawing of
the window.
● Drawing an arc [ARC] window
This window is available only when “STAIN” is selected
for the measurement mode.
1. With the cursor placed on point A, move it in the
desired direction. Point A moves in this direction to
change the shape or size of the window.
A
B
2. Press the [ENT] key to set the position of point A.
3. With the cursor placed on point B, move it in the
desired direction. Point B moves in this direction to
change the shape or size of the window.
A
B
4. Press the [ENT] key to set the position of point B.
5. With the cursor placed inside the window, move it in
the desired direction. The window moves in this
direction. Pressing the [ENT] key repeats the steps
above.
6. After setting the size and position of the window,
press the [ESCAPE] key to complete the drawing of
the window.
52
A
C
B
Chapter 4
Setting Procedure
● Cursor movement by pressing the [ENT] key
Every time the [ENT] key is pressed, the window drawing mode changes as
shown below.
When drawing a square window
When drawing a circular window
When drawing a free square
When drawing a ring
4
When drawing an arc
Tips
To change the window shape
Selecting SQR, CIRC, F.SQR, RING, or ARC is available only when the window is not
drawn. To change the shape to another selection (square, circle, free square, ring, or arc)
after drawing a window, clear the current window. To clear the current window, place
the cursor on [MEASURE] and hold the [CLEAR] key down for at least two seconds.
The message <ERASE SETTINGS N/Y> appears on the screen. Place the cursor on “Y”
and press the [ENT] key.
● Window coordinate value display
The coordinate values of a window are displayed with numerical values.
Use the values to check or save the setting.
Square window
A (200,150)
D
MEASURE
200, 150
400, 300
B
Upper line: Coordinates of
point A (X, Y)
Lower line: Coordinates of
point C (X, Y)
C(400,300)
Circular window
(200,200)
MEASURE
X=+00200
Y=+00200
R= 00100
X: X-coordinate of the circle
center
Y: Y-coordinate of the circle
center
R: Radius
53
Chapter 4
Setting Procedure
Free square window
A (210, 170)
B
(120, 230)
D
(300, 230)
MEASURE
210, 170
120, 230
210, 290
300, 230
1st line: Coordinates of
point A (X, Y)
2nd line: Coordinates of
points B (X, Y)
3rd line: Coordinates of
points C (X, Y)
4th line: Coordinates of
points D (X, Y)
c (210, 290)
Ring window
MEASURE
X=+00200
Y=+00200
ER=00100
IR=00050
(200,200)
4
X: X-coordinate of the
circle center
Y: Y-coordinate of the
circle center
ER: Radius of external
circle
IR: Radius of internal circle
Arc window
A
C
54
B
MEASURE
200, 200
100, 100
250, 150
1st line: Coordinate of point
C (X, Y)
2nd line: Coordinate of point
A (X, Y)
3rd line: Coordinate of point
B (X, Y)
Chapter 4
Setting Procedure
Screen Selection
There are five types of screens: “RAW SCR” and “PROCES1/2/3/4”. Use the
“PROCES1/2/3/4” to check the settings or operation.
SCREEN
WINDOW
RUN
PROG
PROGRAM No.
■ Selecting the screen
Every time the [SCREEN] key is pressed, the screen changes to the next type in
sequence.
Some screens may not appear depending on the selected menu.
■ AREA and POINT
RAW SCR (raw screen)
4
Shows a window frame on a raw screen
PROCES1 (processed screen 1)
Converts the whole screen into a color
binary image using the binary level of the
selected window.
PROCES3 (processed screen 3)
Converts only the inside of the selected window into a binary image
using the binary level of each window
respectively. The area outside the
window is shown in gray.
PROCES2 (processed screen 2)
Converts the whole screen into a binary
image using the binary level of the
selected window. Colors other than the
extracted color are shown in gray.
PROCES4 (processed screen 4)
Converts the inside of each window
into a binary image using the binary
level of each window respectively. The
area outside the windows is shown in
gray.
55
Chapter 4
Setting Procedure
■ Other (EDGE, COUNT, STAIN, and GRAVITY)
RAW SCR (raw screen)
PROCES1 (processed screen 1)
Shows a window frame on a raw
screen.
PROCES2 (processed screen 2)
Display in color density or gray
PROCES3 (processed screen 3.
COUNT and GRAVITY modes only)
4
The 255 levels are shown in yellow on
the gradation display.
56
Display only extracted colors in green
on the gradation screen.
Chapter 4
Setting Procedure
4.4 “AREA” Mode Basic Settings
Set the “AREA” mode from “ARE/CON” mode for continuous detection, and select
“AREA” from “INS/TRG” for detection using the trigger signal input. This section
describes the basic setting procedures using the “ARE/CON” (Area continuous)
mode.
4.4.1
“AREA” mode
■ Difference between “ARE/CON” (Area continuous) and “INS/TRG” (Inspection trigger)
“ARE/CON” detects a target continuously. “INS/TRG” can be used for area detection, but it detects a target only when a trigger signal is input. Both modes are set
using the same procedure.
■ Resolution of image
The images picked up with the CV-701(P)/751(P) are composed of the primary
colors R (red), G (green), and B (blue), and each color has 256 color levels from 0
through 255. For example, a color with R=200, G=50, B=40 is a reddish color, and
a color with R=150, G=150, B=150 is white. The data of R-G, G-B, and R-B are
obtained based on the R, G, B data, and the area is set for the six parameters to
operate color extraction. The color screen processes an image by 16,770,000
resolutions compared to the monochromatic gray mode that processes colors from
white to black with 256 levels. This color mode enables target differentiations that
cannot be distinguished with a black and white mode.
R=20
G=55
B=40
R=174
G=10
B=10
RAW SCR
■ Counting pixels
The CV-701(P)/751(P) counts the pixels of extracted colors in the MEASURE
window and displays the number of pixels. You can set a tolerance (upper/lower
limits) for the number of pixels to differentiate targets between acceptable and
unacceptable. This enables detection of the presence or absence of components
and the size of a target.
Extracted
color pixel
Pixel
Window
Tips
Measured
value: 8
Measured
value: 6
If the position or angle of the target is not constant on the screen, use the position
adjustment function. Select “INS+POS” (Inspection + position) in the mode selection.
➮ See “Basic Setting Flow” on page 107.
57
4
Chapter 4
4.4.2
Setting Procedure
Initial menu screen
The following menu appears after “ARE/CON” is selected.
Program No.
Up to 16 programs
(Nos. 00 to 15) can
be registered.
Shutter speed
Changes shutter speed.
CAM1 CAM2
PROGRAM
No.00
MODE
ARE/CON
SHUTTER
SCRN REG
WIND•1
Window
Sets a window for detection.
DATA
000000
TOL
H=000000
L= 000000
Processing time
Displays the processing time
for each screen. (Units: ms)
4
OPTION
SAVE
T=
RAW SCR
●●●
Detection result
The indicator shows the detection result
for each window (8 windows max.).
The lamp farthest to the left represents
window 1, and the lamp farthest to the
right represents window 8.
● (Green): Within tolerance
● (Red): Out of tolerance
● (White): No detection
–: The window has not been determined.
58
Mode
Allows selection from five
measurement modes.
Screen registration
Registers the image for
setting.
Measured value
Displays the measured value of
the window. (Units: pixels)
Tolerance
Sets the allowable range of the
detection results. (Units: pixels)
Option
Sets the illumination adjustment
SAVE
Saves the settings.
Screen selection
Shows the current screen type.
(Raw screen, Processed screen
1/2/3/4)
Chapter 4
4.4.3
Setting Procedure
Basic setting flow
The “AREA” mode can be set by the following two procedures.
•
•
Select the “ARE/CON” measurement mode.
Select the “AREA” inspection mode from the window menu of the “INS/TRG”
measurement mode.
“ARE/CON”
Select a program number
Page 36
Select a program number to save
the settings to.
Set “ARE/CON” mode
Page 37
Select “ARE/CON” from the five
measurement modes.
Select a shutter speed
Page 38
Select a shutter speed depending
on the speed of movement and
brightness of the target.
Register a screen
Page 39
Register a screen to store the
settings.
Select a window number
Page 41
Select a window number when
measuring two or more areas.
Set COLOR
Page 44
Extract colors of the detection
area.
Set DET
Page 61
Select between the detection
color and the background color
for counting the pixels.
Set MEASURE window
Page 61
Set the area for measurement.
Set TOL
Page 63
Set a tolerance value for
differentiation.
Check the settings
Page 63
Check if the data is properly set.
Save the settings
Page 64
Save the settings.
Common
settings
Mode
setting
Operation
check
Saving
data
➮
For the common settings, refer to “4.3 Basic Settings: Basic setting procedures” on page 36.
59
4
Chapter 4
Setting Procedure
Setting parameters
The parameters in bold type are described in the basic setting procedures.
➮
➮
See “4.5 “AREA” Mode Advanced Settings” on page 65 for other parameters.
See “Basic Settings” on page 36 for the parameters in bold.
Main menu
No.00
MODE
INS/CON
SHUTTER
SCRN REG
WIND•1
4
DATA
TOL
H=
L=
OPTION
Color menu
Window menu
ARE/CON
INS/TRG
INS+POS
ABS.POS
REL.POS
WIND•1
SEL SCRN
COLOR
DET
MEASURE
CAM1
CAM2
WIND•1
WIND•2
WIND•3
WIND•4
WIND•5
WIND•6
WIND•7
WIND•8
MASK
DATA
CLR TYPE
COLOR
COLOR
BACK
SQR
CIRC
F SQR
SQR
CIRC
F SQR
TOL
H=
L=
SELECT
SEN=5
COLOR
WIND•1
WIND•2
WIND•3
WIND•4
WIND•5
WIND•6
WIND•7
WIND•8
BACK
IGNORE
AUTO
SCRN REG
ANALOG
ILLU
SAVE
T=
RAW SCR
■ Screen type sequence
Pressing the [SCREEN] key shows the following sequence.
Raw screen
60
Processed
screen 1
Processed
screen 2
Processed
screen 3
Processed
screen 4
Chapter 4
Setting Procedure
Basic setting procedure
1. First follow the “Basic setting procedures” (➮ page 36) to set the parameters to the color settings.
2. Set [DET] (Detection)
Select whether to count the color pixels (extracted color) in the window or the
background pixels.
1) Place the cursor on [DET] and press the [ENT] key. The detection menu
appears.
COLOR
DET
MEASURE
2) Select [COLOR] or [BACK] with the cursor.
DET
COLOR
BACK
4
3) Press the [ENT] key to confirm the selection.
3. Set [MEASURE] (Measurement window)
Specify the range of the image (window) for measurement.
1) Place the cursor on [MEASURE] and press the [ENT] key. The window
selection menu appears.
WIND•1
SEL SCRN
COLOR
DET
MEASURE
2) Select the shape of the window from [SQR] (square), [CIRC] (circle), and [F
SQR] (free square).
MEASURE
SQR
CIRC
F SQR
3) Press the [ENT] key. A frame appears on the screen. The screen below
shows the frame when [SQR] is selected.
CAM1 CAM2
PROGRAM
WIND•1
SCRN REG
COLOR
DET
MEASURE
200, 200
300, 300
DATA
000000
TOL
H=000000
L= 000000
ANALOG
T=
RAW SCR
61
Chapter 4
Setting Procedure
4) Move the cursor to enclose the desired area for measurement.
CAM1 CAM2
PROGRAM
WIND•1
SCRN REG
COLOR
DET
MEASURE
200, 200
300, 300
DATA
000000
TOL
H=000000
L= 000000
ANALOG
T=
RAW SCR
The window drawing mode changes as follows every time the [ENT] key is
pressed.
Square window
Circular window
4
Free square window
Tips
To change the window shape
Selecting SQR, CIRC, or F SQR is available only when the window is not drawn. To
change the shape to another selection (square, circle, or free square) after drawing the
window, clear the current window.
To clear the current window, place the cursor on [MEASURE] and hold down the
[CLEAR] key for at least two seconds. The message <ERASE SETTINGS N/Y> appears on
the monitor screen. Select “Y” and press the [ENT] key.
5) After setting the size and position of the window, press the [ESCAPE] key to
exit the [MEASURE] setting.
■ Mask window
When a mask window ([MASK]) is overlapped with a measurement window, the
area inside of the mask window is omitted from the measurement.
Draw a mask window using the same procedure as for a measurement window.
MEASURE
MASK
Area to be measured
Mask window
[MEASURE] window
62
Chapter 4
Setting Procedure
4. Set [TOL] (Tolerance)
Set the upper limit “H=” and the lower limit “L=” of the tolerance. The units are
pixels. The measured values within the tolerance will be acceptable; the values
outside of the tolerance will be unacceptable.
1) First, set the upper limit.
Place the cursor on [H=000000] under [TOL] and press the [ENT] key. “0”
for the first digit is shown highlighted. You can enter a numerical value.
TOL
H=000000
L=000000
2) Move the cursor left or right to select the digit to be changed.
TOL
H=000000
L=000000
TOL
H=000000
L=000000
3) Change the value.
4
TOL
H=000500
L=000000
•
With the panel keys
Press the “▲” cursor key repeatedly.
•
With the remote control console
Move the [ENT] key up repeatedly. The value increments by one from “0”, and
after “9” the second digit is incremented.
When the “▼” cursor key is pressed or the [ENT] key is moved down, the value
decrements by one to 0.
4) Press the [ENT] key to confirm the input value.
5) Place the cursor on [L=000000] (lower limit) under [TOL] and change the
value using the same procedure as for the upper limit.
TOL
H=000000
L=000000
Tips
• When you cannot determine the tolerance value, refer to the measurement value
displayed in the “Operation check after changing the settings” described in the following pages.
• The upper limit cannot be smaller than the lower limit.
The setting for WIND•1 is complete.
You can set up to eight windows for a single program number.
To set several windows, select another window number and repeat the above
procedures.
Operation check after changing the settings
1. Press the [ESCAPE] key to return to the initial menu screen.
When the initial menu screen is displayed, trigger signals are input continuously
and the measured value is displayed.
DATA
Measured value
001216
63
Chapter 4
Setting Procedure
2. Check the detection result indicator.
Green: Acceptable (The measured value is within the tolerance range.)
Red:
Unacceptable (The measured value is outside of the tolerance range.)
White: No detection (The trigger signal is not input.)
T=
RAW SCR
Detection result
Note 1: When [INS/TRG] (Inspection + position) is selected, the measured value is
displayed at the time of a trigger input. Press the [TRIGGER] key to input the
trigger signal. The detection result indicator is white before the first trigger input.
Note 2: When [ARE/CON] is selected, “DATA” (Measured value) is retained while
the [TRIGGER] key is pressed.
Tips
4
Use the “illumination adjustment function” when the measured value is not stable because
of the unstable luminous intensity.
➮ See page 136 for the setting procedure.
Saving the settings
Save the setting data. The following three methods can be used to save the data.
•
Press the [RUN/PROG] panel key or slide the mode selection slide switch
on the remote control console up.
When the CV-701(P)/751(P) enters [RUN] mode, the message <REGISTER
SET> appears on the screen and the settings are saved in the internal memory.
•
Select [SAVE] in the menu screen.
When the [ENT] key is pressed, the message <REGISTER SET> appears on
the screen and the settings are saved in the internal memory.
OPTION
SAVE
T=
CAM1 CAM2
PROGRAM
No.00
MODE
ARE/CON
SHUTTER
SCRN REG
WIND•1
DATA
000000
TOL
H=000000
L= 000000
REGISTER SET
•
OPTION
SAVE
T=
RAW SCR
Save the data in CompactFlash memory (Optional)
➮
See “Chapter 7 CompactFlash Memory” on page 171 for the procedure.
Note 1: Do not turn the power off until the message “REGISTER SET” disappears.
Note 2: If the power is turned off before saving the settings, the setting data will be
lost.
64
Chapter 4
Setting Procedure
4.5 “AREA” Mode Advanced Settings
4.5.1
“AREA/CON” menu
AREA menu screen structure
The following is the layered structure of the parameters for the “ARE/CON”mode.
The details of the parameters in 1. Main menu, 2. Window menu, and 3. Color
menu are explained on the following pages.
2. Window menu
1. Main menu
No.00
MODE
INS/CON
SHUTTER
SCRN REG
WIND•1
DATA
TOL
H=
L=
OPTION
ARE/CON
INS/TRG
INS+POS
ABS.POS
REL.POS
WIND•1
SEL SCRN
COLOR
DET
MEASURE
CAM1
CAM2
WIND•1
WIND•2
WIND•3
WIND•4
WIND•5
WIND•6
WIND•7
WIND•8
MASK
DATA
TOL
H=
L=
3. Color menu
CLR TYPE
COLOR
COLOR
BACK
SQR
RING
F SQR
SQR
RING
F SQR
SEN=5
COLOR
WIND•1
WIND•2
WIND•3
WIND•4
WIND•5
WIND•6
WIND•7
WIND•8
4
BACK
IGNORE
AUTO
SCRN REG
ANALOG
ILLU
SAVE
T=
RAW SCR
65
Chapter 4
Setting Procedure
Menu parameters
1. Main menu
“*” indicates the initial setting value.
Parameter
PROGRAM
Setting
Description
Function
00* to 15
Program No. for the
setting
Change the program No.
to set several settings.
1/30 to 1/10000
(1/60*)
Shutter speed
Select a faster shutter
speed when detecting a
fast-moving target.
Register the reference
screen.
Save a target image in
the memory.
Set a measurement
window and the color of a
target.
Set details for detection.
Measured value display
Check the measured
value.
MODE
SHUTTER
SCRN REG N/Y
WIND• 1
4
To sub menu
(For the details,
refer to “ 2.” ).
DATA
TOL
H=000000
L=000000
Set the upper limit “ H”
and the lower limit “ L” .
Set the measured data.
(Units: pixels)
OPTION
To sub menu
(For the details,
refer to the
respective
sections).
Set the illumination
adjustment function.
Set optional settings.
SAVE
Save the setting data.
Save the setting data in
the memory.
T=000000
Processing time display
Check the processing
time.
RAW SCR*
The actual image
captured by the camera.
Check the unprocessed
image.
PROCES1
Processed image for
detection.
Check the detection
condition.
PROCES2
Processed image for
detection.
Check the detection
condition.
PROCES3
Processed image for
detection.
Check the detection
condition.
PROCES4
Processed image for
detection.
Check the detection
condition.
RAW SCR
66
Chapter 4
Setting Procedure
2. Window menu
“*” indicates the initial setting value.
Parameter
WIND• 1
Setting
Description
Function
Window No.
Change the window No.
to set several windows.
Select the camera image
for the screen
registration.
When two cameras are
connected.
To sub menu
(For the details,
refer to “ 3.” ).
Set the colors to be
extracted.
Extract colors for
detection.
COLOR*
Using the cursor, select
the pixels to be extracted
in colors on the screen.
Count pixels in the
extracted color.
BACK
Using the cursor, select
the pixels to be extracted
in the background on the
screen.
Count pixels in the
background.
Draw a square, circle or
free square window on
the screen.
Set the range to be
measured.
Draw a square, circle or
free square window on
the screen.
Set the range not to be
measured.
Measured value display
Check the measured
value.
WIND• 1* to 8
CAM1*
CAM2
SEL SCRN
CAM1|2
CAM1/2
COLOR
DET
SQR
MEASURE
RING
F SQR
SQR
MASK
RING
F SQR
DATA
4
TOL
H=000000
L=000000
Set the upper limit “ H”
and the lower limit “ L” .
Set the tolerance to judge
whether the measured
value is acceptable or
unacceptable.
(Units: pixels)
ANALOG
DATA H
ANALOG H
DATA L
ANALOG L
Set the scaling value for
analog output.
➮ See page 166 for the
setting procedure.
Output the measured
value with the desired
output voltage.
67
Chapter 4
Setting Procedure
3. Color menu
“*” indicates the initial setting value.
Parameter
Setting
Description
Function
Select the color extraction
settings.
Change the extraction
methods or copy the
settings of other windows.
SELECT
Move the cursor on the
screen to select the
colors to be extracted.
Extract the colors.
SEN
Using the cursor, set the
sensitivity for color range
when selecting the
extraction colors.
Change the color range to
be extracted in one
operation.
Set the background color.
When the detected image
is not clear.
IGNORE
Select colors not to be
extracted.
Omit selected colors from
those extracted.
AUTO
Automatically extend the
range for color extraction.
Stabilize the color
extraction.
SCRN REG N/Y
Register the reference
image.
Save the target image in
the memory.
COLOR*
CLR TYPE
WIND• 1 to 8
0 to 9 (5*)
BL*
BACK
WH
4
68
Chapter 4
4.5.2
Setting Procedure
Advanced color settings
When the color extraction is not shown clearly, follow the procedure below to adjust
the settings.
SEN =5
BACK
IGNORE
AUTO
[BACK] (Background)
Set the background color to white or black for [PROCES1] set by the [PROGRAM]
key. (The initial setting: [BL] (black)).
1. Place the cursor on [BACK] under [COLOR] and press the [ENT] key.
The cursor moves to [BL] or [WH].
4
SEN =5
BACK
IGNORE
2. Move the [ENT] key up or down to select [BL] or [WH].
BACK
BLACK
WHITE
3. Press the [ENT] key to confirm the selection.
The screen below the [PROCES1] screen with the background of [BL] or [WH].
[BL] (Black) background
CAM1 CAM2
PROGRAM
WIND•1
SCRN REG
COLOR
DET
MEASURE
MASK
DATA
[WH] (White) background
CAM1 CAM2
PROGRAM
WIND•1
SCRN REG
COLOR
DET
MEASURE
MASK
DATA
000000
TOL
H=000000
L= 000000
000000
TOL
H=000000
L= 000000
ANALOG
T=
RAW SCR
ANALOG
T=
RAW SCR
69
Chapter 4
Setting Procedure
4.6 “INS” Mode Basic Settings
This section describes the basic settings using the “INS” (Inspection) mode.
4.6.1
“INS” Mode
In addition to the “AREA” detection described in the previous section, the “INS/
TRG” (Inspection trigger) mode offers the following nine measurement modes.
Select the mode according to the application.
● OUTER (Outer edge)
Measures the distance between the outermost edges in the window.
OUTER measurement
Window
4
● INNER (Inner edge)
Measures the distance between the innermost edges in the window.
INNER measurement
Window
● GAP
Measures the distance between the odd-numbered edges and the even-numbered
edges counted from the left (in horizontal scanning) or top (in vertical scanning) of
the window. The maximum, minimum, and average values can be obtained.
GAP measurement
Window
● PITCH
Measures the pitch values to obtain the maximum, minimum, and average values.
PITCH measurement
Window
70
Chapter 4
Setting Procedure
● EDGE NO (Edge count)
Counts the number of edges in the window
1
Tips
2
3
4
5
Window
An edge is a point at which the brightness changes from bright to dark or from dark to
bright on the color concentration screen.
● COUNT
Counts the number of clusters of extracted colors in the window. Up to 256 clusters
can be counted.
2
4
1
3
5
4
● POINT (Point sensor)
Detects the presence or absence of the extracted colors of the set point. Up to 8
points can be detected in a window.
Absence
Presence
● STAIN
Detects stains and defects in the window.
Stain
● GRAVITY
Detects the center of gravity and the angle of principal axis of a cluster of the
extracted color.
The principal axis is the longitudinal angle of the cluster.
GRAVITY center
71
Chapter 4
4.6.2
Setting Procedure
Initial menu screen
The following menu appears after “INS/TRG” is selected.
Program No.
Up to 16 programs
(Nos. 00 to 15) can be
registered.
Shutter speed
Changes shutter speed.
Window
Sets a window for detection.
CAM1 CAM2
PROGRAM
No.00
MODE
INS/TRG
SHUTTER
SCRN REG
WIND•1
INSPECT
AREA
DATA
000000
TOL
H=000000
L= 000000
4
Processing time
Displays the processing time
for each screen. (Units: ms)
OPTION
SAVE
T=
RAW SCR
●●●
Detection result
The indicator shows the detection
result for each window (8 windows
max.). The light farthest to the left
represents window 1, and the light
farthest to the right represents
window 8.
● (Green): Within tolerance
● (Red): Outside of tolerance
● (White): No detection
–: The window has not been determined.
72
Mode
Allows selection from five
measurement modes.
Screen registration
Registers the image for setting.
Measured value
Displays the measured value of
the window. (Units: pixels)
Tolerance
Sets the allowable range of the
detection results. (Units: pixels)
Option
Sets the stored screen, illumination adjustment, and data
conversion
SAVE
Saves the settings.
Screen selection
Shows the current screen type.
(Raw screen, Processed screen
1/2/3/4)
Chapter 4
4.6.3
Setting Procedure
Basic setting flow
Common
settings
Mode
setting
Operation
check
Saving
data
➮
Select a program number
Page 36
Select a program number to
save the settings to.
Set “INS/TRG” mode
Page 37
Select “INS/TRG” from the five
measurement modes.
Select a shutter speed
Page 38
Select a shutter speed depending on the speed of movement
and brightness of the target.
Register a screen
Page 39
Register a screen to store the
settings.
Select a window number
Page 41
Select a window number when
measuring two or more areas.
Select INSPECT mode
Page 43
Select INSPECT mode according to the desired inspection
method.
Set COLOR
Page 44
Extract colors from the detection
area.
Set MEASURE window
Page 76
Set the area for measurement.
Set TOL
Page 77
Set a tolerance value for
differentiation.
Check the settings
Page 78
Check that the data is properly
set.
Save the settings
Page 79
Save the settings.
For common settings, refer to “4.3 Basic Settings: Basic setting procedures” on page 36.
73
4
Chapter 4
Setting Procedure
Setting parameters
The parameters in bold type are described in the basic setting procedures.
➮
➮
See “4.7 “INS” Mode Advanced Settings” on page 96 for other parameters.
See “ Basic Settings” on page 36 for the parameters in bold.
Window menu
Main menu
No.00
MODE
INS/CON
SHUTTER
SCRN REG
WIND1
INSPECT
OUTER
4
DATA
TOL
H=
L=
OPTION
ARE/CON
INS/TRG
INS+POS
ABS.POS
REL.POS
WIND•1
INSPECT
OUTER
SEL SCRN
CAM1
CAM2
WIND•1
WIND•2
WIND•3
WIND•4
WIND•5
WIND•6
WIND•7
WIND•8
SVD SCRN
ILLU
DATA CAL
SAVE
T=
RAW SCR
COLOR
SCAN
Color menu
AREA
OUTER
INNER
GAP
PITCH
EDGE NO
COUNT
POINT
STAIN
GRAVITY
X
Y
MEASURE
EDGE SEN
030
CLR TYPE
COLOR1
SELECT
SEN=5
COLOR1
COLOR2
GRAY
WIND•1
WIND•2
WIND•3
WIND•4
WIND•5
WIND•6
WIND•7
WIND•8
IGNORE
AUTO
SCRN REG
DATA
TOL
H=
L=
LEVEL
FILT
ANALOG
■ Screen type sequence
Pressing the [SCREEN] key shows the following sequence.
•
When AREA or COUNT is selected
Raw screen
*
Processed
screen 3
Processed
screen 1
Processed
screen 2
When COUNT or GRAVITY is selected
Raw screen
74
Processed
screen 2
Processed
screen 4
When OUTER, INNER, GAP, PITCH, EDGE NO, or STAIN is selected
Raw screen
*
Processed
screen 1
Processed
screen 1
Processed
screen 2
Processed
screen 3
Chapter 4
4.6.4
Setting Procedure
Basic setting procedure for the measurement mode
You can select a measurement mode best suited for your application from the
following five modes: [OUTER], [INNER], [GAP], [PITCH], and [EDGE NO].
1. First follow the “Basic setting procedures” (➮ page 36) to set the
parameters to the color settings.
2. Select the edge type and scanning direction for measurement.
1) Place the cursor on [SCAN] and press the [ENT] key. The [SCAN] menu
appears.
COLOR
SCAN
MEASURE
2) Select the scanning direction with the cursor.
[X]: Scan in the horizontal direction on the screen.
[Y]: Scan in the vertical direction on the screen.
4
SCAN
X
Y
3) Press the [ENT] key to confirm the selection.
● When [INSPECT] is set to [EDGE NO]
Place the cursor on [SCAN] and press the [ENT] key. The edge menu appears.
SCAN
EDGEMODE
MEASURE
Place the cursor on the desired option and press the [ENT] key.
•
[BL ➞ WH]: Count the edge at which the image changes from dark to bright
when scanned from the left or top of the color screen.
•
[WH ➞ BL]: Count the edge at which the image changes from bright to dark
when scanned from the left or top of the color screen.
EDGEMODE
BL→WH
WH→BL
75
Chapter 4
Setting Procedure
3. Set [MEASURE] (Measurement window)
Specify the size of the window used for measurement. (Example: Setting for
OUTER mode)
WIND•1
SEL SCRN
COLOR
DET
MEASURE
1) Place the cursor on [MEASURE] and press the [ENT] key. A frame appears
on the screen.
CAM1 CAM2
PROGRAM
WIND•1
INSPECT
OUTER
SEL SCRN
COLOR
SCAN
MEASURE
100, 220
400, 260
4
DATA
+0.000
TOL
H=+0.000
L= +0.000
ANALOG
T=
RAW SCR
2) Move the cursor to enclose the desired area for measurement.
CAM1 CAM2
PROGRAM
WIND•1
INSPECT
OUTER
SEL SCRN
COLOR
SCAN
MEASURE
100, 220
400, 260
DATA
+0.000
TOL
H=+0.000
L= +0.000
ANALOG
T=
RAW SCR
The window drawing mode changes as shown below every time the [ENT] key
is pressed.
3) After setting the size and position of the window, press the [ESCAPE] key to
exit the [MEASURE] setting.
76
Chapter 4
Setting Procedure
4. Set [TOL] (Tolerance)
Set the upper limit “H=” and the lower limit “L=” of the tolerance.
1) First, set the upper limit. Place the cursor on [H=0.000] under [TOL] and
press the [ENT] key. The first digit, “0”, is shown as highlighted. You can
enter a numerical value.
TOL
H=+0.000
L=+0.000
2) Change the value.
TOL
H=+0.000
L=+0.000
•
With the panel keys
Press the “▲” cursor key repeatedly.
4
TOL
H=+0.000
L=+0.000
•
With the remote control console
Move the [ENT] key up repeatedly. The value increments by one from “0”. After
“9”, the second digit is incremented.
TOL
H=+150.0
L=+0.000
When the “▼” cursor key is pressed or the [ENT] key is moved down, the value
decrements by one to 0.
3) Press the [ENT] key to confirm the input value.
4) Place the cursor on [L=000000] (lower limit) under [TOL] and change the
value for the lower limit using the same procedure as for the upper limit.
TOL
H=+150.0
L=+0.000
Tips
• When you cannot determine the tolerance value, refer to the measurement value
displayed in “Operation check after changing the settings” described in the following
pages.
• The upper limit cannot be smaller than the lower limit.
The setting for WIND•1 is complete.
You can set up to eight windows for a single program number.
To set several windows, select another window number and repeat the above
procedure.
77
Chapter 4
Setting Procedure
Operation check after changing the settings
1. Press the [ESCAPE] key to return to the initial menu screen.
2. Press the [TRIGGER] key.
•
When [INSPECT] mode is set to [OUTER] or [INNER], the screen shows
two lines indicating the detected edges. (The illustration below shows the
screen for [OUTER].)
CAM1 CAM2
PROGRAM
No.00
MODE
INS/TRG
SHUTTER
SCRN REG
WIND•1
INSPECT
OUTER
DATA
+146.1
TOL
H=+150.0
L= +0.000
OPTION
SAVE
T=
PROCES1
4
•
When [INSPECT] mode is set to [GAP] or [PITCH], the screen shows all
detected edges. (The illustration below shows the screen for [PITCH].)
CAM1 CAM2
PROGRAM
No.00
MODE
INS/TRG
SHUTTER
SCRN REG
WIND•1
INSPECT
PITCH
DATA
Avg+32.90
Max+33.00
Min+32.90
TOL
H=+50.00
L= +0.000
OPTION
SAVE
T=
PROCES1
•
When [INSPECT] is set to [EDGE NO], the screen shows all detected
edges.
CAM1 CAM2
PROGRAM
No.00
MODE
INS/TRG
SHUTTER
SCRN REG
WIND•1
INSPECT
EDGE No
DATA
003
TOL
H= 010
L= 001
OPTION
SAVE
T=
PROCES1
Tips
78
When edge detection is unstable, adjust the detection sensitivity to optimize the detection. (➮ See page 100.)
Chapter 4
Setting Procedure
3. Check the detection result indicator.
Green: Acceptable (The measured value is within the tolerance range.)
Red: Unacceptable (The measured value is outside of the tolerance range.)
White: No detection (The trigger signal is not input.)
Measured value
DATA
+103.4
T=
RAW SCR
Detection result
Saving the settings
4
Save the setting data. The following three method can be used to save data.
•
Press the [RUN/PROG] panel key for at least two seconds or slide the
mode selection slide switch on the remote control console up.
When the CV-701(P)/751(P) enters [RUN] mode, the message <REGISTER
SET> appears on the screen and the settings are saved in the internal memory.
•
Select [SAVE] in the menu screen.
When the [ENT] key is pressed, the message “REGISTER SET” appears on the
screen and the settings are saved in the internal memory.
CAM1 CAM2
PROGRAM
No.00
MODE
INS/TRG
SHUTTER
SCRN REG
OPTION
SAVE
T=
WIND•1
INSPECT
OUTER
DATA
+0.000
TOL
H=+3.410
L= +0.500
REGISTER SET
•
OPTION
SAVE
T=
RAW SCR
Save the data in CompactFlash memory (Optional)
➮
See “Chapter 7 CompactFlash Memory” on page 171 for the procedure.
Note 1: Do not turn the power off until the message “REGISTER SET” disappears.
Note 2: If the power is turned off before saving the settings, the setting data will be
lost.
79
Chapter 4
4.6.5
Setting Procedure
Basic setting procedure for COUNT
Count the number of targets in the measured area. One cluster of extracted color is
counted as one target. Measurement is operated for the entire area inside the
window. This section describes the basic setting procedure for the “COUNT” mode.
1
3
4
5
2
1. First follow the “Basic setting procedures” (➮ page 36) to set the
parameters to the color settings.
2. Set [MEASURE] (Measurement window)
4
Specify the size of the window used for measurement.
1) Place the cursor on [MEASURE] and press the [ENT] key. The window
selection menu appears.
2) Select the shape of the window from [SQR] (square) or [CIRC] (circular).
MEASURE
SQR
CIRC
3) Press the [ENT] key. A frame appears on the screen. The screen below
shows the frame when [CIRC] is selected.
CAM1 CAM2
PROGRAM
WIND•1
INSPECT
COUNT
SEL SCRN
COLOR
MEASURE
X=+00200
Y=+00200
R= 00100
L= 00000
NUMBER
000
TOL
H= 000
L= 000
ANALOG
T=
RAW SCR
4) Move the cursor to enclose the desired area for measurement.
Note: Up to 256 targets can be counted in one MEASURE window. To count more
targets, set two or more windows.
5) The window drawing mode changes as follows every time the [ENT] key is
pressed.
Square window
Circular window
80
Chapter 4
Tips
Setting Procedure
To change the window shape
Selecting SQR or CIRC is available only when the window is not drawn. To change the
shape to another selection (square or circle) after drawing the window, clear the current
window. To clear, move cursor to [MEASURE] and hold [CLEAR] key for at least 2
seconds.
6) After setting the size and position of the window, press the [ESCAPE] key to
exit the [MEASURE] setting.
■ Mask window
When a mask window ([MASK]) is overlapped with a measurement window, the
area inside of the mask window is omitted from the measurement.
Draw a mask window using the same procedure as for a measurement window.
Area to be measured
MEASURE
MASK
[MASK]
window
4
[MEASURE] window
3. Set [TOL] (Tolerance)
Set the upper limit “H=” and the lower limit “L=” of the tolerance. The unit is the
number of targets counted.
1) First, set the upper limit.
Place the cursor on [H=000] under [TOL] and press the [ENT] key. The first
digit, “0”, is shown as highlighted. You can enter a numerical value.
TOL
H= 000
L= 000
2) Move the cursor to the left or right to select the digit to be changed.
TOL
H= 000
L= 000
3) Change the value.
81
Chapter 4
Setting Procedure
•
With the panel keys
Press the “▲” cursor key repeatedly.
•
With the remote control console
Move the [ENT] key up repeatedly. The value increments by one from “0”. After
“9”, the second digit is incremented.
When the “▼” cursor key is pressed or the [ENT] key is moved down, the value
decrements by one to 0.
TOL
H= 009
L= 007
4) Press the [ENT] key to confirm the input value.
5) Place the cursor on [L=000] (lower limit) under [TOL], and change the value
for the lower limit using the same procedure as for the upper limit.
4
The basic setting for the COUNT mode is completed.
Operation check after changing the settings
1. Press the [ESCAPE] key to return to the initial menu screen.
2. Press the [TRIGGER] key.
•
Cursor for all the counted targets appear on the screen.
CAM1 CAM2
PROGRAM
No.00
MODE
INS/TRG
SHUTTER
SCRN REG
WIND•1
INSPECT
COUNT
NUMBER
008
TOL
H= 009
L= 007
OPTION
SAVE
T=
RAW SCR
Tips
• You can omit the undesired noise and/or stains in the window from counting by using
“AREAFILT” (Area filter). (➮ page 101)
• “FILTER” is also available for the setting. (➮ page 103)
3. Check the detection result indicator.
Green: Acceptable (The measured value is within the tolerance range.)
Red: Unacceptable (The measured value is outside of the tolerance range.)
White: No detection (The trigger signal is not input.)
Measured value
NUMBER
008
T=
RAW SCR
Detection result
82
Chapter 4
Setting Procedure
Saving the settings
Save the setting data. The following three method can be used to save the data.
•
Press the [RUN/PROG] panel key for at least two seconds or slide the
mode selection slide switch on the remote control console up.
When the CV-701(P)/751(P) enters [RUN] mode, the message <REGISTER
SET> appears on the screen and the settings are saved in the internal memory.
•
Select [SAVE] on the menu screen.
When the [ENT] key is pressed, the message “REGISTER SET” appears on the
screen and the settings are saved in the internal memory.
CAM1 CAM2
PROGRAM
No.00
MODE
INS/TRG
SHUTTER
SCRN REG
OPTION
SAVE
T=
WIND•1
INSPECT
COUNT
NUMBER
000
TOL
H= 009
L= 008
REGISTER SET
•
4
OPTION
SAVE
T=
RAW SCR
Save the data in CompactFlash memory (Optional)
➮
See “Chapter 7 CompactFlash Memory” on page 171 for the procedure.
Note 1: Do not turn the power off until the message “REGISTER SET” disappears.
Note 2: If the power is turned off before saving the settings, the setting data will be
lost.
83
Chapter 4
4.6.6
Setting Procedure
Basic setting procedure for the POINT (Point sensor) mode
Detects the presence or absence of a target. Judges by the presence or absence
of the extracted color at the set points. Up to eight points can be measured with a
window.
This section describes the basic setting procedure for “POINT” mode.
Extraction color: Red
Present Absent
Present
<Example>
1. First follow the “Basic setting procedures” (➮ page 36) to set the
parameters to the color settings.
2. Set the size for measurement.
4
Set the size of the measurement point.
1) Place the cursor on [SIZE]. Select a size best suited for the area to be
detected. Select the size from 4/8/16 pixels.
COLOR
SIZE
POINT
2) Press the [ENT] key. The size menu appears.
3) Move the cursor to select a desired size and press the [ENT] key to confirm
the selection.
SIZE
4
8
16
3. Select the measurement points
Set up to eight points to be measured. (Up to 64 points can be measured with
eight windows.)
1) Place the cursor on [POINT].
COLOR
SIZE
POINT
2) Press the [ENT] key. The SEL POINT (Point selection) menu appears.
POINT
P1
P2
P3
P4
P5
P6
P7
P8
Tips
84
A point with “●” indicates that the point is already being used.
Chapter 4
Setting Procedure
3) Move the cursor to determine a desired point and press the [ENT] key. A
point frame is displayed in red on the screen.
CAM1 CAM2
PROGRAM
WIND•1
INSPECT
POINT
SEL SCRN
COLOR
SIZE
POINT P1
138,230
MATCH
––––––––
SET
o– – – – – – –
T=
RAW SCR
4) Move the point frame to a desired point for detection, and press the [ENT]
key to confirm the setting.
4
CAM1 CAM2
PROGRAM
WIND•1
INSPECT
POINT
SEL SCRN
COLOR
SIZE
POINT P1
138,230
MATCH
––––––––
SET
oooo– – – –
T=
RAW SCR
5) Repeat the procedure (steps 3 and 4) to set all points.
4. Set the presence/absence
Set the acceptable/unacceptable judgment from the presence/absence of the
extracted colors within the point frames.
The display farthest to the left indicates the result of P1, and the display farthest
to the right indicates the result of P8.
Present: ●
Absent: x
No detection: –
The displays in green indicate that the presence/absence settings match the
result. The displays in red indicate that the settings do not match the result.
MATCH
oxox– – – –
SET
ooxx– – – –
1) Place the cursor on [SET] and press the [ENT] key.
The setting parameter for P1 is highlighted, and the setting becomes
available.
SET
ooxx– – – –
85
Chapter 4
Setting Procedure
2) Move the cursor to select the desired point.
SET
ooxx– – – –
3) Change the setting.
Press the [▲]/ [▼] panel keys or move the [ENT] key up and down on the
remote control console to change the setting.
4) Press the [ENT] key.
The cursor returns to [SET]. Repeat the above procedure (steps 1 to 3) to
change two or more point settings.
The basic setting for the POINT mode is complete.
Note: The detection result output is an OR output based on the MATCH results of
P1 to P8.
4
Operation check after changing the settings
1. Press the [ESCAPE] key to return to the initial menu screen.
2. Press the [TRIGGER] key.
•
[MATCH] displays the measurement result for each point. (Green:
acceptable, Red: unacceptable.)
MATCH
oxox– – – –
Tips
Change “BACK” settings (background color) when the color extraction is not shown
clearly. (➮ page 102)
Saving the settings
Save the setting data. The following three can be used to save the data.
•
Press the [RUN/PROG] panel key for at least two seconds or slide the
mode selection slide switch on the remote control console up.
When the CV-701(P)/751(P) enters [RUN] mode, the message <REGISTER
SET> appears on the screen and the settings are saved in the internal memory.
•
Select [SAVE] on the menu screen.
When the [ENT] key is pressed, the message “REGISTER SET” appears on the
screen and the settings are saved in the internal memory.
CAM1 CAM2
PROGRAM
No.00
MODE
INS/TRG
SHUTTER
SCRN REG
OPTION
SAVE
T=
WIND•1
INSPECT
POINT
MATCH
––––––––
SET
––––––––
REGISTER SET
•
OPTION
SAVE
T=
RAW SCR
Save the data in CompactFlash memory (Optional)
➮
See “Chapter 7 CompactFlash Memory” on page 171 for the procedure.
Note 1: Do not turn the power off until the message “REGISTER SET” disappears.
Note 2: If the power is turned off before saving the settings, the setting data will be
lost.
86
Chapter 4
4.6.7
Setting Procedure
Basic setting procedure for the STAIN mode
Use the STAIN mode to detect stains in the window.
Select a window shape from circle, square, circumference, and arc.
1) Set a small area in the window. The small area is called a “segment”. The
average brightness is measured for each segment. (Change the size of
segments with [SIZE].)
Segment
2) Measure all of the segments for brightness differentials between adjacent
segments. The maximum differential in the window is measured.
4
3) When the measured value exceeds the set level, the stain is judged as
unacceptable (defective).
This section describes the basic setting procedure for the STAIN mode.
1. First follow the “Basic setting procedures” (➮ page 36) to set the
parameters to the color settings.
2. Set [MEASURE] (Measurement window)
Specify the size of the window used for measurement.
1) Place the cursor on [MEASURE] and press the [ENT] key. The window
selection menu appears.
2) Select the shape of the window from [SQR] (square), [CIRC] (circle), [RING]
(circumference), and [ARC] (arc).
MEASURE
SQR
CIRC
RING
ARC
3) Press the [ENT] key. A frame appears on the screen. The screen below
shows the frame when [CIRC] is selected.
CAM1 CAM2
PROGRAM
WIND•1
INSPECT
STAIN
SEL SCRN
COLOR
MEASURE
X=+00200
Y=+00200
R= 00100
LEVEL= 020
NUMBER
000
TOL
H= 000
L= 000
ANALOG
T=
RAW SCR
87
Chapter 4
Setting Procedure
4) Move the cursor to enclose the desired area for measurement.
CAM1 CAM2
PROGRAM
WIND•1
INSPECT
STAIN
SEL SCRN
COLOR
MEASURE
X=+00200
Y=+00200
R= 00100
LEVEL= 020
NUMBER
000
TOL
H= 000
L= 000
ANALOG
T=
RAW SCR
5) The window drawing mode changes as follows every time the [ENT] key is
pressed.
Square window
4
Circular window
Circumference window
Arc window
Tips
To change the window shape
Selecting SQR, CIRC, RING or ARC is available only when the window is not drawn. To
change the shape to another selection (square, circle, circumference or arc) after drawing
the window, clear the current window. To clear, move cursor to [MEASURE] and hold
[CLEAR] for at least 2 seconds.
6) After setting the size and position of the window, press the [ESCAPE] key to
exit the [MEASURE] setting.
3. Set the segment size
Select a value to change the sensitivity for stain detection. The smaller values
offer more sensitivity for small stains.
Tips
Smaller
←
Value
→
Greater
Higher
←
Sensitivity
→
Lower
Enhancing the sensitivity extends the processing time and makes it difficult for the system
to respond to high-speed production lines. Eliminate wasted time and select optimal
values.
The size is the area in the measurement window to be detected in sequence.
1) Place the cursor on [SIZE] and press the [ENT] key.
SIZE 050
LV
020
88
Chapter 4
Setting Procedure
2) Change the values.
Move the cursor keys or the [ENT] key up and down to change the values.
SIZE 050
LV
020
3) Press the [ENT] key to confirm the setting.
SIZE 030
LV
020
4. Select the level
When the measured values exceed the [LEVEL] value, the target is judged as
unacceptable (defective). The measured value is the brightness differential of
the detected areas.
1) Select the upper limit.
Place the cursor on [LV] and press the [ENT] key. The first digit is highlighted. You can input a numerical value for the first digit.
LV
4
020
2) Move the cursor to select the desired digit.
LV
020
3) Change the values.
Move the cursor keys or the [ENT] key up and down to change the values.
LV
090
4) Press the [ENT] key to confirm the LEVEL value.
The basic setting for the [STAIN] mode is completed.
Operation check after changing the settings
1. Press the [ESCAPE] key to return to the initial screen.
2. Press the [TRIGGER] key.
The measurement cursor appears on the area with stains.
CAM1 CAM2
PROGRAM
WIND•1
INSPECT
STAIN
SEL SCRN
COLOR
MEASURE
SIZE= 050
LEVEL= 020
NUMBER
000
ANALOG
T=
RAW SCR
Tips
• When stains and defects are not detected properly, go back to “Select the size”
(➮ page 88) to readjust the SIZE.
• When stains and defects are not extracted properly, use the filter function.
(➮ page 103)
89
Chapter 4
Setting Procedure
3. Check the detection result indicator.
Green: Acceptable (The measured value is within the tolerance range.)
Red: Unacceptable (The measured value is outside of the tolerance range.)
White: No detection (The trigger signal is not input.)
Measured value
DATA
119
T=
RAW SCR
Detection result
Saving the settings
Save the setting data. The following three can be used to save the data.
•
Press the [RUN/PROG] panel key for at least two seconds or slide the
mode selection slide switch on the remote control console up.
When the CV-701(P)/751(P) enters [RUN] mode, the message <REGISTER
SET> appears on the screen and the settings are saved in the internal memory.
•
Select [SAVE] on the menu screen.
When the [ENT] key is pressed, the message “REGISTER SET” appears on the
screen and the settings are saved in the internal memory.
4
CAM1 CAM2
PROGRAM
No.00
MODE
INS/TRG
SHUTTER
SCRN REG
OPTION
SAVE
T=
WIND•1
INSPECT
STAIN
LEVEL= 020
NUMBER
000
REGISTER SET
•
OPTION
SAVE
T=
RAW SCR
Save the data in CompactFlash memory (Optional)
➮
See “Chapter 7 CompactFlash Memory” on page 171 for the procedure.
Note 1: Do not turn the power off until the message “REGISTER SET” disappears.
Note 2: If the power is turned off before saving the settings, the setting data will be
lost.
90
Chapter 4
4.6.8
Setting Procedure
Basic setting procedure for the GRAVITY mode
Use the “GRAVITY” mode to determine the center of gravity and the angle of
principal axis for the extracted area in the binary-converted image data.
Center of gravity: A point at which the target object is supported to be kept in
balance.
Y
Y
X
X
The X-/Y-coordinates of the center of gravity are determined on the screen.
4
Angle of principal axis: The longitudinal angle (θ) of a target.
θ
Note: According to the operation principles, detection will be unstable under the
following conditions.
• When the cluster of extracted colors spreads across the MEASURE window.
• When two or more clusters with a similar size exist in the MEASURE window.
• When the principal axis is not determined. (e.g. square and circular objects)
This section describes the basic setting procedure for the [GRAVITY] mode.
1. First follow the “Basic setting procedures” (➮ page 36) to set the
parameters to the color settings.
2. Set [MEASURE] (Measurement window)
Specify the size of the window used for measurement.
1) Place the cursor on [MEASURE] and press the [ENT] key. The window
selection menu appears.
2) Select the shape of the window from [SQR] (square) and [CIRC] (circular).
MEASURE
SQR
CIRC
91
Chapter 4
Setting Procedure
3) Press the [ENT] key. A frame appears on the screen. The screen below
shows the frame when [SQR] is selected.
CAM1 CAM2
PROGRAM
WIND•1
INSPECT
GRAVITY
SEL SCRN
COLOR
MEASURE
200, 220
300, 300
DATA
X=+0.000
Y=+0.000
ANG=+000
TOL
ANALOG
T=
RAW SCR
4) Move the cursor to enclose the desired area for measurement.
CAM1 CAM2
PROGRAM
WIND•1
INSPECT
GRAVITY
SEL SCRN
COLOR
MEASURE
200, 220
300, 300
DATA
X=+0.000
Y=+0.000
ANG=+000
TOL
4
ANALOG
T=
RAW SCR
5) The window drawing mode changes as follows every time the [ENT] key is
pressed.
Square window
Circular window
Tips
To change the window shape
Selecting SQR or CIRC is available only when the window is not drawn. To change the
shape to another selection (square or circular) after drawing the window, clear the
current window. To clear, move cursor to [MEASURE] and hold [CLEAR] for at least 2
seconds.
Note 1: When two or more targets enter the MEASURE window, the target with the
greatest area is measured.
Note 2: Be sure the [MEASURE] window does not come into contact with the
targets.
6) After setting the size and position of the window, press the [ESCAPE] key to
exit the [MEASURE] setting.
92
Chapter 4
Setting Procedure
■ Mask window
When a mask window ([MASK]) is overlapped with a measurement window, the
area inside of the mask window is omitted from the measurement.
Draw a mask window using the same procedure as for a measurement window.
Area to be measured
MEASURE
MASK
[MASK]
window
[MEASURE] window
3. Set the TOL (Tolerance) of the coordinates
Set the allowable range (upper and lower limits) for the X and Y coordinates.
Set the tolerance for each displayed value.
1) Place the cursor on [TOL] and press the [ENT] key. The TOL window
appears.
2) Place the cursor on [X=xxx] under [TOL] and press the [ENT] key. The
value for the first digit is shown as highlighted. You can enter a numerical
value.
TOL
X=+0.000
=+0.000
Y=+0.000
=+0.000
3) Press the [▲]/[▼] cursor keys (panel key) or press the [ENT] key up or down
to change the value.
•
•
When the [ENT] key is moved up repeatedly, the value increments by
one from “0”. After “9”, the second digit is incremented.
The setting range is ±99999.
TOL
X=+0.000
=+0.000
Y=+0.000
=+0.000
4) Press the [ENT] key to confirm the tolerance value.
TOL
X=+50.00
=+0.000
Y=+10.00
=+0.000
4. Set the [TOL] of the angle
Set the allowable range (upper and lower limits) for the angle of the principal
axis (the longitudinal angle of the cluster). The units are degrees.
1) Place the cursor on [TOL] and press the [ENT] key. The TOL window
appears.
93
4
Chapter 4
Setting Procedure
2) Place the cursor on “ANG=180” (the upper limit of tolerance for the angle),
and press the [ENT] key. The value for the first digit is shown as highlighted.
You can enter a numerical value.
ANG= 180
= 000
3) Press the [▲]/[▼] cursor keys (panel key) or press the [ENT] key up or down
to change the value.
ANG= 180
= 000
4) Press the [ENT] key to confirm the tolerance value.
5) Set the lower limit of the tolerance for the angle following the same procedure for the upper limit.
The basic setting for the GRAVITY mode is complete.
Operation check after changing the settings
4
1. Press the [ESCAPE] key to return to the initial menu screen.
2. Press the [TRIGGER] key.
•
Cross-shaped cursors appear on the center of gravity in the orientation of
the angle of the principal axis.
CAM1 CAM2
PROGRAM
WIND•1
INSPECT
GRAVITY
SEL SCRN
COLOR
MEASURE
MASK
AREAFILT
DATA
X=+0.000
Y=+0.000
ANG=+000
TOL
X=+50.00
=+0.000
Y=+10.00
=+0.000
ANG=180
=000
T=
RAW SCR
Tips
• You can omit the undesired noise and/or stains in the window from counting by using
“AREAFILT” (Area filter). (➮ page 101)
• “FILTER” is also available for the setting. (➮ page 103)
3. Check the detection result indicator.
Green: Acceptable (The measured value is within the tolerance range.)
Red: Unacceptable (The measured value is outside of the tolerance range.)
White: No detection (The trigger signal is not input.)
Measured value
DATA
X=+10.00
Y=+45.00
T=
RAW SCR
Detection result
94
Chapter 4
Setting Procedure
Saving the settings
Save the setting data. The following three can be used to save the data.
•
Press the [RUN/PROG] panel key for at least two seconds or slide the
mode selection slide switch on the remote control console up.
When the CV-701(P)/751(P) enters [RUN] mode, the message <REGISTER
SET> appears on the screen and the settings are saved in the internal memory.
•
Select [SAVE] on the menu screen.
When the [ENT] key is pressed, the message “REGISTER SET” appears on the
screen and the settings are saved in the internal memory.
CAM1 CAM2
PROGRAM
No.00
MODE
INS/TRG
SHUTTER
SCRN REG
OPTION
SAVE
T=
WIND•1
INSPECT
GRAVITY
DATA
X=+0.000
Y=+0.000
ANG=+000
REGISTER SET
•
4
OPTION
SAVE
T=
RAW SCR
Save the data in CompactFlash memory (Optional)
➮
See “Chapter 7 CompactFlash Memory” on page 171 for the procedure.
Note 1: Do not turn the power off until the message “REGISTER SET” disappears.
Note 2: If the power is turned off before saving the settings, the setting data will be
lost.
95
Chapter 4
Setting Procedure
4.7 “INS” Mode Advanced Settings
4.7.1
“INS/TRG” menu
Menu structure
2. Window menu
1. Main menu
No.00
MODE
INS/TRG
SHUTTER
SCRN REG
4
WIND•1
INSPECT
OUTER
DATA
TOL
H=
L=
OPTION
SAVE
T=
RAW SCR
96
ARE/CON
INS/TRG
INS+POS
ABS.POS
REL.POS
WIND•1
INS
OUTER
SEL SCRN
CAM1
CAM2
WIND•1
WIND•2
WIND•3
WIND•4
WIND•5
WIND•6
WIND•7
WIND•8
SVD SCRN
ILLU
DATA CAL
COLOR
SCAN
AREA
OUTER
INNER
GAP
PITCH
EDGE NO
COUNT
POINT
STAIN
GRAVITY
3. Color menu
CLR TYPE
COLOR1
SELECT
SEN=5
X
Y
MEASURE
IGNORE
AUTO
EDGE SEN
030
DATA
TOL
H=
L=
SCRN REG
ANALOG
LEVEL
FILTER
COLOR1
COLOR2
GRAY
WIND•1
WIND•2
WIND•3
WIND•4
WIND•5
WIND•6
WIND•7
WIND•8
Chapter 4
Setting Procedure
1. Main menu
“*” indicates the initial setting value.
Parameter
Setting
Description
Function
00* to 15
Program No. for the
setting
Change the program No.
to set several settings.
1/30 to 1/10000
(1/60*)
Shutter speed
Select a faster shutter
speed when detecting a
fast-moving target.
Register the reference
screen.
Save a target image in the
memory.
Set the INS mode, target
color, and detection
window.
Set details for detection.
INSPECT
INS mode display
Check the INS mode for
the selected window.
DATA
Measured value display
Check the measured
value.
Set the upper limit “ H”
and the lower limit “ L” .
Set the measured data.
(Units: pixels)
PROGRAM
MODE
SHUTTER
SCRN REG N/Y
WIND• 1
To sub menu
(Refer to “ 2.” for
details).
TOL
H=000000
L=000000
OPTION
To sub menu
(Refer to respective Set the illumination
sections for
adjustment function.
details.)
Set optional settings.
SAVE
Save the setting data.
Save the setting data in
the memory.
T=000000
Processing time display
Check the processing
time.
RAW SCR
RAW SCR*
The actual image captured Check the unprocessed
by the camera.
image.
PROCES1
Processed image for
detection.
Check the detection
condition.
PROCES2
Processed image for
detection.
Check the detection
condition.
PROCES3
Processed image for
detection.
Check the detection
condition.
PROCES4
Processed image for
detection.
Check the detection
condition.
97
4
Chapter 4
Setting Procedure
2. Window menu
“*” indicates the initial setting value. **
WIND• 1
SEL SCRN
COLOR
WIND1* to 8
CAM1*
CAM2
CAM1|2
CAM1/2
To sub menu (Refer
to “ 3.” for details).
COLOR*
DET
BACK
4
X*
SCAN
Y
BL ➞ WH *
SCAN
WH ➞ BL
MEASURE
SQR
CIRC
F SQR
RING
ARC
EDGE SEN
000 to 100
MASK
AREAFILT
SQR
CIRC
F SQR
H=65535
L=000000
SIZE
4/8/16
POINT
P1 to P8
DATA
NUMBER
MATCH
––––––––
000
––––––––
TOL
H=000000
L=000000
LEVEL
000
SET
ANALOG
98
DATA H
ANALOG H
DATA L
ANALOG L
GRAVITY
POINT
STAIN
COUNT
PITCH
EDGE NO
Function
GAP
Description
INNER
Setting
AREA
Parameter
OUTER
INS (Inspect) mode
Window No.
Change the window No. to
set several windows.
❍ ❍ ❍ ❍ ❍ ❍ ❍ ❍ ❍ ❍
Select the camera image
for screen registration.
When two cameras are
connected.
❍ ❍ ❍ ❍ ❍ ❍ ❍ ❍ ❍ ❍
Set the colors to be
extracted.
With the cursor, select the
pixels to be extracted in
colors on the screen.
With the cursor, select the
pixels to be extracted in the
background on the screen.
Extract colors for detection. ❍ ❍ ❍ ❍ ❍ ❍ ❍ ❍ ❍ ❍
Count pixels in the
extracted color.
❍ –
Set the scanning direction
Set the scanning direction. to either the X- or Y- axis
–
direction.
Select the direction of edge
Select the direction for
detection for a brightness
–
measurement.
change from BL ➞ WH or
WH ➞ BL.
❍
❍
Draw a square, circular, or
Set the range to be
❍
free square window on the
measured.
screen.
–
–
Set the sensitivity for edge When edge detection is
–
detection.
unstable.
❍
Draw a square, circular, or
Set the range not to be
❍
free square window on the
measured.
screen.
❍
Set areas of targets to be
Set an area filter.
–
omitted.
Set the size of a point for Select the size of points for
–
measurement.
POINT measurement.
Set the position of a point Select positions of points
–
for measurement.
for POINT measurement.
Measured value display
Check the measured value. ❍
Check the counted number
Measured result display.
–
with the COUNT mode.
Check the measured result
Measured result display.
–
with the POINT mode.
Set the tolerance to judge
whether the measured
Set the upper limit “ H” ,
❍
value is acceptable or
and the lower limit “ L” .
unacceptable.
(Units: pixels)
Set the detection level for
Set the level of the stain.
presence/absence
–
detection of stains.
Set the tolerance for the
Set the tolerance for
measured result with the
–
POINT mode.
POINT mode.
Set the scaling value for
analog output.
–
–
–
–
–
–
–
–
❍ ❍ ❍ ❍ ❍ –
–
–
–
Count pixels in the
background.
–
–
–
– ❍ –
–
–
–
❍
–
–
–
–
❍
–
–
–
–
❍
–
–
–
–
❍
–
–
–
–
❍
❍
–
–
–
–
–
–
–
–
❍
❍
–
❍
❍
❍
❍
–
–
–
❍ ❍ ❍ ❍ ❍ –
–
–
–
❍
–
–
–
–
–
–
–
–
–
–
–
–
–
–
–
–
– ❍ –
– ❍ –
– – –
– ❍
– ❍
– –
–
–
–
–
– ❍ –
– ❍
–
–
–
–
–
– ❍ –
–
–
–
–
–
–
– ❍ –
–
❍ ❍ ❍ ❍ ❍ –
– ❍ ❍
–
–
–
–
– ❍ –
–
–
–
–
–
–
–
– ❍ –
–
❍ ❍ ❍ ❍ ❍ ❍ – ❍ ❍
– ❍ –
–
–
–
–
–
–
–
–
–
–
–
– ❍ –
–
Output the measured value
❍ ❍ ❍ ❍ ❍ ❍ ❍ ❍ ❍ ❍
with the desired output
voltage.
Chapter 4
Setting Procedure
3. Color menu
“*” indicates the initial setting value.
Parameter
Setting
Description
Function
Select the color extraction
settings.
Change the extraction
methods or copy the
settings of other windows.
COLOR
COLOR1
COLOR2
CLR TYPE
GRAY
WIND1 to 8
POS ADJ1 to 2
SELECT
Move the cursor on the
screen to select the colors To extract the colors.
to be extracted.
SEN
Set the sensitivity for the
Change the color range to
color range when selecting
be extracted in one
the extraction colors by
operation.
using the cursor.
0 to 9 (5*)
BL*
Set the background color.
When the detected image
is not clear.
IGNORE
Select colors not to be
extracted.
Omit selected colors from
those extracted.
AUTO
Automatically extend the
range for color extraction.
Stabilize the color
extraction.
SCRN REG N/Y
Register the reference
image.
Save the target image in
the memory.
LEVEL
Select a level for color
extraction.
Manually select a level for
color extraction.
Select a filter.
(➮ See page 103 for
details.)
Omit the noise or optimize
detection.
BACK
WH
FILTER
11 types
99
4
Chapter 4
4.7.2
Setting Procedure
Sensitivity adjustment for edge detection
Adjust the sensitivity for edge detection
When edge detection is unstable (e.g. some edges are not detected or
unnecessary edges are detected), adjust the sensitivity to optimize detection.
1. Place the cursor on [EDGE SEN] (Edge sensitivity) in the window menu
and press the [ENT] key.
The first digit is shown as highlighted.
MEASURE
EDGE SEN
030
2. Move the [ENT] key up or down to change the value for [EDGE SEN].
•
4
•
The change in the value for [EDGE SEN] is reflected in the edge detection
status on the monitor screen. Set the optimal sensitivity while watching the
monitor.
A larger value for [EDGE SEN] decreases the sensitivity, and a smaller
value increases the sensitivity.
MEASURE
EDGE SEN
030
CAM1 CAM2
PROGRAM
WIND•1
INSPECT
OUTER
SCRN REG
COLOR
SCAN
MEASURE
EDGE SEN
035
DATA
+0.000
TOL
H=+0.000
L= +0.000
ANALOG
T=
RAW SCR
100
Chapter 4
4.7.3
Setting Procedure
Adjustment for the COUNT and GRAVITY modes
Adjusting the [AREAFILT]
When unnecessary areas are detected with the [COUNT] or [GRAVITY] mode,
adjust the area filter to detect only the clusters of desired size.
Select the upper and lower limit for the area filter.
[H=xxx] shows the upper limit, and [L=xxx] shows the lower limit.
Parameter
Description
H=xxx
Clusters with a greater number of pixels than “H” are not counted.
L=xxx
Clusters with a smaller number of pixels than “L” are not counted.
1. Set the upper limit.
Place the cursor on [H=xxx] under [AREAFILT] in the window menu, and press
the [ENT] key.
AREAFILT
H= 65535
L = 00100
4
2. The first digit is shown as highlighted. Change the value for the upper
limit of AREAFILT by pressing [▲]/[▼] cursor keys.
AREAFILT
H= 65535
L = 00100
3. Press the [ENT] key to confirm the setting.
Press the [TRIGGER] key after pressing the [ENT] key to check the detection
status. Select the optimal value while watching the monitor.
AREAFILT
H= 03000
L = 00100
4. Set the lower limit.
Place the cursor on [L=xxx] and follow the above procedure (1 to 3).
101
Chapter 4
4.7.4
Setting Procedure
Advanced COLOR setting
When the color extraction is not shown clearly, adjust the setting with the menu as
shown below.
SEN =5
BACK
IGNORE
AUTO
[BACK]
When [PROCES1] is selected with the [SCREEN] key, change the background
color to white or black. (The initial setting is [BL] (Black).)
1. Place the cursor on [BACK] under [COLOR] menu and press the [ENT]
key.
The cursor moves to [BL] or [WH].
4
SEN =5
BACK
IGNORE
2. Press the [ENT] key up or down to select [BL] or [WH].
The screens below are the [PROCES1] screens with a [BL] or [WH] background.
BACK
BLACK
WHITE
[PROCES1] with a “BL” background
102
[PROCES1] with a “WH” background
CAM1 CAM2
PROGRAM
WIND•1
INSPECT
POINT
SEL SCRN
COLOR
SIZE
POINT P1
138,230
CAM1 CAM2
PROGRAM
WIND•1
INSPECT
POINT
SEL SCRN
COLOR
SIZE
POINT P1
138,230
MATCH
––––––––
MATCH
––––––––
SET
o– – – – – – –
SET
o– – – – – – –
T=
RAW SCR
T=
RAW SCR
Chapter 4
4.7.5
Setting Procedure
Adjusting the color extraction
Using the filter function on the screen
Follow the procedure below to set advance processing (filter) to an image in order
to omit noise on the screen or to optimize detection. Up to two filters can be set,
and processing is operated following the order of selection.
1) Place the cursor on [FILTER] and press the [ENT] key.
2) Press the [▲]/[▼] cursor keys to select the desired filter.
3) Press the [ENT] key to select a filter function.
EXPAND1
EXPAND2
SHRINK
MEDIAN
AVERAGE
EDGE EM
EDGE EX
INVERT
SHADING
INT UP
TINT UP
*
4
To remove the filter, select the chosen filter to be canceled and press the
[CLEAR] key.
Filter type
Description
EXPAND1
Translates each pixel on the screen into the level of the brightest pixel
within the surrounding 3 x 3 area. Expands the extracted area to stabilize
the processing of small and disconnected edges and clusters.
EXPAND2
Same processing as EXPAND1. Select EXPAND2 to operate the expansion
processing twice.
SHRINK
Translates each pixel on the screen into the level of the darkest pixel within
the surrounding 3 x 3 area. Effective in reducing small amounts of noise.
MEDIAN
Translates each pixel on the screen into the level of the fifth brightest pixel
within the surrounding 3 x 3 area. Reduces the noise without affecting the
size of the extraction range.
AVERAGE
Translates each pixel on the screen into the average brightness level within
the surrounding 3 x 3 area. Because it finds the average from the maximum
and minimum value of the brightness level, it is more effective in eliminating
noise than the MEDIAN.
EDGE EM
Emphasizes the border between the dark and bright area of the image.
EDGE EX
Only displays the border between the dark and bright area of the image.
INVERT
Inverts the bright and dark area.
SHADING
Adjusts the varied luminous intensity in the window.
INT UP
Increases the intensity of the screen to adjust the visibility of the image.
TINT UP
Increases the tint of the screen to sharpen the color of the image.
Some combinations cannot be used simultaneously due to the types and
sequence of the filters. One filter cannot be used two or more times.
103
Chapter 4
Setting Procedure
Basic concepts of the filter function
■ EXPAND
■ EDGE EX
■ SHRINK
■ INVERT
■ MEDIAN
■ SHADING
The median
4
■ AVERAGE
■ INT UP
■ EDGE EM
■ TINT UP
4) When the target colors are varied, for example when setting the [COLOR] for
two or more targets, re-register the screen [SCRN REG] and repeat the color
extraction process described in “Basic Settings” page 36.
CAM1 CAM2
PROGRAM
CLR TYPE
COLOR1
SELECT
SEN =5
BACK
IGNORE
AUTO
SCRN REG
LEVEL
FILTER
T=
RAW SCR
5) Press the [ESCAPE] key to register the color settings.
Note: The color setting interacts with the filter function. When the settings for one
window are copied to another window using the method described on page 44, the
filter type is copied accordingly.
104
Chapter 4
Setting Procedure
Setting the color extraction level
Do not use this function for normal operation. When the color is not extracted
properly, display the histogram of the screen’s color data to operate detailed color
extraction.
The level setting function is available when using the color gradation processing
feature.
■ LEVEL setting procedure
1. Display the color extraction menu.
2. Place the cursor on [LEVEL] and press the [ENT] key.
The histogram appears.
LEVEL
FILTER
4
H: Upper limit
2: Binary level
L: Lower limit
▲
▲
The horizontal axis represents the color level, and the vertical axis represents the
number of pixels. The distribution of pixels is displayed for each color level.
“H” is the upper limit and “L” is the lower limit. Color extraction is operated
between the upper and lower limit. Levels lower than the lower limit are translated
into the lower limit value. Levels higher than the upper limit are translated into the
upper limit value. By setting the “H” and “ L” to a level with concentrated
distribution, undesired effects (e.g. variation of intensity) are likely to occur.
“2” indicates the binary level. The levels above “2” will be converted into green.
3. The setting range for [LEVEL] is shown in blue. Press the [ ]/[ ] cursor
(panel key) or move the [ENT] key to the right and left to select the desired
level.
4. Press the [ENT] key.
▲
▲
The selected level is shown in red.
5. Change the level into the desired level. Press the [ ]/[ ] cursor (panel
key) or move the [ENT] key to the right and left to select the desired level.
6. Press the [ENT] key to confirm the level selection.
The level display returns to blue.
7. Repeat the above procedure (steps 3 to 6) to confirm the other levels.
8. Press the [ESCAPE] key to exit the level setting and return to the color
extraction menu.
LEVEL
FILTER
105
Chapter 4
Setting Procedure
4.8 “INS+POS” Mode Basic Settings
This section describes the basic settings before setting the inspection and position
adjustment modes. For details of the inspection mode, refer to “4.6 “INS” Mode
Basic Settings” (➮ page 70). For details of position adjustment, refer to “4.9 Position Detection Mode Basic Settings” (➮ page 109).
4.8.1
Initial menu screen
The following menu appears after “INS+POS” is selected.
Program No.
Up to 16 programs (Nos. 00
to 15) can be registered.
Shutter speed
Changes shutter speed.
4
POS ADJ
Sets parameters for position
detection.
Window
Sets a window for detection.
Processing time
Displays the processing time
for each screen. (Units: ms)
CAM1 CAM2
PROGRAM
No.00
MODE
INS+POS
SHUTTER
SCRN REG
POS ADJ
WIND•1
INSPECT
AREA
DATA
000000
TOL
H=000000
L= 000000
OPTION
SAVE
T=
RAW SCR
●●●
Detection result
The indicator shows the detection
result for each window (8 windows
max.). The light farthest to the left
represents window 1, and the light
farthest to the right represents
window 8.
● (Green): Within tolerance
● (Red): Outside of tolerance
● (White): No detection
–: The window has not been determined.
106
Mode
Allows selection from five
measurement modes.
Screen registration
Registers the image for
setting.
Measured value
Displays the measured
value of the window.
Tolerance
Sets the allowable range of
the detection results.
Option
Sets the stored screen,
illumination adjustment, and
data conversion
SAVE
Saves the settings
Screen selection
Shows the current screen
type. (Raw screen, Processed screen 1/2/3/4)
Chapter 4
4.8.2
Setting Procedure
Basic setting flow
Common
settings
Select a program number
Page 36
Select a program number to
save the settings to.
Set “INS+POS” mode
Page 37
Select “INS+POS” from the five
measurement modes.
Select a shutter speed
Page 38
Select a shutter speed depending on the speed of movement
and brightness of the
target.
Register a screen
Page 39
Register a screen to store the
settings.
Select a window number
Page 41
Select a window number when
measuring two or more areas.
Select INSPECT mode
Page 43
Select INSPECT mode according to the desired inspection
method.
Set COLOR
Page 44
Extract colors of the detection
area.
Set position adjustment
parameters
Page 109
Refer to page 109 to set the
position adjustment parameters.
Set detection parameters
Page 70
Refer to page 70 to set the
detection parameters.
4
Mode
setting
107
Chapter 4
4.8.3
Setting Procedure
“INS+POS” menu
Menu structure
Main menu
No.00
MODE
INS+POS
SHUTTER
SCRN REG
4
ARE/CON
INS/TRG
INS+POS
ABS.POS
REL.POS
CAM1
CAM2
When two cameras are connected. ➮ page 42
POS ADJ
POS ADJ1
POS ADJ2
To ABS.POS window menu. ➮ page 118
WIND•1
INSPECT
AREA
WIND•1
WIND•2
WIND•3
WIND•4
WIND•5
WIND•6
WIND•7
WIND•8
To INS/TRG menu ➮ page 96
DATA
TOL
H=
L=
OPTION
SVD SCRN
ILLU
DATA CAL
SAVE
T=
RAW SCR
Tips
108
• The window menu is similar to the one for the “INS/TRG” mode.
• The POS ADJ menu is similar to the one for the “ABS.POS” mode.
Chapter 4
Setting Procedure
4.9 “Position Detection” Mode Basic Settings
This section describes the basic settings to detect the position of a target using the
“ABS.POS” (Absolute position) mode. The “REL.POS” (Relative position) and
“INS+POS” (Inspection + position) modes are set using the same procedure.
■ Pattern search
The pattern search method searches a screen for a stored pattern and measures
its position and angle.
It searches the pattern in horizontal, vertical, or rotating directions within the search
range of the projected image to find the most similar pattern. It then measures its
coordinates. The matching ratio of the detected pattern is displayed as the
correlation ratio.
Stored image
4
Pattern window
Search window
■ Edge detection
Using the edge detection method, two windows are set in the X- and Y-axis
directions independently. The screen is scanned from left to right in the X window
and from top to bottom in the Y window to find the coordinates of the first edge.
You can select the edge to be detected at which the image changes from bright to
dark, or the edge at which the image changes from dark to bright.
Y window
Edge
PROG
WINDOW 1
COLOR
MEASURE
248,168
378,236
MASK
– – –, – – –
– – –, – – –
DETECT
MEASURE
001329
TOL
H=000000
L=000000
T=000017
RAW SCRN
●
X window
Edge
109
Chapter 4
4.9.1
Setting Procedure
Initial menu screen
The following menu appears after the “ABS.POS” mode is selected.
Program No.
Up to 16 programs (Nos. 00
to 15) can be registered.
Shutter speed
Changes shutter speed.
Window
Sets a window for detection.
CAM1 CAM2
PROGRAM
No.00
MODE
ABS•POS
SHUTTER
SCRN REG
WIND•1
INSPECT
PATT
DATA
X=+0.000
Y=+0.000
ANG=+000
FIT= 00
4
Processing time
Displays the processing time
for each screen. (Units: ms)
OPTION
SAVE
T=
RAW SCR
●●●
Detection result
The indicator shows the detection
result for each window (4 windows
max.). The light farthest to the left
represents window 1, and the fourth
light from the left represents window 4.
● (Green): Within tolerance
● (Red): Outside of tolerance
● (White): No detection
–: The window has not been determined.
110
Mode
Allows selection from five
measurement modes.
Screen registration
Registers the image for setting.
Search menu
Displays the current search
menu.
Measured value
Displays the measured value of
the window. (X-/Y-coordinates,
angle, correlation value)
Option
Sets the stored screen, illumination adjustment, and data
conversion.
Save
Saves the settings.
Screen selection
Shows the current screen type.
(Raw screen, Processed screen
1/2/3)
Chapter 4
4.9.2
Setting Procedure
Basic setting flow
Select a program number
Page 36
Select a program number to
save the settings to.
Set “Position Detection”
mode
Page 37
Select “ABS.POS” from the five
measurement modes.
Select a shutter speed
Page 38
Select a shutter speed depending on the speed of movement
and brightness of the target.
Register a screen
Page 39
Register a screen to store the
settings.
Select a window number
Page 41
Select a window number when
measuring two or more areas.
Set COLOR
Page 44
Extract colors of the detection
area.
Set MEASURE window
Page 113
Set the measurement range.
Set TOL
Page 114
Set a tolerance value for differentiation.
Check the settings
Page 117
Check that the data is set
properly.
Save the settings
Page 117
Save the settings.
Common
settings
Mode
setting
Operation
check
Saving
data
➮
For common settings, refer to “4.3 Basic Settings: Basic setting procedures” on page 36.
111
4
Chapter 4
Setting Procedure
Setting parameters
The parameters in bold type are described in the basic setting procedures.
➮
See “Basic Settings” on page 36 for the parameters in bold.
Window menu
Main menu
No.00
MODE
ABS.POS
ARE/CON
INS/TRG
INS+POS
ABS.POS
REL.POS
SHUTTER
SCRN REG
WIND•1
WIND•2
WIND•3
WIND•4
WIND•1
MENU
PATT
4
CAM1
CAM2
WIND•1
MENU
SEL SCRN
COLOR
PW
SW
SRCH SPD
SRCH SEN
ANG ADJ
DATA
Color menu
PATT
EDGE
CLR TYPE
COLOR1
SELECT
SEN =5
TOL
ANG=
FIT=
ANALOG
COLOR1
COLOR2
GRAY
WIND•1
WIND•2
WIND•3
WIND•4
IGNORE
AUTO
SCRN REG
DATA
SVD SCRN
ILLU
DATA CAL
OPTION
SAVE
T=
RAW SCR
WIND•1
MENU
SEL SCRN
COLOR
EDGEMODE
X
WINDOW X
DATA
TOL
X=
=
Y=
=
ANALOG
PATT
EDGE
LEVEL
FILT
X
Y
X+Y
X>Y
X<Y
COORD
DEV
■ Screen type sequence
Pressing the [SCREEN] key shows the following sequence.
Raw screen
Processed
screen 1
Processed
screen 2
Processed
screen 3
Basic setting procedure
1. First follow the “Basic setting procedures” (➮ page 36) to set the
parameters to the color settings.
2. Set [PW] (pattern window).
Draw a window (range) on the screen to save the pattern of the target on the
screen.
1) Place the cursor on [PW] and press the [ENT] key. A frame appears on the
screen.
COLOR
PW
SW
112
Chapter 4
Setting Procedure
2) Adjust the window to fit around the desired pattern to be detected.
CAM1 CAM2
PROGRAM
WIND•1
INSPECT
SEL SCRN
COLOR
PW
200, 200
300, 300
SRCH SEN
ANG ADJ
±0
DATA
X=+0.000
Y=+0.000
ANG=+000
FIT= 00
TOL
ANG=±000
FIT= 00
ANALOG
T=000254
RAW SCR
The window drawing mode changes as shown below every time the [ENT]
key is pressed.
3) Press the [ESCAPE] key to exit the [PW] setting after setting the range and
position of the window.
Note: When “GRAVITY1” or “GRAVITY2” is selected under “SRCH SEN”, the
maximum size of a pattern window is 256 x 256 pixels.
3. Set [SW] (Search window).
Draw a window (range) on the screen to search for the pattern saved in PW.
1) Place the cursor on [SW] and press the [ENT] key. A frame appears on the
screen.
COLOR
PW
SW
2) Adjust the window to fit around the area in which the selected pattern should
be searched for.
CAM1 CAM2
PROGRAM
WIND•1
INSPECT
SEL SCRN
COLOR
PW
SW
SRCH SPD
SRCH SEN
ANG ADJ
±0
DATA
X=+0.000
Y=+0.000
ANG=+000
FIT= 00
TOL
ANG=±000
FIT= 00
ANALOG
T=000254
RAW SCR
The window drawing mode changes as shown below every time the [ENT]
key is pressed.
3) Press the [ESCAPE] key to exit the [SW] setting after setting the range and
position of the window.
Note 1: The search window is drawn with a red line. The pattern window searches
for the specified pattern within the search window. If a similar pattern exists near
the specified pattern, narrow the search window to avoid detection errors.
Note 2: Narrowing the search window decreases the processing time.
113
4
Chapter 4
Setting Procedure
■ Window coordinate value display
The window coordinate value is displayed using numerical values. Use the value to
check or save the coordinate values.
A (200,150)
D
MEASURE
200, 150
400, 300
B
Upper line: Coordinates of point A (X, Y)
Lower line: Coordinates of point C (X, Y)
C(400,300)
4. Adjust the angle.
When position detection uses the pattern search, the angle of the target can be
adjusted as necessary. The adjustable range is ±180° maximum.
1) Place the cursor on [ANG ADJ] (Angle adjustment) and press the [ENT] key.
The [ANG ADJ] menu appears on the screen.
4
SRCH SEN
ANG ADJ
±0
2) Place the cursor on the desired angle for adjustment and press the [ENT]
key.
ANG ADJ
±0
±5
±10
±20
±30
±45
±90
±180
Tips
• The angle adjustment function is available only when the search menu is set to
[PATT] (pattern).
• Increasing the range for angle adjustment increases the processing time. Avoid needless
increases.
5. Set the tolerance of the coordinates.
Set the allowable range (upper and lower limits) for the X and Y coordinates.
The values outside of the range are judged as unacceptable. The setting range
is ±99999.
Note: When using the “REL.POS” (Relative position) setting, the tolerance for
[REF WND] (Reference window) is specified with the absolute values. The tolerance for other windows is specified with the difference from the coordinates of
[REF WND].
1) Place the cursor on [TOL] and press the [ENT] key. The [COORD] and
[DEV] selection menu appears.
TOL
ANG=±000
FIT= 00
114
TOL
COORD
DEV
Chapter 4
Setting Procedure
[COORD] : Use the median coordinate of the pattern window (X1, Y1) to display
the measured value.
[DEV]
: Use the difference from the median coordinate of the reference
pattern window (registered screen) (dX, dY) to display the measured
value.
2) Place the cursor on [COORD] and press the [ENT] key. The cursor moves to
[X=xxx].
TOL
COORD
X=+0.500
=+0.000
Y=+0.500
=+0.000
3) Press the [ENT] key.
The first digit, “0”, is shown as highlighted. You can enter a numerical value.
TOL
COORD
X=+0.500
=+0.000
Y=+0.500
=+0.000
4) Move the cursor to the left or right and select the digit to be changed.
5) Press the [▲]/[▼] cursor key (panel key) or move the [ENT] key (remote
control console) up or down repeatedly.
When the [▲] cursor key is pressed or the [ENT] key is moved up
repeatedly, the value increments by one from “0”. After “9”, the second digit
is incremented. The maximum value is “99999”. When the [▼] cursor key is
pressed or the [ENT] key is moved down repeatedly, the value decrements
by one to “0”.
TOL
COORD
X=+100.0
=+0.000
Y=+0.500
=+0.000
6) Press the [ENT] key to confirm the input value for the upper limit of the Xcoordinate.
7) Move the cursor to the second line and set the lower limit with the same
procedure.
8) Move the cursor to [Y=xxx] and input the upper and lower limits for the Ycoordinate with the above procedure (steps 2 to 6).
TOL
COORD
X=+100.0
=+0.000
Y=+0.500
=+0.000
115
4
Chapter 4
Setting Procedure
Note: The selection menu of [COORD] and [DEV] is displayed only when the
tolerance is not specified. To change the current setting, clear the preset tolerance
value.
To clear the tolerance, place the cursor on [TOL] and hold down the [CLEAR] key
for at least two seconds. When the confirmation message appears, select “Y”.
6. Set the tolerance of the angle adjustment.
You can set the tolerance for the angle measured by the angle adjustment.
Values outside of the range are judged as unacceptable.
1) Place the cursor on [ANG=] under [TOL] and press the [ENT] key.
TOL
ANG=±000
FIT= 00
2) The value changes to the tolerance value. The first digit is shown as
highlighted. Set the tolerance value with the [ENT] key.
4
TOL
ANG=±000
FIT= 00
3) Press the [ENT] key to confirm the setting.
Tips
• When the measured angle is within the tolerance range, the detected result is acceptable. When the measured angle is outside of the tolerance range, it is unacceptable.
• The tolerance is applied to both positive and negative values.
• The available values should be within the angle adjustment range.
7. Set the tolerance of the correlation ratio.
Set the tolerance when comparing the matching rate of the saved pattern and
the detected pattern. The correlation ratio is a value that indicates the matching
rate between the saved pattern and the detected pattern. Theoretically, the
value will be 100 if the patterns are identical. A measured value below the
tolerance value is unacceptable. The setting range is 00 to 99.
1) Place the cursor on [FIT=] and press the [ENT] key. The first digit, “0”, is
shown as highlighted. You can enter a numerical value.
TOL
ANG=±000
FIT= 00
2) When the [▲] cursor key (panel key) is pressed or the [ENT] key (remote
control console) is moved up repeatedly, the value increments by one. After
“9”, the second digit is incremented. The maximum value is 99. When the
[▼] cursor key is pressed or the [ENT] key is moved down repeatedly, the
value decrements by one to “0”.
TOL
ANG=±000
FIT= 00
3) Press the [ENT] key to confirm the input value.
The setting of WIND•1 is complete. Up to four detection windows can be set
under one program number. To set two or more windows, select a different
window number and repeat the procedure described above.
116
Chapter 4
Setting Procedure
Operation check after changing the settings
1. Press the [ESCAPE] key to return to the initial menu screen.
2. Press the [TRIGGER] key.
3. Check the detection result indicator.
Green: Acceptable (The measured value is within the tolerance range.)
Red: Unacceptable (The measured value is outside of the tolerance range.)
White: No detection (The trigger signal is not input.)
Measured value
Tips
DATA
X=+0.000
Y=+0.000
ANG=+000
FIT= 00
T=
RAW SCR
Detection result
When detection is not stable, refer to “Advanced position adjustment setting”.
➮ pages 127 to 129
4
Saving the settings
Save the setting data. The following three can be used to save the data.
•
Press the [RUN/PROG] panel key for at least two seconds or slide the
mode selection slide switch on the remote control console up.
When the CV-701(P)/751(P) enters [RUN] mode, the message <REGISTER
SET> appears on the screen and the settings are saved in the internal memory.
•
Select [SAVE] on the menu screen.
When the [ENT] key is pressed, the message “REGISTER SET” appears on the
screen and the settings are saved in the internal memory.
CAM1 CAM2
PROGRAM
No.00
MODE
ABS•POS
SHUTTER
SCRN REG
WIND•1
INSPECT
PATT
OPTION
SAVE
T=
DATA
X=+0.000
Y=+0.000
ANG=+000
FIT= 00
REGISTER SET
•
OPTION
SAVE
T=
RAW SCR
Save the data in CompactFlash memory (Optional)
➮
See “Chapter 7 CompactFlash Memory” on page 171 for the procedure.
Note 1: Do not turn the power off until the message “REGISTER SET” disappears.
Note 2: If the power is turned off before saving the settings, the setting data will be
lost.
117
Chapter 4
Setting Procedure
4.10 “Position Detection” Advanced Settings
4.10.1 “ABS.POS” Menu
Menu structure
2. Window menu
1. Main menu
No.00
MODE
ABS.POS
SHUTTER
SCRN REG
4
WIND•1
MENU
PATT
ARE/CON
INS/TRG
INS+POS
ABS.POS
REL.POS
CAM1
CAM2
WIND•1
WIND•2
WIND•3
WIND•4
WIND•1
MENU
SEL SCRN
COLOR
PW
SW
SRCH SPD
SRCH SEN
ANG ADJ
DATA
PATT
EDGE
3. Color menu
CLR TYPE
COLOR1
SELECT
SEN=5
TOL
ANG=
FIT=
ANALOG
IGNORE
AUTO
SCRN REG
DATA
OPTION
SAVE
T=
RAW SCR
118
SVD SCRN
ILLU
DATA CAL
WIND•1
MENU
SEL SCRN
COLOR
EDGEMODE
X
WINDOW X
DATA
TOL
X=
=
Y=
=
ANALOG
PATT
EDGE
X
Y
X+Y
X>Y
X<Y
COORD
DEV
LEVEL
FILT
COLOR1
COLOR2
GRAY
WIND•1
WIND•2
WIND•3
WIND•4
Chapter 4
Setting Procedure
1. Main menu
“*” indicates the initial setting value.
Parameter
Setting
Description
Function
00* to 15
Program No. for the
setting
Change the program No.
to set several settings.
1/30 to 1/10000
(1/60*)
Shutter speed
Select a faster shutter
speed when detecting a
fast-moving target.
Register the reference
screen.
Save a target image in
the memory.
Set a measurement
window and the color of a
target.
Set details for detection.
MEASURE
Measurement mode
display
Check the measurement
mode of the selected
window.
DATA
Measured value display
Check the measured
value.
ANG
Measured angle display
Check the measured
angle.
FIT
Correlation ratio display
Check the correlation
ratio.
Set the illumination
adjustment function,
value conversion, and
saved screen.
Set optional settings.
SAVE
Save the setting data.
Save the setting data in
the memory.
T=000000
Processing time display
Check the processing
time.
RAW SCR*
The actual image
captured by the camera.
Check the unprocessed
image.
PROCES1
Processed image for
detection.
Check the detection
condition.
PROCES2
Processed image for
detection.
Check the detection
condition.
PROGRAM
MODE
SHUTTER
SCRN REG N/Y
WIND• 1
OPTION
RAW SCR
To sub menu
(Refer to “ 2.” for
details).
To sub menu
(Refer to
respective
sections for
details).
119
4
Chapter 4
Setting Procedure
2. Window menu
“*” indicates the initial setting value.
■ Pattern
Parameter
WIND• 1
MENU
(Search
menu)
Setting
WIND1* to 4
Description
Window No.
PATT*
Select the search method.
EDGE
Function
Change the window No. to
set several windows.
Use the pattern search
method for position
detection.
Use the edge detection
method for position
detection.
CAM1
CAM2
Select the camera image
for screen registration.
When two cameras are
connected.
Set the colors to be
extracted.
Extract colors for
detection.
PW
Set the size and position
of the pattern window.
Set a target to be
searched (detected).
SW
Set the size and position
of the search window.
Set a range to be
searched (detected).
Set the speed or
resolution of the search.
FAST: By 1 pixel
NORMAL: By 1 pixel
SUB PIX: By 0.1 pixel
Change the speed or
resolution of the search.
Set the sensitivity of the
search.
When the search is
unstable.
SEL SCRN
CAM1|2
CAM1/2
4
COLOR
Refer to sub menu
3 "Color Menu"
(page 123) for
detailes.
FAST
SRCH SPD
NORMAL*
SUB PIX
GRAVITY1
GRAVITY2
SRCH SEN
AUTO
FINE1
FINE2
ANG ADJ
±0, ±5, ±10, ±20,
±30, ±45, ±90,
±180
Set the range for the angle To use the angle detection
adjustment.
or angle adjustment.
DATA
Measured value display
Check the measured
value.
ANG
Measured angle display.
Check the measured
value.
FIT
Measured correlation ratio Check the measured
display.
value.
COORD
(Coordinate)
Use the absolute
coordinates on the screen
as the numerical value
output.
DEV (Deviation)
Use the deviation from the
registered screen as the
numerical value output.
TOL
X=0000
=0000
COORD
Y=0000
=0000
120
Set the tolerance for the
distance of the X
coordinate.
Set the tolerance for the X
coordinate.
Set the tolerance for the
distance of the Y
coordinate.
Set the tolerance for the Y
coordinate.
Chapter 4
Parameter
Setting
Description
Setting Procedure
Function
ANG
Set the tolerance for the
angle.
Set the tolerance for the
angle
FIT
Set the tolerance for the
correlation ratio.
Set the tolerance for the
correlation ratio.
Set the scaling value for
analog output.
Output the measured
value with the desired
output voltage.
Processing time display
Check the processing
time.
ANALOG
DATA H
ANALOG H
DATA L
ANALOG L
T=000000
RAW SCR
RAW SCR*
The actual image captured Check the unprocessed
by the camera.
image.
PROCES1
Processed image for
detection.
Check the detection
condition.
PROCES2
Processed image for
detection.
Check the detection
condition.
4
121
Chapter 4
Setting Procedure
■ Edge
“*” indicates the initial setting value.
Parameter
WIND• 1
Setting
WIND• 1* to 4
Description
Window No.
Change the window No. to
set several windows.
Use the pattern search
method for position
detection.
PATT*
MENU
(Search
menu)
Function
Select the search method.
Use the edge detection
method for position
detection.
EDGE
CAM1
SEL SCRN
CAM2
Select the camera image
for screen registration.
When two cameras are
connected.
Refer to sub menu
3 "Color Menu"
(page 123) for
detailes.
Set the colors to be
extracted.
Extract colors for
detection.
X
Set the range to detect the Detect (adjust) the position
edge in the X-axis
of a pattern only in the Xdirection.
axis direction.
Y
Set the range to detect the Detect (adjust) the position
edge in the Y-axis
of a pattern only in the Ydirection.
axis direction.
X+Y
Set the range to detect the Detect (adjust) the position
edges in both the X- and
of a pattern in both the XY-axis directions.
and Y-axis directions.
X>Y
Detect (adjust) the position
Set the range to detect the of a pattern in both the Xedges in both the X- and
and Y-axis directions by
Y-axis directions.
first using the edge in the
X-axis direction.
Y>X
Detect (adjust) the position
Set the range to detect the of a pattern in both the Xedges in both the X- and
and Y-axis directions by
Y-axis directions.
first using the edge in the
Y-axis direction.
CAM1|2
CAM1/2
4
COLOR
EDGEMODE
COORD
WINDOW X SCAN
EDGE SEN
Set the range, scanning
direction, and detection
sensitivity of the X
window.
Set the X window for the
edge search.
COORD
WINDOW Y SCAN
EDGE SEN
Set the range, scanning
direction, and detection
sensitivity of the Y
window.
Set the Y window for the
edge search.
DATA
Measured value display
Check the measured
value.
COORD
(Coordinate)
Use the absolute
coordinates on the screen
as the numerical value
output.
DEV (Deviation)
Use the deviation from the
registered screen as the
numerical value output.
TOL
122
Chapter 4
Parameter
Setting
X=0000
=0000
Description
Setting Procedure
Function
Set the tolerance for the
distance of the X
coordinate.
Set the tolerance for the X
coordinate.
Set the tolerance for the
distance of the Y
coordinate.
Set the tolerance for the Y
coordinate.
Set the scaling value for
analog output.
Output the measured
value with the desired
output voltage.
Processing time display
Check the processing
time.
COORD
Y=0000
=0000
ANALOG
DATA H
ANALOG H
DATA L
ANALOG L
T=000000
RAW SCR*
The actual image captured Check the unprocessed
by the camera.
image.
PROCES1
Processed image for
detection.
Check the detection
condition.
PROCES2
Processed image for
detection.
Check the detection
condition.
PROCES3
Processed image for
detection.
Check the detection
condition.
4
RAW SCR
3. Color menu
“*” indicates the initial setting value.
Parameter
Setting
Description
Function
Select the color extraction
settings.
Change the extraction
methods or copy the
settings of other windows.
COLOR1
COLOR2
CLR TYPE
GRAY
WIND• 1 to 4
SELECT
Move the cursor on the
screen to select the colors To extract the colors.
to be extracted.
SEN
Use the cursor to set the
sensitivity for the color
range when selecting the
extraction colors.
Change the color range to
be extracted in one
operation.
IGNORE
Select colors not to be
extracted.
Omit selected colors from
those extracted.
AUTO
Automatically extend the
range for color extraction.
Stabilize the color
extraction.
SCRN REG N/Y
Register the reference
image.
Save the target image in
the memory.
LEVEL
Select a level for color
extraction.
Manually select a level for
color extraction.
Select a filter.
(Reference: For details,
see page 131.)
Omit the noise or optimize
detection.
FILTER
0 to 9 (5*)
11 types
123
Chapter 4
Setting Procedure
4.10.2 “REL.POS” Menu
Menu structure
The parameters of 2 and 3 are the same as the [ABS.POS] menu.
2. Window menu
1. Main menu
No.00
MODE
REL.POS
SHUTTER
SCRN REG
REF WND
MENU
PATT
4
CAM1
CAM2
REF WND
MENU
SEL SCRN
COLOR
PW
SW
SRCH SPD
SRCH SEN
ANG ADJ
REF WND
REL•1
REL•2
REL•3
DATA
TOL
ANG=
FIT=
ANALOG
ARE/CON
INS/TRG
INS+POS
ABS.POS
REL.POS
PATT
EDGE
3. Color menu
CLR TYPE
COLOR1
SELECT
SEN=5
IGNORE
AUTO
SCRN REG
DATA
OPTION
SAVE
T=
RAW SCR
124
SVD SCRN
ILLU
DATA CAL
WIND•1
MENU
SEL SCRN
COLOR
EDGEMODE
X
WINDOW X
DATA
TOL
COORD
X=
=
Y=
=
ANALOG
PATT
EDGE
X
Y
X+Y
X>Y
X<Y
COORD
DEV
LEVEL
FILTER
COLOR1
COLOR2
GRAY
REF WND
REL 1
REL 2
REL 3
Chapter 4
Setting Procedure
4.10.3 Advanced position adjustment setting (Pattern search)
This section describes the setting procedure for accurate position adjustment.
[SRCH SPD] (Search speed)
Set the speed and resolution of the search.
•
•
•
The initial setting is [NORMAL].
The processing time becomes longer as the setting is changed from [FAST] to
[NORMAL], and then to [SUB_PIX] (Sub pixel).
The [SUB_PIX] setting enables detection with a high resolution of 0.1 pixels.
1. Place the cursor on [SRCH SPD] in the window menu and press the [ENT]
key.
The [SRCH SPD] (Search speed) menu appears.
SW
SRCH SPD
SRCH SEN
2. Place the cursor on the desired option and press the [ENT] key to confirm
the selection for [SRCH SPD].
SRCH SPD
FAST
NORMAL
SUB PIX
Tips
The processing time is displayed at the bottom of the menu screen (T=000000). Check
the value after changing the setting.
[SRCH SEN] (Search sensitivity)
Change the sensitivity of the search when the search is unstable or fails.
•
•
The initial setting is [AUTO].
The sensitivity of the search increases and the stability of detection enhances
as the setting is changed from [OBJT1] to [OBJT2], then to [AUTO], [FINE1],
and [FINE2].
OBJT1
Rough search
Faster
Fine search
Slower
OBJT2
AUTO
FINE1
FINE2
125
4
Chapter 4
Setting Procedure
Note 1: When [OBJT1] or [OBJT2] is selected under [SRCH SEN], the maximum
size of a pattern window is 256 x 256 pixels.
[GRAVITY] (Gravity) mode searches the image for the position of the center of
gravity and its angle of principal axis of the binary-converted extracted color data
(The horizontal axis of the screen and the longitudinal axis of the smallest ellipse
enclosing a cluster of extracted colors form the angle of principal axis.)
Binary conversion processing speeds the processing; however, detection will be
unstable under the following conditions due to the operation principles.
Gravity
Note 2: When the cluster of extracted colors spreads across the MEASURE
window.
Note 3: When two or more clusters with a similar size exist in the MEASURE
window.
Note 4: When the principal axis is not determined. (e.g. square and circular
objects)
4
1. Place the cursor on [SRCH SEN] in the window menu and press the [ENT]
key.
[SRCH SEN] menu appears.
SRCH SPD
SRCH SEN
ANG ADJ
2. Place the cursor on the desired option and press the [ENT] key to confirm
the selection for [SRCH SEN].
SRCH SEN
OBJT1
OBJT2
AUTO
FINE1
FINE2
Tips
126
Increasing the SERCH SEN value slows the processing time. Do not set the sensitivity
higher than it needs to be.
Chapter 4
Setting Procedure
4.10.4 Advanced position adjustment setting (Edge detection)
Selecting the edge detection mode
There are five modes for edge detection. In any mode, the screen is searched in
the direction set with “SCAN” for edge detection.
1. Place the cursor on [MENU] in the window menu and press the [ENT] key.
The search menu appears.
WIND•1
MENU
SEL SCRN
2. Place the cursor on [EDGE] and press the [ENT] key.
The message <ERASE SETTINGS N/Y> appears on the screen. Place the
cursor on “Y” and press the [ENT] key.
4
MENU
PATT
EDGE
3. Place the cursor on [EDGEMODE] mode and press the [ENT] key.
COLOR
EDGEMODE
X
WINDOW X
4. Select the desired mode and press the [ENT] key.
EDGEMODE
X
Y
X+Y
X>Y
Y>X
X: To adjust the position only in the X-axis direction.
X window
Y: To adjust the position only in the Y-axis direction.
Y window
127
Chapter 4
Setting Procedure
X+Y: To adjust the position in both X- and Y-axis directions.
Y window
X window
X>Y: To adjust the position in the X-axis direction first, and then adjust the
position in the Y-axis direction.
Y>X: To adjust the position in the Y-axis direction first, and then adjust the
position in the X-axis direction.
Tips
4
Priority position adjustment
• Example: X priority (X>Y) mode
When the X priority mode is selected, the X coordinate of the edge is searched in the
X window. The result (the difference between the registered X coordinate value and
the detected X coordinate value) is used to shift the Y window, and then the Y coordinate of the edge is searched.
X edge
Y window
Registered screen
Y window is shifted.
• When the preferred edge position is extremely different from the registered position
and the shifted window disappears from the screen, the detection result is unacceptable
regardless of the coordinate value.
The Y window is shifted off the screen.
128
Chapter 4
Setting Procedure
WINDOW X and WINDOW Y settings
WINDOW X/WINDOW Y :
Set a window to search in the X-axis/Y-axis direction with [COORD]. The screen is
searched in the horizontal/vertical direction. Set the direction of the edge search
with [SCAN]. Use the [▲]/[▼] cursor to change the setting.
EDGEMODE
X
WINDOW X
•
WINDOW X
COORD
100, 220
400, 260
SCAN
BL→WH
EDGE SEN
030
X window
Search direction
Y window
Search window
[BL] ← [WH]
Right to left
[BL] ← [WH]
Bottom to top
[WH] ← [BL]
Right to left
[WH] ← [BL]
Bottom to top
[WH] → [BL]
Left to right
[WH] → [BL]
Top to bottom
[BL] → [WH]
Left to right
[BL] → [WH]
Top to bottom
4
[EDGE SEN]: Set the sensitivity of the edge detection.
Setting range: 000 to 100 (Initial setting: 030)
A smaller value increases the sensitivity so that edges are detected with a
smaller difference in the brightness. Set the optimal sensitivity while watching
the monitor.
4.10.5 Advanced position adjustment (Tolerance setting)
[TOL] (Tolerance)
Select the coordinates or the deviation to set the edge tolerance.
[COORD] : Use the absolute coordinates to display the measured value and to
set the tolerance.
[DEV]
: Use the difference from the reference value (registered screen) to
display the measured value and to set the tolerance.
1. Place the cursor on [TOL] in the window menu and press the [ENT] key.
TOL
ANG=±010
FIT= 00
2. Place the cursor on [COORD] or [DEV] and press the [ENT] key.
TOL
COORD
DEV
129
Chapter 4
Setting Procedure
4.10.6 Sensitivity adjustment for edge detection
Adjusting the sensitivity for edge detection
When detection is unstable (e.g. some edges are not detected or unnecessary
edges are detected), adjust the sensitivity to optimize detection.
1. Place the cursor on [WINDOW X] in the window menu and press the [ENT]
key.
WINDOW X
COORD
100, 220
400, 260
SCAN
BL→WH
EDGE SEN
030
4
2. Place the cursor on [EDGE SEN] and press the [ENT] key.
The first digit of the sensitivity is shown as highlighted.
EDGE SEN
030
3. Change the value for the [EDGE SEN] using the [ENT] key.
•
•
The change in the values for [EDGE SEN] is reflected in the edge detection
status on the monitor screen. Set the optimal sensitivity while watching the
monitor.
A larger value decreases the sensitivity, and a smaller value increases the
sensitivity.
CAM1 CAM2
PROGRAM
WIND•1
INSPECT
OUTER
SCRN REG
COLOR
SCAN
MEASURE
EDGE SEN
035
DATA
+0.000
TOL
H=+0.000
L= +0.000
ANALOG
T=
RAW SCR
130
Chapter 4
Setting Procedure
4.10.7 Adjusting the color extraction
Using a filter function on the screen
Follow the procedure below to set advanced processing (filter) to an image in order
to omit noise on the screen or to optimize detection. Up to two filters can be set,
and processing is operated following the order of selection.
1) Place the cursor on [FILTER] and press the [ENT] key.
2) Press the [▲]/[▼] cursor keys to select the desired filter.
3) Press the [ENT] key to select a filter function.
EXPAND1
EXPAND2
SHRINK
MEDIAN
AVERAGE
EDGE EM
EDGE EX
INVERT
SHADING
INT UP
TINT UP
•
4
To remove the filter, select the chosen filter to be canceled and press the
[CLEAR] key.
Filter type
Description
EXPAND1
Translates each pixel on the screen into the level of the brightest pixel
within the surrounding 3 x 3 area. Expands the extracted area to stabilize
the processing of small and disconnected edges and clusters.
EXPAND2
Same processing as EXPAND1. Select EXPAND2 to operate the expansion
processing twice.
SHRINK
Translates each pixel on the screen into the level of the darkest pixel within
the surrounding 3 x 3 area. Effective in reducing small amounts of noise.
MEDIAN
Translates each pixel on the screen into the level of the fifth brightest pixel
within the surrounding 3 x 3 area. Reduces the noise without affecting the
size of the extraction range.
AVERAGE
Translates each pixel on the screen into the average brightness level within
the surrounding 3 x 3 area. Because it finds the average from the maximum
and minimum value of the brightness level, it is more effective in eliminating
noise than the MEDIAN.
EDGE EM
Emphasizes the border between the dark and bright area of the image.
EDGE EX
Only displays the border between the dark and bright area of the image
INVERT
Inverts the bright and dark area.
SHADING
Adjusts the varied luminous intensity in the window.
INT UP
Increases the intensity of the screen to adjust the visibility of the image.
TINT UP
Increases the tint of the screen to sharpen the color of the image.
Some combinations cannot be used simultaneously due to the types and
sequence of the filters. One filter cannot be used two or more times.
131
Chapter 4
Setting Procedure
Basic concepts of the filter function
■ EXPAND
■ EDGE EX
■ SHRINK
■ INVERT
■ MEDIAN
■ SHADING
The median
4
■ AVERAGE
■ INT UP
■ EDGE EM
■ TINT UP
4) When the target colors are varied, for example when setting the [COLOR] for
two or more targets, re-register the screen [SCRN REG] and repeat the
color extraction process described in “Basic Settings” page 36.
5) Press the [ESCAPE] key to register the color settings.
Note: The color setting interacts with the filter function. When the settings for one
window are copied to another window using the method described on page 44, the
filter type is copied accordingly.
Setting the color extraction level
Do not use this function for normal operation. When the color is not extracted
properly, display the histogram of the screen’s color data to operate detailed color
extraction.
This function is useful when a search is not functioning properly with [GRAVITY1/2]
for [SERCH SEN] setting. If an area other than the desired area for the search is
converted into a binary level, change the binary level to normalize the search.
■ [LEVEL] setting procedure
1. Display the color extraction menu.
LEVEL
FILTER
132
Chapter 4
Setting Procedure
2. Place the cursor on [LEVEL] and press the [ENT] key.
The histogram appears.
H: Upper limit
2: Binary level
L: Lower limit
▲
▲
The horizontal axis represents the color level, and the vertical axis represents
the number of pixels. The distribution of pixels is displayed for each color level.
“H” is the upper limit and “L” is the lower limit. The color extraction is operated
between the upper and lower limit. By setting the “H” and “ L” to a level with
concentrated distribution, undesired effects (e.g. variation of intensity) are likely
to occur.
“2” indicates the binary level. The levels above “2” will be converted into green.
3. The setting range for [LEVEL] is shown in blue. Press the [ ]/[ ] cursor
(panel key) or move the [ENT] key to the right or left to select the desired
level.
4. Press the [ENT] key.
▲
▲
The selected level is shown in red.
5. Change the level into the desired level. Press the [ ]/[ ] cursor (panel
key) or move the [ENT] key to the right or left to select the desired level.
6. Press the [ENT] key to confirm the level selection.
The level display returns to blue.
7. Repeat the above procedure (steps 3 to 6) to confirm the other levels.
8. Press the [ESCAPE] key to exit the level setting and return to the color
extraction menu.
LEVEL
FILTER
133
4
Chapter 4
Setting Procedure
4.11 Optional Settings
4.11.1 Saving the running images
Up to eight captured images in the [RUN] mode can be saved for future readout.
The read-out screen can be used for processing and checking the data.
Use this function to check a screen with an unacceptable detection result in RUN
mode at a later date.
Note 1: The screens under the “RUN” operation mode can be saved. The screens
under the “PROGRAM” mode cannot be saved.
Note 2: When saving more than eight screens, the saved screens are over-written
in sequence starting from the earliest data.
Note 3: The screens under “ARE/CON” mode cannot be saved.
Note 4: The processing speed slows down slightly when using the “SAVE SCR”
function.
Note 5: Up to four screens can be saved for each camera when two cameras are
connected.
Note 6: The data is saved in RAM inside the controller. The saved data will be lost
when the power is turned off. To keep the record, save the data in the
CompactFlash memory (➮ page 171).
Note 7: A saved screen cannot be used as a registered screen.
4
Preparations
Advance setting is required to save the captured screen.
Set the SAVE SCR parameters with the environmental setting menu.
1. Put the CV-701(P)/751(P) in [PROGRAM] mode.
2. Press the [ESCAPE] key for at least two seconds.
The environmental setting menu appears.
MEMORY CARD
WHITE BALANCE
SETUP MENU
CHANGE
OUT MODE
RS232C BPS
RS232C OUT
CONSOLE
N.O.
38400
0000000
LANGUAGE
OUTPUT SYMBOL
AUTO OFF
TRIGGER
SAVE SCR
JAPANESE
COLOR
OFF
EXTERNAL
OFF
COPY NO.
AUTO SEQUENCE
No.00
OFF
CLOCK
00/03/30
06:46:46
TO No.00
NUM 4
3. Place the cursor on [SAVE SCR] and press the [ENT] key.
The cursor goes to the item in the right column.
AUTO OFF
TRIGGER
SAVE SCR
4. Change the settings using the [▲]/[▼] cursor key. Setting options are as
follows:
OFF: The screens are not saved.
ALL: All captured screens are saved.
NG: Only unacceptable images are saved.
134
Chapter 4
•
With the panel keys
Press the [▲] or [▼] cursor key.
•
With the remote control console
Move the [ENT] key up or down.
Setting Procedure
5. Press the [ENT] key to confirm the setting.
6. Press the [ESCAPE] key to return to the PROGRAM screen.
Reading saved screens
1. Put the CV-701(P)/751(P) in “PROGRAM” mode.
2. Place the cursor on [OPTION] and press the [ENT] key.
The option selection menu appears.
OPTION
SVD SCRN
ILLU
DATA CAL
4
3. Place the cursor on [SVD SCRN] and press the [ENT] key.
The cursor goes to [SCRN SEL].
PROGRAM
SCRN SEL
TEST
4. Press the [ENT] key.
The list of saved screens appears. The list is in descending order from the last
saving.
SCRN SEL
00/07/08 06:32:15
00/07/08 06:32:13
00/07/08 06:31:53
00/07/08 06:18:25
00/07/08 06:17:37
00/07/08 06:17:23
5. Select the desired saved screen for display.
Placing the cursor on the desired option changes the screen display.
SCRN SEL
00/07/08 06:32:15
00/07/08 06:32:13
00/07/08 06:31:53
00/07/08 06:18:25
00/07/08 06:17:37
00/07/08 06:17:23
•
With the panel keys
Press the [▲] or [▼] cursor.
•
With the remote control console
Move the [ENT] key up and down.
6. Press the [ENT] key to confirm the selection.
To display the saved screen, press the [ESCAPE] key to return to the initial
menu screen.
To check the measured data with the saved screen, go to the next step.
135
Chapter 4
Setting Procedure
7. Place the cursor on [TEST] and press the [ENT] key.
The measured data with the saved screen is displayed.
PROGRAM
SCRN SEL
TEST
Tips
The test mode of the saved screen does not output the detection results.
8. Press the [ENT] key to return to the initial menu screen.
4.11.2 Illumination adjustment function
The illumination adjustment function automatically adjusts the intensity of illumination. A variation in luminance over time does not affect the stability of the detection.
The illumination adjustment function is available with all measurement modes;
however, it cannot follow sporadic changes.
The illumination for the first trigger input under the trigger mode is not adjusted.
4
Processing time of the illumination adjustment
•
“ARE/CON” mode
There is a delay of approx. 0.3 seconds before the illumination is adjusted;
however, the total processing remains unchanged.
•
“INS/TRG” mode
The processing time remains unchanged.
•
“INS+POS”, “ABS.POS”, and “REL.POS” modes
The processing time remains unchanged.
1. Place the cursor on [OPTION] in the main menu and press the [ENT] key.
The option menu appears.
2. Place the cursor on [ILLU] and press the [ENT] key.
The cursor goes to [CAM1].
OPTION
SVD SCRN
ILLU
DATA CAL
3. Place the cursor on [CAM1] or [CAM2] and press the [ENT] key.
The ON/OFF selection menu appears.
PROGRAM
CAM1
OFF
4. Place the cursor on [ON] and press the [ENT] key.
A window (frame) appears on the screen.
CAM1
OFF
ON
136
Chapter 4
Setting Procedure
5. Move the [ENT] key to set a window with a constant luminance to a desired area outside of the target.
CAM1 CAM2
PROGRAM
CAM1
040, 040
140, 140
T=
RAW SCR
6. Press the [ENT] key.
The window position is confirmed.
7. Press the [ESCAPE] key to confirm the setting and exit the selection
menu.
4
Note: Set the window for illumination adjustment to an area with medium brightness. Setting the window in areas with too much or too little luminance will saturate
the illumination adjustment function with slight changes in brightness, leading to
unstable detection.
4.11.3 Unit conversion
Converting a measured value
The measured value is normally displayed in units of pixels. When the data calculation is set, the value can be displayed in mm. The displayed value is converted
based on the set conversion ratio.
Tips
The output from the terminal is an unconverted value.
1. Place the cursor on [OPTION] and press the [ENT] key. The option menu
appears.
2. Place the cursor on [DATA CAL] and press the [ENT] key.
The data calculation menu appears.
OPTION
SVD SCRN
ILLU
DATA CAL
3. Set the conversion ratio.
The measured data is normally displayed in units of pixels. When a conversion
ratio (multiple span) is set, the value can be displayed in mm. The conversion
ratio can be specified from “0.01 times” through “100 times”.
Example Number of pixels x Span = mm
1) Place the cursor on [MULTIPLY] and press the [ENT] key. The first digit, “0”,
is shown as highlighted. You can enter a numerical value.
DATA CAL
MULTIPLY
OFFSET X
OFFSET Y
OFFSET
01.00
+0.000
+0.000
137
Chapter 4
Setting Procedure
2) Move the [ENT] key to the right or left to select a digit to be changed.
DATA CAL
MULTIPLY
OFFSET X
OFFSET Y
OFFSET
01.00
+0.000
+0.000
DATA CAL
MULTIPLY
OFFSET X
OFFSET Y
OFFSET
00.50
+0.000
+0.000
3) Change the value.
4
•
With the panel keys
Press the [▲] cursor repeatedly.
•
With the remote control console
Move the [ENT] key up repeatedly. The value increments by one, and after “9”
the second digit is incremented. Pressing the [▼] cursor or moving the [ENT]
key down decrements the value to “0”.
4) Press the [ENT] key.
The conversion ration is confirmed.
4. Set the offset function.
When two areas are picked up with two cameras, the distance between the two
areas is interpolated by the offset function to calculate the actual size.
Set the offset values for both [OFFSET X] (X-axis direction) and [OFFSET Y]
(Y-axis direction).
Example Number of pixels x Span + Offset = mm
1) Place the cursor on [OFFSET X] and press the [ENT] key. The first digit, “0”,
is shown as highlighted. You can enter a numerical value.
DATA CAL
MULTIPLY
OFFSET X
OFFSET Y
OFFSET
00.50
+0.000
+0.000
2) Move the [ENT] key to the right or left and select the digit to be changed.
3) Change the numerical value. The value increments by one, and after “9” the
second digit is incremented. Pressing the [▲] cursor or moving the [ENT] key
down decrements the value to “0”.
DATA CAL
MULTIPLY
OFFSET X
OFFSET Y
OFFSET
00.50
+0.000
+0.000
4) Press the [ENT] key.
The offset value for the X-axis direction is confirmed.
5) Place the cursor on [OFFSET Y] and repeat the above procedure.
DATA CAL
MULTIPLY
OFFSET X
OFFSET Y
OFFSET
138
00.50
+40.00
+0.000
Chapter 4
Setting Procedure
5. Set the enable/disable of the offset function.
Set whether you want to enable or disable the offset function for each window.
●: Enabled
–: Disabled
1) Place the cursor on [OFFSET] and press the [ENT] key.
2) Move the [ENT] key to the right and left to select a desired window.
3) Change the setting with [▲]/[▼] cursor keys.
4) Press the [ENT] key.
DATA CAL
MULTIPLY
00.50
OFFSET X
+40.00
OFFSET Y
+0.000
OFFSET o–
Window 1 Window 2
4
6. Press the [ESCAPE] key.
The data calculation function is set.
Note 1: The setting for MULTIPLY under DATA CAL is applied for all windows.
Select the enabled/disabled offset function for each window.
Note 2: The DATA CAL function is not activated when the INS mode is set to
[AREA], [POINT], [COUNT], [STAIN] or [EDGE NO].
139
Chapter 4
Setting Procedure
4.12 Operation Check of the Setting Status
The CV-701(P)/751(P) is able to save the state of focus, exposure and position
after setting is complete. Use the saved data to compare and check with the initial
condition when there is a change of target.
4.12.1 Saving the setting status
Save the focus and exposure under the current setting.
1. Prepare a test piece. Prepare a sheet of white paper with a rectangle filled
in black.
Make sure the length of the longitudinal side of the rectangle is about 1/4 of the
field of view. You can set a desired aspect ratio.
2. Put the CV-701(P)/751(P) to “PROGRAM” mode.
3. Hold down the [ESCAPE] key for at least two seconds.
4
The environmental setting menu appears on the screen.
4. Place the cursor on [SETUP MENU] and press the [ENT] key.
The setup menu appears on the screen.
MEMORY CARD
WHITE BALANCE
SETUP MENU
5. Place the test piece prepared in step 1 into the field of view. Make sure the
black rectangle is in the center of the monitor screen. Place the test piece
on a flat surface so that there is no curvature or warpage of the piece.
The screen updates every time the [TRIG] key is pressed.
SETUP
SAVE
CAM1
CAL AREA
PINT
SET
00/03/30
06:41:13
NOW
Note: Be sure the black rectangle does not cover the exposure bars on the four
sides of the screen.
When CAM2 is set, place the cursor on [CAM1] and press the [ENT] key to select
the camera.
SETUP
SAVE
CAM2
140
Chapter 4
Setting Procedure
6. Place the cursor on [SAVE] and press the [ENT] key.
SETUP
SAVE
CAM1
7. The saving of settings is completed.
Press the [ESCAPE] key to display the environmental setting menu.
4.12.2 Comparing with the saved setting status
Compare the saved setting status with the current setting status.
1. Put the CV-701(P)/751(P) into “PROGRAM” mode.
2. Hold down the [ESCAPE] key for at least two seconds.
4
The environmental setting menu appears on the screen.
3. Place the cursor on [SETUP MENU] and press the [ENT] key.
The setup menu appears on the screen.
4. Place the test piece prepared in step 1 of “Saving the setting status” on
the previous page into the field of view. Make sure the black rectangle is
in the center of the monitor screen. Place the test piece on a flat surface
so that it will not have any R.
Make sure to use the same test piece used for the previous saving.
The screen updates every time the [TRIG] key is pressed.
5. Compare the saved status and current status.
Check the screen for the exposure and focus status.
The blue lines indicate saved status, and the red lines indicate the current
status.
The longer bar indicates an increased exposure to light.
The larger circle indicates a looser focus.
Indicates the center position. The blue
line indicates the saved status, and the
red line indicates the current status.
Indicates the exposure status. The blue
indicator shows the saved status, and the
red indicator shows the current status.
SETUP
SAVE
CAM1
CAL AREA
PINT
Indicates the focus. The
blue circle indicates the
saved status, and the
red circle indicates the
current status.
SET
00/03/30
06:41:13
NOW
Note: Be sure the black rectangle does not cover the exposure bars on the four
sides of the screen.
6. Adjust all of the settings so that they will agree with the saved status.
7. The operation check of the setting status is complete.
Press the [ESCAPE] key to display the environmental setting menu.
141
Chapter 4
Setting Procedure
4.13 Initialization
Initialize the settings when you want to reset all of the settings or when the CV701(P)/751(P) operates abnormally.
Note 1: Initialization clears all settings to the factory-set values.
Note 2: If you need to save the settings, save them in the CompactFlash memory,
personal computer through the RS-232C, or take note of the necessary settings.
4.13.1 Initialization of all settings
1. Hold down the [CLEAR] key and turn on the power.
The message <INIT SETTING> appears on the screen and initialization starts.
4
KEYENCE
INIT SETTING
4.13.2 Initialization by program number
You can initialize the settings of one of the 16 programs from 0 to 15 by selecting
the saved program number.
1. Use the [ENT] and [ESCAPE] keys to place the cursor on the [No.] of the
program to be initialized.
CAM1 CAM2
PROGRAM
No.00
MODE
2. Hold down the [CLEAR] key for at least two seconds.
The message <ERASE SETTINGS N/Y> appears on the screen.
• To cancel initialization, select [N] and press the [ENT] key.
• To execute initialization, select [Y] and press the [ENT] key.
CAM1 CAM2
PROGRAM
No.00
MODE
ARE/CON
SHUTTER
SCRN REG
WIND•1
DATA
000000
TOL
H=000000
L= 000000
ERASE SETTINGS N / Y
142
OPTION
SAVE
T=
RAW SCR
Chapter 4
Setting Procedure
4.14 Input/Output Operation in PROGRAM Mode
Even in PROGRAM mode, the CV-701(P)/751(P) accepts a trigger input or provides a BUSY output so that the detection result and numerical value are displayed
on the screen. A comparator output is not provided. Use the result and value as a
test operation for adjustment.
The following table lists the input/output operations in PROGRAM mode.
I/O terminal/
connector
Input terminal
Signal
name
Description
TRG
Trigger input for timing signal
Enabled
PST
Data output selection input
Disabled
Screen registration input (Registers a
REC1/REC2 screen at a TRG signal when this pin is
short-circuited.)
Input connector
CI0 to CI3
Program No. input 0 (LSB)
WI0 to WI2 Output window selection input
CONT
Starts continuous operation when the
program is switched without an external
trigger signal.
W01 to W08 Window comparator output
Output terminal
Disabled
Disabled
Disabled
Disabled
Disabled
WOR
OR output of WO1 to WO8
Disabled
STO
Strobe signal output for output
Disabled
BUSY signal output
Enabled
Position data signal output
Disabled
Data output
Disabled
BUSY
Output connector
Status
D.POLE
D0 to D12
Note: A trigger input is not accepted in PROGRAM mode during setting procedures such as drawing a window or setting values. A trigger input is accepted only
when the [TRIGGER] key on the panel keys or the remote control console can be
used.
143
4
Chapter 4
Setting Procedure
4.15 Environmental Settings
The environmental settings include the display settings and external input settings.
This section describes each environmental setting and the procedure for changing
the settings.
4.15.1 Changing the environmental settings
You can set or check the following items in the environmental settings.
➮
See page 145 for details.
1. Put the CV-701(P)/751(P) in “PROGRAM” mode.
2. Press the [ESCAPE] key for at least two seconds.
The environmental setting menu appears.
MEMORY CARD
WHITE BALANCE
SETUP MENU
4
CHANGE
OUT MODE
RS232C BPS
RS232C OUT
CONSOLE
N.O.
38400
0000000
LANGUAGE
OUTPUT SYMBOL
AUTO OFF
TRIGGER
SAVE SCR
JAPANESE
COLOR
OFF
EXTERNAL
OFF
COPY NO.
AUTO SEQUENCE
No.00
OFF
CLOCK
00/03/30
06:46:46
TO No.00
NUM 4
3. Place the cursor on the desired item.
4. Press the [ENT] key.
The cursor goes to the item in the right column.
5. Change the setting.
•
With the panel keys
Press the [▲]/[▼] cursor key.
•
With the remote control console
Move the [ENT] key up or down.
6. Press the [ENT] key.
The setting is confirmed.
7. Press the [ESCAPE] key to return to the PROGRAM menu.
144
Chapter 4
Setting Procedure
4.15.2 Environmental setting list
“*” indicates the initial setting value.
Parameter
Setting
Description
Function
To save/readout the
To sub menu.
Save/read the settings and
MEMORY
settings and saved screen
➮ See page 171 for saved screen to/from the
CARD
to/from the CompactFlash
details.
CompactFlash memory.
memory.
To sub menu.
To adjust the white
WHITE
➮ See page 148 for Adjust the white balance.
balance.
BALANCE
details.
Save/readout the settings
To sub menu.
SETUP
➮ See page 140 for of focus, exposure, and
To compare the settings.
MENU
details.
reference position.
Use the remote control
To change the program
CONSOLE*
console to change the
No. with the remote control
program No.
console.
To change the program
CHANGE
No. or the output window
Use the I/O connector to
TERMINAL
change the program No. or by inputting an external
the output window.
signal to the I/O connector
during RUN mode.
To output when the
N.O.*
Normally-open
detection result is outside
of the tolerance range.
OUTMODE
To output when the
N.C.
Normally-closed
detection result is within of
the tolerance range.
To change the
RS-232C
9,600/19,200/
Set the communication
communication speed.
BPS
38,400*
speed.
(No. of bits/sec.)
RS-232C
Select the RS-232C output To select the data type
0000000
data.
output by RS-232C.
OUT
Use the Japanese
To change the menu
JAPANESE*
language.
display to Japanese.
LANGUAGE
To change the menu
ENGLISH
Use the English language.
display to English.
Displays the detection
When a color monitor is
COLOR*
result with green, red, and
used.
white indicators.
OUTPUT
SYMBOL
Displays the detection
When a black-and-white
MONO
result with ❍, x, ? and –
monitor is used.
symbols.
Disable automatic backlight To turn on the backlight all
OFF*
shut-off.
the time.
AUTO OFF
To turn off the backlight
Enable automatic backlight
ON
automatically. (Backlight
shut-off. (CV-751(P) only)
operating life: 40,000 hrs.)
Execute detection at each To control detection with
EXTERNAL*
trigger input.
external trigger input.
Execute detection
TRIGGER
continuously without
To repeat detection without
INTERNAL
external trigger inputs by
using external trigger
internally producing trigger signals in the trigger mode.
signals from power-on.
OFF*
No screens are saved.
Saves all screens
ALL
regardless of the detection
SAVE SCR
To save a screen.
result.
Saves the captured screen
NG
with an unacceptable
detection result.
145
4
Chapter 4
Setting Procedure
Parameter
Setting
Description
Source program No.
(00 to 15), Target
Set the source and target
program No.
COPY NO.
program Nos. and select
(00 to 15)
OK to copy.
➮ See page 146 for
the setting.
OFF
Set the program Nos. for
sequential operation.
(MODE1)
➮ See page 147 for
AUTO
SEQUENCE the setting.
Set the program Nos. for
sequential operation.
(MODE2)
CLOCK
Calendar input
Function
To copy the settings of one
program No. to another
program No.
Normal operation
To execute several
program Nos. sequentially
with one trigger signal.
To execute several
program Nos. sequentially
with one trigger signal. The
position adjustment
function and the starting
No. use common data.
Input the present time and
To adjust the calendar.
date.
4
4.15.3 Useful functions
Automatic backlight shut-off [AUTO OFF] (CV-751(P) only)
Turns off the backlight of the monitor automatically. To activate this function, place
the cursor on [AUTO OFF] in the environmental setting menu and select “ON”.
(The backlight has an operating life of 40,000 hours.)
•
The backlight is turned off under the following conditions:
10 or more minutes have passed since the last key operation, detection of
results outside of the tolerance range, or message appearances on the screen.
•
The backlight is turned on again when one of the following occurs:
Any key is pressed.
A control signal is input from the external devices through RS-232C.
The detection result goes outside of the tolerance range.
A message appears on the screen.
Copying the program number [COPY NO.]
The settings of one program number can be copied to another program number.
1. Place the cursor on [COPY NO.] and press the [ENT] key.
The cursor goes to the source number field.
2. Press the [▲]/[▼] cursor keys or move the [ENT] key up or down to select
the source program number and press the [ENT] key.
The cursor goes to the target number field.
3. Press the [▲]/[▼] cursor keys or move the [ENT] key up or down to select
the target program number and press the [ENT] key.
The cursor goes to [OK?].
4. Press the [ENT] key to copy the settings.
When the [ESCAPE] key is pressed at any time during the procedure, the
cursor returns to [COPY NO.].
146
Chapter 4
Setting Procedure
Sequential operation [AUTO SEQUENCE]
Executes the operations of several programs sequentially with one trigger signal by
automatically switching the program numbers. The limitations below are placed on
the first program number. Up to four programs starting from the first program
number can be sequentially processed. (➮ See page 164 for the timing diagrams.
)
Note 1: The first program number can be set with the I/O terminal/connector when
[CHANGE] in the environmental setting menu is set to [TERMINAL].
Note 2: The CV-701(P)/751(P) bypasses the program number under [ARE/CON]
mode and unused program numbers.
e.g.) When the number for [AUTO SEQUENCE] processing is set to 4 with the
following settings, only program No. 0 will be processed.
No.0: [ABS. POS]
No.1/2/3: [ARE/CON]
Setting parameters
OFF
AUTO SEQUENCE
MODE1
MODE2
2
Num
4
3
4
The [Num] in the setting parameters indicates the number of programs to be
processed sequentially.
<e.g.>
When the first program number is set to No.4 and [Num] is set to 2, program
Nos. 4 and 5 are processed sequentially.
<Requirements for the first program number>
[Num]=2: The first program numbers can be selected from 2n (0, 2, 4, 6, 8, 12,
14) only.
[Num]=3/4: The first program numbers can be selected from 4n (0, 4, 8, 12)
only.
Note: When the selected first program number does not satisfy the requirements,
the [AUTO SEQUENCE] function is not activated and only the selected program
number will be processed.
Tips
When a trigger signal is input and the CV starts processing, the display is fixed to the
screen of the first program number.
1. Set the program numbers in advance for sequential operation.
2. Place the cursor on [AUTO SEQUENCE] and press the [ENT] key.
The cursor goes to [OFF].
3. Press the [▲]/[▼] cursor key to set the parameters for [AUTO
SEQUENCE].
MODE2
Executes the operations of several programs sequentially at one trigger signal.
Up to four programs can be processed. The position adjustment function uses
the data of the first program number to process the other programs.
MODE1
Executes the operations of several programs sequentially at one trigger signal.
(Up to four programs can be processed.)
OFF
Executes normal operation.
Note: When the AUTO SEQUENCE is set to MODE2, the CV processes programs
of [INS+POS] mode.
147
Chapter 4
Setting Procedure
4. Press the [ENT] key.
The cursor goes to “2”.
5. Press the [▲]/[▼] cursor key to select the value for [Num].
6. Press the [ENT] key and return to the environmental setting menu.
Adjusting the white balance
Adjust the image using the actual illumination for detection so that white objects are
projected in white. Adjustments of the white balance are required every time the
targets and illumination are changed.
1. Place the cursor on [WHITE BALANCE] and press the [ENT] key.
The adjustment menu appears on the screen.
• A frame and message “REGISTER WHITE T” appears on the screen. Place
a sheet of white paper in front of the camera.
• The screen updates with every trigger signal input.
4
WHITE BALANCE
SET
CAM1
R= 027
G= 017
B= 024
REGISTER WHITE T
2. Place the cursor on [SET] and press the [ENT] key.
The white balance for camera 1 is adjusted.
SET
CAM1
3. Press the [ESCAPE] key to return to the environmental setting menu when
only one camera is connected. When two cameras are connected, go to
step 4.
4. Place the cursor on [CAM1] and press the [ENT] key.
[CAM2] is selected and the adjustment menu for camera 2 appears.
• A frame and message “REGISTER WHITE T” appears on the screen. Place
a sheet of white paper in front of the camera.
• The screen updates with every trigger signal input.
SET
CAM1
5. Place the cursor on [SET] and press the [ENT] key.
The white balance for camera 2 is adjusted.
SET
CAM2
6. Press the [ESCAPE] key to return to the environmental setting menu.
148
Chapter 4
Setting Procedure
Adjusting the clock
Adjust the time and date of the clock built into the CV-701(P)/751(P).
1. Place the cursor on [CLOCK] and press the [ENT] key.
The digit of the year is shown as highlighted. You can adjust the setting.
The time and date are displayed as follows:
Year/Month/Date
Hour/Minute/Second COPY NO.
AUTO SEQUENCE
CLOCK
2. Move the cursor to the right and left to select the digit to be changed.
CLOCK
00/04/07
12:49:57
3. Press the [▲]/[▼] cursor key or move the [ENT] key up/down repeatedly.
CLOCK
00/07/07
12:49:57
4
•
With the panel keys
Press the [▲] cursor key repeatedly.
•
With the remote control console
Press the [ENT] key up repeatedly. The value increments, and after “9” the
second digit is incremented. Every time the [▼] cursor key is pressed or the
[ENT] key is held down, the value decrements to “0”.
4. Press the [ENT] key.
The setting is confirmed.
5. Press the [ESCAPE] key to return to the environmental setting menu.
Note: “Second” cannot be adjusted.
Setting the RS-232C output data
Select the format of data to be output with RS-232C communication.
➮
See page 182 for data formats.
RS-232C OUT 0 0 0 0 0 0 0 0
The numbers indicate (from the left):
Data 0: Output setting of judgment result
Data 1: Output setting of number of pixels
Data 2: Output setting of the measured value [INS] mode
Data 3: Output setting of X coordinate
Data 4: Output setting of Y coordinate
Data 5: Output setting of correlation ratio
Data 6: Output setting of rotation angle
(0: OFF, 1: ON)
(0: OFF, 1: ON)
(0: OFF, 1: ON)
(0: OFF, 1: ON)
(0: OFF, 1: ON)
(0: OFF, 1: ON)
(0: OFF, 1: ON)
All settings are factory-configured to 0.
Tips
1. Place the cursor on [RS-232C OUT] and press the [ENT] key.
The first digit is shown as highlighted. You can change the settings.
RS232C BPS
RS232C OUT
38400
0000000
2. Move the cursor to the right and left to select the digit to be set.
RS232C BPS
RS232C OUT
38400
1000000
149
Chapter 4
Setting Procedure
3. Press the [▲]/[▼] cursor key or move the [ENT] key up or down to change
the value.
4. Press the [ENT] key after setting all digits.
The CV returns to the environmental setting menu.
4
150
Chapter 5
Operation
This chapter describes RUN mode and the controls available during RUN
mode operation.
5.1
Entering RUN Mode ........................................................... 152
5.2
Controls Available in RUN Mode ...................................... 153
Chapter 5
Operation
5.1 Entering RUN Mode
This section describes RUN mode. Before entering RUN mode, complete the
settings described in “Chapter 4 Setting Procedure”.
1. Change the PROGRAM mode to RUN mode.
•
With the panel keys
Hold down the [RUN/PROGRAM] key for at least two seconds.
SCREEN
WINDOW
RUN
PROG
PROGRAM No.
•
With the remote control console
Use one of the following two methods to enter RUN mode.
• Slide up the mode selection switch to “RUN”.
• Unplug the remote control console from the controller.
RUN
5
PROG
RUN
ENT
Mode selection
slide switch
ESCAPE
2. Once the CV-701(P)/751(P) enters RUN mode, [RUN] appears in the upper
right of the screen.
•
•
When “ARE/CON” mode is selected, the CV-701(P)/751(P) starts and
continues detection, judgment, and displaying results.
When a mode other than “ARE/CON” mode is selected, the CV-701(P)/
751(P) starts detection, judgment, and displaying results every time a trigger
signal is input.
NUM NUM NUM
C S , 1 2 3 cr
Note: Once the CV-701(P)/751(P) enters RUN mode, the setting operation from
the remote control console or the panel keys is disabled. You can use only the
[SCREEN], [TRIG], [PROGRAM No.], and [WINDOW] keys and the mode selection
slide switch.
Key-lock function (CV-751(P))
When the key-lock function is activated, the operation of all keys except for the
[SCREEN] and [WINDOW] keys is disabled to prevent accidental key operation.
Set the key-lock function in PROGRAM mode before entering RUN mode.
▲
▲
■ To set the key-lock function
Hold down the [ ] and [ ] cursor keys simultaneously for at
least two seconds. When the function is activated, [KEY
LOCK] appears at the bottom of the menu screen.
▲
152
▲
■ To cancel the key-lock function
Hold down the [ ] and [ ] cursor keys simultaneously for at
least two seconds. The display [KEY LOCK] disappears and
key operation is enabled.
KEY
LOCK
Chapter 5
Operation
5.2 Controls Available in RUN Mode
In RUN mode, the CV-701(P)/751(P) can be controlled using external signals
through the I/O terminals and RS-232C.
Mode
RUN
How to enter
the mode
Available operations
Set CHANGE in the
environmental setting
menu to CONSOLE
and then set the
console’ s slide switch
to “ RUN” .
Terminal/
connector
Judgment result/numerical
value output
Trigger (TRG) input
Coordinate value X/Y
selection (PST) (Only when
pattern search or edge
search in both the X and Y
directions is set.)
156
Unplug the remote
control console from
the controller.
Console
Trigger input
Screen selection
Window No. selection for
display/data output
RUN/PROGRAM selection
152
Send the "R0cr"
RS-232C
command when the CV
is in communication
mode.
Trigger input
Data output
187
Set CHANGE in the
environmental setting
menu to CONSOLE
and then set the
console’ s slide switch
to “ RUN” .
Terminal/
connector
Judgment result/numerical
value output
Trigger (TRG) input
Coordinate value X/Y
selection (PST) (Only when
pattern search or edge
search in both the X and Y
directions is set.) Window
No. selection for
display/data output (Wlx)
156
Unplug the remote
control console from
the controller.
Console
Trigger input
Screen selection
RUN/PROGRAM selection
152
Send the "R0cr"
RS-232C
command when the CV
is in communication
mode.
Trigger input
Data output
187
Short-circuit the REC1 Terminal/
• REC2 and COM2
connector
terminals when the CV
is in RUN or RUN
[EXT] mode.
Screen registration (By
short-circuiting the TRG
and COM1 terminals.)
164
Send the "O0cr"
command.
Reading/writing output
setting
Reading/writing setting
data
Reading/writing registered
screen
Reading/writing program
number
Screen registration
Reading input screen
Saving setting data
188
RUN
(External
control)
Screen
registration
Communication
Reference
page
RS-232C
153
5
Chapter 5
Operation
MEMO
5
154
Chapter 6
I/O Timing and Analog Output
Explains the input/output timing and analog output.
6.1
I/O Terminal Names and Functions .................................. 156
6.2
Input/Output Timing Diagrams ......................................... 160
6.3
I/O Circuit ............................................................................ 165
6.4
Analog Output .................................................................... 166
6.4.1 Analog output terminals ....................................................... 166
6.4.2 Changing analog output settings ......................................... 166
6.4.3 Scaling the analog output .................................................... 167
Chapter 6
I/O Timing and Analog Output
6.1 I/O Terminal Names and Functions
This section describes the names and functions of I/O terminals/connectors and
the position of analog output.
The position of I/O terminals
I/O connector
Analog
output
Analog
output
I/O connector
I/O terminal
I/O terminal
Names and functions of I/O terminals and I/O connectors
● I/O terminal
Terminal No. (controller side)
1 2 3 4 5 6 7 8 9 10 11 12 13 14 15
Terminal No.
Signal name
1
24 VDC
24 VDC power supply input
0V
0 V for power supply input
2
6
3
Description
See the table below.
4
TRG
Trigger input for timing signal
5
See the table below.
6
See the table below.
7
WO1
Window 1 comparator output
8
WO2
Window 2 comparator output
9
WO3
Window 3 comparator output
10
WO4
Window 4 comparator output
11
WO5
Window 5 comparator output
12
WO6
Window 6 comparator output
13
WO7
Window 7 comparator output
14
WO8
Window 8 comparator output
15
WOR
OR output of WO1 to WO8
NPN (CV-701/751)
3
5
6
Common signal (0 V) for
inputs/outputs
STO Strobe signal output for output
Common signal (0 V) for
COM1
inputs/outputs
COM1
PNP (CV-701P/751P)
3
5
6
Power supply for PNP output
(5 to 24 V)
Common signal (0 V) for
COM1
inputs/outputs
V1
STO
Strobe signal output for output
COM1 terminals 3 and 6 are common.
CAUTION
156
Terminal 0 V (for power supply input), COM1, and COM2 are common via a
choke coil. Be sure that there is no potential difference among the three
terminals.
Chapter 6
I/O Timing and Analog Output
Connector pin No. (controller side)
● I/O connector
16 15 14 13 12 11 10 9
8
7
6
5
4
3
2
1
32 31 30 29 28 27 26 25 24 23 22 21 20 19 18 17
Pin No.
Signal
name
1
Input terminal (not to be used)
2
CI0
Program No. input 0 (LSB)
3
CI1
Program No. input 1
Orange
4
CI2
Program No. input 2
Yellow
CI3
Program No. input 3 (MSB)
Green
6
COM2
7
COM2
8
D0
Common signal (0 V) for inputs/outputs
Blue
Common signal (0 V) for inputs/outputs
Purple
Data output 0 (LSB)
Gray
9
D1
Data output 1
White
10
D2
Data output 2
Black
11
D3
Data output 3
Brown
12
D4
Data output 4
Red
13
D5
Data output 5
Orange
14
D6
Data output 6
Yellow
15
D7
Data output 7
Green
16
D8
Data output 8
Blue
17
D9
Data output 9
Purple
18
D10
Data output 10
Gray
19
D11
Data output 11
White
20
D12
Black
22
Data output 12 (MSB)
P
osition data sign output
P.POLE
(output upon negative signal)
See the table below.
23
See the table below.
24
PST
25
WI0
26
WI1
27
WI2
28
CONT
29
BUSY
Brown
Data output selection input
Display and output window selection input 0
(LSB)
Display and output window selection input 1
Yellow
Display and output window selection input 2
Continuous operation input (When a program is
switched, continuous judgment starts without an
external trigger signal.)
BUSY signal output
Purple
Green
Blue
Gray
White
30
REC1
Screen registration input Camera 1
Black
31
REC2
Screen registration input Camera 2
Brown
32
Unused terminal
COM2
COM2
Red
PNP (CV-701P/751P)
NPN (CV-701/751)
23
Red
5
21
22
Cable
color*
Brown
Description
Common signal (0 V)
for inputs/outputs
Red
Common signal (0 V)
for inputs/outputs
Orange
22
—
Unused terminal
23
—
Unused terminal Orange
Red
COM2 terminals 6, 7, 22, and 23 are common.
* The colors represent the cable colors used in the special I/O cable (option: OP35341).
Data outputs (D0 to D12) are 13-bit binary outputs (negative-true logic).
D0 (LSB) to D12 (MSB) signals are in one-to-one correspondence with
1.2.4.8…4096, and they read data by doing sums of the terminals that are turned
on.
Tips
For screen registration input TRG with the REC (1 and/or 2) input.
Simultaneous inputs of REC 1/2 and CONT show the raw screen with a cross-shaped
cursor in the center.
157
6
Chapter 6
I/O Timing and Analog Output
Binary data input (Output window selection input)
Input
W0
Window No.
W1
W2
OFF
OFF
OFF
1
ON
OFF
OFF
2
OFF
ON
OFF
3
ON
ON
OFF
4
OFF
OFF
ON
5
ON
OFF
ON
6
OFF
ON
ON
7
ON
ON
ON
8
Binary data output format from D0 to D12
The format of binary data output varies depending on the measurement mode.
Note: The data output from the terminals is not binary-converted.
Mode
Sub-mode
AREA
Closed
OUTER/
INNER
EDGE
6
GAP/PITCH
EDGE NO
COUNT
POINT
STAIN
GRAVITY
PATT
EDGE
MODE
PST
Output data
Selection
Open
The last 13 bits of AREA measured data.
The first 13 bits of AREA measured data.
Open
Edge measurements
Closed
Edge measurements
Open
Pitch average value
Closed
Pitch average value
Open
Edge number
Closed
Edge number
Open
Count number
Closed
Count number
Open
Dn1.: Pn2. [OFF: background, ON: extraction color]
Closed
The detection result of Dn1.: Pn2. [OFF: x, ON: ❍]
Open
Measured data
Closed
Measured data
Open
X coordinate of the detected point
Closed
Y coordinate of the detected point
Open
X coordinate of the detected point
Closed
Y coordinate of the detected point
Open
X coordinate of the detected point
Closed
Y coordinate of the detected point
1. The nth bit of output data
2. Point n
3. 1: ON/ 0: OFF
4. The decimal point is not output. (The ten-times value of the displayed value is output.)
158
3.
3.
Chapter 6
I/O Timing and Analog Output
Point sensor (Supplemental)
The status of each point (extracted color/non-extracted color) is output when the
PST terminal is open.
The detection result of each point is output when the PST terminal is short-circuited. (Turns ON when the results agree with the [SET] of each point.)
Point 1 to 8 output data corresponding to D0 to D7.
P1,
P2,
...……
P8
↓
D0,
↓
D2
...……
↓
D7
● Analog output
Use the special cable (OP-41420) for connection.
6
159
Chapter 6
I/O Timing and Analog Output
6.2 Input/Output Timing Diagrams
This section describes the timing diagrams in RUN mode for each measurement
mode.
ARE/CON timing
1/30 sec.
1
Internal
trigger
2
WO1 to WO8
WOR
ANALOG
OUTPUT
1
1
3
4
2
3
2
3
5
4
4
5
5
ON
STO
OFF
20ms
ON
BUSY
OFF
RS-232C
OUTPUT
1
4
CONT
•
•
•
6
160
The process is repeated every 1/30 of a second.
The RS-232C output skips at a given interval. (The output cycle varies depending on the number of windows and the baud rate setting.)
RS-232C data transmission is stopped when the CONT is short-circuited.
Chapter 6
I/O Timing and Analog Output
INS/TRG and INS+POS timing
1 ms min.
ON
TRG
OFF
WO1 to WO8
WOR
WI0 to WI2
100 ms
D0 to D12
ANALOG
OUTOPUT
4 ms
4 ms
2 ms
2 ms
ON
STO
OFF
ON
BUSY
OFF
RS-232C data
transmission
•
•
•
•
•
•
•
•
•
Processing time
(T=00000)
232C
data
At the moment of the TRG signal input, the STO output is turned off, and the
BUSY output is turned on.
When the TRG signal is input and the judgment result is determined, the outputs of WO1 to WO8 and WOR are provided, and the STO output is turned on.
The previous judgment output is retained during the processing time. The RS232C data transmission is also activated.
The window data outputs (D0 to D12) show the data for the windows specified
with the output window selection inputs (WI0 to WI2). The settings of WI0 to
WI2 are effective even after the judgment result is determined. The STO output
is turned off during the output window selection. Read the data while the STO
output is on.
To select windows using the WI0 to WI2 input signals, set “CHANGE” in the
environmental setting menu to “TERMINAL”.
Limit the rising time variation of the binary data of WI0 to WI2 to 3 ms or less.
The TRG input is accepted during RS-232C communication to start new processing. The RS-232C communication output is continued.
The TRG input and the communication command are not accepted while the
BUSY output is on.
The STO output is turned off during the period between the first TRG input after
power on, RUN mode selection or program number selection, and the determination of the judgment result.
When the data transmission period of RS-232C communication is 33 ms or
less, the period while the BUSY output is on or the processing time does not
include RS-232C transmission time. It shifts to TRG waiting status after turning
off the BUSY output at the end of the processing time. The transmission time
varies with the number of windows, output settings (➮ See page 182), and the
baud rate setting.
161
6
Chapter 6
I/O Timing and Analog Output
ABS. POS and REL. POS timing
1 ms min.
ON
TRG
OFF
WO1 to WO4
WOR
WI0 to WI2
100 ms
15 ms min.
ON
PST
OFF
10 ms
D0 to D12
X-coordinate Y-coordinate X-coordinate
X-coordinate
P.POLE
ANALOG
OUTOPUT
4 ms
4 ms
1 ms
ON
STO
OFF
4 ms
ON
BUSY
OFF
2 ms
Processing time
(T=00000)
RS-232C data
232C
data
transmission
•
6
•
•
When the TRG signal is input and the judgment result is determined, the outputs of WO1 and WOR are provided and the STO output is turned on. The
previous judgment output is retained during the processing time.
For the position data output, the X coordinate is output while the PST input is
off, and the Y coordinate is output while the PST input is on. The PST input is
effective after the judgment result is determined. While the X and Y coordinates
are switched, the STO output is turned off. Read the data while the STO output
is on.
The STO output is turned off during the period between the first TRG input after
power-on, RUN mode selection or program number selection, and the determination of the judgment result.
Program number selection timing
● Continuous operation: OFF
Program No. 1
CI0 to CI3
Program selection time
Program No. 2
Program selection time
ON
BUSY
OFF
Program No. 1
Program No. 2
Program No.
•
•
•
•
162
To select a program number using the I/O terminal, set “CHANGE” in the
environmental setting menu to “TERMINAL”.
The average program selection time is 230 ms. It depends on the settings.
Limit the rising time variation of the binary data of a program number selection
input to 3 ms or less.
The CI0 to CI3 are level-locked.
Chapter 6
I/O Timing and Analog Output
Continuous operation: ON
ON
CONT
OFF
ON
TRG
OFF
ON
BUSY
OFF
Program selection time +
processing time (20 ms min.)
Program selection time +
processing time (20 ms min.)
ON
STO
OFF
CI1 to CI3
Program No.
•
•
•
•
•
•
•
•
•
•
*
Program No. 0
Program No. 0
Program No. 1
Program No. 1
Program No. 2
Program No. 2
Program No. 0
Program No. 0
When the program number is externally selected while the CONT input is on,
the stored image is processed again with the new settings.
To turn on CONT input, set “CHANGE” in the environmental setting menu to
“TERMINAL”.
The average program selection time is 230 ms. It depends on the settings.
Limit the rising time variation of the binary data of a program number selection
input to 3 ms or less.
The CI0 to CI3 are level-locked.
The menu screen does not reflect continuous operation. Only the message
“CONT” appears on the screen. The menu screen shows the measured value of
the program number processed at the TRG input.
Continuous operation is completed when the program number returns to the
number that was being processed when the TRG signal was input.
When CONT is off during operation, the display is changed to the program No.
and continuous operation is terminated.
The WOR output is the OR output with all windows specified in continuous
operation.
When CONT is input, the message “CONT” is shown at the bottom of the
screen.
The “AUTO SEQUENCE” mode is provided to process the operations of several
preset programs sequentially by automatically switching the program numbers
without any control of the I/O input.
➮ Refer to “Environmental Settings” on page 144 for details.
163
6
Chapter 6
I/O Timing and Analog Output
Timing under AUTO SEQUENCE mode
Program No. 0
setting confirmed
ON
TRG
Program No. 2
Program No. 1
setting confirmed setting confirmed
OFF
15 ms min. 15 ms min.
ON
STO
OFF
ON
BUSY
OFF
Judgment
WO1 to WO8
Program
selection
status
•
•
•
•
•
•
6
Program No. 0
No. 1
No. 2
No. 0
At the moment the TRG input is turned on, the AUTO SEQUENCE mode starts
processing. BUSY is turned on at the moment of TRG input, and it is turned off
when the processing is completed.
STO is turned off when TRG input is turned on, and it is turned on when the
processing is completed and the judgment result is determined for each window.
The judgment result varies with each program number. The previous judgment
output is retained during processing.
The total processing time is the period that BUSY is on.
The WOR output is turned on when a window is judged as unacceptable in all of
the settings.
The characters “ATSQ” are shown at the bottom of the screen.
■ The processing of judgment result
• To judge one unacceptable result as “unacceptable”, check the common falling
points of both WOR output and BUSY.
• If judgment results for each window of each program number are required,
check the judgment output status with the PLC at every STO rising after the
TRG (BUSY) rising. The number of STO risings after TRG input indicates the
program number.
Screen registration timing (RUN mode)
ON
REC1
OFF
ON
REC2
OFF
ON
TRG
OFF
ON
BUSY
OFF
Preparation for
screen registration
Screen
registration
Preparation for
operation
REC1: CAM1
REC2: CAM2
•
164
When the CONT terminal is short-circuited while REC1/REC2 is short-circuited,
the RAW SCREEN is displayed and the screen updates without TRG inputs. A
cross-shaped cursor appears on the screen. During this period, the screen is
not registered even when TRG signal is input.
Chapter 6
I/O Timing and Analog Output
6.3 I/O Circuit
This section describes specifications and circuit diagrams for each terminal.
Input circuit diagram
NPN model
+24 V
+5 V
3 kΩ
1.5 kΩ
IN
IN
2.2 kΩ
470 Ω
COM2
COM1
PNP model
8.2 kΩ
3 kΩ
IN
IN
3 kΩ
470 Ω
COM2
COM1
• Terminal name: TRG
ON voltage: 10 V max. (PNP 10 V min.)
ON current: 3 mA min.
OFF voltage: 17 V min. (PNP 5 V max.)
OFF current: 2 mA max. (PNP 1.5 mA max.)
• Terminal name: CI0 to CI3, PST, REC1 to
2, CONT, WI0 to WI2
ON voltage: 1.5 V max. (PNP 10 V min.)
ON current: 1.5 mA min.
OFF voltage: 3 V min. (PNP 3 V max.)
OFF current: 0.1 mA max.
Output circuit diagram
NPN model
NPN
OUT
NPN
OUT
COM1
COM2
PNP model
V1
PNP
OUT
• Terminal name: STO, WO1 to WO8, WOR
Maximum applied voltage: 30 V
Maximum sink current: 50 mA
Residual voltage: 1 V max.
Leakage current: 0.1 mA max.
CAUTION
• Terminal name: D0 to D12, P.POLE,
BUSY
Maximum applied voltage: 30 V
Maximum sink current: 10 mA
Residual voltage: 1 V max.
Leakage current: 0.1 mA max.
Terminal 0 V (for power supply input), COM1, and COM2 are common via a
choke coil. Be sure that there is no potential difference among the three
terminals.
165
6
Chapter 6
I/O Timing and Analog Output
6.4 Analog Output
6.4.1
Analog output terminals
■ Connection
Connect the CV-701(P)/751(P) to the analog output device using a special cable
(OP-41420).
■
•
•
•
•
Analog output
Analog output bound: 0 to 4.095 V
Analog output resolution: 12 bits
Output impedance: 100 Ω
Analog output precision: 2 % of F.S.
Analog output terminal
100 Ω
6
CAUTION
6.4.2
GND for analog output, video output, and camera housing are common via a
coil. Be sure that there is no potential difference among the three terminals.
Changing analog output settings
The analog output of a measured value is available (output to a mini plug) in a
range of 0 to 4 V. The analog output can be converted to an output voltage value
by using a scaling method. The parameters of analog output can be set for each
window. When the CV is in RUN mode, the voltage of the current measurement
window is output.
Tips
166
• When the CV is operated with the initial settings, output voltage corresponds to the
displayed measured value. For example, when “200.0” is displayed, the output voltage
will be 2 V.
• When the CV is in PROGRAM mode, the output is always 0 V regardless of the
displayed value.
Chapter 6
6.4.3
I/O Timing and Analog Output
Scaling the analog output
Set the scaling of analog output for each window.
This section describes a setting to output the “X” value of [ABS.POS] measurement
mode.
1. Place the cursor on [WIND•1] in the main menu and press the [ENT] key.
The window selection menu appears.
SHUTTER
SCRN REG
WIND•1
2. Select a window to change the analog output setting and press the [ENT]
key.
The window menu appears.
WIND•1
WIND•1
WIND•2
WIND•3
WIND•4
3. Place the cursor on [ANALOG] and press the [ENT] key.
The list of setting parameters appears.
FIT= 00
ANALOG
T=
6
4. Select a desired parameter to be output. Select [X] here.
FIT= 00
X
Y
ANG
FIT
5. Press the [ENT] key.
The scaling setting menu appears.
■ Scaling method
Set the monitor output value for the corresponding two desired points to perform
scaling.
Before scaling
After scaling
Analog output
Analog output
(V)
(V)
SET
DATA H (400.0) ➞ANALOG H (2.000)
DATA L (0)
➞ANALOG L (0)
4
2
0
400.0
Displayed
value
0
400.0
Displayed
value
6. Set [DATA H]. Place the cursor on [DATA H] and press the [ENT] key.
The first digit is shown as highlighted. You can enter a numerical value.
ANALOG
DATA H
→ANALOG H
DATA L
→ANALOG L
X
+4000.00
4.000
+0000.00
0.000
167
Chapter 6
I/O Timing and Analog Output
7. Move the [ENT] key to the right and left to select a digit to be changed.
ANALOG
DATA H
→ANALOG H
DATA L
→ANALOG L
X
+4000.00
4.000
+0000.00
0.000
8. Change the value.
•
With the panel keys
Press the [▲]/[▼] cursor key repeatedly.
•
With the remote control console
Press the [ENT] key up or down repeatedly.
When [▲] cursor is pressed repeatedly, the value increments by one from 0.
After “9”, the second digit is incremented.
When [▼] cursor is pressed or the [ENT] key is pressed down repeatedly, the
value decrements by one until it reaches 0. After “0”, the second digit is
decremented.
9. Press the [ENT] key to confirm the setting.
ANALOG
DATA H
→ANALOG H
DATA L
→ANALOG L
6
X
+4000.00
4.000
+0000.00
0.000
10. Set [ANALOG H], [DATA L], and [ANALOG L] with the same procedure for
[DATA H] described in steps 5 to 8.
ANALOG
DATA H
→ANALOG H
DATA L
→ANALOG L
X
+4000.00
2.000
+0000.00
0.000
11. Press the [ESCAPE] key after setting all of the parameters and return to
the window menu.
The setting of analog output is complete.
Note: When there are two or more output parameters (e.g. X-/Y-coordinates), the
parameter last set will be output. The “●” in step 3 indicates the current selection.
Tips
When INS mode is set to “GAP” or “PITCH”, the average of the measured value is
output.
The setting of analog output can be changed for each window. To set several
windows, select another window number and follow the above procedure (Steps 1
to 10).
168
Chapter 6
I/O Timing and Analog Output
Output parameters
ARE/CON
ARE/TRG,
INS+POS
ABS.POS,
REL.POS
Number of pixels
ARE
Measured value
OUTER
Measured value
INNER
Measured value
GAP
Average of gap-pitch
PITCH
Average of center-pitch
EDGE NO
Number of edge
COUNT
Number of count
POINT
No output
STAIN
Measured value
GRAVITY
Measured value
PATT
X-/Y-coordinates, detection angle, correlation ratio
EDGE
X-/Y-coordinates
6
169
Chapter 6
I/O Timing and Analog Output
MEMO
6
170
Chapter 7
CompactFlash Memory
This section describes how to use the CompactFlash memory with the CV701(P)/751(P).
7.1
Mounting and Dismounting the CompactFlash
Memory ............................................................................... 172
7.1.1 Mounting the CompactFlash memory .................................. 172
7.1.2 Dismounting the CompactFlash memory ............................. 172
7.2
Reading of Data to a Personal Computer ........................ 173
7.3
How to Use CompactFlash Memory ................................. 174
7.3.1 Parameter descriptions ........................................................ 174
7.3.2 Saving the setting in CompactFlash memory ...................... 175
Chapter 7
CompactFlash Memory
7.1 Mounting and Dismounting the CompactFlash Memory
CompactFlash memory can be used with the CV-701(P)/751(P).
This section describes how to use the CompactFlash memory.
7.1.1
Mounting the CompactFlash memory
Insert a CompactFlash memory as illustrated.
Position the CompactFlash memory
observing the correct orientation.
3
2
1
7.1.2
Dismounting the CompactFlash memory
Press the EJECT button to remove the CompactFlash memory from the CV701(P)/751(P).
2
1
7
CAUTION
EJECT button
Do not remove the CompactFlash memory while accessing it. Otherwise, the
data and/or CompactFlash memory may be damaged.
Note: Use KEYENCE optional NR-M32 CompactFlash memory.
172
Chapter 7
CompactFlash Memory
7.2 Reading of Data to a Personal Computer
The data saved on a 32-MB CompactFlash memory (option: NR-M32) can be
recorded on other media such as hard disks and CompactFlash memory, etc.
1. Mount a 32-MB CompactFlash memory (option: NR-M32) to a PCMCIA
adapter (option: C-A1), and then insert into a PC-card slot of a notebook
personal computer.
*
When the CompactFlash memory is not recognized by the system, refer to
the following procedures.
PCMCIA adapter
2
1
■ Recognition of a CompactFlash memory
A simple setup procedure is required when a CompactFlash memory is used for
the first time. Follow the procedure shown below for the setup. (The display
screen may vary slightly with the PC models and different versions of Windows.)
Procedures
1. When inserting a CompactFlash memory to the PC-card slot of a personal
computer for the first time the display screen below will automatically appear.
A driver file for CompactFlash memory comes standard with Windows. Additional devices such as FD are not required.
2. Click [Finish].
The setup for the CompactFlash memory driver is complete.
2. Open My Computer from the desktop and double-click on the icon named
as “Nr_m32_8” for the CompactFlash memory drive. The saved data will
be displayed.
3. When saving the data to different media, drag and drop the data to the
desired media to copy them.
Tips
Files with the extension “.bmp” can be opened with image processing software (Windows
Accessory, Paint, etc.).
173
7
Chapter 7
CompactFlash Memory
7.3 How to Use CompactFlash Memory
The following three types of data can be stored in CompactFlash memory.
•
•
•
BASE SET: Environmental setting data
WINDOW SET: Setting data
SCREEN: Saved screen
Up to 16 setting data and registered screens and 8 [SVD SCRN] screens can be
saved on the internal memory of the CV-701(P)/751(P). Use CompactFlash
memory to save more settings and screens.
Tips
7.3.1
The settings, registered screens and saved screens can be saved in a PC by using an RS232C communication interface.
Parameter descriptions
FILE TYPE
Select a file type from the following three types. Select the desired file type to be
set.
•
•
•
BASE SET: Environmental setting data (1 KB)
WINDOW SET: Setting data, registered screen (16 settings: approx. 4.2 MB)
NG SCREEN: Saved screen
ACTION
Select the desired action to be executed from the following six items.
Select an item in [ACTION] and choose [EXECUTE].
SAVE
: Save the selection of setting data, registered screens and save
screens in CompactFlash memory.
LOAD
: Read the selection of setting data, registered screens and save
screens from CompactFlash memory.
DELETE
: Delete the selected files from CompactFlash memory.
SAVE BMP : Save the saved screen in CompactFlash memory in bitmap
format.
DELETE BMP : Delete saved screens in bitmap format from CompactFlash
memory.
UPDATE LIST: Update the list of files saved in CompactFlash memory.
7
Note 1: The CV processes the set of registered screens and setting data for 16
programs as a single unit. The program numbers are not processed individually in
SAVE and LOAD operation.
Note 2: Save data in RAW format before saving files in bitmap format.
SELECT
Select the saved screen.
The display is shown only when [NG SCREEN] is selected in [FILE TYPE].
174
Chapter 7
CompactFlash Memory
FILE NAME
The name of the file.
The format of a file name is as follows.
(File type)
BS
(Number). (Extension)
000
DAT
The numerical values can be changed from 0 to 999.
The file type and extension are defined automatically.
“●” is shown next to the file name when the saved screen file in stored in bitmap
form.
BS 000 .DAT : Environmental setting data
WS 000 .CV7 : Setting data, registered screen data
NG 000 .RAW : Saved screen data
NG 000 .BMP : Saved screen data in bitmap format
LABEL
The characters are set to the file as an identification label. Up to ten characters can
be designated.
EXECUTE
Press the [ENT] key to execute the actions set in the [ACTION] menu.
7.3.2
Saving the setting in CompactFlash memory
This section describes the procedure to save the settings in CompactFlash
memory.
The procedure can be applied to the saving of other data.
1. Display the environmental setting menu.
➮
Refer to page 144 to display the environmental setting menu.
MEMORY CARD
WHITE BALANCE
SETUP MENU
7
CHANGE
OUT MODE
RS232C BPS
RS232C OUT
CONSOLE
N.O.
38400
0000000
LANGUAGE
OUTPUT SYMBOL
AUTO OFF
TRIGGER
SAVE SCR
JAPANESE
COLOR
OFF
EXTERNAL
OFF
COPY NO.
AUTO SEQUENCE
No.00
OFF
CLOCK
00/03/30
06:46:46
TO No.00
NUM 4
2. Place the cursor on [MEMORY CARD] and press the [ENT] key.
3. The CompactFlash memory menu is displayed.
FILE TYPE
ACTION
WINDOW SET.
UPDATE LIST
FILE NAME
LABEL
EXECUTE
WS000
.CV7
FILENAME
DATE
o : WITH BMP
TIME
LABEL
4. Change the file type settings. Place the cursor on [FILE TYPE] and press
the [ENT] key.
The cursor moves to the right column automatically. You can change the
setting.
175
Chapter 7
CompactFlash Memory
5. Change the file type.
Select [WINDOW SET].
FILE TYPE
ACTION
WINDOW SET.
UPDATE LIST
FILE NAME
LABEL
EXECUTE
BS000
.DAT
• With the panel keys
Press the [▲]/[▼] cursor keys.
• With the remote control console
Press the [ENT] key up or down.
6. Press the [ENT] key to confirm the setting.
7. Set the [ACTION].
Refer to steps 4 to 6 to select and confirm the [SAVE].
8. Select the [FILE NAME]. Place the cursor on [FILE NAME] and press the
[ENT] key.
The cursor goes to the first digit of the [FILE NAME] automatically. You can
change the numerical value.
FILE NAME
LABEL
EXECUTE
WS000
.CV7
9. The numerical value of [WS000.CV7] for [FILE NAME] can be changed.
10. Move the cursor to the left or right to select the desired digit to be
changed.
11. Change the numerical value.
• With the panel keys
Press the [▲]/[▼] cursor keys repeatedly.
7
• With the remote control console
Press the [ENT] key up or down repeatedly.
The value increments by one from 0 every time the [▲] cursor is pressed.
After 9, the value returns to 0. When [▼] cursor is pressed or the [ENT] key
is move down repeatedly, the value decrements by one to 0. After 0, the
value returns to 9.
12. Press the [ENT] key to confirm the [FILE NAME].
Tips
176
When files are already stored in the CompactFlash memory, place the cursor on the file
name in the list and press the [ENT] key to confirm the selection.
Chapter 7
CompactFlash Memory
13. Set the [LABEL]. Place the cursor on [LABEL] and press the [ENT] key.
The keyboard menu appears on the screen.
FILE NAME
LABEL
EXECUTE
012 3
ABC D
K LMN
U VW X
✱#
WS000
4
E
O
Y
5
F
P
Z
.CV7
6
G
Q
.
7
H
R
/
8 9
I J
S T
– :
END
14. A green frame appears on the “0” in the keyboard menu. Move the frame
to the desired character to be set.
•
With the remote control console
Move the [ENT] key in the desired direction to move the frame in the respective
direction.
▲
With the panel keys
Press the [▲][▼][ ][ ] cursor keys to move the frame in the desired direction.
▲
•
T_
012 3
ABC D
K LMN
U VW X
✱#
4
E
O
Y
5
F
P
Z
6
G
Q
.
7
H
R
/
8 9
I J
S T
– :
END
15. Press the [ENT] key to input the character with the frame to [LABEL].
▲
▲
Up to ten characters can be designated for the [LABEL]. The digits of the
current selection are shown underlined in green. To alter the digit to be
changed, select the [ ]/[ ] on the lower- right corner of the screen and press
the [ENT] key. The underline moves to the right or left. Press [CLEAR] key to
delete underlined characters.
TEST_
012 3
ABC D
K LMN
U VW X
✱#
4
E
O
Y
5
F
P
Z
6
G
Q
.
7
H
R
/
8 9
I J
S T
– :
END
7
16. After setting the [LABEL], move the frame to [END] on the lower-right
corner of the keyboard menu and press the [ENT] key.
17. Check the defined settings and execute.
Place the cursor on [EXECUTE] and press the [ENT] key.
FILE NAME
LABEL
EXECUTE
WS000
TEST
.CV7
Note 1: Make sure that the CompactFlash memory is inserted before the execution. When the CompactFlash memory card is not inserted before the execution,
the error message “PLEASE INSERT CF CARD.” appears on the screen. Press
the [ESCAPE] key to dismiss the error message. Insert the CompactFlash memory
card and try the execution again.
Note 2: Do not insert/eject the CompactFlash memory during execution.
18. After the settings are confirmed, press the [ESCAPE] key to return to the
environmental setting menu.
Press the [ESCAPE] key again to return to the setting menu.
177
Chapter 7
CompactFlash Memory
MEMO
7
178
Chapter 8
RS-232C Interface
This section describes the connection between the CV-701(P)/751(P) and a
personal computer.
8.1
Overview ............................................................................. 180
8.1.1 Specifications ....................................................................... 180
8.2
Connection ......................................................................... 181
8.3
Commands and Data Formats .......................................... 182
8.3.1
8.3.2
8.3.3
8.3.4
8.3.5
8.3.6
Commands in PROGRAM mode ......................................... 182
Commands for CompactFlash memory ............................... 187
Commands in RUN mode .................................................... 188
Output data format ............................................................... 189
Command list ....................................................................... 193
Applications of RS-232C communication setting ................. 194
Chapter 8
RS-232C Interface
8.1 Overview
The CV-701(P)/751(P) features an RS-232C interface.
This section describes the communication commands using RS-232C.
The communication function enables the following controls and data outputs:
• Select the operation mode (PROGRAM/RUN mode selection).
• Read and write programs.
• Register the screen.
• Read and write the registered screen.
• Read the input screen.
• Read and write the set values.
• Read the saved screen.
• Input trigger signals.
• Select the output data (judgment result, number of pixels, coordinates, correlation ratio, angle).
• Read the output data selection.
• Output data.
• Re-output data.
• Read and write the CompactFlash memory.
8.1.1
Specifications
Same as a modem that conforms to the EIA (Electronic Industries Association) RS232C
Duplex
Synchronization
Data format
ASCII
Data length
8 bits
Stop bit length
1 bit
Parity check
None
Baud rate
Data delimiter
X parameter
8
180
Full
Start/stop
9600/19200/38400 bps
CR
Only with binary data-responses
➮
Refer to page 143 for the baud rate adjustment.
➮
Refer to page 182 for the commands and data formats.
Chapter 8
RS-232C Interface
8.2 Connection
Connection with a PC
Connect the CV-701(P)/751(P) to a personal computer using a special cable OP27221 (Cable length: 3 m)
■ Connection
PC
25-pin
D-sub connector
Ferite core
OP-25057 for
9-pin connector
I/O
OP-27221
(Cable length: 3 m)
O
VIDET
OU
RA
ME
CA
2
■ Pin assignment
■ Wiring (special cable)
CV
PC side
CV side
1 2 3 4 5 6 7 8
25-pin
9-pin
SD (TXD)
2
2
3
SD (TXD)
RD (RXD)
3
3
2
RD (RXD)
SG (GND)
4
7
5
SG (GND)
4
7
RS (RTS)
5
8
CS (CTS)
6
6
DR (DSR)
8
1
CD (DCD)
20
4
ER (DTR)
181
8
Chapter 8
RS-232C Interface
8.3 Commands and Data Formats
This section describes the commands and data formats used for RS-232C communication.
8.3.1
Commands in PROGRAM mode
Send “O0 [Cr]” to the CV-701(P)/751(P) to stop operation.
Tips
After writing data, send SS [Cr] to the CV-701(P)/751(P) to save the settings. If the power
is turned off without saving the settings, the setting data will be lost.
● Reading the program number
The current program number is sent back to the PC.
Command
P R cr
Response
P R ,
NUM NUM
1
2
cr
NUM: Program No. (00 to 15)
● Writing the program number
The current program is changed to the number specified with the PC.
Command
P W ,
Response
P W cr
NUM NUM
1
2
cr
NUM: Program No. (00 to 15)
Error
E R , P W , #1 #2 cr
● Reading output settings
The current output data selection (judgment result, number of pixels, measured
value of edge detection, X coordinate, Y coordinate, correlation ratio, and rotation
angle) is sent back to the PC. The initial settings for all data are 0.
8
Command
A R cr
Response
A R ,
NUM NUM NUM NUM NUM NUM NUM
0
1
2
3
4
5
6
cr
Data 0: Output setting of judgment result (0: OFF, 1: ON)
Data 1: Output setting of number of pixels (0: OFF, 1: ON)
Data 2: Output setting of the measured value of the INS mode (0: OFF, 1: ON)
Data 3: Output setting of X coordinate (0: OFF, 1: ON)
Data 4: Output setting of Y coordinate (0: OFF, 1: ON)
Data 5: Output setting of correlation ratio (0: OFF, 1: ON)
Data 6: Output setting of rotation angle (0: OFF, 1: ON)
182
Chapter 8
RS-232C Interface
● Writing output settings
Select the output data (judgment result, number of pixels, measured value of edge
detection, X coordinate, Y coordinate, correlation ratio, and rotation angle). The
writing of output settings can be set in the environmental setting menu.
➮ See page 149.
NUM NUM NUM NUM NUM NUM NUM
Command
A W ,
Response
A W cr
Error
E R , A W , #1 #2 cr
0
1
2
3
4
5
6
cr
● Reading the setting data
The setting data (all data except for the registered screen) for the current program
number is sent back to the PC. The setting data can be saved in the PC.
Command
S R cr
Response
S R ,
Data Data Data
0
1
2
...
Data Data Check-
1238 1238 sum
cr
Checksum range: Data 0 to Data 1239 (1240 data)
Data 0 to Data 1239: Binary data
Calculation is not necessary for the checksum.
● Writing the setting data
The setting data (all data except for the registered screen) is written to the current
program number. The stored setting data can be written from the PC to the CV701(P)/751(P). Be sure to save the data using the SS [Cr] command after writing.
Command
S W ,
Response
S W cr
Data Data Data
0
1
2
...
Data Data Check-
1238 1239 sum
cr
Checksum range: Data 0 to Data 1239 (1240 data)
Data 0 to Data 1239: Binary data
8
Calculation is not necessary for the checksum.
Error
E R , S W , #1 #2 cr
● Reading the environmental setting data
The environmental setting data for the current program number is sent back to the
PC. The setting data can be saved in the PC.
Command
S A cr
Response
S A ,
Data Data Data
0
1
2
...
Data Check-
83
sum
cr
Checksum range: Data 0 to Data 83
Data 0 to Data 83: Binary data
Calculation is not necessary for the checksum.
183
Chapter 8
RS-232C Interface
● Writing the environmental setting data
The environmental setting data is written to the current program number. The
stored setting data can be written from the PC to the CV-701(P)/751(P). Be sure to
save the data after writing.
Command
S B ,
Response
S B cr
Data Data Data
0
1
2
...
Data Check-
83
sum
cr
Checksum range: Data 0 to Data 83
Data 0 to Data 83: Binary data
Calculation is not necessary for the checksum.
Error
E R , S B , #1 #2 cr
Note: The environmental setting includes the white balance adjustment. When
setting two or more CVs, be sure to select the optimal white balance value for each
CV.
● Reading the registered screen
The image data for the registered screen is sent back to the PC. Data for one line
is sent in a single communication. To read the whole image, the transmission is
repeated to read the data from line 0 to 485.
Command
B R , Cn ,
Response
B R ,
Data Data
0
1
NUM NUM NUM
1
...
2
3
cr
Data Data Check-
510 511 sum
cr
Checksum range: Data 0 to Data 511 (512 data)
Data 0 to Data 511: Binary data
Cn: Camera No.
NUM: Line No. (Line 0 to 485) of image data
Calculation is not necessary for the checksum.
● Writing the registered screen
The stored image data in the PC is written to the CV’s registered screen. The
screen registration is saved when writing of image data of LINE 0 to 485 is completed.
8
Command
B W , Cn ,
Data Data Check-
510 511
Response
sum
NUM NUM NUM
1
cr
B W cr
Checksum range: Data 0 to Data 511 (512 data)
Data 0 to Data 511: Binary data
Cn: Camera No. (CAM1: 1, CAM2: 2)
NUM: Line No. (Line 0 to 485) of image data
Calculation is not necessary for the checksum.
184
2
3
,
Data Data
0
1
...
Chapter 8
RS-232C Interface
● Reading the input screen
The stored image saved in the CV is sent back to the PC. Data for one line is sent
in a single communication. To read the whole image, the transmission is repeated
to read the data from line 0 to 485. This operation is enabled during the transmission with O0 [Cr].
Command
B I
, Cn ,
Response
B I
,
Data Data
0
1
NUM NUM NUM
1
...
2
3
cr
Data Data Check-
510 511 sum
cr
Checksum range: Data 0 to Data 511 (512 data)
Data 0 to Data 511: Binary data
Cn: Camera No. (CAM1: 1, CAM2: 2)
NUM: Line No. (Line 0 to 485) of image data
Calculation is not necessary for the checksum.
Note: When incorrect commands are sent, the error message is sent back. The
error message is defined as below.
E R ,
, #1 #2 cr
∆: Command character
● Reading the saved screen
The stored image of the registered screen saved in the CV is sent back to the PC.
Data for one line is sent in a single communication. To read the whole image, the
transmission is repeated to read the data from line 0 to 485.
Command
B N ,
NUM
Response
B N ,
Data Data
0
0
,
1
NUM NUM NUM
1
...
2
3
cr
Data Data Check-
510 511 sum
cr
Checksum range: Data 0 to Data 511 (512 data)
Data 0 to Data 511: Binary data
NUM0: Registered screen No., NUM1/2/3: Line No. of image data (Line 0 to 485)
Calculation is not necessary for the checksum.
8
● Reading the window number
The current window number is sent back to the PC.
Command
U R cr
Response
U R ,
NUM
1
cr
NUM: Window No. (1 to 8)
185
Chapter 8
RS-232C Interface
● Writing the window number
The current window number is changed to the number specified with the PC.
Command
U W ,
Response
U W cr
NUM
1
cr
NUM: Window No. (1 to 8)
● Registering the screen
Save the image captured with the camera as the registered screen.
Command
D
NUM
Response
D
NUM
1
1
cr
cr
NUM: 0=CAM1 and CAM2, 1=CAM1, 2=CAM2
● Saving the setting data
The setting data is saved in the CV’s internal memory. When the power is turned
off without sending this command, the setting data for RS-232C will be lost.
Command
S S cr
Response
S S cr
● Changing to RUN mode
The CV-701(P)/751(P) is switched to RUN mode.
8
186
Command
R 0 cr
Response
R 0 cr
Chapter 8
8.3.2
RS-232C Interface
Commands for CompactFlash memory
Send the commands to access the CompactFlash memory. The commands are
available while the CV is in program mode with O0 [Cr].
● Reading the setting data and registered screen
Read the setting data and image data of the specified file from the CompactFlash
memory. The 16 programs stored under the specified file are written to the CV,
overwriting all current programs.
Command
C S ,
Response
C S cr
NUM NUM NUM
1
2
3
cr
NUM1 to NUM3: File No. in the CompactFlash memory
● Reading the environmental setting data
Read the environmental setting data into the CV from the CompactFlash memory.
Command
C C ,
Response
C C cr
NUM NUM NUM
1
2
3
cr
NUM1 to NUM3: File No. in the CompactFlash memory
Note: The environmental setting includes the white balance adjustment. When
setting two or more CVs, be sure to select the optimal white balance value for each
CV.
● Reading setting data for one program
Setting data for only one program is sent to the CV from the CompactFlash
memory.
Command
C 1 ,
Response
C 1 cr
NUM NUM NUM
1
2
3
, a1 a2 , b1 b2 cr
8
NUM1 to NUM3: File No. in the CompactFlash memory
a1 to 2: Program No. to be read in the file, b1 to 2: Program No. where the read
program will be written to the CV.
● Writing the saved screen
The image data of the saved screen is written on the CompactFlash memory.
Command
C N cr
Response
C N cr
When the CompactFlash memory is full, an error message will be sent.
Important: Make sure not to insert or eject the CompactFlash memory while
access to the CompactFlash memory is made.
187
Chapter 8
8.3.3
RS-232C Interface
Commands in RUN mode
Send [R][0][Cr] to the CV-701(P)/751(P) to switch it to the RUN mode before using
the following commands.
● Trigger
Input a trigger signal
Command
T 1 cr
Response
T 1 ,
Numerical
value data
cr
T G ,
Numerical
value data
cr
(with external trigger)
(Numerical value data: Depends on the output data setting. Refer to the “Output
data format” on page 189.)
● Re-outputting data
Output the latest processing result data again.
Command
M 0 cr
Response
M 0 ,
Numerical
value data
cr
(Numerical value data: Depends on the output data setting. Refer to the “Output
data format”.)
● Stopping
Stop the operation of the CV-701(P)/751(P)
8
188
Command
O 0 cr
Response
O 0 cr
Chapter 8
8.3.4
RS-232C Interface
Output data format
The data formats available with the AW commands are listed below. The available
data for output is limited depending on the measurement mode.
Data format
PROGRAM mode
EDGE
PATT
EDGE
INS+POS 1.
❍
❍
±00000.000
±99999.999
000
100
–180
+ 179
❍
❍
❍
❍
STAIN
❍
POINT 8.
❍
COUNT
±00000.000
±99999.999
EDGE NO.
❍
PITCH
❍
GAP
❍
INNER
❍
OUTER
PATT
❍
GRAVITY
❍
❍
0 (acceptable)
1 (unacceptable)
000000
243840
AREA
No. of pixels
❍
❍
❍
❍
❍
❍
❍
❍
❍
❍
❍
❍
❍
❍
❍
❍
❍
❍
❍
INS 7.
X coordinate
Y coordinate
2.
2, 4.
2, 4.
Correlation ratio
Rotation angle
3.
REL.
POS 6.
❍
Output item
Judgment result
ABS.
POS
INS/TRG
ARE/CON 5.
Normal mode
❍
❍
❍
❍
❍
1. In the INS+POS mode, the output format of the INS measured data is the same as that for INS/
TRG, and the format of the position adjustment is the same as that for ABS.POS.
2. When the edge detection mode is set to either the X- or Y-axis direction only, the coordinate of the
other axis is not output.
3. The output is disabled when the rotation angle is not used.
4. The coordinate output is fixed to “sign + five-digit integer +decimal point + three-digit fraction”.
5. The data output is stopped when the CONT input is short-circuited in the ARE/CON mode.
6. REF WND (reference window) uses the absolute value for judgment or data output. The other
windows use the difference from the REF WND.
7. The output format for INSPECT output varies as follows depending on the measurement mode.
• OUTER, INNER
Measured dimension
• GAP, PITCH
Measured dimension (Maximum and minimum values)
• EDGE NO
Number of detected edge
• COUNT
Counted number
• POINT
Color extraction condition of each point
• STAIN
Measured value
• GRAVITY
Detected X and Y coordinates, angle of principal axis
Measured dimension
±00000.000
±99999.999
Number of edges
±00000.000
±99999.999
Counted number
±00000.000
±99999.999
8
8. Each digit represents the condition of color extraction as follows:
0: Background color, 1: Detected color, 9: Unassigned
(Example) 01019999
189
Chapter 8
RS-232C Interface
Example
To output the number of pixels in “Window 1” and “Window 2”:
1 2 3 4 5 6 , 0 0 1 0 0 0
cr
Window 2 has
1,000 pixels.
Window 1 has
123,456 pixels.
Order of output data
•
•
•
WO1 processing ➞ WO2 processing ➞ ... ➞ WO8 processing [cr]
The judgment output and pixel output are given only for the windows with
settings assigned.
[,] is output as a separator between data.
Example
When WO1 and WO3 are set in “AREA” mode:
(1) If the output data is selected as [1][0][0][0][0][0][0] (the judgment output for
WO1 to WO8), the output data is as follows.
1 , 0
cr
WO3:OK (Acceptable)
WO1:NG (Unacceptable)
(2) If the output data is selected as [1][1][0][0][0][0][0] (the judgment and pixel
output for WO1 to WO8), the output data is as follows.
1 , 1 2 3 4 5
, 0 , 0 0 1 0 0 0
No. of
pixels in WO1
No. of
pixels in WO3
WO1:NG
(Unacceptable)
cr
WO3:OK
(Acceptable)
Example
When WO1 and WO2 are used in “ABS.POS” mode:
If the output data is selected as [0][0][0][1][1][1][1] (X and Y coordinates, correlation
ratio, rotation angle):
+ 0 0 1 4 2 . 0 0 0 , - 0 0 3 6 3 . 0 0 0,0 9 2
8
X coordinate
of WO1
Y coordinate
of WO1
Correlation ratio
of WO1
+ 0 0 5 , + 0 0 3 9 2 . 0 0 0,+ 0 0 5 0 .
Rotation angle
of WO1
X coordinate
of WO2
0 8 9 , + 0 0 8
Correlation
ratio of WO2
190
cr
Rotation angle
of WO2
Y coordinate
of WO2
0 0 0
Chapter 8
RS-232C Interface
Example
When WO1 and WO2 are used in “INS+POS” mode:
(1) When AREA is set to WO1, and OUTER is set to WO2, and the X and Y
coordinates are selected for PATT output in position adjustment.
If the output data is selected as [1][1][1][1][1][0][0] (output of the judgment
result, number of pixels, INS, and X and Y coordinates), and one camera is
connected:
0 ,0 0 2 3 4 5 , 1 , + 0 0 5 1 . 0 0 0,
No. of
WO1:OK
(Acceptable) pixels in
WO1
WO2:NG
(Unacceptable)
OUTER of WO2
+ 0 0 1 0 2 . 0 0 0 , . 0 0 2 0 1 . 0 0 0
Y coordinate of
position adjustment
X coordinate of
position adjustment
(2) Output conditions are the same as that for (1). Two cameras are connected.
WO1: CAM1, WO2: CAM2
0 ,0 0 2 3 4 5,1 , + 0 0 5 1 . 0 0 0 ,
WO1: OK
(Acceptable)
No. of
pixels in
WO1
WO2: NG
(Unacceptable)
OUTER of WO2
+ 0 0 1 0 2 . 0 0 0, + 0 0 2 0 1 . 0 0 0,
X coordinate of position
adjustment for CAM1
Y coordinate of position
adjustment for CAM1
+ 0 0 3 0 5 . 0 0 0, 0 0 2 8 . 0 0 0,
X coordinate of position
adjustment for CAM2
Y coordinate of position
adjustment for CAM2
8
191
Chapter 8
RS-232C Interface
Example
When AUTO SEQUENCE is activated:
If;
Two AREA windows are set to Program No. 0
One OUTER window is set to Program No. 1
X and Y coordinates of the ABS.POS window are set to Program No. 2
The output data is selected as [0][1][1][1][1][0][0] (Output of No. of pixels, INS, and
X and Y coordinates):
0 0 1 0 0 3 ,
0 0 2 5 0 0
cr
The measured value of Program No. 0
+0 0 0 9 0 . 0 0 0
cr
The measured value of Program No. 1
+0 0 1 5 0 . 5 0 0 , +2 1 0 . 3 0 0
cr
The measured value of Program No. 2
When the AUTO SEQUENCE function is activated, the data is output sequentially
with [cr] output for each program No.
8
192
Chapter 8
8.3.5
RS-232C Interface
Command list
Commands in PROGRAM mode
Function
Command
Read program No.
P R cr
Write program No.
P W ,
Read output setting.
A R cr
Write output setting.
A W ,
Read settings.
S R cr
Write settings.
S W ,
Read environmental
setting.
S A cr
Write environmental
setting.
S B ,
Read registered
screen.
Description
Program No. is sent
back to the PC.
NUM NUM
1
2
Program No. is
changed.
cr
The current output
data selection is sent
back to the PC.
NUM NUM
0
1
...
NUM
6
The output data is
selected.
cr
Setting is sent back to
the PC.
DATA DATA
0
1
DATA Check... 1239
sum cr
Setting is written to the
CV.
Environmental setting
is sent back to the PC.
...
DATA Check75 sum
cr
Environmental setting
is written to the CV.
B R , Cn ,
NUM NUM NUM
cr
The image data for the
registered screen is
sent back to the PC.
B W , Cn ,
DATA ... DATA Check0
511 sum cr
NUM NUM NUM
Write registered
screen.
Read input screen.
B I , Cn ,
NUM NUM NUM
Read saved screen.
B N ,
Read window No.
U R cr
Write window No.
U W ,
NUM
NUM
0
,
1
1
1
2
2
2
3
3
3
NUM NUM NUM
1
2
3
,
cr
cr
The registered screen
is written to the CV.
The image in the CV
memory is sent back to
the PC.
The image data for the
saved screen is sent
back to the PC.
Window No. is sent
back to the PC.
NUM
1
cr
Window No. is
changed.
8
Register screen.
D
Save settings.
S S cr
Settings are saved in
the nonvolatile
memory.
RUN
R 0 cr
The CV is set to RUN
mode.
1
cr
DATA DATA
0
1
A screen is registered.
193
Chapter 8
RS-232C Interface
Commands for CompactFlash memory
Function
Command
Read setting data and
registered screen.
C S ,
NUM NUM NUM
Read environmental
setting.
C C ,
NUM NUM NUM
C 1 ,
NUM NUM NUM
Read settings for one
program.
Write saved screen.
1
1
1
2
2
2
3
3
cr
cr
3
,
a1 a2 , b1 b2 cr
Description
Setting data and
registered screen are
read from the
CompactFlash
memory.
Environmental settings
are read from the
CompactFlash
memory.
Settings for one
program are read from
the CompactFlash
memory.
The data for saved
screen is saved in the
CompactFlash
memory.
C N cr
Commands in RUN mode
Function
Description
T 1 cr
A trigger signal is
input.
Re-output data
M 0 cr
The latest data is
output again.
Stop
O 0 cr
The operation is
stopped.
Trigger
8.3.6
Command
Applications of RS-232C communication setting
This section describes the basic flow of the communication setting.
Communication settings with RS-232C
PC
Send O0 cr
8
CV
Measurement mode : RUN operation is stopped.
Waiting for response
Send back O0 cr
AW******* cr
Waiting for response : Set the output data.
Waiting for response
Send back AW cr
Send SS cr
Waiting for response : Save the changed data.
Waiting for response
Send back SS cr
Send RO cr
Waiting for response : Set the CV to RUN mode.
Waiting for response
Send back RO cr
: Agreed
: Agreed
: Agreed
: Agreed
Measurement mode
When a trigger signal is input, the measured results will be output with the RS232C communication.
Output setting with the CV-701(P)/751(P)
➮ Refer to page 149 to select the output data in the environmental setting menu.
When a trigger signal is input, the measured results will be output with the RS232C communication.
194
Chapter 8
RS-232C Interface
Example
When WO1 and WO2 are used in “INS+POS” mode:
(1) When AREA is set to WO1, and OUTER is set to WO2, and the X and Y
coordinates are selected for PATT output in position adjustment.
If the output data is selected as [1][1][1][1][1][0][0] (output of the judgment
result, number of pixels, INS, and X and Y coordinates), and one camera is
connected:
0 ,0 0 2 3 4 5 , 1 , + 0 0 5 1 . 0 0 0,
No. of
WO1:OK
(Acceptable) pixels in
WO1
WO2:NG
(Unacceptable)
OUTER of WO2
+ 0 0 1 0 2 . 0 0 0 , . 0 0 2 0 1 . 0 0 0
Y coordinate of
position adjustment
X coordinate of
position adjustment
(2) Output conditions are the same as that for (1). Two cameras are connected.
WO1: CAM1, WO2: CAM2
0 ,0 0 2 3 4 5,1 , + 0 0 5 1 . 0 0 0 ,
WO1: OK
(Acceptable)
No. of
pixels in
WO1
WO2: NG
(Unacceptable)
OUTER of WO2
+ 0 0 1 0 2 . 0 0 0, + 0 0 2 0 1 . 0 0 0,
X coordinate of position
adjustment for CAM1
Y coordinate of position
adjustment for CAM1
+ 0 0 3 0 5 . 0 0 0, 0 0 2 8 . 0 0 0,
X coordinate of position
adjustment for CAM2
Y coordinate of position
adjustment for CAM2
8
191
Chapter 8
RS-232C Interface
Example
When AUTO SEQUENCE is activated:
If;
Two AREA windows are set to Program No. 0
One OUTER window is set to Program No. 1
X and Y coordinates of the ABS.POS window are set to Program No. 2
The output data is selected as [0][1][1][1][1][0][0] (Output of No. of pixels, INS, and
X and Y coordinates):
0 0 1 0 0 3 ,
0 0 2 5 0 0
cr
The measured value of Program No. 0
+0 0 0 9 0 . 0 0 0
cr
The measured value of Program No. 1
+0 0 1 5 0 . 5 0 0 , +2 1 0 . 3 0 0
cr
The measured value of Program No. 2
When the AUTO SEQUENCE function is activated, the data is output sequentially
with [cr] output for each program No.
8
192
Chapter 8
8.3.5
RS-232C Interface
Command list
Commands in PROGRAM mode
Function
Command
Read program No.
P R cr
Write program No.
P W ,
Read output setting.
A R cr
Write output setting.
A W ,
Read settings.
S R cr
Write settings.
S W ,
Read environmental
setting.
S A cr
Write environmental
setting.
S B ,
Read registered
screen.
Description
Program No. is sent
back to the PC.
NUM NUM
1
2
Program No. is
changed.
cr
The current output
data selection is sent
back to the PC.
NUM NUM
0
1
...
NUM
6
The output data is
selected.
cr
Setting is sent back to
the PC.
DATA DATA
0
1
DATA Check... 1239
sum cr
Setting is written to the
CV.
Environmental setting
is sent back to the PC.
...
DATA Check75 sum
cr
Environmental setting
is written to the CV.
B R , Cn ,
NUM NUM NUM
cr
The image data for the
registered screen is
sent back to the PC.
B W , Cn ,
DATA ... DATA Check0
511 sum cr
NUM NUM NUM
Write registered
screen.
Read input screen.
B I , Cn ,
NUM NUM NUM
Read saved screen.
B N ,
Read window No.
U R cr
Write window No.
U W ,
NUM
NUM
0
,
1
1
1
2
2
2
3
3
3
NUM NUM NUM
1
2
3
,
cr
cr
The registered screen
is written to the CV.
The image in the CV
memory is sent back to
the PC.
The image data for the
saved screen is sent
back to the PC.
Window No. is sent
back to the PC.
NUM
1
cr
Window No. is
changed.
8
Register screen.
D
Save settings.
S S cr
Settings are saved in
the nonvolatile
memory.
RUN
R 0 cr
The CV is set to RUN
mode.
1
cr
DATA DATA
0
1
A screen is registered.
193
Chapter 8
RS-232C Interface
Commands for CompactFlash memory
Function
Command
Read setting data and
registered screen.
C S ,
NUM NUM NUM
Read environmental
setting.
C C ,
NUM NUM NUM
C 1 ,
NUM NUM NUM
Read settings for one
program.
Write saved screen.
1
1
1
2
2
2
3
3
cr
cr
3
,
a1 a2 , b1 b2 cr
Description
Setting data and
registered screen are
read from the
CompactFlash
memory.
Environmental settings
are read from the
CompactFlash
memory.
Settings for one
program are read from
the CompactFlash
memory.
The data for saved
screen is saved in the
CompactFlash
memory.
C N cr
Commands in RUN mode
Function
Description
T 1 cr
A trigger signal is
input.
Re-output data
M 0 cr
The latest data is
output again.
Stop
O 0 cr
The operation is
stopped.
Trigger
8.3.6
Command
Applications of RS-232C communication setting
This section describes the basic flow of the communication setting.
Communication settings with RS-232C
PC
Send O0 cr
8
CV
Measurement mode : RUN operation is stopped.
Waiting for response
Send back O0 cr
AW******* cr
Waiting for response : Set the output data.
Waiting for response
Send back AW cr
Send SS cr
Waiting for response : Save the changed data.
Waiting for response
Send back SS cr
Send RO cr
Waiting for response : Set the CV to RUN mode.
Waiting for response
Send back RO cr
: Agreed
: Agreed
: Agreed
: Agreed
Measurement mode
When a trigger signal is input, the measured results will be output with the RS232C communication.
Output setting with the CV-701(P)/751(P)
➮ Refer to page 149 to select the output data in the environmental setting menu.
When a trigger signal is input, the measured results will be output with the RS232C communication.
194
Chapter 9
Specifications
This section describes the specifications and dimensions.
9.1
Specifications ................................................................... 196
9.2
Dimensions ....................................................................... 198
Chapter 9
Specifications
9.1 Specifications
Controller
Model
No. of pixels
Process cycle
Binary level
Program registration
No. of registered screens
Area sensor
Absolute position detection
Relative position detection
Width
measurement
Pitch/gap
measurement
Mode
Inspection Edge No.
Count
mode
Stain detection
Point sensor
Functions
Gravity
measurement
Position adjustment
Input
AdjustIllumination adjustment
ment
Advance processing
(FILTER function)
Data calculation
Screen Save
Setting Help
Camera input
External trigger input
Program selection
ConContinuous detection
trol
input
Screen registration
Window selection
LCD
monitor
9
Panel
Backlight
Memory card
Video output
RS-232C interface
Control output
NPN
PNP
Numerical value output
Analog output
Display language
Power supply voltage
Rating
Current consumption
Ambient temperature
Environment
Relative humidity
Weight
196
CV-751(P)
CV-701(P)
508 (H) x 480 (V): 240,000 pixels
30 c/s (Varies depending on the setting.)
Color binary conversion processing by color extraction or
color contrast processing
16 programs (8 programs when two cameras are used)
Programs are externally selectable.
16 screens (1 screen/program or 2 screens/program)
8 max./program, Window shape: circle/square/free square
4/program, Window shape: square
4/program, Window shape: square
8/program, Window shape: square
8/program, Window shape: square
8/program, Window shape: square
8/program, Window shape: square/circle
8/program, Window shape: square/circle/circumference/arc
8/program, 8/window
8/program, Window shape: square/circle
Color contrast search/line sensor/color binary gravity/principal axis angle,
X-/Y-axis direction, rotation ±180˚
1 illumination adjustment window/program
(2/program when 2 cameras are used.)
Expand/shrink/median/average/edge emphasis/edge
extraction/shading/brightness up/tint up/invert
Unit conversion (pixel, mm, inch) + Offset
8 screens
Save parameter upon setting
2
1 (Non-voltage input)
Data input (x4), 16 programs selectable (Non-voltage input)
Detection is continued without an external trigger when the program No. is
changed while CONT input is on. (Non-voltage input)
2. Screens are registered by a trigger signal while REC input is on.
(Non-voltage input)
Data input (x3), 8 windows selectable (Non-voltage input)
TFT 5.5 inch, full color
Not provided
Cold cathode fluorescent tube
Not provided
(Life: 40,000 hrs)
CompactFlash memory
Conforming to NTSC system
1 ch, numerical value output and control input/output
(Baud rate: 38,400 bps max. selectable)
NPN open-collector (x9), 50 mA max. (30 V max.)
PNP open-collector (x9), 50 mA max. (30 V max.)
Binary 13 bits, 10 mA max. (30 V max.)
0 to 4 V output, output impedance: 100 Ω
Japanese/English selectable
24 VDC ±10%
1.4 A
700 mA
0 to +40° C (32 to +104° F)
35 to 85%, No condensation
Controller: Approx. 400 g, Remote
Controller: Approx. 900 g
control console: Approx. 160 g
Chapter 9
Specifications
Camera
Model
Image pickup
element
System
Reading
Size
No. of pixels
Pixel shape
Electronic shutter
Lens mount method
Ambient
temperature
Environment
Relative
humidity
Weight
CV-070
Inter-line transfer type color CCD
Progressive (all reading)
1/3 inch
350,000 pixels
Square-pixel/RGB filter
1/30, 1/50, 1/60, 1/100, 1/125, 1/250, 1/500, 1/1000,
1/2000, 1/4000, 1/10000 sec.
C mount
0 to +40˚ C (32 to 104° F)
35 to 85%, No condensation
Camera: Approx. 310 g (including 3 m cable)
9
197
Chapter 9
Specifications
9.2 Dimensions
Controller: CV-701(P)
Unit: mm
47.2
45.2
43
162
2- ø4-4
Mounting hole
150
4
(52)
When memory
card is attached
20.7
37.3
53.2
100
100
35.4
112
8.7
2
4.4
3.9
4.4
(70)
Remote control console: OP-30938
Accessory: CV-701(P) only
R2
44
23
3
12
18 12
9
103
6.5
ø4.5
Cable length: 3 m
198
ø11
Unit: mm
Chapter 9
Specifications
Controller: CV-751(P)
Unit: mm
(191) (Dimension of mounting bracket)
5
175
22.3
59.2
57.2
55
Panel thickness
1.2 to 4.0 mm
111 (Effective display area)
(63.7)
When memory
card is attached
Mounting bracket
Mounting screw
23.2
25
60 83
(Effective
display area)
130
(60)
Panel cutout for CV-751(P) controller
Unit: mm
169+10
207
124 +10
9
190
199
Chapter 9
Specifications
Camera: CV-070
Unit: mm
10
42.8
ø6.6
Cable length: 3 m
8-M3
Depth: 4 max.
8
30
32
ø28 18
30
30
1/4-20UNC
Depth: 5 max.
12
15
10
When plastic fitting (accessory) is attached.
1/4-20UNC
Depth: 6 max.
2-M3
Depth: 5 max.
2-M4
Depth: 5 max.
18
14.7
10
40
24.8
31
34.9
Close-up adapters (Option: OP-35406)
Unit: mm
0.5
1
5 4
10
1 inch
32UN
4
22
1 inch
32UN
4
1 inch
32UN
Lens
Unit: mm
■ 3.5 mm lens: CV-L3
9
2
M1.7
3
*Focus ring lock screw
*Diaphragm ring lock screw
43
P0.75
CU1
Crest32
ø32
3.5mm
ø45
1:1.6
146°
80°
37.5
200
17.526
Chapter 9
■ 6 mm lens: CV-L6
Specifications
A B
37
17.526
4
1.4 engraving
position
CU1
Crest 32
ø29.4
ø32
6mm
ø32.8
ø32
30.5
P0.5
37°
1:1.4
Isopleths
90°
A-A
B-B
12.8
19
Focus ring lock screw
Diaphragm ring lock screw
A B
■ 16 mm lens: CV-L16
24.5
4
17.526
4.4
ø30
A B
ø30
1.6 engraving
position
ø16
CU1
Crest 32
16mm
ø29.3
27P0.5
1 : 1.6
Isopleths
37°
90°
7.5
12.1
A-A
B-B
A B
Diaphragm ring lock screw
Focus ring lock screw
■ 50 mm lens: CV-L50
A
Focus ring lock screw
B
Diaphragm ring
lock screw
12.4
5.5
3-M1.7
1.8 engraving
position
95°
ø32
30.5
P0.5
50mm 1:1.8
120°
CU1
Crest 32
120°
A-A
37
Model
Focal distance
Diaphragm
Point-blank range
Mount
Filter screw
diameter
Weight
B-B
17.526
A
9
105°
3-M1.7
4
Isopleths
B
CV-L3
3.5 mm
F1.6 to CLOSE
0.1 m
C mount
CV-L6
6 mm
F1.4 to CLOSE
0.2 m
C mount
CV-L16
16 mm
F1.6 to CLOSE
0.4 m
C mount
CV-L50
50 mm
F1.8 to CLOSE
1.0 m
C mount
43.0 mm P0.75
30.5 mm P0.5
27.0 mm P0.5
30.5 mm P0.5
Approx. 90 g
Approx. 70 g
Approx. 44 g
Approx. 55 g
201
Chapter 9
Specifications
TFT color monitor (Option: CV-M30)
Unit: mm
Panel thickness
1.0 to 2.0 mm
125
Mounting bracket
Mounting screw
137
(Dimension of
mounting bracket)
51
123
83
(Effective display area)
20°
40°
130
90°
7
111
(Effective display area)
52
160
175
(Dimension of mounting bracket)
Panel cutout for CV-M30 TFT color monitor
Unit: mm
189
124 +10
155 +10
158
9
Display screen size
LCD panel
Matrix size
Color
Drive system
Environment
Weight
202
320 x 3 (H) x 240 (V)
Full color
TFT active matrix system
1.0 V p-p 75 Ω
Video input
Rating
5.5 inch, 111.36 (H) x 85.52 (V) mm
Power supply voltage
24 VDC ± 10%
Current consumption
700 mA max.
Ambient temperature
0 to +40° C (32 to +104° F)
Relative humidity
35 to 85%, No condensation
Approx. 570 g
Chapter 9
Specifications
Ring lamp (Option: CV-R11)
■ Illuminator
* When mounting bracket (L) is attached. (Cable length: 2 m)
Unit: mm
41.5
23
33
Camera mounting hole
4- M2.5 x R4
ø48
14.821.23074
ø92
48
36 55 69
ø90
ø90
16
40
15
42.5
98
Amplifier
140
110
Unit: mm
40
8
15
15
110
15
Mounting bracket (S)
2.8
15
80
20
15
22
Unit: mm
16
R1.6
16.8 23.2 30
14
20
Lighting system
Luminous color of lamp
Lamp dimensions
Average service life 1.
Initial average luminance 2.
Luminance stability
Power supply voltage
Rating
Current consumption
Ambient temperature
Environment
Relative humidity
Weight
Illuminator
Amplifier
Inverter type high-frequency light (25 to 35 kHz)
N-EX (daylight-balanced)
Outer diameter: 80 mm, inner diameter: 56 mm.
Approx. 2000 hrs.
(Luminance deteriorates to 70%.)
800 lx ±10% (250 mm below the lamp center)
± 1.5% for the variation of 100 VAC ±10%
24 VDC ±10% (50/60 Hz common)
20 VA
+5 to +50° C (+41 to 122 ° F)
35 to 90%, No condensation
Approx. 150 g
(including diffuser and mounting bracket)
Approx. 650 g (including cable)
1. The average service life is the normal life expectancy of a lamp before the initial luminance
deteriorates to 70%, with continuous use under an ambient temperature of 25°C (and in a vibrationfree environment.
2. The initial average luminance is the luminance of a lamp in mint condition.
203
9
Chapter 9
Specifications
Mounting stand for CV-751(P) (Option: OP-35481)
Unit: mm
17
30
13
7
100
B-B Cross section
173
7.1
28.6 57
16.4
47.4
17
13.5
99.7
4.1
4.6
10
14.1
28.5
12.3
B
B
70°
79
9
204
Appendices
This section describes general troubleshooting procedures, a list of optional parts, and an index.
Appendix A General Troubleshooting .................................... 206
Appendix B Optional Parts List ............................................... 208
Appendix C Index ..................................................................... 210
Appendix D Sample Sheets for Setup Menu .......................... 213
Appendix E Sample Sheets for Testing.................................. 215
Appendices
Appendix A General Troubleshooting
Troubleshooting
Symptom
Power supply
does not turn on.
No image appears
on the monitor.
Probable Cause
The power cable is not
connected correctly.
The power supply exceeds
the specific range.
The monitor cable is not
connected correctly.
The lens cover is not
removed.
The lens diaphragm is not
adjusted properly.
The power supply is not
turned on.
Corrective action
Connect the power cable
correctly.
Use the power supply within
the specific range.
Turn off the power and then
connect the monitor cable
correctly.
Remove the lens cover.
Appendices
Adjust the lens diaphragm
properly.
Turn on the power. Use the
power supply within the
specific range.
The camera cable is not
Turn off the power and then
connected correctly.
connect the camera cable
correctly.
The monitor is not adjusted Adjust the brightness, hue,
correctly.
etc.
The menu
The lens focus and
Adjust the focus and
appears, but no
diaphragm are not adjusted diaphragm.
properly.
image appears.
An abnormal
The shutter speed is not
Set the proper shutter
image appears.
suitable.
speed.
The lens and CCD lightClean the lens and CCD
receiving surface are not
light-receiving surface with
clean.
an air duster.
The remote control The remote control console Turn off the power, and then
console does not is not connected correctly. connect the console
operate.
correctly.
The control selector is not
Set the control selector to
set to the console.
the console.
RS-232C
The communication cable is Turn off the power, and then
communication is not connected correctly.
connect the communication
disabled
cable correctly.
A proper communication
Check the wiring and
cable is not used.
connect a proper cable.
The communication protocol Change the communication
is not set properly on the
protocol on the PC.
PC.
Judgment
The output unit is not
Refer to the output circuit
result/numeric
connected correctly.
and connect the output unit
value is not
correctly.
output.
The CV-701(P)/751(P) is not Slide the console slide
set to RUN mode.
switch to set RUN mode.
The tolerance is not set
Set the tolerance correctly.
correctly.
The window does not
Retry the settings beginning
enclose the target properly. from the screen registration.
If targets deviate often, use
the position adjustment
function.
The illumination is not
Use a stable illumination
stable.
lamp designed for image
processing.
206
Reference
page
11
196
12
–
13
13
12
14
13
*1
–
12
11
181
181
180
165
*2
*3
*4
15
Appendices
Symptom
The backlight
turns off.
Probable Cause
The inner temperature is
high.
The power
indicator
illuminates red
light.
Corrective action
Reference
page
Ensure that there is
sufficient space for
ventilation around the
controller. Ensure that the
cooling fan is working.
Contact your nearest
KEYENCE office if you find
any abnormality.
7
*1. See page 38.
*2. See page 152.
*3. See pages 63, 77, 93, 114.
*4. See page 39.
Error messages
Message
Cause
Corrective action
• The camera connector is unplugged. Turn off the power, check the
• Another camera is connected.
camera connection, and then
turn on the power again. To
actually change the camera
connection, press the [ENT]
key to initialize the settings and
set the camera again.
USE CAM1
Only Camera 2 is connected.
When using only one camera,
turn off the power, connect to
the CAM1, and then turn on the
power again.
When connecting two cameras,
turn off the power, check the
connection with CAM1, and
then turn on the power again.
INIT. SETTING
The data in the internal memory is
abnormal.
Press the [ENT] key to initialize
the settings.
CANNOT SET
SCREE
Internal damage occurred.
Contact your nearest KEYENCE
office.
Appendices
CAMERA
CHANGED.
INIT SETTING
207
Appendices
Appendix B Optional Parts List
This section lists parts that allow you to maximize the function of the CV-701(P)/
751(P).
Product name
Model
3.5 mm lens
CV-L3
A wide-angle lens with a 3.5 mm
focal length.
6 mm lens
CV-L6
A wide-angle lens with a 6 mm
focal length.
16 mm lens
CV-L16
A standard lens with a 16 mm focal
length.
50 mm lens
CV-L50
A telephoto lens with a 50 mm
focal length.
CV-R11
An 80 mm diameter ring lamp that
offers inverter type higher
frequency light. (Special polarizer
is available. OP-35387)
OP-35406
A set of 0.5, 1, 5, 10, and 22 mm
close-up adapters.
TFT color monitor
CV-M30
A 5.5-inch, low profile color LCD
monitor. Tabletop installation or
panel mounting to a control panel
is available.
Power supply
KV-U3*
KV-U6W
A DC current power supply that
provides 24 VDC, 1.4 A.
(KV-U6W: 0.8 A)
* KV-U3 is not available in Europe.
Ring lamp
Appendices
Close-up adapter
set
208
Appearance
Description
Appendices
Product name
Model
Appearance
Description
Cable for the I/O connector.
(cable length: 3 m)
I/O cable
OP-35341
RS-232C cable
(D-sub 9-pin)
OP-35382
RS-232C cable
(D-sub 25-pin)
OP-25253
Analog output
cable
OP-41420
CompactFlash
memory
NR-M32
A 32-MB CompactFlash memory
C-A1
An adapter to place a
CompactFlash memory to the PC
card slot of a PC
OP-35481
Used when the CV-751(P) is not
panel-mounted.
Stand
Cable to be connected to the
analog output terminal.
(cable length: 2 m)
Appendices
PCMCIA adaptor
A special cable for RS-232C
communication.
(cable length: 3m)
209
Appendices
Appendix C Index
This section provides a list of terms used in this manual in alphabetical order.
Number
24 VDC power supply ................................. 3, 4, 11, 12, 156
24 VDC power supply input terminal ............................... 3, 4
Alphabet
A
Basic settings/PROGRAM No. selection ........................... 36
Basic settings/SCRN REG ................................................ 39
Basic settings/SEL SCRN ................................................. 42
Basic settings/WIND1 ....................................................... 41
Binary conversion ................................................................ ix
C
ABS. POS ................................................................. 23, 118
CALENDAR ..................................................................... 149
ACTION ........................................................................... 174
CHANGE ......................................................................... 145
ANG ........................................................................ 114, 120
CLEAR ........................................................................ 49, 53
ARE/CON .............................................................. 18, 57, 65
[CLEAR] key ................................................................ 32, 33
AREA mode ................................................................ 18, 57
CLOCK ............................................................................ 149
AREA mode/DATA ............................................................ 63
COLOR adjustment trimmer .............................................. 14
AREA mode/PROCES1 .................................................... 66
Color extraction ......... 44, 47, 48, 49, 69, 102, 105, 131, 132
AREA mode/PROCES2 .................................................... 66
COPY (Color setting) ........................................................ 44
AREA mode/PROCES3 .................................................... 66
COPY (Setting data) ....................................................... 146
AREA mode/PROCES4 .................................................... 66
COPY NO. ....................................................................... 146
AREA mode/RAW SCRN .................................................. 66
COUNT ................................................................. 20, 71, 80
AREA mode/color menu .................................................... 68
COUNT/DATA ................................................................... 83
AREA mode/main menu .................................................... 66
COUNT/MASK .................................................................. 81
AREA mode/window menu ............................................... 67
COUNT/MEASURE ........................................................... 80
AREA/DET ........................................................................ 61
COUNT/TOL ..................................................................... 81
AREA/MEASURE .............................................................. 61
COUNT/maximum number ................................................ 80
AREA/TOL ........................................................................ 62
COUNT/saving the settings ............................................... 83
AREAFILT ....................................................................... 101
Camera ......................................................................... 8, 13
AUTO ................................................................................ 47
Camera connector ........................................................... 3, 4
AUTO OFF ...................................................................... 146
Circular [CIRC] window, drawing a ................................... 51
AUTO SEQUENCE ......................................................... 147
Circumference [RING] window, drawing a ....................... 52
AVERAGE ....................................................................... 103
Close-up adapter ................................................................. 9
Analog output .................................................................. 166
Color gradation processing ................................................. ix
Analog output terminal ............................................ 3, 4, 166
CompactFlash memory ........................................... 171, 172
Angle adjustment ............................................................ 114
CompactFlash memory slot ............................................ 3, 4
Angle adjustment ............................................................ 114
Control selector ............................................................. 3, 11
Arc [ARC] window, drawing an .......................................... 52
Correlation ratio ............................................................... 116
B
▼
▼
Cursor ([▲][▼][ ][ ]) keys ............................................... 32
Cursor keys ....................................................................... 32
BACK ........................................................................ 69, 102
Appendices
BL → WH ........................................................................ 129
D
BL ← WH ........................................................................ 129
DATA CAL ....................................................................... 137
BRIGHT adjustment trimmer ............................................. 14
Data format ..................................................................... 189
Backlight .......................................................................... 146
Dimensions ..................................................................... 198
Basic setting procedures ................................................... 36
Basic settings/CLR TYPE (Color type) .............................. 44
Basic settings/COLOR ...................................................... 44
E
Basic settings/COLOR1 .................................................... 44
EDGE EM ........................................................................ 103
Basic settings/COLOR2 .................................................... 44
EDGE EX ........................................................................ 103
Basic settings/Color extraction .......................................... 44
EDGE NO .............................................................. 20, 71, 75
Basic settings/GRAY ......................................................... 44
EDGE SEN .............................................................. 100, 130
Basic settings/MODE selection ......................................... 37
EDGE mode .................................................................... 127
210
Appendices
[ENT] key .......................................................................... 32
INVERT ........................................................................... 103
[ESCAPE] key ............................................................. 32, 33
Illuminator .......................................................................... 15
EXECUTE ....................................................................... 175
Initialization ..................................................................... 142
EXPAND ......................................................................... 103
Input circuit diagram ........................................................ 165
EXTERNAL ..................................................................... 145
Input/Output in [PROGRAM] mode ................................. 143
Edge detection .......................................................... 24, 109
Environmental setting ...................................................... 144
F
FILE NAME ..................................................................... 175
FILE TYPE ...................................................................... 174
FILTER ................................................................... 103, 131
FIT ........................................................................... 116, 120
Features .............................................................................. ix
Free square [F SQR] window, drawing a .......................... 52
G
GRAVITY .............................................................. 20, 71, 91
GRAVITY/MASK ............................................................... 93
GRAVITY/MEASURE ........................................................ 91
GRAVITY/TOL .................................................................. 93
GRAVITY/TOL for angle ................................................... 93
GRAY ................................................................................ 44
H
HUE adjustment trimmer ................................................... 14
K
Key-lock function ............................................................. 152
L
LABEL ............................................................................. 175
LANGUAGE .................................................................... 145
LEVEL ..................................................................... 105, 132
LEVEL (STAIN) ................................................................. 89
LEVEL histogram .................................................... 105, 133
Lens ................................................................................. 3,4
M
MASK .................................................................... 62, 81, 93
MEASURE ........................................................................ 61
MEDIAN .......................................................................... 103
MEMORYCARD .............................................................. 175
MONITOR adjustment trimmer ........................................... 3
Mask window ......................................................... 62, 81, 93
Menu hierarchy ................................................................. viii
Menu screen ..................................................................... 34
Mode selection slide switch ............................................... 33
I
I/O connector ................................................... 3, 4, 156, 157
I/O terminal .............................................................. 3, 4, 156
IGNORE ............................................................................ 48
INNER ......................................................................... 22, 70
INS mode .......................................................................... 70
Modular connector .......................................................... 3, 4
Monitor ................................................................................ 3
Monitor (CV-M30) .......................................................... 4, 12
Monitor cable ..................................................................... 11
N
INS+POS .................................................................. 22, 106
N.C. ................................................................................. 145
INS/COLOR menu ............................................................ 99
N.O .................................................................................. 145
INS/DATA .......................................................................... 97
No. .................................................................................... 36
INS/FILTER ..................................................................... 103
INS/Main menu ................................................................. 97
INS/PROCES1 .................................................................. 97
INS/PROCES2 .................................................................. 97
INS/PROCES3 .................................................................. 97
INS/PROCES4 .................................................................. 97
INS/RAW SCRN ................................................................ 97
INS/TOL ............................................................................ 77
INS/TRG ............................................................................ 70
INS/TRG (AREA) .............................................................. 57
INS/TRG (EDGE NO) ........................................................ 71
O
OBJT1/OBJT2 ................................................................. 125
OFFSET .......................................................................... 138
OUT MODE ..................................................................... 145
OUTER ........................................................................ 19, 70
OUTPUT SYMBOL ......................................................... 145
Optional parts .................................................................. 208
Optional settings ............................................................. 134
Output circuit diagram ..................................................... 165
Over-scanning type monitor .............................................. 10
INS/Window menu ............................................................ 98
INT UP ............................................................................ 103
INTERNAL ...................................................................... 145
P
PITCH (Gap pitch) ....................................................... 19, 70
211
Appendices
INS/MEASURE ................................................................. 76
Appendices
POINT ................................................................... 20, 71, 84
STAIN .................................................................... 20, 71, 87
POINT/[MATCH] ............................................................... 86
STAIN/LEVEL ................................................................... 89
POINT/[SET] ..................................................................... 85
STAIN/MEASURE ............................................................. 87
POINT/point ...................................................................... 84
STAIN/SIZE ....................................................................... 88
POINT/size ........................................................................ 84
SVD SCRN ...................................................................... 134
POINT: presence/absence setting .................................... 85
SW (Search window) ....................................................... 113
POINT: saving the setting ................................................. 86
Saving running image ..................................................... 134
[PROGRAM No.] key .................................................. 32, 36
Screen registration ............................................................ 39
PW (Pattern window) ...................................................... 112
Screen selection ................................................................ 55
Panel keys ..................................................................... 3, 32
Screen selection display ..................................... 60, 74, 112
Pixel .................................................................................. 19
Square [SQR] window, drawing a ..................................... 51
Pixels, number of .............................................................. 57
Position detection ...................................................... 23, 109
Position detection/DATA ................................................. 119
Position detection/FILTER .............................................. 131
Position detection/PROCES1 ......................................... 119
Position detection/PROCES2 ......................................... 119
Position detection/RAW SCRN ....................................... 119
Position detection/color menu ......................................... 122
Position detection/main menu ......................................... 119
Position detection/window menu (EDGE) ....................... 122
Position detection/window menu (PATT) ........................ 120
Power indicator ............................................................... 3, 4
Processing time display .............................. 58, 72, 106, 110
Program No. ...................................................................... 36
R
RAW SCRN ....................................................................... 55
REF WIND (Reference window) ....................................... 26
RS-232C BPS ................................................................. 145
T
TEST ............................................................................... 136
TINT UP .......................................................................... 103
TOL (AREA) ...................................................................... 62
TOL (COORD) ................................................................ 114
TOL (DEV) ...................................................................... 116
TOL (INS) .......................................................................... 77
TRIGGER ........................................................................ 145
[TRIGGER] key ........................................................... 32, 33
Tolerance display ................................................ 58, 72, 106
Tolerance for angle adjustment ....................................... 116
Two cameras ..................................................................... 42
Two cameras, connecting ................................................. 42
U
Under-scanning type monitor ............................................ 10
Unit conversion ......................................................... 22, 137
RS-232C OUT ......................................................... 145, 149
RS-232C interface ........................................................... 179
RUN external control ....................................................... 153
V
Video output terminal .................................................... viii, ix
RUN mode ...................................................................... 152
[RUN/PROGRAM] key ...................................................... 32
Relative position detection ........................................ 25, 124
W
Remote control console ............................................ 3, 4, 12
WHITE BALANCE ........................................................... 148
Ring lamp .......................................................................... 15
WINDOW X ..................................................................... 129
WINDOW Y ..................................................................... 129
S
[WINDOW] key .................................................................. 32
Window ............................................................................. 50
SAVE ................................................................... 64, 79, 117
Window No. ....................................................................... 41
SAVE SCR ...................................................................... 134
Working distance ................................................................. 8
Appendices
SCAN ................................................................................ 75
[SCREEN] key ............................................................. 32, 33
SEN (Color sensitivity) ...................................................... 48
SETUP MENU ................................................................. 140
SHADING ........................................................................ 103
SHRINK ........................................................................... 103
SHUTTER ......................................................................... 38
SHUTTER speed .............................................................. 38
SPAN .............................................................................. 137
SRCH SEN (Search sensitivity) ...................................... 125
SRCH SPD (Search speed) ............................................ 125
212
Z
Zoom ................................................................................. 47
Appendices
Appendix D Sample Sheets for Setup Menu
Sample sheets for setup menu
Appendices
✄
Tear-off line
The adjusting procedures in SETUP menu (➮ page 140) use a black rectangle
placed in the field of view. Cut out this page and use it to adjust the settings.
Cut out the rectangle according to the angle of the field of view.
213
Appendices
Appendices
214
Appendices
Appendix E Sample Sheets for Testing
Appendices
Tear-off Line
The setting procedures in this manual use the following samples.
Cut out this page and use them to practice changing the settings.
215
Appendices
Appendices
216
WARRANTIES AND DISCLAIMERS
(1) KEYENCE warrants the Products to be free of defects in materials
and workmanship for a period of one (1) year from the date of shipment. If
any models or samples were shown to Buyer, such models or samples
were used merely to illustrate the general type and quality of the Products
and not to represent that the Products would necessarily conform to said
models or samples. Any Products found to be defective must be shipped to
KEYENCE with all shipping costs paid by Buyer or offered to KEYENCE for
inspection and examination. Upon examination by KEYENCE, KEYENCE,
at its sole option, will refund the purchase price of, or repair or replace at no
charge any Products found to be defective. This warranty does not apply
to any defects resulting from any action of Buyer, including but not limited to
improper installation, improper interfacing, improper repair, unauthorized
modification, misapplication and mishandling, such as exposure to excessive current, heat, coldness, moisture, vibration or outdoors air. Components which wear are not warranted.
(2) KEYENCE is pleased to offer suggestions on the use of its various
Products. They are only suggestions, and it is Buyer’s responsibility to
ascertain the fitness of the Products for Buyer’s intended use. KEYENCE
will not be responsible for any damages that may result from the use of the
Products.
(3) The Products and any samples (“Products/Samples”) supplied to
Buyer are not to be used internally in humans, for human transportation, as
safety devices or fail-safe systems, unless their written specifications state
otherwise. Should any Products/Samples be used in such a manner or
misused in any way, KEYENCE assumes no responsibility, and additionally
Buyer will indemnify KEYENCE and hold KEYENCE harmless from any
liability or damage whatsoever arising out of any misuse of the Products/
Samples.
(4) OTHER THAN AS STATED HEREIN, THE PRODUCTS/SAMPLES
ARE PROVIDED WITH NO OTHER WARRANTIES WHATSOEVER. ALL
EXPRESS, IMPLIED, AND STATUTORY WARRANTIES, INCLUDING,
WITHOUT LIMITATION, THE WARRANTIES OF MERCHANTABILITY,
FITNESS FOR A PARTICULAR PURPOSE, AND NON-INFRINGEMENT
OF PROPRIETARY RIGHTS, ARE EXPRESSLY DISCLAIMED. IN NO
EVENT SHALL KEYENCE AND ITS AFFILIATED ENTITIES BE LIABLE
TO ANY PERSON OR ENTITY FOR ANY DIRECT, INDIRECT, INCIDENTAL, PUNITIVE, SPECIAL OR CONSEQUENTIAL DAMAGES (INCLUDING, WITHOUT LIMITATION, ANY DAMAGES RESULTING FROM LOSS
OF USE, BUSINESS INTERRUPTION, LOSS OF INFORMATION, LOSS
OR INACCURACY OF DATA, LOSS OF PROFITS, LOSS OF SAVINGS,
THE COST OF PROCUREMENT OF SUBSTITUTED GOODS, SERVICES
OR TECHNOLOGIES, OR FOR ANY MATTER ARISING OUT OF OR IN
CONNECTION WITH THE USE OR INABILITY TO USE THE PRODUCTS,
EVEN IF KEYENCE OR ONE OF ITS AFFILIATED ENTITIES WAS ADVISED OF A POSSIBLE THIRD PARTY’S CLAIM FOR DAMAGES OR
ANY OTHER CLAIM AGAINST BUYER. In some jurisdictions, some of the
foregoing warranty disclaimers or damage limitations may not apply.
BUYER’S TRANSFER OBLIGATIONS: If the Products/Samples purchased by Buyer are to be resold or delivered to a third party, Buyer must
provide such third party with a copy of this document, all specifications,
manuals, catalogs, leaflets and written information provided to Buyer pertaining to the Products/Samples.
217
96M0568
User’s Manual
High-speed, High-accuracy, Color Vision System
CV-700 Series
AFFILIATED COMPANIES
KEYENCE CORPORATION
1-3-14, Higashi-Nakajima,
Higashi-Yodogawa-ku,
Osaka, 533-8555, Japan
Phone: 81-6-6379-2211
Fax: 81-6-6379-2131
KEYENCE CORPORATION OF AMERICA
Phone: 201-930-0100 Fax: 201-930-0099
KEYENCE (THAILAND) CO., LTD
Phone: 02-369-2777 Fax: 02-369-2775
KEYENCE DEUTSCHLAND GmbH
Phone: 06102-36 89-0 Fax: 06102-36 89-100
KEYENCE TAIWAN CO., LTD
Phone: 02-2627-3100 Fax: 02-2798-8925
KEYENCE (UK) LIMITED
Phone: 01908-696900 Fax: 01908-696777
KEYENCE (HONG KONG) CO., LTD
Phone: 3104-1010 Fax: 3104-1080
KEYENCE FRANCE S.A.
Phone: 01 47 92 76 76 Fax: 01 47 92 76 77
KEYENCE INTERNATIONAL TRADING
(SHANGHAI) CO., LTD.
Phone: 021-68757500 Fax: 021-68757550
KEYENCE SINGAPORE PTE LTD
Phone: 392-1011 Fax: 392-5055
KEYENCE (MALAYSIA) SDN BHD
Phone: 03-252-2211 Fax: 03-252-2131
KEYENCE KOREA CORPORATION
Phone: 02-563-1270 Fax: 02-563-1271
© KEYENCE CORPORATION, 2000 CV700-UM-3-0202 Printed in Japan
CV-700 Series User’s Manual
Specifications are subject to change without notice.