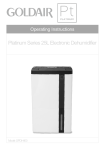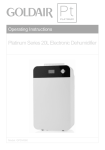
1
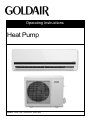
Operating Instructions
Heat Pump
Model: GHP100, GHP200, GHP300
General Care and Safety Guide
Thank you for choosing a Goldair Heat Pump. This Goldair Heat has been
designed and manufactured to high standards of engineering and with
proper use and care, as described in this leaflet, will give you years of
useful service. Please read these instructions carefully.
1.
Use only the voltage specified on the rating
label of the unit.
2. Keep all objects at least 1 metre from the
front and sides of the unit. Do not place unit
close to radiant heat source.
3. Do not operate in areas where petrol, paint
or other flammable liquids are used or
stored.
4. Do not insert or allow foreign objects to
enter any ventilation or exhaust opening, as
this may cause an electric shock, fire or
damage to the unit. Do not sit on the unit.
5. Do not operate this unit with a damaged
cord, plug or after the unit malfunctions or
has been dropped or damaged in any
manner. contact the Goldair Customer
Services Team to arrange examination,
electrical service or repair.
6. This unit is intended for household use only
and not for commercial or industrial use.
7. Use this unit only as described in this
manual. Any other use is not recommended
by the manufacturer and may cause fire,
electrical shock or injury.
8. The common cause of overheating is
deposits of dust or fluff in the unit. Ensure
these deposits are removed regularly by
unplugging the unit and vacuum cleaning
the air vents and grills.
9. Do not use abrasive cleaning products on
this unit. Clean with a damp cloth (not wet)
rinsed in hot soapy water only. Always
remove plug from the mains supply before
cleaning.
10. Do not connect the unit to mains supply until
completely assembled and adjusted.
11. Ensure the Heat Pump is installed on a flat,
stable, heat-resistant surface.
12. Do not install the Heat Pump directly
above or below any power socket or
switch.
13. This unit is not intended for use by persons
(including children) with reduced physical,
sensory or mental capabilities or lack of
experience and knowledge, unless they
are supervised or have been given
instruction concerning the use of the unit
by a person responsible for their safety.
14. Do not use this unit in the immediate
surrounds of a bath, a shower, or a
swimming pool or other liquids. The unit
must not be immersed in any liquids.
15. When the unit has been unpacked, check it
for transport damage and ensure all parts
have been delivered. If parts are missing
or the unit has been damaged, contact the
Goldair Customer Services Team.
16. If your unit does not work, or is not working
properly, contact the place of purchase or
the Goldair Customer Services Team.
Repair work on the unit by unqualified
persons can cause serious risk to the user.
17. There are no user serviceable parts
installed in the unit.
18. Do not place the unit in wardrobes or other
enclosed spaces as this may cause fire
hazards.
19. This unit is not supposed to be used in or
around locations where foodstuffs, works
of art or delicate articles of science, etc are
stored.
20. Indoor use only.
21. Children should be supervised to ensure
that they do not play with the unit.
22. It is important that you do not cover this
heat pump.
TECHNICAL SPECIFICATION
Model No:
Supply:
Wattage:
GHP100, GHP200, GHP300
220-240VAC 50Hz
GHP100 – 660/680W GHP200 1490/1580W
GHP300 1940/2060W
Overview of your Heat Pump
Heat pumps draw heat from air outside to heat a home, transferring heat
rather than running an element to create it. This can be reversed in
summer, so that the unit is used to cool the room.
INDOOR UNIT
1.
4.
5.
Side clip to access manual
operation
LED Control panel
Horizontal louvres (for manual
adjustment only)
Air outlet
Oscillating louvre
6.
7.
8.
9.
Air inlet
Air outlet
Connecting pipe & cable
Stop valve
2.
3.
1
2
3
4
5
OUTDOOR UNIT
6
7
8
9
CONTROL PANEL
Remote Sensor
Defrost/Temperature
adjusting indicator
Temperature
indicator
Power
on/off
Timer
indicator
Overview of your Heat Pump
Goldair heat pumps are covered under warranty only when a Goldair
Approved Installer has completed the install, any heat pump not installed
by a Goldair Approved Installer will void its warranty.
REMOTE
For best results, aim the remote directly at the
remote sensor on the control panel.
The remote has a 5 metre range of operation.
The remote control requires 2x AAA batteries
(included). Remove the plastic tab from the rear
of the remote to install batteries.
1.
2.
3.
4.
5.
6.
7.
8.
9.
10.
11.
12.
13.
14.
Temperature increase
Temperature decrease
Mode
Swing
Reset
Air Direction (oscillating louvre)
LED display
Fan speed
Power on/off
Timer on
Sleep
Timer off
Lock
Turbo
MEMORY FUNCTION
If power supply is cut off when the appliance is
running, or when the unit is powered off, it will
automatically restart in the last working mode
once power is restored.
REMOTE CONTROL PANEL
The control panel on the Remote indicates the
Heat Pump mode and function.
1.
2.
3.
4.
5.
6.
7.
Temperature indicator
Transmitting indicator (blinks
when the remote transmits to
the indoor unit control panel)
Power on/off indicator
Operation mode indicator
Lock indicator
Timer indicator
Fan speed indicator
NOTE: You will hear a beep each time a
remote control button is pressed, as it
transmits to the indoor unit control panel.
(°C)
Operating your Heat Pump
Always choose a safe location for the Heat Pump, keeping in mind the
safety precautions outlined. Ensure all packaging has been removed from
the unit before use.
WARNING Keep all objects at least 1 metre from
the front and sides of the unit.
Note: When the Heat Pump is turned on for the first
time, it may release a slight odour or mist, or
cracking noise. This is a normal occurrence caused
by the initial heating of the internal components and
should not occur again.
OPERATION
Once the Heat Pump has been installed by a
Goldair approved installer, check that the batteries
of the remote are inserted correctly before
attempting to power the unit on.
Press the Power button on the Remote to turn the
unit on. The power on/off indicator will display on
the control panel.
The LED on the control panel will display the default
temperature of 24°C and begin to blow out air on
Low fan speed in heat mode.
Note: When the unit is powered on it may take
several minutes to heat to the set temperature
before begging to blow air. This is normal, and is
indicated on the control panel by the
Defrost/Temperature adjusting indicator being
illuminated.
MODE
Press Mode button to switch between the following:
AUTO - COOL - DRY - HEAT - FAN
In AUTO mode, the fan speed will cycle between
low and high to maintain the set temperature, and
cannot be adjusted. When the unit is run in this
mode, AUTO indicator will illuminate on the Control
Panel.
In COOL mode, water may drip from the unit if it has
been running non-stop for an extended period of
time, it is recommended if this condensation occurs
to adjust the louvre to vertical and adjust the fan
speed to high.
In DRY mode, the fan speed cannot be adjusted.
When the room temperature is lower than 10°C in
this mode, the unit will automatically stop
dehumidifying until the room temperature increases
again.
In HEAT mode use the High fan speed setting
initially and then switch to the Low speed setting for
greater economy.
In FAN mode, the temperature cannot be adjusted.
To turn the unit off, press the Power Button again.
Note: When the unit has been powered off the fan
will continue to run as the unit shuts down. This is
normal, and assists to prolong the life of the unit.
This can be overridden by pressing the Power
button a third time.
THERMOSTAT
Press the arrow up or arrow down buttons to adjust
the temperature to your desired setting (from 1730°C). Once you have set the desired temperature,
the LED on the control panel will blink and then
display the new set temperature. The unit will now
work to adjust the room temperature to the set
temperature.
FAN SPEED
Press Fan Speed button to switch between the
following:
AUTO - HIGH - MED - LOW
In AUTO mode, the fan speed will cycle between
low, medium and high to achieve the set desired
room temperature.
When switching between modes, the unit will pause
as it re-adjusts, this is indicated by the LED
Defrost/Temperature adjusting indicator displayed
on the Control Panel. Once the unit has adjusted
the internal temperature, the fan will begin to blow
air at the set temperature, note that this pause while
the unit re-adjusts may take several minutes.
SLEEP
When the SLEEP button is pressed, the unit will
change the fan speed to low.
Sleep setting can only be set in AUTO - COOL HEAT modes. When Sleep is selected in Cool or
Heat modes the unit will adjust the set temperature
by 1-2°C per hour for the first 2 hours of operation,
and then remain for the next 5 hours before the unit
switches off automatically.
Operating your Heat Pump
TIMER
SWING
The Heat Pump is fitted with a timer that will turn the This button turns the unit oscillation function on and
unit on or off after the desired time has elapsed.
off.
To set the unit to turn on:
Press the TIMER ON button to adjust the length of
time from 1 – 24hours that you would like the unit to
run for before turning on. Each press of Timer On
button will adjust the length of time before the unit
switches on. The first 1-10 hours will adjust in 30
minute increments with each press of the Timer On
button, the remaining 11-24 hours will adjust in 1
hour increments.
To turn off the Timer setting function, set the Timer
On back to 0 hours.
AIR DIRECTION
The louvre can be manually adjusted to the desired
angle by pressing this button.
Note: The louvre will automatically close when the
unit is powered off.
HORIZONTAL LOUVRE
The Heat Pump is fitted with 3 horizontal louvres
than can be manually adjusted at the unit only.
TURBO
This function can be set while the unit is running, or This function operates in Cool mode only.
when the unit is powered off.
By pressing the TURBO button the unit will change
the fan speed to high, and work to cool the room
When the unit is powered on, and the TIMER ON faster. Press the Turbo button again to cancel this
function is set, the unit will turn back on after the set function.
length of time, only after the unit has been powered
off.
RESET
To set the unit to turn off:
When the recessed RESET button is pressed all
Press the TIMER OFF button to adjust the length of current settings are cancelled and the unit will begin
time from 1 – 24hours that you would like the unit to to operate in the default settings.
run for before turning off. Each press of Timer Off
button will adjust the length of time before the unit LOCK
switches off. The first 1-10 hours will adjust in 30
minute increments with each press of the Timer Off When the recessed LOCK button is pressed the
button, the remaining 11-24 hours will adjust in 1 controls will not be able to be changed. Press the
Lock button again to cancel this function and enable
hour increments.
To turn off the Timer setting function, set the Timer the controls.
Off back to 0 hours.
DEFROST
Do not use this Heat Pump with a programmer, Occasionally the air around the motor can become
remote-control system, separate timer or any other very cool, this will cause the unit to go into defrost
device that switches the Heat Pump on mode. The Defrost/Temperature adjusting indicator
automatically.
light will illuminate on the control panel.
This is a normal function for the Heat Pump and
LED DISPLAY
By pressing the LED button the LED on the control cannot be controlled by the user.
panel which switch off but the unit will continue to
run. To illuminate and view the LED display again,
press the LED display button a second time.
Cleaning and Maintenance
MANUAL OPERATION
By pressing the left and right Side clips in together
on the Indoor unit, and lifting the unit front panel,
the manual switch can be accessed. The Manual
Operation should only be used when maintenance
is being performed on the unit, or the Remote fails
to operate.
CARE AND CLEANING
The Heat Pump requires regular cleaning to ensure
trouble free operation:
Ensure that the Heat Pump has been allowed to
Power Off completely before cleaning.
Switch the Heat Pump off from the mains supply
before cleaning.
Use a damp cloth (not wet) to wipe the exterior of
the Indoor unit to remove dust and dirt.
Use a vacuum cleaner to remove dust and fluff from
around the grill/louvre.
Never use solutions such as benzene, thinners or
polishing agents.
Ensure the Heat Pump is dry before switching back
on at the mains supply.
IMPORTANT! NEVER COVER THIS HEAT PUMP!
CAUTION
Do not touch the metal parts of the unit when
removing the filters. Injuries can occur when
handling sharp metal edges.
Do not use water to clean inside the unit. Exposure
to water can destroy the insulation, and lead to
possible electric shock.
Do not attempt to dismantle the Heat Pump. There
are no user serviceable parts. For service or repair,
contact an authorised electrical service technician.
CAUTION: The Heat Pump generates heat during
use. Proper precautions must be taken to prevent
the risk of burns, scalds, fires or other damage to
persons
It is important that you do not cover this Heat Pump.
STORAGE
If you do not plan to use the unit for a long period of
time the follow steps can be performed to care for
the unit:
• Clean the indoor unit and filters.
• Operate the fan for about half a day to dry the
inside of the unit.
• Power off the unit and switch off at the mains
supply.
• Remove the batteries from the remote control
unit.
• The outdoor unit requires periodic maintenance
and cleaning; Do not attempt to do this yourself
contact your authorised service technician.
TO CLEAN THE AIR FILTER:
Ensure that the Heat Pump has been allowed to
Power Off completely and has been switched off
from the mains supply.
Press the left and right Side clips in together on the
Indoor unit, and lift the unit front panel.
Remove the filter by pressing the Filter clip in and
gently pulling the filter down and out of the unit.
Clean the filter with a vacuum or with water. Dry the
filter.
The Freshening filter sits in behind the air filter and
can be removed by gently pulling out from its frame.
Clean the freshening filter with a vacuum or with PROOF OF PURCHASE
water. Dry the filter.
To receive warranty retain receipt as proof of
purchase. (Refer to back of booklet).
Ensure both the air filter, and freshening filter are
completely dry before placing back in the unit.
Never use unit without the air filter and freshening
filter.
SUPPORT AND TECHNICAL ADVICE
Goldair – New Zealand
Monday – Friday 8am-5pm
Phone +64 (0)9 917 4000
Phone 0800 232 633
[email protected]
Goldair – Australia
Monday – Friday 8am-5pm
Phone +61 (0)3 9336 4423
Phone 1300 465 324
[email protected]
Trouble shooting
The following events may occur during normal A peculiar smell comes out from the indoor unit
operation.
This may be caused by the indoor unit giving off
smells permeated from building material, from
The unit will not restart for 3-4 minutes after it furniture, or smoke.
stops
The unit is designed not to blow cold air on HEAT The Heat Pump turns to FAN only mode from
mode. This may occur when the indoor heat COOL or HEAT mode
exchanger is in one of the following three situations When indoor temperature reaches the set
and the set temperature has not been reached.
temperature the compressor will stop automatically,
1. When heating has just started.
and the Heat Pump turns to FAN only mode. The
compressor will start again when the indoor
2. Defrosting.
temperature rises on COOL mode or falls on HEAT
3. Low temperature heating.
mode.
The indoor or outdoor fan stop running when
defrosting
Frost may be generated on the outdoor unit during
heat cycle when the outdoor temperature is low and
humidity is high resulting in lower heating efficiency
of the Heat Pump.
During this time the Heat Pump will stop heating
operation and start defrosting automatically.
The time to defrost may vary from 4 to 10 minutes
according to the outdoor temperature and the
amount of frost built up on the outdoor unit.
The Heat Pump runs after turning off the unit
When turning off the unit under COOL (AUTO
COOL, FORCED COOL) and DRY mode, the Heat
Pump will run for 7-10 minutes, then stop the
operation and turn off the unit automatically.
A white mist coming out from the indoor unit
This may generate due to a large temperature
difference between air inlet and air outlet on COOL
mode in an indoor environment that has a high
relative humidity.
A white mist may generate due to moisture
generated from defrosting process when the Heat
Pump restarts in HEAT mode operation after
defrosting.
Heating mode
The Heat Pump draws in heat from the outdoor unit
and releases it via the indoor unit during heating
operation. When the outdoor temperature falls, heat
drawn in by the Heat Pump decreases accordingly.
At the same time, heat loading of the Heat Pump
increases due to larger difference between indoor
and outdoor temperature. If a comfortable
temperature can't be achieved by the Heat Pump,
we suggest you use a supplementary heating
device.
Low noise emitting from the Heat Pump
You may hear a low hissing sound when the
compressor is running or has just stopped running.
It is the sound of the refrigerant flowing or coming to
a stop.
You can also hear a low "squeak" sound when the
compressor is running or has just stopped running.
This is caused by heat expansion and cold
contraction of the plastic parts in the unit when the
temperature is changing.
A noise may be heard due to louver restoring to its
original position when power is turned on.
Dust is blown out from the indoor unit
This is a normal condition when the Heat Pump has
not been used for a long time or during first use of
the unit.
Dripping water may condensate on the surface of
the indoor unit when cooling in a high relatively
humidity (relative humidity higher than 80%). Adjust
the horizontal louver to the maximum air outlet
position and select HIGH fan speed.
Auto-restart function
Power failure during operation will stop the unit
completely.
When the power restores, the OPERATION
indicator on the indoor unit starts flashing. To
restart the operation, push the ON/OFF button on
the remote controller, the unit restarts automatically
with all the previous settings preserved by the
memory function.
Two Year Warranty
Thank you for purchasing this Goldair product. Your product is warranted against faults and manufacture when used in
normal domestic use for a period of two years. In non-domestic use Goldair limits the voluntary warranty to three
months.
Goldair undertake to repair or replace this product at no charge if found to be defective due to a manufacturing fault
during the warranty period.
This warranty excludes damage caused by misuse, neglect, shipping accident, incorrect installation, or work carried out
by anyone other than a qualified electrical service technician.
PLEASE KEEP YOUR RECEIPT AS THIS WILL HELP VERIFY YOUR WARRANTY.
The benefits given to you by this warranty are in addition to other rights and remedies available to you under law in
relation to the goods or services to which this warranty relates.
In Australia, our goods come with guarantees that cannot be excluded under the Australian Consumer Law. You are
entitled to a replacement or refund for a major failure and compensation for any other reasonably foreseeable loss or
damage. You are also entitled to have the goods repaired or replaced if the goods fail to be of acceptable quality and the
failure does not amount to a major failure.
In New Zealand this warranty is additional to the conditions and guarantees of the Consumers Guarantee Act (1993).
Goldair – New Zealand
CDB Goldair
PO Box 100-707
N.S.M.C
Auckland
Phone +64 (0)9 917 4000
Phone 0800 232 633
www.goldair.co.nz
Goldair – Australia
CDB Goldair Australia Pty
PO Box 574
South Morang
Victoria, 3752
Phone +61 (0)3 9336 4423
Phone 1300 GOLDAIR (1300 465 324)
www.goldair.com.au
Goldair Two Year Warranty (IMPORTANT: Please complete and retain this warranty card)
Name
Address
Place Of Purchase
Date of Purchase
Name Of Product
Model Number
Attach a copy of the purchase receipt to this warranty card
Due to continual design improvements, the product illustrated in this User Manual may differ slightly from the actual product.