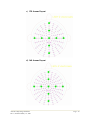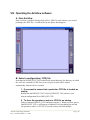
1
ActiveTwo System Operating Guidelines Edited by: Lloyd Smith Cortech Solutions, LLC [email protected] Please forward suggestions for improvement of this manual to the address above. ActiveTwo Operating Guidelines Rev. 6, Printed: January 31, 2007 Page - i ActiveTwo Operating Guidelines Rev. 6, Printed: January 31, 2007 Page - ii Table of Contents I. Intended use of the system.......................................................................................................1 A. Applications .........................................................................................................................1 B. Research use only – not a medical device............................................................................1 II. Educational resources available to ActiveTwo users...............................................................2 A. This booklet..........................................................................................................................2 B. ActiveTwo User Guide ........................................................................................................2 C. On-site installation and training...........................................................................................2 D. Web site of Cortech Solutions (US/Canada representative)................................................2 E. Web site of BioSemi (manufacturer of ActiveTwo)............................................................2 III. Cautions: what NOT to do...................................................................................................3 A. Do not attempt to use the system before familiarizing yourself with the documentation. ..3 B. Do not connect any AC powered device to the A/D box.....................................................3 C. Do not allow active electrode tips to come into contact with any other metal. ...................3 D. Do not store a full-depleted battery......................................................................................3 E. Do not use soap to clean gel / paste from the electrodes. ....................................................3 F. Do not soak electrodes in any liquid for more than 10 minutes at a time............................3 G. Do not plug connectors into system in the wrong orientation. ............................................3 H. Do not use alligator clips or other metal conductors to connect signal inputs to the active electrodes. ....................................................................................................................................4 IV. Components and accessories of the system .........................................................................5 A. Consumable supplies............................................................................................................5 1. Electrolytes for use with active electrodes.......................................................................5 2. Syringe to inject gel into head-cap electrode holders ......................................................5 3. Double-sided adhesive electrode rings for use with flat-type active electrodes ..............6 4. Other consumable items you might find useful ...............................................................6 B. Comfortable, flexible head caps for the ActiveTwo system................................................8 1. Sizes and layouts..............................................................................................................8 C. Active electrodes ................................................................................................................11 1. Pin-type electrodes on ribbon cable ...............................................................................11 2. Flat-type electrodes with individual leads/connectors ...................................................12 D. A/D box..............................................................................................................................13 1. ActiveTwo User M anual................................................................................................13 2. New features of the M ark II A/D box............................................................................13 3. Front panel .....................................................................................................................13 4. Top panel........................................................................................................................16 E. Battery unit.........................................................................................................................17 1. Overview ........................................................................................................................17 2. Advice and cautions .......................................................................................................17 F. Battery charger and AC adapter.........................................................................................18 1. Charger front panel ........................................................................................................18 2. Charger rear panel ..........................................................................................................18 3. Connections....................................................................................................................18 G. Fiber-optic cable ................................................................................................................19 1. Advantages .....................................................................................................................19 2. Description.....................................................................................................................19 ActiveTwo Operating Guidelines Rev. 6, Printed: January 31, 2007 Page - iii 3. Cautions .........................................................................................................................19 H. Optical receiver / U SB 2.0 interface ..................................................................................20 1. Advantages .....................................................................................................................20 2. Front-panel.....................................................................................................................20 3. Optical receiver / U SB interface: rear panel ..................................................................21 I. Optional non-EEG sensors.................................................................................................21 1. Respiration.....................................................................................................................21 2. Skin conductance (SC)...................................................................................................22 3. Temperature...................................................................................................................26 4. Pulse / plethysmograph..................................................................................................26 5. Jazz vigilance monitor ...................................................................................................27 6. Active strain gage...........................................................................................................27 7. M icrophone....................................................................................................................28 8. Dual response switch .....................................................................................................28 J. ActiView software .............................................................................................................28 V. ActiveTwo hardware setup ....................................................................................................29 A. Connect the ActiveTwo components.................................................................................29 B. Ensure that electrodes and sensors have been applied properly to participant..................29 C. Plug the electrodes and sensors into the A/D box..............................................................29 D. Verify the speed mode .......................................................................................................29 E. Turn on power....................................................................................................................29 F. Verify that the CM in Range light comes on .....................................................................30 G. Start the ActiView software...............................................................................................30 VI. ActiView software installation...........................................................................................31 A. Computer requirements......................................................................................................31 1. Windows XP, SP2..........................................................................................................31 2. USB 2.0 interface ...........................................................................................................31 3. Adequate display resolution...........................................................................................31 4. Windows user rights.......................................................................................................31 B. Copy software from web or place CD in drive ..................................................................31 1. Use CD...........................................................................................................................31 2. Download latest software from BioSemi.com ...............................................................31 C. USB Driver Installation .....................................................................................................32 D. LabVIEW Runtime Engine Installation.............................................................................34 1. Locate “LVRunTimeEng.exe”.......................................................................................34 2. Double-click LVRunTimeEng.exe ................................................................................34 3. Click through the installation using all default settings .................................................34 E. Copy the ActiView application to a local folder................................................................34 1. Create a new folder under \Program Files .....................................................................34 2. If you downloaded ActiView .........................................................................................35 3. If you are installing from the CD ...................................................................................35 4. Check the files in the ActiView folder...........................................................................35 5. Create a Windows shortcut to ActiView........................................................................35 VII. Applying electrodes and sensors to participant..................................................................36 A. Applying pin-type active electrodes ..................................................................................36 1. Familiarize yourself with basic skull surface anatomy..................................................36 ActiveTwo Operating Guidelines Rev. 6, Printed: January 31, 2007 Page - iv 2. 3. Fit the head cap ..............................................................................................................36 Fill electrode holders with electrolyte gel......................................................................38 B. Apply flat-type active electrodes .......................................................................................42 1. Peel the adhesive electrode ring off of its paper backing ..............................................43 2. Apply the ring to the plastic electrode housing..............................................................43 3. Apply gel to electrode contact .......................................................................................43 4. Then, remove the paper backing from the adhesive ring and attach to participant .......43 5. Drape leads over the participant’s shoulder...................................................................43 C. Connect the electrodes to the A/D box..............................................................................43 1. Pin-type electrodes: ribbon cables with 68-pin D connectors.......................................43 2. Flat-type electrodes: individual leads (two lead cable) with key-shaped connectors....44 3. CM S/DRL set with circular DIN connector (Important: keep leads together!).............44 4. Verify that the blue CM in Range LED comes on .........................................................44 D. Apply any additional sensors .............................................................................................45 1. Skin conductance (SC)...................................................................................................45 2. Respiration.....................................................................................................................47 3. Temperature...................................................................................................................48 4. Plethysmograph..............................................................................................................48 5. Other sensors..................................................................................................................48 VIII. Operating the ActiView software ......................................................................................49 A. Start ActiView....................................................................................................................49 B. Select a configuration (.CFG) file......................................................................................49 1. If you want to ensure that a particular .CFG file is loaded on startup ...........................49 2. To force the operator to select a .CFG file on startup....................................................49 3. To load a CFG file manually, follow these steps:..........................................................50 C. Verify the equipment is properly connected ......................................................................50 D. Turn on the A/D box power and verify the contacts at CM S and DRL.............................50 E. Verify the Decimation Ratio and Screen Length settings..................................................50 F. Click on Start to display data.............................................................................................51 G. Select Electrode Offset to check electrode contacts ..........................................................51 1. Which electrode contacts are responsible for high electrode offsets? ...........................51 2. Assuming electrodes are connected to the subject, what does Electrode Offset measure?.................................................................................................................................51 3. Verify low, stable offsets across channels .....................................................................51 4. If offsets are all at the maximum level: CM S/DRL .......................................................51 5. If offsets only at certain channels are at the maximum level.........................................52 H. Select M onopolar Display tab to view incoming signals ...................................................52 1. Settings to use in checking electrode contacts ...............................................................52 2. If the signals all look fine...............................................................................................52 3. If you see unstable signals, even though the Electrode Offsets are low and stable.......53 I. Record data ........................................................................................................................53 1. Click Start File...............................................................................................................53 2. Designate which groups of channels you want to save to the file .................................53 3. Set a path and file name for saving data ........................................................................54 4. IMPORTANT: ActiView is still Paused! ......................................................................54 IX. Best practices for making good EEG measurements .........................................................55 ActiveTwo Operating Guidelines Rev. 6, Printed: January 31, 2007 Page - v A. Optimizing the laboratory environment .............................................................................55 1. Ample room ...................................................................................................................55 2. Separate rooms for participant and experimenter ..........................................................55 3. Shielded room ................................................................................................................55 4. Lighting..........................................................................................................................56 5. Ventilation......................................................................................................................56 6. Furniture.........................................................................................................................56 B. Regular testing with the “one-bucket” and “two-bucket” methods...................................57 1. The one-bucket test – shorted input test.........................................................................57 2. The two-bucket test – testing inter-channel calibration .................................................58 C. Electrode and head-cap maintenance .................................................................................59 1. Follow the current guidelines for electrode handling ....................................................59 2. Follow these guidelines for head-cap maintenance .......................................................61 D. Participant intake procedures .............................................................................................61 1. M easure head at intake, and make sure you have a head-cap that fits snugly...............61 2. Instruct participants in advance to: ................................................................................61 E. Electrode application and signal-quality checking ............................................................61 1. Err on the side of too little gel rather than too much. ....................................................62 2. Use Electrode Offset tab in ActiView to check offsets .................................................62 3. Check signal quality in monopolar and bipolar tabs using Reference = None (Raw). ..62 F. Positioning of A/D box, cables and participant .................................................................63 1. Follow the furniture guidelines above. ..........................................................................63 2. Position A/D box as close as practically possible to participant....................................63 3. Keep the active electrode leads close together along the length of the run from participant to A/D box............................................................................................................63 4. Wrap CM S/DRL around the other leads 3-5 times to minimize the loop pickup area..63 5. Keep power cables, power supplies and cables carrying other high-level signals away from the participant................................................................................................................63 X. Triggering for event-related potentials ..................................................................................64 A. Connect the triggering device/computer to the ActiveTwo Trigger Input Port.................64 B. Assemble ActiveTwo and turn on power...........................................................................64 C. Select Analog under trigger format in the M onopolar Display page.................................64 D. Observe the state of the trigger input port..........................................................................64 E. Start the device/application that will send the trigger signals............................................64 F. If trigger signals are visible and reliable… ........................................................................64 G. If trigger signals are not visible/reliable… ........................................................................64 H. Save a short test data file with triggers. .............................................................................65 I. Trigger timing problems… ................................................................................................65 XI. Basic file reading and analysis steps for EEG/ERP in EM SE Suite 5.1............................66 A. Basic steps..........................................................................................................................66 1. File->New Workspace ...................................................................................................66 2. Right-click Project 1, and select Add->Time series data...............................................66 3. Browse to a data file, and double click. .........................................................................66 4. Right-click on new data file and select Load. ................................................................66 5. EM SE analyzes the event channel .................................................................................66 6. Select Edit->Channels ....................................................................................................66 ActiveTwo Operating Guidelines Rev. 6, Printed: January 31, 2007 Page - vi 7. Turn OFF any unused channels and the Status channel.................................................66 8. Designate PassTrough channels .....................................................................................66 9. Turn off some channels..................................................................................................66 10. What if my data appear as flat lines? .........................................................................66 B. Applying an EEG reference ...............................................................................................67 1. Version dependencies in EEG reference handling.........................................................67 2. Applying a reference in EM SE Data Editor...................................................................67 XII. M easuring physiological signals other than EEG..............................................................68 A. Apply any additional sensors .............................................................................................68 B. Turn on the display of desired sensors...............................................................................68 1. In ActiView, select the Auxiliary Sensors tab................................................................68 2. Select sensors to display ................................................................................................68 3. Choose suitable scale settings for the selected sensors..................................................68 4. Set ‘DC reset at screen start’ ON or OFF ......................................................................68 C. Save the displayed sensors.................................................................................................68 XIII. Analyzing physiological signals other than EEG ..............................................................69 A. ActiveTwo is typically used with at least a few non-EEG signals ....................................69 B. ActiveTwo / ActiView file format: BDF...........................................................................69 C. EDF vs BDF.......................................................................................................................69 D. Which signal analysis tools read BDF files? .....................................................................69 1. EM SE Suite....................................................................................................................69 2. BESA .............................................................................................................................69 3. g.BSanalyze....................................................................................................................69 4. EEGLAB........................................................................................................................69 5. BIOSIG ..........................................................................................................................69 E. Which ones are designed for analysis of non-EEG signals?..............................................69 F. Signals often combined with EEG .....................................................................................70 1. Signals measured with active electrodes........................................................................70 2. Signals measured with specialized sensors ....................................................................71 XIV. Basic file reading and analysis steps for EEG / ERP in EEGLAB................................73 A. Start M ATLAB and EEGLAB...........................................................................................73 B. Select File->Import data->From BioSemi BDF File using BIO SIG .................................73 C. Browse to the file and double-click on it. ..........................................................................73 D. ImportBDF dialog..............................................................................................................73 1. Reading only part of the file ..........................................................................................73 2. Event channel designation .............................................................................................73 3. Reference .......................................................................................................................73 XV. Electrode care and cleaning ...............................................................................................74 A. Five Rules of thumb:..........................................................................................................74 1. Clean with water ............................................................................................................74 2. Dry with paper towel; store away from direct sunlight. ................................................74 3. No soap; avoid contact with metals...............................................................................74 4. Remove from cap gently ................................................................................................74 5. Keep connector dry........................................................................................................74 B. Handling.............................................................................................................................74 1. Remove electrodes from cap and connector from A/D box gently................................74 ActiveTwo Operating Guidelines Rev. 6, Printed: January 31, 2007 Page - vii 2. 3. 4. 5. Remove from cap gently ................................................................................................74 Connector ejectors..........................................................................................................74 Keep connector clean and dry ........................................................................................74 M inimizing electrode drift .............................................................................................74 C. Cleaning .............................................................................................................................75 1. Use warm tap water........................................................................................................75 2. Soft brush if necessary ...................................................................................................75 3. Dry with paper towel, and air dry fully..........................................................................75 4. No soap ..........................................................................................................................75 5. Clean before allowing to dry..........................................................................................75 D. Storage/M odifications/Splitting of the flat cable ...............................................................75 1. Avoid contact with metal...............................................................................................75 2. Avoid light .....................................................................................................................76 3. Avoid airtight storage containers ...................................................................................76 4. Do not split cables..........................................................................................................76 E. M alfunctions ......................................................................................................................76 1. If an electrode is not operating as specified, please do the following: ..........................76 F. Life span (Life expectancy) ...............................................................................................76 XVI. Battery maintenance.......................................................................................................78 A. Overview ............................................................................................................................78 1. Two batteries supplied ...................................................................................................78 2. Battery type....................................................................................................................78 3. Standard battery capacity...............................................................................................78 4. Double capacity battery .................................................................................................78 5. Useful life.......................................................................................................................78 6. Charge time ....................................................................................................................78 7. Reduced capacity ...........................................................................................................78 B. Advice and cautions ...........................................................................................................78 1. Charger to use ................................................................................................................78 2. Overcharging..................................................................................................................78 3. Diminished capacity.......................................................................................................78 4. Storage ...........................................................................................................................78 5. Charge maintenance .......................................................................................................79 6. Ensure power at charger source .....................................................................................79 7. When to recharge ...........................................................................................................79 8. Battery meter..................................................................................................................79 C. See also details on battery use/maintenance in user manual..............................................79 XVII. Troubleshooting ActiveTwo..........................................................................................80 A. ActiView display: partial screen or blue/gray screen ........................................................80 1. Changing your display mode settings in Windows........................................................80 2. If a suitable display mode is not available .....................................................................81 B. Noisy active electrodes ......................................................................................................81 1. The “one-bucket test”.....................................................................................................82 C. CM in range does not come on while a participant is connected.......................................83 1. Possible causes ...............................................................................................................83 2. Troubleshooting procedure ............................................................................................84 ActiveTwo Operating Guidelines Rev. 6, Printed: January 31, 2007 Page - viii D. The system worked earlier, but now I get error 5000 ........................................................85 XVIII. Other technical details not elsewhere documented ........................................................86 A. Structure of the CFG file....................................................................................................86 1. Options that are set in ActiView and saved in the text .CFG file ..................................86 2. Options that you may want to adjust in the text .CFG file (underlined below) .............86 Appendix A. Disinfection Guidelines......................................................................................88 ActiveTwo Operating Guidelines Rev. 6, Printed: January 31, 2007 Page - ix I. Intended use of the system A. Applications The BioSemi ActiveTwo measurement system is designed to measure potential differences on the human or animal body surface. The system is successfully used to record signals originating from the brain (electroencephalography, EEG), the heart (electrocardiography, ECG), and the muscles (electromyography, EM G) for research purposes. The ActiveTwo system can be adapted to these different applications by using different versions of the (active) electrodes. Besides body surface potentials, the ActiveTwo system can acquire signals from a wide range of additional sensors, in order to measure variables like body temperature, muscle force, etc. B. Research use only – not a medical device The ActiveTwo is designed, and intended to be used as an instrument for scientific research only. The electrophysiological data acquired with the ActiveTwo is meant to be used within the framework of scientific research. The system is not intended for medical applications. The system is not approved or allowed to be used for diagnosis or treatment of disease, and the measured data shall not be used as a basis for any medical decision. The system is not certified as a M edical Device as defined in EU directive 93/42/EEC, Article 1, Sec 2 (a) (European Union), or as defined in the Federal Food Drug & Cosmetic (FD&C) Act, Chapter II, Sec 201 (h) (USA). Because the ActiveTwo is designed as an instrument for research, it offers a flexibility that cannot be offered in a system designed for patient treatment. For example, the hardware configuration and the open-source software are highly configurable to adapt the system to various demands of different research applications. This flexibility, however, also allows the user to choose configurations and/or software modifications that lead to corrupted data being measured. This is the mains reason that the system shall not be used for diagnosis or treatment of patients. M oreover, the system is meant to be used only by skilled professionals. ActiveTwo Operating Guidelines Rev. 6, Printed: January 31, 2007 Page - 1 II. Educational resources available to ActiveTwo users A. This booklet This booklet was first developed in February of 2006 for use in a training course provided by Cortech Solutions in Wilmington, NC USA. We expect to update it periodically. B. ActiveTwo User Guide BioSemi has done an excellent job of documenting the ActiveTwo hardware in the ActiveTwo User Guide. This document is always available on the ActiView software CD. C. On-site installation and training Take advantage of the opportunity to have an experienced technician visit after a new ActiveTwo purchase to help install the system/software and train you and your colleagues in its operation and maintenance. D. Web site of Cortech Solutions (US/Canada representative) Visit www.cortechsolutions.com, especially the Support section. E. Web site of BioSemi (manufacturer of ActiveTwo) Visit www.biosemi.com, especially the FAQ (frequently-asked questions) section. ActiveTwo Operating Guidelines Rev. 6, Printed: January 31, 2007 Page - 2 III. Cautions: what NOT to do. A. Do not attempt to use the system before familiarizing yourself with the documentation. M ost operator errors that result in damage to the system can be avoided by familiarizing yourself with the system documentation, especially this section and the sections covering Electrode Handling and Battery M aintenance. B. Do not connect any AC powered device to the A/D box. Connecting an AC powered signal source to the A/D box will decrease the signal to noise ratio of other signals measured by the A/D box and it can pose a safety risk. An optional auxiliary Analog Input Box is offered for this purpose. C. Do not allow active electrode tips to come into contact with any other metal. Contact between dissimilar metals can result in corrosion and reduction in electrode performance (e.g. increased noise). D. Do not store a full-depleted battery. When a battery enters shutdown mode (red Shutdown LED on front panel of battery comes on during system operation and power to system is lost), it is in its most fragile state. It is imperative to place the batter on the charger immediately to prevent further loss of charge that could result in permanent damage to the battery. E. Do not use soap to clean gel / paste from the electrodes. Wash electrodes immediately after use with warm water to remove gel / paste residue. Soap can accelerate the loss of Chloride from the electrode pellets, and its use on a routine basis should be avoided. F. Do not soak electrodes in any liquid for more than 10 minutes at a time. Prolonged soaking of the electrodes allows liquid to penetrate the ceramic electrode pellet, softening it, and making it more vulnerable to breakage. Soaking the electrodes in liquid for a prolonged period of time also results in corrosion, or loss of electrode material. G. Do not plug connectors into system in the wrong orientation. Attempting to force connectors into the system in the wrong orientation can damage input connectors on the A/D box, necessitating costly and time-consuming repairs. ActiveTwo Operating Guidelines Rev. 6, Printed: January 31, 2007 Page - 3 H. Do not use alligator clips or other metal conductors to connect signal inputs to the active electrodes. Connecting alligator clips or other metal conductors to the active electrodes will result in corrosion and it will most likely result in permanent damage to the active electrodes. Use the one- and two-bucket methods described in the Troubleshooting section to short inputs or to conduct signals to the system inputs. ActiveTwo Operating Guidelines Rev. 6, Printed: January 31, 2007 Page - 4 IV. Components and accessories of the system Starting at the participant and working in the logical direction of the host PC. A. Consumable supplies 1. Electrolytes for use with active electrodes a) SignaGel (by Parker Laboratories, Inc.) SignalGel is the recommended electrolyte for most applications. As a polymer, it remains conductive for hours. The product has been designed, manufactured and packaged under the strictest conditions, resulting in consistent quality and safety as well as a long shelf life. b) Others you might consider using (1) Electro-Gel (Electro-Cap International, Inc.) (2) Lectron III, Chloride 10 (Pharmaceutical Innovations, Inc.) (3) Ten20 (Weaver and Company) (4) Elefix (Nihon Kohden America) c) Electrolytes to avoid (1) Abralyt (Easy-Cap GmbH) Contains unnecessary pumice. (2) QuikGel (Compumedics Ltd) Accelerates electrode corrosion. 2. Syringe to inject gel into head-cap electrode holders ActiveTwo Operating Guidelines Rev. 6, Printed: January 31, 2007 Page - 5 a) MonoJect syringe with integrated, curved plastic tip M ore expensive, but also more appealing to participants b) 10 cc Luer-Lok syringe Use with 15 or 16 gauge blunt-tipped needle 3. Double-sided adhesive electrode rings for use with flat-type active electrodes a) 13 x 5 (mm, od x id) – roll of 500 b) 20 x 8 – roll of 500 c) 12 x 4 (pkg. of 100) d) 19 x 4 (pkg. of 100) 4. Other consumable items you might find useful a) Distilled water Used with table salt for balancing electrodes and for testing / troubleshooting. Tap water will suffice for washing and occasional testing, but distilled water is best for routine electrode balancing. b) NaCl (non-iodized table salt) M ixed with water for electrode balancing and for testing / troubleshooting. c) Medical tape Use 3M M icropore paper tap to hold electrodes or leads in place or to bundle leads together. Avoid cloth (Durapore) or transparent (Transpore) tape, as these tapes leave residues. d) Disinfectant solution Below is a list of disinfectant solutions in ascending order of effectiveness AND ascending order of deleterious effects on electrode materials. ActiveTwo Operating Guidelines Rev. 6, Printed: January 31, 2007 Page - 6 (1) Hydrogen peroxide (2) Isopropyl alcohol 70% (3) Intermediate-level disinfectants (a) Eco Tru (Enviro Systems) (b) Envirocide (Me trex) (4) Not recommended – high-level disinfectants (a) Me tricide (Me trex) Accelerates loss of Chloride from electrodes, drying/cracking of lead-wire insulation and bleaching of electrode/head-cap labels ActiveTwo Operating Guidelines Rev. 6, Printed: January 31, 2007 Page - 7 B. Comfortable, flexible head caps for the ActiveTwo system The ActiveTwo head cap was developed in cooperation with Dr. Peter Praamstra at the Behavioral Brain Sciences Center, University of Birmingham, United Kingdom. The head cap consists of an elastic cap with plastic electrode holders. The cap itself does not contain electrodes - only plastic electrode holders that receive the pin-type active electrodes. The caps have ear-slits for easy access to the ears. Head-caps are provided with an elastic / velcro chin strap for fixing the cap in place, but body harnesses with criss-cross chest straps are also available. The fabric template of the standard caps is suitable for positioning electrodes at traditional 10/20 positions. 1. Sizes and layouts Caps are available in a wide range of sizes and with a variety of electrode position layouts: Size Color Head Circ. # Sites Std. Layout Infa 6 Red 22-26 cm 32 10/20 premature infants Infa 5 Blue 26-30 cm 32 10/20 premature infants Infa 4 Yellow 30-34 cm 32 10/20 premature infants Infa 3 Brown 34-38 cm 64 10/20 Infa 2/3 Pink/Brown 36-40 cm 64 10/20 Infa 2 Pink 38-42 cm 64 10/20 Infa 1/2 Lt Blue/Pink 40-44 cm 64 10/20 Infa 1 Light Blue 42-46 cm 64 10/20 X-Small/Infa 1 Green/ Light Blue 44-48 cm 64 10/20 X-Small Green 46-50 cm 128 10/20 or ABC Small/X-Small Yellow/Green 48-52 cm 128 10/20 or ABC Small Yellow 50-54 cm 256 10/20 or ABC Medium/Small Red/Yellow 52-56 cm 256 10/20 or ABC Medium Red 54-58 cm 256 10/20 or ABC Large/Medium Blue/Red 56-60 cm 256 10/20 or ABC Large Blue 58-62 cm 256 10/20 or ABC X-Large Brown 62-66 cm 256 10/20 or ABC Boys Girls 0 - 1 mo. 0 - 1.5 mo. 0 - 2 mo. .5 - 3 mo. 1 - 3.5 mo. 1.5 - 5.5 mo. 2 - 6.5 mo. 3 - 9 mo. 3.5 - 10.5 mo. 5.5 - 15.5 mo. 6.5 - 19 mo. 9 - 28 mo. 10.5 - > 36 mo. 15.5 - > 36 mo. 19 - > 36 mo. 28 - > 36 mo. toddlers / children children / teens / small adults teens / adults teens / adults large teens / adults exceptionally large adults Standard cap layouts for 16, 32 and 64 channels are based on the International 10/20 System. Layouts for 128, 160 and 256 channels have electrode positions that are radially equidistant from CZ. The electrode position coordinates of standard ActiveTwo head caps are available from the www.cortechsolutions.com/Downloads.htm web page. The images below provide a top view of the 32, 64, 128, 160 and 256 channel standard head cap layouts. ActiveTwo Operating Guidelines Rev. 6, Printed: January 31, 2007 Page - 8 a) 32 channel layout b) 64 channel layout ActiveTwo Operating Guidelines Rev. 6, Printed: January 31, 2007 Page - 9 c) 128 channel layout d) 160 channel layout ActiveTwo Operating Guidelines Rev. 6, Printed: January 31, 2007 Page - 10 e) 256 channel layout C. Active electrodes 1. Pin-type electrodes on ribbon cable a) Typical application: EEG These electrodes are designed to be used with the ActiveTwo electrode holders, especially with a head cap, for measuring EEG. Standard electrode sets contain 32 active electrodes, and are labeled according to either 10-20/10-5 positions or arbitrary A1-32, …H1-32 nomenclature. b) Custom applications: ECG, EMG, etc. It is possible to mount the plastic electrode holders in a different fabric garment to permit measurement of other signals. For example, a tight fitting shirt with electrode holders and pin-type active electrodes could be used to measure ECG from an array of electrodes on the torso. Other ActiveTwo Operating Guidelines Rev. 6, Printed: January 31, 2007 Page - 11 garments could be designed for positioning electrode holders over muscles of interest for measurement of surface EM G. c) Latest design improvements The latest iteration of the pin-type active electrode design includes: (1) Sintered Ag/AgCl pellet material improved A new, harder electrode pellet resists moisture and stands up to abuse better. Epoxy joint at cable entry to prevent separation. (2) Strain relief on top of connector to further resist separation at cable entry (3) Improved protection against electrostatic discharge (4) Label (e.g. A1-32) positioned on top of connector (5) Serial number on side of D connector The serial number aids our record keeping and tracking of manufacturing issues according to manufacture date/batch. Please do not remove it. 2. Flat-type electrodes with individual leads/connectors a) Standard applications: EOG, ECG, EMG and EEG reference The flat-type active electrodes were designed specifically for use on bare skin for measuring EOG, ECG, EM G or EEG at mastoids, earlobes, nose, nape of the neck, etc. In these applications, you should use the double-sided adhesive electrode rings to adhere the electrodes to the skin. Peel the adhesive electrode ring off of its paper backing, apply the ring to the plastic electrode housing taking care to position the opening in the ring around the electrode pellet (note that the pellet is closer to the electrode ring than you might expect, and it is not directly opposite the electrode label). After sticking the ring to the electrode and before removing the protective paper cover, apply a small amount of conductive electrolyte gel to the electrode pellet. Then, remove the paper backing from the adhesive ring. Following this procedure should help remove any excess gel that might otherwise prevent the adhesive from sticking to the skin. Some cleaning of the skin with an alcohol prep pad may be required in case of excessive makeup, sweat or dry skin. ActiveTwo Operating Guidelines Rev. 6, Printed: January 31, 2007 Page - 12 b) Other applications: EEG To record EEG from the scalp, you can use the flat-type active electrodes with an adhesive electrode past such as Ten20 paste or Elefix. Alternatively, you can use collodion (glue) to apply the electrodes to a participant’s scalp for sleep studies or other long-term monitoring applications (use only non-acetone remover). Take care to use the same electrolyte paste for the CM S/DRL and EEG reference electrodes. c) Latest design improvement Flat-type active electrodes now have a stronger wire to address problems with leads breaking at the junction with the active electrode. This new wire can be distinguished from the old wire by the fact that the new wire has a light gray color and no printing on the insulation jacket, whereas the old wire had a dark gray color and printing on the jacket. D. A/D box 1. ActiveTwo User Manual See the latest version of the ActiveTwo User M anual for detailed specifications and operating instructions for the A/D box. 2. New features of the Mark II A/D box The new M ark II (mk2) A/D box has the capacity for 280 channels total. The mark II design also includes the capability to be daisy chained with other A/D boxes in a master-slave relationship (slave boxes must have Optical In port on front panel which is added as an extra cost option). In certain circumstances (e.g. daisy chaining), the M ark II boxes can provide greater numbers of channels at bandwidth settings previously supported. 3. Front panel a) Aux connectors (1) Left-most (Aux1) now carries CMS/DRL (common) (2) Aux 2 and Aux ActiveTwo Operating Guidelines Rev. 6, Printed: January 31, 2007 Page - 13 3 typically carry 1 – 2 bipolar sensor signals (a) Sensor options (see Optional Non-EEG Sensors below for more de tails) (i) Skin conductance (ii) Respiration (iii) Temperature (iv) Pulse / plethysmograph (v) Other sensor options (a) Microphone (b) Photocell (c) Accelerometer (d) Load cell (e) Custom (b) Safe ty and signal-quality pre caution Aux inputs are on the patient-connected side of the device, so avoid connecting AC-powered signal sources to these inputs. Doing so could result in an unsafe situation and/or reduction of signal quality on other channels. b) LED indicators (1) Power (green) On indicates power is reaching the A/D box from the battery. (2) CM in range (blue) On indicates CM S/DRL electrodes are adequately connected to subject and no fault conditions (over/under-current) are detected. (3) Low-battery (red) On indicates low-battery state, activated when 20% of battery capacity is reached. c) Speed-mode dial This dial sets the overall sample-rate and bandwidth of system. The final sample-rate to file is a function of both the speed-mode and the ActiveTwo Operating Guidelines Rev. 6, Printed: January 31, 2007 Page - 14 decimation-ratio set in the ActiView software. See the ActiveTwo User Guide for more details on setting the speed mode. Before setting the speed mode, first identify if your A/D box is model M k1 or Mk2. To do so, see the ‘About ActiView’ tab-page in the ActiView software, where the model will be identified after the software has communicated with the system at least once since boot. The rotary switch can be used to select 8 different speedmodes for the A/D box (speed-mode 9 is reserved for use as Analog Input Box). Use a small screwdriver to rotate the switch to the preferred number according to the table below. After changing the speed-mode, switch the A/D box off and on again to reset the ADCs. Changing the speed-mode having the power connected is not harmful to the electronic circuitry, but the synchronization between channels may be lost. SpeedMode 0 1 2 3 4 5 6 7 8 9 Samplerate 2048 (2 kHz) 4096 (4 kHz) 8192 (8 kHz) 16384 (16 kHz) 2048 (2 kHz) 4096 (4 kHz) 8192 (8 kHz) 16384 (16 kHz) AIB-mode Reserved A/D box Mk1 PIN + TP ch. Sensors 256 + 0 No 128 + 0 No 64 + 0 No 32 + 0 No 232 + 8 Yes 104 + 8 Yes 40 + 8 Yes 8+8 Yes AIB-mode Reserved AIB-mode Reserved A/D box Mk2 PIN + TP Sensors ch. Multi box use: In speedmode 0-3, the A/D boxes work as up to 4 optical fiber ‘daisy chained’ boxes, each with a maximum of 128+8 channels @ 2kHz. The speedmode switch = box number. (0=Box1, 1=Box2, 2=Box3, 3=Box4). Daisy chain possibilities are not included in the standard base system. 256+8 Yes 128+8 Yes 64+8 Yes 32+8 Yes AIB-mode Reserved Yes Reserved Note: When an auxiliary analog input box (AIB) is connected, the A/D box should always be on SpeedM ode 4. The acquisition software adjusts automatically to the selected speed-mode (check the indicator in the “about ActiView” tab page). You should close and restart the ActiView software after changing the A/D box speedmode, to prevent selectors from remaining disabled in the new speed-mode. ActiveTwo Operating Guidelines Rev. 6, Printed: January 31, 2007 Page - 15 d) DC input (battery connector) Note that the cable is attached to the battery, rather than the A/D box or AC charger supply. The A/D box is not intended to be operated from AC power. e) Optical output Fiber optic signal cable from A/D box to optical receiver f) Optical input – optional M ark II A/D boxes optionally can have two (2) fiber-optic connectors on the front panel, one input and one output. The input is active only when operating the system in slave mode as part of a daisy -chain of multiple A/D boxes (speed modes 1-3). 4. Top panel a) 68-pin D connectors labeled A1-32 to H1-32 (1) Each connector carries 32 monopolar channels of data from a single ribbon cable (2) A1-32 represents inputs 1-32, B1-32 inputs 33-64, and so on (3) Standard configuration expects active electrodes; not suitable for passive electrodes (custom configuration possible) b) Key-shaped two-contact connectors labeled EX1EX8 (1) Each connector carries one monopolar channel of data (2) Standard configuration expects active electrodes; not suitable for passive electrodes (active adapter for passive electrodes available) ActiveTwo Operating Guidelines Rev. 6, Printed: January 31, 2007 Page - 16 E. Battery unit 1. Overview a) Two standard batteries supplied with each base system b) Standard battery is high-capacity, rechargeable, leadacid type with no memory effect c) Standard battery capacity: approximately 15 hours with 72 channels, 10 hours with 136 channels and 5 hours with 280 channels d) Useful life defined as over 1000 charge/recharge cycles e) Fully-depleted standard battery with full capacity will take approximately 3.5 hours to charge f) Reduced charge time reflects diminished capacity 2. Advice and cautions a) Use only supplied charger b) Not possible to overcharge using standard charger c) If capacity is significantly diminished (charge time less than 3 hours), cycle battery fully 3-5 times by charging/discharging/charging until capacity (charge time) increases to normal. d) Never store a fully-depleted battery; store only fully charged e) Battery will maintain a charge for weeks/months while stored at normal operating temperature. Recharge stored batteries frequently to avoid deep discharge. f) If power at source is lost while battery is connected to charger, the charger forms a partially open circuit that will slowly drain the battery. Leaving this situation too long can cause permanent damage. If you doubt the reliability of ActiveTwo Operating Guidelines Rev. 6, Printed: January 31, 2007 Page - 17 your power source, disconnect charged batteries from the charger as soon as the Ready LED comes on. g) Connect battery to charger after using approximately 75% of capacity. h) See meter in ActiView for current battery state or place on charger when Low Battery LED comes on. F. Battery charger and AC adapter Sophisticated charging unit with intelligence to maintain optimal battery performance and maximize useful life coupled with a unique 9V, 3A AC/DC converter. 1. Charger front panel a) Red “Full Charge” LED On indicates battery charge is 0-90%, so full charge is being delivered b) Yellow “Trickle Charge” LED On indicates battery charge is 90% or greater. c) Green “Ready” LED On indicates battery is fully-charged. d) Charge output connector Socket for connecting cable from battery unit 2. Charger rear panel a) DC power input connector Connect power from AC/DC converter b) Fuse Replaceable 5 AM P fuse 3. Connections a) Connect AC adapter to charger b) Plug AC adapter into AC socket c) Connect battery unit to charger ActiveTwo Operating Guidelines Rev. 6, Printed: January 31, 2007 Page - 18 G. Fiber-optic cable 1. Advantages a) Perfect electrical isolation Eliminates current leakage problems between host computer and patient-connected device, which yields better signal quality and ensures safer operation. b) Eliminates interference pickup Length of fiber cable between front-end and host PC can run next to other power and signal cables without picking-up interference. c) Longer cable runs Cable runs up to 50 meters are possible without signal loss. Standard cables are 3 meters in length. 2. Description a) Unidirectional fiber-optic communication lead between optical output connector on front panel of A/D box and optical receiver / USB 2.0 interface b) Standard multimode (62.5/125), simplex, ST-ST cable 3. Cautions Note that this cable is made of glass fiber and is somewhat delicate. Take care to: a) Avoid running-over the cable with rolling chair wheels b) Avoid closing the cable in doors c) Avoid setting heavy objects on the cable d) Avoid positioning connections so that ends of cable are subject to shear stress ActiveTwo Operating Guidelines Rev. 6, Printed: January 31, 2007 Page - 19 H. Optical receiver / USB 2.0 interface Receives digital data via unidirectional fiber-optic cable from the A/D box 1. Advantages a) Portability M akes ActiveTwo completely portable when used with a notebook computer b) Flexibility Programmable logic allows easy changing of number of channels and sample rate c) Electrical isolation Trigger inputs remain galvanically isolated from A/D box, electrodes and patient d) No unwieldy AC supply required Easy power supply from PC via USB 2.0 port e) Simplifies troubleshooting LED indicators for data input and output f) Easy Windows XP installation When performed properly, installation under XP takes only a few minutes 2. Front-panel a) Fiber-optic input connector b) Data input LED (left of fiber-optic connector) On indicates power is being received from host PC via USB interface and data are being received from A/D box. c) USB 2.0 output connector d) Data output LED (right of USB connector) On indicated data are being requested by application via driver on host PC. This LED will not come on unless data are being requested by host for display or storage. ActiveTwo Operating Guidelines Rev. 6, Printed: January 31, 2007 Page - 20 3. Optical receiver / USB interface: rear panel The rear panel contains the system’s 37-pin digital I/O connector a) 16-bit trigger input port Pins 1-16 of this port represent bits 0-15 of the 16-bit trigger input port. b) Digital output port Pins 17-31 of this port represent bits 0-14 of the digital output port (accessible to developers and for custom applications only – not presently utilized by the standard ActiView software). c) System clock signal output The system’s clock signal is carried out to pin 32 of the 37-pin digital I/O connector. d) Ground on pin 37 Pin 37 carries the system ground. Connect to ground of trigger port of stimulus computer or ground of other devices connected to trigger port. Use caution when considering connecting this ground to a device that the subject will come in contact with (e.g. a button box), as this can compromise system safety and reduce signal-to-noise ratio of physiological measurements. I. Optional non-EEG sensors A variety of sensors other than the active electrodes are available for use with ActiveTwo. In general, a “sensor” consists of a transducer with some specialized electronics and one or two dedicated amplifier/converter channels installed in the A/D box. Sensor inputs are on the middle and right-most circular DIN connector on the front panel of the A/D box. If there are any sensors installed in the A/D box, labels above the circular connectors on the front panel of the A/D box will indicate what type of sensor electronics are installed at the connectors. If labels above the connectors read “Aux2” and/or “Aux3”, no sensor electronics are installed on the associated connector. 1. Respiration A Nihon Kohden TR-753T respiration belt is provided with a cable wired for use with one of the three available circular DIN connectors on the ActiveTwo front panel. Strong reliable signals are produced, because the respiration belt uses the ActiveTwo system's power supply. An additional LabVIEW module is delivered with the system when a respiration belt is ordered. ActiveTwo Operating Guidelines Rev. 6, Printed: January 31, 2007 Page - 21 2. Skin conductance (SC) With this ActiveTwo accessory, the conductance of the skin can be measured. The SC option consists of 2 passive electrodes to induce an oscillatory signal exactly synchronized with the system's sample-rate. The skin conductance option is wired to one of three available circular DIN connectors on the ActiveTwo front panel. Because the skin conductance accessory uses "lock-in detection", the stimulus-current can be as low as 1uA. The low-current and synchronized oscillator ensure that the biopotential measurements (EEG, EM G or ECG) are not corrupted by the skin conductance oscillator signal. In models produced before mid-2005, these couplers were configured to measure skin resistance or galvanic skin response (GSR). ActiView software version 5.35 or later automatically identifies whether the ActiveTwo system has a 16 Hz or 512 Hz coupler. To check which model you have, setup the ActiveTwo system and start the ActiView software to view incoming data for a few seconds. Then, select the "Auxiliary Sensors" tab, and check the "GSR units" indicator in the left sidebar: “unit = Ohm” means a 512 Hz GSR coupler is installed “unit = nanoSiemens” means a 16 Hz skin conductance coupler is installed The version of coupler installed can also be checked by identifying the "physical dimension" of the “GSR” channel in the header of the BDF file (field 13 of the header, see http://www.biosemi.com/faq/file_format.htm). The GSR signal itself is the result of processing in ActiView, and only reflects (slow) impedance/conductance variations. The original excitation frequency is not present in the signal. In other words: FTT or any other analysis of the GSR signal stored in the BDF file will not reveal the underlying 16 or 512 Hz excitation signals. The GSR signals to file are not filtered (bandwidth is the anti-aliasing filter frequency as displayed in the right sidebar). However, the frequency of the excitation frequency imposes a limit in the maximal frequency of the variations in impedance/conductance that can be measured. With the 16 Hz GSR, a full wave of the excitation signal is necessary to calculate a conductance value. This means that a new GSR value can only appear every half-wave, or every 31.25 ms. At a 2048 Hz sample rate, the BDF file will contain 64 identical samples for each single GSR value). In other words, the effective sample rate of the GSR is 32 Hz, and consequently GSR variations faster than 16 Hz are ignored (Nyquist ActiveTwo Operating Guidelines Rev. 6, Printed: January 31, 2007 Page - 22 theorem). Incidentally, this is the reason for the choice of 16 Hz as the best compromise between the previous 512 Hz value and the typically used 10 Hz value. A lower frequency makes the response to GSR changes too slow, and a higher value results in responses that involve both resistive and capacitive components rather than the more pure measure of skin resistance/conductance. See the appropriate heading below for further information about the type of unit you are using. a) 512 Hz GSR coupler The 512 GSR circuit in ActiveTwo uses 1 A constant current, 512 Hz square wave signal that is synchronized with the ActiveTwo system’s sample rate. Although these are different from the parameters often used in GSR measurement, this design is intended to make the GSR coupler optimally compatible with the apparatus for EEG measurement. Typical GSR AC excitation frequencies overlap with the frequency range recorded in EEG, thus making it difficult to measure EEG at the same time without corrupting the signal. DC excitation can affect the EEG baseline, producing electrode offsets that make it similarly difficult to measure EEG simultaneously. The LSB value (resolution) is 1 . With the 24-bit ADC, the GSR signal has an input range of 0 to +262 k. Because ActiveTwo uses a higher excitation frequency than most stand-alone devices, it measures smaller absolute skin resistance values. Also, the response on subject's arousal is an INCREASE in skin resistance, instead of the DECREASE of skin resistance seen with DC and low frequency (up to approx. 10 Hz) excitation. However, the response is very reliable: we measure a typical resting skin resistance of approx. 5 k, with responses of (+) 50-100 , and a quick return to the baseline value after when the subject relaxes again. Since many analysis programs do not have a mechanism to handle units other than uV, it is useful to know that GSR data points are scaled such that when the GSR units are displayed in V, 1 V is equal to 1 . To convert to Siemens, take the reciprocal of the value (S = 1 / R). Note that you cannot simply take the reciprocal of a resistance CHANGE, because S2-S1 is not equal to 1/(R2-R1). So, every point should be converted from to Siemens separately, before calculating changes in Siemens. ActiveTwo’s GSR measurement works with a DC coupled amp (same as for the EEG channels), so there is no high-pass time constant to worry about. Any high-pass filtering would be performed in software off-line. A low-pass filter of 3-10 Hz is usually applied off-line to reduce ActiveTwo Operating Guidelines Rev. 6, Printed: January 31, 2007 Page - 23 interference. ActiView displays the GSR with a 3 Hz low-pass, but the data to file are full bandwidth (no filters are applied). Note that the GSR sensor only works in speed modes that allow recording of sensor channels (i.e. 4, 5, 6, 7 and 8). Remember that if you change the speed mode, you will need to turn off the power at the battery unit and turn it on again to let the internal firmware adjust itself to the new speed mode. Also, your ActiView CFG file must enable the use of sensors. Since most systems are sold without GSR measurement capability, the default configuration files that come with new versions of software contain a code that disables the sensors. To edit the CFG file, open it in Windows Notepad, and go to the section entitled [FreeChoice]. Look for the code: AuxFree=0% If you find this, change it to: AuxFree=1% Remember that, if you do not explicitly select a CFG file, the DEFAULT.CFG file in the same directory as the .EXE is used. Once you open the ActiView program and the CFG file you want to use is active, click over to the sensors page to be sure that the GSR sensor is selected for display. When you click Start File, be sure to enable saving of sensor signals by selecting the option to “Save displayed sensors”. Note that the CM S and DRL electrodes must be attached to the subject and connected to the system, and the blue “CM in range” light must be on for GSR measurement to work properly. Also, the green "GSR in range" lights should be on when GSR electrodes make adequately low impedance contacts with the subject. Note that the green GSR lights always remain off if the blue CM light is off. GSR can only be measured with the blue CM light and the green G SR lights glowing. Finally, if the GSR signal looks flat after you have made all of the other settings, it may be that you need to increase the scale of the GSR signal on the display. There is a scale tool at the left side of the Sensors display page. b) 16 Hz SC coupler The 16 Hz SC circuit in ActiveTwo uses 1 A constant current, 16 Hz square wave signal that is synchronized with the ActiveTwo system’s sample rate. The 16 Hz design is intended to make the SC coupler consistent with traditional SC methodology. Although the 16 Hz ActiveTwo Operating Guidelines Rev. 6, Printed: January 31, 2007 Page - 24 excitation frequency might be expected to interfere with simultaneous EEG measurements in ActiveTwo, testing has confirmed that there is minimal influence from the 16 Hz excitation frequency on the EEG signal. The LSB value (resolution) with the 16 Hz SC frequency is 1 nanoSiemens. With the 24-bit ADC, The SC signal has an input range of 574 nanoSiemens (1.7 M Ohm) to 262,000 nanoSiemens (3.8 kOhm). With the 16 Hz SC coupler in ActiveTwo, the response on subject's arousal is an INCREASE in skin conductance (DECREA SE in skin resistance), instead of the INCREASE of skin resistance seen with the 512 Hz GSR. Since many analysis programs do not have a mechanism to handle units other than uV, it is useful to know that SC data points are scaled such that when SC units are displayed in uV, 1 uV is equal to 1 nanoSiemens. To convert to Ohms, take the reciprocal of the Siemens value (R = 1 / S). For example: 10,000 nanoSiemens is 100 kOhm. Note that you cannot simply take the reciprocal of a conductance CHANGE, because R2-R1 is not equal to 1/(S2-S1). So, every point should be converted from Siemens to separately, before calculating changes in . ActiveTwo’s SC measurement works with a DC coupled amp (same as for the EEG channels), so there is no high-pass time constant to worry about. Any high-pass filtering would be performed in software off-line. A lowpass filter of 3-10 Hz is usually applied off-line to reduce interference. ActiView displays the SC signal with a 3 Hz low-pass, but the data to file are full bandwidth (no filters are applied). Note that the SC sensor only works in speed modes that allow recording of sensor channels (i.e. 4, 5, 6, 7 and 8). Remember that if you change the speed mode, you will need to turn off the power at the battery unit and turn it on again to let the internal firmware adjust itself to the new speed mode. Also, your ActiView CFG file must enable the use of sensors. Since most systems are sold without SC measurement capability, the default configuration files that come with new versions of software contain a code that disables the sensors. To edit the CFG file, open it in Windows Notepad, and go to the section entitled [FreeChoice]. Look for the code: AuxFree=0% If you find this, change it to: AuxFree=1% ActiveTwo Operating Guidelines Rev. 6, Printed: January 31, 2007 Page - 25 Also, since the change from the 512 Hz GSR to 16 Hz SC, the default channel labels for the SC couplers (two couplers per A/D box are possible) in the ActiView software CFG files have not been modified from G SR1 and GSR2 to SC1 and SC2. You may wish to make this change in your CFG files for clarity. Look for the entries “Aux1=GSR1” and “Aux2=GSR2” and change the labels to the right of the = sign to “SC1” and “SC2” or “SCR1” and “SCR2”. Remember that, if you do not explicitly select a CFG file, the DEFAULT.CFG file in the same directory as the .EXE is used. Once you open the ActiView program and the CFG file you want to use is active, click over to the sensors page to be sure that the SC1 and/or SC2 sensors are selected for display. When you click Start File, be sure to enable saving of sensor signals by selecting the option to “Save displayed sensors”. Note that the CM S and DRL electrodes must be attached to the subject and connected to the system, and the blue “CM in range” light must be on for GSR measurement to work properly. Also, the green "GSR in range" lights should be on when GSR electrodes make adequately low impedance contacts with the subject. Note that the green GSR lights always remain off if the blue CM light is off. GSR can only be measured with the blue CM light and the green G SR lights glowing. Finally, if the GSR signal looks flat after you have made all of the other settings, it may be that you need to increase the scale of the GSR signal on the display. There is a scale tool at the left side of the Sensors display page. 3. Temperature With this high precision temperature sensor from HP (Agilent 21078A), skin temperatures can be measured. The temperature sensor directly plugs into one of the three available circular DIN connectors on the front panel of the ActiveTwo A/D Interface Box. An additional LabVIEW module is delivered with the system when a temperature sensor is ordered. 4. Pulse / plethysmograph This Plethysmograph sensor from ADI instruments (M LT1020) uses an infrared photoelectric sensor to detect changes in tissue blood volume. The Plethysmograph sensor directly plugs into the front of the ActiveTwo. An additional LabVIEW module is delivered with the system when a ActiveTwo Operating Guidelines Rev. 6, Printed: January 31, 2007 Page - 26 Plethysmograph sensor is ordered. This sensor can be ordered with a finger clip (/F option), with a Velcro strap (/p option) or with an ear clip (see picture, /E option). Click here for the .pdf specifications of the plethysmograph. 5. Jazz vigilance monitor The Jazz vigilance monitor system was developed by a Polish academic research group, led by Prof. Ober. A special 'synchronic' version is offered for interfacing directly with the ActiveTwo. The synchronic Jazz system consists of 3 building blocks: 1) the head mounted eye monitor, 2) transmitter with twin fiber-optic connection (data out, sync in), and 3) receiver with twin fiber-optic connection and RS232 output. Note that there is no head position/orientation monitoring capability, so Jazz cannot be used to derive 'point-of-regard' from eye-position, as would typically be possible with an eye-tracking system, unless the subject's head is immobilized. The sample-rate of Jazz is synchronized with the ActiveTwo sample rate via a sync connection between ActiveTwo receiver and Jazz receiver. The Jazz data interfaces to the ActiveTwo host PC via the RS-232 port. The ActiView acquisition software combines the ActiveTwo data (via USB2 port) and Jazz data (via RS-232 port). 6. Active strain gage BioSemi can equip your force transducer with a miniature (15x30mm) precision strain gage amplifier. This makes your strain gage active. The output signal is processed by the ActiveTwo A/D box just like any other active sensor. The advantages are that all influences of the connection cable are completely eliminated, there is no cable interference and there is no temperature drift. The Active strain gage contains a low-noise, low-power, zerodrift, chopper-stabilized differential amplifier. The power supply is from the ActiveTwo A/D box (16mA total bridge current). The modification to the Active strain gage can be performed for quarter, half and full bridge strain gage configurations. The supplied LabVIEW module automatically zeros the bridge and amplifier offset on startup. No further hardware trimming is necessary. The photo shows a precision force measurement for finger pressure, the amplifier is sealed in resin on the left side of the ergometer. Note that the Active strain gage needs 2 extra channels. ActiveTwo Operating Guidelines Rev. 6, Printed: January 31, 2007 Page - 27 7. Microphone M icrophone to record audio stimuli and responses. A highly effective built-in spherical filter minimizes wind and breath 'pop' noise. Connects directly to the standard BioSemi ActiveTwo Ergo input on the A/D box. 8. Dual response switch Response switches for direct connection to the AUX (front) connectors on the A/D box. The setup with the response switches connected directly to the A/D box ensures accurate timing of the response moments (pulse is mixed directly with the incoming EEG signals) as well as optimal isolation of the subject (no grounded equipment near the subject). Using the USB trigger port with a response box also provides good timing, but has the disadvantage of bringing the safety grounds near the subject. The BioSemi Response switches connected to the A/D box will make sure your response timing is accurate and your subject isolation remains optimal. J. ActiView software ActiveTwo is provided with a free, open-source data acquisition software program called ActiView. ActiView is optimized for use with ActiveTwo, and it provides mechanisms for visualizing and storing signals from all of the system’s available sensors, including specialized sensors like the Jazz Synchronic Vigilance M onitor. The source code is provided so that 1) users have access at the most basic level to understand how their data are being treated, and 2) developers can easily modify the standard application to add specific functionality they need. ActiView has been developed using National Instruments LabVIEW, so the source code is provided in the form of LabVIEW llb files, and developers must have access to LabVIEW to view and modify the source code. See the sections on ActiView Software Installation and Operating the ActiView Software for detailed instructions on using the software. ActiveTwo Operating Guidelines Rev. 6, Printed: January 31, 2007 Page - 28 V. ActiveTwo hardware setup A. Connect the ActiveTwo components The diagram below shows how to connect the basic components of the ActiveTwo system. Note that there are a wide variety of other sensors that can be used with ActiveTwo, and those are not depicted here. In general, other sensors would be connected to the Aux 2 or 3 inputs. B. Ensure that electrodes and sen sors have been applied properly to participant See the section above on applying electrodes to ensure that the electrodes and sensors are properly connected to the subject. C. Plug the electrodes and sensor s into the A/D box Plug electrodes and sensors in at their designated locations. See above section for details. D. Verify the speed mode Check the Speed Mode dial on front panel of A/D box to be sure that it is set according to the requirements of the current study. Refer to the ActiveTwo User M anual for detailed specifications and instructions. E. Turn on power Depress the power switch on the battery unit connected to the A/D box. ActiveTwo Operating Guidelines Rev. 6, Printed: January 31, 2007 Page - 29 F. Verify that the CM in Range light comes on If CM in Range does not come on, then verify that you followed the steps described under Applying Electrodes. Failing that, see the section on Troubleshooting. G. Start the ActiView software See the section on Operating the ActiView Software for details. ActiveTwo Operating Guidelines Rev. 6, Printed: January 31, 2007 Page - 30 VI. ActiView software installation A. Computer requirements Ensure that your host PC meets the following requirements: 1. Windows XP, SP2 2. USB 2.0 interface If you wonder whether your computer has a USB 2.0 interface, check Device M anager for an “Enhanced USB Host” entry. This is “code” for USB 2.0. 3. Adequate display resolution The four resolutions below are specifically supported, but other display modes providing at least 1024 lines will work fine. Display modes with fewer than 1024 lines present a problem, because ActiView does not dynamically resize to the current display mode. a) WSXGA = 1440 x 900 at 16:10 aspect ratio (laptop / notebook) b) SXGA = 1280 x 1024 (LoRes) c) UXGA = 1600 x 1200 (HiRes) d) WUXGA = 1920 x 1200 (Wide) 4. Windows user rights You must have local administrative rights to install ActiView and the LabVIEW Runtime Engine. Often, the USB driver will install properly even if the current user does not have administrative rights. Note that if your network administrator forces software installed by local users to be located in a specific folder with access rights limited to one user or group (e.g. on a network drive), the access to the ActiView application may be limited to the current user or members of the same security group. Consult with your network administrator to determine the correct user rights required for optimal installation and operation of ActiView. B. Copy software from web or place CD in drive 1. Use CD Insert the ActiView software CD in the drive of the host computer, or … 2. Download latest software from BioSemi.com ActiveTwo Operating Guidelines Rev. 6, Printed: January 31, 2007 Page - 31 Retrieve the desired version of ActiView software, associated version of the LabVIEW Runtime Engine and the USB interface driver from http://www.biosemi.com/download.htm. Note: there are low-resolution (LoRes), high-resolution (HiRes) and highresolution + wide (Wide) versions of ActiView 5.34 available for download. Each operates at a fixed resolution as described above. C. USB Driver Installation a) Disconnect fiber-optic cable Driver installation will fail if fiber-optic cable is connected to USB interface and to A/D box with A/D box power on during the driver installation procedure. b) Connect USB cable Connect the USB cable to the front panel USB connection on the optical receiver / USB 2.0 interface. c) “Windows Update” question – IMPORTANT! Windows will detect the USB device and it may bring up a dialog box asking whether it can search Windows update to find a suitable driver. IMPORTANT: ANSWER ‘NO’ TO THIS QUESTION! d) Next, Windows will ask whether it can find the best driver automatically. ActiveTwo Operating Guidelines Rev. 6, Printed: January 31, 2007 Page - 32 (1) If you have the BioSemi CD in the drive Select the option, “Install the software automatically”, and Windows will find the driver. (2) If you downloaded the software from the BioSemi web site (a) Be sure to unzip the contents of the downloade d zip file to a folde r on your PC. (b) Sele ct the option to “Install from a list or spe cific location”, and click Ne xt to proceed. (c) Sele ct “Include this location in the se arch”, and type the path to the folde r whe re you place d the drive r or use the Browse option to locate the folde r. (d) Click Next to procee d. e) Success = BioSemi icon If Windows finds and installs the correct driver, you will see the BioSemi icon in the final dialog box. ActiveTwo Operating Guidelines Rev. 6, Printed: January 31, 2007 Page - 33 D. LabVIEW Runtime Engine Installation ActiView 5.34 and later require LabVIEW Runtime Engine (LVRTE) version 7.1. Note that other versions of ActiView may require different versions of LVRTE. See the table at http://www.biosemi.com/download_actiview.htm for a list of ActiView versions and the version of LVRTE required for each (a link to download each is also provided). 1. Locate “LVRunTimeEng.exe” Open Windows Explorer. If you are installing from the CD, then browse to the BioSemi CD, and find the folder containing the LVRTE self-installer called “LVRunTimeEng.exe”. If you downloaded ActiView and LVRTE from the BioSemi web site, then browse to the folder in which you placed the “LVRunTimeEng.exe.”. 2. Double-click LVRunTimeEng.exe The LVRTE installation will begin. 3. Click through the installation using all default settings E. Copy the ActiView application to a local folder 1. Create a new folder under \Program Files Create a folder for the selected version of ActiView: “<DriveLetter>:\Program Files\ActiView\<VersionNumber_Resolution>\” where “<DriveLetter>” is the letter of the drive that contains your existing Program Files folder and <VersionNumber_Resolution> is the version number of the ActiView software and resolution (e.g. LoRes). Assuming multiple versions of ActiView that you want to use rely upon the same version of the LVRTE (http://www.biosemi.com/download_actiview.htm), you can have multiple versions of ActiView installed on the PC at once. ActiveTwo Operating Guidelines Rev. 6, Printed: January 31, 2007 Page - 34 2. If you downloaded ActiView If you downloaded the ActiView application, it will be contained in a ZIP archive file from which you will need to extract the application and associated files. Place the extracted files in the folder you created in step (1) above. 3. If you are installing from the CD If you are installing ActiView from a BioSemi CD, then select a version of ActiView that will be compatible with the highest-resolution display mode that your computer can comfortably display. WSXGA = 1440x900, SXGA = 1280 x 1024 (LoRes), UXGA = 1600 x 1200 (HiRes) and WUXGA = 1920 x 1200 (Wide). Place all of the files associated with the chosen version of ActiView in the folder you created in step (1) above. 4. Check the files in the ActiView folder The ActiView folder should contain the following files: Exact names for the .EXE, .INI and .LLB files will differ depending upon which version of ActiView you chose in the step above. Note that the .CFG files will be recognized as M icrosoft Office Outlook configuration files if you have M icrosoft Outlook installed. Note also that, beginning with version 6.00, CFG files with channel label schemes matching the 1020 head caps are located in the folder named “Configuring”. 5. Create a Windows shortcut to ActiView Right-click on the file with the .EXE extension in the ActiView folder and select Create Shortcut. Rename and move the shortcut file to your Desktop (<DriveLetter>:\Documents and Settings\<YourUserNameHere>) or to the shared desktop (<DriveLetter>:\Documents and Settings\All Users) to make it convenient for other users to find and access the shortcut. ActiveTwo Operating Guidelines Rev. 6, Printed: January 31, 2007 Page - 35 VII. Applying electrodes and sensors to participant A. Applying pin-type active electrodes 1. Familiarize yourself with basic skull surface anatomy If you are not already familiar with the surface anatomy of the skull, familiarize yourself with the important landmarks used in EEG positioning. These are: a) Nasion b) Inion c) Left preauricular point (LPA) and right preauricular point (RPA) d) Vertex (intersection of lines between nasion/inion and left/right preauricular points), also know as Cz 2. Fit the head cap a) Measure head circumference to select proper cap size M easure the circumference of the subject’s head just above the eyebrows and over the inion at the back of the head. Use this circumference measurement as a guide in choosing a head cap size. Fifteen cap sizes are available, but most users have access only to a few sizes. Cap sizes are intended to fit a four centimeter range of head circumferences, so the tightness of fit will vary depending on whether your participant falls near the upper or lower end of the range for a given cap. ActiveTwo Operating Guidelines Rev. 6, Printed: January 31, 2007 Page - 36 b) Measure nasion-inion distance before applying head cap and divide this distance by two M easure the distance from nasion to inion and divide by two to determine the proper location of the Vertex electrode (in 10/20 or 10/5 terminology, the Vertex is referred to as Cz). Remember this measurement. c) If participant has long hair, fix mastoid or earlobe electrodes before putting-on the head-cap Hair long enough to cover the mastoids or earlobes will make it difficult to impossible to fix mastoid or earlobe electrodes after putting on the cap, so fix at least these flat-type electrodes before putting on the head cap. Note that it is also advisable for a subject with long hair to let their hair down and distribute it evenly around the back and sides of the head to minimize the barrier it can form preventing electrolyte gel from contacting the scalp. Follow the steps under Apply flat-type active electrodes below to apply these electrodes. d) Put the cap on the participant’s head Standing behind the participant, 1) place the frontal electrode holders on the forehead (taking care not to let them slip over the participants eyes), and 2) stretch the cap back over the head. Finally 3) reach under the participant’s chin and fix the chin strap. Some participants may find it helpful to place tissue or gauze under the chin strap for comfort and to avoid chafing. 1 2 3 e) Measure nasion-to-inion distance and adjust cap position from front-to-back After putting on the cap, measure to be sure that the vertex electrode is where it should be. With caps labeled according to the 10/20 or 10/5 system, the vertex electrode site will be labeled Cz, but in the standard ActiveTwo 128, 160 and 256 channel head ActiveTwo Operating Guidelines Rev. 6, Printed: January 31, 2007 Page - 37 caps, the vertex will be labeled A1. M ost often, the cap will be slightly too far back on the head at first. f) Position vertex at half-way point between LPA and RPA Open the ear-slit in the left side of the head cap and find LPA. Place the zero point of the measuring tape at LPA. Stretch the tape over the head as close to the vertex electrode as possible while trying to avoid placing the tape over electrode holders. Note that if one side of the tape goes over electrode holders and the other side of the tape goes next to electrode holders, the measurement of the half-way point will be inaccurate. Open the right ear-slit in the cap and find the measurement at RPA. Divide this distance by two to determine the correct position of the vertex from leftto-right. g) Ensure cap is not rotated Standing behind (or in front of) participant, visualize a line following the center hole in each of the midline electrode holders from vertex toward the front of the head. If this line does not line up with the nose, then rotate the cap to line up the midline electrodes with the nose. h) Repeat the above steps Repeat the steps above one last time to ensure vertex is at half-way point between nasion/inion and LPA/RPA and cap is not rotated. 3. Fill electrode holders with electrolyte gel a) If using SignaGel… If using SignaGel, remove the plunger from a clean syringe, and inject approximately 10 ml of gel into the syringe. This is a suitable amount for about 64 channels. Use less gel if you have fewer channels. Replace the plunger. b) If using another electrolyte that does not come in a tube… If using another gel that does not come in a tube, decant 10-20 ml of gel into a disposable cup. This helps avoid contamination of the vessel containing the electrolyte. Remove the needle if you are using a Luer-Lok syringe. Then, place the tip of the syringe into the gel in the cup, and pull back on the plunger to pull approximately 10 ml gel into the syringe. This is a suitable amount for about 64 channels. Use less gel if you have fewer channels. If you removed the needle from the syringe, replace the needle. ActiveTwo Operating Guidelines Rev. 6, Printed: January 31, 2007 Page - 38 c) Inject gel into the first electrode holder Place the tip of the needle or syringe (tip) into one of the electrode holders, being careful to touch the scalp and lift the syringe away from the head as you press the plunger. If you hold the tip at the scalp and do not pick up while pressing the plunger, the gel will spread across the scalp rather than forming a conductive column from the scalp to the top of the electrode holder. As your first site, choose a position where the hair seems to be fullest. IMPORTANT – do not abrade the scalp as is traditionally done with other EEG systems. This will only increase the risk of breaking the skin, which can result in infection. d) Ask the participant whether they feel the gel at the scalp If the participant does not feel the cold sensation of the gel at the scalp, the use the tip of the syringe to part the hair (touch the scalp with the tip and rock gently back-and-forth once or twice) and then inject a small amount of gel. Ask the participant again if they feel the gel. If so, then proceed to the next step. If not, then try another location where the hair is less full. Repeat this until the participant reports feeling the cold sensation of the gel on the scalp. Use this self-report technique any time you doubt whether the gel is making contact with the scalp. (1) Important notes about electrode contact impedance With ActiveTwo, the gel simply needs to make contact with the scalp and with the electrode (which will be placed in the electrode holder later) to measure excellent quality signals. The ActiveTwo system has very high input impedance, so it is very tolerant of high impedance contacts at the skin. For the most part, skin impedance levels (and differences in skin impedance) are not important factors in signal quality measured with ActiveTwo. There are two main exceptions to consider: (a) Ve ry high impe dance contacts There is a relatively narrow range (very unlikely, and occurs very infrequently) of possible skin impedance levels at which ActiveTwo will exhibit higher input noise (e.g. 60 Hz common mode interference) or instability (e.g. lowfrequency drift), so it is sometimes necessary to touch-up contacts at one or two sites to address noisy signals. ActiveTwo Operating Guidelines Rev. 6, Printed: January 31, 2007 Page - 39 (b) Skin potentials Be aware that no bio-amplifier system, including ActiveTwo, can distinguish between local variations in skin potential and local variations in very low frequency potentials resulting from brain activity. Below is a sample of the low-frequency artifact associated with skin potentials and sweat to assist in recognizing this phenomenon: We recommend designing your experiment and your experimental procedure to minimize the possibility that skin potentials will corrupt your EEG measurements. Here are some suggestions for minimizing skin potentials: (i) Design your lab space with adequate ventilation. Surprisingly enough, people often go to great lengths to build a shielded room with special electrically-quiet lighting, but they forget about ventilation and temperature control. Have your lab space designed with more ventilation and range of temperature control than you would expect to need, especially if you have an electrically shielded room and/or are using low-voltage halogen lighting. (ii) Use a fan to move air through the room. If you do not have control over heating and cooling systems, then use a simple electric fan to increase air flow around the participant. Keep the fan as far as is practical from the subject, and make sure that you follow the recommendations below for twisting the CM S/DRL electrode leads around the leads of the active electrodes to minimize pickup of magnetic noise associated with the fan’s electric motor. ActiveTwo Operating Guidelines Rev. 6, Printed: January 31, 2007 Page - 40 (iii)Ask your participants to layer their clothing. Suggest that participants wear a short-sleeve shirt with a sweat shirt or sweater so that they can remove a layer if they get too warm. Warm participants will produce spontaneous skin potentials that will require high-pass filtering to remove. (iv) Use an electrolyte gel with higher salt content. SignaGel contains no Chloride. To minimize susceptibility to skin potential artifact, especially that associated with physical exertion by the subject during the recording session, use an electrolyte gel containing Chloride. Lectron III, Chloride 10 is a good choice. Do not use Abralyt or Quik-Gel as these products contain other undesirable ingredients. e) Fill the remaining electrode holders with gel This is the second most time-consuming step of applying an electrode head cap. It is important to use only enough gel in each site, and it is important to try to fill each holder, but practice this procedure to minimize the time it takes to fill all of the holders. f) Insert the pin-type active electrodes into the head-cap Drape a ribbon cable containing pin-type electrode holders around your neck and over your shoulders. Observe that pin 1 and channel 1 are on the side of the ribbon cable with the red line. Take a group of four or eight electrodes at one or the other end of the cable in one hand, being careful to control the others so that they do hit the participant in the eye. ActiveTwo Operating Guidelines Rev. 6, Printed: January 31, 2007 Page - 41 g) Drape ribbon cables over the participant’s shoulder After applying each pin-type active electrode set, drape the ribbon cable over the participant’s shoulder so that you do not step on them as you move around. h) Insert CMS and DRL electrodes On newer systems, CM S and DRL are on a special lead with a circular DIN connector that fits in to the leftmost circular jack on the front panel of the A/D box. On older systems, CMD and DRL are included as the last two electrodes on the A1-32 electrode set. Note that on new systems, the pins on the first D connector serving CM S and DRL are still connected, so if you plug in an A electrode set with CM S/DRL and a circular DIN connector with CM S/DRL, the safety circuit of ActiveTwo will be engaged, causing the CM in Range light to go out and making it impossible to record meaningful data. IMPORTANT: Be careful to avoid electrolyte bridges between CM S and/or DRL and active electrodes. An electrolyte bridge (short) between any active electrode and DRL will result in very high noise in the signal measured from the active electrode. An electrolyte bridge between any active electrode and CM S will result in a flat-line (no voltage can be measured between two shorted contacts). B. Apply flat-type active electrodes If you will use flat-type active electrodes to measure EOG, ECG, EM G or EEG reference (that you did not apply before putting on the head cap), then apply those at this time. Some cleaning of the skin with an alcohol prep pad may be necessary in case of excessive makeup or sweat. Note that it is possible to use only flat-type active electrodes (without a head-cap), but you must always have CM S and DRL connected to the subject. In this case, you will need to have a special flat-type CM S/DRL set that plugs into the front panel of the A/D box. If you are not using the head cap, you may wonder where the CM S and DRL electrodes should be positioned. The location of DRL is not particularly important – it just needs to be on the body. For convenience, position DRL within about 3 inches of CM S. The location of CM S is theoretically important, since it is effectively the common. If possible, position CM S near the middle ActiveTwo Operating Guidelines Rev. 6, Printed: January 31, 2007 Page - 42 of the electrode array. If the density of the electrode array does not permit this, then position CM S as close to the electrode array as possible. IM PORTANT: Be careful to avoid positioning CM S and DRL too close to other electrodes. An electrolyte bridge (short) between any active electrode and DRL will result in very high noise in the signal measured from the active electrode. An electrolyte bridge between any active electrode and CM S will result in a flat-line (no voltage can be measured between two shorted contacts). 1. Peel the adhesive electrode ring off of its paper backing 2. Apply the ring to the plastic electrode housing Take care to position the opening in the ring around the electrode pellet. Note that the pellet is closer to the electrode ring than you might expect, and it is NOT directly opposite the electrode label. 3. Apply gel to electrode contact After sticking the ring to the electrode and before removing the protective paper cover, apply a small amount of conductive electrolyte gel to the electrode pellet. 4. Then, remove the paper backing from the adhesive ring and attach to participant Remove the paper backing and place the electrode where you want it. Note that when you position the electrode, you will be looking at the label side. Remember that the electrode contact is at about the junction of the lead wire with the plastic housing, rather than directly under the label. Following the procedure outlined here should help remove any excess gel that might otherwise prevent the adhesive from sticking to the skin. 5. Drape leads over the participant’s shoulder After applying each flat-type active electrode, drape the lead over the participant’s shoulder so that you do not step on them as you move around. C. Connect the electrodes to the A/D box Plug the electrodes that are attached to the participant into the A/D box. 1. Pin-type electrodes: ribbon cables with 68-pin D connectors The ribbon cables with 68-pin D connectors are labeled A1-32, B1-32, etc. Plug these connectors into the A/D box first, taking care that the connector is oriented so that the label is legible to you if you are standing facing the front of the A/D box. (Note that ribbon cable sets are available with flat-type electrodes, although this configuration is typically only required for dense surface EM G measurements.) IMPORTANT: Take care to plug connectors in the correct orientation to avoid costly damage to connectors on the cables or on the A/D box. ActiveTwo Operating Guidelines Rev. 6, Printed: January 31, 2007 Page - 43 Attempting to plug-in a D connector in the wrong orientation can result in a bent pin on a 68-pin D connector (electrode ribbon cable). Attempting to plug-in a damaged D connector can result in damage to the mating D connector on the top of the A/D box. Since all of the connectors on the top of the A/D box are mounted to a single input board, a single damaged input connector may require the entire input board to be replaced. 2. Flat-type electrodes: individual leads (two lead cable) with key-shaped connectors Individual leads with key-shaped connectors are intended to plug-in at EXG1-8 on the top panel of the A/D box. Note that the labels on the electrodes match labels on the connectors, so it is a good idea to be consistent in connecting these leads to the A/D box in such a way that the labels match. That said, the labels in the electrodes are somewhat arbitrary, and it is possible to plug in an electrode labeled EXG1 at the jack labeled EXG2 without any ill effects aside from the obvious potential confusion that could result. (Note that individual leads with key-shaped connectors are available with pin-type electrodes to supplement the standard electrode array provided by the head cap + ribbon cable or as quickinsert leads to replace a faulty electrode from a 32 channel ribbon cable on an emergency basis.) 3. CMS/DRL set with circular DIN connector (Important: keep leads together!) a) IMPORTANT: Wrap the CMS/DRL cable around the other electrode and sensor cables Wrap CM S/DRL around the other cables 3-5 complete turns before plugging it into the front of the A/D box to help minimize magnetic interference pickup. Use medical tape or Velcro cable ties to keep the cables close to one another. This is an important step to ensure you measure the absolute best quality data possible. b) Insert the circular DIN connector at the front panel of the A/D box Insert the connector taking care to position it in the correct orientation. Press-in and turn the plastic ring on the DIN connector until it is snug. Do not over-tighten as the plastic ring can break. 4. Verify that the blue CM in Range LED comes on CM in Range serves more than one purpose, but it must be ON to record meaningful data. ActiveTwo Operating Guidelines Rev. 6, Printed: January 31, 2007 Page - 44 a) CM in Range: solid blue (on) = CMS and DRL connected to participant and A/D box CM in Range will not come on if the CM S and DRL electrodes are not connected to the participant, if there is not adequate gel to make contact with the participant’s skin and if the CM S/DRL cable is not connected to the A/D box. b) CM in Range: solid blue (on) = No faults detected CM in Range will not come on if any over-current or under-current state is detected at the CM S electrode. Such a situation can be caused by a faulty active electrode or a connector / cable serving any active electrode. An over current situation theoretically could be caused by current flowing via a leaky ground of another device the subject is in contact with, but you would have to be extremely unlucky to encounter this circumstance. D. Apply any additional sensors ActiveTwo supports a variety of other sensors for measuring physiological and nonphysiological signals. A current list is maintained in the Accessories section under ActiveTwo on the Cortech Solutions web site (www.cortechsolutions.com). New sensor options are periodically added, so check the web site if you have not looked at it recently. If you need a sensor that was not provided with your system or that you do not find in the Accessories listing under ActiveTwo on our web site, please contact us. 1. Skin conductance (SC) M easuring SC is more complicated than measuring signals with some of the other sensors available for use with ActiveTwo, so we have provided some specific procedural recommendations. a) Preparation (1) Start with clean electrodes Tarnish on the electrodes may affect the baseline resistance reading, but it will not affect the ability of the system to measure changes in skin conductance. (2) Wash your hands Always wash your hands with soap and water before applying electrodes to someone else. If you have any breaks in the skin of your hands, or any “weeping” rashes or lesions, wear examination gloves. (3) Wash the participant’s hands Always have the participant wash his/her hands with soap and water and dry them thoroughly before applying electrodes. This helps to equate the degree of skin hydration across participants. ActiveTwo Operating Guidelines Rev. 6, Printed: January 31, 2007 Page - 45 (4) If the subject has any breaks in the skin or weeping lesions on his/her hands near the recording sites, DO NOT RUN THAT SUBJECT. b) SC electrode application (1) Select an electrolyte to use as a conductive medium. Skin conductance is best measured using an electrolyte formulated specifically for skin conductance measurements rather than the strongly hypertonic solutions generally used for EEG or ECG measurements. Keep the electrolyte container closed between uses. Do not use SignaGel or other electrolyte solutions with high salt concentrations for GSR. One option is to have a local compounding pharmacist make a batch of electrolyte paste according to one of the recipes found in: Lykken, D.T., & Venables, P.H. (1971). Direct M easurement of Skin Conductance: A Proposal for Standardization. Psychophysiology, 8, 656- 672. (2) Apply paste evenly to the surface of the electrode. Avoid creating air bubbles in the paste. Fill the electrode well to the top to insure contact between the entire electrode surface and the skin. Overfilling will cause paste to spread out under the collar when the electrode is applied to the subject, resulting in variation in the electrode contact area and poor adhesion of the collar. If you overfill the electrode, use the side of a toothpick to grade off the excess paste. (3) Select a location and affix electrodes Press the electrode in place on the subject with the lead wire running in an appropriate direction. Be careful not to move the electrode after contact with the skin. Press firmly on the electrode to be sure that it adheres tightly to the skin. Use paper tape to hold the electrodes in place. The double-sided adhesive rings pictured below are an option, but tape usually works best with paste electrolytes. (a) Option 1 (standard placement) Affix the electrodes to the volar (palmer) surface of the distal phalanges (the fingerprint region) of the left hand. Run the leads down the fingers ActiveTwo Operating Guidelines Rev. 6, Printed: January 31, 2007 Page - 46 toward the palm, and wrap a loop of paper tape around the lead and medial phalange of each finger to relieve stress on the electrode. Further secure each electrode with a loop of paper tape around the fingertip. (b) Option 2 (alternative placement) If the subject has cuts or callouses on his/her fingertips, or if he/she has slender fingers that make it difficult to secure electrodes to the fingertips, opt instead for the thenar and hypothenar eminences of the subject's left hand. Place the electrodes so that the leads travel toward the wrist and secure them at that point with a strip of paper tape. (4) Connect electrodes to A/D box Connect the SC electrode leads at the circular DIN connector marked GSR on the front panel of the A/D unit. If you are not also recording EEG, then position flat-type CM S and DRL electrodes on the back of the hand about 2 inches apart. Be sure that the CM in Range light comes one when the CM S and DRL electrodes are connected and the A/D box power is on. Skin on the arms and hands tends to be dryer than elsewhere on the body and may require some preparation (moistening with water or electrolyte gel) for adequate conductivity to be achieved. If CM in Range comes on, no further skin preparation for CM S/DRL or for the SC electrode sites should be necessary. (5) Adaptation period Reliable recording requires an adaptation period of at least 10 minutes (15-20 minutes is recommended for research in which within-session change in skin conductance level is an important variable). This period allows equilibration of hydration and sodium at the interface between the subject's skin and the electrode paste. 2. Respiration The ActiveTwo respiration sensor is a Nihon Kohden TR753T respiration belt. Two channels on the ActiveTwo are modified in order to provide a bipolar signal. Strong reliable signals are available because the respiration belt uses the power supply from the ActiveTwo system. The respiration belt directly plugs into the front of the ActiveTwo Operating Guidelines Rev. 6, Printed: January 31, 2007 Page - 47 ActiveTwo. 3. Temperature With this high precision temperature sensor from HP (Agilent 21078A), skin temperatures can be measured. The temperature sensor directly plugs into the front of the ActiveTwo. 4. Plethysmograph This Plethysmograph sensor from ADI instruments (M LT1020) uses an infrared photoelectric sensor to detect changes in tissue blood volume. The Plethysmograph sensor directly plugs into the front of the ActiveTwo. This sensor can be ordered with a finger clip (BS-AT-PSF option), with a Velcro strap (BS-AT-PSP option) or with an ear clip (BS-AT-PSE). 5. Other sensors Sensors other than those above are generally provided with a connector designed to plug into a circular DIN jack labeled Ergo1 or Ergo 2 on the front panel of the A/D box. Regardless of whether these are physiological sensors, it is still necessary for the CM S and DRL electrodes to be connected to the participant and for the CM in Range light to be on (indicating the system has a stable common against which to measure electrical potential) for meaningful signals to be measured. ActiveTwo Operating Guidelines Rev. 6, Printed: January 31, 2007 Page - 48 VIII. Operating the ActiView software A. Start ActiView Start ActiView by double-clicking the ActiView .EXE file or the shortcut you created pointing to the .EXE file. A window like the one below should appear. B. Select a configuration (.CFG) file Note that the file DEFAULT.CFG located in the current directory (the directory in which the ActiView executable (.EXE) file you are using is located) will be loaded automatically when ActiView is started. 1. If you want to ensure that a particular .CFG file is loaded on startup Rename the old DEFAULT.CFG to OLD_DEFAULT.CFG, and save your desired configuration file as DEFAULT.CFG. 2. To force the operator to select a .CFG file on startup Delete or rename DEFAULT.CFG and do not replace it. When ActiView goes to find DEFAULT.CFG, it will bring up a Windows File Open dialog box and ask the operator to select a .CFG file. If you have a busy lab with multiple ActiveTwo Operating Guidelines Rev. 6, Printed: January 31, 2007 Page - 49 experiments being conducted with the same equipment, it is advisable to use this strategy to ensure that the operator chooses the right .CFG file (to the degree that the operator is aware of which .CFG his experiment requires). 3. To load a CFG file manually, follow these steps: a) Select About ActiView This tab can be found at the upper right side of the ActiView screen. b) Select Load Config This button can be found at the top of the left-hand panel. A Windows file dialog will appear showing the contents of the current directory. The current directory will be the directory in which the ActiView program (.EXE) exists. c) Select a configuration (.CFG) file, and click OK When the ActiView screen returns, the new settings will have been loaded, but their effect may not be seen until you return to the Monopolar Display tab (upper left) and click Start to start viewing the incoming data. Note in particular that the Channel labels will not update until after the Start button has been pressed. Other parameters such as Sample Rate and Bandwidth, which depend on the current setting of the Speed M ode dial on the front of the A/D box, will not be updated unless the program has communicated at least once with the A/D box (either before or after the .CFG was loaded). C. Verify the equipment is properly connected See ActiveTwo hardware setup for guidelines on connecting the equipment. D. Turn on the A/D box power and verify the contacts at CMS and DRL Once the equipment is connected, depress the power switch on the battery unit connected to the A/D box and follow the instructions under Electrode Offset below to verify that the CM S/DRL electrodes are properly connected to the subject and that there are no other problems that would prevent you from recording meaningful data. E. Verify the Decimation Ratio and Screen Length settings Decimation Ratio and Screen Length are the two main parameters you will need to verify before clicking Start below. These two parameters cannot be adjusted while data are being displayed. ActiveTwo Operating Guidelines Rev. 6, Printed: January 31, 2007 Page - 50 F. Click on Start to display data Start will display the incoming signals in the ActiView screen. Regardless of how good or bad the signals look in this view, we recommend that you visit the Electrode Offset tab (see below) to check the stability of the electrode contacts. G. Select Electrode Offset to check electrode contacts The Electrode Offset tab displays a running average of the voltage measured between CM S and each active electrode. This value is not convertible to impedance, and it should not be considered the functional equivalent of impedance. Relatively low, stable electrode offset is a necessary, but not sufficient, condition for measuring good quality physiological signals from active electrodes. 1. Which electrode contacts are responsible for high electrode offsets? a) CMS/DRL not connected Offset values exceeding the input range of the A/D converter (+-262 mV) across all channels, suggest that the CM S/DRL connection is not intact. b) CMS/DRL OK, but certain active electrodes not connected Offset values exceeding the input range of the A/D converter at fewer than the total number of channels suggest that the CM S/DRL connection IS intact, but contacts at the measurement sites (active electrodes) ARE NOT intact. 2. Assuming electrodes are connected to the subject, what does Electrode Offset measure? Electrode offset reflects the half-cell potential of the electrode/gel/skin interface. Differences in offset are mainly attributable to the attachment of stray ions at electrode tips (oxidation) or the loss of ions from the tip (corrosion). If you take good care of the electrodes (following the Electrode Handling guidelines in the ActiveTwo User Manual), you should see mainly small variations in offset that are easily tolerated by the system. 3. Verify low, stable offsets across channels Verify that offsets at each active electrode are between +-40 mV and they do not oscillate rapidly when the participant moves his or her head back and forth. It is a good idea to ask the participant to move while viewing the offsets to ensure a good, stable connection. 4. If offsets are all at the maximum level: CMS/DRL Stable contacts at CM S and DRL are necessary for measuring low, stable offsets on other channels. If offsets at all channels are at +262 mV, then the CM in ActiveTwo Operating Guidelines Rev. 6, Printed: January 31, 2007 Page - 51 Range LED is probably off. It may be necessary to part the hair or add electrolyte gel to make a stable contact at CM S/DRL. 5. If offsets only at certain channels are at the maximum level If some channels show high offsets, but the majority show low, stable offsets, then part the hair with the syringe tip and add gel at the offending sites. H. Select Monopolar Display tab to view incoming signals Once you have done what is necessary to create low, stable electrode offsets at all of the active electrodes, you should click over to the M onopolar Display tab to view the incoming signals. 1. Settings to use in checking electrode contacts To maximize the information you get from the M onopolar Display tab during the process of electrode contact checking, we recommend the following settings. a) Set Channels to include the range of inputs you are using If you are using 32 active electrodes on the first 68-pin connector for ribbon cables (labeled A1-32; normally used for pin-type active electrodes), then select A under the Channels selector. If you are using 128 active electrodes on four ribbon cables plugged in at the first four D connectors (A1-32 … D1-32), then select ABCD under the Channels selector. b) Set Reference to None (Raw) Selecting None (Raw) under Reference will show you the voltage reading at each active electrode with respect to CM S (effectively, the Common). Note that this view is consistent with the way signals are stored by ActiView – unreferenced. The unreferenced view is helpful in identifying noisy channels, and it eliminates the possibility that the digital reference subtraction will make a saturated (flat signal; voltage exceeding the input range of the A/D converter) channel look like it is in range and measuring a meaningful signal. c) Turn off display filters (Low-Pass and High-Pass) The High-Pass and Low-Pass filters should be ff to maximize your ability to see unwanted low and high frequency interference. Use this unfiltered view to guide you in finding sources of interference and eliminating them before you start recording data. To turn the display filters off, click on the green with the green highlight in the center below each filter title to change its state to gray or off. 2. If the signals all look fine You may find that all of the signals look perfectly reasonable at this point. If so, then you should proceed to Recording Data below. ActiveTwo Operating Guidelines Rev. 6, Printed: January 31, 2007 Page - 52 3. If you see unstable signals, even though the Electrode Offsets are low and stable After verifying low, stable electrode offsets, you may find a few channels on the M onopolar Display tab show high 60 Hz noise or low-frequency interference (unstable baseline). If this occurs, follow these steps: a) Remove the active electrode at the offending site. b) Insert the syringe tip and touch the scalp. c) Gently rock the syringe back-and-forth 2-3 times to part the hair. d) Apply more gel, but only if… If no gel is visible at this site or you think you may not have applied gel here during preparation, then apply more gel. Be careful to avoid using too much gel, because this can result in electrolyte bridges between two active electrodes or between an active electrode and CM S or DRL. e) Repeat the above steps until satisfactory signals are achieved from all active electrodes. f) If you still have noisy channels after trying everything If you find that certain channels do not respond to your efforts to eliminate 60 Hz noise or unstable baseline, see the section on Troubleshooting below for assistance. I. Record data 1. Click Start File Start File is at the lower right side of the M onopolar Display page, and it is available only while viewing data (see above). 2. Designate which groups of channels you want to save to the file A dialog box will come up asking you to designate which channels ActiView should save. a) Predefined channel groups Use the drop-down menu to select a predefined group of channels or to choose to save the channels that currently are being displayed (M onopolar Displayed Channels). ActiveTwo Operating Guidelines Rev. 6, Printed: January 31, 2007 Page - 53 b) Additional channels (EXG channels, sensors, AIB channels) Use the selector buttons to indicate whether to save the eight EXG channels, the displayed sensors (use the list on the sensors tab to change which ones are displayed before starting the Save File process), AIB channels, etc. 3. Set a path and file name for saving data If the path specified in the current CFG file exists, then a Windows file dialog will come up allowing you to choose a path and file name for the saved data. If the path in the CFG file does not exist, then an error message will come up. Click out of the error message, and use the Windows file dialog to choose/create a folder in which to save the data file. After your session is finished, you may want to save the CFG file to ensure the newly selected path is active the next time this CFG file is used. 4. IMPORTANT: ActiView is still Paused! Note that after all of the above steps, the software is still not saving data. ActiView comes up in Paused mode, and it is necessary to “un-pause” manually or using a reserved code from a remote computer connected to ActiveTwo via the trigger input port. Click on Paused to switch the software to the Saving mode. During the recording session, you can click Pause Save to interrupt data saving (while the display continues to update) and then click Paused to resume saving. ActiveTwo Operating Guidelines Rev. 6, Printed: January 31, 2007 Page - 54 IX. Best practices for making good EEG measurements A. Optimizing the laboratory environment 1. Ample room Clear enough space in the lab for the ActiveTwo system, computer(s) and any necessary furniture. Allow at least 2-3 feet between ActiveTwo A/D box / participant and any source of electrical interference. As an aside – note that people often confuse some of the environmental requirements of our magnetic 3D digitizer products with those of ActiveTwo. Note that these are separate issues. In most cases, a full-equipped participant room is a uniquely bad place to measure electrode positions. If you will be using a Patriot of Fastrak magnetic digitizer to measure electrode positions, remember that metal objects (i.e. metal file cabinets, metal studs in walls, etc.) near the participant can impact the accuracy of position measurements. M ount the system’s magnetic digitizer as close as possible to the participant’s head, and then measure the distance between the transmitter and the opposite side of the head. Keep metal objects at least 3 times this distance from the transmitter and the participant’s head. Note that despite the fact that Aluminum is a poor conductor of electricity it is a particularly poor choice for use in a tripod to mount the transmitter, as it has a strong influence on the magnetic field. 2. Separate rooms for participant and experimenter An area with two adjoining rooms is preferred -- one sound attenuated room for the participant and a separate area for the experimenter. Sound attenuation and visual isolation will help your participant stay focused on the task at hand, and it will allow the experimenter some freedom to move around and perform necessary tasks without distracting the participant. 3. Shielded room An electrically-shielded room often does not produce a noticeable improvement in the quality of EEG measured with ActiveTwo. Whether it will be helpful depends on the environment and what type of devices you decide to bring inside of the shielded room with the participant. a) Faraday cage (RF shielding) – not required A Faraday cage, which is intended to provide protection against unwanted electric fields, is generally not required with the ActiveTwo system. Note that Faraday cages are often used to shield against radio frequency (RF) interference, but RF is well above the frequency range of interest in EEG (and outside the measurement range of the equipment), so RF is not a serious concern unless the source is extremely powerful (e.g. a radio station antenna just outside the building) or extremely close to the ActiveTwo Operating Guidelines Rev. 6, Printed: January 31, 2007 Page - 55 participant (i.e. a cell phone near the participant’s head). A Faraday cage can be constructed from continuous conductive sheet metal (best protection against RF) or copper mesh surface (walls, ceilings, floors, windows and light fixtures covered) enclosing the participant room. A Faraday cage around the participant room can help minimize interference from electrical equipment (i.e. power supplies) outside the room, but this is often futile, since electrical devices such as monitors (with integrated power supplies) are being used inside the participant room anyway. Examples of sources of electrical interference that may be of concern if located too close to the participant or the ActiveTwo A/D box are switching power supplies for monitors or other equipment, computers and other AC powered electrical equipment b) Mu metal enclosure (magnetic shielding) – required only in extreme cases A magnetically shielded room is generally not required unless there are exceptionally strong sources of magnetic interference in the area. M ost typical office and laboratory environments are suitable for operating ActiveTwo without magnetic shielding. It is only in extreme cases that magnetic shielding would be required for the operation of the equipment. Even in extreme cases, if one part of the building poses a magnetic challenge, a different room in the building will be just fine. Examples of sources of strong magnetic interference that may be of concern are M RI / NM R equipment in adjacent rooms and large electrical motors associated with elevators, trains or other heavy equipment in the immediate area around the lab space. 4. Lighting Lighting in the participant room can be a source of electrical interference and heat, both of which can be problematic for EEG recording. Special attention should be paid to selecting light fixtures that provide adequate illumination while emitting minimum heat. In general, fluorescent lighting produces the greatest amount of electrical interference. AC incandescent lighting is better, but still somewhat electrically noisy. The best option for minimizing electrical interference in a lab environment is low-voltage DC lighting. DC lights normally use halogen bulbs, which generate more heat than incandescent bulbs, so be careful to select DC lighting that does not generate excessive heat or compensate for the extra heat by providing extra AC / ventilation. 5. Ventilation Ventilation and temperature control are important variables in preparing the participant room. Be sure that you have adequate temperature control and plenty of ventilation in the participant room to make the environment comfortable for the participant. You will get better data from a comfortable participant. 6. Furniture ActiveTwo Operating Guidelines Rev. 6, Printed: January 31, 2007 Page - 56 In general, avoid furniture with metal frames or surfaces in favor of wood or plastic. M etal-framed tables are especially problematic. M etal-framed chairs are generally OK, as long as they are upholstered and have minimal exposed metal. a) Chair for participant A comfortable low-back chair is recommended for studies in which the participant will sit upright viewing a display or listening to sounds. A comfortable procedure chair with localized neck support (e.g. a dentist’s chair) has advantages for supine participant positioning over a standard upholstered recliner, since a standard recliner places support behind the head, placing pressure on the electrodes, rather than behind the neck away from the electrodes. b) Desk or table for equipment in participant area A wood or plastic table or computer stand is recommended for use inside the participant room. Avoid furniture with metal surfaces or metal frames in the participant area since metal can inductively couple interference from monitor power supplies and other powered devices in the participant room to the participant if the participant comes into contact with the metal surface or frame. c) Small cart for supplies used in preparing the participant A small wood or plastic wheeled cart may be useful for holding consumable supplies, and if the participant room is small it is sometimes helpful for this cart to have wheels so that it can be rolled in and out as needed. d) Additional small table for equipment in participant area A small wood or plastic table is needed to hold the EEG system’s input box. The table should be small enough that it can sit beside or behind the participant. B. Regular testing with the “one-bucket” and “two-bucket” methods To ensure the best possible performance when you have a participant connected to the system, bench-test the system regularly without a participant to ensure everything is in working order. 1. The one-bucket test – shorted input test a) Fill a glass or plastic bowl or bucket with tap water and add a teaspoon of table salt (NaCl). b) Make sure that the ActiveTwo hardware is assembled correctly, the power to the system is on and the ActiView ActiveTwo Operating Guidelines Rev. 6, Printed: January 31, 2007 Page - 57 software is up and running. c) Connect CMS/DRL to the A/D box and submerge the CMS and DRL electrodes in the water. d) Connect only the offending electrode(s) to the system, and submerge it in the salt water. e) Observe the CM in Range light. If it goes out, then see the section CM in Range does not come on in the ActiveTwo Operating Guidelines booklet. f) Set Channels (left panel of ActiView monopolar display tab) to display only the used channels, set the Scale (upper left corner) to 100 uV/div, set Reference (left panel, lower) to None (Raw). g) Observe the signal on all connected channels over the course of 5 minutes. If you see anything other than flat traces in this test, it may be helpful to save the data (save only the monopolar displayed channels) so that you can send them to your support contact for advice or assistance. (1) If the signal starts out relatively flat and becomes noisy over time This is a sign that the electrode pellet may have lost some of its Chloride. This is a sign that it is nearing the end of its useful life. (2) If the signal starts out noisy but becomes quiet over the course of 3-5 minutes This is most likely a sign that the electrodes started out dry and it took a few minutes for the moisture to penetrate the hard electrode material. 3-5 minutes of slightly noisy signals when starting out with dry electrodes is within the expected range of normal operation. To avoid this initial noisy period, try soaking your active electrodes in salt water for 5 minutes once a week or for 5 minutes before each recording session. IM PORTANT: Soaking active electrodes in any liquid for longer than 10 minutes at a time is inadvisable as moisture will penetrate the electrode pellets and accelerate corrosion (loss of electrode material), resulting in poor electrode performance. 2. The two-bucket test – testing inter-channel calibration ActiveTwo Operating Guidelines Rev. 6, Printed: January 31, 2007 Page - 58 a) Fill two vessels with salt water Fill two glass or plastic bowls or buckets with tap water and add a teaspoon of table salt (NaCl) to each. b) Assemble ActiveTwo and turn on power M ake sure that the ActiveTwo hardware is assembled correctly, the power to the system is on and the ActiView software is up and running. c) Connect CMS/DRL to the A/D box and submerge the CMS and DRL electrodes in the water of one vessel. d) Connect all of the active electrodes to the system, and submerge them in the salt water of the same vessel. e) Perform the one-bucket test as described above. f) Remove the active electrodes from the first vessel and submerge them in the second vessel (separate from CMS/DRL). g) Set Channels (left panel of ActiView monopolar display tab) to display only the used channels, set the Scale (upper left corner) to 100 uV/div, set Reference (left panel, lower) to None (Raw). h) Use Ag/AgCl electrodes to conduct signal Use Ag/AgCl electrodes to connect a signal generator to the test rig. Place the electrode carrying the signal generator Common (black) to the vessel containing CM S/DRL, and place the electrode containing the signal (red) to the vessel containing the active electrodes. IMPORTANT – do not use electrodes or other objects made of other metals to conduct signals into the salt water. Electrode corrosion or oxidation can result. i) Observe/record signal Observe the signal on the connected channels over the course of 1-2 minutes. To determine whether the system is measuring the same voltage across channels, save the data to a file and review it in your preferred analysis software tool. C. Electrode and head-cap maintenance 1. Follow the current guidelines for electrode handling See the ActiveTwo User M anual for electrode handling guidelines. Here are some additional suggestions. ActiveTwo Operating Guidelines Rev. 6, Printed: January 31, 2007 Page - 59 a) Use approved gel/paste. Use SignaGel, Ten20 or Elefix for standard lab situations. Use Lectron III, Chloride 10 (Pharmaceutical Innovations) if your subjects are physically active, if temperature control in the lab is problematic, or if for any other reason you are having problems with skin potentials. We have found that this gel with higher Chloride content can help minimize drift caused by sweat and skin potentials. Avoid using unapproved gel/paste products. b) Wash electrodes immediately after use. c) Use warm tap water in a plastic basin for cleaning. d) Avoid soap. Avoid using detergents, as much as possible. Even mild detergent will eventually facilitate the corrosion of electrode pellets and loss of Chloride from the sintered electrode tips. e) Avoid prolonged soaking. Avoid soaking in water or other liquids, especially where other metal parts are present (e.g. electrodes, sink drains, etc). f) Choose the mildest disinfectant that meets your needs. Be aware that disinfectant products have a detrimental effect on the electrode contacts and the lead wire insulation. Options range from Hydrogen Peroxide (mild) to Isopropyl Alcohol to surface level disinfectants such as EcoTru and Envirocide to M etricide (harsh). g) Air-dry the electrodes away from direct sunlight. h) Store the electrodes away from direct sunlight in a nonmetallic container separate from other metal parts. i) Use very soft brush if necessary but only infrequently. If you notice a build-up of gel or paste on the electrodes despite regular cleaning, brush lightly with a very soft toothbrush to clean the surface of the electrode. Do this only infrequently, as the electrode contacts are soft and brushing will remove material. j) To balance offsets and minimize drift upon application, soak electrodes in salt water for 10 minutes before use. Use one teaspoon of table salt to one liter of tap water. This is an especially useful procedure if you are planning to convert data to another file format with reduced precision (i.e. 16-bit or 12-bit) for analysis. ActiveTwo Operating Guidelines Rev. 6, Printed: January 31, 2007 Page - 60 Avoid soaking too long. This is an acceptable procedure to use routinely (before every run), but it can be helpful in maintaining low electrode offsets even if performed only after every third or fourth use of the electrodes. 2. Follow these guidelines for head-cap maintenance a) Wash with mild soap (e.g. dish soap) and water. b) Choose the mildest disinfectant that meets your needs. Be aware that disinfectant products have a detrimental effect on the elastic fabric of the head cap. Options range from Hydrogen Peroxide (mild) to Isopropyl Alcohol to surface level disinfectants such as EcoTru and Envirocide to M etricide (harsh). c) Dry flat. Dry your head caps flat on a towel to avoid stretching. d) Avoid heat. Do not use heat to accelerate drying. A cool fan will accelerate drying considerably. D. Participant intake procedures 1. Measure head at intake, and make sure you have a head-cap that fits snugly. 2. Instruct participants in advance to: a) Minimize Nicotine and Caffeine use 2-3 hours before session to minimize muscle artifact. b) Arrive early, especially if a long walk or stairs will be required to reach the lab. c) Wash their hair the morning of the session and avoid using hair products such as leave-in conditioners, hair gels, waxes, oils, etc. d) Layer their clothing so that they can control their own body temperature in case they arrive overheated or in case the lab space is too warm or too cold for them. E. Electrode application and signal-quality checking ActiveTwo Operating Guidelines Rev. 6, Printed: January 31, 2007 Page - 61 1. Err on the side of too little gel rather than too much. Too much gel can result in spreading and electrolyte bridges. This can lead to identical measurements at involved sites (average potential between two active electrodes), increased noise (i.e. short between active electrode and DRL results in reduction of CM RR) or complete loss of signal (i.e. short between active electrode and CM S results in no measured electrical potential at active electrode). 2. Use Electrode Offset tab in ActiView to check offsets Verify that offsets are low (+-25 mV) and stable. Low, stable electrode offset is a necessary (but not sufficient) condition for measuring good quality signals in ActiveTwo. To address contact problems, remove the electrode at the site in question, use the syringe tip to part the hair by touching the tip to the scalp and gently rocking back-and-forth, inject a small amount of gel and replace the electrode. a) Offsets > +-40 mV Offsets exceeding +-40 mV that do not exceed the +-262 mV input range of the A/D converter indicate a potential problem of electrode corrosion or oxidation. b) Offsets exceeding +-262 mV on all channels Offsets exceeding +-262 mV on all channels with active electrodes connected indicate a problem with poor contact at CM S or DRL or a system fault (broken wire, faulty cable/connector junction, fault in active electrode electronics or fault in A/D box). c) Offsets exceeding +-262 mV on less than the total number of used channels Offsets exceeding +-262 mV on less than the total number of used channels indicate inadequate contacts at the active electrodes. d) Unstable offsets Have the participant move her head back and forth a few times to ensure that the contacts are stable even during rapid movements. 3. Check signal quality in monopolar and bipolar tabs using Reference = None (Raw). Ask the participant to sit quietly while you observe the EEG signal on the M onopolar and Bipolar pages. Set Channels to display all of the channels associated with electrodes you have connected to the system, set Reference to None (raw) to display the single-ended voltage measurement between CM S and each channel and turn off the high-pass and low-pass filters (de-select the green ‘button’ below each in the M onopolar Display page). Look for problems such as: a) High 60 Hz interference ActiveTwo Operating Guidelines Rev. 6, Printed: January 31, 2007 Page - 62 60 Hz is identifiable by the periodic envelope that results from the fact that the display does not have adequate horizontal resolution to display the high-frequency signal. b) Low-frequency instability Low-frequency instability can result from poor electrode contacts (inadequate contact between gel/skin/electrode), but it can also be caused by aged electrodes from which too much Chloride has been lost. Use the one-bucket test above to distinguish between the two. F. Positioning of A/D box, cables and participant 1. Follow the furniture guidelines above. Avoid metal tables, especially in the presence of other electrical equipment. 2. Position A/D box as close as practically possible to participant. Although impractical, the electrical ideal is for the A/D box to be on the participant’s lap. Keep the two as close together as possible. 3. Keep the active electrode leads close together along the length of the run from participant to A/D box. It is particularly important to keep each lead near the CM S/DRL lead, but it is also useful to keep each lead close to its reference lead. Use Velcro cable ties or tape to keep leads together. 4. Wrap CMS/DRL around the other leads 3-5 times to minimize the loop pickup area. The distance between CM S/DRL and the other leads is proportional to the degree of susceptibility to magnetic interference pickup (this is the kind of interference usually associated with large magnets or electric motors that a M u metal enclosure would eliminate). Keeping the leads close together makes the system optimally resistant to picking up this kind of interference. 5. Keep power cables, power supplies and cables carrying other high-level signals away from the participant Power cords, power strips, video/audio cables and AC/DC converters are examples of potential sources of interference to be aware of. ActiveTwo Operating Guidelines Rev. 6, Printed: January 31, 2007 Page - 63 X. Triggering for event-related potentials The best method for triggering ActiveTwo depends to some degree upon the type of stimulus apparatus you choose to use and the type of software you will use to analyze the resulting data. Follow these general guidelines to trigger ActiveTwo: A. Connect the triggering device/computer to the ActiveTwo Trigger Input Port. If a trigger cable was provided with your system for this particular stimulator, it should work fine without modification. Typically, trigger cables provided by Cortech Solutions are designed to connect a standard PC parallel port to the ActiveTwo trigger input port. If the cable you have was designed to connect another type of device, you may need to modify it before it will work with your device. Consult your support contact for assistance or see the ActiveTwo Trigger Input Port pinout information in the ActiveTwo User Guide or at http://www.biosemi.com/faq/trigger_signals.htm. B. Assemble ActiveTwo and turn on power. M ake sure that the ActiveTwo hardware is assembled correctly, the power to the system is on and the ActiView software is up and running. C. Select Analog under trigger format in the Monopolar Display page. D. Observe the state of the trigger input port. See if the used bits are being held low or high. Each pin on the trigger port is the equivalent to one trigger bit. The port has 16 pins/bit plus a ground. The standard ActiveTwo trigger cable provided by Cortech Solutions is designed for use with a standard PC parallel port and has only 8 bits plus ground connected (pins 2-9 on the DB25 connector = pins 1-8 on the DB37 connector, pin 25 on the DB25 = pin 37 on the DB37 = ground. The other (unused) pins/bits (pins 9-16 on the DB37 connector) are shorted to ground so that these bits are always held low. E. Start the device/application that will send the trigger signals. Start sending triggers and observe the analog trigger input signals to see if the port goes first to zero (all bits low) followed by brief pulses (colored lines) on the used bits. F. If trigger signals are visible and reliable… Switch Trigger Format to ‘Decimal’ to see if the trigger values are what you expected. G. If trigger signals are not visible/reliable… Increase the duration of trigger pulses to a value slightly higher than 1/R where R = the final sample rate to file. The sample rate to file can be determined by multiplying the overall sample rate associated with the selected speed mode by the decimation ration selected in ActiView. ActiveTwo Operating Guidelines Rev. 6, Printed: January 31, 2007 Page - 64 H. Save a short test data file with triggers. Read the sample file in your analysis program to ensure that triggers are faithfully represented. I. Trigger timing problems… Be aware that the ActiveTwo trigger port is very reliable, and any timing problems are guaranteed to be on the stimulus delivery side. It is advisable to test trigger output timing using a two-channel scope (video: photocell signal to channel one, trigger bit to channel two; audio: audio line-level signal to channel one, trigger bit to channel two). If testing with a scope reveals no problems, it is possible to test ActiveTwo trigger timing by connecting a photocell or mic signal to one ActiveTwo channel (optional photocell and mic sensors are available) and a trigger bit to the ActiveTwo trigger port. ActiveTwo Operating Guidelines Rev. 6, Printed: January 31, 2007 Page - 65 XI. Basic file reading and analysis steps for EEG/ERP in EMSE Suite 5.1 A. Basic steps 1. File->New Workspace 2. Right-click Project 1, and select Add->Time series data. 3. Browse to a data file, and double click. 4. Right-click on new data file and select Load. 5. EMSE analyzes the event channel EM SE creates a new table of events in a text file. 6. Select Edit->Channels Scroll to the bottom of the list. 7. Turn OFF any unused channels and the Status channel. This will simplify later display and signal processing steps. 8. Designate PassTrough channels Change any polygraphic (non-EEG) channels to PassThrough, and click OK. 9. Turn off some channels To optimize the display of EEG, you may want to view only the EEG channels or only polygraphic channels, since the relatively large scales of polygraphic channels may conflict with the small scale of EEG channels. 10. What if my data appear as flat lines? If there appears to be no signal on any of the channels, it is most likely a problem of there being a very high signal value on one or more channels (e.g. one saturated or unused channel), which confuses the autoscaling algorithm. In this case, click the second icon from the left to apply a polynomial (default = order 1 or linear) detrend to the signals. This will center the traces on their channel labels at left and compensate for any offset or drift that may confuse the autoscaling algorithm. ActiveTwo Operating Guidelines Rev. 6, Printed: January 31, 2007 Page - 66 B. Applying an EEG reference ActiView always stores signals WITHOUT A REFERENCE (single-ended or monopolar), no matter what choice of reference you select on the left hand panel of the ActiView screen. 1. Version dependencies in EEG reference handling a) How reference was handled in EMSE 5.0 If you load BDF data in EM SE 5.0, the software will ask you to specify what kind of reference was used, and you should select the "implicit" option, even though this is not strictly correct. This was a work around made necessary by the fact that BioSemi is the only system supported by EM SE Suite that does not include an implicit reference in the stored data. b) How reference is handled in EMSE 5.1 The way the reference is handled for BDF data files has been improved in 5.1. The software now knows that BioSemi files are always stored without a reference, so it does not ask you to specify a reference when you read the file. This does not change the fact that you still must apply a reference using the Filter Pipeline. M oreover, EM SE now analyzes the characteristics of the data file (e.g. number of channels) and, assuming you are using one of the standard BioSemi electrode layouts, EM SE loads a suitable default electrode position data file (Probe). 2. Applying a reference in EMSE Data Editor a) Load the data in EMSE Data Editor b) Select the reference to use and create ERP averages. Assuming you stored signals from the channels you want to use as the reference (e.g. earlobes recorded with EXG1 and EXG2), you can apply a reference using (filter pipeline->montage) and create averages. c) To change the reference… If you want to change the reference, start by reloading the raw data file (right-click on the node for the raw data in the workspace, and select Load), apply a different reference (filter pipeline->montage) and recompute averages. ActiveTwo Operating Guidelines Rev. 6, Printed: January 31, 2007 Page - 67 XII. Measuring physiological signals other than EEG A. Apply any additional sensors ActiveTwo supports a variety of other sensors for measuring physiological and nonphysiological signals. A relatively current list is maintained in the Accessories section under ActiveTwo on the Cortech Solutions web site (www.cortechsolutions.com). New sensor options are periodically added, so the latest sensor options may take a few weeks to make it onto the web site. If you need a sensor that was not provided with your system or that you do not find in the Accessories listing on-line, please contact us. B. Turn on the display of desired sensors 1. In ActiView, select the Auxiliary Sensors tab. 2. Select sensors to display In the left panel of the Sensors page, left-click to select the sensors to display (Ctrl+left-click to select multiple). 3. Choose suitable scale settings for the selected sensors Note that ActiView provides special scale selectors for built-in sensors. Use these to set the desired scale for each type of sensor being used. 4. Set ‘DC reset at screen start’ ON or OFF ActiView can set the first data point for each sensor channel to zero (artificially correcting the baseline) to make it easier to see signals with different scales or offsets in a single display window. For some situations you may prefer to see the actual signal level without any artificial baseline correction. C. Save the displayed sensor s After you use Start at the top left side of the Monopolar Display & Triggers page, you will have the option at the lower right side of the page to select Save File. Click Save File and select the green option button labeled Displayed Sensors to include in the saved data file the data from the displayed sensors. ActiveTwo Operating Guidelines Rev. 6, Printed: January 31, 2007 Page - 68 XIII. Analyzing physiological signals other than EEG ActiveTwo is a flexible data acquisition system, with the capability to record EEG and a wide variety of other physiological (and non-physiological) signals. A. ActiveTwo is typically u sed with at least a few non-EEG signals The majority of our customers use ActiveTwo to record EEG along with a few other types of signals. How many other signals are recorded varies widely as do the signal processing requirements for these non-EEG physiological (and non-physiological) signals. B. ActiveTwo / ActiView file format: BDF The ActiView data files are stored in a format know as BDF, which is an open, documented file format pattered after the European Data Format (EDF) supported by so many signal analysis software tools. C. EDF vs BDF In fact, the only substantive difference between BDF and EDF files is the fact that the EDF data files have 16 bits per data sample and the BDF data files have 24 bits per data sample. D. Which signal analysis tools read BDF files? The BDF file format is supported by a wide variety of signal analysis software tools, including: 1. EMSE Suite 2. BESA 3. g.BSanalyze 4. EEGLAB 5. BIOSIG E. Which ones are designed for analysis of non-EEG signals? Of these tools, g.BSanalyze and BIOSIG include the widest variety of non-EEG analysis techniques. EM SE Suite, BESA and EEGLAB are mainly EEG-oriented, but there is a great deal of overlap between the techniques used for EEG and those you might want to use for other signals. ActiveTwo Operating Guidelines Rev. 6, Printed: January 31, 2007 Page - 69 F. Signals often combined with EEG 1. Signals measured with active electrodes a) EOG (electrooculogram) There are a few different reasons why one would want to measure EOG in combination with EEG: (1) Artifact detection and trial rejection Eye movements and blinks produce significant artifacts in EEG. Consequently, EOG is most often monitored along with EEG to improve one’s ability to distinguish between artifact and real data. EM SE Suite, BESA, g.BSanalyze and EEGLAB offer this capability. (2) Artifact removal Algorithms can be applied for removing EOG artifacts from EEG. This is sometimes necessitated by the fact that the population of interest is unable to control their eye movements. It is sometimes necessitated by the experimental paradigm. EM SE Suite, BESA, g.BSanalyze and EEGLAB offer this capability. (3) Rejection of trials based on eye-movements In experiments where visual fixation is required, EOG is often used simply to exclude trials on which a participant moved her eyes. EM SE Suite, BESA, g.BSanalyze and EEGLAB offer this capability. b) ECG (electrocardiogram) (1) Monitoring heart-rate as a dependent variable or for trial selection/rejection M ost often, ECG would be combined with EEG to permit monitoring of heart-rate on a moment-by-moment basis for purposes of trial selection/rejection or categorization. For this purpose, one may be better-off using a version of ActiView (i.e. BETA release of ActiView 5.35B) that calculates heart-rate on-line from EXG7-EXG8 and saves it in the Sensor channel named Ergo1. Strangely enough, even with all of the fancy algorithms they incorporate, EEG signal analysis tools generally do not incorporate mechanisms that can easily derive heart rate from an ECG signal. ActiveTwo Operating Guidelines Rev. 6, Printed: January 31, 2007 Page - 70 (2) Artifact detection/rejection and/or removal ECG sometimes produces an artifact in the EEG record, so it may be combined with EEG for some of the same reasons as above. In fact, some of the same algorithms offered in software tools for handling EOG artifacts also could be applied to ECG artifacts. c) EMG (electromyogram) EM G signals are typically recorded from a bipolar pair of electrodes placed over the muscle group of interest. (1) EEG / EMG: time-locking the EEG/ERP analysis window to motor events EM SE Suite, BESA, g.BSanalyze and EEGLAB offer the capability to insert event markers either manually or based on some kind of simple threshold applied to an EM G channel. (2) Surface EMG (no EEG) When EM G is used as a dependent variable (e.g. blink-reflex), EEG is not typically measured. Very sophisticated analysis algorithms do exist for EM G, but by-and-large, EM G is analyzed using relatively simple algorithms that are available in EEG analysis tools. Two relatively special mechanisms that are often used for EM G analysis are rectification (taking the absolute value of the signal) and smoothing. EM SE Suite, BESA, g.BSanalyze and EEGLAB all offer these capabilities and more. 2. Signals measured with specialized sensors a) Skin conductance (SC) (1) Some overlap in methodology with EEG analysis EM SE Suite, BESA, g.BSanalyze and EEGLAB can be used to average event-related GSR signals, and to some degree, these tools can also be used to make measurements of signal amplitude and latency on a trial-by-trial basis. (2) Not well standardized The methods used to analyze GSR signals are not as well standardized as those used for the other types of signals we discuss here. Consequently, there seem to be a wide variety of analysis methods in use in the literature. (3) Not handled all that well by EEG analysis tools Some commonly-used analysis methods for SC signals (e.g. counting ‘turns’) are not implemented in EEG analysis tools. ActiveTwo Operating Guidelines Rev. 6, Printed: January 31, 2007 Page - 71 b) Respiration Analysis of respiration signals is similar in many respects to the analysis of ECG signals. Respiration would most often be monitored alone as a dependent variable or with EEG for trial selection/rejection or categorization. For this purpose, one may be better-off using a version of ActiView that calculates respiration-rate on-line and saves it in a special Sensor channel. Strangely enough, even with all of the fancy algorithms they incorporate, EEG signal analysis tools generally do not incorporate mechanisms that can easily derive respiration rate from a respiration signal. We hope to have a BETA release of ActiView in the coming months with the capability to calculate respiration rate on-line. c) Temperature Only a few customers are using our temperature sensor, but generally they seem to be interested in sleep and circadian rhythms. In combination with EEG, temperature would most-likely be used for segment selection/rejection or categorization. This could be accomplished in EM SE Suite, BESA, g.BSanalyze and EEGLAB. d) Plethysmograph Although the signal looks entirely different, the Pleth signal would be used for the same primary purpose as ECG: derivation of heart-rate for selection/rejection/categorization of data segments or trials. ActiveTwo Operating Guidelines Rev. 6, Printed: January 31, 2007 Page - 72 XIV. Basic file reading and analysis steps for EEG / ERP in EEGLAB A. Start MATLAB and EEGLAB B. Select File->Import data->From BioSemi BDF File using BIOSIG C. Browse to the file and double-click on it. D. ImportBDF dialog A dialog box will appear asking you to specify some characteristics of the data file. 1. Reading only part of the file If you want to read only part of the data file (because your PC does not have enough memory to read and analyze the whole file), then specify which blocks to read in the first field. 2. Event channel designation Enter the last channel number as the event channel (the prompt will tell you how many there are, so if it says [1 17], enter 17. IM PORTANT: The built-in EEGLAB function that handles reading events from the Status channel is limited to data collected from ActiveTwo M ark I systems (all ActiveTwo systems up to about October or November, 2005). For data collected with M ark II systems, it is best to use the events derived by BIOSIG. For specific instructions on this, please consult the EEGLAB list and/or Alois Schloegl, the developer of BIOSIG. 3. Reference EEGLAB knows that ActiveTwo data are stored unreferenced, so it wants the operator to say which channel should be used to rereference the data. Enter a channel number and click OK. ActiveTwo Operating Guidelines Rev. 6, Printed: January 31, 2007 Page - 73 XV. Electrode care and cleaning A. Five Rules of thumb: 1. Clean with water Clean electrodes softly immediately after use (when the gel is still soft) by hand with warm water. 2. Dry with paper towel; store away from direct sunlight. Dry the electrodes softly, with hand towels. Store the electrodes in a dark dry place. 3. No soap; avoid contact with metals. Do not use aggressive soaps etc. Do not let the pellets touch any kind of metals. 4. Remove from cap gently Do not pull-out the electrodes at the flat cable (grab the electrodes at the casing). 5. Keep connector dry Do not let water or gel enter the connector. B. Handling 1. Remove electrodes from cap and connector from A/D box gently Do not use force on the cable or pull the electrodes at the ribbon cable when removing the electrode out of the head cap or the connector out of the A/D box. 2. Remove from cap gently Grab the electrodes at the casing, and then pull them softly out of the head-cap. 3. Connector ejectors The A/D box has ejectors on the top for easy removal of the connector. Always make sure to use them. 4. Keep connector clean and dry Keep the connector clear of water/gel. When a connector is polluted with gel or salt water, it should be rinsed with distilled water, followed by a rinse with alcohol (ethanol) and finally the connector should be allowed to dry completely before putting into operation again. 5. Minimizing electrode drift After applying the electrodes, it takes some time before the chemical reactions in ActiveTwo Operating Guidelines Rev. 6, Printed: January 31, 2007 Page - 74 the electrode-gel-skin interface reach a stable equilibrium. It will typically take approximately 5 minutes before baseline drift and noise have settled completely. Quicker settling of the electrode noise to a low level can be achieved by placing the electrodes in water approximately 5-10 minutes before the measurement is started. During these 5-10 minutes, the salt water will be absorbed in the A g/A gCl pellet, enabling the pellet to make better chemical contact with the gel. Please note that the longer the electrodes are placed in water, the longer it will take the water to evaporate and this will accelerate the corrosion process of the Ag/AgCl pellet. C. Cleaning The silver/silver-chloride (AgA gCl) sintered electrodes behave like sponges, they absorb water and electrode gel. The deeper the water/gel has penetrated the electrode, the longer it will take afterwards for the water to vaporize. As long as your electrodes are ‘wet’, corrosion processes will take place. This corrosion process will in the long run make your electrodes noisier. That is why it is important to clean the electrodes immediately after use and dry them immediately to eliminate the opportunity for corrosion to develop. 1. Use warm tap water Use warm tap water to rinse off the gel from the electrodes (make sure to keep the connector dry). Warm water (up to 50 degrees Celsius) will dissolve the gel quicker. 2. Soft brush if necessary Use a soft brush for removing gel residues from the electrodes only if absolutely necessary. 3. Dry with paper towel, and air dry fully. Softly dry the electrodes with hand paper. Let them hang out to dry. 4. No soap Only use soap if water does not seem to clean the electrodes properly, never use solvents (e.g. acetone), acids or alkaline. 5. Clean before allowing to dry Do not let the electrodes dry without being cleaned first. When the electrodes dry up covered with gel/salt/minerals, the cleaning process will be harder and takes more time, making your electrodes become polluted and/or corroded sooner. D. Storage/Modifications/Splitting of the flat cable 1. Avoid contact with metal Do not store the electrodes in a metal box. In general, prevent the electrode tips from touching any metal objects, because this causes pollution of the Ag/A gCl pellets with “strange” metal particles (increasing noise). ActiveTwo Operating Guidelines Rev. 6, Printed: January 31, 2007 Page - 75 2. Avoid light Exposure of the Ag/A gCl electrode tip to light also causes deterioration. Keep out of direct sunlight or other bright sources of light when the electrodes are not being used. 3. Avoid airtight storage containers Do not store the electrodes in an airtight container. Best storage method is to wrap the electrodes in a paper towel and place them in a cardboard box or to hang them freely in a dark place. 4. Do not split cables The electrodes are not intended to be modified by the customer. Especially "splitting" the flat-cable further may lead to a non-repairable malfunction and void your warranty! If you have a request for different splitting of an electrode set contact BioSemi (or its local representative) E. Malfunctions 1. If an electrode is not operating as specified, please do the following: a) Soak in salt water Soak the electrodes in water with some salt added (approx. one small teaspoon per liter, use a non-metal bowl). (1) If this causes the blue led to turn off, then the electrode set is in need of repair (return to dealer/manufacturer) (2) If you experience noise, then please follow-up the directions below concerning noisy electrodes. (3) Noisy electrodes: (also read “Life span”) Noisy electrodes generally mean that your electrodes have reached its end of life. You can extend the life a little bit by placing the electrodes in salt water for about an hour before you start your measurement. This soaking process often removes noise. A last remedy is to use a grain 600 or higher waterproof abrasive paper to polish the electrode tip. Use very soft circular movements, preferably no more than 2-3 times on the same area, removing an even very thin layer across the entire surface. F. Life span (Life expectancy) Ag-AgCl sintered electrodes have a limited life span. This is caused by several processes ActiveTwo Operating Guidelines Rev. 6, Printed: January 31, 2007 Page - 76 such as corrosion, the dissolving of the Chloride in the pellets and the wearing of the pellet during the cleaning process. After approximately 200 measurements, the color of the pellets will change from gray/brown (silver–chloride) to silver, due to the disappearing of the chloride. The A gCl slowly dissolves in gel and water during the cleaning. Eventually, this leaves only silver behind. The resulting pure silver electrode has much higher drift and noise characteristics than the original A g/A gCl electrode, forcing your electrode set to be replaced. ActiveTwo Operating Guidelines Rev. 6, Printed: January 31, 2007 Page - 77 XVI. Battery maintenance A. Overview 1. Two batteries supplied Two standard batteries supplied with each base system. 2. Battery type Standard battery is high-capacity, rechargeable, lead-acid type with no memory effect. 3. Standard battery capacity Capacity is approximately 15 hours with 72 channels, 10 hours with 136 channels and 5 hours with 280 channels. 4. Double capacity battery Double-capacity batteries are available. 5. Useful life Useful life defined as over 1000 charge/recharge cycles. 6. Charge time Fully-depleted standard battery with full capacity will take approximately 3.5 hours to charge. 7. Reduced capacity Reduced charge time reflects diminished capacity. B. Advice and cautions 1. Charger to use Use only supplied charger. 2. Overcharging It is not possible to overcharge using the standard charger. 3. Diminished capacity If capacity is significantly diminished (charge time less than 3 hours), cycle battery fully 3-5 times by charging/discharging/charging until capacity (charge time) increases to normal. 4. Storage Never store a fully-depleted battery; store only fully charged. ActiveTwo Operating Guidelines Rev. 6, Printed: January 31, 2007 Page - 78 5. Charge maintenance Battery will maintain a charge for weeks/months while stored at normal operating temperature. Recharge stored batteries frequently to avoid deep discharge. 6. Ensure power at charger source If power at source is lost while battery is connected to charger, the charger forms a partially open circuit that will slowly drain the battery. Leaving this situation too long can cause permanent damage. If you doubt the reliability of your power source, disconnect charged batteries from the charger as soon as the Ready LED comes on. 7. When to recharge Connect battery to charger after using approximately 75% of capacity. 8. Battery meter See meter in ActiView for current battery state or place on charger when Low Battery LED comes on. C. See also details on battery use/maintenance in user manual ActiveTwo Operating Guidelines Rev. 6, Printed: January 31, 2007 Page - 79 XVII. Troubleshooting ActiveTwo A. ActiView display: partial screen or blue/gray screen ActiView was developed in LabVIEW, and LabVIEW tools are notoriously difficult to resize dynamically within Windows (reliably). Consequently, BioSemi have decided to maintain a few versions of the ActiView software, each operating at a fixed display resolution. If the current display mode has an inadequate number of lines to display the ActiView screen, you will see a display like this: If the bottom of the screen is cut-off, or you see only a blue-gray screen without any controls at left, right, top or bottom, try changing the video display mode to accommodate the number of lines (900, 1024 or 1200) required by the chosen version of ActiView. 1. Changing your display mode settings in Windows To change the display mode, follow these steps: a) Go to Control Panel Go to Start->Control Panel (or Start->Settings->Control Panel when operating in Classic Start M enu mode). b) Select Display In the Control Panel, select Appearance->Themes->Display (or select Display when operating in Classic Control Panel mode). ActiveTwo Operating Guidelines Rev. 6, Printed: January 31, 2007 Page - 80 c) Set resolution In the Display dialog, click the Settings tab, and move the Screen Resolution slider to the right to increase the resolution to a mode that has an adequate number of display lines to support the version of ActiView you have selected. The second number in the pair (e.g. 1024 in “1280 x 1024”) should be greater than or equal to 900 if you selected the laptop version, 1024 if you selected a LoRes version of ActiView or greater than or equal to 1200 if you selected a HiRes version of ActiView. You should not have to worry about the horizontal resolution value for LoRes or HiRes versions, as long as the vertical resolution (number of lines) is adequate. For HiRes Wide versions of ActiView, you will need a display mode with resolution equal to or greater than 1920 x 1200. 2. If a suitable display mode is not available If your display (graphics adapter + monitor) does not support a video mode with adequate resolution to display the version of ActiView you are using, then you may consider using a lower resolution version of ActiView. If you are already using the LoRes version (1280 x 1024), then consider upgrading your monitor. a) If you are using a notebook or laptop Because notebook and laptop displays that support SXGA or greater resolution are becoming rare, BioSemi now offers a lower resolution wide screen version (1440 x 900) for notebooks. b) If you are using an LCD monitor LCD monitors tend to offer fewer display modes than most graphics cards these days, so try switching to a CRT (traditional monitor with cathode ray tube). c) If you are already using a CRT If you are already using a CRT, then you may need to upgrade to a new graphics adapter or an entirely new computer. B. Noisy active electrodes Noisy signals on certain active electrodes during a recording session may indicate a problem with the electrode, but noisy signals can also result from a poor contact with the subject’s scalp. Follow these steps to troubleshoot active electrodes. ActiveTwo Operating Guidelines Rev. 6, Printed: January 31, 2007 Page - 81 1. The “one-bucket test” a) Fill a glass or plastic bowl or bucket with tap water and add a teaspoon of table salt (NaCl). b) Make sure that the ActiveTwo hardware is assembled correctly, the power to the system is on and the ActiView software is up and running. c) Connect CMS/DRL to the A/D box and submerge the CMS and DRL electrodes in the water. d) Connect only the offending electrode(s) to the system, and submerge it in the salt water. e) Observe the CM in Range light. If it goes out, then see the section CM in Range does not come on below. f) Set Channels (left panel of ActiView monopolar display tab) to display only the offending channel (s), set the Scale (upper left corner) to 100 uV/div, set Reference (left panel, lower) to None (Raw). g) Observe the signal on the offending channel over the course of 5 minutes (longer only in extreme cases). It may be helpful to save the data (save only the monopolar displayed channels) so that you can send it to your support contact for advice or assistance. (1) If the signal starts out relatively flat and becomes noisy over time This is a sign that the electrode pellet may have lost some of its Chloride. This is a sign that it is nearing the end of its useful life. (2) If the signal starts out noisy but becomes quiet over the course of 3-5 minutes This is most likely a sign that the electrodes started out dry and it took a few minutes for the moisture to penetrate the hard electrode material. 3-5 minutes of slightly noisy signals when starting out with dry electrodes is within the expected range of normal operation. To avoid this initial noisy period, try soaking your active electrodes in salt water for 5 minutes before each recording session. IM PORTANT: Soaking active electrodes in any liquid for ActiveTwo Operating Guidelines Rev. 6, Printed: January 31, 2007 Page - 82 longer than 5 minutes is inadvisable as moisture will penetrate the electrode pellets and accelerate corrosion (loss of electrode material), resulting in poor electrode performance. C. CM in range does not come on while a participant is connected If the CM in Range LED either fails to come on or it goes out during a recording session, there can be more than one possible cause. At the simplest level, it may indicate a poor contact with the participant at the CM S/DRL electrodes. However, there is a safety circuit designed into the ActiveTwo A/D box that can be engaged by either an overcurrent or an over-current situation detected at the CM S electrode. Such situations are normally associated with faulty leads or connectors. 1. Possible causes a) Inadequate connection between CMS and/or DRL electrode and participant’s body Check to be sure that the CM S and DRL electrodes are making good contact with the participant, and be sure they are plugged into the A/D box. b) More than one CMS/DRL set plugged in The last two leads on the A connector and the A ribbon cable can serve CM S/DRL electrodes. If you have CM S/DRL connected at the front panel of the A/D box, check to be sure that the A electrode set you are using does not also have CM S and DRL electrodes. If it does, then use these CM S/DRL electrodes and unplug the CMS/DRL set at the front panel. c) Faulty lead wire A broken lead wire under the wire insulation will be detected by the ActiveTwo safety circuit as a fault. In particular, old-style EXG electrodes (flat electrodes with individual leads and touchproof keyshaped connectors) are subject to this problem. The old-style EXG electrodes can be identified by their dark gray wire insulation jacket, on which there is black printing. If you have this type of EXG electrode, and it is causing CM to go out of range, then it is probably due to a lead wire fault inside the insulation near the junction with the active electrode. The new-style EXG electrodes have light-gray lead wire insulation with no printing. These lead wires have proven much more robust than the old style lead wires. d) Faulty lead/connector junction on 32-channel electrode set Old style 32-channel active electrode sets with ribbon cables and 68-pin D connectors do not have a strain relief to keep the ribbon cable from pulling ActiveTwo Operating Guidelines Rev. 6, Printed: January 31, 2007 Page - 83 the D connector apart. Some very old electrode sets do not have epoxy glue in the joint where the connector clamps onto the ribbon cable. Check for an intermittent contact at the junction between the ribbon cable and the D connector. e) Faulty lead insulation If the wire insulation is broken but the wire is still intact, it is possible for gel or other moisture) on the electrode and lead wire (even very small amount) to conduct between the electrode contact and the exposed wire, resulting in an electrical short circuit. This will be detected by the ActiveTwo safety circuit as a fault. f) Other unknown faults 2. Troubleshooting procedure The best practice is to bench-test the electrodes (no participant connected – just a virtual participant in the form of a bucket of water). However, if you are in the midst of a recording session, it is possible to isolate a problem electrode / lead / connector and make the best of the session. M ost times this will mean losing just one channel of data. a) If a participant is connected, and you want to proceed with recording data (1) If your A1-32 electrode set has CMS/DRL on it, then leave A1-32 plugged in and unplug each of the other connectors (e.g. B1-32,…EXG1, …) one at a time to see if one of them causes the CM in Range light to come on. (2) If your CMS/DRL electrodes are plugged in at the front panel of the A/D box, then leave them connected and unplug each of the other connectors (e.g. A1-32,…EXG1, …) one at a time to see if one of them causes the CM in Range light to come on. (3) If you isolate one EXG electrode that causes CM in Range to come on, then simply remove that electrode and replace it if possible. (4) If you isolate one D connector that causes CM in Range to come on, then plug that connector back in and remove the active electrodes associated with that connector from the head cap one at a time until CM in Range comes on. If more than one electrode is at fault, it may not be possible to ActiveTwo Operating Guidelines Rev. 6, Printed: January 31, 2007 Page - 84 identify the offending electrode in a reasonable amount of time using this procedure. b) Bench testing – the “one-bucket test” (1) Fill a glass or plastic bowl or bucket with tap water and add a teaspoon of table salt (NaCl). (2) Make sure that the ActiveTwo hardware is assembled correctly, the power to the system is on and the ActiView software is up and running. (3) Connect CMS/DRL to the A/D box and submerge the CMS and DRL electrodes in the water. Leave CMS and DRL connected and in the salt water throughout the test. (4) Connect all of the active electrodes to the system, and submerge them in the salt water one-by-one or in organized groups until you identify one or more electrodes that cause the CM in range LED to go out. D. The system worked earlier, but now I get error 5000 If the system worked fine before, and nothing has changed as far as connections or computer configuration, then the Power settings of your computer (Control Panel) may have caused the computer to go into Standby mode. When standby is activated, the power to the USB port is lost, which causes the firmware in the ActiveTwo USB interface to “crash”. The Data LED next to the fiber optic connector on the Optical Receiver / USB Interface will still light up, indicating the USB port is supplying power to the box and data are coming in from the A/D box, but the Data LED next to the USB port on the Optical Receiver will not light up. If this happens, just disconnect and reconnect the USB cable at the computer or at the USB Interface. This will force the firmware in the USB interface to reinitialize, and it should correct the problem. ActiveTwo Operating Guidelines Rev. 6, Printed: January 31, 2007 Page - 85 XVIII. Other technical details not elsewhere documented A. Structure of the CFG file The .CFG contains configuration options for the ActiView program. The file format is similar to a Windows INI file with bracketed section headings followed by variables and arguments. Some of these options can be set from the ActiView menu, and some can be set only by editing the .CFG file with a text editor. 1. Options that are set in ActiView and saved in the text .CFG file The entries in the sections listed below are best set within ActiView by using the interactive menus. The purposes of these entries are mostly apparent from their names. a) [Selectors] b) [FreeChoice] c) [TCP] 2. Options that you may want to adjust in the text .CFG file (underlined below) Note that any entry not underlined below is inadvisable to change by editing the text .CFG file. a) [System] Warning=0 M otherboard=12 ElecGain="0....................................//0: 31.25nV/bit, 1: 125nV/bit." AIBGain="1....................................//0: 31.25nV/bit, 1: 125nV/bit." RespSwitch="0...........//0: standard ergo, 1: ergo 1 and 2 coupled to trigger 9 and 10 (for response switches)." LineWidth="1 .................................................//1 to 5, thin to thick" Cursor="0.......................................................................................... ....................................... //0: LabVIEW cursor, 1: Windows cursor" b) [Labels] (For the entries below, be careful to change only the text to the right of the equal sign! Keep labels to four characters or less for convenience of data display.) Chan1=Fp1 Chan2=AF7 Chan3=AF3 … ActiveTwo Operating Guidelines Rev. 6, Printed: January 31, 2007 Page - 86 Tou1=EXG1 Tou2=EXG2 Tou3=EXG3 … Aux1=GSR1 Aux2=GSR2 Aux3=Erg1 Aux4=Erg2 Aux5=Resp Aux6=Plet Aux7=Temp Aux8=Batt Jazz1=EyeX Jazz2=EyeY Jazz3=AccX Jazz4=AccY Jazz5=Heam Jazz6=Oxyh Jazz7=Amb Jazz8=M ic Jazz9=Pow Box1=Ana1 Box2=Ana2 Box3=Ana3 … Trig=Status c) [Save] Subset=6 Touchproofs=1 Sensors=0 Jazz=1 Anas=1 SaveBox=15 PauseOff="-1................................//-1 is disabled, 0-255 is enabled" PauseOn="-1................................//-1 is disabled, 0-255 is enabled" SavePath=c:\BDFdata\Testdata.bdf ActiveTwo Operating Guidelines Rev. 6, Printed: January 31, 2007 Page - 87 Appendix A. Disinfection Guidelines The Division of Healthcare Quality Promotion (DHQP) of the US Centers for Disease Control (CDC) maintains detailed guidelines on sterilization or disinfection of patient-care equipment. Here we reproduce for your convenience a set of General Principles on the topic published on the CDC website at: http://0-www.cdc.gov.mill1.sjlibrary.org/ncidod/dhqp/bp_sterilization_medDevices.html S terilization or Disinfection of Medical Devices The following principles are applicable to most questions CDC receives about sterilization or disinfection of patient-care equipment. However, these statements are not comprehensive. General Principles 1. In general, reusable medical devices or patient-care equipment that enters normally sterile tissue or the vascular system or through which blood flows should be sterilized before each use. Sterilization means the use of a physical or chemical procedure to destroy all microbial life, including highly resistant bacterial endospores. The major sterilizing agents used in hospitals are a) moist heat by steam autoclaving, b) ethylene oxide gas, and c) dry heat. However, there are a variety of chemical germicides (sterilants) that have been used for purposes of reprocessing reusable heat-sensitive medical devices and appear to be effective when used appropriately, i.e., according to manufacturer's instructions. These chemicals are rarely used for sterilization, but appear to be effective for high-level disinfection of medical devices that come into contact with mucous membranes during use (e.g., flexible fiberoptic endoscopes). 2. Disinfection means the use of a chemical procedure that eliminates virtually all recognized pathogenic microorganisms but not necessarily all microbial forms (e.g., bacterial endospores) on inanimate objects. There are three levels of disinfection: high, intermediate, and low. High-level disinfection kills all organisms, except high levels of bacterial spores, and is effected with a chemical germicide cleared for marketing as a sterilant by the Food and Drug Administration. Intermediate-level disinfection kills mycobacteria, most viruses, and bacteria with a chemical germicide registered as a "tuberculocide" by the Environmental Protection Agency (EPA). Low-level disinfection kills some viruses and bacteria with a chemical germicide registered as a hospital disinfectant by the EPA. 3. Heat stable reusable medical devices that enter the blood stream or enter normally sterile tissue should always be reprocessed using heat-based methods of sterilization (e.g., steam autoclave or dry heat oven). 4. Laparoscopic or arthroscopic telescopes (optic portions of the endoscopic set) should be subjected to a sterilization procedure before each use; if this is not feasible, they should receive high-level disinfection. Heat stable accessories to the endoscopic set (e.g., trocars, operative instruments) should be sterilized by heat-based methods (e.g., steam autoclave or dry heat oven). ActiveTwo Operating Guidelines Rev. 6, Printed: January 31, 2007 Page - 88 5. Reusable devices or items that touch mucous membranes should, at a minimum, receive high-level disinfection between patients. These devices include reusable flexible endoscopes, endotracheal tubes, anesthesia breathing circuits, and respiratory therapy equipment. 6. M edical devices that require sterilization or disinfection must be thoroughly cleaned to reduce organic material or bioburden before being exposed to the germicide, and the germicide and the device manufacturer's instructions should be closely followed. 7. Except on rare and special instances (as mentioned below), items that do not ordinarily touch the patient or touch only intact skin are not involved in disease transmission, and generally do not necessitate disinfection between uses on different patients. These items include crutches, bedboards, blood pressure cuffs, and a variety of other medical accessories. Consequently, depending on the particular piece of equipment or item, washing with a detergent or using a low-level disinfectant may be sufficient when decontamination is needed. If noncritical items are grossly soiled with blood or other body fluids, follow instructions outlined in the section on HIV-related sterilization and disinfection of this information system. Exceptional circumstances that require noncritical items to be either dedicated to one patient or patient cohort, or subjected to low-level disinfection between patient uses are those involving: 1. Patients infected or colonized with vancomycin-resistant enterococci or other drugresistant microorganisms judged by the infection control program, based on current state, regional, or national recommendations, to be of special or clinical or epidemiologic significance or 2. Patients infected with highly virulent microorganisms, e.g., viruses causing hemorrhagic fever (such as Ebola or Lassa). If you have questions about a low- or intermediate-level disinfectant and certain sterilants, contact the manufacturer, or the Antimicrobial Program Branch, Environmental Protection Agency (EPA) hotline (703) 308-0127 or email: [email protected]. The EPA is the federal regulatory agency for low- or intermediate-level disinfectants and some sterilants. If you have questions about high-level disinfectants (sterilants), or how to clean, disinfect or sterilize a particular medical device, first contact the manufacturer of the product. If you are unable to obtain sufficient information in this manner, contact the Food and Drug Administration (FDA) regional office or the FDA Center for Devices and Radiological Health at (301) 4434690. FDA is the federal regulatory agency for safe and effective use of medical devices and is now also responsible for regulation of chemical sterilants. Date last modified: August 20, 2002 ActiveTwo Operating Guidelines Rev. 6, Printed: January 31, 2007 Page - 89