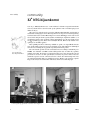
1
NUMMER 29 • NAJAAR 2003 REDAKTIE Wybo Dekker, waarnemend hoofdredakteur Frans Goddijn Taco Hoekwater Siep Kroonenberg Piet van Oostrum N E D E R L A N D S T A L I G E TE X G E B R U I K E R S G R O E P N E D E R L A N D S T A L I G E TE X G E B R U I K E R S G R O E P Voorzitter Hans Hagen [email protected] Secretaris Willi Egger [email protected] Penningmeester Wybo Dekker De Nederlandstalige TEX Gebruikersgroep (NTG) is een vereniging die tot doel heeft de kennis en het gebruik van TEX te bevorderen. De ntg fungeert als een forum voor nieuwe ontwikkelingen met betrekking tot computergebaseerde document-opmaak in het algemeen en de ontwikkeling van ‘TEX and friends’ in het bijzonder. De doelstellingen probeert de ntg te realiseren door onder meer het uitwisselen van informatie, het organiseren van conferenties en symposia met betrekking tot TEX en daarmee verwante programmatuur. De ntg biedt haar leden ondermeer: [email protected] Bestuursleden Erik Frambach [email protected] Frans Goddijn [email protected] Karel Wesseling [email protected] Postadres Nederlandstalige TEX Gebruikersgroep Maasstraat 2 5836 BB Sambeek Postgiro 1306238 t.n.v. NTG, Deil SWIFT/BIC-code: ING BNL 2A IBAN-code: NL05PSTB0001306238 E-mail bestuur [email protected] E-mail MAPS redaktie [email protected] WWW www.ntg.nl Copyright © 2003 NTG 2 Tweemaal per jaar een ntg-bijeenkomst. 2 Het ntg-tijdschrift maps. 2 De ‘TEX Live’-distributie op dvd/cdrom inclusief de complete ctan softwarearchieven. 2 Verschillende discussielijsten (mailing lists) over TEX-gerelateerde onderwerpen, zowel voor beginners als gevorderden, algemeen en specialistisch. 2 De ftp server ftp.ntg.nl waarop vele honderden megabytes aan algemeen te gebruiken ‘TEX-producten’ staan. 2 De www server www.ntg.nl waarop algemene informatie staat over de ntg, bijeenkomsten, publicaties, en links naar andere TEX sites. 2 Korting op (buitenlandse) TEX-conferenties en -cursussen en op het lidmaatschap van andere TEX-gebruikersgroepen. Lid worden kan door overmaking van de verschuldigde contributie naar de ntg-giro (zie links); vermeld iban- zowel als swift/bic-code en selecteer shared cost. Daarnaast dient via www.ntg.nl een informatieformulier te worden ingevuld. Zonodig kan ook een papieren formulier bij het secretariaat worden opgevraagd. De contributie bedraagt e 40; voor studenten geldt een tarief van e 20. Dit geeft alle lidmaatschapsvoordelen maar geen stemrecht. Een bewijs van inschrijving is vereist. Een gecombineerd ntg/tug-lidmaatschap levert een korting van 10% op beide contributies op. De prijs in euro’s wordt bepaald door de dollarkoers aan het begin van het jaar. De ongekorte tug-contributie is momenteel $65. MAPS bijdragen kunt u opsturen naar [email protected], bij voorkeur in LaTEX- of ConTEXt formaat. Bijdragen op alle niveaus van expertise zijn welkom. Productie. De Maps wordt gezet met behulp van een LaTEX class file en een ConTEXt module. Het pdf bestand voor de drukker wordt aangemaakt met behulp van pdfetex 1.11b Web2C 7.5.2 draaiend onder Linux 2.4. De gebruikte fonts zijn Adobe Times-Roman met Old Style Figures, Adobe Frutiger en de vrije txfonts fontset. TEX is een door professor Donald E. Knuth ontwikkelde ‘opmaaktaal’ voor het letterzetten van documenten, een documentopmaaksysteem. Met TEX is het mogelijk om kwalitatief hoogstaand drukwerk te vervaardigen. Het is eveneens zeer geschikt voor formules in mathematische teksten. Er is een aantal op TEX gebaseerde producten, waarmee ook de logische structuur van een document beschreven kan worden, met behoud van de letterzet-mogelijkheden van TEX. Voorbeelden zijn LaTEX van Leslie Lamport, AMS-TEX van Michael Spivak, en ConTEXt van Hans Hagen. Inhoudsopgave Nummer 29, najaar 2003 Redactioneel, Wybo Dekker 1 32e NTG-bijeenkomst, Frans Goddijn 2 TEX user groups worldwide – what’s cooking?, Erik Frambach 6 LaTEX: een newbie-ervaring, Koen Wybo 10 BachoTEX2003, Kees van der Laan 15 Toolbox, Wybo Dekker 24 Docbook In ConTEXt, Simon Pepping 26 Drawing Message Sequence Charts with LaTEX, Sjouke Mauw and Victor Bos 38 Labels voor gevaarlijke stoffen met LaTEX, Roland Smith 44 Aligning Metapost graphs in ConTEXt combinations, Karel H Wesseling 50 Drawing a type-case in ConTEXt, Willi Egger 53 Optisch uitvullen in de Maps, Siep Kroonenberg 60 Installing fonts in LaTEX: a user’s experience, Ferdy Hanssen 61 The Font Installation Guide, Philipp Lehman 65 Najaar 2003 iii Redactioneel Wybo Dekker [email protected] Voor u ligt het negenentwintigste nummer van de maps. Het is het eerste nummer van dit jaar en het zal ook het enige nummer blijven. De oorzaak hiervan is dat binnen de redactie en met name bij de hoofdredacteur, Johannes Braams, te weinig tijd beschikbaar was om de leden, u dus, achter de vodden te zitten en u te bewegen tot het opschrijven van een verhaal over een van de vele leuke en voor anderen interesssante dingen die u met TEX doet. Johannes Braams heeft daarom besloten zijn functie terug te geven en het bestuur heeft Niels Moes bereid gevonden om zijn taak over te nemen. Niels is echter nog druk bezig met het schrijven van zijn proefschrift en zal daarom pas over enkele maanden zijn functie kunnen gaan uitoefenen. Hij zal de hoofdredacteur voor de voorjaars-maps van 2004 worden. Tegenover die niet verschenen maps staat, dat we u dit jaar nog zullen verblijden de TEXlive distributie 2003 (die deze keer ook de ctan-dump bevat en uit twee cdroms en een dvd bestaat) en met een prachtig handzaam boekje van de hand van Hans Hagen en Willi Egger, dat een overzicht geeft van alle outline fonts die op de nieuwe TEXlive distributie beschikbaar komen. Verder heeft het bestuur Ernst van der Storm bereid gevonden de maps-redactie te versterken. De redactie zal dus bestaan uit Niels Moes, Piet van Oostrum en Ernst van der Storm. Daarnaast zullen Frans Goddijn en ikzelf vanuit het bestuur de redactie voorlopig blijven ondersteunen. Dat wil niet zeggen dat Siep Kroonenberg en Taco Hoekwater zich niet meer met de maps zullen bemoeien: integendeel, zij zullen het leeuwendeel van het werk blijven verrichten. Zij vormen het productie-team, dat zich primair richt op de vormgeving en het zetten van de maps. Bij gebrek aan een actieve redactie is de voor u liggende maps grotendeels door Frans Goddijn en mijzelf bijeengebracht en we denken dat we daar, in intensieve samenwerking met Siep Kroonenberg, in geslaagd zijn; en dat is vooral daaraan te danken dat we enkelen van u bereid hebben gevonden het hart uit te storten: Najaar 2003 2 Frans Goddijn levert een eloquent en rijk geïllustreerd 2 2 2 2 2 2 2 2 2 2 2 2 verslag van de 32e ntg-bijeenkomst. Erik Frambach laat zien dat ook andere Local Users Groups niet ontkomen aan problemen bij het produceren van hun tijdschriften en dat niet alleen... Koen Wybo beschrijft zijn ervaringen als beginneling op LaTEX-gebied en geeft een overzicht van veel documentatie-bronnen, Kees van der Laan doet uitgebreid verslag van de BachoTEX2003. Wybo Dekker probeert de Toolbox weer nieuw leven in te blazen. Simon Pepping laat zien hoe conTEXt kan worden gebruikt om DocBook documenten te zetten, van twee niet-NTG-leden, Sjouke Mauw en Victor Bos hebben we een interessant verhaal uit TUGboat mogen overnemen over het tekenen van Message Sequence Charts. Roland Smith laat zien hoe hij etiketten die we in doe-het-zelf zaken en drogisterijen nog wel eens tegenkomen in LaTEX genereert. Karel Wesseling laat zien hoe metapost-figuren onderling kunnen worden uitgelijnd, Willi Egger gunt ons een blik in een ouderwetse zetkast en laat en passant zien hoe de \btable ... \etable omgeving gebruikt kan worden om een lade daaruit te tekenen. Siep Kroonenberg heeft een primeur met de toepassing van pdfTEX’s protruding characters in onze mapsen schrijft er een prijsvraag zonder prijzen over uit. Ferdy Hanssen neemt ons mee op de queeste van enkele font-istallaties. Hij verwijst daarbij naar Philipp Lehman’s Font Installation Guide: en last, but not least: we willen meer aandacht gaan schenken aan fonts. Daarom is in dit nummer een facsimile opgenomen van de buitengewoon heldere en practisch bruikbare Font Installation Guide van Philipp Lehman. We wensen u veel leesplezier! 1 Frans Goddijn Piet van Oostrum, door Dilys Bronkhorst community 32e NTG-bijeenkomst Voor de 32e NTG-bijeenkomst was “vorm en inhoud” als thema vastgesteld. Een thema waarvan je denkt “dat we daar niet eerder op zijn gekomen.” Tal van onderwerpen passen immers in die jas. We waren voor de derde maal te gast in het Arnhemse Hotel Haarhuis. Na de koffie in de bekende wandelgangen van het hotel begonnen we de dag met een ledenvergadering. Van het bestuur zaten voorzitter Hans Hagen en secretaris Willi Egger aan de tafel voorin de zaal. Eerst dreigde de hele agenda (notulen, mededelingen, ingekomen stukken…) in vijf minuten gedaan te zijn, inclusief vrolijke mededelingen over de maps (komt eraan) en 4TEX (conflict opgelost, Wietse Dol vriendelijk akkoord, Erik laat zijn aandeel in de opbrengst aan de NTG, applaus). Maar gelukkig kwam het onderwerp OSOSS ter sprake, een ingewikkelde kwestie waar slechts enkele experts het woord over kunnen voeren. Dat deden deze deskundigen dan ook en wel zodanig dat de geplande vergadertijd ruim werd gevuld. Piet van Oostrum opende de reeks voordrachten met een volledige verhandeling over bibTEX, een onderdeel van TEX waarmee bibliografieën zijn te maken bij opstellen, artikelen en boeken. Piet had de voorafgaande nacht tot twee uur doorgewerkt aan zijn presentatie en zoals we van hem gewend zijn, leverde hij een perfect verhaal. Naast de technische aspecten was het ook interessant om te horen hoe merkwaardig men in de ons omringende landen denkt over alfabetisch sorteren. Bij het op de gewenste volgorde krijgen van een lijst van auteursnamen leidt dit tot allerlei verrassende ingrepen. Ledenvergadering geleid door voorzitter Hans Hagen (r) 2 Johan Vromans vertelt over MMDS. MAPS NTG-bijeenkomst community Intussen was gasttekenares Dilys Bronkhorst gearriveerd en zij zou gedurende de dag een aantal portrettekeningen maken. Johan Vromans schaamt zich er niet voor een hacker te zijn. Hij is er juist trots op. Hij vertelde over het ontstaan van MMDS, zijn op Perl gebaseerde pakket waarmee mensen die echt niets van TEX weten toch door middel van TEX documenten kunnen maken. Johans Perl-scripts behappen de door de gebruiker ingetikte tekst, begrijpen wat een aanhef is, wat een kopje, een opsomming... en de brief, het artikel en de offerte worden keurig in TEX gezet en voorzien van briefhoofd en paginering drukklaar gemaakt. Overigens, ook webpagina’s kunnen op dezelfde manier worden vervaardigd. De ontwikkeling van MMDS is tevens een afspiegeling van de computerhistorie, want Johan Vromans werkt al aan het pakket sinds de jaren tachtig van de vorige eeuw. Tijdens de lunch konden de NTG-leden onderling ideeën uitwisselen en aan alle tafels klonk een enthousiast rumoer. Dilys Bronkhorst tekende er een interpretatie van René van der Heijden. Sanne Dijkstra was vlak voor de lunch gekomen, niet alleen omdat we er bekend om staan onze gasten in de watten te leggen maar ook om vlak voor haar lezing even te peilen wat voor volkje TEX gebruikers nu eigenlijk vormen. Er was haar verteld dat het gaat om nerds met verstand van typografie, maar met een andere bril op dan normale typografen. Haar voordracht was voor velen in de zaal een fris en ander geluid: typografen op een kunstacademie kijken anders dan wij gewend zijn naar de wetten en regels van het zetwerk. Sommige dingen die Sanne in haar verhaal aanstipte zijn voor ons gesneden koek, zoals de onwenselijkheid van kleinkapitalen als deze worden verkregen door hoofdletters domweg verkleind te zetten, of het vet maken van letters door bestaande letters in dikker zwart te plaatsen. Andere benaderingswijzen van vlakverdeling waren voor een aantal luisteraars wel nieuw, zoals het bepalen van een ideaal vlak voor tekst op een vel door middel van het tekenen van diagonalen over een samenstel van twee pagina’s. Tenslotte gaf Sanne aan de hand van dia’s van de 4TEX manual haar suggesties voor de manier waarop je kritisch naar functionele vormgeving zou kunnen kijken. Sanne Dijkstra Najaar 2003 Johan Vromans, door Dilys Bronkhorst Tenar van Kooten Niekerk en pianiste Cathelijne Maat 3 community René van der Heijden, door Dilys Bronkhorst Frans Goddijn Wonderlijk mooi sloot de voordracht van Willi Egger hier op aan. De diagonalen die door Sanne Dijkstra werden genoemd, bleken een startpunt van zijn verhandeling over gulden snede en eenvoudige constructietekeningen waarmee feilloos kan worden bepaald waar je het beste je kantlijnen kunt plaatsen en hoeveel tekst je volgens beproefde vuistregels op je pagina kunt zetten. Daarbij deed Willi ook uit de doeken hoe het komt dat boekjes die op A5-formaat zijn geproduceerd meestal zo vervelend in de hand liggen. De afgelopen keren dat Willi Egger voordrachten hield op NTG-dagen bleek de tijd telkens zo krap bemeten door uitgelopen lezingen dat hem was verzocht zijn verhaal wat in te korten, reden waarom we ditmaal nadrukkelijk een héle lezing hadden gevraagd. Niemand had daar spijt van en na het verhaal van Willi kwamen er allerlei vragen en discussies los, beantwoord en gestuurd door zowel Willi Egger als Sanne Dijkstra, die speciaal voor de lezing van Willi was gebleven. Ferdy Hanssen liet daarna zien hoe je, door de aanwijzingen van een paar handleidingen secuur en geduldig toe te passen, zonder al te veel vallen en opstaan zelf een Type1 font kunt installeren. Hoe ingewikkeld dat is, hangt deels af van de keuze van het font. Voor veel fonts staat al bijna alles op de TEXLive CD/DVD, voor andere moeten tal van bestanden worden gegenereerd, gekopieerd, veranderd van naam… Na de theepauze nam Hans Hagen plaats achter de sprekerstafel. Als Hans vertelt over de nieuwste ontwikkelingen dan is het opletten geblazen. Soms verschijnen er dermate nooit-vertoonde beelden op het beamerscherm dat er enige tijd overheen gaat voordat je je realiseert wat er eigenlijk aan de hand is. Als je dan een deel van Hans’ tekst hebt gemist, moet je je stevig concentreren om de boot niet ernstig te missen. In dit geval kwam er een PDF document op het scherm waar allerlei dingen op konden worden ingevuld. Andere schermen werden geopend en gesloten en een typisch TEX-run log-scherm flitste voorbij waarna een ander document in PDF werd bekeken. Na verloop van tijd bleek het een systeem te zijn dat in principe verwantschap heeft met de aanpak van Johan Vromans’ MMDS. Hier kon de gebruiker allerlei keuzes en opties menugestuurd aanklikken, waarmee op simpele wijze mogelijkheden beschikbaar komen die er normaal alleen zijn voor mensen die niet bang zijn van gecompliceerde command line variabelen. Een opvolger voor 4TEX? Michael Guravage smeedt TEX plannen met Patrick Gundlach. 4 Roland Kwee (l) en Willi Egger (r) MAPS NTG-bijeenkomst community Hans heeft weleens verteld dat bij grotere instellingen die TEX voor publicaties gebruiken de trend bestaat om TEX te beschouwen en te gebruiken als back-end, als een applicatie waar de meeste gebruikers niet veel meer mee te maken hebben omdat TEX op de achtergrond zijn werk doet. Deze nieuw getoonde schil, een slim PDF document waarmee op de achtergrond allerlei TEX trucs kunnen worden aangestuurd, lijkt ook die richting op te gaan. Intussen arriveerden zangeres Tenar van Kooten Niekerk en pianiste Cathelijne Maat. Ondanks de erbarmelijk ontstemde piano van het hotel brachten de beide vrouwen met grote flair en helderheid een sprankelend programma. Deze weken staan zij met twee collega’s in een Arnhems theater met een show rond een reeks liedjes over de liefde. Willi Egger had een aantal liedteksten met behulp van ConTEXt in een kleine programmafolder gezet. Mede dankzij het inspirerende en verfrissende optreden van Tenar en Cathelijne waren de leden vervolgens in een puike stemming om tijdens de borrel in het hotelcafé over van alles met elkaar te brainstormen. Niet iedereen bleef over TEX bezig, maar hier en daar werden toch nog TEX-plannen gesmeed. Ook tijdens de eenvoudige doch voedzame maaltijd in het restaurant van Haarhuis was het typesetten her en der nog onderwerp van gesprek, maar in het algemeen ging de conversatie meer de richting op van vrije kunsten, atletiek en liefde. Toch was er ook nog gelegenheid voor een korte vergadering aan een tafeltje apart, van de mensen die momenteel met de Maps bezig zijn. Ja, het werd erg laat, maar er ging deze dag geen uur verloren! Erik Frambach geniet van een geslaagde NTG-bijeenkomst. Najaar 2003 Siep Kroonenberg, door Dilys Bronkhorst Dilys Bronkhorst met Frans Goddijn 5 community TEX user groups worldwide – what’s cooking? Erik Frambach abstract This article is based on a presentation given at the UK TUG meeting in Oxford in October 2002. It describes some current problems that TEX user groups face and it attempts to distill lessons learned and recommendations from almost 25 years of TEX user groups history. keywords TEX user groups, lugs, problems, volunteer work, history Introduction During discussions by email and at TEX meetings in The Netherlands, Germany, Poland, the UK and the USA, it became clear that currently several TEX user groups (local user groups, ‘lugs’ for short) are facing similar problems. These problems include constitutional crises, failures to produce journals, membership decline and financial difficulties. We will point out and discuss some of these problems and we will attempt to provide recommendations for solving and/or preventing them. History Since the ‘birth’ of TEX in 1978 many lugs were formed. In Table 1 we’ve listed some highlights in lugs history. It’s remarkable that most lugs were formed in the last decade. Undoubtably the Internet has played a major role here by providing easy and cheap means of software distribution (FTP servers and World Wide Web servers) and personal contacts (Usenet News and email). Gathering a historic overview of the founding (and dissolving) of lugs proved be be rather difficult. No one seems to be keeping track of the history of lugs. Even websites of existing user groups often provide little or no information on their history. Analysis of the development of user groups over the years shows a distinct geographical bias: 2 Europe: very many lugs were founded. 2 North America: very few lugs were founded. 2 Asia: only a few lugs were founded. 6 2 South America: no lugs were founded. 2 Africa: no lugs were founded. 2 Other continents: neither. The many European lugs can be explained by the need for support for their own language in TEX(e.g. DANTE, NTG, GUTenberg, CSTUG). This also (partially) explains why there are so few in North America. The oldest lug (TUG) resides there, and by nature TEX is English language oriented. Nevertheless, the vastness of the continent could have encouraged more local groups to start their own activities. In Asia TEX seems to be much less known than in the western world. Although typesetting eastern languages with TEX is possible, it’s hardly as easy as typesetting western (Latin based) languages. There may also be a cultural barrier here. South America and Africa (in fact, all continents on the southern hemisphere) lack lugs. We can only speculate on the reasons for this. Ups and downs Many lugs have had and/or are having their share of problems, but there are also successes to celebrate. In this section we will list some of them. Internal problems Running a lug is not a trivial task. Many things can go wrong. Some of the problems that have occurred are: 2 Constitutional problems: bylaws and articles may prove to be extremely limiting or paralysing under difficult or un- 1978: 1980: 1987: 1988: 1989: 1992: 1997: 2002: TEX ‘final’ version released TUG founded UK TUG founded NTG founded, GUTenberg founded DANTE e.V. founded GUST founded 19 lugs 25 lugs Table 1. Highlights in user groups history MAPS TEX user groups worldwide – what’s cooking? foreseen circumstances. E.g., constitutions may require a certain hard coded number of members to be present at a meeting for any decision to be taken. Sometimes nothing is specified about disolving the lug which can lead to endless discussions. 2 Boards that don’t perform (well): struggle for power, in- compatible personalities, poor discussion technique, poor management and hidden agendas are only a few of the problems that a lug (or any organization) may have to face. Part of the problem is that the goals of a lug are often unclear or too abstract (“promote usage of TEX”). 2 Financial problems: fuzzy bookkeeping, insufficient in- sight and control, an amateurish approach and poor (independent) auditing are some the problems that have occurred. Big risks can be involved. Who can afford a big conference like EuroTEX? What will happen if the tax man starts an inquiry? 2 CD-rom production problems: we’ve seen 4TEX thrive community 2 Finance: banking costs are not (well) managed, result- ing in loss of money; conference budgets and reports on financial results are not standardized or not available at all. 2 EuroTEX & TUG Conference: coordination and selec- tion of organizing parties is very obscure – nevertheless conferences are usually very successful. 2 pdfTEX: international cooperation made this product flourish; NTS: many lessons were learned but this academic exercise doesn’t justify its costs; Omega: lack of cooperation repels users and volunteers and frustrates development. The Good News The gloomy list of internal problems above may give you the impression that lugs are doomed. Indeed there is lots of room for improvement, but let’s not forget what we’ve achieved. Here’s an overview of only a few successes in which lugs played an important role: for several year, but then it died because of internal conflicts. TEXlive has been very successful but is very vulnerable because of the extremely small size of the team that produces it. 2 TEXlive cd-rom: this product made TEX easily access- 2 Journals: able repository of all TEX related software where countless users with Internet access have found the resources they needed. The cd-rom versions are very useful for those with no or limited access to the Internet. Though not intended to, the cd-roms also serve as historic snap shots by freezing archives at regular intervals. MAPS, Baskerville, TUGboat, TEXnische Komödie are having problems acquiring enough articles and/or publishing on time. 2 Meetings: the organization and timing of meetings is of- ten more or less random, cheap locations can be hard to find, conferences can be costly (risky), and some lugs opt for electronic only “meetings” (e.g., the Nordic group). able to users on all major operating systems, standardizing the way TEX installations are configured. 2 CTAN and CTAN cd-roms: CTAN has been a valu- 2 4TEX: this product was the first to provide a true plug ations (4TEX, TEXlive, journals, conferences, etc.). You can’t force them either, so you need a more subtle management style to encourage and support them. & play TEX environment that could run completely from cd-rom (remember, disk space was expensive back then) and contained all tools usually found in commercial word processors. International cooperation 2 pdfTEX: this product instantly warped TEX into the new 2 Volunteers: you can’t rely on them to live up to expect- Although all lugs have similar goals, their activities may interfere with each other and opportunities for cooperation and synergy may be missed. 2 Conferences: lack of coordination may cause dates of major meetings to clash; too often the organization depends on the same volunteers; financial risks are unclear and certainly not covered by the whole group of lugs. 2 Journals: distribution of journals to all lugs is still not in place; exchange of interesting articles and translation services are still poor; indexes of all journals or an index of all journals combined is lacking – better still would be a database, but that is definitely beyond reach; online availability of journals/articles and crossreferencing is very poor or non-existing. Najaar 2003 era of PDF documents and all their extra features like hypertext and web links. pdfTEX even made Adobe admit it had no software that could produce documents of the level of complexity that pdfTEX could (easily) generate. 2 NTS: this ‘New Typesetting System’ was initially sup- posed to be the successor of TEX as we know it, but eventually it turned out that for various reasons it could only be a complete rewrite of TEX in a different programming language which should make the implementation of extensions much easier. This may or may not happen, but anyway this project proved that the TEX community at large, represented by many lugs, is capable of (re)building a system as complex as TEX. A true successor to TEX will become essential soon enough as the world progresses… 7 community 2 Mailing lists and news groups: several of these have been very successful in providing support to TEX users of all levels, and as a platform for discussions of various TEXnical issues. 2 Conferences: every year there are at least a few success- ful meetings which last half a day up to a week, where progress is made by discussing TEXniques and where representatives of lugs can gather to coordinate their efforts in a friendly environment. 2 International contacts during lug meetings: over the Erik Frambach (e.g., LaTEX, emTEX, CTAN, Web2c, ConTeXt, Omega, fpTEX, MikTEX). 2 We don’t learn from each other’s mistakes. There is no sense of history. All too often a new lug board means that much knowledge and experience goes down the drain. Do’s and Don’ts From the experience gained by lugs we can extract the following recommendations to lugs: years some of the meetings of lugs which used to be ‘local’ have become more and more international (e.g., GUST, DANTE, UKTUG and NTG meetings). 2 Review your constitution (compare it to others) on a reg- 2 New: Webcalendar is a web based system that all lugs 2 Check your legal and financial position on a regular can use to publish their meetings and other events to the whole world. Potential date clashes are easy to track because the Webcalendar can show all events of all lugs simultaneously. 2 New: a central ‘TEX bank’ account should help in min- imizing international money transfers which are always costly. 2 New: an attempt has been made to get European funding ular basis. Watch out for potential deadlocks (voting rules!) and unforeseen events such as dissolvement of the lug. basis. Get independent professional advice before it’s too late (read: the tax man will strip you down…). 2 Find the right size of your board (not too big, not too small) so you can actually get things done. 2 Think twice before you hire personnel e.g. for running a lug office. This could generate more problems than it will solve. for the further development of TEX. This is a joint effort of several European lugs. 2 In case of internal problems, talk to other lugs. Chances Patterns or Lessons learned 2 Cherish your volunteers! They are your most valuable Looking back at more than two decades of lugs at work, we can distinguish some recurring patterns, and there are several lessons to be learned: 2 Amateurs operating on (semi) professional levels can de- liver astonishing products. But, reliability and consistency are weak. 2 There is no shortage of money, but not enough activit- ies to spend it on. There are no established procedures for requesting support from lugs. 2 Volunteers are tough to manage, especially by volunteers :-) It’s not clear how the precious time and energy of vo- lunteers can be managed and/or supported in a successful way. 2 New lugs are mostly oriented on ‘difficult’ languanges are your problems are not unique. assets. Bold statements Naturally we don’t have all the answers to all the problems. However, we do have several items we think would be useful for lugs to discuss among themselves or with other lugs. We list them here as ‘bold statements’. Note that we deliberately chose provocative expressions and that they do not nessecarily represent our view on the issue. They are primarily meant to evoke discussions. 1. There is no good definition of a lug. There are no cri- teria for becoming a ‘formal’ lug. Or an ‘informal’ lug, whatever that is. 2. Vision and mission of lugs are poorly developed. Most, if not all, lugs have no long term strategy, which makes them vulnerable to lots of problems. (e.g., Indian, Chinese, Hungarian, Vietnamese), not on application, working field or computer system. 3. The model of user groups based on a common country 2 Formalities have frustrated many projects and activities. 4. Information and expertise is no longer hard to find be- However, anarchy hasn’t done much better. 2 Many successes in the TEX world can be attributed to or language no longer suffices. cause of the Internet. Therefore lugs have to find new reasons for being. A new lug model is needed. individuals, with little or no involvement/support of lugs 8 MAPS TEX user groups worldwide – what’s cooking? community 5. Most lugs are clueless when it comes to promoting TEX 9. Lugs should not have professional staff members. This or even themselves. This is a threat for the entire TEX community. scenario is bound to lead to problems, as history has proven. 6. Lugs should be more involved in the process of defining 10. Lugs growing too big to handle (2000 members?) and implementing a successor to TEX and accompanying software. should split into smaller groups. 7. Inter-lug communication depends only on a few per- Conclusion sons who meet only a few times a year. Email communication among lugs is subminimal. Joint projects could help to improve this. 8. Intra-lug communication should be improved. Sending a cd-rom and a journal, and organizing one or two meetings a year is not enough. Members will not become involved, which is why it’s hard to find volunteers. Najaar 2003 For already two decades lugs have been around to promote TEX and support TEX users. They have had their ups and downs, but most of them have survived in spite of the incredible advances and changes that the computer world has gone through and is still going through. We are sure that in the next decade lugs should play a major role in keeping TEX and the whole TEX community alive and kicking. So let’s redefine and revive lug activities! 9 Koen Wybo advocacy LaTEX: een newbie-ervaring abstract Hoe ik een LaTEX-adept werd; argumentatie pro LaTEX en contra zijn grafische concurrenten: Word en OpenOffice. Inleiding Reflecterend op de weg die ik heb afgelegd om uiteindelijk bij LaTEX aan te komen, kan je niet anders dan verwonderd zijn. Want na negen jaar werken met diverse varianten van grafische tekstverwerkers ben ik nu tevreden met mijn prestatie die ik maak met een simpele editor. Graag vertel ik je ‘hoe het zover is kunnen komen’ ;–), waarom ik uiteindelijk met LaTEX werk en geef ik graag nog enkele aanbevelingen voor newbies. Kleine routebeschrijving Het is gek om te bedenken dat ik zo’n tien jaar terug mijn thesis heb verwerkt met een elektronische typmachine met geheugen. Van opmaak was niet veel sprake. Ik beschikte slechts over twee typmagrietwielen die gebruikt werden voor respectievelijk gewone tekst en voetnoottekst. Door te werken met hoofdletters, onderstrepen en vet kon uniforme lay-out worden aangebracht. Voor mijn studentenbudget was dit wonder van techniek een prijzige aankoop. Financiële argumenten hebben toen de doorslag gegeven want de veredelde typmachine kostte toen maar de helft van een PC zonder software (jawel het tijdperk van de i286) en was zelfs drie keer goedkoper dan een Mac. Gevolg van het budgetteren is dat ik nu enkel een getypte versie heb van mijn thesis en de digitale variant enkel kan geraadpleegd worden op de typmachine die de tekst mooi presenteert op een scherm van 10 regels hoog. Conversie naar PC of Mac is niet mogelijk. Het eerste schooljaar dat ik les gaf maakte ik op deze machine mijn –– weinige –– cursusmateriaal. Maar de informatica was niet langer te stuiten: een tweedehands PC gekocht met daarop Word6. Een wereld van mogelijkheden ging open. Meerdere lettertypes, invoegen van clipart, landscape afdrukken, uitwisselen van documenten … Het nodige overtypwerk werd erbij genomen als ook de eerste strubbelingen met nukkige software. Groot was m’n opluchting toen de opvolger Word97 verscheen. Dit pakket had duidelijk meer onder de motorkap. M’n enthousiasme leidde zelfs tot het delen van m’n opgedane kennis. In de scholengroep waar ik werkzaam ben, gaf ik meerdere navormingssessies Word97. Het gratis pakket Staroffice 5.1 wist mij te verleiden om over te stappen. Niet enkel omdat het gratis is, maar ook omdat het een platform-onafhankelijk programma is. Staroffice was/is immers ook verkrijgbaar voor Linux, een besturingssysteem dat vanaf 1999 meer en meer mijn aandacht kreeg. Gelukkig is de dochter: OpenOffice [13] in zijn huidige toestand heel wat stabieler en sneller. De eerste stappen met LaTEX dateren van rond de milleniumwende. Toen echter kreeg het een onvoldoende en heb ik het lang niet gebruikt. De steile leercurve was er op dat ogenblik teveel aan, de tijd ontbrak om alles op het net op te zoeken. Pas nadat er bij een samenwerkingsverband met linux-vrienden werd geopteerd om documenten aan te maken in LaTEX, heb ik het echt weten waarderen. Het begin was even doorbijten totdat de 10 MAPS LaTEX: een newbie-ervaring advocacy basisprincipes geleerd waren. Nadien kreeg ik mijn werk gedaan. Maar zoals altijd wenst men meer: speciale hoofding, aangepaste paginavoetnoten, invoegen van afbeeldingen met tekstomloop, conversie naar html en pdf … De zoektocht naar meer informatie op internet en usenet was begonnen. Waarom overstappen? Naast de ‘sociaal-gedwongen’ overstap naar LaTEX zijn er meerdere argumenten waarom ik niet afkerig ben van LaTEX. Emotioneel WYSIWYG mag dan als slogan vlot verkopen, het werkt toch niet zoals beloofd. Paginaeindes die niet meer weg te halen zijn, afbeeldingen die maar niet op de juiste plaats willen blijven staan, opmaak die verdwijnt na het knippen/plakken in een ander bestand, hoofdingen die ‘plots’ de standaardstijl niet meer respecteren, enzovoorts … Al deze ellende begint je na verloop van tijd de keel uit te hangen. Gekoppeld aan het gevoel dat jij moet voldoen aan de software in plaats van omgekeerd, leidt dit bij mij tot de conclusie dat WYSIWYG-software niet ‘optimaal’ is. Een ander belangrijk emotioneel aspect is toch wel het esthetisch verschil tussen pagina’s opgemaakt met LaTEX en die van een grafisch tekstverwerkingsprogramma. Daar kan je alleen maar jaloers op worden. Economisch Je zou het nauwelijks verwachten dat ook een Vlaming naar zijn portemonnee kijkt. En toch … Schaf je je verschillende versies aan van het officepakket van de marktleider dan mag je tweejaarlijks een behoorlijk bedrag op tafel leggen. Je kan het natuurlijk wel bij het oorspronkelijke product houden van een tiental jaar terug maar dan is het hopen dat je collega’s niet upgraden naar meer recente versies. Jij zal dan onmogelijk hun document kunnen openen. Om nog maar te zwijgen van de restrictieve licenties, de Rights Management Services en de verplichte upgrade van het totale Windows besturingssysteem die de maker van het meest verspreide office-pakket zal inbouwen in zijn nieuw product.1 Niet te vergeten natuurlijk de aanschaf van een virusscanner want deze documenten blijken soms ‘beestjes’ in zich te dragen.2 Als tijd geld is, dan is de overstap naar LaTEX zeker aan te raden. Door het gescheiden houden van inhoud en vormgeving spaart mij dit heel wat uurtjes oplapwerk uit. Niet enkel voor mijn eigen documenten maar ook deze die ik ontvang van collega’s. Immers door printerinstellingen, aanwezige lettertypes, enzovoorts … verschilt een Word-document op twee verschillende computers. Tekstverwerkingsprogramma’s zorgen voor het nodige comfort om op een efficiënte wijze je resultaat (in mijn geval: een cursus godsdienst) te verwezenlijken. Men kijkt graag naar dit gebruiksgemak en gaat al te vaak voorbij aan de effecten van het gebonden zijn aan een bepaald programma op lange termijn. Ben je zeker dat je na twintig jaar je documenten nog kan openen? Hoeveel geld zul je in die tijd gespendeerd hebben aan ‘noodzakelijke’ upgrades? Stel dat de producent van het programma failliet gaat: beschik je over voldoende conversiemogelijkheden om dit naar een ander programma over te brengen? Al1. voor de nieuwe versie van Word2003 plant Microsoft een nieuwe documentindeling. Het zal voor mensen van de ’oude’ versie onmogelijk zijn de nieuwe versie te openen en te bewerken. Ook zal de conversie van Word-documenten door andere grafische tekstverwerkingsprogramma’s zal niet meer mogelijk zijn. [17] 2. Gelukkig bestaat er voor mensen die liever grafisch werken een gratis office-pakket dat zeker niet moet onderdoen voor zijn commerciële tegenhangers. Openoffice [13] is niet enkel kostenloos, het realiseert bovendien nog één van mijn principiële doelstellingen. Najaar 2003 11 advocacy Koen Wybo lerlei zaken die je in overweging moet nemen, wil je niet gebonden zijn aan één bepaalde producent. Niet enkel de grafische tekstverwerkers lijden aan dit euvel. Ook bepaalde TEX-varianten zijn van commerciële aard. Economisch betekent ook dat je software gewoon moet werken. Wat ben je met een Officepakket waar je jezelf continu moet herinneren om tijdig op te slaan omdat een crash op de minst verwachte, meest ongelegen tijdstippen kan plaatsvinden. Anders uitgedrukt: crashes genereren altijd een vorm van verlies. Zij het in verlies van typtijd of inspirerende gedachten ‘van het moment’ die verloren zijn gegaan. Principieel LaTEX is ‘Vrije software’. Dit betekent dat elke gebruiker het recht heeft om de software te gebruiken, kopiëren, verspreiden, bestuderen, veranderen en verbeteren.3 Het resultaat hiervan is zichtbaar in de opkomst van het GNU/Linux-besturingssysteem: een juweeltje van OS dat naast de kernel een gans scala aan vrije software omvat. Deze GNU-gedachte brengt een ‘ecosysteem’ tot stand waar mondiaal mensen werken aan software die voor iedereen beschikbaar is. Hierdoor ontstaat niet een –– wat sommigen noemen –– ‘communistische’ variant van software maar brengt het betere kwaliteit tot stand. Bovendien ontstaat zo een schare aan menRichard M. Stallman, Linus Torvalds, and Donald E. sen die zich willen inzetten Knuth engage in a discussion on whose impact on voor het project en is vanaf the computerized world was the greatest. een bepaald ‘point of no reStallman: God told me I have programmed the best turn’ ook de overlevingskans editor in the world! vergroot. Herman Bruyninckx, Torvalds: Well, God told me that I have prof aan de K.U. Leuven en programmed the best operating system in the world! heftig voorstander van vrije Knuth: Wait, wait – I never said that. software, heeft heel wat argumenten [14] in het voordeel van Open Software.4 ProducFrom rec.humor.funny. submitted by [email protected] (Erik Meltzer) ten gebaseerd op TEX die niet open zijn, beveel ik niet aan bij vrienden die ook met een TEX-variant willen beginnen. Een uitspraak die erg cru lijkt. Uiteindelijk komt het neer op je niet laten inpalmen door een producent die je afhankelijk wil maken van zijn software.5 Voor je het weet ben je vastgeklonken aan één bepaald product. Naast een vlotte interface is het wijs om oog te hebben voor duurzaamheid op lange termijn.6 Het voordeel van een open standaard is bekend. Internet heeft er zijn bestaan aan te danken. Juist door het feit dat iedereen de technische aspecten van de standaard ter inzage heeft, kan het niet gemonopoliseerd worden door één bepaalde fabrikant. Het naleven van een standaard garandeert een langere levensduur van de software: standaarden worden pas vervangen als er technologische nood aan is, niet als één of ander bedrijf verwacht er commercieel voordeel uit te halen. Daarom ook is LaTEX zalig om mee te werken. Je bent gerust dat: 1. heel veel mensen werken met de software en je dus altijd wel ergens terecht kan met je vragen 2. de software wordt uitgebreid en onderhouden 3. LaTEX is opgenomen in de lijst van de vrije software [1]. Meer info over vrije software is te vinden op [2] 4. Je kan het eens nalezen op [15] Op [4] krijg je nog enkele argumenten mee voor efficient ICT-gebruik die ook deels ook opgaan voor de LaTEX-gebruiker. Ook op [8] krijg je argumenten mee waarom een pakket als LaTEX te verkiezen is boven een WYSIWYG. 5. Voor extra argumenten: zie supra, het internetartikel van Dhr. Bruyninckx 6. Naast open standaarden bestaat er inderdaad ook open content. Een thema dat we hier buiten beschouwing laten. 12 MAPS LaTEX: een newbie-ervaring 3. advocacy zonder de bedoeling om je financieel uit te knijpen als een citroen 4. en je weet dat je kennis van het pakket niet weggeërodeerd zal zijn na de volgende o-zo-noodzakelijke update. It takes guts to LaTEX LaTEX is niet voor iedereen. Volgens mij zijn er enkele basisvoorwaarden waaraan je moet voldoen om met LaTEX te kunnen werken. Voor alle duidelijkheid: spreek hier enkel vanuit mijn ervaring met tetex, de unix-variant. 1. WYSIWYG geeft je het gevoel alsof je controle hebt over de software en je eindproduct dat je maakt. Je hebt een instant-kijk op je eindproduct. Met een paar muisklikken boks je een tekst in elkaar die voldoet aan je inhoudelijke en esthetische normen. Om de stap te zetten naar een programma dat je terugwerpt naar het inhoudelijke en het esthetische voor eigen rekening neemt, is veel moed en lef gevraagd. Als je die stap kan maken, ben je goed op weg om ook LaTEX een kans te geven. 2. Wil je een serieuze inspanning leveren om je teksten, artikels, boeken … ook op esthetisch vlak een voltreffer te maken, dan kan LaTEX je ‘companion’ zijn. 3. Je moet durven in te gaan tegen de algemene mentaliteit van collega’s en vrienden die grafisch nog altijd gelijkstellen met superieure programma’s. Bovendien wordt een Worddocument gezien als een ‘standaard’.7 Het is bijna ongehoord om een alternatief te formuleren. 4. Als je de beslissende keuze maakt om te gaan voor jouw eindproduct en niet voor het programma waarmee het moet gemaakt worden, dan ben je op de goede weg. 5. Uiteindelijk: als je HTML kan schrijven in een editor: waarom dan ook niet LaTEX? Startblok voor nieuwe benen Nuttige tips die je kan geven als iemand aan LaTEX begint. Anders uitgedrukt: om de frustratiedrempel te verlagen is het goed om: 1. Op weg gezet te worden met iemand die reeds LaTEX kent. Of je kan je natuurlijk inschrijven op de mailinglijst van de ntg.8 Ook in de (engelstalige) discussiegroep comp.text.tex is er heel wat info te vragen (en te vinden). 2. 3. Zoek eerst documentatie op en vooral: lees ze aandachtig. Heel wat documentatie is reeds online te vinden. Naast de ntg-site [11] kan je ook je inspiratie opdoen bij [9] en [16] Een algemene beginnersinleiding op LaTEX is te vinden op [7] De elektronische versie van maps [10] is ook niet te versmaden. 4. Wil je na de eerste stappen heel specifiek gaan werken dan zijn de boeken van onder andere Leslie Lamport [6] en Michel Goossens [3] uitstekende begeleiders. Ook A Guide to LATEX [5] krijgt positieve recensies.9 Je kan ze kopen of –– goedkoper –– bij de bibliotheek ontlenen (eventueel via het bibliotheek-uitleensysteem.) 5. Weet ook dat er bij LaTEX onopgeloste mysteries blijven bestaan. De meest hardnekkige W-vragen die je zal blijven stellen zijn: 7. Wat het uiteraard niet is omdat de specificaties niet zijn. Zie ook http://www.openstandaarden.be/teksten/definitie 8. Inschrijven kan op [12] 9. De meeste van deze boeken krijgen in het voorjaar van 2004 een update. Najaar 2003 13 advocacy Koen Wybo 2 Wanneer verschijnt LaTEX3? 2 Waarom werken niet meer mensen met dit systeem? 2 Waarom enkel EPS in LaTEX en niet JPG? 2 Waar ergens op de CTAN-server? 2 Waar is mijn fontmap en hoe gebruik ik nu die fonts? 2 Wat is het verschil met XML en welke is nu de beste? 2 Wie maakt die LaTEX-packages en waarom? 2 Waar vind ik voorbeeld-PDF’s? 2 Welke editor/front-end is gemakkelijker dan Vi? Referenties [ 1 ] http://www.gnu.org/directory/all/. Lijst van vrije software. [ 2 ] http://www.gnu.org/home.nl.html. Nederlandstalige gnu-site. [ 3 ] Michel Goossens, Frank Mittelbach, and Alexander Samarin. companion. Addison-Wesley, 1994. The LaTeX [ 4 ] http://people.mech.kuleuven.ac.be/˜bruyninc/efficiente-ict/#achtergronden. Argumentatie waarom open standaarden te verkiezen zijn boven propriëtaire in het uitwisselen van documenten. [ 5 ] Helmut Kopka and Patrick W. Daly. A guide to LaTeX2e: Document Preparation for Beginners and Advanced Users. Addison-Wesley, third edition, 1999. [ 6 ] Leslie Lamport. LaTeX: a document preparation system. Addison-Wesley, second edition, 1994. [ 7 ] http://ludit.kuleuven.be/software/latex/. Introductiepagina LaTEX van de K.U. Leuven met heel wat interessante links voor newbies. [ 8 ] http://www.northernjourney.com/opensource/newbies/newb020.html. Introductie voor LaTEX-newbies die gebruik maken van linux. [ 9 ] http://www.win.tue.nl/latex/documentation.html. Uitgebreide Nederlandstalige documentatie over LaTEX. [ 10 ] http://www.ntg.nl/maps/electromaps.html. Elektronische versie van het ledenblad van de NTG: degelijke info. [ 11 ] http://www.ntg.nl/whatislatex.html. Wat is LaTEX? [ 12 ] http://www.ntg.nl/mail.html. Bekende site van de Nederlandstalige Tex Gebruikersgroep ;-). [ 13 ] http://www.openoffice.org. OpenOffice homepage. [ 14 ] http://people.mech.kuleuven.ac.be/˜bruyninc/. Homepagina van Dhr. Bruyninckx, heftig voorstander van de open-source gedachte in Vlaanderen. [ 15 ] http://people.mech.kuleuven.ac.be/˜bruyninc/ictvisie.html. ICT-visie van Dhr. Bruyninckx, pleidooi voor open formaten en open software. [ 16 ] http://theory.uwinnipeg.ca/localfiles/infofiles/teTeX/. Veel (Engelstalige) links en vooral info over TEX maar vooral over LaTEX. [ 17 ] http://www.aaxnet.com/editor/edit029.html#office. About conversion of Word documents. 14 MAPS community BachoTEX2003 Kees van der Laan Hunzeweg 57 9893 PB Garnwerd Gr The Netherlands as of old, and some more http://home.hetnet.nl/ [email protected] ~cgvanderlaan/ abstract A (partial) report of GUST’s 11th meeting at Bachotek, Poland is given. It is incomplete because I could not understand most of the Polish contributions and I skipped the LaTEX day. It reflects just of one of the threads through BachoTeX03’s life. A question is raised: can the TEX-world follow with pdfTEX the evolving PDF standard? keywords BachoTEX2003, GUST, Poland Motivation Nobody asked me to write a trip report, so I just did it for myself to increase awareness, to remember better what I have picked up, to ponder aloud about ideas which popped up, and not to let it fall into oblivion, not to let it go with the wind. Moreover, it was interesting to experience with this report as a pdfTEX e-paper, with links to WWW addresses, e.g. for the photos. This note is available at http://home.hetnet.nl/˜cgvanderlaan/notes/ bachotex03.pdf or with the .tex extension for the source, instead of the .pdf extension. A version with pages of screen size I will consider once I have created a BLUe Φ OutpuT Routine for the purpose.1 Around the meeting This was the first time I did not really contribute to a BachoTEX I attended, except for me being there.2 Roughly 60 people participated, of which 6 from Holland, 3 from Germany, 1 from the UK, and 1 from France. No longer the Polish people consider BachoTEX a family affair, also the Dutchies come with their spouses, children and pets. Michael is the example and Sveta + Beer joined me again. Taco and Bianca preferred to celebrate their 10th wedding anniversary at home. On the (strenuous) way back,3 I had as driver plenty of time to think it over, while glimpsing the beautiful Polish May landscape, to let the highlights flash-back, to ponder about ‘might-have-been’s, about missed opportunities, to resmell the smoke of the bonfire, 1. Is it still needed with scrolling Acrobat? Yes, definitely, it is much nicer. Most likely I will use this approach in next year’s report. 2. Well… maybe I contributed in the backwash by writing this report and making earlier BachoTEX reports available on my site. It seems to me that I contributed similarly to TEX’s life by my overview notes: What is TEX and MetaFont all about? of 1992, Catching up — pdf and html at the heart of 1998, and my last year’s Professionals and amateurs. TEXnically I also contributed, IMHO, but it seems that these contributions have not been perceived as I hoped for, have not gained adherents as Ulrik mentioned to me. However, my paradigm series of notes is available at the TEX-Live 6 CD-ROM (see directory texmf/doc/paradigm), and who knows what more notes of mine are out there, because usually I’m not asked, whether I agree or consider it better to unpublish. All my work published in MAPS is available on NTG’s jubileum CD-ROM of 2001 which contains MAPS1–24, as a wealth of PDFs with search facilities. MAPS issues in HTML are available on the TEX Live CD-ROM. 3. Sveta in her trip report in Russian paid attention to this aspect, and some more. Najaar 2003 15 community Kees van der Laan to retaste the (smoked) sausages and (ashes-baked) potatoes, to allow the fire-spitters,4 redo their job on my retina, and… last but not least to hear the music, again. Remarkable about the participants was that quite a few are retired TEXies already, are no longer active with TEX&Co. They only use TEX&Co now and then for their pleasure, while in day-to-day life they are not allowed to use it or just don’t use it for various reasons. This reminded me of one of my earlier thoughts about the lifetime of a TEXie. The logistics of the organization was in good hands: Jola and her team did as usual a good job, all went as smooth as smooth can be. Thank you! The lodging in the various bungalows spread along the lakeside was OK, the weather as usual, the food tasty5 — de GUSTibus non (TEX) disputandum6 — and more than sufficient. However, there is one Polish soup — flaki (Eng: tripe), a gourmet of good repute — which I just can’t swallow, but Beer really liked it. The program/conference/organizing committees had it all well organized. The LaTEX issues were concentrated on one day, so plain TEXies like me had a day off. Thank you. The proceedings were available at the spot as GUST bulletin 19. Thank you, Tomek, Stachek and Piotr! It is a pity that it is not complete, some authors could apparently not make it to submit in time.7 The lecture room compared to early BachoTEXs has improved and is technically wellequipped with a ‘beamer’ connected to a PC to assist the lecturer.8 The computers in the computer room form an ethernet, and are connected by ASDL to the internet.9 So, email and browsing the WWW was available for the participants and their families. Well-done! Thank you Jerzy, Marek… I should have hanged around more in that room and learn from the experience of those present. For example Ronald Kwee contacted expressions of interest site where he traced the origins of the famous 20%-80% rule. New, since 1998, is also a bar/café with terraces, to facilitate socializing. Poland seems to prosper. The countryside is beautiful, especially in May with all those bloosming trees, lilacs, and you name it. Money machines in the streets are common and convenient. There is less police than 10 years ago on the roads near for us foreigners difficult to recognize village/built-up areas to check your speed.10 The next BachoTEX will be special: on the 1 st of May, Poland will officially join the EEC! Moreover, Poland traditionally celebrates its proclamation on the 3rd of May 1791 of the first modern constitution of all Europe! And for me personally, it will be 10 years ago that I visited BachoTEX for the first time, and 11002 years ago that I visited for the first time Hanna, Janusz Bien, Włodek, Jacko and GUST avant la lettre. 4. Peter is the children’s hero: his rockets captivated Maarten among others and with the bonfire Maarten was Peter’s best assistent. 5. I love the Polski grip the Polish mushrooms. 6. The slogan on this year’s T-shirt. 7. Jacko’s second paper is not in there because the editors considered the documentation which comes along with the macros sufficient. I tend not to submit any longer. I freed myself from restrictions/deadlines and I put the material on my WWW site when I’m done with it, like this report. Editors can include the links after verification in their column. There are disadvantages to publishing on the WWW, I know, but I consider the freedom as an extra for the time being, and the way of doing in general for the future — and my TEX&Co future started in 1998 — if not the way out when forced by costs. 8. Or the lecturer can just team up (wirelessly?) the beamer to his private laptop. 9. So, I downloaded my last years work from my site in order to put the notes on display, but… no way: my PDF files could be watched on the screen but not printed?!? After all, I’m happy that it did not work because the pdfbookmark macros contained some serious flaws, /. 10. A village/built-up area is/was defined by one or more houses nearer than 50 yards to the road?!? 16 MAPS BachoTEX2003 community Presentations For the conference program visit http://www.gust.org.pl/BachoTeX/2003. Nice was as usual the handy map. Presentation tools Nowadays pdfscreen11 seems to be the tool to be used. Although it is handy to have the buttons on the screen I prefer (hidden) links, which don’t disturb the contents. It seems that people like to show their new acquired TEXnologies, nothing wrong with that, and forget about the main purpose to convey the matter. It must be said that pdfscreen is more modest than just Acrobat reader with its full control bar. For me a hypertexted pdf file supported by the keyboard buttons for next, previous, end and begin and some hidden links, is enough. Hans Hagen seemed to have realized this earlier, because in one of his screen-oriented documentations (MetaFun) he realized tiny, very tiny buttons almost hidden in the border, nearly invisible because of the coloured and changing modest passe-partouts. Jacko also practices this approach as can be witnessed from his presentations. Nice! Lectures I realize that I won’t do justice below to the majority of Polish speakers by not mentioning them. I just could not profit from most of the lectures because they were in Polish (no English abstracts let alone summaries, but… the titles were in English, fortunately.). And… sigh, after so many years I only can approximately say: in (w), yes (tak), no (nie), OK (dobry), bad (zły), good morning/day (dzień dobry), good evening (dobry wieczór), sorry (przepraszam), thank you (dzi¸ekuje), don’t mention it (niema za co), please (prosz¸e), goodbye (dowidzenia), lake (jezioro), lecture room (sala wykładowa), open (otwarte), closed (zamkniȩte), key (klucz), how (jak), silent (tigo), sir (pan), dining room (stolowka), breakfast (sniadania), lunch (obiad), dinner (kolacja), menu (karta), beet soup (barszcz), sauerkraut and meat (bigos), mushroom (grip), bon appetit (smasnego), I love you (ja kocham ciewie). I can order a beer/vodka (edno piwo/edna wodka) or a cup of tea/coffee (herbata/kawia) and similar trivia in Polish. No way of reading Polish let alone understanding a lecture, despite my recently acquired knowledge of Russian.12 I’m sorry.13 But… there is hope: I learned some more words: plit(ok), streszczenie and klesh,14 one diminitive Katarzyna, and from my guide the pronunciation of the combination of letters: sz pronounced as sch, cz as tsch, examples steszczin, streszczenie, rz as z, example Andrzej, ch as h, example chchałbym. There is some good news, however. Zofia Walcsak coined the idea of teaching us Polish before, along and after the conference informally, but more structured than along the meals, social gatherings or during the guitars in the night. And why not a weeklyfollow-up of lessons by email? Some sort of network academy? Splendid, we like that.15 So GUST why don’t you give it a try?16 11. I could not spot it, nor its documentation, on the CTAN 2002 CD-ROMs nor on the TEX-live 6 CDROM. A keyword facility similar to the one on NTG’s MAPS 1–24 CD-ROM of 2001 would be useful. 12. I was pointed out to some dangers: zapomnjat means in Russian to remember and in Polish the opposite: to forget! 13. The simultaneous translations for a small group somewhere in the room is not sufficient either. 14. At home Beer suffered again from several ticks; since last year I go to Bachotek with a tickpincer. 15. Since Januari Sveta and I enjoy satellite TV next to the cable and we can watch Russian TV and…Poland I and II! Who knows what that will bring. I know, I know, no way of picking up a single word at the moment, but maybe there are some educational broadcasts for children? 16. Maybe it will attrack more foreign participants ,. My wishes? To pronounce the words correctly. To understand the songs and to be able to join the quire in at least one of the traditional Polish bonfire songs. Sveta even talked about a BachoTEX hymn. Katia has promised to send me in PDF one of the Polish songs typeset in Latin Modern, of course, along with an English translation which I’ll put on my WWW site, next to the already available Russian songs. Other practicalities are for example to be able to understand the Najaar 2003 17 community Kees van der Laan Installing PostScript fonts for TEX, Janusz Nowacki It was obviously meant for a PC environment, not aimed at people like me, the Mac-ies. I got it that he summarized the files involved — .tfm .pfb .enc .map (.fd .sty) — and what to do where, meaning what these files should contain, and where they should be stored and under what name. Moreover, he used BoP’s TOIL, ie the Type One Installing UtiLity. I like it when people write down the results after one has found one’s way through the mass. So, the installation and (mixed) use of (new) fonts in TEX is still a nuisance, not yet solved in an easy way, I presume? Anecdote. Janusz has the reputation of not understanding nor speaking English, but since The EuroTEX at Kerkrade, since his lecture supported by slides/e-paper in English, he has proven that Polish TEX-ies improve on themselves. So Janusz rehearse on it another time, if it is not too cumbersome. Latin Modern, or an abundant extension of the Computer Modern family by accented characters using MetaType1, Bogusław Jackowski It was all about diacritical characters as extensions to the CM fonts. As usual Jacko’s contributions are very well-prepared. It seems that he is a professional in the sense of G.E.Forsythe: ‘a professional starts where an amateur ends.’ He provided English copies of his e-pages, the digital follow-up of the old transparencies, slides or foils. Moreover, the underlying paper in the proceedings was in English. Thank you Jacko! His walk along history lane of character embellishments, well necessary extras, was apparently influenced by the lecture style of Andrzej Tomaszewski. Nice! These new Latin Modern fonts, geared towards Polish diacritical characters, will be released in the exotic Hawaii. Thank you Jacko, your BoP company and the sponsors: DANTE, NTG…. Polishing TEX has a history already. I remember the beginnings where the precise positioning of the embellishments were at stake. Now it is about uniting elements, about composed characters as one integrated symbol, in order to get rid of the problems in scaling among others, I presume? MetaPost macros for dashing of closed areas, Bogusław Jackowski He made use of the fact that MetaPost allows multiple occurrences of the operator withcolor in a single drawing statement. Thanks to that property the operator withcolor can cleverly be redefined to perform hatching rather than filling. Nice! I have to study the details and (re)do it to get the hang of it. I guess that the macros are available on the GUST fileserver for TEX&Co materials.17 Indexing in Polish textbooks, Włodek Bzyl His approach to indexing — linear sorting on the fly — is interesting. We’ll soon be able to watch the real-life example of the Polish version of the TEXbook. One remark, however. Why not just improve on Knuth by doing the sorting as sidestep from TEX,18 ie as a subtask controlled by TEX, and not necessarily done by TEX as I did? Typesetting tables using Metapost, Piotr Bolek An interesting contribution because he essentially introduced the concept of layers — as we know already from Adobe’s Photoshop — to TEX&Co.19 Volker Schaa communicated information on the street about car parking, and when and where we sould obey what speed limits. 17. The GUST fileserver was also subject of a BoF. 18. The magical \write18 with functionality to have access to system commands from within TEX, was in the early nineties opposed by… Knuth! 19. Well, not true. Knuth already in his OTR approach used the overlay idea for printing multi-columns. I guess that Hans created a ConTEXt OTR in order to include (coloured/changing) backgrounds of all sorts, not in the least for his e-papers. In PS we had the old overprint of DRAFT or CONFIDENTIAL all over the page in a shade of grey. I know, I know, one of those other missed opportunities: I should have talked 18 MAPS BachoTEX2003 community that there are problems to come when the tables interact with for example the text around. Moreover, Volker mentioned that layers are the new issue of Acrobat 6, which triggered some thoughts with respect to the evolving pdf standard and pdfTEX, or better the niche for TEX in there. TEX tools in Windows XP or how to bite a cactus, Pawel Jackowski Yes, this is the first time I attended a TEX- lecture of Jacko’s son. As far as I understood, he mentioned the confusing differences in how to use TEX under various OS’s on a PC. How to cope with it — bite the cactus — I could not grasp. Funny, and well-done in the family tradition. Typescripts: the ConTEXt way of combining font families, Hans Hagen Interesting and powerful how Hans solved the problem of mixing fonts, while paying attention to the quality aspects. Apparently, the virtual fonts idea is not enough. As of yet I have no hands-on with ConTEXt, but I’ll give it a try once I have a new computer, and will pick from Hans’ brains by looking under the hood. How to make Jerzy love TEX again?, Hans Hagen This lecture was all about showing the power of PDF forms when used together with TEX&Co. The text is not entered through an editor but through a pdf form, which he believes is a user-friendly way of using TEX. The user doesn’t have to be aware that TEX&Co are under the hood. Hmmm, I see the claim, but…. What are the applications suited for this approach? What are the limitations? Let us wait and see for Jerzy’s answer.20 Hans uses for the purpose: pdfTEX, Acrobat based GUI, ConTEXt macros, PERL and Ruby scripts, XML dataflows, a watched folder system, collection of Ruby modules, classes and applications. Impressive! Hyperref package, Martin Schröder A bit fast to my taste he summarized the possibilities of this package written by Sebastian Rahtz in the late nineties. I missed examples. I pity that he did not mention that PS pictures should separately be converted to PDF (or PNG), as he told me later privately. So, older scripts to be enriched by hyperrefs should also be adapted with respect to markup and the accompanying (PostScript, …) pictures should be transformed into PDF (or PNG) as well.21 It is just a pity that I could not understand Grzegorz lecture ‘Towards better quality of pdf files,’ which I guess is related to the above and to the work I started last year, although I took the quality for granted.22 to Hans about this and about a lot more. 20. By the way Jerzy’s complaint is that TEX is not user-friendly. 21. As far as I understand, ConTEXt does support creation of PS pictures via MetaPost and inclusion of these in PDF e-paper on the fly. 22. Yes, yes, I agree I should have talked to him, this is one of the might-have-beens I realized too late. Equally well — another missed opportunity — I should have talked to my friend Radek, about his usage of the Titanium Mac, simply because I’m about to buy a G4 Mac, either the Quicksilver or the Titanium notebook. I also would have liked to ask him about audio→MP3 conversion, and maybe he could have demonstrated it, and I could have judged the results. The results I get are insufficient, maybe because my hardware is too limited. Erik, yes he uses a Titanium nowadays, could not demonstrate it either because it seems that iTunes 3 with respect to MP3 conversion offers you the possibility to burn a CD in MP3, and not the possibility to simply convert an audio file into MP3. iTunes 4 seems to offer what I need. Radek’s wireless contacting the ethernet access-point through the built-in airport (extreme?) did not work on the spot, alas. The functionality is nice and I would have liked to watch its performance. Najaar 2003 19 community Kees van der Laan BoFs One was about the GUST file server for TEX&Co materials — o Polskiej Bibliotece Internetowej — in Polish, /. This was in parallel with Jerzy’s BoF, so we were not left unattended. The future of European LUGs, Jerzy Ludwichowski Maybe there was a change in the program, because his guidance was all about fund-raising from ‘Brussels’ and what sensible projects we could define for the purpose.23 Hmmm, I wish him all the success he can get, but I doubt it that he will succeed. The reason? We had great and appealing projects like NTS, and we failed!24 Moreover, I think that we are too narrow-minded, too much involved with TEX’s purpose and possibilities. We should have an eye for multi-media — oh yes I know it is a buzzword — but 10 years ago I already day-dreamed in this direction, see my What is TEX and Metafont all about? We could start a multi-media project in teaching, eg ‘Polish for foreigners’, with TEX&Co somewhere under the hood.25 Hans’ forms could be used as interface for drilling, such that one can only proceed when results of the tests so far are sufficient. This kind of computer-assisted multi-media training I watched in practice when Sveta was learning Dutch. It is the modern way of learning foreign languages. The point I like to make is that next to typesetting one badly needs compact sound (and video) for e-paper on CD-ROM/DVD and WWW, but this is beyond TEX’s purpose. For acceptable transport time on the WWW we need still better compression techniques and/or faster transmission possibilities.26 MP3 as compression for audio is not perceived as good enough. The multi-media examples I like are art CD-ROMs such as ‘Escher Interactief’ and ‘Het mysterie Margritte — een surrealistische ontmoeting met Margritte,’ the various CD-ROM encyclopedia, the e-dictionaries with pronunciation options, and the ‘Wining-and-Dinings’ to learn Spanish cooking for example. Another aspect why we are in a weak position with respects to grants is that volunteersbiased User Groups, are not the structures for making real advances. Developments are made! Definitely! Somebody,27 sometime, somewhere at BachoTEX made the remark that real progress can apparently only be made at an University where PHD-students may invent new techniques supervised by a professor with vision, like Knuth, in want for the results. Hàn Thế Thành, with his pdfTEX, guided by Jir̆i Zlatus̆ka, seems to be an example. Workshops As usual before and after the meeting tutorials were offered. Very useful for the newcomers and for those who want to embark on a new corner of TEX&Co. Andrzej on bookcover design, Chris on digital presentations tools, Janusz Bien on GNU emacs for LaTEX users, Jacek Kmiecik on LaTEX–a second step, and Stachek on configuring and fine-tuning of TEX installations under windows and linux. 23. I’m sorry that I did not make notes of the projects Jerzy listed. 24. A less ambitious project was LaTEX3 which also seems to have slipped of the road. eTEX and PDFTEX, a nearly one man’s effort, are successful, though. 25. Is the functionality–Polish for foreigners on CD-ROM/DVD–already available? If not that can be granted, I’m sure. 26. Maybe, internet via satellite? 27. Was it Ulrik? 20 MAPS BachoTEX2003 community Social events Bonfire The social event is the traditional bonfire with sausages to be grilled and potatoes to be baked in the ashes, while the ‘guitars in the night’ are playing with the people around as quire. Jacko and his family are really great, not only because of their guitar playing: their a capella is something you should have listened to at least once in your life. It must be said that not only Polish songs are sung, but also Ukrainean, Russian, and… English! In the early BachoTEX’s we had Phil’s share and last year David Kastrup treated us on some of Leonard Cohen. Then, I was very much surprised by Marek Czubenko, who did not only join in singing the Polish, Ukrainean and Russian songs but als those of Cohen! Orienting competition Another off-off social event was the orienting competition. These competitions are quite popular in Russia and apparently in Poland. Pecular! Funny! Tuned for the ocasion, was how you could score. Not only by finding the spots but also by emptying the bottle of beer: bringing the empty bottle(s) yields 1 extra point for each bottle and a cap yields 2 bonus points. Nice, well-done! Thank you Piotr and … Annual assembly I really can’t tell what it was all about, but big laughter there was. I trust the GUST membership to decide the right things, so my default in voting is to obstain. Two motions were tabled, explained in English, and after voting accepted with one obstention, ,. To understand the words of a motion is one thing, to realize the implications is another. Pictures, alas no sound nor video What is the value of a BachoTEX report without pictures, without sound?28 From the last EuroBachoTEX a wealth of photo galleries is available at http://www.gust.org.pl/ BachoTeX/2002. I guess that when you read this report the photos of the corresponding year 2003 will also be available. Paveł Jackowski mentioned http://www.jaroslaw.pl/festiwal.29 I don’t know about a site with Polish music (sound, lyrics (translated), but those who want some Russian–lyrics (with transliterations or translations)–are invited to visit my site and find some links to Russian (bard) music. I wonder when we may enjoy the bonfire songs from GUST’s site. Evolving PDF standard At the moment we have PDF 1.5 with Acrobat 6 around the corner. Jacko’s octopussy model of several years ago with PS at the heart, is replaced by PDF as the essential format 28. One or two pictures won’t do, although as for all we know a picture is worth a thousand words. Moreover, I have to wait untill I have ended my film in my camera and have the film developed, printed and digitally written to CD. (My digital Quicktake 200 is out of order, alas.) Pondering over an e-paper approach I don’t know as of yet what is the good approach compatible with TEX&Co. If we also like to have video in TEX&Co then we have to use Adobe’s Acrobat. Acrobat ≥ version 5 allows sound and video import, and I read that pdfTEX offers facilities for this. So, we have either the old approach of just (digital) picture inclusion for books, reports and ilks or the CD-ROM multi-media approach. Interesting! For this report I only included links to WWW’s with photos (gallery of pictures), no sound as of yet, alas. For the music you still have to join a BachoTEX, nothing can replace BachoTEX-live. 29. It is about last years festival in the fall: pesni nashi koreni (songs of our roots). Najaar 2003 21 community Kees van der Laan to go to and from. If we use one or more layers of PDF 1.5 for TEX&Co then we can always go back form this PDF layer to TEX, realizing the functionality of .tex ↔ .pdf, after another tool has been used to modify some other layer.30 The complexity of cooperating tools is decoupled, as long as we don’t flatten the layers. PDF 1.5 and Acrobat 6 are potentially very useful. Adobe Nederland in their recent Acrobat 6 introductory seminar advocated the use of layers for languages: a PDF file may contain layers with English, Dutch, Polish… translations. Automatic translation just has started but the results are still very poor. TEX DVIPS Distiller Maybe, the workflow .tex −→ .dvi −→ .ps −→ .pdf is better suited for pdfTEX keeping pace with the evolving PDF standard than the shortcut .tex −→ .pdf. In my e-paper paradigm notes I will exercise both approaches–with or without PostScript– summarize the advantages and disadvantages and come up with conclusions. I wonder whether we can keep pace with the evolving PDF standard in pdfTEX. Apple has the same problem because from OS X onwards the screen is PDF oriented. Conclusions As one can see it is no surprise that the BachoTEXs are well-attended. All the TEXnical ingredients are there and well-cooked. Social life is very cosy and the location excellent. Moreover, if the meal goes with some music it can’t be but a success. This time was no exception. For me the BachoTEXs are the off-off-TUG meetings, they substantiate the TEX-life I like. Acknowledgements Thank you GUST for having invited me again,31 you have definitely switched me in TEX&Co active mode again, although there is much activity in the world outside, the world beyond TEX&Co’s purpose. Thank you conference committee and speakers for the nice material you offered. Thank you Jola for all the care you gave us, especially for organizing the lunch package which paved our way back. Thank you photographers for making your photos available, such that I could incorporate in this report links to them.32 Thank you all those present for the nice and cosy atmosphere. See you next year,33 if not earlier. My case rests, have fun and all the best.34 Appendices Experience in writing this e-paper I ended up with a hybrid, a mixture, of a classical paper and an e-paper, take for example the page size which is A4 biased and that photos are not included but just linked to, which adheres to the hypertext idea. 30. The functionality, meaning, we can just refresh the TEX&Co layer(s) independently of (what we did with) the other layers. 31. But, as promised on the EuroBachoTEX I would have come, nonetheless. 32. Not all photos linked to are taken at BachoTEX2003, but IMHO that does not really matter for conveying the impression. 33. For next year I intend not only to contribute a lecture or two, but also try the near to impossible to familiarize myself with the flavour of Polish, and grasp the opportunity to talk to people, getting rid of the missed-opportunities syndrome. Then there is my long-standing wish to join the ‘guitars in the night’ on my ocarino donated by Grizina, some years ago… keep fingers crossed. 34. Errors in this note? Do drop me an email: mailto:[email protected]. 22 MAPS BachoTEX2003 community Troublesome is the handling of links to WWW addresses. My macros have been adapted such that the links are also written to a file, in order to maintain a survey of what is used. There is no warning whatshowever when an address becomes obsolete and the link dangling. That is what modern general hypertexts entail, I’m afraid. Photos I did not include but just hyperlinked to them. This entailed a separation of the text and coloured photos. Watched interactively, it adds context information to the photos which is added value compared to just a photo gallery. A PDF file put in a directory on my site won’t be searched by search engines for META information. The search engines just look for the META information provided in a HTML page. It seems that my pdfTEX version, based on PDF 1.2 according to the file info, contains a flaw with respect to apostroph’s, where the apostroph disappears. Used WWW links P15 http://home.hetnet.nl/~cgvanderlaan/ P15 mailto:[email protected] P15 http://home.hetnet.nl/~cgvanderlaan/notes/bachotex03.pdf P15 http://home.hetnet.nl/~cgvanderlaan/notes/bachotex03.tex P15 http://www.gust.org.pl/EuroBachoTeX/photos/PBolek/imagepages/image15.htm P15 http://home.hetnet.nl/~cgvanderlaan/notes/overview.pdf P15 http://home.hetnet.nl/~cgvanderlaan/notes/texandco.pdf P15 http://home.hetnet.nl/~cgvanderlaan/notes/profsandamateurs.pdf P15 http://home.hetnet.nl/~slmorozova/notes/polen03ru.txt P16 http://www.gust.org.pl/EuroBachoTeX/photos/KBazargan/imagepages/image2.htm P16 http://www.gust.org.pl/EuroBachoTeX/photos/PBolek/imagepages/image9.htm P16 http://www.gust.org.pl/EuroBachoTeX/photos/TSheibak/imagepages/image10.htm P16 http://home.hetnet.nl/~cgvanderlaan/plaatjesmap/bungalow.jpg P16 http://www.gust.org.pl/BachoTeX/2003/plan_bacho.html P16 http://www.xs4all.nl/~rkwee/20030430bachotex/web/ 20030502Hanna_Kimia_Albert_Maarten_Kim_Peter_Sam_water_rocket_launcher_at_lake.jpg P16 http://www.gust.org.pl/EuroBachoTeX/photos/PBudzik/imagepages/image5.htm P16 http://eoi.cordis.lu P16 http://www.xs4all.nl/~rkwee/eurobachotex/web/20020503x_Stanislav_x.jpg P16 http://www.gust.org.pl/BachoTeX/2003 P17 http://home.hetnet.nl/~cgvanderlaan/notes/bachotex94.pdf P18 http://www.gust.org.pl/EuroBachoTeX/photos/MWolinski/imagepages/image10.htm P19 http://www.xs4all.nl/~rkwee/20030430bachotex/web/20030503Radek_Anna.jpg P20 http://home.hetnet.nl/~cgvanderlaan/notes/overview.pdf P21 http://www.gust.org.pl/BachoTeX/2002 P21 http://www.jaroslaw.pl/festiwal P21 http://home.hetnet.nl/~cgvanderlaan/russian.html Najaar 2003 23 LaTEX Toolbox Wybo Dekker [email protected] abstract Nieuwe avonturen in TEX-land. keywords index, rules, tooltips, uitvullen Tegen fraudeurs Sander van Geloven schreef: Weet iemand hoe ik een \hrulefill kan maken die iets hoger ligt, eigenlijk precies in het midden van de hoogte van een gewone kleine letter. Nu heb ik met \hrulefill dit maar ik wil eigenlijk (maar dan tot het einde van de regel) dit ——————— Het is om te voorkomen dat iemand op de hardcopy nog tekst na het einde van de regel kan plaatsen. Nu kreeg ik van Piet van Oostrum de volgende twee tips: Tenslotte: ik zou ook wel mijn statuten document willen veranderen in een statuten LaTEX-klasse, alleen doe ik dit liever samen met iemand die hier al wat meer ervaring in heeft om gelijk een goed bruikbare statuten.cls te maken voor ieders gemak. Bij deze ook hier een oproep aan mensen die hier een steentje willen bijdragen. Noot Wybo: Door de ex als eenheid te gebruiken zorg je dat de ruleafmetingen meeschalen met het font, maar dat moet je dan ook voor de diepte doen. De height .6ex genereert een \hrule die op de baseline ligt en een hoogte heeft die 0.6 maal de x-hoogte is. De depth -2pt verwijdert aan de onderkant 2pt, zodat, als 0.6 maal de x-hoogte kleiner is dan 2pt, de \hrule zelfs helemaal verdwijnt! De oplossing is dus: \def\mrulefill{% ~\leavevmode\leaders% \hrule height .6ex depth -.5ex\hfill% \kern0pt} \def\mrulefill{\leavevmode\leaders% \hbox{-}\hfill\kern0pt} zodat je \hrule 0.55–0.45 = 0.1ex breed wordt en met zijn midden op (0.55+0.45)/2 = een halve x-hoogte terechtkomt: Maar die resulteert in een onderbroken streepjeslijn die opgebouwd is uit een heleboel ‘-’ karakters:-------------------De tweede tip: Cursieve indextermen \def\mrulefill{% \leavevmode\leaders% \hrule height 3pt depth -2pt\hfill% \kern0pt} was precies wat ik wilde, een ononderbroken lijn op halve x-hoogte: Nu heb ik dit nog aangepast tot: \def\mrulefill{% ~\leavevmode\leaders% \hrule height .6ex depth -2pt\hfill% \kern0pt} Dan is er nog een spatie tussen het einde van de regel met tekst en het begin van de lijn: Verder heb ik ook de hoogte aangepast om het er beter uit te laten zien en die met de fontgrootte mee te laten schalen. 24 Maarten Wisse schreef: Als ik dit compileer: \documentclass{article} \usepackage{makeidx} \makeindex \begin{document} Ik doe dit in de hoofdtekst: \index{ambitus@\textit{ambitus}} en ergens anders: \footnote{% \index{ambitus@\textit{ambitus}} Een voetnoot met een indexterm} \printindex \end{document} dan wordt een .ind file gegenereerd met daarin: MAPS Toolbox \begin{theindex} \item \textit {ambitus}, 1 \item \textit{ambitus}, 1 \end{theindex} met als gevolg dat de indexterm ambitus tweemaal in de index komt. Weet iemand een manier om dit te vermijden? Er wordt in de LC van alles gezegd over protecten van commando’s binnen voetnoten, maar wat ik protect (footnote, index of textit) het effect is hetzelfde: twee index items in plaats van één. Johannes Braams antwoordde: Een manier om het te vermijden weet ik zo 1-2-3 niet. Wel kan ik het verklaren, wellicht dat dat een clue levert. De twee items worden door makeindex als verschillend gezien vanwege de spaties. Die spaties worden veroorzaakt door het \protect-ed commando mechanisme van de huidige LaTEX; die die zorgt er namelijk voor dat het commando \index expandeert naar \index (waarbij de een spatie voorstelt). In de meeste gevallen zijn die spaties irrelevant en ziet LaTEX de volgende keer weer het commando \index, expandeert naar \index en dan hebben we twee spaties tussen \index en zijn argument … Piet van Oostrum schreef: Dit is een oud probleem. Zie LaTEX bug 1435. (Gevolgd door een citaat van dat LaTEX-bug-rapport, dat voor mij niet te volgen was, dus dat laat ik maar even weg …) Maar Piet kwam ook met een minder obscure oplossing: Gebruik footnote.sty en genereer de voetnoot met: \begin{footnote} \index{ambitus@\textit{ambitus}} Een voetnoot met een indexterm \end{footnote} Of, als alternatief: redefinieer \index met: \let\origindex\index \renewcommand{\index}[1]{\origindex{#1}} Maar dit vereist dat je geen speciale tekens zoals % $ en \ in je index entries gebruikt zonder daar een \ voor te zetten (zoals dat in \index wel kan). Vervolgens kwam Piet met nog een derde oplossing, afkomstig van Jeremy Gibbons uit TeX and TUG news (Hey, it works!): maak en gebruik een style file met daarin: % % % % % plainfootnote.sty: incorporate plain TeX’s trickery into \LaTeX’s footnote macros, to allow \verb"..." within footnotes (the argument to \footnote is not read before it is executed) Najaar 2003 LaTEX \long\def\@footnotetext{% \insert\footins\bgroup \footnotesize \interlinepenalty \interfootnotelinepenalty \splittopskip\footnotesep \splitmaxdepth \dp\strutbox \floatingpenalty \@MM \hsize\columnwidth \@parboxrestore \edef\@currentlabel{% \csname p@footnote\endcsname \@thefnmark}% \@makefntext{\rule{\z@}{\footnotesep}% \ignorespaces}% \futurelet\next\fo@t } \def\fo@t{\ifcat\bgroup\noexpand\next \let\next\f@@t \else \let\next\f@t\fi \next} \def\f@@t{\bgroup\aftergroup\@foot\let\next} \def\f@t#1{#1\@foot} \def\@foot{\strut\egroup} Al Piets oplossingen bleken te werken, de tweede zelfs beter dan hij zelf verwachtte. Tenslotte kwam Johannes Braams met de suggestie: probeer eens makeindex -c (als je tenminste makeindex gebruikt). Volgens Frank Mittelbach zou dat moeten helpen zonder ander truken te moeten toepassen …Maar dat bleek niet te werken: de -c-optie comprimeert weliswaar meer dan één spatie tot één spatie, maar ten opzichte van nul spaties blijft er dan toch nog een verschil over. Tenslotte, als ik dan als spuit 11 nog een duit in het zakje mag doen: met een nieuw index-commando vang je twee vliegen in één klap: \newcommand{\ITX}[1]{\index{#1@\textit{#1}}} want ten eerste wordt \index net als in Piets tweede oplossing nu altijd vanuit een ander commando (\ITX) aangeroepen, zodat in de .ind-file geen verschillen ontstaan, en ten tweede kan in plaats van \index{ambitus@\textit{ambitus}} nu eenvoudig \ITX{ambitus} worden gebruikt. 25 Simon Pepping xml Docbook In ConTEXt, a ConTEXt XML mapping for DocBook documents What is Docbook In ConTEXt? Docbook In ConTEXt combines two technologies that are widely used by authors of technical literature: the Docbook DTD and the ConTEXt macro package for TEX. It is a ConTEXt module that allows one to produce a typeset version of a Docbook XML file, in dvi or pdf format. It takes a Docbook XML file as input for TEX. ConTEXt’s built-in XML parser parses the file and applies ConTEXt commands when it reads opening and closing tags. Which ConTEXt commands are applied, and therefore how the output is formatted, is determined by the Docbook In ConTEXt module. Docbook Docbook 1 has been available since the early 1990s. Over the years it has evolved into an extensive DTD for technical literature. Long ago extensive, customizable stylesheets 2 became available, first in DSSSL, later also in XSLT. The Jade program and the JadeTEX macro package made it possible to run the DSSSL style sheets and print the output with high-quality free tools. This enabled one to author, format and print Docbook documents without expensive software tools. With the advent of XML and XSLT more free tools have become available. These combined features have made the Docbook DTD the DTD of choice for technical literature. The Linux Documentation Project is one well-known project that switched over from a private DTD to the Docbook DTD. Due to this strong position, the toolset for working with Docbook documents is growing rapidly, see e.g. http://www.miwie.org/docbookinfo.html 3. How did it start and where is it now? During EuroTEX 2001 in Kerkrade I had become interested in using ConTEXt because of the beautiful presentation styles used by Hans Hagen and several other speakers. While I was following the ConTEXt email list, I also became interested in ConTEXt’s XML capabilities. These seemed so wonderful to me, that I had to understand how this could be done using TEX macro programming. I started asking questions. Sometimes Hans answers such questions with the suggestion that one take up some or other project. So he suggested that I start an XML mapping for Docbook. I really had other plans, but I was so intrigued with ConTEXt’s XML capabilities that I could not resist and gave it a start. As an added benefit, I would become more familiar with the Docbook DTD. When I started I certainly was aware that this would not be a small task. Docbook is such a large DTD, allowing its authors to use the hundreds of 1. http://www.oasis-open.org/docbook/ 2. http://sourceforge.net/projects/docbook 3. http://www.miwie.org/docbookinfo.html 26 MAPS Docbook In ConTEXt xml elements in innumerable combinations. But only while the project evolved did it become evident to me how large it really is. Michael Wiedmann, who is interested in all possible tools to render Docbook documents, heard about the project soon after I started it. He made several contributions. His support and interest helped me to continue through the difficult phase when a project is no longer new, but you do not yet have anything really usable and you know all too well how much work still has to be done. Now, a year later, I have some sort of an answer as to how it is possible to program ConTEXt’s XML capabilities in TEX macros: Theoretically TEX macro programming is complete (is it called NP-complete?). Hans Hagen is one of the few programmers who can turn this theory into practice. I also have a working XML mapping for DocBook documents in ConTEXt, which I call Docbook In ConTEXt (DIC). It contains good layout instructions for a number of oft used elements in their more common combinations. Running Docbook In ConTEXt Before one can typeset an XML file myfile.xml, one should create a TEX driver file myfile.tex, which should look something like this: \input xtag-docbook \starttext \processXMLfilegrouped{\jobname.xml} \stoptext Then TEX is invoked as: texexec myfile.tex to get a dvi file, or as texexec pdf myfile.tex to get a pdf file. In the driver file xtag-docbook is the file name of the module. The XML document is input with the \processXMLfilegrouped command. The filename \jobname.xml is always correct provided the driver file and the XML file have the same base name. Alternatively, one can always use the same driver file, in which the name of the XML file is changed each time. The ConTEXt documentation indicates that one can also run the XML file as texexec xmlfilter=docbook testxml.xml. This will not work because the name of the Docbook In ConTEXt module does not conform to ConTEXt’s naming conventions. It works if the module is renamed as xtag-doc.tex. Customizing Docbook In ConTEXt A Docbook XML document is a normal ConTEXt document. The commands that make up a ConTEXt document are also at work when a Docbook XML document is processed. They are just one layer away from what the user sees. Therefore the output can be customized as for any ConTEXt document with ConTEXt’s setup commands. The setup commands should be given after the Docbook In ConTEXt module has been read, so that they override the default setup commands in the module. If you do not give additional setup commands, ConTEXt’s defaults are applied. This is an example of a driver file with ConTEXt setup commands: \input xtag-docbook \setupindenting[medium] \setupheadertexts[section][pagenumber] \setupheader[leftwidth=.7\hsize,style=slanted] \setuppagenumbering[location=] \setupitemize[each][packed][before=,after=,indentnext=no] Najaar 2003 27 xml Simon Pepping \starttext \processXMLfilegrouped{\jobname.xml} \stoptext Docbook In ConTEXt defines a few setup commands and other customizations of its own. Section blocks ConTEXt always applies pagebreaks around section blocks, and it treats the Table of Contents and the Index as chapters. This behaviour can be changed with the pagebreaks option of the \setupXMLDB command: \setupXMLDB[pagebreaks=all]: Default ConTEXt behaviour. \setupXMLDB[pagebreaks=sectionblocks]: ToC and Index do not start a new page, and they are treated as sections. All other section blocks retain their default ConTEXt behaviour. \setupXMLDB[pagebreaks=none]: In addition to the sectionblocks option, bodymatter, appendices and backmatter do not start a new page. Titles Titles are formatted with a command of the form XMLDB\XMLparent title, where \XMLDBparent should be replaced with the name of the element to which the title belongs, e.g. XMLDBarticletitle. These commands can be redefined. They take one argument, the title. For example, the article title could be redefined as: \def\XMLDBarticletitle#1% {\startalignment[left]\bfb #1\stopalignment \blank} The section titles can be customized with ConTEXt’s usual \setuphead command. blockquote, epigraph and attribution The elements epigraph and blockquote have their own setup commands \setupepigraph and \setupblockquote, which have the following options: narrower. Both epigraph and blockquote are formatted using ConTEXt’s narrower environment. The value of this option is a list of left, right and middle that is passed on to the \startnarrower command. See the ConTEXt documentation for \startnarrower for the effect of these settings. quote. The value is on or off. When on, quotation marks are applied as with ConTEXt’s quotation environment. command. The value is a command or set of commands, which are applied at the start of the narrower environment. The element attribution is customized with the command \setupattribution, which has one option: command. The value is applied at the start of the attribution. More customizations Customization has only recently obtained the attention it deserves. More setup commands like those for blockquote and epigraph will follow. The distribution contains a document Customization.xml which will contain an up to date description of the customization options. Other tools for the same task Docbook In ConTEXt is not the only tool for typesetting a Docbook document. The canonical tool for typesetting any XML file is XSL + FO. An XSL stylesheet is used to define the desired output in terms of Formatting Objects (FO). The FO description can be thought of as a formatter independent layout description. Then an FO processor is used to produce actual printed output, on paper or as an electronic document. 28 MAPS Docbook In ConTEXt xml XSL stylesheets for Docbook have been available for several years, written by Norman Walsh. They implement a large part of the Docbook elements—not all elements, that seems impossible. And they are extensively parametrized, so that users can customize many aspects without modifying the XSL code. The objective of XSL + FO is: one stylesheet, many processors. Several FO processors are available, among which two free tools: FOP and TEX. FOP is a dedicated FO processor, that produces output in PDF. It is available from the Apache website 4. TEX can be used as an FO processor using David Carlisle’s xmltex and Sebastian Rahtz’s passivetex package, which runs under LaTEX. ConTEXt is a prospective FO processor. It already has an XML parser. Mappings should be defined for Formatting Objects, in the same way as I have done for Docbook In ConTEXt. Future plans Currently, Docbook In ConTEXt is not completely integrated with the ConTEXt distribution. I have strictly used the ConTEXt API wherever I could, and avoided to develop my own variants. But I have preferred to develop this module in separation from the development of ConTEXt itself. The time has now come to work on a better integration. I hope this can be achieved over the next year. If good, customizable XSL stylesheets for Docbook exist, and if ConTEXt could be an FO processor for the resulting output, then why would it be a good idea to spend so much effort on writing a special Docbook stylesheet for ConTEXt? In the ConTEXt community the idea of a special Docbook stylesheet for ConTEXt has been greeted with enthousiasm. Apparently, here the theory of one stylesheet for many processors succumbs to the practice that users prefer to work with their tools of choice. For a popular set of tools like Docbook and ConTEXt users afford the effort of another style sheet. Such a style sheet is more manageable for them and running the required tools is easier. On the other hand, until now, I have spent most of the required effort. And my answer tends to be: Maybe it is not the best way to support Docbook and XML in ConTEXt. Maybe it would be more useful to work on FO mappings in ConTEXt. Over the past year I have set up this stylesheet. I have investigated the main structure of Docbook and come up with a way to map that to a ConTEXt document. I have implemented a framework for the mapping. I have enjoyed doing all that, and my insight and skills in TEX macro programming have increased immensely. But the time has come that others take this over, add mappings for more elements, add customizations, add new ideas. I plan to move forward to more generic work to support formatting of XML documents using TEX as the typesetting tool. Availability Currently, Docbook In ConTEXt is available separately from the ConTEXt distribution, from my web site 5. Michael Wiedmann’s web page 6 with Docbook tools has a link to the Docbook In Context files. Programming Docbook In ConTEXt ConTEXt and XML ConTEXt can take XML documents as input. For that purpose it contains a non-validating XML parser, which recognizes XML tags as markup instructions. And it has an API 4. http://xml.apache.org/fop 5. http://www.hobby.nl/˜scaprea/context 6. http://www.miwie.org/db-context/index.html Najaar 2003 29 xml Simon Pepping (Application Programmer’s Interface) which allows one to define actions for those tags. This is called mapping XML tags to ConTEXt. A typical mapping instruction is \defineXMLenvironment[element]{start action}{stop action}. During the start and stop actions one has access to the attribute values of the element. For example, this is how one reads the align attribute of an entry element (in a table) and issues the corresponding setup command for ConTEXt’s TABLE environment: \doifXMLvar{entry}{align}% {\expanded{\setupTABLE[align=\XMLvar{entry}{align}{}]}} ConTEXt’s programming interface for XML mapping is robust. Rarely if ever does one get tangled in expansion problems. But, as is seen in the above example, timing the expansion remains an issue: The command to retrieve the attribute value, \XMLvar{entry}{align}{}, must be expanded before the setup command can be read by TEX. That is what \expanded does. It is easy, is it not? In principle, writing a mapping for an XML document in ConTEXt is simple. You state which ConTEXt commands you want to use for the start and stop of each element, and ConTEXt takes care of the rest. Practice is more complicated, certainly if you want to write a useful, extensible and customizable mapping for a complicated DTD. In the following sections I discuss a number of noteworthy features of the Docbook In ConTEXt mapping. Encoding and language An XML document declares its encoding in the xml declaration at the start of the document. ConTEXt supports several encodings, among which the XML default encoding utf-8. Correctly reading an encoding is one thing. Making all characters available that can be addressed by an encoding is quite another thing. Unicode and its utf-8 encoding have brought all characters in the Unicode range, currently more than 50,000, within scope in a single document. At the moment many of these are mapped to ‘unknown character’. Work is ongoing to bring more characters within reach of ConTEXt in a single document. A Docbook document may declare its language in the xml:lang attribute of the document element. The Docbook in ConTEXt module contains at the moment translated strings for four languages: English, German, Dutch and Italian. These are used for automatically generated strings, such as the titles of the table of contents, the abstract, and the index. Features for each element Context stack Because an XML document has a tree structure, each element in the document has a list of ancestors. I call that the context, or the context stack, which contains the ancestors from the document root to the current element. An element may push itself onto the context stack when it starts, and pop itself when it finishes. In principle all elements should do so. In practice a number of elements omit this because they or their children do not use the context stack in their formatting. During formatting, the context stack can be inspected with the following commands: \XMLDBcurrentelement: The current element’s name. \XMLancestor#1: The name of the ancestor at level #1 The current element is at level 0. \XMLparent: The name of the current element’s parent. 30 MAPS Docbook In ConTEXt xml \the\XMLdepth: The depth of the context stack. \doifXMLdepth#1: Execute the following instruction if the context stack has a cer- tain depth. \XMLDBprintcontext: Print the context stack in the log file (mainly for debugging purposes). ConTEXt also defines the context stack. I have redefined it because ConTEXt’s implementation did not satisfy my plans. Later I have simplified my usage of the context stack. ConTEXt’s implementation may now be perfectly satisfactory, but I have not checked this. ConTEXt defines \currentXMLelement, which also holds the name of the current element. But it is only guaranteed to be valid while ConTEXt reads the XML tag. Indeed, the mapping of some start tags in Docbook in ConTEXt emit an \egroup command, which invalidates the value of \currentXMLelement. Ignorable white space XML has the interesting feature of ignorable white space. It can be used to give the raw XML document a nice formatting and make it fairly readable. (It did not exist in SGML. As a consequence, SGML documents may be practically unreadable in an ASCII editor.) For applications that read the DTD, this feature is rather clear: white space in elements whose content may only consist of elements, is ignorable. For example, when the content model of a section only contains paragraphs, all white space that surrounds the paragraphs is ignorable. Applications like ConTEXt that do not read the DTD, must resort to other means to find out whether white space is ignorable or not. I have introduced a feature that is similar to the mechanism used in XSLT. One can declare that an element preserves white space with the command \defineXMLDBpreservespace#1, and that it ignores white space with the command \defineXMLDBstripspace#1. For these declarations to work, the elements should be on the context stack, and they and their children should use the command \XMLDBdospaces as the last command in their start and end tags. \XMLDBdospaces has the effect of ignoring spaces following the XML tag if the current element has been declared to ignore spaces. In practice this is only used by elements that would suffer if white space is not ignored. Note that TEX itself already ignores a lot of white space, viz. all white space that it reads in vertical mode. In the example of white space surrounding paragraphs in a section, TEX would do the right thing by itself. The correct functioning of \XMLDBdospaces is rather subtle. The following is a generic element mapping: \defineXMLenvironment[xxx] {\XMLDBpushelement{\currentXMLelement} \XMLDBdospaces} {\XMLDBpopelement \XMLDBdospaces} The command \XMLDBdospaces in the start tag is executed while xxx is the current element. So it ignores white space if xxx has been declared to contain ignorable white space. But the same command in the end tag is executed after xxx has popped itself from the context stack. So its parent is the current element, and the command ignores white space if that parent has been declared to ignore white space. That is indeed exactly what we want, because the spaces following the end tag </xxx> are in the parent’s content. There is a class of ignorable white space that TEX refuses to ignore: blank lines are converted to \par commands by TEX’s input scanner, before we can tell TEX whether white space is ignorable or not. Even this does not always matter to TEX because TEX discards empty paragraphs or paragraphs that consist of white space only. In the above example we could insert blank lines between the paragraphs without ill effect. But a blank line between the start tag of a footnote and its first paragraph has a notably bad Najaar 2003 31 xml Simon Pepping effect: it introduces a \par command between the footnote number and the start of the text, so that the footnote number is in a paragraph by itself. Such harmful blank lines can only be removed by preprocessing of the XML document. I wrote a tool to do that. It is a SAX document handler written in Java, which removes all ignorable white space. I call it ‘Normalizer’, and it is available on my web site 7. The output of this tool is not only good for the ConTEXt mapping. Looking over it is informative for authors of XML documents. Every amount of white space that is left by the tool, is regarded as meaningful white space by XML parsers. Is that really what the author wants? Every element In principle every element should contain the following commands: \defineXMLenvironment[xxx] {\XMLDBpushelement\currentXMLelement \XMLDBseparator \XMLDBdospaces} {\XMLDBpopelement \XMLDBdospaces} That is, it pushes itself onto the context stack. It checks whether it should typeset a separator. And it checks whether it should ignore following white space. In its end tag, it pops itself from the context stack, and it checks whether its parent should ignore following white space. The separator is used by such elements as author, which may generate a comma or the word ‘and’ between consecutive elements. By default it is set to \relax. A parent element should give it a suitable definition to be used by its children, and reset it to the default when it finishes. Which element is next? ConTEXt’s XML parsing is event based. This means that the parser generates events, such as the start or stop of an element, and calls the associated actions. During the actions one only sees the current event. One cannot look back at past events, except for the data that one saved. One can certainly not look forward to check which elements follow. In contrast, XSLT is tree based. That means that one can scan all elements, preceding and following, in the formatting commands of an element. Event-based parsing may present serious problems to the programmer. Is there a title? An abstract may but need not have a title. When there is no title, I want to print the default title ’Abstract’. Because of the event-based nature of the parse, one cannot at the start of the abstract look forward to see if a title will follow. One can only try to find a future event at which one may safely conclude that there is no title if one has not yet seen a title. In an abstract the optional title may be followed by three types of element, para, simpara and formalpara. When any of these elements is started, one may safely conclude that either the title has been seen or there is no title. One solution is to save the title, and to redefine the mappings of each of these three elements, such that they output the title or the default title if there was no title. And then restore their default definitions for the following elements. Another way to tackle this problem is to save the whole abstract and process it twice. In the first pass we check whether there is a title. During this pass, all output should be suppressed. In the second pass we first output the title or the default title if no title was 7. http://www.hobby.nl/˜scaprea/context 32 MAPS Docbook In ConTEXt xml found in the first pass, and then we output the content. Again this requires a redefinition of the three possible elements that may follow the title, so that they suppress their output at the first pass. The third option is provided by TEX itself, not by the XML mapping. We redirect the typesetting of the abstract into a vbox. At the same time we save the title in the variable \XMLDBtitletext, which removes it from the typeset content in the vbox. Then we output the saved title or the default title if there is no saved title, and next we output the vbox. This is the best option, and I use it. In a section this solution would be more problematic: we run the risk of saving a large vbox. Working with options one or two is also not fun, because there are more elements to be redefined. I think the only viable alternative would be to work with \everypar, because \everypar is TEX’s low-level signal that there is new text. Fortunately, in a section a title is required, so I did not (yet) have to work out this problem. This is an example of the problems that arise because in an event-based parse it is hard to determine if an optional element is not present. The following section presents an example of the problems that arise because in an event-based parse it is equally hard to determine when a certain group of elements is finished. Sectioning Like many systems, ConTEXt partitions its document in frontmatter, bodymatter, appendices and backmatter (called section blocks). The section block governs such properties as the numbering of the chapters and sections. I use the end of the frontmatter to print the table of contents. Docbook does not have the equivalent of section blocks. There is not a single element that contains the frontmatter, the bodymatter or the backmatter. Therefore I analysed the top-level structure of a docbook document, and divided the elements that may occur as top-level elements into frontmatter elements, bodymatter elements and backmatter elements. When the first top-level bodymatter element is seen, the frontmatter is complete and the bodymatter starts. Similarly for the backmatter. For a book in Docbook the situation is rather clear: The bodymatter starts with the first part, chapter, article or reference. For an article the situation is much more fuzzy. While I counted only 6 top-level frontmatter elements, I identified 60 top-level bodymatter elements. The situation is complicated by the fact that some of these 60 top-level bodymatter elements may occur in the frontmatter at a lower level. For example, abstract, authorblurb and address may occur within the element articleinfo, which itself is a main constituent of the frontmatter. They may also occur as top-level elements, in which case I consider them as part of the bodymatter. The transitions between the other section blocks are fortunately more clearly marked. The complete analysis is contained in the documentation in the module itself. The situation is programmed using the commands \XMLDBmayensurebodymatter and \XMLDBmayensurebackmatter. All top-level bodymatter and backmatter elements execute the appropriate command. These commands check if the element is a direct child of the document element, i.e. if the depth of the context stack equals 2, and if the corresponding section block has not yet been started. The current section block is kept in the variable \XMLDBsectionblock. Specific elements Tables Docbook uses the CALS table model. ConTEXt uses two different table models. One is the tabulate environment, which is based upon TEX’s \halign. It is quite sensitive to expansion timing errors. The other is the TABLE environment, also called natural tables. It Najaar 2003 33 xml Simon Pepping is a very powerful and flexible environment, with much customization possibilities using \setupTABLE commands. A special feature of this table model is that rows, columns and cells can be configured both before and after their content has been given, at any time before the end-of-table (\eTABLE) command. Because ConTEXt’s natural tables have much similarities to CALS tables, the mapping is in principle very easy: a row corresponds to TR, an entry to TD, colspec elements can be mapped to \setupTABLE commands. There are three main complications. The top, bottom, left and right frames of a CALS table are determined by the frame attribute of the table; the rowsep and colsep attributes of the correspond- ing rows and cells should be ignored. CALS tables can have multiple tgroup elements, each with their own number of columns, and their own alignment and frame settings (colspec elements). Each tgroup may have its own thead and tfoot elements, which may contain their own colspec elements. These requirements have led to the following model: The table element generates a ConTEXt table, i.e. the table float, using the \placetable command. Each tgroup element generates its own TABLE environment, i.e. the actual table. The table is not openend by the start tag of the table, because at that moment the title is not yet known. Instead, it is opened by the start tag of the first tgroup (command \XMLDBopentable, which contains the ConTEXt command \placetable). The start tag of each following tgroup typesets the previous tgroup (command \XMLDBendTABLE). Before typesetting, the left and right frames are set up. The start tag of the second tgroup also sets up the top frame. The end tag of the table does the same as the start tag of the next tgroup would do. In addition it sets up the bottom frame of the table, and closes the vbox of the \placetable command. The rest is careful attribute processing, and issuing the required \setupTABLE commands at the right time. Attribute processing generates a lot of overhead, because both the attribute names and their possible values have to be translated from CALS to \setupTABLE. That makes the code somewhat less readable, but the logic is quite straightforward. Issuing the required \setupTABLE commands is a precise work. The start tag of the first tgroup applies the frame, colsep and rowsep attributes of the table (\XMLDBopentable), so that they apply to all TABLEs in this CALS table. The start tag of each tgroup applies its own align, colsep and rowsep attributes, within its own TABLE environment. colspec elements of a tgroup apply their attributes to the whole column of this TABLE. The colspec elements in the thead and tfoot elements, on the other hand, must save their attributes (\XMLDBsavecolspec); they will be applied per entry in the thead and tfoot. row elements apply their attributes immediately to the whole row. entry elements first check whether they are in a thead or tfoot; if so, they apply the saved colspec attributes. Then they apply their own attributes. This order is important. ConTEXt gives precedence to properties set up per cell over properties set up for the whole table or per row or column. But in this case we apply what was originally a column specification per cell, so we must take care of the precedence ourselves. Revision history The revision history contains a number of revisions. Each revision specifies one or more fields out of five possible fields. I wanted to represent this in a table which should only 34 MAPS Docbook In ConTEXt xml contain those columns for which at least one revision specifies data. Programming this was my first challenge in this project. Hans Hagen suggested the solution. The revision history is saved, and then processed twice. For the first pass of the saved revision history, we define the revision fields such that they register themselves when they occur, but suppress all output. We also count the number of revisions, so that we will know which row must contain the bottom rule of the table. Now we know which fields occur and we can setup the table and output its header row. For the second pass we define the revision element such that it outputs the row with the fields. So that the fields are output in the same order as in the header row, regardless of their order in the XML document, we first save the fields in a revision, and at the end tag of the revision we output the whole row in the desired order. I worked this out both in ConTEXt’s tabulate environment and with its natural tables. I decided to keep the solution with the natural tables, because natural tables are more flexible and less prone to expansion errors. This procedure demonstrates a powerful feature of ConTEXt’s XML processing: It is possible to save a node of the XML document with its subtree; in other words, the content of an element, complete with embedded elements, is saved in a variable without parsing. Later one can process the saved subtree as often as one likes. In between one is free to redefine the behaviour of the embedded elements. In TEX’s macro language this is quite normal behaviour : \def\savevar#1{\def\var{#1}} ... % redefine \processvar \processvar{\var} ... % redefine \processvar \processvar{\var} In other programming languages it is not nearly as easy. Saving a node with its subtree in a SAX content handler so that it can be processed later is not a trivial task. It is a disadvantage of the above procedure that the code is not easily read, certainly not if one is not used to the procedure. Recently, I have discussed an alternative procedure using Giuseppe Bilotta’s xdesc module. It would achieve the same result but make the programming more transparent. Another advantage would be that it is more easily customizable by the user. Program listing and CDATA I have spent an enormous amount of time on program listings. At first it seemed easy: ConTEXt has a verbatim environment which suits our purpose. Then it was pointed out to me that some program listings contain CDATA sections, which were not treated well by my solution. I realized that a program listing is not really a verbatim environment because it does not disable XML tags. I dived deep into ConTEXt’s verbatim environment and came up with a variant that supported two types of verbatim: one real verbatim for CDATA sections and one that did only line oriented layout for program listings. Moreover, it was nestable, so that it could deal with CDATA sections within program listings. But it remained problematic to get it quite right. When the end of the CDATA section or of the program listing element was followed by text on the same line, this text was lost. And my white space tool did exactly that: put the following text right behind the end of the program listing element. When I revisited the problem a few months later it dawned on me that the whole verbatim approach was wrong. Neither CDATA sections nor program listing environments have anything to do with TEX’s notion of verbatim. CDATA sections just disable XML Najaar 2003 35 xml Simon Pepping markup. They may occur anywhere in an XML document, and have no semantic meaning. Indeed, an XML parser does not even report whether CDATA sections are used in an XML document; it simply resolves them. For the program listing I found a simple solution. It avoids scanning a whole line at a time, therefore it avoids scanning the text following the end of the program listing with the wrong catcodes in place. It uses \obeylines and \obeyspaces and it places struts at the start of a line to prevent the leading spaces to be discarded by TEX’s paragraph mechanism. That is all, and it does the job well. Hyperlinks, URLs and external documents Docbook documents mark hyperlinks with the ulink element; the url is contained in its url attribute. If we were writing HTML documents it would be easy: <ulink url="URL">text</ulink> would be translated to <a href="URL">text</href> and the browser would do the rest. But not such an easy solution in a PDF document. Links to PDF documents should be treated differently from links to other documents, and relative links to non-PDF documents are not allowed. Therefore, we have to analyse the URL and complete it if necessary. In ConTEXt strings can be split into parts with commands like \beforesplitstring string\at substring\to\var which splits string at substring and stores the first part in \var. I use this and similar commands to check whether the URL has an authority (this is the term used by RFC2396, which specifies URIs; usually it is called the protocol, e.g. http) and whether it is an absolute or a relative URL. If a local file is specified, we also check whether it has the extension pdf. Links to local PDF documents are created using the ConTEXt command \useexternaldocument, links to other documents use the ConTEXt command \useURL. A special problem is posed by URLs like slashdot.org. Is it a web server, or is it a file in the current directory? Cf. the URL myfile.html, which has exactly the same pattern. After the terminology of RFC2396 I call this abbreviated URLs. By default they are not recognized. Thus myfile.html is correctly linked to as a local document, while slashdot.org is incorrectly linked similarly. The user can switch recognition of abbreviated URLs on by setting \XMLDBcheckabbrURItrue, and can switch if off again by setting \XMLDBcheckabbrURIfalse. Unfortunately, I do not know how to get the working directory in a ConTEXt run, so that relative URLs are currently not properly completed. Customization For a long time I did not pay much attention to customization. Recently, I received requests to make a mapping for the blockquote and epigraph elements. Together with that request a discussion arose on the ConTEXt mailing list about customization. As a consequence these two elements and their child element attribution have proper setup options, viz. the commands \setupblockquote, \setupepigraph and \setupattribution. I am sure that more such setup commands will follow. The same discussion on the ConTEXt mailing list touched upon attributes whose range of values is not constrained. An example is the role attribute of the para element. It is not possible to define actions for such attributes in the stylesheet, because the possible values are not known. The idea arose to put a hook in the stylesheet for the user’s own formatting command. Something like \attributeaction[para][role]. The user could define such an action with something like \defineXMLattributeaction[para][role]. The stylesheet should invoke the attribute action within a group in order to allow the user to change fonts etc. for this element. Therefore ConTEXt cannot invoke the attribute action automatically, because it cannot know where it should do so. For example, some 36 MAPS Docbook In ConTEXt xml mappings for the opening tag invoke \egroup; if the attribute action had been invoked automatically, its scope would be ended immediately. This idea has not yet been implemented. I am not sure how far customization can go. Enabling extreme customizability would come down to defining a new language for describing the formatting of a Docbook document. This would go too far. On the other hand, customizability is a strong feature of ConTEXt. It is not difficult to add customizability options to the stylesheet; ConTEXt has some good commands for that. Acknowledgement The first versions of the mappings for several elements, a.o. the ulink element, were contributed by Michael Wiedmann. He also contributed the string literal files for English and German. Giuseppe Bilotta contributed the string literals file for Italian. And of course, nothing of this would have been possible without Hans Hagen’s ConTEXt. Najaar 2003 37 application Drawing Message Sequence Charts with LaTEX Sjouke Mauw Computing Science Department Eindhoven University of Technology P.O. Box 513 NL-5600 MB, Eindhoven The Netherlands msc ftp login to CTAN archive User ftp client ftp.tex.ac.uk CTAN ftp.tex.ac.uk [email protected] connect getlogin Victor Bos Software Construction Laboratory Turku Centre for Computer Science Lemminkäisenkatu 14 A FIN-20520, Turku Finland login anonymous anonymous Ok [email protected] command successful abstract The MSC macro package facilitates LaTEX users to easily include Message Sequence Charts in their texts. This article describes the motivation for developing the MSC macro package, the features of the MSC macro package, and the design of the MSC macro package. Figure 1. An ftp login to the CTAN at ftp.tex.ac.uk Introduction The Message Sequence Chart (msc) language is a visual formalism to describe interaction between components of a system. The language is standardized by the itu (International Telecommunication Union) in Recommendation Z.120 [IT01]. An introductory text on msc can be found in [RGG96]. MSCs have a wide application domain, ranging from requirements specification to testing and documentation. An example of a Message Sequence Chart is given in Figure 1. The msc shows an ftp login session to a ctan archive. Three players, called instances, are involved in the session: User, ftp client, and CTAN at location ftp.tex.ac.uk. The instances are denoted by vertical lines. Interaction between instances is denoted by labeled arrows. For instance, the arrow ftp.tex.ac.uk is a message from User to ftp client. Sending and receiving of a message are special types of events; each message has a send event and a receive event. Later we will see other types of events. Events occur on instance lines. Events are ordered in time and for each instance, time is supposed to run from top to bottom. Furthermore, the send event of a message never 38 occurs after the receive event of the message. For example, from Figure 1, we can derive that the ftp.tex.ac.uk message occurs before the connect message, because the receive event of the first message occurs before the send event of the second message. In order to include mscs in LaTEX documents, we have developed the msc macro package. The current version of the msc macro package supports almost the full msc language as defined in the standard. In this article we will describe the motivation of the msc macro package, the features of the msc macro package, the design of the msc macro package, and the limitations of the msc macro package. This paper does not describe all features of the msc macro package. For a thorough treatment of the msc macro package we refer to the user manual [BM02b]. Motivation Several commercial and non-commercial tools are available, which support drawing or generating Message Sequence Charts. However, these tools are in general not freely available and often not flexible enough to satisfy MAPS Drawing Message Sequence Charts with LaTEX all users’ wishes with respect to the layout and graphical appearance of an msc. Furthermore, they often do not allow the user to include LaTEX code in the mscs. Another drawback of these tools is that quite often they restructure mscs automatically. Though for simple mscs this might be what the user wants, for more complex mscs the result of automatic restructuring is usually not desired. Therefore, people often use general drawing tools, such as xfig (see http://www.xfig.org/) to draw mscs. However flexible this approach is, it has some drawbacks. First of all, general drawing tools have (and should have) a low level of abstraction; their interface is defined in terms of coordinates, points, lines, polygons, etc. To draw mscs, the user would probably be more comfortable if the interface was defined in terms of instances, messages, actions, etc. For example, if you are drawing a message in an msc using a general drawing tool, you would probably have to draw a line with an arrow head from a position (x0 , y0 ) to a position (x1 , y1 ), instead of drawing a message from an instance i0 to an instance i1 of the msc. Another drawback of using general drawing tools is that they usually do not provide libraries of msc symbols. Therefore, if you have to draw many mscs, it will take much effort to get a set of consistent looking mscs. Furthermore, if you want to change a parameter of the mscs, e.g., the width of the instance head symbols, you would probably have to edit all mscs manually. For these reasons, we developed the msc macro package for LaTEX. The macros in the package enable a textual representation of an msc in a LaTEX source document. By compiling the LaTEX document into PostScript, a graphical representation of the msc is generated. The design requirements for the msc macro package were: 1. The package should follow the itu standard with respect to shape and placement of the symbols of an msc. 2. The interface of the package should be at the right level of abstraction. 3. There should only be a limited amount of automatic restructuring and layout of the mscs. 4. The appearance of (sets of) mscs should be configurable by an appropriate set of parameters. 5. The msc macro package should run on standard LaTEX distributions. User interface In this section we will briefly describe the user interface of the msc macro package. We will do this by giving examples and showing the LaTEX code that produced the examples. Najaar 2003 application MSC environment mscs are drawn in the msc environment. The syntax of this environment is \begin{msc}[titlepos]{title}...\end{msc} The title of the msc is defined by the title parameter. The optional parameter titlepos determines the position of the title. By default it is l (left aligned). Other possible values are c (centered) and r (right aligned). Instances Instances are declared with the \declinst[*]{nn}{an}{in} command. The starred version produces a fat instance which will not be discussed in this paper. The nn parameter defines a nickname of the instance. Nicknames identify instances and are used to draw messages and events. The an parameter defines the above name of the instance. This is the text to be placed above the instance head symbol (the rectangle at the top of an instance). The in parameter defines the inside name of the instance. This is the text to be placed inside the instance head symbol. Both the inside name and the above name may be empty. Messages Messages are drawn with the \mess[pos]{txt}{s}{r}[offset] command. The optional pos parameter defines the position of so-called self messages: messages from an instance to itself. The default value of pos is l (to the left of the instance) and another possible value is r (to the right of the instance). The txt parameter defines the label of the arrow representing the message. The s parameter is the nickname of the instance on which the send event occurs, i.e., the nickname of the sender. The r parameter is the nickname of the instance on which the receive event occurs, i.e., the nickname of the receiver. The optional parameter offset defines the number of levels the receive event is shifted vertically with respect to the send event. Levels are discussed in the next paragraph. Offsets are useful if two instances send messages to each other and then wait for the messages to be received. For example, Figure 2 shows messages a and b between instances i and j. The receive event of message a occurs after the send event of message b and vice versa. Both messages have offset = 2 in order to place the receive events two levels below the send events. Levels The height of an msc environment is determined by the number of levels and a fixed amount of vertical space above and below the first and last level, respectively. Levels are created by the \nextlevel[num] command. The optional parameter denotes the number of levels to be added; its default value is 1. Levels are used to order events in time. Recall that time runs from top to bottom, i.e., it runs from higher levels to lower levels. Events in the same level are drawn at equal vertical distance from the top of the msc. The send event of a message will always be drawn in 39 application Sjouke Mauw and Victor Bos msc Messages i j a b \begin{msc}{Messages} \declinst{i}{$i$}{} \declinst{j}{$j$}{} \mess{$a$}{i}{j}[2] \nextlevel \mess{$b$}{j}{i}[2] \nextlevel[2] \end{msc} Figure 2. Using non-zero message offsets the current level. The receive event of a message can be drawn in another level using the offset parameter of the \mess command. Note that levels are not part of the msc language, they are just an implementation means to draw mscs. Using the commands described so far, we can generate the msc of Figure 1. The LaTEX input to generate that msc is given below. The length \instdist, used in the last \mess command, defines the distance between instances of an msc and is one of the parameters to configure the msc macro package. Here, it is used to create a \parbox that is 15% smaller than the distance between the instances of the msc. \begin{figure}[tb] \begin{center} \begin{msc}{ftp login to CTAN archive} \declinst{usr}{User}{} \declinst{ftp}{ftp client}{} \declinst{ctan}{ftp.tex.ac.uk}{CTAN} \mess{ftp.tex.ac.uk}{usr}{ftp} \nextlevel \mess{connect}{ftp}{ctan} \nextlevel \mess{getlogin}{ctan}{ftp} \nextlevel \mess{login}{ftp}{usr} \nextlevel \mess{anonymous}{usr}{ftp} \nextlevel \mess{anonymous}{ftp}{ctan} \nextlevel \mess{Ok}{ctan}{ftp} \nextlevel[2] \mess{\parbox[b]{.85\instdist} 40 {\centering command successful}}{ftp}{usr} \end{msc} \end{center} \end{figure} Actions Actions are events that can be used to model internal activity of a particular instance. Actions are defined with the \action{txt}{nn} command. The txt parameter defines the text to be placed inside the action symbol. The nn parameter is the nickname of the instance that executes the action. The action will be drawn at the current level with its top aligned with send events at the same level. For example, suppose CTAN has to do some computations in order to determine if the anonymous login is allowed. The computation could be modeled by a check action, as depicted in Figure 3. The LaTEX code for the msc of Figure 3 is: \begin{msc}{Action} \declinst{ftp}{ftp client}{} \declinst{ctan}{ftp.tex.ac.uk}{CTAN} \nextlevel \mess{anonymous}{ftp}{ctan} \nextlevel \action{Check}{ctan} \nextlevel[2] \mess{Ok}{ctan}{ftp} \end{msc} Regions Another way to model internal activity, or inactivity, is by using regions. Regions are defined by the \regionstart{regtype}{nn} and the \regionend{nn} commands. The regtype parameter defines the type of the region: activation, coregion (which will not be discussed in this paper), or suspension. The nn parameter is MAPS Drawing Message Sequence Charts with LaTEX msc Action application msc Regions ftp client ftp.tex.ac.uk CTAN User ftp client ftp.tex.ac.uk CTAN anonymous anonymous anonymous check Ok command successful Ok Figure 3. An MSC with an action Figure 4. An MSC with activation and suspension regions the nickname of the instance on which the region should be drawn. If an instance is active, e.g., doing some computations, this can be modeled by an activation region. If an instance is inactive, e.g., waiting for results, this can be modeled by a suspension region. For example, the computation of the CTAN could be modeled by an activation region. Furthermore, the ftp client is inactive during this computation, which could be modeled by a suspension region. Figure 4 shows the resulting msc. The LaTEX code for the msc of Figure 4 is: how redefining one of the msc parameters can increase this space. \begin{msc}{Regions} \declinst{usr}{User}{} \declinst{ftp}{ftp client}{} \declinst{ctan}{ftp.tex.ac.uk}{CTAN} \regionstart{activation}{ftp} \mess{anonymous}{usr}{ftp} \nextlevel \regionstart{suspension}{ftp} \regionstart{activation}{ctan} \mess{anonymous}{ftp}{ctan} \nextlevel[2] \mess{Ok}{ctan}{ftp} \regionend{ctan} \regionstart{activation}{ftp} \nextlevel \mess{\parbox[b]{.85\instdist} {\centering command successful}}{ftp}{usr} \regionend{ftp} \end{msc} Note that the space between the activation region of the ftp client and the anonymous message from the ftp client to ctan is very small. In the next paragraph we will show Najaar 2003 MSC parameters The msc macro package has almost 30 parameters to change the layout of mscs. For example, the width of instances, the distance between instances, the distance between the head symbols and the msc frame, and the width and height of action symbols can all be changed. These parameters are represented by the LaTEX lengths \instwidth, \instdist, \topheaddist, \actionwidth, \actionheight, respectively. For instance, in the msc of Figure 4, the distance between the instances should be slightly bigger, in order to increase the space between the activation region of the ftp client and the anonymous message from the ftp client to ctan. Figure 5 shows the same msc, but now the distance between instances is increased by 10%. The LaTEX code for this msc is the code for Figure 4 in which just after the line \begin{msc}{regions} the line \setlength{\instdist}{1.1\instdist} is included. The location where an msc parameter is changed in the LaTEX source document determines its effect. Since the msc parameters are normal LaTEX macros or LaTEX lengths, the normal LaTEX scoping rules for these entities apply. For example, if a length parameter is changed outside any LaTEX environment, its effect is visible for all msc environments defined after the change. However, if it is changed inside an msc environment, its effect is only visible for that msc. Since there are many parameters to configure the msc macro package, there are three predefined parameter settings to generate small, normal, or large mscs. The command \setmscvalues{parset} can be used to change the selected parameter settings. The parset parameter should be small, normal, or large. The default setting is normal. 41 application Sjouke Mauw and Victor Bos msc Regions 2 User ftp client ftp.tex.ac.uk CTAN anonymous anonymous command successful Ok Figure 5. An MSC with larger distance between instances. Implementation In this section we will describe some aspects of the implementation of the msc macro package. Drawing MSCs In general, and as shown by the examples of the previous sections, an msc consists of a number of vertically oriented instances that are connected by horizontally oriented messages. So, the width of an msc is related to the number of instances and the height of an msc is related to the number of (ordered) messages. Based on this observation, there are several implementations possible. To define the width of an msc, we could use an additional parameter of the msc environment. However, this strategy has some drawbacks. First of all, an extra parameter, the horizontal position, is required to declare instances. Furthermore, this parameter probably changes whenever a new instance is added to the left of an existing instance. Finally, the user should calculate the value of this parameter carefully in order to get evenly spaced instances. Therefore, we chose to compute the width of an msc based on the number of instances declared by the user and the, user definable, \instdist length that defines the distance between instances. This decision does not violate requirement 3 of Section , no automatic structuring and layout, since the number of instances is under control of the user. Furthermore, the user can adjust the space to the left of the first instance and the space to the right of the last instance by redefining the length parameter \envinstdist. The messages are partially ordered based on the relative position of their send and receive events on instances. We could have decided to provide commands to order the events and then let the package compute the final layout of the msc. However, apart from the fact that this 42 computation is not trivial, this strategy fails with respect to requirement 3: no automatic structuring and layout. Another strategy is to use an extra parameter of the msc environment to define the vertical size of an msc. There are several drawbacks to this approach. First of all, the vertical size has to be computed. Secondly, commands to draw messages, actions, regions, etc., should have one or more additional parameter to indicate the vertical position at which they should be drawn. Finally, if a new message is to be added somewhere in the msc, the vertical placement parameter of commands below the new message should probably be updated. Therefore, we chose to only provide a command, \nextlevel, to advance the current height of the msc. By increasing the current height between two messages, the partial order can be defined. Furthermore, one can easily add new messages to the msc at any vertical position without having to change parameters of existing messages. These decisions resulted in an msc environment in which the msc is drawn in a top-left bottom-right fashion. Nicknames As explained above, the msc macro package uses nicknames to identify instances. If an instance is declared, the following attributes are associated to its nickname: The inside name, The above name, The width of the instance line, A flag indicating if it is a normal or a fat instance, The left, center, and right x-position of the instance, The y-position from which this instance still has to be drawn, The style of the instance line, and The style of the region of the instance. The \declinst command defines the attributes using the following TEX code pattern: \expandafter\def \csname instattrnickname\endcsname {value} where attrnickname is the concatenation of the attribute, e.g., abname (above name), and the nickname and where value is the value of the attribute. For instance, the declaration \declinst{usr}{User}{} defines the following commands: \instabnameusr, \instinnameusr, \instbarwidthusr, \instisfatusr, \instxposusr, \instlxposusr, \instrxposusr, \instyposusr, \instlinestyleusr, and \instregionstyleusr. For each instance attribute, there is an internal command to read the value of the attribute. For example, to read MAPS Drawing Message Sequence Charts with LaTEX the value of the above name of instance usr, one should use \msc@instabname{usr}. For some attributes, like the current y-position, there is a command to change the value of the attributes. For example, to change the yposition of instance usr to the value y, one could use \msc@setinstypos{usr}{y}. Underlying drawing engine The msc macro package uses the pstricks package, see [vZ93] or Chapter 4 of [GMS94], to draw lines, arrows, and frames. This package is now commonly available in LaTEX distributions, so relying on this package does not violate requirement 5. A drawback of pstricks is that it is incompatible with pdfLaTEX. Consequently, our msc macro package is incompatible with pdfLaTEX, too. However, there are other ways to generate pdf from LaTEX documents. One option is to first convert the dvi file into PostScript, e.g., using dvips, and then convert the PostScript file into pdf, e.g., using the ps2pdf utility included in ghostscript distributions (http://www.cs.wisc.edu/˜ghost/). Availability The msc macro package is freely available at CTAN, see directory macros/latex/contrib/supported/msc, and at http://www.win.tue.nl/˜sjouke/mscpackage.html. It is distributed under the LaTEX Project Public License, see http://www.latex-project.org/lppl.txt. Documentation of the package consists of a user manual [BM02b] and a reference manual [BM02a]. These documents are included in the distribution. Conclusions The msc macro package enables users to include mscs in LaTEX documents. Furthermore, the mscs have a consistent layout that can be configured by an appropriate set of parameters. The package supports almost the complete itu standard of the msc language, including msc documents and high level mscs (which were not discussed in this paper). Najaar 2003 application 1. The abstraction level of the msc macro package is as desired. 2. The user has full control over the relative position of instances, messages, etc. 3. Changing mscs, e.g., adding extra instances or messages, is easy and does not require computations by the user. 4. The msc macro package is highly configurable. There are about 30 user definable length parameters and a small number of text parameters. The developers of the msc macro package consider the package more or less complete. Therefore, the only changes to the package will be bug fixes and/or code documentation. References [ BM02a ] Victor Bos and Sjouke Mauw. A LaTEX macro package for Message Sequence Charts—Reference Manual—Describing msc macro package version 1.13, April 2002. Included in MSC macro package distribution. [ BM02b ] Victor Bos and Sjouke Mauw. A LaTEX macro package for Message Sequence Charts—User Manual—Describing msc macro package version 1.13, April 2002. Included in MSC macro package distribution. [ GMS94 ] Michel Goossens, Frank Mittelbach, and Alexander Samarin. The LaTEX Companion. AddisonWesley, 1994. [ IT01 ] ITU-TS. ITU-TS Recommendation Z.120: Message Sequence Chart (MSC). ITU-TS, Geneva, 2001. [ RGG96 ] E. Rudolph, P. Graubmann, and J. Grabowski. Tutorial on message sequence charts (msc’96). In FORTE, 1996. [ vZ93 ] Timothy van Zandt. Pstricks, PostScript macros for Generic TEX. User’s Guide, available at every CTAN site, (CTAN:graphics/pstricks/), 1993. 43 Roland Smith [email protected] toepassing Labels voor gevaarlijke stoffen met LaTEX abstract Volgens Europese regelgeving (67/548/EEC) is men verplicht om verpakkingen voor gevaarlijke stoffen te voorzien van labels die bepaalde informatie moeten bevatten. Met behulp van het labels package en een aantal in postscript geschreven pictogrammen is het mogelijk deze labels zelf te maken. keywords gevaarlijke stoffen, labels, 67/548/EEC, latex Inleiding Volgens de EG-richtlijnen moeten gevaarlijke stoffen en preparaten op de verpakking gekenmerkt worden. Als men zulke stoffen koopt, zijn ze door de leverancier van een label volgens de richtlijnen voorzien. Als men ze vervolgens overhevelt in een andere verpakking, moet men deze zelf van een dergelijk label voorzien. Er zijn programma’s verkrijgbaar voor het maken van zulke labels. Maar door het relatief kleine markt ervoor is deze software vaak niet zo goed van kwaliteit en relatief kostbaar. Het bedrijf waar ik werkzaam ben had voor het maken van deze labels een DOS programma, dat niet meer aan de praat te krijgen was onder windows. Een zoektocht naar alternatieven leverde alleen een veredeld tekenprogramma op waarbij je ook een speciale kleurenprinter moest kopen, of speciale voorbedrukte labels. Dit programma kon ook niet overweg met de database van stoffen die we voor het oude programma hadden aangelegd. Aangezien we al de beschikking hebben over een kleuren laserprinter, heb ik de labels in LaTEX 2ε te gemaakt. Inhoud en opmaak van een label Deze labels moet bepaalde informatie bevatten; 2 handelsnaam van de stof of het preparaat 2 naam van de gevaarlijke componenten 2 gevarensymbolen 2 R- en S-zinnen 2 naam en adres van de leverancier Deze informatie is te vinden op het veiligheidsinformatieblad volgens 93/112/EEG. Elke leverancier van gevaarlijke stoffen is verplicht een dergelijk informatieblad te beschikking te stellen. De gevarensymbolen zijn ondermeer het bekende doodshoofd voor vergiftige stoffen en een kruis voor schadelijke en irriterende stoffen. Een overzicht van de symbolen en hun betekenis is weergegeven in tabel 1. 44 MAPS Labels voor gevaarlijke stoffen met LaTEX toepassing Tabel 1. Overzicht gevarensymbolen Symbool Kenletter Betekenis bijtend Xn schadelijk N milieugevaarlijk Xi irriterend E ontplofbaar O oxiderend F licht ontvlambaar T vergiftig F+ zeer licht ontvlambaar T+ zeer vergiftig Kenletter Betekenis C Symbool De term “R- en S-zinnen” staat voor de risks en safety aanbevelingen. Dit zijn een aantal standaard zinnen (vertaald in alle Europese talen) die aanduiden wat de risico’s van een bepaalde stof zijn en hoe je er veilig mee om kunt gaan. De R- en S-zinnen die van toepassing zijn op gedenatureerde alcohol zijn hieronder als voorbeeld weergegeven: R11: Licht ontvlambaar R20/21/22: Schadelijk bij inademing, opname door de mond en aanraking met de huid R68/20/21/22: Schadelijk: bij inademing, aanraking met de huid en opname door de mond zijn onherstelbare effecten niet uitgesloten S7: In goed gesloten verpakking bewaren S16: Verwijderd houden van ontstekingsbronnen – niet roken S36/37: Draag geschikte handschoenen en beschermende kleding S45: In geval van ongeval of indien men zich onwel voelt, onmiddellijk een arts raadplegen (indien mogelijk hem dit etiket tonen) Een label voor een container tot 50 liter moet minstens 150 mm breed en 74 mm hoog zijn. Gewoonlijk staan maximaal twee gevarensymbolen links, en de rest van de tekst rechts. De symbolen zijn circa 3 cm in het vierkant. Implementatie De benodigde symbolen heb ik gevonden op het internet. Deze waren echter uitgevoerd als .gif bestanden van lage resolutie en hetgeen er erg lelijk uitzag. Daarom heb ik de symbolen zelf geïmplementeerd in postscript, gevolgd door conversie naar pdf met epstopdf. De meeste symbolen zijn met de hand gedaan. De symbolen voor ontplofbaar en oxiderend zijn gemaakt met autotrace.1 Oorspronkelijk is het label gezet als een geneste minipage omgeving. Als relatieve nieuwkomer in LaTEX kon ik deze opmaak niet krijgen zoals ik het hebben wilde. Daarom is het label nu uitgevoerd in een picture omgeving, met daarin een \parbox voor de tekst aan de rechterkant. 1 % -*- latex -*2 % $Id: ethanol.tex,v 1.3 2003/01/29 17:24:00 rsmith Exp $ 1. http://autotrace.sourceforge.net/ Najaar 2003 45 toepassing Roland Smith 3 4 5 6 7 8 9 % % % % % % % LaTeX sourcecode file for making 105x74 stickers for chemicals. Suited for containers up to 50 liters. Written by R.F. Smith <[email protected]> in 2003 and placed in the public domain Op de volgende regels worden de macro’s gedefinieerd die de inhoud van de labels bepalen. Te beginnen met de handelsnaam, de gevaarlijke stoffen en eventuele codenummers 10 11 12 13 14 15 16 17 %%%% Contents of the sticker; change these to suit you %%%% % \Chemname should contain the trade name for the substance \newcommand{\Chemname}{Ethanol} % \Contains describes the main ingredient \newcommand{\Contains}{Bevat: ethanol, 5\% methanol} % \Codenumber is for the code your organization has given this % material (if any). You can leave it empty. \newcommand{\Codenumber}{1322 501 33801} Vervolgens kunnen er maximaal twee symbolen met bijbehorende betekenis opgenomen worden. Het zou waarschijnlijk eleganter zijn om macro’s te definiëren die een symbool en de bijbehorende tekst combineren. Maar in het opgenomen overzicht is duidelijk genoeg te zien welke combinaties gebruikt moeten worden. 18 19 20 21 22 23 24 25 26 27 28 29 30 31 32 33 34 35 36 37 38 39 40 41 % % % % % % % % % % % % % % % % % % Possibilities for Upper-/LowerSymbol and Upper-/LowerText: Symbol English text Dutch text E explosive.pdf explosive ontplofbaar O oxide.pdf oxidising oxiderend F flammab.pdf highly flammable licht ontvlambaar F+ flammab.pdf extremely flammable zeer licht ontvlambaar T toxic.pdf toxic vergiftig T+ toxic.pdf very toxic zeer vergiftig C corrosive.pdf corrosive bijtend Xn harmful.pdf harmful schadelijk Xi harmful.pdf irritant irriterend N environ.pdf dangerous for the milieugevaarlijk environment none template.pdf The next four lines select the two symbols that can go on the sticker, and the accompanying texts. If you want to leave a symbol empty, use template.pdf \newcommand{\UpperSymbol}{flammab} \newcommand{\UpperText}{licht ontvlambaar} \newcommand{\LowerSymbol}{harmful} \newcommand{\LowerText}{schadelijk} Vervolgens worden de R- en S-zinnen opgenomen. Deze zijn gezet als description elementen. Het zou mooi zijn om een macro te definiëren die automatisch de juiste zin genereert op basis van het nummer, bijvoorbeeld \R{20/21/22}. Maar dat is mij op dit moment TEXnologisch te hoog gegrepen. 46 MAPS Labels voor gevaarlijke stoffen met LaTEX 42 43 44 45 46 47 48 49 50 51 52 53 54 55 56 57 58 59 60 61 62 toepassing % Next are the R&S sentences. You should be able to find them % on the MSDS for the substance. They are set as % _description_ items. \newcommand{\RSsentences}{ \item[R11:] Licht ontvlambaar \item[R20/21/22:] Schadelijk bij inademing, opname door de mond en aanraking met de huid \item[R68/20/21/22:] Schadelijk: bij inademing, aanraking met de huid en opname door de mond zijn onherstelbare effecten niet uitgesloten \item[S07:] In goed gesloten verpakking bewaren \item[S16:] Verwijderd houden van ontstekingsbronnen -niet roken \item[S36/37:] Draag geschikte handschoenen en beschermende kleding \item[S45:] In geval van ongeval of indien men zich onwel voelt, onmiddelijk een arts raadplegen (indien mogelijk hem dit etiket tonen) } Tenslotte wordt nog naam en adres van de leverancier toegevoegd, en de datum waarop het bestand gecompileerd is. 63 64 65 66 67 % The name, address and phone number of the supplier should % go here. \newcommand{\Firma}{Chemproha -- Donker Duyvisweg 44, 3316 BM Dordrecht\\ tel. 078-6544944} \newcommand{\filedate}{\number\year-\number\month-\number\day} Deze macro’s bevatten alle variabele informatie van een label. Nu volgt de algemene code. Uitgegaan wordt van de standaard article class, met het labels package. Indien men labels in een andere taal wil maken, moet men natuurlijk een ander argument aan het babel package meegeven. Omdat ik meestal .pdf bestanden maak van dergelijke labels, heb ik het times package gebruikt om ervoor te zorgen dat er postscript fonts gebruikt worden. 68 69 70 71 72 73 74 75 76 77 78 79 80 81 82 %%%%%%%%%% Normally no changes required below here %%%%%%%%%% \documentclass[a4paper]{article} \usepackage{times} \usepackage[dutch]{babel} \usepackage[latin1]{inputenc} \usepackage{graphicx} \usepackage{labels} % Settings for the label package; 8 105x74 stickers on an % A4 page. \LabelCols=2 \LabelRows=4 \LeftBorder=0mm \RightBorder=0mm \TopBorder=1mm Najaar 2003 47 toepassing Roland Smith 83 \BottomBorder=0mm 84 \numberoflabels=8 85 De inhoud van het \genericlabel commando is de werkelijke definitie van de inhoud van de sticker. De maten die gebruikt zijn om de verschillende elementen van de picture omgeving te plaatsen zijn proefondervindelijk bepaald. De macro’s die boven gedefinieerd zijn worden hier gebruikt. Dit deel van het bestand hoeft dan ook zelden aangepast te worden om een ander label te maken. Al komt het voor dat op regel 86 \huge vervangen moet worden door \Large indien de handelsnaam van de stof erg lang is. 86 87 88 89 90 91 92 93 94 95 96 97 98 99 100 101 102 103 104 105 106 107 108 109 110 111 112 113 114 115 116 117 118 119 \begin{document} \genericlabel{% \raisebox{-35mm}{ \setlength{\unitlength}{1mm} \renewcommand{\sfdefault}{phv}\sffamily \begin{picture}(104,74) \put(5,40){\makebox(29,29){% \includegraphics[width=29mm]{\UpperSymbol}}} \put(5,36.5){\makebox(29,5){% \textbf{\textsc{\scriptsize\UpperText}}}} \put(5,8){\makebox(29,29){% \includegraphics[width=29mm]{\LowerSymbol}}} \put(5,4.5){\makebox(29,5){% \textbf{\textsc{\scriptsize\LowerText}}}} \put(35,62){\parbox[t][62mm][t]{60mm}{ {\huge\textbf{\Chemname}}\\\scriptsize \textbf{\Contains}\\ \Codenumber\\ \rule[2pt]{60mm}{.5pt} \setlength{\leftmargini}{0pt}\vspace{-7pt} \begin{description} \setlength{\itemsep}{0pt}\setlength{\topsep}{0pt} \setlength{\parskip}{1pt} \RSsentences \end{description} \vfill \rule[2pt]{60mm}{.5pt}\\ \tiny\Firma\hfill\filedate } } \end{picture} } } \end{document} Het resultaat ziet eruit zoals (verkleind) weergegeven in figuur 1. Een LaTEX voorbeeld bestand en de bijbehorende postscript bestanden zijn te vinden onderaan op de software pagina van mijn website2 . Op het moment dat ik dit schrijf is de laatste versie chemlabels-20030208.tar.gz. 2. http://www.xs4all.nl/˜rsmith/software/ 48 MAPS Labels voor gevaarlijke stoffen met LaTEX toepassing Ethanol Ethanol R11: Licht ontvlambaar R20/21/22: Schadelijk bij inademing, opname door de mond en aanraking met de huid R68/20/21/22: Schadelijk: bij inademing, aanraking met de huid en opname door de mond zijn onherstelbare effecten niet uitgesloten S07: In goed gesloten verpakking bewaren S16: Verwijderd houden van ontstekingsbronnen – niet roken S36/37: Draag geschikte handschoenen en beschermende kleding S45: In geval van ongeval of indien men zich onwel voelt, onmiddelijk een arts raadplegen (indien mogelijk hem dit etiket tonen) R11: Licht ontvlambaar R20/21/22: Schadelijk bij inademing, opname door de mond en aanraking met de huid R68/20/21/22: Schadelijk: bij inademing, aanraking met de huid en opname door de mond zijn onherstelbare effecten niet uitgesloten S07: In goed gesloten verpakking bewaren S16: Verwijderd houden van ontstekingsbronnen – niet roken S36/37: Draag geschikte handschoenen en beschermende kleding S45: In geval van ongeval of indien men zich onwel voelt, onmiddelijk een arts raadplegen (indien mogelijk hem dit etiket tonen) Bevat: ethanol, 5% methanol 1322 501 33801 Bevat: ethanol, 5% methanol 1322 501 33801 LICHT ONTVLAMBAAR LICHT ONTVLAMBAAR SCHADELIJK SCHADELIJK Chemproha – Donker Duyvisweg 44, 3316 BM Dordrecht tel. 078-6544944 Chemproha – Donker Duyvisweg 44, 3316 BM Dordrecht tel. 078-6544944 2003-11-26 Ethanol Ethanol Bevat: ethanol, 5% methanol 1322 501 33801 LICHT ONTVLAMBAAR Bevat: ethanol, 5% methanol 1322 501 33801 R11: Licht ontvlambaar R20/21/22: Schadelijk bij inademing, opname door de mond en aanraking met de huid R68/20/21/22: Schadelijk: bij inademing, aanraking met de huid en opname door de mond zijn onherstelbare effecten niet uitgesloten S07: In goed gesloten verpakking bewaren S16: Verwijderd houden van ontstekingsbronnen – niet roken S36/37: Draag geschikte handschoenen en beschermende kleding S45: In geval van ongeval of indien men zich onwel voelt, onmiddelijk een arts raadplegen (indien mogelijk hem dit etiket tonen) SCHADELIJK LICHT ONTVLAMBAAR Chemproha – Donker Duyvisweg 44, 3316 BM Dordrecht tel. 078-6544944 2003-11-26 2003-11-26 Ethanol Ethanol R11: Licht ontvlambaar R20/21/22: Schadelijk bij inademing, opname door de mond en aanraking met de huid R68/20/21/22: Schadelijk: bij inademing, aanraking met de huid en opname door de mond zijn onherstelbare effecten niet uitgesloten S07: In goed gesloten verpakking bewaren S16: Verwijderd houden van ontstekingsbronnen – niet roken S36/37: Draag geschikte handschoenen en beschermende kleding S45: In geval van ongeval of indien men zich onwel voelt, onmiddelijk een arts raadplegen (indien mogelijk hem dit etiket tonen) R11: Licht ontvlambaar R20/21/22: Schadelijk bij inademing, opname door de mond en aanraking met de huid R68/20/21/22: Schadelijk: bij inademing, aanraking met de huid en opname door de mond zijn onherstelbare effecten niet uitgesloten S07: In goed gesloten verpakking bewaren S16: Verwijderd houden van ontstekingsbronnen – niet roken S36/37: Draag geschikte handschoenen en beschermende kleding S45: In geval van ongeval of indien men zich onwel voelt, onmiddelijk een arts raadplegen (indien mogelijk hem dit etiket tonen) Bevat: ethanol, 5% methanol 1322 501 33801 Bevat: ethanol, 5% methanol 1322 501 33801 SCHADELIJK LICHT ONTVLAMBAAR SCHADELIJK Chemproha – Donker Duyvisweg 44, 3316 BM Dordrecht tel. 078-6544944 Chemproha – Donker Duyvisweg 44, 3316 BM Dordrecht tel. 078-6544944 2003-11-26 2003-11-26 Ethanol Ethanol R11: Licht ontvlambaar R20/21/22: Schadelijk bij inademing, opname door de mond en aanraking met de huid R68/20/21/22: Schadelijk: bij inademing, aanraking met de huid en opname door de mond zijn onherstelbare effecten niet uitgesloten S07: In goed gesloten verpakking bewaren S16: Verwijderd houden van ontstekingsbronnen – niet roken S36/37: Draag geschikte handschoenen en beschermende kleding S45: In geval van ongeval of indien men zich onwel voelt, onmiddelijk een arts raadplegen (indien mogelijk hem dit etiket tonen) R11: Licht ontvlambaar R20/21/22: Schadelijk bij inademing, opname door de mond en aanraking met de huid R68/20/21/22: Schadelijk: bij inademing, aanraking met de huid en opname door de mond zijn onherstelbare effecten niet uitgesloten S07: In goed gesloten verpakking bewaren S16: Verwijderd houden van ontstekingsbronnen – niet roken S36/37: Draag geschikte handschoenen en beschermende kleding S45: In geval van ongeval of indien men zich onwel voelt, onmiddelijk een arts raadplegen (indien mogelijk hem dit etiket tonen) Bevat: ethanol, 5% methanol 1322 501 33801 Bevat: ethanol, 5% methanol 1322 501 33801 LICHT ONTVLAMBAAR R11: Licht ontvlambaar R20/21/22: Schadelijk bij inademing, opname door de mond en aanraking met de huid R68/20/21/22: Schadelijk: bij inademing, aanraking met de huid en opname door de mond zijn onherstelbare effecten niet uitgesloten S07: In goed gesloten verpakking bewaren S16: Verwijderd houden van ontstekingsbronnen – niet roken S36/37: Draag geschikte handschoenen en beschermende kleding S45: In geval van ongeval of indien men zich onwel voelt, onmiddelijk een arts raadplegen (indien mogelijk hem dit etiket tonen) SCHADELIJK Chemproha – Donker Duyvisweg 44, 3316 BM Dordrecht tel. 078-6544944 LICHT ONTVLAMBAAR 2003-11-26 LICHT ONTVLAMBAAR SCHADELIJK SCHADELIJK Chemproha – Donker Duyvisweg 44, 3316 BM Dordrecht tel. 078-6544944 2003-11-26 Chemproha – Donker Duyvisweg 44, 3316 BM Dordrecht tel. 078-6544944 2003-11-26 Figuur 1. de opgemaakte pagina Najaar 2003 49 Karel H Wesseling [email protected] 27 November 2003 metapost Aligning METAPOST graphs in C ONTEXT combinations Introduction For scientific plotting I like to use the Graph package by John Hobby within Context and when I have two or more separate graphs made I combine them into one figure with one figure caption. Combining is easy but aligning the graphs in a pleasing way required a trick. Attempt 1 To demonstrate the problem I prepared two graphs plotting blood pressure and heart interval versus time (of course, it could be any signal) and added the result of spot measurements (BRS) to the graph. The vertical scales differ for each signal and these scales must be indicated in the graph. Each graph in isolation looks beautiful and a particularly nice feature is its seemingly endless scalability. Blowing the graph up from a design size of 5 cm width to 50 cm width or bigger is no problem. Context then performs the combination of the graphs in one column aligned vertically using the \startcombination[1*2] command. The METAPOST pictures have been given an invisible outer box size, the so--called “bounding box” and this is a narrow fit to the total spaced used. METAPOST doesn’t care about centering the actual graph area in the bounding box. The graph areas, therefore, are not aligned vertically. See Fig. 1 left two panels. Attempt 2 Adding the vertical scale values to the graphs, that differ in width, causes the miss--alignment. The plot areas are exactly 5 cm but the lettering sticks out on either side of it. This unbalancing effect could be annihilated by adding invisible texts of equal width, sticking out left and right of the graph area by an equal amount. An \hbox command comes to mind. An hbox can be given a horizontal width. In Context a \framed command could also be used. Don’t try it, however, they don’t work unless they are filled with something that prints (thus not spaces) or as long as the empty \framed has a frame that’s not made invisible. Clearly, METAPOST refuses to adapt its bounding box to invisible matter. We, on the other hand, refuse to have extraneous matter printed. Here is a solution that works, nevertheless. We let METAPOST draw a fullsquare xyscaled(10cm,8cm) centered at the midpoint of the graph area. This makes both graphs of equal width and height and alignment in a \startcombination is perfect. This is shown in Fig. 1 right two panels. The fullsquare is opaque. Anything plotted before it is drawn disappears behind it, anything plotted later is visible. It must therefore be the first plot command in the picture. In addition, it must be given a color and the color might be considered undesirable. The solution to that is to plot it withcolor .9999white. For all practical purposes this is as white as white paper is. Here is the program for two curves within one graph: 50 MAPS Aligning METAPOST graphs in Context combinations metapost \startreusableMPgraphic{outlier} picture Panel; % .9999white for a white panel Panel:=image(fill fullsquare xyscaled(10cm,8cm) withcolor .9white); draw begingraph(5cm,5cm); % the plot area is 5 x 5 cm setcoords(linear,linear); % always set coordinates, or else setrange(210,100,230,125); % then set range gdraw (220,112.5) plot Panel; % center horizontal & vertical glabel.top(btex ibi (ms) etex,231,126); glabel.bot(btex time (s) etex,220,96); gdraw "sy13lb.ups" withpen pencircle scaled 1.5bp; % data plot autogrid(,); % always an autogrid, here empty setcoords(linear,linear); % hidden effect: resets scaling setrange(210,500,230,1500); % note a different vertical scale gdraw "in13lb.ups" withpen pencircle scaled .7bp; % data plot autogrid(otick.bot,grid.rt); % draw horizontal & vertical scales endgraph; \stopreusableMPgraphic And this is how two of them are used in a Context combination. \placefigure[middle][fig:outlierb013] {Both left panels... } {\startcombination[1*2] {\reuseMPgraphic{outlier1}} {} {\reuseMPgraphic{outlier2}} {} \stopcombination} Postscript A true hacker would have thought of a solution in less time than it cost me. The manual that comes with Hobby’s Graph package is written for experts, not for the common user. Graph’s output is so accurate and scalable that one wants to use it anyway but experimentation is time consuming and when one must finish a production on time and within budget the level of experimentation required is bedeviling. The solution for that is to post a question with the Context user group. Najaar 2003 51 metapost Karel H Wesseling sys 125 brs 100 sys 125 brs 100 120 80 120 80 115 60 115 60 110 40 110 40 105 20 105 20 100 140 210 145 215 150 155 time (s) 220 225 time (s) 0 160 100 140 145 150 155 time (s) 0 160 ibi (ms) ibi (ms) 1400 1400 1200 1200 1000 1000 800 800 600 600 230 210 215 220 225 time (s) 230 Figure 1 Both left panels on white background are clearly shifted with respect to each other as indicated by the dashed lines that do not meet. Right panels on a gray background show a correctly aligned system of diagrams. In all diagrams: the thick line represents systolic pressure variations in mmHg, over a 20 s observation window in a person (use ‘sys’ vertical scale), the thin line similarly is the time interval between heart beats in ms (use ‘ibi’ vertical scale), the crosses represent estimates of the sensitivity of blood pressure control by the bodies baroreflex expressed in ms/mmHg (use brs vertical scale) derived from the combined blood pressure and beat interval variability data which clearly move up and down in synchronism. 52 MAPS applications Drawing a type-case in ConTEXt Willi Egger abstract There are different environments with which one can typeset tables; all of them have their advantages and disadvantages. One of the recent problems I had to solve was to draw a typesetter’s type-case from the lead-typesetting era. Since it looks like a table, I built the drawing in the \bTABLE . . . \eTABLE environment. Introduction Formerly, when text was typeset by hand, fonts, e.g. letters, were stored in special drawers called type-cases (Dutch: letterkast, German: Setzkasten). These cases were strong wooden frames divided into four compartments by a wooden cross. Each compartment was divided into a series of boxes by thin wooden strips. The depth of such typecases was small, normally not exceeding 3 cm. The layout of type-cases varied over time. Our drawing is an example of a three-quarter type-case popular in The Netherlands. When typesetting text by hand, most of the letters are lower case. To facilitate picking the letters, lower case letters were located in the lower part of the type-case. From the size and location of the different boxes, one can deduce the number of single letters needed to assemble a text. The layout of a type-case was optimized for typesetting speed. You might have realized that the expression of ‘lower case’ and ‘upper case’ (capitals) letters for the different fonts is linked to the location of the letters in the type-case. This is true for both English and Dutch: ‘onderkast’ en ‘bovenkast’ (kapitalen). Najaar 2003 Analysis of the type-case While looking for a straightforward approach to this drawing, it seemed best to build the type-case from four tables with the following characteristics arranged in a two by two matrix. − All four tables have the same width. − All table rows are 6em high. − The width of the columns of the upper and lower left tables have a relation of 1.75: 2. − The two top tables each have four rows. − The two lower tables each have eight rows. Part of the cells are combined rows and / or columns. Building the tables General setups for the tables The row height and the alignment of text within the cells are identical for all cells. These dimensions are defined outside the \bTABLE . . . \eTABLE environment. \setupTABLE[row] [even] [align={middle,lohi}, height=6ex] \setupTABLE[row] [odd] [align={middle,lohi}, height=6ex] 53 applications Willi Egger The table for upper case letters A B C D E F G H I K L M N O P Q R S T V W X Y Z J U „ –— ’ \bTABLE \setupTABLE[c] [1,2,3,6,7,8] [width=3em] \setupTABLE[c] [4,5] [width=1.5em] \bTR \bTD A \eTD \bTD B \eTD \bTD C \eTD \bTD[nc=2] D \eTD \bTD E \eTD \bTD F \eTD \bTD G \eTD \eTR \bTR \bTD H \eTD \bTD I \eTD \bTD K \eTD \bTD[nc=2] L \eTD \bTD M \eTD \bTD N \eTD 54 \bTD O \eTD \eTR \bTR \bTD P \eTD \bTD Q \eTD \bTD R \eTD \bTD[nc=2] S \eTD \bTD T \eTD \bTD V \eTD \bTD W \eTD \eTR \bTR \bTD X \eTD \bTD Y \eTD \bTD Z \eTD \bTD J \eTD \bTD U \eTD \bTD \char132 \eTD \bTD -- --- \eTD \bTD \char146 \eTD \eTR \eTABLE MAPS Drawing a type-case in ConTEXt applications The special character table ÆŒ Ç ] û ∗ † § ö ü ! ? 9 0 ( - É È Ê Ë ff fl fi ffl ffi á é í ó ú â ê î ô à è ì ò ù ä ë ï 1 2 3 4 5 6 7 8 æœ \bTABLE \setupTABLE[c] [even] [width=1.75em] \setupTABLE[c] [odd] [width=1.75em] \bTR \bTD \’E \eTD \bTD \‘E \eTD \bTD \ˆE \eTD \bTD \"E \eTD \bTD ff \eTD \bTD fl \eTD \bTD fi \eTD \bTD ffl \eTD \bTD ffi \eTD \bTD {\tfxx \AE \OE \\ \ae \oe}\eTD \bTD \c{C} \eTD \bTD $]$ \eTD \eTR \bTR \bTD \’a \eTD \bTD \’e \eTD \bTD \’i \eTD \bTD \’o \eTD \bTD \’u \eTD \bTD \ˆa \eTD \bTD \ˆe \eTD \bTD \ˆi \eTD \bTD \ˆo \eTD \bTD \ˆu \eTD Najaar 2003 \bTD \bTD \bTR \bTD \bTD \bTD \bTD \bTD \bTD \bTD \bTD \bTD \bTD \bTD \bTD \bTR \bTD \bTD \bTD \bTD \bTD \bTD \bTD \bTD \bTD \bTD \bTD \bTD \eTABLE $*$ \\ $\dagger$ \eTD \char167 \eTD \eTR \‘a \eTD \‘e \eTD \‘i \eTD \‘o \eTD \‘u \eTD \"a \eTD \"e \eTD \"i \eTD \"o \eTD \"u \eTD ! \eTD ? \eTD \eTR 1 \eTD 2 \eTD 3 \eTD 4 \eTD 5 \eTD 6 \eTD 7 \eTD 8 \eTD 9 \eTD 0 \eTD $($ \eTD - \eTD \eTR 55 applications Willi Egger The table with part of the lower case letters & k d b ç e c g l m n i z y v u t pasjes x \bTABLE \setupTABLE[c] [1,2] [width=2.625em] \setupTABLE[c] [3,4,5] [width=5.25em] \bTR \bTD \& \eTD \bTD[nr=2] b \eTD \bTD k \eTD \bTD[nr=2] d \eTD \bTD[nr=3] e \eTD \eTR \bTR \bTD \c{c} \eTD \bTD c \eTD \eTR \bTR \bTD g \eTD 56 \bTD[nr=2] l \eTD \bTD[nr=2] m \eTD \bTD[nr=2] n \eTD \eTR \bTR \bTD z \eTD \bTD i \eTD \eTR \bTR \bTD y \eTD \bTD[nr=2] v \eTD \bTD[nr=2] u \eTD \bTD[nr=2] t \eTD \bTD[nr=3] {\tfx pasjes} \eTD \eTR \bTR \bTD x \eTD \eTR \eTABLE MAPS Drawing a type-case in ConTEXt applications The table with the rest of the letters Due to the fact that the last row of this table has the height of two ordinary rows, this has to be setup so: \setupTABLE[r][last][height=12ex] w s dunne spaties f g sup. o a p hel ; : h dunne spaties spaties ij r j 1 2 pt inf. vierkanten , . kwadraat wit \bTABLE \setupTABLE[c] [1] [width=5.25em] \setupTABLE[c] [2,3,4,5,6,7] [width=2.625em] \setupTABLE[r] [last] [height=12ex] \bTR \bTD w \eTD \bTD[nr=2] {\tfx dunne spaties} \eTD \bTD[nr=2] f \eTD \bTD[nr=2] g \eTD \bTD[nr=2] h \eTD \bTD j \eTD \bTD hel \eTD \eTR \bTR \bTD s \eTD \bTD ; \eTD Najaar 2003 \bTD : \eTD \eTR \bTR \bTD[nr=2] o \eTD \bTD[nr=2] p \eTD \bTD[nr=2] ij \eTD \bTD {\tfx sup.} \eTD \bTD {\tfxx dunne spaties} \eTD \bTD[nc=2] {\tfx spaties} \eTD \eTR \bTR \bTD {\tfx $\frac{1}{2}$pt} \eTD \bTD {\tfx inf.} \eTD \bTD[nc=2] {\tfx vierkanten} \eTD \eTR \bTR \bTD a \eTD \bTD[nc=2] r \eTD \bTD , \eTD \bTD . \eTD \bTD[nc=2] {\tfx kwadraat wit} \eTD \eTR \eTABLE 57 applications Willi Egger Assembly of the type-case In order to present the drawing as a type-case, the four tables are put into a frame. To get the placement right, several steps are necessary: First, two times two tables are placed into a \hbox. The horizontal placement is achieved by \removeunwantedspaces\quad. Vertically the two \hboxes are separated by a \vskip of 2ex. Finally, to enclose the drawing in a frame, the whole is placed into a \framed command. \framed [frame=on, rulethickness=1pt, offset=.5em, align=normal] {\hbox{\getbuffer[Caps] \removeunwantedspaces\quad \getbuffer[Spec-Char] \removeunwantedspaces} \vskip2ex \hbox{\getbuffer[Lower-Case1] \removeunwantedspaces\quad \getbuffer[Lower-Case2] \removeunwantedspaces}} A B C D E F G É È Ê Ë ff fl fi ffl ffi H I K L M N O á é í ó ú â ê î ô P Q R S T V W à è ì ò ù ä ë ï X Y Z J U „ –— ’ 1 2 3 4 5 6 7 8 & k b ç c e s dunne spaties f g g sup. l m Ç ] û ∗ † § ö ü ! ? 9 0 ( - w d n z o p æœ j hel ; : h dunne spaties spaties ij i ÆŒ 1 2 pt inf. vierkanten , . kwadraat wit y v u t pasjes a r x 58 MAPS Drawing a type-case in ConTEXt applications This is a large table, and will scale with the fontsize (height definitions in ex and width definitions in em). However, in order to typeset this drawing to fit in a given typesetting layout one can use the following mechanism: A B C D E F G É È Ê Ë ff fl fi ffl ffi H I K L M N O á é í ó ú â ê î ô P Q R S T V W à è ì ò ù ä ë ï X Y Z J U „ –— ’ 1 2 3 4 5 6 7 8 & k b ç e c s dunne spaties f g g sup. l m Ç ] û ∗ † § ö ü ! ? 9 0 ( - w d n o z p æœ j hel ; : h dunne spaties spaties ij i ÆŒ 1 2 pt inf. vierkanten , . kwadraat wit y v u t pasjes a r x Figure 1 Layout 1 of an ordinary (dutch) type-case \placefigure [here] [] {Layout \footnote{\quote{{\sc BOEK} {\em over het maken van boeken ({\sc BOOK} on making books)}}, H. van Krimpen, 1966} of an ordinary (dutch) type-case} {\externalfigure[Type-Case] [type=buffer, width=\textwidth]} 1. ‘BOEK over het maken van boeken (BOOK on making books)’, H. van Krimpen, 1966 Najaar 2003 59 typografie Optisch uitvullen in de Maps Siep Kroonenberg In deze maps wordt voor het eerst gebruik gemaakt van optisch uitvullen met behulp van protruding characters, dat wil zeggen dat wordt gepoogd de rechterkantlijn er rechter uit te laten zien door tekens met horizontale uitsteeksels, zoals onder andere afbreekstreepjes, iets in de kantlijn te laten uitsteken. Dit is een optie van pdfTEX die niet aanwezig is in een klassieke TEX. Hàn Thế Thàn gaat uitgebreid hierop in in zijn proefschrift.1 Hans Hagen heeft er al eens over geschreven in de Maps,2 maar nu wordt het eindelijk ook in de Maps in praktijk gebracht, althans in de meeste LaTEX stukken. Om dit te aktiveren moet je deze optie eerst aanzetten: \pdfprotrudechars=1 Een waarde van 1 betekent: aan maar doe het pas nadat de alinea in regels is verdeeld zodat als je om wat voor reden dan ook toch een dvi-bestand wilt maken, er geen tekstverloop optreedt. Andere mogelijke waarden zijn 0 (uit) en 2 (wel tekstverloop). Je geeft per font aan hoever welke tekens in de linkerof rechterkantlijn moeten uitsteken. LaTEX heeft een perfekt handvat hiervoor: de derde parameter van het \DeclareFontFamily commando of de zesde parameter van het \DeclareFontShape commando. Hier kun je allerlei initialisatiecode kwijt. Meestal staat daar niets: \DeclareFontFamily{T1}{ptm}{} Elke regel definieert een linker (\lpcode) of rechter (\rpcode) protrude-faktor voor één teken uit één lettertype. In de \DeclareFontFamily en \DeclareFontShape macro’s staat \font voor: het font waar we het nu over hebben. Het teken wordt aangeduid met zijn plaats in de encoding vector. Bovenstaand voorbeeld is voor texnansi-encoding; voor de meer gangbare T1-encoding zou dat moeten zijn: \DeclareFontFamily{T1}{...}{% \rpcode\font ‘-=120 \rpcode\font ‘,=100 \rpcode\font ‘.=100 \rpcode\font ‘:=50 \rpcode\font ‘;=50 \lpcode\font 96=100 % quoteleft \rpcode\font 39=100 % quoteright \lpcode\font 16=250 % quotedblleft \rpcode\font 17=250 % quotedblright \rpcode\font 21=150 % endash \rpcode\font 22=100 % emdash } Als je een echte fijnproever bent of een erg buitenissig lettertype hebt dan zal het wel eens de moeite lonen om per lettertype protrude-factors te definiëren, maar zover ben ik niet gegaan. Het is ook wel de moeite om protrude-factors te definiëren voor letters zoals de ‘T’ en ‘W’ die erg uitsteken. Op het moment van schrijven maken vier stukken geen gebruik van protrude-factors. Kijk maar eens of je die eruit kunt halen. Voor de Maps Times-en-Frutiger fontfamilie staat daar nu: \DeclareFontFamily{LY1}{ptfs}{% \rpcode\font ‘-=120 \rpcode\font ‘,=100 \rpcode\font ‘.=100 \rpcode\font ‘:=50 \rpcode\font ‘;=50 \lpcode\font 96=100 % quoteleft \rpcode\font 39=100 % quoteright \lpcode\font 147=250 % quotedblleft \rpcode\font 148=250 % quotedblright \rpcode\font 150=150 % endash \rpcode\font 151=100 % emdash } 60 1. Hàn Thế Thàn, Micro-typographic extensions to the TEX typesetting system, Masaryk University, Brno, 2000. 2. Hans Hagen, Hanging punctuation, a pdfTEX microtypographic extension, Maps 25, najaar 2000. MAPS fonts Installing fonts in LaTEX: a user’s experience Ferdy Hanssen abstract This paper presents a user’s experience with installing fonts for use in LaTEX. It will be shown that it is not hard to make a standard Type 1 font work, if you use modern font installation software for LaTEX. All the steps necessary to install the example fonts will be shown. The example fonts used are Adobe Garamond from Adobe and Mrs. Eaves from Emigre. keywords fonts, LaTEX, user Introduction Installing fonts in LaTEX has the name of being a very hard task to accomplish. But it is nothing more than following instructions. However, the problem is that, first, the proper instructions have to be found and, second, the instructions then have to be read and understood. We will show that it is not hard, by sharing with you our experience with installing two commercially available font families, that work out of the box on most computer systems. We will only deal with fonts in the so-called Type 1, or Postscript, format. Truetype fonts are not within the scope of this paper. Also so-called expert fonts, containing lots of special characters, will not be discussed. We confine ourselves to fonts containing the Latin alphabet, with accents used in Western Europe. Furthermore we have installed all fonts within a TEX Live 7 installation on the Linux operating system. But the procedures should be similar on any TEX system which adheres to the TEX Directory Standard. A very good book on the subject of installing fonts for use with TEX and LaTEX is Alan Hoenig’s “TEX unbound” [5]. We have not read it completely, but what we have read indicates this book goes into quite some depth on explaining the issues with installing fonts for use with TEX. Unfortunately it is a rather expensive book, and when you have spent a lot of money on acquiring a set of nice, new fonts, you do not want to spend another substantial amount of money on a 580 page book. And you definitely do not want to spend a few days reading and (trying to) understand that book to be able to use your fonts with your favorite typesetting software. Najaar 2003 Fortunately, there is another document available. An excellent guide is Philipp Lehman’s guide [7]. Maybe its best feature is that it is available for free. You can simply download it from CTAN [3]. It certainly is a very good guide to help you installing and using your fonts without having to read hundreds of pages. Both Alan Hoenig and Philipp Lehman recommend the use of the programme fontinst to help you install your fonts. Before we tried to install the font Mrs. Eaves, available from Emigre [4], we had never used this programme before. But with the use of Philipp Lehman’s “Font Installation Guide” it turned out not to be too difficult to use, at least when the installation of a simple Latin alphabet is all that is required. Philipp Lehman suggests to read at least the general, introductory bits of the fontinst manual [6], the Fontname scheme by Karl Berry [2] and the standard LaTEX font selection guide [1], all available from CTAN [3], to acquire a reasonable understanding of the material. Installing Adobe Garamond The standard font family Adobe Garamond, also known as Adobe’s Type 1 font package number 100, consists of six fonts. These are called: AGaramond-Regular AGaramond-Semibold AGaramond-Bold AGaramond-Italic AGaramond-SemiboldItalic AGaramond-BoldItalic When you buy this package from Adobe, these fonts are what you get. Adobe provides nice instructions on how to install and use them, just not for TEX. Luckily for you and me, TEX and LaTEX support has already been taken care of. Table 1. Renaming of Adobe Garamond files Font name Original file name New Fontname file name AGaramond-Regular AGaramond-Italic AGaramond-Semibold AGaramond-SemiboldItalic AGaramond-Bold AGaramond-BoldItalic gdrg____.pfb gdi_____.pfb gdsb____.pfb gdsbi___.pfb gdb_____.pfb gdbi____.pfb padr8a.pfb padri8a.pfb pads8a.pfb padsi8a.pfb padb8a.pfb padbi8a.pfb 61 fonts 62 dvips TEXMFLOCAL When you want to use a newly acquired font, it is important to always check first if ready-made support is available, to save you a lot of work. For many Type 1 fonts this is the case, and it can be found on CTAN [3] in the directory /fonts/psfonts. Adobe Garamond support has been written by Sebastian Rahtz and is available on CTAN in the directory /fonts/psfonts/adobe/agaramon. All that is needed now are only two things. First, the actual font files need to be renamed according to Karl Berry’s Fontname scheme. Second, all files need to be copied to the correct spot in the standard TEX directory tree. All of this is nicely documented by Philipp Lehman [7]. The renaming bit is easy in this case, as the fonts are actually listed literally in Karl Berry’s Fontname [2]. In the current version, which dates from May 2003, they are listed on page 37. But the best way to look for them is by performing a file contents search on all files with file extension map in the fontname subdirectory of your TEXMF tree. The files, as supplied by Adobe, should be renamed according to table 1. We only need the actual font data files, with file extension pfb, in this case. Note that the font name we will use in TEX or LaTEX later is pad. Then the files should be copied to the proper place. But, what is that proper place. Actually that is pretty straightforward. First of all, all locally added TEX things should be installed in your TEXMFLOCAL tree. Where this actually is, depends on your installation. With TEX Live, you can select this location when you install it. In this local tree, you should create a directory fonts (if it not already exists), with subdirectories tfm, type1, and vf. Within each of these subdirectories a directory with the name of the foundry should be created. For Adobe we use the name adobe. And within each of these three directories we need a directory with the name agaramon, the same as the name Sebastian Rahtz gave to his package. In the same way we also need a dvips/config and tex/latex/adobe/agaramon subdirectory in TEXMFLOCAL. So we now have a directory tree which contains at least the directories shown in figure 1. We now need to simply copy all files with extension tfm to the fonts/tfm/adobe/agaramon directory, all files with extension pfb to the fonts/type1/adobe/agaramon directory, and all files with extension vf to the fonts/vf/adobe/ agaramon directory. All files with extension fd need to be copied to the tex/latex/adobe/agaramon directory. And finally the supplied file pad.map needs to be copied to the dvips/config subdirectory. To make sure the TEX engine can find all these files, we now need to update the search database. For the TEX Live system the actual command is mktexlsr or texhash, but yours may be different. This can be found in the documentation of your TEX distribution. After this step we need to enable the map file. Again, on TEX Live just run the com- Ferdy Hanssen fonts tex config tfm adobe agaramon type1 adobe agaramon vf adobe agaramon latex adobe agaramon Figure 1. Directory tree for Adobe Garamond mand updmap enable Map pad.map. You should look in your documentation for the exact way of doing this. Now all is set to use the newly installed Adobe Garamond font. You simply need to add the line \renewcommand{\rmdefault}{pad} to the preamble of your LaTEX document and you are in business. Or you can write a simple package by creating a file containing this line, followed by the line \endinput, naming it agaramon.sty, and placing it in the directory tex/latex/adobe/agaramon. Sebastian Rahtz did not include such a file in his package, although he did include it in some other packages. Partially installing Mrs. Eaves For the installation of Emigre’s Mrs. Eaves we did not have the luxury of a ready-made package. Up to now we only have a very basic set of these fonts installed. The entire package consists of nine fonts, three of which contain only a large set of ligatures. The fonts in the base package are: MrsEavesRoman MrsEavesBold MrsEavesPetiteCaps MrsEavesItalic MrsEavesSmallCaps MrsEavesFractions The special fonts with ligatures are called: MrsEavesJustLigRoman MrsEavesJustLigBold MrsEavesJustLigItalic The only fonts we have installed for use under TEX and LaTEX up to now are the first four. The petite caps font is a special variant of the small caps font, with even smaller capitals. The fractions font and the ligatures we have not yet looked at in detail. We will provide you with the steps we needed for using MAPS Installing fonts in LaTEX: a user’s experience fonts Table 2. Renaming of Mrs. Eaves files Original file name New Fontname file name MrsEavesRoman MrsEavesRoman MrsEavesItalic MrsEavesItalic MrsEavesBold MrsEavesBold MrsEavesSmallCaps MrsEavesSmallCaps MEAVROMA.AFM MEAVROMA.PFB MEAVITAL.AFM MEAVITAL.PFB MEAVBOLD.AFM MEAVBOLD.PFB MEAVSMCA.AFM MEAVSMCA.PFB fevr8a.afm fevr8a.pfb fevri8a.afm fevri8a.pfb fevb8a.afm fevb8a.pfb fevrc8a.afm fevrc8a.pfb TEXMFLOCAL Font name dvips fonts tex config tfm emigre mrseaves type1 emigre mrseaves vf emigre mrseaves latex emigre mrseaves Figure 3. Directory tree for Mrs. Eaves the first four within TEX, and we simply followed the first tutorial of Philipp Lehman’s installation guide [7], which is suitable for installing simple fonts with a Latin alphabet. The first problem was that Mrs. Eaves is not mentioned in Karl Berry’s Fontname scheme, so we had to come up with a new font name. We selected fev. The letter f stands for small, public foundries. The Emigre foundry seems to fit the bill here. The two-letter combination ev is unused up to now, and seems fitting for the name Mrs. Eaves. With the other guidelines for font naming we came up with the precise naming as seen in table 2. Note that the files with both extension afm and extension pfb need to be renamed. Renaming them in this way greatly simplifies the use of fontinst later. We need to create a temporary directory with all renamed files in them. We also need a special driver file for fontinst. It has to look exactly like the one shown in figure 2 and it could be named drv-fev.tex. We then run fontinst in the temporary directory with the command tex drv-fev. This creates a lot of files. We now need to compile the metric and virtual fonts. This is done by running the programme pltotf on all files with extension pl and by running the programme vptovf on all files with extension vpl. This step creates even more files. We now have almost all files needed to use Mrs. Eaves within TEX. Analogous to the Adobe Garamond fonts, we now need a directory structure to place our files. The necessary tree is shown in figure 3. Then we need to copy all files with extension tfm into the directory fonts/tfm/emigre/ \input fontinst.sty \latinfamily{fev}{} \bye mrseaves, all files with extension pfb into the directory fonts/type1/emigre/mrseaves, and all files with extension vf into the directory fonts/vf/emigre/mrseaves. All files with extension fd should be copied to the directory tex/latex/emigre/mrseaves. We also need a map file, so programmes like xdvi and dvips know what to look for. It can be tricky to write such a file, but using Philipp Lehman’s tutorial it turns out to be not very hard to do. The map file we created can be seen in figure 4. We actually do not know if the value 0.167 as parameter to create a slanted font provides an aesthetically pleasing typeface. The designer obviously never intended such a font to exist. The map file should be named fev.map and placed in the dvips/config directory. A simple package file, like the one shown in figure 5, makes using the font in LaTEX very easy. Note that we use the T1 font encoding. We simply follow Philipp Lehman’s advice in this. Those encodings are not yet clear to us. This LaTEX package is called mrseaves.sty and placed in the directory tex/latex/emigre/mrseaves. All that is needed to make the new font work now is running the command mktexlsr or texhash, followed by enabling the map file with the command updmap enable Map fev.map. It must be said that it was a pleasant surprise to see it actually work after this. \NeedsTeXFormat{LaTeX2e} \ProvidesPackage{mrseaves} [2003/09/03 v0.1 Emigre MrsEaves] \RequirePackage[T1]{fontenc} \RequirePackage{textcomp} \renewcommand*{\rmdefault}{fev} \endinput Figure 5. Simple package for Mrs. Eaves Figure 2. Driver file for Mrs. Eaves Najaar 2003 63 fonts Ferdy Hanssen fevb8r MrsEavesBold "TeXBase1Encoding ReEncodeFont" <8r.enc <fevb8a.pfb fevbo8r MrsEavesBold "0.167 SlantFont TeXBase1Encoding ReEncodeFont" <8r.enc <fevb8a.pfb fevr8r MrsEavesRoman "TeXBase1Encoding ReEncodeFont" <8r.enc <fevr8a.pfb fevrc8r MrsEavesSmallCaps "TeXBase1Encoding ReEncodeFont" <8r.enc <fevrc8a.pfb fevri8r MrsEavesItalic "TeXBase1Encoding ReEncodeFont" <8r.enc <fevri8a.pfb fevro8r MrsEavesRoman "0.167 SlantFont TeXBase1Encoding ReEncodeFont" <8r.enc <fevr8a.pfb Figure 4. Map file for Mrs. Eaves Conclusions This paper describes our experience with installing two font families for use with TEX Live. It is a lot easier than we thought at first. We owe, of course, many thanks to all the people who wrote the wonderful software, manuals and tutorials to make it so practical. We only installed part of the Mrs. Eaves family. The intention is to make the others work within TEX as well. As time permits we will look into this, partly as a learning experience, partly to be able to actually use that font within TEX, and partly to share the resulting files and experience with you. References [ 1 ] LaTEX3 Project Team. LaTEX2e font selection, Sept. 2000. Latest edition available on-line at http://www.ctan.org/tex-archive/macros/latex/ doc/fntguide.pdf. 64 [ 2 ] K. Berry. Fontname—filenames for TEX fonts, May 2003. Latest edition available on-line at http: //www.ctan.org/tex-archive/info/fontname/ fontname.pdf. [ 3 ] Comprehensive TEX Archive Network web site. http://www.ctan.org/. [ 4 ] Emigre web site. http://www.emigre.com/. [ 5 ] A. Hoenig. TEX unbound: LaTEX & TEX Strategies for Fonts, Graphics, & More. Oxford University Press, 1998. ISBN 0-19-509685-1. [ 6 ] A. Jeffrey and R. McDonnell. fontinst—font installation software for TEX, June 1998. Latest edition available on-line at http://www.ctan.org/ tex-archive/fonts/utilities/fontinst/doc/ manual/fontinst.ps. [ 7 ] P. Lehman. The font installation guide, Aug. 2003. Latest edition available on-line at http: //www.ctan.org/tex-archive/info/Type1fonts/ fontinstallationguide.pdf. MAPS Philipp Lehman schreef bijgaande handleiding voor het installeren van Postscript Type 1 fonts. Fontinstallatie zal nooit een fluitje van een cent worden, maar met deze handleiding bij de hand en de documenten die erin worden aanbevolen is het in elk geval niet langer een hachelijk avontuur voor helderzienden. Wie de aangegeven stappen volgt, kan niet verdwalen. Lehmans handleiding is bovendien een lust voor het oog, fraai van functionele opzet en ook daarom drukken we het graag af in deze MAPS. The Font Installation Guide PHILIPP LEHMAN o fFfi O on n t tt N ns T AU G U S T 2 0 0 3 The Font Installation Guide Using Postscript fonts to their full potential with Latex PHILIPP LEHMAN VERSION 1.23 Copyright © –, Philipp Lehman, [email protected] Permission is granted to copy, distribute and/or modify this document under the terms of the gnu Free Documentation License, version ., with no invariant sections, no front-cover texts, and no back-cover texts. A copy of the license is included in the appendix. This document is distributed in the hope that it will be useful, but without any warranty; without even the implied warranty of merchantability or fitness for a particular purpose. contents introduction . . . . . . . . . . . . . . . . . . . . . . . . . . . . . . . i the basics . . . . . . . . . . . . . . . . . . . . . . . . . . . . . . i. Renaming the files – • i. Using fontinst – • i. Installing the files – • i. Creating map files – • i. Using the fonts – • i. Computer Modern and t1 encoding – ii standard font sets . . . . . . . . . . . . . . . . . . . . . . . . ii. The fontinst file – • ii. The latinfamily macro revisited – • ii. Map files revisited – iii optical small caps and hanging figures . . . . . . . . . . . iii. The fontinst file – • iii. The map file – • iii. The style file – • iii. Fonts supplied with Tex – iv the euro currency symbol . . . . . . . . . . . . . . . . . . . . iv. Uncoded euro symbol – • iv. Euro symbol encoded as currency symbol – • iv. Euro symbol taken from external symbol font – • iv. Euro symbol taken from external text font – v expert font sets, regular setup . . . . . . . . . . . . . . . . v. Basic fontinst file – • v. Verbose fontinst file – • v. Inferior and superior figures – • v. The map file – • v. The style file – • v. Using the fonts – vi expert font sets, extended setup . . . . . . . . . . . . . . . vi. The fontinst file – • vi. Text ornaments – • vi. The map file – • vi. Extending the user interface – • vi. A high-level interface for ornaments – • vi. The style file – code tables . . . . . . . . . . . . . . . . . . . . . . . . . . . . . . . . the gnu free documentation license . . . . . . . . . . . . . . . . revision history . . . . . . . . . . . . . . . . . . . . . . . . . . . . . introduction This guide to setting up Postscript Type fonts for use with Tex and Latex is not systematic but task-oriented. It will discuss the most common scenarios you are likely to encounter when installing Postscript fonts. The individual tutorials collected here are not self-contained, though: the second tutorial will presuppose that you have read the first one and so on. All the tools employed in the installation process are documented well, the actual difficulty most users are facing when trying to install new fonts is understanding how to put all the pieces together. This applies to fontinst, the Tex font installation tool, in particular. Controlled by Tex commands, fontinst is a powerful and extremely flexible tool. While its manual documents all available commands individually, you will most likely wonder how to actually employ them after reading the manual. This is what this guide is about. Because of its concept, you will need the following additional manuals when working with it: The fontinst manual – Shipping as fontinst.dvi, the fontinst manual is the most important piece of documentation you will need when working with this guide since most files required for proper Postscript font support are generated by fontinst. You do not need to work through the sections explaining all low-level commands in detail, but make sure that you have read the more general parts and that you have a basic understanding of what fontinst is and what it does. If this manual is not included in your distribution, get it from the Comprehensive Tex Archive Network (ctan).¹ The Fontname scheme – Fonts used with Tex are usually renamed according to a dedicated naming standard, the Fontname scheme by Karl Berry. Take a look at the outline of the scheme as given in fontname.dvi and make sure you have copies of the individual map files at hand. These lists define names for a large number of commercial Postscript fonts. You will need them while working with this guide. If the documentation of the Fontname scheme is not part of your distribution, you can read it online² or download the complete package from a ctan ftp server.³ The Latex font selection guide – It might be a good idea to read the Latex font selection guide as well before proceeding with the first tutorial. It provides an overview of the New Font Selection Scheme (nfss). This scheme is not used during font installation, but it will help you to understand certain aspects of the installation process. This guide ships with most Tex distributions as fntguide.dvi and is also available in pdf format from ctan.⁴ Feel http://www.ctan.org/tex-archive/fonts/utilities/fontinst/doc/manual/ http://www.ctan.org/tex-archive/info/fontname/ ftp://tug.ctan.org/tex-archive/info/fontname.tar.gz http://www.ctan.org/tex-archive/macros/latex/doc/fntguide.pdf introduction free to skip the chapter about math fonts as we are only going to deal with text fonts. Setting up math fonts is a science in its own right. Please note that this guide was written with version . of fontinst in mind. On July , , Lars Hellström has released fontinst . to the public.¹ The recipes proposed here should still work with the latest version, but they do not exploit the new features of the new release. I will try to update this guide as my time permits. The latest release of this guide can always be found at ctan.² Acknowledgments I am indebted to Timothy Eyre for taking the time to proofread and comment on an earlier revision of the entire guide. I would also like to thank William Adams, Adrian Heathcote, and Adrian Burd for pointing out spelling mistakes. http://www.ctan.org/tex-archive/fonts/utilities/fontinst/ http://www.ctan.org/tex-archive/info/Type1fonts/fontinstallationguide.pdf tutorial i the basics This introductory tutorial serves two purposes. It covers the most basic installation scenario by explaining how to use fontinst’s \latinfamily macro to integrate a small font family into a Tex system. By providing step-by-step installation instructions, it will also discuss the installation procedure as a whole. The later tutorials will focus on the more advanced capabilities of fontinst. Before we begin, let’s take a look at an overview of the installation procedure: Step 1: renaming the font files – First of all, we copy all Type fonts (extension pfb) and the corresponding Ascii metric files (afm) to a temporary directory and rename them according to the Fontname scheme. Step 2: creating metrics and virtual fonts – We will use fontinst, a font installer that works with Adobe font metric files in Ascii format (afm), to generate metric files and virtual fonts. Fontinst is normally not used interactively but controlled by a Tex file. Since the fontinst file is specific to a given font family, we need to write a suitable file for our fonts first and run it through Tex afterwards. Step 3: compiling metrics and virtual fonts – Fontinst will generate font metrics and virtual fonts in a human-readable format which need to be converted to a machine-readable form afterwards. Hence we run all property list files (pl) created by fontinst through pltotf to create Tex font metrics (tfm) and all virtual property list files (vpl) through vptovf to create virtual fonts (vf) and the corresponding Tex font metrics for them. Step 4: installing the files – We install all font metrics (afm), Type font outlines (pfb), Tex font metrics (tfm), virtual fonts (vf), and font definition files (fd) into the local Tex tree. The remaining files are not required anymore and may be deleted. Step 5: creating map files – The fonts are now set up for Tex and Latex, but not for dvi and pdf drivers, which are configured separately. We create map files for dvips, pdftex, and, if a version of xdvi with native support for Postscript fonts is available, for xdvi. We install the map files and add them to the applications’ configuration files. Step 6: updating the hash tables – Finally, we run texhash to update the file hash tables used by the kpathsea search library. i. Renaming the files Users unfamiliar with fontinst tend to moan when introduced to the Fontname scheme for the first time. This file naming standard, which is also known by the name of its creator as the Karl Berry scheme, is often regarded as overly the basics complicated, cumbersome, unclear, and unmanageable. And indeed, it will appear somewhat cumbersome to anyone working with an operating system that does not impose silly limits on the lengths of file names. All of that is not the fault of its creator, however, but an inevitable result of the historical need to encode a complete font designation in a string of eight characters in order to cope with the limitations of the dos filesystem as well as the iso- filesystem used for data cd-roms. The most important asset of the Fontname scheme is that it is the only formalized naming system widely used within the Tex community. Given the large number of files required to integrate a given typeface into a Tex system, installations without formal file naming would quickly get out of control. So, if the next couple of paragraphs should sound a bit cumbersome to you, you are in good company. Rest assured that after installing a few font families and watching your installation grow, you will understand the benefits of this scheme. In order to understand the basic principles of the Fontname scheme, see the file fontname.dvi for an overview as well as excerpts from various map files. Browse the map files of individual vendors for the complete listings. When using the \latinfamily macro, strict adherence to the scheme is required. If you write a custom fontinst file using lower-level commands, the naming is technically up to you. It is still a good idea to stick to the naming system where possible. If a given typeface is not included in the map file for the respective foundry, take the foundry code from supplier.map and the code of the typeface from typeface.map. If the typeface is not listed at all, you will need to create a new code. This should be an unused one if possible. Try handling weight, variant, and encoding codes as strictly as possible. Foundry and typeface codes may be handled more liberally. For large text font families, most font vendors do not put all fonts in a single package. They usually offer a base package containing upright and italic/ oblique fonts plus an advanced package complementing the former. The advanced package will usually contain one of the following additional font sets: a set of optical small caps¹ and hanging figures,² a set of expert fonts,³ additional weights, or a combination of these sets. This package has to be purchased sep ‘Optical’ or ‘real’ small caps, as opposed to ‘mechanical’ or ‘faked’ ones, are special glyphs found in a dedicated small caps font. They are preferable to mechanical small caps since they were actually drawn by the font designer. Mechanical small caps are generated by taking the tall caps of the font and scaling them down. While hanging or ‘old style’ figures have ascenders and descenders to blend in with lowercase and mixed case text, lining figures are aligned with the height of the capital letters (compare to 1369). Hanging figures are designed for use within mixed case text whereas lining figures are suitable for all uppercase text only. The latter also work well for applications like numbered lists and, since they are usually monospaced, for tabular settings. ‘Expert’ fonts are complements to be used in conjunction with regular text fonts. They usually contain optical small caps, additional sets of figures, ligatures as well as some other symbols. Please refer to tutorial v for further information. using fontinst arately and can normally not be used independently in a sensible way. We will use Sabon as an example in this tutorial. The Sabon family offered by Adobe is split up into two packages. The base package contains upright and italic fonts (with lining figures) in regular and bold weights, while the so-called sc & osf package provides optical small caps and hanging figures. Hanging figures are also known as “old style figures”, hence the name sc & osf. In the first and the second tutorial we will deal with the base package only. Adding the sc & osf package to the base install will be discussed in the third tutorial. As we receive the package from Adobe or from a vendor, it contains the following files: sar_____.afm sar_____.inf sar_____.pfb sar_____.pfm sai_____.afm sai_____.inf sai_____.pfb sai_____.pfm sab_____.afm sab_____.inf sab_____.pfb sab_____.pfm sabi_____.afm sabi_____.inf sabi_____.pfb sabi_____.pfm Of those files, we only need two types: the font metrics in Ascii format (afm) and the binary font outlines (pfb). We copy these to our working directory to rename them. In this case, finding the proper names is simple because the typeface is listed explicitly in adobe.map: psbr8a psbri8a psbb8a psbbi8a Sabon-Roman Sabon-Italic Sabon-Bold Sabon-BoldItalic A A A A 088 088 088 088 sar_____ sai_____ sab_____ sabi____ The first column indicates the Fontname name and the last column the original name of the files as shipped by the vendor.¹ After renaming, we find the following files in the working directory: psbr8a.afm psbr8a.pfb psbri8a.afm psbri8a.pfb psbb8a.afm psbb8a.pfb psbbi8a.afm psbbi8a.pfb We can now begin with the installation process. i. Using fontinst Since writing a fontinst file can be quite a time-consuming thing to do, fontinst provides a special macro which is able to deal with standard scenarios like this one. You can look up the \latinfamily command in the fontinst manual to understand what it does in detail. For our situation, it will suffice to say that it is able to recognize the standard fonts we provide by their file name – hence the need for strict adherence to the Fontname scheme in this case. Fontinst will create all metric and auxiliary files required by Latex without further directions in the form of lower-level commands. Therefore our fontinst file is as simple as it can get: The fourth column may also prove helpful: it indicates the number of the Adobe font package to which this font belongs. This number will save you a lot of time if you are trying to locate updated metric files for a font on Adobe’s ftp server since the files are sorted by package number there. ₁ ₂ ₃ the basics \input fontinst.sty \latinfamily{psb}{} \bye After loading fontinst () we simply call the \latinfamily macro with the base of the file names (the foundry code plus the typeface code) as the first argument (). The second argument is code to be executed whenever this typeface is used. This is often employed to suppress hyphenation of fixed-width typefaces by setting the hyphenation character to a non-existing encoding position. If we wanted to suppress hyphenation for this font family, we would call the macro like this: ₂ \latinfamily{psb}{\hyphenchar\font=-1} We save the file as drv-psb.tex, for example, and run it through tex: tex drv-psb.tex The \latinfamily macro will create metric files, virtual fonts, and auxiliary files for four different encodings: Tex Base , ot1, t1, and ts1. While Tex Base serves as the basis for virtual fonts using other encodings, it is usually not employed as such on the Latex level, although \latinfamily provides font definition files for the Tex Base encoded fonts as well. The ot1 encoding is a -bit legacy encoding solely suitable for text using the English alphabet only because it requires the use of composite glyphs when typesetting accented letters. These glyphs are inferior to the native glyphs provided by Postscript fonts. When using ot1 encoding and typesetting the letter a with a grave accent, for example, Tex does not use the real glyph à as provided by the font because ot1 discards all accented letters. This amounts to almost half of the glyphs found in common Postscript fonts. Instead, Tex will use the stand-alone grave accent and move it over the lowercase letter a to form a composite glyph. Apart from their inferior typographic quality, composite letters break Tex’s hyphenation algorithm so that words containing an accented letter are not hyphenated beyond this letter. Another problem with them is that they break searching for words containing accented letters in pdf files. In short, ot1 should be considered obsolete unless you need the letters of the English alphabet only. But even in this case, t1 encoding would be a sound choice. t1, also known as Cork encoding, is a more recent text encoding suitable for a wide range of Latin scripts. Also known as Text Companion encoding, ts1 complements t1 by providing additional glyphs such as currency signs and other frequently used symbols like ‘copyright’ or ‘registered’. ts1 is never used as the main text encoding because it merely contains symbols. A user interface to the glyphs found in ts1 is provided by the textcomp package. When running the fontinst file through tex, fontinst will write a lot of messages to the terminal. These will include warnings about glyphs not being found, since a few glyphs defined in ot1 and t1 encoding are missing from the glyph set of our fonts: using fontinst (/usr/share/texmf/tex/fontinst/base/ot1.etx Warning: missing glyph ‘dotlessj’. Warning: missing glyph ‘lslashslash’. (/usr/share/texmf/tex/fontinst/base/t1.etx Warning: missing glyph ‘perthousandzero’. Warning: missing glyph ‘dotlessj’. Warning: missing glyph ‘Eng’. Warning: missing glyph ‘eng’. These warnings are normal, the missing glyphs are simply not provided by most Postscript fonts. In addition to that, you will most likely be lacking the ligatures ‘ff ’, ‘ffi’, and ‘ffl’. This means that they will not be typeset as a single glyph but as a sequence of characters. There is no warning message in this case as fontinst will construct the ligatures using the single-letter glyphs at hand. You will usually find these ligatures in so-called expert fonts which complement the base fonts. Some foundries however, like FontFont, include them in the base fonts. Standard Postscript fonts should always provide the ligatures ‘fi’ and ‘fl’. The situation is worse for ts1 encoding since parts of it are rather exotic, defining glyphs not found in industry-standard fonts such as a ‘copyleft’ symbol, or glyphs which should rather go in a dedicated symbol font such as arrow symbols: (/usr/share/texmf/tex/fontinst/base/ts1.etx Warning: missing glyph ‘arrowleft’. Warning: missing glyph ‘arrowright’. Warning: missing glyph ‘tieaccentlowercase’. Warning: missing glyph ‘tieaccentcapital’. Warning: missing glyph ‘newtieaccentlowercase’. Warning: missing glyph ‘newtieaccentcapital’. Warning: missing glyph ‘blank’. Warning: missing glyph ‘hyphendbl’. Warning: missing glyph ‘zerooldstyle’. Warning: missing glyph ‘oneoldstyle’. Warning: missing glyph ‘twooldstyle’. Warning: missing glyph ‘threeoldstyle’. Warning: missing glyph ‘fouroldstyle’. Warning: missing glyph ‘fiveoldstyle’. Warning: missing glyph ‘sixoldstyle’. Warning: missing glyph ‘sevenoldstyle’. Warning: missing glyph ‘eightoldstyle’. Warning: missing glyph ‘nineoldstyle’. Warning: missing glyph ‘angbracketleft’. Warning: missing glyph ‘angbracketright’. Warning: missing glyph ‘Omegainv’. Warning: missing glyph ‘bigcircle’. Warning: missing glyph ‘Omega’. Warning: missing glyph ‘arrowup’. Warning: missing glyph ‘arrowdown’. Warning: missing glyph ‘born’. Warning: missing glyph ‘divorced’. Warning: missing glyph ‘died’. Warning: missing glyph ‘leaf’. Warning: missing glyph ‘married’. Warning: missing glyph ‘musicalnote’. the basics Warning: Warning: Warning: Warning: Warning: Warning: Warning: Warning: Warning: Warning: Warning: Warning: Warning: Warning: Warning: Warning: Warning: Warning: Warning: Warning: Warning: Warning: Warning: Warning: Warning: Warning: Warning: Warning: missing missing missing missing missing missing missing missing missing missing missing missing missing missing missing missing missing missing missing missing missing missing missing missing missing missing missing missing glyph glyph glyph glyph glyph glyph glyph glyph glyph glyph glyph glyph glyph glyph glyph glyph glyph glyph glyph glyph glyph glyph glyph glyph glyph glyph glyph glyph ‘hyphendblchar’. ‘dollaroldstyle’. ‘centoldstyle’. ‘colonmonetary’. ‘won’. ‘naira’. ‘guarani’. ‘peso’. ‘lira’. ‘recipe’. ‘interrobang’. ‘interrobangdown’. ‘dong’. ‘pertenthousand’. ‘pilcrow’. ‘baht’. ‘numero’. ‘discount’. ‘estimated’. ‘openbullet’. ‘servicemark’. ‘quillbracketleft’. ‘quillbracketright’. ‘copyleft’. ‘circledP’. ‘referencemark’. ‘radical’. ‘euro’. While this may seem like a long list, it is not unusual when installing fonts not specifically designed for Tex. You will get the most common symbols such as currency signs and other frequently used symbols, and chances are that you are not going to miss the lacking ones. If you want to learn more about these encodings, simply run fontinst’s encoding vectors through latex to get a dvi file containing a commented listing of all the glyphs: latex latex latex latex 8r.etx ot1.etx t1.etx ts1.etx After fontinst is finished, we run all property list files (pl) through pltotf to create Tex font metric files (tfm) and all virtual property list files (vpl) files through vptovf to create virtual fonts (vf). When using the Bash shell, this can be done as follows: for file in *.pl; do pltotf $file; done for file in *.vpl; do vptovf $file; done The generation of Tex font metrics, virtual fonts, and font definition files is now complete. i. Installing the files The Tetex distribution supports a total of three Tex trees: a global one, a local one, and a user tree. The global tree is usually maintained by package man- installing the files agement software. The local tree is for everything that is not part of the Tetex distribution but should be available system-wide. The user tree is for private files of individual users on the system. Fonts and everything related to them should go in the local tree if you have administrative access on the system. Putting them in the global tree is a bad idea because they might get overwritten when you update Tetex; putting them in a private one will restrict access to them to a single user which is probably not what you want if you have administrative access. It is a good idea to define the variable $TEXMF (all trees) in a way that references $TEXMFLOCAL (the local tree) before $TEXMFMAIN (the global tree). This will allow you to install newer versions of selected packages in the local tree without updating the whole install. I recommend defining $TEXMF as follows in texmf.cnf: TEXMF = {$HOMETEXMF,!!$TEXMFLOCAL,!!$TEXMFMAIN} This will give you two levels on top of the global install: your local extensions will be preferred over files in the global tree and can in turn be overridden by individual users who put files in their private tree ($HOMETEXMF). These settings should go into the global configuration file for the kpathsea search library, texmf.cfg. For the rest of this section we will assume that we are installing the fonts in the local tree and that its top directory is /usr/local/share/texmf. The relevant branches of the local tree are as follows: /usr/local/share/texmf/ /usr/local/share/texmf/dvips/ /usr/local/share/texmf/dvips/config/ /usr/local/share/texmf/fonts/ /usr/local/share/texmf/fonts/afm/ /usr/local/share/texmf/fonts/afm/adobe/ /usr/local/share/texmf/fonts/afm/adobe/sabon/ /usr/local/share/texmf/fonts/tfm/ /usr/local/share/texmf/fonts/tfm/adobe/ /usr/local/share/texmf/fonts/tfm/adobe/sabon/ /usr/local/share/texmf/fonts/type1/ /usr/local/share/texmf/fonts/type1/adobe/ /usr/local/share/texmf/fonts/type1/adobe/sabon/ /usr/local/share/texmf/fonts/vf/ /usr/local/share/texmf/fonts/vf/adobe/ /usr/local/share/texmf/fonts/vf/adobe/sabon/ /usr/local/share/texmf/pdftex/ /usr/local/share/texmf/pdftex/config/ /usr/local/share/texmf/tex/ /usr/local/share/texmf/tex/latex/ /usr/local/share/texmf/tex/latex/adobe/ /usr/local/share/texmf/tex/latex/adobe/sabon/ /usr/local/share/texmf/xdvi/ /usr/local/share/texmf/xdvi/config/ The main components of this directory structure are defined by the Tex Directory Structure (tds),¹ another standard introduced to cope with the large http://www.tug.org/tds/ the basics number of files that make up a typical Tex system. The appropriate locations for the different file types should be more or less obvious. The fonts/ branch has subdirectories for Ascii font metrics (afm/), Tex font metrics (tfm/), Type fonts (type1/), and virtual fonts (vf/). It is customary to create subdirectories for the foundry and for each font family. You can take the names of these subdirectories from the Fontname scheme as well, although this is not a requirement. The standard directory name for the foundry is given in the file supplier.map, the standard name for the typeface in typeface.map. Here are the relevant lines from both files for Sabon: p adobe sb sabon @r{Adobe (@samp{p} for PostScript)} Sabon b:ClassicalGaramondBT The font description files (fd) for Latex go in a subdirectory of tex/latex/. The exact location is up to you but I recommend using the foundry/typeface scheme as well. We do not need the directories dvips/, pdftex/, and xdvi/ at this point, but we are going to use them later. Now we create all directories and copy the files into the local tree as follows: cp cp cp cp cp *.afm *.tfm *.pfb *.vf *.fd /usr/local/share/texmf/fonts/afm/adobe/sabon/ /usr/local/share/texmf/fonts/tfm/adobe/sabon/ /usr/local/share/texmf/fonts/type1/adobe/sabon/ /usr/local/share/texmf/fonts/vf/adobe/sabon/ /usr/local/share/texmf/tex/latex/adobe/sabon/ All files left in the working directory will not be used any more and may be deleted. i. Creating map files All the files that Tex and Latex need in order to use Sabon are now available. At this point we could create a perfectly valid dvi file with the right amount of blank space for every glyph – but we would not see a single glyph when looking at a dvi preview. Note that Tex itself is completely indifferent to the actual font files. It will only use the metrics in the tfm files without accessing the glyph outlines. Rendering or embedding fonts is at the responsibility of the application which displays the dvi file or processes it further in order to generate Postscript. pdftex is a special case because it combines the roles of Tex and of a pdf driver. All of these applications need to know which fonts to use. This information is provided in ‘map’ files which map font metrics to font outlines. We will deal with the three most popular applications, the Postscript driver dvips, the dvi viewer xdvi, and pdftex. All of them need to be provided with a suitable map file. For dvips, the syntax of this file is explained in detail in the dvips manual.¹ For pdftex, it is is explained in the pdftex manual, and for xdvi in the documentation that comes with the source distribution. Fortunately, xdvi and pdftex are capable of reading dvips’s map files to a certain http://www.radicaleye.com/dvipsman/ creating map files extent. If written with a little bit of care, dvips, pdftex, and xdvi can share the same map file. This section will explain how to do that. Let’s take a look at the first line of what will become psb.map, our map file for Sabon. The first column indicates the name of the raw Tex font without any file extension: psbr8r Sabon-Roman "TeXBase1Encoding ReEncodeFont" <8r.enc <psbr8a.pfb Since the \latinfamily macro reencodes all regular text fonts from Adobe Standard encoding (Fontname code 8a) to Tex Base (8r) when creating metric files for Tex, it corresponds to the name of the pfb file with encoding 8r instead of 8a. In this case, psbr8a.pfb becomes psbr8r. psbr8r Sabon-Roman "TeXBase1Encoding ReEncodeFont" <8r.enc <psbr8a.pfb The second column is the Postscript name of the font. Do not try to guess the right name or copy it from some map file you found somewhere on the web some time ago. If your font is included in one of the foundry-specific lists of the Fontname scheme, the Postscript name is given in the second column of the respective table. If it is not or if you are in doubt, the Postscript name should be taken from the header of the afm file for every font. Here are a few lines from psbr8a.afm: StartFontMetrics 2.0 Comment Copyright (c) 1989 Adobe Systems Incorporated. All Rights Reserved. Comment Creation Date:Fri Mar 10 16:47:51 PST 1989 FontName Sabon-Roman FullName 12 Sabon* Roman 05232 FamilyName Sabon EncodingScheme AdobeStandardEncoding The relevant part is the line starting with “FontName” – the Postscript name of this font is “Sabon-Roman.” For each font, we copy this name verbatim to psb.map. psbr8r Sabon-Roman "TeXBase1Encoding ReEncodeFont" <8r.enc <psbr8a.pfb The third column of our map file is a reencoding instruction. As mentioned above, the \latinfamily macro reencodes all fonts from Adobe Standard encoding to Tex Base when creating metric files for Tex. This affects the metrics only, which are defined in the tfm files generated by fontinst, while the glyph outlines as defined in the pfb file still use the font’s native encoding. Therefore, we add a reencoding directive to the map file that will instruct all applications dealing with the actual glyph outlines to reencode them accordingly. psbr8r Sabon-Roman "TeXBase1Encoding ReEncodeFont" <8r.enc <psbr8a.pfb Finally, the last column contains a list of files that dvips will embed in the Postscript file. In this case, we need the Postscript encoding vector 8r.enc for Tex Base encoding and the pfb file, since we want the fonts to be embedded in the Postscript file. Now the map file for our basic Sabon set looks like this: psbr8r psbri8r psbb8r psbbi8r the basics Sabon-Roman Sabon-Italic Sabon-Bold Sabon-BoldItalic "TeXBase1Encoding "TeXBase1Encoding "TeXBase1Encoding "TeXBase1Encoding ReEncodeFont" ReEncodeFont" ReEncodeFont" ReEncodeFont" <8r.enc <8r.enc <8r.enc <8r.enc <psbr8a.pfb <psbri8a.pfb <psbb8a.pfb <psbbi8a.pfb In addition to that, we need to tell dvips about the slanted versions of all upright fonts which \latinfamily creates by default. We copy the lines for SabonRoman and Sabon-Bold and insert o, the Fontname code for slanted fonts, after the weight code of the Tex font name; psbr8r becomes psbro8r and psbb8r is changed to psbbo8r: psbro8r Sabon-Roman "0.167 SlantFont TeXBase1Encoding ReEncodeFont" <8r.enc <psbr8a.pfb psbbo8r Sabon-Bold "0.167 SlantFont TeXBase1Encoding ReEncodeFont" <8r.enc <psbb8a.pfb Note that the name of the pfb file does not change. We also add a “SlantFont” instruction to the third column. By default, \latinfamily uses a slant factor of . when creating the modified metrics and our map file has to indicate this accordingly. Our complete map file looks like this: psbr8r psbri8r psbb8r psbbi8r psbro8r psbbo8r Sabon-Roman "TeXBase1Encoding ReEncodeFont" Sabon-Italic "TeXBase1Encoding ReEncodeFont" Sabon-Bold "TeXBase1Encoding ReEncodeFont" Sabon-BoldItalic "TeXBase1Encoding ReEncodeFont" Sabon-Roman "0.167 SlantFont TeXBase1Encoding ReEncodeFont" Sabon-Bold "0.167 SlantFont TeXBase1Encoding ReEncodeFont" <8r.enc <8r.enc <8r.enc <8r.enc <8r.enc <8r.enc <psbr8a.pfb <psbri8a.pfb <psbb8a.pfb <psbbi8a.pfb <psbr8a.pfb <psbb8a.pfb The format suggested here is suitable for xdvi, dvips, and pdftex. We copy psb. map to the branch dvips/config/ in the local Tex tree. In order to configure dvips, we locate the default configuration file of dvips (config.ps) in the main Tex tree and copy it to the same location. If the search order for all Tex trees is set up as suggested above, this local copy will now be picked up instead of the global one. We open this file in a text editor, locate the section for map files (lines defining map files begin with a lowercase “p”), and add the new map file so that the updated section looks as follows: % p % p Standard map file provided by default +psfonts.map New map file for Sabon +psb.map The procedure for pdftex is similar: the configuration file is called pdftex. cfg and map files are marked with the string “map” at the beginning of the line. After copying the file to the branch pdftex/config of the local tree and updating it, the relevant section should look similar to the following example: % Standard map file provided by default map +pdftex.map % New map file for Sabon map +psb.map We repeat this step one more time for xdvi. The configuration file for xdvi is called xdvi.cfg, the local branch is xdvi/config and lines indicating a map file begin with “dvipsmap”: using the fonts % Map files provided by default dvipsmap ps2pk.map dvipsmap ... % New map file for Sabon dvipsmap psb.map In addition to that, we have to make sure that an encoding definition for Tex Base encoding is provided as well. The configuration file for xdvi should contain the following line: % Tag enc Suffix 8r Encoding name TeXBase1Encoding Encoding file 8r.enc The installation is now finished. Do not forget to update the file hash tables by running texhash or an equivalent command! i. Using the fonts Everything you need to know about using the fonts can be found in the Latex font selection guide.¹ The second chapter of this guide documents the standard nfss commands used to switch fonts under Latex. Let’s take a look at some examples. To select Sabon at any point in a Latex file, we use a command like: \fontfamily{psb}\selectfont Sabon provides two weights which are readily available using compact font selection macros like \textbf and \bfseries. Larger font families may offer more than two weights. To select a particular weight, we use the \fontseries command in conjunction with the nfss series codes defined during the installation of the font family. Please refer to the code table on page of this guide for a list of the most common nfss codes. To select the semibold (sb) weight for example, we would use the following construct: \fontseries{sb}\selectfont Compact font switching macros such as \mdseries and \bfseries do not switch to a fixed nfss font series, they use \mddefault and \bfdefault for the regular and bold weight respectively. If we want to use semibold as the default bold weight, for example, we simply redefine \bfdefault accordingly: \renewcommand*{\bfdefault}{sb} In order to use Sabon as the default roman typeface for the whole document, we redefine \rmdefault in the preamble: \renewcommand*{\rmdefault}{psb} It is much more convenient to put the initialization of the font family into a dedicated style file (sty), though. Our file sabon.sty might look like this: ₁ ₂ \NeedsTeXFormat{LaTeX2e} \ProvidesPackage{sabon}[2002/04/17 v1.0 Adobe Sabon] http://www.ctan.org/tex-archive/macros/latex/doc/fntguide.pdf ₃ ₄ ₅ ₆ the basics \RequirePackage[T1]{fontenc} \RequirePackage{textcomp} \renewcommand*{\rmdefault}{psb} \endinput Essentially, we redefine \rmdefault in order to use Sabon as the default roman typeface for the whole document. In addition to that, we load the fontenc package and switch to t1 encoding, which is more appropriate for Postscript fonts than the ot1 encoding used by default. We also load the textcomp package which provides a user interface for the symbols found in ts1 encoding. This will allow us to access symbols such as ‘copyright’ or ‘registered’. If the textcomp package is used in conjunction with inputenc, it is even possible to enter most of these symbols directly in a Latex file. There is one thing we have to keep in mind when switching to t1 encoding. The default encoding is a global setting that applies to all text fonts used in a Latex file, unless the encoding is reset explicitly using the nfss macro \fontencoding. It will affect the font family defined as \rmdefault, but also the families set up as \sfdefault and \ttdefault. By default, these are Computer Modern Sans Serif (cmss) and Computer Modern Typewriter (cmtt). Using these fonts in conjuction with t1 encoding will pose some problems most European Tex users are already well familiar with. It is perfectly possible, provided that we use a suitable version of the Computer Modern fonts. Choosing a suitable version, however, can be quite difficult. We will discuss some typical issues related to that in the following section. Alternatively, we could use other t1 encoded sans serif and typewriter typefaces available in Postscript format. For example, here is an enhanced version of sabon.sty using Helvetica (phv) and Courier (pcr): ₁ ₂ ₃ ₄ ₅ ₆ ₇ ₈ \NeedsTeXFormat{LaTeX2e} \ProvidesPackage{sabon}[2002/04/17 v1.0 Adobe Sabon with PS fonts] \RequirePackage[T1]{fontenc} \RequirePackage{textcomp} \renewcommand*{\rmdefault}{psb} \renewcommand*{\sfdefault}{phv} \renewcommand*{\ttdefault}{pcr} \endinput This setup is certainly not the most fortunate one in terms of typography, but it should be safe from a technical perspective. Helvetica and Courier are part of the Postscript base fonts built into every Level Postscript device. Most Tex distributions do not ship with the original versions of these fonts but they provide suitable replacements for them. For our setup of Sabon, the next section is only relevant if you want to use Computer Modern Sans Serif and Computer Modern Typewriter in conjunction with Sabon. If you deploy different t1 encoded sans serif and typewriter typefaces, which are available in Postscript format, all you need to do is redefine \sffamily and \ttfamily in sabon.sty or in the preamble of the respective Latex file as shown above for Helvetica and Courier. computer modern and t1 encoding i. Computer Modern and t1 encoding The Computer Modern fonts designed for t1 and ts1 encoding are called ec and tc fonts respectively, together known as European Computer Modern. When switching to t1 encoding, we implicitly switch to these fonts. Note that European Computer Modern, while being derived from Donald Knuth’s original Computer Modern typefaces, is not simply a t1 encoded drop-in replacement. Over the years it has evolved into an independent typeface. The additional fonts created for the European Computer Modern family have been subject to debate based on their design. Some of them are considered to be typographically inferior to the original designs. From a technical perspective, the problem with the European Computer Modern fonts is that, historically, they have been available in Metafont format only. This implies that Postscript and pdf files will contain bitmap representations of these fonts when we switch to t1 encoding. Bitmap fonts, however, have a fixed resolution and so are not independent of the output device. They are not suitable for on-screen display and a major inconvenience for every print shop, if they are tolerated at all. Donald Knuth had designed the Computer Modern fonts in Metafont format and with ot1 encoding in mind. Blue Sky Research and Y&Y developed Postscript versions of these fonts later, which were donated to the public in and have been shipping with most Tex distributions ever since. While these fonts work fine for Postscript and pdf files, they are not suitable for tasks requiring letters not found in the English alphabet because their glyph base is still restricted to ot1 encoding. Jörg Knappen’s European Computer Modern fonts address this issue by providing a more comprehensive set of glyphs, but they have in turn been subject to the limitations of Metafont. In the following, I will briefly introduce several solutions which try to address these problems. Most of them are trade-offs in one way or another. Tables and try to provide an overview of the major design variations over the Computer Modern theme along with their implementations. The tables are by no means exhaustive, there are even more fonts derived from the original Computer Modern typefaces. To work around the hyphenation problem of ot1 encoding while sticking to the original Computer Modern fonts, there is a choice of two packages on ctan which provide t1 encoded virtual fonts based on the original Computer Modern family of fonts: the ae¹ and the ze² fonts. The ae fonts are built on top of Computer Modern exclusively, but unfortunately they lack almost a dozen t1 characters including the French double and single guillemets, which makes their default setup unsuitable for all French and a lot of German texts. For Computer Modern Typewriter, the situation is even worse. There is a supplemental package called aecompl which adds Metafont versions of the missing characters, but that again brings up the problem we were trying to avoid in the first http://www.ctan.org/tex-archive/fonts/ae/ http://www.ctan.org/tex-archive/fonts/zefonts/ the basics typeface fonts name Computer Modern European Computer Modern Latin Modern European Modern cm cm, Blue Sky cm, Bakoma ae ze ec & tc ec & tc, Micropress Tt cm-super lm em format Metafont Postscript Postscript virtual fonts virtual fonts Metafont Postscript Postscript Postscript Postscript Postscript Table 1: Computer Modern, fonts and formats place. A different complement called aeguill¹ at least adds Postscript versions of the guillemets. An enhanced version of sabon.sty might then look like this: ₁ ₂ ₃ ₄ ₅ ₆ ₇ ₈ \NeedsTeXFormat{LaTeX2e} \ProvidesPackage{sabon}[2002/04/17 v1.0 Adobe Sabon with AE] \RequirePackage[T1]{fontenc} \RequirePackage{textcomp} \RequirePackage{ae} \RequirePackage{aeguill} \renewcommand*{\rmdefault}{psb} \endinput The ze fonts take a different approach to work around this problem: the missing characters are taken from standard Postscript fonts such as Times and Helvetica. This means that there will be some typographical inconsistencies, but we are safe from a technical point of view. While the ae fonts and the corresponding supplemental packages ship with most Tex distributions, you might need to download the ze fonts from ctan. When using the ze fonts, our enhanced version of sabon.sty would look like this: ₁ ₂ ₃ ₄ ₅ ₆ ₇ \NeedsTeXFormat{LaTeX2e} \ProvidesPackage{sabon}[2002/04/17 v1.0 Adobe Sabon with ZE] \RequirePackage[T1]{fontenc} \RequirePackage{textcomp} \RequirePackage{zefonts} \renewcommand*{\rmdefault}{psb} \endinput There is a more robust solution you might be interested in if you require t1 encoded Computer Modern fonts. Free Postscript versions of the European Computer Modern fonts have been made available, although they might not have made their way into every Tex distribution yet. As mentioned before, one prob http://www.ctan.org/tex-archive/macros/latex/contrib/supported/aeguill/ computer modern and t1 encoding fonts encoding native cm cm, Blue Sky cm, Bakoma ae ze ec, tc cm-super lm ot1 ot1 font specific ot1 ot1 t1, ts1 a font specific supported ot1 ot1 ot1 t1, with composite glyphs t1, with composite glyphs t1, ts1 t1, ts1, t2a, t2b, t2c, x2 t1, ts1, ly1, qx1 Table 2: Computer Modern, fonts and encodings lem with ot1 encoded fonts is that they rely on composite glyphs which break searching for words containing accented letters in pdf files. Both the ae and the ze fonts, although they enable Tex to hyphenate words containing accented letters properly, still suffer from this particular problem as they are based on ot1 encoded fonts internally. It is highly advisable to switch to a real t1 version of the Computer Modern fonts in Postscript format. Such fonts are included in two independent packages: Péter Szabó’s Tt¹ as well as Vladimir Volovich’s more recent cm-super² package. Both packages include Postscript fonts which are traced and post-processed conversions of their Metafont counterparts. Unless you know that a specific font you need is provided by the Tt package only, go with the more advanced cm-super package which will bring you as close to a real solution as you can possibly get when using free versions of the European Computer Modern fonts. Note, however, that it is a rather large download. Since it includes a huge number of fonts, the compressed package is about mb in size. The cm-super fonts use Adobe Standard as their native encoding, but the glyph set provided by these fonts includes Cyrillic letters as well. In addition to t1 and ts1, cm-super supports the Cyrillic encodings t2a, t2b, t2c, and x2. See the package documentation for installation instructions and answers to the most frequently asked questions. Here is a version of our style file for use in conjunction with cm-super: ₁ ₂ ₃ ₄ ₅ ₆ ₇ \NeedsTeXFormat{LaTeX2e} \ProvidesPackage{sabon}[2002/04/17 v1.0 Adobe Sabon with CM-Super] \RequirePackage[T1]{fontenc} \RequirePackage{textcomp} \RequirePackage{type1ec} \renewcommand*{\rmdefault}{psb} \endinput Recently, yet another new implementation of Computer Modern has been re http://www.ctan.org/tex-archive/fonts/ps-type1/ec/ http://www.ctan.org/tex-archive/fonts/ps-type1/cm-super/ the basics leased to the public, the promising Latin Modern fonts created by Bogusław Jackowski and Janusz M. Nowacki. Unlike Tt and cm-super, Latin Modern is derived from the original Computer Modern designs and augmented with accented letters as well as other glyphs missing from the very restricted glyph base of the original fonts. While the Latin Modern fonts are younger than European Computer Modern, they are a parallel development from a systematic perspective. Consequently, they are not affected by the controversial design decisions underlying certain parts of the European Computer Modern family of fonts. They use a font specific encoding by default and feature a glyph base suitable for t1, ts1, ly1 as well as the Polish encoding qx1. Even though these fonts are still under development, they are already perfectly usable as of this writing. Here is yet another iteration of our style file for Sabon, combined with Latin Modern for the sans serif and typewriter families: ₁ ₂ ₃ ₄ ₅ ₆ ₇ \NeedsTeXFormat{LaTeX2e} \ProvidesPackage{sabon}[2003/07/27 v1.0 Adobe Sabon with LM] \RequirePackage[T1]{fontenc} \RequirePackage{textcomp} \RequirePackage{lmodern} \renewcommand*{\rmdefault}{psb} \endinput Apart from these free fonts, there are also commercial offerings from Y&Y¹ and Micropress.² Judging by the vendors’ websites, Micropress offers Postscript versions of European Computer Modern while the European Modern fonts by Y&Y are augmented Postscript versions of the original Computer Modern typefaces. Please refer to the respective website for details and pricing. Since I have never used any of these fonts, I cannot comment on their quality or on any possible shortcomings. http://www.yandy.com/em.htm http://www.micropress-inc.com/fonts/ecfonts/ecmain.htm tutorial ii standard font sets While the \latinfamily shorthand is very convenient, it is not capable of coping with complex installation scenarios. Sooner or later you will probably have more specific requirements or simply desire more control over the basics. This will require using lower-level fontinst commands in most cases. ii. The fontinst file In this tutorial, we will essentially repeat the scenario discussed in the previous one. This time, however, we will employ lower-level commands. The verbose file introduced here will also serve as a template for subsequent tutorials. ₁ ₂ \input fontinst.sty \substitutesilent{bx}{b} After loading fontinst we set up an alias that will suppress a warning when the respective font is substituted. Why would we want to set up this particular alias? Note that bx is the nfss code of the ‘bold extended’ series. The Latex macros \textbf and \bfseries do not switch to a fixed series, they use \bfdefault instead which is set to bx by default. As long as you are using the Computer Modern fonts this is fine since they actually include bold extended fonts. For font families which do not, however, using these macros would result in a warning. To avoid that, you would need to redefine \bfdefault to a suitable weight. The problem here is that \bfdefault is a global setting applying to all of Latex’s font families (\rmdefault, \sfdefault, and \ttdefault), but it is not safe to assume that all of them will offer the same weights. To avoid any need to redefine \bfdefault unless we really want to, we set up an alias so that every request for ‘bold extended’ (bx) is substituted by ‘bold’ (b).¹ Unless bold extended fonts are available, simply think of bx as the default bold weight. The standard weight is selected by Latex in a similar way. The relevant macro is called \mddefault and defaults to m. Make sure that the nfss series m is always defined, either mapped to actual fonts or as a substitution. In this case our font family provides regular-weight fonts so we will simply use them for the m series. Some font families, however, are based on the main weights ‘light’ and ‘demibold’ instead of ‘regular’ and ‘bold’. In this case, we would either just map these weights to the m and b series directly or use the proper nfss series codes (l and db) plus the following substitutions: \substitutesilent{m}{l} \substitutesilent{bx}{db} This is a default substitution that fontinst will always silently include. We could omit line here, but if semibold fonts are available you might prefer using those as a substitute for bx. standard font sets Again, think of m as the default weight if regular-weight fonts are not available. Every font family should provide mappings for the nfss series m and bx in the font definition file. If fonts matching these series exactly are not available, use substitutions to ensure that the defaults for \mddefault and \bfdefault will work without user intervention. Since \mddefault and \bfdefault are overall settings applying to all of Latex’s families, redefining them explicitly may cause problems. Doing so should be an option, not a requirement. ₃ \substitutesilent{sc}{n} We also add a substitution for the sc shape, which will in fact be used by the ts1 encoded families only. Since ts1 contains symbols and figures, we do not need an additional small caps font for this encoding as it would be identical to the upright variant anyway. However, to ensure that all text commands of the textcomp package will always work, even if the active nfss shape is sc, we set up this shape substitution. ₄ \setint{smallcapsscale}{800} The basic Sabon set we are dealing with offers upright and italic fonts but no optical small caps. As a substitute, fontinst is capable of transparently generating so-called ‘mechanical’ or ‘faked’ small caps – as opposed to ‘optical’ or ‘real’ small caps which are actual glyphs found in a dedicated small caps font. Mechanical small caps are generated by taking the tall caps of the font and scaling them by a certain factor: means full size, means .. Since Type fonts scale linearly, scaling down tall caps implies that they will appear lighter than the corresponding lowercase glyphs, thus disturbing the color of the page. However, if they are too tall they do not mix well with the lowercase alphabet. Optical small caps match the ‘x-height’ of the font. This is the height of the lowercase alphabet without ascenders and descenders. They blend in seamlessly with lowercase and mixed case text. Depending on the typeface, this usually corresponds to a value in the range of –. If you scale down tall caps so that they match the x-height of the font, they will appear too light in running text. Finding a suitable value for this is obviously a trade-off. We are going to use fontinst’s default setting of here but you might want to experiment with a value in the range of –. For serious applications of small caps we would need optical small caps, provided in a dedicated small caps or in an expert font. For details on small caps and expert sets, please refer to tutorial iii and v respectively. ₅ \setint{slant}{167} The integer variable smallcapsscale is a predefined variable used by fontinst’s encoding vectors. We could use it in conjunction with \latinfamily as well. The variable slant is specific to our fontinst file. We define it for convenience so that we can set the slant factor for all subsequent font transformations globally. The slant factor defines how much the glyphs slope to the right. It is a real the fontinst file number equivalent to the tangent of the slant angle. Fontinst represents this number as an integer though, so we have to multiply the tangent by . The value (~ .°) is a reasonable default. Any value significantly greater that (~ °) is usually too much.¹ ₆ ₇ ₈ ₉ \transformfont{psbr8r}{\reencodefont{8r}{\fromafm{psbr8a}}} \transformfont{psbri8r}{\reencodefont{8r}{\fromafm{psbri8a}}} \transformfont{psbb8r}{\reencodefont{8r}{\fromafm{psbb8a}}} \transformfont{psbbi8r}{\reencodefont{8r}{\fromafm{psbbi8a}}} We start off with some basic font transformations: all fonts are reencoded from Adobe Standard (Fontname code 8a) to Tex Base encoding (8r). Please refer to the fontinst manual for an explanation of the syntax of the individual commands used here and in the following. ₁₀ ₁₁ \transformfont{psbro8r}{\slantfont{\int{slant}}\reencodefont{8r}{\fromafm{psbr8a}}} \transformfont{psbbo8r}{\slantfont{\int{slant}}\reencodefont{8r}{\fromafm{psbb8a}}} Like the \latinfamily shorthand, our fontinst file should create slanted fonts as well. These need to be reencoded and, well, slanted. We are using the slant variable defined in line to set the slant factor. The raw, Tex Base encoded fonts are now prepared for the generation of virtual fonts. ₁₂ ₁₃ ₁₄ \installfonts \installfamily{T1}{psb}{} \installfamily{TS1}{psb}{} The installation of a font family is enclosed in an environment which we open in line and close later in line . First of all, the font family we are about to install has to be declared: we have Adobe Sabon and we are going to install it in t1 encoding (Fontname code 8t) as well as in ts1 (8c). The third argument to \installfamily corresponds to the second one of the \latinfamily command: it is used to include code in the font definition file that will be read by Latex whenever the font is selected. t1 will serve as our base encoding in Latex’s text mode later. It is complemented by ts1 which provides additional glyphs such as currency signs and other frequently used symbols. The \latinfamily command also provides ot1 (7t) and Tex Base encoded fonts. We will omit both encodings here as we do not need them. While raw Tex Base encoded fonts (8r) form the basis of all virtual fonts, they are usually not deployed as such on the Tex level, and the ot1 encoding is not suitable for Postscript fonts anyway. We will therefore deliberately ignore it and focus on t1 and ts1 exclusively. ₁₅ \installfont{psbr8t}{psbr8r,latin}{t1}{T1}{psb}{m}{n}{} I suggest you do not bother trying to match the slope of the italic fonts when creating a slanted variant of a roman font. This will usually not work for typefaces with true italics because the latter are an independent design. standard font sets To create the individual virtual fonts, we use fontinst’s \installfont command. The first argument to \installfont is the virtual font we are going to create, the second one is a list of files used to build this font. These can be afm, mtx, or pl files, their extension is omitted. If multiple fonts are provided, \installfont does not overwrite any encoding positions when reading in additional files, it simply fills vacant slots if it finds suitable glyphs in the next font. The metric file latin.mtx is an auxiliary file provided by fontinst which should always be read when creating ot1 or t1 encoded text fonts. The third argument is the file name of an encoding vector without the file extension, in this case t1.etx. The remaining arguments are written verbatim to the font definition file and declare the respective font in a format that the Latex font selection scheme (nfss) can process: t1 encoding, Adobe Sabon¹, medium², normal (that is, upright or roman). The last argument is only relevant if fonts with different design sizes are available. It is empty for linearly scaled fonts. ₁₆ \installfont{psbrc8t}{psbr8r,latin}{t1c}{T1}{psb}{m}{sc}{} The small caps font is slightly different. Since we do not have any Type font containing optical small caps we need to ‘fake’ them by scaling the uppercase alphabet and putting the scaled glyphs in the encoding positions of the lowercase alphabet. Fortunately, we do not have to deal with the actual low-level glyph scaling. We simply load t1c.etx, a special encoding vector which will take care of that, using the value of smallcapsscale as the scale factor. ₁₇ ₁₈ \installfont{psbro8t}{psbro8r,latin}{t1}{T1}{psb}{m}{sl}{} \installfont{psbri8t}{psbri8r,latin}{t1}{T1}{psb}{m}{it}{} Since the slanting was already performed on the raw fonts, the virtual slanted and the italic fonts are handled just like the upright ones. Now all regular fonts are done and we can repeat this part (–) for the bold fonts: ₁₉ ₂₀ ₂₁ ₂₂ \installfont{psbb8t}{psbb8r,latin}{t1}{T1}{psb}{b}{n}{} \installfont{psbbc8t}{psbb8r,latin}{t1c}{T1}{psb}{b}{sc}{} \installfont{psbbo8t}{psbbo8r,latin}{t1}{T1}{psb}{b}{sl}{} \installfont{psbbi8t}{psbbi8r,latin}{t1}{T1}{psb}{b}{it}{} After that, we add virtual fonts for ts1 encoding: ₂₃ \installfont{psbr8c}{psbr8r,textcomp}{ts1}{TS1}{psb}{m}{n}{} Like latin.mtx, textcomp.mtx is an auxiliary metric file provided by fontinst. It should always be added when creating ts1 encoded fonts for the textcomp package. The third argument, the encoding vector, refers to ts1.etx in this case. As ts1 encoding is for symbols only and we did set up a shape substitution, we do not need a ts1 encoded small caps font. Slanted and italic fonts are handled like the upright one: Latex does not really care about the name of the font or the foundry. This argument simply defines the code that identifies the font within the nfss. In fact, the more appropriate name would be regular because medium is a moderate bold weight with the nfss code mb. the latinfamily macro revisited ₂₄ ₂₅ \installfont{psbro8c}{psbro8r,textcomp}{ts1}{TS1}{psb}{m}{sl}{} \installfont{psbri8c}{psbri8r,textcomp}{ts1}{TS1}{psb}{m}{it}{} We repeat – for the bold fonts: ₂₆ ₂₇ ₂₈ \installfont{psbb8c}{psbb8r,textcomp}{ts1}{TS1}{psb}{b}{n}{} \installfont{psbbo8c}{psbbo8r,textcomp}{ts1}{TS1}{psb}{b}{sl}{} \installfont{psbbi8c}{psbbi8r,textcomp}{ts1}{TS1}{psb}{b}{it}{} Finally, we close the install environment and terminate: ₂₉ ₃₀ \endinstallfonts \bye ii. The latinfamily macro revisited Note that our fontinst file is not strictly equivalent to the \latinfamily macro but rather stripped down to the most useful parts with respect to typical Postscript fonts. Essentially, we did not create any font description files for the raw Tex Base encoded fonts and we dropped ot1 encoding. If you are curious, you should be able to reconstruct all the steps taken by \latinfamily when looking at the log file created by fontinst while keeping our file in mind. Here are the relevant lines from the log file after running \latinfamily on the basic Sabon set. Only lines beginning with “INFO> run” are relevant in this context as they indicate lower-level macros used by \latinfamily: INFO> INFO> INFO> INFO> INFO> INFO> INFO> INFO> INFO> INFO> INFO> INFO> INFO> INFO> INFO> INFO> INFO> INFO> INFO> INFO> INFO> INFO> INFO> INFO> INFO> INFO> INFO> INFO> INFO> INFO> run run run run run run run run run run run run run run run run run run run run run run run run run run run run run run \transformfont <psbr8r> from <psbr8a> \installrawfont <psbr8r><psbr8r,8r><8r><8r><psb><m><n> \installfont <psbr7t><psbr8r,latin><OT1><OT1><psb><m><n> \installfont <psbr8t><psbr8r,latin><T1><T1><psb><m><n> \installfont <psbr8c><psbr8r,textcomp><TS1><TS1><psb><m><n> \installfont <psbrc7t><psbr8r,latin><OT1c><OT1><psb><m><sc> \installfont <psbrc8t><psbr8r,latin><T1c><T1><psb><m><sc> \transformfont <psbro8r> from <psbr8r> (faking oblique) \installrawfont <psbro8r><psbro8r,8r><8r><8r><psb><m><sl> \installfont <psbro7t><psbro8r,latin><OT1><OT1><psb><m><sl> \installfont <psbro8t><psbro8r,latin><T1><T1><psb><m><sl> \installfont <psbro8c><psbro8r,textcomp><TS1><TS1><psb><m><sl> \transformfont <psbri8r> from <psbri8a> \installrawfont <psbri8r><psbri8r,8r><8r><8r><psb><m><it> \installfont <psbri7t><psbri8r,latin><OT1i><OT1><psb><m><it> \installfont <psbri8t><psbri8r,latin><T1i><T1><psb><m><it> \installfont <psbri8c><psbri8r,textcomp><TS1i><TS1><psb><m><it> \transformfont <psbb8r> from <psbb8a> \installrawfont <psbb8r><psbb8r,8r><8r><8r><psb><b><n> \installfont <psbb7t><psbb8r,latin><OT1><OT1><psb><b><n> \installfont <psbb8t><psbb8r,latin><T1><T1><psb><b><n> \installfont <psbb8c><psbb8r,textcomp><TS1><TS1><psb><b><n> \installfont <psbbc7t><psbb8r,latin><OT1c><OT1><psb><b><sc> \installfont <psbbc8t><psbb8r,latin><T1c><T1><psb><b><sc> \transformfont <psbbo8r> from <psbb8r> (faking oblique) \installrawfont <psbbo8r><psbbo8r,8r><8r><8r><psb><b><sl> \installfont <psbbo7t><psbbo8r,latin><OT1><OT1><psb><b><sl> \installfont <psbbo8t><psbbo8r,latin><T1><T1><psb><b><sl> \installfont <psbbo8c><psbbo8r,textcomp><TS1><TS1><psb><b><sl> \transformfont <psbbi8r> from <psbbi8a> INFO> INFO> INFO> INFO> standard font sets run run run run \installrawfont <psbbi8r><psbbi8r,8r><8r><8r><psb><b><it> \installfont <psbbi7t><psbbi8r,latin><OT1i><OT1><psb><b><it> \installfont <psbbi8t><psbbi8r,latin><T1i><T1><psb><b><it> \installfont <psbbi8c><psbbi8r,textcomp><TS1i><TS1><psb><b><it> This listing is a complete summary of what the \latinfamily macro does in this case, broken down into lower-level commands. The order of the commands differs slightly from our file, because the \transformfont calls are not grouped at the beginning but rather used ‘on demand’ for each shape. This difference is irrelevant from a technical point of view. \transformfont must obviously be called before \installfont or \installrawfont tries to use the transformed fonts, but the exact location does not matter. Since we did not create any font description files for Tex Base encoding, we did not use the \installrawfont macro in our fontinst file. This macro does not build a virtual font but rather sets up a raw, Tex Base encoded font for use under Latex. Here are some crucial points we would have to keep in mind when writing a fontinst file that does exactly what \latinfamily would do: the macro \installrawfont is used in conjunction with 8r.mtx instead of latin.mtx, the encoding file is obviously 8r.etx in this case. Creating ot1 encoded virtual fonts requires latin.mtx and ot1.etx. You will also notice that, in addition to ot1c.etx and t1c.etx, fontinst used encoding files like ot1i.etx and t1i.etx when creating italic virtual fonts. For t1 encoding, t1.etx and t1i.etx are equivalent because t1i.etx reads t1.etx internally, hence we did not use t1i.etx in our fontinst file. The situation is the same with ts1.etx and ts1i.etx. For ot1 encoding, however, the difference is crucial because this encoding differs depending on the shape: the upright shape features a dollar symbol while the italic shape puts an italic pound symbol in the slot of the dollar. This is yet another idiosyncrasy of ot1. ii. Map files revisited With all of that in mind, let’s now go back to the dvips map file from the first tutorial and take another look at it. The meaning of the reencoding and slanting instructions should be much clearer now: psbr8r psbri8r psbb8r psbbi8r psbro8r psbbo8r Sabon-Roman "TeXBase1Encoding ReEncodeFont" Sabon-Italic "TeXBase1Encoding ReEncodeFont" Sabon-Bold "TeXBase1Encoding ReEncodeFont" Sabon-BoldItalic "TeXBase1Encoding ReEncodeFont" Sabon-Roman "0.167 SlantFont TeXBase1Encoding ReEncodeFont" Sabon-Bold "0.167 SlantFont TeXBase1Encoding ReEncodeFont" <8r.enc <8r.enc <8r.enc <8r.enc <8r.enc <8r.enc <psbr8a.pfb <psbri8a.pfb <psbb8a.pfb <psbbi8a.pfb <psbr8a.pfb <psbb8a.pfb Note that the t1 and ts1 encodings are used for the virtual fonts only, they are what Tex will work with. A Postscript file created by dvips, however, does not contain any virtual fonts. They will have been resolved into the raw fonts they are based on by dvips. The raw fonts used to build virtual ones were reencoded to Tex Base encoding during the installation. But this reencoding step affects the font metrics only while the pfb files embedded in the Postscript code still map files revisited use Adobe Standard as their native encoding. Therefore every application reading the final file has to repeat the reencoding step for the font outlines before rendering the fonts. This is what the “ReEncodeFont” instruction is all about. Since we cannot expect every application to know about Tex Base encoding, we embed the respective encoding vector (8r.enc) along with the fonts. Compare the first \transformfont command in the fontinst file to the first line of the map file: \transformfont{psbr8r} {\reencodefont{8r} {\fromafm{psbr8a}}} psbr8r Sabon-Roman "TeXBase1Encoding ReEncodeFont" <8r.enc <psbr8a.pfb The situation is similar for the slanted fonts. The font files embedded in the Postscript file are not slanted, they are upright. Fontinst has performed the slanting for the font metrics only, it does not touch the font outlines at all. The slanting of the glyph outlines will be performed by a Postscript printer or an interpreter like Ghostscript. After resolving the virtual fonts, all that dvips does as far as the raw fonts are concerned is reading the files listed in psb.map and embedding them along with the “SlantFont” instruction. The transformation of the glyph outlines takes place when the Postscript code is rendered on screen or on paper. Both “ReEncodeFont” and “SlantFont” are instructions for the application finally performing the rendering. The value of the “SlantFont” instruction has to correspond to the slant factor used in the fontinst file. As mentioned above, fontinst’s representation of the slant factor is slightly different. The value used in the map file is a real number corresponding to fontinst’s (integer) slant factor divided by . That’s why its precision is fixed to three decimal places. Let’s compare a line of the map file to the corresponding line of the fontinst file: \transformfont{psbro8r}{\slantfont{167}\reencodefont{8r}{\fromafm{psbr8a}}} psbro8r Sabon-Roman "0.167 SlantFont TeXBase1Encoding ReEncodeFont" <8r.enc <psbr8a.pfb Essentially, think of map files as a way of recording all encoding and shape modifications applied to the font metrics during the installation, so that they can be repeated for the font outlines when the final Postscript file is displayed or printed. This information is required for the raw fonts only because all the information concerning the virtual fonts is contained in the virtual font files. When using dvi or pdf as the final output format, the division of labor between the various tools involved differs since pdftex combines the roles of Tex and dvips, while dvi viewers deal with both the virtual fonts and the rendering of the font outlines on screen. The principle, however, remains the same. Therefore pdftex and xdvi require map files as well. tutorial iii optical small caps and hanging figures When choosing a new typeface, bear in mind that optical small caps and hanging figures are not available for all commercial Postscript fonts. If they are available for a certain typeface, they are usually provided separately, either in a sc & osf or in an expert font package. We will deal with the former case in this tutorial, the latter will be discussed in tutorial v. Suppose we have acquired the Sabon sc & osf package to complement our base install of Sabon. This package provides four additional fonts: a regular sc & osf, an italic osf, a bold osf, and a bold italic osf font. These fonts will provide us with hanging figures for all shapes in both weights. Small caps are available for the regular weight only; we will still have to make do with mechanical small caps for the bold weight. Adobe does not include a separate regular-weight upright osf font. The respective figures are to be found in the small caps font instead. Our original file set looks like this: sar_____.afm sar_____.inf sar_____.pfb sar_____.pfm sai_____.afm sai_____.inf sai_____.pfb sai_____.pfm sab_____.afm sab_____.inf sab_____.pfb sab_____.pfm sabi_____.afm sabi_____.inf sabi_____.pfb sabi_____.pfm sarsc___.afm sarsc___.inf sarsc___.pfb sarsc___.pfm saiof___.afm saiof___.inf saiof___.pfb saiof___.pfm sabof___.afm sabof___.inf sabof___.pfb sabof___.pfm sabio___.afm sabio___.inf sabio___.pfb sabio___.pfm After renaming and choosing the required files, we could start off with the following set of files: psbr8a.afm psbr8a.pfb psbri8a.afm psbri8a.pfb psbb8a.afm psbb8a.pfb psbbi8a.afm psbbi8a.pfb psbrc8a.afm psbrc8a.pfb psbrij8a.afm psbrij8a.pfb psbbj8a.afm psbbj8a.pfb psbbij8a.afm psbbij8a.pfb But before we begin, let’s take a closer look at the encoding of the fonts. We will have to deal with some peculiarities characteristic for typical sc & osf sets. Taking a look at psbr8a.afm, you will see that in Adobe Standard encoding, which is the native encoding of all fonts of the Sabon family, the figures are encoded as “zero”, “one”, “two” etc.: C 48 ; WX 556 ; N zero ; B 52 -15 504 705 ; C 49 ; WX 556 ; N one ; B 91 0 449 705 ; C 50 ; WX 556 ; N two ; B 23 0 507 705 ; Compare that to the glyph names of figures in an expert font: C 48 ; WX 511 ; N zerooldstyle ; B 40 -14 480 436 ; C 49 ; WX 328 ; N oneoldstyle ; B 35 -3 294 425 ; C 50 ; WX 440 ; N twooldstyle ; B 44 -3 427 436 ; optical small caps and hanging figures The different glyph names are appropriate because regular Postscript fonts usually come with lining figures by default while expert fonts feature hanging (‘old style’) figures amongst other things. Now let’s take a look at psbrc8a.afm: C 48 ; WX 556 ; N zero ; B 41 -15 515 457 ; C 49 ; WX 556 ; N one ; B 108 0 448 442 ; C 50 ; WX 556 ; N two ; B 72 0 512 457 ; When comparing these glyph names to the actual outlines in psbrc8a.pfb,¹ we would see that this font in fact comes with hanging (‘old style’) figures even though the figures are labeled using the standard names. This is the case with all osf fonts included in the sc & osf package. The reason why this complicates the installation procedure will become clear when we take a look at the Tex side. In t1 encoding, for example, the figures are (essentially) encoded like this by default: \setslot{zero}\endsetslot \setslot{one}\endsetslot \setslot{two}\endsetslot While ts1 encoding (essentially) references them as follows: \setslot{zerooldstyle}\endsetslot \setslot{oneoldstyle}\endsetslot \setslot{twooldstyle}\endsetslot We face a similar problem with small caps. The lowercase letters in psbr8a.afm are labeled like this: C 97 ; WX 500 ; N a ; B 42 -15 465 457 ; C 98 ; WX 556 ; N b ; B 46 -15 514 764 ; C 99 ; WX 444 ; N c ; B 25 -15 419 457 ; Expert fonts, which provide small caps as well but do not need to follow Adobe Standard encoding, encode small caps as follows: C 97 ; WX 457 ; N Asmall ; B -15 -3 467 446 ; C 98 ; WX 481 ; N Bsmall ; B 34 -3 437 437 ; C 99 ; WX 501 ; N Csmall ; B 38 -14 477 448 ; Our font psbrc8a features small caps in place of lowercase letters but it has to follow Adobe Standard encoding: C 97 ; WX 556 ; N a ; B 10 0 546 509 ; C 98 ; WX 556 ; N b ; B 49 0 497 490 ; C 99 ; WX 556 ; N c ; B 49 -12 512 502 ; This is one of the tricky parts when installing typical sc & osf sets. Fontinst’s encoding vectors expect distinct names for distinct glyphs while the metric files of sc & osf fonts do not provide unique names for optical small caps and hanging figures. The other idiosyncrasy of sc & osf sets is specific to a few font foundries (including Adobe) only: there is no separate upright osf font so we have to The correct name of this font is psbrcj8a, but we will stick to the naming proposed in adobe.map here. the fontinst file take the upright hanging figures from the small caps font when building virtual fonts. iii. The fontinst file For fontinst, we use the file introduced in the last tutorial as a template and add the features we need. We will create two Latex font families: psb and psbj. The former will provide lining figures while the latter will use the hanging figures of the osf fonts instead. Both families will incorporate optical small caps where available. In the following, all comments concerning the fontinst file will be restricted to those aspects diverging from our template. Please refer to the previous tutorial for a commentary on the original template. ₁ ₂ ₃ ₄ ₅ ₆ ₇ ₈ ₉ ₁₀ ₁₁ ₁₂ ₁₃ \input fontinst.sty \substitutesilent{bx}{b} \substitutesilent{sc}{n} \setint{smallcapsscale}{800} \setint{slant}{167} \transformfont{psbr8r}{\reencodefont{8r}{\fromafm{psbr8a}}} \transformfont{psbri8r}{\reencodefont{8r}{\fromafm{psbri8a}}} \transformfont{psbb8r}{\reencodefont{8r}{\fromafm{psbb8a}}} \transformfont{psbbi8r}{\reencodefont{8r}{\fromafm{psbbi8a}}} \transformfont{psbrc8r}{\reencodefont{8r}{\fromafm{psbrc8a}}} \transformfont{psbrij8r}{\reencodefont{8r}{\fromafm{psbrij8a}}} \transformfont{psbbj8r}{\reencodefont{8r}{\fromafm{psbbj8a}}} \transformfont{psbbij8r}{\reencodefont{8r}{\fromafm{psbbij8a}}} The first couple of lines of our template remain unchanged (–). After the reencodings inherited form our template, we insert the additional fonts since they need to be reencoded as well (–). ₁₄ ₁₅ ₁₆ ₁₇ \transformfont{psbro8r}{\slantfont{\int{slant}}\reencodefont{8r}{\fromafm{psbr8a}}} \transformfont{psbbo8r}{\slantfont{\int{slant}}\reencodefont{8r}{\fromafm{psbb8a}}} \transformfont{psbrco8r}{\slantfont{\int{slant}}\reencodefont{8r}{\fromafm{psbrc8a}}} \transformfont{psbboj8r}{\slantfont{\int{slant}}\reencodefont{8r}{\fromafm{psbbj8a}}} In addition to that, we need slanted versions of the new fonts. Slanting the small caps font () may seem like a strange thing to do at first since we do not really want to create a slanted small caps shape. But since regular-weight hanging figures are found in the small caps font, we need a slanted version of that as well to provide matching figures for the slanted shape of the psbj family later. ₁₈ ₁₉ ₂₀ ₂₁ ₂₂ \installfonts \installfamily{T1}{psb}{} \installfamily{TS1}{psb}{} \installfont{psbr8t}{psbr8r,latin}{t1}{T1}{psb}{m}{n}{} \installfont{psbrc8t}{psbrc8r,unsetnum,kernoff,psbr8r,kernon,latin}{t1}{T1}{psb}{m}{sc}{} The file psbrc8r provides small caps and hanging figures, but we want psb to be a consistent family using lining figures throughout. Therefore, we read psbrc8r first and clear the encoding positions of all figures using commands from a separate metric file, unsetnum.mtx, right after that. This file is listed further down; all it does is clear all figure slots. When adding psbr8r after- optical small caps and hanging figures wards, the figure slots of the virtual font psbrc8t will be filled using the lining figures found in psbr8r. Note that \installfont does not overwrite any encoding slots when processing additional metric files, it simply fills vacant slots if it finds suitable glyphs in the next font. This allows us to insert the lining figures of psbr8r in the virtual font while the rest of the glyphs including the small caps is taken from psbrc8r. As to the encoding vector, we use the regular encoding file t1.etx in this case since psbrc8r uses standard glyph names for the small caps so that t1c.etx would be inappropriate. There is one more thing we have to take into account: adding a metric file to the \installfont command also adds kerning information provided by that file. The problem here is that some of the glyph names in our raw fonts are not unique since the small caps in psbrc8r are encoded and labeled just like the lowercase letters in psbr8r. The kerning data in psbr8r, however, refers to ordinary lowercase letters. Under certain circumstances, misleading kerning data might thus be included in the virtual small caps font psbrc8t. To avoid that, we add two auxiliary files provided by fontinst, kernon.mtx and kernoff.mtx, which enable and disable fontinst’s \setkern command. When added to the input file list as shown above, this will effectively ignore the kerning data in psbr8r. ₂₃ ₂₄ ₂₅ ₂₆ \installfont{psbro8t}{psbro8r,latin}{t1}{T1}{psb}{m}{sl}{} \installfont{psbri8t}{psbri8r,latin}{t1}{T1}{psb}{m}{it}{} \installfont{psbb8t}{psbb8r,latin}{t1}{T1}{psb}{b}{n}{} \installfont{psbbc8t}{psbb8r,latin}{t1c}{T1}{psb}{b}{sc}{} Optical small caps are available for the regular weight only. For the bold series we have to make do with ‘faked’ small caps, so we use the encoding file t1c.etx here (). The remaining lines for t1 encoding do not require any adjustments: ₂₇ ₂₈ \installfont{psbbo8t}{psbbo8r,latin}{t1}{T1}{psb}{b}{sl}{} \installfont{psbbi8t}{psbbi8r,latin}{t1}{T1}{psb}{b}{it}{} That’s it for t1 encoding. While ts1 is primarily intended for symbols complementing t1, it includes hanging figures as well. Since the only way to use them is loading the textcomp package and typing rather cumbersome text commands like \textzerooldstyle it is not very useful to have them in ts1. Our psbj family will make them the default figures anyway so that they are readily available. But we are being picky. We have put down some hard, cold cash for the Sabon sc & osf package and we want to make the most of it. Let’s see how we can put hanging figures in TS1/psb as well. As mentioned above, the problem here is that the osf fonts use regular glyph names for the hanging figures while fontinst’s ts1 encoding vector references them by oldstyle names. Hence we have to turn regular figures – which are in fact hanging figures not encoded as such – into hanging figures. To do that, we need an additional resource provided by fontinst, the metric file resetosf.mtx. With this in mind, let’s add a section for ts1 encoding to our fontinst file: the fontinst file ₂₉ ₃₀ \installfont{psbr8c}{psbr8r,unsetnum,kernoff,psbrc8r,kernon,resetosf,textcomp}{ts1}% {TS1}{psb}{m}{n}{} For the upright fonts, the hanging figures are in fact in the small caps font which complicates the installation even more. But we have dealt with this problem before and the first steps should therefore look familiar: we read psbr8r, clear the standard figures using unsetnum, and read psbrc8r. Since we are dealing with ts1 here, one additional step is required. We add resetosf.mtx to the input file list of this \installfont command to rename the figures found in psbrc8r (the figures in psbr8r have already been discarded by unsetnum). resetosf will rename the figures to “zerooldstyle” and so on. We also add kernon.mtx and kernoff.mtx to protect the kerning data. Typing \textthreeoldstyle in a Latex file when the textcomp package has been loaded would now typeset a proper hanging three. ₃₁ ₃₂ \installfont{psbro8c}{psbro8r,unsetnum,kernoff,psbrco8r,kernon,resetosf,textcomp}{ts1}% {TS1}{psb}{m}{sl}{} The slanted shape is handled in a similar way because it relies on the figures in the small caps font as well. For the remaining virtual fonts, the installation is simpler. Since the osf fonts already provide hanging figures, all we need to do is rename them for ts1 encoding by adding resetosf.mtx: ₃₃ ₃₄ ₃₅ ₃₆ ₃₇ \installfont{psbri8c}{psbrij8r,resetosf,textcomp}{ts1}{TS1}{psb}{m}{it}{} \installfont{psbb8c}{psbbj8r,resetosf,textcomp}{ts1}{TS1}{psb}{b}{n}{} \installfont{psbbo8c}{psbboj8r,resetosf,textcomp}{ts1}{TS1}{psb}{b}{sl}{} \installfont{psbbi8c}{psbbij8r,resetosf,textcomp}{ts1}{TS1}{psb}{b}{it}{} \endinstallfonts This is the first half of our fontinst file which is dealing with the psb family. Compared to the template introduced in the previous tutorial it adds optical small caps to t1 and hanging figures to ts1 encoding. We will create an additional font family called psbj which we want to use hanging figures throughout. ₃₈ ₃₉ ₄₀ \installfonts \installfamily{T1}{psbj}{} \installfont{psbrj8t}{psbr8r,unsetnum,kernoff,psbrc8r,kernon,latin}{t1}{T1}{psbj}{m}{n}{} If we want the psbj family to incorporate hanging figures, we need to exchange the figure set of the virtual font like we did when creating the regular-weight small caps font above. But this time, we do it the other way around: we read psbr8r first, clear the encoding slots of all figures, and add psbrc8r afterwards to fill the figure slots using the hanging figures found in psbrc8r. Only the figures found in psbrc8r will be included in the virtual font as all other encoding slots were already filled by psbr8r. Again, care needs to be taken with the kerning data here. The kerning information in psbrc8r refers to small caps although the glyphs are encoded as ordinary lowercase letters. Hence we need to add kernon.mtx and kernoff.mtx to discard the kerning data in psbrc8r. ₄₁ optical small caps and hanging figures \installfont{psbrcj8t}{psbrc8r,latin}{t1}{T1}{psbj}{m}{sc}{} The small caps font does not require any modifications this time. psbrc8r already contains hanging figures so we can use it as-is. Since psbrc8r uses standard glyph names for small caps and hanging figures, we use the regular encoding vector t1.etx. ₄₂ \installfont{psbroj8t}{psbro8r,unsetnum,kernoff,psbrco8r,kernon,latin}{t1}{T1}{psbj}{m}{sl}{} The slanted shape is straightforward to the upright one: we read psbro8r, clear the figures, and add the slanted hanging figures provided by psbrco8r. We also toggle fontinst’s \setkern macro by adding kernon and kernoff. ₄₃ \installfont{psbrij8t}{psbrij8r,latin}{t1}{T1}{psbj}{m}{it}{} Building the italic virtual font is trivial because we have an italic osf font with easily accessible hanging figures in the standard slots. Since there are osf fonts for all bold shapes as well, they do not require any special modifications either. We simply use the appropriate osf fonts instead of the fonts from the basic Sabon package: ₄₄ ₄₅ \installfont{psbbj8t}{psbbj8r,latin}{t1}{T1}{psbj}{b}{n}{} \installfont{psbbcj8t}{psbbj8r,latin}{t1c}{T1}{psbj}{b}{sc}{} We create ‘faked’ bold small caps using the special t1c.etx encoding file because there is no bold small caps font. ₄₆ ₄₇ ₄₈ ₄₉ \installfont{psbboj8t}{psbboj8r,latin}{t1}{T1}{psbj}{b}{sl}{} \installfont{psbbij8t}{psbbij8r,latin}{t1}{T1}{psbj}{b}{it}{} \endinstallfonts \bye This is the complete fontinst file for the nfss font families psb and psbj. It requires the metric file unsetnum.mtx which is part of the fontinst package. Metric files always begin with \relax and enclose all commands in a metrics environment. Essentially, unsetnum.mtx consists of several \unsetglyph commands which clear all figure slots: \relax \metrics \unsetglyph{zero} \unsetglyph{one} \unsetglyph{two} \unsetglyph{three} \unsetglyph{four} \unsetglyph{five} \unsetglyph{six} \unsetglyph{seven} \unsetglyph{eight} \unsetglyph{nine} \endmetrics You probably will have noticed that we did not create ts1 encoded fonts for the psbj family. The reason is quite simple: since ts1 is not a regular text encoding TS1/psbj would be identical to TS1/psb anyway. To ensure that the textcomp the map file package works for the psbj family nonetheless, we need to set up some substitutions. Since fontinst does not support family substitutions we cannot create them automatically. We have to write a font definition file manually. The file ts1psbj.fd should like this: \ProvidesFile{ts1psbj.fd} \DeclareFontFamily{TS1}{psbj}{} \DeclareFontShape{TS1}{psbj}{m} {n} {<-> \DeclareFontShape{TS1}{psbj}{m} {sc}{<-> \DeclareFontShape{TS1}{psbj}{m} {sl}{<-> \DeclareFontShape{TS1}{psbj}{m} {it}{<-> \DeclareFontShape{TS1}{psbj}{b} {n} {<-> \DeclareFontShape{TS1}{psbj}{b} {sc}{<-> \DeclareFontShape{TS1}{psbj}{b} {sl}{<-> \DeclareFontShape{TS1}{psbj}{b} {it}{<-> \DeclareFontShape{TS1}{psbj}{bx}{n} {<-> \DeclareFontShape{TS1}{psbj}{bx}{sc}{<-> \DeclareFontShape{TS1}{psbj}{bx}{sl}{<-> \DeclareFontShape{TS1}{psbj}{bx}{it}{<-> \endinput ssub ssub ssub ssub ssub ssub ssub ssub ssub ssub ssub ssub * * * * * * * * * * * * psb/m/n} {} psb/m/sc}{} psb/m/sl}{} psb/m/it}{} psb/b/n} {} psb/b/sc}{} psb/b/sl}{} psb/b/it}{} psb/b/n} {} psb/b/sc}{} psb/b/sl}{} psb/b/it}{} The syntax of font definition files is explained in the Latex font selection guide and will not be discussed in detail here.¹ The main point of this file should be evident: for all series and shapes, we substitute TS1/psb for TS1/psbj because we did not create virtual fonts for TS1/psbj. The ssub directive is a silent substitution. For details, see chapter of the font selection guide, section . in particular. With this additional font definition file we now have a fully functional setup for psb and psbj in t1 and ts1 encoding. iii. The map file After running the fontinst file through Tex and installing the new fonts, we still need to update the map file psb.map. We add the following lines for the additional fonts found in the sc & osf package: psbrc8r psbrij8r psbbj8r psbbij8r Sabon-RomanSC Sabon-ItalicOsF Sabon-BoldOsF Sabon-BoldItalicOsF "TeXBase1Encoding "TeXBase1Encoding "TeXBase1Encoding "TeXBase1Encoding ReEncodeFont" ReEncodeFont" ReEncodeFont" ReEncodeFont" <8r.enc <8r.enc <8r.enc <8r.enc <psbrc8a.pfb <psbrij8a.pfb <psbbj8a.pfb <psbbij8a.pfb In addition to this, we need slanted versions of the new fonts. For the bold osf font this is obvious. Since regular-weight hanging figures are found in the small caps font, we need a slanted version of this font as well to provide matching figures for the slanted shape of the psbj family. This leads us to the slanted small caps variant: psbrco8r Sabon-RomanSC "0.167 SlantFont TeXBase1Encoding ReEncodeFont" <8r.enc <psbrc8a.pfb psbboj8r Sabon-BoldOsF "0.167 SlantFont TeXBase1Encoding ReEncodeFont" <8r.enc <psbbj8a.pfb This is the complete map file: psbr8r Sabon-Roman "TeXBase1Encoding ReEncodeFont" <8r.enc <psbr8a.pfb http://www.ctan.org/tex-archive/macros/latex/doc/fntguide.pdf psbri8r psbb8r psbbi8r psbrc8r psbrij8r psbbj8r psbbij8r psbro8r psbbo8r psbrco8r psbboj8r optical small caps and hanging figures Sabon-Italic "TeXBase1Encoding ReEncodeFont" Sabon-Bold "TeXBase1Encoding ReEncodeFont" Sabon-BoldItalic "TeXBase1Encoding ReEncodeFont" Sabon-RomanSC "TeXBase1Encoding ReEncodeFont" Sabon-ItalicOsF "TeXBase1Encoding ReEncodeFont" Sabon-BoldOsF "TeXBase1Encoding ReEncodeFont" Sabon-BoldItalicOsF "TeXBase1Encoding ReEncodeFont" Sabon-Roman "0.167 SlantFont TeXBase1Encoding ReEncodeFont" Sabon-Bold "0.167 SlantFont TeXBase1Encoding ReEncodeFont" Sabon-RomanSC "0.167 SlantFont TeXBase1Encoding ReEncodeFont" Sabon-BoldOsF "0.167 SlantFont TeXBase1Encoding ReEncodeFont" <8r.enc <8r.enc <8r.enc <8r.enc <8r.enc <8r.enc <8r.enc <8r.enc <8r.enc <8r.enc <8r.enc <psbri8a.pfb <psbb8a.pfb <psbbi8a.pfb <psbrc8a.pfb <psbrij8a.pfb <psbbj8a.pfb <psbbij8a.pfb <psbr8a.pfb <psbb8a.pfb <psbrc8a.pfb <psbbj8a.pfb iii. The style file With two Sabon families at hand, we might want to update sabon.sty to make them readily available. We add the two options oldstyle and lining for the respective font families (–) and make hanging figures the default (). Loading the package with the option oldstyle or without any option will set up psbj as the default roman family while using the lining option will make it select psb instead. It might also be handy to have dedicated text commands to switch between the two figure sets. Since such commands will need to work with all font families anyway, let’s put them in a stand-alone style file, nfssext.sty, and load that in sabon.sty (): ₁ ₂ ₃ ₄ ₅ ₆ ₇ ₈ ₉ ₁₀ \NeedsTeXFormat{LaTeX2e} \ProvidesPackage{sabon}[2002/05/12 v1.1 Adobe Sabon] \RequirePackage[T1]{fontenc} \RequirePackage{textcomp} \RequirePackage{nfssext} \DeclareOption{oldstyle}{\renewcommand*{\rmdefault}{psbj}} \DeclareOption{lining}{\renewcommand*{\rmdefault}{psb}} \ExecuteOptions{oldstyle} \ProcessOptions \endinput The style file nfssext.sty might look like this: ₁ ₂ ₃ ₄ ₅ ₆ ₇ ₈ ₉ ₁₀ ₁₁ ₁₂ ₁₃ ₁₄ ₁₅ ₁₆ ₁₇ \NeedsTeXFormat{LaTeX2e} \ProvidesPackage{nfssext}[2003/03/14 v1.2 Experimental NFSS Extensions] \newcommand*{\exfs@tempa}{} \newcommand*{\exfs@tempb}{} \newcommand*{\exfs@try@family}[1]{% \let\exfs@tempa\relax \begingroup \fontfamily{#1}\try@load@fontshape \expandafter\ifx\csname\curr@fontshape\endcsname\relax \PackageWarning{nfssext}{% Font family ’\f@encoding/#1’ not available\MessageBreak Ignoring font switch}% \else \gdef\exfs@tempa{\fontfamily{#1}\selectfont}% \fi \endgroup \exfs@tempa} fonts supplied with tex This is an outline for a command that makes use of a few nfss internals to switch to a specific family if and only if it is available. Essentially, we try to load the requested family in the current encoding (). If this succeeds, we set up a macro () to be expanded later that will actually switch font families; if not, we print a warning message (–) and do nothing. ₁₈ ₁₉ ₂₀ ₂₁ ₂₂ ₂₃ ₂₄ \def\exfs@get@base#1#2#3#4\@nil{#1#2#3}% \DeclareRobustCommand{\lnstyle}{% \not@math@alphabet\lnstyle\relax \exfs@try@family{\expandafter\exfs@get@base\f@family\@nil}} \DeclareRobustCommand{\osstyle}{% \not@math@alphabet\osstyle\relax \exfs@try@family{\expandafter\exfs@get@base\f@family\@nil j}} The macros \lnstyle and \osstyle switch to lining and hanging (‘old style’) figures respectively. They are like \bfseries or \itshape. Internally, they will take the first three letters of the current nfss font family name (), append a letter to it where appropriate (none for lining figures, j for hanging figures), and call \exfs@try@family. Even though this mechanism is rather simpleminded, it should work just fine for all fonts set up properly according to the Fontname scheme. ₂₅ ₂₆ ₂₇ \DeclareTextFontCommand{\textln}{\lnstyle} \DeclareTextFontCommand{\textos}{\osstyle} \endinput The corresponding text commands, \textln and \textos, take one mandatory argument and can be employed like \textbf or \textit. iii. Fonts supplied with Tex The standard Postscript fonts supplied with most Tex distributions do not include optical small caps, nor do they include hanging figures. The default typeface of both plain Tex and Latex however, Computer Modern Roman, does include such glyphs. Unfortunately, the design of the small caps is flawed. Their height corresponds to what you usually end up with when creating mechanical small caps. Being too tall, these small caps hardly blend in with lowercase text at all, even though their color matches that of the lowercase alphabet. Hanging figures are included in Computer Modern as well, but they are hidden in some of the math fonts. The only way to use them with the default setup is rather cumbersome: the command \oldstylenums{} will take the numbers to be typeset as hanging figures as an argument. There is a set of virtual fonts for the European Computer Modern fonts which make these hanging figures the default in Tex’s text mode so that they are readily available. These fonts are provided in the eco package available from ctan.¹ Please refer to the package documentation for installation and usage instructions. Since this package essentially consists of a set of virtual fonts, it should also work in conjunction with the cm-super fonts mentioned in section i.. http://www.ctan.org/tex-archive/fonts/eco/ tutorial iv the euro currency symbol While the euro symbol has been supported by Latex for quite some time – it is included in ts1 encoding and the textcomp package provides the corresponding text command \texteuro – the real problem is getting fonts that provide this glyph and setting them up accordingly. You might want to read this tutorial even if you are not affected by this particular issue, because it deals with some generic encoding problems that you may encounter in a different context as well. There is a bit more to updating a font than drawing a euro symbol and putting it in the font. It has to be properly encoded as well. Since the euro symbol is not defined in Adobe Standard encoding, it can normally only be included as an uncoded glyph in regular Postscript text fonts. An uncoded glyph is only accessible after reencoding and assigning it to a valid encoding position. Some font foundries decided to follow this path in order to conform to Adobe Standard encoding. Others preferred to drop some supposedly rarely used glyph and put the euro symbol in its encoding position instead. While this violates the encoding standard, it can be more convenient under certain circumstances. In the following, we will explore ways to handle both situations cleanly. Finally, we will learn how to take the euro symbol from an external font if none is provided by the text font itself. iv. Uncoded euro symbol While Adobe used to be rather inattentive to the problem at first, the foundry is finally updating their typeface portfolio by gradually adding matching euro symbols to their fonts – a process that has been promoted by the introduction of the Opentype font format. Recent releases of Adobe Garamond, for example, already ship with matching euro symbols. A quick look at the afm file shows that in this case, the foundry decided to handle the encoding problem in a strict manner. The new symbol is correctly labeled as “Euro” but it is not encoded by default as that would violate Adobe Standard encoding. An encoding slot number of -1 tells us that the glyph was not assigned to any encoding position: C -1 ; WX 572 ; N Euro ; B -13 -14 542 640 ; In order to access it, we need to reencode the font and assign the glyph “Euro” to a valid encoding position. The standard procedure we have been pursuing in this guide involves reencoding all fonts to Tex Base encoding anyway precisely the euro currency symbol because of cases like this one. By reencoding all base fonts to Tex Base encoding, we ensure that all glyphs our virtual fonts rely on are properly encoded in the raw fonts we use as their basis. But we have to keep in mind that older versions of Tex Base encoding did not include the euro symbol either. The previous release of fontinst, version ., came with an encoding vector that is not suitable for our situation for this very reason. You can verify that by running the file 8r.etx through Latex to create a documented listing of the encoding vector as follows: latex 8r.etx Now take a look at the dvi file 8r.dvi: if the version number of this file is . (dated June , ), it does not include the euro symbol. The best way to solve this problem is updating fontinst to the latest release which ships with an updated encoding vector.¹ After that, you can install the fonts as usual. Note, however, that you will need a matching version of 8r.enc as well, so that dvips and pdftex can use the symbol. This file is distributed separately and not included in the fontinst release.² In the following, we will create our own updated versions of 8r.etx and 8r.enc. This is merely intended as an illustrating of how to deal with a typical encoding problem. If you simply want to get access to an uncoded euro glyph, upgrade to fontinst ., update 8r.enc, and install the fonts as usual. You might want to skip the next paragraphs and continue reading with section iv. on page in this case. If you want to learn more about fontinst’s encoding vectors, read on. First, we create a copy of the file 8r.etx as provided by fontinst .. The updated encoding vector of the new fontinst release puts the euro symbol in slot . We will do the same to ensure that our vector remains compatible with the official distribution. Let’s take a look at the relevant part of 8r.etx: ₆₂₄ ₆₂₅ ₆₂₆ ₆₂₇ ₆₂₈ ₆₂₉ ₆₃₀ ₆₃₁ ₆₃₂ ₆₃₃ ₆₃₄ ₆₃₅ ₆₃₆ \setslot{asciitilde} \comment{The ASCII tilde ‘\textasciitilde’. This is included for compatibility with typewriter fonts used for computer listings.} \endsetslot \comment{The following 32 slots, 128--159, are based on Windows ANSI.} \nextslot{130} \setslot{quotesinglbase} \comment{A German single quote mark ‘\quotesinglbase’ similar to a comma, but with different sidebearings.} \endsetslot Slot defines “asciitilde”, slots – are empty, and slot defines the lower single quotation mark “quotesinglbase”. The slot number is automatically incremented by one for each \setslot command, but if some slots are left http://www.ctan.org/tex-archive/fonts/utilities/fontinst/ http://www.ctan.org/tex-archive/info/fontname/8r.enc uncoded euro symbol empty the slot has to be set explicitly with a \nextslot command. This is done for “quotesinglbase” above. We want to add the euro symbol in slot , so we add the following: ₆₃₀ \comment{The following 32 slots, 128--159, are based on Windows ANSI.} \nextslot{128} \setslot{Euro} \comment{The euro currency symbol ‘\texteuro’.} \endsetslot ₆₃₂ ₆₃₃ ₆₃₄ ₆₃₅ ₆₃₆ \nextslot{130} \setslot{quotesinglbase} \comment{A German single quote mark ‘\quotesinglbase’ similar to a comma, but with different sidebearings.} \endsetslot Since slot is empty and the last slot defined was we need to set the slot explicitly by adding \nextslot before actually defining the encoding position. When defining the slot, keep in mind that the glyph names are case sensitive; “euro” is not equivalent to “Euro”. We also add an explanation so that the commented listing of the encoding vector provides a meaningful explanation. This is all we need. It might be a good idea to update \title and \date at the beginning of the file to avoid any confusion. Finally, we install this file in the branch tex/fontinst/base/ of the local Tex tree. If our system has been set up as recommended in the first tutorial, fontinst will now pick up our updated encoding vector. Now we need a version of 8r.enc that matches our 8r.etx. This is what the relevant part of 8r.enc looks like: ₇₁ ₇₂ ₇₃ ₇₄ ₇₅ ₇₆ ₇₇ ₇₈ ₇₉ % 0x70 /p /q /r /s /t /u /v /w /x /y /z /braceleft /bar /braceright /asciitilde /.notdef % 0x80 /.notdef /.notdef /quotesinglbase /florin /quotedblbase /ellipsis /dagger /daggerdbl /circumflex /perthousand /Scaron /guilsinglleft /OE /.notdef /.notdef /.notdef Note that in Postscript encoding vectors empty slots are marked “.notdef ”. We can spot the same pattern: “asciitilde” in slot is followed by three empty slots (–) and finally “quotesinglbase” in slot . We count the slots and add “Euro” in slot (indicated in hexadecimal notation as ‘0x80’ here): ₇₁ ₇₂ ₇₃ ₇₄ ₇₅ ₇₆ ₇₇ ₇₈ ₇₉ % 0x70 /p /q /r /s /t /u /v /w /x /y /z /braceleft /bar /braceright /asciitilde /.notdef % 0x80 /Euro /.notdef /quotesinglbase /florin /quotedblbase /ellipsis /dagger /daggerdbl /circumflex /perthousand /Scaron /guilsinglleft /OE /.notdef /.notdef /.notdef the euro currency symbol After that, we move our modified 8r.enc to dvips/base/ in the local Tex tree and update the kpathsea file databases by running texhash. Our system is now ready for the euro. Since reencoding all text fonts to Tex Base encoding is part of our regular installation routine anyway, the fontinst file does not need any adjustments. The reencoding is performed as usual: \transformfont{padr8r}{\reencodefont{8r}{\fromafm{padr8a}}} \transformfont{padri8r}{\reencodefont{8r}{\fromafm{padri8a}}} \transformfont{padb8r}{\reencodefont{8r}{\fromafm{padb8a}}} \transformfont{padbi8r}{\reencodefont{8r}{\fromafm{padbi8a}}} The new 8r encoding vector will ensure that the euro symbol is available in all Tex Base encoded raw fonts, so we can simply use them to build ts1 encoded virtual fonts: \installfont{padr8c}{padr8r,textcomp}{ts1}{TS1}{pad}{m}{n}{} \installfont{padri8c}{padri8r,textcomp}{ts1}{TS1}{pad}{m}{it}{} \installfont{padb8c}{padb8r,textcomp}{ts1}{TS1}{pad}{b}{n}{} \installfont{padbi8c}{padbi8r,textcomp}{ts1}{TS1}{pad}{b}{it}{} After installing the fonts and creating a map file as usual, the euro symbol will be available as \texteuro when loading the textcomp package. iv. Euro symbol encoded as currency symbol Bitstream was one of the first type foundries to update their font collection and add a matching euro symbol to all fonts. When looking at the fonts, the first thing we notice is that the foundry decided to encode the euro symbol as the generic currency symbol ¤. The reasoning behind this is that you can access the symbol without reencoding the font. Since the generic currency symbol is hardly ever used anyway, it is no surprise that this particular glyph was dropped. We could install Bitstream fonts as usual and use \textcurrency instead of \texteuro to access the euro symbol, but that would imply keeping the idiosyncrasies of a given font in mind while writing, and modifying the text when changing the typeface – not quite what one would expect when working with a high-level markup language like Latex. When taking a closer look at the pfb and afm files, we can see that the fonts in fact contain two euro symbols. One of them is uncoded (slot -1) and labeled as “Euro”: C -1 ; WX 556 ; N Euro ; B 6 -12 513 697 ; The other one is found in encoding slot , that is, it is encoded as the currency symbol and named accordingly. To verify that, we have to take a look at the pfb files in a font viewer or a font editor. Since the euro symbol is both encoded and labeled just like a currency symbol, there is no way to tell the difference by looking at the afm file only: C 168 ; WX 556 ; N currency ; B 6 -12 513 697 ; euro symbol taken from external symbol font If we want a readily available euro symbol (and one that is available as such), we have two options in this case. Either we reencode the font and assign the uncoded euro symbol to a valid encoding position or we use the already encoded euro symbol found in the slot of the currency symbol and move it to the proper encoding position. The former case was already discussed above, let’s now investigate the latter. The best way to move the glyph to a different slot is resetting it when creating the ts1 encoded virtual font. We use an approach that is functionally equivalent to the way we have reset the hanging figures in the previous tutorial. The appropriate low-level commands that set the glyph go in a dedicated metric file, reseteur.mtx, which we have to create ourselves: ₁ ₂ ₃ ₄ ₅ ₆ ₇ ₈ \relax \metrics \resetglyph{euro} \glyph{currency}{1000} \endsetglyph \setleftrightkerning{euro}{currency}{1000} \unsetglyph{currency} \endmetrics We reset the glyph “euro” based on the glyph “currency” scaled to its full size (–), adjust the kerning on either side of “euro” to match that of “currency” () and finally unset the glyph “currency” () because there is no such thing as a currency symbol in this font. In the fontinst file, we include the metric file reseteur.mtx in the file list of the respective \installfont command right after the metrics for this font have been read. This might look as follows: \installfont{bsbr8c}{bsbr8r,reseteur,textcomp}{ts1}{TS1}{bsb}{m}{n}{} We only need to do this for the ts1 encoded virtual fonts as t1 does not include the euro symbol. Apart from that, the fontinst file does not need any adjustments. iv. Euro symbol taken from external symbol font Let’s go back to our install of Sabon to see if we can get euro support for Sabon as well. The font itself does not include a euro symbol at all so all we can do is take it from an external font. While some other font foundries at least provide special symbol fonts containing a collection of matching euro glyphs for all typefaces that have not been updated yet, Adobe merely offers a set of generic euro fonts containing glyphs that do not really match any typeface at all.¹ From a typographical perspective, this is a desperate workaround. However, lacking a matching euro symbol, we do not have a choice. The Adobe Euro fonts come in three flavors: serif (Euro Serif), sans serif (Euro Sans), and condensed sans serif (Euro Mono, intended for use with monospaced fonts). Each family consists of regular, regular italic, bold, and bold italic fonts. Instead of using a serif euro http://www.adobe.com/type/eurofont.html the euro currency symbol that does not match our typeface we will use the sans serif design which has a more generic look that adheres to the shape of the reference design of the European Commission. Granted, this one does not match our typeface either – but at least it does not pretend to do so. Now that we are aware of the most common encoding pitfalls, we inspect the afm files first before proceeding with the installation. The Euro fonts put the euro symbol in all encoding positions. When looking at the afm file, we can see that the fonts use a font specific encoding and that the glyphs are labeled as “Euro” with a consecutive number appended to the name: C C C C C C C C C 33 34 35 36 37 38 39 40 41 ; ; ; ; ; ; ; ; ; WX WX WX WX WX WX WX WX WX 750 750 750 750 750 750 750 750 750 ; ; ; ; ; ; ; ; ; N N N N N N N N N Euro.001 Euro.002 Euro.003 Euro.004 Euro.005 Euro.006 Euro.007 Euro.008 Euro.009 ; ; ; ; ; ; ; ; ; B B B B B B B B B 10 10 10 10 10 10 10 10 10 -12 -12 -12 -12 -12 -12 -12 -12 -12 709 709 709 709 709 709 709 709 709 685 685 685 685 685 685 685 685 685 ; ; ; ; ; ; ; ; ; On further inspection, we find two additional glyphs. There is a glyph labeled as “Euro” in slot as well as an uncoded glyph labeled “uni20ac”: ; B 10 -12 709 685 ; C 128 ; WX 750 ; N Euro C -1 ; WX 750 ; N uni20AC ; B 10 -12 709 685 ; The number 20ac is in hexadecimal. This is the encoding position of the euro symbol in Unicode encoding, hence the string “uni20ac”. If nothing else, one thing is for sure: someone was trying to make sure that every application out there would be able to access that euro symbol. Fortunately, this covers our situation as well. We need a glyph that is both properly encoded and labeled as “Euro”; the encoding position does not matter since we will include it in a virtual font using a different encoding anyway. The one in slot fits our needs perfectly. In practice, this means that we can simply add the file name to the input file list of an \installfont command when creating ts1 encoded virtual fonts with fontinst. This time no reencoding or renaming is required. The relevant section of our fontinst file for Sabon would look as follows: \installfont{psbr8c}{psbr8r,zpeurs,textcomp}{ts1}{TS1}{psb}{m}{n}{} \installfont{psbro8c}{psbro8r,zpeuros,textcomp}{ts1}{TS1}{psb}{m}{sl}{} \installfont{psbri8c}{psbri8r,zpeuris,textcomp}{ts1}{TS1}{psb}{m}{it}{} \installfont{psbb8c}{psbb8r,zpeubs,textcomp}{ts1}{TS1}{psb}{b}{n}{} \installfont{psbbo8c}{psbbo8r,zpeubos,textcomp}{ts1}{TS1}{psb}{b}{sl}{} \installfont{psbbi8c}{psbbi8r,zpeubis,textcomp}{ts1}{TS1}{psb}{b}{it}{} Since the Adobe Euro fonts are non-standard, their naming is non-standard as well. We will discuss that in more detail below. Before running this file, we need to copy the properly named afm files of the Adobe Euro fonts to the working directory so that fontinst will find them. For the euro glyph to be available later, the Euro fonts need to be installed in the usual way so that Tex as well as pdftex, dvips, and xdvi are able to use them. Because the above fontinst file depends euro symbol taken from external symbol font on this installation, it makes sense to do it first. Since the installation of symbol fonts differs from that of regular text fonts, we will take a look at the required steps. The Euro font package¹ will provide us with the following set of files: _1______.afm _1______.inf _1______.pfb _1______.pfm _1i_____.afm _1i_____.inf _1i_____.pfb _1i_____.pfm _1b_____.afm _1b_____.inf _1b_____.pfb _1b_____.pfm _1bi____.afm _1bi____.inf _1bi____.pfb _1bi____.pfm _2______.afm _2______.inf _2______.pfb _2______.pfm _2i_____.afm _2i_____.inf _2i_____.pfb _2i_____.pfm _2b_____.afm _2b_____.inf _2b_____.pfb _2b_____.pfm _2bi____.afm _2bi____.inf _2bi____.pfb _2bi____.pfm _3______.afm _3______.inf _3______.pfb _3______.pfm _3i_____.afm _3i_____.inf _3i_____.pfb _3i_____.pfm _3b_____.afm _3b_____.inf _3b_____.pfb _3b_____.pfm _3bi____.afm _3bi____.inf _3bi____.pfb _3bi____.pfm The Fontname map file adobe.map defines the following names for these fonts: zpeur zpeub zpeubi zpeuri zpeurs zpeubs zpeubis zpeuris zpeurt zpeubt zpeubit zpeurit EuroSerif-Regular EuroSerif-Bold EuroSerif-BoldItalic EuroSerif-Italic EuroSans-Regular EuroSans-Bold EuroSans-BoldItalic EuroSans-Italic EuroMono-Regular EuroMono-Bold EuroMono-BoldItalic EuroMono-Italic A A A A A A A A A A A A 916 916 916 916 916 916 916 916 916 916 916 916 _3______ _3b_____ _3bi____ _3i_____ _1______ _1b_____ _1bi____ _1i_____ _2______ _2b_____ _2bi____ _2i_____ We select all afm and all pfb files, rename them, and start off with the following file set: zpeur.afm zpeur.pfb zpeurs.afm zpeurs.pfb zpeurt.afm zpeurt.pfb zpeuri.afm zpeuri.pfb zpeuris.afm zpeuris.pfb zpeurit.afm zpeurit.pfb zpeub.afm zpeub.pfb zpeubs.afm zpeubs.pfb zpeubt.afm zpeubt.pfb zpeubi.afm zpeubi.pfb zpeubis.afm zpeubis.pfb zpeubit.afm zpeubit.pfb As we do not really need fontinst when dealing with symbol fonts, we simply run afm2tfm on each afm file to create a corresponding tfm file for Tex: afm2tfm afm2tfm afm2tfm afm2tfm afm2tfm afm2tfm afm2tfm afm2tfm afm2tfm afm2tfm zpeur.afm zpeuri.afm zpeub.afm zpeubi.afm zpeurs.afm zpeuris.afm zpeubs.afm zpeubis.afm zpeurt.afm zpeurit.afm zpeur.tfm zpeuri.tfm zpeub.tfm zpeubi.tfm zpeurs.tfm zpeuris.tfm zpeubs.tfm zpeubis.tfm zpeurt.tfm zpeurit.tfm http://www.adobe.com/type/eurofont.html the euro currency symbol afm2tfm zpeubt.afm zpeubt.tfm afm2tfm zpeubit.afm zpeubit.tfm We also need slanted versions of all upright fonts. As slant factor, we use the generic value .: afm2tfm afm2tfm afm2tfm afm2tfm afm2tfm afm2tfm zpeur.afm zpeub.afm zpeurs.afm zpeubs.afm zpeurt.afm zpeubt.afm -s -s -s -s -s -s 0.167 0.167 0.167 0.167 0.167 0.167 zpeuro.tfm zpeubo.tfm zpeuros.tfm zpeubos.tfm zpeurot.tfm zpeubot.tfm In addition to that, we need a map file for dvips. Map files for symbol fonts are simpler than those for text fonts because the fonts are not reencoded. Therefore, there will be no “ReEncodeFont” instruction and no encoding vector. The first lines of peu.map look like this: zpeur zpeuri zpeub zpeubi zpeurs zpeuris zpeubs zpeubis zpeurt zpeurit zpeubt zpeubit EuroSerif-Regular EuroSerif-Italic EuroSerif-Bold EuroSerif-BoldItalic EuroSans-Regular EuroSans-Italic EuroSans-Bold EuroSans-BoldItalic EuroMono-Regular EuroMono-Italic EuroMono-Bold EuroMono-BoldItalic <zpeur.pfb <zpeuri.pfb <zpeub.pfb <zpeubi.pfb <zpeurs.pfb <zpeuris.pfb <zpeubs.pfb <zpeubis.pfb <zpeurt.pfb <zpeurit.pfb <zpeubt.pfb <zpeubit.pfb We also need to add “SlantFont” instructions for all slanted shapes: zpeuro zpeubo zpeuros zpeubos zpeurot zpeubot EuroSerif-Regular EuroSerif-Bold EuroSans-Regular EuroSans-Bold EuroMono-Regular EuroMono-Bold "0.167 "0.167 "0.167 "0.167 "0.167 "0.167 SlantFont" SlantFont" SlantFont" SlantFont" SlantFont" SlantFont" <zpeur.pfb <zpeub.pfb <zpeurs.pfb <zpeubs.pfb <zpeurt.pfb <zpeubt.pfb While we are at it, let’s also write some font definition files for Latex. These are not required if the fonts are only referenced by other virtual fonts, but they will allow us the access the Euro fonts directly in any Latex file. The syntax of the commands used in font definition files is explained in the Latex font selection guide mentioned in the introduction. Our font definition file for Euro Serif, upeu.fd, should look like this: \ProvidesFile{upeu.fd} \DeclareFontFamily{U}{peu}{} \DeclareFontShape{U}{peu}{m} \DeclareFontShape{U}{peu}{m} \DeclareFontShape{U}{peu}{m} \DeclareFontShape{U}{peu}{m} \DeclareFontShape{U}{peu}{b} \DeclareFontShape{U}{peu}{b} \DeclareFontShape{U}{peu}{b} \DeclareFontShape{U}{peu}{b} {n} {<-> {sc}{<-> {sl}{<-> {it}{<-> {n} {<-> {sc}{<-> {sl}{<-> {it}{<-> zpeur} {} ssub * peu/m/n} {} zpeuro}{} zpeuri}{} zpeub} {} ssub * peu/b/n} {} zpeubo}{} zpeubi}{} euro symbol taken from external symbol font \DeclareFontShape{U}{peu}{bx}{n} {<-> \DeclareFontShape{U}{peu}{bx}{sc}{<-> \DeclareFontShape{U}{peu}{bx}{sl}{<-> \DeclareFontShape{U}{peu}{bx}{it}{<-> \endinput ssub ssub ssub ssub * * * * peu/b/n} {} peu/b/n} {} peu/b/sl}{} peu/b/it}{} For Euro Sans, upeus.fd: \ProvidesFile{upeus.fd} \DeclareFontFamily{U}{peus}{} \DeclareFontShape{U}{peus}{m} {n} {<-> \DeclareFontShape{U}{peus}{m} {sc}{<-> \DeclareFontShape{U}{peus}{m} {sl}{<-> \DeclareFontShape{U}{peus}{m} {it}{<-> \DeclareFontShape{U}{peus}{b} {n} {<-> \DeclareFontShape{U}{peus}{b} {sc}{<-> \DeclareFontShape{U}{peus}{b} {sl}{<-> \DeclareFontShape{U}{peus}{b} {it}{<-> \DeclareFontShape{U}{peus}{bx}{n} {<-> \DeclareFontShape{U}{peus}{bx}{sc}{<-> \DeclareFontShape{U}{peus}{bx}{sl}{<-> \DeclareFontShape{U}{peus}{bx}{it}{<-> \endinput zpeurs} {} ssub * peus/m/n} {} zpeuros}{} zpeuris}{} zpeubs} {} ssub * peus/b/n} {} zpeubos}{} zpeubis}{} ssub * peus/b/n} {} ssub * peus/b/n} {} ssub * peus/b/sl}{} ssub * peus/b/it}{} And for Euro Mono, upeut.fd: \ProvidesFile{upeut.fd} \DeclareFontFamily{U}{peut}{} \DeclareFontShape{U}{peut}{m} {n} {<-> \DeclareFontShape{U}{peut}{m} {sc}{<-> \DeclareFontShape{U}{peut}{m} {sl}{<-> \DeclareFontShape{U}{peut}{m} {it}{<-> \DeclareFontShape{U}{peut}{b} {n} {<-> \DeclareFontShape{U}{peut}{b} {sc}{<-> \DeclareFontShape{U}{peut}{b} {sl}{<-> \DeclareFontShape{U}{peut}{b} {it}{<-> \DeclareFontShape{U}{peut}{bx}{n} {<-> \DeclareFontShape{U}{peut}{bx}{sc}{<-> \DeclareFontShape{U}{peut}{bx}{sl}{<-> \DeclareFontShape{U}{peut}{bx}{it}{<-> \endinput zpeurt} {} ssub * peut/m/n} {} zpeurot}{} zpeurit}{} zpeubt} {} ssub * peut/b/n} {} zpeubot}{} zpeubit}{} ssub * peut/b/n} {} ssub * peut/b/n} {} ssub * peut/b/sl}{} ssub * peut/b/it}{} We install the map file peu.map as well as all afm, tfm, pfb, and fd files in the local Tex tree as explained in the first tutorial and add peu.map to the configuration files for pdftex, dvips, and xdvi. Finally, we run texhash. The euro symbol can now be used in virtual fonts. Since we have font definition files for Latex as well, we could also access it in any Latex file with a construct like this one: {\fontencoding{U}\fontfamily{peu}\selectfont\char 128} So let’s make that a generic euro package, peufonts.sty, for use with all fonts that do not provide a native euro symbol: ₁ ₂ ₃ ₄ \NeedsTeXFormat{LaTeX2e} \ProvidesPackage{peufonts}[2002/10/25 v1.0 Adobe Euro Fonts] \RequirePackage{textcomp} \DeclareRobustCommand{\eurrm}{{% ₅ ₆ ₇ ₈ ₉ the euro currency symbol \fontencoding{U}\fontfamily{peu}\selectfont\char 128}} \DeclareRobustCommand{\eursf}{{% \fontencoding{U}\fontfamily{peus}\selectfont\char 128}} \DeclareRobustCommand{\eurtt}{{% \fontencoding{U}\fontfamily{peut}\selectfont\char 128}} We define three commands, \eurrm, \eursf, and \eurtt, which typeset a serif, sans serif, and monospaced euro symbol respectively. Note the additional braces to keep the font change local. ₁₀ ₁₁ ₁₂ ₁₃ ₁₄ ₁₅ ₁₆ ₁₇ ₁₈ \DeclareOption{sans}{\def\eur\eursf} \DeclareOption{serif}{\def\eur\eurrm} \DeclareOption{mono}{\def\eur\eurtt} \DeclareOption{textcomp}{% \PackageInfo{peufonts}{Hijacking ’\string\texteuro’}% \def\texteuro{\eur}} \ExecuteOptions{sans} \ProcessOptions \endinput We also provide \eur along with three options controlling whether it uses the serif, sans serif, or monospaced euro symbol; sans is set up as the default in line . The option textcomp will hijack the text command \texteuro as provided by the textcomp package. This is very handy when using the inputenc package with Latin (iso8859-15) as input encoding and entering the euro symbol directly, as inputenc uses \texteuro internally. With this option, we may also type \texteuro or simply € in the input file to typeset a euro symbol. For this to work, inputenc has to be loaded before this package. Please keep in mind that this is a global redefinition affecting all text fonts. We do not activate it by default as some fonts may provide a native euro symbol. We also write a message to the log when redefining \texteuro and request textcomp in line so that it is loaded before peufonts. iv. Euro symbol taken from external text font There is yet another way to get the euro symbol for a font that does not provide one by default. Suppose we have an external text font including a euro symbol that would go reasonably well with our copy of Sabon. If this euro symbol is uncoded but labeled correctly, we could simply add the text font to the input file list of the respective \installfont commands as shown in section iv. and then proceed as outlined in section iv.. What if it is encoded as the currency symbol in the external text font? In this case, we take an approach that is based on section iv. with some minor adjustments. Let’s assume we have a copy of Bitstream Classical Garamond. Since Classical Garamond is Bitstream’s take on Sabon, the euro symbol of this typeface will obviously go quite well with our install of Sabon. The syntax of the \installfont commands will look like this: \installfont{psbr8c}{psbr8r,unsetcur,bsbr8r,reseteur,psbr8r,textcomp}{ts1}{TS1}{bsb}{m}{n}{} euro symbol taken from external text font psb is Adobe Sabon, bsb is Bitstream Classical Garamond, and reseteur.mtx has been discussed in section iv.. In this case, we need an additional metric file, called unsetcur.mtx here, that clears the currency slot before bsbr8r.afm is read. Without this additional step, the euro symbol found in the currency slot of bsbr8r.afm would be discarded as psbr8r.afm has already provided this symbol. reseteur.mtx would then move the currency symbol found in psbr8r.afm to the euro slot, which is obviously not what we want. We need to clear the currency slot using unsetcur.mtx, which is quite simple: \relax \metrics \unsetglyph{currency} \endmetrics With this additional resource, what happens is this: psbr8r.afm is read and processed, the currency slot is cleared by unsetcur.mtx, then bsbr8r.afm is read, filling the currency slot with its euro glyph (which is encoded as the currency symbol in bsbr8r.afm). Our metric file reseteur.mtx will then move the euro symbol found in bsbr8r.afm to the euro slot and clear the currency slot. After that, we read psbr8r.afm again to get the original Adobe Sabon currency symbol of back. Our virtual font will now contain all glyphs found in Adobe Sabon plus the euro symbol of Bitstream Classical Garamond, all properly encoded. Note that, for this to work, we need a complete install of Bitstream Classical Garamond, including map files for dvips and pdftex, in addition to the steps outlined above. tutorial v expert font sets, regular setup Expert fonts are complements to be used in conjunction with regular text fonts. They usually contain optical small caps, additional sets of figures – hanging, inferior, superior –, the f-ligatures ff, fi, fl, ffi, and ffl, plus a few text fractions and some other symbols. Since they are companion fonts only, which do not contain the regular uppercase and lowercase alphabet, they are not useful on their own. To employ them in a sensible way we need the basic text fonts as well. In this tutorial, we will install the complete Monotype Janson font set as provided by the base and the expert package offered by Agfa Monotype. The base package contains four text fonts (regular, regular italic, bold, bold italic): jan_____.afm jan_____.inf jan_____.pfb jan_____.pfm jani____.afm jani____.inf jani____.pfb jani____.pfm janb____.afm janb____.inf janb____.pfb janb____.pfm janbi___.afm janbi___.inf janbi___.pfb janbi___.pfm The expert package adds the corresponding expert fonts: jny_____.afm jny_____.inf jny_____.pfb jny_____.pfm jnyi____.afm jnyi____.inf jnyi____.pfb jnyi____.pfm jnyb____.afm jnyb____.inf jnyb____.pfb jnyb____.pfm jnybi___.afm jnybi___.inf jnybi___.pfb jnybi___.pfm When talking about “expert font sets” in this tutorial, we are referring to all of the above (base plus expert package). The proper file names for Monotype Janson are given in monotype.map. Expert fonts have essentially the same file name as the corresponding text fonts, but their encoding code is 8x instead of 8a for Adobe Standard encoding. After renaming the files, we start off with the following file set: mjnr8a.afm mjnr8a.pfb mjnri8a.afm mjnri8a.pfb mjnb8a.afm mjnb8a.pfb mjnbi8a.afm mjnbi8a.pfb mjnr8x.afm mjnr8x.pfb mjnri8x.afm mjnri8x.pfb mjnb8x.afm mjnb8x.pfb mjnbi8x.afm mjnbi8x.pfb There are two ways to install an expert font set. Apart from writing a verbose fontinst file using low-level commands we may also use the \latinfamily macro. We will take a look at the latter case first and proceed with a verbose fontinst file afterwards. v. Basic fontinst file As usual, our file begins with a typical header setting up some common font substitutions (–). While the Janson expert package provides optical small caps for the regular weight, the bold expert fonts do not contain optical small expert font sets, regular setup caps. For the bold series, we have to make do with mechanical small caps. The \latinfamily macro will take care of that automatically. All we need to do is define a scale factor of . (): ₁ ₂ ₃ ₄ \input fontinst.sty \substitutesilent{bx}{b} \substitutesilent{sc}{n} \setint{smallcapsscale}{720} In the third tutorial, we have incorporated lining and hanging figures by creating two font families: a family with the basic, three-character font family name (lining figures) and a second family featuring hanging figures, with the letter j appended to the font family name. The character j is the Fontname code for hanging figures. In this tutorial, we need an additional code: the letter x, indicating a font featuring expert glyphs. When installing expert sets with the \latinfamily macro we use these family names to instruct fontinst that we have an expert set at hand and that we want it to create a font family featuring expert glyphs with lining figures () plus a second family featuring expert glyphs with hanging figures (): ₅ ₆ ₇ \latinfamily{mjnx}{} \latinfamily{mjnj}{} \bye Please note that appending x and j to the font family name works for expert font sets only. The \latinfamily macro is not capable of dealing with sc & osf font sets in the same way. These sets always require a fontinst file using low-level commands such as the one discussed in tutorial iii. v. Verbose fontinst file While the \latinfamily macro incorporates the most fundamental features of expert sets, such as optical small caps and additional f-ligatures, it does not exploit all the glyphs found in expert fonts. To use them, you will need to use low-level fontinst commands, at least for parts of the fontinst file. But before we start with our verbose fontinst file, let’s first take a look at some encoding issues specific to expert fonts. When dealing with sc & osf fonts in the third tutorial, we had to rename some glyphs or move them around because in sc & osf fonts, hanging figures and small caps are found in the standard slots for figures and the lowercase alphabet. With small caps and hanging figures provided by expert fonts the installation is in fact simpler since all glyph names are unique. To understand the difference, we will take a brief look at the glyph names in the respective afm files. Compare the names of lowercase glyphs as found in mjnr8a.afm to the small caps glyph names in mjnr8x.afm: C 97 ; WX 427 ; N a ; B 59 -13 409 426 ; C 98 ; WX 479 ; N b ; B 18 -13 442 692 ; C 99 ; WX 427 ; N c ; B 44 -13 403 426 ; verbose fontinst file C 97 ; WX 479 ; N Asmall ; B 19 -4 460 451 ; C 98 ; WX 438 ; N Bsmall ; B 31 -4 395 434 ; C 99 ; WX 500 ; N Csmall ; B 37 -12 459 443 ; The situation is similar for lining and hanging (‘old style’) figures. The following lines are taken from mjnr8a.afm and mjnr8x.afm respectively: C 48 ; WX 469 ; N zero ; B 37 -12 432 627 ; C 49 ; WX 469 ; N one ; B 109 -5 356 625 ; C 50 ; WX 469 ; N two ; B 44 0 397 627 ; C 48 ; WX 469 ; N zerooldstyle ; B 39 0 431 387 ; C 49 ; WX 271 ; N oneoldstyle ; B 44 -5 229 405 ; C 50 ; WX 396 ; N twooldstyle ; B 37 0 356 415 ; In practice, this means that adding expert fonts to the basic font set amounts to little more than adding them to the input file list of \installfont in most cases. Still, some additional steps are required. Fortunately, all we need to do in order to make optical small caps and hanging figures readily available is using dedicated encoding vectors provided by fontinst. These encoding vectors reference the glyphs by names corresponding to those found in expert fonts, thus allowing us to pick optical small caps and hanging figures at will. With that in mind, we can get down to business. Our fontinst file begins with a typical header (–): ₁ ₂ ₃ ₄ ₅ \input fontinst.sty \substitutesilent{bx}{b} \substitutesilent{sc}{n} \setint{smallcapsscale}{720} \setint{slant}{167} Unfortunately, Monotype Janson provides small caps for the regular weight only. Hence we have to make do with mechanical small caps for the bold series. We set a scale factor of . for that (). ₆ ₇ ₈ ₉ ₁₀ ₁₁ \transformfont{mjnr8r}{\reencodefont{8r}{\fromafm{mjnr8a}}} \transformfont{mjnri8r}{\reencodefont{8r}{\fromafm{mjnri8a}}} \transformfont{mjnb8r}{\reencodefont{8r}{\fromafm{mjnb8a}}} \transformfont{mjnbi8r}{\reencodefont{8r}{\fromafm{mjnbi8a}}} \transformfont{mjnro8r}{\slantfont{\int{slant}}\reencodefont{8r}{\fromafm{mjnr8a}}} \transformfont{mjnbo8r}{\slantfont{\int{slant}}\reencodefont{8r}{\fromafm{mjnb8a}}} We reencode (–) and slant (–) the basic fonts as usual. Expert fonts do not require any reencoding, but we do need slanted variants of them as well: ₁₂ ₁₃ \transformfont{mjnro8x}{\slantfont{\int{slant}}{\fromafm{mjnr8x}}} \transformfont{mjnbo8x}{\slantfont{\int{slant}}{\fromafm{mjnb8x}}} We will create two font families: mjnx, featuring expert glyphs, optical small caps, and lining figures, plus mjnj incorporating hanging instead of lining figures. ts1 encoded virtual fonts will be generated for the mjnx family only. ₁₄ ₁₅ ₁₆ ₁₇ \installfonts \installfamily{T1}{mjnx}{} \installfamily{TS1}{mjnx}{} \installfont{mjnr9e}{mjnr8r,mjnr8x,latin}{t1}{T1}{mjnx}{m}{n}{} expert font sets, regular setup As mentioned above, incorporating expert glyphs boils down to adding an additional file to the arguments of the \installfont command, in this case the file mjnr8x.afm. Note that we use the encoding suffix 9e instead of 8t for all t1 encoded virtual fonts of the mjnx family to indicate that they feature expert glyphs. While the code 8t, as defined by the Fontname scheme, is for t1 (Cork) encoding, 9e indicates t1 plus expert glyphs. Please refer to section . of the Fontname scheme for a comprehensive list of these codes and the code tables on page of this guide for additional hints. ₁₈ \installfont{mjnrc9e}{mjnr8r,mjnr8x,latinsc}{t1c}{T1}{mjnx}{m}{sc}{} For the small caps font we use the encoding vector t1c.etx which will map the small caps in mjnr8x.afm to the encoding positions of the lowercase alphabet in our t1 encoded virtual font. Instead of latin.mtx we use the special metric file latinsc.mtx in this case. The remaining virtual fonts of the mjnx family are built as expected: ₁₉ ₂₀ ₂₁ ₂₂ \installfont{mjnro9e}{mjnro8r,mjnro8x,latin}{t1}{T1}{mjnx}{m}{sl}{} \installfont{mjnri9e}{mjnri8r,mjnri8x,latin}{t1}{T1}{mjnx}{m}{it}{} \installfont{mjnb9e}{mjnb8r,mjnb8x,latin}{t1}{T1}{mjnx}{b}{n}{} \installfont{mjnbc9e}{mjnb8r,mjnb8x,latin}{t1c}{T1}{mjnx}{b}{sc}{} Since the bold expert font does not provide small caps, we create mechanical ones. The t1c.etx encoding vector will deal with that transparently, but we have to make sure that the regular latin.mtx metric file is read here since there are no optical small caps in the raw font. ₂₃ ₂₄ \installfont{mjnbo9e}{mjnbo8r,mjnbo8x,latin}{t1}{T1}{mjnx}{b}{sl}{} \installfont{mjnbi9e}{mjnbi8r,mjnbi8x,latin}{t1}{T1}{mjnx}{b}{it}{} That’s it for t1 encoding. Creating ts1 encoded virtual fonts featuring expert glyphs is pretty straightforward. We simply add the expert fonts to the input file list. Note the encoding suffix of the virtual fonts. We use 9c instead of 8c to indicate that the virtual fonts feature expert glyphs: ₂₅ ₂₆ ₂₇ ₂₈ ₂₉ ₃₀ ₃₁ \installfont{mjnr9c}{mjnr8r,mjnr8x,textcomp}{ts1}{TS1}{mjnx}{m}{n}{} \installfont{mjnro9c}{mjnro8r,mjnro8x,textcomp}{ts1}{TS1}{mjnx}{m}{sl}{} \installfont{mjnri9c}{mjnri8r,mjnri8x,textcomp}{ts1}{TS1}{mjnx}{m}{it}{} \installfont{mjnb9c}{mjnb8r,mjnb8x,textcomp}{ts1}{TS1}{mjnx}{b}{n}{} \installfont{mjnbo9c}{mjnbo8r,mjnbo8x,textcomp}{ts1}{TS1}{mjnx}{b}{sl}{} \installfont{mjnbi9c}{mjnbi8r,mjnbi8x,textcomp}{ts1}{TS1}{mjnx}{b}{it}{} \endinstallfonts The mjnx family including t1 and ts1 encoded fonts is now complete. We continue with the mjnj family which we want to feature hanging figures by default: ₃₂ ₃₃ ₃₄ \installfonts \installfamily{T1}{mjnj}{} \installfont{mjnr9d}{mjnr8r,mjnr8x,latin}{t1j}{T1}{mjnj}{m}{n}{} The encoding code 9d indicates a t1 encoded font with expert glyphs and hanging figures. We will use this code for all t1 encoded virtual fonts of the mjnj family. This family is supposed to feature hanging figures in the standard en- inferior and superior figures coding positions for figures. We have to keep in mind that the regular encoding vector for t1 encoding (t1.etx) references the figures as “zero,” “one,” “two” while the hanging (‘old style’) figures in the expert font (which we want to be available by default) are labeled “zerooldstyle,” “oneoldstyle” and so on. In order to arrange the glyphs according to our wishes, we could read the regular font, clear the figures, read the expert font and rename the ‘old style’ figures. In this case, however, there is a simpler way: we use the special encoding vector t1j.etx which is essentially equivalent to t1.etx but automatically appends the suffix “oldstyle” to all figures. ₃₅ \installfont{mjnrc9d}{mjnr8r,mjnr8x,latinsc}{t1cj}{T1}{mjnj}{m}{sc}{} We have regular optical small caps, so we use the metric file latinsc.mtx here. Instead of t1c.etx we use the encoding file t1cj.etx to make hanging figures the default. The remaining virtual fonts are built like the upright shape (): ₃₆ ₃₇ ₃₈ ₃₉ \installfont{mjnro9d}{mjnro8r,mjnro8x,latin}{t1j}{T1}{mjnj}{m}{sl}{} \installfont{mjnri9d}{mjnri8r,mjnri8x,latin}{t1j}{T1}{mjnj}{m}{it}{} \installfont{mjnb9d}{mjnb8r,mjnb8x,latin}{t1j}{T1}{mjnj}{b}{n}{} \installfont{mjnbc9d}{mjnb8r,mjnb8x,latin}{t1cj}{T1}{mjnj}{b}{sc}{} There are no optical small caps in the bold-weight expert fonts. Thus, when generating the bold small caps font, we use the metric file latin.mtx and the encoding file t1cj.etx to create mechanical small caps. ₄₀ ₄₁ ₄₂ \installfont{mjnbo9d}{mjnbo8r,mjnbo8x,latin}{t1j}{T1}{mjnj}{b}{sl}{} \installfont{mjnbi9d}{mjnbi8r,mjnbi8x,latin}{t1j}{T1}{mjnj}{b}{it}{} \endinstallfonts At this point, we have a comprehensive text setup featuring expert f-ligatures, optical small caps as well as a choice of readily available lining and hanging figures. However, there are some glyphs in expert fonts that we have not considered yet. v. Inferior and superior figures Expert fonts usually provide superior and inferior figures which can be combined with a dedicated fraction slash called ‘solidus’ to typeset arbitrary text fractions like ¹⁄₂ or even ³¹⁄₁₂₇. Please note that these figures are not suitable for Tex’s math mode but they can be useful in text mode even if there is no need to typeset text fractions. For example, in this guide the footnote marks in the body text are typeset using superior figures and inferior figures are used for the line numbers of the code listings. Like hanging figures, we want inferior and superior figures to be readily available. Therefore, we will create two additional font families, mjn0 and mjn1, which put inferior and superior figures in the standard encoding positions for figures just like our mjnj family does for hanging figures. We have been using the encoding vector t1j.etx to make hanging figures the default in this tutorial so let’s find out what t1j.etx does in detail and try to modify this approach according to our needs. This is t1j.etx: expert font sets, regular setup \relax \encoding \setcommand\lc#1#2{#2} \setcommand\uc#1#2{#1} \setcommand\lctop#1#2{#2} \setcommand\uctop#1#2{#1} \setcommand\lclig#1#2{#2} \setcommand\uclig#1#2{#1} \setcommand\digit#1{#1oldstyle} \inputetx{T1} \endencoding As you can see, t1j.etx is short. It does not define any encoding slots. All it does is predefine a few macros and use \inputetx to load t1.etx afterwards. The relevant part (and the only point at which it differs from what t1.etx does in this respect) is the line defining the \digit macro. To understand this mechanism, we need to take a look at how t1.etx defines the encoding slots for all figures: \setslot{\digit{one}}\endsetslot \setslot{\digit{two}}\endsetslot \setslot{\digit{three}}\endsetslot The glyph names of figures are not given verbatim, they are used as an argument to the \digit macro. The default definition of this macro as given in t1.etx looks like this: \setcommand\digit#1{#1} This means that the glyph labeled “one” in the afm file will end up in the encoding position for the numeral one in the virtual font – and so on. t1j.etx predefines the \digit macro as follows: \setcommand\digit#1{#1oldstyle} In this case the glyph labeled “oneoldstyle” in the afm file will end up in the encoding position for the numeral one in the t1 encoded virtual font. When taking a look at the glyph names of hanging, inferior, and superior figures in the afm files of our expert fonts now, the approach we need to take in order to access them should be obvious: C 48 ; WX 469 ; N zerooldstyle ; B 39 0 431 387 ; C 49 ; WX 271 ; N oneoldstyle ; B 44 -5 229 405 ; C 50 ; WX 396 ; N twooldstyle ; B 37 0 356 415 ; C 210 ; WX 323 ; N zeroinferior ; B 27 -13 296 355 ; C 211 ; WX 323 ; N oneinferior ; B 84 -5 240 357 ; C 212 ; WX 323 ; N twoinferior ; B 27 0 288 358 ; C 200 ; WX 323 ; N zerosuperior ; B 27 293 296 661 ; C 201 ; WX 323 ; N onesuperior ; B 84 298 240 661 ; C 202 ; WX 323 ; N twosuperior ; B 27 303 288 661 ; Just like ‘old style’ figures, inferior and superior figures use suffixes to the respective glyph names in (properly encoded) expert fonts. This means that we inferior and superior figures can modify t1j.etx accordingly to create encoding vectors incorporating inferior and superior figures. Hence our encoding vector for t1 encoded fonts featuring inferior figures (t10.etx, read: t-one-zero since 0 is the Fontname code for inferior figures) should look like this: \relax \encoding \setcommand\lc#1#2{#2} \setcommand\uc#1#2{#1} \setcommand\lctop#1#2{#2} \setcommand\uctop#1#2{#1} \setcommand\lclig#1#2{#2} \setcommand\uclig#1#2{#1} \setcommand\digit#1{#1inferior} \inputetx{t1} \endencoding All we need to do in t10.etx is use \setcommand to predefine the \digit macro as follows: \setcommand\digit#1{#1inferior} This will add the suffix “inferior” to all digits. For superior figures, the approach is similar. We create an encoding vector called t11.etx (read: t-one-one since 1 is the Fontname code for superior figures): \relax \encoding \setcommand\lc#1#2{#2} \setcommand\uc#1#2{#1} \setcommand\lctop#1#2{#2} \setcommand\uctop#1#2{#1} \setcommand\lclig#1#2{#2} \setcommand\uclig#1#2{#1} \setcommand\digit#1{#1superior} \inputetx{t1} \endencoding With t10.etx and t11.etx at hand, we may now create the font families mjn0 and mjn1 pretty much like we have generated mjnj. Let’s put the new encoding vectors in our working directory and go back to the fontinst file: ₄₃ ₄₄ ₄₅ \installfonts \installfamily{T1}{mjn0}{} \installfont{mjnr09e}{mjnr8r,mjnr8x,latin}{t10}{T1}{mjn0}{m}{n}{} We add the code 0 to the name of the virtual font (mjnr09e here), use the encoding vector t10.etx, and adapt the nfss font declaration (in this case T1/mjn0/m/n) accordingly. Other than that, the virtual fonts of the mjn0 family are generated in the usual way: ₄₆ ₄₇ ₄₈ ₄₉ ₅₀ \installfont{mjnro09e}{mjnro8r,mjnro8x,latin}{t10}{T1}{mjn0}{m}{sl}{} \installfont{mjnri09e}{mjnri8r,mjnri8x,latin}{t10}{T1}{mjn0}{m}{it}{} \installfont{mjnb09e}{mjnb8r,mjnb8x,latin}{t10}{T1}{mjn0}{b}{n}{} \installfont{mjnbo09e}{mjnbo8r,mjnbo8x,latin}{t10}{T1}{mjn0}{b}{sl}{} \installfont{mjnbi09e}{mjnbi8r,mjnbi8x,latin}{t10}{T1}{mjn0}{b}{it}{} ₅₁ expert font sets, regular setup \endinstallfonts Our fontinst file will omit the small caps shape to save some disk space. We have included a global shape substitution for the sc shape in the header, so mjn0/sc will be substituted by mjn0/n via a silent substitution in the font definition file. Since the figures of upright and small caps shapes do not differ at all and since we need the mjn0 family for figures only, we can safely omit the small caps shape. For the mjn1 family, we adapt the names of the virtual fonts (adding the Fontname code to indicate superior figures), the encoding vector (t11.etx), and the nfss declaration in a similar way: ₅₂ ₅₃ ₅₄ ₅₅ ₅₆ ₅₇ ₅₈ ₅₉ ₆₀ ₆₁ \installfonts \installfamily{T1}{mjn1}{} \installfont{mjnr19e}{mjnr8r,mjnr8x,latin}{t11}{T1}{mjn1}{m}{n}{} \installfont{mjnro19e}{mjnro8r,mjnro8x,latin}{t11}{T1}{mjn1}{m}{sl}{} \installfont{mjnri19e}{mjnri8r,mjnri8x,latin}{t11}{T1}{mjn1}{m}{it}{} \installfont{mjnb19e}{mjnb8r,mjnb8x,latin}{t11}{T1}{mjn1}{b}{n}{} \installfont{mjnbo19e}{mjnbo8r,mjnbo8x,latin}{t11}{T1}{mjn1}{b}{sl}{} \installfont{mjnbi19e}{mjnbi8r,mjnbi8x,latin}{t11}{T1}{mjn1}{b}{it}{} \endinstallfonts \bye This is our complete fontinst file which will provide us with four font families: mjnx, mjnj, mjn0, and mjn1. Virtual fonts in t1 encoding are provided for all families, but ts1 encoded ones for mjnx only since they would be identical for all of our four font families anyway. Thus, we can simply use substitutions instead of creating duplicate virtual fonts. As mentioned in the third tutorial, however, fontinst does not provide family substitutions. We have to write font definition files manually to ensure that the lacking ts1 encoded fonts are substituted by their counterparts of the mjnx family so that the textcomp package will work with all of them. For the mjnj family, our font definition file for ts1 encoding (ts1mjnj.fd) looks like this: \ProvidesFile{ts1mjnj.fd} \DeclareFontFamily{TS1}{mjnj}{} \DeclareFontShape{TS1}{mjnj}{m} {n} {<-> \DeclareFontShape{TS1}{mjnj}{m} {sc}{<-> \DeclareFontShape{TS1}{mjnj}{m} {sl}{<-> \DeclareFontShape{TS1}{mjnj}{m} {it}{<-> \DeclareFontShape{TS1}{mjnj}{b} {n} {<-> \DeclareFontShape{TS1}{mjnj}{b} {sc}{<-> \DeclareFontShape{TS1}{mjnj}{b} {sl}{<-> \DeclareFontShape{TS1}{mjnj}{b} {it}{<-> \DeclareFontShape{TS1}{mjnj}{bx}{n} {<-> \DeclareFontShape{TS1}{mjnj}{bx}{sc}{<-> \DeclareFontShape{TS1}{mjnj}{bx}{sl}{<-> \DeclareFontShape{TS1}{mjnj}{bx}{it}{<-> \endinput ssub ssub ssub ssub ssub ssub ssub ssub ssub ssub ssub ssub * * * * * * * * * * * * mjnx/m/n} {} mjnx/m/n} {} mjnx/m/sl}{} mjnx/m/it}{} mjnx/b/n} {} mjnx/b/n} {} mjnx/b/sl}{} mjnx/b/it}{} mjnx/b/n} {} mjnx/b/n} {} mjnx/b/sl}{} mjnx/b/it}{} This is the equivalent for mjn0, the file ts1mjn0.fd: \ProvidesFile{ts1mjn0.fd} \DeclareFontFamily{TS1}{mjn0}{} \DeclareFontShape{TS1}{mjn0}{m} {n} {<-> ssub * mjnx/m/n} {} the map file \DeclareFontShape{TS1}{mjn0}{m} {sc}{<-> \DeclareFontShape{TS1}{mjn0}{m} {sl}{<-> \DeclareFontShape{TS1}{mjn0}{m} {it}{<-> \DeclareFontShape{TS1}{mjn0}{b} {n} {<-> \DeclareFontShape{TS1}{mjn0}{b} {sc}{<-> \DeclareFontShape{TS1}{mjn0}{b} {sl}{<-> \DeclareFontShape{TS1}{mjn0}{b} {it}{<-> \DeclareFontShape{TS1}{mjn0}{bx}{n} {<-> \DeclareFontShape{TS1}{mjn0}{bx}{sc}{<-> \DeclareFontShape{TS1}{mjn0}{bx}{sl}{<-> \DeclareFontShape{TS1}{mjn0}{bx}{it}{<-> \endinput ssub ssub ssub ssub ssub ssub ssub ssub ssub ssub ssub * * * * * * * * * * * mjnx/m/n} {} mjnx/m/sl}{} mjnx/m/it}{} mjnx/b/n} {} mjnx/b/n} {} mjnx/b/sl}{} mjnx/b/it}{} mjnx/b/n} {} mjnx/b/n} {} mjnx/b/sl}{} mjnx/b/it}{} And finally, ts1mjn1.fd for the mjn1 family: \ProvidesFile{ts1mjn1.fd} \DeclareFontFamily{TS1}{mjn1}{} \DeclareFontShape{TS1}{mjn1}{m} {n} {<-> \DeclareFontShape{TS1}{mjn1}{m} {sc}{<-> \DeclareFontShape{TS1}{mjn1}{m} {sl}{<-> \DeclareFontShape{TS1}{mjn1}{m} {it}{<-> \DeclareFontShape{TS1}{mjn1}{b} {n} {<-> \DeclareFontShape{TS1}{mjn1}{b} {sc}{<-> \DeclareFontShape{TS1}{mjn1}{b} {sl}{<-> \DeclareFontShape{TS1}{mjn1}{b} {it}{<-> \DeclareFontShape{TS1}{mjn1}{bx}{n} {<-> \DeclareFontShape{TS1}{mjn1}{bx}{sc}{<-> \DeclareFontShape{TS1}{mjn1}{bx}{sl}{<-> \DeclareFontShape{TS1}{mjn1}{bx}{it}{<-> \endinput ssub ssub ssub ssub ssub ssub ssub ssub ssub ssub ssub ssub * * * * * * * * * * * * mjnx/m/n} {} mjnx/m/n} {} mjnx/m/sl}{} mjnx/m/it}{} mjnx/b/n} {} mjnx/b/n} {} mjnx/b/sl}{} mjnx/b/it}{} mjnx/b/n} {} mjnx/b/n} {} mjnx/b/sl}{} mjnx/b/it}{} As far as Latex is concerned, our setup is complete now. We still need a map file, though. v. The map file The syntax of map files has been discussed in detail before. The lines for the basic font set should therefore be obvious: mjnr8r mjnri8r mjnb8r mjnbi8r mjnro8r mjnbo8r JansonMT "TeXBase1Encoding ReEncodeFont" JansonMT-Italic "TeXBase1Encoding ReEncodeFont" JansonMT-Bold "TeXBase1Encoding ReEncodeFont" JansonMT-BoldItalic "TeXBase1Encoding ReEncodeFont" JansonMT "0.167 SlantFont TeXBase1Encoding ReEncodeFont" JansonMT-Bold "0.167 SlantFont TeXBase1Encoding ReEncodeFont" <8r.enc <8r.enc <8r.enc <8r.enc <8r.enc <8r.enc <mjnr8a.pfb <mjnri8a.pfb <mjnb8a.pfb <mjnbi8a.pfb <mjnr8a.pfb <mjnb8a.pfb Mapping lines for expert fonts are simpler because there is no need for reencoding and no encoding vector will be included: mjnr8x mjnri8x mjnb8x mjnbi8x JansonExpertMT JansonExpertMT-Italic JansonExpertMT-Bold JansonExpertMT-BoldItalic <mjnr8x.pfb <mjnri8x.pfb <mjnb8x.pfb <mjnbi8x.pfb We do need slanted expert fonts as well, though: mjnro8x JansonExpertMT "0.167 SlantFont" mjnbo8x JansonExpertMT-Bold "0.167 SlantFont" <mjnr8x.pfb <mjnb8x.pfb This is our complete map file for Monotype Janson, mjn.map. expert font sets, regular setup v. The style file Our style file for Janson, janson.sty, is based on the one suggested in section iii.. We simply adjust the package name and the names of the font families: ₁ ₂ ₃ ₄ ₅ ₆ ₇ ₈ ₉ ₁₀ \NeedsTeXFormat{LaTeX2e} \ProvidesPackage{janson}[2002/12/30 v1.0 Monotype Janson] \RequirePackage[T1]{fontenc} \RequirePackage{textcomp} \RequirePackage{nfssext} \DeclareOption{oldstyle}{\renewcommand*{\rmdefault}{mjnj}} \DeclareOption{lining}{\renewcommand*{\rmdefault}{mjnx}} \ExecuteOptions{oldstyle} \ProcessOptions \endinput With an expert font set at hand, however, we have to extend nfssext.sty to support expert families: ₁ ₂ ₃ ₄ ₅ ₆ ₇ ₈ ₉ ₁₀ ₁₁ ₁₂ ₁₃ ₁₄ ₁₅ ₁₆ ₁₇ ₁₈ ₁₉ ₂₀ ₂₁ ₂₂ ₂₃ ₂₄ ₂₅ \NeedsTeXFormat{LaTeX2e} \ProvidesPackage{nfssext}[2003/03/14 v1.2 Experimental NFSS Extensions] \newcommand*{\exfs@tempa}{} \newcommand*{\exfs@tempb}{} \newcommand*{\exfs@try@family}[2][]{% \let\exfs@tempa\relax \begingroup \fontfamily{#2}\try@load@fontshape% \expandafter\ifx\csname\curr@fontshape\endcsname\relax \edef\exfs@tempa{#1}% \ifx\exfs@tempa\@empty \PackageWarning{nfssext}{% Font family ’\f@encoding/#2’ not available\MessageBreak Ignoring font switch}% \else \PackageInfo{nfssext}{% Font family ’\f@encoding/#2’ not available\MessageBreak Font family ’\f@encoding/#1’ tried instead}% \exfs@try@family{#1}% \fi \else \gdef\exfs@tempa{\fontfamily{#2}\selectfont}% \fi \endgroup \exfs@tempa} As soon as expert fonts come into play, the \lnstyle macro has to cater for two font families which, depending on the font, may contain lining figures: a basic font family with a three-character code or an expert family with a fourcharacter code ending with the letter x. To make sure that nfssext.sty will work for fonts like Janson as well as fonts without an expert set, the first thing we need to do is extend our main font switching macro, enabling it to cope with both cases. To do so, we will introduce an optional argument. Essentially, we try to load the font family given by the mandatory argument first (). If this family is not available, we do not quit with a warning but add a note to the log file (–) and try the family given by the optional argument next (). If loading using the fonts the alternative family fails as well, we finally print a warning message (–). If the optional argument is not used, the second step will be omitted. ₂₆ ₂₇ ₂₈ ₂₉ ₃₀ \def\exfs@get@base#1#2#3#4\@nil{#1#2#3} \DeclareRobustCommand{\lnstyle}{% \not@math@alphabet\lnstyle\relax \exfs@try@family[\expandafter\exfs@get@base\f@family\@nil]% {\expandafter\exfs@get@base\f@family\@nil x}} After that, the \lnstyle macro needs to be adjusted in order to exploit the optional argument. It will try the expert family with a four-character code first () and make \exfs@try@family fall back to the basic font family with a three-character code () if the former is not available. ₃₁ ₃₂ ₃₃ \DeclareRobustCommand{\osstyle}{% \not@math@alphabet\osstyle\relax \exfs@try@family{\expandafter\exfs@get@base\f@family\@nil j}} The availability of hanging figures is expressed by appending the letter j to the font family code for both basic and expert font sets, so \osstyle does not need any modification. ₃₄ ₃₅ ₃₆ ₃₇ ₃₈ ₃₉ \DeclareRobustCommand{\instyle}{% \not@math@alphabet\instyle\relax \exfs@try@family{\expandafter\exfs@get@base\f@family\@nil 0}} \DeclareRobustCommand{\sustyle}{% \not@math@alphabet\sustyle\relax \exfs@try@family{\expandafter\exfs@get@base\f@family\@nil 1}} With inferior and superior figures implemented as two additional font families, mjn0 and mjn1, we add two macros activating these families by adding 0 and 1 to the family name respectively. ₄₀ ₄₁ ₄₂ ₄₃ ₄₄ \DeclareTextFontCommand{\textln}{\lnstyle} \DeclareTextFontCommand{\textos}{\osstyle} \DeclareTextFontCommand{\textin}{\instyle} \DeclareTextFontCommand{\textsu}{\sustyle} \endinput We also add two text commands, \textin and \textsu, which activate these figures locally, similar to \textit or \textbf. v. Using the fonts Most features of expert font sets such as additional f-ligatures and optical small caps will be available automatically when selecting the new font families. Using them does not require any additional macros. Lining and hanging figures can be conveniently selected by activating the respective font family, in this case mjnx and mjnj, or by using the style file janson.sty suggested above. Since inferior and superior figures are not used as regular figures, they are treated differently. We will take a look at some possible applications. The inferior and superior figures found in expert fonts were originally intended for typesetting text fractions so let’s write a simple macro for that. To typeset a fraction, we combine inferior expert font sets, regular setup and superior figures with the \textfractionsolidus macro provided by the textcomp package. Accessing the figures implies switching font families locally. Note the additional set of braces which will keep the font change local: \newcommand*{\textfrac}[2]{% {\fontfamily{mjn1}\selectfont #1}% \textfractionsolidus {\fontfamily{mjn0}\selectfont #2}} Writing \textfrac{1}{2} in the input file will typeset the fraction ¹⁄₂. When looking at an expert font in a font editor, you will see that expert fonts contain a fixed number of text fractions. Some of them are included in ts1 encoding and supported by the textcomp package, but typing rather long commands such as \textthreequarters is not exactly convenient. Since there are only nine of them they are not very useful anyway. With a complete set of inferior and superior figures at our disposal, our macro will work for arbitrary fractions like ³⁄₇ or ¹³⁄₁₇. Instead of using ‘hard-wired’ fonts as shown above, it is even better to use the font switching macros provided by nfssext.sty instead since they will dynamically adjust to the active text font: \newcommand*{\textfrac}[2]{% \textsu{#1}% \textfractionsolidus \textin{#2}} What about using superior figures as footnote numbers? To do so, we need to redefine \@makefnmark. This is the default definition: \def\@makefnmark{\hbox{\@textsuperscript{\normalfont\@thefnmark}}} In order to use optical superior figures instead of mechanical ones, we drop \@textsuperscript and switch font families instead: \def\@makefnmark{\hbox{\fontfamily{mjn1}\selectfont\@thefnmark}} We do not need to add additional braces in this case since \hbox will keep the font change local. Using our new font switching macros, this may also be accomplished like this: \def\@makefnmark{\hbox{\sustyle\@thefnmark}} Note that, if you want to put a definition of \@makefnmark in the preamble of a regular Latex input file (as opposed to a class or a style file), it has to be enclosed in \makeatletter and \makeatother: \makeatletter \def\@makefnmark{\hbox{\sustyle\@thefnmark}} \makeatother tutorial vi expert font sets, extended setup In this tutorial we will combine what we have learned in tutorials iii and v to install a very complete font set featuring expert fonts, small caps, and hanging figures. This tutorial will also add multiple weights, italic small caps, italic swashes and text ornaments to that. Our example is Adobe Minion, base plus expert packages: pmnr8a pmnri8a pmns8a pmnsi8a pmnb8a pmnbi8a pmnc8a pmnrc8a pmnric8a pmnriw7a pmnsc8a pmnsic8a pmnsiw7a pmnbj8a pmnbij8a pmncj8a pmnr8x pmnri8x pmns8x pmnsi8x pmnb8x pmnbi8x pmnc8x pmnrp Minion-Regular Minion-Italic Minion-Semibold Minion-SemiboldItalic Minion-Bold Minion-BoldItalic Minion-Black Minion-RegularSC Minion-ItalicSC Minion-SwashItalic Minion-SemiboldSC Minion-SemiboldItalicSC Minion-SwashSemiboldItalic Minion-BoldOsF Minion-BoldItalicOsF Minion-BlackOsF MinionExp-Regular MinionExp-Italic MinionExp-Semibold MinionExp-SemiboldItalic MinionExp-Bold MinionExp-BoldItalic MinionExp-Black Minion-Ornaments A A A A A A A A A A A A A A A A A A A A A A A A 143 143 143 143 143 143 143 144 144 144 144 144 144 144 144 144 144 144 144 144 144 144 144 144 morg____ moi_____ mosb____ mosbi___ mob_____ mobi____ mobl____ mosc____ moisc___ moswi___ mosbs___ mosic___ mossb___ mobos___ mobio___ mozof___ mjrg____ mji_____ mjsb____ mjsbi___ mjb_____ mjbi____ mjbl____ moor____ In addition to these fonts, the expert package includes a set of regular-weight display fonts intended for titling and display work at very large sizes. Generated from the same master sources by interpolation, the display fonts share the lettershapes of the text fonts while being based on a design size of pt. Since they form a complete set including small caps and expert fonts, they are handled just like the Minion text set and we will not explicitly consider them here. vi. The fontinst file With a very comprehensive set of fonts at our disposal, we will be fastidious. There will be no computed glyph shapes – no mechanical small caps and no slanted fonts – thus making this setup suitable for professional typesetting. Note that the bold and black weights do not feature optical small caps. Even though there are expert fonts for these weights, they do not contain any small caps glyphs. The bold weight is merely intended for applications requiring a expert font sets, extended setup very strong contrast, for example to highlight the keywords in a dictionary, while the black weight of a typeface like Minion is only relevant for certain types of display work. Without further ado, we start off as usual: ₁ ₂ ₃ ₄ ₅ \nonstopmode \input fontinst.sty \substitutesilent{bx}{sb} \substitutenoisy{sc}{n} \substitutenoisy{si}{it} When looking at our font set it is obvious that semibold should be used as the main bold weight, hence we make it the default by substituting sb for bx. Since the bold and black weights do not feature optical small caps, we add appropriate substitutions for the sc and si (italic small caps) shapes. ₆ ₇ ₈ ₉ ₁₀ ₁₁ ₁₂ ₁₃ ₁₄ ₁₅ ₁₆ \transformfont{pmnr8r}{\reencodefont{8r}{\fromafm{pmnr8a}}} \transformfont{pmnrc8r}{\reencodefont{8r}{\fromafm{pmnrc8a}}} \transformfont{pmnri8r}{\reencodefont{8r}{\fromafm{pmnri8a}}} \transformfont{pmnric8r}{\reencodefont{8r}{\fromafm{pmnric8a}}} \transformfont{pmns8r}{\reencodefont{8r}{\fromafm{pmns8a}}} \transformfont{pmnsc8r}{\reencodefont{8r}{\fromafm{pmnsc8a}}} \transformfont{pmnsi8r}{\reencodefont{8r}{\fromafm{pmnsi8a}}} \transformfont{pmnsic8r}{\reencodefont{8r}{\fromafm{pmnsic8a}}} \transformfont{pmnb8r}{\reencodefont{8r}{\fromafm{pmnb8a}}} \transformfont{pmnbi8r}{\reencodefont{8r}{\fromafm{pmnbi8a}}} \transformfont{pmnc8r}{\reencodefont{8r}{\fromafm{pmnc8a}}} Reencoding: you know the drill. We reencode all base fonts using Adobe Standard as their native encoding. While the swash fonts are based on Adobe Standard as well, they contain a special set of glyphs and are handled like expert fonts. ₁₇ ₁₈ ₁₉ ₂₀ ₂₁ \installfonts \installfamily{T1}{pmnx}{} \installfamily{TS1}{pmnx}{} \installfont{pmnr9e}{pmnr8r,pmnr8x,latin}{t1}{T1}{pmnx}{m}{n}{} \installfont{pmnri9e}{pmnri8r,pmnri8x,latin}{t1}{T1}{pmnx}{m}{it}{} The setup of the upright and italic shapes does not differ from tutorial v. ₂₂ ₂₃ ₂₄ ₂₅ ₂₆ ₂₇ \installfont{pmnrc9e}% {kernoff,pmnr8r,pmnr8x,kernon,glyphoff,pmnrc8r,glyphon,resetsc,latinsc}% {t1c}{T1}{pmnx}{m}{sc}{} \installfont{pmnric9e}% {kernoff,pmnri8r,pmnri8x,kernon,glyphoff,pmnric8r,glyphon,resetsc,latinsc}% {t1c}{T1}{pmnx}{m}{si}{} There is one problem with taking optical small caps from an expert font as demonstrated in tutorial v: there are no kerning pairs between the uppercase alphabet and the small caps replacing the lowercase letters. Without dedicated small caps fonts there is nothing we can do about that. Now that we have both expert and small caps fonts, however, we could take an approach similar to the one outlined in tutorial iii, adding the expert font on top of them to get the additional ligatures. We will use a different technique though, which extracts the more comprehensive kerning data from the small caps fonts while taking the fontinst file the glyphs from the base and the expert fonts only. Apart from being conceptually cleaner, this approach has the additional benefit of not requiring the small caps fonts after the metrics and the virtual fonts have been generated, resulting in slightly smaller pdf and Postscript files if fonts are embedded. The input file list should be more or less self-explanatory: we use kernoff.mtx to ignore the kerning data while reading the respective base and expert fonts. Then we add kernon.mtx to re-activate the kerning commands and a special metric file called glyphoff.mtx to ignore the glyph data. After that, we read the corresponding small caps font and re-activate the glyph commands. Finally, we add resetsc.mtx as well as latinsc.mtx. Our encoding file is t1c.etx. ₂₈ ₂₉ ₃₀ ₃₁ ₃₂ ₃₃ ₃₄ ₃₅ \installfont{pmns9e}{pmns8r,pmns8x,latin}{t1}{T1}{pmnx}{sb}{n}{} \installfont{pmnsi9e}{pmnsi8r,pmnsi8x,latin}{t1}{T1}{pmnx}{sb}{it}{} \installfont{pmnsc9e}% {kernoff,pmns8r,pmns8x,kernon,glyphoff,pmnsc8r,glyphon,resetsc,latinsc}% {t1c}{T1}{pmnx}{sb}{sc}{} \installfont{pmnsic9e}% {kernoff,pmnsi8r,pmnsi8x,kernon,glyphoff,pmnsic8r,glyphon,resetsc,latinsc}% {t1c}{T1}{pmnx}{sb}{si}{} We repeat these steps for the semibold weight. ₃₆ ₃₇ ₃₈ \installfont{pmnb9e}{pmnb8r,pmnb8x,latin}{t1}{T1}{pmnx}{b}{n}{} \installfont{pmnbi9e}{pmnbi8r,pmnbi8x,latin}{t1}{T1}{pmnx}{b}{it}{} \installfont{pmnc9e}{pmnc8r,pmnc8x,latin}{t1}{T1}{pmnx}{eb}{n}{} The bold and black weights are handled differently because there are no optical small caps. We will simply omit the respective shapes. The black weight will be mapped to the eb series of the nfss. After finishing t1 encoding we continue with ts1. Our setup for ts1 encoding does not differ from tutorial v either: ₃₉ ₄₀ ₄₁ ₄₂ ₄₃ ₄₄ ₄₅ ₄₆ \installfont{pmnr9c}{pmnr8r,pmnr8x,textcomp}{ts1}{TS1}{pmnx}{m}{n}{} \installfont{pmnri9c}{pmnri8r,pmnri8x,textcomp}{ts1}{TS1}{pmnx}{m}{it}{} \installfont{pmns9c}{pmns8r,pmns8x,textcomp}{ts1}{TS1}{pmnx}{sb}{n}{} \installfont{pmnsi9c}{pmnsi8r,pmnsi8x,textcomp}{ts1}{TS1}{pmnx}{sb}{it}{} \installfont{pmnb9c}{pmnb8r,pmnb8x,textcomp}{ts1}{TS1}{pmnx}{b}{n}{} \installfont{pmnbi9c}{pmnbi8r,pmnbi8x,textcomp}{ts1}{TS1}{pmnx}{b}{it}{} \installfont{pmnc9c}{pmnc8r,pmnc8x,textcomp}{ts1}{TS1}{pmnx}{eb}{n}{} \endinstallfonts The pmnx family is now complete. We continue with pmnj which will feature hanging figures by default: ₄₇ ₄₈ ₄₉ ₅₀ \installfonts \installfamily{T1}{pmnj}{} \installfont{pmnr9d}{pmnr8r,pmnr8x,latin}{t1j}{T1}{pmnj}{m}{n}{} \installfont{pmnri9d}{pmnri8r,pmnri8x,latin}{t1j}{T1}{pmnj}{m}{it}{} To make hanging figures the default throughout the pmnj family we employ the encoding file t1j.etx. Other than that, the setup of the upright and italic shapes does not differ from pmnx. ₅₁ ₅₂ ₅₃ \installfont{pmnrc9d} {kernoff,pmnr8r,pmnr8x,kernon,glyphoff,pmnrc8r,glyphon,resetosf,resetsc,latinsc}% {t1cj}{T1}{pmnj}{m}{sc}{} ₅₄ ₅₅ ₅₆ expert font sets, extended setup \installfont{pmnric9d} {kernoff,pmnri8r,pmnri8x,kernon,glyphoff,pmnric8r,glyphon,resetosf,resetsc,latinsc}% {t1cj}{T1}{pmnj}{m}{si}{} For the small caps shape of the pmnj family we essentially use the technique introduced above. Since this font family will feature hanging figures we use the encoding file t1cj.etx and add the metric file resetosf.mtx. ₅₇ ₅₈ ₅₉ ₆₀ ₆₁ ₆₂ ₆₃ ₆₄ \installfont{pmns9d}{pmns8r,pmns8x,latin}{t1j}{T1}{pmnj}{sb}{n}{} \installfont{pmnsi9d}{pmnsi8r,pmnsi8x,latin}{t1j}{T1}{pmnj}{sb}{it}{} \installfont{pmnsc9d} {kernoff,pmns8r,pmns8x,kernon,glyphoff,pmnsc8r,glyphon,resetosf,resetsc,latinsc}% {t1cj}{T1}{pmnj}{sb}{sc}{} \installfont{pmnsic9d} {kernoff,pmnsi8r,pmnsi8x,kernon,glyphoff,pmnsic8r,glyphon,resetosf,resetsc,latinsc}% {t1cj}{T1}{pmnj}{sb}{si}{} Again, we repeat these steps for the semibold weight. ₆₅ ₆₆ ₆₇ ₆₈ \installfont{pmnb9d}{pmnb8r,pmnb8x,latin}{t1j}{T1}{pmnj}{b}{n}{} \installfont{pmnbi9d}{pmnbi8r,pmnbi8x,latin}{t1j}{T1}{pmnj}{b}{it}{} \installfont{pmnc9d}{pmnc8r,pmnc8x,latin}{t1j}{T1}{pmnj}{eb}{n}{} \endinstallfonts The bold and black weights are essentially handled like those of the pmnx family, only differing in the choice of the encoding file. ₆₉ ₇₀ ₇₁ ₇₂ ₇₃ ₇₄ ₇₅ ₇₆ ₇₇ ₇₈ \installfonts \installfamily{T1}{pmn0}{} \installfont{pmnr09e}{pmnr8r,pmnr8x,latin}{t10}{T1}{pmn0}{m}{n}{} \installfont{pmnri09e}{pmnri8r,pmnri8x,latin}{t10}{T1}{pmn0}{m}{it}{} \installfont{pmns09e}{pmns8r,pmns8x,latin}{t10}{T1}{pmn0}{sb}{n}{} \installfont{pmnsi09e}{pmnsi8r,pmnsi8x,latin}{t10}{T1}{pmn0}{sb}{it}{} \installfont{pmnb09e}{pmnb8r,pmnb8x,latin}{t10}{T1}{pmn0}{b}{n}{} \installfont{pmnbi09e}{pmnbi8r,pmnbi8x,latin}{t10}{T1}{pmn0}{b}{it}{} \installfont{pmnc09e}{pmnc8r,pmnc8x,latin}{t10}{T1}{pmn0}{eb}{n}{} \endinstallfonts In addition to pmnx and pmnj, we also add dedicated font families incorporating inferior and superior figures. Since inferior figures are found in the expert fonts, our approach here does not differ from the one introduced in section v.. ₇₉ ₈₀ ₈₁ ₈₂ ₈₃ ₈₄ ₈₅ ₈₆ ₈₇ ₈₈ \installfonts \installfamily{T1}{pmn1}{} \installfont{pmnr19e}{pmnr8r,pmnr8x,latin}{t11}{T1}{pmn1}{m}{n}{} \installfont{pmnri19e}{pmnri8r,pmnri8x,latin}{t11}{T1}{pmn1}{m}{it}{} \installfont{pmns19e}{pmns8r,pmns8x,latin}{t11}{T1}{pmn1}{sb}{n}{} \installfont{pmnsi19e}{pmnsi8r,pmnsi8x,latin}{t11}{T1}{pmn1}{sb}{it}{} \installfont{pmnb19e}{pmnb8r,pmnb8x,latin}{t11}{T1}{pmn1}{b}{n}{} \installfont{pmnbi19e}{pmnbi8r,pmnbi8x,latin}{t11}{T1}{pmn1}{b}{it}{} \installfont{pmnc19e}{pmnc8r,pmnc8x,latin}{t11}{T1}{pmn1}{eb}{n}{} \endinstallfonts The same holds true for superior figures. ₈₉ ₉₀ ₉₁ ₉₂ \installfonts \installfamily{T1}{pmnw}{} \installfont{pmnriw9d}{pmnri8r,unsetcaps,pmnriw7a,pmnri8x,latin}{t1j}{T1}{pmnw}{m}{it}{} \installfont{pmnsiw9d}{pmnsi8r,unsetcaps,pmnsiw7a,pmnsi8x,latin}{t1j}{T1}{pmnw}{sb}{it}{} the fontinst file ₉₃ ₉₄ \endinstallfonts \bye In order to incorporate the italic swashes we create an additional font family called pmnw. We read the respective base font and clear the slots of the capital letters using the metric file unsetcaps.mtx. After that we add the respective swash font and finally the expert font as usual. We employ t1j.etx to get hanging figures by default. Our self-made metric file unsetcaps.mtx uses the \unsetglyph command as follows: \relax \metrics \unsetglyph{A} \unsetglyph{B} \unsetglyph{C} ... \unsetglyph{X} \unsetglyph{Y} \unsetglyph{Z} \endmetrics We are merely clearing the slots of captial letters found in the English here. Capital letters with an accent are not removed because the Minion swash set does not provide accented swash capitals anyway. This means that all accented capital letters will be taken from the ordinary italic font. In this particular case ot1 encoding could be used as a workaround since this encoding constructs accented letters from the English alphabet as discussed in tutorial i. So here is the respective part of the file for ot1 encoding: \installfonts \installfamily{OT1}{pmnw}{} \installfont{pmnriw9o}{pmnri8r,unsetcaps,pmnriw7a,pmnri8x,latin}{ot1j}{OT1}{pmnw}{m}{it}{} \installfont{pmnsiw9o}{pmnsi8r,unsetcaps,pmnsiw7a,pmnsi8x,latin}{ot1j}{OT1}{pmnw}{sb}{it}{} \endinstallfonts Note that using a setup including ot1 encoding for one font family only will require switching the encoding explicitly when selecting the swash fonts: \fontencoding{OT1}\fontfamily{pmnw}\selectfont The pmnw family as generated by fontinst will only cover two shapes in either case. Since fontinst does not support family substitutions we cannot take the missing shapes from pmnj in the fontinst file. We have to edit the respective font definition file, t1pmnw.fd, after running fontinst. For t1 encoding it should look as follows: \ProvidesFile{t1pmnw.fd} \DeclareFontFamily{T1}{pmnw}{} \DeclareFontShape{T1}{pmnw}{m} {n} {<-> \DeclareFontShape{T1}{pmnw}{m} {sc}{<-> \DeclareFontShape{T1}{pmnw}{m} {sl}{<-> \DeclareFontShape{T1}{pmnw}{m} {it}{<-> \DeclareFontShape{T1}{pmnw}{m} {si}{<-> \DeclareFontShape{T1}{pmnw}{sb}{n} {<-> ssub * pmnj/m/n} ssub * pmnj/m/sc} ssub * pmnj/m/it} pmnriw9d} ssub * pmnj/m/si} ssub * pmnj/sb/n} {} {} {} {} {} {} expert font sets, extended setup \DeclareFontShape{T1}{pmnw}{sb}{sc}{<-> \DeclareFontShape{T1}{pmnw}{sb}{sl}{<-> \DeclareFontShape{T1}{pmnw}{sb}{it}{<-> \DeclareFontShape{T1}{pmnw}{sb}{si}{<-> \DeclareFontShape{T1}{pmnw}{b} {n} {<-> \DeclareFontShape{T1}{pmnw}{b} {sc}{<-> \DeclareFontShape{T1}{pmnw}{b} {sl}{<-> \DeclareFontShape{T1}{pmnw}{b} {it}{<-> \DeclareFontShape{T1}{pmnw}{b} {si}{<-> \DeclareFontShape{T1}{pmnw}{eb}{n} {<-> \DeclareFontShape{T1}{pmnw}{eb}{sc}{<-> \DeclareFontShape{T1}{pmnw}{eb}{sl}{<-> \DeclareFontShape{T1}{pmnw}{eb}{it}{<-> \DeclareFontShape{T1}{pmnw}{eb}{si}{<-> \DeclareFontShape{T1}{pmnw}{bx}{n} {<-> \DeclareFontShape{T1}{pmnw}{bx}{sc}{<-> \DeclareFontShape{T1}{pmnw}{bx}{sl}{<-> \DeclareFontShape{T1}{pmnw}{bx}{it}{<-> \DeclareFontShape{T1}{pmnw}{bx}{si}{<-> \endinput ssub * pmnj/sb/sc}{} ssub * pmnj/sb/it}{} pmnsiw9d} {} ssub * pmnj/sb/si}{} ssub * pmnj/b/n} {} ssub * pmnj/b/sc} {} ssub * pmnj/b/it} {} ssub * pmnj/b/it} {} ssub * pmnj/b/si} {} ssub * pmnj/eb/n} {} ssub * pmnj/eb/sc}{} ssub * pmnj/eb/it}{} ssub * pmnj/eb/it}{} ssub * pmnj/eb/si}{} ssub * pmnw/sb/n} {} ssub * pmnw/sb/sc}{} ssub * pmnw/sb/it}{} ssub * pmnw/sb/it}{} ssub * pmnw/sb/si}{} Only the pmnx family offers ts1 encoded fonts as the glyphs found in this encoding are identical across all font families. To make sure that all font families work as expected, however, we need font definition files containing family substitutions which cannot be defined in a fontinst file. For the pmnj family: \ProvidesFile{ts1pmnj.fd} \DeclareFontFamily{TS1}{pmnj}{} \DeclareFontShape{TS1}{pmnj}{m} {n} {<-> \DeclareFontShape{TS1}{pmnj}{m} {sc}{<-> \DeclareFontShape{TS1}{pmnj}{m} {sl}{<-> \DeclareFontShape{TS1}{pmnj}{m} {it}{<-> \DeclareFontShape{TS1}{pmnj}{sb}{n} {<-> \DeclareFontShape{TS1}{pmnj}{sb}{sc}{<-> \DeclareFontShape{TS1}{pmnj}{sb}{sl}{<-> \DeclareFontShape{TS1}{pmnj}{sb}{it}{<-> \DeclareFontShape{TS1}{pmnj}{b} {n} {<-> \DeclareFontShape{TS1}{pmnj}{b} {sc}{<-> \DeclareFontShape{TS1}{pmnj}{b} {sl}{<-> \DeclareFontShape{TS1}{pmnj}{b} {it}{<-> \DeclareFontShape{TS1}{pmnj}{eb}{n} {<-> \DeclareFontShape{TS1}{pmnj}{eb}{sc}{<-> \DeclareFontShape{TS1}{pmnj}{eb}{sl}{<-> \DeclareFontShape{TS1}{pmnj}{eb}{it}{<-> \DeclareFontShape{TS1}{pmnj}{bx}{n} {<-> \DeclareFontShape{TS1}{pmnj}{bx}{sc}{<-> \DeclareFontShape{TS1}{pmnj}{bx}{sl}{<-> \DeclareFontShape{TS1}{pmnj}{bx}{it}{<-> \endinput ssub ssub ssub ssub ssub ssub ssub ssub ssub ssub ssub ssub ssub ssub ssub ssub ssub ssub ssub ssub * * * * * * * * * * * * * * * * * * * * pmnx/m/n} {} pmnx/m/n} {} pmnx/m/sl} {} pmnx/m/it} {} pmnx/sb/n} {} pmnx/sb/n} {} pmnx/sb/sl}{} pmnx/sb/it}{} pmnx/b/n} {} pmnx/b/n} {} pmnx/b/sl} {} pmnx/b/it} {} pmnx/eb/n} {} pmnx/eb/n} {} pmnx/eb/sl}{} pmnx/eb/it}{} pmnx/sb/n} {} pmnx/sb/n} {} pmnx/sb/sl}{} pmnx/sb/it}{} ssub ssub ssub ssub * * * * pmnx/m/n} pmnx/m/n} pmnx/m/sl} pmnx/m/it} For the pmnw family: \ProvidesFile{ts1pmnw.fd} \DeclareFontFamily{TS1}{pmnw}{} \DeclareFontShape{TS1}{pmnw}{m} \DeclareFontShape{TS1}{pmnw}{m} \DeclareFontShape{TS1}{pmnw}{m} \DeclareFontShape{TS1}{pmnw}{m} {n} {<-> {sc}{<-> {sl}{<-> {it}{<-> {} {} {} {} the fontinst file \DeclareFontShape{TS1}{pmnw}{sb}{n} {<-> \DeclareFontShape{TS1}{pmnw}{sb}{sc}{<-> \DeclareFontShape{TS1}{pmnw}{sb}{sl}{<-> \DeclareFontShape{TS1}{pmnw}{sb}{it}{<-> \DeclareFontShape{TS1}{pmnw}{b} {n} {<-> \DeclareFontShape{TS1}{pmnw}{b} {sc}{<-> \DeclareFontShape{TS1}{pmnw}{b} {sl}{<-> \DeclareFontShape{TS1}{pmnw}{b} {it}{<-> \DeclareFontShape{TS1}{pmnw}{eb}{n} {<-> \DeclareFontShape{TS1}{pmnw}{eb}{sc}{<-> \DeclareFontShape{TS1}{pmnw}{eb}{sl}{<-> \DeclareFontShape{TS1}{pmnw}{eb}{it}{<-> \DeclareFontShape{TS1}{pmnw}{bx}{n} {<-> \DeclareFontShape{TS1}{pmnw}{bx}{sc}{<-> \DeclareFontShape{TS1}{pmnw}{bx}{sl}{<-> \DeclareFontShape{TS1}{pmnw}{bx}{it}{<-> \endinput ssub ssub ssub ssub ssub ssub ssub ssub ssub ssub ssub ssub ssub ssub ssub ssub * * * * * * * * * * * * * * * * pmnx/sb/n} {} pmnx/sb/n} {} pmnx/sb/sl}{} pmnx/sb/it}{} pmnx/b/n} {} pmnx/b/n} {} pmnx/b/sl} {} pmnx/b/it} {} pmnx/eb/n} {} pmnx/eb/n} {} pmnx/eb/sl}{} pmnx/eb/it}{} pmnx/sb/n} {} pmnx/sb/n} {} pmnx/sb/sl}{} pmnx/sb/it}{} ssub ssub ssub ssub ssub ssub ssub ssub ssub ssub ssub ssub ssub ssub ssub ssub ssub ssub ssub ssub * * * * * * * * * * * * * * * * * * * * pmnx/m/n} {} pmnx/m/n} {} pmnx/m/sl} {} pmnx/m/it} {} pmnx/sb/n} {} pmnx/sb/n} {} pmnx/sb/sl}{} pmnx/sb/it}{} pmnx/b/n} {} pmnx/b/n} {} pmnx/b/sl} {} pmnx/b/it} {} pmnx/eb/n} {} pmnx/eb/n} {} pmnx/eb/sl}{} pmnx/eb/it}{} pmnx/sb/n} {} pmnx/sb/n} {} pmnx/sb/sl}{} pmnx/sb/it}{} ssub ssub ssub ssub ssub ssub ssub ssub ssub ssub ssub * * * * * * * * * * * pmnx/m/n} {} pmnx/m/n} {} pmnx/m/sl} {} pmnx/m/it} {} pmnx/sb/n} {} pmnx/sb/n} {} pmnx/sb/sl}{} pmnx/sb/it}{} pmnx/b/n} {} pmnx/b/n} {} pmnx/b/sl} {} For the pmn0 family: \ProvidesFile{ts1pmn0.fd} \DeclareFontFamily{TS1}{pmn0}{} \DeclareFontShape{TS1}{pmn0}{m} {n} {<-> \DeclareFontShape{TS1}{pmn0}{m} {sc}{<-> \DeclareFontShape{TS1}{pmn0}{m} {sl}{<-> \DeclareFontShape{TS1}{pmn0}{m} {it}{<-> \DeclareFontShape{TS1}{pmn0}{sb}{n} {<-> \DeclareFontShape{TS1}{pmn0}{sb}{sc}{<-> \DeclareFontShape{TS1}{pmn0}{sb}{sl}{<-> \DeclareFontShape{TS1}{pmn0}{sb}{it}{<-> \DeclareFontShape{TS1}{pmn0}{b} {n} {<-> \DeclareFontShape{TS1}{pmn0}{b} {sc}{<-> \DeclareFontShape{TS1}{pmn0}{b} {sl}{<-> \DeclareFontShape{TS1}{pmn0}{b} {it}{<-> \DeclareFontShape{TS1}{pmn0}{eb}{n} {<-> \DeclareFontShape{TS1}{pmn0}{eb}{sc}{<-> \DeclareFontShape{TS1}{pmn0}{eb}{sl}{<-> \DeclareFontShape{TS1}{pmn0}{eb}{it}{<-> \DeclareFontShape{TS1}{pmn0}{bx}{n} {<-> \DeclareFontShape{TS1}{pmn0}{bx}{sc}{<-> \DeclareFontShape{TS1}{pmn0}{bx}{sl}{<-> \DeclareFontShape{TS1}{pmn0}{bx}{it}{<-> \endinput For the pmn1 family: \ProvidesFile{ts1pmn1.fd} \DeclareFontFamily{TS1}{pmn1}{} \DeclareFontShape{TS1}{pmn1}{m} {n} {<-> \DeclareFontShape{TS1}{pmn1}{m} {sc}{<-> \DeclareFontShape{TS1}{pmn1}{m} {sl}{<-> \DeclareFontShape{TS1}{pmn1}{m} {it}{<-> \DeclareFontShape{TS1}{pmn1}{sb}{n} {<-> \DeclareFontShape{TS1}{pmn1}{sb}{sc}{<-> \DeclareFontShape{TS1}{pmn1}{sb}{sl}{<-> \DeclareFontShape{TS1}{pmn1}{sb}{it}{<-> \DeclareFontShape{TS1}{pmn1}{b} {n} {<-> \DeclareFontShape{TS1}{pmn1}{b} {sc}{<-> \DeclareFontShape{TS1}{pmn1}{b} {sl}{<-> expert font sets, extended setup \DeclareFontShape{TS1}{pmn1}{b} {it}{<-> \DeclareFontShape{TS1}{pmn1}{eb}{n} {<-> \DeclareFontShape{TS1}{pmn1}{eb}{sc}{<-> \DeclareFontShape{TS1}{pmn1}{eb}{sl}{<-> \DeclareFontShape{TS1}{pmn1}{eb}{it}{<-> \DeclareFontShape{TS1}{pmn1}{bx}{n} {<-> \DeclareFontShape{TS1}{pmn1}{bx}{sc}{<-> \DeclareFontShape{TS1}{pmn1}{bx}{sl}{<-> \DeclareFontShape{TS1}{pmn1}{bx}{it}{<-> \endinput ssub ssub ssub ssub ssub ssub ssub ssub ssub * * * * * * * * * pmnx/b/it} {} pmnx/eb/n} {} pmnx/eb/n} {} pmnx/eb/sl}{} pmnx/eb/it}{} pmnx/sb/n} {} pmnx/sb/n} {} pmnx/sb/sl}{} pmnx/sb/it}{} vi. Text ornaments The Minion expert package includes a dedicated ornament font, pmnrp.pfb. As discussed before in section iv., we do not really need fontinst when installing symbol fonts. Since no reencoding is required and there are no virtual fonts, afm2tfm is sufficient for the job: afm2tfm pmnrp.afm pmnrp.tfm Using the fonts with Latex requires a font definition file, though. Symbol fonts are not based on any particular encoding, so we use the encoding code U (uncoded, unknown) in this case. This is upmnp.fd: \ProvidesFile{upmnp.fd} \DeclareFontFamily{U}{pmnp}{} \DeclareFontShape{U}{pmnp}{m}{n}{<-> pmnrp}{} \endinput vi. The map file The map file for Minion is longer than the one in the last tutorial, but conceptually similar. Note that the sc & osf fonts are not required. They are included here for reference only. The swash and ornament fonts were not reencoded, hence their mapping is similar to that of expert fonts: pmnr8r pmnri8r pmns8r pmnsi8r pmnb8r pmnbi8r pmnc8r pmnrc8r pmnric8r pmnsc8r pmnsic8r pmnbj8r pmnbij8r pmncj8r pmnr8x pmnri8x pmns8x pmnsi8x pmnb8x Minion-Regular Minion-Italic Minion-Semibold Minion-SemiboldItalic Minion-Bold Minion-BoldItalic Minion-Black Minion-RegularSC Minion-ItalicSC Minion-SemiboldSC Minion-SemiboldItalicSC Minion-BoldOsF Minion-BoldItalicOsF Minion-BlackOsF MinionExp-Regular MinionExp-Italic MinionExp-Semibold MinionExp-SemiboldItalic MinionExp-Bold "TeXBase1Encoding "TeXBase1Encoding "TeXBase1Encoding "TeXBase1Encoding "TeXBase1Encoding "TeXBase1Encoding "TeXBase1Encoding "TeXBase1Encoding "TeXBase1Encoding "TeXBase1Encoding "TeXBase1Encoding "TeXBase1Encoding "TeXBase1Encoding "TeXBase1Encoding ReEncodeFont" ReEncodeFont" ReEncodeFont" ReEncodeFont" ReEncodeFont" ReEncodeFont" ReEncodeFont" ReEncodeFont" ReEncodeFont" ReEncodeFont" ReEncodeFont" ReEncodeFont" ReEncodeFont" ReEncodeFont" <8r.enc <8r.enc <8r.enc <8r.enc <8r.enc <8r.enc <8r.enc <8r.enc <8r.enc <8r.enc <8r.enc <8r.enc <8r.enc <8r.enc <pmnr8a.pfb <pmnri8a.pfb <pmns8a.pfb <pmnsi8a.pfb <pmnb8a.pfb <pmnbi8a.pfb <pmnc8a.pfb <pmnrc8a.pfb <pmnric8a.pfb <pmnsc8a.pfb <pmnsic8a.pfb <pmnbj8a.pfb <pmnbij8a.pfb <pmncj8a.pfb <pmnr8x.pfb <pmnri8x.pfb <pmns8x.pfb <pmnsi8x.pfb <pmnb8x.pfb extending the user interface pmnbi8x pmnc8x pmnriw7a pmnsiw7a pmnrp MinionExp-BoldItalic MinionExp-Black Minion-SwashItalic Minion-SwashSemiboldItalic Minion-Ornaments <pmnbi8x.pfb <pmnc8x.pfb <pmnriw7a.pfb <pmnsiw7a.pfb <pmnrp.pfb vi. Extending the user interface Before creating a style file for Minion, we will update nfssext.sty one more time to support its additional features. Support for swashes is easily added since the framework is already in place. Therefore, the first part of the file does not require any changes, we simply add support for swashes by defining \swstyle in a similar vein (–): ₁ ₂ ₃ ₄ ₅ ₆ ₇ ₈ ₉ ₁₀ ₁₁ ₁₂ ₁₃ ₁₄ ₁₅ ₁₆ ₁₇ ₁₈ ₁₉ ₂₀ ₂₁ ₂₂ ₂₃ ₂₄ ₂₅ ₂₆ ₂₇ ₂₈ ₂₉ ₃₀ ₃₁ ₃₂ ₃₃ ₃₄ ₃₅ ₃₆ ₃₇ ₃₈ ₃₉ ₄₀ ₄₁ ₄₂ \NeedsTeXFormat{LaTeX2e} \ProvidesPackage{nfssext}[2003/03/14 v1.2 Experimental NFSS Extensions] \newcommand*{\exfs@tempa}{} \newcommand*{\exfs@tempb}{} \newcommand*{\exfs@try@family}[2][]{% \let\exfs@tempa\relax \begingroup \fontfamily{#2}\try@load@fontshape \expandafter\ifx\csname\curr@fontshape\endcsname\relax \edef\exfs@tempa{#1}% \ifx\exfs@tempa\@empty \PackageWarning{nfssext}{% Font family ’\f@encoding/#2’ not available\MessageBreak Ignoring font switch}% \else \PackageInfo{nfssext}{% Font family ’\f@encoding/#2’ not available\MessageBreak Font family ’\f@encoding/#1’ tried instead}% \exfs@try@family{#1}% \fi \else \gdef\exfs@tempa{\fontfamily{#2}\selectfont}% \fi \endgroup \exfs@tempa} \def\exfs@get@base#1#2#3#4\@nil{#1#2#3} \DeclareRobustCommand{\lnstyle}{% \not@math@alphabet\lnstyle\relax \exfs@try@family[\expandafter\exfs@get@base\f@family\@nil]% {\expandafter\exfs@get@base\f@family\@nil x}} \DeclareRobustCommand{\osstyle}{% \not@math@alphabet\osstyle\relax \exfs@try@family{\expandafter\exfs@get@base\f@family\@nil j}} \DeclareRobustCommand{\instyle}{% \not@math@alphabet\instyle\relax \exfs@try@family{\expandafter\exfs@get@base\f@family\@nil 0}} \DeclareRobustCommand{\sustyle}{% \not@math@alphabet\sustyle\relax \exfs@try@family{\expandafter\exfs@get@base\f@family\@nil 1}} \DeclareRobustCommand{\swstyle}{% \not@math@alphabet\swstyle\relax \exfs@try@family{\expandafter\exfs@get@base\f@family\@nil w}} expert font sets, extended setup Adding thorough support for italic small caps is not quite as easy. The problem is that the creators of the nfss apparently did not think of italic small caps when putting italics and small caps in the same category. Since both variants are on the shape axis of the nfss they are mutually exclusive. While this will not keep us from using \fontshape to select italic small caps explicitly, nesting \scshape and \itshape does not have the desired effect. When nested, these macros simply override each other instead of switching to italic small caps. This problem is not as exotic as it may seem because italic small caps are hardly ever used explicitly. Typically, they come into play when small caps and italics are mixed on the same line. For example, think of a page header which is set in small caps, containing a highlighted word set in italics; or an italic section heading with an acronym set in small caps. To work around this problem, we will have to redefine a few nfss macros. But first of all, we will add a macro for explicit switching to italic small caps. ₄₃ \newcommand*{\sidefault}{si} Note that the nfss does not use fixed shape codes like it and sc for the italic and the small caps shape, but rather macros like \itdefault and \scdefault. We will handle italic small caps in a similar way by defining \sidefault, which defaults to si. Now let’s define \sishape for explicit switching to italic small caps: ₄₄ ₄₅ ₄₆ \DeclareRobustCommand{\sishape}{% \not@math@alphabet\sishape\relax \fontshape\sidefault\selectfont} While we are able to typeset italic small caps by selecting them explicitly, macros like \itshape and \scshape will simply ignore the new shape. Let’s redefine these macros to make them take advantage of italic small caps transparently. In order to do so, we need a macro that will merge properties of the shape axis, thereby allowing us to treat italics and small caps as if they were not on the same axis: ₄₇ ₄₈ ₄₉ ₅₀ ₅₁ ₅₂ ₅₃ ₅₄ ₅₅ ₅₆ \newcommand*{\exfs@merge@shape}[3]{% \edef\exfs@tempa{#1}% \edef\exfs@tempb{#2}% \ifx\f@shape\exfs@tempb \expandafter\ifx\csname\f@encoding/\f@family/\f@series/#3\endcsname\relax \else \edef\exfs@tempa{#3}% \fi \fi \fontshape{\exfs@tempa}\selectfont} This macro will switch to the font shape given as the first argument unless the current shape is identical to the one indicated by the second argument. In this case it will switch to the shape designated by the third argument instead, provided that it is available for the current font family. With this macro at hand we redefine \itshape: extending the user interface ₅₇ ₅₈ ₅₉ \DeclareRobustCommand{\itshape}{% \not@math@alphabet\itshape\mathit \exfs@merge@shape{\itdefault}{\scdefault}{\sidefault}} Essentially, \itshape will switch to the font shape it unless the current shape is sc, in which case it will switch to si instead, provided that si is available. \scshape does it the other way around: ₆₀ ₆₁ ₆₂ \DeclareRobustCommand{\scshape}{% \not@math@alphabet\scshape\relax \exfs@merge@shape{\scdefault}{\itdefault}{\sidefault}} We also redefine \upshape to make it switch to sc instead of n if the current shape is si: ₆₃ ₆₄ ₆₅ \DeclareRobustCommand{\upshape}{% \not@math@alphabet\upshape\relax \exfs@merge@shape{\updefault}{\sidefault}{\scdefault}} If no italic small caps are available, all of these macros will behave like they did before, making them suitable for global use. While we are at it, we also define a new macro, \dfshape, that will reset the current shape to the default (n unless \shapedefault has been redefined) regardless of the current shape: ₆₆ ₆₇ ₆₈ \DeclareRobustCommand{\dfshape}{% \not@math@alphabet\dfshape\relax \fontshape\shapedefault\selectfont} Before we add text commands for our new font switches, there is still one thing left to do. The macro \swstyle, which we have defined above (–), will switch to the the font family providing italic swashes (for example, pmnw). However, it will not activate the italic shape. It would be convenient to have a macro which takes care of all of that. We first create an auxiliary macro holding the shape which provides the actual swashes: ₆₉ \newcommand*{\swshapedefault}{\itdefault} Then we create a macro which will call \swstyle and select the shape providing the italic swashes in one shot: ₇₀ ₇₁ ₇₂ \DeclareRobustCommand{\swshape}{% \not@math@alphabet\swshape\relax \swstyle\fontshape\swshapedefault\selectfont} Finally, we add text commands for our new font switches: ₇₃ ₇₄ ₇₅ ₇₆ ₇₇ ₇₈ ₇₉ \DeclareTextFontCommand{\textln}{\lnstyle} \DeclareTextFontCommand{\textos}{\osstyle} \DeclareTextFontCommand{\textin}{\instyle} \DeclareTextFontCommand{\textsu}{\sustyle} \DeclareTextFontCommand{\textsi}{\sishape} \DeclareTextFontCommand{\textdf}{\dfshape} \DeclareTextFontCommand{\textsw}{\swshape} As far as text is concerned, all features of Minion are readily available at this point. Using the ornaments would still require low-level commands, though. expert font sets, extended setup vi. A high-level interface for ornaments Technically, ornament fonts are comparable to the euro fonts discussed in section iv.. To typeset the first ornament of Minion, for example, we could use the following construct: {\usefont{U}{pmnp}{m}{n}\char 97} As this is rather awkward and requires looking at the afm file to find out the encoding slot of each ornament, we will implement a higher-level solution. The problem is that ornament fonts do not conform to any encoding, so there is no standard we could rely on as far as the order of the glyphs in the font is concerned. We have to provide this information explicity in minion.sty. To facilitate this, we define the following macro: ₈₀ ₈₁ \newcommand*{\DeclareTextOrnament}[7]{% \expandafter\def\csname#1@orn\@roman#2\endcsname{#3/#4/#5/#6/#7}} To declare the first ornament of Minion, this macro would be employed as follows: \DeclareTextOrnament{pmn}{1}{U}{pmnp}{m}{n}{97} We use the first three letters of the font family name as an identifier (pmn) and assign a number ( in this case) to the ornament defined by the remaining arguments. These arguments form a complete font declaration with a syntax similar to that of the nfss macro \DeclareFontShape. The last argument is the encoding slot of the ornament ( here) as given in the afm file. You might wonder why we use a complete font declaration here. Since all ornaments are located in the same font, using the same encoding, series, and shape, this seems to be redundant. In this case, this is actually true. The problem is that ornaments are not neccessarily provided in dedicated fonts. Adobe Garamond, for example, comes with ornaments which are included in some of the alternate text fonts so we use a complete declaration for maximum flexibility. Internally, the ornaments are saved in a format modeled after the way the nfss handles font shapes. When typesetting an ornament later, we need a macro to parse this font declaration: ₈₂ ₈₃ ₈₄ ₈₅ ₈₆ ₈₇ ₈₈ ₈₉ ₉₀ \begingroup \catcode‘\/=12 \gdef\exfs@split@orndef#1/#2/#3/#4/#5\@nil{% \def\f@encoding{#1}% \def\f@family{#2}% \def\f@series{#3}% \def\f@shape{#4}% \def\exfs@tempa{#5}} \endgroup Since we use the base of the font family name as an identifier, we also need a macro that expands to the first three letters of the current font family: ₉₁ \def\exfs@base@family{\expandafter\exfs@get@base\f@family\@nil} the style file Now we can finally implement a user macro that actually typesets the ornament. We will simply call it \ornament: ₉₂ ₉₃ ₉₄ ₉₅ ₉₆ ₉₇ ₉₈ ₉₉ ₁₀₀ ₁₀₁ ₁₀₂ ₁₀₃ ₁₀₄ ₁₀₅ ₁₀₆ \DeclareRobustCommand{\ornament}[1]{% \expandafter\ifx\csname\exfs@base@family @orn\@roman#1\endcsname\relax \PackageWarning{nfssext}{% Ornament #1 undefined for font family ’\exfs@base@family’\MessageBreak Setting debug mark}% \rule{1ex}{1ex}% \else \begingroup \edef\exfs@tempb{\csname\exfs@base@family @orn\@roman#1\endcsname}% \expandafter\expandafter\expandafter\exfs@split@orndef \expandafter\string\exfs@tempb\@nil \selectfont\char\exfs@tempa \endgroup \fi} \endinput First of all, we check if the desired ornament has been declared () and issue a warning if not (–). We also typeset a mark () to facilitate debugging in this case. If it has been declared, we expand and parse the declaration (–), switch fonts, and typeset the ornament (). We use a group to keep the font change local. vi. The style file The style file for Minion is similar to the ones suggested in section iii. and v.. The only difference is the declaration of the text ornaments. This is the first part of minion.sty: ₁ ₂ ₃ ₄ ₅ ₆ ₇ ₈ ₉ \NeedsTeXFormat{LaTeX2e} \ProvidesPackage{minion}[2003/03/25 v1.0 Adobe Minion] \RequirePackage[T1]{fontenc} \RequirePackage{textcomp} \RequirePackage{nfssext} \DeclareOption{oldstyle}{\renewcommand*{\rmdefault}{pmnj}} \DeclareOption{lining}{\renewcommand*{\rmdefault}{pmnx}} \ExecuteOptions{oldstyle} \ProcessOptions When declaring the text ornaments, we take the encoding slot numbers from the respective afm file: C 97 ; C 98 ; C 99 ; C 100 ; C 101 ; WX 885 ; N ornament1 ; WX 1036 ; N ornament2 ; WX 1066 ; N ornament3 ; WX 866 ; N ornament4 ; WX 390 ; N ornament5 ; B B B B B 50 -65 835 744 ; 50 4 986 672 ; 50 -106 1016 745 ; 50 98 816 534 ; 50 86 341 550 ; We add a declaration for each ornament: ₁₀ ₁₁ ₁₂ ₁₃ ₁₄ \DeclareTextOrnament{pmn}{1}{U}{pmnp}{m}{n}{97} \DeclareTextOrnament{pmn}{2}{U}{pmnp}{m}{n}{98} \DeclareTextOrnament{pmn}{3}{U}{pmnp}{m}{n}{99} \DeclareTextOrnament{pmn}{4}{U}{pmnp}{m}{n}{100} \DeclareTextOrnament{pmn}{5}{U}{pmnp}{m}{n}{101} ₁₅ ₁₆ ₁₇ ₁₈ ₁₉ ₂₀ ₂₁ ₂₂ ₂₃ ₂₄ ₂₅ ₂₆ ₂₇ ₂₈ ₂₉ ₃₀ ₃₁ ₃₂ ₃₃ expert font sets, extended setup \DeclareTextOrnament{pmn}{6}{U}{pmnp}{m}{n}{102} \DeclareTextOrnament{pmn}{7}{U}{pmnp}{m}{n}{103} \DeclareTextOrnament{pmn}{8}{U}{pmnp}{m}{n}{104} \DeclareTextOrnament{pmn}{9}{U}{pmnp}{m}{n}{105} \DeclareTextOrnament{pmn}{10}{U}{pmnp}{m}{n}{106} \DeclareTextOrnament{pmn}{11}{U}{pmnp}{m}{n}{107} \DeclareTextOrnament{pmn}{12}{U}{pmnp}{m}{n}{108} \DeclareTextOrnament{pmn}{13}{U}{pmnp}{m}{n}{109} \DeclareTextOrnament{pmn}{14}{U}{pmnp}{m}{n}{110} \DeclareTextOrnament{pmn}{15}{U}{pmnp}{m}{n}{111} \DeclareTextOrnament{pmn}{16}{U}{pmnp}{m}{n}{112} \DeclareTextOrnament{pmn}{17}{U}{pmnp}{m}{n}{113} \DeclareTextOrnament{pmn}{18}{U}{pmnp}{m}{n}{114} \DeclareTextOrnament{pmn}{19}{U}{pmnp}{m}{n}{115} \DeclareTextOrnament{pmn}{20}{U}{pmnp}{m}{n}{116} \DeclareTextOrnament{pmn}{21}{U}{pmnp}{m}{n}{117} \DeclareTextOrnament{pmn}{22}{U}{pmnp}{m}{n}{118} \DeclareTextOrnament{pmn}{23}{U}{pmnp}{m}{n}{119} \endinput As mentioned before, Adobe Garamond features ornaments in the alternate text fonts, requiring a complete font declaration. In this case, the definitions would look as follows: \DeclareTextOrnament{pad}{1}{U}{pada}{m}{n}{49} \DeclareTextOrnament{pad}{2}{U}{pada}{m}{n}{50} \DeclareTextOrnament{pad}{3}{U}{pada}{m}{it}{49} Note that the ornament macro is deliberately designed to be sensitive to the active font family. When using Minion as text font, \ornament{1} will typeset the symbol a. When using Adobe Garamond, the same command sequence will typeset 1 instead. If you would like to use these text ornaments in a font independent manner, simply switch font families explicitly, adding extra braces to keep the font change local: {\fontfamily{pmnx}\selectfont\ornament{1}} Which Minion font family you select (for example, pmnx or pmnj) does not matter, but it has to be a known one, that is, there has to be a font definition file corresponding to the active text encoding in addition to the one for the ornament font. Note that, since the ornament declarations are given in the style file, you also need to load the respective package in the document preamble. For example, if you would like to typeset a document in Sabon and make use of some Minion text ornaments, you might do the following: \documentclass... \usepackage{minion} \usepackage{sabon} ... \begin{document} ... Text in Sabon ... {\fontfamily{pmnx}\selectfont\ornament{1}} the style file Apart from that, you can always go back to lower-level commands which merely depend on a font definition file (upmnp.fd and upada.fd here) for the respective ornament font: {\usefont{U}{pmnp}{m}{n}\char 97} {\usefont{U}{pada}{m}{n}\char 49} code tables The tables on the following pages are intended to give an idea of how the codes of the Fontname scheme relate to those used by Latex’s font selection scheme (nfss). The Fontname codes are what we use when renaming the font files during the installation while the nfss codes are what we need when selecting a certain font under Latex later. Sticking to the nfss codes listed below is not a technical requirement for a functional font installation. When using the \latinfamily macro, fontinst will indeed use these nfss codes. When employing low-level fontinst commands, however, the nfss font declaration is controlled by the last five arguments of the \installfont command. In theory, we could use an arbitrary code and the nfss would handle that just fine. It is still highly recommended to stick to these codes to avoid confusion and incompatibility. Two dashes in one of the table cells indicate that there is no customary code for this font property in the respective scheme whereas a blank cell means that the code is omitted. Properties which are not catered for by the \latinfamily macro are marked with an asterisk in the last column. Please note that Fontname codes and nfss codes cannot be mapped on a one-to-one basis in all cases since the two schemes are rather different in concept. Weights and widths, which are treated separately by the Fontname scheme, need to be concatenated and handled as a ‘series’ when using the nfss since the latter does not have independent categories (‘axes’) for weight and width. The ‘variant’ category of the Fontname scheme on the other hand, which embraces several different properties including shapes like italics as well as special glyph sets such as small caps or alternative figures, does not correspond to a single nfss axis. Some variants, like italics and small caps for example, are mapped to the ‘shape’ axis of the nfss. Others, such as alternative figures, are handled in completely different ways. Table lists variants corresponding to the most common nfss shapes only. When looking at the documentation of the Fontname scheme, you will find a lot more variant codes not mentioned here. Although they are used for file naming, they do not, or, at least do not necessarily correspond to a customary nfss shape. Hanging, inferior, and superior numbers (Fontname codes j, 0, and 1), for example, are treated as ‘variants’ by the Fontname scheme but they are usually implemented as independent font families on the level of the nfss. For the encodings listed in table the situation is similar. For example, a virtual font in t1 encoding featuring expert glyphs is indicated by adding 9e to the file name. However, on the level of the nfss the encoding code is T1 for all t1 encoded fonts and the fact that the font provides expert glyphs is expressed by adding the letter x to the font family name. code tables weight ultra light, thin, hairline extra light light book regular medium demibold semibold bold heavy black extra bold, extra black ultra bold, ultra black poster fontname code nfss series a j l k r m d s b h c x u p ul* el* l m m mb db sb b eb eb eb ub --* Table 3: Codes for font weights width ultra compressed ultra condensed extra compressed, extra condensed compressed condensed narrow regular extended expanded extra expanded ultra expanded wide fontname code nfss series u o q p c n uc* uc* ec* c* c* c x e v -w x* x* ex* ux* --* Table 4: Codes for font widths variant normal, upright, roman italic oblique, slanted small caps italic small caps upright italic outline fontname code nfss shape i o c ic -l n it sl sc si* ui* ol* Table 5: Codes for font variants code tables encoding Adobe Standard Expert Tex Base Tex Text Tex Tex with expert set Tex Text with expert set and osf Cork Cork with expert set Cork with expert set and osf Text Companion Text Companion with expert set fontname code nfss encoding 8a 8x 8r 7t 9t 9o 8t 9e 9d 8c 9c 8a 8x 8r OT1 OT1 OT1 T1 T1 T1 TS1 TS1 Table 6: Codes for font encodings the gnu free documentation license Version ., November Copyright © , , Free Software Foundation, Inc. Temple Place, Suite , Boston, ma - usa . Preamble The purpose of this license is to make a manual, textbook, or other functional and useful document ‘free’ in the sense of freedom: to assure everyone the effective freedom to copy and redistribute it, with or without modifying it, either commercially or noncommercially. Secondarily, this license preserves for the author and publisher a way to get credit for their work, while not being considered responsible for modifications made by others. This license is a kind of ‘copyleft’, which means that derivative works of the document must themselves be free in the same sense. It complements the gnu General Public License, which is a copyleft license designed for free software. We have designed this license in order to use it for manuals for free software, because free software needs free documentation: a free program should come with manuals providing the same freedoms that the software does. But this license is not limited to software manuals; it can be used for any textual work, regardless of subject matter or whether it is published as a printed book. We recommend this license principally for works whose purpose is instruction or reference. . Applicability and definitions This license applies to any manual or other work, in any medium, that contains a notice placed by the copyright holder saying it can be distributed under the terms of this license. Such a notice grants a world-wide, royalty-free license, unlimited in duration, to use that work under the conditions stated herein. The document, below, refers to any such manual or work. Any member of the public is a licensee, and is addressed as you. You accept the license if you copy, modify or distribute the work in a way requiring permission under copyright law. A modified version of the document means any work containing the document or a portion of it, either copied verbatim, or with modifications and/or translated into another language. A secondary section is a named appendix or a front-matter section of the document that deals exclusively with the relationship of the publishers or authors of the document to the document’s overall subject (or to related matters) and contains nothing that could fall directly within that overall subject. (Thus, if the document is in part a textbook of mathematics, a secondary section may the gnu free documentation license not explain any mathematics.) The relationship could be a matter of historical connection with the subject or with related matters, or of legal, commercial, philosophical, ethical or political position regarding them. The invariant sections are certain secondary sections whose titles are designated, as being those of invariant sections, in the notice that says that the document is released under this license. If a section does not fit the above definition of secondary then it is not allowed to be designated as invariant. The document may contain zero invariant sections. If the document does not identify any invariant sections then there are none. The cover texts are certain short passages of text that are listed, as front-cover texts or back-cover texts, in the notice that says that the document is released under this license. A front-cover text may be at most five words, and a backcover text may be at most words. A transparent copy of the document means a machine-readable copy, represented in a format whose specification is available to the general public, that is suitable for revising the document straightforwardly with generic text editors or (for images composed of pixels) generic paint programs or (for drawings) some widely available drawing editor, and that is suitable for input to text formatters or for automatic translation to a variety of formats suitable for input to text formatters. A copy made in an otherwise transparent file format whose markup, or absence of markup, has been arranged to thwart or discourage subsequent modification by readers is not transparent. An image format is not transparent if used for any substantial amount of text. A copy that is not ‘transparent’ is called ‘opaque’. Examples of suitable formats for transparent copies include plain Ascii without markup, Texinfo input format, Latex input format, sgml or xml using a publicly available dtd, and standard-conforming simple html, Postscript or pdf designed for human modification. Examples of transparent image formats include png, xcf and jpg. Opaque formats include proprietary formats that can be read and edited only by proprietary word processors, sgml or xml for which the dtd and/or processing tools are not generally available, and the machine-generated html, Postscript or pdf produced by some word processors for output purposes only. The title page means, for a printed book, the title page itself, plus such following pages as are needed to hold, legibly, the material this license requires to appear in the title page. For works in formats which do not have any title page as such, ‘title page’ means the text near the most prominent appearance of the work’s title, preceding the beginning of the body of the text. A section entitled xyz means a named subunit of the document whose title either is precisely xyz or contains xyz in parentheses following text that translates xyz in another language. (Here xyz stands for a specific section name mentioned below, such as ‘Acknowledgements’, ‘Dedications’, ‘Endorsements’, or ‘History’.) To ‘preserve the title’ of such a section when you modify the docu- the gnu free documentation license ment means that it remains a section ‘entitled xyz’ according to this definition. The document may include warranty disclaimers next to the notice which states that this license applies to the document. These warranty disclaimers are considered to be included by reference in this license, but only as regards disclaiming warranties: any other implication that these warranty disclaimers may have is void and has no effect on the meaning of this license. . Verbatim copying You may copy and distribute the document in any medium, either commercially or noncommercially, provided that this license, the copyright notices, and the license notice saying this license applies to the document are reproduced in all copies, and that you add no other conditions whatsoever to those of this license. You may not use technical measures to obstruct or control the reading or further copying of the copies you make or distribute. However, you may accept compensation in exchange for copies. If you distribute a large enough number of copies you must also follow the conditions in section . You may also lend copies, under the same conditions stated above, and you may publicly display copies. . Copying in quantity If you publish printed copies (or copies in media that commonly have printed covers) of the document, numbering more than , and the document’s license notice requires cover texts, you must enclose the copies in covers that carry, clearly and legibly, all these cover texts: front-cover texts on the front cover, and back-cover texts on the back cover. Both covers must also clearly and legibly identify you as the publisher of these copies. The front cover must present the full title with all words of the title equally prominent and visible. You may add other material on the covers in addition. Copying with changes limited to the covers, as long as they preserve the title of the document and satisfy these conditions, can be treated as verbatim copying in other respects. If the required texts for either cover are too voluminous to fit legibly, you should put the first ones listed (as many as fit reasonably) on the actual cover, and continue the rest onto adjacent pages. If you publish or distribute opaque copies of the document numbering more than , you must either include a machine-readable transparent copy along with each opaque copy, or state in or with each opaque copy a computernetwork location from which the general network-using public has access to download using public-standard network protocols a complete transparent copy of the document, free of added material. If you use the latter option, you must take reasonably prudent steps, when you begin distribution of opaque copies in quantity, to ensure that this transparent copy will remain thus accessible at the stated location until at least one year after the last time you distribute an opaque copy (directly or through your agents or retailers) of that edition to the gnu free documentation license the public. It is requested, but not required, that you contact the authors of the document well before redistributing any large number of copies, to give them a chance to provide you with an updated version of the document. . Modifications You may copy and distribute a modified version of the document under the conditions of sections and above, provided that you release the modified version under precisely this license, with the modified version filling the role of the document, thus licensing distribution and modification of the modified version to whoever possesses a copy of it. In addition, you must do these things in the modified version: a. Use in the title page (and on the covers, if any) a title distinct from that of the document, and from those of previous versions (which should, if there were any, be listed in the history section of the document). You may use the same title as a previous version if the original publisher of that version gives permission. b. List on the title page, as authors, one or more persons or entities responsible for authorship of the modifications in the modified version, together with at least five of the principal authors of the document (all of its principal authors, if it has fewer than five), unless they release you from this requirement. c. State on the title page the name of the publisher of the modified version, as the publisher. d. Preserve all the copyright notices of the document. e. Add an appropriate copyright notice for your modifications adjacent to the other copyright notices. f. Include, immediately after the copyright notices, a license notice giving the public permission to use the modified version under the terms of this license. g. Preserve in that license notice the full lists of invariant sections and required cover texts given in the document’s license notice. h. Include an unaltered copy of this license. i. Preserve the section entitled ‘History’, preserve its title, and add to it an item stating at least the title, year, new authors, and publisher of the modified version as given on the title page. If there is no section entitled ‘History’ in the document, create one stating the title, year, authors, and publisher of the document as given on its title page, then add an item describing the modified version as stated in the previous sentence. j. Preserve the network location, if any, given in the document for public access to a transparent copy of the document, and likewise the network locations given in the document for previous versions it was based on. These the gnu free documentation license k. l. m. n. o. may be placed in the ‘History’ section. You may omit a network location for a work that was published at least four years before the document itself, or if the original publisher of the version it refers to gives permission. For any section entitled ‘Acknowledgements’ or ‘Dedications’, preserve the title of the section, and preserve in the section all the substance and tone of each of the contributor acknowledgements and/or dedications given therein. Preserve all the invariant sections of the document, unaltered in their text and in their titles. Section numbers or the equivalent are not considered part of the section titles. Delete any section entitled ‘Endorsements’. Such a section may not be included in the modified version. Do not retitle any existing section to be entitled ‘Endorsements’ or to conflict in title with any invariant section. Preserve any warranty disclaimers. If the modified version includes new front-matter sections or appendices that qualify as secondary sections and contain no material copied from the document, you may at your option designate some or all of these sections as invariant. To do this, add their titles to the list of invariant sections in the modified version’s license notice. These titles must be distinct from any other section titles. You may add a section entitled ‘Endorsements’, provided it contains nothing but endorsements of your modified version by various parties – for example, statements of peer review or that the text has been approved by an organization as the authoritative definition of a standard. You may add a passage of up to five words as a front-cover text, and a passage of up to words as a back-cover text, to the end of the list of cover texts in the modified version. Only one passage of front-cover text and one of backcover text may be added by (or through arrangements made by) any one entity. If the document already includes a cover text for the same cover, previously added by you or by arrangement made by the same entity you are acting on behalf of, you may not add another; but you may replace the old one, on explicit permission from the previous publisher that added the old one. The author(s) and publisher(s) of the document do not by this license give permission to use their names for publicity for or to assert or imply endorsement of any modified version. . Combining documents You may combine the document with other documents released under this license, under the terms defined in section above for modified versions, provided that you include in the combination all of the invariant sections of all of the original documents, unmodified, and list them all as invariant sections of the gnu free documentation license your combined work in its license notice, and that you preserve all their warranty disclaimers. The combined work need only contain one copy of this license, and multiple identical invariant sections may be replaced with a single copy. If there are multiple invariant sections with the same name but different contents, make the title of each such section unique by adding at the end of it, in parentheses, the name of the original author or publisher of that section if known, or else a unique number. Make the same adjustment to the section titles in the list of invariant sections in the license notice of the combined work. In the combination, you must combine any sections entitled ‘History’ in the various original documents, forming one section entitled ‘History’; likewise combine any sections entitled ‘Acknowledgements’, and any sections entitled ‘Dedications’. You must delete all sections entitled ‘Endorsements.’ . Collections of documents You may make a collection consisting of the document and other documents released under this license, and replace the individual copies of this license in the various documents with a single copy that is included in the collection, provided that you follow the rules of this license for verbatim copying of each of the documents in all other respects. You may extract a single document from such a collection, and distribute it individually under this license, provided you insert a copy of this license into the extracted document, and follow this license in all other respects regarding verbatim copying of that document. . Aggregation with independent works A compilation of the document or its derivatives with other separate and independent documents or works, in or on a volume of a storage or distribution medium, is called an ‘aggregate’ if the copyright resulting from the compilation is not used to limit the legal rights of the compilation’s users beyond what the individual works permit. When the document is included in an aggregate, this license does not apply to the other works in the aggregate which are not themselves derivative works of the document. If the cover text requirement of section is applicable to these copies of the document, then if the document is less than one half of the entire aggregate, the document’s cover texts may be placed on covers that bracket the document within the aggregate, or the electronic equivalent of covers if the document is in electronic form. Otherwise they must appear on printed covers that bracket the whole aggregate. . Translation Translation is considered a kind of modification, so you may distribute translations of the document under the terms of section . Replacing invariant sections the gnu free documentation license with translations requires special permission from their copyright holders, but you may include translations of some or all invariant sections in addition to the original versions of these invariant sections. You may include a translation of this license, and all the license notices in the document, and any warranty disclaimers, provided that you also include the original English version of this license and the original versions of those notices and disclaimers. In case of a disagreement between the translation and the original version of this license or a notice or disclaimer, the original version will prevail. If a section in the document is entitled ‘Acknowledgements’, ‘Dedications’, or ‘History’, the requirement (section ) to preserve its title (section ) will typically require changing the actual title. . Termination You may not copy, modify, sublicense, or distribute the document except as expressly provided for under this license. Any other attempt to copy, modify, sublicense or distribute the document is void, and will automatically terminate your rights under this license. However, parties who have received copies, or rights, from you under this license will not have their licenses terminated so long as such parties remain in full compliance. . Future revisions of this license The Free Software Foundation may publish new, revised versions of the gnu Free Documentation License from time to time. Such new versions will be similar in spirit to the present version, but may differ in detail to address new problems or concerns.¹ Each version of the license is given a distinguishing version number. If the document specifies that a particular numbered version of this license “or any later version” applies to it, you have the option of following the terms and conditions either of that specified version or of any later version that has been published (not as a draft) by the Free Software Foundation. If the document does not specify a version number of this license, you may choose any version ever published (not as a draft) by the Free Software Foundation. http://www.gnu.org/copyleft/ revision history 1.23 2003-08-31 1.20 2003-07-17 1.10 2003-03-27 1.00 2003-03-25 0.80 2003-03-23 0.68 2003-02-09 0.66 0.65 2003-01-26 2003-01-19 0.60 2003-01-11 0.54 2003-01-04 0.52 2003-01-02 0.50 2002-12-30 0.43 2002-10-25 0.40 0.30 0.20 2002-08-11 2002-05-12 2002-04-17 Added tables and to section i. Revised section i., adding note about Latin Modern Revised section i. Added preliminary hints concerning fontinst . to section iv. Fixed problem with nfssext.sty (sections iii., v., and vi.) Improved support for swashes in nfssext.sty (section vi.) Revised discussion of ornaments in section vi. Revised discussion of swashes in section vi. Added spelling corrections by William Adams Added spelling corrections by Adrian Burd Added gnu Free Documentation License to the appendix Added explicit licensing clause Final release for fontinst . Added tutorial vi Updated notes on contributions Added spelling corrections and suggestions by Timothy Eyre Revised section i., splitting off section i. Added section iii. Updated notes on contributions Revised section iv. Updated notes on contributions Added highlighting to code listings Added spelling corrections by Adrian Heathcote Added spelling corrections by William Adams Added section ii. Revised section ii. Revised introduction Revised tutorial iii Added discussion of kerning issues to section iii. Revised discussion of ot1 encoding in tutorial i Added minor changes to code tables Added code table to appendix Revised note on code tables in appendix Added tutorial v Added code tables , , and to appendix Added revision history First public pre-release featuring tutorials i–iv Added installation instructions to section iv. Added section iv. Added tutorial iv Added tutorial iii Unreleased draft including tutorials i and ii