1
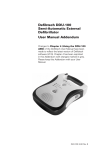
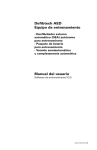
AED Training Equipment
- Standalone AED Trainer
- Training Battery Pack System
User Manual
Training Software V2.2
DAC-515E Rev. B
Notices
Defibtech shall not be liable for errors contained herein or for incidental or
consequential damages in connection with the furnishing, performance, or use
of this material.
Information in this document is subject to change without notice. Names and
data used in the examples are fictitious unless otherwise noted.
Limited Warranty
The information in the Defibtech AED User Manual does not constitute any
warranty as to the Defibtech AED or any related products. The “Limited
Warranty” shipped with Defibtech AED products serves as the sole and
exclusive warranty provided by Defibtech L.L.C. with respect to these products.
Copyright
Copyright 2006 Defibtech, L.L.C.
All rights reserved. No part of this documentation may be reproduced or
transmitted in any form by any means without the express written consent of
Defibtech, L.L.C.
DAC-515E Rev. B
Contents
1 Introduction to Defibtech AED Training Products.......................... 1
2 Training Equipment Components & Preparation............................. 2
2.1 Common Components.............................................................. 2
2.1.1 DBP-RC2 Training Battery Pack........................................................ 2
2.1.2 DTR-400 Remote Control................................................................ 2
2.1.3 Training Pads ................................................................................ 2
2.2 Standalone AED Trainer .......................................................... 3
2.3 Training Battery Pack System ................................................ 3
2.3.1 Configuring a Defibtech DDU-100 series AED as a Trainer................... 3
3 Training Scenarios .......................................................................... 4
3.1 Available Scenarios.................................................................. 4
3.2 The Default Training Scenario................................................. 4
3.3 Programming the Default Scenario......................................... 5
3.3.1 Programming the Default Scenario Without the Remote Control .......... 5
3.3.2 Programming the Default Scenario With the Remote Control................ 5
4 Remote Control Commands . .......................................................... 6
5 Using the Remote Control With Multiple AEDs .............................. 7
5.1 Assigning Unique Names to AEDs............................................ 7
5.2 Removing Unique Names from AEDs........................................ 7
6 Notice to European Union Customers ............................................ 8
7 Contacts........................................................................................... 9
DAC-515E Rev. B
1Introduction to Defibtech AED Training Products
Defibtech offers two equipment options for training students in the use of its
AEDs:
The “Standalone AED Trainer” is a dedicated training AED package that
is externally similar to a fully-functional Defibtech AED, but has bright red
overmolding to clearly distinguish it as a training device. It cannot be used to
defibrillate patients. A Remote Control is provided with the Standalone AED
Trainer, which allows the instructor to control training exercises and AED functions
from a distance.
The “Training Battery Pack System” is a rechargeable training battery pack and
training software (provided on a small data card) that allows a fully-functional
Defibtech DDU-100 series AED to be converted to a training device. The Remote
Control is an optional part of this package.
The functional details of these two equipment options are identical during training
operations. Discussion of these details begins in section 3.
DAC-515E Rev. B
2Training Equipment Components & Preparation
Note: The following section 2.1 applies to both the Standalone AED Trainer
and the Training Battery Pack System. After reviewing this section, please refer
to either section 2.2 or section 2.3 as appropriate to your specific training
equipment.
2.1 Common Components
2.1.1 DBP-RC2 Training Battery Pack
The rechargeable DBP-RC2 Training Battery Pack is a component of both the
Standalone AED Trainer and the Training Battery Pack System.
Before use, the Training Battery Pack should be charged using the supplied
battery pack charger (DTR-200). The battery will fully charge in 12-14 hours.
Note: Avoid overcharging for longest battery life – when proper charging
procedures are followed, the battery pack should have a life of approximately 200
charge/discharge cycles.
The Training Battery Pack does not require a 9V battery.
Note: If a Training Battery Pack is installed in an AED or AED Trainer with a 9V
battery, the ASI indicator light in the upper right corner of the AED will blink
red and a warning chirp will be generated to warn the user that the AED is not
capable of operating as a rescue defibrillator.
2.1.2 DTR-400 Remote Control
The DTR-400 Remote Control is supplied with the Standalone AED Trainer and is
an optional component of the Training Battery Pack System.
Use of the Remote Control during training exercises is optional when using
either equipment option.
The Remote Control requires two AAA batteries. Insert the batteries into the
battery compartment in the back of the Remote Control. No other setup of the
Remote Control is required.
2.1.3 Training Pads
One set of adult training pads (DDP-101TR) is supplied with the Standalone AED
Trainer and are available separately for optional use with the Training Battery Pack
System.
Training pads are available as complete sets (pads, wire, & connector
assemblies) and as economical replacement pads in both adult and pediatric
sizes. The replacement pads attach (with hook and loop fasteners) to the
reusable wire & connector supplied with complete pad sets.
Part numbers for these pad options are: DDP-101TR (Complete adult pad set),
DDP-105TR (5-pack adult replacement pads), DDP-201TR (Complete pediatric pad
set), DDP-205TR (5-pack pediatric replacement pads).
DAC-515E Rev. B
2.2 Standalone AED Trainer
WARNING: The Standalone AED Trainer cannot be used to defibrillate patients.
The components required to operate the Standalone AED Trainer are:
1.
2.
3.
4.
Standalone AED Trainer (DDU-100TR).
Training Battery Pack (DBP-RC2) - supplied with the Standalone AED
Trainer.
Training Pads - 1 adult set (DDP-101TR) supplied.
Remote Control (DTR-400) - supplied, but use is optional.
2.3 Training Battery Pack System
The Defibtech Training Battery Pack System allows a standard Defibtech DDU100 Series AED to be converted to an AED training device. It is available in two
configurations: one with a Remote Control and one without.
WARNING: While the Training Battery Pack is inserted in a DDU-100 series AED,
the AED cannot be used to perform a rescue. Replacing the Training Battery
Pack with a rescue battery pack will immediately allow the AED to be used to
perform a rescue.
The components required to operate a DDU-100 series AED in training mode are:
1.
2.
3.
4.
5.
DDU-100 series AED.
Training Battery Pack (DBP-RC2) - supplied with both system
configurations.
Training Software Card (DTR-300) - supplied with both system
configurations.
Training Pads - use is optional
Remote Control (DTR-400) - use is optional.
2.3.1 Configuring a Defibtech DDU-100 series AED as a Trainer
1.
2.
3.
Remove the rescue battery pack from the DDU-100 AED.
Insert the DTR-300 Training Software Card into the slot directly above
the battery pack opening (label side up, notched end towards unit).
Insert the Training Battery Pack until it latches into place.
The AED will now operate only in training mode.
WARNING: While the Training Battery Pack is inserted in a DDU-100 series AED,
the AED cannot be used to perform a rescue. Replacing the Training Battery
Pack with a rescue battery pack will immediately allow the AED to be used to
perform a rescue.
Note: The AED will announce “Training Mode” each time it is turned on. This will
indicate that it cannot be used to defibrillate a patient while the Training Battery
Pack is inserted.
WARNING: Training Pads cannot be used to rescue a patient. If Training Pads are
connected to a non-training configured AED, the AED will say “Check Pads,” and
the AED will report an error during the next automatic self-test.
DAC-515E Rev. B
3Training Scenarios
3.1 Available Scenarios
Six training scenarios (described below) are available for training exercises, and
can be changed during training as desired.
The following scenarios are available:
1.
VF (Ventricular Fibrillation) that converts to a non-shockable rhythm
(normal sinus rhythm) after the 1st shock. This scenario is based on
the American Heart Association AED training scenario and allows for a
quick overview and demonstration of AED operation.
2.
Non-shockable rhythm throughout.
3.
Bad pads indication until the pads are disconnected and then reconnected (simulating replacement of the pads), followed by VF that
converts after the 1st shock to a non-shockable rhythm (normal sinus
rhythm).
4.
VF that converts on the 2nd shock to a non-shockable rhythm (normal
sinus rhythm).
5.
Non-converting persistent VF.
6.
Pads not applied to the patient. This scenario is recommended as the
Default Scenario when using the Remote Control. The AED will prompt
the student to apply pads to the patient dummy, and the instructor can
then manually select rhythm simulations (such as NSR and VF) or any
one of the above training scenarios using the Remote Control.
Note: When the AED Trainer is turned on, it will power up in the Default
Scenario, not in the last-used scenario (see section 3.3 for instructions on setting
the Default Scenario).
Note: Training scenarios 1-5 assume that pads have already been applied to
the patient if pads are connected to the AED when the AED is turned on. For
properly sequenced exercises using these training scenarios, the student should
either apply the pads to the patient before turning the unit on, or turn the unit
on with pads disconnected, apply the pads to the patient, and then connect the
pads to the AED.
3.2 The Default Training Scenario
When a AED Trainer is first turned on, it operates in the “Default Training
Scenario”. The Default Training Scenario can be changed to any of the six available
training scenarios.
Note: New Standalone AED Trainers and newly-configured DDU-100 AEDs are
factory programmed to initially start with the Default Training Scenario set to
scenario #1.
DAC-515E Rev. B
3.3 Programming the Default Scenario
The AED Trainer can be re-programmed to start in any of the six available
scenarios when powered on.
3.3.1 Programming the Default Scenario Without the Remote
Control
If the user does not have a Remote Control, the processes of selecting training
scenarios and programming the Default Scenario are the same. The AED will
retain the last scenario selected and start with that scenario the next time it is
powered on.
Use the following procedure to select a training scenario when a Remote Control
is not available:
1.
2.
3.
4.
5.
6.
Start with the AED off.
Hold the Shock button down while turning the unit on.
The unit will announce “Training Mode n,” where “n” is the number of
the current Default Training Scenario.
Release the Shock button.
Push the Shock button repeatedly to advance through the available
training scenarios until the desired scenario is reached (the AED will
announce each scenario number in sequence).
Note: It is OK to push the Shock button rapidly (without waiting for the
numbers to be announced) in order to advance more quickly.
Turn the AED off. The AED will now operate in the chosen training
scenario until the Default Scenario is reprogrammed.
3.3.2 Programming the Default Scenario With the Remote Control
Note: When performing training using the Remote Control, Defibtech
recommends programming training scenario #6 (Pads not applied) as the
Default Training Scenario. This will allow the instructor to manually select rhythm
simulations or other training scenarios as desired using the Remote Control.
To program the Default Scenario using the Remote Control:
1.
Start with the AED off.
2.
Power on the AED.
3.
Press and release the Shift Key on the Remote Control.
4.
Press and release the Alt Key on the Remote Control.
5.
Press the number key corresponding to the desired training scenario (#1
through #6).
6.
The AED will announce “Training Mode ‘n’” where ‘n’ corresponds to
the numeric key that was pressed.
The Default Training Scenario has now been programmed and the AED will start
using this training scenario every time the unit is turned on.
Note: The AED will announce “Training Mode” each time it is turned on to
indicate that it cannot be used to defibrillate a patient.
DAC-515E Rev. B
4Remote Control Commands
The Remote Control can be used to change the behavior of the AED at any
time while the unit is powered on. The remote will have no effect on an AED
not configured as a trainer. The following functions can be performed using the
Remote Control keys:
•
OFF - turns the AED off.
•
PADS - simulates disconnected pads.
•
NSR - simulates a Normal Sinus Rhythm (typically used once pads
have been applied to the training dummy).
•
VFIB - simulates Ventricular Fibrillation (typically used once pads
have been applied to the training dummy).
•
MOTION - simulates a cardiac rhythm corrupted with excessive
motion artifacts (typically used once pads have been applied to the
training dummy).
•
1 - 6 - instantly changes the AED to the corresponding training
scenario.
•
VOLUME UP - increases the volume of the AED’s voice
incrementally (up to a maximum limit).
•
VOLUME DOWN - reduces the volume of the AED’s voice
incrementally (down to a minimum limit).
•
PAUSE - alternately suspends and resumes AED operation. Once
paused, the AED will only respond to the PAUSE key of the Remote
Control.
DAC-515E Rev. B
5Using the Remote Control With Multiple AEDs
The Remote Control can be used to individually control up to four AEDs at a time
in a classroom setting.
To control each of the four AEDs individually, each AED must be assigned a
unique letter “name.” The Remote Control has four keys (A through D) which are
used to program the AEDs with this name.
These keys may then be used as a prefix to any of the commands described in
the previous section (e.g. pressing A, then NSR causes AED ‘A’ to simulate a
normal sinus rhythm, pressing D, then PAUSE will cause AED ‘D’ to suspend
operation).
Note: To simultaneously control multiple AEDs after they have been assigned
unique names, the instructor may use the Remote Control key sequence SHIFTALT-‘Key’ (where ‘Key’ is the desired control command). All AEDs within range
will respond to this sequence regardless of name assignment.
5.1 Assigning Unique Names to AEDs
To program up to four AEDs with unique names, use the following procedure:
1.
Start with all the AEDs off.
2.
Power on the AED that is to be programmed.
3.
Press and release the Shift Key on the Remote Control.
4.
Press and release the Alt Key on the Remote Control.
5.
Press one of the four alphabetically labeled keys on the Remote Control
(A to D) to set the AEDs “name.”
5.2 Removing Unique Names from AEDs
To remove the programmed name from an AED, use the following procedure:
1.
Start with all the AEDs off.
2.
Power on the AED with the name assignment that is to be removed.
3.
Press and release the Shift Key on the Remote Control.
4.
Press and release the Alt Key on the Remote Control.
5.
Press the Off Key on the Remote Control.
Note: To avoid accidental naming or re-naming of AEDs in a setting where all
AEDs may not be turned off, it is recommended that the above setup procedures
be performed on each AED in a separate room.
DAC-515E Rev. B
6Notice to European Union Customers
The crossed-out wheeled bin symbol
on this device indicates that this
equipment has been put on the market after 13 August 2005, and is included
in the scope of the directive 2002/96/EEC on waste electrical and electronic
equipment (WEEE) and of the national decree(s) which transpose provisions of
such directive.
At the end of its lifetime, this device can only be disposed of in compliance with
the provisions of the above mentioned European directive (and following possible
revisions) as well as with the corresponding national regulation. Severe penalties
are possible for unauthorized disposal.
Electrical and Electronic Equipment (EEE) may contain polluting components
and hazardous substances which accumulation could pose serious risk for
the environment and human health. That’s why local Administrations provide
regulations which encourage reuse and recycling, and prohibit the disposal of
WEEE as unsorted municipal waste and require the collection of such WEEE
separately (at specifically authorized treatment facilities). Manufacturer and
authorized distributors are required to supply information about a safe treatment
and disposition of the specific device.
You may also return this equipment to your distributor when purchasing a new
one. As for reuse and recycling, notwithstanding the limits imposed by the
nature and the use of this device, the manufacturer will do his best to develop
recovery processes. Please contact the local distributor for information.
DAC-515E Rev. B
7Contacts
Defibtech, L.L.C.
741 Boston Post Road
Guilford, CT 06437
Tel.:
Fax :
(866) 333-4241 (Toll-free within North America)
(203) 453-4507
(203) 453-6657
Emails: [email protected]
(Sales)
[email protected] (Medical Device Reporting)
[email protected] (Service and Repair)
European Authorized Representative:
Emergo Europe
Molenstraat 15
2513 BH The Hague
The Netherlands
Tel.: +31 70 345 8570
Fax:
+31 70 346 7299
DAC-515E Rev. B