1
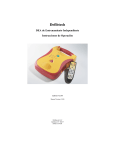
DCF-350T Standalone AED Trainer Package Introduction
Defibtech
Standalone AED Trainer
The DCF-350T Standalone AED Trainer package (DDU-100TR
Trainer AED with DBP-RC2 Training Battery) may be used to
instruct students in the various operating modes of Defibtech DDU100 series AEDs. The DDU-100TR is externally very similar to a
standard DDU-100, with the exception that the black rubberized
portions of the unit are red. This clearly distinguishes the trainer
device, which cannot be used to defibrillate patients, from fully
functional DDU-100 AEDs.
Ten instructor-selectable scenarios are provided. A remote control
can be used to optionally allow the instructor to control the training
device and to manually simulate additional training scenarios.
Operating Instructions
DCF-350T Standalone AED Trainer Warnings
Warning: The DDU-100TR Standalone Trainer cannot be used to
defibrillate patients.
Preparing the Training Package
The components required to operate the DCF-350T Trainer are:
Software V2.001
Manual Version 2.002
1.
2.
3.
4.
DDU-100TR Standalone AED Trainer
DBP-RC2 Training Battery Pack
DDP-100TR Training Pads
DTR-400 IR Remote Control (Optional)
The Training Battery Pack should be charged using the appropriate
battery pack charger (DTR-201 for the DBP-RC2) before use. The
battery will fully charge in 12-14 hours (note: avoid overcharging for
longest battery life – when proper charging procedures are followed,
the battery pack should have a life of approximately 200 charge/
discharge cycles).
Defibtech, LLC
Guilford, CT 06437
(866) 333-4241
The Training Battery Pack does not require a 9V battery. If a 9V
battery is installed, and the AED is turned off, the ASI will blink red
and a warning chirp will be generated to warn the user that the AED
is not capable of operating as a rescue defibrillator.
The AED will run the last programmed training scenario every time it
is turned on (see Programming sections below).
Page 1
Programming the Default Training Scenario without the IR Remote
Control
The Training Battery Pack retains the last programmed training
scenario and plays that scenario every time the AED is turned on until
a different training scenario is programmed. The instructor may
select from the available training scenarios (listed below). Use the
following programming procedure when an IR Remote Control is not
available:
1.
2.
3.
To program the Pads Not Applied Scenario (Training Scenario 10):
1.
2.
3.
4.
5.
6.
Start with the AED off.
Power on the AED.
Press and release the Shift Key on the IR Remote Control.
Press and release the Alt Key on the IR Remote Control.
Press and release the Pads Key on the IR Remote Control.
The AED will say “Training Mode 10”.
Start with the AED off.
Hold the Shock button down while turning the unit on.
The unit will announce “Training Mode,” followed by the
currently set scenario number.
Release the Shock button.
Thereafter, each time the Shock button is pushed, the
scenario number will advance and the AED will speak the
scenario number. Push the Shock button until the desired
scenario number is spoken (note: it is ok to push the Shock
button rapidly, without waiting for the numbers to be
spoken, in order to advance more quickly).
Turn the AED off.
If a different default scenario is desired on power up, the AED can be
programmed with the remote control to any of the other 9 scenarios
as follows:
The AED will now operate in the chosen training scenario until the
scenario is reprogrammed. Note that the AED will speak “Training
Mode” each time it is turned on to indicate that it cannot be used to
defibrillate a patient.
The default training scenario has now been programmed, and the
AED will operate in this training scenario every time the unit is
turned on. Note that the AED will speak “Training Mode” each time
it is turned on to indicate that it cannot be used to defibrillate a
patient.
4.
5.
6.
1.
2.
3.
4.
5.
6.
Start with the AED off.
Power on the AED.
Press and release the Shift Key on the IR Remote Control.
Press and release the Alt Key on the IR Remote Control.
Press a numeric key, 1 to 9, to program Training Scenario 1
to Training Scenario 9.
The AED will say “Training Mode ‘n’” where ‘n’
corresponds to the numeric key that was pressed.
Note: Training Scenarios 1-9 assume that if the pads are plugged into
the AED when the unit is turned on, the pads have already been
“applied” to the patient. Therefore, for proper operation of these
training scenarios, the student should either apply the pads to the
patient before turning the unit on or turn the unit on without the pads
plugged in and only plug in the pads after they have been applied to
the patient.
Programming the Default Training Scenario with the IR Remote
Control
When using the IR Remote Control, training scenarios can be selected
during operation by using the numeric keys on the remote. Defibtech
recommends that the AED be programmed to default to Training
Mode 10 (Pads not Applied) when using the IR Remote so the unit
always turns on with “pads off.”
Page 2
Page 3
Available Training Scenarios
IR Remote Setup
Different training scenarios can be selected by the instructor, either
by using the above described selection method, or by pressing the
appropriate number key on the remote. Scenarios 1-8 are based on
the American Heart Association AED training scenarios, but may be
applied to many other training protocols as well. Scenario 9 allows
for a quick overview and demonstration of AED operation. Scenario
10 is recommended as the default scenario when using the Training
Package with the remote control.
Before using the remote, insert two AAA batteries into the battery
compartment in the back of the remote control. No other setup of the
remote control is required.
The following scenarios are available:
Persistent VF that does not convert for 3 shocks, followed by
1 minute of CPR, followed by VF that converts on the 4th
shock to a non-VF rhythm (normal sinus rhythm).
2. VF that converts on the 2nd shock to asystole (non-shockable
rhythm).
3. VF that converts on the 2nd shock to a non-shockable rhythm
(normal sinus rhythm).
4. Non-shockable rhythm throughout.
5. Persistent VF that does not convert for 3 shocks, followed by
1 minute of CPR, followed by VF that converts on the 4th
shock to a non-VF rhythm (normal sinus rhythm).
6. Non-shockable rhythm throughout.
7. VF that converts on the 2nd shock to a non-shockable
rhythm, then patient refibrillates, and then converts to a
normal rhythm after a 3rd shock.
8. Bad pads indication until the pads connector is removed and
plugged back in (simulating replacement of the pad set),
followed by VF that converts on the 2nd shock to a nonshockable rhythm (normal sinus rhythm).
9. VF that converts on the 1st shock to a non-shockable rhythm
(normal sinus rhythm).
10. Pads are not applied to the patient. This scenario is used
with the IR Remote Control where the instructor can
interactively select different rhythms, such as NSR and VF,
or any one of the predefined Training Scenarios after the
student has applied the pads to the patient dummy.
IR Remote Commands
In Training Mode, the remote control can be used to change the
behavior of the AED at any time while the unit is powered on. The
remote will have no effect on an AED not configured for training.
The following functions can be performed using the remote control:
1.
Press the OFF key to turn off the AED.
Press the PADS key to simulate disconnected pads.
Press the NSR key to simulate a Normal Sinus Rhythm (e.g.
once pads have been applied to the training dummy).
Press the VF key to simulate Ventricular Fibrillation (e.g.
once pads have been applied to the training dummy).
Press the MOTION key to simulate a cardiac rhythm
corrupted with excessive motion artifacts (e.g.. once pads
have been applied to the training dummy).
Press a Numeric Key (1 to 9) to instantly change the training
scenario to one corresponding to that key (i.e. 1 begins
Training Scenario 1, 2 begins Training Scenario 2, etc.).
Press the VOLUME UP key to increase the volume of the
AED’s voice output. Subsequent pressing of the VOLUME
UP key will cause the volume to incrementally increase.
Once the volume has increased to the maximum possible,
pressing the VOLUME UP key will have no effect.
Press the VOLUME DOWN key to reduce the volume of the
AED’s voice output. Subsequent pressing of the VOLUME
DOWN key will cause the volume to incrementally
decrease. Once the volume has decreased to the minimum
possible, pressing the VOLUME DOWN key will have no
effect.
Press the PAUSE key to alternately suspend and resume
AED operation. Once paused, the AED will only respond to
the PAUSE key of the IR Remote Control.
Note that when the Trainer AED is turned on, it will power up in the
default scenario and not in the last used scenario (see previous section
on how to set the default scenario).
Page 4
Page 5
IR Remote with Multiple AEDs
The IR Remote Control can be used with up to four AEDs in a large
classroom. In order to individually command a given AED with the
IR Remote, each AED must be programmed with a unique name.
The IR Remote provides four alphabetically labeled keys (A through
D) which are used to name the AEDs and then may be used as a
prefix to any of the commands described in the previous section (e.g.
pressing A then NSR causes AED ‘A’ to simulate a normal sinus
rhythm, pressing D then PAUSE will cause AED ‘D’ to suspend
operation). To give a specific AED a unique name, the following
procedure must be performed:
1.
2.
3.
4.
5.
Start with all the AEDs off.
Turn on the AED that is to be programmed.
Press and release the Shift Key on the IR Remote Control.
Press and release the Alt Key on the IR Remote Control.
Press one of the four alphabetically labeled keys on the IR
Remote Control (A to D) to set the AEDs “name.”
To remove the programmed unique name from an AED, the
following procedure must be performed:
1.
2.
3.
4.
5.
Start with all the AEDs off.
Power on the AED that is to be programmed.
Press and release the Shift Key on the IR Remote Control.
Press and release the Alt Key on the IR Remote Control.
Press the Off Key on the IR Remote Control.
Note: The IR Remote and AED will always respond to SHIFT-ALT‘Key’ sequences without regard for programmed names.
As the remote control can be “seen” by multiple AEDs in the same
room, it is recommended that the above setup procedures be
performed on each AED in a separate room.
Page 6