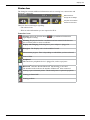
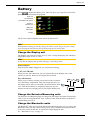
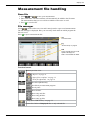
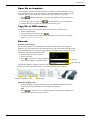
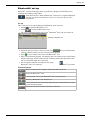
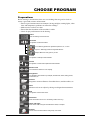
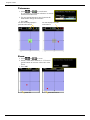
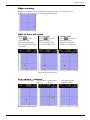
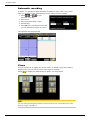
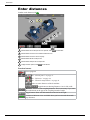
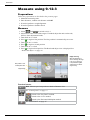
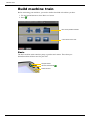
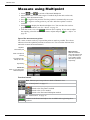
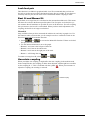
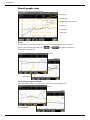
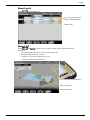
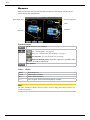
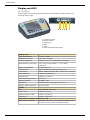
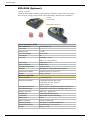
1
E710
MANUAL
English
05-0461 Revision 10.0
System version 7.0
CONTENT
INTRODUCTION1
Service and calibration
3
Travelling with your measurement system
4
DISPLAY UNIT
CHOOSE PROGRAM
23
Preparations23
PROGRAM VALUES
25
5
Tolerance26
Navigation buttons
6
Zoom26
OK buttons
6
Half or Zero set value
27
Function buttons
6
Live values – colours
27
Status bar
7
Automatic recording
28
Screen dump
8
Streaming values
29
LED lights
8
Calibration check
30
Battery9
HORIZONTAL31
Charge the Display unit
9
Adjust measuring units
32
A PC via USB cable 9
Select machines
33
Dry cell batteries 9
Enter distances
34
Charge the Detector/Measuring units
9
Measure using Easy Turn™
35
Measure using Multipoint
36
Calculator10
Measurement file handling
11
Quality assessment
37
Save file
11
Measure using 9-12-3
38
File manager
11
Result and adjust
39
Live values
40
Favourites12
Open file as template 13
Thermal compensation
Copy file to USB memory
13
RefLock™43
Barcode13
Tolerance44
Print file (Optional) 14
Report14
Download file to PC
Control panel
14
15
Filter15
Unit and resolution
16
Detector rotation
16
Date and time
16
Language17
User 17
Backlight17
Automatic power off
18
VGA18
System update 19
License 20
Bluetooth® set up
21
42
SOFTFOOT47
MACHINE TRAIN 49
Build machine train
50
Enter distances
52
Measure using EasyTurn™
53
Measure using Multipoint
54
Measure using 9-12-3
55
Result56
Result Machine view
56
Result Table view
57
Result Graph view
58
Lock feet pair
59
Best fit and Manual fit
59
Uncertain coupling
59
Adjust 60
Tolerance62
Thermal compensation
63
VERTICAL65
Preparations TWIST95
65
Measure95
Measure66
Result96
Result67
Adjust machine
68
CARDAN69
FLANGE FLATNESS
97
Preparations98
Measuring procedure
Flange result
99
Mount the units
69
101
Cone laser beam 70
Taper graph
103
Rough alignment
71
Calculation settings
104
Measure71
Custom reference points 105
Result72
Best fit 107
Adjustment72
All positive 108
All negative 108
STRAIGHTNESS73
Show target
74
Show reference target
74
Measure75
Quickmode76
Add and delete points
77
BTA109
Measure using Display unit
111
Measure without Display unit
114
VIBROMETER115
Measure116
Result78
Vibration level
117
Calculation settings
82
Bearing condition value
118
Reference points
82
OFFSET AND ANGLE
119
Best fit operations
84
BATTERY PACKS
121
TECHNICAL DATA
123
Waviness85
Straightness settings
86
FLATNESS89
Display unit E51
124
Measuring units
125
Preparation89
BTA E180 (Optional)
126
Enter distances
Vibrometer (Optional)
127
89
Measure91
Result table
92
Result grid
93
Result 3D
93
Calculation settings
94
Reference points
94
Best fit
94
INDEX 129
INTRODUCTION
Damalini AB
Damalini AB develops, manufactures and markets Easy-Laser® measurement and
alignment equipment based on laser technology.
We have more than 25 years of experience from measurement tasks in the field and
product development. We also provide measurement service, which means that we
ourselves use the equipment we develop, and continuously improve it. Because of this
we dare to call ourselves measurement specialists.
Do not hesitate to contact us about your measurement problems. Our expertise will
help you solve it in an easy way.
Declaration of conformity
Equipment: Easy-Laser® product range
Damalini AB declares that the Easy-Laser® product range is
manufactured in conformity with national and international regulations.
The system complies with, and has been tested according to the
following requirements:
EMC Directive
Low Voltage Directive
Laser Classification
2004/108/EG
2006/95/EC
EN-60825-1 and complies with 21 CFR 1040.10 and 1040.11
except for deviations pursuant to Laser Notice No. 50,
dated June 24, 2007.
RoHs Directive
2002/95/EG
WEEE Directive
2002/96/EG
®
For Bluetooth devices: This device complies with Part 15 of the FCC Rules.
Operation is subject to the following two conditions:
(1) this device may not cause harmful interference
(2) this device must accept any interference received, including interference that may
cause undesired operation.
Disposal of old electrical and electronic equipment (Applicable throughout the European Union and other European countries with separate collection programs)
This symbol, found on product or on its packing, indicates that this product should not be treated as household waste when disposed of.
It should be handed over to an applicable collection point for the recycling of electrical and electronic equipment. By ensuring this product is disposed
correctly, you will help to prevent potential negative consequences to the environment
and human health. For more detailed information about the recycling of this product,
please contact your local city office, household waste disposal service or the retail
store where you purchased this product.
Quality certificate
Damalini AB is ISO 9001:2008 certified. Certificate number 900958.
Damalini AB confirm, that our products are produced according to applicable national
and international regulations and standards. All components are checked before assembly and final products are tested in functionality and visually checked before delivery
The calibration of the equipment fully complies with ISO9001: 2008 #7.6
1
Introduction
Limited warranty
This product is manufactured under Damalini’s strict quality control system. Should
the product fail within two (2) years from the date of purchase under normal usage
conditions, Damalini will repair or replace the product free of charge.
1.Using new or refurbished replacement parts.
2.Exchange the product with a product that is new or which has been manufactured
from new or serviceable used parts and is at least functionally equivalent to the
original product.
Proof of purchase date should be confirmed, and sent together with a copy of the original purchase document.
Warranty is valid under normal usage described in the user’s manual appended with
the product. The warranty comprises failure on Easy-Laser® product that could be
related to material and/or fabrication errors. The warranty is valid only in the country
of purchase.
The warranty is not valid in the following cases:
• If the product is broken due to mishandling or incorrect operation
• If the product has been exposed to extreme temperature, calamity, chock or high
voltage.
• If the product has been modified, repaired or disassembled by unauthorized personnel.
Compensation for possible damage due to failure on Easy-Laser® product is not included in the warranty. Freight cost to Damalini is not included in the warranty.
Note!
Before delivery of the product for warranty repair, it is the responsibility of the buyer
to backup all data. Data recovery is not included in the warranty service and Damalini is not responsible for data that may be lost or damaged during transit or repair.
Lithium Ion battery limited warranty
Lithium ion batteries inevitably lose power during their lifetimes, depending on usage
temperatures and the number of charging cycles. Therefore, the internal rechargeable
batteries used in the E-series are not included in our general 2-year warranty. There
is a 1 year warranty for the battery capacity not to fall below 70 % (a normal change
means that the battery must have more than 70 % capacity after more than 300 charging cycles). A 2 year warranty applies if the battery becomes unusable because of a
manufacturing fault or factors that Damalini AB could be expected to have control of,
or if the battery displays abnormal loss of capacity in relation to use.
Extended warranty
Easy-Laser® Measurement and Alignment Systems meet the highest quality standards!
For this reason, we have extended the warranty to you to a total of 3 years — free of
charge!
The prerequisite for a warranty extension is that you register your system parts on
the Internet within 6 months of purchase. The warranty period begins on the date of
purchase. The warranty extension applies to all products in accordance with the EasyLaser® Warranty requirements.
2
Introduction
Safety precautions
Easy-Laser® is a laser instrument in laser class II
with an output power less than 1 mW, which
requires the following safety precautions:
• Never stare directly into the laser beam
• Never aim the laser beam at anyone else’s eyes.
Note!
Opening the laser units can result in hazardous radiation, and will invalidate the
manufacturer warranty.
If starting the machine to be measured would result in injuries, the possibility to unintentionally start it must be disabled before mounting the equipment, for example by
locking the switch in the off position or removing the fuses. These safety precautions
should remain in place until the measurement equipment has been removed from the
machine.
Note!
The system should not be used in explosive risk areas.
Service and calibration
Our Service centres will quickly assist you if your measurement system need to be
repaired or when it is time for calibration.
Our main Service centre is located in Sweden. There are several local Service centres
that are certified to carry out limited service and repair. Contact your local Service
centre first before sending your equipment for service or repair. All Service centres are
listed on our web site under Service and Calibration.
Before sending your measuring system to our main Service centre, please fill in the
online Service and Repair report. www.easy-laser-service.com
Manuals as PDF
You can download our manuals in pdf format from our website. The pdf’s are also
available on the USB memory stick that is delivered with most systems.
EasyLink
The new version of our database program EasyLink is available on the USB memory
stick that is delivered with most systems. You can always download the latest version
from damalini.com>download>software.
3
Introduction
Travelling with your measurement system
When travelling by airplane with your measurement system we strongly recommend
that you check which rules apply for each airline company. Some companies/countries
have limitations for checked baggage when it comes to items including batteries. For
information about Easy-Laser® batteries, please see system unit details in the end of
this manual. It is also good practice to remove the batteries from the equipment, when
possible, e.g. D22, D23 and D75.
Compatibility
The E-series is not compatible with previous analogue units from the D-series. You can
however continue to use previous brackets.
Disclaimer
Damalini AB and our authorized dealers will take no responsibility for damage to
machines and plant as a result of the use of Easy-Laser® measurement and alignment
systems.
Copyright
© Damalini 2013
We might change and correct the manual in later issues without further information.
Changes to the Easy-Laser® equipment may also affect the accuracy of the information.
October 2013
Fredrik Eriksson
Quality Manager, Damalini AB
Damalini AB, PO Box 149, SE-431 22 Mölndal, Sweden
Phone: +46 31 708 63 00, E-mail: [email protected]
Web: www.damalini.com
4
DISPLAY UNIT
Press and hold the On/Off button to reset the Display unit.
LED signals
OK buttons
Navigation buttons
Numeric buttons
Function buttons
A
Connection for external power.
B
Network connection. (Not available on all systems.)
C
External connection. Use for projector for example. (Not available on all systems.)
D
USB A (master). Use for USB memory.
E
USB B (slave). Use for connecting to a PC.
F
Connection for Easy-Laser® equipment.
G
Protective cover.
Battery compartment
(Not available on all systems.)
A
B
C
D
E
F
G
5
Display unit
Navigation buttons
To navigate on the screen, use the navigation buttons. The selected icon is marked with
a yellow frame. The navigation buttons are also used to move between the icons in a
submenu and to change the values in the fields.
Navigation buttons
OK button
Numerical buttons
Function buttons
OK buttons
There are two green OK buttons and they both work in the same way. Press
select the currently selected icon for example.
to
Function buttons
The icons above the function buttons change depending on which view is currently
displayed on screen.
Below is a list of the most common icons.
Back to previous view. Press and hold to leave current program.
Back. There is no “previous view”. Leave the current program.
More. Contains a submenu with general functions,
such as
(Control panel) and
(Save file).
Submenus
The icons formed as an arrow contain a submenu. Use the navigation buttons to navigate in a submenu. Press
to select.
Function button with arrow contains submenu
6
Display unit
Status bar
The Status bar contains additional information such as warning icon, current time and
Bluetooth® connection.
Measurement unit.
Change units via Settings.
The yellow arrow indicates
that there are sub-menus
There are also text messages regarding:
• The selected icon.
• Hints on what information you are expected to fill in.
Status bar icons
Warning. Select the function button
to get additional information
regarding the warning.
Warning. Displayed when the coordinates has been rotated in the detector.
Go to Control panel to rotate coordinates.
Display unit charging. Indicating that a power adaptor is plugged in.
Hourglass. The Display unit is in the middle of a task.
Measurement progress. Time is depending on which filter you have selected.
Selected filter.
Peripheral.
Indicates that a peripheral device is plugged in, such as a projector.
Bluetooth®. Indicates that the Bluetooth® functionality is activated.
The number beside indicates the number of Bluetooth® units connected.
Printing report on thermal printer. The thermal printer is optional equipment.
Printing performed OK.
Printing problem.
7
Display unit
Screen dump
It is possible to take screen dumps of what is currently displayed on screen. You can
e-mail the screen dump or use it for reports.
Take a screen dump
1.Press and hold the numeric button period (.) for 5 seconds.
2.An hour glass is displayed on the status bar.
3.The screen dump is saved in the file system as a .jpg file. It is named with current
date and time. Select
to open saved files. See “Measurement file handling”
on page 11.
LED lights
Right indicator
Yellow
Flashing: The internal battery in the Display unit is charging.
Left indicator
Left indicator has several functions and colours:
Red/Blue
Red
Blue
Green
Light blue
8
Quick flashing: Reprogramming the system.
Flashing: Warning, for example low battery.
Flashing: Searching for detectors equipped with Bluetooth®.
Fixed light: Connected to detectors equipped with Bluetooth®.
Flashing: Display unit is starting.
Fixed light: The internal battery in the Display unit is fully charged.
Flashing: Backlight is off, but the Display unit is still on. Press any
button to activate the Display unit.
Display unit
Battery
Select
to display the Battery view. This view gives you a good overview of the
battery status of all connected equipment.
Display unit
Dry cell batteries
(not available for all systems)
Detector or
Measuring unit
Battery pack
Serial number
Charging
The E-series is not compatible with units from the D-series.
Note!
When finished working for the day, charge the whole system. Plug in the power adaptor to the Display unit and connect the measuring units by using cable.
Charge the Display unit
The Display unit can be used from -10ºC to +50ºC. Charge the Display unit within the
temperature range of ±0ºC to +40ºC.
Note!
If you shut the Display unit off while charging, it will charge faster.
Power adaptor
With the power adaptor plugged in, you can keep on working.
A PC via USB cable
While you have this connection, you can open the files in the Display unit via the
explorer in your PC. However, the Display unit is locked.
Dry cell batteries
When you get a battery warning, insert four R14 dry cell batteries in the battery compartment. This will prolong the power of
the Display unit so that you can finish your measurement. However, if the internal battery is completely empty, the dry cell
batteries do not have enough power to start up the Display unit.
USB
Charge the Detector/Measuring units
The Detectors and Measuring units are charged by the Display unit when connected by
cable. If you are using Bluetooth® units, switch to cable when the battery in the Detector/Measuring unit is low.
Charge the Bluetooth® units
The Bluetooth® units are powered by the Detector/Measuring units. To save energy, the
Bluetooth® units will only connect when you are using a measurement program. There
is no power switch on the unit. To switch off, simply unplug the unit.
See “Bluetooth® set up” on page 21.
9
Display unit
Calculator
The calculator is found on the Start view and Control panel (
).
1.Select
and
to open the calculator.
2.Use the numerical buttons and function buttons to enter values.
3.Use the
button to compute.
Select to display sub-menu
Use OK button as equal sign (=)
Unit converter
The unit converter is found on the Start view and Control panel (
).
1.Select
and
to open Unit converter.
2.Select a category. Move using the navigation buttons up and down.
3.Press navigation button right. The result column is activated.
4.Select a unit to convert from.
5.Enter an amount. The other units are recalculated.
In the example below, one inch is selected.
Select category
Select unit and amount
10
Display unit
Measurement file handling
Save file
1.Select
and
to save your measurement.
2.Enter a file name. The date and time will automatically be added to the file name.
The measurements that you save will be available to other users as well.
3.Press
to save the file.
File manager
Select
(found on the start view and Control panel) to open saved measurements.
The File manager is displayed. Here you can easily when and from which program the
file was saved.
Press
to open a measurement file.
xml
A measurement file.
jpg
“Screen dump” on page 8
PDF
A report. The PDF report can not be
opened in the Display unit.
PDF is not available for E420.
Function buttons
Back to previous view.
“Report” on page 14.
“Open file as template” on page 13.
“Print file (Optional)” on page 14.
Sort files alphabetically.
Sort files by measurement program.
Sort by time.
Show all files.
Show only xml files.
Show only pdf files.
Show only jpg files.
“Copy file to USB memory” on page 13.
Delete files. Delete all displayed files or only selected file.
11
Display unit
Favourites
It is possible to save a measurement as a Favourite. A Favourite can be used for example when you have many flanges or machines with the same dimensions. This way you
do not have to enter the same distances or tolerances every time. When you have saved
as Favourite, a new icon is displayed on the start screen.
Create a favourite
1.Select
to open the File manager and select a file.
2.Select
and
to save the selected file as a Favourite.
3.Go to the start screen and select
to see all favourites.
4.Press OK to open a Favourite. All distances are filled in.
Import favourites
The favourite files are saved in the folder Favourites in the Display unit.
1.Plug in the Display unit to a PC and open the Favourites folder.
2.Copy the .FAV (favourite) file to the root of an USB memory stick.
3.Connect the USB stick to a Display unit and select
Delete favourite
1.Select
to open the File manager and select a file.
2.Select
and
3.Select a file and
to show all Favourite files.
.
Show Favourite
Import Favourites
from USB
Create Favourite
12
and
to import.
Display unit
Open file as template
You can open a saved measurement and use it to make a new measurement. This is
very useful when you have many flanges or machines with the same dimensions for
example. This way you do not have to enter the same distances every time.
1.Select
(found on the Start view and Control panel). The File manager is
displayed.
2.Select a file in the list and select
. The Edit distance view is displayed.
3.Change distances if needed and proceed to measuring view.
Copy file to USB memory
You can easily copy a saved measurement or other files to a USB memory.
1.Insert a USB memory.
2.Select the file you want and select
.
3.A folder is automatically created on the USB memory. The file is saved in the
folder \Damalini\archive\.
Barcode
Save file with barcode
The barcode scanner is not included in all systems. The first time you measure a
machine, you stick a barcode on the machine and save the measurement together with
the scanned barcode. Next time you align the same machine, all you need to do is scan
the barcode and all machine data is read.
1.Scan the barcode on the machine.
2.Enter a file name.
3.Press
to save the file. All measurement
File name
data is saved together with the barcode.
Barcode number
The barcode number is added to the file name.
When you connect the Display unit to a PC the whole file name is shown:
File name
Date and time User
Barcode number
Barcode reader
Open file with barcode
• Start the Display unit and scan the barcode. The latest measurement that was
made and saved with this barcode is automatically opened.
OR
• Select
to open File view. Scan the barcode on the machine. All measurements saved with this barcode are shown.
13
Display unit
Print file (Optional)
Part no. 03-1004
The thermal printer is optional equipment.
1.Save the measurement. To print from a Shaft program, you need to
open a saved measurement before you can print a report.
2.Connect the thermal printer and select
and
.
3.The progress is displayed on the status bar.
Printing report on thermal printer.
Printing performed OK.
Printing problem.
You can also save a measurement, download the pdf-report to your PC and print the
pdf-report.
Report
A report is generated and saved in the filing system. You can not open an old measurement and save it again (program Machine train is an exception to this). You can
however generate a new report from an opened file. This means you can for example
change the language and make a new report from the opened measurement. You can
download the report to a PC and print it.
Company logo
You can replace the logo on the report with your own .jpg file.
1.Name your logo logo.jpg. The default logo has the proportions of 230x51
pixels.
2.Connect the Display unit to your PC using the USB-cable.
3.Place your image in the Display unit’s folder Damalini/custom/reports/
logo.
File extensions (for example .jpg) are often hidden in the Explorer window. To display file extensions do the following: Open an Explorer window and press Alt to show
menu. Select Tools > Folder options. Click the View tab > Advanced settings > Clear
the Hide extensions for known file types check box.
Date format
By default, the date and time format is set to Central European Time (CET).
You can change the date and time format used in your PDF reports.
See “Date and time” on page 16.
Download file to PC
1.Start the Display unit.
2.Connect the USB cable between the Display unit and PC.
3.While you have this connection, the Display unit is blocked.
4.View and/or copy the files to the PC.
EasyLink
You can also use our database program EasyLink to view the files on your PC.
EasyLink is available on the USB memory stick that is delivered with
most systems. You can always download the latest version from damalini.
com>download>software.
14
Display unit
Control panel
Select
and
to open the Control panel. Some of the settings are personal
and will be default next time you start the system.
Note!
All settings are not available
for all systems.
Filter
Select
to open the Filter view.
If the laser beam passes through air with varying temperature, this may influence the
direction of the laser beam. If measurement values fluctuate, this could mean unstable
readings. Try to reduce air movements between laser and detector by, for instance,
moving heat sources, closing doors. If the readings remain unstable, increase the filter
value (more samples will become available to the statistical filter).
Measurement progress. Time is depending on
which filter you have selected.
Selected filter
Select filter
Use as short a time as possible that still produces acceptable stability
during the measurement. Default is set to 1. Normally you will use a
filter value of 1-3. If you set the filter type to 0, no filter will be used.
Use the numerical buttons 3, 6 and 9 to set the filter. In the Filter view
but also when you are using a measuring program.
Use numerical buttons to select filter
Current noise level in
the system before and
after filtering
Currently selected filter
Use numerical buttons to set filter.
Button 6 will restart
the filter
Press function button 6
to test how long the measurement progress is
Graph shows filtered
noise level over time
15
Display unit
Unit and resolution
Personal setting
Select
to open the Units and resolution view. Use the navigation buttons to
move between the fields. Set Metric or Imperial and which resolution you want to use.
Default is set to 0.01 mm (0.4 mil). The selected unit is shown on the Status bar.
Note!
It is possible to select 0.0001mm only in the E940 system.
For E420, only 0.01mm is possible.
Detector rotation
Personal setting
The coordinate system can be rotated 90º. Select
to open the Detector rotation
view. When you have rotated the coordinates, a warning is displayed on the Status bar.
Detector rotation will only affect detectors with two axis.
Warning displayed on
Status bar
Detector rotation view
Date and time
Select
to open the Date and Time view. Set the date and time. Default is set to
Central European Time. (CET)
Date and time view
Select
to set the date format used in your PDF reports.
Date and time used in PDF reports
16
Display unit
Language
Personal setting
Select
to open the Language view. Default is set to English. Use the navigation
buttons to select a language. Press
to save changes.
Language view
User
Select
settings.
to open the Users view. A user account is used for storing your personal
Use the function buttons
to add or remove users. To switch user, simply select the user you would like to switch to and press .
User view
Backlight
Personal setting
Select
to open the Backlight view. Use the navigation buttons to move between
the fields. Press
to save changes. When backlight is off, the left LED signal will
flash to indicate that the Display unit is still on.
Backlight level
Adjust the backlight to make it easier to read in bright sunlight. Remember however
that a high contrast consume more battery power. Default is set to 50%.
Reduce after
Set time before backlight reduction as a way to save energy. The Display unit will be
dimmed, but is still on. Default is set to Never.
Off after
Set time before backlight off. Default is set to Never.
Backlight view
17
Display unit
Automatic power off
Personal setting
Select
to open the Automatic off view. Select how much time before automatic
power off. Use the navigation buttons to select. Press
to save changes.
Automatic power off view
Note!
Measurements in progress will not be saved in the event of an Automatic power off.
Information
Select
to display the information regarding serial number and version of the
equipment.
Information view
VGA
(Not available on all systems.)
Makes it possible to show display unit screen image with a projector, for example in a
training context. Must be factory installed on order.
Select
18
to open the VGA view.
Display unit
System update
Download update file
1.Go to www.damalini.com > Download > Software >
E series Display unit Firmware Update.
2.Download the update file to your PC.
3.Unzip the file.
4.Copy the .elu file to the root of a USB memory.
Save .elu file on a USB memory.
Install update file
1.Start the Display unit. Make sure that the internal battery of the Display unit is charged. The battery symbol
should be at least yellow.
2.Insert the USB memory in the Display unit. Do not
remove the USB memory until the update is finished.
3.Select
and
to display the System
update view.
4.Select the update file and press .
5.Select
. The installation starts.
6.The Display unit will automatically restart when
the installation is finished and the Main menu is
displayed.
Select the .elu file.
Note!
During restart, the screen turns black for up to one
minute. When the main menu is displayed, it can
“freeze” (no response when you press buttons). If
this happens, press the On/Off button for at least 15
seconds to restart the Display unit.
Main menu is automatically displayed after restart.
Font package
Some of the early E-series systems was not installed with Unicode fonts. To install the
latest system updates, you need to install the font package with Unicode fonts.
Check if you need to install:
1.Select
and
to display the Language view.
2.Check if you have Chinese installed. If Chinese is
installed, you already have the correct Font package.
If not, please go to www.damalini.com > Download >
Software > Eseries Display unit Font package update
and follow the instructions above to install.
Chinese installed?
No need to update with Font package.
19
Display unit
License
It is easy to upgrade your Display unit.
1.Contact your Easy-Laser® distributor if you wish to upgrade your Display unit.
2.An e-mail will be sent to you with information on how to download the update
file.
3.Save the file to the root of the file system to a USB memory stick or directly to the
Display unit.
Save file on USB
1.Save the downloaded license file to a USB memory stick.
2.Insert the USB memory stick in the Display unit.
3.Select
and
to display the License view.
4.Select
5.Press
to search for licenses.
to import license.
Save file to Display unit
1.Connect the Display unit to a PC.
2.Save the license file to the root of the Display unit’s storage.
3.Select
and
to display the License view.
4.Select
to search for the new license file. A window is displayed.
5.Disregard the text and select
is achieved.
20
. The license file is installed and full functionality
Display unit
Bluetooth® set up
Bluetooth® wireless technology makes it possible for Display unit and Detector to
exchange data without using cables.
Some detectors have built-in Bluetooth®, others have a separate Bluetooth
unit that you attach to the detector. Please see Technical data for more
information.
Set up
This is only necessary when adding new Bluetooth® units to the list.
1.Select
to open the Bluetooth® view.
2.Select
to search for Bluetooth® units.
3.The view is updated with the Easy-Laser® Bluetooth® units you can connect to.
Searching for Bluetooth® units
4.Select the unit you want to connect to and select
. The unit will automatically be connected when you start a measurement program.
5.Press
to save changes and to leave the Bluetooth® view.
6.Enter a measurement program. The Display unit will connect to the selected units.
While connecting, the left LED indicator is flashing with a blue light which will
turn to a fixed blue light once connected.
7.An icon on the status bar will indicate how many
Bluetooth® units are connected.
One Bluetooth® unit connected
Function buttons
Back to Control panel. Changes made in the table are saved.
Search for Bluetooth® units.
Cancel search. Use if your Bluetooth® unit is already found.
Remove a Bluetooth® unit from the list.
Connect the unit. The unit will automatically be connected when you start
a measurement program.
Disconnect the unit. The unit will still be in the list.
21
Display unit
Use only one Bluetooth® unit
Many of our systems are delivered with two Measuring units. In some cases you might
want to use only one unit together with a laser transmitter. By default both units are set
to “Connect
”. If the unused unit is set to “Connect
”, the system will keep on
trying to connect to it, even if it is not plugged in.
1.Attach the Bluetooth unit to the detector.
2.Select
to open the Bluetooth® view.
3.Set the Bluetooth® unit you want to use to
.
4.Make sure that the other units are set to
.
5.Enter a measuring program.
The Display unit will connect to the selected unit. This may take a couple of minutes.
Note!
Remove Bluetooth® unit from the Measuring unit before putting the equipment in the
carrying case. If attached, it will discharge the Measuring unit.
Bluetooth® information
This device contains
FCC ID: PVH0925
IC: 5325A-0925
This device complies with Part 15 of the FCC Rules.
Operation is subject to the following two conditions;
(1) this device may not cause harmful interference, and
(2) this device must accept any interference received, including interference that may
cause undesired operation.
22
CHOOSE PROGRAM
Preparations
Before starting a measurement, there are several things that are good to check to
ensure a good and accurate measurement.
• Ensure a good measurement environment. Strong sunlight, warning lights, vibrations and temperature gradients can affect the readings.
• Make sure the surfaces are clean.
• Ensure that the foundation of the machine is stable.
• Check for play and clearance in the bearing.
Values
Shows live readings from S and M units.
Horizontal
For alignment of horizontal machines.
9-12-3. Measuring positions are registered at positions 9, 12, 3 o’clock.
EasyTurn™. Measuring positions are registered within 40º.
Multipoint. Measure as many point as you want.
Vertical
For alignment of vertically mounted machines.
Cardan
For alignment of cardan-shaft-coupled/centre-offset machines.
Machine train
For machine trains with two or more couplings.
Straightness
For straightness measurement of (for example) machine bases, shafts, bearing journals,
machine tools, etc.
Flatness
Program to measure flatness of machine bases, machine tables, etc.
Twist
Measure twist on an object by taking two diagonal measurements.
BTA
For alignment of belt and chain drives.
VIbrometer
Shows the vibration level in “mm/s” and bearing condition value in “g”.
Offset and Angle
Shows centre offset and angular error between two shafts, for example.
Softfoot
Check to ensure that the machine is resting evenly on all its feet.
23

24
PROGRAM VALUES
With the program Values, you can see live readings from the detectors.
As default, a target and a table is displayed.
Press OK to register values.
Live values, vertical and horizontal.
Detector or Measuring unit
Registered values
Serial number
Use the navigation
buttons to scroll
the list
Unit two (out of two connected)
Target
Tolerance area
Laser point
(becomes a line when
using spinning laser)
Current range
Function buttons
Back, leave program.
See “Control panel” on page 15.
See “Tolerance” on page 26.
See “Zoom” on page 26.
Save file. See “Measurement file handling” on page 11.
See “Automatic recording” on page 28.
Delete registered values.
Print report on thermal printer (optional equipment).
See “Streaming values” on page 29.
Set current value to zero.
Half displayed value.
Return to absolute value.
Only available after zeroing or halving.
Choose how to display values. Use left and right navigation button to
switch between two or more detectors when only one target is displayed.
25
Program values
Tolerance
1.Select
and
to set tolerance.
It is possible to set different tolerance in vertical
and horizontal direction.
2.Use navigation buttons to move between the
fields and to change the tolerance.
3.Press OK.
Live values and marking displayed in
green when within tolerance.
Live values displayed in red when
outside tolerance.
Zoom
1.Select
and
to zoom.
2.Select a zoom factor between 1–5. Use navigation buttons to increase or decrease zoom
factor.
3.Press OK.
Default view
26
Zoom factor is set to 2
Program values
Edge warning
When the laser beam is close to the edge, the edge is “lit up” as a warning. It is not
possible to register values when you see the edge warning.
Half or Zero set value
Half value
Zero set value
Absolute value
Select
to half
displayed value.
Zero point of the PSD
moves halfway towards the
laser point.
Select
to zero set
displayed value.
Zero point of the PSD
moves to the laser point.
Select
to return to
the absolute value.
Zero point of the PSD
returns to the PSD centre.
Note the change of the current range
Live values – colours
Live values are normally yellow
Green when within
tolerance
Red when outside
tolerance
Loss of signal, laser beam
interrupted for example
27
Program values
Automatic recording
In Values, it is possible to make automatic recording of values. This is very useful
when you want to register values during a longer time period for example.
1.Select
and
to start
automatic recording.
2.Set Interval.
3.Press navigation button “right”.
4.Set Duration.
5.Press OK. The recording will start and
you can follow the progress on screen.
Icon indicates that values are being recorded
Views
You can decide how to display the current values. As default a target and a table is
displayed, but you can choose to show only target for example.
Select
to display the different layout options, see image below.
Note!
Use left and right navigation button to switch between two or more detectors when
only one target is displayed.
28
Program values
Streaming values
With the Streaming value functionality, you can transfer data from the Display unit.
For this to work, you need a USB to USB Null Modem Cable, the USB cable delivered
with the system does not work for streaming values.
1.Connect the Display unit to the PC using a USB to USB Null Modem Cable.
The USB-to-USB null modem
cable shows up as a Virtual
Serial Port with the following
properties:
19200 bps, 8n1 without flow
control.
The port number can, for example, be found using the Device Manager. See ‘USB Serial Port’ under ‘Ports (COM and LPT)’.
2.Click Open.
3.Start the program Values in the Display unit.
4.Select
and
to start streaming values.
5.To stop, select
.
In this example, PuTTY
is used to show the
streamed data
Data format
The data is sent as lines with semi colon separated values. Each line begin with a
detector identification, S, M, Vib or BTA, followed by the detector serial number. The
unit and resolution depends on the settings in the user profile.
Data from Vib: Vib;serial;LP;HP;G;
Data from BTA: BTA;serial;PSD1X;PDF2X;PDF3X;X axis angle;Y axis angle;Z axis
angle;
Data from S: S;serial;PSD X; PSD Y; X axis angle;Y axis angle;Z axis angle;
Data from M: M;serial;PSD X; PSD Y; X axis angle;Y axis angle;Z axis angle;
29
Program values
Calibration check
Use the program Values to check if the detector readings are within
specified tolerances.
Quick check
1.Set the tolerance to 0.01 mm (0.5mil).
2.Select
and show targets for both M- and S-unit.
3.Select
to zero set value.
4.Place a shim under the magnet base to lift the Munit 1mm (100mils). The M-unit’s reading shall
correspond to the movement within 1% (1mil ±
1digit) (0.01mm ± 1 digit).
5.Remove the shim from the M-unit.
6.Select
to zero set value.
7.Make a mark to mark out the position of the detector.
8.Place the shim under the magnet base of the S-unit.
The S-unit’s reading shall correspond to the movement within 1% (1mil ± 1digit) (0.01mm ± 1 digit).
Make sure that the distance is kept
Parallel lift to a known distance.
Shim exactly 1mm.
Note!
The shim must be exactly 1 mm. In this example it is only the M-unit that is checked.
Zero set value
Select to show both targets.
Precision check
1.Fasten one unit in a machine tool.
2.Select
to zero set value.
3.Move the units a known distance is to use the movement of a machine tool spindle.
4.The fastened unit’s reading shall correspond to the
movement within 1% (1mil ± 1digit) (0.01mm ± 1 digit).
Note!
In this example it is only the unit fastened in the machine that is checked.
30
HORIZONTAL
For horizontally mounted machines.
Select between three different measuring methods:
EasyTurnTM
Start anywhere on the turn. The three measuring positions can be registered with as little as 20º between positions. By default, the EasyTurn
program is shown.
See “Measure using Easy Turn™” on page 35.
Horizontal Multipoint
Start anywhere on the turn. Register as many points as you wish.
See “Thermal compensation” on page 42
9-12-3
The measuring positions are registered at positions 9, 12, 3 o’clock. The
inclinometers are not used.
“Measure using 9-12-3” on page 38.
Note!
Measurements made with older versions of the Horizontal program are opened with
the older version of the program. For information regarding the previous program version, please see corresponding manual.
Work flow
Preparations
1. Mount units
2. Enter distances
3. Rough alignment
Measure
Adjust/Result
EasyTurn™
Live any angle
Multipoint
Live 9, 12, 3 or 6
Live 9 o’clock
9-12-3
Live 3 o’clock
Live 12 o’clock
Live 6 o’clock
31
Horizontal
Mount the units
1.Mount the S-unit on the stationary machine and the M-unit on the movable machine.
2.Mount the units facing each other. Make sure they are at the approximately same
rotational angle and radius.
Rod
Laser adjustment knob
Connectors for cables or
Bluetooth® unit
Locking knob
Laser adjustment knob
Hook for the chain
Chain tension knob
Mounted measuring units
Connect cables or Bluetooth® units
Cable
The measuring units has two connectors that are used for cables or Bluetooth® units.
1.Connect a cable to the Display unit. Connect the other end to any of the
measuring units.
2.Connect the second cable between the measuring units.
Bluetooth®
The Display unit is equipped with Bluetooth® wireless technology, which makes it possible for the Display unit to receive data without using cables. For more information, see
“Bluetooth® set up” on page 21.
Adjust measuring units
When making a new installation, a rough alignment can be necessary. Place the Measuring units on the rods, make sure they are at the approximately same rotational angle and
radius. Also make sure that the adjustment knob is adjustable in both directions.
1.Place the Measuring units at 9 o’clock. Aim the laser beams at the centre of the
targets.
2.Turn the shaft to position 3 o’clock. Note where the laser beams hit.
3.Adjust the laser beams half way to the centre of targets. Use the adjustment knobs.
4.Adjust the movable machine until the laser beam hits the centre of targets.
12
1
9
3
6
The example shows the S-unit, but the procedure is made on both units.
32
2
3
4
Horizontal
Select machines
Before measuring your machines, you need to define what kind of machines you have.
1.Use navigation buttons to select Basic or Custom.
2.Press .
Basic: Contains a pump and a motor. These
predefined machines have two feet pair each.
Custom: Select this option if you want to select
machine types.
Custom
Select this option if you want to select machine types. There are several machine types
to choose from. You can also define as many feet pairs as you need on the machines.
More than three feet pairs are visualized as one solid
foot on the machine.
Switch M and S
1.Use navigation buttons up and down to find the machine you want.
2.Press . The next machine becomes active.
When you are done, select
to continue to Enter distance view.
Select number of feet pair
If you want to change the number of feet pair on the machine, simply enter the number
you want on the numerical buttons.
Function buttons
Leave program.
See “Control panel” on page 15.
Open table to rename the machines and change the number of feet pairs.
Switch on which machine you will place the S (stationary) and
M (movable) measuring unit.
Continue to Measure view.
33
Horizontal
Enter distances
Confirm each distance with
3
.
7
6
5
3
2
1
1 Distance between first and second feet pair. Optional, select
2 Distance between second feet pair and S-unit. Optional, select
to activate field.
to activate field.
3 Distance between S-unit and M-unit. Measure between the rods.
4 Distance between S-unit and centre of coupling.
5 Distance between M-unit and feet pair one.
6 Distance between feet pair one and feet pair two.
7 Coupling diameter. Optional, select
to activate field.
Function buttons
Leave program.
See “Control panel” on page 15.
See “Tolerance” on page 44.
See “Thermal compensation” on page 42.
Select to enter distances of the S-machine.
Toggle between showing Distance view in 3D or 2D.
Diameter. Select to enter coupling diameter. This is necessary if you want
the result based on the gap of the coupling instead of angle.
Toggle button. Show movable machine to the left or the right.
Continue to Measure view. Available when you have entered the mandatory distances.
34
Horizontal
Measure using Easy Turn™
Preparations
Follow the preparations as described in the previous pages.
1.Mount the measuring units.
2.Enter distances, confirm each distance with OK.
3.If needed, perform a rough alignment.
4.If needed, perform a Softfoot check.
Measure
It is possible to measure with as little as 40º spread between the measurement points.
However, for an even more accurate result, try to spread the points as much as possible. The colours indicates where the optimum positions to measure are.
1.Adjust laser to the centre of the targets. If needed, adjust the units on the rods,
then use laser adjustments knobs.
2.Press
to register first position. The first position is automatically set to zero.
A red marking is displayed.
3.Turn shafts outside of the red 20º marking.
4.Press
to register second position.
5.Turn shafts outside of the red markings.
6.Press
to register third position. The Result and adjust view displayed.
Angle warning. Shown if the angle between M and S is
greater than 2 degrees.
S-unit
Red 20º marking
Edge warning
When the laser beam is
close to the edge, the edge
is “lit up” as a warning. It
is not possible to register
values when you see the
edge warning.
Laser point
Green indicates best
measurement position
Edge warning
Detector values
Function buttons
Back. Measure previous position or back to Distance view.
See “Control panel” on page 15.
Switch to the EasyTurn™ method.
Switch to the 9-12-3 method.
Switch to the Horizontal Multipoint method.
See “SOFTFOOT” on page 47.
35
Horizontal
Measure using Multipoint
Preparations
Follow the preparations as described in the previous pages.
1.Mount the measuring units.
2.Enter distances, confirm each distance with OK.
3.If needed, perform a rough alignment.
4.If needed, perform a Softfoot check.
Measure
1.Select
and
to switch to Horizontal Multipoint.
2.Adjust laser to the centre of the targets. If needed, adjust the units on the rods, then use
laser adjustments knobs.
3.Press
to register first position. The first position is automatically set to zero.
4.Press
to register as many points as you wish. After three points a result is available.
5.Select
to display the Result and adjust view. See “Result and adjust” on page
39.
Spread the measurement points
For a more accurate result, try to spread the points as much as possible. The colours indicates where the optimum positions to measure are. The colour bar indicates a statistical
accuracy of the measurement.
Registered
measurement point
Edge warning
When the laser beam is
close to the edge, the edge
is “lit up” as a warning. It
is not possible to register
values when you see the
edge warning.
Green = best place to
measure!
First position is automatically set to zero
Edge warning
Quality assessment
Green = a good spread of the
measurement points.
Function buttons
Back. Measure previous position or back to Distance view.
See “Control panel” on page 15.
Switch to the EasyTurn™ method.
Switch to the 9-12-3 method.
Switch to the Horizontal Multipoint method.
See “SOFTFOOT” on page 47.
Continue to the Result and adjust view. Available after registering three
positions with a minimum spread of 40º.
36
Horizontal
Quality assessment
Not available for the US market!
From the result view, select
and
to show the Quality assessment view
Attainable accuracy
Many measurement points that also have a good spread, will statistically ensure a high
accuracy. This is the same indicator as on the measurement view. If the attainable accuracy is low, try to spread the points as much as possible.
Acquired accuracy
Actual measured values from the units. If the acquired accuracy is low, it may depend
on for example air turbulence or bearing clearance.
Temperature stability
Measured temperature variation in the measuring units. If the stability is low, remeasure when the temperature has stabilized.
Measurement direction
Indicates if you have changed measurement direction. It is better to move the measurement units in the same direction.
Quality assessment
A sum of the four quality factors. Also available in the pdf report.
37
Horizontal
Measure using 9-12-3
Preparations
Follow the preparations as described in the previous pages.
1.Mount the measuring units.
2.Enter distances, confirm each distance with OK.
3.If needed, perform a rough alignment.
4.If needed, perform a Softfoot check.
Measure
1.Select
and
to switch to 9-12-3.
2.Adjust laser to the centre of the targets. If needed, adjust the units on the rods,
then use laser adjustments knobs.
3.Turn shafts to 9 o’clock.
4.Press
to register first position. The first position is automatically set to zero.
5.Turn shafts to 12 o’clock.
6.Press
to register second position.
7.Turn shafts to 3 o’clock.
8.Press
to register third position. The Result and adjust view is displayed. See
“Result and adjust” on page 39.
Edge warning
When the laser beam is
close to the edge, the edge
is “lit up” as a warning. It
is not possible to register
values when you see the
edge warning.
First position is automatically set to zero
Edge warning
Function buttons
Back. Measure previous position or back to Distance view.
See “Control panel” on page 15.
Switch to the EasyTurn™ method.
Switch to the 9-12-3 method.
Switch to the Horizontal Multipoint method.
See “SOFTFOOT” on page 47.
38
Horizontal
Result and adjust
Offset, angle and feet values are clearly displayed. Both horizontal and vertical direction are shown live, which makes it easy to adjust the machine. Values within tolerance
are green.
Vertical offset and angle
Horizontal offset and angle
Thermal compensation
has been set
Feet values.
Yellow frame indicates live values.
Add shims
Remove shims
Function buttons
Back to measure view.
See “Control panel” on page 15.
Save, see “Measurement file handling” on page 11.
See “Tolerance” on page 44.
See “Thermal compensation” on page 42.
Show target. This is a quick way to see where the laser beam hits the
target and how the measuring units are positioned.
Print report on thermal printer (optional equipment). Available when
you open a saved measurement.
Edit distances. Press OK to confirm changes. The result is recalculated.
See “Quality assessment” on page 37.
RefLock, lock feet. Note! Not available for E420.
See “Live values” on page 40.
Toggle button. Show/hide Position indicator. See “Position indicator”
on page 41.
Toggle button. Switch between to show gap and show angular error per 100 mm.
For this to work you need to set the coupling diameter.
39
Horizontal
Live values
When reading the values, face the stationary machine from the movable machine.
Positions for measuring units as seen from the movable machine.
Live values are marked with yellow frame.
12
9
3
6
Face the stationary machine (S) from the movable machine (M). Then 9 o’clock is to the left, as in the measuring programs.
Offset and angle values
The offset and angle value indicate how well the machine is aligned at the coupling.
They appear in both horizontal and vertical direction.
These values are important to get within tolerance.
Offset
The centre lines of two axis are not concentric but parallel.
This is measured at the coupling centres.
In this example, a positive offset is shown.
Angular misalignment
The centre lines of two axis are not parallel.
In this example, a negative angle is shown.
Offset and angular misalignment
Misalignment is often a combination of both offset and angular
misalignment.
Show live values for EasyTurnTM and Multipoint
The inclinometer can be used to show live values at all angles.
Show live values at any angle.
Inclinometer controls when to show live values.
Show live values for 9-12-3
The inclinometer is not used. You can manually show in which position your measurement units are.
Select
to show the live options.
Force live to 6 o’clock.
Force live to 12 o’clock.
Force live to 3 o’clock.
Force live to 9 o’clock.
40
Horizontal
Adjust
Adjust the machine if needed.
1.Shim the machine according to the vertical feet values.
2.Adjust the machine sideways according to the live horizontal values.
3.Tighten the feet.
4.Select
to remeasure.
Position indicator
To adjust, you need to place the measuring units in live position (9, 12, 3 or 6 o’clock).
Select
to show the Position indicator.
Position indicator
Function buttons
Toggle button. Show/hide position indicator manually.
Toggle button. Select
to display the position indicator automatically when you move the measuring units.
Save
You can save a measurement and open it later to continue to measure. When you save
the measurement again, it will not overwrite the earlier version.
When you save a measurement, a pdf is automatically generated.
See “Measurement file handling” on page 11.
41
Horizontal
Thermal compensation
During normal operation, machinery is influenced of different factors and forces. The
most common of these changes is the change in the temperature of the machine. This
will cause the height of the shaft to increase. This is called thermal growth. To compensate for thermal growth, you enter values for cold condition compensation.
Select
and
from the result and
distance view. The Thermal compensation view
is displayed.
1
Example
It can be necessary to place the cold machine a
bit lower to allow thermal growth. In this example we set -5mm as vertical compensation, both
offset and angle.
1.Before thermal compensation.
2.Set thermal compensation.
3.Thermal compensation set. When you have
set thermal compensation and return to the
result view, the values have changed. When
the machine becomes warm, the thermal
growth will make it perfectly aligned.
2
Indicates that the compensation values
are set for cold (offline) condition.
Vertical offset and
angle for movable machine.
Indicates that thermal
compensation has been set
Feet values
1.On the distance view, enter distances for the
S-machine.
2.Select
.
3.Set thermal compensation values based on
feet values. The coupling values are recalcalculated. If there are more than two feet
pairs, you enter values for the first and last
feet pair.
Note!
Only the coupling values are visible in the PDF
report and the printed report.
42
3
Horizontal
RefLock™
From the result view, you can select the function RefLock™. Here you can choose any
two feet pairs as locked and thus choose which machine is to be used as stationary and
which as adjustable. If you want to lock feet pair on the stationary machine, you need
to enter distances.
1.Select
and
.
2.The RefLock graph view is displayed. Navigate using the left and right navigation
button.
3.Select
to lock the selected feet pair or
to unlock.
4.Select
to continue to the result view.
Stationary machine
Movable machine
Selected feet pair
Locked feet pair
Note!
RefLock™ is available when using the program Horizontal. Not available for programs Vertical or Cardan.
43
Horizontal
Tolerance
1.Select
and
. The tolerance window is displayed.
2.Select a tolerance and press .
GAP values
Add user defined tolerance
Function buttons
Close Tolerance view.
See “Control panel” on page 15.
Edit user defined tolerance.
Delete user defined tolerance.
Add new tolerance
You can add your own user defined tolerance.
1.Select the row “Add new tolerance”. Press .
2.Enter name and tolerance.
3.Press . The new tolerance is added to the list.
Tolerance in result views
The tolerances are clearly displayed in the result views.
Green = within tolerance
Red = not within tolerance
44
Horizontal
Tolerance table
The rotation speed of the shafts will decide the demands on the alignment. The table
on this side can be used as a guidance if no other tolerances is recommended by the
manufacturer of the machines.
The tolerances is set to the maximum allowed deviation from accurate values, with no
consideration to if that value should be zero or compensated for thermal growth.
Offset misalignment
Excellent
rpm
0000-1000
1000-2000
2000-3000
3000-4000
4000-5000
5000-6000
mils
3.0
2.0
1.5
1.0
0.5
<0.5
Acceptable
mm
0.07
0.05
0.03
0.02
0.01
<0.01
mils
5.0
4.0
3.0
2.0
1.5
<1.5
mm
0.13
0.10
0.07
0.04
0.03
<0.03
Angular misalignment
Excellent
rpm
0000-1000
1000-2000
2000-3000
3000-4000
4000-5000
5000-6000
mils/’’
0.6
0.5
0.4
0.3
0.2
0.1
Acceptable
mm/100mm
0.06
0.05
0.04
0.03
0.02
0.01
mils/’’
1.0
0.8
0.7
0.6
0.5
0.4
mm/100mm
0.10
0.08
0.07
0.06
0.05
0.04
The higher the rpm of a machinery is, the tighter the tolerance must be. The acceptable
tolerance is used for re-alignments on non-critical machinery. New installations and
critical machines should always be aligned within the excellent tolerance.
Note!
Consider these tables as guidelines. Many machines must be aligned very accurately
even if they have a lower rpm. For example gearboxes.
45
Horizontal
46
SOFTFOOT
Perform a softfoot check to ensure that the machine is resting evenly on
all its feet. A softfoot can be angular and/or parallel, see image.
Softfoot can be caused by:
• Twisted machinery foundations.
• Twisted or damaged machinery feet.
• Improper amount of shims under machine feet.
• Dirt or other unwanted materials under machine feet.
Start Softfoot from main shaft menu
1.Select
and
.
Angular softfoot
2.Enter distances. Select “Custom” if you want to
select other machine images and/or more than three
feet pair.
3.Select
to continue.
Parallel softfoot
Start Softfoot from Horizontal program
1.Select
and
to open Horizontal program.
2.Enter distances. Confirm each distance with OK. To perform a Softfoot check,
you need to enter distances between the feet pairs. The measure view is displayed.
3.Select
. Softfoot is only available before you have registered any measurement points.
Function buttons
Leave program.
See”Control panel” on page 15.
Enter distance for S-machine. Makes it possible to perform a softfoot measurement on the S-machine.
Toggle between 3D and 2D view.
Add a feet pair. Only available for E530. In E710 you select machines and
optional number of feet when you select custom.
Toggle button. Show movable machine to the left or the right.
Continue to Measure view. Available when you have entered the distances.
47
Softfoot
Measure softfoot
1.Tighten all feet bolts.
2.Turn the measuring units to 12 o’clock.
3.Adjust laser to the centre of targets. If needed, adjust the units on the rods, then use laser
adjustments knobs.
Turn the measuring units to 12 o’clock.
Adjust laser point to centre of target.
4.Press OK. The Softfoot measure view is displayed. The first bolt is marked with yellow.
5.Loosen and then retighten the first bolt.
6.Press OK to register value.
7.Register values on all four feet. The result is displayed.
8.Shim the foot with the largest movement.
9.Do a Softfoot check again.
Measure:
Loosen and retighten bolt before register value.
Result:
Arrow indicating that the machine is tilting in this direction.
Note!
If the largest movement is opposite from the smallest it is not a conventional softfoot and you
will be asked to check the foundation.
Function buttons
Leave Softfoot.
See “Control panel” on page 15.
Save. Only available when you have started Softfoot from the main menu.
Zero value of selected foot.
Toggle button to switch machine. To check Softfoot, distances between feet pairs
are necessary. If needed, the Enter distance view is displayed. Not available for
E420.
Remeasure Softfoot.
Continue to Measure view, only available when you have started Softfoot from the
program Horizontal.
48
MACHINE TRAIN
Use for machines mounted in a train with two or more couplings.
Work flow
Build machine train
ll co
uplin
g
s
Enter distances
Co
n ti
nu
eu
n ti l
you
hav
em
eas
ure
da
Measure
Adjust
Result
49
Machine train
Build machine train
Before measuring your machines, you need to define what kind of machines you have.
1.Use navigation buttons to select Basic or Custom.
2.Press .
Basic: Three predefined machines.
Custom: Build a custom train.
Basic
The basic machine train contains a pump, a gearbox and a motor. These three predefined machines all have two feet pair each.
Navigation buttons
OK button, illustrated with
Numerical buttons
50
.
Machine train
Custom
Select this option if you want to build a custom machine train. You build the train from
left to right. There are several machine types to choose from and you can add as many
as you need to your machine train. You can also define as many feet pairs as you need
on the machines.
Select machine
1.Use navigation buttons up and down to find the machine you want.
2.Press . The next machine becomes active.
3.Add as many machines as you need. When you are done, select
to Measure view.
to continue
Select number of feet pair
If you want to change the number of feet pair on the machine, simply enter the number
you want on the numerical buttons.
More than three feet pairs are visualized
as one solid foot on the machine.
Machine with two feet pairs
Build train table
Select
to open a table view. In this table
you can rename the machines and change the
number of feet pairs.
51
Machine train
Enter distances
Confirm each distance with
.
7
3
1
4
2
6
5
1 Distance between first and second feet pair.
2 Distance between second feet pair and S-unit.
3 Distance between S-unit and centre of coupling.
4 Distance between S-unit and M-unit. Measure between the rods.
5 Distance between M-unit and feet pair one.
6 Distance between feet pair one and feet pair two.
7 Coupling diameter. Optional, select
to activate field.
Function buttons
Leave program.
See “Control panel” on page 15.
See “Thermal compensation” on page 63.
Diameter. Select to enter coupling diameter. This is necessary if you want
the result based on the gap of the coupling instead of angle.
Continue to Measure view.
When there are more than three feet
pairs, a table is displayed where you
enter the distances.
52
Machine train
Measure using EasyTurn™
It is possible to measure with as little as 40º spread between the measurement points.
However, for an even more accurate result, try to spread the points as much as possible. The colours indicates where the optimum positions to measure are.
1.Adjust laser to the centre of the targets. If needed, adjust the units on the rods,
then use laser adjustments knobs.
2.Press
to register first position. The first position is automatically set to zero.
A red marking is displayed.
3.Turn shafts outside of the red 20º marking.
4.Press
to register second position.
5.Turn shafts outside of the red markings.
6.Press
to register third position. The Result and adjust view displayed.
7.The result is displayed. You can show the result as graph, table or machine view.
See chapter Result.
8.From the result view, select
to measure next coupling. If you want to adjust
the coupling, select the machine you want to adjust and press . See chapter
Adjust.
Angle warning. Shown if the angle between M and S is
greater than 2 degrees.
S-unit
Red 20º marking
Edge warning
When the laser beam is
close to the edge, the edge
is “lit up” as a warning. It
is not possible to register
values when you see the
edge warning.
Laser point
Green indicates best
measurement position
Edge warning
Detector values
Function buttons
Back. Measure previous position or back to Distance view.
See “Control panel” on page 15.
Switch to the EasyTurn™ method.
Switch to the 9-12-3 method.
Switch to the Horizontal Multipoint method.
See “SOFTFOOT” on page 47.
53
Machine train
Measure using Multipoint
1.Select
and
to switch to Horizontal Multipoint.
2.Adjust laser to the centre of the targets. If needed, adjust the units on the rods,
then use laser adjustments knobs.
3.Press
to register first position. The first position is automatically set to zero.
4.Press
to register as many points as you wish. After three points a result is
available.
5.Select
to display the Result and adjust view. You can show the result as
graph, table or machine view. See “Result” on page 56.
6.From the result view, select
to measure next coupling. If you want to adjust
the coupling, select the machine you want to adjust and press . See “Adjust” on
page 60.
Spread the measurement points
For a more accurate result, try to spread the points as much as possible. The colours
indicates where the optimum positions to measure are. The colour bar indicates how
statistical accurate the measurement is.
Registered
measurement point
Edge warning
When the laser beam is
close to the edge, the edge
is “lit up” as a warning. It
is not possible to register
values when you see the
edge warning.
Green = best place to
measure!
First position is automatically set to zero
Edge warning
Colour bar
Green = a good spread of the
measurement points.
Function buttons
Back. Measure previous position or back to Distance view.
See “Control panel” on page 15.
Switch to the EasyTurn™ method.
Switch to the 9-12-3 method.
Switch to the Horizontal Multipoint method.
See “SOFTFOOT” on page 47.
Continue to the Result and adjust view. Available after registering three
positions.
54
Machine train
Measure using 9-12-3
1.Select
and
to switch to 9-12-3.
2.Adjust laser to the centre of the targets. If needed, adjust the units on the rods,
then use laser adjustments knobs.
3.Turn shafts to 9 o’clock.
4.Press
to register first position. The first position is automatically set to zero.
5.Turn shafts to 12 o’clock.
6.Press
to register second position.
7.Turn shafts to 3 o’clock.
8.Press
to register third position.
Current machines
selected
S-unit
Target
Laser point
Edge warning
Detector values
Return to enter distances
Select to show/hide M-unit
EasyTurn™
9.The result is displayed. You can show the result as graph, table or machine view.
See “Result” on page 56.
10.From the result view, select
to measure next coupling. If you want to adjust
the coupling, select the machine you want to adjust and press . See “Adjust” on
page 60.
55
Machine train
Result
Graph view
Table view
You can show the result as graph, table or machine view.
By default the machine view is displayed. Navigate in the result views
by using the navigation buttons.
Machine view
Result Machine view
Select
and
. The Machine view is displayed.
Coupling not
within tolerance.
Selected machine and coupling
Horizontal and
Vertical offset
Horizontal and
Vertical angle
The selected machine’s feet pair
Feet pair
If there are more than three feet pairs, values are only displayed for the first three pairs
in this view. To view values for all feet pairs, switch to Table view.
Adjust coupling
Select the machine you want to adjust and press
. See “Adjust” on page 60.
Function buttons
Remeasure the coupling. Press and hold to leave program.
See “Control panel” on page 15.
Save file. “Measurement file handling” on page 11.
See “Tolerance” on page 62.
See “Thermal compensation” on page 63.
View and edit distance.
Print. “Measurement file handling” on page 11.
Toggle button. Show Gap or Angle values.
Switch result view.
Measure next coupling.
56
Machine train
Result Table view
Select
and
. The Result Table view is displayed.
Navigate using the navigation buttons.
Selected coupling
Selected machine
Coupling values
Feet values
Function buttons
Remeasure the coupling. Press and hold to leave program.
See “Control panel” on page 15.
Save file. “Measurement file handling” on page 11.
See “Tolerance” on page 62.
See “Thermal compensation” on page 63.
View and edit distance.
Print. “Measurement file handling” on page 11.
Toggle button. Show Gap or Angle values.
Lock / unlock feet pair. Available when you show feet values.
See “Lock feet pair” on page 59.
Toggle between showing feet or coupling values.
Switch result view.
Save
You can save a measurement and open it later to continue to measure. When you save
the measurement again, it will not overwrite the earlier version.
When you save a measurement, a pdf is automatically generated only when the whole
train has been measured.
See “Measurement file handling” on page 11.
57
Machine train
Result Graph view
Select
and
. The Graph view is displayed.
Selected machine
and coupling
Selected feet pair
Offset
Angle
Function buttons
Remeasure the coupling. Press and hold to leave program.
See “Result Machine view” on page 56.
Lock / unlock feet pair. If you can not adjust a feet pair, use the lock
function. See “Lock feet pair” on page 59.
Toggle between showing horizontal or vertical graph.
Switch result view.
Available when you have measured the whole train. See “Best fit and
Manual fit”.
Best fit
Manual fit
Select to measure next coupling.
58
Machine train
Lock feet pair
This function is available in graph and table view. We recommend that you lock two
feet pair to get the most accurate calculated reference line as possible. If you choose to
lock only one feet pair, the tilt of the train is maintained and the coupling is offset.
Best fit and Manual fit
By default, an average best fit is calculated on the measured machine train. This means
that the train is tilted to the flattest possible plane. If no feet pairs are locked, the system assumes that all machines are possible to move in all directions. For each coupling
that you measure, the best fit is recalculated. When you have made adjustments on a
coupling, the best fit is no longer recalculated.
Manual fit
Only available when you have measured the whole train, and only in graph view. Use
this function when you know that you for example can move a machine a little in one
direction, but not at all in another direction.
1.Select
and
to activate the Manual fit function. If there are locked
feet pair, these are unlocked.
2.Use the numerical buttons to move the graph.
• Buttons 1 and 4 move the left part of the train
• Buttons 2 and 5 moves the whole train.
• Buttons 3 and 6 moves the right part of the train.
• Button -+ will change the scale.
To return to average best fit, select
and
.
Uncertain coupling
When you adjust one coupling, it might affect the next coupling in the machine train.
In the example below, the coupling A -B has been adjusted, which might have an affect
on the coupling B - C. This is indicated with the symbol
. When you remeasure or
adjust the coupling, the warning is removed.
Uncertain coupling
59
Machine train
Adjust
You can adjust a machine even though you have not measured the whole train.
Enter distances
Measure
Adjust
Continue until you have
measured all couplings
Result
1.Select the machine you want to adjust and press .
If you just measured the coupling, the Adjustment view is displayed. If not, you
need to remeasure the coupling first and the Measure view is displayed.
2.Adjust the machine.
3.Select
when you are done. The Measure view is displayed.
4.Remeasure the coupling to confirm the adjustment.
Select the machine you want to adjust. In this
case, we want to adjust the machine “B”.
Offset and angle
Feet values.
Yellow frame indicates live values.
Add shims
Remove shims
60
Machine train
Function buttons
Back to result view.
See “Control panel” on page 15.
Toggle button. Select to show/hide Position indicator.
See “Position indicator” on page 41.
See “Live values” on page 40.
Continue. You need to remeasure the coupling to confirm the position of
the measuring units.
Uncertain coupling
When you adjust one coupling, it might affect the next coupling in the machine train.
This is indicated with the symbol
.
Scale
The scale of the graph might change when you have made adjustments.
Scale
61
Machine train
Tolerance
1.Select
and
. The tolerance window is displayed.
2.Select a tolerance and press . The next coupling in the train is selected.
Add user defined tolerance
GAP values
Function buttons
Close Tolerance view.
See “Control panel” on page 15.
Edit user defined tolerance.
Delete user defined tolerance.
Add new tolerance
You can add your own user defined tolerance.
1.Select the row “Add new tolerance”. Press .
2.Enter name and tolerance.
3.Press . The new tolerance is added to the list.
Tolerance in result views
The tolerances are clearly displayed in the result views.
Green = within tolerance
Red = not within tolerance
62
Machine train
Thermal compensation
During normal operation, machinery is influenced of different factors and forces. The
most common of these changes is the change in the temperature of the machine. This
will cause the height of the shaft to increase. This is called thermal growth. To compensate for thermal growth, you enter values for cold condition compensation.
Select
and
tion view is displayed.
from the result and distance view. The Thermal compensa-
Example
Some machine manufacturers can
inform you how much their machines need to be compensated.
For example, it can be necessary to
place the cold machine a bit lower
to allow thermal growth.
Thermal compensation view
In this example we set -5mm as vertical
compensation, both offset and angle.
Indicates that the compensation
values are set for cold condition
Vertical offset and
angle for machine A
Thermal compensation set
When you have set thermal compensation and return to the result view, the
values have changed.
When the machine becomes warm, the
thermal growth will make it perfectly
aligned.
Indicates that thermal
compensation has been set
63
Machine train
64
VERTICAL
The program Vertical is used for vertical and/or flange mounted machines.
Preparations
1.Mount the M-unit on the movable machine and the S-unit on the stationary
machine.
2.Select
and
to open Vertical program.
3.Enter distances. Confirm each distance with .
If you have a barcode reader, simply scan the barcode and all machine data is read.
See “Measurement file handling” on page 11.
1 Distance between S-unit and M-unit.
Measure between the rods. Mandatory.
3
4
1
5
2
2 Distance between S-unit and centre of coupling. Mandatory.
3 Number of bolts (4, 6 or 8 bolts).
4 Bolt circle diameter (centre of the bolts).
5 Coupling diameter. Select
to activate field.
Function buttons
Leave program.
See “Control panel” on page 15.
Select to enter diameter of coupling.
Forward to measure view.
65
Vertical
Measure
The program Vertical uses the 9-12-3 method.
1.Position the units at 9 o’clock, at bolt number one. Make sure that it is possible to
also position the units at 12 and 3 o’clock.
2.Press
to register first position. The first position is automatically set to zero.
3.Turn units to position 12 o’clock.
4.Press
to register position.
5.Turn units to position 3 o’clock.
6.Press
to register position. Measurement result is displayed.
Circle indicates where
to position the S-unit.
Edge warning
Edge warning
When the laser beam is close to the edge, the edge is “lit up” as a warning. It is not
possible to register values when you see the edge warning.
Angle
Offset
The measuring units at 12 o’clock. Arrows
indicates live values.
66
Vertical
Result
The result is displayed as sideways offset in the coupling and angular error between
shafts.
Live values in
the 9-3 direction
Live values in
the 6-12 direction
Live values
The values can be displayed live in two directions:
• Live in the 9-3 direction.
Select
and position the measuring units at 3 o’clock.
• Live in the 6-12 direction.
Select
and position the measuring units at 12 o’clock.
Function buttons
Back, remeasure from first position.
See “Control panel” on page 15.
Save, see “Measurement file handling” on page 11.
Set tolerance.
Show target. This is a quick way to see where the laser beam hits
the target and how the measuring units are positioned.
Print report on thermal printer (optional equipment). Only available when you open a saved measurement.
Adjust distances. Press
to confirm changes. The result is
recalculated.
Toggle button. Switch between showing live values in the
direction 9-3 or 6-12.
See “Shim result view” on page 68.
Toggle button. Switch between to show gap and show angular error per
100 mm. For this to work you need to set the coupling diameter.
67
Vertical
Shim result view
To view this, you need to enter number of bolts and diameter of bolt circle.
1.Select
to open Shim value view. The values are not live.
2.Read values. The highest bolt is calculated as 0.00. Values below zero indicates
that the bolt is low and need shimming.
3.Select
to return to Result view.
Note!
If you shim the machine, remeasure from position 9 o’clock to update all measurement
values.
Adjust machine
1.Compare the offset and angular error to the tolerance demands.
2.If the angular error need to be adjusted, please shim the machine first, then adjust
the offset.
3.Tighten the bolts and remeasure.
68
CARDAN
The Cardan program is used for alignment of cardan-shaft-coupled/centreoffset machines.
Mount the units
1.Mount the arm bracket on the non adjustable shaft. You can use the magnet bases
or the mount the bracket directly on the flange.
2.Mount the S-unit on the arm bracket.
3.Mount the M-unit on the magnetic disc. If the adjustable shaft has a thread, use
suitable search dowel. This makes the centering easier.
4.Mount the targets.
Non adjustable shaft
Magnet base
Arm bracket
Handle
S-unit
Targets
Alternative mounting with offset
bracket and chain.
Adjustable shaft
Search dowel
Magnetic disc
M-unit
Joined arm brackets for large offset
69
Cardan
Enter distances
1.Select
and
to open Cardan program.
2.Enter distances. Confirm each distance with OK.
1 Distance between S-unit and M-unit.
Measure between the rods. Mandatory.
3
2 Distance between feet pair one and feet pair two. Optional.
to activate field.
3 Coupling diameter. Optional, select
1
2
Function buttons
Leave program.
See “Control panel” on page 15.
Diameter. Select to enter coupling diameter. This is necessary if you want
the result based on the gap of the coupling instead of angle.
Continue. Available when you have entered the mandatory distances.
Cone laser beam
When you turn the shaft, the laser beam will draw a circle on the target. If the distance
between S and M is small (<300 mm or 12 inch), it can be difficult to cone the laser
beam. If this is the case, proceed to Rough alignment.
1.Note where the laser beam hit the target at position 1.
2.Turn one of the shafts 180º. Note the position 2.
3.Adjust the laser beam halfway towards position 1, to
position 3.
4.Turn the shaft again. If the laser beam does not move
when you turn, the laser beam is correctly coned.
5.Repeat step 2–5 with the opposite unit.
6.Position both units at 9 o’clock.
7.Move the arm bracket until the laser hits the centre of
the target on the M-unit.
8.Adjust the S-unit laser beam until it hits the centre of the
detector. Adjust using the red screws.
9.Adjust the arm bracket until the laser from the M-unit hits
the S-unit in the centre of the target.
10.Adjust the laser beam on the M-unit until it hits the centre
of the detector.
11.Remove the targets.
70
Use handle when
turning the shaft
1
3
2
Centre of target
Centre of detector
Cardan
Rough alignment
1.Adjust the arm bracket until the laser beam from the
M-unit hits the centre of the target.
2.Adjust the movable machine until both laser
beams hit centre of the targets.
3.Adjust the arm bracket if the adjustment of the
machine is not enough.
4.Turn the shafts to 9 o’clock.
Connectors pointing upwards.
5.Adjust the laser beams to the marking for
centre of detector.
6.Remove the targets. The Display unit shows the
position of the laser beams.
Centre of detector
Centre of target
Measure
The shafts are positioned at 9 o’clock.
1.Press OK to register first position. The first position is automatically set to zero.
2.Turn the shafts to 12 o’clock.
3.Press OK to register position.
4.Turn the shafts to 3 o’clock.
5.Press OK to register position.
6.The result for the angular error is displayed.
Laser beam
S and M unit
Live values
First position is automatically set to zero
71
Cardan
Result
Measuring units
positioned at 12 o’clock
Both vertical and horizontal
view are displayed
Locked feet pair
Function buttons
Back
See “Control panel” on page 15.
See “Measurement file handling” on page 11.
Show target. This is a quick way to see where the laser beam
hits the target and how the measuring units are positioned.
Print report on thermal printer (optional equipment). Available
when you open a saved measurement.
Generate report. Available when you open a saved measurement.
Toggle button. Show vertical or horizontal live values.
Toggle button to move the lock. By default, the feet pair with the highest
value is set to zero and locked.
Toggle button. Switch between to show gap and show angular error per
100 mm. For this to work you need to set the coupling diameter.
Adjustment
Check the machine according to the tolerance and adjust the machine if needed. No
offset adjustment is made.
1.Adjust the machine vertically by shimming according to the vertical feet values.
2.Adjust the machine sideways according to the live horizontal values.
3.Tighten the feet.
4.Select
to remeasure.
72
STRAIGHTNESS
The program Straightness is used for machine foundations, shafts, bearing
journals and machine tools for example.
The basic principle for straightness measurement is that all measurement values will
show the position of the detector unit relative to the laser beam. First, the laser beam is
roughly aligned along the measurement object. The detector is then positioned on the
selected measuring points and the values registered.
Work flow
Select
and
Preparations
Mount units
Rough align
Show target
Show reference target
to start the Straightness program.
Measure
Press OK to register values.
Measurement table view
Measurement position view
Result
Set tolerance
Save
Print report
Set offset for reference point
Set reference point
Best fit around zero
Best fit all positive
Best fit all negative
Waviness
73
Straightness
Show target
Select
and
to display a target. This is a quick way to see where the laser
beam hits the target and how the detector is positioned. Select
to close the target, or press OK.
Detector serial number
Calculated and raw values
The values displayed here are raw
values. When you measure, calculated values are used. Calculated values
are based on the distance from first
measurement point and selected reference points.
Function buttons
Zero set displayed value. Only zeroes the value while the target is opened.
Return to the absolute value.
Half displayed value. Only zeroes the value while the target is opened.
Close target. (Or press OK).
Show reference target
Select
and
to display the reference
target. The first time you select the command, a
window is displayed. Select which detector you
want to use as reference detector and press OK.
Function buttons
Zero set displayed value.
Return to the absolute value.
Close target. You can also close by pressing OK.
See “Half or Zero set value” on page 27.
74
Straightness
Measure
1.Press OK. A window is displayed where you can enter the distance for the measurement point. If you leave the field empty, you can measure using “quickmode”.
2.Press OK to register a value. An hourglass is displayed while the value is registered.
3.Select
to continue to Result view.
Vertical, Horizontal and Angle values
Reference point.
See also Calculation settings
History points.
See also Straightness settings.
Reference point with offset
Selected measuring point
Distance from first point
Function buttons
Leave program.
See “Control panel” on page 15.
See“Straightness settings” on page 86
Show target.
Show reference target.
Edit distance. Edit distance for selected point.
Add measuring point.
Delete measuring point.
Go to measuring point. A window is displayed. Enter the point
to which you want to go.
Set offset. Set offset for selected reference point.
Zero set displayed value. Only available before registering the
first point. (Or press numerical button zero.)
Return to the absolute value. Only available before registering the
first point. (Or press numerical button 1.)
Set reference point. See “Result” on page 78.
Open Distance view, see “Enter distances” on page 76.
Continue to Result view. Available when you have registered two points.
75
Straightness
Quickmode
Quickmode means that you measure without entering any distances. Leave field empty
to use quickmode.
No distance entered
Enter distances
Select
to open the Distance view. This is an easy way to fill in many distances.
Do this before you have registered a value.
1.Enter number of measuring points. Press OK.
• Select if the points are evenly placed or not. Use navigation buttons left and right.
If set to <YES>, you are prompted to fill in the distance between point 1 and 2.
• If set to <No>, fill in each distance in the table.
2.Select
to save changes and return to Measuring table view.
Leave Distance view and return to Measuring table view. No changes are saved.
Note!
If you have registered values and open Enter distance view and make changes, your
registered values will be deleted.
76
Straightness
Add and delete points
Distances are always measured from the same point.
200
400
700
900
Add measuring point
Adding points between renumbers the existing following points. In this example, we
add a new point after point number three.
1
2
3
4
5
4
6
5
550
Delete measuring point
Deleting points between renumbers the existing following points. In this example, we
delete point number three.
1
2
3
3
4
4
5
5
6
77
Straightness
Result
The result can be displayed as graph, table or a 3D view. By default the table view is
displayed. The function buttons are almost the same for all three views. Zoom is only
available in Graph view. See following pages for more information regarding each
view and its functions.
Table view
Graph view
3D view
Switch view
Function buttons
Back to measure. To remeasure, select a point and then
Contains a sub-menu:
.
See “Control panel” on page 15.
See “Straightness settings” on page 86.
Save file. See “Measurement file handling” on page 11.
Print report. Save file and plug in printer (optional equipment).
Set tolerance. It is possible to set different vertical and horizontal tolerance. See “Tolerance” on page 81.
Zoom. Only available in Graph view.
Contains a sub-menu:
Go to measuring point. A window is displayed. Enter the point to which
you want to go.
Set offset for reference point. See “Calculation settings” on page 82.
Contains a sub-menu. See “Calculation settings” on page 82.
Raw data. Return to original data.
Set as reference point.
Remove as reference point. The point itself is not removed.
Best fit around 0.
All positive. The best fit with all measurement points above zero.
All negative. The best fit with all measurement points below zero.
Show waviness.
Views. Switch between table, graph and 3D view.
78
Straightness
Result table view
Navigate using the navigation buttons. To remeasure, select a point in the list and
select
.
Reference point
Reference point with offset
Max
Min
Peak-peak
Standard deviation
Straightness RMS
Max waviness
The highest value.
The lowest value.
Difference between Max and Min value
Average difference between Max and Min value.
Root Mean Square (Numerical Flatness)
Set waviness is shown in bracket.
See “Waviness” on page 85.
Result 3D view
Navigate using the numeric buttons.
• Buttons 2, 4, 6 and 8 rotates the 3D view.
• Button 5 returns to the initial view.
Selected point
Navigate using the numeric buttons
79
Straightness
Result graph view
Navigate using the navigation buttons.
Selected point
Reference point
Reference point with vertical offset
Vertical line
Horizontal line
History points
Zoom
It is possible to zoom in the graph view if you have registered more than 20 points.
Select a measurement point and select
around the selected point.
and
. The graph is zoomed in
Zoomed in
Zoomed out
Selected point
Scale using navigation buttons
Press navigation button “Up” and “Down” to scale the result graph view.
Scaled up
Normal
Same point selected
80
Straightness
Tolerance
1.Select
. A the tolerance window is displayed.
2.Set use tolerance to <YES>. Navigate
using the navigation buttons. Press OK.
3.Set vertical and horizontal tolerance.
Press OK to confirm each tolerance.
The tolerance is shown in the result
view.
Enter tolerance
Tolerance in graph and table view
• In the Table view, the values within tolerance are shown in black, values not
within tolerance are red.
• In the Graph view, vertical and horizontal tolerances are colour coded.
Vertical tolerance
Horizontal tolerance
81
Straightness
Calculation settings
Select to display sub-menu with different calculation settings.
Select
to revert to original data. All calculations and
reference points are removed.
Reference points
Select
and
to set selected point as reference point. You can set one or
two reference points. To remove a reference point, select it in the table or graph and
then select
. The point itself is not removed. The reference points are clearly
displayed in both table and graph.
Note!
You can also set and remove reference points by pressing the green OK button.
One reference point
Setting a single reference point will offset all other measurement points based on the
set reference point.
The reference point is clearly displayed
in both table and graph view.
82
Straightness
Two reference points
Setting two reference points will offset all other measurement points based on a reference line drawn between the two set reference points.
Both reference points are set to zero
Reference point with offset
By using reference point offset it is possible to move the position of a reference point.
This can be used for instance in turbine measurements to compensate for thermal
expansion.
Reference points
Same reference points, but with offset.
83
Straightness
Best fit operations
All best three best fit operations will try to find a reference line where the peak to peak
value of the measurement points is minimized. This can be used for instance to see if a
surface is within given tolerances. The difference between the best fit operations is the
offset that is set.
Best fit – around 0
This operation removes all reference points. Centre the values
so that the maximum and minimum values are equally large.
Best fit – all positive
Removes all reference points.
The best fit with all measurement points above zero.
Best fit – all negative
Removes all reference points.
The best fit with all measurement points below zero.
84
Straightness
Waviness
It may be insufficient to interpret the quality of a measurement by looking only at the
measurement peak to peak value. Waviness is often used to detect large deviations. In
some applications there might not be a problem with many small deviations, but one
large will cause great problems. Bearings in diesel engines is one example.
To set waviness, select
To show waviness graph, select
and
.
and
.
Example
The two surfaces in the example below have the same peak to peak value. However
the first measurement is rougher than the second.
In many applications a smooth measurement is desired. Using waviness it is possible
to indicate the smoothness of a measurement. In this example, the rougher measurement will get a waviness graph with higher values.
Max value
Min value
Two surfaces with same peak-to-peak value
Waviness calculation
The waviness number is calculated by letting a sliding set of reference points traverse
the measurement values. The maximum absolute value between the reference points
will determine the waviness number at the given position.
Waviness factor 1 checks the deviations between three measurement points. For example between points 1-3, 2-4 and 3-5 etc.
Waviness factor 2 checks the deviations between four measurement points.
85
Straightness
Straightness settings
Select
and
to open Straightness settings.
For global settings, see “Control panel” on page 15.
Show/hide horizontal values
It is possible to hide the horizontal values. The horizontal values will still be registered, but not visible.
1.Select
. A window is opened.
2.Select Yes or No. Navigate using the navigation buttons.
3.Press OK to confirm choice.
Note!
Only available when you use the program Straightness with a two axis detector.
Show history
If you remeasure a point, the old values are saved as history points. You can select
to show or hide these points while measuring. It is only possible to select the latest
registered value, not the history points. If you delete a point with history points, all its
history is deleted as well. Default is set to hide. Even when set to “hide”, the history
points are saved and can be viewed later.
1.Select
. A window is opened.
2.Select Yes or No. Navigate using the navigation buttons.
3.Press OK to confirm choice.
History points
86
Straightness
Smooth/sharp graph
1.Select
. A window is opened.
2.Select Yes or No. Navigate using the navigation buttons.
3.Press OK to confirm choice.
When set to Smooth, the graph will find a smooth path between the measurement
points.
Sharp
Smooth
Waviness settings
1.Select
. A window is opened.
2.Select waviness factor. Navigate using the navigation buttons.
3.Press OK to confirm choice.
To show waviness in the result view, select
Graph view
and
.
Same measurement but with waviness
See “Waviness” on page 85.
87
Straightness
88
FLATNESS
Program to measure flatness of machine bases,
machine tables, etc.
Preparation
1.Mount the laser transmitter on the table.
2.Mount the detector close to the transmitter on the table (1).
3.Select
to open the program Flatness and enter distances.
4.Select
to open the target.
5.Select
to zero set the value. This is now reference point number one.
6.Move the detector to reference point number two (2).
7.Adjust the laser beam by using the screw (A) on the tilt
2
table. Level to ± 0.1 mm.
Three reference points
8.Move the detector to reference point number three (3).
9.Adjust the laser beam by using the screw (B) on the tilt
1
table. Level to ± 0.1 mm.
B
Repeat procedure until you have all three reference points
within ± 0.1 mm.
3
A
Enter distances
Up to 500 measurement points can be handled.
Distance between first and
last point on X-axis
Number of points on X-axis
Distance between first and
last point on Y-axis
Number of points on Y-axis
Function buttons
Back. Leave program.
See “Control panel” on page 15.
See “Tolerance” on page 91.
Open distance table view. “Distance table view” on page 90.
Continue to Measure view.
Note!
If one of your axis has more than six measurement points, make that the Y-axis. This
will give you a better pdf-report.
89
Flatness
Distance table view
Select
X or Y axis.
to open Distance table view. Use if the distances between points vary in
Distance between points
Press OK to add more points
Distance between first and
last point on Y-axis
Function buttons
Leave Distance table view and return to Distance view.
No changes are saved.
See “Control panel” on page 15.
See “Tolerance” on page 91.
Delete point. It is only possible to delete the last point in the list.
Toggle button. Enter distances for X or Y-axis.
Continue to Measure view.
Note!
It is also possible to enter distances in the default distance view and switch to Distance
table view. This is a fast way if you only need to change one out of many distances
Distance view (default)
Point separation is the same for all points
90
Distance table view
Change point separation if needed
Flatness
Measure
Press
to register values. It is possible to measure the points in any order. First measured
point is set as reference point. When you have measured all points, the Result view is displayed.
First point automatically
becomes reference point.
Selected point.
Current value.
Physical coordinates of
selected point.
Function buttons
Back. Return to enter distances.
See “Control panel” on page 15.
See “Tolerance” below.
Measuring direction. Measure left to right or up and down.
Show target. Useful if you want to rough align for example.
Continue to Result view. Available when you have measured three positions.
Tolerance
By default, the ISO standard is used. The ISO tolerance is calculated automatically depending on which distances you have entered. Only global tolerance is available.
Select
to set custom tolerance.
Set custom tolerance
91
Flatness
Result table
Select
to open table view. Values outside the tolerance are displayed with red.
Reference point
Point with offset
More info regarding selected point
Function buttons
Remeasure selected point.
See “Control panel” on page 15.
Set offset for selected point.
See “Tolerance” on page 91.
Save file, see “Measurement file handling” on page 11.
Toggle button. Set selected point as reference point. Remove as reference.
See “Calculation settings” on page 94.
Raw data. Revert to original data.
Three reference points are automatically set to zero.
Best fit around 0.
All positive. The best fit with all measurement points above zero.
All negative. The best fit with all measurement points below zero.
See “Result 3D” on page 93.
See “Result grid” on page 93.
See “Result table” on page 92.
Note!
To remeasure: select a measurement point and select
92
.
Flatness
Result grid
Select
to open table view.
Red = values not within tolerance
Green = values within tolerance
Reference point
Result 3D
Select
and
to open 3D view. Only available when all points have been
measured.
• Use the navigation button to select measurement points.
• Navigate using the numeric buttons.
• Buttons 2, 4, 6 and 8 rotates the 3D view.
• Button 5 returns to the initial view.
Use numerical buttons to rotate the image.
Yellow = selected point
Black = reference point
93
Flatness
Calculation settings
Select
to display calculation settings. You can try different settings to see which
one suits the best and analyze the measurement result directly in the Display unit. You
can also save reports with different settings to analyze further later.
Reference points
The measurement values can be recalculated so that any three of them become zero
references, with the limitation that a maximum of two of them are in line horizontally,
vertically or diagonally in the coordinate system. (If there are three in line, it is just a
line, and not a plane!). Reference points are needed when you are going to machine the
surface.
Custom reference points
1.Select
to set currently selected point to zero.
2.Select one or three reference points. When you select a second reference point, the
values are not recalculated. Set a third reference point to recalculate the values.
3.Select
if you want to return to raw data.
Set three reference points
1.Select
2.Select
to set three reference points.
if you want to return to raw data.
Best fit
Best fit around 0
When you perform a best fit calculation, the measurement object is tilted to the lowest
peak to peak value. It is fitted as flat as possible between two planes where the average
value is zero. Select
and
to calculate best fit around 0.
All positive
The measurement object is tilted as in a Best fit calculation, but the reference line is
moved to the lowest measurement point. Select
and
to calculate the best
fit with all measurement points above 0.
All negative
The measurement object is tilted as in a Best fit calculation, but the reference line is
moved to the highest measurement point. Select
and
to calculate the best
fit with all measurement points below 0.
94
TWIST
Measure twist on an object by taking two diagonal measurements. If you
want to measure a machine foundation made of two beams you can build a
temporary reference block at the centre point.
Preparations
Select
and
to start the program Twist.
1.Place the S-unit as shown on the screen. Make sure that the Sand M-unit are on the same height. Especially important when
Same height
you are using a tilt table.
2.Mark where the positions A, B, C and D are on your measurement object. Make sure to place the centre point exactly in the middle.
3.Place M-unit on position D. Make sure that the laser beam hits the detector target.
4.Place the M-unit on the centre point. Make a mark to ensure that you place the detector exactly on the same position each time.
5.Place the M-unit on measurement position A.
6.Select
to zero set the value.
7.Move the M-unit to measurement point D. Adjust the laser beam to zero (± 0.1).
Measure
1.Place the S-unit as shown on the screen.
2.Place the M-unit on measurement position A and press
.
3.Follow the instructions on screen and register values on all measurement points.
When you have registered a value on point B, the Result view is automatically displayed.
Guide to where to place the measuring unit
Indicates in which direction you will measure.
Centre point
Leave program
Back
Function buttons
Back. Leave program.
See “Control panel” on page 15.
Zero set the displayed value. Only available before registering the first value.
Return to absolute value. Only available before registering the first value.
95
Twist
Result
Three measurement points are automatically set to zero.
Function buttons
Remeasure.
Save file, “Measurement file handling” on page 11.
See “Control panel” on page 15.
96
FLANGE FLATNESS
Easy-Laser® Flange systems can be used on flanges up to 40m in diameter. You can
measure 1 to 5 circles of measurement points, for example inner, middle and outer
circles, in order to see the taper of the flange. Each circle can have 3–180 measurement
points. The program guides you graphically step-by-step through the entire measurement.
97
Flange Flatness
Preparations
Use the program Values, Flange flatness or targets for the set up.
Point one
1.Place the laser transmitter (D22 or D23)
on the flange. Notice the direction, see
image.
2.Place the detector close to the transmitter.
3.Make a mark to mark out the position of
the detector.
4.Adjust the detector or target so the laser
beam hits the centre.
5.If you use a measurement program, select
to zero set point number one.
Notice the direction and
location of transmitter.
Point number one,
close to the transmitter. Zero set.
Point two
6.Move the detector to point number two,
see image.
7.Aim the detector straight towards the
laser.
8.Adjust the laser beam by turning the
screw on the transmitter’s tilt table. Level
to ± 0.05 mm or better.
Point three
9.Move the detector to point number three,
see image.
10.Adjust the laser beam by turning the
screw on the transmitter’s tilt table. Level
to ± 0.05 mm or better.
Repeat procedure until you have all three
reference points within ± 0.1 mm.
90°
Point number two,
adjust laser beam.
Adjust with
this screw.
Point number three,
adjust laser beam.
90°
Adjust with
this screw.
98
Flange Flatness
Measuring procedure
Enter distances
1.Select
and
to open the Flange flatness program.
2.Enter distances, confirm all data with the green OK button.
Select green arrow to
continue.
Number of circles
Points/circle
Splitting angle
Diameter
Measurement
direction
Start angle
3.Select
Enter number of circles, up to five circles is possible.
Enter 3-180 points.
The splitting angle is automatically calculated. If you know the
splitting angle, it is possible to enter this and get the number of
measuring points.
Enter the diameter of each circle.
You can measure clockwise or anti clockwise. Use Navigation
buttons to change direction.
As default, the first measurement point is set to 0º. Select a
start angle if you want to start anywhere else.
to continue to measuring.
99
Flange Flatness
Measure
1.The first measurement point is marked with yellow.
2.Press OK to register measurement values. The measurement points you have
registered are greyed out.
Registered values
Live values
Select to display sub-menu.
Current measurement point is marked with yellow
Function buttons
Back. Press and hold to leave program completely.
Contains a sub-menu.
Open Control panel.
Save. See “Measurement file handling” on page 11.
Generate report.
Print on thermal printer (Optional equipment).
Zero set. Set current value to zero. Only available before you have registered the first value.
Views. Available when you have registered all points.
Contains a sub-menu.
Open Graph view.
Open 3D view.
Open Table view.
Open Taper table.
Open Taper graph.
100
Flange Flatness
Flange result
The result can be displayed in several ways; graph, 3D or table. If you have measured
two or more circles, you can view the taper graph and taper table.
Flange graph view
Select
and
overview of the result.
to display the Graph view. In this view, you have a good
Navigation
Use the navigation buttons to move in the table. Button left and right will move between the columns.
Currently selected measurement point
Each column represent a circle. Use
the navigation buttons to move between
columns and rows.
Max
Min
Peak-peak
Standard deviation
Flatness RMS
The highest value.
The lowest value.
Difference between Max and Min value
Average difference between Max and Min value.
Root Mean Square (Numerical Flatness)
Function buttons
Back. Press and hold to leave program completely.
Contains a sub-menu.
Open Control panel.
Save. See “Measurement file handling” on page 11.
Generate report.
Print on thermal printer (Optional equipment).
See “Calculation settings” on page 104.
Views. Contain a sub-menu with different flange and taper views.
Note!
Press and hold
to leave program completely.
101
Flange Flatness
Flange 3D view
Select
and
to display the 3D view.
Measurement point number one,
marked yellow
Zero plane
Same function buttons as in Flange Graph view.
Flange table view
Select
and
to display Table view.
Select if you only want to see the table. Use navigation buttons to move in the table.
Same function buttons as in Flange Graph view.
Note!
The calculation settings under
in the table.
102
is made on the circle (column) currently selected
Flange Flatness
Taper table
Select
and
to display Taper table. Here you get a good overview of the
inclination of the flange, between the measured circles. Taper values are displayed both
as graph and table. Use navigation buttons to move in the table.
Taper graph
Select
and
around in the graph.
to display Taper graph. Use the navigation buttons to move
103
Flange Flatness
Calculation settings
Select
to display calculation settings. You can try different scenarios to see
which one suits the best and analyze the measurement result directly in the Display
unit. You can also save reports with different settings for best fit to analyze further
later.
Reference point. Set custom reference points.
Raw data. Revert to original data.
1 ref point. Measurement point #1 is automatically set to zero.
3 ref points. Three reference points are automatically set to zero.
Best fit around 0. Calculated on the selected circle or measurement
points.
All positive. The best fit with all measurement points above zero.
Calculated on selected circle or measurement points.
All negative. The best fit with all measurement points below zero.
Calculated on selected circle or measurement points.
In the following examples, we show a flange with much exaggerated surface.
See image below. Red indicates reference plane.
104
Flange Flatness
Custom reference points
Reference points are needed when you are going to machine the surface.
1.Select a measurement point in the Table view or Graph view.
2.Select
to set currently selected
point to zero.
3.Select one or three reference points. When
you select a second reference point, the
values are not recalculated. Set a third
reference point to recalculate the values.
4.Select
if you want to return to raw
data.
One reference point selected
One reference point
Select a measurement point in the Table view
or Graph view.
1.Select
to select first point as reference.
2.Select
if you want to return to raw
data.
First point set as reference.
Three reference points
1.Select
to set three reference points.
One is set on measurement point #1 and
the other are distributed evenly on 120º.
2.Select
if you want to return to raw
data.
Reference plane is resting on three reference
points. Here you can clearly see what is below Three points set as reference.
and above the reference plane.
Three reference points
105
Flange Flatness
Best fit – select circle or points
By default best fit is calculated on the selected circle in the table. You can also select
all measurement points on a certain position.
1.Select
and
or
.
2.Select a circle or measurement points in the table. See below.
3.Select one of the best fit options.
4.The calculation is made on the selected circle/measurement points. To make the
same best fit calculation on another circle, repeat step 1–3.
Select circle
By default the best fit calculation is made on the currently selected circle. Use navigation buttons left and right to select another circle in the table.
Circle A selected.
Select measurement points
You can make best fit calculations on all measurement points on a certain position.
1.Select circle A in the table.
2.Press left navigation button to select the whole row.
3.Use navigation buttons to move up and down in the table.
2A, 2B and 2C selected.
106
Flange Flatness
Best fit
When you perform a best fit calculation, the flange is tilted to the lowest peak to peak
value. It is fitted as flat as possible between two planes where the average value is zero.
See example below:
Reference plane
Raw data, in this case a flange with an irregular surface
Peak to peak
Reference plane
Best fit calculated. The flange is now
fitted between two parallel planes.
Select
and
to calculate best fit around 0. Select a circle or measurement
points in the table. Below is the same calculation displayed in Flange 3D view and
Flange table view. In the image below, calculation is made on circle A.
Note!
You can save reports with different settings for best fit to analyze further later.
107
Flange Flatness
All positive
The flange is tilted as in a Best fit calculation, but the reference line is moved to the
lowest measurement point. See example below:
Reference plane
Select
and
to calculate the best fit with all measurement points above 0.
Select a circle or measurement points in the table. In the image below, calculation is
made on circle A.
All negative
The flange is tilted as in a Best fit calculation, but the reference line is moved to the
highest measurement point. See example below:
Reference plane
Select
and
to calculate the best fit with all measurement points below 0.
Select a circle or measurement points in the table. In the image below, calculation is
made on circle A.
108
BTA
Easy-Laser® BTA system consists of a laser transmitter and a detector.
Magnetic mountings on laser and detector make it easy to mount the
equipment. Non-magnetic sheave/pulleys can be aligned as the units are
very light and can be mounted using double-sided tape.
Note!
BTA is not included in the Shaft or Geo systems but bought as an option.
For technical information, see “BTA E180 (Optional)” on page 126.
Connector
Detector aperture
Battery Alkaline 1xR6 (AA) 1.5 V
Image showing BTA E180
All types of sheave/pulleys can be aligned, regardless of belt type. You can compensate for sheaves of varying widths.
V-belt
Flat belt
Timing belt
Chain drives
The misalignment can be offset or angular. It can also be a combination of both.
Offset misalignment
Angular misalignment
Offset and angular misalignment
109
BTA
Preparations
• Check the sheaves for radial runout. Bent shafts will make it impossible to perform an accurate alignment.
• Check the sheaves for axial runout. If possible, adjust with the mounting screws of
the bushings.
• Make sure that the sheaves are clean from grease and oil.
Mount the units
The units are mounted on a flat machined surface with magnets. The magnets are very strong, try to soften the touch by
putting just one magnet to sheave first, then turning the other
ones in. Non-magnetic sheave/pulleys can be aligned as the
units are very light and can be mounted using double-sided
The units fit small as well as
tape.
1.Mount the laser transmitter on the stationary machine. large sheaves.
2.Mount the detector on the movable machine.
3.Make sure all magnetic surfaces are in contact with the sheave.
OR
Movable
Stationary
Stationary
Movable
On steel surface
On non-magnetic object
All of the magnetic surfaces must be in contact with the object.
Magnetic areas
Align with targets
Misaligned sheaves
Vertical alignment
110
Laser beam
Aligned sheaves
The beam disappears in the slot
of the target.
Horizontal alignment
BTA
Measure using Display unit
The E180 BTA can be used as a separate tool, see “Measure without Display unit” on
page 114.
Enter distances
1.Connect to the Display unit via cable or use Battery pack with Bluetooth®.
2.Press the ON button on the laser transmitter.
3.Select
to open the BTA program.
4.Select
if you want to enter sheave face width. Press OK.
5.Enter distance between feet pairs. Press OK.
Distance
between feet pairs
Mandatory
Sheave face width
Optional
Movable machine is to the left.
Movable machine is to the right.
Function buttons
Leave program.
See “Control panel” on page 15.
Sheave face width. Select to activate fields if the sheaves have different
face widths.
Contains a sub menu.
The Display unit automatically recognize where the units are placed.
However, you can do this manually as well.
Set M-unit to the left.
Set M-unit to the right.
Return to Automatic configuration.
Sheave face width
The distance from the belt to the axial face of the sheave can be
different on the two sheaves. To calculate a possible offset the
system requires both sheave face widths.
1.Measure the distance from the belt to the axial face of the
sheave.
2.Select
to activate fields and enter distances.
111
BTA
Measure
Make sure that the laser line hits the detector aperture. The Display unit shows the
offset and angular misalignment.
Vertical angular error
Horizontal angular error
Offset
Adjustment
Shim value
Function buttons
Back. Return to enter distances.
See “Control panel” on page 15.
Save, see “Measurement file handling” on page 11.
Set tolerance. See also Tolerance on next page.
Print on thermal printer (Optional equipment). Available when
you have saved the measurement.
Edit distance.
Values – colours
White
Green
Red
++++
Note!
No tolerance set.
Value within tolerance.
Value outside tolerance.
Loss of signal, laser beam interrupted for example.
The laser transmitter flashes when the battery is low. Change the batteries before you
continue to measure.
112
BTA
Tolerance
Recommended maximum tolerances from manufacturers of belt transmissions depends
on type of belt, usually between 0.25–0.5°.
1.Select
2.Select
. The tolerance view is displayed.
<°
mm/m
mils/inch
0.1
0.2
0.3
0.4
0.5
0.6
0.7
0.8
0.9
1.0
1.75
3.49
5.24
6.98
8.73
10.47
12.22
13.96
15.71
17.45
Recommended
to set user defined tolerance.
Adjust
Start by adjusting the sheave, and then the machine.
• Correct offset by moving the movable machine with axial jackscrews, or by repositioning one of the sheaves on its shaft.
• Correct vertical angular error by shimming the movable machine.
• Correct horizontal angular error by adjusting the movable machine with lateral
jackscrews.
When you adjust the machine one way, it often affects the machine’s other alignment
conditions. Which means this process may have to be repeated several times.
Note!
If not using the system for a long period of time, remove the batteries.
113
BTA
Measure without Display unit
The E180 BTA can be used as a separate tool.
Measure
1.Press
to start the detector and ON to start the laser transmitter.
2.Read the values. Offset, horizontal angle and vertical angle are displayed.
3.Adjust machine, see previous page.
Offset (mm or inch)
Horizontal angle
Vertical angle
Settings
On/Off
Battery
Different sheave width
M
If the sheaves have different face widths, just add or
subtract the difference from the zero value to get the
value for perfect alignment.
1 mm (0.040”)
S
2 mm (0.080”)
Settings
Press
to open the settings view. Use to move up and down in the menu.
• Press to switch position on the M and S-unit.
• Toggle between mm and inch with .
Battery
Press
to see the battery status of the detector. While the battery is charging, there is
a green flashing light. The laser transmitter flashes when the battery is low. Change the
batteries before you continue to measure.
Red, flashing once: Battery empty.
Red, flashing twice: Battery needs charging.
Green, flashing three times: Good.
Green, fixed light: Battery full.
114
Note!
If not using the system for a long
period of time, remove the battery from
the laser transmitter.
VIBROMETER
Easy-Laser® Vibrometer is used in preventive as well as active maintenance work on rotating machinery. It measures the vibration level and
bearing condition of machinery.
When measuring vibration level, Easy-Laser® Vibrometer is measuring the effective
velocity (mm/s or inch/s RMS) in the frequency range between 2 and 3200 Hz. This
range covers most of the frequencies that will occur for the majority of mechanical
malfunctions and imperfections, for example unbalance and misalignment.
When used to measure bearing condition the Easy-Laser Vibrometer is measuring the
effective acceleration (RMS) in the frequency range between 3200 and 20000 Hz.
Trend analysis of the bearing condition value can be used to determine wear and tear
of machine bearings.
Magnetic tip
Measuring tip
See “Vibrometer (Optional)” on page 127.
Mount directly on machine
It is possible to remove the magnetic tip and mount the probe directly to the machine,
using the M6 threaded stud.
Measuring tip
For measuring points that are hard to reach, use the measuring tip. Simply unscrew the
magnetic tip and replace with the measuring tip. When measuring with the measuring
tip, place it firmly against the measurement point and hold it as vertical, horizontal or
axial as possible. When the measuring tip is used the frequency range is reduced to
about 800 to 1500Hz.
Note!
Vibrometer is not included in all Shaft systems.
115
Vibrometer
Measure
1.Use the standard red cable to connect the Vibrometer directly to the Display unit.
Wireless units cannot be used.
2.Select
to open the Vibrometer program.
• Enter rpm. Optional.
• Use the navigation buttons if you want to register another point than is selected
by default.
3.Place the vibrometer against the measurement point. Pressing more firmly should
not change the reading. If this happens, adjust the measuring point.
4.Wait a few seconds for the value to stabilize.
5.Press OK to register value.
Vibration level
Speed
Enter rpm. Optional.
Bearing condition
Selected
measurement point
Values for vibration level or
bearing condition is shown.
Switch using function button.
Function buttons
Leave program.
See “Control panel” on page 15.
Save, see “Measurement file handling” on page 11.
Print report on thermal printer (optional equipment).
Generate report. Available when you open a saved measurement.
Toggle button. Show values for bearing condition or vibration level.
Toggle button.
Show high frequency (10–3200 Hz) or low frequency (2–3200 Hz).
Contains a submenu
Clear selected measurement point.
Clear all measurement points.
Tolerance. Show tolerance table for vibration level and bearing condition value.
116
Vibrometer
Vibration level
In the Display unit, a table from ISO 10816-3 standard is shown. This standard is used for
machines with power above 15kW and nominal speeds between 120–15000 rpm.
1.Use navigation buttons to select a measurement point.
2.Select
to open the tolerance table. It displays the values for the selected point.
Selected
measurement point
High frequency
Bearing condition table
Vibration level displayed
in mm/s or inch/s
Rigid or flexible
The ISO standard is classifying the machines differently if the machines have flexible or
rigid foundations. Usually this is determined from drawings and calculations of the machine.
Groups
• Group 1. Large machines with rated power above 300kW. Electrical machines with shaft
height H > 315mm. Operating speed ranges from 120 to 15000 rpm
• Group 2. Medium-sized machines with a rated power above 15kW up to and including
300kW. Electrical machines with shaft height between 160 < H < 315 mm. Operating
speed normally above 600 rpm.
• Group 3. Pumps with multivane impeller and with separate driver with rated power
above 15kW.
• Group 4. Pumps with multivane impeller and with integrated driver with rated power
above 15kW.
Guideline
Another standard you can use is ISO 2372 class 4, for large machines on flexible
foundations.
0 – 3 mm/s
0 – 0.12inch/s
3 – 7 mm/s
0.12 – 0.27 inch/s
Small vibrations. None or very small bearing wear.
Low noise level.
Noticeable vibration levels often concentrated to some specific part
as well as direction of the machine. Noticeable bearing wear. Seal
problems occur in pumps etc. Increased noise level. Plan action
during next regular stop. Keep the machine under observation and
measure at smaller time intervals than before to detect a deterioration trend if any. Compare vibrations to other operating variables.
7 – 18 mm/s
Large vibrations. Bearings running hot. Bearing wear-out cause
0.27 – 0.71 inch/s frequent replacements. Seals wear out, leakage of all kinds evident.
Cracks in weldings and concrete foundations. Screws and bolts are
loosening. High noise level. Plan action soonest.
> 18 mm/s
Very large vibrations and high noise levels. This is detrimental to
> 0.71 inch/s
the safe operation of the machine. Stop operation if technically or
economically possible considering the plant stop cost.
117
Vibrometer
Bearing condition value
Bearing condition value is used for trend analysis. If the bearing condition value
increases over time, it can be a sign that the bearing is poorly lubricated, overloaded
due to misalignment or has a damaged surface. A high bearing condition value can
however appear in gearboxes, converting machines with cutters and similar machines
without any bearing fault. This is because this type of machinery naturally produces
high frequency vibrations that are similar to the vibrations produced by a machine with
a bearing fault.
The bearing condition value is the quadratic mean, RMS value, of all high frequency
vibrations between 3200 Hz to 20000 Hz. This value is an acceleration average measured in multiples of the standard gravity constant, g.
The diagram below is only a guide to interpret the bearing condition value. A high
bearing condition value should always be used as a request to make detailed frequency
analysis. Do not change bearings before this is done.
Open tolerance table for bearing condition
1.Select a measurement point.
2.Select
Selected
measurement point
to open the tolerance table.
Replace
Failing
Fair
Acceptable
Good
Line showing rpm.
(Shown only if you have entered rpm.)
118
OFFSET AND ANGLE
The Offset and Angle program displays measurement values from measuring units S and M. The measurement values can be zeroed and any offset
and angular changes between the units that may occur are displayed.
1.Enter distance between measuring units.
2.Press OK.
Enter distance
Horizontal offset and
angle displayed
Vertical offset and
angle displayed
Function buttons
Leave program.
See “Control panel” on page 15.
Show target. This is a quick way to see where the laser beam hits
the target and how the measuring units are positioned.
See “Streaming values”.
Zero set. Set current value to zero.
Absolute. Return to absolute value.
Half. Half displayed value.
119
Offset and angle
120
BATTERY PACKS
When not using cable to the measuring units, you can use our chargeable battery pack.
The battery pack comes in two versions, with or without built-in Bluetooth®.
Battery pack
(Part No. 12-0617)
1.Place the battery pack on the rods.
2.Plug in the red cable to the measuring unit.
The measuring unit will charge and you can continue measuring.
Battery indicator*
The battery indicator only
shows the battery status of
the Battery pack.
This Battery pack does not have a builtin Bluetooth®, you can however connect
a Bluetooth® unit to the Detector/Measuring unit. To save energy, the Bluetooth®
units will only connect when you are
using a measurement program. There
is no power switch on the Bluetooth®
unit. To switch off, simply unplug it. The
Bluetooth® unit have a serial number that
is shown in the Bluetooth view in the
Display unit.
On/Off
Diode green when Battery
pack is active.
Diode yellow when no unit is
connected. The Battery pack
will automatically shut off.
Bluetooth® unit
Optional
Diode yellow when attached
correctly.
Diode blue when Bluetooth® connection is established.
Battery pack
with Bluetooth®
(Part No. 12-0618)
This Battery pack has built-in Bluetooth® functionality. For more information on how to set up and search for
Bluetooth® units, see “Bluetooth® set
up” on page 21.
The Battery pack’s serial number is
placed on the backside. This serial number is shown in the Bluetooth view in
the Display unit.
Battery indicator*
On/Off
Diode green when Battery
pack is active.
Diode yellow when no unit is
connected. The Battery pack
will automatically shut off.
When the Battery pack run empty, the
lights for Battery indicator and On/Off
are switched off. However, the built-in
Bluetooth® will still function as long as
the Detector has some power left.
Bluetooth® (only 12-0618)
Built-in functionality.
Diode yellow when attached
correctly.
Diode blue when Bluetooth® connection is established.
* Battery indicator
Constant green light
Battery pack full.
Flashing green light
Battery pack OK
Flashing red light
Battery pack low. Approx. 15 min. left to empty.
Battery pack empty and will shut down.
121
Battery packs
Charge battery pack
Using Display unit
It is possible to charge battery packs without Bluetooth® via the Display unit, one at a
time. You can charge both a Detector and a battery pack by connecting the equipment
as described in the image. If the Display unit is turned off while charging, the equipment will charge faster.
1.Connect the Display unit with the adapDisplay unit
tor. The Display unit itself does not have
enough power to charge the battery pack.
2.Use standard red cable to connect battery
Battery pack Detector
pack to the
Display unit.
Adaptor
Using splitting box
When you have two battery packs or battery
packs with Bluetooth®, you can use our splitting box (Part No. 12-0597).
1.Plug in the power adaptor to the splitting
box. Use the standard power adaptor
delivered with your system. All lights are
lit up on the splitting box.
2.Plug in the battery pack and
Detectors to the splitting box.
Corresponding light is switched off.
3.When the battery pack is fully charged, the
light is switched on again.
Splitting box
Detector
Detector
Battery pack
Battery pack
Splitting box
Adaptor
Contact for power adaptor
Using split cable
For two Battery packs or Battery packs with
Split cable
Bluetooth®, you can also use our split cable
(Part No. 12-0725).
The split cable can only be used to charge the
Battery pack
Battery packs, not as a “red cable”.
Battery pack
1.Plug in the power adaptor and split cable
to the Display unit.
2.Plug in the battery packs.
3.When the battery packs are fully charged, the light is
constant green on the Battery pack.
122
Adaptor
TECHNICAL DATA
System Easy-Laser® E710 Shaft, Part No. 12-0440
A complete system contains
1
1
1
2
2
2
2
2
2
1
1
1
1
1
1
1
1
1
1
Measuring unit M
Measuring unit S
Display unit
Bluetooth® units
Cables 2 m
Shaft brackets with chains
Extension chains
Magnet bases
Offset brackets
Set of rods 4x60 mm, 4x120 mm [4.72”, 2.36”]
Manual
Measuring tape 3 m
USB memory stick
USB cable
Power adaptor (100–240 V AC)
Toolbox
Cleaning cloth for optics
CD with documentation
Carrying case
System
Relative humidity
Weight (complete system)
Carrying case
10–95%
10 kg [22 lbs]
WxHxD: 500x400x200 mm [19.7x15.7x7.8”]
Drop tested. Water and dust tight.
123
Technical data
Display unit E51
Part. no 12-0418
In the Display unit you are guided through the measurement procedure and can save
and analyze the results.
A B C D E
A
B
C
D
E
F
F
Connection for charger
Network connection
Expansion port
USB A
USB B
Easy-Laser® measurement equipment
Display unit
Type of display/size
Displayed resolution
Power management
Internal battery (stationary)
Battery compartment
Operating time
Connections
Storage memory
Help functions
Environmental protection
Housing material
Dimensions
Weight (without batteries)
VGA 5.7” colour
0.001 mm / 0.05 thou
Endurio™ system for unbroken power supply
Li Ion, Not restricted PI967, 3.7 volt, 43Wh,
11600 mAh
For 4 pcs R 14 (C)
Appro. 30 hours (Normal operating cycle)
USB A, USB B, External, Easy-Laser® units, Network
>100,000 measurements
Calculator, Converter
IP Class 65
PC/ABS + TPE
WxHxD: 250x175x63 mm [9.8x6.9x2.5”]
1030 g [2.3 lbs]
Cables
Type
System cable
Extension system cable
USB cable
With Push/Pull connectors
Length 2 m [78.7”]
Length 5 m [196.8”]
Length 1.8 m [70.8”]
EasyLink™ data base software for PC
Minimum requirements
124
Windows® XP, Vista, 7. For the export functions, Excel 2003 or newer must be installed on the PC.
Technical data
Measuring units
Part no. 12-0433
Part no. 12-0434
PSD (2 axis)
Laser aperture
Connectors
Threaded fixing hole for future
expansion and more measurement possibilities
Measuring units
Type of display/size
Detector resolution
Type of laser
Laser wavelength
Laser safety class
Laser output power
Inclinometers
Thermal sensors
Environmental protection
Dimensions
Weight
Internal battery
2-axis PSD 20x20 mm [0.78” sq]
0.001 mm / 0.05 thou
Diode laser
635–670 nm
Class 2
<1 mW
0.1º resolution
± 1° C accuracy
IP Class 66 and 67
BxHxD: 60x60x42 mm [2.36x2.36x1.65”]
202 g [0.45 lbs]
LI-Po, 3.7 volt, 2.5Wh, 680mAh
Wireless connection unit (Not included for all systems)
Wireless communication
Operating temperature
Housing material
Environmental protection
Dimensions
Weight
Class I Bluetooth® Wireless Technology
-10–50 °C
ABS
IP Class 66 and 67
53x32x24 mm [2.1x1.2x0.9”]
25 g [0.06 lbs]
Bluetooth®
Note!
Diode yellow when attached
correctly.
Diode blue when Bluetooth®
connection is established.
The Bluetooth® unit is powered by the
Detector. To save energy, the Bluetooth®
connection is only established when you
are using a measurement program.
125
Technical data
BTA E180 (Optional)
Part no. 12-0796
Clean the units and the windows at the apertures with a dry cotton cloth. If not using
the system for a long period of time, remove the battery from the laser transmitter.
Connector
Detector aperture
Battery Alkaline 1xR6 (AA) 1.5 V
Laser transmitter E180
Sheave diameter
Laser class
Output power
Laser wavelength
Beam angle
Accuracy
Battery type
Battery operation
Operating temperature
Material
Dimensions BxHxD
Weight
> 60 mm [2.5”]
2
<1 mW
635–670 nm
60°
Parallelity: < 0.05°,
Offset < 0.2 mm [0.008”]
1xR6 (AA) 1.5 V
8 hours cont.
-10ºC to +50ºC
ABS plastics / Hard anodized aluminium
145x86x30 mm [5.7x3.4x1.2”]
270 g [9.52 oz]
Detector unit E180
Sheave diameter
Displayed resolution
Measurement distance
Measurement range
Display resolution
Display type
Connection
Battery type
Battery operation
Housing material
Dimensions BxHxD
Weight
126
> 60 mm [2.5”]
(Changeable between mm/inch)
Axial offset: 0.1 mm [0.005”]
Angular value: 0.1°
Up to 3 m [9.8’] between transmitter and detector
Axial offset: ±3 mm [0.12”] Angular value: ±8°
Offset: 0.1º Angle:0.01º
Yellow OLED 96x96 pixels
Bluetooth® wireless technology
Li-Ion
5 hours continuously
ABS plastics / Anodized aluminium
95x95x36 mm [3.7x3.7x1.4”]
190 g [6.7 oz]
Technical data
Vibrometer (Optional)
Part no. 12-0654
Magnetic tip
Measuring tip
Instrument/Software
Measurement range
Resolution
Frequency range
Probe
Sensitivity
Dimensions
0–50 mm/s [0–2 inch/s] RMS
0.1 mm/s [0.005 inch/s]
Total level: 2–3200 Hz (Lp), 10–3200 Hz (Hp)
Bearing condition: 3200–20000 Hz
100 mV/g ±10%
Magnet: L=20 mm [4/5”], =15 mm [19/32”]
Gauge tip: L=65 mm [2 1/2”9]
127
Technical data
128
INDEX
A
Angle 119
Angle warning 35, 53
Angular misalignment 40
B
Bar-code 13
Barcode 8
Battery 5
Battery view 9
Bearing 116
Bearing condition 118
Belt 109
Best fit 59, 84
Bluetooth® 7, 9, 21
Buttons 5
C
Calculated values 74
Calculation settings 82
Calibration 3
Calibration check 30
Convert units 10
D
M
Manual fit 59
Manuals as PDF 3
Measurement direction 99
Metric unit 16
M-unit 32
O
Offset 109, 119
Offset for reference point 78
P
PDF 16
Peak to peak 79, 101, 107
Personal settings 15
Position indicator 39, 41
Power adaptor 9
Print 14
Projector 7
Q
Quickmode 76
R
File handling 11
Filter 15
Flatness RMS 101
Font package 19
Raw data 92, 104
Raw values 74
Reference plane 107
Reference point 105
Reference points 82
Reference target 74
Rename machine 33, 51
Rename machines 33, 51
Report 14
Resolution 16
Rotate coordinates 7
Rough alignment 71
rpm 116
G
S
Distance view 76
E
EasyLink 3, 14
elu file 19
Escape 5
F
Gap 34, 39, 52
Graph view 101
I
Icons 6
Imperial unit 16
ISO standard 117
L
Language 17
LED signal 5, 8
License 20
Logo 14
T
Table view 102
Taper 103
Target 74
Template 13
Time and date 16
Tolerance 44, 43, 62, 81
Twist , 23
U
Uncertain coupling 59
Unicode 19
Unit 16
Update system 19
Upgrade system 20
USB 5, 13
User 17
V
Values 25, 28
Vibrometer 115
W
Warning icon 7
Warranty 2
Waviness 85
Z
Zoom 80
Screen dump 8
Service centre 3
Settings 15
Sheave 111
Softfoot 47
Splitting angle 99
Standard deviation 79, 101
Start angle 99
Status bar 7
Straightness settings 86
Streaming value 29
Submenu 6
S-unit 32
129