1
Raptor User Manual
9
Common Tasks
This section shows how to complete common tasks. Please refer to the Main Interface section for
details concerning specific controls and features (see page 15).
Connections
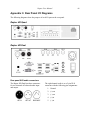
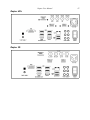
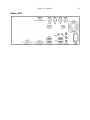
Please refer to Appendix C, page 46 for information on the various connectors and I/O ports on
the Raptor. Also, the Raptor HD+ ships with a breakout cable; see page 49.
Video Input
It is necessary to set the video input in the software application. If you know exactly what your
input signal is (interface, resolution, framerate), you can set it directly. Otherwise, the Raptor
provides a mechanism to detect the resolution and framerate for a given input.
Auto-detection
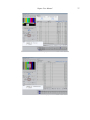
Pull down the Options menu, open the Video Input sub-menu, open the sub-menu corresponding
to your video input, and select Auto-detect.
Auto-detection can also be activated via the Front Panel: OPTION + RECORD + >>.
For more information, see Auto detection on page 24.
Changing Input Manually
The Raptor supports a wide variety of formats for video input. These are accessed via the
Options > Video Input menu. Please see Video Input on page 24 for more information.
Audio Input
The Raptor supports both XLR analog audio input and Embedded audio. These can be selected
in the Options > Audio Input menu (see page 25).