1
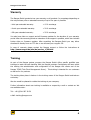
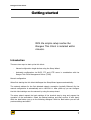
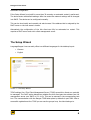
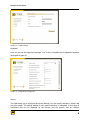
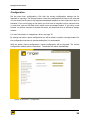
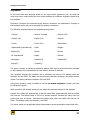
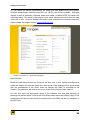
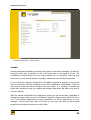
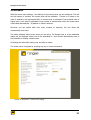
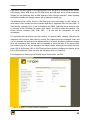
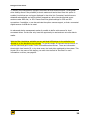
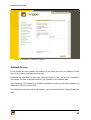
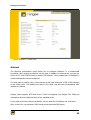
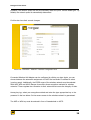
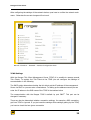
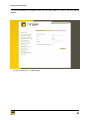
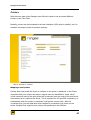
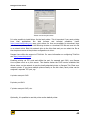
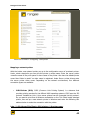
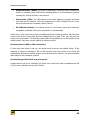
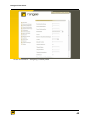
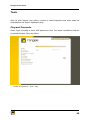
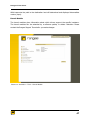
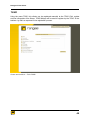
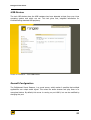
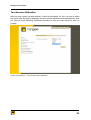
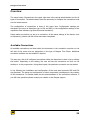
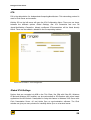
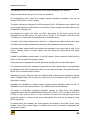
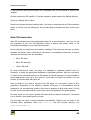
Rangee Thin Client R ANGEE THI N CLIE NT User Manual Rangee Thin Client User Manual– Rev. 6.40v2 © Copyright 2011, Rangee GmbH Gut-Dämme-Str. 11, 52070 Aachen E-mail: [email protected] Web: You always find the actual version of this user manual at the download area of our homepage: http://www.rangee.com/ (Support > Downloads). Copyright This manual is copyrighted. The unauthorized copying (partial or complete), reproduce, translate or dissemination via electronic media is prohibited. Trademark ICA ® is a registered trademark of Citrix Systems, Inc. MetaFrame™ is a registered trademark of Citrix Systems, Inc. Ericom® and PowerTerm® are registered trademarks of Ericom® Software Ltd. Microsoft®, Windows®, Windows® NT® and Windows® 2000 are registered trademarks of Microsoft Corporation. Java® is a registered trademark of Sun Microsystems, Inc. ThinPrint® is a registered trademark of ThinPrint GmbH. All other product names and company names mentioned in this manual are used only for identification or explanation of products or companies and may be trademarks of their respective owners. Diclaimer The information in this manual has been compiled to configure Rangee thin clients. The Rangee GmbH reserves the right to modify parts of the content at any time. The Rangee GmbH can not be held responsible for errors or ambiguous information in this manual. Aachen, Germany, January 2011 2 Rangee Thin Client Contents Warranty.....................................................................................6 Training......................................................................................6 Introduction...............................................................................7 The Setup Wizard........................................................................8 Finish the Setup Wizards...........................................................................12 Information................................................................................................16 Desktop configuration................................................................................18 Remote-administration..............................................................................21 Software Update........................................................................................22 Configuration.............................................................................................26 Keyboard....................................................................................................27 screen.........................................................................................................29 Screensaver ...............................................................................................31 Drives.........................................................................................................32 Network Devices........................................................................................35 Network......................................................................................................36 Printers.......................................................................................................41 Tools.........................................................................................46 Ping and Traceroute...................................................................................46 Information about Drives..........................................................................48 TCMS...........................................................................................................49 PCI-Devices................................................................................................50 USB-Devices...............................................................................................51 EsounD-Configuration................................................................................51 Boot-Configuration....................................................................................52 Touchscreen-Calibration............................................................................53 Hide Mouse Cursor.....................................................................................54 Overview...................................................................................56 Available Connections................................................................................56 3 Rangee Thin Client ICA..............................................................................................................58 Global ICA-Settings....................................................................................58 New ICA-Connection..................................................................................60 New PN Agent/XenDesktop connection....................................................62 RDP...........................................................................................63 Globale RDP Settings.................................................................................64 New RDP Connection.................................................................................65 Mozilla Firefox..........................................................................67 VMwareview.............................................................................69 Desktop mirroring via VNC.......................................................73 Remote Access via SSH.............................................................74 Rescue Panel............................................................................74 4 Rangee Thin Client Introduction Congratulations on your purchase of a thin Rangee client with Rangee Linux! Rangee Linux is a state-of-the-art embedded Linux system for thin client devices that meet high demands on functionality. Rangee Linux offers both comprehensive and flexible functions for networks with many different types of servers and web applications. With Rangee Linux the thin client is able to set up several sessions to Windows 2003 Server, Windows 2000 Server, Windows NT Terminal Server, Unix-based server, mainframe, intranet and the Internet at the same time. This Administrator Guide is primarily intended for thin client administrators. It describes how to start the thin client and how to configure it. For additional help, the Rangee Support +49 (0)241 / 997 28 50 or [email protected]. is available by phone under This manual is divided into the following chapters : Getting Started Setup guide Administration of the client Configuration of the global settings Set up connections Configuration of connections Extended administration Extendet configuration settings 5 Rangee Thin Client Warranty The Rangee GmbH granted a two year warranty on all products. In percentage depending on the net purchase price an extended warranty of up to five years is possible: - third year extended warranty: + 15 % surcharge - fourth year extended warranty: + 20 % surcharge - fifth year extended warranty: + 25 % surcharge You also have claim on support and all firmware updates for the duration of your warranty period. After the warranty period an extension of the support is possible, which also includes further claim on firmware updates. After consulting the Rangee GmbH you may either download it directly from our FTP site or we will send you a support CD. In case of warranty please contact the Rangee support or follow the instructions at http://www.rangee.de/site/de/service_1/33.html Training As part of the Rangee partner program the Rangee GmbH offers specific qualified user trainings to teach the safe handling with the Rangee products. Participants will learn within the training the administration and configuration of the Rangee thin clients and of the Rangee TCMS (Thin Client Management Server). This training is intended for our customers as well as for our partners. The training takes place in Aachen in the training rooms of the Rangee GmbH and take an entire day. We also would be pleased to realize the training at your company. Further information about user training is available on request by e-mail or contact us. We are available under: Tel.: +49 (0)241 997 28 50 e-Mail: [email protected] 6 Rangee Thin Client Getting started With the simple setup routine the Rangee Thin Client is installed within minutes. Introduction There are two ways to start up the thin client: - Manual configuration single devices using the Setup Wizard - Automatic configuration via DHCP, FTP and HTTP server in combination with the Rangee Thin Client Management Server (TCMS) Manual configuration When first starting the thin client theRangee the Setup Wizard appears automatically. The network address for the first detected network connection (typically Ethernet) for the manual configuration is automatically set to 169.254.0.1. After power up you can configure the thin client settings over the network by using the setup wizard. The setup wizard request the basic settings of the terminal step by step and prepare the operation of the workstation. Select the desired settings and then confirm it with Apply. With the Next button you go to the following dialogues. With the Back button you can call previous dialogs and edit it. 7 Rangee Thin Client Automatic configuration If the Setup Wizard is not edit for more than 30 seconds, an automatic restart is performed. The device starts with default settings. After the restart the network settings will be changed into DHCP. The device can be configured manually. This can be done locally and remotely via web browser if the address that is assigned by the DHCP server or the host name is known. Alternatively the configuration of the thin client can fully be automated on restart. This requires a DHCP server and a thin client management server. The Setup Wizard LanguageRangee Linux currently offers two different languages for the desktop layout: • German • English Picture 1 – The Setup Wizard TCMS settings Via a Thin Client Management Server (TCMS) several thin clients can centrally be managed. The DHCP option determines whether the thin client gets the address from the management server over DHCP or if it is fix. This can be entered in the corresponding text box. The communication with the Rangee TCMS takes place by default via port 5800. After a successful registration at the TCMS you can see the groups here, the client belongs to. 8 Rangee Thin Client Picture 2 – TCMS settings Keyboard Here you can set the keyboard language. You´ll find a complete list of supported keyboard languages at page 26. Picture 3 – Setup Wizard: keyboard Screen This field allows you to configure the screen settings. You can specify resolution, refresh rate and color depth. The default setting for the graphic selection is automatic. In this case all resolutions that can be displayed by the monitor and the graphic card are offered. 9 Rangee Thin Client Depending on the graphic card not all resolutions can be used. IIn any case, you should test the settings after each change. If the test image could not be displayed correctly, the settings have to be adjusted again. If the desired resolution and refresh rate can not be shown, the graphic card driver is not compatible with the existing graphic card, what can be solved by forcing the option Vesa-mode. Picture 4 – Setup Wizard: screen settings Network The following configuration menu allows you to configure an Ethernet or a wireless LAN port. You can also use more ports that are available onboard as well as in the form of PCI and PCMCIA or as USB port. Every found port is shown in network devices and can be configured in an approriate menu by selecting the specific network. The host name is used as host name by Unix / Linux systems and as client name in ICA or RDP sessions. The default host name is the name mac-and the corresponding MAC address of a device. Rangee Linux supports NTP-Timeserver. Once configured, the Rangee thin client gets the current date and time information from the stated server. If you need more fonts as the integrated Rangee Linux offers, you an link an external font server by entering the IP address. In this form you also can enter a DNS server and additional an alternate DNS-Server. 10 Rangee Thin Client Picture 5 – Setup Wizard: network Network devices Clicking lan0 you can configure the Ethernet network interface card according to their network settings. Basically you can choose between the automatic allocation of the connection information via DHCP or manually via a static IP address. To use a DHCP server, you only have to activate the DHCP option. Otherwise enter the IP address of the device and the subnet mask in the fields below. Confirm also your input with Apply. Picture 6 – Setup-Wizard: network – interface-settings lan0 11 Rangee Thin Client Connected wireless LAN adapter can be configured by clicking on wlan0. Again you can choose between automatic assignment via DHCP and the use of static IP address information (see lan0). Additionally the ESSID name of the wireless network can be specified. With WEP, WPA and WPA2 Rangee Linux offers three encryption methods for wireless networks. This offers security for transmission of sensitive data and regulate the access to your network. At key type, select your encryption method and enter the appropriate key or password in the box below. So the secure access to the wireless network is guaranteed. After configuring the network devices, the network settings in the main menu have to be confirmed to be accepted and activated. Picture 7 – Setup Wizard: network – interface-setting wlan0 Finish the Setup Wizards With this dialog the configuration wizard will be finished. After the restart the thin client is available on your network. 12 Rangee Thin Client Picture 8 – Configuration-Wizard: Finish Hotkeys Rangee Linux offers several useful hotkeys, as described below, to provide users with easier access to important information and settings. Ctrl + Alt + or Move to the next/ previous link Ctrl + Alt + End Minimizes all windows and show the Kommbox Ctrl + Alt + Maximizes all active sessions Ctrl + Alt + Minimizes all active sessions Shift +Ctrl + Alt + N Shows the current network setting Shift + Ctrl + Alt + C Zeigt die laufenden Prozesse an Shift + Ctrl + Alt + F Reset to factory default Shift + Ctrl + Alt + M Shows the Audio Mixer Shift + Ctrl + Alt + K Opens the Kommbox Shift + Ctrl + Alt + R Restart the device Shift + Ctrl + Alt + V Shows the current OS-version 13 Rangee Thin Client 14 Rangee Thin Client Administration of the clients Using the Kommbox you can adjust all the settings according to your requirements. Overview The administration of Rangee Linux thin clients is based on an internal web server. So you have a uniform user interface whether you make the settings from the distance (remote) or on-site (local). The internal web server will start with the Kommbox. You´ll find further information about the remote administration on site 20. On the menu item Setup you can log in to the Kommbox. For this pleas use the following access data: User name: administrator Password: engels After a successful registration as administrator the Kommbox offers different options which you can found in the form of a menu bar on the left side of the dialog box. Details about the selected options are shown in the right part of the window. 15 Rangee Thin Client Picture 9: Kommbox – registration With the quit button in the upper right edge of the window you log outof the Kommbox. So the following users can not make or change administrative settings. With the quit button it is also possible to turn off the device or to restart it. This might be necessary if system changes were made that take effect only by restarting. Information The general information offer an overview of the most important configuration settings at the thin client. Here you will be shown which user with what status is currently logged on the device. Currently the Rangee Linux provides the user administrator who has all rights and the user guest which has restricted rights. You also get information about the IP address and MAC address of the device, as well as the installed software modules and their versions. You will also find detailed information about the processor, memory size, and the size of the flash memory. After a successful login to the Kommbox this menu option will open. 16 Rangee Thin Client Picture 10: Kommbox – general information User settings With this form the administrator can set up additional administrators locally on the device and specify the appropriate access rights. Please note that at assignment or changes of the password, the password have to contain at least three characters. Passwords with less than three characters are not accepted by the system. The Guest account is a predefined user account with limited rights. 17 Rangee Thin Client Picture 11: Kommbox – user settings Desktop configuration In the desktop configuration, the graphical user interface of each device is specified. First, the menu language for the desktop layout is selected. The Rangee Linux currently offers two different languages: • German • English The option show program icons on the desktop allows you to create a Windows-like desktop environment. Here three icons will be set up on the desktop by default: Shutdown - switch off the device Reboot – restart the thin client Kommbox – opens the conneciton and configuraion settings 18 Rangee Thin Client Under connections settings you also have the option to create an desktop icon for each connection. At Wallpaper you have the possibility to upload your own desktop background or to change the color of the desktop. To view any background image you have to obtain the image from a network drive or a local drive. You´ll find further information about how to link drives on page 32. Then you have to load the new background on change background. The previously connected network drive now appears under release for background graphic. In the field below you only hav to enter the filename of the background image. Please note that the graphics have to be JPG o GIF files. Other graphic formats are not supported by the system. When you have taken over your settings select the loaded graphic from the drop down menu under wallpaper. The desired background image will be shown. Picture 13: Kommbox – change background Under display background graphic you can specify how your background image should be pictured. You can choose between normal display, full screen and tiled display. 19 Rangee Thin Client When setting up the desktop layout there can additionally be vizualiized a pogram taskbar. This taskbar is useful when multiple connections are used simultaneously and displays this in the form of singel buttons. From the start menu you can go to the preconfigured applications as well as to the standard functions like shutdown, reboot and Kommbox. Furthermore the taskbar can be shown permanently or be hidden automatically by using this option. Rangee Linux also offers the option of positioning the taskbar. If desired the taskbar can be positioned at the top or bottom of the desktop. With show date and time you can specify whether the date and time will also be shown in the taskbar. Show Kommbox is the option to choose how you want the Kommbox to be shown. Depending on you settings, the Kommbox and the Kommbox icon can be shown on your desktop. Another option is that only the Kommbox or only the Kommbox icon can be shown on your desktop. The last option is that neither the icon nor the Kommbox appears. Of course you still have access to the setup and configuration settings by using network access to the device or open the Kommbox with the keyboard shortcut Shift+Strg-Alt-K. Fore more information about remote administration see page 20+72 continued following. Alternatively there is also the option to show another homepage in the Kommbox than the local hombepage. For this you only have to add an alternative homepage in the field below. Please note that you have to confirm your changes to the desktop configuration with apply and that some system changes only take effect after a reboot. The option show stop buttons at the Kommbox allows to display connection start buttons as well as buttons to exit dedicated individual connections. After the activation you´ll find this within the connection overview. To do this, you have change into connections. 20 Rangee Thin Client Picture 14: Kommbox – desktop-configuration Remote-administration Because of the integrated http web server the administrator can connect to the Rangee thin client from every web browser on the network. So the setting options remote are the same as local via Kommbox. The remote access via web browser is activated by default and occurs via the HTTPS protocol which builds up a secure http connection to the Rangee thin client. Standard port for HTTPS connections is the port 443. At deviate web port (https) you have the option to add another released port. To access a Rangee thin client, simply type https://<IP-Adresse> in the address bar of the web browser. Another option the Rangee Linux offers for the remote administration is by remote access via VNC. The abbrevation VNC stands for Virtual Network Control and offers the administrator the ability by using a previously established VNC password to reflect the screen on a remote computer (for example on Windows by using a VNC viewer). By displaying the VNC restart icon the user ensures with a double click on this icon that the reflection is ended. 21 Rangee Thin Client Please always use the latest VNC viewer for the desktop reflection which you can download at http://www.realvnc.com. Even here you have the option to enter a different VNC port instead of the standard port 5900. With the behavior of external connection via VNC, you define how the local user should be informed about the desktop reflection. For more information on remote access via SSH, see page 72 et seq. Picture 15: Kommbox – remote-administration Software Update Rangee the firmware can be upgraded via the menu item software update. There you can install new firmware versions and change or update software modules. Within the warranty the software support is for free. After the warranty the service can be extended with costs (Subscription). Configuration of the update server As the update server, you need a web server or an FTP server. On this server you create a directory Rangee. In this directory, you set up the subdirectories firmware and software. 22 Rangee Thin Client The update of a module and a firmware has two components: 1. An XML file which describes the module an 2. One or more IMG files containing the actual softwaremodule (eg ICA client). The necessary updates are available for download on the Rangee website. Please send us an short e-mail to request your access data for a secure access to the update files. Short time later you will receive an email with the appropriate access data for our download server. Upon request Rangee sends you the support CD with the latest modules. For questions on this, please contact your retailer or the Rangee support. Prepare software update Software updates should be performed only if necessary and if necessary after consulting the Rangee support. At Software Update you find a list of the installed software modules. First you have to configure the device at update server settings and show where it will find the update modules. The access to the update server can either take place via the http or ftp protocol. Again you have the options to enter a different port. Next, specify the server and the directory containing the new modules. Finally, enter your username and password to ensure an authenticated access to the update server. For FTP updates this is mandatory. ; For HTTP updates this is optional. With block cross updates you ensure that single firmware versions stay installed on the thin client and not standardized by using the TCMS. Each Rangee Thin Client can serve others Rangee thin clients on the network as the update server. By selecting Yes you enable this feature. Therefor you have to enter the IP address of the thin client which will serve as update server at the other thin clients on the network as update server. Enter the directory /update/. The remaining thin clients can then install the firmware and all software modules that are installed on the reference model. The option yes, force master can only be used if you manage Rangee thin clients by using the remote management software (TCMS). With this option the thin client is entered as update server at all other thin client within a group. Its own update server settings are preserved and stay unchanged. Please confirm your settings with accept. 23 Rangee Thin Client Picture 16: Kommbox – update server settings Next to the button update server settings you can now see the update server you have entered. Otherwise an error message appears. In that case you should check your entries again. Run software update At the drop down menu next to the individual modules you now have to select the modules which should be changed. It is possible to delete a software module or, if available on the update server, to install a newer version. The standard setting is that no change takes place. Confirm your settings after careful consideration with accept. You will then be asked to restart. The relevant update files will be loaded and installed automatically during the next boot. The display gives you detailed information about the status of the update process. 24 Rangee Thin Client Picture 17: Kommbox – software update 25 Rangee Thin Client Configuration Via the menu item configuration a file with the current configuration settings can be imported or exported. The storage location where the configuration file have to be exported or from where the file have to be imported substantially depends on from where this menu is activated. If you work locally on the device you first have to integrate a drive (network drive or local drive, such as USB flash drive) which serves as storage location. If you using a web browser on another computer to access this menu, the local hard drive is offered as storage location. For more information on integrating a drive, see page 32. By clicking the button export configuration you will be asked to specify a storage location for the configuration that have to be exported before it is downloaded. With the button import configuration a saved configuration will be imported. The current configuration settings will be overwritten. The device will reboot automatically. Picture 18: Kommbox – configuration 26 Rangee Thin Client Keyboard In this menu item wht language layout for the input device keyboard is set. By using the drop down menu select layout you can choose between the different keyboard layouts that are available. Important: Configure the keyboard layout before connections are established. Changes to the keyboard layout will not be accepted for existing connections. The following keyboard layouts are available among others: - German - German Trimodal - German (CH) - English (UK) - English (US) - Spanish - French - French (CH) - Netherlands - Netherlands (international) - Polish - Belgian - Belgian(NL) - Danish - Dvorak - US International - Italian - Hebrew - Norewgian - Swedish(FI) - Swedish(SE) -Turkish(F) - Turkish(Q) The option numlock on startup is enabled by default. After turning on the device the numpad on the keyboard can automatically be used without activate it manually. The repetition rate sets the repetition rate in characters per second. The setting values are between 100 and 5000. The delay sets the delay time between pressing a key and character repeat. The setting values are between 250 and 5000. Using touch screens, it may be helpful to use the on-screen keyboard. Therefor you have to activate this option. With the option left-handed mouse you can adjust the mouse functions for left-handers. Rangee Linux offers the administrator to set the double blick speed manually with the double click interval. The default value of 250 ms is already entered. Increase the value, then the double click may be slower. Decrease the default value, then the double click have to be faster. The setting values are between 1 and 2000. The cursor speed can be adjusted using the parameter mouse acceleration and mouse limit. 27 Rangee Thin Client You can enable the secure authentication via smart card with enable smart card support. Different authentication methods using RDP, e.g. DATEV, and ICA are possible. Both with internal as well as externally connected smart card reader (certified DATEV SC Reader and mIDentity sticks). This option is also used for using online banking at the thin client via ctapi under RDP or ICA. For more detailed information, what procedures are currently supported, please contact the Rangee support: [email protected] . Picture 19: Kommbox – keyboard (language) Date and time Before you edit date and time you should set the time zone. If your system is configured to optain the settings for date and time from a time server, these settings will be synchronized with the specifications of the server when the Rangee thin client ist connected to the network. The setting for the time server can be found under the menu item network. You can also enter the appropriate values in the dialogue time and date manually by selecting the desired values in the various drop down menus and finally clicking apply. If the system does not take the time check the system time in the BIOS and set it if necessary to the GMT time. 28 Rangee Thin Client Picture 20: Kommbox – date and time screen Via the configuration dialogue screen the video output of the device is adapted. On delivery, the device starts with a resolution of 800 x 600 pixels and a color depth of 16 bits. The configuration method defines how the screen settings can be configured. With the drop down menu you can choose between automatic, manual and user-defined configuration. If you choose the automatic configuration all possible configuration settings on the graphic card in conjunction with the respective screen will be determined automatically. Then you only have to select the desired resolution and color depth. It is necessary to restart the device after applying to keep your settings and changes take effect. But before you have to test your settings. With the manual configuration all configuration options can be set manually. Regardless of whether the image can be shown in the desired resolution, frequency and depth of color or not. If the required adjustment can not be displayed, you will be informed by an error message. Via the menu item open X-TCP port you can open port 6000 so that X-based programs can be started remote on the thin client. 29 Rangee Thin Client If you need widescreen resolutions you only can set it by user-defined or manual configuration. At the user-defined configuration you can enter the resolution manually. Force VESA mode is disabled by default. This can patch eventual graphic problems at old hardware platforms especially then using the Rangee Linux PC-stick. Before you accept your settings and reboot the device please test them first. Rangee thin clients support the multi-monitor mode if the thin client model has two monitor interfaces (eg. TK3752, LT320, LT520 or A3300S). Choose in ports, if the thin client is using VGA & DVI or DVI and DVI2 for the multi-monitor mode. Moreover Rangee Linux also support from version 6.10 the quad-monitor use by using the Matrox Epica TC4. Four monitors side by side, or arranged in a square, can be used under ICA and RDP. When using a touch screen , it is necessary to select the used touch-type. Rangee Linux supports three types: EloTouch, A-Mount, Penmount, EGalax and Zytronic. For more information on setting up your touchscreen, see page 53. Picture 21: Kommbox - screen 30 Rangee Thin Client Screensaver With the screen saver settings , the settings for the screen saver can be configured. This will set the number of minutes, the screen saver will be activated. If there is no value or the value 0 entered in the approprate field, no screen saver is activated. If the entered value is higher than 0, this value is equivalent to the number of minutes after which the screen saver is activated automatically. By default no value is entered. Moreover you can define after how many minutes of inactivity, the thin client will automatically shut down. The mode indicates which screen saver you are using. The Rangee logo or a free selectable image can be displayed which have to be submitted in *.xpm format. Alternatively there is the possibility to display a black screen. All settings be active after taking over and after a restart. The screen saver is stopped by pressing any key or mouse movement. Picture 22: Kommbox – screensaver settings 31 Rangee Thin Client Drives Under drives the Rangee Linux offers the ability to connect network drives and local drives. Important: Local drives that are connected to the thin client, have to be FAT32 formatted. By clicking on new network drive the configuration menu for connecting a network share will open. At name of assignment the network share is given a name. Which protocol is used for the data comunication is specified at protocol. When selecting a protocol you have to consider on which system the network share will be connected. If the drive integration is performed on a Windows system, the protocol, which communicates by default on port 139, has to be SMB (Server Message Block). If the drive connecting is on a Unix/ Linux system, the communication protocol will be NFS (Network File Service). NFS is by default using port 2049 for the data communication. With the option CIFS network shares can be connected within a Microsoft Windows Active Directory. Picture 23: Kommbox – configure network drive Again a different port can be entered. Following only the server on which the release was established, the directory path and name of the share are given. An authentication with username and password allows a secure access to the network share. 32 Rangee Thin Client Local drives will only appear in the configuration when the drive is connected to the device. USB memory sticks, USB floppy and CD-ROM drives and USB hard drives will be supported. Rangee can not guarantee that all USB extensions work without restriction. When selecting compatible modules the Rangee support will be pleased to assist you. The detected drives will be shown in the drop down menu accordingly to their names, as usual under Linux. Usually the first connected USB stick is integrated with the name SDB. Is there already a partition on it, it will be displayed with SDB1. Select the drives that you want to connecnt to the ThinClient. By using a card reader, you have to select the partition. The names without numbers (SDA, SDB, SDC, …) at the end are placeholder for other connections. It is important that you always have the partition, for example SDB1, selected, otherwise the integration will not work. After clicking confirm, the created drives are displayed. With edit you can changed the settings of the displayed drive if required. By clicking delete an existing drive will be deleted. After clicking start it is possible to share the drive. If the share exists, the access to the drive can be stopped by the button delete. Would you like to use this drive under RDP to a Windows 2003 or 2008 Terminal Server session, configure the settings of the ICA or RDP connection (Does not work with Windows 2000 or NT servers). For information on setting up the terminal server connecntion, see P.58 Bild 24: Kommbox – Lokales Laufwerk konfigurieren 33 Rangee Thin Client To simplify this configuration, Rangee Linux offers an auto mount function. In the global drive settings there is the possibilty to check automount local drives. Once this option is enabled, local drives are no longer displayed in the drive list. Connected, local drives are detected automatically and will be directly mapped as a drive into the terminal server sessions under RDP and / or ICA. Please chech the global settings for RDP and ICA connections. In addition, u can also activate the option camera support, so that a connected digital camera via USB can be used. An advanced device management makes it possible to define write access for local connected drives. So the user only have the opportunity to read and can not write data to media. With the filter blacklist or whitelist you can add local USB devices to the whitelist to be allowed or on the blacklist to be excluded. To get the vendor-ID connect the local drive on the thin client and get it under Tools> Information about Drives. There are information about which local vendor ID, or by what name, the local drive registered to the system. This Vendor ID or the name of the device, you enter into the field of the filter.For more information on drives, see page 48 34 Rangee Thin Client Picture 25: Kommbox – Global Drive Settings Network Devices In this section you can configure the settings for the serial ports on your machine. Choose the port you want to configure and click edit. Customize the parameters of flow rate, character length (in bits), parity, and 2 stopbits to your needs. The flow control can be set for the hardware or the software side. With the option TCP redirect, it is possible to appeal the serial port via LAN connection. By default the TCP Port is set to 2000. The Mode determines the type of transmission. You can choose between Telnet, Modem and Raw. 35 Rangee Thin Client Bild 26: Kommbox – serielle Ports Network The following configuration menu allows you to configure Ethernet- or a wireless-LAN connection. Also, several connections can be used. In addition to onboard Lan, you can use forms of PCI- and PCMCIA cards as well as USB devices. Every located port is displayed in network devices and can be configured. The host name is used by Unix / Linux systems as the host name and in ICA or RDP sessions as the client name. The default host name is the name mac-and the corresponding MAC address of a device. Rangee Linux supports NTP time server. If this is configured, the Rangee Thin Client get information about the date and time of the specified server. If you need more fonts, than are available, you can enter the IP address of a font server. Also, in this form, you can add a DNS server and an alternate DNS server. 36 Rangee Thin Client The option udhcpc activates an alternative DHCP client, you should test if there are problems receiving the DHCP information. Picture 27 – Kommbox - network Network Devices By clicking lan0 you can configure the ethernet network interface according to your network settings. Basically, you can choose between getting the IP by DHCP or manually to define a static IP address. To use a DHCP server, just activate the DHCP option. Otherwise, enter the IP address for the client and the subnetmask in the fields below. For data communication with an external network, the default gateway must be specified. If needed you can assigne every network interface an own default gateway. Under MTU (Maximum Transmission Unit) you can also set your maximum packet size that can be transmitted over the network, manually. The default value is 1500 (octets). If the communication between the Ethernet interface on the device and the remote cause 37 Rangee Thin Client problems, the network speed can be set manualley under the point choose media-type . By default, the network speed is automatically determined. Confirm also here their current changes. Picture 28 – Kommbox - Network – Interface Configuration lan0 Connected Wireless LAN Adapter can be configured by clicking on wlan. Again, you can choose between the automatic assignment via DHCP and use static IP address to select (previous page). Additionally, the ESSID name of the wireless network must be selected. With WEP, WPA and WPA2 Rangee Linux offers three encryption methods for wireless networks. These regulate the connection to their network and ensure the integrity of data. Among key typ, select your encryption method and enter the type appropriate key or the password in the box below. So the secure access to the wireless network is guaranteed. The WEP or WPA key must be entered in form of hexadecimal or ASCII. 38 Rangee Thin Client After configuring the settings of the network devices youe have to confirm the network main menu. Otherwise the current changes will not work. Bild 29 – Kommbox - Netzwerk – Interface Configuration wlan0 TCMS Settings With the Rangee Thin Client Management Server (TCMS) it is possible to manage several Thin Clients. To register the Thin Client at the TCMS you can configure the settings of communication in the following. The DHCP option determines whether the thin client get the IP address of the management Server via DHCP or you can enter a fixed adress. To setting up the address manual you can enter the IP adress or the DNS name of the TCMS in the textbox below The communication with the Rangee TCMS is default by port 5800 th. This port can be changed if necessary. There can also be determined whether connection settings, for example a RDP connection, get from TCMS or ignored. If you just want the settings divice settings getting by the TCMS, you have to check the box ignore connection. 39 Rangee Thin Client For more information on Rangee TCMS see the user guide of TCMS or ask the Rangee support. Picture 30: Kommbox – TCMS Settings 40 Rangee Thin Client Printers With the menu item printer Rangee Linux offers the option to set up several different printers on the Thin Client. Basically, printers can be connected to the local interfaces (USB, serial or parallel), and be accessed via network protocols (network printers). Bild 31: Kommbox - Drucker Mapping a local printer Clicking New Local printer the menu to configure a new printer is displayed. In the Printer description field, your printer can assign a unique name for identification. Under server printer name the name of the print queue will be entered. Here the name of the print driver must entered as it is called at the Server. This is important for ICA and RDP connections, so automatically when the printer is connected, it will get the correct driver. With the connection type, you can determine which interface is connected to the printer on the device. Rangee Linux supports local printers with parallel port and USB port. 41 Rangee Thin Client Picture 32: Server print driver It is also possible to install driver for the local printer. This is important if you want printing from local applications like Web browser and terminal emulation. Under http://www.linuxprinting.org many print drivers for linux are available for download. Here you select the printer, click in the following window on download PPD file and save this file on a network drive. Bind this network drive to the thin client and you can select the file at the drop down menu at the printers configuartion at driver. Rangee Linux offers the support of ThinPrint. For more information on configuring ThinPrint see http://www.thinprint.de. Enabling printing via TCP ports and define the port, for example port 9100, your Rangee Linux system work as a print server. This feature makes the CUPS service available and allows others on the network to use the locally attached printer on Rangee Thin Client as a network printer. If you have multiple printers locally on the thin client, each printer can be assigned a separate TCP port, eg.: A printer uses port 9100 B printer port 9101 C printer uses port 9102, etc. Optionally, it is possible to use this printer as the default printer. 42 Rangee Thin Client Picture 33: Kommbox – Configuring a lokal printer Mapping a network printer With the button new network printer you go to the configuration menu of a network printer. Under printer description you can give the printer a unique name. Enter the server printer name the name of the print queue or share name of the printer. Also here the default printer name New Printer is used if no other name is registered. Under Server printer drivers enter the server printer driver name. Depending on the network environment, four different connection types are available: • CUPS-Printer (IPP): CUPS (Common Unix Printing System) is a daemon that provides printing services for the differnt UNIX operating systems. CUPS uses the IPP protocol. Installed on Unix / Linux server printers can be connected via this protocol. Do you want to print from a Windows workstation on the Thin Client locally attached printer, then set up a new network printer in Windows and enter the following URL address below to make the connection with the printer: http://<IP-AdresseThinClient>:631/printers/<Druckername> 43 Rangee Thin Client • Windows-Printer (SMB): If a printer is installed on a Windows server, seleced this mode for connection type. SMB (Server Message Block) is a communication protocol including for printing services in the network. • Unix-Printer (LPD): The LPD protocol (Line Printer Daemon) manages and sends print jobs over IP networks. LPD is the predecessor of CUPS. Installed on Unix / Linux server printers can be connected via this protocol. • HP JetDirect (socket): Is a network printer via print server, which is HP JetDirectcompatible, accessible, this type of connection is recommended. Under Server enter where the printer is installed and fill the following textbox with the exact name of the server printer driver that the installed printer is used. Then, you still carry the name of the print queue. The following option offers the possibility to use this printer as the default printer. Save your current settings by clicking confirm. Use the printer in RDP or ICA connections If more than one printer is set up, one device must be set as the default printer. If the mapping of printers is allowed in ICA or RDP sessions, the local printer of the Client will automatically become the default printer in the terminal server session. The communication takes place via the respective protocol. Use the Rangee Thin Client as a print server Printers that are set up on a Rangee Thin Client can be used with other workstations as LPR or IPP printer. Optional you can use ThinPrint. 44 Rangee Thin Client Picture 34: Kommbox – Configuring a network printer 45 Rangee Thin Client Tools With the tools Rangee Linux offers a number of useful diagnostic tools which make the administration and support significantly easy. Ping and Traceroute Under Ping it is possibly to sent a ICMP packet to an host. This makes it possible to check tht Connection between Client and Server. Picture 35: Kommbox – Tools –Ping 46 Rangee Thin Client With traceroute the path to the destination host will determined and displayed intermediate routers (hops). Kernel-Module The kernel modules gives information about which drivers support the specific hardware. The kernel modules can be extended by a software update, or delete. Attention: Please contact the Rangee Support Team befor you make changes. Picture 37: Kommbox – Tools – Kernel-Module 47 Rangee Thin Client Information about Drives Here are displayed local connected USB drives. Each drive can be entered by the model name or the vendor ID in a black or white list. Picture 38: Kommbox – Tools-Information about Drives 48 Rangee Thin Client TCMS Using the menu TCMS, thin clients can be registered manually at the TCMS. Click register and the information from Setup> TCMS Settings will be used to register by the TCMS. In the textbox Log file is a response to the registration process. Picture 39: Kommbox – Tools-TCMS 49 Rangee Thin Client PCI-Devices Under the menu item PCI device the hardware is shown which were detected at system startup from your Linux operating system. This tool is helpful to get information about troubleshooting. This content can be copied in a email for the Rangee-Support. You do this using the following email address: [email protected] Picture 40: Kommbox – Tools – PCI-Devices 50 Rangee Thin Client USB-Devices The tool USB devices show the USB hardware has been detected at boot from your Linux operating system and which are not. This tool gives fast, insightful information for troubleshooting attached USB periphery. Picture 41: Kommbox – Tools-USB-Devices EsounD-Configuration The Enlightened Sound Daemon, is a sound server, which makes it possible that multiple applications can output audio signal. This mixes the audio streams and play them on a recognized device. By default, this server is running on port 16001, but can be modified by changing the port. 51 Rangee Thin Client Boot-Configuration To optimize the boot process at different computer architectures by using the Rangee PC stick, it is necessary to individualize the boot configuration. In older PC systems, it is sometimes necessary to disable ACPI (Advanced Configuration and Power Interface), because this standard is not yet supported by hardware. Some computer architectures with Intel chipsets need the video modes "Intel" to display the boot menu. Alternatively, set the video mode to text boot. So the Thin Client show during system startup, which system components are initialized and started. For efficient retrieval of I / O devices, select the IRQ polling during the boot progress. Alternatively also DMA (Direct Memory Access) to be activated. Picture 42: Kommbox – Tools-Boot-Configuration 52 Rangee Thin Client Touchscreen-Calibration After the touch screen has been defined, it must be calibreated. For this, you have to select the device type. By clicking calibreate, the touch-screen-calibration starts automatically. Now you have to touch differently positioned crosshairs to align the touch panel as much as possibly. Picture 43: Kommbox – Tools-Touchscreen-Calibration 53 Rangee Thin Client Hide Mouse Cursor Some applications doesen't need tht mouse cursor. So you can adjust the configurationt that the mouse is hidden. Than the mouse cursor will the next time reboot shifted in the lower right corner and is thus no longer visible. The Administrator can undone this setting via remote administration. 54 Rangee Thin Client Configuration of Connections This chapter describes the connection types on the Rangee Thin Client are available and how to set up 55 Rangee Thin Client Overview The menu button Connections in the upper right area is the central administration tool for all types of connection. The administrator have the oportunity to configure the connections local and via remote access. The configuration of connections is done in this menu item. Configuration settings are changed in the menu of Kommbox (eg for ICA and RDP) or the configuration settings of the respective client software (eg NX and terminal emulation). Please make sure before you set up a connection, all the setup settings of the device, such as Keyboards, printers and disk drives have been completed. Available Connections All available connections are listed within the Kommbox in the connection overview on the left side of the screen and are dependent on the type of Rangee Thin Clients. Additional connection software can be installed if required. The user get a list of all configured connections within the Kommbox to start it up by clicking the button. Depending on the setting, the user will see the connections as icons on the desktop or in the program bar. Using these inputs, the particular connection can be started. In the following the installation and configuration of the most used protocols RDP and ICA are discussed. The setup and configuration of other compounds is analogous to the creation of NX connections. For details please see the documentation of the connection software. If you still have questions please contact your retailer or the Rangee support. 56 Rangee Thin Client Bild 45: Kommbox - Verbindungsübersicht 57 Rangee Thin Client ICA ICA is the abbreviation for Independent Computing Architecture. This networking protocol is used in Citrix-Server environments. Klicking ICA on the left menu will open the ICA Configuration Menu. There you can chose between the different options Global Settings, new ICA Connection and new PN Agent/XenDesktop Connection. Already configured ICA-connections will be listed directly below. Those can be edited or deleted via the corresponding buttons. Picture 46: Kommbox – ICA-Configuration Global ICA-Settings Devices that are connected via USB to the Thin Client, like PDA with Palm OS, Windows CE.Net and Windows 2003 mobiles, can be synchronized on ICA-Sessions with server based applications like MS Outlook. Prerequisite for using this feature is Windows 2003 Server with Citrix Presentation Server 4.0 and Active Sync as synchronisation software. The Citrix website can give you more pointers for installing Active Sync on a terminal server. 58 Rangee Thin Client The settings for the ICA session are made in the Global Settings for ICA sessions. Please concact Rangee Support if you have any questions. The configuration pane Global ICA settings includes connection parameter, that can be issued to ICA-Session on their creation. The option Activesync recognizes via USB connected PDA in ICA-Sessions and is able to use server based applications like Outlook to synchronise. Please consider the appropriate server configuration (see page 42). By activating the option Get server via DHCP the entries for the server group can be distributed by the DHCP-server. For this to work, TAG ID 75 as character code string with <IP-Adress> as value needs to be configured on the DHCP-server. The option Third mouse button acts as Control+v: configures the middle mouse button, that only data, that has been copied to the clipboard, will be pasted at the correct position. Compress lowers network traffic and needs to be activated on the server side as well. It can have a negative effect on slower servers and will impact the performance and cause problems. Disable Sound disables sound transfer in the ICA session. Slower networks should use this option to limit the traffic the sessions create. Serial ports can be mapped into the ICA session by activating the corresponding option. Two options are present for mapping connected drives. With Map all disks on a single letter all detected drives will be displayed as folders in one single drive letter. The dropdown menu allows you to chose the letter to assign. Alternatively by using Map each disk on a different letter all drives can be mapped to indivual letters. Detected drives will be listed and each has his own dropdown menu for chosing a drive letter to assign. Activating the checkbox for Enable printers mapping makes installed printers on this TC available for use in the terminal session. The Default printer will be displayed. The access to information regarding accessible sessions on Citrix Server and enabled applications works with the Standard-Networkprotocol (TCP-IP, TCP-IP via http or SSL/TLSHTTPS). In case a server farm is in use, at least one server from the Citrix server farm should be entered in Primary server group. Alternatively this entry can be made by using DHCP(see above) If backup farms are available, can those adresses be entered in the fields Server group backup 1 and Server group backup 2. Multiple servers can be entered by separating the entries with a space. 59 Rangee Thin Client If the ICA-Client sould ignore specific error messages they can be defined at Ignore error number. All other options are ICA psecific. For further questions, please contact the Rangee Support. Save your settings with Confirm. Should you change the global settings later, you have to reactivate the old ICA-connections again, to do this, open the settings for the corresponding connection and click Confirm once more. New ICA-Connection New ICA connection opens the configuration menu for a new connection. Here you can set the properties of the new ICA-connection. Enter a distinct and unique name in the Connection Name field for your new ICA-connection. Screen size lets you select how the session is displayed. The drop down box lets you chose between Full Screen, Super Full Screen, a fixed size or a percentage of the screen. In case of fixed size the following sizes are selectable: • 640 x 480 pixel • 800 x 600 pixel and • 1024 x 768 pixel By using multi-monitor mode, via usage of a dualhead or quadhead graphics card, it's necessary, to select the appropriate dualhead or Quadhead-optionens. Here you can select, on which of the connected screens the ICA-session should be displayed. It is also possible to spread one session over up to four screens. If you want to spread one session over two screens you should select the option all. Next you define if you want to connect to the ICA-server or if you want to open an ICAapplication. Depending on the selection, detected ICA-server or ICA-applications will be displayed in the corresponding window, which can be selectet via drop down menu. For this to work, the serverprotocol and the server farm has to be specified in the global setting. By using Server you can input a specific ICA-server that you want to connect to. Port allows you to specifiy a non-stadart port to connect. The ICA-client can open a single application automatically. Therefor you can enter in the following fields, application name, e.g. excel.exe and the working directory, e.g. C:\Programme\Office. 60 Rangee Thin Client User, Password and Domain can be entered beforehand for automatic log-in procedures. The connection can be opened automatically as well when a smart-card is inserted. Encryption makes the data transfer of your ICA-session more secure. Base encryption is activated per default. When activating encryption, it should be checked that the server is also configured to use encryption. Remote computer sound selects if sound output should be brought to the client or be left at the remote computer. Colors lets you select the colors of each ICA-session. 256 colors is selected as default. Activate Mouse click feedback to enable the thin client to give feedback even before the server has answered. Default is, automatic. With local text echo the thin client will update keyboard inputs wbfore the server has send the screenupdate completely. With the option Use recent global settings is it possible to use the global settings in every ICA-session. If this option is deactivated, all global settings, will be linked to the connection, that have been configured by the time the connection is created. Later changes to the global settings wil have no effect whatsoever on this connection. In this case different ICAconnections can use different global settings. The option Automatic start allows to use the pre-configured connection autmatically when the client boots up. This option is turned off by default. Connection ending option lets you chose how the client will behave when the connection is closed. 61 Rangee Thin Client Picture 48: Kommbox – ICA-configuration New PN Agent/XenDesktop connection PN Agent is the abbreviation for Program Neighborhood Agent. This application, developed by Citrix Systems, Inc., allows the connection to a server with installed Nfuse or Webinterface, to open applications, that have been enabled for usage. Citrix XenDesktop is a solution for the deployment of virtual desktops. A connection to XenDesktop can be configured in the following configuration dialog. Username, password and domain can be entered beforehand for automated connection- and login procedures. A manual login will be opened otherwise. If multiple applications were enabled for use via the web-interface, it is possible to chose one Application for automatic start. The Connection ending option lets you chose between different actions. These actions can be specified in the configuration or be selected by the user. 62 Rangee Thin Client Picture 49: Kommbox – PN Agent/XenDesktop-configuration RDP RDP stands for Remote Desktop Protoco and is a standard protocoll from Microsoft. Rangee Linux uses open source RDP development and if required a paid development of the company ThinSoft Inc. The RDP protocol allows connections to Windows NT 4 TSE, Windows 2000 Terminal Server, Windows XP and Windows 2003 and 2008 Terminal Server. By clicking on RDP in the left menu bar you open the menu for RDP configuration. Within these menu can choose between different options Global Settings and New Connection. The pre-configured RDP connections are listed below. These can be edited or deleted using the corresponding buttons. 63 Rangee Thin Client Bild 50: Kommbox – RDP Configuration Globale RDP Settings Using the Remote Desktop Protocol (RDP) a session on a Windows Terminal Server will be started. The RDP global settings contain the global default settings for all RDP connections. With the point enable mapping of serial port the local serial interfaces will mapped on a terminal session. The option USB redirection allows to pass the local USB ports in the RDP session. All USB devices can be used by this way in the RDP session. This is useful for example to include support for locally connected scanners and synchronization of smartphones. For this, the third party software is required. For more information, see http://www.usb-redirector.com For mapping the local drives to the thin client, there are two ways. With map all disks on a single letter all detected drives are shown as folders under a single drive letter. Set up the drive letter in the drop down menu below. 64 Rangee Thin Client Alternatively you can with map each disk on a different letter using RDP assigne every individual drive letter. The detected drives are listed, and each of them has a own drop down menu that lets you determine the drive letter. Check the box enable printers mapping on the Thin Client printer will mapped in the terminal session. You can also choose the default printer in the drop down menu default printer. Deaktivate Animation and the Thin Client wouldn't show every step while scrolling. Only the final result will be displayed. If show window while dragging is aktiveted the Client try to show every step by dragging a windo with the cursor. With the settings desktop background and themes the desktop background and individual themes can be enabled or disabled. Picture 51: Kommbox – Global RDP Settings New RDP Connection By clicking the button New Connection you will passed to the configuration settings for a new RDP connection. Under Server you can entered the IP adress or DNS name of the terminal server which you want to connect. 65 Rangee Thin Client If you want to set the Server when the connection is started manual you have to enter a (?). So the user can enter an individual Hostsystem which he wants to connect. Optional you have the oportunity to enter %hostname% into the textbox User. Than the username will automatically generated with the hostname of the client. Alternatively, you can also click on the button above for searching available RDP servers inside your network. These are then displayed in the drop down menu Available RDP-server. For selecting a server, open it and click on the desired server. User name, password and domain can be entered for an automatic login process. Also the connection can be started automatically when a smart card is inserted. RDP allows you to automatically launch an application. Set in the following fields the name of the application, eg excel.exe, together with the associated working directory, eg C: \ Program Files \ Office. Also there, the application can be set, which is provided by a Windows Server 2008 as a RemoteApp. Under color you set the color depth of the current RDP connection. By using several monitors like dual-head or quad-head it is also here necessary to establish the appropriate dual-head or quad-head options. Here you can specify whether the session will displayed at every monitor, or if you want to distribute the session on two or more monitors. The standard color depth is setting on 256 color. But you can easy change it in the corresponding drop down menu. The sound output is by default No sound output. Data compression and Encryption are desabled by default. With the option Fullscreen mode, the window size of the RDP session will display the whole screen. This option is enabled by default. Depending on your needs you can set a connection ending option, to tell the Thin Client should behave when ending the connection. Here you have a choice between Reconnect and Shutdown client. The RDP connection can be configured to start automatically after booting the device. Confirm your settings by clicking Apply again. With Force bitmap updates the Thin Client invites screen content after each action. This option stop display errors, but this feature is resource-heavy. Therefore by default this option is disabled. Static graphical components in the screen content can be cached with Persistent bitmap caching faster. You can also set a start delay if you want to establish the connection after the bootup time. The Thin Client then waits from the registered value in seconds to establish a connection. This can be useful if the thin client start up connections in a specific order. 66 Rangee Thin Client At end of connection, the user can choose between different actions. These actions can be fixed within the configuration or selected by the user. Picture 52: Kommbox – new RDP Connection Mozilla Firefox The softwaremodul Mozilla Firefox makes it possible to use the free webbrowser locally on your Thin client. In the Global Settings you can define the behavior of the browser if it should save its settings, via Save preferences. All settings and customisations , e.g. certificates of websites or the history of visited websites will be saved and still be available on the next start of the browser. Language lets you define which language layout you want to use. Different Modes allow the browser to function, more or less, in the way the User wants. The Kiosk Protokoll Whitelist defines the standart protocol of the webbrowser. To open a https-based Homepage, the Whitelist needs to be adjusted. 67 Rangee Thin Client Picture 53: Kommbox – Global settings Mozilla Firefox To create a new connection, first define a Connection name. As Homepage you enter the site, that should be openend on start of the connection. Standard port for connections is Port 80. A different port can be entered. At Multihead Options you can define, which monitor should display the Firefox session. Should it be displayed on all connected display deviced, please use the all option. To start Firefox automatically, activate the option automatic start. Different actions can be defined or selected by the user when the connection ends. Select the approriate option! 68 Rangee Thin Client Picture 54: Kommbox – new Firefox connection VMwareview VMware view is a desktop virtualization solution. The use of this softwaremodule requires, that a VMware virtualized desktop environment is present. Connections to virtual desktops can be made via the softwaremodule VMwareview. Create a New connection and enter a Connection Name. Virtual desktops support tunneled and not tunneled communikcation. The option Create Tunnel, creates a direct data transfer to the View connection server. If no tunnel is created, the data transfer will be between the host system of the desktop and the client. If a tunnel should be created, enter The View connection server will provide these. the Tunnel-connection ID. Enter the DNS-Name of theView Connection Server, to be able to make a connection betweent the client and the connection server. 69 Rangee Thin Client If there are multiple virtual desktops for a user, enter the Desktop-Name which should be opened automatically. With the selection of RDP / PCoIP you set which protocol will be used in the transfer between connection server and virtual desktop. If RDP is selected, the RDP module has to be installed locally on the thin client. The use of PcoIP has to be configured server side. Resolution specifies the display if the Window. The drop down box allows the selection of Fullscreen and Fixed size. If the VMwareview session should be spanning two displays, select the Fullscreen option. Two options are present for mapping connected drives. With Map all disks on a single letter all detected drives will be displayed as folders in one single drive letter. The dropdown menu allows you to chose the letter to assign. Alternatively by using Map each disk on a different letter all drives can be mapped to indivual letters. Detected drives will be listed and each has his own dropdown menu for chosing a drive letter to assign. Activating the checkbox for Enable printers mapping makes installed printers on this TC available for use in the virtual desktop session. The Default printer will be displayed. Connection ending option, lets you select how the client behaves when the connection ends. These options can be set in the configuration or selected by the user. 70 Rangee Thin Client 71 Advanced Administration This Chepter contains mor information about remote acces to a Rangee Thin Client. Remote Administration via HTTPS Cause of the built-in HTTPS-webserver the administrator have the possibility with every webbrowser in the network connect to the Rangee Thin Client. So he can remote changed the configuration of the Client without disturb the user in front of the Client. To connect to an Rangee Thin Client type https://<IP-Adresse> in the adress line of your webbrowser. If no more access rights were granted, only the administrator have the access to log in. To log on the client the administrator have to switch to the Setup menu and sign in the name and passwort. After this he can change every configuration. Picture 58: Remote-Administration via Webbrowser Desktop mirroring via VNC Another option for remote administration the Rangee Linux offers by remote access via VNC. VNC provides the administrator the ability, by using a previously established VNC password, to mirroring the screen on the remote computer to his own (eg under Windows using a VNC viewer). Depending on the settings, the user get a message that a remote access via VNC has been started. Bild 59: Desktop-Spiegelung über VNC Remote Access via SSH Rangee Linux has an SSH server, which allowed every SSH client access to the device. Username and password for SSH access to the Thin Client is available on request . Rescue Panel During the boot process, shortly after switching on the device, with the ESC key can be called the rescue panel. This includes the following features : • Firmware: Starting the OS Rangee Linux on device. • Disable VESA-Mode: Starts Rangee Linux without VESA support. Particularly important of using PC-Stick in PC with Intel chipsets. • Disable ACPI: Turning the power management ACPI off. Usefull by using the PCsticks in older computer architectures. • Reset to factory defaults: Reset Rangee Linux to factory settings. If the password has been forgotten, this action can also be use by getting the master password. Contact to the Rangee support. • Reset to factory Video defaults: resets the graphic settings to factory. • Update Firmware: This menu item allows the firmware to completely reload. For questions, please contact the Support Rangee The actions in the rescue panel should be performed only in an emergency by an administrator. The implementation of the selected action requires an administrator password. This is identical to the password for administrator access to the Kommbox. By default it is "engels".