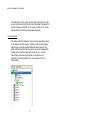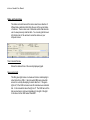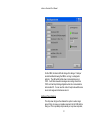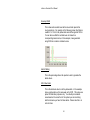
1
rioServer Standard User Manual Worldwide Technical Support and Product Information: http://www.riotechinst.com/ RioTech Instrument Ltd LLP 27326 Robinson Road, Suite 225 The Woodlands, TX 77385, USA Phone: 832-543-9542 Fax: 281-298-8618 i rioServer Standard User Manual Important Information : Warranty The media on which you receive RioTech Instruments software are warranted to be free from defect in materials and workmanship for a period of 90 days from the date of purchase as evidenced by receipts or other documentation. RioTech Instruments will, at its option, repair or replace software media that is defective if RioTech Instruments receives notice of such defects during the warranty period. RioTech Instruments does not warrant that the operation of the software shall be uninterrupted or error free. A Return Material Authorization (RMA) number must be obtained from the RioTech Instruments and clearly marked on the outside of the package before any equipment will be accepted for warranty work. RioTech Instruments will pay the shipping costs of returning to the owner parts that are covered by warranty. RioTech Instruments believes that the information in this document is accurate. In the event that technical errors or typographical errors are found, RioTech Instruments reserves the right to make changes to the subsequent editions of this document without prior notice to the holders of this edition. The reader should consult RioTech Instruments if errors are suspected. In no event shall RioTech Instruments be liable for any damages arising out of or relating to this document or the information contained in it. Except as specified herein, RioTech Instruments makes no warranties, express or implied, and specifically disclaims any warranty of merchantability or fitness for a particular purpose. Customer’s right to recover damages caused by fault or negligence on the part of RioTech Instruments shall be limited to the amount theretofore paid by the customer. RioTech Instruments will not be liable for damages resulting from the loss of data, profits, use of products, or incidental or consequential damages, even if advised of the possibility thereof. This limitation of the liability of RioTech Instruments will apply regardless of the form of action, whether in contract or tort, including negligence. Any action against RioTech Instruments must be brought within one year after the cause of the action accrues. RioTech Instruments shall not be liable for any delay in performance due to causes beyond its reasonable control. The warranty provided herein does not cover damages, defects, malfunctions, or service failures caused by the owner’s failure to follow the RioTech Instruments’ installation, operation, or maintenance instructions; owner’s modification of the product; owner’s abuse, misuse, or negligent acts; and power failure or surges, fire, flood, accident, actions of third parties, or other events outside reasonable control. ii rioServer Standard User Manual Copyright Under the copyright laws of the United States of America and other countries, this publication may not be reproduced or transmitted in any form, electronic or mechanical, including photocopying, recording, storing in an information retrieval system, or translating, in whole or part, without prior written consent of RioTech Instruments Ltd LLP. Trademarks rioServer, rioServer Standard, and the RioTech Logo are trademarks of RioTech Instruments Ltd LLP. RioTech is a trademark of Rio Tech Instruments Ltd LLP. Acrobat®, is a registered trademark of Adobe Systems Incorporated. Windows® is a registered trademark of Microsoft Corporation. Pentium® is a registered trademark of Intel Corporation. AMD Athlon® is a registered trademark of Advanced Micro Devices, Inc. All other trademarks and service marks are owned by their respective companies. iii rioServer Standard User Manual WARNING REGARDING USE OF RIOTECH INSTRUMENTS PRODUCTS RioTech Instruments products are not designed with components and testing for a level of reliability suitable for use in or in connection with any system whose failure can reasonably be expected to cause significant injury to a human. In any application, including the above, reliability or operation of the software and hardware products can be impaired by adverse factors, including, but not limited to, fluctuations in electrical power supply, computer hardware malfunctions, computer operating system malfunctions, installation errors, software and hardware compatibility problems, malfunctions or failures in electronic monitoring or control devices, transient failures of electronic systems (hardware or software), unanticipated uses or misuses, or errors on the part of the user (adverse factors such as these are hereafter collectively termed “system failures”). Any application where a system failure would create a risk of harm to property or persons (including the risk of bodily injury or death) should not be reliant solely upon one form of electronic system due to the risk of system failure. To avoid damage, injury, or death, the user must take reasonably prudent steps to protect against system failures, including, but not limited to, backup or shut down mechanisms. Because each system is unique and differs from RioTech Instruments testing platforms and because a user may use a RioTech Instruments product in combination with other products in a manner not evaluated or contemplated by RioTech Instruments, the user is ultimately responsible for verifying and validating the suitability of RioTech Instruments products wherever RioTech Instruments products are incorporated in a system or application, including, without limitation, the appropriate design and safety level of such system or application. iv rioServer Standard User Manual Table of Contents Chapter 1: Introduction to the rioNet Monitoring System..........................12 System Components ............................................................................12 The Host Computer...........................................................................12 Vibration Monitoring Units (VMUs)....................................................13 Communications Network.................................................................14 Chapter 2: Setup Procedure ....................................................................16 Software Installation .............................................................................16 rioServer Standard Installation..........................................................16 Installing Over Previous Software Versions ..................................16 Network Communications Adapter Setup Procedure ...........................17 Connecting the NCA Directly to the Computer..................................17 Assigning an IP address to the NCA.................................................18 Chapter 3: Introduction to rioServer Standard..........................................20 Overview ..............................................................................................20 Upgrades and Reinstallation ................................................................20 Upgrades: .........................................................................................20 Reinstallation: ...................................................................................22 rioServer Standard’s main screen ........................................................22 The Tree Control...............................................................................23 Status and Control Area .......................................................................25 Time Collected Window ....................................................................25 Now acquiring light............................................................................25 Time To Clear ...................................................................................26 Historical Scrollbar Control ...............................................................26 Note: Scrollbar Shows Only Single Day ........................................26 First Day Button ................................................................................26 Previous Day Button .........................................................................26 Next Day Button................................................................................27 Last Day Button ................................................................................27 Alarm Log .........................................................................................27 Status Bar .........................................................................................27 v rioServer Standard User Manual Calculated Spectrum Energy Statistics............................................. 28 Sensor Summary Area......................................................................... 29 Exploring rioServer Standard Graphical Displays ................................ 29 Traces.................................................................................................. 30 Green Trace ..................................................................................... 30 Purple Reference Trace ................................................................... 30 Red Alarm Trace .............................................................................. 31 Yellow Alarm Trace .......................................................................... 31 Graph Labels ....................................................................................... 31 Graph Tool Controls ......................................................................... 31 Zoom Tools ...................................................................................... 32 Cursor Tool....................................................................................... 32 Hand Tool......................................................................................... 32 Exploring Menu Options of the Main Screen........................................ 33 File Menu.......................................................................................... 33 Edit Menu ......................................................................................... 34 Graph Menu ..................................................................................... 36 Help Menu........................................................................................ 38 Edit VMU List ....................................................................................... 39 VMU Dialog ...................................................................................... 40 Exploring rioServer Standard Configuration......................................... 44 Communications Configuration ............................................................ 46 VMU Name....................................................................................... 46 Unit ID .............................................................................................. 46 VMU Serial Number.......................................................................... 46 IP Address........................................................................................ 47 Test Connection ............................................................................... 47 Root Directory .................................................................................. 47 Warning: Changing the Directory to Save Sensor Data................ 47 Communications Timing Options ......................................................... 49 Radio Timing Options....................................................................... 49 Set Radio Timing Selector................................................................ 50 Making Sure a VMU Responds to Radio Timing Commands: ...... 50 Test Long Waveform: ....................................................................... 50 vi rioServer Standard User Manual Using Test Long Waveform to Adjust Radio Timing:.....................50 Enter Radio Diagnostic Mode ...........................................................51 Additional Timout Settings ................................................................52 Enable Power Save Mode ................................................................53 Basic Configuration ..............................................................................53 VMU Enabled....................................................................................54 Configure Acquisition Rate ...............................................................54 VMU’s Trend Scan Rate ...................................................................55 Note on collection rates:................................................................55 Spectrum Scan Rate Divisor.............................................................55 Sensor Settings ................................................................................56 Load/Save Profile .............................................................................56 Alarm and Trend Configuration ............................................................57 Envelope Alarms...............................................................................57 Band Alarms .....................................................................................57 Trends & Trend Alarms.....................................................................57 Configure Sensor Dialog ......................................................................57 Sensor Enable Check-box ................................................................58 Sensor Name....................................................................................59 fMax..................................................................................................59 Lines .................................................................................................59 Averages...........................................................................................59 Acquisition Time ...............................................................................60 Sensor Type .....................................................................................60 Sensitivity..........................................................................................61 Tach Multiplier ..................................................................................61 Fixed RPM ........................................................................................61 Auto Scale Settings...........................................................................62 Module Settings ................................................................................62 Set New Cal Factor...........................................................................62 Warning: Modifying Set New Cal Factor........................................63 Note: Accuracy of Amplitudes in Spectrum Graphs.......................63 RPM Source .....................................................................................64 Check Bias Voltages.........................................................................64 vii rioServer Standard User Manual Envelope Alarm Options Dialog ........................................................... 65 Enabled ............................................................................................ 66 Track RPM ....................................................................................... 67 Alarm Email Enabled ........................................................................ 67 Require Local Ack ............................................................................ 67 Require Remote Ack ........................................................................ 67 Create Alarm Trace .......................................................................... 67 Envelope Width ................................................................................ 68 Alarm Padding.................................................................................. 68 Min Yellow Alarm.............................................................................. 68 Min Red Alarm.................................................................................. 69 Start.................................................................................................. 69 Stop.................................................................................................. 69 Learn Mode On ................................................................................ 69 Set Learn Expiration ......................................................................... 70 Learn Mode Expiration ..................................................................... 70 Temporarily Suspend Alarms ........................................................... 70 Edit Band Alarm List Dialog ................................................................. 71 Trends and Trend Alarms Dialog ......................................................... 74 Trend Configuration Dialog............................................................... 76 RPM Tracking................................................................................... 79 Exporting Trends .............................................................................. 80 Preferences Dialog .............................................................................. 80 Trend Display Options...................................................................... 81 Viewer Trend Depth ......................................................................... 82 Miscellaneous................................................................................... 82 Default Units..................................................................................... 85 Email Setup Buttons......................................................................... 86 Edit Reporting Options Dialog .............................................................. 87 Edit Email List Dialog ........................................................................... 90 Email Setup Dialog .............................................................................. 91 Chapter 4: Troubleshooting rioServer Standard ...................................... 93 Serial Communications Problems ........................................................ 93 Hardware Problems.......................................................................... 93 viii rioServer Standard User Manual Driver Problems ................................................................................95 Software Problems............................................................................95 Software Usability Issues .....................................................................97 Building The Monitoring Network ......................................................98 Using Alarms to Manage Machine Reliability....................................98 Frequently Asked Questions.............................................................99 Index ......................................................................................................100 ix rioServer Standard User Manual About This Manual This manual describes the procedures for installation, configuration, and use of the rioServer Standard vibration monitoring system. Users should carefully read the installation section of this manual before attempting to install any hardware or software. Once the installation procedure is fully understood, then the user should proceed with installation. Persons installing the hardware should be trained and experienced in installing electronic equipment since potentially dangerous voltages can be present at various stages of the installation process. Also, persons installing the software should be trained and experienced in installing computer software. This manual is also available electronically in Portable Document Format (PDF). The PDF version in included on the rioServer Standard software installation CD. The system must have Adobe Acrobat Reader 3.0 or a later version installed to view PDFs. (Refer to the Adobe Systems Incorporated Web site at www.adobe.com to download Acrobat Reader.) x rioServer Standard User Manual xi rioServer Standard User Manual Chapter 1: Introduction to the rioNet Monitoring System The rioNet system consists of a number of Vibration Monitoring Units (VMU) connected by a serial communications network to a computer running the rioServer Standard software. Below is an overview of each of the systems components, followed by an explanation of how they all work together to provide a powerful, cost effective vibration monitoring solution. System Components The Host Computer The computer runs the rioServer Standard software program. This system manages the entire rioServer Standard system. It is run on a standard Microsoft Windows XP based PC. By running on standardized commonly available hardware, the overall system cost is kept to a minimum. The computer has the following minimum hardware requirements: 2 GHz Intel Pentium 4 or AMD Athlon processor, 512 MB RAM, 2-button mouse, 50 MB free hard disk space, an Ethernet network port. In addition, it is strongly suggested that the user protect the computer by (1) keeping anti-virus software installed, updated and running, and (2) powering the computer and VMU power supply with a high quality uninterruptible power supply and surge suppressor. 12 rioServer Standard User Manual Vibration Monitoring Units (VMUs) VMU’s are electronic units that gather information regarding the health of plant equipment. VMU’s are connected to accelerometers near or beside the machinery and to a serial network that sends the collected information to the rioServer software. VMUs can be ordered in the following type enclosures: VMU105 - DIN rail mounted enclosure with screw terminals. VMU205 – portable NEMA 4X white plastic case with BNC connections VMU305 - NEMA 4X gray plastic JIC style wall mountable case (BNC connections optional) The VMU108 should be housed in some type of rated enclosure, while the VMU208 is sealed protected from dust and moisture, but should be protected from physical abuse and direct sunlight (to prevent overheating on hot days). The VMU308 is suitable for mounting in an industrial environment near the equipment being monitored without any additional enclosures. VMU-108 VMU-208 13 rioServer Standard User Manual VMU-305 Communications Network The rioNet system is designed to work over various network topologies: RS485 at 19.2 Kb Radios – 900 MHz Spread Spectrum Frequency Hopping Ethernet Cellular Wifi Modems Any combination of the above VMU’s use the RS485 2-wire standard. Multiple VMU’s can be connected together in a multi-drop configuration. 14 rioServer Standard User Manual The rioServer software can only communicate using Ethernet so each rioNet system must have a data conversion device, rioNet use a device called a Network Communication Adaptor or NCA. The two most frequently used methods by rioServer to communicate with VMU’s is direct wired and wireless. Direct wire with rioNet NCA Wireless connection VMU Adapter Wireless Modules 15 PC with Network rioServer Standard User Manual Chapter 2: Setup Procedure Software Installation Before installing the rioServer Standard software, ensure that the computer on which it is to be installed meets the minimum requirements set forth in Chapter 1. First setup the 485-serial driver as per the hardware installation instructions above. Then install the rioServer Standard software. rioServer Standard Installation Step 1 Step 2 Step 3 Log on to the computer with “Administrator” rights. Load the rioServer Standard installation CD in the CD drive. Run setup.exe. Installing Over Previous Software Versions If a newer version of rioServer Standard is being installed over an older version you must allow the uninstall program to run and then run setup.exe again. Step 4 Step 5 Step 6 Complete the installation by following the prompts of the install program. Reboot the computer. Run the rioServer Standard run by clicking on the icon under “RioTech Instruments” in the Start Menu. 16 rioServer Standard User Manual Network Communications Adapter Setup Procedure The network communications adapter (NCA) converts the RS485 communications standard over to Ethernet allowing the software to communicate with the VMUs. RioTech ships each NCA two different types of Ethernet cables: One orange cable called a “crossover” cable that is used when connecting the NCA directly to a computer. One gray “patch” cable is used when connecting the NCA to a LAN (usually through a wall mounted plug or a network hub). The cables have identical connectors, however they are NOT interchangeable. You can only use them for the proper type of connection as mentioned above. Power must be supplied to the NCA with the supplied AC adapter. Connecting the NCA Directly to the Computer When using a laptop, which is not already connected to a hub, switch, router or if the computer running rioServer has another two network cards, it is possible to connect the NCA directly to the computer using the orange cable supplied with the NCA. While every NCA needs an identifying address called an IP, when connected directly to a computer, the computer and NCA can automatically pick an IP address. Unfortunately this address will change every time the computer and/or NCA is started. RioServer will not know of these address changes and will not know where to look for its NCA to communicate with. Therefore it will be necessary to run the locate NCA option in rioServer every time the computer is restarted if you use this configuration. The only reason 17 rioServer Standard User Manual to use this configuration is to avoid setting up IP addresses and network masks in the computer and NCA. The above can be avoided by giving the NCA a permanent IP address. Assigning an IP address to the NCA If operating within a corporate network, the network administrator can provide assistance in configuring both your PC and the NCA. Remember to plug the NCA into the Ethernet network using the proper cable (a crossover cable when plugging the NCA directly into a PC or laptop’s network port, or a patch cable when plugging into a LAN). Cables supplied by RioTech Instruments are color codes as orange for crossover cables and gray for patch cables, but cables from other sources may be colored differently. You now need to use the NCA Configuration Utility to identify the NCA’s IP address. The NCA Configuration Utility can be run by using the Windows Start Menu and the shortcut is located under “RioTech Instruments”. The NCA Configuration Utility will allow you to set an IP and the optional hostname for your NCA. When you run the NCA Config Utility it will automatically search the network (consisting of the NCA and your PC in this case) for all NCA’s. If your NCA does not show up automatically in the list, check to ensure the yellow link light is lit where the Ethernet cable plugs into the NCA. If the cable is not lit, then the NCA is not properly plugged into the network. First ensure that the NCA power plug is connected and that the cables are securely in place. If the link light still does not come on, contact your IT department to help you resolve why. Until the link light is lit, there is a hardware problem and nothing can be done in software to fix anything. Once the link light turns on, click the search button 18 rioServer Standard User Manual again to repeat the search. The search function works by using a UDP broadcast and may not find NCA’s that are plugged in on the far side of routers (depending on the configuration of the router). Once the NCA is on your network, simply highlight the NCA you wish to edit and click the appropriate button to edit the IP or the Hostname. An NCA does not need to have a hostname. The hostname is simply a friendly name you can assign to an NCA so you can remember which IP is located where. For example, you might call one of your NCA’s “Pump House” and another NCA “Tank Farm”. If you are unfamiliar with TCP/IP networking, we strongly recommend you contact your IT department for assistance when configuring the NCA. Most companies have a range of IP’s that are available for “static” use. A “static” IP is an IP that has been manually set by a user and will never change on it’s own. RioTech recommends using a static IP. 19 rioServer Standard User Manual Chapter 3: Introduction to rioServer Standard Overview RioNet is a powerful data acquisition system used for monitoring and diagnosis of any type of industrial equipment that has vibration characteristics. The RioNet system can acquire and transport vibration data over long distances, saving the data for immediate, as well as, historical evaluation. rioServer is the heart of the rioNet system. It controls the communications network and the remote VMUs, stores the collected data, provides alarm notification and presents the data to the user. The rioNet system allows a technician to: Gather, transport and manage vibrational data Monitor acquired data as: o Time waveform, o Velocity or acceleration based FFT, and o Trended vibration energy. Do in-depth analysis using: o Frequency and amplitude cursors, o Sideband cursors, or o Time difference cursors. Automatically monitor equipment for: o Changes in FFT line energy, and o Changes in trended vibration energy. o Automatically notify appropriate personnel when changes occur. Upgrades and Reinstallation Upgrades: 20 rioServer Standard User Manual By default, the installation program will install rioServer Standard into the directory “C:\Program Files\RioTech”. When upgrading to a new version, running the setup.exe file will overwrite the already existing program. The primary configuration file for the program will be NOT be erased when the program is reinstalled. Data files will not be overwritten when installing an upgrade either. 21 rioServer Standard User Manual Reinstallation: By default, the installation program will install rioServer Standard into the directory “C:\Program Files\RioTech”. When reinstalling the same version on a computer, running the setup.exe file the first time will uninstall the existing program. You must run setup.exe a second time to install the upgrade. Data files will not be overwritten when installing an upgrade. rioServer Standard’s main screen The main screen is the primary interface to the whole RioNet system. A sample view of this screen is shown below: 22 rioServer Standard User Manual The main areas of the screen are the menu along the top of the screen, the tree control on the left side of the screen, the graph, the sensor summary information in the lower left side of the screen, and the status and control area just below the graph. The Tree Control This is the control that allows the user to choose what will be shown in the graph on the main screen. Clicking on the tree can change what sensor is currently selected and what data is shown in the graph. Different levels of the tree can be opened and collapsed by clicking on the plus/minus sign right beside an icon. If an icon doesn’t have a plus/minus sign beside it, then there are no branches of the tree below that icon. An example of a tree is shown below: 23 rioServer Standard User Manual In this example, the spectrum of sensor 1 is selected. If you wished to view the time waveform of sensor 1, you would simply click on the time waveform icon. Clicking on the “Trends” icon will show all configured trends on a single graph. Clicking on an individual trend will show just the one trend on a graph. In order to view alarm levels you need to view trends one at a time. Looking at the 8 different sensor icons, you will notice that the icon for sensor 1 is green, sensor 2 has a red X across it, and sensors 3,4,5,6 and 7 are gray. The green sensor icon means that the sensor is enabled and the bias voltage was good last time it was checked. The red X over sensor 2 means that the sensor is enabled but that the bias voltage was bad last time it was checked. The gray icons mean that the sensors are not enabled. If a sensor is enabled, but the spectrum and time waveform icons are gray, that means that spectrums are disabled for that sensor. Disabling spectrums is done by setting the “Spectrum Scan Rate Divisor” to zero (0). See the “Configure VMU” dialog below for more information. Beside sensor 1, you will see the text “CPU fan”. This is a userdefined label that will help you remember what is connected to the sensor. Usually, you will want to put something that describes the piece of equipment that is being monitored. For example, a sensor mounted on the horizontal axis of the drive end of a motor connected to a fan called the “FD Fan” might be labeled “FD Fan DE H”. 24 rioServer Standard User Manual Status and Control Area The status and control area of the main screen has a collection of different status indicators that inform the user of the current status of rioServer. There is also a set of historical controls that allow the user to view previously collected data. You can also grab the lower right hand corner of the window to resize the window on your computer screen. Time Collected Window Shows the date and time of the currently displayed graph. Now acquiring light This little green light comes on whenever rioServer is attempting to collect data from a VMU. It also lists what VMU name and which sensor it is currently attempting to collect data from. If the green light is off, it the VMU and sensor are left at whatever was collected last. In the screenshot above the light is off. The VMU name of the last acquired sensor is shown immediately to the right of the light. In this case it is the VMU named “NewVMU”. 25 rioServer Standard User Manual Time To Clear This countdown timer is normally disabled and grayed out. However if the current VMU and sensor are in alarm, the time left before the alarm flag is automatically cleared will be counting down in this control. Historical Scrollbar Control By moving the blue scrollbar handle with the mouse, the user can scroll between scans on a particular sensor. Alternately, the user can click on the triangular shaped buttons immediately to either side of the scroll bar to move the scroll bar position 1 scan in either direction. Note: Scrollbar Shows Only Single Day The scrollbar only displays all the scans in a given day. When the blue handle is all the way to the left, it will show the 1st scan of the day. When it is all the way to the right, it will show the last scan of the day. First Day Button The button changes the current day to the first day that contains scans. After this button is clicked, this button and the previous day buttons will be grayed out. The date that is now current will be shown just above the scroll bar. Previous Day Button The button loads all the scans collected during the previous day. If no scans were taken on the day immediately before the 26 rioServer Standard User Manual current day, it will move as far as necessary to find a day with scans. This button is grayed out when there are no previous days with scans. The date that is now current will be shown just above the scroll bar. Next Day Button The button changes the current day to the next day that contains scans. If no scans were taken on the next day immediately after the current day, it will move as far as necessary to find a day with scans. This button is grayed out when the current day is the last day with scans. The date that is now current will be shown just above the scroll bar. Last Day Button The button changes the current day to the last day that contains scans. After this button is clicked, this button and the next day buttons will be grayed out. The date that is now current will be shown just above the scroll bar. Alarm Log This is a list of the last alarms that have been generated by rioServer. They are listed in chronological order. This list only stores the most current alarms. The number of alarms that are stored in this list is configured in the preferences dialog. Status Bar 27 rioServer Standard User Manual Along the very bottom of the window is a status bar that shows 4 pieces of information. There are 2 countdown timers that show how long it will be until another spectrum or trend point is collected on the current sensor. When acquisition is stopped, the time until next scan will show NaN. It also shows the index of what spectrum you are currently viewing and how many there have been collected so far today. Lastly, it shows the date that is currently being viewed. Calculated Spectrum Energy Statistics There are two numeric indicators at the bottom right of graph. To select whether to display RMS or peak, go to Edit/Options/Display. Overall Energy (RMS or Peak): The top numeric display will be labeled either “Overall RMS” or “Overall Peak” and displays the calculated statistic for the entire collected spectrum being displayed, regardless of the portion of that spectrum that is being viewed at the time. You can pick what calculation type is used for the statistic in the “Preferences Dialog” in the Miscellaneous options frame. Zoom O/A Value Energy: Zoom O/A Value shows just the calculated statistic in the currently viewed portion of the waveform. When the graph is zoomed out to view the entire spectrum, the 2 numbers will be the same. If you zoom in to a particular area of the spectrum, the “Zoom O/A RMS” or “Zoom O/A Peak” will show you the energy contained in just that portion of the spectrum. The statistic calculation type will always be the same as the calculation type for overall described above. 28 rioServer Standard User Manual Sensor Summary Area The sensor summary area shows some vital statistics on the currently selected sensor. An image of this area is shown below: This VMU name, sensor notes, and sensor number are all selfexplanatory. The “Trend Interval” is the time (in HH:MM:SS) between collected trend points on this sensor. The “Spect Interval” is the time between collected spectrum/time waveforms for this sensor. The Bias Voltage is the last collected bias voltage from this sensor. Last reception is the 100% of data that was returned from the last communication attempt (with any VMU, not just the current one). “fMax” and “Lines” indicate the frequency max and lines of resolution of the displayed graph. Exploring rioServer Standard Graphical Displays The rioServer graphical displays contain a powerful set of tools for monitoring and diagnosing vibration data. The displays allow users to display the same data in different format, zoom in on areas of interest, run cursors over data to do in-depth analysis, and display alarm limits for data. 29 rioServer Standard User Manual The graph area of the rioServer screen is shown below: Traces Green Trace The green trace on the graph is current data. Purple Reference Trace If the reference is turned on, a purple trace will appear underneath the green trace. The reference trace selector can be found in the menu under Graph/Reference Scan. 30 rioServer Standard User Manual Red Alarm Trace If the envelope alarms or the band alarms are enabled for this sensor, a red line will be displayed showing the value of the red alarm. Yellow Alarm Trace If the envelope alarms or the band alarms are enabled for this sensor, a yellow line will be displayed showing the value of the yellow alarm. Graph Labels Whenever you are viewing a spectrum that is not the most recently acquired spectrum, the blue text “Historical Data” will be displayed in the upper right side of the graph. Whenever you are viewing a spectrum that generated an alarm, the blue text “In Alarm”. Graph Tool Controls The graph controls allow extensive control over the graph and have many powerful functions. It will be worth your time to learn to fully control all the powerful visualization features of the graph included in rioServer Standard. A large version of the graph controls is shown below: 31 rioServer Standard User Manual The 3 tool modes you can select from are the Zoom Tool (the icon looks like a magnifying glass), the Cursor Tool (the icon looks like a plus sign), and the Hand Tool (the icon looks like a hand). You can tell which tool is active by the appearance of the button being pushed down. For example, in the picture above the “Zoom Tool” is selected. Zoom Tools The Zoom Tools Palette is shown below: The zoom tools palette will display when the zoom tool icon is clicked with the mouse. The little arrow at the bottom right of the icon tells you that there is another palette or menu below this button. Starting in the upper left (and moving left to right, top to bottom), the tools are: zoom to a rectangle, zoom with vertical cursors, zoom with horizontal cursors, full scale zoom, zoom in, and zoom out. Cursor Tool The cursor tool allows you to manipulate the graph cursor using the mouse. The graph cursor will not respond to the mouse unless this tool is the active tool. The cursor should always respond to the keyboard arrow keys. Hand Tool 32 rioServer Standard User Manual The hand tool allows you to “grab” the entire graph with the mouse and drag the graph traces around. It is most useful for moving the whole graph in small amounts. Exploring Menu Options of the Main Screen File Menu The file menu looks as follows: Print: Prints the current graph. Send Email Now: Opens a dialog that allows you to send an email that includes screenshots of the current sensor’s spectrum and trend graph display. Sensor Health Check: Checks all enabled sensors for their bias voltage. This function is used to restore operation to a sensor that was flagged as ‘bad’ due to an improper bias voltage reading during operation. Delete Old Files: Opens a dialog that allows you to select a range of dates from which to delete the spectrum files. 33 rioServer Standard User Manual Refresh File Cache: Reloads the current list of files from the disk drive. This is especially useful if you manually delete files from a sensor’s directory using Windows Explorer. Backup Configuration: Opens a dialog that allows you to send an email that includes an .ini file with your current configuration data. Exit: Saves the current settings and closes the program. Edit Menu The edit menu looks as follows: Run: This command starts or stops data acquisition. 34 rioServer Standard User Manual Collapse Tree To VMU Modules: This command causes the tree to collapse so that all you see is a list of VMU modules. Each icon will have a + sign next to it so that you can re-expand any part of the tree you wish. This is handy if you have a lot of VMUs configured. Collapse Tree To Sensors: This command causes the tree to collapse so that you see each Sensor underneath each VMU. Clear Current Sensor Alarm Flag: When a sensor enters into alarm, an alarm flag is put above the tab of that sensor. Further alarms for that sensor are suppressed until the flags are cleared. This command clears the alarm flag for just the currently viewed sensor. It has no effect if the current sensor isn’t in alarm. Clear All Alarm Flags: When a sensor enters into alarm, an alarm flag is put above the tab of that sensor. Further alarms for that sensor are suppressed until the flags are cleared. This command clears all alarm flags from all VMUs. Configure Sensors: This command opens a sub-menu that allows direct access to various configuration items. A picture of this submenu is included immediately below. Configure VMU: This command opens a dialog that allows the user to configure all the options for a particular VMU. 35 rioServer Standard User Manual Edit VMU List: This command opens a dialog that allows the user to add, edit, or remove a VMU from the list of VMUs. Configure Trend Export: This command opens a dialog that allows the user to configure data exporting from the software. Preferences: This command opens a dialog in which the user can select options that deal with the overall program, not individual sensors. Graph Menu The graph menu looks as follows: Autoscale Graph Now: This command autoscales the current graph as per the settings in the Configure Sensors dialog. Zoom Out Graph Fully: This command zooms the current graph out to full scale 36 rioServer Standard User Manual Automatically Autoscale X Axis: This command explicitly autoscales the X (time or frequency) axis. Automatically Autoscale Y Axis: This command explicitly autoscales the Y (amplitude) axis. Get Spectrum Now: This command causes rioServer to immediately collect a time waveform, spectrum, and set of trend points on the currently selected sensor of the current VMU. Be aware that rioServer will collect this spectrum even if the bias voltage is bad, so if the data returned looks strange, check the bias voltage to ensure the sensor is properly wired. Cursor: This item accesses a submenu that allows the user to pick what kind of cursor to display on the graph. The contents of the submenu will automatically change when different kinds of graphs are visible. Graph Amplitude Options: This item accesses a submenu that allows the user to pick which amplitude scale the graph should use. Graph Frequency Units: This item accesses a submenu that allows the user to pick what units to display on the graph’s X Axis. Demodulation: This option causes the currently displayed spectrum/time waveform to be demodulated according to the current demodulation type selected in “preferences” and according to the options shown at the bottom left corner of the main screen. For more information on these settings, please refer to the preferences screen section of this manual. 37 rioServer Standard User Manual Reference Scan: This item accesses a submenu that allows the user to set or clear the reference scan. The user can either “Lock”, “Load” or “Clear” the reference scan. The “Lock Reference Scan” option is chosen when the user wants to take the currently displayed graph and set it to be the reference scan. You will not notice the purple trace immediately, because it will be exactly under the green trace. Once you scroll to another scan, the purple reference scan will be visible. You can choose the “Load Reference Scan From File” if there is a data file that you wish to load as a reference scan. The presence of a reference scan does not effect the operation of the program in any way. The primary purpose of the reference trace is for the user to visually compare two spectrums to one another; however, it can also be used as a basis for creating envelope alarms. The “Clear Reference Scan” option is checked when the reference scan is off. Help Menu The Help menu looks as follows: Registration: This item will open the product registration dialog Show Context Help: This item will change the cursor to a question mark so the user can click on an item on the screen for an explanation of that item. 38 rioServer Standard User Manual Help Contents And Index: This item will open rioServer’s online help file. About rioServer Standard: This item will display a dialog box showing what version of the program is currently running and displaying the copyright information for the program. Edit VMU List Before you can configure a VMU and start collecting data, you must add the VMU to the VMU List. To do this, choose the menu item “EditEdit VMU List” from the menu on the main screen. Opening this dialog causes rioServer to verify the NCA name for each NCA configured. The cursor will change to an hourglass during the search period which normally lasts about 5-15 seconds, depending on the number of VMU’s configured. As shown above, there is one VMU configured as “NewVMU” having 192.168.0.42 as an IP with unit ID of 1. The data and configuration information for this VMU is stored in a sub-directory of 39 rioServer Standard User Manual C: drive called “NewVMU”. If you try to attach 2 VMUs with the same Unit ID to the same NCA, neither VMU will operate properly. When the program is first started, this list will be empty. To create a new VMU, click the button on the right side of the dialog labeled “Create New” to open the “VMU Dialog”. To add a VMU to the list that has already been created before (possibly moved from another machine or the VMU was removed from the list), click the button labeled “Add From Disk”. If you wish to edit a VMU’s basic information, click the button labeled “Edit VMU” to open the VMU dialog. If you wish to remove a VMU from the list, highlight the VMU that you wish removed and click the button labeled “Remove”. You may rename an NCA using the “Edit NCA” button. VMU Dialog This dialog is opened from the Edit VMU List Dialog by pressing either the “Create New” button or the “Edit” button. 40 rioServer Standard User Manual When this dialog is reached by clicking the “Edit” button, it will be preloaded with the previous information from the VMU List. VMU Name: This is the name of the VMU that will appear in the drop down list on the main screen and will appear in all the email alarm reports and periodic reports. Each VMU must have a unique name. IP Address: This is the network address of the NCA that rioServer will use to communicate to the VMU. 41 rioServer Standard User Manual Search For NCA: This button causes rioServer to search the local subnet for NCAs. You will be presented with a list of NCAs that were found. You highlight the NCA you wish to connect to and click “Use this NCA” to close the dialog. See “Configuring the Network Communications Adapter” above in chapter 2 for more information on this dialog. NCA Type: Select the type of NCA you are using. Most of the time this will be the rioNet NCA-NE. Use the rioNet NCA-Cell if you are using a cellular modem to connect to your VMU. RioNet-LE is for future implementation and is currently not used. Extra Delay: This is an extra delay that is allowed when a network connection is slower than normal. Typically you can leave this number 0 when connecting an NCA to a corporate network. For slower networks use the average ping time from the rioServer computer to the NCA as an extra delay value. Test NCA using Telnet: If you suspect a network problem affecting communications after you pick an NCA, use this button to test the network connection and the NCA itself. A telnet session is opened between rioServer and the NCA testing the NCAs serial communications settings. A summary of the telnet session is shown in a dialog box. A successful test results are shown below: 42 rioServer Standard User Manual Unit ID: This is the serial network ID of the VMU. Test Comm To VMU: This button will cause rioServer to attempt to communicate with the VMU using the indicated comport and Unit ID. Search For VMU: This button searches for any VMUs connected to the NCA. The search is from Unit ID 1 to 48. All the Unit Ids to which a response was received will be listed in a drop down box. Simply choose the Unit ID you wish and click “Use Selected ID” for the Unit ID to be loaded into the VMU Dialog Screen. This screen is shown below: 43 rioServer Standard User Manual Root Directory: This is the directory that the VMU’s configuration file will be stored in. Each sensor will have a sub-directory created under this directory. The small button just below this input box with a folder icon on it will open a dialog box that allows you to select a directory. When using the browse dialog, you must enter the directory you wish to select, then click the button at the bottom right labeled “Current Folder”. Exploring rioServer Standard Configuration The user can configure rioServer Standard by opening the “Configure VMU” Dialog. This dialog is opened by choosing “EditConfigure VMU” from menu at the top of the main screen. 44 rioServer Standard User Manual There are 4 main areas in the “Configure VMU” Dialog window. They are: Communications Configuration, Basic Configuration, Communications Timing Options, and the Alarm and Trend configuration area. 45 rioServer Standard User Manual Communications Configuration VMU Name This is the name that will appear in the list of available VMU on the main screen of the program. This name will also appear in email alarm notices, so it will be helpful if the name is descriptive of what the unit is measuring. Unit ID This is the network identification number that rioServer uses to communicate with the VMU. Each VMU on a serial communications network MUST have a unique Unit ID. VMU Serial Number 46 rioServer Standard User Manual This numeric indicator displays the current serial number of the connected unit (if known). If this number is blank or all zeros, then the software has never successfully communicated with the VMU. You should check to ensure the Unit ID and Serial Port selector are correct and press the “Test Connection” button. IP Address This is the IP Address of the NCA connected to the VMU. The small lights to the right side of the text field tell you whether rioServer was able to successfully ping the IP Address specified. Note: You can increase the ping time for this test below on this same screen near the bottom. RioServer only tests the IP whenever it is changed. So if you want it to try again, delete a character from the IP, type it again, then click the light to redo the test. Test Connection Pressing this button causes the software to send a message to the VMU. The VMU then responds with a small packet of configuration data (including the serial number and calibration factor). Root Directory This is the directory that the rioServer Standard software uses to create the directories for each sensor. Warning: Changing the Directory to Save Sensor Data 47 rioServer Standard User Manual When using the browse button on the right hand side of the text entry area, you must be in the directory you wish to use when the “Current Folder” button is clicked. All alarm settings and log files are stored in this root directory. If selected properly the correct path will be in the “Root Data Save Path” window. Current Folder Button 48 rioServer Standard User Manual Communications Timing Options Radio Timing Options This slider adjusts the packet size and delay between packets that are transmitted from the VMU to the software. The “very fast” setting should be used when the VMU is directly wired to the computer with a 485 serial cable, or when there is excellent reception with the radios. There is no inter-packet delay for “very fast”. On the “fast” setting, the VMU will delay 10 ms after every 80 bytes of data to allow the radios to retry transmission. On the moderate setting, the delay increases to 20 ms every 80 bytes of data. On the “slow” setting, the delay increases to 30 ms, but now it delays after every 40 bytes of data. On the “very slow” setting, the delay increases to 50 ms after each 20 bytes of data. These delays give the radios extra time so they can retry more times before a data stream is lost. Make sure the VMU timing status word displayed in parenthesis next to the label says current before 49 rioServer Standard User Manual you click “Close”, otherwise changes you’ve made haven’t been uploaded to the VMU and could result in the inability to communicate until both the VMU and the rioServer software are using the same timing settings. To update the status, click on “Set Radio Timing Selector”. Set Radio Timing Selector This button commands the VMU to switch to the current setting of the Radio Timing option slider. If the command is successful then the tag word beside the Radio Timing option will change from “unknown” to “current”. Making Sure a VMU Responds to Radio Timing Commands: When communication is poor, the Radio Timing option slider will not represent what is set in the VMU. If the rioServer Standard software is set to the same value as the VMU, the status word in parenthesis beside the label for the Radio Timing slider will be “current” instead of “unknown”. Continue to click on the “Set Radio Timing” button until the status word changes. If that doesn’t work, try moving the radios closer together or temporarily wiring the VMU directly to the computer. Test Long Waveform: This button commands the VMU to send a long (4096 byte) buffer of data back to the computer. When clicked, a popup message will inform as to what percentage of the total buffer was received. Using Test Long Waveform to Adjust Radio Timing: The “Test Long Waveform” command represents the most demanding capability of the communication system. To get 50 rioServer Standard User Manual the proper representation as the reliability of the connection, the test should be run 4 to 10 times. The response from the test does not have to be 100% every time the test is run, but should return 100% at least 50% or more of the time. If the test returns 100% less than 50% of the time, adjust the radio timing to a slower setting. Enter Radio Diagnostic Mode This command will cause rioServer Standard to enter into a special “Radio Diagnostic Mode”. Messages will be sent continuously to the VMU. At the top of the block of statistics will be a total count of messages sent. Then there is a statistical breakdown of how many of those were completely successful, partially successful, and how many failed. Then there is a break down of just the last 100 messages. On the right side of the screen is an indicator of what the last message’s result was. 51 rioServer Standard User Manual On the VMU, the Green LED will change from being a 1 blink per second heartbeat showing the VMU is running, to a diagnostic indicator. The LED will blink fast when communications are at 100%. It will blink slow when messages are running at less than 100% and it will stop blinking altogether when the communications rate reaches 0%. You can use this mode to help locate which areas are in radio range and which areas are not. Additional Timout Settings This drop down list gives the software the option to wait a longer period of time to receive a complete response from the VMU before timing out. This is probably only necessary on very slow computers, 52 rioServer Standard User Manual or when using Ethernet serial ports. The 2 numeric indicators below this list show you the actual numerical values of the chosen timing option. The ping time is an extra delay to account for the one-way transmission time to the serial port. The throughput time is the extra time to allow for delays in transmission speed. Adding delays here generally will NOT help improve the reception rate when communicating with radios. Note: When to use Serial Port Timing instead of Radio Timing Options: Serial Port Timing adjusts the time the software waits for a response while Radio Timing Options changes the packet size and time between packets that are sent from the VMU. When using remote serial ports over IP, set Radio Timing Options to “very fast” and use Serial Port Timing to improve on the Test Long Buffer result. Enable Power Save Mode This setting is for future implementation, so it has been grayed out in this display. Basic Configuration 53 rioServer Standard User Manual VMU Enabled This makes the VMU active Configure Acquisition Rate This button brings up the Configure Acquisition Rate dialog, shown below. 54 rioServer Standard User Manual VMU’s Trend Scan Rate This is a drop down box for selecting the interval between times that rioServer collects data from the remote VMUs. Note on collection rates: The time necessary to collect data from the remote VMUs is related to: Number of sensors selected. The fewer sensors that are turned on the faster the program will complete collecting data from each selected sensor. Collection settings. Setting such as fMax and Lines will greatly influence collection rates. (See Setting Collected Signal Parameters.) Spectrum Scan Rate Divisor 55 rioServer Standard User Manual This number sets the number of trend points collected for each spectrum that will be saved. For example, if the scan rate is set for 10 minutes and the spectrum scan rate divisor is set to 6, then rioServer will collect a new trend point every 10 minutes and a new spectrum every hour (6 x 10 minutes = 60 minutes = 1 hour). If you set the number to 0, it will disable spectrums altogether. So a divisor of 10 means every ten trend points save a spectrum. A divisor of 1 means save a spectrum every trend point. A divisor of 0 means never save a spectrum. Save Trend Pt As Spectrum On Trigger When the Spectrum Scan Rate Divisor is entered as 0 or greater than 1, additional Spectrums can be saved when the conditions of the Trigger Type are met. For instance with the Spectrum Scan Rate Divisor set to 0, the Trigger Type set to Tach Only, and the Tach Trigger Point set to an RPM value between 0 and the nominal running speed of the machine, The VMU will only save a Spectrum when the machine is running. Sensor Settings This button causes another dialog to appear in order to setup the details of how the individual sensor’s data is collected. Load/Save Profile 56 rioServer Standard User Manual This setting is for future implementation, so it has been grayed out in this display. Alarm and Trend Configuration Envelope Alarms This button causes another dialog to appear in order to setup the envelope alarms. See chapter 5 for more details. Band Alarms This button causes another dialog to appear in order to setup the band alarms. See chapter 5 for more details. Trends & Trend Alarms This button causes another dialog to appear where you can setup the trends and the trend alarms. See chapter 5 for more details. Configure Sensor Dialog This dialog is reached in one of three ways. It can be reached by clicking on the button labeled “Sensor Settings” in the Configure VMU dialog. It can be reached through the menu item “EditConfigure SensorsAcquisition Parameters” on the main screen. It can also be reached by right-clicking a sensor icon on the VMU tree and selecting “Configure Sensors” from the dialog. All eight sensors on the current VMU can be configured in this dialog. The items that are sensor specific are in the tab area of the dialog. The items below the tab area apply to all eight sensors. 57 rioServer Standard User Manual Sensor Enable Check-box Next to the sensor number tab is the Sensor Enable Check-box. This turns on/off the data collection for this sensor. If data collection is off, no data collection will occur. All functions on this sensor will be disabled if this control is unchecked (trend data will not be captured, no alarms will be issued on this sensor, etc…). 58 rioServer Standard User Manual Sensor Name This is a user-defined label that will help you remember what is connected to the sensor. Usually, you will want to put something that describes the piece of equipment that is being monitored. For example, a sensor mounted on the horizontal axis of the drive end of a motor connected to a fan called the “FD Fan” might be labeled “FD Fan DE H”. fMax This drop down list box allows you to choose the highest frequency for the spectrum you wish to view. The smaller the number, the longer the VMU will take to collect the data. Lines This drop down list box allows you to choose the number of lines of resolution you wish to see for each spectrum that is collected. The larger the number, the longer the VMU will take to collect the data. Averages This number is how many acquisition cycles to collect and average for creating a spectrum. The greater the number, the longer it will take rioServer to collect the data and the larger the stored data file will be on your hard drive. Averaging lowers the total noise floor of a spectrum. Averaging also reduces the systems sensitivity to transient events (this may be good or bad depending on what you are trying to respond to). 59 rioServer Standard User Manual Acquisition Time This is a number calculated by rioServer estimating how long a single collection event will take with the current fMax, Lines and Averages settings. You can use this to help plan your collection schedule. Sensor Type Use this drop-down menu to select the type of sensor you are using, Accelerometer, Velocity, Displacement, or Custom Data Point. Selecting Custom allows adjustment of the custom parameters for your data point. This feature changes the sensor to static voltage input, not a dynamic accelerometer input. You can input a minimum and maximum voltage, minimum and maximum engineering unit, and an engineering unit label. For example, a temperature sensor with a 10mV per Kelvin sensitivity would be configured typically as 0 to 3.9 volts, -273.15 to 116.85 engineering units, and “deg C” as the unit. If you wished the display to be in degrees Fahrenheit instead, you would enter to –459.7 to 243.2 as the engineering 60 rioServer Standard User Manual units. If you wished to see the temperature in Kelvin, simply put 0 to 390. This is because 116.85 degC = 243.2 degF = 390 degK. Thus 3.9 volts would be equal to all 3 values for this particular sensor example, depending on the unit you wished to view the data in. Sensitivity This is the sensitivity of the accelerometers the system is connected to. For accelerometers this is expressed in mV/G, for velocimeters this is expressed in mV/(in/sec), and for displacement sensors this is expressed in mV/mil. This number should be entered as specified by the accelerometer manufacturer. Tach Multiplier This number is only used when the VMU is u1sing a tachometer (see RPM Source below). This number is multiplied by the current tachometer reading to create the “RPM” used for this sensor. Fixed RPM This number is used whenever the VMU is NOT using the tachometer (see RPM Source below). 61 rioServer Standard User Manual Auto Scale Settings These settings determine how graphs will be shown by default. There are two sets of Auto Scale Settings, one for Spectrums and one for Time Waveforms. Each has selectable Amplitude Units: Velocity, Acceleration, Displacement and Custom. For spectrums you can specify frequency units and the max frequency shown. For time waveforms specify time units and maximum time shown. Module Settings Set New Cal Factor 62 rioServer Standard User Manual This button will cause the program to show a new dialog screen. On this screen you will be able to type in a new calibration factor for the VMU. Warning: Modifying Set New Cal Factor Do not modify Current Calibration Factor button unless you have calibration equipment. Note: Accuracy of Amplitudes in Spectrum Graphs All VMU’s are calibrated at the factory using a pure sine wave test signal. Few real world signals will give the same results as lab conditions. Reading compared to other similar types of equipment may vary because of the following: Different Sensors – The same location on the same piece of equipment may give different readings because most sensors are +/- 10% Different time – Unless two pieces of measuring equipment are somehow synchronized, they will always display different (sometimes significantly different) amplitudes. Windowing – The various FFT windows allow the user varying to trade offs between frequency resolution and amplitude accuracy. Different window settings in different pieces of equipment can give very different readings. Lines of resolution and center frequency of lines – By their design, FFTs divide the energy in the signal into a group of discrete frequencies. These frequencies evenly spaced between the fMin and fMax. If an incoming signal has a frequency that falls between those discrete frequencies, the FFT will divide the energy between the frequency above and frequency below in proportion to how close the incoming signal is to the discrete frequencies in the FFT. If the signal is 63 rioServer Standard User Manual halfway between two center frequencies then the power in that signal will be divided evenly between the two spectral lines, making each half as high. This is important because measurements taken on two different pieces of equipment (each properly calibrated) with similar signal input settings, can give different readings because the center frequencies of each of their spectral lines may be different. Different windows can also change this behavior. The nominal accuracy of the VMU’s manufactured by RioTech Instruments is +/- 10%. In most conditions, the accuracy will be substantially better than this nominal accuracy, but customers should verify the calibration setting of the entire assembled system using the same accelerometers that will be used for equipment monitoring using a calibrated shaker table to ensure accuracy when monitoring sensitive or critical equipment. RPM Source This selector switch allows the use of either the tachometer input on the VMU, or user selected number which is fixed. There are 4 things that the software does with this number. It stores the current RPM with each data file written to disk. It uses this number to calculate the x-axis when viewing the data in orders. It also uses this number to activate the trigger when using a tach data save trigger (for more info see the File Output tab). Lastly, it is used for the advanced band alarm tracking feature. Check Bias Voltages This button opens a window that displays the current bias voltage for each of the 5 sensors. The voltage reading will have a red 64 rioServer Standard User Manual background if the bias voltage is less than 8 volts or greater than 15 volts. A voltage of close to zero indicates that either the sensor power supply is physically turned off (a little red switch on the VMU itself), or that the sensor wire is shorted. A voltage more than 15 normally indicates that a sensor wire is broken or a sensor is not connected to that channel. A properly connected sensor typically reads about 11-12 volts depending on the manufacturer. Envelope Alarm Options Dialog This dialog is reached in one of three ways. It can be reached by clicking on the button labeled “Envelope Alarms” in the Configure VMU dialog. It can be reached through the menu item “EditConfigure SensorsEnvelope Alarm Config” on the main screen. It can also be reached by right-clicking a sensor icon on the VMU tree and selecting “Configure Envelope Alarms” from the dialog. All eight sensors on the current VMU can be configured in this dialog. You must setup each sensor’s alarm values individually. 65 rioServer Standard User Manual Enabled This check box enables envelope alarms for this sensor. You will only see the alarm trace on the main screen if the envelope alarms are enabled. For any individual sensor, only Band alarms OR Envelope alarms can be enabled. So, if you attempt to enable envelope alarms when Band alarms are already enabled, you will get a warning message and have the choice of using either Band OR Envelope alarms. 66 rioServer Standard User Manual Track RPM With “Track RPM” checked, the envelope alarm traces will move as RPM changes. Alarm Email Enabled Checking this box allows rioServer to send emails when an alarm is triggered. If this box is left un-checked, you will NOT receive emails when envelope alarms happen on this sensor. Require Local Ack Checking this box requires the user to acknowledge this sensor’s envelope alarms. Require Remote Ack Checking this box requires any rioNet Viewers who are connected to this VMU to acknowledge this sensor’s envelope alarms. Create Alarm Trace This button uses the spectrum defined to the right of this button to create an alarm trace. The “last spectrum collected” means the spectrum that is shown on the main screen when viewing the most recent day with data, and when the history scroll bar is all the way to the right. If you wish to generate a spectrum based on some other spectrum, simply lock that spectrum as a reference, then build the alarm trace off the “Current Reference” spectrum. 67 rioServer Standard User Manual Envelope Width This is how wide an alarm level will be around each peak in the source spectrum. For example, in the following screen shot there is a width of +/- 15 Hz in the yellow alarm around the signal at 120 Hz. You can also see that the red alarm was not raised in a corresponding manner since, in this example, it was generated using 0.002 as a minimum red alarm value. Alarm Padding This is the percentage above the spectrum used to generate the alarm values. Min Yellow Alarm This is the minimum value to set the yellow alarm. In the example close up picture above, this value was set to 0.001. This value was picked for illustration purposes only. You should pick a realistic value based on the noise floor of the system you are monitoring and the tolerance you have for false alarms. Please note this is in units of in/sec. 68 rioServer Standard User Manual Min Red Alarm As for the Min Yellow Alarm, but for red alarms. In the example above, this was set to 0.002. Again, you should pick a value appropriate for the system you are measuring. Please note this is in units of in/sec. Start This is the low frequency cutoff for the alarms when alarm values are created. It defaults to the lowest frequency available in the spectrum, but you may change the number to a higher value if you wish. Signals in the frequencies less than the start frequency will NEVER trigger an alarm, no matter how high the signal gets. Stop This is similar to the “Start” values described above. This is the high frequency limit for alarms when an alarm trace is generated. Learn Mode On Checking this box enables rioServer’s exclusive “Learn Mode” feature. When this feature is activated, new spectrums that are acquired and cause an alarm will cause the alarm to be raised rather than an alarm issued. The alarm will be raised to whatever the new spectrum amplitude is plus the percentage listed above in “Alarm Padding”. You can see if learn mode is currently activated on a particular sensor by looking at the Icon of the sensor in the tree. If an “L” is 69 rioServer Standard User Manual visible in the upper right side of the icon, the sensor is in learn mode. If it is not visible, the sensor is not in learn mode. The learn mode icon is shown below: Set Learn Expiration This button opens a dialog (shown below) that allows you to automatically turn off Learn Mode at a predetermined time or after a set duration. The “Set Expiration” button is disabled when learn mode is off. Depending on the state of the “Set Expiration By” switch, you can choose either a number of hours to leave learn mode on, or a date/time that learn mode will switch off. When choosing a date/time, the number of hours between the current date/time and the expiration date/time is calculated and displayed for you to help assist you in choosing an appropriate expiration date/time. If you choose a duration of zero (or an expiration time that is already past), then learn mode will be left on permanently until it is manually turned off. Learn Mode Expiration This display shows you the date/time of when this sensor’s Learn Mode will automatically expire. If learn mode expiration is turned off it will display “Never Expires”. If learn mode is turned off, then it will display “Disabled”. Temporarily Suspend Alarms This check box will suspend envelope alarm. If you check this box, you will NOT receive emails when envelope alarms happen on this sensor. 70 rioServer Standard User Manual Set Suspend Expiration This button opens a dialog (shown below) that allows you to automatically turn off “Temporarily Suspend Alarms” at a predetermined time or after a set duration. It functions like “Set Learn Expiration” Suspend Expiration This display shows you the date/time of when this sensor’s “Temporarily Suspend Alarms” will automatically expire. It functions like “Learn Mode Expiration”. Edit Band Alarm List Dialog This dialog is reached in one of three ways. It can be reached by clicking on the button labeled “Band Alarms” in the Configure VMU dialog. It can be reached through the menu item “EditConfigure SensorsBand Alarm Config” on the main screen. It can also be reached by right-clicking a sensor icon on the VMU tree and selecting “Configure Band Alarms” from the dialog. All eight sensors on the current VMU can be configured in this dialog. You must setup each sensor’s alarm values individually. 71 rioServer Standard User Manual This dialog allows you to define 10 bands (either distinct or overlapping). To add a new alarm, simply type the yellow and red alarm values (the units are in/sec) and the frequency you wish to start and stop at, select which band you wish to overwrite and click “Replace”. The new values will appear in the list. You can highlight a line in the list by simply clicking on it. Then, once it is highlighted, you can use the 4 control buttons to the right of the list to modify that line (move it up or down, delete the line, or temporarily disable the line without deleting it). Double clicking on a line will copy the 72 rioServer Standard User Manual line’s contents into the 4 text entry fields at the top. You can then edit the contents and click “Replace” to put the newly edited line back into the list. Items first in the list have priority when there is an overlap in the frequency. For example, in the preceding screenshot, the frequencies between 80 and 110 Hz are defined in both lines. Since the first line is above the second, the first line has precedence. So the frequencies from 10-80 are defined by line 2, 80-110 Hz are overridden by line 1, and 110-500 are defined by line 2. Thus, 3 regions were defined with only 2 entries. You can make the 10 entries as complex as you wish. You will be able to view the created waveform once you return to the main screen. Don’t forget to enable the alarms for all the channels you want by clicking the “enable” check box. Also remember, that email alerts must be enabled/disabled for each alarm type on each VMU. The “Track Band Alarm using Tachometer”, is an advanced feature that enables the bands to “track” with the machines speed. When you define an alarm set, you will have a specific RPM in mind for where you are centering your bands. This RPM needs to be entered into the RPM basis if you wish the bands to follow when the machine changes speed. For example, if you define a band from 390-410 Hz because the 1x running speed of the machine is at 400 Hz, then you should enter 400 Hz as the RPM basis. Then if the machine speeds up to 500 Hz, the alarms will automatically move with it up to 487.5 and 512.5. Which is proportionally the same spread, but centered around the new RPM. Don’t forget to set the alarms for all the sensors you wish to use, and don’t forget to enable them. You can check your settings by going to the main screen and looking at the graphs for the alarm traces. You cannot turn on both band and envelope alarms for the 73 rioServer Standard User Manual same sensor. Only one of these spectrum alarms can be active at any time per sensor. Trends and Trend Alarms Dialog This dialog is reached in one of three ways. It can be reached by clicking on the button labeled “Trends & Trend Alarms” in the Configure VMU dialog. It can be reached through the menu item “EditConfigure SensorsTrend Config And Alarms” on the main screen. It can also be reached by right-clicking a trend icon on the VMU tree and selecting “Edit Trend Config” from the dialog. All eight sensors on the current VMU can be configured in this dialog. You must setup each sensor’s alarm values individually. Each sensor can have up to 10 trends configured on it. Trends are configured using the line of controls above the list of trends. Once you have setup the new trend appropriately, you replace the 74 rioServer Standard User Manual currently highlighted trend in the list with the contents of the new trend stats. 75 rioServer Standard User Manual Trend Configuration Dialog Placing the mouse cursor over any of these controls and leaving it there for about 3 seconds will cause a small yellow “tool tip” to appear that gives more information about the control. Some additional details of the trend parameters are explained below: Trend Name: This name can be anything you wish that will describe the trend. These names will be shown on the main screen in a drop down list, so that you can choose which trend to display. Each sensor on each VMU has its own list of possible trends. Within one sensor’s list, each trend name must be unique. Thus, sensor 1 and sensor 2 can both have a trend called “Overall RMS”. 76 rioServer Standard User Manual But sensor 1 cannot have 2 trends named “Overall RMS”. It could however have a trend called “Overall RMS 1” and “Overall RMS 2”. Alarms: This is the value that will indicate an alarm condition for this trend. It is scaled in whatever unit is chosen in the “Unit” parameter. “High High” and “Low Low” alarms are considered “red” alarms for alarm handling and processing purposes. “High” and “Low” alarms are considered “yellow” alarms. Unit: This is the type of unit in which the trend is calculated, displayed, and checked for alarms. The units available are mV, G, in/sec2, mils/sec2, mm/sec2, in/sec, mils/sec, mm/sec, in, mils, and mm. Please note that the units that have sec2 in them and Gs are in the acceleration domain, units with only sec in them are in the velocity domain, and units without sec are in the displacement domain. The unit mV will use the raw voltage reading on the VMU without any scaling. Start/Stop Frequency: These are the values that define the bandwidth of the data that is used for the trend calculation. The raw data is first scaled into the proper unit, then run through an 8th order butterworth bandpass filter using these numbers as the beginning and end Fc for the bandpass filter. The minimum value of the start frequency is 1 Hz. The minimum value of the stop frequency is any number greater than the start frequency. Choosing a stop frequency higher than the Fmax of the sensor is not recommended. The analog system on the VMU has an antialiasing hardware filter that is set 2.4% above the sensor’s Fmax setting. The Nyquist limit of the signal is 28% above the sensor’s Fmax setting. 77 rioServer Standard User Manual Graphing Color: This is the color of the graph trace on the main screen when you select to see “All” trend traces at once. When you view only 1 trend trace at a time, the trend trace is always shown in green. Calculation Type: This is how the calculation is done on the time domain waveform to generate each trend value. You have 7 choices for each trend. The “true peak” setting will cause rioServer to search the bandwidth limited time domain signal for greatest instantaneous difference from the average value. The “equivalent peak” setting will result in rioServer calculating the RMS value of the signal and multiplying the signal by 1.414 (this feature is included for compatibility with those older systems that lack a genuine true peak capability). As expected, the RMS setting will result in the RMS value of the signal being trended. The 4th choice, labeled “Crst Factor”, is the crest factor. The crest factor is a mathematical indication of how much impacting is occurring in the signal. It is strongly recommended that the start/stop frequency be assigned to the fMin and fMax of the sensor when using the crest factor setting unless you are checking for impacting in a particular band. There is also a setting that appears whenever you select a trend in the list of type “Crst Factor” that allows you to force the trend to 0 whenever the magnitude of the RMS energy is below a fixed value (so the crest factor will not get huge when the machine is turned off). The next choice, labeled “avg RMS” results in the RMS value being trended similarly to the “RMS” option above, but using averaging as a low pass filter to reduce variability when trending unstable processes. The filter implemented reduces variability by 80%. The setting for “Instab” is a measure of how stable a measurement is. The number shown is twice the standard deviation of the RMS energy in the band, normalized to the RMS level of the band. For example, a reading of 0.2 means that the standard deviation of the signal is 10% of the value of the average 78 rioServer Standard User Manual signal itself. A value of 2 means that the standard deviation of the signal is the size of the average signal itself. The setting “Instab+R” is similar to Instab, but it is not normalized to the signal amplitude. Instead it is the signal’s rms energy plus twice the standard deviation of the rms. Thus if the RMS energy gets higher, or if the RMS energy becomes less stable, the trend will increase. Finally there are the settings for “Peak to Peak”, “Max Value”, and “Min Value.” “Max Value” is the highest amplitude value in the waveform. “Min Value” is the lowest. “Peak to Peak” is the Max minus the Min. RPM Tracking At the bottom of each sensor’s trend configuration area is a checkbox to enable “RPM Band Tracking”. This advanced feature allows the start and stop frequency for each trend to automatically adjust to changes in the RPM of the monitored machine. This feature only works if you are using the tachometer input on a VMU. When you click the checkbox, rioServer will enable the control labeled “RPM basis for tracking”. You need to enter the “normal” running speed of the machine in the RPM basis control. Normal here is not based on what proportion of time the machine actually spends running at that speed. Instead, “normal” means the nominal RPM of the machine that was used when calculating the start and stop frequencies of the trends. For example, suppose a user has a variable speed machine that is monitored by sensor 1 of a VMU and the tachometer input is being used. Suppose that the user wishes to trend the RMS value of the input from 5 to 10 times running speed. If the machine is running at 3600 RPM, then this band runs from 300 Hz (60 Hz machine speed X 5) to 600 Hz (60 Hz machine speed X 10). So, the user creates a trend band to calculate RMS with a start frequency of 300 and a 79 rioServer Standard User Manual stop frequency of 600. The user then turns on parameter band tracking and enters 3600 as a basis RPM. Now they start the machine and it begins running at 1800 RPM during some startup cycle. 1800 RPM is exactly 50% of 3600 RPM, so the trend would be calculated at 50% of the nominal start and stop frequencies (150 – 300 Hz in this case). Suppose, a couple minutes later during the next scan the machine is running at 2700 RPM. Now 2700 Hz is 75% of 3600 Hz, so the start and stop frequencies would be 225 Hz and 450 Hz respectively for this particular scan. So, the frequency band that is used to calculate the trend would automatically move as the machine sped up and slowed down. The machine’s RPM is read only once immediately before the time waveform data is collected. So, if the machine changes speeds very quickly, it is likely that the calculated trend point will not always exactly represent the band desired. To maximize the accuracy in this case, configure the sensor to use a small number of lines of resolution and a relatively high Fmax so that the collection time is small. Exporting Trends Trends can be exported from the host computer to external instruments using analog outputs. Preferences Dialog This dialog is reached through the menu item “EditPreferences” on the main screen. All the program behavior that is not directly related to a particular VMU is configured on this screen. 80 rioServer Standard User Manual This dialog has five main sections: “Misc”, “Trend Display Options”, “Email Setup”, “DMSI setup” and “Default Units”. Each of these areas are explained in more detail below. Trend Display Options Trend Time Autoscaling: This will change the behavior of how the trend graph autoscales the X axis. You can choose to have the program never autoscale the trend graph, to scroll the graph right until you see the last data point but keep the amount of time visible constant, or to autoscale the graph so all points are visible. These rules are applied whenever a new scan is acquired by the software. Trend Amplitude Autoscaling: This will change the behavior of how the trend graph autoscales the Y axis. You can choose to never 81 rioServer Standard User Manual autoscale the trend graph (even if you manually autoscale the graph), autoscale the Y axis only when you manually autoscale the graph, or to autoscale the Y axis every time the graph is autoscaled. Trend Autoscale Width: This allows you to choose a fixed width to the visible data when the trend is autoscaled. The program has a different behavior depending on whether the autoscale was initiated by the user, or because a new scan arrived. When initiated by the user, the X axis will always be scaled to a width as determined by this control. When initiated by a new scan arriving, this setting is only used if the “Trend Time Autoscaling” is set to “scroll to last point”. Trend Depth: This dropdown list box allows the user to select how many data points to keep for a trend graph before the oldest points are deleted. The quantity of trended data points can be specified either as a number of data points, or as all the number of data points collected within a certain time frame. Viewer Trend Depth This allows the user to select how many data points to allow someone using RioTech’s Viewer application to download. Miscellaneous Scan History: This option controls the behavior of the scroll bar below the graph. If the scroll bar is all the way to the right and you are viewing the most current day, you are viewing the most current data available on that particular sensor. The “Never Change” option will cause the program to never move the scroll bar when new scans are acquired. The option “Keep Current If Viewing 82 rioServer Standard User Manual Current” will automatically move the scroll bar to point to the most current scan, if the scroll bar is currently viewing the most current scan. If you are not viewing the most current scan, it will leave the scroll bar alone when new data arrives on that sensor. The setting “Always Keep Current”, will cause the scroll bar to jump to the most current data immediately once new data has been collected, regardless of whether the user has deliberately scrolled back to view an older scan. It is recommend that the “Keep Current If Viewing Current” option be selected for normal operations to prevent confusion between users. Alarm Auto-Clear: This feature gives the operator the option of automatically clearing alarms after a predetermined time period. If the sensor is still in alarm after this time period another alarm is issued. This has no effect on sensors that are in “Learn Mode” as they never actually enter into alarm (alarms are reset immediately and so no alarm is actually generated). Demod Calc Type: This control allows the user to define what calculation type rioServer uses to demodulate time waveforms. Peak is most useful when the impacting you are observing is significantly higher than the noise floor in the band you are monitoring. RMS and average offer better signal to noise ratios than the peak calculation type, but they can mask the severity of the impacting. The Bessel calculation improves the signal to noise ration even better. The performance of all 4 of these calculation types greatly depends on the Fmin and envelope factors chosen on the main screen. Since the user may wish to modify these factors “on the fly” while they are looking at the data, the result of changing these controls can be viewed in real-time as the factors are changed. The Fmin factor controls the initial high-pass filter that is 83 rioServer Standard User Manual used for demodulation. This number should be high enough that all noise sources other than the periodic impacting is suppressed, but the “ring” frequency of the impacting is not affected. The “envelope factor” is the amount of “smoothing” or “enveloping” that is done to the data after filtering and rectification. The larger the envelope factor, the smoother the resulting time waveform will look. The effect of this smoothing depends on which calculation type you are using. When using the peak calculation type, increasing this value too much will cause the more energy to be reported as being present than is really in the impacting. When using RMS, average, or Bessel calculation types, the higher the number the lower the energy that will be reported in the impacts. Since each situation and event is different, we recommend that you experiment with setting to see what works best for you and your application. Auto Run: This feature will cause the program to automatically start collecting data whenever the program is run. It will also cause the program to restart whenever a dialog box that paused the program is closed. It is highly recommend that this feature be turned on once the system is fully configured. During installation and configuration of new sensors and VMUs, it might be preferred to leave this feature off. Calc Stat (velocity or acceleration): This is the measurement type that rioServer Standard uses when viewing data in the indicated domain. The results of this calculation are shown on the main screen near the lower right corner (See “Calculated Spectrum Energy Statistics” in the section above on the main screen.) Window Type: This drop down list box allows you to choose the windowing option that rioServer Standard will use when calculating the frequency spectrum. Unless you are familiar with the 84 rioServer Standard User Manual mathematical concepts of windowing and digital signal processing, it is strongly recommending that this setting be left on Hanning. Send Graph With Emails: This option causes a jpg image of the currently alarming spectrum graph to be attached to all outgoing email alarms. Configure Reporting Options: This button causes the reporting options dialog to open (See Edit Reporting Options Dialog below for more information.) Show VMU Temperature: This will cause the software to get the internal temperature of the VMU. This is not a valid measurement for process control. It is a self- diagnostic tool to see if the VMU is in an environment that could potentially be harmful to it. The VMU is rated only to 60 degC. Running the unit in an environment hotter than about 55 degC runs the risk of damaging or destroying the VMU and thus is not recommended. The VMU typically runs a couple degrees hotter than the surrounding environment due to the internal power consumption of the electronics. Default Units Spectrum: This is the default unit for spectrum data. Whenever you change from sensor to sensor (or to a new VMU), rioServer will automatically switch to this unit. This prevents the user from customizing a graph when analyzing a particular spectrum, then forgetting to set the units back to normal. Later, another user may see the graph and think something is wrong if they don’t notice that the units have been changed. 85 rioServer Standard User Manual Time Waveform: This is the unit that the software uses when displaying the time waveform (See spectrum above for more information.) Trend: This is the unit that the software uses when displaying the trend (See spectrum above for more information.) Email Setup Buttons Edit Email List: This button causes another dialog to appear where you can setup the distribution list of people you wish to receive email notification of alarms (See chapter 5 for more details.) Email Setup: This button causes another dialog to appear where you can configure the email. The email MUST be configured properly before email can be sent successfully (See chapter 5 for more details.) Send Test Email: This button causes a short test email to be sent to the email distribution list. It is HIGHLY recommended that this test be done before counting on proper email delivery. This prevents misspellings in the SMTP server address and email addresses from going unnoticed. 86 rioServer Standard User Manual Edit Reporting Options Dialog This dialog is reached by clicking the “Configure Reporting Options” button in the “Preferences” dialog. This dialog allows the user to configure when periodic reports are generated and to whom. When the checkbox “Reports Enabled” is checked, rioServer will generate a periodic report with an interval between reports as selected in the dropdown list titled “Report Frequency”. Each day the first report will occur at the time indicated in the “Starting Report Time” control. The starting time is shown in hours then minutes in 24 hour format. Thus in the 87 rioServer Standard User Manual example above, a report will be generated once each day at 9 am in the morning. If you selected 8 hours in the report frequency control and a start time of 8:30, then rioServer would generate a report at 8:30 am and at 4:30 pm. The email addresses of the intended recipients of the report should be entered into the control labeled “Email Address” one at a time, clicking the “Add” button after each entry. To remove an address from the list, simply highlight the item you wish to remove and click “Delete”. There are 8 possible parts to the report that you can include or not in any combination you desire. “Sensor Summary” will include a list of all the settings of all the sensors on rioServer, including sensors that are disabled. “Alarm Summary” will include a detailed list of all the alarms that have occurred since the last report was generated. “Disk Space Summary” will include statistics on the hard drive on the computer rioServer is running on. “Sensor Health Summary” will include the current status on all the sensors as determined by their bias voltage. “Images of All Alarms” will attach to the report email an image of all the alarm spectrums for each alarm that was generated since the last report. “Images of All Sensors” will include an image of the last spectrum collected for every sensor that is enabled. “Data Files for All Alarms” will include the stored time waveform data file for every alarm event since the last report. “Data Files for All Sensors” will include the most recent data file for every sensor that is enabled. 88 rioServer Standard User Manual As of this edition of the user manual, only the first 3 of these reporting options are enabled. The last 4 options will be added into later versions of rioServer. 89 rioServer Standard User Manual Edit Email List Dialog When you click the “Edit Email List” button in the preferences dialog, the following dialog will appear: Type new items in the top text box, and click add. To delete them, just highlight the item by clicking on it and click delete. To temporarily disable an item, highlight it and click disable. Click close when finished. It is recommended that you send a test email to ensure that any new or edited entries in the email list are spelled correctly. 90 rioServer Standard User Manual Email Setup Dialog When you click the “Edit Email Setup” button in the options dialog, the following dialog will appear: It is STRONGLY recommended that you click the “Send Test Email” button on the “Preferences” dialog after adjusting these settings to ensure proper operation of email. Display Text for “From Address”: This is what recipients of the email will see in the “From” field when viewing the email. Actual address for “From Address”: This is the return address of the email. Most email servers REQUIRE this to be a valid address. SMTP Server Address: This is the address of the SMTP server. You must put this in properly or else the email will not be sent. Check with your I.T. people if you don’t know what to put here. 91 rioServer Standard User Manual Logon to SMTP server when sending: This is generally NOT required. Use this only if necessary. 92 rioServer Standard User Manual Chapter 4: Troubleshooting rioServer Standard This section presents some of the common problems encountered by users of the rioServer Standard software and their solutions. The two main areas where people run into trouble are: connectivity to the VMUs over the RS-485 serial network, and getting the software to do what you want it to do. Serial Communications Problems Communications problems with a VMU typically fall into one of 3 categories. Those categories are: hardware, driver, and software. Hardware problems relate to the physical items needed for the system to operate. Driver problems relate to a type of software that directly controls the hardware connected to the computer the rioServer Standard software is running on. Software problems relate to the rioServer Standard software itself. In this section we will try to teach you what problems in each of these three areas are like and how to fix them (see the RioTech Setup Manual for more information.) Hardware Problems Hardware that is related to the proper communications between the VMUs and the rioServer Standard software includes: the VMU itself, the connectors and cabling from between the VMU and the host computer’s RS-485 serial adapter, and the host computer’s RS-485 serial adapter. To verify that the VMU is powered properly, the user can visually inspect the VMU while it is powered to verify that the power LED is lit. On the VMU-105, the power LED is colored red and is on the same side of the module as the power and communications 93 rioServer Standard User Manual connector. On the VMU-205, the power LED is also colored red and is labeled ‘power’. This LED should be continuously lit. If this LED ever blinks off, then power was somehow interrupted. Power surges can damage the VMU and should be avoided. After verifying that the VMU is powered properly, the user will be able to see a blinking LED (colored blue on the VMU-150, and colored green on the VMU-205) that is referred to as the heartbeat. This heartbeat LED will blink once per second and verifies that the onboard computer is running. If the power LED is on, but the heartbeat LED is not blinking, then it is probable that the unit is damaged and needs repair. When using a National Instruments RS-485 serial adapter, there is normally a 5 volt difference between the + line and the - line. The line will generally be very close to ground potential, while the + line will be approximately at 5 volts. When using a MOXA Ethernet-485 Adapter, the + line will be approximately at +2.3 volts while the line will be approximately +2.1 volts relative to ground. These voltages refer to the state of the serial bus when no communications traffic is present. If the voltages are significantly different from these values and communications are not working, we suggest you try reversing the wires on the - and + lines to see if the system will start working. RioTech Instruments recommends that systems normally be installed using the ‘cool’ color for - (such as black, blue or green) and using a ‘warm’ color for + (such as red, white, or yellow), unless such wiring colors are contrary to your normal practice. Cables from RioTech Instruments use black for ground, red for power, green for - and white for +. Also, remember that, as a general rule, systems should never be grounded at more than 1 place. All ground wires should be tied together and connected to earth ground at only a single location to prevent ground loops. 94 rioServer Standard User Manual Another item to test is the wire itself between the VMU and the host computers RS-485 serial adapter. If you unplug the wire on both ends of the cable and check for continuity between the wires you should measure infinite impedance. Then attach a jumper clip shorting the 2 wires on one side of the cable and use a meter to measure the impedance (ideally it should be less than 1 ohm). Next you should remove the jumper clip and measure the impedance between each wire and earth ground. The impedance should be infinite. If the wire passes these 3 tests, you may conclude that the wiring is not defective. If the wire fails any of these tests you must repair the wire, otherwise proper communications will not be possible. Driver Problems A driver is a special piece of software that allows the rioServer Standard software to communicate with the RS-485 serial adapter hardware. This driver must be installed properly for the system to operate. In the event that the serial adapter is suspected of not functioning properly, it is recommend that the driver be uninstalled and reinstalled before changing the hardware. For specific instructions on how to do this, refer to the documentation for the specific adapter that you have (see Setup Manual for details.) Software Problems While every effort is made to thoroughly test the rioServer software, it is possible that the software can malfunction. One of the areas in which it is possible to create such a malfunction is to install the program without administrator rights to the machine. 95 rioServer Standard User Manual Each time when rioServer starts up, rioServer will load its configuration from a file called “Rio Server.ini”. This file is located in the same directory as the executable program. The default location for rioServer to be installed in is “C:\Program Files\RioTech\”. If any files in this directory are deleted, it may become necessary to reinstall the program before it will work properly. The configuration file “Rio Server.ini” contains critical information necessary to the proper operation of the system. Users should not manually edit this file. If this file is corrupted, it may become necessary to delete the file. In most cases, it will be sufficient to simply rename the file to another name rather than deleting it. When rioServer Standard cannot find the file on startup, it will create a new file with the default values. Please note: the default values do not define any alarms. Another area of potential problem is that the ActiveX libraries and controls used by the program were not properly registered with the Windows operating system due to the user not having administrator privileges on the computer when the program was installed. In this case it is probably easiest to uninstall the program, logon as administrator, reinstall the program and run it. It is possible to manually register the ActiveX libraries and controls, but this is recommended only for expert Windows users. The files that must be registered are ANSMTP.DLL (which controls sending emails), MSCOMM32.OCX (which controls the serial ports), and MSCOMCT2.OCX (which includes the calendar and time controls for assigning learn mode expiration and deleting old files). These files should be registered using the Microsoft Registry Server (regsvr32.exe). If you are unfamiliar with this process, then do not attempt it, call RioTech Instruments for technical assistance. 96 rioServer Standard User Manual Software Usability Issues RioServer Standard is a very complex piece of software. Due to the multitude of options available to the user, it is not always immediately clear how to do what you need to do. In this section we will discuss how to get some of the more common tasks done with the software and discuss the philosophy behind why the software was designed the way it is so that you can get the most benefit out of its unique and powerful attributes. Finally, we will discuss some frequently asked questions and explain their answers. 97 rioServer Standard User Manual Building The Monitoring Network There are a number of different options to consider when building a network of VMUs to be controlled by a host computer running rioServer Standard. Use a pair of radios as a “virtual cable”, enabling you to jump over areas where placing a cable would be difficult or costly. Use an Ethernet/RS-485 adapter to utilize an existing computer network to decrease installation costs. The wired RS-485 serial link between a VMU and a radio can be several thousand feet long, so it is not necessary to locate the radio in close proximity to the machine being monitored. Using Alarms to Manage Machine Reliability One of the practices that our customers have found most helpful in managing the reliability of their rotating equipment is to create a group of trend traces for each sensor, with each trend trace being based on a failure mode of the machine. For example, on a machine with roller bearing, bearing faults typically occur between 5 and 10 times the running speed of the machine. Balance issues and misalignment problems typically between 0.5 and 3 times the running speed. Many times the bearing problems will start at a very high frequency and slowly “move down” the spectrum, until they are in the typical 5-10 times range. For a machine like this, it may be particularly useful to create a trend band that calculates the RMS energy from 0.5 to 3 times running speed. For a machine running at 3600 rpm, this would be from 30 to 180 Hz. This trend might be called “RMS 30-180”. In this way, when a user sees an alarm email from this sensor, they would know what machine it is from (from the VMU name), what 98 rioServer Standard User Manual sensor its from (from the sensor note) and exactly what band produces the data (from the trend name). This information would also be in the screenshot image that is attached with emails (if image attachments are turned on). Thus, the user has all the information necessary to decide if more diagnostic effort should be placed on the machine. Frequently Asked Questions To be added at a later date. 99 rioServer Standard User Manual Index Acquisition Rate..................vii, 54 Alarm Auto-Clear..................... 81 Alarm Log ............................ v, 27 Alarms .. vii, viii, ix, 57, 65, 70, 73, 75, 86, 96 Create Alarm Trace.............. 67 Envelope Alarms.................. 65 Auto Run.................................. 82 Auto Scale ..........................vii, 62 Autoscale..................... 36, 37, 80 Backup Configuration .............. 34 Band Alarms.................vii, 57, 70 bias voltage24, 29, 33, 37, 64, 86 Bias Voltage ............................ 29 Cal Factor.....................vii, 62, 63 Calc Stat.................................. 82 Cursor Tool..........................vi, 32 Delete Old Files....................... 33 Demod Calc Type.................... 81 Demodulation .......................... 37 Edit Email List.............. viii, 84, 88 Envelope Alarms ..........vii, 57, 65 Envelope Width.................... 67 First Day Button................... v, 26 fMax......................................... 59 Graph Tool Controls ............vi, 31 Graphical Displays................... 29 Hand Tool............................vi, 32 Host ......................................... 12 Last Day Button................... v, 27 Lines........................................ 59 Long Waveform.................. vii, 50 Machine Reliability ..............ix, 96 Machine RPM Source Selector 62 main screen............................. 22 Menu Edit Menu ............................ 34 File Menu............................. 33 Graph Menu......................... 36 Help Menu ........................... 38 NCA.v, 15, 17, 18, 19, 39, 40, 41, 42, 43, 47 Next Day Button ...................v, 27 Preferencesviii, 28, 36, 78, 85, 89 Previous Day Button.............v, 26 Radio Diagnostic Mode ...... vii, 51 Radio Timing ......vi, vii, 49, 50, 53 Reference Scan................. 30, 38 Refresh File Cache.................. 34 Reinstallation........................... 22 rioNet......v, 12, 14, 15, 20, 42, 67 RPM .... vii, viii, 56, 61, 64, 66, 72, 77, 78 Run/Pause Buttons ................. 23 Scan Rate Selector ................. 55 Sensitivity ........................... vii, 61 Sensor Health Check .............. 33 Serial Networks ....................... 14 Software Installation................ 16 Spectrum.....vi, vii, 14, 24, 28, 37, 55, 56, 63, 82, 83 Spectrum Rate Divisor ............ 55 100 rioServer Standard User Manual Start/Stop Frequency...............75 Status Bar ............................v, 27 Tach Multiplier..........................61 Time Waveform........................83 Timing Options.........................49 Timout Settings .................. vii, 52 Trace....................... vi, viii, 30, 31 Traces......................................30 Trend .. vii, viii, 29, 36, 45, 55, 56, 57, 73, 74, 79, 80, 83 Upgrades .................................20 VMU vi, vii, 12, 13, 14, 15, 24, 25, 26, 29, 35, 36, 37, 39, 40, 41, 42, 43, 44, 45, 46, 47, 49, 50, 51, 52, 53, 54, 55, 56, 57, 59, 61, 63, 64, 65, 67, 70, 72, 73, 74, 75, 77, 78, 83, 91, 92, 96 VMU List..................................39 Window Type...........................82 Zoom O/A Value Energy..........28 Zoom Tools......................... vi, 32 101