1
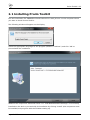
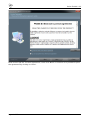
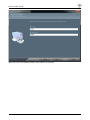
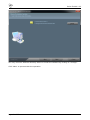
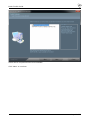
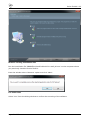
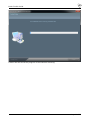
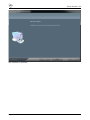
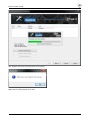
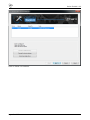
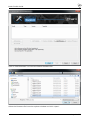
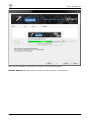
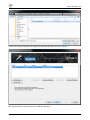
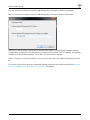
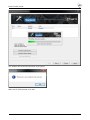
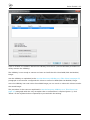
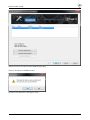
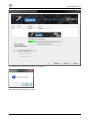
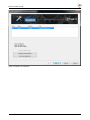
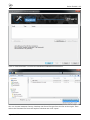
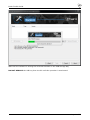
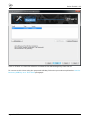
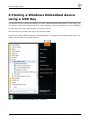
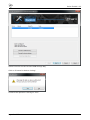
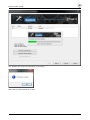
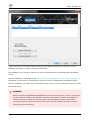
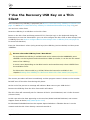
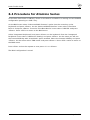
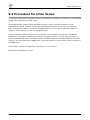
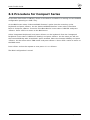
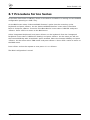
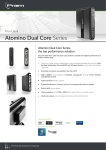
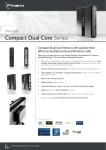
Documentation Area
Praim Toolkit Guide
This document is exclusive property of Praim Srl.
Permission is granted to print and copy this document for noncommercial distribution.
Author:
Documentation
Date:
29-Oct-2013 09:48
URL:
http://wiki.praim.com/display/PTool125
Page 1 of 57
Praim Toolkit Guide
Table of Contents
1 Introduction ______________________________________________________________________________ 4
1.1 Firmware compatibility _______________________________________________________________ 5
2 Installing and Removing Praim Toolkit ____________________________________________________ 6
2.1 Installing Praim Toolkit _______________________________________________________________ 7
2.2 Removing Praim Toolkit _____________________________________________________________ 16
3 How to create Recovery USB Key for ThinOX _____________________________________________ 20
4 Cloning a ThinOX device using a USB Key ________________________________________________ 29
5 How to create Recovery USB Key for Windows Embedded ________________________________ 35
6 Cloning a Windows Embedded device using a USB Key ___________________________________ 42
7 Use the Recovery USB Key on a Thin Client ______________________________________________ 47
7.1 Booting from USB Key for U9xxx and A9xxx thin client model _______________________ 49
8 How to configure BIOS to boot always from a USB Key first ______________________________ 50
8.1 Procedure for Ultra Dual Core Series ________________________________________________ 51
8.2 Procedure for Atom Dual Core Series ________________________________________________ 52
8.3 Procedure for Compact Dual Core Series ____________________________________________ 53
8.4 Procedure for Atomino Series _______________________________________________________ 54
8.5 Procedure for Ultra Series ___________________________________________________________ 55
8.6 Procedure for Compact Series _______________________________________________________ 56
8.7 Procedure for Ino Series _____________________________________________________________ 57
Praim Toolkit
Page 2 of 57
Praim Toolkit 1.2.5
Praim Toolkit
User Guide
Praim Toolkit 1.2.5 - User Guide
Revision: 1
Date: 28 October 2013
This document has been produced by Praim.
This guide, the software and the firmware are protected under international copyright laws,
with all rights reserved. It's forbidden to reproduce, adapt or translate this guide into any
language in any form or by any means, except documentation kept by the purchaser for
backup purposes, without explicit written permission of Praim Srl.
The information in this document is subject to change without notice. Praim Srl makes no
representations or warranties with respect to the contents hereof and specifically disclaim any
implied warranties of merchantability or fitness for any particular purpose. Further, Praim Srl
reserves the right to revise this publication and to make changes from time to time in the
content hereof without obligation of Praim Srl to notify any person of such revision or changes.
Unless otherwise specified, all references to company names, addresses and data appearing in
this guide or in screenshots and examples are fictitious and is only meant to illustrate the use
of the Praim product and are used only for identification or explanation and to the owner’s
benefit. All products and/or company names mentioned herein are trademarks or copyrights of
their respective owners.
Page 3 of 57
Praim Toolkit Guide
1 Introduction
The "Praim Toolkit" software allows to create a USB Memory stick that can be used to restore a
Praim thin client.
The procedure explained in this guide has to be executed only in exceptional cases and not
before you have tried other ways (eg. put a terminal to factory default via ThinOX Terminal
Properties).
Below you can find information on:
how to install and remove "Praim Toolkit" software
how to initialize the USB Memory Key for restoring a thin client
how to initialize the USB Memory Key for cloning a thin client
how to use the USB Memory Key on the thin client
This guide is valid for thin client models belonging to:
Ultra Dual Core Series
Atom Dual Core Series
Compact Dual Core Series
Atomino Series
Ultra Series
Compact Series
Ino Series
Page 4 of 57
Praim Toolkit 1.2.5
1.1 Firmware compatibility
For ThinOX thin client: only firmware 8.2.x and above are suitable to be used with these
procedures.
Page 5 of 57
Praim Toolkit Guide
2 Installing and Removing Praim Toolkit
Praim Toolkit can be installed on these supported Operating Systems in both 32 or 64 bit
architecture (if O.S. support 64 bit):
Windows 7
Windows 2003 Server
Windows 2008 Server (also SP2)
All this O.S. can be installed on physical hardware or in a virtual machine environment.
In any case Praim Toolkit will run in 32 bit mode only.
Page 6 of 57
Praim Toolkit 1.2.5
2.1 Installing Praim Toolkit
Run the installation file "PRAIMThinClientToolkit-W7-1.0.005_RC.exe" on the computer where
you want to install "Praim Toolkit".
The following window will appear on the display.
Select the appropriate language for the program (default is "Italiano") and click "OK" to
proceed with the installation.
Whether the component “Microsoft Visual C++ 2010 Redistributable Package” is not already
installed on the device, proceed with its installation by clicking "Install" (the component must
be installed) and progress with the ThinMan setting up.
Page 7 of 57
Praim Toolkit Guide
Click "Next" to confirm the installation.
Page 8 of 57
Praim Toolkit 1.2.5
Read and accept the "License Agreement", then click "Next" to continue. It is possible to print
the agreement by clicking on "Print".
Page 9 of 57
Praim Toolkit Guide
Type the User and Company Name. Click "Next" to continue.
Page 10 of 57
Praim Toolkit 1.2.5
You may choose a different directory where to install the software by clicking on "Change".
Click "Next" to proceed with the operation.
Page 11 of 57
Praim Toolkit Guide
Select which components has to be installed.
Click "Next" to continue.
Page 12 of 57
Praim Toolkit 1.2.5
Click "Install" to begin the installation. By clicking on "Back" is still possible to change the
settings entered so far.
Page 13 of 57
Praim Toolkit Guide
A status bar will show the progress of the installation. At this point is still possible to quit the
operation by clicking on "Cancel".
Page 14 of 57
Praim Toolkit 1.2.5
The software is now installed. Click "Finish" to end the installation.
Page 15 of 57
Praim Toolkit Guide
2.2 Removing Praim Toolkit
Removing Praim Toolkit can be done in two different modes:
via "Control Panel" -> "Programs and Features"
running the installation file "PRAIMThinClientToolkit-W7-1.0.005_RC.exe"
Remove via Control Panel
Access the "Control Panel" from Windows Menu Start and then double-click on "Programs and
Features". Scroll the list of the installed software and select "Praim - ThinClientToolkit".
Click on "Uninstall". Skip the next step and proceed.
Page 16 of 57
Praim Toolkit 1.2.5
Remove running installation file
Run the installation file "PRAIMThinClientToolkit-W7-1.0.005_RC.exe" on the computer where
you previously installed "Praim Toolkit".
From the window select "Remove" option and click "Next".
For both cases
Select "Yes" from the dialog window to confirm the removing of the software.
Page 17 of 57
Praim Toolkit Guide
A status bar will show the progress of the software removing.
Page 18 of 57
Praim Toolkit 1.2.5
The software is removed.
Page 19 of 57
Praim Toolkit Guide
3 How to create Recovery USB Key for
ThinOX
Connect an empty USB Storage Key to the Windows 7 PC. Whether the USB Storage Key is not
empty you will lose all the data inside it.
Run "ThinOX USB Recovery" software.
Page 20 of 57
Praim Toolkit 1.2.5
Select from the list the inserted USB Storage Key.
Click on "Format as USB Recovery".
Confirm the operation clicking on "Yes".
Page 21 of 57
Praim Toolkit Guide
The window will show the operation in progress.
Wait until it finished and click "OK".
Page 22 of 57
Praim Toolkit 1.2.5
Click on "Next" to continue.
Page 23 of 57
Praim Toolkit Guide
Click on "Add Firmware" to insert the ThinOX firmware file.
Select the firmware file from the explorer window and click "Open".
Page 24 of 57
Praim Toolkit 1.2.5
Wait until the software is writing the firmware on the USB Storage Key.
DO NOT REMOVE the USB key from the PC until this operation is terminated.
Page 25 of 57
Praim Toolkit Guide
Click on "Finish" to close the software and detach the USB Storage Key from the PC.
Clicking on "Remove Firmware" will delete the firmware from the USB Storage Key. You may
use this feature after restoring the thin client firmware.
From this window you can also add a ThinOX Template file that will be inserted as thin client
configuration in the USB Storage Key. For more information on Template file please refer to the
ThinMan User Guide. Click on "Add Template".
Page 26 of 57
Praim Toolkit 1.2.5
Select the ThinOX Template file using the browsing windows and click "Open".
The template file is imported into the USB Storage Key.
You can remove a template from the USB Storage Key clicking on "Remove Template".
Page 27 of 57
Praim Toolkit Guide
You can remove a template from the USB Storage Key clicking on "Remove Template".
You can remove a firmware from the USB Storage Key clicking on "Remove Firmware".
Clicking on "Set override" will open this window that allows to override the ThinMan Address
configuration contained in the template. This option will overwrite, on the USB Key, the options
configured in the loaded template. Click "OK" to confirm these changes.
Click on "Finish" to close the software, then you can disconnect the USB Storage Key from the
PC.
To recover a thin client using the prepared USB Key follow the procedure explained at Use the
Recovery USB Key on a Thin Client (see page 47) paragraph.
Page 28 of 57
Praim Toolkit 1.2.5
4 Cloning a ThinOX device using a USB
Key
It is possible to use a prepared USB Key to clone a ThinOX device. In this way you can extract a
thin client image and save it on a USB Key, then it is possible to use this USB Key to write the
previously saved image on new thin clients.
WARNING
This procedure is destructive on the destination thin clients. It will remove the thin
client license and you have to contact the Praim Support to obtain the correct one.
Instead to use this procedure try to restore the thin client using the recovery
procedure (see How to create Recovery USB Key for ThinOX (see page 20) for more
informations).
The first step is to prepare the key in the cloning mode.
Connect an empty USB Storage Key to the Windows 7 PC. Whether the USB Storage Key is not
empty you will lose all the data inside it.
Page 29 of 57
Praim Toolkit Guide
Run "ThinOX USB Recovery" software.
Page 30 of 57
Praim Toolkit 1.2.5
Select from the list the inserted USB Storage Key.
Click on "Format for device cloning".
Confirm the operation clicking on "Yes".
Page 31 of 57
Praim Toolkit Guide
The window will show the operation in progress.
Wait until it finished and click "OK".
Page 32 of 57
Praim Toolkit 1.2.5
Click on "Finish" to continue. Detach the USB Key from the PC (use the Windows procedure to
safely remove the USB Key).
The USB Key is now ready to extract and save on itself the thin client DOM (Disk On Module)
image.
Use the USB Key as explained in the Use the Recovery USB Key on a Thin Client (see page 47)
paragraph on the master configured thin client to extract its DOM (Disk On Module) image.
Once the USB Key has read a thin client DOM image you can use it on other thin clients to write
the saved image.
The procedure is the same as explained in Use the Recovery USB Key on a Thin Client (see
page 47) paragraph with the only exception that a confirmation is required (press "y" and
"Enter" on the keyboard when requested) to proceed with the writing.
Page 33 of 57
Praim Toolkit Guide
WARNING
This operation will clone the first thin client firmware and configuration on all the other
thin clients. Pay attention because also the license, the hostname and the IP Address
configuration are cloned.
The license contained on the cloned thin clients will be not valid. Contact the Praim
Support to obtain the correct license.
So you will have all the thin clients with the same hostname (remember to change it
after the cloning operation).
Also if a static IP Address is configured on the first thin client the cloned thin clients will
have the same static IP Address causing network problem.
Page 34 of 57
Praim Toolkit 1.2.5
5 How to create Recovery USB Key for
Windows Embedded
Connect an empty USB Storage Key to the Windows 7 PC. Whether the USB Storage Key is not
empty you will lose all the data inside it.
Run "Windows Embedded USB Recovery" software.
Page 35 of 57
Praim Toolkit Guide
Select from the list the inserted USB Storage Key.
Click on "Format as USB Recovery".
Conform the operation clicking on "Yes".
Page 36 of 57
Praim Toolkit 1.2.5
The window will show the operation in progress.
Wait until it finished and click "OK".
Page 37 of 57
Praim Toolkit Guide
Click on "Next" to continue.
Page 38 of 57
Praim Toolkit 1.2.5
Click on "Add Firmware" to select the Windows Embedded firmware file.
You can choose between Factory, Backup and Clone file type from the list on the right. Then
select the firmware file from the explorer window and click "Open".
Page 39 of 57
Praim Toolkit Guide
Wait until the software is writing the selected firmware on the USB Storage Key.
DO NOT REMOVE the USB key from the PC until this operation is terminated.
Page 40 of 57
Praim Toolkit 1.2.5
Click on "Finish" to close the software and detach the USB Storage Key from the PC.
To recover a thin client using the prepared USB Key follow the procedure explained at Use the
Recovery USB Key on a Thin Client paragraph.
Page 41 of 57
Praim Toolkit Guide
6 Cloning a Windows Embedded device
using a USB Key
It is possible to use a prepared USB Key to clone a Windows Embedded device. In this way you
can extract a thin client image and save it on a USB Key, then it is possible to use this USB Key
to write the previously saved image on new thin clients.
The first step is to prepare the key in the cloning mode.
Connect an empty USB Storage Key to the Windows 7 PC. Whether the USB Storage Key is not
empty you will lose all the data inside it.
Run "Windows Embedded USB Recovery" software.
Page 42 of 57
Praim Toolkit 1.2.5
Select from the list the inserted USB Storage Key.
Click on "Format for device cloning".
Conform the operation clicking on "Yes".
Page 43 of 57
Praim Toolkit Guide
The window will show the operation in progress.
Wait until it finished and click "OK".
Page 44 of 57
Praim Toolkit 1.2.5
Click on "Finish" to close the software. Detach the USB Storage Key from the PC (use the
Windows procedure to safely remove the USB Key).
The USB Key is now ready to extract and save on itself the thin client DOM (Disk On Module)
image.
Use the USB Key as explained in the Use the Recovery USB Key on a Thin Client (see page 47)
paragraph on the master configured thin client to extract its DOM (Disk On Module) image.
Once the USB Key has read a thin client DOM image you can use it on other thin clients to write
the saved image.
WARNING
Before restoring a Windows Embedded thin client be sure to power it on and verify that
the thin client is visible in the ThinMan console. If the device is visible on ThinMan its
license is saved, so when the recovery phase is terminated the device will restore
correctly its license. If the thin client is not shown on the ThinMan console its license
has to be entered manually.
The procedure is the same as explained in Use the Recovery USB Key on a Thin Client (see
Page 45 of 57
Praim Toolkit Guide
The procedure is the same as explained in Use the Recovery USB Key on a Thin Client (see
page 47) paragraph with the only exception that a confirmation is required (press "y" and
"Enter" on the keyboard when requested) to proceed with the writing.
NOTE
At the end of writing the thin client will reboot. Leave the thin client untouched and
wail. It will execute a recovery phase and it will reboot once or twice.
Page 46 of 57
Praim Toolkit 1.2.5
7 Use the Recovery USB Key on a Thin
Client
Once the Recovery USB Key is prepared (see How to create Recovery USB Key for ThinOX (see
page 20) and How to create Recovery USB Key for Windows Embedded (see page 35)) you
can use it on a thin client.
Insert the USB Key in a USB Port on the thin client.
Power on the thin client and keep pressed "F12" (function key) on the keyboard during the
bootstrap to access the "Boot Menu" (you can also configure the thin client to boot always from
a USB key first, see How to configure BIOS to boot always from a USB Key first (see page 50)
for more informations).
From the "Boot Menu" select (using arrow keys) the USB Key (see box below) and then press
<ENTER>.
How to select the USB Key from "Boot Menu"
For most BIOS the USB key is available and can be selected under HARDDISK, press
<ENTER> on the keyboard and selected then USB0 (or similar, it can be also the model
name of the USB key).
In some cases (depending on the BIOS version and manufacturer) select USB-ZIP from
the available choice.
For U9xxx thin client model (e.g. U9700) follow the instruction available in the
chapther Booting from USB Key for U9xxx and A9xxx thin client model (see page 49).
The restore procedure will start immediately and the progress status is shown on the monitor.
DO NOT turn off the thin client during this phase.
At the end of the process a message will indicate “Now remove your USB device”.
Remove the USB Key from the thin client and it will reboot.
The thin client will eventually ask for "Numero di Serie" (Serial Number) and "Codice Licenza"
(License Code).
In this case write the data appearing on the monitor (Model and MAC Address) and contact
Support Team at Praim (http://www.praim.com).
For Windows Embedded devices the request depend whether a ThinMan Server is on the
network and the thin client already communicate with it.
For ThinOX devices click "Annulla" on the first window then write down model and MAC Address
Page 47 of 57
Praim Toolkit Guide
For ThinOX devices click "Annulla" on the first window then write down model and MAC Address
and contact support team on Praim (http://www.praim.com).
Page 48 of 57
Praim Toolkit 1.2.5
7.1 Booting from USB Key for U9xxx and A9xxx
thin client model
For U9xxx thin client models (e.g. U9700, A9700) it is not possible to boot always from USB
Key. Every time you need to boot from the USB Key you have to:
insert the USB Key in a USB 2.0 port (USB 3.0 ports have a blue plastic insert in the
middle of the port and/or port is signed as "SS", while in USB 2.0 the insert is black)
power on the thin client
access the BIOS window pressing continuously "Del" key on the keyboard at the thin
client bootstrap
select "Boot" in the upper menu (using left and right arrow keys on the keyboard)
select "Hard Drive BBS Priorities" in the central window (using up and down arrow keys
on the keyboard)
press <ENTER> on "Boot Option #1" and, from the list, select "USB FLASH DRIVE PMAP";
press <ENTER> to confirm choice
press <F4> key on the keyboard and then <ENTER> to save the configuration and exit
the BIOS setup window (this will reboot the thin client)
The thin client will reboot using the USB Key as boot device. This configuration is not saved in
the BIOS but every time you need to boot from USB device you have to follow the procedure
explained above.
Page 49 of 57
Praim Toolkit Guide
8 How to configure BIOS to boot always
from a USB Key first
To allow the thin client to boot always from USB Key first you have to change its BIOS
configuration.
The procedure is slightly different and depend on the thin client hardware.
Page 50 of 57
Praim Toolkit 1.2.5
8.1 Procedure for Ultra Dual Core Series
It is not possible to configure U9xxx thin client model to boot always from the USB Key. Every
time you need to boot from a USB Key you have to follow the procedure explained at chapter
Booting from USB Key for U9xxx and A9xxx thin client model (see page 49).
Page 51 of 57
Praim Toolkit Guide
8.2 Procedure for Atom Dual Core Series
It is not possible to configure A9xxx thin client model to boot always from the USB Key. Every
time you need to boot from a USB Key you have to follow the procedure explained at chapter
Booting from USB Key for U9xxx and A9xxx thin client model (see page 49).
Page 52 of 57
Praim Toolkit 1.2.5
8.3 Procedure for Compact Dual Core Series
On the thin client insert a USB Key. Power on the device and while it is starting access the BIOS
configuration pressing on <DEL> key.
On the BIOS menu select "Advanced BIOS Features" option (use the arrow key on the
keyboard) and press <Enter>. On the "Advanced BIOS Fetaures" menu select "First Boot
Device" and press <Enter>. From the "First Boot Device" menu select "Removable" and press
<Enter>. Press <ESC> to return on the BIOS menu.
Select "Integrated Peripherals" and press <Enter> on the keyboard. From the "Integrated
Peripheral" menu select "USB Device Setting" and press <Enter>. On the menu you will see
the inserted USB Key with "Auto Mode" option enabled. Select the inserted USB Key and press
<Enter>. On the menu select "FDD mode" and press <Enter>. Press <ESC> twice to return on
the BIOS menu.
Press <F10> and on the request to save press <Y> or <Enter>.
The BIOS configuration is saved.
Page 53 of 57
Praim Toolkit Guide
8.4 Procedure for Atomino Series
On the thin client insert a USB Key. Power on the device and while it is starting access the BIOS
configuration pressing on <DEL> key.
On the BIOS menu select "Advanced BIOS Features" option (use the arrow key on the
keyboard) and press <Enter>. On the "Advanced BIOS Features" menu select "First Boot
Device" and press <Enter>. From the "First Boot Device" menu select "USB-ZIP" and press
<Enter>. Press <ESC> to return on the BIOS menu.
Select "Integrated Peripherals" and press <Enter> on the keyboard. From the "Integrated
Peripheral" menu select "USB Device Setting" and press <Enter>. On the menu you will see
the inserted USB Key with "Auto Mode" option enabled. Select the inserted USB Key and press
<Enter>. On the menu select "FDD mode" and press <Enter>. Press <ESC> twice to return on
the BIOS menu.
Press <F10> and on the request to save press <Y> or <Enter>.
The BIOS configuration is saved.
Page 54 of 57
Praim Toolkit 1.2.5
8.5 Procedure for Ultra Series
On the thin client insert a USB Key. Power on the device and while it is starting access the BIOS
configuration pressing on <DEL> key.
On the BIOS menu select "Advanced BIOS Features" option (use the arrow key on the
keyboard) and press <Enter>. On the "Advanced BIOS Features" menu select "First Boot
Device" and press <Enter>. From the "First Boot Device" menu select "USB-ZIP" and press
<Enter>. Press <ESC> to return on the BIOS menu.
Select "Integrated Peripherals" and press <Enter> on the keyboard. From the "Integrated
Peripheral" menu select "USB Device Setting" and press <Enter>. On the menu you will see
the inserted USB Key with "Auto Mode" option enabled. Select the inserted USB Key and press
<Enter>. On the menu select "FDD mode" and press <Enter>. Press <ESC> twice to return on
the BIOS menu.
Press <F10> and on the request to save press <Y> or <Enter>.
The BIOS configuration is saved.
Page 55 of 57
Praim Toolkit Guide
8.6 Procedure for Compact Series
On the thin client insert a USB Key. Power on the device and while it is starting access the BIOS
configuration pressing on <DEL> key.
On the BIOS menu select "Advanced BIOS Features" option (use the arrow key on the
keyboard) and press <Enter>. On the "Advanced BIOS Features" menu select "First Boot
Device" and press <Enter>. From the "First Boot Device" menu select "USB-ZIP" and press
<Enter>. Press <ESC> to return on the BIOS menu.
Select "Integrated Peripherals" and press <Enter> on the keyboard. From the "Integrated
Peripheral" menu select "USB Device Setting" and press <Enter>. On the menu you will see
the inserted USB Key with "Auto Mode" option enabled. Select the inserted USB Key and press
<Enter>. On the menu select "FDD mode" and press <Enter>. Press <ESC> twice to return on
the BIOS menu.
Press <F10> and on the request to save press <Y> or <Enter>.
The BIOS configuration is saved.
Page 56 of 57
Praim Toolkit 1.2.5
8.7 Procedure for Ino Series
On the thin client insert a USB Key. Power on the device and while it is starting access the BIOS
configuration pressing on <DEL> key.
On the BIOS menu select "Advanced BIOS Features" option (use the arrow key on the
keyboard) and press <Enter>. On the "Advanced BIOS Features" menu select "First Boot
Device" and press <Enter>. From the "First Boot Device" menu select "USB-ZIP" and press
<Enter>. Press <ESC> to return on the BIOS menu.
Select "Integrated Peripherals" and press <Enter> on the keyboard. From the "Integrated
Peripheral" menu select "USB Device Setting" and press <Enter>. On the menu you will see
the inserted USB Key with "Auto Mode" option enabled. Select the inserted USB Key and press
<Enter>. On the menu select "FDD mode" and press <Enter>. Press <ESC> twice to return on
the BIOS menu.
Press <F10> and on the request to save press <Y> or <Enter>.
The BIOS configuration is saved.
Page 57 of 57