1
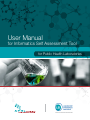
User Manual
for Informatics Self Assessment Tool
for Public Health Laboratories
This publication was 100% funded with federal funds from a federal program
of $3,093,643. This publication was supported by Cooperative Agreement
# U60HM000803 funded by the Centers for Disease Control and Prevention. Its
contents are solely the responsibility of the authors and do not necessarily represent
the official views of CDC or the Department of Health and Human Services.
National Center for Immunization and Respiratory Diseases (IP)
Office of Surveillance, Epidemiology and Laboratory Services (OSELS)
National Center for HIV, Viral Hepatitis, STDs and TB Prevention (PS)
National Center for Zoonotic, Vector-borne, and Enteric Diseases (CK)
National Center for Environmental Health (NCEH)
Coordinating Office for Terrorism Preparedness and Emergency Response (CTPER)
© Copyright 2015, Association of Public Health Laboratories. All Rights Reserved.
Table of Contents
1
Introduction��������������������������������������������������������������������������������������������������������������������������������������� 2
2
Organization of the Tool�������������������������������������������������������������������������������������������������������������������� 3
3
Introductory Steps����������������������������������������������������������������������������������������������������������������������������� 6
4
Manage Assessments����������������������������������������������������������������������������������������������������������������������� 8
5
Fill out an Assessment�������������������������������������������������������������������������������������������������������������������� 11
6
View Progress on an Assessment�������������������������������������������������������������������������������������������������� 15
7
Complete and Publish an Assessment to APHL���������������������������������������������������������������������������� 16
8
Reports�������������������������������������������������������������������������������������������������������������������������������������������� 17
2.1Overview������������������������������������������������������������������������������������������������������������������������������������������3
2.2Guidance �����������������������������������������������������������������������������������������������������������������������������������������5
2.3Glossary ������������������������������������������������������������������������������������������������������������������������������������������5
3.1
3.2
4.1
4.2
4.3
5.1
5.2
5.3
5.4
5.5
6.1
6.2
7.1
8.1
8.2
8.3
8.4
8.5
8.6
8.7
Set Up / Edit / Delete User Account��������������������������������������������������������������������������������������������������6
Set Up Laboratory Demographics�����������������������������������������������������������������������������������������������������7
Create New Assessment������������������������������������������������������������������������������������������������������������������8
Assign Domains��������������������������������������������������������������������������������������������������������������������������������9
Change Status from Pending to Active – Required for Completing Assessment������������������������������10
Fill Out Capability Areas (CA)�����������������������������������������������������������������������������������������������������������11
Move from one Capability Area (CA) to the next������������������������������������������������������������������������������12
Set Capability Area (CA) to be N/A��������������������������������������������������������������������������������������������������12
Edit an Assessment������������������������������������������������������������������������������������������������������������������������13
Approve an Assessment ����������������������������������������������������������������������������������������������������������������14
Determine Completion Status���������������������������������������������������������������������������������������������������������15
Determine Domains Assigned to Capability Area (CA)���������������������������������������������������������������������15
Create, Complete, Submit and Publish an Assessment from an
APHL Assessment Event Request��������������������������������������������������������������������������������������������������16
Access Reports������������������������������������������������������������������������������������������������������������������������������17
Standard Report Features���������������������������������������������������������������������������������������������������������������17
Assessment Summary Report��������������������������������������������������������������������������������������������������������18
Report Card �����������������������������������������������������������������������������������������������������������������������������������18
Longitudinal Report ����������������������������������������������������������������������������������������������������������������������19
Assessment Template Report ��������������������������������������������������������������������������������������������������������19
Individual Assessment Report ��������������������������������������������������������������������������������������������������������20
SA Tool User Manual
1
1
Introduction
The purpose of this self-assessment tool is to enable Public Health Laboratories (PHLs) to have a comprehensive
understanding and assessment of their current informatics capabilities. The limited funding available for PHL informatics
has focused on program-specific applications, not on a laboratory’s cross-cutting informatics system. This is the first
initiative that has sought to measure overall informatics capabilities in PHLs. This tool, guided by a collaboration of PHL
directors, senior staff, and informatics experts, represents best-practice benchmarks and standards.
The self-assessment tool was created as a key part of the Laboratory Efficiencies Initiative (LEI). The Association of Public
Health Laboratories (APHL) and the Center for Surveillance, Epidemiology, and Laboratory Services at the Centers for
Disease Control and Prevention (CDC) cosponsor the LEI. The goal of the LEI is to assure long-term sustainability of the
nation’s PHL system by improving the efficiency of state, local, and territorial PHLs. Additional information about the LEI is
available from APHL at http://www.aphl.org/aphlprograms/lss/Laboratory-Efficiencies-Initiative/Pages/default.aspx and
CDC at http://www.cdc.gov/ophss/csels/od/liu.html. The initial framework of the tool was based upon the “Requirements
for Public Health Laboratory Information Management Systems (LIMS)” published by APHL in 2003 and the associated 16
business processes that provide the framework for a PHL’s LIMS. (APHL, 2003)
Laboratories that are in the process of procuring LIMS can use the assessment tool as a guide to ensure the LIMS has all,
or at least the key, capabilities they want. At the same time, laboratories that have implemented a LIMS can use the tool
to measure LIMS capabilities and ensure that the LIMS is being used to improve laboratory efficiency. While a laboratory
may determine that it does possess a specific capability, completing the assessment can help it recognize flaws in current
processes and thereby provide a roadmap for re-implementing these capabilities with greater efficiency. PHLs can use
assessment results to prioritize upgrades to their existing capabilities. Prioritization can highlight important gaps in a
laboratory’s request for allocation of resources.
Assessment findings can also be used to develop and inform policies within the laboratory, as well as with external
partners. Laboratories may repeat the assessment at intervals to identify trends in capabilities
SA Tool User Manual
2
2
Organization of the Tool
2.1Overview
The tool is organized into 19 Capability Areas (CAs) (see Table 1). Collectively, the CAs represent the principal laboratory
functions that an information system supports. The CAs closely track the 16 business processes identified by APHL’s 2003
report. In addition, the SME group added three CAs to reflect functions related to data exchange and interoperability, core
Information Technology (IT) services, and policies and procedures.
Table 1: 19 Capability Areas
CA #1
Laboratory Test Request and Sample receiving
CA #2
Test Preparation, LIMS Processing, Test Results Recording and Verification
CA #3
Report Preparation and Distribution
CA #4
Laboratory Test Scheduling
CA #5
Prescheduled Testing
CA #6
Specimen and Sample Tracking/Chain of Custody
CA #7
Media, Reagents, Controls: Manufacturing and Inventory
CA #8
Interoperability and Data Exchange
CA #9
Statistical Analysis and Surveillance
CA #10
Billing for Laboratory Services
CA #11
Contract and Grant Management
CA #12
Training, Education and Resource Management
CA #13
Laboratory Certifications/Licensing
CA #14
Customer Relationship Management
CA #15
Quality Control (QC) and Quality Assurance (QA) Management
CA #16
Laboratory Safety and Accident Investigation
CA #17
Laboratory Mutual Assistance/Disaster Recovery
CA #18
Core IT Services: Hardware, Software and Services
CA #19
Policies and Procedures, including Budgeting and Funding
SA Tool User Manual
3
2
Organization of the Tool
Each CA includes:
• A title
• A brief description
• One or more capability statements (CSs).
The CS represents the capability of a laboratory that has reached full maturity. The associated indicator statements
describe laboratories at various stages of maturity (see Table 2). CSs with three stages of maturity are graded from 1 to
3 points with 3 representing the highest level of maturity. CSs requiring a Yes or No response assign a score of 1 for ‘No’
and 3 for ‘Yes’. Laboratories can use these levels as ‘milestones’ to measure current status and progress towards full
maturity. Users can also select “Not Applicable” (N/A) if a particular CS is not relevant.
Table 2: Levels of Maturity
Level 3
Technology and process in place/extended to execute the functions described beyond
the local business domain.
Level 2
Minimal required technology and process in place to execute the functions described.
Level 1
No/very little current ability to execute the functions described.
N/A
Not applicable to this laboratory.
To obtain the greatest benefit from the tool, users should rank their laboratory’s capabilities based on the capabilities
that are currently present and in use in the laboratory. Responses based on a laboratory’s potential will not provide
laboratories with the granularity they need to assess their true maturity level and subsequently progress from one level
to the next. As the user enters a response to a CS, the tool automatically calculates the laboratory’s grade and percent
completed for the related CAs. Note that there is no overall “grade” or “score” for all the 19 CAs. It is also important to
remember that the numeric score is not indicative of a “Pass” or “Fail” determination. The tool allows for flexibility in
whether a user completes it from the perspective of a specific LIMS implemented in one section of the laboratory, or from
the aspect of the overall capability of the laboratory and the services it is able to provide. This flexibility enables a user to
target systems or services, and even specific sections within the laboratory.
• Each CS can be graded using either 2 or 3 levels that may be applicable to a laboratory’s informatics capacity.
• For CSs with 2 levels, responses are in the form of Yes, No or Not Applicable. A Yes response is assigned a score
of 3 and a No response is assigned a score of 1.
• For CSs with 3 levels, Level 1 is assigned a score of 1, Level 2 a score of 2 and Level 3 a score of 3.
• The maximum possible score for any one CS is 3 and the lowest possible score is 1.
• The maximum possible score for a CA is 3 multiplied by the total number of CSs (with 3 being the maximum score
for any one CS).
• The scores are not weighted
• If a laboratory selects N/A as the response for a CS, the Statement is not assigned a score. The maximum
possible score for the CA is reduced by 3 points to account for the exclusion of the CS with a response of ‘N/A’.
This is to prevent the laboratory/domain from being ‘penalized’ for a capability not being relevant.
A user must complete the entire assessment i.e. enter responses for all domains included in the assessment in order to
fully understand their score for the respective CAs
SA Tool User Manual
4
2
Organization of the Tool
2.2Guidance
Guidance is provided for each CA to help users have a more detailed understanding of the CA and corresponding CSs
before completing the CA. The guidance for a CA is only visible once the CA has been assigned to a domain. Each
guidance has the following sections
• Background: Information on the capability area
• What: The role the capability area plays in improving laboratory efficiency
• How: A description of the how a laboratory that has this capability can improve its efficiency
2.3Glossary
The glossary provides an explanation for key terms/terminology used throughout the tool. These terms are sorted
alphabetically. The glossary is available at any time while logged into the tool and is not dependent on CA or domain.
SA Tool User Manual
5
3
Introductory Steps
3.1 Set Up / Edit / Delete User Account
3.1.1Description
• Laboratory directors will be designated as administrators of the tool will receive login information from APHL.
Administrators can set up new users and additional administrators under the Manage Users tab, which you see
upon initial login.
3.1.2Steps
1.
Log into SA tool as Admin Laboratory user
2.
Click on the Manage Users tab
3.
Click on button labeled ‘Add’
a. In the save user box fill out details for the new user. Users can only proceed after entering information
for the required fields: a. Username; b. First Name; c. Last Name; d. Email Address; e. Roles. Select the
Role/s from the dropdown box that appears when you click in the field. The roles are described in Table
3 below:
b. Click OK and a green pop up box in the top right area of your screen will indicate that the information was
successfully saved
c. To edit a user that has already been created, select the user record to be edited from the Manage Users
tab and click Edit. Click OK to ensure changes are saved
4.
To delete a user that has been created, select the user record to be edited from Manage Users tab and click
Delete. You will be asked to confirm that you want to delete the user before you can proceed
Laboratory
Administrator
Laboratory
Reviewer
Laboratory
Approver
Laboratory
Responder
Create new assessment
Edit
Duplicate assessment
Edit
Assessment grid
Edit
View
Edit
Edit
Statement response
Edit
View
Edit
Edit
Assign assessment
Edit
Change active status
Edit
View
View
View
Approve or disapprove
Edit
View
Edit
View
Details
Edit
Reports
View
View
View
View
Laboratory tab
Edit
No
No
No
Users tab
Edit
No
No
No
SA Tool User Manual
6
3
Introductory Steps
3.2 Set Up Laboratory Demographics
3.2.1Description
• Only users with administrative rights can set up Laboratory demographics. This section has required fields
indicated by asterisks that must be entered in order to complete the assessment.
3.2.2Steps
1.
Log into SA tool as Admin laboratory User
2.
Click on the Laboratory tab
3.
Fill out the boxes on the Laboratory tab that includes address information which are Laboratory Name; Address
1; Address 2; City and State; Zip code. These are all required fields
4.
On the same tab you will see questions specific to your informatics and IT capacity and budget. There are a
few required fields (indicated by a red asterisk) that will be useful for comparison, particularly when comparing
your laboratory against national level data.
a. Number of FTEs in your organization (select range from a picklist)
b. Number of IT/Informatics staff in your organization (select a range from a picklist)
c. CDC funding source from the previous year (select all that apply)
d. Total Annual Budget (select range from a picklist)
e. Testing performed in the following areas (select from picklist) – Required Field
f.
LIMS Software in use (select from picklist) – Required Field
g. Type of Laboratory/Organization (select from picklist) – Required Field
h. Total cost for LIMS acquisition, implementation and maintenance (select from picklist)
5.
Please click Save to ensure your responses are saved in the tool
SA Tool User Manual
7
4
Manage Assessments
4.1 Create New Assessment
4.1.1Description
• Users designated as administrators of the tool, can set up new assessments. New assessments that are not
created through an APHL assessment event request are private. New assessment information can be imported
into an APHL event request; refer to section 7 for more information on completing an APHL assessment event.
4.1.2Steps
1.
Log into the SA tool. Assessments created in the past will be displayed on the ‘Manage Assessments’ tab.
2.
To create a new assessment all required fields in the Laboratory Demographic section must be completed.
3.
Click ‘New’ to create a new assessment or ‘Duplicate’ to copy on that you have already created. NOTE: Clicking
on Duplicate will not copy your responses, only the questions to be included in the assessment
4.
Clicking ‘New’ will display a pop up box with the following fields:
a. Event Name (required entry) – you can give each assessment any name you choose
b. Assessment Template – select one from the picklist
c. Comments – any notes you want to record
5.
Click OK to accept your entries
6.
On the Manage Assessments tab, you will see the Assessment you just created along with the following details:
a. Created- this is the date you first created the assessment
b.
Capability Areas (CAs) – this lists all the CAs in the tool
c. Comments – any notes you may have made during setting up the assessment
d. By – username of the individual that created the assessment
e. Percent complete – progress made to complete an assessment made across all domains of the tool
f.
Four buttons that let you do the following
i.
Assign – Assign each CA to a domain
ii. Details – View the information you entered when you created the assessment
iii. Delete – Delete an assessment if it is new and without data. This option cannot be used to delete an
assessment with data
iv. Status – Change the default status from Pending to Active when a user is ready to proceed with
entering data into the assessment
SA Tool User Manual
8
4
Manage Assessments
4.2 Assign Domains
4.2.1Description
• Domains are the options available to laboratories for filling out the assessment. Laboratories can choose to
complete the assessment (a) as an organization by selecting the domain Lab Wide (b) Each laboratory unit
completing its own assessment by selecting only one domain and(c) For multiple laboratory sections at the
same time by selecting more than one domain e.g. both Newborn Screening and Environmental Testing. The
assessment will be complete after all selected domains include responses.
4.2.2Steps
1.
Click “Assign” to select the assessment to be worked on from the Manage Assessment tab
2.
All 19 CAs and their assigned domains will appear on the Assign Domains screen.
NOTE: The “Assigned to” column will appear blank for a new assessment as no domains are assigned yet.
a. The ‘Change’ button on the same screen allows you to Assign/Modify domains. Click on the ‘Change’
button for the Capability Area of your choice and the following domain options are available: Select All; LabWide; Clinical Testing; Environmental Testing; Newborn Screening; Pathology; Surveillance/EQA support as
needed
b. Select the appropriate domain/s for the CA
i.
Select Lab Wide from the domain list for an assessment of your entire organization
ii. Selecting All will assign all domains to the CA and a separate assessment will need to be completed
for each domain
c. To assign the same domain/s to all CAs: (a) On the Assign Domains screen, check the box to the left of
Title which selects all CAs (b) Click on the Change Multiple Assessments button visible above ‘Title’ and(c)
Select the domains in the pop up box and click OK. All CAs will now have the domains you selected and
assigned.
d. To assign the same domain/s to some but not all CAs: (a) Check the box to the left of each CA. (b)
Click on Change Multiple Assessments button about ‘Title’ and (c) Select the domain/s in the pop up box
and click ok. All CAs that had been selected will now have the domains you assigned.
3.
To modify a domain assigned to a CA; (a) Check the box to the left of the CA (b) Click Change and uncheck
domains to be excluded. NOTE: Once an assessment is partially or fully complete, domains already included
in the assessment cannot be excluded using the above option. CAs without assigned domains, will be visible
but not fillable in your assessment.
4.
IMPORTANT: A new assessment will remain in ‘Pending’ Status until you use the status button to Assign
‘Active’ status to your assessment on the Manage Assessments tab; see 4.3 for details. Once complete, you
will see the ‘Edit’ button’ that enables you to begin filling out the assessment.
SA Tool User Manual
9
4
Manage Assessments
4.3 Change Status from Pending to Active – Required for Completing
Assessment
4.3.1Description
• All newly created assessments have a default status of ‘Pending’. This status must be changed to ‘Active’ before
responses can be entered in the assessment. Only Laboratory Administrator can perform this function
4.3.2Steps
1.
On the Manage Assessments tab, locate the assessment you wish to work on.
2.
To the right of the Assessment name, the status is displayed as ‘Pending’.
3.
To change the status click on the button labeled ‘Status’.
4.
In the pop up box select ‘Active’ from the Assessment status dropdown menu. You can enter comments, if
needed, on the status change.
5.
Click OK. On the Manage Assessments tab the status has now changed to ‘Active’ and you can proceed with
entering data into the assessment.
a. Assessments in progress will display an “Active” status
b. Assessments that have all CAs filled out will display a “Completed” status
c. Assessments submitted to APHL will display a ‘Published’ status
SA Tool User Manual
10
5
Fill out an Assessment
5.1 Fill Out Capability Areas (CA)
5.1.1Description
• It is most meaningful if you complete the assessment following the sequence of CAs as they are arranged to
mimic the progression of sample processing in a laboratory
• Only CAs that were assigned to the domain can be selected for entry
• The following columns are displayed to the right of the CAs:
–– Mark as N/A – Use this option to exclude an entire CA from your assessment if this capability does not apply
to your laboratory.
–– Lab Wide – Use this option if a specific CA is applicable to all domains
–– Complete guidance – This guidance (that you can access by clicking on the hyperlink) provides additional
background and references for the CA.
–– CS count – This lists the number of CSs that comprise the CA
–– Current Score – This lists the score for a specific CA within a domain based on the number of questions
answered and the level selected. The denominator represents the maximum possible score.
–– Progress – This represents how much of the assessment has been completed for that CA including Statements
marked as Not Applicable
5.1.2Steps
1.
From the Manage Assessments tab, identify the assessment you wish to work on
2.
The status of the Assessment should be ‘Active’. See earlier section on how to change status from ‘Pending’
to ‘Active’.
3.
Click on the Edit button to the right of the Assessment name and on the next screen select the relevant domain
4.
Click on the highlighted CA.
5.
You will go to the first CS for that CA
6.
Select the maturity Level that most accurately captures your laboratory’s current informatics capacity, not
planned or future scenarios
7.
In addition to selecting the appropriate maturity level for a CS, the following are available to you:
8.
Comments – if there are specific aspects regarding the CS that you wish to take a note of, please write them
here
9.
Guidance –You also have an option here to read the Guidance for help with completing the assessment. .
10.
Once you have made your level selection, the Progress bar displayed at the lower part of your screen will
indicate the number of CSs for which maturity levels have been selected and the number that still remain to
be completed.
11.
Click Next to go to the next sequential CS
12.
You can return to the Master list of CAs at any time by clicking on the ‘Back to Domain Summary’ link on the
top right section of the screen
SA Tool User Manual
11
5
Fill out an Assessment
5.2 Move from one Capability Area (CA) to the next
5.2.1Description
• Only CAs that were assigned to the domain will be highlighted and therefore responses can be entered only for
these CAs
5.2.2Steps
1.
Progress from one CA to the next can be done in two ways
a. When completing the CSs go to another CA at any time by clicking on ‘Back to Domain Summary’ link on
the top right of the screen. This will take you to the Master List of CAs
b. After returning to the Master List of CAs, you can select the next applicable CA. We recommend proceeding
sequentially from one CA to the next to maximize the benefit of the tool.
5.3 Set Capability Area (CA) to be N/A
5.3.1Description
• Only those CAs that have been assigned to domains can be marked as Not Applicable
5.3.2Steps
1.
Go to the Manage Assessment tab
2.
Select the assessment of interest
3.
Click on the ‘Edit’ button to the right of the assessment name
4.
On the next screen, select the relevant domain
5.
CAs assigned to this domain are displayed and highlighted
6.
To mark an entire CA as Not Applicable, check the box in the column ‘Mark as N/A’ to the right of the CA name
7.
A comment or reason for this designation is required.
8.
Click OK
9.
You will return to the list of CAs
10.
The CA that was marked as Not Applicable is no longer highlighted and has a check to the right of its name
indicating that it is Not Applicable for that domain
11.
The Progress scale for this CA is also updated to 100% as all CSs within the CA now have a N/A score
SA Tool User Manual
12
5
Fill out an Assessment
5.4 Edit an Assessment
5.4.1Description
• Users can change the score assigned to a CS or remove N/A that may have been assigned to a CA prior to
publishing the assessment to APHL
5.4.2Steps
1.
From the Manage Assessments tab, find the Assessment you wish to edit.
2.
Click on the Edit button
3.
On the next screen select the relevant domain
4.
The Master List of CAs will be displayed and the assigned CA’s are highlighted.
5.
To edit an entry, select the CA you wish to change, by clicking on the name. If the CA was assigned N/A and
you wish to now assign levels to CSs in this CA, uncheck the ‘Mark as N/A’ box associated with the CA and the
CA name will now be highlighted and can be selected for editing.
6.
Next select the CS you wish to edit
7.
To change the level within a CS, select the most appropriate level, select next to save your change. Your new
entry will over write any previous entry.
8.
If you wish to exit immediately after making one change, click on ‘Back to Domain Summary’. A pop up window
will ask if you wish to save your changes. Make the appropriate selection.
SA Tool User Manual
13
5
Fill out an Assessment
5.5 Approve an Assessment
5.5.1Description
• Only Assessments with a ‘Complete’ status can be approved. Those with ‘Active’ or ‘Pending’ status cannot be
approved. The status of the entire assessment automatically changes to ‘Complete’ from ‘Active’ when every
assigned domain is completed
• Approvals are done by domain. Therefore if an assessment comprises multiple domains, each domain need to
be individually approved
• Once an assessment is approved no changes can be made till the Admin user un-approves it. Individual domains
can only be un-approved prior to the entire assessment being approved.
5.5.2Steps
1.
Go to the Manage Assessments tab
2.
Locate the Assessment to be approved and click on the ‘Status’ button
3.
The pop up window displays the number of CAs completed by Domain and the Progress is indicated as 100%.
Status is indicated as Complete. A button labeled ‘Approve’ is displayed.
NOTE: If the progress is not 100%, status for the domain will not be complete and the approve button will not
be visible
4.
To approve each domain, click on the ‘Approve’ button and the Status changes to Approved for the domain. If
multiple domains were included in the assessment, a separate ‘Approve’ button will be visible for each domain
and this step needs to be repeated.
5.
When you return to the Manage Assessments tab, the status remains as Complete for the assessment.
NOTE: If multiple domains were assigned and all are not completely entered, the status on the Manage
Assessments tab will display as Active and not Completed.
6.
To approve the entire assessment, click on the Status button from the Manage Assessments tab and from
the Assessment Status drop down box, select ‘Approved’. When you return to the Manage Assessments tab,
the status of the entire assessment is now displayed as ‘Approved’
7.
Once an entire assessment has been Approved, the only way to un-approve it is by clicking on Status, and
changing Assessment status to ‘Active’. On the Manage Assessments tab, the status of the entire assessment
will change to Completed.
SA Tool User Manual
14
6
View Progress on an Assessment
6.1 Determine Completion Status
6.1.1Steps
1.
There are multiple ways to determine if the assessment for a specific domain is complete; from the Manage
Assessments tab, locate the assessment of your interest.
2.
The extent to which the entire assessment has been completed is displayed as a percentage under ‘percent
complete’.
3.
To determine completion of an assessment at the individual domain level, click on the Status button. This will
display the completion level for each domain as a percentage.
4.
To determine completion of an assessment at the CA level, select the Edit button from the Manage Assessments
tab. You will be taken to a list all CAs for the associated domain and the progress for each are displayed as a
scale and percentage.
5.
During the process of entering responses, the bar displayed below the title of the CA has the updated status
of that CA including percent complete and current score. The number of CS answered and remaining can be
determined by looking at the CS list as well as the progress bar at the bottom of the screen.
6.
Once the assessment is approved, the View button from the Manage Assessments tab will display all assigned
and completed CAs (at 100% completion) and score by domain.
6.2 Determine Domains Assigned to Capability Area (CA)
6.2.1Steps
1.
Go to the Manage Assessments tab and locate the assessment
2.
Click on the ‘Assign’ button to the right of the CA name. A list of all 19 CAs is displayed and each domain to
which they a CA has been assigned is displayed as an abbreviation.
3.
A circle adjacent to the domain name indicates the extent of completion of the specific CA
a. CAs that have all responses completed for a domain and are approved, have a circle lighter in color with
an ‘A’ in the center to indicate Approved
b. CAs completed for a domain but not approved, have the circle that is a darker shade
c. CAs with no responses for a domain will have grey circles for the domain
SA Tool User Manual
15
7
Complete and Publish an Assessment to APHL
7.1 Create, Complete, Submit and Publish an Assessment from an
APHL Assessment Event Request
7.1.1Description
• New assessments that have been created under the Manage Assessment tab can be imported into an APHL
event request. Assessments can be in any status; pending, active, complete and approved. Once imported,
assessments can be published for submission to APHL.
7.1.2Steps
1.
To create an assessment from an APHL originated assessment event, there are two options:
a. Create a new assessment using the ‘create’ button on the APHL event. Refer to sections 4 and 5 for
details on assigning domains and completing new assessments.
b. Import an assessment from the manage assessment tab using the ‘create’ button on an APHL event and
selecting ‘import data’ function.
2.
To import data from an existing assessment, including assigned domains, CAs, and CS responses, locate the
APHL assessment template from the Manage Assessments tab and select the Create button
3.
From the picklist displaying all private assessments completed by your laboratory, select the desired
assessment. Click on ‘Import data from previous assessment’.
4.
The system will return to the Manage Assessments tab and the name of the APHL assessment will be altered
to the name of your assessment with a (2) suffix. The status is displayed as Pending.
5.
Click on the Status button and verify the Approval status of each assigned domain. All data from the private
assessment will now be available in the new assessment.
a. To add domains to the assessment, the assessment must be made Active by changing the status on the
status dropdown for the overall assessment and un-approve the domain you wish to modify. Follow the
steps outlined in section 4.2.2 to assign the domains.
b. If any domains are not complete, complete them as outlined in section 5 of this manual.
c. If any domains are not approved, approve the domains as outlined in section 5 of this manual.
d. Once all domains are approved, click the status button and use the status dropdown to approve the entire
assessment.
6.
For newly created and imported assessments, an Approved status is required to submit to APHL
7.
To carry out the final submission process to APHL, select the Status button, and from the corresponding pop
up box, select ‘Publish’ from the Assessment status dropdown.
8.
When you return to the Manage Assessments tab now, the status is listed as Published.
SA Tool User Manual
16
8
Reports
8.1 Access Reports
To work on reports, click on the Report button on the Manage Assessment tab. You will see a screen that lists 5 types of
reports
1.
Assessment Summary Report
2.
Report Card
3.
Longitudinal Reports
4.
Assessment Template Report
5.
Individual Assessment Report
8.2 Standard Report Features
All reports have the following features:
1.
Export
a. The report can be exported by clicking on the ‘floppy disk’ icon on the ribbon at the top, visible after
completion of steps to set up the report (as listed in the following report sections). This will also display the
various formats available for export.
b. The application creates a download file following the format selected. Based on your browser settings, this
file may be displayed in the lower section of your browser window. You can also find it in your Downloads
folder.
2.
Print
a. Export the report first. Then print from the exported file
3.
Search
a. Users can search for text or numbers in the report by entering the value in the search box located to the
left of ‘Find’
b. The text that matches the search item is highlighted
4.
Page scrolling
a. The report is split over multiple pages to allow for easier viewing
b. Users can move from one page to the next by clicking on the arrows adjacent to the page number
5.
Refresh
a. This allows the user to refresh the screen.
6.
You can return to the main listing of report by clicking on ‘Back to Report list’
SA Tool User Manual
17
8
Reports
8.3 Assessment Summary Report
8.3.1Description
• This report enables you to view the detailed responses to each assessment.
8.3.2Steps
1.
Click on Assessment Summary Report.
• On the next screen, select the Assessment you wish to view the report for using the name assigned when
you set up the assessment. In the adjacent box, Select the domain for which you wish to view the report.
You can select multiple domains in this box if the assessment comprises multiple domains
2.
Click on View Report.
3.
The Assessment Summary Report lists each CA, all corresponding CSs and the Level that was selected by the
responder. For CAs that were not assigned to the domain selected for the report, the Level is blank and does
not include any data. If multiple domains are selected when generating the report, each domain will have a
column in the report for displaying the results of the Levels selected in the assessment
8.4 Report Card
8.4.1Description
• This report enables you to compare the results of your laboratory against the average score from other laboratories
that have submitted their score to APHL
8.4.2Steps
1.
Click on Report Card Report from the Reports screen
2.
On the next screen select the assessment you wish to view the report for using the name assigned when you
set up the assessment. Select a domain; multiple domains cannot be selected.
3.
Click View Report. The Report Card displays the CAs and corresponding CSs for which responses were provided
with corresponding scores, a column with National Average score for each CS based on data reported by other
laboratories to APHL.
SA Tool User Manual
18
8
Reports
8.5 Longitudinal Report
8.5.1Description
• This report enables you to view responses for a specific domain over time for all assessments. An assessment is
not specified to run this report; instead a duration of time is required for which you are interested in viewing data
for the specified domain so you can see changes in the scores for each CA and CS
8.5.2Steps
1.
Click on the Longitudinal Report link from the Reports screen
2.
On the next screen select a domain for which you wish to see results; multiple domains cannot be selected.
Select one CA and corresponding CSs. Select Begin and End dates for the Time Period
3.
Click View Report.
8.6 Assessment Template Report
8.6.1Description
• This report allows you to view and print the entire assessment including the Levels available for scoring each CS
within a CA
8.6.2Steps
1.
Click on the Empty Statements Report link from the Reports screen
2.
On the next screen select the assessment you are interested in
3.
Click on View Report. The Assessment Template Report displays all CAs, corresponding CSs and all available
levels for each CS. Scores are not displayed.
SA Tool User Manual
19
8
Reports
8.7 Individual Assessment Report
8.7.1Description
• This report enables you to view specific scores for selected CAs and domains. For example, you can opt to view
all CSs for CA 2 where your Newborn Screening laboratory scored a Level 2.
8.7.2Steps
1.
Click on Individual Assessment Report from the Reports screen
2.
On the next screen select the assessment you wish to view the report for using the name assigned when you
set up the assessment. Select one or multiple domains. Select one or more CAs; multiple CAs need to be
selected one at a time. Select a response score from Level 1, 2, 3 and N/A. To include multiple score in the
report, you need to select these from the list one at a time.
3.
Click View Report. The Individual Assessment Report displays the Title of the Report, the title of the CA selected
for the Report, a table that includes columns for CSs, Response Title which lists the Level selected during
assessment completion, Criteria which explains the meaning of the selected level for that CS, Response
Score which is a numeric interpretation of the selected Level, and Response Notes that lists any comments
made during assessment completion. The report displays a blank page if the responses were recorded for the
selected CA or the selected Level was not used for scoring any CS in the CA of interest.
SA Tool User Manual
20