1
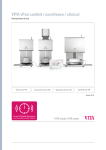
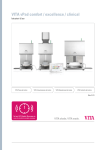
VITA vPad comfort / excellence /clinical
Operating manual
VITA shade taking
VITA shade communication
VITA shade reproduction
VITA shade control
Date of issue: 06.11
VITA vPad comfort / excellence / clinical
Table of contents
1
Introduction
5
12.4 Save
19
2
Scope of delivery
6
12.5 Program buttons
19
3
Technical information
6
13
20
4
Technical data
6
13.1 Description of function buttons
20
4.1
Dimensions/Weights
6
13.2 Predrying temperature/Predrying time
21
4.2
Electrical data
6
13.3 Predrying lift positions
21
4.3
Ambient conditions
6
13.4 Prevacuum
22
5
Intended use
7
13.5 Main vacuum
22
6
Operation and cleaning of the control unit
8
13.6 Rise time/Rise temperature
23
6.1
Warranty and liability
8
13.7 Firing temperature and holding time
24
6.2
Spare parts
8
13.8 Cooldown temperature and holding time
24
6.3
Safety information
8
13.9 Cooldown lift position
25
7
Safety functions
9
13.10 Changes after starting a firing program
25
7.1
Mains power supply failure
9
13.11 Quickstart
26
8
Automatic temperature calibration
10
14
Create and edit materials, programs and
8.1
Service
10
user profiles
27
9
First use
11
14.1 Create a new material
27
9.1
Connections of the VITA VACUMAT 6000 M
14.2 Change material
29
ceramic furnace
11
9.2 Connections of the VITA VACUMAT 6000 MP
Entering/modifying/saving program values
14.3 Duplicate material (copy)
299
14.4 Delete material
30
combipress furnace
12
14.5 Position material
30
9.3
Compressed air connection
12
14.6 Import material
30
10
Switching on the device
13
14.7 Export material
30
10.1 Start standby
13
14.8 Create/modify programs
31
10.2 Preventing condensation
14
14.9 Modify programs
32
10.3 Status display
14
14.10 Duplicate programs
32
14.11 Delete programs
32
15
14.12 Position programs
32
11.1 Start standby
15
14.13 Import programs
33
11.2 Ending standby
15
14.14 Export programs
33
11.3 Lift buttons
16
15
34
11.4 Cooldown to standby
16
15.1 Activate/enter the password
35
11.5 Switching off
16
15.2 Delete the password
35
12
17
15.3 Modify a user profile
35
12.1 Process data
18
15.4 Duplicate a user profile
35
12.2 Night program
19
15.5 Delete a user profile
36
12.3 Back button
19
15.6 Change user profile position
36
11
Operation and features of VITA vPad
comfort / excellence / clinical
Selecting the firing program
Create/modify user profiles
3
VITA vPad comfort / excellence / clinical
15.7 Import a user profile
36
15.8 Export a user profile
36
16
37
Press programs
16.1 Start temperature for press program
37
16.2 Rise time/Rise temperature
38
16.3 Vacuum time
38
16.4 Press temperature
38
16.5 Pressing time 1 and press pressure
38
16.6 Pressing time 2 and press pressure
38
16.7 Starting a press program
39
17
Photo viewer
40
17.1 Image settings
40
18
41
Settings
18.1 Multifurnace
41
18.2 Furnace settings
42
18.3 Adjust press pressure
43
18.4 Device data
44
18.5 Date
45
18.6 vPad
45
18.7 Start profile
45
18.8 Languages
45
18.9 Basic settings – Factory settings
46
18.10 Passwords
46
18.11 Update
46
18.12 Cancel a firing program
47
19
Error messages
48
20
Alphabetical order of contents
4
49, 50
VITA vPad comfort / excellence / clinical
1 Introduction
Dear Customer,
Thank you for deciding to purchase a VITA vPad comfort/excellence/clinical
unit to operate and control your VITA VACUMAT 6000 M ceramic furnace or
VITA VACUMAT 6000 MP combipress furnace or VITA ZYRCOMAT 6000 MS
(available from autumn 2011).
You can use the VITA vPad comfort / clinical to connect up to 2 VITA VACUMAT
6000 M / 6000 MP and VITA ZYRCOMAT 6000 MS units.
You can use the VITA vPad excellence to connect up to 4 VITA VACUMAT
6000 M / 6000 MP and VITA ZYRCOMAT 6000 MS units.
Please read this user manual carefully before use.
The user manual is an important aid for operating the device successfully and
safely.
The user manual contains important information on how to use the device
safely, appropriately and efficiently. Adherence to the information contained
in the manual helps to prevent risks, reduce repair costs and downtime and
increase the reliability and service life of the device.
All of the illustrations and drawings in this user manual are intended for
general explanatory purposes and are not authoritative for the detailed
construction of the device.
This operating manual must always be kept close to the device. It must be read
and followed by all persons responsible for working with/on the device, for
example in relation to:
•
•
•
•
Operation
Troubleshooting work routines
Cleaning
Servicing (maintenance, inspection, repairs).
Copyright
The confidentiality of this user manual must be respected. It must only be
used by authorized persons. It may only be transferred to third parties with
the written approval of VITA Zahnfabrik H. Rauter GmbH & Co. KG.
The entirety of the documentation is protected by the Copyright Act.
The dissemination or duplication of documents, even in the form of excerpts,
and the use and communication of their content is prohibited except where
expressly permitted. Violations are punishable by law and will result in
obligatory claims for compensation of damages.
All rights to exercise intellectual property rights are reserved.
5
VITA vPad comfort / excellence / clinical
2 Scope of delivery
2.1 Device supplied in special box including:
•
•
•
•
1 VITA vPad comfort 7” color touchscreen or
1 VITA vPad clinical 7" color touchscreen or
1 VITA vPad excellence 8.5" color touchscreen
1 user manual
An additional switchbox and connection cable (VITA Prod. No. D47009)
are required for operating 2 to 4 VITA VACUMAT 6000 M / 6000 MP or
VITA ZYRCOMAT units with the VITA vPad comfort / excellence / clinical
control unit.
3Technical Information
ITA vPad comfort / clinical control unit with 7“ color touchscreen,
V
memory capacity of 500 programs with 1 GB photo viewer and control of up
to 2 sintering units, furnaces or combipress furnaces.
VITA vPad excellence control unit with 8,5“ color touchscreen, memory
capacity of 1000 programs with 2 GB photo viewer and control of up to 4
sintering units, furnaces or combipress furnaces.
4Technical Data
4.1Dimensions/weights
VITA vPad comfort / excellence / clinical
•
•
•
•
•
idth: 235 mm
W
Depth: 156 mm
Height: 150 mm
Weight: 0.7 kg
Housing: Plastic
4.2Electrical data
The power of 48 V DC is supplied to the VITA VACUMAT 6000 M /
6000 MP or VITA ZYRCOMAT 6000 MS via the connection cable.
4.3Ambient conditions
•
•
•
6
se indoors
U
Ambient temperature: 2°C to 40°C
Relative humidity 80% at 31°C
VITA vPad comfort / excellence / clinical
5 Intended use
Basic information on the device design
The device is designed according to a state of the art design and recognized
safety standards.
However, if it is used inappropriately, hazards for the health and safety of the
user or third parties may arise as well as the risk of damaging the device and
other valuable assets.
Unauthorized modes of operation
Operating the device with power sources, products, etc., which are subject
to hazardous materials regulations or could have any negative impact on the
health of the operating personnel, and the use of equipment modified by the
user, are not permitted.
Authorized modes of operation
The operation of the device is only permitted if this user manual has been
completely read and understood and the procedures described in it have been
observed. Any other or additional use, e.g. processing of products other than
those intended as well as handling of hazardous materials or substances
injurious to health, is considered to be contrary to the recommended use.
The manufacturer/supplier will not be liable for any damage resulting from
such unauthorized use. The risk of such use is borne exclusively by the user.
7
VITA vPad comfort / excellence / clinical
6 Operation and cleaning of the control unit
Do not operate the control unit with sharp or hot objects; this will result in
damage to the touchscreen.
Clean the display at regular intervals with a screen cleaner. A screen cleaner
does not cause any scratches, generates an antistatic effect and the touch
screen will remain clean longer.
Damage to the display attributable to improper handling during
operation or cleaning is excluded from the warranty.
6.1 Warranty and liability
The warranty and liability are based on the terms and conditions stipulated in
the contract.
In the event of software modifications without the knowledge and
approval of VITA Zahnfabrik H. Rauter GmbH & Co. KG, all liability and
warranty claims are invalidated.
6.2 Spare parts
Spare parts must comply with the technical requirements specified by the
manufacturer. This is always ensured when using original spare parts.
6.3 Safety information
Before using the device for the first time, please observe the safety
information for the VITA VACUMAT 6000 M / 6000 MP furnaces (see
operating instructions of VITA VACUMAT 6000 M / 6000 MP – Safety
information).
8
VITA vPad comfort / excellence / clinical
7 Safety functions
The furnace is operated with a VITA vPad comfort / excellence / clinical
control unit and has the following safety and monitoring features:
•
•
•
•
•
Temperature sensor monitoring
Temperature monitoring
Vacuum monitoring
Power supply failure protection
Lift monitoring
Additional functions when operating with the VITA VACUMAT 6000 MP:
• Detection of pellets for VITA press pellets
• Detection of press stroke
7.1 Mains power supply failure
The device is equipped with power supply failure protection. This component
prevents a program interruption and hence incorrect firing in the event of
a brief failure of the mains power supply. The power failure protection is
activated as soon as the mains power supply fails when a firing program is
running.
Mains voltage failure time less than approx. 15 sec.
The program continues to run and is not interrupted. The display is out of
order during this period. The display shows the start screen once the power
is supplied again; after pressing the Material key, the running program is
displayed again.
Mains voltage failure time longer than approx. 15 sec.
The program is interrupted and the display is out of order.
Once mains power is supplied again, the display shows the start screen.
Once the mains power is supplied again, the time required to
switch the control unit back on again is approx. 20 sec.
9
VITA vPad comfort / excellence / clinical
8 Automatic temperature calibration
Automatic temperature calibration is activated by the processor after each
start of a firing program.
The temperature calibration examines and corrects all deviations, which have
occurred in the electronic components regarding temperature measurement
and temperature control.
This calibration is performed after each start of a program and does not have
any influence on the general time sequence. Therefore, even if the device
is operated over a longer period, constant temperature control of +/- 1°C is
achieved.
8.1 Service
Further information about the device is available on the homepage:
http://www-vita-zahnfabrik.com
Software updates can be downloaded under Services / Equipment
Servicing.
Moreover there is also a registration possibility for the VITA Update
Messenger to be automatically informed by email about new information on
the device.
Technical questions and questions concerning repair and warranty can be
sent to the following email address:
[email protected]
Phone +49 (0) 7761 / 562-105, -106, -101
10
VITA vPad comfort / excellence / clinical
9 First use
Observe the setup and first use instructions in the VITA Vacumat 6000 M /
6000 MP or the VITA ZYRCOMAT user manual.
•
•
•
•
•
•
Use the connector cable supplied to connect the control unit VITA vPad
comfort / excellence / clinical to the VITA VACUMAT 6000 M / 6000 MP or
VITA ZYRCOMAT 6000 MS.
Plug in the vacuum pump (only for VITA VACUMAT 6000 M / 6000 MP)
Insert the vacuum pump tube (only for VITA VACUMAT 6000 M / 6000 MP)
Plug in the power supply cable.
Switch on the device using the main switch.
The lift moves to the lower position, then to the upper position and back
to the lower position (lift distance measurement).
Additional features of the VITA VACUMAT 6000 MP:
• Connection for compressed air (max. 5 bar) to the pressure regulator of the
vacuum pump. Attach the enclosed tube clamps to the compressed air tube:
one clamp to the outlet from the laboratory's compressed air line and one
clamp to inlet to the pump.
For information about the individual connections see sections 9.1 and 9.2
Attach the firing socket to the lift plate!
Operating the device without a firing socket can damage the device
due to the strong influence of heat.
When using 2 or more firing units with a vPad comfort / excellence / clinical control
unit, it is important to observe the numerically marked connections of the Switchbox.
One furnace must always be connected to port 1.
9.1 Connections of the VITA VACUMAT 6000 M furnace
Status display
(see sect. 9.3)
Control unit connection for
VITA vPad comfort / excellence / clinical
or
Switchbox
Connection for VITA vPad easy
(see also user manual
VITA VACUMAT 6000 M)
Device fuses
(see user manual
VACUMAT 6000 M / 6000 MP)
Vacuum pump connection
Mains voltage connection
Connection for vacuum tube
Main switch
11
VITA vPad comfort / excellence / clinical
9.2 Connections of the VITA VACUMAT 6000 MP combipress furnace
(see also user manual VITA VACUMAT 6000 MP)
Status display
(see sect. 9.3)
Compressed air connection,
max. 5 bar
Device fuses
Control unit connection for
VITA vPad comfort / excellence / clinical
or
Switchbox
Vacuum pump connection
Pressure regulator 3 bar
Connection for VITA vPad easy
Mains voltage connection
Main switch
Connection for vacuum tube
9.3 Compressed air connection
The vacuum pump features a pressure regulator.
The inlet pressure from the lab's compressed air supply should not exceed 6 bar.
The pressure supplied to the device should be adjusted to a maximum of 5 bar.
About the settings for the press pressure, see sect. 18.3
9.3 Connections of VITA ZYRCOMAT 6000 MS
(see also user manual of VITA ZYRCOMAT 6000 MS)
Control unit connection for
VITA vPad comfort / excellence / clinical
or
Switchbox
Device fuses
Main switch
Mains voltage connection
12
VITA vPad comfort / excellence / clinical
10 Switching on the device
Switch on the device using the main switch (see sect. 9.1, 9.2 and 9.4).
The lift moves to the lower position, the software boots up and the start
screen is displayed.
After connecting the VITA VACUMAT 6000 M / 6000 MP, the display shows:
Temperature
Standby on
Standby off
Lift up
Laboratory
VITA vPad comfort / excellence / clinical with
1 Device
Laboratory
VITA vPad comfort / excellence / clinical with
with 2 Devices
Lift down
Standby
Switch off
Temperature
Furnace 1
Furnace 2
Standby on
Standby off
Standby
Switch off
Lift up
Lift down
Switch off
10.1Start Standby
1 Device:
Press the Standby On button.
2 Devices:
Select the device using the Furnace 1
or Furnace 2 buttons.
Press the Standby On button.
The lift moves into the firing chamber and the temperature increases to the
set standby temperature. After reaching the standby temperature and holding
for 5 minutes, the device is ready for firing processes.
The Cooldown button is only displayed if the temperature in the firing
chamber is higher than the standby temperature.
13
VITA vPad comfort / excellence / clinical
10.2 Preventing condensation (AntiCon)
If the device is switched on with the main switch and standby is started,
the lift moves to the upper position, but does not seal the firing chamber
completely. This allows condensation in the insulation to evaporate.
After reaching the standby temperature and holding for approx. 5 minutes,
the firing chamber is completely sealed and the device is ready for use. With
the Standby Off button, the lift is lowered and the heater is switched off.
10.3 Status display
The status display shows the following operating modes:
• Green – device in standby mode
• Blue – program active
• Red – error
14
VITA vPad comfort / excellence / clinical
11 Operation and features of
VITA vPad comfort / excellence / clinical
Laboratory
Temperature
Standby on
Standby off
Lift up
Lift down
Cooling
Standby
Switch off
VITA vPad comfort /vPad excellence with 1 firing unit
Laboratory
Temperature
Standby
Switch off
Standby on
Standby off
Lift up
Lift down
Switch off
Cooling
1
2
3
4
5
6
7
8
9
10
11
12
13
14
15
16
17
Standby temperature
Firing chamber temperature
Time / date
Standby features
Materials / firing programs
Device settings
User profiles / individual material and program settings
Photo Viewer
Standby On
Standby Off
Lift Up
Lift Down
Fast cooldown to standby (symbol is only displayed if the temperature
in the firing chamber is higher than the standby temperature)
Number of the selected device / user name / password protection
status: if password is activated – icon "lock" is closed;
if password protection is not activated – icon "lock" is open
Device off / display off, see sect. 11.5
Information field with remaining time/user/temperature
Switch off device in multi-furnace mode, see sect. 11.5
VITA vPad comfort /vPad excellence with 2 firing units
11.1 Start Standby
Standby On
Programs, settings, user and Photo Viewer (upper bar tab) may be operated in
active or inactive standby mode.
If the device is switched on using the main switch and the standby program
is started, the lift moves to the upper position and remains approx. 2-3 cm
open for approx. 10 minutes, so that condensation in the insulation can
evaporate.
After reaching the standby temperature and holding it for 5 min., the device
is closed.
11.2 Standby beenden
Standby Off
The lift moves down, and the heater switches off.
15
VITA vPad comfort / excellence / clinical
11.3 Lift Buttons
Lift Up
Lift Down
The lift moves up or down when the Lift Up or Lift Down buttons
are pressed.
11.4 Cooldown to standby
Cooldown
The Cooldown button is only displayed/active when the firing chamber
temperature is higher than the standby temperature.
The lift remains in the lower position and the pump is switched on; after
reaching the standby temperature minus 50°C, the lift is raised up and the
firing chamber is heated to the standby temperature.
11.5 Switching off
Switch off
When operating several furnaces, each device can be switched off individually. If
several devices are being operated with one control unit, a dialog box is displayed
showing the devices in operation when pressing the Switch off button. The
devices can then be selected individually to switch them off.
After pressing the Device off button, the lift is raised up, the heater is switched
off and Switch off is shown on the display.
16
VITA vPad comfort / excellence / clinical
12 Selecting the firing program
On pressing the Material tab or User tab, programs can be selected.
Material
On pressing the Material tab, the stored materials are displayed.
User
On pressing the User tab, the users that have been set up are displayed;
after selecting a user, the stored materials are displayed.
To select and start a firing program, follow the steps below:
1. Select the material
Laboratory
Temperature
Standby
Edit
Switch off
2. Select the program
Oxidation firing
WASH OPAQUE firing
WASH OPAQ. Paste
Opaque firing
OPAQUE Paste
MARGIN firing
EFFECT LINER firing
1st dentine firing
2nd dentine firing
Glanz Akz.
GLAZE w. GLAZE LT
Correction with COR
Temperature
Standby
Edit
Switch off
Back
3. Start the program using the START button
The firing curve is colored red according to the program sequence.
VITA VM 15
Glaze firing
The time sequence is displayed on the individual buttons for the program
phases.
Temperature
Standby
Switch off
The total program time is displayed in red (see the clock symbol at the top
right).
Processdata
Nightmode
Back
Save
Stop
Start
When operating just one furnace, the firing program is displayed during
the entire program sequence.
After the program sequence, the display returns to the firing programs.
17
VITA vPad comfort / excellence / clinical
When operating multiple furnaces, approx. 20 sec. after the program start
the Furnace Overview screen is displayed (see sect. 10 figure 2).
The next free device can thus be selected and used for firing.
A signal sounds at the end of the program; for settings, see sect. 18.2.
The active program can be interrupted at any time using the Stop button.
Information about the additional function buttons:
12.1 Process data
Laboratory
Job data
Process data
Job number
Temperature
Name
Memo/Note
Standby
Press Process data button, display shows:
Cancel
Switch off
Processdata
Nightmode
Back
Save
Ok
Stop
Start
Saving process data for quality assurance
The following data are saved automatically:
• User / operator
• Material name
• Name of firing program
• Firing program data – set and actual values
• Device type
• Device number
• Date of firing process
The following data can additionally be entered in a dialog box:
Press input field:
• Order No.
• Name
• Note / remarks about the firing object
Apply the value using the OK button or retain the last value using the Cancel
button and return to the firing curve screen.
These data are stored in the control unit memory. These data can subsequently
be exported to a USB stick and transferred to the administration program
(FDS – Firing-Data-System) on the PC (see sect. 18.4).
This administration program permits archiving of all firing data and subsequent
tracking and printing of individual orders.
18
VITA vPad comfort / excellence / clinical
12.2Night program
Night program
Pressing the key activates the night program; at the end of a firing program
the lift is moved into the firing chamber after the temperature in the firing
chamber has decreased to 200°C; display and heating are deactivated.
To switch the unit on again, the main switch needs to be switched off and on
again.
The night program must be activated before starting a firing program.
12.3Back button
Back
The Back button is used to display the previously selected screen.
12.4 Save
Save
Saving program values - see sect. 13.
12.5 Program buttons
Functions of the program buttons – see sect. 13.1 Entering / modifying
program values.
19
VITA vPad comfort / excellence / clinical
13 Entering / modifying / saving program values
Any programs and program values can be customized except of the programs
under user VITA.
All of the VITA original programs are stored under user VITA and serve as a
backup copy of the factory settings.
User Laboratory (for VITA vPad clinical "Practice") is a copy of user VITA and can
also be modified; changes of the material names cannot be performed (see sect. 14).
All materials available for CEREC practices are already prestored for user Doc
that is exclusively available for the VITA vPad clinical unit.
Temperature
VITA
Doc
Praxis
Mike
When creating a new user, a copy of all VITA programs is created automatically.
These programs can be customized and saved by the users depending on their
individual needs. This does not apply to changes of the material names.
Sarah
Standby
Edit
Switch off
Various symbols are available for creating new materials, which can also be
changed (see sect. 14.1).
Value changes are saved using the Save button.
Temperature
Block 1
VITABLOCS
If a program with modified values is started directly with the Start button,
the change is valid only for the active program sequence; at the end of the
program, the value is reset to the last saved value.
Block 2
Standby
Edit
Switch off
If password protection is activated, the password is requested after pressing
the Save button. After entering the valid password, the value entered can be
saved.
For value changes after starting the program, see sect. 13.10.
13.1 Description of function buttons
Laboratory
VITA VM 15
Temperature
Standby
Switch off
Processdata
Nightmode
Back
Save
Stop
Start
Stop
Start
Figure 1 shows firing program view
Press
Program 1
Temperature
Standby
Switch off
Processdata
Nightmode
Back
Save
Figure 2 shows firing program view with 2nd temperature rise
20
1
2
3
4
5
6
7
8
9
10
11
12
13
14
15
16
17
18
Predrying temperature and predrying time (see sect. 13.2)
Predrying lift positions (see sect. 13.3)
Prevacuum (see sect. 13.4)
Rise time / Rise temperature (see sect. 13.6)
Main vacuum (see sect. 13.5)
Firing temperature and holding time (see sect. 13.7)
Cooldown temperature and holding time (see sect. 13.8)
Lift position for cooldown (see sect. 13.9)
Saving the process data (see sect. 12.1)
Night program (see sect. 12.2)
Back to previous screen (see sect. 12.3)
Save button (see sect. 13)
Program stop button
Program start button
1st firing temperature and holding time
Vacuum for 2nd temperature rise and holding time
2nd rise time / rise temperature
2nd firing temperature and holding time
VITA vPad comfort / excellence / clinical
13.2Predrying temperature / predrying time
Laboratory
Start
Temperature
Value 200 - 800
Predrying temperature
Press Predrying button, display shows:
Predrying time
Enter / change values
Standby
Switch off
Cancel
Processdat
Ok
Start
•
•
Move to the Predrying temperature or Predrying time field
Enter the value
Entry ranges:
Temperature 200°C – 800°C
Time
0 – 40:00 min/sec.
The available entry values are displayed.
Apply the value using the OK button or retain the last value
using the Cancel button and return to the Firing curve screen.
Labor
Predrying lift position
Temperature
Time c
Value c
Time b
Value b
Time a
Value a
13.3Predrying lift positions
Three lift positions are available for the predrying phase.
Value 0-80
Press Lift position button, display shows:
Standby
Enter / change values
Switch off
Processdat
Cancel
Ok
Start
The dialog is subdivided into entry for position in %
and entry for the remaining time at the position.
Enter lift position in % and press OK button to accept
or
move lift to the desired position using the Lift button and use Arrow
button to accept the value.
Time for remaining in the positions:
The time for position c is determined automatically:
Time for position a or b
•
•
Press desired field for position a or b
Enter the value
The available entry values are displayed.
Apply the value using the OK button or retain the last value using the
Cancel button and return to the Firing curve screen.
21
VITA vPad comfort / excellence / clinical
For the predrying phase, 3 lift positions are available.
Position a – lower position Position b – middle position
Position c – upper position entry value 0 – 30%
entry value max. 60%
entry value max. 100%
The time values of the individual positions depend on the predrying time.
The time value for position c is determined automatically.
In the event of a change in the predrying time of more than 3:00 min., the
time for position a and position b is retained and the time for position c
is adapted.
In the event of a change in the predrying time of less than 3:00 min.,
predrying is completed in position b with the lift position 50%.
13.4Prevacuum
Laboratory
Predrying vacuum
Value 1-100
Pre-vacuum Value
Temperature
Press the Prevacuum button, display shows:
Pre-vacuum Time
Enter / change values
Standby
Switch off
Cancel
Processdat
Ok
Start
•
•
Move to the Time or Value % field
Enter the value
Entry ranges:
Time 0 – 30:00 min/sec.
Value % 0 – 100%
The available entry values are displayed.
Apply the value using the OK button or retain the last value using
the Cancel button and return to the firing curve screen.
The Prevacuum setting creates the vacuum inside the firing chamber,
before the temperature rise becomes active. On entering the time 0:00, the
prevacuum is deactivated.
13.5Main vacuum
Laboratory
Main vacuum
Value 1-100
Vacuum value
Temperature
Press the Main vacuum button, display shows:
Main vacuum time
Standby
Switch off
22
Enter / change values
Start temperature
Processdat
Cancel
Ok
Start
•
•
Move to the Time or Value % or °C field
Enter the value
VITA vPad comfort / excellence / clinical
Entry ranges:
Value % 50 – 100%
Time 0 – 80:00 min/sec.
Temperature °C 200°C – 1,190°C
The available entry values are displayed.
Apply the value using the OK button or retain the last value using the
Cancel button and return to the firing curve screen.
The time values for switching the vacuum pump on and off depend on the
preset program values. If the end temperature or predrying temperature are
changed, the vacuum time is adapted to the rise time.
The max. vacuum time is calculated from the rise time plus the temperature
holding time at the end temperature.
13.6Rise time – rise temperature
Laboratory
Rise
Temperature
Value 20-120
Gradient
Press Rise button, display shows:
Rise time
Standby
Switch off
Enter / change values
Processdat
Cancel
Ok
Start
•
•
Move to the °C/min or min field
Enter the value
Entry value °C/min
Entry value min/sec.
20°C to 120°C
03:00 to 40:00 min/sec.
The available entry values are displayed.
Apply the value using the OK button or retain the last value using the
Cancel button and return to the firing curve screen.
After entering a value °C/min or min/°C, the 2nd value is automatically
calculated and displayed.
If the calculated temperature rise is below 20°C/min. due to entering
a value for the temperature rise in min/sec., or it exceeds the max. value
of 120°C, a respective message is displayed.
If, after entering the temperature rise, the predrying temperature or the
firing temperature are changed, the value °C/min. is retained, and the
time in min/sec. is adjusted.
23
VITA vPad comfort / excellence / clinical
13.7Firing temperature and holding time
Laboratory
Hold
Temperature
Value 200-1190
Firing temperature
Press Firing temperature button, display shows:
Firing time
Standby
Switch off
Enter / change values
Cancel
Processdat
Ok
Start
•
•
Move to the °C or min field
Enter the value
Entry value
Entry value max. 1,190°C max. 40:00 min/sec.
The available entry values are displayed.
Apply the value using the OK button or retain the last value using the
Cancel button and return to the firing curve screen (see sect. 13, figure 1).
13.8Cooldown temperature and holding time
Laboratory
Value: 200°C - 900°C
Temperature
Cooldown temperature
Press Cooldown temperature, display shows:
Cooldown time
Standby
Switch off
Enter / change values
Activate cooldown
Processdat
Cancel
Ok
Start
•
•
Move to the °C or min field
Enter the value
Entry value Entry value 200°C – 900°C 0 – 40:00 min/sec.
The available entry values are displayed.
The field Activate cooldown is automatically activated when entering
the temperature or time – button with activation control.
Deactivating cooldown
Press Deactivate cooldown – button without activation control.
Apply the value using the OK button or retain the last value using the
Cancel button and return to the firing curve screen (see sect. 13, figure 1).
24
VITA vPad comfort / excellence / clinical
13.9Cooldown lift position
Laboratory
Cooldown lift position
Temperature
Value 0-100
Cooldown lift position
Press Lift position button, display shows:
Standby
Switch off
Enter / change values
Processdat
Cancel
Ok
Start
•
•
Move to the °C or min field
Enter the value
The available entry values are displayed in the dialog box.
Apply the value using the OK button or retain the last value using the Cancel
button and return to the firing curve screen (see sect. 13, figure 1).
The same procedure is used to enter and change the values of the
2nd temperature rise and 2nd holding time.
13.10 Changes after starting a firing program
Program values may be changed after starting a firing program. To avoid
incorrect firing, changes, which automatic settings have on other program
sections, cannot be performed, such as changing the rise time, which will
automatically adjust the vacuum time.
The password request is deactivated here; it is not possible to save and the
change is only applied temporarily.
Generally, only an inactive program section can be changed. The other
program sections, which can still be changed, are identifiable by the display of
the button (dark button). If a program section that is still available is selected
for a change, and if it becomes active in the meantime, the program switches
to the firing curve screen and the program continues running with the value
previously obtained.
In the dialog box, the time display shows the time still available for a change.
The following values can be modified:
•
•
•
•
Firing temperature
Holding time for the firing temperature
Cool down temperature
Holding time for cooling temperature
When the end temperature is changed, the °C/min gradient is always
maintained, the rise time and the vacuum time are adjusted accordingly.
25
VITA vPad comfort / excellence / clinical
13.11 Quickstart
If the firing chamber temperature is higher than the program’s predrying
temperature or the start temperature when a firing program is started, the
Quickstart screen is displayed.
The Quickstart button is only active in firing programs without
predrying.
In Quickstart, the following options can be selected:
•
•
•
Slow cooldown to the start temperature without using the vacuum
Fast cooldown to the start temperature by switching on the vacuum
pump
Quick Start program start at the current firing chamber temperature
On selecting Quickstart, the gradient (°C/min) is retained and the rise time is
adjusted. Likewise, in a program with vacuum, the vacuum time is adjusted to
the time of the temperature rise. The adjusted values are displayed and must
be confirmed by pressing the OK button.
26
VITA vPad comfort / excellence / clinical
Laboratory
14 Create and edit materials, programs and
user profiles
At the appropriate level in the display, the Edit button for Materials,
Programs and User profiles (users) is shown.
Temperature
Standby
Edit
Switch off
Figure 1 shows Materials screen
Edit
With this button, the yellow editing level is activated, which includes the
following options:
Laboratory
Oxidation firing
Wash Opaque powder
Wash Opaque paste
Opaque firing
OPAQUE Paste
MARGIN firing
LUMINARY firing
Stains-fixation
1st dentine firing
2nd dentine firing
Glaze firing
Glaze Akz.
Temperature
Standby
Edit
Switch off
Back
Figure 2 shows Programs screen
Laboratory
Temperature
VITA
•
•
•
•
•
•
•
Create new material, programs, user profile
Modify material, programs, user profile
Duplicate material, programs, user profile
Delete material, programs, user profile
Position material, programs, user profile
Import material, programs, user profile from USB stick
to control unit
Export material, programs, user profile from control unit
to USB stick
Materials and programs listed under User VITA
cannot be changed.
Laboratory
Standby
Switch off
Edit
Figure 3 shows User profiles screen
14.1 Create a new material
New materials can be created under Material or under User.
Material
On pressing the Material tab, the stored materials are displayed directly.
User
Pressing the User tab shows the created user profiles and, after selecting
a user, the stored materials are displayed.
27
VITA vPad comfort / excellence / clinical
Laboratory
1. Select the Material tab
• Press Edit button
Temperature
Standby
Edit
Switch off
Figure 1 – display shows materials
•
Press New button
Laboratory
Temperature
Standby
Switch
New
Change
Copy
Delete
Position
Import
Export
Back
Figure 2 – display shows editing level for materials
Laboratory
Material Name:
Temperature
Standby
Cancel
Switch off
New
Change
Copy
Delete
Figure 3 – entries for material
28
Position
Ok
Import
Export
Back
2. Enter material name (max. 12 characters)
• Press Material name label field – keypad is shown.
• Enter name
• Press OK button
• Select container (3 options)
or
•
Select program for pressing (see press programs)
or
•
Select 2-step program for crystallization firings
(see 2-step programs)
or
•
•
•
Select program for Blocs
Select color (5 options)
Press OK button to accept or press Cancel button
to return to Figure 2 (editing level)
VITA vPad comfort / excellence / clinical
14.2Change material
VITA
Materials and programs stored under the VITA user cannot be changed.
When pressing the Edit button, the message "VITA user can not be changed"
is displayed.
Laboratory /
Practice
Doc
The following functions are provided for the materials and programs listed
under Laboratory user (for VITA vPad clinical "Practice") and Doc user
(for VITA vPad clinical):
• Change
• Duplicate
• Delete
• Position
• Import
• Export
•
•
•
•
•
In figure 1 Material, press the Edit button – the editing level is displayed
Select Material to be modified
Press the Modify button
Enter or select the desired changes, name, color or container
(see figure 3)
Apply using the OK button or press the Cancel button
to return to figure 2.
The display shows the modified material.
Press the Back button – the display shows figure 1 Materials.
Please note: All program values and program names for VITA materials
can be changed. The VITA materials names and VITA containers cannot be
changed.
14.3Duplicate material (copy)
•
•
•
•
•
•
In figure 1 Material, press the Edit button.
The editing level is displayed.
Select the Material to be duplicated.
Press the Duplicate button
The material with associated programs is added and marked
for identification with an additional number (e.g. VITA VM 13 (2))
Press Back button – display shows figure 1 Materials
The material name can be changed using the Modify mode (see sect. 14.2).
29
VITA vPad comfort / excellence / clinical
14.4Delete material
Laboratory
Temperature
Standby
Edit
Switch off
•
•
•
•
•
Figure 1 – display shows materials
In figure 1 Material, press the Edit button – the editing level
is displayed
Select the Material to be deleted
Press the Delete button
Apply using the OK button or press the Cancel button to return
Press Back button – display shows figure 1 Materials
Warning: If a material is deleted, the programs stored
for the material will also be deleted.
Laboratory
14.5Position material
Temperature
Standby
Switch off
New
Change
Copy
Delete
Position
Import
Export
Figure 2 – display shows editing level for materials
Back
•
•
•
•
In figure 1 Material, press the Edit button – the editing level
is displayed
Select the Material having its position changed
Press the Position button – the material group moves 1 digit
to the right.
Press Back button – display shows figure 1 Materials
14.6Import material
•
•
•
•
•
In figure 1 Material, press the Edit button – the editing level
is displayed.
Select the Import button
Select Data from the USB stick
Press Import button – data are transferred to the control unit
Press Back button – display shows figure 1 Materials
Warning: To import data, the USB stick containing the data
to be imported must be inserted into the control unit.
14.7Export material
•
•
•
•
•
30
In figure 1 Material, press the Edit button – the editing level
is displayed
Select the Material to be exported
Press the Export button
Press Save or Cancel button
Back button – display shows figure 1 Materials
Warning: To export data, the USB stick must be inserted
into the control unit.
VITA vPad comfort / excellence / clinical
14.8Create / modify programs
Programs can be created or modified under Material or under User.
Material
On pressing the Material tab, the stored materials are displayed directly.
User
Laboratory
Pressing the User tab shows the created user profiles and, after selecting a
user, the stored materials are displayed.
Temperature
Standby
Edit
Switch off
1. Select the material
Figure 1 shows materials
2. Select program for editing
Laboratory
Oxidation firing
Wash Opaque powder
Wash Opaque paste
Opaque firing
OPAQUE Paste
MARGIN firing
LUMINARY firing
Stains-fixation
1st dentine firing
2nd dentine firing
Glaze firing
Glaze Akz.
Temperature
Standby
Edit
Switch off
Back
Figure 2 shows programs
Press the Edit button – display shows yellow editing level (figure 3).
Laboratory
Oxidation firing
WASH OPAQUE firing
WASH OPAQUE PASTE
OPAQUE firing
OPAQUE PASTE firing
WASH OPAQUE firing NEM
WA. OPA. PASTE firing NEM
OPAQUE firing NEM
OPAQUE PASTE firing NEM
MARGIN firing
EFFECT LINER firing
1st dentine firing
When selecting a user with a password, the keypad is displayed to enter the
password after pressing the Edit button.
Temperature
After entering the password, figure 3 Editing level is displayed.
Standby
Switch off
New
Change
Copy
Delete
Position
Import
Export
Back
Figure 3 shows editing level
Laboratory
Program name:
Temperature
•
•
•
Press New button – keypad is shown (see figure 4)
Enter name – max. 20 characters
Press OK button – display shows the newly created program.
The new program may be displayed on a new page.
Standby
Switch off
Cancel
Ok
Figure 4 shows entry of program names
31
VITA vPad comfort / excellence / clinical
•
Use keys to change pages
•
Program values are entered and saved after selecting the program
in the firing curve view (see sect. 13).
Laboratory
Temperature
Standby
14.9Modify programs
Edit
Switch off
Figure 1 shows materials
Laboratory
Oxidation firing
Wash Opaque powder
Wash Opaque paste
Opaque firing
OPAQUE Paste
MARGIN firing
LUMINARY firing
Stains-fixation
1st dentine firing
2nd dentine firing
Glaze firing
Glaze Akz.
Temperature
•
•
•
•
•
•
Select material in Figure 1
In figure 2 Firing programs, press the Edit button –
the editing level is displayed
Select the program to be modified
Press the Modify button
Use the keypad to enter the desired changes (name)
Press the OK button
Standby
Edit
Switch off
14.10 Duplicate programs
Back
Figure 2 shows programs
Laboratory
Oxidation firing
WASH OPAQUE firing
WASH OPAQUE PASTE
OPAQUE firing
OPAQUE PASTE firing
WASH OPAQUE firing NEM
WA. OPA. PASTE firing NEM
OPAQUE firing NEM
OPAQUE PASTE firing NEM
MARGIN firing
EFFECT LINER firing
1st dentine firing
Temperature
•
•
•
•
Select material in figure 1
In figure 2 Firing programs, press the Edit button –
the editing level is displayed
Select the program to be duplicated
Press the Duplicate button
The program is added and marked with an additional number.
For name changes, see sect. 14.9
Standby
Switch off
New
Change
Copy
Delete
Position
Import
Export
Back
Figure 3 shows editing level
Laboratory
Program name:
Temperature
14.11 Delete programs
•
•
•
•
•
Select material in figure 1
In figure 2 Firing programs, press the Edit button –
the editing level is displayed
Select the program to be deleted
Press the Delete button
Press the OK button to delete or go back using the Cancel button
Standby
14.12 Change program position
Switch off
Figure 4 shows entry of program names
32
Cancel
Ok
•
•
•
•
Select material in figure 1
In figure 2 Firing programs, press the Edit button –
the editing level is displayed
Select the program to be repositioned
Press the Position button - the program is shifted 1 digit to the right
VITA vPad comfort / excellence / clinical
14.13 Import programs
•
•
•
•
•
Select material in figure 1
In figure 2 Firing programs, press the Edit button –
the editing level is displayed
Press the Import button
Select program to be imported from the USB stick
Press Import or Cancel button
Warning: To import data, the USB stick containing the data
to be imported must be inserted into the control unit.
14.14 Export programs
•
•
•
•
•
Select material in figure 1
In figure 2 Firing programs, press the Edit button –
the editing level is displayed
Select the program to be exported
Press the Export button
Press the OK or Cancel button
Warning: To export data, the USB stick must be inserted
into the control unit.
33
VITA vPad comfort / excellence / clinical
15 Create / modify user profiles
IIn the VITA vPad comfort control unit, up to 4 users can be created.
In the VITA vPad excellence control unit, up to 12 users can be created.
User
Press the User tab – the display shows all users
Laboratory
Temperature
VITA
Laboratory
Standby
Edit
Switch off
Figure 1 shows user profile view
User profile VITA is set up and contains all of the VITA original programs.
These programs cannot be modified and are used as a backup copy of the
factory settings.
The user profile Laboratory (for VITA vPad clinical "Practice") is a copy
of the original VITA programs. These programs can be customized by
users depending on their individual needs. VITA material names and VITA
containers, however, cannot be modified.
All materials available for CEREC practices and the relevant programs are already
prestored for user Doc that is exclusively available for the VITA vPad clinical unit.
Program values of newly created User profiles can be modified.
For user profiles already created with password protection, the keypad is
displayed for entering the password.
If a new user profile is created, a copy of the VITA original programs is added
automatically.
Laboratory
Temperature
VITA
Laboratory
Standby
Switch off
New
Change
Copy
Delete
Position
Import
Export
Back
Press Edit button display shows figure 2 for editing the users.
Figure 2 shows editing level
Press New. The display shows figure 3
Laboratory
Temperature
VITA
Laboratory
Standby
Cancel
Switch off
New
Change
Copy
Delete
Position
Figure 3 shows entry for a new user
34
Ok
Import
Export
Back
Create a new user profile
•
•
•
•
•
Move to the label field – the keypad is displayed
Enter the user name – max. 12 characters
Press the OK button
Select Symbol (10 options)
Apply using the OK button or activate password protection
or press the Cancel button to return to figure 2
VITA vPad comfort / excellence / clinical
15.1 Activate / enter the password:
•
•
•
•
•
Press the Password
button – the keypad is shown
Enter the password
Confirm with OK button
Re-enter the password
Press the OK button or Cancel button - the keypad is removed
Password-protected programs can be used by all users;
active programs can be modified but not saved.
15.2Delete the password
•
•
•
•
•
•
Press the Password
button – the keypad is shown
Enter the password
Press the OK button – the keypad is removed
Press Modify button
Press the Password
button – the keypad is shown
Press OK button twice to confirm empty label field –
password is deleted
15.3Modify a user profile
•
•
•
•
•
•
•
•
•
•
In figure 1, User Profile, press the Edit button –
the editing level is displayed
Select the user profile to be modified
Press the Modify button.
For password-protected users, the keypad for entering
the password is shown.
Enter the password
Press the OK button
Move to the label field – the keypad is shown
Modify the user name – max 12 characters
Press the OK button
Modify the Symbol (10 options)
Press the OK button or Cancel button
15.4Duplicate a user profile
•
•
•
In figure 1, User Profile, press the Edit button
Select the User profile to be duplicated
Press the Duplicate button
The user profile is added and marked with an additional number for
identification, for example laboratory (2).
35
VITA vPad comfort / excellence / clinical
15.5Delete a user profile
Laboratory
Temperature
VITA
Laboratory
Standby
Edit
Switch off
•
•
•
•
•
•
In figure 1, User Profile, press the Edit button
Select the user profile to be deleted. For password-protected users,
the keypad for entering the password is shown.
Enter the password
Press the OK button
Press the Delete button
Press the OK button or Cancel button
Figure 1 shows view of user profiles
15.6Change user profile position
Laboratory
Temperature
VITA
Laboratory
•
•
•
In figure 1, User Profile, press the Edit button
Select the user profile to be positioned
Press the Position button –
the user profile is shifted to the right (1 digit)
Standby
Switch off
New
Change
Copy
Delete
Figure 2 shows editing level
Position
Import
Export
Back
15.7Import a user profile
•
•
•
•
In figure 1, User Profile, press the Edit button
Press the Import button
Select the user profile to be imported
from the USB stick
Press Import button or use Cancel button to go back
Warning: To import data, the USB stick containing the data
to be imported must be inserted into the control unit.
15.8Export a user profile
•
•
•
•
36
In figure 1, User Profile, press the Edit button
Select the user profile to be exported
Press the Export button
Press the Apply button or use Cancel button
to go back
Warning: To export data, the USB stick must be inserted
into the control unit.
VITA vPad comfort / excellence / clinical
16 Press programs
PM 9
The programs stored under this material button are VITA press programs.
To create materials of other manufacturers, see sect. 14.1 Creating a new
material.
Enter/change values
Laboratory
3 bar – 2 Pellets
3 bar – 1 Pellet
5 bar – 1 Pellet
Temperature
Press the Press material button,
display shows figure 1 Available press programs.
5 bar – 2 Pellets
1. Select desired press program
Standby
Edit
Switch off
Back
Figure 1 shows press programs
2. Selected press program is displayed
Laboratory
3 bar – 1 Pellet
Temperature
Standby
Switch off
Processdata
Nightmode
Back
Save
Stop
Start
16.1 Start temperature for press program
Figure 2 shows program view/firing curve
Press field 750°C with start temperature, display shows:
Enter / change start value
Laboratory
Value: 200°C - 800°C
Temperature
Start temperature
•
•
Press 750°C field
Enter value
Range of values 200°C – 900°C Standby
Switch off
Processdat
Cancel
Ok
Values that can be entered are displayed.
Start
•
Press OK button to accept the value or use Cancel button
to retain the previous value; return to figure 2 Firing curve.
16.2 Rise time / rise temperature
Press Rise time / rise temperature field.
Enter/change values, see sect. 13.6 Enter/change values.
37
VITA vPad comfort / excellence / clinical
16.3Vacuum time
The vacuum time in the press program cannot be adjusted or changed.
The vacuum is automatically adjusted during the entire pressing time.
16.4Pressing temperature/pressing time
Press Pressing temperature/pressing time field.
Enter/change values
see sect. 13.7 Enter/change values.
16.5 Pressing time 1 and press pressure
Laboratory
Value: 0:00 - 40:00
Press time
Temperature
Press Pressing time 1/press pressure field.
Enter/change values
Pressure
Standby
Switch off
•
•
Change pressure
Cancel
Processdat
Ok
Press Min field
enter value
Start
Range of time values
0 – 40:00 min/sec.
Values that can be entered are displayed.
Use Change pressure button to select the press pressure.
For adjusting the press pressure, see sect. 18.3.
•
Press OK button to accept the value or use Cancel button to retain
the previous value; return to figure 2 Firing curve, see section 16.
16.6 Pressing time 2 and press pressure
Laboratory
3 bar – 1 Pellet
Temperature
Enter/change values
See sect. 16.5.
Standby
Switch off
38
Press Pressing time 2/press pressure field.
Processdata
Nightmode
Back
Save
Stop
Start
The default pressing time 1 is automatically ended if the press plunger has
reached its final position and no measurable change of stroke occurs.
If no change of stroke is measured, pressing time 2 is activated.
The pressing time runs down according to the setting; the press process
is completed and the lift is moved to the lower position.
VITA vPad comfort / excellence / clinical
16.7Starting a press program
Laboratory
3 bar – 1 Pellet
Temperature
After selecting the press program, the display shows figure 1:
•
•
Standby
Switch off
Note! The press object is inserted only after the start
temperature has been reached.
Processdata
Nightmode
Back
Save
Stop
Press Start button – lift is moved into the chamber
Firing chamber temperature rises to the start temperature
Start
Figure 1
After reaching the start temperature, the display shows figure 2:
Laboratory
3 bar – 1 Pellet
Temperature
Start temperature has been reached, please
insert material.
•
•
•
•
Press OK button – lift is moved to the lower position
Display shows figure 3 "Please insert material"
Insert press pellet
Press OK button – lift is moved into the chamber.
Standby
Cancel
Switch off
Processdata
Nightmode
Back
Ok
Save
Stop
Start
Figure 2
Laboratory
3 bar – 1 Pellet
Please insert material.
Temperature
Standby
Switch off
Cancel
Processdata
Nightmode
Back
Save
Ok
Stop
While the press pellet is moved into the chamber,
the pressing cylinder is extended and retracted.
•
Once it is retracted, the number of pellets inserted
(for VITA materials) is displayed.
•
Press OK or Cancel button to confirm.
Start
Figure 3
While the program is running, the display shows figure 4:
Laboratory
3 bar – 1 Pellet
Temperature
•
•
•
red curve – temperature progress
light grey curve – vacuum progress
black curve – pressure progress
Standby
Switch off
Figure 4
Processdata
Nightmode
Back
Save
Stop
Start
To achieve correct pressing, it is required to place
the press object in the center of the lift plate.
A firing socket suitable for the size of the press muffle
with 2 small press plates being inserted must be used
and placed on a level surface.
39
VITA vPad comfort / excellence / clinical
17 Photo Viewer
Photo
Photo
Laboratory
Pressing the Photo tab opens the saved images folder
in the control unit.
Internal memory
Image 1
Patient name
Name
Image 2
Name
Patient
Image 3
Patient name 2
Name
Image 4
Name 2
Patient
By pressing the name field, the image is selected and opened
using the Open button.
Temperature
Standby
Switch off
Data Source
Copy
Open
The memory capacity of the VITA vPad comfort control unit is 1 GB;
the memory capacity of the VITA vPad excellence control unit is 2 GB.
Images can be displayed and saved. Images are opened in JPEG and PNG
formats.
Data source
Using the Data Source button, the internal memory in the control unit
or a USB port (e.g. USB stick with images) is selected.
Copy
Using the Copy button, images can be copied from the internal memory
in the control unit to the USB stick or from the USB stick to the control unit.
Open
The selected image is displayed using the Open button.
17.1 Image settings
Laboratory
Temperature
Standby
Move
Switch off
40
Back
The following display options are available:
•
•
•
•
•
Contrast
Brightness
Zoom
Black / white
Move
VITA vPad comfort / excellence / clinical
18 Settings
Settings
Press Settings tab
Laboratory
Temperature
Standby
Switch off
Multifurnace Furnace Settings Device Data
Display shows:
Figure 1 Settings without combipress furnace
Date
vPad
Profile
Language
Base Settings
Passwords
Update
Cancel
or
Figure 1
Figure 2 Settings with combipress furnace
Laboratory
Temperature
Standby
Switch off
Multifurnace Furnace Settings Device Data
Pressure
Date
vPad
Profile
Language
Base Settings
Passwords
Update
Cancel
Figure 2
18.1 Multifurnace
Multifurnace
Identification of connected furnaces. It is possible to provide the furnace
with a name chosen by the user (10 characters).
Laboratory
Temperature
Furnace 2
Furnace 1
VITA vPad comfort – max. 2 devices can be connected.
VITA vPad excellence – max. 4 devices can be connected.
Furnace 3
Figure 1 shows vPad excellence control unit
with one VITA VACUMAT 6000 MP (combipress furnace)
and two VITA VACUMAT 6000 M (ceramic furnaces).
Standby
Switch off
Standby on
Standby off
Lift up
The control unit saves the names of all the furnaces.
Lift down
Switch off
Figure 1
Laboratory
Temperature
Furnace 1
Furnace 2
Furnace 3
Cancel
Standby
Switch off
Base Settings
Passwords
Update
•
•
•
Press Multifurnace button under Settings –
display shows the connected devices (see figure 2)
Press desired device to enter name – confirm entry
Display shows keypad –
enter name and confirm with OK button
Ok
Cancel
Figure 2
41
VITA vPad comfort / excellence / clinical
18.2Furnace settings
Furnace
settings
Press Furnace settings button, display shows:
Laboratory
Group 1
Lift speed
Sound sheme
Silvertest
Temperature
Temperature offset
Volume
Start
Stop
Error
Standby temperature
Standby
Hours
Execute
Test
Test
Test
•
•
•
•
Lift speed
Temperature calibration
Cleaning firing
Sound
Hours remaining till cleaning cycle
Deactivate Cleaning cycle
Switch off
Cancel
Ok
Lift speed
The lift speed can be continuously adjusted using the slide control.
Temperature calibration with silver wire test
With this program and the VITA silver wire test set (VITA Order No. B 230),
the temperature in the firing chamber can be checked and readjusted by up to
plus/minus 20°C. During calibration, the prerequisites for performing the test
(instructions in the silver wire test set) with the silver wire must be strictly
observed. Deviations will result in incorrect measurements and therefore
incorrect settings.
A preset program is available for calibrating the firing chamber temperature.
2 program sequences are required for checking the firing chamber
temperature with the silver wire test.
The first program run must be performed at 955°C (set in the program);
the silver must not be molten after this.
The second program must be performed at 965°C; this temperature value
must be entered. After this program run, the silver must have melted into
a ball.
Deviations of up to plus/minus 20°C can be entered.
Result of the silver wire test:
Temperature too low: Enter correction with minus symbol in front
Temperature too high: Enter correction without any symbol in front (plus symbol is added automatically).
42
VITA vPad comfort / excellence / clinical
Cleaning firing
Cleaning firing is performed automatically after the preset time.
In this program, the firing chamber is heated up and impurities
can evaporate from the slightly opened firing chamber.
It is recommended to carry out this firing in regular intervals.
The cleaning firing can also be ended at any time.
Sound
In the sound program, various acoustic signals can be set:
Program start, program end, alarm/service message.
VITA vPad comfort, VITA vPad excellence and VITA vPad clinical feature
6 sound groups that can be selected individually. Each sound group consists of
3 signals to indicate program start, program end and alarm.
The individual sounds can be played using the Test button.
18.3Adjust press pressure
The press pressure can be adjusted for the various press materials.
Press pressure
Laboratory
Pressure Settings
Temperature
Standby
Switch off
Multifurnace
Ok
Date
Base Settings
Passwords
Update
Cancel
Press Press pressure button, display shows the settings for the press
pressure.
•
•
•
•
Press 5.0 bar field
The higher press pressure (e.g. 5 bar) is adjusted with the pressure
regulator at the vacuum pump.
Press 3.0 bar field
The lower press pressure (e.g. 3 bar) is adjusted with the pressure
regulator 2 (see sect. 9.2) at the rear of the device.
Note! When adjusting the press pressure, it must be ensured
that the pressure is initially set to zero and then set slowly
to the desired value of 3 bar, for example.
This is required to relieve the residual pressure in the system.
The respective field is activated by pressing the OK button.
If the 3.0 bar and 5.0 bar fields are pressed again, other values
than 3.0 bar will be displayed in the 3.0 bar field since the residual
pressure in the system leads to incorrect values.
Therefore it is required (for 3.0 bar setting) to set the pressure
to 0 and then to 3.0 bar again.
If the pressure was set accordingly, no further settings are required
(also if a different value is displayed!).
43
VITA vPad comfort / excellence / clinical
The program displays a pressure value that differs considerably.
In this case, the OK button is pressed to confirm the message
and the press process is continued.
During the active press program, the pressure can be readjusted
using the pressure regulator.
18.4Device data
Device data
Press Settings tab, display shows:
Device information:
Laboratory
Device informations
Furnace Revision:
Furnace Serial No.:
Temperature
Furnace Name:
vPad Serial No.:
Hotline:
vPad Revision:
Standby
Operating datas
Operating hours:
Heating hours:
Export
Error-log
Process data
Operating datas
Device information
All datas
Heating hours muffle:
Switch off
Ok
•
•
•
•
•
•
•
•
•
Furnace revision – software information
Furnace serial no. – device no.
Furnace name – name of the device
vPad serial no. – serial no. of control unit
Hotline no. for service
vPad revision – indicating the software version
Operating hours for the device
Heating hours
Heating hours for the muffle
Export job data
Firing data storage for quality assurance.
•
•
Storage of firing data target and actual values (see sect. 12.1 Process data)
Storage of the following data:
– user name
– device no.
– date of the firing process,
– job no.
These data are stored in the control unit and exported via the USB stick
to the administration program (FDS – Firing Data System) on the PC,
where it can also be processed further, printed out and archived.
The firing data administration program FDS is a special accessory
and must be ordered separately, Prod. No. D34230NG
Export operating data / device information / all files
All program sequences and operating data are saved automatically in the
control unit.
If, for example at the end of a firing program, an unsatisfactory firing result is
obtained or an error in the program sequence should occur, the operating data,
device information or even all the device data can be exported to a USB stick
and emailed to
[email protected] for evaluation.
44
VITA vPad comfort / excellence / clinical
18.5Date
Date
Setting options:
•
Date and time
Selection option for the time format and date format.
18.6vPad
vPad
Press vPad button, display shows:
Laboratory
Temperature
Multifurnace
Calibration
Standby
Switch off
Brightness
Cancel
Date
Base Settings
Passwords
Update
Ok
Calibration of control unit –
The vPad should be calibrated when the display can no longer be precisely
operated.
Press the Calibration button – display turns dark –
press the illuminated circles in the display, and the display is activated again.
Cancel
Display brightness –
Set the desired brightness level using the slider.
Press the OK or Cancel button.
18.7Start profile
Start profile
VITA
Temperature
Select the User profile displayed immediately after switching on the device.
On new devices, the control unit is started with the VITA user profile.
Press Start profile button, display shows all user profiles available.
VITA
Laboratory 1
Laboratory 2
Alex
Select the desired user profile.
Standby
The new start profile is only displayed after restarting the unit.
Switch off
Edit
45
VITA vPad comfort / excellence / clinical
18.8Languages
Languages
•
•
•
Selects the language
Selects the date and time formats
Selects the temperature display in °C or °F
18.9 Basic settings – factory settings:
Basic settings
The following settings are reset to the factory settings:
•
•
•
•
•
•
•
Start profile is set to VITA user profile
Display brightness
Program interruption
Lift speed
Language
Date and time format
Personal program settings and individual
user profiles are deleted
18.10 Passwords
By entering a password, the device system settings can be protected.
Passwords
Password setting for the system:
On activating the system password under Administrator, no changes
to the system (parameter changes, various settings, etc.) can be performed
without first entering the password.
In the "Enter password" screen, any existing password can be deleted
by pressing the OK button twice (see sect. 15.2).
46
VITA vPad comfort / excellence / clinical
18.11 Update
Update
Software updates are loaded onto the control unit using a USB stick.
See Download / VITA Equipment / Software Updates on the website
http://www.vita-zahnfabrik.com for recent software updates.
To be informed about new software updates by e-mail,
go to Service / Equipment servicing to subscribe to the
"VITA Equipment Update Messenger" (free of charge).
The update is copied to a USB stick, which is inserted into the control unit.
On pressing the Update button, the new software is detected
and installed.
Warning: While updating leave the USB stick in the control
unit and do not press any button.
18.12 Cancel a firing program
Cancel
A firing program that has been started can be interrupted by pressing the
STOP button once or by pressing the OK button to confirm the message
"Do you want to stop the firing process".
47
VITA vPad comfort / excellence / clinical
19 Error messages
Message on the
display
Observed event
Testing / elimination
Vacuum is not
achieved
Program with vacuum is interrupted
if a value of at least 30% is not
reached within 30 secs
• Clean/test/replace the lift plate gasket.
• Clean the sealing lip on the firing chamber floor.
For cleaning work, see VACUMAT 6000 M or 6000 MP
user manuals.
• Check the vacuum pump independently of the device.
• Check the vacuum system in the furnace.
Fan does not work
The running firing program has been
interrupted
• Check the fan connection on the board.
• Clean/replace the fan.
The lift is blocked
The lift travels down too far
• The end switch for the lower position is not activating.
The respective LED must light up when the end switch
is pressed.
• Check/adjust/replace the end switch.
The temperature
inside the firing
chamber is more
than 1,200°C
The display indicates more than
1,200°C
• This error can be triggered by various causes.
To detect/eliminate the error, specialist knowledge
and technical measuring devices are required.
• Replace the CPU board.
The temperature
sensor is faulty
Program is interrupted
• Check the thermoelement connection on the board.
• Check the thermoelement connection in the firing chamber.
• Check the thermoelement connection in the firing chamber.
• Replace the thermoelement.
The target temperature in the firing
chamber has been
too low / too high for
more than 5:00 mins
Temperature rise does not
correspond to the prescribed time
• Heater faulty
• Triac faulty
• Triac control faulty
The temperature
regulation caused an
error
No temperature rise
• Firing muffle or Triac faulty
The heater cannot be
controlled correctly
Temperature rise absent or too fast
• Firing muffle faulty; replace it
Continuous tone for
approx. 6 secs.
Continuous tone
• Fuses are faulty
• Replace the faulty fuse
• Replace the plug for the heater connection on the board;
check the CPU – replace the board
48
VITA vPad comfort / excellence / clinical
20 Alphabetical order of contents
A
Ambient conditions
6
Automatic temperature calibration10
Authorized modes of operation
7
B
Brightness
40
C
Calibration of control unit
Cancel a firing program
Changes after starting a firing
program
Cleaning firing
Compressed air connection
Copyright
Condensation
Contrast
Cooldown lift position
Cooldown to standby
Cooldown temperature and
holding time
Creating a new material
Create a new user
Creating / modifying user profile Creating or editing materials,
programs and users
Create / modify programs
D
Data source
Date
Date format
Deleting programs
Detection of press stroke
Deleting user profile
Delete material
Delete password
Delete user
Device data
Device connections
Device information
Device no.
Dimensions/weights
Display brightness
Duplicate material
Duplicate user
45
47
25
43
12
5
14
40
25
16
24
27
27
34
20
31
40
45
45
32
9
36
30
35
27
44
11, 12
44
18, 44
6
45
29
27
Duplicating programs
Duplicating user profile
32
35
E
Electrical data
6
Ending standby
15
Entering/modifying/saving program
values
20
Error messages
48
Exporting programs
33
Exporting user profile
36
Export job data
44
Export material
30
Export operating data
44
Export user
27
F
Factory settings
46
FDS – Firing-Data-System
44
Firing temperature
24
Firing temperature holding time 24
First use
11
Function buttons
18, 20
Furnace settings
42
H
Holding time
Hotline no. for service
24
44
I
Image settings
Importing programs
Importing user profile
Import material
Import user
Installation and first use
40
33
36
30
27
11
J
Job data
44
L
Languages
Liability
Lift buttons
Lift speed
Lock symbol
45
8
16
42
15
M
Mains power supply failure
Main vacuum
Mains voltage failure time
Modifying programs
Modifying user profile
Modifying users
Multifurnace
9
22
9
32
35
27
41
N
Name of the device
Night program
44
19
O
Operating and cleaning
the control unit
Operating data
Operating hours
Operation and features
8
44
44
15
P
Password
Password-protected programs
Password setting for the system
Photo viewer
Positioning programs
Positioning user profile
Position material
Position user
Predrying
Predrying lift positions
Predrying phase
Predrying temperature
Predrying time
Pressing time 1
Pressing time 2
Press pressure
Press programs
Press temperature Pressure regulator 3 bar
Prevacuum
35
35
46
40
32
36
30
27
21
21
21
21
21
38
38
43
38
38
12
22
Q
Quality assurance
Quickstart 18, 44
26
49
VITA vPad comfort / excellence / clinical
R
Rise temperature
23, 26, 37
S
Safety functions
Safety signs
Scope of delivery
Silver wire test set
Select firing program
Service
Settings
Setting of press pressure
Software
Sound
Spare parts
Starting standby
Start press programs
Start profile
Start temperature for
press program
Status display
Storage of firing data for quality
assurance Switching on the device
Switch off button
44
13
16
T
Technical information
Temperature calibration
Time
Time format
6
42
45
45
9
8
6
42
17
10
41
43
47
43
8
15
39
45
37
14
U
Unauthorized modes of operation 7
Update
47
V
Voltage failure protection
vPad
W
Warranty
Z
Zoom
50
9
15, 45
8
40
With the unique VITA SYSTEM 3D-MASTER all natural tooth
shades are systematically determined and completely reproduced.
1622_1E - 0611 (.000) S
Please note: Our products should be used according to the working instructions.
We cannot be held liable for damages resulting from incorrect handling or usage.
The user is furthermore obliged to check the product before use with regard to its
suitability for the intended area of applications. We cannot accept any liability if the
product is used in conjunction with materials and equipment from other manufacturers which are not compatible or not authorized for use with our product.
Furthermore, our liability for the correctness of this information is independent of the
legal ground and, in as far as legally permissible, is limited to the invoiced value of
the goods supplied excluding turnover tax. In particular, as far as legally permissible,
we do not assume any liability for profit loss, for indirect damages, for consequential damages or for claims of third parties against the purchaser. Claims for damages
based on fault liability (culpa in contrahendo, breach of contract, unlawful acts, etc.)
can only be made in the case of intent or gross negligence.
Date of issue of these directions for use: 06.11
VITA Zahnfabrik H. Rauter GmbH & Co. KG
Postfach 1338 · D-79704 Bad Säckingen · Germany
Tel. +49 (0) 7761/ 562-0 · Fax +49 (0) 7761/ 562-299
Hotline: Tel. +49 (0) 7761/ 562-222 · Fax +49 (0) 7761/ 562-446
www.vita-zahnfabrik.com · [email protected]