1
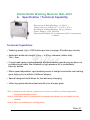
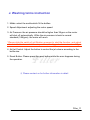
Orbital Bottle Washing Machine
(Specification & User’s manual) (BAL-3001)
Filler
FILLER CO., LTD.
TEL:(02)2593-1616 2591-6873
FAX:(02)2586-4587
http://www.filler.com.tw
E-mail:[email protected]
Directory
A. Specification / Technical Capability …………..
01
B. Diagrammatic Structure ………………………..
02
C. Diagrammatic Dimensions …………………….
03
D. List of Accessories ……………………………..
04
E. Control Panel Introduction ……………………..
05
F. Warnings &Emergency Measures …………….
06
G. Assembling procedures…………………………
07
H. Disassembling procedures……………………..
09
I. Operation Procedures ……………………………
10
J. Washing terms instruction ………………………
11
K. Warranty & Proof of Purchase…….……. … …
12
Filler
L. Maintenance & Replacement Record Sheet …… 14
Filler_00
Orbital Bottle Washing Machine BAL-3001
A. Specification / Technical Capability
Dimension of Main Machine: L x W x H
140cm x 52cm x 120cm (4'7" x 1'8.5" x 3'11")
Net Weight of Main Machine: 85 kg (188 lbs)
Power Supply: 110V, 50/60Hz
Equipment Needed: Air compressor with 1 horsepower
or above
Technical Capabilities:
• Washing speed: Up to 1800 bottles per hour (average 30 bottles per minute).
Filler
• Applicable bottle-size height 2.5cm ~ to 22cm, diameter (either side)
1cm ~ 9cm.
• 4 rinse head spray nozzles adapted, effective washing and drying are done via
multidirectional water flow followed by high pressure air to immediately
blow dry bottles.
• Motor speed adjustable, rapid washing works in straight track while oval orbiting
gives high purity to bottles of different shapes.
• Special designed mold allows for fast and easy changing.
• Utilize top grade stainless steel and alloy for all major parts.
*Note 1: Machine works with air compressor. It is more cost effective to directly purchase
from general hardware stores.
*Note 2: Using water rinse, recycled bottles (second time used bottle) are not suitable for this
machine
*Note 3: There are 16 bottles per working track:
Filler_01
B. Diagrammatic Structure
Height adjusting pole
Fixation of height
Bottle rack
Fixation of Water
preventing board
Water
preventing
board
Corrector
Rotary plates
Motor speed
Filler
Air control
Water Input
Water Outlet
Pure Water
Input
ON
OFF
ON
OFF
ON
OFF
power
Hot water rinse
Control panel
Pure water rinse
Reset button
Air filtration
adjusting
valve
Power Input
Filler_02
C. Diagrammatic Dimensions
1200
520
45
200
155
350
45
410
45
350
500
movable
265
Filler
1250
ON
OFF
I
0
1035
ON
OFF
ON
OFF
660
1200
1400
item
Map no
Q’ty
Filler_03
date
Filler co.
orbital bottle washing
machine BAL-3001
02
Scale
1:1
1
Measurement
mm
91.09.23 material
Aluminum alloy &
stainless steel
D. List of Accessories
item
illustration
article
code
Quantity
1
Mold
BW-24
16
pieces
2
Mold Seat
BW-13
2 pieces
3
Fixing bolt
BW-25
16
pieces
4
User’s manual
description
remarks
Filler
FM-B3001
1 set
Filler_04
E. Control Panel Introduction
Motor speed
4
OFF
1
Water rinse
2
ON
Air/Jet control
5
OFF
ON
OFF
1. Power on / off
Power
ON
6
3
Pure water rinse
Filler
2. Power on / off of water pump
3. Power on / off of pure water pump
4. Motor speed controller
5. Air/Jet control button
6. Motor speed adjusting button
Filler_05
F. Warnings & Emergency Measures
1. This machine should be operated by air compressor and
electricity, please check if the voltage is appropriate before
use. Also check if the air compressor is connected with the
machine. In order to keep the action in good and normal
situation, the motor will shut off automatically when the air
pressure is below 3Kgcm. While the air pressure is back to
normal standard (3.5Kgcm), the motor will rerun.
2. Please install the washing mold carefully as the motor power
is on, and make sure the mold is assembled well in right
place to avoid seize-up.
3. Disassembling the main body of machine is strictly prohibited.
Action of such automatically results in warranty to be totally
voided.
Filler
4. Connect the ground wire along with the plug properly before
use. Never attempt to dismantle the ground wire.
5. Avoid any careless operation at all time.
6. Turn off the Power while it’s not in use for a long time.
Emergency measures Press reset button or unplug the power immediately in case of
any abnormal output continually performed by the machine.
Contact us right away for further assistance. Never attempt to
dismantle the machine.
Filler_06
G. Assembling Procedure
1. Selecting one mold which fits the bottle, it needs totally 16 pieces of
mold and 16 pieces of fixing bolt.
Height adjusting pole
Fixation of
height
Bottle rack
Mold and
Mold seat
Water Preventing
board
Fixation of water
preventing board
Rotary plate
Filler
2. Put a set of mold (including the seat) together with bottle on the bottle
rack (1 set for each side), adjust the height adjusting pole to fit the
bottles, then put down the fixation of height and lock.
(1)
(2)
Filler_07
3. Turn on the power, motor will run automatically. Then adjust the
motor speed to zero(0).
please note: when the speed is zero, the power of motor is still on. Please do
the following procedure carefully.
4. Install 3~4 molds at first, then install the others following the
rotary plates by adjusting the motor speed until 16 molds are
finished.
please note: when install the mold the motor speed should be on zero(0).
Following is the instruction of one set mold assembly:
a) Put the mold on the rotary plate.
b) Insert the fixing bolt to the hole and turn 90 degrees in order to fix
the mold on the rotary plate.
Filler
b.
a.
mold
hole of fixing bolt
hole of fixing bolt
rotary plate
Fixing bolt
5. Repeat the steps to finish the assembly of 16 molds.
Filler_08
H. Disassembling Procedures
Please note: disassemble only in power-off condition of water pump
and pure water pump.
1. Disassembling procedure is the reverse of assembling
procedure.
2. Please do it carefully as the motor power is on when
disassembling mold.
Filler
Filler_09
I. Operation Procedures
*Remember to always turn “off” the Motor when you’re away from the machine
1. At first, check up the connections of air compressor, water input, pure
water input, and water outlet if connect well with the machine.
2. Turn on the power.
3. Check if all molds are properly assembled.
4. Turn on the power of water pump.
5. Turn on the power of pure water pump.
6. Adjust the motor to the proper speed.
Filler
7. Put the bottles upside down into the molds.
8. Washing process is started, take out the bottles after they rotate from
inner side of water preventing board.
9. Repeat step 7 & 8 to continue the washing work.
10. The washing procedure is: Put bottles -> water rinse -> pure water rinse
-> dry -> outer bottle rinse -> take out bottles.
Filler_10
J. Washing terms instruction
1. Molds: select the molds which fit the bottles.
2. Speed Adjustment: adjusting the motor speed.
3. Air Pressure: the air pressure should be higher than 3Kgcm or the motor
will shut off automatically. While the air pressure is back to normal
standard (3.5Kgcm), the motor will rerun.
*Please slide the switch of air filtration governor to start the function, and adjust
the twist button to control the air pressure, the biggest volume is set on 5Kgcm.
4. Air/Jet Control: Adjust the button to control the jet volume according to the
bottle size.
Filler
5. Reset Button: Please press the reset button while the error happens during
the operation.
※ Please contact us for further information in detail.
Filler_11
K. One (1) Year Limited Warranty - Worldwide
Filler Co. warrants their standard products against defects in their operation
and non-consumable materials under normal use for a period of ONE (1)
YEAR from the date of purchase by the original purchaser (“Warranty
Period”). When a non-consumable hardware defect arises within the
Warranty Period, a claim written in detail is to be received by Filler Co. within
30 days of the date the defect was discovered. At its option, Filler Co. will
either (1) repair the hardware defect at no charge, using new or refurbished
replacement parts, or (2) exchange the product with a product that is new or
which has been manufactured from new or serviceable used parts and is at
least functionally equivalent to the original product. This Limited Warranty
does not apply to the damage caused by failure to either (1) follow instruction
relating to the product’s use, or (2) handle, fill, transmit, wash, clamp, and/or
manufacture the materials that are feasible and agreed upon through product
testing beforehand and under general industrial acceptance.
Except as provided in this Warranty and to the extent permitted by law, Filler
Co. shall not be liable for any direct, special, incidental, or consequential
damages of any kind, including, but not limited to any expenses for removal
or reinstallation resulting from a defect; loss of use; loss of revenue; loss of
actual or anticipated profits (including loss of profits on contracts); loss of the
use of money; loss of anticipated savings; loss of business; loss of
opportunity; loss of goodwill; loss of reputation; loss of damage to or
corruption of material; or any indirect of consequential loss or damage
howsoever caused including the replacement of equipment and property, any
costs of recovering, programming, or reproducing any material stored, filled,
transmitted, handled, washed, clamped or used with Filler Co.’s products.
Filler
Filler_12
* Proof of Purchase *
Owner’s
Name
Address
Article
Purchase
Date
Dealer
Signature
Model
TEL
FAX
Manufacturer
Model
Filler
Filler Co.,LDT.
Signature
BAL-3001
TEL
886-2-2593-1616
FAX
886-2-2586-4587
886-2-2591-6873
In practical terms:
1) We warrant this machine with quality of performing steady operation in normal use
(based on existing industrial standard) according to its design, for one year counting from
the date of purchase. .
2) Parts that are considered consumables are not covered under this warranty.
3) Parts & labor will be charged additional if the breakdown of machine is due to following:
•
•
•
•
•
•
Unauthorized disassembling of the machine.
Unauthorized operation based on instructions NOT included in User’s Manual.
Inappropriate power supply voltage applied.
Damage from rats, insects, poor working condition, and natural disasters.
Accident caused by failure in following instructions on assembling, disassembling, and
cleaning procedures. (for example, sinking/soaking machine into water)
Filler_13
L. (1) Maintenance Record Sheet
Date
Maintenance Item
Signature
Filler
Filler_14
(2) Replacement Record Sheet
Initiation Date
Replacement
Date
Material / Item
Remarks
Filler
Filler_15