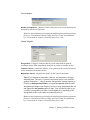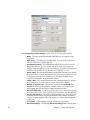
1
GW Contour v.1.0
User’s Manual
2D contour maps, velocity vectors, and particle pathlines
© 2008 Schlumberger Water Services
i
ii
Preface
Schlumberger Water Services (SWS) is a recognized leader in the development and application of
innovative groundwater technologies in addition to offering expert services and professional training to
meet the advancing technological requirements of today’s groundwater and environmental professionals.
Waterloo Hydrogeologic Software (WHS) consists of a complete suite of environmental software
applications engineered for data management and analysis, modeling and simulation, visualization, and
reporting. WHS is currently developed by SWS and sold globally as a suite of desktop solutions.
For over 18 years, our products and services have been used by firms, regulatory agencies, and
educational institutions around the world. We develop each product to maximize productivity and
minimize the complexities associated with groundwater and environmental projects. To date, we have
over 14,000 registered software installations in more than 85 countries!
Need more information?
If you would like to contact us with comments or suggestions, you can reach us at:
Schlumberger Water Services
460 Phillip Street - Suite 101
Waterloo, Ontario, CANADA, N2L 5J2
Phone: +1 (519) 746-1798
Fax: +1 (519) 885-5262
General Inquiries: [email protected]
Web: www.swstechnology.com, www.water.slb.com
Obtaining Technical Support
To help us handle your technical support questions as quickly as possible, please have the following
information ready before you call, or include it in a detailed technical support e-mail:
• A complete description of the problem including a summary of key strokes and program event
(or a screen capture showing the error message, where applicable)
• Product name and version number
• Product serial number
• Computer make and model number
• Operating system and version number
• Total free RAM
• Number of free bytes on your hard disk
• Software installation directory
• Directory location for your current project files
You may send us your questions via e-mail, fax, or call one of our technical support specialists. Please
allow up to two business days for a response. Technical support is available 8:00 am to 5:00 pm EST
Monday to Friday (excluding Canadian holidays).
Phone: +1 (519) 746-1798
Fax: +1 (519) 885-5262
E-mail: [email protected]
Training and Consulting Services
Schlumberger Water Services offers numerous, high quality training courses globally. Our courses are
designed to provide a rapid introduction to essential knowledge and skills, and create a basis for further
professional development and real-world practice. Open enrollment courses are offered worldwide each
year. For the current schedule of courses, visit: www.swstechnology.com/training or e-mail us at: [email protected].
Schlumberger Water Services also offers expert consulting and peer reviewing services for data
management, groundwater modeling, aqueous geochemical analysis, and pumping test analysis. For
further information, please contact [email protected].
Waterloo Hydrogeologic Software
We also develop and distribute a number of other useful software products for the groundwater
professionals, all designed to increase your efficiency and enhance your technical capability, including:
• Visual MODFLOW Premium*
• Hydro GeoAnalyst*
• Hydro GeoBase*
• Hydro GeoLogger*
• Aquifer Test Pro*
• AquaChem*
• GW Contour*
• UnSat Suite Plus*
• Visual HELP*
• Visual PEST-ASP
• Visual Groundwater*
iv
Visual MODFLOW Premium
Visual MODFLOW Premium is a three-dimensional groundwater flow and contaminant transport
modeling application that integrates MODFLOW-2000, SEAWAT-2000, MODPATH, MT3DMS,
MT3D99, RT3D, VMOD 3D-Explorer, WinPEST, Stream Routing Package, Zone Budget, MGO,
SAMG, and PHT3D. Applications include well head capture zone delineation, pumping well
optimization, aquifer storage and recovery, groundwater remediation design, simulating natural
attenuation, and saltwater intrusion.
Hydro GeoAnalyst
Hydro GeoAnalyst is an information management system for managing groundwater and environmental
data. Hydro GeoAnalyst combines numerous pre and post processing components into a single program.
Components include, Project Wizard, Universal Data Transfer System, Template Manager, Materials
Specification Editor, Query Builder, QA/QC Reporter, Map Manager, Cross-Section Editor, HGA 3DExplorer, Borehole Log Plotter, and Report Editor. The seamless integration of these tools provide the
means for compiling and normalizing field data, analyzing and reporting subsurface data, mapping and
assessing spatial information, and reporting site data.
Hydro GeoBase
Hydro GeoBase is an information management system for managing groundwater and environmental
data. Additionally, Hydro GeoBase can be used as a platform to integrate other applications within the
SWS product suite, including Hydro GeoAnalyst, AquiferTest and AquaChem. Components include,
Project Wizard, Universal Data Transfer System, Materials Specification Editor, Query Builder, QA/QC
Reporter, and Report Editor. The seamless integration of these tools provide the means for compiling
and normalizing field data, analyzing and reporting subsurface data, and reporting site data.
Hydro GeoLogger
Hydro GeoLogger is Hydro GeoBase integrated with a borehole logging tool that allows you to collect,
manage, and analyze your groundwater and environmental data. Components include, Project Wizard,
Universal Data Transfer System, Materials Specification Editor, Query Builder, QA/QC Reporter,
Borehole Log Plotter, and Report Editor. The seamless integration of these tools provide the means for
compiling and normalizing field data, analyzing and reporting subsurface data, and reporting site data.
AquiferTest Pro
AquiferTest Pro, designed for graphical analysis and reporting of pumping test and slug test data, offers
the tools necessary to calculate an aquifer's hydraulic properties such as hydraulic conductivity,
transmissivity, and storativity. AquiferTest Pro is versatile enough to consider confined aquifers,
unconfined aquifers, leaky aquifers, and fractured rock aquifers conditions. Analysis results are
displayed in report format, or may be exported into graphical formats for use in presentations.
v
AquiferTest Pro also provides the tools for trends corrections, and graphical contouring water table
drawdown around the pumping well.
AquaChem
AquaChem is designed for the management, analysis, and reporting of water quality data. AquaChem’s
analysis capabilities cover a wide range of functions and calculations frequently used for analyzing,
interpreting and comparing water quality data. AquaChem includes a comprehensive selection of
commonly used plotting techniques to represent the chemical characteristics of aqueous geochemical
and water quality data, as well includes PHREEQC - a powerful geochemical reaction model.
GW Contour
The GW Contour data interpolation and contouring program incorporates techniques for mapping
velocity vectors and particle tracks. GW Contour incorporates the most commonly used 2D data
interpolation techniques for the groundwater and environmental industry including Natural Neighbor,
Inverse Distance, Kriging, and Bilinear. GW Contour is designed for contouring surface or water levels,
contaminant concentrations, or other spatial data.
UnSat Suite Plus
UnSat Suite Plus seamlessly integrates multiple one-dimensional unsaturated zone flow and solute
transport models into a single, intuitive working environment. Models include SESOIL, VS2DT,
VLEACH, PESTAN, Visual HELP and the International Weather Generator. The combination of models
offers users the ability for simulating the downward vertical flow of water and the migration of dissolved
contaminants through the vadose zone. UnSat Suite Plus includes tools for project management,
generating synthetic weather data, modeling flow and contaminants through the unsaturated zone,
estimating groundwater recharge and contaminant loading rates, and preparing compliance reports.
Visual HELP
Visual HELP is a one-dimensional, unsaturated zone flow modeling application built for optimizing the
hydrologic design of municipal landfills. Visual HELP is based on the US E.P.A . HELP model
(Hydrologic Evaluation of Landfill Performance) and has been integrated into a 32-Bit Windows
application. It combines the International Weather Generator, Landfill Profile Designer, and Report
Editor. Applications include designing landfill profiles, predicting leachate mounding, and evaluating
potential leachate seepage to the groundwater.
Visual PEST-ASP
Visual PEST-ASP combines the powerful parameter estimation capabilities of PEST-ASP, with the
graphical processing and display features of WinPEST. Visual PEST-ASP can be used to assist in data
interpretation, model calibration and predictive analysis by optimizing model parameters to fit a set of
observations. This popular estimation package achieves model independence through its capacity to
communicate with a model through its input and output files.
Visual Groundwater
Visual Groundwater is a visualization software package that delivers high-quality, three-dimensional
representations of subsurface characterization data and groundwater modeling results. Combining
graphical tools for three-dimensional visualization and animation, Visual Groundwater also features a
data management system specifically designed for borehole investigation data. The graphical display
features allow the user to display site maps, discrete data contours, isosurfaces and cross sectional views
of the data.
vii
Groundwater Instrumentation
Diver-NETZ
Diver-NETZ is an all-inclusive groundwater monitoring network system that integrates high-quality
field instrumentation with the industries latest communications and data management technologies. All
of the Diver-NETZ components are designed to optimize your project workflow from collecting and
recording groundwater data in the field - to project delivery in the office.
*Mark of Schlumberger
Table of Contents
1. Introduction . . . . . . . . . . . . . . . . . . . . . . . . . . . . . . . . . . . . . . . . . . . . . . . . . 1
Main Features . . . . . . . . . . . . . . . . . . . . . . . . . . . . . . . . . . . . . . . . . . . . . . . . . . . . . . . . . 1
Data Entry and Importing . . . . . . . . . . . . . . . . . . . . . . . . . . . . . . . . . . . . . . . . . . . . . . . . . . . . . . . . . . .1
Visualization . . . . . . . . . . . . . . . . . . . . . . . . . . . . . . . . . . . . . . . . . . . . . . . . . . . . . . . . . . . . . . . . . . . . . .2
Interpretation and Analysis . . . . . . . . . . . . . . . . . . . . . . . . . . . . . . . . . . . . . . . . . . . . . . . . . . . . . . . . . .2
Reporting . . . . . . . . . . . . . . . . . . . . . . . . . . . . . . . . . . . . . . . . . . . . . . . . . . . . . . . . . . . . . . . . . . . . . . . . .2
Installation . . . . . . . . . . . . . . . . . . . . . . . . . . . . . . . . . . . . . . . . . . . . . . . . . . . . . . . . . . . . 2
Installing GW Contour. . . . . . . . . . . . . . . . . . . . . . . . . . . . . . . . . . . . . . . . . . . . . . . . . . . . . . . . . . . .3
Starting GW Contour . . . . . . . . . . . . . . . . . . . . . . . . . . . . . . . . . . . . . . . . . . . . . . . . . . . . . . . . . . . . .5
Un-installing GW Contour. . . . . . . . . . . . . . . . . . . . . . . . . . . . . . . . . . . . . . . . . . . . . . . . . . . . . . . . .5
On-Line Help . . . . . . . . . . . . . . . . . . . . . . . . . . . . . . . . . . . . . . . . . . . . . . . . . . . . . . . . . . 6
Software Maintenance and Technical Support . . . . . . . . . . . . . . . . . . . . . . . . . . . . . . 8
About the Interface . . . . . . . . . . . . . . . . . . . . . . . . . . . . . . . . . . . . . . . . . . . . . . . . . . . . . 8
Menu Bar . . . . . . . . . . . . . . . . . . . . . . . . . . . . . . . . . . . . . . . . . . . . . . . . . . . . . . . . . . . . . . . . . . . . . . . . .9
Project . . . . . . . . . . . . . . . . . . . . . . . . . . . . . . . . . . . . . . . . . . . . . . . . . . . . . . . . . . . . . . . . . . . . . . . .9
View . . . . . . . . . . . . . . . . . . . . . . . . . . . . . . . . . . . . . . . . . . . . . . . . . . . . . . . . . . . . . . . . . . . . . . . . . .9
Input . . . . . . . . . . . . . . . . . . . . . . . . . . . . . . . . . . . . . . . . . . . . . . . . . . . . . . . . . . . . . . . . . . . . . . . . .10
Output . . . . . . . . . . . . . . . . . . . . . . . . . . . . . . . . . . . . . . . . . . . . . . . . . . . . . . . . . . . . . . . . . . . . . . .10
Settings. . . . . . . . . . . . . . . . . . . . . . . . . . . . . . . . . . . . . . . . . . . . . . . . . . . . . . . . . . . . . . . . . . . . . . .10
Help . . . . . . . . . . . . . . . . . . . . . . . . . . . . . . . . . . . . . . . . . . . . . . . . . . . . . . . . . . . . . . . . . . . . . . . . .10
Toolbar . . . . . . . . . . . . . . . . . . . . . . . . . . . . . . . . . . . . . . . . . . . . . . . . . . . . . . . . . . . . . . . . . . . . . . . . . .10
Project Tree . . . . . . . . . . . . . . . . . . . . . . . . . . . . . . . . . . . . . . . . . . . . . . . . . . . . . . . . . . . . . . . . . . . . . .12
Property Viewer . . . . . . . . . . . . . . . . . . . . . . . . . . . . . . . . . . . . . . . . . . . . . . . . . . . . . . . . . . . . . . . . . .13
Plot Viewer. . . . . . . . . . . . . . . . . . . . . . . . . . . . . . . . . . . . . . . . . . . . . . . . . . . . . . . . . . . . . . . . . . . . . . .13
2. Working with GW Contour . . . . . . . . . . . . . . . . . . . . . . . . . . . . . . . . . . . 15
New Projects . . . . . . . . . . . . . . . . . . . . . . . . . . . . . . . . . . . . . . . . . . . . . . . . . . . . . . . . . 15
Default project settings . . . . . . . . . . . . . . . . . . . . . . . . . . . . . . . . . . . . . . . . . . . . . . . . . . . . . . . . . . . . .15
Project Units. . . . . . . . . . . . . . . . . . . . . . . . . . . . . . . . . . . . . . . . . . . . . . . . . . . . . . . . . . . . . . . . . . .16
Project Domain and Base Map selection . . . . . . . . . . . . . . . . . . . . . . . . . . . . . . . . . . . . . . . . . . . . .18
Adding Georeference Points . . . . . . . . . . . . . . . . . . . . . . . . . . . . . . . . . . . . . . . . . . . . . . . . . . . . . .19
Deleting Georeference Points . . . . . . . . . . . . . . . . . . . . . . . . . . . . . . . . . . . . . . . . . . . . . . . . . . . . .20
Advanced Settings . . . . . . . . . . . . . . . . . . . . . . . . . . . . . . . . . . . . . . . . . . . . . . . . . . . . . . . . . . . . . .21
Working with your project. . . . . . . . . . . . . . . . . . . . . . . . . . . . . . . . . . . . . . . . . . . . . . 26
Main Menu. . . . . . . . . . . . . . . . . . . . . . . . . . . . . . . . . . . . . . . . . . . . . . . . . . . . . . . . . . . . . . . . . . . . . . .26
Project Menu . . . . . . . . . . . . . . . . . . . . . . . . . . . . . . . . . . . . . . . . . . . . . . . . . . . . . . . . . . . . . . . . . .27
View Menu. . . . . . . . . . . . . . . . . . . . . . . . . . . . . . . . . . . . . . . . . . . . . . . . . . . . . . . . . . . . . . . . . . . .27
Input Menu. . . . . . . . . . . . . . . . . . . . . . . . . . . . . . . . . . . . . . . . . . . . . . . . . . . . . . . . . . . . . . . . . . . .28
Output Menu . . . . . . . . . . . . . . . . . . . . . . . . . . . . . . . . . . . . . . . . . . . . . . . . . . . . . . . . . . . . . . . . . .28
Help Menu . . . . . . . . . . . . . . . . . . . . . . . . . . . . . . . . . . . . . . . . . . . . . . . . . . . . . . . . . . . . . . . . . . . .30
Project Tree . . . . . . . . . . . . . . . . . . . . . . . . . . . . . . . . . . . . . . . . . . . . . . . . . . . . . . . . . . . . . . . . . . . . . . 30
Property Viewer . . . . . . . . . . . . . . . . . . . . . . . . . . . . . . . . . . . . . . . . . . . . . . . . . . . . . . . . . . . . . . . . . . 31
Project Options . . . . . . . . . . . . . . . . . . . . . . . . . . . . . . . . . . . . . . . . . . . . . . . . . . . . . . . . . . . . . . . . 31
Base Map Options . . . . . . . . . . . . . . . . . . . . . . . . . . . . . . . . . . . . . . . . . . . . . . . . . . . . . . . . . . . . . . 34
Data Set Options . . . . . . . . . . . . . . . . . . . . . . . . . . . . . . . . . . . . . . . . . . . . . . . . . . . . . . . . . . . . . . . 34
Interpolated Result Options . . . . . . . . . . . . . . . . . . . . . . . . . . . . . . . . . . . . . . . . . . . . . . . . . . . . . . . 35
Velocity Vector Options . . . . . . . . . . . . . . . . . . . . . . . . . . . . . . . . . . . . . . . . . . . . . . . . . . . . . . . . . 36
Particle Tracking Options . . . . . . . . . . . . . . . . . . . . . . . . . . . . . . . . . . . . . . . . . . . . . . . . . . . . . . . . 37
Report Options. . . . . . . . . . . . . . . . . . . . . . . . . . . . . . . . . . . . . . . . . . . . . . . . . . . . . . . . . . . . . . . . . 37
Plot viewer . . . . . . . . . . . . . . . . . . . . . . . . . . . . . . . . . . . . . . . . . . . . . . . . . . . . . . . . . . . . . . . . . . . . . . . 38
Data Input . . . . . . . . . . . . . . . . . . . . . . . . . . . . . . . . . . . . . . . . . . . . . . . . . . . . . . . . . . . . 38
Base Maps . . . . . . . . . . . . . . . . . . . . . . . . . . . . . . . . . . . . . . . . . . . . . . . . . . . . . . . . . . . . . . . . . . . . . . . 39
Deleting a Base Map . . . . . . . . . . . . . . . . . . . . . . . . . . . . . . . . . . . . . . . . . . . . . . . . . . . . . . . . . . . . 39
Adding a Base Map . . . . . . . . . . . . . . . . . . . . . . . . . . . . . . . . . . . . . . . . . . . . . . . . . . . . . . . . . . . . . 39
Renaming a Base Map . . . . . . . . . . . . . . . . . . . . . . . . . . . . . . . . . . . . . . . . . . . . . . . . . . . . . . . . . . . 39
Data Sets . . . . . . . . . . . . . . . . . . . . . . . . . . . . . . . . . . . . . . . . . . . . . . . . . . . . . . . . . . . . . . . . . . . . . . . . 39
Copy and Paste Data. . . . . . . . . . . . . . . . . . . . . . . . . . . . . . . . . . . . . . . . . . . . . . . . . . . . . . . . . . . . . . . 40
Import Data . . . . . . . . . . . . . . . . . . . . . . . . . . . . . . . . . . . . . . . . . . . . . . . . . . . . . . . . . . . . . . . . . . . . . . 42
Control Points . . . . . . . . . . . . . . . . . . . . . . . . . . . . . . . . . . . . . . . . . . . . . . . . . . . . . . . . . . . . . . . . . . . . 44
Adding Control Points . . . . . . . . . . . . . . . . . . . . . . . . . . . . . . . . . . . . . . . . . . . . . . . . . . . . . . . . . . . 45
Deleting Control Points . . . . . . . . . . . . . . . . . . . . . . . . . . . . . . . . . . . . . . . . . . . . . . . . . . . . . . . . . . 46
Importing Control Points . . . . . . . . . . . . . . . . . . . . . . . . . . . . . . . . . . . . . . . . . . . . . . . . . . . . . . . . . 46
Editing Control Points . . . . . . . . . . . . . . . . . . . . . . . . . . . . . . . . . . . . . . . . . . . . . . . . . . . . . . . . . . . 47
Exporting Control Points . . . . . . . . . . . . . . . . . . . . . . . . . . . . . . . . . . . . . . . . . . . . . . . . . . . . . . . . . 47
Saving Control Points . . . . . . . . . . . . . . . . . . . . . . . . . . . . . . . . . . . . . . . . . . . . . . . . . . . . . . . . . . . 47
3. Interpolated Results . . . . . . . . . . . . . . . . . . . . . . . . . . . . . . . . . . . . . . . . . 49
Creating New Interpolations. . . . . . . . . . . . . . . . . . . . . . . . . . . . . . . . . . . . . . . . . . . . . 49
Editing Interpolated Data . . . . . . . . . . . . . . . . . . . . . . . . . . . . . . . . . . . . . . . . . . . . . . . 52
Interpolated Data Set Properties . . . . . . . . . . . . . . . . . . . . . . . . . . . . . . . . . . . . . . . . . 53
Exporting Interpolation Results . . . . . . . . . . . . . . . . . . . . . . . . . . . . . . . . . . . . . . . . . . 53
4. Velocity Vectors and Particle Tracking. . . . . . . . . . . . . . . . . . . . . . . . . . 55
Velocity Vectors . . . . . . . . . . . . . . . . . . . . . . . . . . . . . . . . . . . . . . . . . . . . . . . . . . . . . . . 55
Settings . . . . . . . . . . . . . . . . . . . . . . . . . . . . . . . . . . . . . . . . . . . . . . . . . . . . . . . . . . . . . . . . . . . . . . . . . . 55
Editing Vector maps . . . . . . . . . . . . . . . . . . . . . . . . . . . . . . . . . . . . . . . . . . . . . . . . . . . . . . . . . . . . . . . 58
Particle Tracking Maps . . . . . . . . . . . . . . . . . . . . . . . . . . . . . . . . . . . . . . . . . . . . . . . . . 59
Settings . . . . . . . . . . . . . . . . . . . . . . . . . . . . . . . . . . . . . . . . . . . . . . . . . . . . . . . . . . . . . . . . . . . . . . . . . . 61
Adding Particles . . . . . . . . . . . . . . . . . . . . . . . . . . . . . . . . . . . . . . . . . . . . . . . . . . . . . . . . . . . . . . . . . . 63
Single . . . . . . . . . . . . . . . . . . . . . . . . . . . . . . . . . . . . . . . . . . . . . . . . . . . . . . . . . . . . . . . . . . . . . . . . 63
Table of Contents
Circle . . . . . . . . . . . . . . . . . . . . . . . . . . . . . . . . . . . . . . . . . . . . . . . . . . . . . . . . . . . . . . . . . . . . . . . .63
Line . . . . . . . . . . . . . . . . . . . . . . . . . . . . . . . . . . . . . . . . . . . . . . . . . . . . . . . . . . . . . . . . . . . . . . . . .63
Animating Particles. . . . . . . . . . . . . . . . . . . . . . . . . . . . . . . . . . . . . . . . . . . . . . . . . . . . . . . . . . . . . . . .64
Deleting Particles. . . . . . . . . . . . . . . . . . . . . . . . . . . . . . . . . . . . . . . . . . . . . . . . . . . . . . . . . . . . . . . . . .65
Delete Selected. . . . . . . . . . . . . . . . . . . . . . . . . . . . . . . . . . . . . . . . . . . . . . . . . . . . . . . . . . . . . . . . .65
Delete All . . . . . . . . . . . . . . . . . . . . . . . . . . . . . . . . . . . . . . . . . . . . . . . . . . . . . . . . . . . . . . . . . . . . .65
Editing Particle Tracking maps . . . . . . . . . . . . . . . . . . . . . . . . . . . . . . . . . . . . . . . . . . . . . . . . . . . . . .66
5. Reports . . . . . . . . . . . . . . . . . . . . . . . . . . . . . . . . . . . . . . . . . . . . . . . . . . . . 67
About the Interface . . . . . . . . . . . . . . . . . . . . . . . . . . . . . . . . . . . . . . . . . . . . . . . . . . . . 67
Main Toolbar . . . . . . . . . . . . . . . . . . . . . . . . . . . . . . . . . . . . . . . . . . . . . . . . . . . . . . . . . . . . . . . . . . . . .68
Side Toolbar. . . . . . . . . . . . . . . . . . . . . . . . . . . . . . . . . . . . . . . . . . . . . . . . . . . . . . . . . . . . . . . . . . . . . .69
Main Menu Bar . . . . . . . . . . . . . . . . . . . . . . . . . . . . . . . . . . . . . . . . . . . . . . . . . . . . . . . . . . . . . . . . . . .69
Report / Template . . . . . . . . . . . . . . . . . . . . . . . . . . . . . . . . . . . . . . . . . . . . . . . . . . . . . . . . . . . . . .69
Edit . . . . . . . . . . . . . . . . . . . . . . . . . . . . . . . . . . . . . . . . . . . . . . . . . . . . . . . . . . . . . . . . . . . . . . . . . .70
Page . . . . . . . . . . . . . . . . . . . . . . . . . . . . . . . . . . . . . . . . . . . . . . . . . . . . . . . . . . . . . . . . . . . . . . . . .70
Image / Side Toolbar . . . . . . . . . . . . . . . . . . . . . . . . . . . . . . . . . . . . . . . . . . . . . . . . . . . . . . . . . . . .72
Help . . . . . . . . . . . . . . . . . . . . . . . . . . . . . . . . . . . . . . . . . . . . . . . . . . . . . . . . . . . . . . . . . . . . . . . . .73
Creating Report Templates . . . . . . . . . . . . . . . . . . . . . . . . . . . . . . . . . . . . . . . . . . . . . 73
Page Layout . . . . . . . . . . . . . . . . . . . . . . . . . . . . . . . . . . . . . . . . . . . . . . . . . . . . . . . . . . . . . . . . . . .74
Create Page Border . . . . . . . . . . . . . . . . . . . . . . . . . . . . . . . . . . . . . . . . . . . . . . . . . . . . . . . . . . . . .74
Add Text Labels. . . . . . . . . . . . . . . . . . . . . . . . . . . . . . . . . . . . . . . . . . . . . . . . . . . . . . . . . . . . . . . .75
Adding an Image . . . . . . . . . . . . . . . . . . . . . . . . . . . . . . . . . . . . . . . . . . . . . . . . . . . . . . . . . . . . . . .76
Modifying Layer Orders. . . . . . . . . . . . . . . . . . . . . . . . . . . . . . . . . . . . . . . . . . . . . . . . . . . . . . . . . . . .77
.
1
Introduction
GW Contour is a data interpolation and visualization tool that can create twodimensional groundwater data models, graphically displayed using color shading,
contour maps, and velocity vector maps. GW Contour also runs simulations that
describe particle movement in a hydrogeological area over time.
GW Contour supports several data file formats, and works by interpolating discrete
data sets, and presenting the interpolation results as color shading and/or contour maps.
Based on interpolation results of specific data set types such as head, porosity, and
hydraulic conductivity, it also allows the creation of velocity vector maps and performs
particle tracking simulations.
GW Contour is oriented towards groundwater professionals, site assessment/
remediation professionals, geologists, agriculturalists, and other environmental
professionals. GW Contour can be used for evaluation of contaminated areas, risk
analysis of exposure routes, wellhead protection area studies, and many more fields of
study.
GW Contour offers a number of additional features such as control points,
georeferenced base maps, and graphical reports that make it easy to assess, interpret,
and document your data.
1.1 Main Features
The following main features are available in GW Contour.
1.1.1 Data Entry and Importing
• Discrete data import - Import discrete data in a variety of file formats: ASCII
.TXT, ESRI “Points” .SHP, MS Excel .XLS, MS Access .MDB, and Surfer
.GRD files.
• Control Points - Allow users graphically add or load new data (control points)
to the data set in order to adjust the interpolation results obtained.
• Discrete data interpolation - Interpolation of discrete data sets in order to obtain
continuous results that can be represented through color shading or contour line
Main Features
1
maps.
• Export of interpolation results - Export of interpolation results to ASCII .TXT
or Surfer .GRD files.
1.1.2 Visualization
• Georeferenced base maps - Allows import and geo-referencing of graphics
files to use as background maps. Supported formats are: .DXF, .BMP, .GIF,
.TIF, .JPG, .PNG, and .EMF
• Color shading map - Color shading-based representation of the interpolated
results demonstrating data variation within the geographic area of the project
domain.
• Contour maps - Contour line-based representation of the interpolated results
demonstrating data variation within the geographic area of the project domain.
1.1.3 Interpretation and Analysis
• Velocity vector map - Create a map of vectors representing the velocity and
orientation of groundwater movement.
• Particle tracking - Simulation of particle movement over time using both
forward and backward tracking particles.
1.1.4 Reporting
• Export to graphics file - Export of maps (images) in several file formats:
.BMP, .JPG, .WMF, .EMF, .DXF, .TIF, .GIF, and .PNG.
• Professional reports - Generation of reports based on images from the GUI
window, with text, objects, and images added, and customized headers/footers
with company information and logos.
1.2 Installation
To run GW Contour you will need the following minimum system configuration:
•
•
•
•
•
Pentium II, 300 MHz
64 MB of RAM (128 MB recommended)
CD ROM drive
100 MBytes free hard drive space
Windows 2000 (SP4) / Windows XP Professional (SP1 or later) / Windows
Vista (Business, Ultimate, Enterprise), with Microsoft .NET Framework
Version 1.1 (available from the Microsoft Windows Update website)
Please NOTE that these are the minimum requirements to install GW Contour. If you
intend to create and work with complex projects, you will require a faster machine
(Pentium 4 recommended) with more RAM (256 MB or more recommended), and
more free hard drive space (2-10 GB recommended)
2
Chapter 1 : Introduction
If you have any problems with your particular system configuration, please make sure
that you followed the installation instructions precisely (see below under Installing
GW Contour). If the problem is still unresolved, contact your hardware experts.
Finally, if you are still having difficulties, see the section in the Preface on How to
Contact SWS.
Installing GW Contour
GW Contour must be installed on your local hard disk to run. Please read the section on
hardware requirements at the beginning of this section to ensure that your system meets
the requirements before performing the installation.
Note: You can install GW Contour from your CD-ROM, or by downloading
it from the SWS FTP site (ftp://ftp.flowpath.com).
Note: Once the installation of GW Contour is completed, there will be a
number of files in the program folder, plus several subfolders
containing additional files. Please do NOT delete any files or
subfolders in the GW Contour program folder, as all files are important
to the function of the software.
If you are running the GW Contour software installation from your product CD, click
the
Install Now button to start the installation process.
Installation
[1]
From the Welcome screen, click [Next>] to continue to the User Information
window, as shown in the following screenshot:.
[2]
The User Information window will prompt you to enter your name, company
name, and serial number. Use all UPPER CASE letters and hyphens for the serial
number, with no spaces between characters. When all fields have been completed,
3
click [Next>].
Note:If you have entered an incorrect or invalid serial number, you will be
prompted to go back and re-enter your serial number. Please verify the characters,
and be sure that you have used UPPER CASE letters, and hyphens.
[3]
From the Confirmation window, click [Next>] to proceed to the Destination
Folder window, as shown in the following screenshot:
[4]
Select the Destination Folder on your computer where you want to install your
software. The default destination folder is c:\program files\[program name].
Alternately, you may click the Browse button to select a different folder. Please
remember that you must install the software on your local hard drive. Click
[Next>] when you have chosen the appropriate directory.
Note: SWS recommends that you select a pathname that does NOT contain multiple spaces, punctuation, accented characters, or other “odd” characters. The same
guidelines apply for project names.
[5]
4
From the Select Features window (shown in the following screenshot), you can
choose to install all components, or select the components to install. If your
selected installation directory does not have enough free space, you have the
option to Browse to another folder. GW Contour requires MDAC version 2.6 or
later to run. If you already have a compatible version of MDAC installed, you
Chapter 1 : Introduction
can deselect this component. Click [Next>] to continue with the installation.
[6]
From the Ready to Install window, click [Next>] to start the installation of files.
An Updating System window will appear with a progress bar, and the
Successfully Installed window will appear with the installation process is
complete. Click the [Finish] button to close the installation wizard.
Note: Before starting GW Contour, please ensure that you have Microsoft
.NET framework version 1.1 or newer installed on your computer by clicking on Start>Settings>Control Panel>Add/Remove Programs. If this component is not listed, you may download it for free from the
windowsupdate.microsoft.com website.
Starting GW Contour
Once GW Contour has been installed on your computer, simply double-click on the
GW Contour shortcut icon, or click on Start/Programs/SWS Software/GW Contour/
GW Contour.
Un-installing GW Contour
To uninstall GW Contour please follow the steps below:
• Make sure the GW Contour program is closed.
• From your Windows operating system desktop, click Start>Settings>Control
Panel>Add/Remove Programs, and remove GW Contour from the list.
Installation
5
1.1 On-Line Help
The On-Line Help includes full color screen captures and illustrations which are
otherwise black and white in the GW Contour User’s Manual. The information of
interest can be viewed at all stages of the project.
On-Line Help can be accessed by selecting Help/Contents from the Main Menu. A
Help window will appear, similar to the one shown below. This window is divided
into three main areas:
• A Navigation Frame on the left displays the Contents, Index, Search, and
Favorites tabs.
• A Toolbar across the top displays a set of buttons to move around the Help
system.
• A Topic Frame on the right displays the actual Help topics included in the
On-Line Help.
Navigation Frame
Toolbar
Topic Frame
The tabs in the Navigation Frame provide the core navigational features as described
below.
Contents
The Contents tab displays the entries in the “Table of Contents” in the form of an
represent Table of Contents
expandable/collapsible tree view. Closed book icons
entries that have subentries.
6
Chapter 1 : Introduction
Index
The Index tab displays the entries from the Table of Contents. You can scroll to find
the index entry you want, or you can type in the first few letters of the Keywords in the
text box, and the index will scroll automatically as you type. Double-click an index
entry to display the corresponding Help topic. Alternately, you may select an index
entry and then click the Display button to open the Help topic.
Search
The Search tab is used to search the On-Line Help documents for a word or phrase you
are interested in. Simply type the word or phrase to search for, and then press [Enter] or
click the Display button.
Favorites
You can add frequently accessed Help topics to a personal list of favorites, which is
displayed on the Favorites tab. Once you have added a topic to your list of favorites,
you can access the topic by double-clicking it. Click Add to add the currently displayed
topic to your favorites list. Select a favorite and then click Remove to delete a topic
from your favorites list.
The functionality of the main buttons displayed in the Toolbar are described below:
The Hide button hides the Navigation Frame, so only the Toolbar and the
Topic Frame are visible. This allows more space on the screen to enlarge
the Topic Frame for better viewing of the application.
The Show button displays all areas, the Navigation Frame, the Toolbar,
and the Topic Frame.
Clicking the Forward button displays the next Help topic in sequence.
Clicking the Back button displays the previous Help topic in sequence.
Clicking the Home button returns to the Introduction section.
The Print button prints the currently displayed Help topic.
On-Line Help
7
1.2 Software Maintenance and Technical Support
Your purchase of a new license of GW Contour includes 1 (one) year of free
Maintenance.
Maintenance for your software consists of upgrades to new versions of your software,
updates to the current version, and technical support via phone, email, or fax. You
have the option, at any time, to purchase a Maintenance Contract that extends your
entitlement to free upgrades, updates, and technical support, in one year increments. A
detailed summary of the Annual Maintenance Benefits is provided below:
•
•
•
•
•
•
•
•
•
•
Free Major Software Upgrades, and Updates to the Current Version
Notification of Free Updates/Upgrades Available for your Software
Unlimited Telephone Support
Unlimited Email Support
Priority Response to Error Reports
Direct Bug Fix Updates
Documentation Updates
On-Demand FTP Downloads
Showcase Your Projects in SWS E-News
Option to Beta Test New Products
For more information about Annual Maintenance Contracts, contact our Sales
department via email at [email protected], or via phone at:
+1 519-746-1798.
1.3 About the Interface
GW Contour's graphical user interface is organized in five main components to
provide the user easy access to its main functions. The user interface components are
listed below.
8
Chapter 1 : Introduction
Main Menu
Toolbar
Plot Viewer
Tree
Viewer
Property
Viewer
1.3.1 Menu Bar
The Menu Bar is where the user finds all GW Contour features logically organized
under six menu options: Project, View, Input, Output, Settings, and Help.
Project
The Project menu contains menu items for creating, opening, saving, and closing
projects and exiting the system. A list of the most recent projects opened in GW
Contour is also provided.
View
The View menu contains menu items for turning on/off the project tree, the property
viewer, and the project legend, as well as zoom controls.
About the Interface
9
Input
The Input menu contains menu items and submenus for creating and manipulating
data sets and base maps. The Input menu and submenus allow users to:
• Create and delete base maps
• Create, edit, and delete data sets
• Manage control points (add, load, delete, save, export, etc.)
Output
The Output menu contains menu items and submenus for creating and manipulating
interpolated results, velocity vectors, particle tracking output, and reports. Options for
copying to the clipboard and exporting to an image file are also located in the Output
menu.
Settings
The Settings menu contains options allowing you to edit the settings for
interpolations, velocity vectors, particle tracking, and the project. The Settings menu
also includes tools for editing the properties of the active interpolated result layer.
Help
The Help menu contains information About the program (Version, registration, and
contact information), and the Contents of the Online Help file.
1.3.2 Toolbar
The toolbar contains commonly accessed features. For a short description of the
function of a toolbar button, move the mouse pointer over the icon without clicking
either mouse button.
The toolbar buttons that appear beneath the menu bar are dynamic, changing as you
move from one window to another. Some toolbar buttons are enabled only when
certain windows are in view, or in a certain context. For example, the Paste button is
only enabled after the Copy command has been used.
The following tool buttons appear at the top of the GW Contour main window:
New button creates a new project.
Open button opens an existing project.
Save button saves the current project.
10
Chapter 1 : Introduction
Print button prints the contents of the Project Viewer window.
Properties button displays/hides the Properties frame.
Tree viewer button displays/hides the Project Tree frame.
Contour line button draws contour lines for the interpolated data.
Colour map button draws colour shading for the interpolated data.
Zoom in (select) button allows you to zoom in to a selected area (defined
by clicking-and-dragging the mouse to create a rectangular zoom area).
Zoom out button returns to the default (plan) view.
Zoom in (click) button allows you to dynamically zoom in towards a
specific point on your project.
Zoom out (previous zoom) button allows you to dynamically zoom out
away from a specific point on your project.
Add contour at point button draws a contour line at a selected point on the
project (click the mouse button on the desired location of the contour line).
Draw particle tracking button adds particle pathlines to your project (you
must generate particle tracking data first).
Add single control point button allows you to manually add a data point
for the selected data set, to assist with interpolation of your project data
(click the mouse button on the desired location of the control point, then
enter the control point data).
About the Interface
11
Add control points along a line button allows you to manually add a
line of 10 data points for the selected data set, to assist with interpolation
of your project data (click-and-drag the mouse button on the desired
location of the line of control points, then enter the control point data).
Delete selected control point button removes the selected data control
point from your project (click on a point to delete it).
Delete all control points button will delete all control points that have
been added for the selected data set.
Add single particle button adds a particle at the selected location (click
your mouse at the desired location of the particle).
Add particles along a circle button adds a ring of particles at the
selected location (click-and-drag your mouse at the desired location of the
particle ring to increase the diameter of the ring).
Add particles along a line button adds a line of particles at the selected
location (click-and-drag your mouse at the desired location of the particle
line).
Delete selected particle button removes the selected particle (click on a
particle to delete it).
Delete all particles button removes all particles from the project.
Add base map button allows you to add a base map to your project.
1.3.3 Project Tree
The Project Tree is GW Contour’s graphical interface component that contains all data
components. The data components are organized in nodes and sub-nodes under the
project node (the root node). Under the root node, there are six nodes corresponding to
each data component supported by the tool. When a new data set, interpolated result,
etc. is created, a new sub-node corresponding to the new component is added under
the related node. Nodes can be expanded/collapsed to either view or hide their
contents.
12
Chapter 1 : Introduction
Check boxes beside sub-nodes determine whether the components are displayed in the
Plot Viewer. Right-clicking on a node will present a pop-up menu containing specific
settings for that component.
1.3.4 Property Viewer
The Property Viewer is GW Contour's graphical interface component, displaying
properties for each data component in the project. When a node is selected in the
Project Tree, its properties are displayed in the Property Viewer. The individual
properties vary from one component to another, and individual properties may or may
not be editable. The properties of each component are described in detail later on in this
manual.
1.3.5 Plot Viewer
The Plot Viewer is GW Contour's GUI component where maps and data sets are
displayed. Each time a component is added to the Project Tree, a new layer is added to
the Plot Viewer, superimposed on the previous layers.
About the Interface
13
14
Chapter 1 : Introduction
2
Working with GW Contour
This chapter provides detailed information about the features, settings, and properties
available for GW Contour projects.
2.1 New Projects
A GW Contour project is generated from discrete data sets collected over a
geographical area. This data is then interpolated across the project domain, and visually
represented using contour lines, color maps, velocity vectors, and particle tracking.
Each project has basic information and settings, described in the next section. To begin
the process of creating a new project, click Project>New from the Main Menu.
2.1.1 Default project settings
When creating a new GW Contour project, you are prompted to enter default settings
for a number of properties in the Default project settings window, as shown in the
following screenshot:
New Projects
15
• Project Name - The name of the project, and the name of the .GWC file
created by GW Contour (containing the project information).
• Project path - The specified folder where the project file will be saved. You
can manually enter a project pathname (if the path already exists), or use the
Set Path button
which also allows you to create a new folder.
Please Note: SWS recommends that your project pathname does NOT contain
spaces, punctuation, accented characters, or other “odd” characters. Additionally,
the pathname to your project files must be on your local hard disk. Network paths
are not recommended.
• Set path as default - Checking this box will allow GW Contour to use the
path as the default path for new projects in the future.
• Author - An optional field which may contain the name of the project creator.
• Description - An optional field which allows the user to enter brief
descriptive information about the project, such as its purpose, client, etc.
Project Units
The project’s units are usually based on the units of the field data that will be imported
and interpolated.
Please Note: Depending on the units selected, conversions may take place during
some calculations or data import to ensure consistency.
The project units include:
• Head - Represents the height of the water table. Head units supported are
meter (m), centimeter (cm), and feet (ft).
• Hydraulic conductivity - Represents the lateral conductivity of the aquifer.
16
Chapter 2 : Working with GW Contour
•
•
•
•
Conductivity units supported are meters/second (m/s), centimeters/second (cm/
s), meters/day (m/day), and feet/day (ft/day).
Concentration - Represents the amount of contaminant present. Concentration
units supported are: milligrams/liter (mg/l), parts per million (ppm), parts per
billion (ppb), milli-equivalents/liter (meq/l), micrograms/liter (ug/l), and
milligrams/kilogram (mg/kg)
Time - Represents linear time, used for pathlines and time markers. Time units
supported are seconds (sec), days (day), and months (month).
Coordinate - Represents the length units for the project X and Y coordinates.
Coordinates units supported are the same as for Head.
Set units as default - Checking this box will allow GW Contour to use the unit
options as the defaults for new projects in the future.
Once these settings have been configured, clicking the [Next] button will open the
second Default project settings window, as shown in the following figure:
In the second Default project settings window, you are prompted to enter default
settings for a number of properties.
• Base map working directory - The specified folder where the georeferenced
map file will be saved. You can manually enter a base map pathname (if the
path already exists), or use the Set Path button
which also allows you to
create a new folder. Please Note that WHI recommends your base map
pathname does NOT contain spaces, punctuation, accented characters, or other
“odd” characters. Additionally, the pathname to your base map file must be on
your local hard disk. Network paths are not recommended.
• Number of particle points on circle - The number of particles that will be
New Projects
17
assigned if a circle of particles is added.
• Number of particle points on line - The number of particles that will be
assigned if a line of particles is added.
• Vertical exaggeration - the ratio of Y to X axes in the project domain. A
setting of 0 will “stretch” the axes scale so that they fit in the Plot viewer
window. A setting of 1 will be a 1:1 ratio, where the scale is exactly
proportional.
Project Domain and Base Map selection
The project domain defines the lateral extents of your area of study. The X and Y
coordinates can be entered manually by selecting the Provide project extents option,
and entering a Minimum and Maximum coordinate for the X and Y axes. If you
provide project extents, you can then click the Advanced Settings button to
configure your Advanced settings (see page 21 for a description of the options
available).
The Number of grid intervals determines the number of nodes across the domain that
will be used for interpolation purposes. A higher number will create a finer
interpolation, but may also result in longer interpolation times.
Then click [Finish] in the Default project settings window to complete the creation
of your project.
Alternately, the project domain can be defined in relation to a base map that is
imported into the project. A base map is a graphical image of the project domain,
which has been geo-referenced with X and Y coordinates to define the lateral extents
of the map.
Base map import can take place during project creation, or at a later date once the
project has already been created. Please Note that if you do not import a base map
during project creation, you will need to Provide project extents, and then import
your base map at a later date using georeference coordinates that will overlay the
project extents you have already defined.
GW Contour supports import of base maps in the following file formats:
.BMP, .JPG, .TIF, .GIF, .DXF, .SVG, .EMF, .PNG
In the Project domain frame, you can choose the Use base map option, then select
your file by manually entering the pathname and file name, or use the Set Path button
to locate your image file.
Once you have selected your image file, the Georeference Base Map window will
appear, as shown in the following screenshot:
18
Chapter 2 : Working with GW Contour
In order to map the pixels of the image to a coordinate system, the graphics file must
have two georeference points with known coordinates. These georeference points must
be defined by the user as described below.
If an AutoCAD .DXF file is used for the site map, the top right-hand section of the
Select Model Region window will already contain the Display Area coordinates where
(X1, Y1) is the map coordinate in the lower left-hand corner and (X2, Y2) is the map
coordinate in the top right-hand corner. These values are automatically read from the
map file and may be modified to expand or shrink the available ‘real estate’ for defining
the project domain.
If a graphics file is used for the site map, the top right-hand section will contain the
coordinates of the two Georeference Points once they have been entered. These
values cannot be modified unless one of the georeference points is deleted and a
different georeference point is assigned.
Adding Georeference Points
To set the first georeference point:
• Click the [Set Georeference Point] icon in the toolbar
• Click on a map location where the world coordinates are known
• A Georeference point window will appear prompting for the X and Y world
coordinates of the selected location
New Projects
19
• Enter the X and Y coordinates for this point
• Repeat this procedure for the second georeference point
Once the georeference points have been set, the project domain must be oriented on
the project base map.
Deleting Georeference Points
To delete a georeference point:
• Click the [Delete Georeference Point] icon in the toolbar
• Click on the georeference point to delete
Note: If a georeference point is deleted, a new georeference point must be added,
as two georeference points are required to create a coordinate system.
In the Georeference Base Map window, once you have defined 2 georeference
points, the project domain is represented by an outline of a box with circular nodes at
each corner and with arrows pointing along the X and Y axes. The project domain box
can be shifted, expanded, and rotated to any alignment on the site map using the
toolbar options described below. These options are also available under the Options
menu item.
Typically, the project domain is aligned along the principal direction of groundwater
flow. The following toolbar buttons are provided to assist you with the process of
providing georeference points.
Zoom in:
Click-and-drag the mouse to select the zoom area.
Zoom out:
View the entire map display area.
New Map:
Load a new file for the site map.
The Georeference Point fields show the coordinates of the points you used to
establish georeferencing. The Map Region fields show the model attributes such as
the origin, the dimensions, and the angle. None of these parameters are editable,
except for the georeferencing points.
File Attributes
Once the map georeferencing points are selected and the [OK] button has been
clicked, the File attributes window will appear as shown in the following figure. It
confirms the name of the source file being imported and the name of the map file
being created for the GW Contour project.
20
Chapter 2 : Working with GW Contour
Click the [OK] button, and you will return to the Default project settings window
where you can modify the Advanced Settings if required (described below), then click
[Finish] in the Default project settings window to complete the creation of your
project.
Advanced Settings
Clicking on the Advanced Settings button in the Default project settings window will
open the Advanced Settings window, as shown in the following screenshot:
The tabs across the top of the window provide access to the advanced options, which
are described below. Please Note that the Bilinear interpolation method (available only
when interpolating a .GRD file) does not have any Advanced Settings, and so is not
mentioned in this section.
Note: For more information on selecting and modifying interpolation parameters,
please see “Geostatistical Software Library and User’s Guide, Second Edition.” by
New Projects
21
C. Deutsch and A. Journet. Oxford University Press, 1998
Kriging
Point per block along X and Y - Allows the user to choose Block Kriging used for
interpolation, instead of Point Kriging. Block Kriging is based on the premise that
since Kriging is a linear algorithm, direct estimation of the block average is possible
for user-defined blocks. The default values for this parameter is 1.
Min and max points for block - When Block Kriging is selected, the minimum and
maximum number of points must be entered.
Kriging type:
Ordinary - Should be chosen if the mean is not constant throughout the project
domain, and needs to be recalculated depending on the location. For most situations,
Ordinary Kriging is the most common option.
Nonstationary simple - Should be chosen if the SK mean is not constant, and has to
be read from an external file.
Stationary simple with SK mean - Should be chosen if the mean value is known and
is constant throughout the project domain. The Mean field allows you to enter the
value.
With external drift - This option should be selected when only the trend component
needs to be estimated, and not the residual component, where the variable is assumed
to be the sum of the trend and the residual component. This option is also referred to
as Universal Kriging
Drift Types - These options are only required when External drift has been selected.
22
Chapter 2 : Working with GW Contour
Estimative - Allows the user to select whether the Variable or the Trend will be
estimated.
Angle one - Defines the search ellipsoid for situations in which anisotropy is present in
the data.
Angle two - Defines the search ellipsoid for situations in which isotropy is present in
the data.
Nugget constant - Quantifies the sampling and assaying errors in the data. In a
Variogram plot the nugget constant is the y-intercept value.
Min and max Radius - Defines the minimum and maximum distance for determining
the neighbourhood of points for interpolation. For isotropic data, the two radius values
(maximum and minimum) are the same. If the total number of points in the data is large
(>200), computation time for Kriging may be reduced by specifying a smaller radius
for the search.
Variograms - Allows the user to select the type of variogram that will be used.
Clicking the [Variogram] button will open the Variogram window, as shown in the
following screenshot:
Variogram model - The model type being used
Angles one and two - Refer to the Sang1 and Sang2 parameters
C parameter - Controls the shape of the function
Min and max horizontal rangers - Refer to the Radius min and max parameters
Vertical range - Refers to the Radius Hvert parameter
Note: For more information on selecting and modifying interpolation parameters,
please see “Geostatistical Software Library and User’s Guide, Second Edition.” by
C. Deutsch and A. Journet. Oxford University Press, 1998
New Projects
23
Inverse Distance
Number of neighbours - Number of nearest data points to use when calculating the
interpolated value for each grid node.
Note: For more information on selecting and modifying interpolation parameters,
please see “Geostatistical Software Library and User’s Guide, Second Edition.”
by C. Deutsch and A. Journet. Oxford University Press, 1998
Natural Neighbor
Use gradient - If flagged, it indicates that the system must blend the gradient
calculation and the linear interpolation calculation to produce a smoother surface.
Tautness 1 and 2 - Controls the influence of the gradient on the results, and may be
used to smooth the interpolated surface.
Magnitudes X and Y - Magnification factors for the X and Y coordinates
Note: If you attempt to interpolate a data set, and encounter a message
indicating that "The ratio of vertical to horizontal scales is too small for
gradient estimation...", simply open the Interpolation Settings window by
clicking on Settings>Interpolation, or expand the Specific subnode under
Interpolation Settings in the Property viewer for your interpolated data set,
and change the Use gradient option to "No". You will then be able to successfully re-interpolate your data set with slightly less smoothing of the
interpolated surface, but without encountering an error.
Note: For more information on selecting and modifying interpolation parameters,
please see “Geostatistical Software Library and User’s Guide, Second Edition.”
by C. Deutsch and A. Journet. Oxford University Press, 1998
24
Chapter 2 : Working with GW Contour
Layer Settings
Contour settings:
Label visible - Indicates that contour value labels will be displayed.
Label font - Define the font for labels.
Decimals - Number of decimal places included in contour value labels.
Interval - An interval of 2, for example, means that only every second contour line
will be labeled.
Color settings:
Color palette - The color palette used on the color shading and contour line maps.
The default palette is rainbow.
Image quality - The quality (resolution) of color shading
Zebra - If checked, colours do not grade smoothly from one to the next. Instead,
transitional colours between the major colour shades are removed, resulting in one
colour on the Plot viewer representing a range of values.
Transparency - Allows contour lines, base maps, pathlines, and other layers to be
seen at the same time as the colour shading overlay. The default transparency is
50%, however it can be increased or decreased as desired.
Once you have modified the Advanced settings to your satisfaction, click the [OK]
button to return to the Default project settings window. When all data has been
entered, click the [Finish] button to complete the creation of your project.
New Projects
25
2.2 Working with your project
Once your project has been created (or you have reopened an existing project by
clicking Project>Open, or Project>Recent Projects) the Data Entry window will
open, as shown in the following screenshot:
The Data Entry window is divided into several main components, as described in the
following sections:
2.2.1 Main Menu
The Main Menu contains the main features of GW Contour:
• Project - Contains menu items for creating projects, opening projects, saving
projects, closing projects, and exiting the system. A list of the most recent
projects opened in GW Contour is also provided.
• View - Contains menu items to show/hide the Project Tree, the Property
Viewer, and the project legend, as well as zoom controls.
• Input - Contains menu items and submenus for creating and manipulating data
sets and base maps. The Input menu and submenus allow users to:
• Create and delete base maps
• Create, edit, and delete data sets
• Manage control points (add, load, delete, save, export, etc.)
• Output - Contains menu items and submenus for creating and manipulating
interpolated results, velocity vectors, particle tracking output, and reports.
26
Chapter 2 : Working with GW Contour
Options for copying to the clipboard and exporting to an image file are also
located in the Output menu.
• Settings - Contains options for editing interpolation settings, velocity vector
settings, particle tracking settings, and project settings. The Settings menu also
includes tools for editing the properties of the active interpolated result layer.
• Help - The Help menu contains information About the program (Version,
registration, and contact information), and the Contents of the Online Help
file.
Project Menu
The Project item in the Main Menu bar has the following options:
•
•
•
•
•
•
New - Create a new GW Contour project.
Open - Open an existing project.
Close - Close the current project.
Save - Save the current project.
Save As - Save a copy of the current project.
Print Preview - View the current image in the Project Viewer as it will be
printed.
• Print - Send the current image in the Project Viewer to the printer.
• Recent projects - Open an existing project from a list of projects that have
been viewed recently.
• Exit - Close GW Contour.
View Menu
The View item in the Main Menu bar has the following options:
•
•
•
•
Tree view window - Allows you to view/hide the Project tree
Property view - Allows you to view/hide the Property view
Legend - Allows you to view/hide the project legend
Zoom - Provides options for magnifying the project domain:
Working with your project
27
• Zoom In - Allows you to zoom into a selected area (defined by clicking-anddragging the mouse to create a zoom window)
• Zoom Out - Returns to the default (plan) view
• Zoom Animated - When used in conjunction with the Zoom In/Zoom Out
option, allows you to dynamically zoom towards or away from a point using
your mouse button
• Zoom Previous - Returns to the last zoom setting
Input Menu
The Input item in the Main Menu has the following options:
• Base map - Provides options for managing the project base maps:
• New - Add a new base map to the project domain. Please see “Adding a Base
Map” on page 39 for a detailed explanation.
• Delete - Remove the selected basemap from the project. You must click on
the map to be deleted in the Project Tree, highlighting the node, before
performing the delete operation.
• Data set - Provides options for managing the project data sets:
• New - Create a new data set by importing data from a file, or copying and
pasting data from the Windows clipboard. Please see “Data Sets” on page 39
for a detailed explanation.
• Edit - Manually modify the data points in the selected data set. You must
click on the data set to be edited in the Project Tree, highlighting the node,
before performing the edit operation. You can edit the X and Y coordinates,
and the values, for any point(s).
• Delete - Remove the selected data set from the project. You must click on
the data set to be deleted in the Project Tree, highlighting the node, before
performing the delete operation.
• Control points - Add additional points to the data set, to be used during the
interpolation process.
• Add single - Add one control point at the desired location.
• Add along a line - Add a line of evenly spaced control points.
• Import - Import control points (X, Y, value) from a text file.
• Edit - Modify the X-Y coordinates and values for the control points.
• Export - Export control points to a text file.
• Save to project - Save control points as a part of the project. Unsaved
control points are lost when the project is closed.
• Delete single - Select a control point to remove.
• Delete all - Remove all control points for the selected data set.
Output Menu
The Output item in the Main Menu has the following options:
28
Chapter 2 : Working with GW Contour
• Interpolated result - Provides options for generating and modifying
interpolated data sets:
• New - Create a new interpolated data set from a data set that has already been
imported/copied into the project. Please see Chapter 3, Interpolated Results
for a detailed explanation.
• Edit - Manually modify the data points in the selected interpolated data set.
You must click on the data set to be edited in the Project Tree, highlighting
the node, before performing the edit operation. You can edit the X and Y
coordinates, and the values, for any point(s).
• Delete - Remove the selected interpolated data set from the project. You must
click on the data set to be deleted in the Project Tree, highlighting the node,
before performing the delete operation.
• Add point at - Add a contour line at the selected location on your Project
Viewer.
• Export to grid file - Provides options for exporting the active (selected)
interpolated data set to a Surfer .GRD file, in either ASCII or Binary form
• Contour lines - Display the selected interpolated data set using contour lines.
• Colour shading - Display the selected interpolated data set using colour
shading.
• Velocity vectors - Provides options for generating and modifying velocity
vectors:
• New - Add a new velocity vector overlay to your project. Please see Chapter
4, Velocity Vectors and Particle Tracking for a detailed explanation.
• Delete - Remove the selected velocity vectors from the project. You must
click on the velocity vectors to be deleted in the Project Tree, highlighting the
node, before performing the delete operation.
• Particle tracking - Provides options for generating and modifying a particle
tracking simulation.
• New - Create a particle tracking simulation. Please see Chapter 4, Velocity
Vectors and Particle Tracking for a detailed explanation.
• Delete - Remove the selected particle tracking simulation from the project.
You must click on the particle tracking simulation to be deleted in the Project
Tree, highlighting the node, before performing the delete operation.
• Particles - Provides options to add particles to, or delete particles from, the
simulation. Please see Chapter 4, Velocity Vectors and Particle Tracking for
a detailed explanation.
• Run simulation - Run the selected simulation to generate particle pathlines
and time markers.
Working with your project
29
• Time markers on/off - Show/hide time markers on particle pathlines
• Report - Provides options to generate and modify reports based on the
contents of your Plot viewer window. Please see Chapter 5, Reports for a
detailed explanation.
• New (using default template) - Create a new report using the default
template.
• New (select template) - Create a new report, and select from the existing
list of templates.
• New (without template) - Create a new report, without using a template
• Open - Open the selected report file from the project. You must click on the
report to be opened in the Project Tree, highlighting the node, before
performing the open operation.
• Remove - Delete the selected report from the project. You must click on the
report to be deleted in the Project Tree, highlighting the node, before
performing the delete operation.
• Template - Provides options to create a New template, Open an existing
template, or Remove an existing template.
• Copy to clipboard - Copy the Plot viewer image to the Windows clipboard
• Export to image file - Export the Plot viewer image to a graphics file.
Help Menu
The Help item in the Main Menu has the following options:
• Contents - Displays the GW Contour On-Line Help (please see “On-Line
Help” on page 6 for a complete description of the On-Line Help features
• About - provides version information.
2.2.2 Project Tree
The Project Tree contains all of the data components of the project, and allows the
data components to be modified using the menu items that appear in the Main Menu.
By right-clicking on a node in the Project tree, the list of available options will appear.
• Right-clicking on a project node (Base map, Input, Interpolated result,
30
Chapter 2 : Working with GW Contour
Velocity vector, Particle tracking) allows you to create a New entry.
• Right-clicking on the Report node allows you to create a New report, or create,
open, or remove a template.
• Right-clicking on a sub-node lists options that pertain to the particular data set:
• Right-clicking on a Base map allows you to Rename, or Remove, the base
map.
• Right-clicking on a Data set allows you to manually Edit the data in the data
set, Rename or Remove the data set, add or delete Control Points to the
data, or create Interpolated results from the data set.
• Right-clicking on an Interpolated results data set allows you to manually Edit
the data in the data set, Rename or Remove the data set, re-Interpolate the
data set after making changes, create a Velocity vector or Particle tracking
overlay, or change the Plot type from Contour map to Colour shading.
• Right-clicking on a velocity vector data set allows you to Rename or
Remove the data set, Show the velocity vectors, change the Settings for the
vectors, and change the Interpolation settings.
• Right-clicking on a Particle tracking data set allows you to Rename or
Remove the data set, add or delete particles, Run the particle tracking
simulation, and change the Settings for the vectors.
• Right-clicking on a Report allows you to Open, Rename, or Remove the
report.
2.2.3 Property Viewer
The Property viewer contains settings for the active node in the Project tree. As you
browse through the Project tree, the options in the Property viewer will change to
reflect the active node.
Project Options
Clicking on the Project Name in the Project Tree will open the following list of
parameters in the Property viewer window. Expanding each parameter group (by
Working with your project
31
clicking on the + sign beside the group name) will list all the parameters in that group.
Clicking the - sign beside the group name will collapse the list.
The following parameters can be modified for the Project through the Property
viewer, by clicking in the parameter field and either typing in a new value, or using
the pull-down menu that will appear, as shown in the example below:
• Project domain - Provides options to modify the X and Y extents of the
project. By entering a new value for the X and Y minimum and maximum
coordinates, the project domain can be changed.
• Display settings - Provides options to modify the overlays in the Plot viewer
window:
• Vertical Exaggeration - The ratio of Y to X axes in the project domain. A
setting of 0 will “stretch” the axes scale so that they fit in the Plot viewer
window. A setting of 1 will be a 1:1 ratio, where the scale is exactly
proportional.
• Colour shading - Provides options to modify colour shading parameters:
32
Chapter 2 : Working with GW Contour
• Select between a rainbow or monochromatic colour scale by clicking in
the Colour palette option, then using the pull-down menu to make your
selection.
• Change the Quality of the colour shading. Higher resolution will improve
the transition between colours, but will also increase refresh times.
• Switch to Zebra shading. If checked, colours do not grade smoothly from
one to the next. Instead, transitional colours between the major colour
shades are removed, resulting in one colour on the Plot viewer representing a range of values.
• Set the colour shading to Transparent, which will allow contour lines,
base maps, pathlines, and other layers to be seen at the same time.
• Type in the Transparency value (in percent). The lower the value, the
more opaque the color shading overlay will be.
• Contour map - Provides options to modify contour map parameters:
• Change the Colour of contour lines, using the pull-down menu.
• Change the Colour palette of graded contour lines, using the pull-down
menu.
• Show/hide contour labels using the Visible option.
• Change the Colour and Font of labels
• Change the Number of decimal points displayed in contour labels.
• Velocity vectors - Provides options to modify velocity vector parameters:
• Select whether to Show the magnitude, or simply the direction of the
vectors.
• Select the Number of vectors drawn per node.
• Determine the Scale factor for vectors.
• Change the Colour of vectors.
• Particle tracking - Provides options to modify velocity vector parameters:
• Change the Maximum travel time for particles.
• Change the Width of particle pathlines.
• Determine the colour of Forward and Backward tracking pathlines.
• Show/Hide time markers using the Visible option.
• Determine the Type of time markers that are drawn.
• Determine the time Interval that time markers are drawn.
• Enter custom time marker Values (if the Custom option was selected for
the marker Type).
• Interpolation Settings - Provides options to modify the settings for each
Interpolation method. Please see “Advanced Settings” on page 21 for a
description of the Interpolation method settings.
• Project Units - Provides a Read Only list of the units of measurement in the
project.
• Base map path - Allows the user to specify the default Base map folder (where
the georeferenced image file is saved).
Working with your project
33
Base Map Options
When a sub-node is selected (making it the active selection), the Property viewer will
display the following parameters:
• Base map path - Allows the user to specify the default Base map folder
(where the georeferenced image file is saved).
Data Set Options
When a sub-node is selected (making it the active selection), the Property viewer will
display the following parameters:
• Data - Provides options to edit the data set:
• Data set type - a read only field indicating the type of information contained
in the data set.
• Data set values - Provides a link to edit the values in the current data set.
• Control points - Provides a link to edit the values of control points for the
current data set.
• Domain - Provides options to modify the X and Y extents of the project. By
entering a new value for the X and Y minimum and maximum coordinates,
the project domain can be changed.
• Display settings - Provides options for modifying the data set Markers and
Labels:
• Marker - Provides options for modifying the data markers, which indicate
the location of data points on the project domain:
• Visible - Show/hide data markers.
• Size - Increase/decrease the size of data markers.
34
Chapter 2 : Working with GW Contour
• Style - Change the appearance of data markers.
• Fill Colour - Change the shading colour of the data markers.
• Pen Colour - Change the outline colour of the data markers.
• Label - Provides options for modifying the data labels, which indicate the
value assigned to a data point:
• Visible - Show/hide data labels.
• Size - Increase/decrease the size of data labels.
• Alignment - Change the location of the label in relation to the data point.
• Decimals - Number of decimal places in the data set values
Interpolated Result Options
When a sub-node is selected (making it the active selection), the Property viewer will
display the following parameters:
• Data set - Allows you to change the data set being used for interpolation.
• Display settings - Provides options for modifying the interpolated data set
overlay on the Plot viewer:
• Plot type - Allows you to select between Colour shading and Contour lines
plot types.
• Plot settings - Provides options for modifying the plot output. Please see
Colour shading and Contour lines on page 32 for a detailed description of
the options available (the options displayed will depend on the selection made
in the Plot type field).
• Decimals - Allows the user to change the number of decimal places displayed
in data labels (also listed under the Plot Settings).
• Interpolation Settings - Lists both the Common and Specific (Advanced)
settings that have been used to create the interpolated data set. If Liveupdate is
not turned on, you will need to manually re-interpolate the data set for your
changes to take effect. Please refer to “Advanced Settings” on page 21 for more
information about the advanced settings for each method.
• Liveupdate - Allows you to apply changes immediately if selected, or wait
Working with your project
35
until the node is manually refreshed before changes are applied if it is not
selected.
Velocity Vector Options
When a sub-node is selected (making it the active selection), the Property viewer will
display the following parameters:
• Visible - Show/hide the velocity vectors.
• Interpolated results - Allows you to change the average values entered for
Conductivity and Porosity, as well as providing a Read Only list of the settings
used to create the Velocity vector overlay.
• Display settings - Provides options to modify the velocity vectors:
• Show velocity vector’s magnitude - Select whether to scale the vector size
proportional to magnitude, or simply show the direction of the vector.
• Number per node - Determine’s the number of vectors drawn per node in
the project domain.
• Scale factor - Increasing the scale factor will “stretch” all vectors by the
same factor (i.e. a Scale factor of 2 will double the size of all vectors), which
can be useful if you have some very small vectors in your project.
• Colour - Select the vector colour from the pull-down colour palette.
• Liveupdate - Allows you to apply changes immediately if selected, or wait
until the node is manually refreshed before changes are applied if it is not
selected.
36
Chapter 2 : Working with GW Contour
Particle Tracking Options
When a sub-node is selected (making it the active selection), the Property viewer will
display the following parameters:
• Visible - Show/hide the particles, time markers, and pathlines.
• Interpolated results - Allows you to change the average values entered for
Conductivity and Porosity, as well as providing a Read Only list of the settings
used to create the Particle pathlines overlay.
• Display settings - Provides options to modify the particles and pathlines:
• Max travel time - The maximum time over which the particle movement will
be simulated.
• Width - Determines the width of particle pathlines.
• Forward - Select the forward pathline colour from the pull-down colour
palette.
• Backward - Select the backward pathline colour from the pull-down colour
palette.
• Time markers - Show/hide time markers using the Visible option, and
change the frequency, interval, and custom time values for your time markers.
See “Settings” on page 61 for more information.
• Liveupdate - Allows you to apply changes immediately if selected, or wait
until the node is manually refreshed before changes are applied if it is not
selected.
Report Options
When a sub-node is selected (making it the active selection), the Property viewer will
display the following parameter:
Working with your project
37
• Report File - The name of the file where the report is being saved.
2.2.4 Plot viewer
The Plot viewer displays the information contained in each sub-node of the Project
tree. By clicking on a sub-node in the Project tree, you can make that node active,
which moves it to the “top” of the overlays being displayed on the Plot viewer. If you
find that some of the information you are trying to display is being “masked” by
another overlay, simply click on the overlay of interest in the Project tree to bring it to
the foreground. The Plot viewer window also displays legends for visible overlays, if
the Legend option has been checked for the sub-node. You can turn a legend on/off by
clicking on a sub-node in the Project tree, then clicking View>Legend from the Main
Menu.
Legends in the Plot viewer can be repositioned by clicking-and-dragging the legend to
a new position in the Plot viewer.
2.3 Data Input
Once you have created a new project, or re-opened an existing project, you can add/
edit/remove Base maps and Data sets from the project, as described in the following
sections.
38
Chapter 2 : Working with GW Contour
2.3.1 Base Maps
When a project is first created, a Base map can be added. However, one or more Base
maps can also be added to an existing project. If a Base map exists in your project, it
will appear as a sub-node in the Project tree, and shown in the following screenshot:
Deleting a Base Map
To remove an existing Base map from your project, you can either right-click on the
sub-node and select Remove, or you can select the sub-node in the Project tree, then
click on Input>Base map>Delete from the Main Menu.
Adding a Base Map
To add a Base map to an existing project, you can either right-click on the Base map
node in the Project tree and select New, or click on Input>Base map>New from the
Main Menu. In either case, the Base map settings window will appear, as shown in
the following screenshot:
From the Base map settings window, you can enter a Name for the new Base map,
select the Destination folder for the georeferenced file, and select the Source file. The
process for adding a new Base map is the same as described in “Project Domain and
Base Map selection” on page 18.
Renaming a Base Map
To rename a Base Map in the Project tree, you can right-click on the Base map node in
the Project tree and select Rename.
2.3.2 Data Sets
GW Contour allows users to create interpretations and Particle Tracking using several
types of Data Sets: Heads, Hydraulic Conductivity, Porosity, Concentration, and
General for all other data set types.
Data Input
39
Note: Although the labels used for the Data Sets refer to hydrogeological applications, GW Contour can work with any type of data. For example, ground surface
elevations are based on units of “height”, and so they can be imported under the
“Head” data set type, or under the General data set type.
• Heads - The technical definition of Hydraulic Head is the height above a
reference plane (for example, sea level) that a column of water can be
supported by the hydraulic pressure in a ground water system at a given point.
For the purposes of GW Contour, Head data sets refer to elevation data
measured at X and Y locations.
• Hydraulic conductivity - Hydraulic conductivity represents the ease of water
movement through a porous media, measured in distance vs. time. Hydraulic
conductivity values are always >= 0.
• Porosity - Effective Porosity (ne) is the ratio between drainable pore volume,
and the total volume of soil sample. It can also be stated as the ratio of the total
volume of voids available for fluid transmission to the total volume of the
porous medium. Porosity values are always 0 < ne < 1.
• Concentration - Represents the concentration (or amount) of any element or
substance measured. Concentration values must be >= 0.
• General - For all other types of data sets. The unit can be specified by the user,
and can have any value.
GW Contour contains flexible options for the creation and modification of data sets.
You may import from numerous file formats, or copy and paste from the Windows
clipboard. These features are discussed below.
2.3.3 Copy and Paste Data
You can start the copy-and-paste process from the Project tree by right-clicking on
the Data node, and selecting New, or you can clicking on Input>Data Set>New from
the Main Menu. To copy and paste data, you must copy data into the Windows
clipboard BEFORE you select the Paste from clipboard option. Open the source file,
highlight the contents you want to use for your data set, and copy (for example, by
hitting Ctrl-C on your keyboard). Once you have copied data to the Windows
clipboard, click the Paste from clipboard radio button in the Data Set Wizard
window, and the data in the Windows clipboard will be automatically copied into the
data fields, as shown in the following screenshot:
40
Chapter 2 : Working with GW Contour
You must select the Data set type, and in the case of Conductivity, enter an
Anisotropy factor between Kx and Ky. You can also enter a Data set name, which
will be useful when Interpolating your data sets later. Once you have entered all
required information, click on the [Next] button to proceed to the Column match
window. As shown in the following screenshot, you must match each required
Parameter to a Column of data. You can also select the Unit for each column of data
being imported. The data will be automatically converted to your project units during
the import process.
By clicking in the Column fields, data can be manually edited at this time.
Data Input
41
Once you have entered all required information, click on the [Next] button to proceed
to the Grid domain window. As shown in the following screenshot, you can define
the Grid domain which can exclude data points if their coordinates are outside the
domain you select (by default the domain is set to the project domain).
Note: If you have points in your data set that are outside of your project domain,
or outside of the Grid domain you select, a warning message will be displayed
prompting you to either continue, or return to this screen and change your selections.
If you choose to Display data set locations with symbols, you can click the Set
marker button to pick the symbol, fill colour, and pen colour for the markers that will
indicate each data point on your project domain. You may also select the precision
with which the data will be imported by setting the number of Decimals.
Once you have entered all required information, click on the [Finish] button to
complete the import process. Your data points will be added to your project, and a
Data set will be added to the Data set node of the project tree.
2.3.4 Import Data
To import data from a file instead of pasting from the Windows Clipboard, you can
either right-clicking on the Data node in the Project tree and select New, or click on
Input>Data Set>New from the Main Menu. The Data Set Wizard window will
appear, as shown in the following screenshot:
42
Chapter 2 : Working with GW Contour
In the Data Set Wizard window, click the Import file radio button if it is not already
selected, then click in the Data set name field and enter a name.
Select the Data set type from the combo-box, and then click the Browse button
and select the file to be imported from a folder on your hard drive. In the case of
Conductivity, you will also need to enter an Anisotropy factor between Kx and Ky.
GW Contour can import data from ASCII .TXT files, Surfer .GRD files, MS Excel
.XLS files, ESRI “Points” .SHP files, and MS Access .MDB files. When importing data
from a file, you have the option of disregarding the first row, which usually contains
headers. Check the Ignore column headers in row 1 check box to start importing from
the second row.
When all required data has been entered, click on the [Next] button to proceed to the
Column match window. As shown on page 41, you must match each required
Parameter to a Column of data. You can also select the Unit for each column of data
being imported. The data will be automatically converted to your project units during
the import process.
Data Input
43
By clicking in the Column fields, data can be manually edited at this time.
When all required data has been entered, click on the [Next] button to proceed to the
Grid domain window. As shown on page 42, you can define the Grid domain which
can exclude data points if their coordinates are outside the domain you select (by
default the domain is set to the project domain).
Note: If you have points in your data set that are outside of your project domain,
or outside of the Grid domain you select, the cell(s) containing the point(s) are
highlighted, and a warning message will be displayed prompting you to either
continue, or return to this screen and change your selections.
If you choose to Display data set locations with symbols, you can click the Set
marker button to pick the symbol, fill colour, and pen colour for the markers that will
indicate each data point on your project domain.
Once you have entered all required information, click on the [Finish] button to
complete the import process. Your data points will be added to your project, and a
Data set will be added to the Data set node of the project tree.
2.3.5 Control Points
The Control Points feature of GW Contour allows users to adjust the results of
interpolations by adding control points to a data set at specific coordinates inside the
grid domain. Users can interpolate a data set and view the output in GW Contour, then
add Control Points and re-interpolate the data to view the changes. It is important to
note that, unless Control points are Saved, or Exported, they are only temporarily
added to the project, and will be removed when the project is closed. Information
about saving and exporting Control points is included in this section.
44
Chapter 2 : Working with GW Contour
Adding Control Points
To add Control Points to an existing data set, you can either right-click on the data set
sub-node in the Project tree and select Control Points, or click on Input>Data
Set>Control Points from the Main Menu. Alternately, you can use the toolbar buttons
when the sub-node has been selected in the Project tree. In each case, you
have the option to Add a single point, or Add a line of points.
Adding a Single Control Point
If you select the Add single option, you can add one (or more) points by left-clicking at
one (or more) locations on your project domain. Each time you select a point, you will
be prompted to enter a data value at that point, and shown in the following screenshot:
Once you have entered a data value and clicked [OK], and new point will be added to
the overlay. If you have made Markers visible (see “Data Set Options” on page 34), a
marker will be placed at the location of the Control point.
Adding a Line of Control Points
The process to add a line of control points is the same as adding a single control point,
except that you click-and-drag your mouse to create the line of points. When the line is
oriented correctly, let go of the mouse button, and the Edit Data window will appear, as
shown in the following screenshot:
For each data point, enter a value, then click [OK] when finished, and the Control points
will be added to the data set. As with the Add single feature, if you have made
Markers visible, markers will be placed at the location of each Control point in the line.
Data Input
45
Note: If Control points are being added to a data set that has already been Interpolated, the data set must be re-interpolated in order to reflect the Control point data.
Deleting Control Points
To delete Control Points from an existing data set, you can either right-click on the
data set sub-node in the Project tree and select Control Points, or click on
Input>Data Set>Control Points from the Main Menu. Alternately, you can use the
toolbar buttons
when the sub-node has been selected in the Project tree. In each
case, you have the option to Delete a single point, or Delete all points.
If Delete single is selected, you can click on one (or more) Control points in the
Project viewer to remove them. You will not be able to delete a point that is part of the
regular data set, only Control points.
If Delete all is selected, a warning message will appear prompting you to confirm that
all Control points in the data set will be deleted.
Importing Control Points
GW Contour also allows user to import control points from a text (.TXT) file. To
import Control points, select the data set in the Project tree, then click Input>Data
Set>Control Points>Import. The Import ASCII control points window will appear,
as shown below:
Select the .TXT file containing your Control points (it must contain X, Y, and Data
columns), and then click [Open]. An Edit data window will then open, allowing you
to review and edit the X coordinates, Y coordinates, and data values being imported.
Once you have reviewed the data, click [OK], and the Control points will be added to
your data set, and displayed on the Plot Viewer if the data set Markers are set to
visible.
46
Chapter 2 : Working with GW Contour
Editing Control Points
Control point data can also be edited after being added to a data set. Click Input>Data
Set>Control Points>Edit. In the Edit data window that appears, the X coordinate, Y
coordinate, and Value can be edited for any Control point in the data set. When you
have finished making changes, click the [OK] button to save your changes.
Exporting Control Points
Control points added to a data set are temporary, and will be removed from a project
when the project is closed unless they are explicitly saved to the data set, or exported to
a text file. To Export control points from a selected data set, click Input>Data
Set>Control Points>Export, then select a folder location and file name to save the
Control point X coordinates, Y coordinates, and values. An exported file can be reimported into a data set at a later date by following the Importing Control Points
procedure described previously.
Saving Control Points
As mentioned in the previous paragraph, Control points can be saved to a data set so
that the user does not need to add them again next time the project is opened. To save
Control points to a selected data set, click Input>Data Set>Control Points>Save to
project. A confirmation message will appear, and the Control points will become part
of the data set.
Data Input
47
48
Chapter 2 : Working with GW Contour
3
Interpolated Results
Interpolation is used to estimate values across a larger area using known values from a
discrete set of data points. In GW Contour, several interpolation methods are available
to process your particular data in the most effective way possible. The Interpolated
Results can be displayed on the Project viewer using contour lines, or colour shading.
Contour line and colour shading maps allow users to visualize and analyze variation of
head, porosity, hydraulic conductivity, or concentration of a species over a geographic
area within the project domain.
3.1 Creating New Interpolations
In order to create an Interpolated Result, at least one data set must already exist. To start
the Interpolation process, you can either right-click on the data set sub-node in the
Project tree and select Create Interpolated results, or click on Output>Interpolated
result>New from the Main Menu. In either case, the Interpolated Result Settings
window will open, as shown in the following figure:
Creating New Interpolations
49
In the Interpolated results settings window, enter the following information:
• Name - The name of the Interpolated results data set, as it appears in the
Project tree.
• Data source - The data set to be interpolated. You can use the pull-down
menu to select from available data sets.
• Interpolation method - The interpolation method to be used to create the
interpolated data set. You can use the pull-down menu to select between
Kriging, Natural Neighbors, and Inverse Distance. The Bilinear interpolation
method is only available if a gridded data set (.GRD file) is used.
• X min, X Max - The horizontal boundaries of the interpolated area. By default,
these numbers are set to the horizontal extents of the project domain. If a grid
domain larger than the project domain is set, the project domain will be
resized to accommodate the grid domain defined.
• Y Min, Y Max - The vertical boundaries of the interpolated area. By default,
these numbers are set to the vertical extents of the project domain.
• Number of grid intervals - The number of nodes in the Horizontal and
Vertical directions for interpolation. A higher number will create a finer
interpolation, but will also result in longer interpolation times.
• Min value, Max value - Use these as cut-off values, if you want to clip the map
at the Min or Max value. These values must be between the data Min and Max.
• Use log interpolation - This option will interpolate the log values of the data
points and then invert the log value distribution. This option is commonly
used for interpolating data with a high degree of variance such as hydraulic
conductivity.
• Live update - Allows changes to occur immediately when made.
• Advanced settings - Clicking the Advanced settings button will open the
50
Chapter 3 : Interpolated Results
Advanced settings window, as described in “Advanced Settings” on page 21.
Please note that in this case, only the selected Interpolation method advanced
settings will be shown. The Bilinear Interpolation method does not have any
advanced settings.
Click the [OK] button to proceed to the Display Settings window, as shown in the
following screenshot:
The Display Settings window allows you to select between a Contour map and
Colour shading for your output, and allows you to set the parameter for each option.
Contour Map Options:
• Intervals - Allows you to choose between a specific Contour interval, or select
a Number of intervals evenly spaced between the highest and lowest value.
• Lines - Allows you to select a Color palette for the contour lines.
• Labels - Allows you to show/hide labels using the Visible checkbox, and
specify the label Font, the number of Decimal places in the label, and the
Interval between contour lines (i.e. an interval of 2 means that only every
second contour line will be labeled).
Note: Once the interpolated results contour map has been created, you can manually add a contour line at any point in the Project viewer by selecting the Output>Interpolated Result>Add point at option, then clicking on the project viewer
at the desired location of the contour line(s).
Creating New Interpolations
51
Colour Shading Options:
• Colour Palette - Allows you to select the colour to be used for shading.
• Quality - Specifying a higher quality will result in a smoother gradation
between shades of the colour palette, but may result in slower refresh rates
• Zebra - If checked, colours do not grade smoothly from one to the next.
Instead, transitional colours between the major colour shades are removed,
resulting in one colour on the Plot viewer representing a range of values.
• Transparency - Allow contour lines, base maps, pathlines, and other layers
to be seen at the same time as the colour shading is displayed. The default
transparency is 50%, however it can be increased or decreased as desired.
When you have finished setting all display options, click the [OK] button to
interpolate the data set, and create the Interpolated Results. A sub-node corresponding
to the interpolated result is added to the Project tree, and the Interpolated results
overlay is added to the Project viewer.
3.2 Editing Interpolated Data
To manually edit the Interpolated Results, you can either right-click on the data set
sub-node in the Project tree and select Edit, or click on Output>Interpolated
result>Edit from the Main Menu. In either case, the Edit data window will open, as
shown in the following figure:
You can edit any data point Value in this window, then select [OK] to finish.
52
Chapter 3 : Interpolated Results
3.3 Interpolated Data Set Properties
GW Contour provides a number of settings that can be used to customize the display of
Interpolated Results in the Project viewer. By right-clicking on a Data set in the Project
tree, the following options can be displayed (as shown in the figure):
• Edit - Edit the interpolated values in tabular form.
• Rename - Change the name of the Interpolated Results data set as it appears in
the Project tree.
• Delete - Remove the interpolated data set.
• Interpolate - Re-run the interpolate process (to update the results if you have
modified your input data, or interpolation settings).
• Create velocity vector - Calculate velocity vectors for your project domain
based on the selected Interpolated results. Please see Chapter 4 , Velocity
Vectors and Particle Tracking for details on how to create Velocity vectors.
• Create particle tracking - Calculate particle pathlines for your project domain
based on the selected Interpolated results. Please see Chapter 4 , Velocity
Vectors and Particle Tracking for details on how to create Particle pathlines.
• Interpolation settings - Modify the Advanced settings for your Interpolated
results. Please see “Advanced Settings” on page 21 for details on modifying
Advanced settings. The interpolation settings can also be accessed by clicking
Settings-interpolation from the Main Menu.
• Plot type - Allows you to display your Interpolated results data using a
Contour map, or Colour shading.
Options for modifying the Interpolated results data set are also presented in the Project
viewer. Please see “Interpolated Result Options” on page 35 for a description of the
options available
3.4 Exporting Interpolation Results
GW Contour allows the user to export Interpolated results to an external file, that can
be used in another program. To export an Interpolated results data set, click on
Output>Interpolated result>Export to grid file from the Main Menu. The Export
interpolation results window will open, and you can select the name, type, and folder,
used to save the file you are creating.
Interpolated Data Set Properties
53
54
Chapter 3 : Interpolated Results
4
Velocity Vectors and Particle Tracking
Once you have entered and interpolated a groundwater elevations data set, you are
ready to do some post-processing and interpretation of the data. With GW Contour, you
may create velocity vectors and/or particle pathlines indicating direction, velocity, and
travel time of groundwater flow for your site. This chapter describes how to create
velocity vectors and particle tracking maps, and the various settings and features
available.
Velocity vectors are calculated based on Darcy’s law. For more details, please refer to
“Applied Hydrogeology, Third Edition”, C. W. Fetter. Prentice-Hall, Inc., 1994.
4.1 Velocity Vectors
4.1.1 Settings
Velocity vectors indicate the direction and velocity of groundwater flow throughout the
site. Velocity and orientation are represented as vectors plotted over the specified area.
To create a new velocity vector map,
)
Output>Velocity Vectors>New from the Main Menu.
The Velocity vector wizard will open, as shown in the following figure:
Velocity Vectors
55
Enter a Velocity vector name for the vector map, and define the necessary inputs.
The minimum data requirements for calculating Velocity Vectors are listed below:
• Heads - From the combo-box, select a head interpolated results data set.
If one is not available, return to the Input, create a Heads data set, then
interpolate this data set. Please see Chapter 3: Interpolated Results for a
complete description on creating Interpolated results.
• Porosity - From the combo-box, select a porosity interpolated results data
set. If one is not available, you can return to the Input, create a Porosity data
set, then interpolate this data set. Please see Chapter 3: Interpolated Results
for a complete description on creating Interpolated results.
Alternately, if porosity data is not available, you can select the Use an
average value option, and enter an estimated porosity value for the project
domain.
NOTE: Porosity should be entered as the effective porosity.
• Hydraulic Conductivity - From the combo-box, select a conductivity
interpolated results data set. If one is not available, you can return to the
Input, create a Conductivity data set, then interpolate this data set. Please see
Chapter 3: Interpolated Results for a complete description on creating
Interpolated results
Alternately, if conductivity data is not available, you can select the Use an
average value option, and enter an estimated conductivity value for the
project domain.
• Liveupdate - Allows you to apply changes immediately if selected, or wait
until the node is manually refreshed before changes are applied if it is not
selected.
Once you have defined the data requirements, click [Next] to proceed to the next step
in the Velocity vector wizard.
56
Chapter 4 : Velocity Vectors and Particle Tracking
Define the required inputs as follows:
• Proportional to Magnitude - Checking this option will size and scale the
vectors according to their calculated magnitude.
• Number per Node - Define the number of vectors per grid node
• Scale Factor - This option will scale the vectors according to their size. Scale
factor is used to set the length of the velocity vector corresponding to the
highest flow velocity. This value may need to be increased in order to see the
lower range of velocity vectors.
• Color - Select a display colour for the vectors.
Once you are done, click [Finish] to create the map.
A progress dialog will appear indicating the calculations are in progress.
Once this is complete, the Velocity Vectors map should appear, as shown in the
following screenshot:
Velocity Vectors
57
A new node is created under the Project tree's Velocity vector node and a new layer
containing the resulting velocity vectors added to the Plot viewer.
4.1.2 Editing Vector maps
Once the vector map has been created, you may modify the settings in several ways:
58
[1]
Right-mouse click on the Vector node in the Tree View, and select Settings, or
select Settings>Velocity Vectors from the Main Menu, and the following
dialog will appear:
[2]
You can also modify the Vector properties under the Property Viewer (as
shown in the following screenshot); select any Vectors node from the tree view,
then modify the necessary settings.
Chapter 4 : Velocity Vectors and Particle Tracking
If you Use Average Values for either the Conductivity or Porosity, you may modify
the values under the Interpolated results section. A detailed description of the options in
the Property viewer can be found in “Velocity Vector Options” on page 36. The
changes will only take effect after you update the velocity vector map, unless you check
the Liveupdate option. To manually update the velocity vector map, right-click on a
Velocity Vectors sub-node in the tree, then select Show Velocity Vectors.
4.1 Particle Tracking Maps
The Particle Tracking Map is unique because it does not simply represent a “snap-shot”
in time. Groundwater pathlines represent a historical travel log of the groundwater
particles. By displaying time markers, you can see where the groundwater will travel to,
or originated from, after specified time intervals (e.g. 365, 730, 7300 days).
Particle pathlines are calculated based on Darcy’s law, which is summarized by the
following formula:
dh
Q = KA -----dl
where:
Q - flow rate
K - Conductivity
A - Area through which the water flows
dh/dl - Hydraulic gradient
In GW Contour, the hydraulic conductivity, K, denotes only the horizontal conductivity
(Kx, Ky), due to the two-dimensional nature of the models.
To calculate pathline distance, you need to know the groundwater velocity:
Particle Tracking Maps
59
When water flows through an open channel, the flow rate, Q, is equal to the product of
the velocity, V, and the cross-sectional area of flow, A.
Q = V ·A
Re-arrange this equation to solve for velocity:
---V = Q
A
In a porous medium, the area, which groundwater may flow through is equal to the
product of the effective porosity (ne) and the physical dimensions. Therefore, by
substitution we can get the following equation:
dh
-----dl
V = K · A · -------------ne · A
And simplify to get:
dh
K · -----dl
V = ---------------ne
The distance that pathlines travel is calculated using:
D = V·T
Where:
D - distance
V - groundwater velocity (calculation explained above)
T - travel time
Note that the groundwater velocity should not be assumed to be the same as the
contaminant velocity due to the following factors that affect contaminant movement:
• Biodegradation, decay, and adsorption
• Diffusion and dispersion
Note: For more details, please refer to “Applied Hydrogeology, Third Edition”, C.
W. Fetter. Prentice-Hall, Inc., 1994, pp. 142-151
60
Chapter 4 : Velocity Vectors and Particle Tracking
Forward tracking pathlines are used to predict where groundwater is flowing, and how
long it will take to reach a given location if it starts from a known location at a known
time.
Backward tracking pathlines are used to predict where groundwater, at a given location
and time, is coming from, and how long it took to travel there.
4.1.1 Settings
To create a new particles map, click on Output>Particle Tracking>New from the Main
Menu. The Particle tracking wizard will appear, as shown in the following figure:
Enter a Particle tracking map name and define the necessary inputs. The minimum
data requirements for calculating Particle pathlines are listed below:
• Heads - From the combo-box, select a head interpolated results data set. If
one is not available, return to the Input, create a Heads data set, then interpolate
this data set. Please see Chapter 3: Interpolated Results for a complete
description on creating Interpolated results.
• Porosity - From the combo-box, select a porosity interpolated results data
set. If one is not available, you can return to the Input, create a Porosity data set,
then interpolate this data set. Please see Chapter 3: Interpolated Results for a
complete description on creating Interpolated results.
Alternately, if porosity data is not available, you can select the option “Use an
average value”, and enter an estimated porosity value for the project domain.
NOTE: Porosity should be entered as the effective porosity.
• Hydraulic Conductivity - From the combo-box, select a conductivity
interpolated results data set. If one is not available, you can return to the
Input, create a Conductivity data set, then interpolate this data set. Please see
Particle Tracking Maps
61
Chapter 3: Interpolated Results for a complete description on creating
Interpolated results.
Alternately, if conductivity data is not available, you can select the option
“Use an average value”, and enter an estimated conductivity value for the
project domain.
• The Live update option allows you to apply changes immediately if selected,
or wait until the node is manually refreshed before changes are applied if it is
not selected.
Once you have defined the data requirements, click [Next] to proceed to the next step
in the Particle tracking wizard.
In this dialog, there are several display options available for customizing the pathlines
and time markers:
Under the General frame, specify:
• Max travel time for the pathlines
• The Line width for the pathlines
• A Pathline color for Forward and Backward pathlines
Under the Time Marker frame, specify:
• Whether or not the time markers are Visible
• Frequency:
• Specify an interval for time markers (Every ## days)
OR
• Define Custom time marker intervals.
Use the
button to add a time interval
Use the
button to remove the selected time interval
Use the
button to edit the selected time interval
62
Chapter 4 : Velocity Vectors and Particle Tracking
Click [Finish] to create the particle tracking map.
A new node is created under the Project tree's Particle Tracking node and a new layer
is added in the Plot viewer.
Note: Now that you have added a Particle tracking node to your project, you must
assign particles in your project domain, then animate these particles, to see the
results of the particle tracking simulation. This is explained below.
4.1.2 Adding Particles
GW Contour provides several options for adding particles to your project domain.
Single
Single particles are useful for point source contamination, or for placing particles at
random locations on your site.
To add single particles:
• From the main menu, select Output>Particle tracking>Particles>Add single,
Add single particle button.
or click on the
• Using your mouse, left click once at the desired particle location.
• Select the tracking direction for the particles (Forward or Backward).
To animate these particles, skip ahead to “Animating Particles” on page 64.
Circle
A circle of backward tracking particles is often assigned around a pumping well, in
order to determine the capture zone for that well.
To add a circle of particles:
• From the Main Menu, select Output>Particle tracking>Particles>Add along
a circle, or click on the
Add particles along a circle button in the
Toolbar.
• Using your mouse, click-and-drag the cursor to locate the ring, and increase the
radius of the circle.
• Once you have assigned your circle of particles, select the tracking direction for
the particles (Forward or Backward).
To animate these particles, skip ahead to “Animating Particles” on page 64.
Line
A line of particles is useful for property boundaries, to determine from where
groundwater is originating, or to where it is travelling.
Particle Tracking Maps
63
To add a line of particles:
• From the Main Menu, select Output>Particle tracking>Particles>Add
Add particles along a line button in the
along a line, or click on the
Toolbar.
• Using your mouse, click-and-drag to anchor the desired starting point of the
line, orient the line, and stretch out the line of particles.
• Select the tracking direction for the particles (Forward or Backward).
To animate these particles, please see “Animating Particles” on page 64.
4.1.3 Animating Particles
Once particles have been added to your project, you may then calculate (animate) the
pathlines, and display time markers. If you have not yet added particles, refer to the
section “Adding Particles” on page 63.
To animate your particles:
• From the Main Menu, select Output>Particle tracking>Run Simulation; or
Draw particle tracking button in the Toolbar. Alternately,
click on the
you can right-click on a Particle tracking node in the tree view, and select Run
Simulation.
A progress dialog will appear, indicating the pathline calculations are in progress.
Once this is complete, the particle tracking map will appear; similar to the following
screenshot:
64
Chapter 4 : Velocity Vectors and Particle Tracking
4.1.4 Deleting Particles
You may remove individual particles from your project, or remove all particles
associated with a Particle tracking node, using the following options:
Delete Selected
To remove only the selected particles from the project:
• Select Output>Particle tracking>Particles>Remove selected from the Main
Menu, or click on the
Delete selected particle button in the Toolbar
• Click on the desired particle(s) or groups of particles to delete.
Delete All
To remove all particles from the project:
• Select Output>Particle tracking>Particles>Remove all, or click on the
Delete all particles button in the Toolbar
• A confirmation warning message will appear; click [OK] to proceed.
Particle Tracking Maps
65
4.1.5 Editing Particle Tracking maps
Once the particle tracking map has been created, you may modify the settings in
several ways:
• Right-click on the Particle tracking node in the Project Tree, and select
Settings, or select Settings>Particle tracking from the Main Menu, and the
Edit path line settings window will appear:
• You can also modify the Particle tracking properties under the Property
Viewer (as shown in the following screenshot). Select a Particle tracking node
from the tree view, then modify the necessary settings.
If you selected Use Average Values for either the Conductivity or Porosity, you may
modify these values here. The changes will only take effect after you Re-run the
Particle Simulation, as explained in “Animating Particles” on page 64.
66
Chapter 4 : Velocity Vectors and Particle Tracking
5
Reports
The Report Editor included with GW Contour is used to create professional reports
containing the 2D views you have generated for your projects. This chapter presents
information on how to create, edit, and save reports and report templates, which can be
printed or exported for convenient transfer to your colleagues and/or clients.
The Report Editor provides the following features:
•
•
•
•
•
•
•
•
Send Particle Tracking or Interpolated Results data to the Report Maker
Create and save Report Layout Templates
Create and Manage Reports
Design and Preview Reports
Add annotation text or objects (lines and shapes)
Modify the order of report layers
Paste images from clipboard
Save, Export, and Print Reports
The Report Editor contains two modules:
• The Template Designer: create and save page templates for re-use
• The Report Maker: create, save, and print reports containing your GW Contour
maps and data
Each module of the Report Editor comes with its own set of toolbars and icons that
perform specific tasks related to the window. The following sections present a detailed
description of the toolbar icons for each component.
5.1 About the Interface
There are two main components to the Report Editor - the Report Maker and the
Template Designer. The Report Maker allows you to create a new report, or edit an
existing report, while the Template Designer allows you to develop a common
framework that can be used to make multiple reports quickly and easily. Both features
use a common interface, and so the features are described together in the following
sections.
About the Interface
67
The Report Maker may be launched from GW Contour by either right-clicking on the
Report node in the Project tree and selecting New, or clicking Output>Report>New
from the Main Menu.
The Template Designer may be launched from GW Contour by either right-clicking
on the Report node in the Project tree and selecting Template, or clicking
Output>Report>Template from the Main Menu.
In either case, the preview window will be displayed, similar to the following figure:
The Report Maker/Template Designer window contains the following items:
• Main Toolbar - provides multiple buttons controlling the reports.
• Side Toolbar - provides multiple buttons for the tools used to design the
report.
• Main Menu bar - provides access to most of the features in the Report Editor.
• Layout window - provides the interface for designing the report.
5.1.1 Main Toolbar
The following options are available from the Main Toolbar:
New Report - Create a new report.
Open Report - Open an existing report.
Save Report - Save the changes made to the report.
68
Chapter 5 : Reports
Save Report As - Save a copy of the report.
Print Report - Print the current report.
Zoom In - Increase view magnification by 25% (Max zoom - 400%).
Zoom Out - Decrease view magnification by 25% (Min zoom - 25%).
Magnification - Increase or decrease the overall size of the report page in
the preview window.
5.1.2 Side Toolbar
The following options are available from the Side Toolbar:
Pointer
Text tool
Rectangle
Filled Rectangle
Outlined Rectangle
Triangle
Outlined Triangle
Clipboard
Line
Ellipse
Filled Ellipse
Outlined Ellipse
Filled Triangle
Add image
Default Line Color
Default Fill Color
For more details on using these tools, see "Image / Side Toolbar" on page 72.
5.1.3 Main Menu Bar
The Main Menu bar contains all features of the Report Editor logically organized into
five menu options: Report, Edit, Page, Image, and Help.
NOTE: If you load the preview window in Template Designer mode (i.e for creating new templates or modifying existing templates), the first menu item will be
named Template instead of Report.
Report / Template
The Report/Template menu contains menu items for managing reports and the Report
Maker itself. Options under the Report/Template menu allow users to:
• Create New Reports
About the Interface
69
•
•
•
•
•
Open Reports; only files with the extension .WRM/.TPL may be opened
Print Reports
Save Reports as a .WRM/.TPL file
Create a copy of an existing report using the Save as feature
Export to Image exports the report to an image file. Supported formats
include BMP, JPG, TIF, GIF, EMF and PNG.
• Close the current report
• Exit the Report Maker, and return to GW Contour main window
Edit
The Edit menu provides common Windows clipboard tools, for editing the report/
template currently in view. Options under the Edit menu allow users to:
•
•
•
•
•
Copy - Copy the selected item to the windows clipboard
Cut - Cuts the selected object to clipboard
Paste - Pastes the clipboard item onto the current layer
Delete - Delete the selected item
Select All - Select all objects on the report
Page
The Page menu contains menu items for controlling the report/template layout.
Options available under this menu allow users to:
• Add Page - The new page will appear as a new tab, at the bottom of the
Report Maker below the Page Layout window.
• Remove Page - Remove the selected page from the report
• Rename Page - A small dialog will appear (as shown below), allowing you
to enter a unique name for each selected page.
• Page Configuration - Loads a standard Windows Page Setup dialog, as
shown in the following screenshot:
70
Chapter 5 : Reports
In this dialog, you may modify the Paper Size, Source, page Orientation,
and Margins.
• Change Template - Select a different template for your report.
When the template is changed, all the annotation layers (shapes, text) and the
GW Contour image will be carried over to the new template.
About the Interface
71
Image / Side Toolbar
The Image menu/Side Toolbar contains items for controlling objects on the report,
and the page’s zoom magnification. The Side Toolbar and Image menu contain
slightly different options, however most options are found in both locations:
• Pointer - Use the mouse to drag-and-drop or resize objects in the report/
template.
• Clipboard - Copy the contents of the preview window to the Windows
Clipboard.
• Text - Add text labels to the report. When this item is selected, the following
dialog will appear:
•
•
•
•
•
•
•
72
Enter the desired text into the box provided. You may change also format the
text entered by selecting the Format>Font menu item, which will load the
standard Font/Size/Style/Color dialog. Once you configure the text to your
satisfaction, click [OK] in the Font dialog and again in the Enter Text dialog.
You must then place the text box at the desired location in the report, and left
click once to fix it onto the report. After this, you may need to re-size the text
box to achieve the desired appearance.
Line - Add a line
Rectangle - Outlined, Filled, or Filled and Outlined
Ellipse - Outlined, Filled, or Filled and Outlined
Triangle - Outlined, Filled, or Filled and Outlined
Add picture from file- Add a graphic image to the report/template. Supported
file formats are .JPG, .BMP, .GIF, and .PNG
Default Line/Fill Colour - Clicking on the colour box allows you to change
the colour that will be used for either a line, or for the shading or an object.
Shape configuration - When you select this item, the following dialog will
appear:
Chapter 5 : Reports
You can modify the Colour of the Line, and the shading (Fill) by clicking on the
Colour box and selecting from the palette window that opens. Leaving the semitransparent checkbox unchecked will result in an opaque shading (fill). The Weight of
the line determines the thickness of the outline.
Checking the Default for new shapes button will configure GW Contour to use these
settings when shapes are created in the future.
Once a shape has been added to the report, you may select it, then re-position or re-size
it using your mouse to click-and-drag the box sides.
Help
The Help menu provides a link to the GW Contour on-line help, with helpful hints on
how to use the Report Editor.
5.2 Creating Report Templates
The following section describes the features of the Report Template Designer, and
how it can be used to build and customize your own report templates. The overview
instructions below tell you how to create a basic report template, and how to customize
the template to your own preferences.
To start the process of creating a new Template, click on
Output>Report>Template>New from the Main Menu. Once the preview window has
opened, select Template>Save As from the Main Menu to create a new template. Enter
a name for the template, and click [OK]. A new blank Template will now exist in the
preview window.
Creating Report Templates
73
Page Layout
The first step is to define the page layout. This includes page orientation, size, and
margins. Click on Page>Page Configuration from the preview window Menu.
Specify the desired Paper, Orientation, and Margins settings. You can also configure
your default printer by clicking the [Printer] button. When you have made the
required changes, click [OK].
Create Page Border
In your report template, you may want to add a border around the entire page. To do
so:
• Click on Image>Rectangle>Rectangle Tool from the preview window Main
Menu.
• Draw a rectangle just inside the perimeter of the page, representing a border
for the report, by clicking-and-dragging the rectangle outline.
Once the shape has been placed on the report, you may modify the properties of this
shape:
• Click on Image>Shape Configuration from the Main Menu, and the Format
window will appear, as shown in the following screenshot:
74
Chapter 5 : Reports
You can modify the Colour of the Line, and the box shading (Fill) by clicking on the
Colour box and selecting from the palette window that opens. Leaving the semitransparent checkbox unchecked will result in an opaque shading (fill). The Weight of
the line determines the thickness of the box outline.
Once a shape has been added to the report, you may select it, then re-position or re-size
it using your mouse to click-and-drag the box sides.
Add Text Labels
You can add fixed text Labels that are hardcoded into the template. If a text label is
added to a template, the label will always be displayed in a report using the template.
You may want to use text labels to provide your company details, or a header or footer,
or to add universal comments to the report template. To add text labels:
• Click on Image-Text Tool from the Main Menu. A text box will appear, as
shown in the following figure:
• Enter the desired text into the box provided.
• To modify the text font size and style, click on Format-Font in the text
window. Once you have made the required font changes, click [OK] to apply
the changes and return to the text window.
• Click [OK] to close the text box.
• Use your mouse to position the text box at the desired location, then click-and-
Creating Report Templates
75
drag to re-size or re-position the text box.
To modify the contents of an existing text box, double click on the text or right-click
on the text box and select Edit Text.
Adding an Image
With the GW Contour Report Maker, you may add an external image (for example,
your company logo), from a file in one of the supported formats: (.BMP, .GIF, .PNG,
or .JPG).
• Click on Image>Add Picture from file from the preview window Main
Menu.
• In the Open window that appears, locate the desired image file, then click
[Open].
Use your mouse to position the image at the desired location, then click-and-drag to
re-size or re-position the image. An example of the appearance of an image on a
template is shown in the following screenshot:
Feel free to experiment with the features of the Template Designer, to develop
templates that suit your particular needs.
To save your report as a template for re-use in the future, click Template>Save from
the preview window Main Menu
The template will be saved in the “Templates” subfolder of your GW Contour
installation directory (the default pathname is \\Program
Files\GWContour\Templates). The template will now appear in the list of available
templates, and can be selected when you choose to create a report.
76
Chapter 5 : Reports
5.2.1 Modifying Layer Orders
As you design your report or report template, you increase the number of layers, and it
may become difficult to select and modify layers that are on top of, or beneath, other
layers.
With the Report Maker, you can modify the order of layer as described below:
• Right-click on any layer (i.e. a text box, shape, image, etc.) in the report.
• From the pop-up menu that appears, select an appropriate Order option, as
shown in the following screenshot:
•
•
•
•
Bring to Front - Move the selected layer on top of all other layers
Sent to Back - Move the selected layer below all other layers
Bring Forward - Move the selected layer up one level
Send Backward - Move the selected layer down one level
Creating Report Templates
77
78
Chapter 5 : Reports
INDEX
A
Add point at 51
Advanced Settings 21
B
Base map configuration 17
Base Map Options 34
Base Maps 39
C
Colour Shading Options 52
Column match 41
Concentration 40
Contour Map Options 51
Control Points 44
Copy and Paste 40
D
Data Set Options 34
Data Sets 39
Default project settings 15
G
Georeference Points 19
H
Heads 40
Hydraulic conductivity 40
I
Import Data 42
Interpolated Result Options 35
Interpolated Results 49
Interpolated results settings 50
Interpolation method 50
Interpolation Results, Exporting 53
Inverse Distance 24
K
Kriging 22
L
Layer Settings 25
N
Natural Neighbor 24
Number per Node 57
P
Particle Tracking 59
Particle Tracking Frequency 62
Particle Tracking Options 37
Particle Tracking Settings 61
Particles, animating 64
Particles, Deleting 65
Plot viewer 38
Porosity 40
Project Options 31
Project Tree 30
Project Units 16
Property Viewer 31
Proportional to Magnitude 57
Provide project extents 18
R
Report Options 37
Report Templates 73
Reports 67
S
Scale Factor 57
Set Model Region 18
V
Vector maps, Editing 58
Velocity Vector Options 36
Velocity Vector Settings 55
Velocity Vectors 55
Vertical exaggeration 18