1
User Manual
Written by Bob Simmerman
Special thanks to Alex Martini for content editing, and to the entire Image Space
Incorporated Team—this manual would not have been possible without you!
Image Space Incorporated
Page 1
7/27/2006
Table of Contents
Minimum Specifications ..................................................................................................... 4
Features of rFactor............................................................................................................... 5
Getting Started..................................................................................................................... 6
Cockpit Overview ............................................................................................................. 11
rFactor Introduction—rFactor Motorworks....................................................................... 18
On Assignment—rFactor Motorworks ............................................................................. 19
Vayline........................................................................................................................... 20
H6 ..................................................................................................................................21
Kodi................................................................................................................................23
On Assignment with Devon Mack—At The Facility........................................................ 24
Customize.......................................................................................................................... 29
Difficulty........................................................................................................................ 29
Rules.............................................................................................................................. 33
Controls.......................................................................................................................... 34
Display........................................................................................................................... 36
Audio..............................................................................................................................37
The Shop –Vehicle Upgrades............................................................................................ 39
Venue Assessment............................................................................................................. 42
Multiplayer.........................................................................................................................47
Control Commands List..................................................................................................... 53
Appendix A: Tuning For Speed—The Garage.................................................................. 56
Appendix B: Extra Features............................................................................................... 65
Appendix C: Firewall Guide.............................................................................................. 71
Legal and Warranty............................................................................................................79
Image Space Incorporated
Page 2
7/27/2006
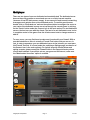
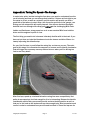
rFactor
The world of rFactor is a unique place where Motorsports fans can come together to
share their passion for the sport. It is a place where we can challenge competitors
and challenge ourselves. It is a place where new friends are made and old friends
are reunited, a place that combines the technical world of vehicle design with the
creation of race competition. Add to this the creative flair of custom paint jobs,
circuit creation, and race organization, and what you have is but a small taste of the
world that rFactor has become.
This is truly an exciting time in Motorsports simulation. What we do today is helping
to shape the future of this sport. Each person brings something unique to this
exciting and ever changing landscape. We are all a major factor in our future.
Happy Racing,
The rFactor Team
Image Space Incorporated
Page 3
7/27/2006
Minimum Specifications
In order to get the most out of the rFactor experience, make sure your system
meets, or exceeds, the following hardware requirements:
System Requirements
1.0 GHz processor
Windows 98 SE, ME, 2000, XP, XP 64-bit (Note: will not run in Windows 95 or
Windows 98 First Edition)
256 MB RAM
GeForce 3 or Radeon 8500
64 MB video RAM
DirectX 9.0c
2.0 GB of hard drive space for installation
After downloading, double click on the downloaded file to begin the installation.
Before the game starts, an option to update your DirectX version to 9.0c is offered—
it is important to go ahead with the DirectX update at this point even if you have
9.0c installed to ensure you have the most current version and any updated DirectX
9.0c files that rFactor requires in order to function properly.
Image Space Incorporated
Page 4
7/27/2006
Features of rFactor
•Rules to simulate different types of racing: Standing starts, formation laps,
rolling starts, racing by time or laps or both, local or full-course yellows
depending on the severity of the accident, and many more fully-customizable
options.
•Dynamically changing Time of Day (TOD), with headlights and beautiful
transitions from day to dusk to night to dawn. Time scaling allows a full 24-hour
transition in as little as 24-minutes.
•Brand new DX9 graphics engine featuring advanced pixel shaders and bump
mapping effects. Solid DX8 and DX7 support for older cards and/or for achieving
higher frame rates.
•Head movement physics, cockpit vibrations, detailed track surface bump
modeling and seat adjustments all give the user a better sense of speed and
control. Field of View (FOV) adjustable from the in-game Display menu.
•Includes expanded sound system with incredible and unique sounds for most
vehicles and engine upgrades.
•Completely updated multiplayer AI featuring a dedicated server with advanced
functionality, matchmaking, and the RaceCast plug-in interface (featuring live
timing, results, and rankings). Future support for more league functionality,
driver swaps, downloadable vehicles/skins/tracks, and voice chat.
•Replay Fridge replay system allows AVI-format creation with effects defined
through plug-ins.
•Camera system include mouse-free look and allows you to move anywhere.
Each vehicle features custom cameras.
•New vehicle upgrade system allows users to buy parts for performance, looks,
and/or sound.
•Improved tire physics and new tire contact calculation, engine boost, support
for various types of suspension including four-link rear suspensions, as well as
other advances in vehicle dynamics.
•Extensive support for modders.
Image Space Incorporated
Page 5
7/27/2006
Getting Started
No doubt you are eager to hit the track right away, and this is just the section for
you. The career paths in the game are a lot of fun to work through, and it is a great
feeling when a car you have crafted over a period of time becomes the dominant
force on the track. But for now, we want to get you up and running quickly, and
allow you to familiarize yourself with the many options and racing configurations
available to you. rFactor is rich in detail, and this ‘virtual playground’ is a serious
business—the more you put into it, the more you will get out of it. Much like the
racers at the 24 Hours of Toban, dedication is needed to get the most enjoyment.
Player Creation
Following the install and activation of rFactor, the user is presented with a blank
name entry box—this will be your first player creation. Of course, you can always
create another persona later; perhaps you will have one for online play and another
for offline, or one for testing one of the numerous mods and tracks that the rFactor
Motorworks community is providing. The New Player button is found by selecting
the Customize icon, then the Player icon, and finally the Create player button. As a
new player you will be asked to select a series to play. Series can be freely switched
from play session to play session; for now it is recommended that you try either the
“OW Challenge 2006” (for open wheel racing) or the “SR Grand Prix” (a Sports Car
series). After selecting a series, you are also able to customize the Team, Vehicle,
Helmet, Nationality, Date of Birth, and Location. Date of Birth and Location are
optional, but help to make the experience a little more personal. Don’t fret the
choices; you are always free to change them later. Just give your player a name,
and then proceed to the Settings button, also found under the main Control button.
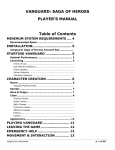
Before you take a car out for a spin you should configure your input device. Found
under the Settings button, along with several option categories, you will find the
Controls option page. For now, just make sure the most critical inputs are mapped
to your preference. Be sure to check steering, braking, throttle, and clutch in the
small input map to the left of the action/key map table. Other tabs lead to pages
for fine-tuning your input device; all of these pages will be accessible from the realtime monitor should you need to bounce back quickly and tweak input parameters.
Image Space Incorporated
Page 6
7/27/2006
Once you are satisfied with you controller mappings, it’s time to pick a car and head
to a track. From the “Vehicle” tab you can see all the cars available to you through
this particular series. Both the “OW Challenge” and the “SR Grand Prix” only allow
you to drive cars you currently own, but both start you off with multiple cars to
choose from. Select the “Show Owned” button to view what these cars are. Pick
one and head to the Control tab to select a track.
Once you have selected an owned vehicle, it’s time to select a track. Open up the
Control button to access rFactor’s offline game options. “Testing” will allow you
unlimited time on the track, so pick that to familiarize yourself with the rFactor
driving model.
Toban Raceway Park is a good place to start. Click on the circuit name to open up
the different track layouts available. Highlight a track layout and hit “Load Circuit”
and you will begin to load the track. When finished, you will find yourself in the
main driving interface. From here, you can adjust a vast amount of setup options for
the car (see The Garage for extensive setup information and comprehensive track
orientation example), and for the system running the simulator.
Image Space Incorporated
Page 7
7/27/2006
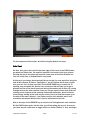
At the top of the screen, you will notice the various adjustment tabs. Even while
actively within the game, rFactor allows you to adjust many settings and those all
can be found here. Some of the graphical related settings are not changeable and
those will be grayed out.
To the lower left is the chat and voting window, where you communicate through a
text based system with other drivers at the track. The Vote Yes and Vote No buttons
are used when a ‘vote’ is put up—such as the addition of another driver (AI), or the
advancement of the session to the next—useful when everyone is ready to qualify
for example, but the warm-up time has not been met. The middle button reveals a
smaller GUI where even more options can be selected—you can bookmark the
server you are on, and place your vote for more of less AI drivers, for example.
At the bottom right, a small screen is seen and this is the Monitor screen. By
manipulation of various trackside and car mounted cameras, a careful eye can be
kept on competitors, or you can take a look at how the advancing day is changing
the shadows in a particularly difficult corner. Clicking on the middle of this screen
will expand the driver’s monitor for an even closer look. By using the END key
camera (see Extra Features for more detailed information), you can elevate the
viewpoint to very high above the track, and get a feel for the nature of the layout.
Image Space Incorporated
Page 8
7/27/2006
For the purposes of this section, we will be using the default car setup.
Drive Time!
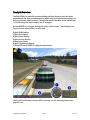
Ok then, let’s get on the track! At the lower right of the screen is the RACE button,
go ahead and select that. You now find yourself in the cockpit, with your pit man
pointing the way to the proper pit lane exit—make sure to heed his direction in a
race, as a hefty fine, or disqualification, may result.
At this point, you can go ahead and pull the car out but, for now, we will be using the
new AI drive feature of rFactor. Tapping the ‘I’ key will initiate the AI driver to take
over your car. Let’s do that now. Next, hit the PAGE DOWN key to enable the TVtracking cam and watch the AI driver turn a few laps: this will allow you to get a
glimpse and feel of the track layout and driving line used by the AI driver. By cycling
through some of the other camera views, you can get a much closer look at the car,
noticing how it responds to the roadway—suspension deflection, wheel and driver
arms turning, leaning of the head into the corner, the bit of dust that comes up as
the side of the road is clipped … the rFactor world is richly detailed, and it is all
accurately represented and the feel is just as meticulous as the look.
After a few laps, hit the ESCAPE key to return to the Testing Session main interface.
Hit the RACE button again, but this time, you will be taking the car out. As soon as
you leave the pits, make sure to toggle off the rev limiter (Default ‘L’ key), and begin
Image Space Incorporated
Page 9
7/27/2006
your run. Start out slow, to get a feel of the track layout and car handling behavior.
After a few laps, you will begin to gain confidence, and will soon be ready to dive
into the setup features to fine tune the on-track experience. After a few more laps,
your fuel will get low and you will have to make a pit stop. The quickest way to get a
pit stop done is to make sure you ‘notify’ your crew before you come in, and when
you get the ‘Pit Crew Ready’ message, you can come into the pits, confident your
crew is ready to do the job. Make sure you have checked the mapping of the
Request Pit control so that you can do this while on the track. Pit stops are often
overlooked in race preparation, but they are a critical part of any on track success.
Get an advantage over your opponents by practicing the pit lane entry—time it
carefully so you can enter as fast as possible, but still remain at the pit lane speed
limit.
You have now had your first rFactor experience, and it is only the tip of the iceberg.
A full career path of many different car types awaits you, and most of the cars found
in rFactor can be extensively upgraded with the after market parts provided by
rFactor Motorworks. See The Shop-Vehicle Upgrades for a listing of all available
upgrade options.
Image Space Incorporated
Page 10
7/27/2006
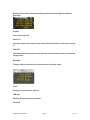
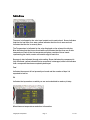
Cockpit Overview
The DAS 2500 is a powerful system enabling real time display of on-track driver
performance, tire wear and temperature, engine and brake system temperature as
well as numerous other functions. Through the careful alteration of the default DAS
*.PLR file entry, the output display can be changed.
Hit the INSERT key to toggle through the three ‘cockpit views’. The following is an
overview of the actual driver’s cockpit view:
Digital RPM Displays
Digital Gear Display
Digital Speed Display
Digital Position Display
Digital Laps Display
Digital Flag Warning Display
7 Mode LCD: press ENTER to toggle through modes
The layout of each team’s cockpit LCD unit varies, but the following features are
present in all:
Image Space Incorporated
Page 11
7/27/2006
Digital Displays
RPM
The sequence of lights illuminates as your revs increase. If you are shifting
manually, ensure that you shift-up a gear as the red light appears. Note that these
lights cycle when the launch control system is active and pulsate when the RPM
limiter is active.
Note: Launch control is restricted for some classes/events; consult the relevant
sanctioning to determine whether this feature can be enabled.
Gear
The selected gear is indicated as 1-7 (Forward Gears), N (Neutral) or R (Reverse).
Speed
This number indicates the current speed of the car. It can be set up to display in
MPH or KMH.
Position
The number on the left indicates your current position, whilst the number on the
right indicates how many other drivers started the session.
Laps
The number on the left indicates the number of the lap you are on, whilst the
number on the right indicates the total number of laps for the current session.
Image Space Incorporated
Page 12
7/27/2006
Flag Warning:
The Yellow LEDs light up when a yellow flag is active in the sector that you are in.
The Blue LEDs flash when you are about to be lapped and are expected to give way
to the lapping car(s) behind.
The Red LEDs light up when you have been ‘black flagged’ and are expected to take
a stop/go penalty.
The Red LEDs flash on and off if you have been disqualified.
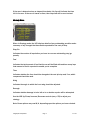
LCD Displays
With seven unique screen modes displaying everything from tire temperature to
time of day, the DAS 2500 leads the way in information display. You can cycle
through the various LCD displays with the ‘Enter’ key.
Timing
During Race sessions the following information is displayed:
Driver Ahead
The gap to the driver ahead of you.
Driver Behind
The gap to the driver behind you.
Best
The fastest lap time and the name of the driver who has set it.
Leader
Current leader of the race.
Image Space Incorporated
Page 13
7/27/2006
During Practice, Warm Up and Qualifying sessions the following information is
displayed:
Current
Your current lap time.
Sector {X}
Your best time for the current sector, where {X} is the number of the sector you are
in.
Self Split
The difference between your current lap time and your best lap time, as at the last
timing sector.
Best Split
The pole-sitter’s best time for the current sector and their name.
Clock
Displays the current time in game.
LDR laps
Number of laps led by current leader.
Time Left
Image Space Incorporated
Page 14
7/27/2006
If the race is determined on an elapsed time basis, this line will indicate the time
left in the race. If the race is based on time, then Laps Left will be seen instead.
Strategy Mode
When in Strategy mode, the LCD displays details of any outstanding penalties and a
summary of any changes that have been requested for the next pit stop.
Stop/Go
Indicates the number of laps before you have to serve an outstanding stop/go
penalty.
Fuel
Indicates the total amount of fuel that the car will be filled with and how many laps
that amount of fuel is expected to enable you to complete.
Tires
Indicates whether the tires should be changed at the next pit stop and, if so, which
compound should be used.
Wing
Indicates the angle to which the front wing should be adjusted.
Damage
Indicates whether damage is to be left as is or whether repairs will be attempted.
Use the LCD Up/Down/Increase/Decrease controls (see p. 52) to adjust your
strategy.
Note: Some options may read N/A, depending upon the options you have selected.
Image Space Incorporated
Page 15
7/27/2006
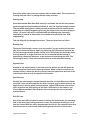
Vehicle Status
Tire wear is indicated by the color bars located next to each wheel. Green indicates
that the tire has little or no wear; yellow indicates that the tire is worn and red
indicates that the tire is severely worn.
Tire Temperature is indicated by the color displayed on the relevant tire display.
Blue indicates that the tires are cold while red indicates that the tires are at race
temperature. Each of the tire temperature displays consists of three bands
representing the inside, center and outside edge of each tire.
Damage is also indicated through color-coding. Green indicates the component is
fully functional, yellow indicates that a component is damaged, whilst red indicates
that a component has been completely destroyed.
Fuel
Indicates the amount of fuel presently on board and the number of laps it is
expected to last for.
Pit
Indicates the lap number on which you are next scheduled to make a pit stop.
Miscellaneous temperatures and other information.
Image Space Incorporated
Page 16
7/27/2006
Driver Aids
Should any of the driving aids be enabled, this page will display an illuminated icon
corresponding to the particular aid. If there is more than one setting for an aid
value, then the intensity of the light indicates the level of aid employment—the
brighter the icon, the higher the degree of aid being used.
Image Space Incorporated
Page 17
7/27/2006
rFactor Introduction—rFactor Motorworks
The rFactor dynasty is comprised of rFactor Motorworks which currently
manufactures such popular sports cars as the H6 Howston and the Kodi ZRz. It is
also the organizing body of two small but dynamic race series, the OpenWheel
Challenge and the SR Grand Prix.
The rFactor organization has been built from the ground up to encourage and assist
the club-racing community. Through the Motorworks empire’s relationships with
interested teams, access is granted to the rFactor Motorworks’ coveted rFm’s (with
these, any group can create a sanctioned event) using any car they choose,
including those custom-built using the state-of-the-art manufacturing provided by
rFactor Motorworks.
A radical departure from the mainstream world of Motorsports and sanctioning
bodies, rFactor Motorworks’ fiercely aggressive and creative take has seen the
sport grow exponentially over the last four years and it is now watched by an
estimated worldwide audience of 100–150 million viewers at some of its larger
sanctioned events.
Formed in 1991 by a handful of dedicated dreamers, rFactor Motorworks has grown
from a grass roots Sunday club-racing group to an internationally acclaimed multichassis manufacturing and sanctioning body. From the very basic to the very
advanced, there is a car and event for just about any level of racer. Depending on
your skill level, you may feel right at home in the top-of-the-class FIS chassis, with
650 mind-bending horsepower, or the fully loaded H6 Howston that, with its 450
horses under the hood and too many innovations and upgrades to mention, is the
class of the field in the Late Model Sports Car Series.
rFactor Motorworks’ dedication to providing a strong and competitive starting point
for the serious racer has helped make them world famous. In fact, in 1997, Hank
‘Pork Chop’ McLoskey took his H6 Howston from showroom stock to World
Champion in the Open Class Late Model Sports Car Championship and showed a
very shocked and surprised world that racing was no longer for the elite and well-todo—anyone with enough heart and desire could now reach the pinnacle of their
class.
For this service to the racing community, rFactor Motorworks has received
numerous awards and praises as a provider whose desire is simply to extend to all
the chance of having their dream of becoming a world class racing car driver
become a reality.
Image Space Incorporated
Page 18
7/27/2006
On Assignment—rFactor Motorworks
Recently, Motor Chronicle Magazine was given the rare opportunity of a totally
unrestricted look behind the scenes of the four main players in the rFactor
Motorworks world. In addition to once in a lifetime exclusive interviews, we were
given access to some of the hottest cars around, from the ‘not so docile’ Rhez, to
the monstrous FIS—and lived to tell the tale.
Consisting of Vayline Motors, H6, Kodi, and RaceWorks Motorsport, this dynasty of
auto manufacturers did not fully come together until quite some time after Kodi and
H6 fell under the protective ownership of rF Motors. With those two strategic
acquisitions, rF Motors next had visions of a unification of the top manufacturers in
the world, with eventual hopes of extending the automotive experience quite a bit
beyond ‘conventional’. Soon, Vayline and RaceWorks followed suit, and the world’s
largest auto manufacturing and support dynasty was formed.
Choosing the name rFactor Motorworks, this corporate partnership began the slow
process of revolutionizing auto manufacturing as the world had previously
understood it. Not only does rFactor Motorworks manufacture some of the most
popular automobiles in the world, it is their assistance to the end user in a racing
environment that has truly established their reputation as a manufacturer that is
more than willing to not only make a profit, but further the interests of their
customers in ways other companies can only dream about. Through the use of their
‘virtual assembly lines’, anyone can manufacture just about any car they can
imagine. Through the use of VEH, HDV, MAS, SFX, and GEN blueprints—all provided
at a small cost to the user—the sky is the limit on just how radical or conventional
the client’s car can be. In fact, Dale ‘Moonshine’ McCoy and Dennis ‘Shotgun’
Hatfield recently settled many of their legendary off-track battles in a one-off car cocreated by them both at the Mills Grand Prix track.
I recently had the good fortune to be invited to a weeklong manufacturer’s
conference, where rFmotorworks, among other things, let the world in on some of
their plans for the future. It was an amazing opportunity, and I was afforded the
luxury of meeting many of the principals in this recently formed collaboration. It
was nothing short of astounding. As an added bonus, Kramden MotoGear Inc. was
also there—and they were more than happy to give me a very in-depth and detailed
look at their DAS 2500 Data Acquisition and Mapping System, an aftermarket addon that can be used for everyday tasks such as GPS location displays, or as a full
blown racing data acquisition and display unit with nearly unlimited
programmability.
As an introduction, a familiarization with each principle is presented—all of which
can be found on the respective manufacturer’s web page.
Image Space Incorporated
Page 19
7/27/2006
Vayline
Vayline Motor Company was founded in 1965 by Richard M. Stanton. Originally an
engine building firm, Vayline produced some of the most competitive stock car
engines to come out of Southern England during the 1960s and 1970s. From New
Cross to Reading to Brands Hatch, Vayline engines could be heard in all their glory
… glory that often wound up celebrated on many podiums after long, hard days of
racing.
Engine building continued, as well as victories. In 1984, Richard stepped down from
Vayline and turned over control to Tommy, his eldest son. Tommy’s plan was to
expand Vayline to more than an engine building concern: He wanted to build cars.
From his experience as an oval racer as well as dabbling in road racing, Tommy
knew that Vayline could produce much more than a winning engine.
On a cold winter day in December of 1984, Tommy officially took the reigns of
Vayline. He moved the company north to Newcastle and set out on a mission … to
make affordable racers for the masses. At first, his idea was met with hesitation.
Tommy knew it would take development time. “Give me four years and you’ll see a
Vayline car in the Winner’s Circle!” It took Tommy three years and eight months. On
July, 28th 1987, a Vayline R crossed the finish line first in its class at the Goodwood
Festival of Speed in Sussex.
The rest is history. Tommy was able to acquire additional funding to expand the
Vayline plant and began production of the Vayline R. Since 1987, Vayline cars have
won numerous road racing and oval track championships. The tradition continues
with the all-new Vayline Rhez. Speed has never been so affordable.
Image Space Incorporated
Page 20
7/27/2006
H6
The story of H6 is the story of Amedeo Grimaldi. It all begins in Turin, Italy, circa
1927. Marco Grimaldi, heir to the 500 year old Grimaldi agriculture fortune, made
the decision to walk away from the successful family business to pursue his newly
found passion of cinema and motion pictures. In May of 1927 Marco, along with his
wife and children, made the journey to the States ... to Hollywood, California.
Amedeo, who was only two years old at the time of the move, soon became
accustomed to the role of a ‘new world’ Grimaldi. With the success of his fathers'
cinematography came a lifestyle filled with culture, creativity and modern luxuries.
As the years passed, Amedeo began to make a name for himself as well ... as
Hollywood’s' newest Party Boy. Amedeo's high profile relationships with female
cinema stars, his exorbitant spending sprees as well as his eccentricities made him
a favorite of Hollywood gossip columnists.
In 1952, the gossip hit an all-time high when Amedeo claimed he was going to
pursue his dream of entering the Indianapolis 500. The Hollywood playboy wanted
to become a race car driver. Many thought this to be a publicity stunt for the
Grimaldi, whose auto racing experience had been limited to racing from nightclub to
nightclub in a limousine. Amedeo, however, did indeed enter the race, only to crash
on the 26th lap and proving to the world that it was just another ill-fated publicity
stunt ... or was it?
That experience sparked a passion within Amedeo Grimaldi which eventually would
make him a World Champion only four years later. During those four long years,
Amedeo spent much of his time back in Italy, honing his racing skills and winning
auto races. In 1956, Amedeo captured the World Championship in an Alfieri 8CV.
The following three years were also successful for Grimaldi, finishing 2nd in 1957
and 1959 as well as capturing the number one spot again in 1958. After his 2nd
place points finish in 1959, Amadeo made a bid to purchase the Automobili
Sportive Alfieri SpA. Based in Modena, the fledgling auto manufacturer gave him
the opportunity to succeed at auto racing; Grimaldi in turn wanted to share his good
fortune. In 1964, at age 39, Grimaldi officially retired from motor sport as a driver
to devote his time cultivating Automobili Sportive Alfieri.
Image Space Incorporated
Page 21
7/27/2006
Through the years, Amedeo Grimaldi learned that running an automotive company
presented many challenges: high production costs and the limited market for his
automobiles landed Alfieri in serious financial troubles during the late 1970s. The
turning point came in 1981 when, under the pressure of his two sons, Alessandro
and Dante, Amedeo decided to re-direct Alfieri's marketing efforts towards the
States.
Grimaldi also made an unprecedented decision to give the company a new name,
H6. These drastic changes confirmed to skeptics that Amedeo was still the
eccentric he was in his youth. Once again he proved them wrong. Grimaldi
positioned H6 as the ultimate affordable Italian sportscar. This market strategy, as
well as H6's commitment to motor sport, made a perfect combination. H6
increased their sales by over 400% over the next eight years while still maintaining
the orginal Alfieri quality standards.
In 1999, Amedeo realized that in order for H6 to meet the challenges of the new
millennium, the company needed to form an alliance with a partner who could
effectively carry on the H6 name and maintain its dedication to quality and
workmanship. rF Motors purchased 51% of the Grimaldi H6 stock in November of
1999. Alessandro and Dante Grimaldi continue to play an integral role in the
success of H6 to this day.
The fusion again proved to be a winning idea. In tribute to the great Amedeo
Grimaldi, H6 presents the 2006 Howston GP, a car destined to lengthen the long
wake of Grimaldi family successes.
Here the original letter written by Amedeo (who returned to live in Italy), to his sons
and grandchildren (from the H6 archive):
Cari figli e nipoti, il progresso incalza ed è giunto il tempo di fondere la nostra
impresa con compagnie in grado di vincere le sfide che il futuro riserverà, ma non
dimenticate mai le radici da cui provenite. Siate sempre orgogliosi dei tanti
successi sportivi che io e gli altri piloti della squadra abbiamo ottenuto con le
Howston, spingendole ogni volta al limite . Conservate integro il carattere delle
nostre auto , la cui origine è nel grande cuore della tradizione motoristica Italiana.
Ora che sono vecchio e stanco, e ora che voi rappresentate il futuro, promettetemi
di mantenere alto il prestigio sportivo del nostro marchio.
Con affetto,
Amedeo Grimaldi
Image Space Incorporated
Page 22
7/27/2006
Kodi
Kodi Manufacturing was founded in Hungary in 1927 by Kodi Attila and Kodi Balázs.
The ‘Kodis’ invented one of the first all-steel cars in Eastern Europe. Bicycles were
the first vehicles produced by the Kodis. In 1928, they opened a machine shop in
the town of Székesfehérvár, making stove parts and, later, auto-parts. The Kodi
Brothers, in 1931, established a large auto-parts plant in Budapest, Hungary. There
the brothers made engines and other auto-parts and, in 1933, began producing
their own automobiles. Production was abruptly halted and the plant was closed
during the dark years of World War 2.
After the fall of Nazi Germany, the Kodi Brothers decided to re-open operations in
rapidly growing post-war Germany. In 1946, Kodi Manufacturing was re-born. Kodi
Attila and Kodi Balázs were responsible for a number of manufacturing innovations,
including an oven that could bake enamel onto steel auto-bodies. By 1952, the year
in which both brothers died, Kodi was one of the industry's largest companies.
Kodi Manufacturing continued to prosper throughout the 1960s and 1970s.
However, the 1980s saw the company begin to face the challenge of dwindling
sales. Cost of production and ever-increasing competition forced Kodi to close many
of their European manufacturing plants. By 1994, Kodi Manufacturing was on the
verge of bankruptcy and the future seemed bleak—at best.
The Kodi concern was purchased by rF Motors in 1995. Realizing that a complete
overhaul of the company was in order, rF Motors re-located Kodi headquarters to
the Motor City. The next eight years proved prosperous for the newly-invigorated
Kodi name. State-of-the-art manufacturing was implemented, world class German
engineers were contracted, and an aggressive marketing campaign focusing on
Kodi Motorsport was launched world-wide.
rF Motors made a bold decision in 2004 to re-capture the history of Kodi by
constructing a brand-new European manufacturing facility in Munich Germany ...
just three kilometers from the old Kodi Manufacturing building. The Kodi Brothers
would be proud.
Image Space Incorporated
Page 23
7/27/2006
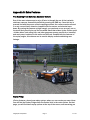
On Assignment with Devon Mack—At The Facility
As I approached what many are calling the ‘Holy Grail’ of the racing industry, I
asked myself again—Devon Mack-- how did you get so lucky to land this
assignment…?
Approaching the main facility, it immediately becomes apparent that rFactor
Motorworks is a surprising departure from what we are used to seeing in the
automotive industry. For one thing, the grounds look more like a resort than an
industrial facility, and there are not over-abundances of admonishing signs that
warn the passerby they are not welcome in some area or other. Quite the opposite,
the rFactor Motorworks’ main headquarters’ grounds are masterpieces of design,
layout, and beauty. The landscaping features some of the most diverse flora and
fauna to be found anywhere in the world, and the atmosphere of the place is
comforting. As I made my way inside, it struck me that success is rooted in even the
smallest details of the larger plan.
Steeped in tradition dating back to World War II, this new alliance of auto
manufacturers and racing support infrastructure is promising to revolutionize the
way we approach racing—and so far, the impact has been appreciable. Already
deals are being signed for the transfer of the blueprints and files needed to create
tracks and cars outside of the main production facility—with full support of those
creations from the auto makers. A level of support rarely seen, I wonder what other
amazements await as I begin the discussion with five of the main principle figures
involved in this unique project—Tommy Stanton, of Vayline Motors; Alessandro and
Dante Grimaldi of H6; and two representatives from rF Motors.
We have followed the history of this company for quite some time, and when the
merger took place, it was quite surprising—what was the main driving force for this
decision?
Tommy Stanton: I cannot speak for all, of course, but one of the reasons for our
actions was the realization that racing had changed dramatically, and no longer
resembled the sport and art as our fathers and grandfathers knew it. It almost
seemed to become a matter of the haves, and the have a lot mores, and while it is
not a foolish thing to spend half a billion dollars running a team for a single season
when you will receive (well, a winning team, anyway …) four-to-six times that back in
endorsements, broadcast, publication, and other royalties, it is also something not
even a fraction of the many smaller companies and racing teams are able to do.
And, in my opinion, the racing began to suffer for it—and it appeared that the days
of proving oneself on the track had given way to the days of press agents and wind
tunnel fees in the millions per year. We wanted to change that—we wanted to give
racing back to the racer and, just as importantly, back to the fans. We wanted
anyone, no matter the skill level, to enjoy the highest technology available but with
the emphasis strongly on racing. Of course, this type of revolution does not happen
overnight, but the changes can already be seen. For example, women with the
talent have a much better chance of success as the gender bias that pervades
Image Space Incorporated
Page 24
7/27/2006
racing is being effectively controlled with our new venture and it was a goal from
the very beginning.
Alessandro Grimaldi: In our case, much of our decision was based on what Tony has
said but, in other regards, it was also a matter of our own survival. As the spending
in the upper classes escalated over the years, we found it difficult to keep up with
the latest demands of the teams, and maintain the quality that has been our
trademark. And we simply were not prepared to sacrifice quality, even if it meant
our own demise. In the end, we were very fortunate, and are extremely proud to be
a part of this exciting, and daring, new venture.
What is your most popular car?
RaceWorks Representative: Well, I think the others would have to agree—the
rTrainer is by far the largest selling car produced by the new corporation. Our main
goals were affordability and safety and we feel we have struck that balance to near
perfection. Providing the perfect launching point for a wide variety of entry-level
talent, the rTrainer series has launched the careers of many champions. We
continue to refine the car, and now that the merger is fully in place, we can also
offer the buyer the rare opportunity to assist in the actual design of the vehicle. This
allows a level of customization never before seen in the industry.
What types of upgrades do you offer, and how does one go about obtaining them?
Dante Grimaldi: Basically, everything you see on the car is upgradeable. From a
race-ready motor to the tiniest decal, upgrades to our cars at any stage are as
simple as buying the parts and either having the dealer install them, or installing
them yourself—the most popular route by far. The H6, for example, can be turned
into a fully race-prepped vehicle and back to a more sedate one again in a matter of
a few hours. This is just one of the benefits of the merger—the vast opening of
previously guarded technology has led to an exponential growth in our ability to
provide cars that are the perfect fit for our customers.
Why the decision to offer compatibility with the Kramden MotoGear DAS?
Tommy Stanton: Kramden MotoGear has been a long time player in the field of
automotive data acquisition and display, and has proven their dedication to quality
and service over the years, so the choice was an easy one.
On the surface, it is plainly clear that all of the companies seem to have a common
goal—make racing affordable, and offering the customer the right car for the right
job—that is, get them in a racing class that matches their talents—what are some of
the ‘behind the scenes’ work being done to enhance the first time racer experience?
rF Motors Representative: The first thing we wanted to do was to immediately open
the technology floodgates, so to speak. By providing free and open access to all
relevant blueprints, files, and the latest in computer machining techniques, we are
Image Space Incorporated
Page 25
7/27/2006
now able to distribute relevant technology in a fraction of the time we were used to.
The customer benefits from this are tremendous—race-tested technology is now
reaching them in a fraction of the time, and with a noticeable increase in quality.
We have a long way to go to be sure, but the framework is in place for a robust and
dynamically changing provision for the racing community. At the same time, our
passenger car models are benefiting as well—new improvements in computer
modeling have allowed us to create one of the safest cars in the history of
automotive manufacturing.
Kramden MotoGear DAS 2500 Description/Interview—LCD System
I was able to meet with Ron Turner, CEO and Lead Designer at Kramden MotoGear,
and of the many questions on my mind, it was Kramden’s revolutionary data
acquisition and display system that had my interest at an all time high. Proving to
be one of the most popular aftermarket add-ons shortly after it was released, the
DAS 2500 has nearly unlimited functionality and it was only logical that rFactor
Motorworks would approach them for their expertise in the field of digital data
acquisition and display. It is capable of common everyday use, such as GPS
navigation, and excels in dealing with full blown racing data and feedback—with this
functionality and an industry standard ease of use, the DAS 2500 has firmly placed
itself at the center of any serious driving or racing concern.
What was the main factor for the production of the DAS 2500?
RT: We had been producing special, ‘one off’ units for a select few racing groups
and it was during the development phase when we decided to design and build the
unit in such a way as to give it broad appeal to the serious racer, or the weekend
traveler who just wants a good way to get where they are going without getting lost.
By going this route, we have future proofed the unit as it is fully customizable, and
upgradeable—using either Flash EPROM firmware upgrades, or *.PLR code changes,
both of which take mere moments to complete.
How easy is the programming of the LCD? What functionality does it offer?
RT: From the very start, we wanted to keep the programming simple, but with great
functionality. While it would have been easier to just design a dedicated racing unit,
we felt that with the recent developments at rFactor Motorworks, we could better
serve the aftermarket community by offering as many features as possible, and at
the same time, provide an easy-to-use system. As far as functionality goes, the DAS
2500 has it all—a very complete and feature rich GPS system for the casual traveler
and, for the racing interest, there is quite a bit more. When connected to sensors on
the car, we can display tire temperatures, engine and oil temperatures as well as a
host of timing options that provide the racer with relevant scoring information in
terms of lap and split times. Some of the events do not have a telemetry chopper at
them, so the DAS 2500 can be used in these cases to get the driver the information
s/he needs, given that pit communications are not available.
Image Space Incorporated
Page 26
7/27/2006
What types of equipment is needed to download and display the LCD data?
RT: With the DAS 2500, all you need is a PC and an RS232 interface to download
the data. Using our custom designed software, it is only a matter of a few mouse
clicks to get the full picture. At this time, however, we are in negotiations with a
custom software designer to make this entire process a bit easier. We hope to
eventually have a full blown telemetry display system—the data is there, but at this
time we have to resolve a few minor issues in order to increase the ease-of-use in
this regard.
We have heard rumors in the motor industry that the KMG 2005 DAS will be offered
as an option on some of the manufacturer’s cars—which manufacturers can we
expect to participate in this program? Which cars will be outfitted at the initial
launch of the program?
RT: At this time, due to NDA papers, we cannot say which manufacturers will be
offering the DAS 2500 as ‘stock’, but the groundwork is being laid as we speak.
However, the model is currently available to any who would like to give it a try.
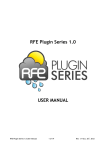
What kind of a procedure is involved in retrofitting a unit on an older model? Are
there various packages offered depending on the customers needs? What about
custom programming and functionality, is this offered ‘out of the box’?
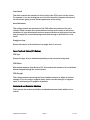
An early sketch of the DAS 2500, as imagined by Ron Turner.
RT: While the base unit does not come pre-programmed beyond GPS navigation
duties, all of the circuitry is in place, and it is not a difficult matter to reprogram the
unit to the user’s wishes. Programmability out of the box is limited, but we hope to
Image Space Incorporated
Page 27
7/27/2006
change that in the very near future as our new software begins the testing phase. As
far as retrofitting goes, it is a simple matter of a flash update of the EPROM, and a
few code changes to the *.PLR command script—we wanted to keep it easy, and we
also felt that forcing current owners of the older model to upgrade was not fair. The
retrofitted units will offer the same functionality as one rolling off the assembly line
today. We also produce ‘one off’ units on a per request basis.
Where is the unit manufactured?
RT: Currently, we are using our facility in Springfield, Illinois for the DAS 2500 unit
construction, and software programming duties are being handled by an outfit
located in Ann Arbor, Michigan. I can’t say much now, but in the future all of the
DAS 2500 manufacturing, programming, research and development will take place
at a dedicated facility.
After the interview, Ron gave me a very in-depth look at how the DAS 2500 works in
a race environment. It took a few moments to get acquainted with the button layout
and command control system, but once familiar with that task, it becomes difficult
to imagine driving without this unit installed. At a glance, the driver is presented
with a lot of critical information, but the flow of that information is controlled
entirely by the driver so they see only what they need to see. Although the unit I
tried did not have the computer output circuitry installed, the core functionality of
the unit was identical to the more advanced ‘telemetry dump’ model.
Image Space Incorporated
Page 28
7/27/2006
Customize
There are a plethora of options and tweaks in rFactor that allow the end user a
highly customized play experience. In this section we will identify the organization
of these options and explain a little about what they do.
Underneath the “Customize” tab on the main menu there are three sub-tabs:
“Player”, “Settings”, and “Vehicle”. The “Player” sub-tab op allows you to change all
details concerning the identity of your game persona. These are covered in more
depth in the “getting started” section of this manual. The vehicle tab displays all the
cars allowed for the current mod. The purchase, selling, and upgrading of your car
collection is accomplished here. Both of these pages are straightforward and fairly
self-explanatory. The “Settings” sub-tab however, contains a huge assortment of
game play tweaking options, and it is here that we focus our current discussion.
Difficulty
This screen allows you to change the various difficulty settings.
Invulnerability
Image Space Incorporated
Page 29
7/27/2006
Select this option when you want a pristine ride no matter what. This is perfect for
learning that new track, or dealing with an unruly car setup.
Steering Help
Once the Kramden Moto Gear DAS circuitry is activated, the unit will send control
inputs through the wheel enabling the driver to ‘feel’ the best line through a corner.
This incredible learning tool is made possible at the time of track creation by the
application of a special magnetic strip along the center of the ‘best line’ through a
corner. Of course, this will be a different path for differing autos, hence the
application of several of these strips, all encoded to the particular cars’ DAS
programming.
This aid will guide you through the corners. There are three levels of effect.
Braking Help
The perfect line through a corner is not very useful if you are coming out the other
side off the track somewhere. Again, by employing the DAS system, impulses are
fed into the programmable brakes and the driver will actually feel the brake pedal
moving—when he no longer feels that, he can be assured that his braking is
approaching ‘theoretical optimum’ as his motions are mimicking the ideal. This
technology is rarely, if ever, used once the driver is comfortable with braking.
Opposite Lock
Coupled to slip angle sensors on the front and rear wheels, this aid will guide the
driver through an out-of-control steering situation. While it cannot overcorrect for
extreme inputs, it allows the driver to quickly learn the appearance and feel of the
control inputs that occur in an opposite lock situation.
Spin Recovery
Possibly the most complex system Kramden provides, the Spin Recovery aid does
just what it says and accomplishes this with a complex array of wheel sensors, slip
angle sensors, steering wheel position sensors, engine RPM sensors, and various
other items that are trade secrets at this time. Used mainly in the trainers, and
rFactor Motorworks Basic Race Schools, this one can get you out of a jam with
minimal drama.
Auto Pit Lane
One of the most difficult tasks to master is pitting. Overshooting the pits, speeding,
and, in the worst case, hitting people not in cars, the technique of pitting is not as
easy as it looks. With this option programmed into the car, the computer takes over
once the pit lane is entered and automatically guides the driver to his pit stall.
Image Space Incorporated
Page 30
7/27/2006
Stability Control
Identical in principle to the system found on most rFactor Motorworks passenger
car models, this system is designed to eliminate spins due to weight transfer and
tire grip overloads by an ingenious on-the-fly adjustment of roll bar settings,
hydraulically controlled torsion bars, and suspension ride height adjustments.
Anti-Lock Brakes
Another system identical in principle to those found in passenger cars, this system
is made possible by using wheel speed and grip load sensors, pulsing the brakes to
prevent a lockup under hard pedal application. This aid is a common feature in
many sanctioned events, and an invaluable tool to the driver for learning how
intermittent brake application at the limit of grip is achieved. While a human cannot
pulse the brake pedal as fast as an electronic system can (approximately 10-15
times per second), by learning how to avoid such a situation in the first place,
laptimes will begin to improve.
Traction Control
This aid employs traction sensors for the rear tires and feeds this data back to a
programmable unit connected to the engine’s ignition system. If a traction loss
condition is sensed at the rear of the car, the ignition spark is shut off to the
engine’s cylinders in such a way as to eliminate the traction lost due to the
application of too much throttle. Some of the more experienced drivers have been
known to purposely activate the traction control system when finding themselves in
an oversteer condition—a hard bang on the throttle, and the rotating rear end
suddenly becomes a tenable situation.
Auto-Shifting
As the name implies, the car can be setup for several types of shifting maps. Most
common is the full automatic that allows for the up-shifts and downshifts to be
made by the system with no driver intervention. Other options are up-shift only,
downshift only, and off. Depending on the sanctioning for an event, Auto-Shifting is
still in fairly widespread use but the fastest drivers, when questioned, indicate that
they feel a driver can be faster with manual shifting. But before you have years of
experience, this option will give you a good idea of the proper gear to be in for a
particular corner.
Auto-Clutch
Hydraulically controlled, this system allows the driver to shift at any RPM without
lifting from the throttle. By controlling the driveline synchronization of the car, an
Auto-Clutch shift takes approximately thirty milliseconds, much faster than a
Image Space Incorporated
Page 31
7/27/2006
human can duplicate. The expense of the system makes it difficult to find in a
training environment, but there are companies that offer this with their training
packages.
Auto-Reverse
With this option on, depressing and holding down the brake pedal will put the car
into reverse automatically.
Damage Multiplier
Using the latest advances in composites and other strength enhancing techniques,
some pretty amazing damage resistance can be obtained. Used strictly in the
training environment, this setting controls the amount of strength used in chassis
tubing, and how many layers of composites are added to the body panels and
components. The cars can be difficult to control with the added mass, but driver
confidence is boosted immensely, making this the perfect tool for building
confidence at a new track, or when more than a few new drivers are on the track
together. Another costly item, it is found at select training facilities within the
rFactor Motorworks.
AI—Strength
One of the unforeseen benefits of the magnetic track strips was the further
development of the so-called ‘car of the future’—a car that can run without any
driver intervention whatsoever. Using various control systems, the car is able to
follow multiple lines around any given track, at any given speed: from docile to
racing speed, the AI cars have provided to be invaluable learning tools. In fact, in his
preparation for the now infamous Feud Race, Dennis ‘Shotgun’ Hatfield used this
very technology to program his opponent’s behavior, statistically, into the AI controls
and was thereby able to accurately duplicate, on the track, many of his longtime
rival’s signature moves and racing tactics. Adjustable to levels that would put all but
the very best racers to shame in terms of laptimes, this is yet another in a long line
of amazing features rFactor Motorworks offers to the budding—or serious—racer.
AI—Aggression
Much like AI strength, this controls the ‘attitudes’ of the AI drivers and is adjustable
to some very challenging levels. For a baseline, set this at the level which will allow
you to best the AI by approximately one second per lap on a consistent basis. By
steadily increasing the speed of the synthetic opponents, you will find your laptimes
become lower, and your comfort level while driving in traffic will increase
dramatically. Driving in traffic is an essential talent to master if you ever hope to be
the class of the field—and no amount of money will get you there.
Image Space Incorporated
Page 32
7/27/2006
Rules
The options found here allow the user to configure the race conditions and
parameters to nearly limitless combinations.
Flag Rules
Allows the user to configure the type of race flags that will be seen during a race.
Fuel Usage
If you are not running a 100% race (time or laps), and wish to ensure a pit stop for
fuel, select the desired fuel rate consumption multiplier here.
Tire Wear
Similar to fuel usage, this will ensure a pit stop is required in shorter length races.
Mechanical Failures
By changing the type of mechanical failures, the damage behavior for the cars can
be customized.
Private Testing
By toggling this option on, there will be no AI cars while in a testing session.
AI Drivers
This controls the amount of AI drivers in the session. If more AI drivers are selected
than are in a given class, duplicate names will be seen in the session. Try this with
the trainers, selecting more than ten.
Race Grid Position
If the Qualifying session is toggled off (select Race Weekend, then the Race Details
tab) this setting will determine your placement on the grid when the race begins.
Race Start Time
Choose the time of day for the race start. With the dynamically changing lighting of
rFactor, this can have a dramatic impact on how you approach the track as the
sessions advance. Be careful not to select too late of a time for the Open Wheel
class, as visibility will become difficult at best.
Race Time Scale
Image Space Incorporated
Page 33
7/27/2006
This allows you to speed up the time-of-day lighting effects. With a setting
maximum of 60x, a full day can be raced in about a half hour.
Type of Start
Each track has its own type of starting rules (rolling or standing) and those can be
overridden with this setting.
Race Length Type
By altering this setting, you can control if the race is gauged by laps run, or time
elapsed.
Race Laps
If the race is determined by a lap amount, set the desired value with this toggle.
Race Time
If the race is determined by a fixed amount of time, set the desired value with this
toggle.
Controls
Controller Assignment and Function Mapping
See the Complete Controls section of this manual for the entire list of control and
map-able functions that can be used and/or assigned to the keyboard or the
primary driving controller. rFactor includes many new features, so make sure to
take a good look—the new trackside cameras are unmapped by default, but are a
great enhancement to the simulation and allow for some breathtaking replay views.
Rates Buttons
Digital Steering/ Throttle/Brake/Clutch Rate
If using a digital control device for a specific input, this set the rate of control.
Digital control devices are devices that have only two states: on and off. In order to
smooth the responsiveness of these inputs, we ramp up the effect over time. These
sliders allow you to control the speed with which the full effect takes place.
Speed Sensitivity
This setting controls the sensitivity of the steering. If you find the steering too hard
to control at high speed due to the motion of the wheel, adjust this setting to find a
good balance between control and stability.
Image Space Incorporated
Page 34
7/27/2006
Look Ahead
This slider controls the amount the driver field of view (FOV) turns into the corner.
For example, if you are turning the car to the left, the entire viewpoint will move to
the left as well, giving a more lifelike appearance to the driving.
Head Movement
This setting controls the movement of the FOV within the confines of the car’s
cockpit. rFactor includes the representation of bumps on the track as well as the
simulation of in-car disturbances such as extreme vibration at high speed—too fast,
and you might find yourself bumping around hard enough to lose the line on the
track!
Exaggerate Yaw
Moves the camera in the direction of car angle when in a corner.
Force Feedback Button (FFB Button)
FFB Type
Choose the type of force feedback depending on the controller being used.
FFB Effects
With options between from None to Full, this controls the amount of force feedback
effects mapped through the control system.
FFB Strength
This setting controls how strong the force feedback values are. Adjust to desired
strength. If you are using a Logitech wheel, make sure this setting is of negative
value, if not already set to negative by default.
Controller 1 and Controller 2 Buttons
These control the various sensitivities and dead zones associated with the car’s
control.
Image Space Incorporated
Page 35
7/27/2006
Display
The visual aspect of the rFactor world is controlled here. Experiment with these
settings in order to strike a balance between graphical splendor and CPU
performance.
Circuit Detail
Controls the amount of details displayed for a given track.
Player Detail
Controls the detail and appearance of the user’s on-track car.
Opponent Detail
Controls the detail and appearance of the AI opponents’ cars.
Texture Detail
Controls the detail of the rFactor world textures.
Texture Filter
Bilinear, Trilinear, and Anisotropic texture filtering options are selected here. Full
Screen Anti-Aliasing (FSAA) must be set-up by using the rFactor Config.exe program
found in your rFactor directory.
Shadows
This controls the amount of shadows. At the highest levels, the shadows are cast
over and into the cockpit, giving an amazing sense of immersion. If you are having
performance problems, try to reduce this setting first. Lowering the setting to High
will still give the dynamically changing effect, but the casting of the shadow into the
driver cockpit will not be seen.
Shadow Blur
Selecting this option will give the shadows cast a much smoother appearance, but
at the cost of performance. If you are having performance difficulties, turn this
option to OFF.
Auto Detail FPS
This option, when toggled on, will adjust the level of detail in rFactor in order to
maintain a minimum frame rate value. The number that is displayed when this
option is selected is the minimum desired frame rate.
Image Space Incorporated
Page 36
7/27/2006
Special Effects
Adjust this to control the amount and detail of special effects (smoke, skid marks,
sparks, etc.) and the duration they last.
Visible Vehicles
Select the amount of vehicles that are rendered at the same time on the track.
Message Center
If this is on, chat, pit crew, and game status messages are displayed in a window
located at the lower left of the drivers view.
KPH/MPH
Choose KPH or MPH as the primary display of speed.
Heads-Up Display (HUD)
Toggles the HUD display of information projected over the driving screen on or off.
Default View
Change the default view here, from the driving perspective.
Mirrors
This setting toggles the display of the mirrors on or off. The mirrors, like many of the
other settings here, can also be changed in-game.
Vehicle FOV
Controls the field of view (FOV) of the driving perspective. Experiment with this
setting to get the desired balance between cockpit view, for example, and sensation
of speed preference.
Audio
To control the sound experience in the rFactor world, change these settings to your
tastes.
Music Volume
This slider controls the rFactor music volume.
Image Space Incorporated
Page 37
7/27/2006
Sound Effects Volume
rFactor sound effects volume is adjusted with this slider.
Engine Volume
Controls the player’s engine volume.
Player Volume Ratio
How loud your car is relative to everything else.
Opponent Volume Ratio
How loud your opponents will be in relation to everything else.
Number of Effects
Controls the number of simultaneous sound effects that are processed.
Image Space Incorporated
Page 38
7/27/2006
The Shop –Vehicle Upgrades
rFactor Motorworks not only manufactures some of the best cars in the world, they
are also actively and extensively involved in the aftermarket support of those cars.
Whether your preference is for a better sounding exhaust or a full-blown racecar,
rFactor Motorworks provides for everything you will need. In fact, in order to
advance your career standing, upgrading is an absolute must. But care must be
taken—make sure to research the track well, as a power upgrade might not be as
desirable as a brake system upgrade, depending on the nature of the track. And at
a track that is very narrow, such as the friendly confines of Sardian, proper handling
and gearing setup is a must. Weight reduction upgrades are unique in that they
must be purchased and installed in sequence. At this time, the FIS cars are not
upgradeable. The full description of each upgrade can be found in the Upgrades
Information Window to the right of the Upgrades Select Window.
Trainer Upgrades
DAS 2500 LCD Unit
Advanced School Package
National Stock Car Upgrades
The Stock car series offers complete upgrade packages based on the track type and
are complete chassis and aero packages. Make sure to select the proper package
or you may find your car overheating or worse—underperforming!
Short Track
FIS Upgrades
None at this time.
SR Class Car Upgrades Available
Spoiler
Provides for better rear end stability.
Cockpit
Removes some of the stock car interior and replaces the items with rFactor
Motorworks approved racing pieces.
Side Skirt
Image Space Incorporated
Page 39
7/27/2006
Not just for styling, this upgrade can help with handling as well.
Front End
Allows for adjustable down force at the front of the car, a must have for those
technical venues.
Rear End
See Front End.
Hood
Reducing weight and providing for better airflow into the engine compartment, this
is a good upgrade to get early on.
Exhaust
Besides sounding better, an upgraded exhaust system is a sure and easy way to
gain a few more horsepower.
Tires
You will want to keep the tire upgrades in line with any driveline upgrades as you
will need to get the power to the road.
Brakes
From better performance overall, to a full blown race setup, the brake upgrade is
one of the most critical changes to your car—another good item to pick up as soon
as possible. Upgrade in stages if you cannot afford to make the jump to the race
setup right away.
Weight Reduction (Must upgrade in stages)
Drastically reduces the weight of the car by removing unnecessary items and
replacing (not just a simple removal) a select few by much lighter, and stronger,
components. This upgrade path must be done in stages, as the later upgrades share
construction areas with the lower end reduction packages.
Suspension
With this upgrade, the suspension can be fine-tuned and dialed in to give that
perfect setup.
Computer Chip
Image Space Incorporated
Page 40
7/27/2006
A simple upgrade that can yield serious results, this is yet another good upgrade to
get early on, as the Engine upgrades can be quite expensive.
Engine Tuning
Here is the good stuff—you can get some very substantial gains in performance, but
be warned—raw horsepower is useless if you are using it to turn rubber into glue.
Match the engine performance to the chassis capabilities, and you will be well on
your way to a great handling and fast racecar.
Clutch
Upgrading the driveline requires a stronger clutch. Make sure to match the clutch
performance level with your current engine spec.
Flywheel
Much like the clutch upgrade, this is another necessary driveline upgrade.
Transmissions
From a simple automatic to a full-blown and adjustable race transmission, find your
preference here.
Differential
Have more control over the behavior of the rear of the car by upgrading the
differential to the fully adjustable model.
Fuel Tank
Lighter, and safer, the upgraded fuel tank is a requirement for many rFactor
Motorworks sanctioned race events.
Horn
Last but not least—give the opponents a shout with this custom horn. Upgrade
available for SR cars only.
Image Space Incorporated
Page 41
7/27/2006
Venue Assessment
Through the use of currently available technologies, rFactor Motorworks has laid the
foundation for what can only be called ‘Team and Racer Track Creation’. Once a
suitable location has been found, the basic track layout uses ideas borrowed from
the world’s military and engineering road and bridge building corps. The actual
track layout can be constructed in about a week, and this is the first step—the laying
of the road grid used to make the track. It is a composite material stronger than
steel, and is the backbone of the track, and can be anywhere from 15 to 37.5 feet
in width, with no real limits on the length, or shape. Next, a special resin is poured
into the honeycomb structure of the track grid, giving it rigidity but at the same time
maintaining the flexibility that is required due to temperature changes and loading
stresses. When the resin has dried, the final coat is applied—similar to the surface
of an aircraft carrier flight deck; this material has an estimated lifetime of 15-25
years, and is repairable, much like its asphalt cousins. Finally, the landscapers are
brought in to finish the look and feel of the track creator’s vision. rFactor
Motorworks currently owns 1.2 million acres of land around the world, and strongly
encourages the creation of tracks by interested parties. But this is not cheap—to
gain access to the MAS and INI blueprints required for accurate track creation or
replication will run you around 10-15 million, USD, but compare this to the 150-200
million to build a conventional track, and the advantages become crystal clear. In
other words, for the price that many teams are paying to simply race a full season,
an entirely new venue can be created. And it can just as easily be taken down, and
the land returned to a condition that does not indicate that anything was ever there.
A truly remarkable feat, and another in a long line of wonders rFactor Motorworks
has put forth in its efforts to make auto racing a household phrase.
Toban Raceway Park
Location—Toban Indiana, USA
Length—Special Event, Reverse—2.603 KM/1.6 Miles
Special Event, Normal—2.603 KM/1.6 Miles
Special Event, Long—4.012 KM/2.5 Miles
Grand Prix Event—4.012 KM/2.6 Miles
Type—Road course
Number of Configurations—Four layouts supporting all classes.
Sardian Heights
Location—Sardian Heights, Georgia, USA
Length—Temporary Street Circuit, Short Event—1.35 KM/0.84 Miles
Temporary Street Circuit, Long Event—2.53 KM/1.58 Miles
Type—Temporary Street Course, Road Course layout.
Number of Configurations—Two layouts supporting all SR events, OW Trainers and
rF Advanced models.
Image Space Incorporated
Page 42
7/27/2006
Mills Metro Park
Location—Mills City, Virginia, USA
Length—Mills Short—1.846 KM/1.2 Miles
Mills Special Event, Reverse Layout, Long—3.149 KM/1.95 Miles
Mills Grand Prix, Long—3.149 KM/1.95 Miles
Type—Road Course
Number of Configurations—Three layouts supporting all classes,
Orchard Lake Raceway
Location—Washington Pennsylvania, USA
Length—Speedway Infield Road Course—3.713 KM/2.31 Miles
Speedway Oval Course—2.91 KM/1.81 Miles
Type—Road and Oval Course
Number of Configurations—Two, all classes allowed.
Joesville Speedway
Location—Joesville Montana, USA
Length—Short Oval Course—0.656 KM/0.41 Miles
Type—Fixed Oval.
Number of Configurations—One, fixed oval, SR classes, rF Trainer and rF Advanced
classes, FIS Championship Series.
Essington Long
Location
Length
Type
Number of Configurations
Lienz Festival Der Geschwindigkeit
Location—Lienz, Austria
Length—Week 1—Altstadt—1.53 Km/0.95 miles
Week 2—GP Short—2.68 Km/1.66 miles
Week 3—GP—6.26 Km/3.89 miles
Week 4—GP Long—7.23 Km/4.49 miles
Week 5—24 Hour GP—8.16 Km/5.07 miles
Week 6—Rally Hill Climb—6.78 Km/4.21 miles
Type—Temporary road course
Number of Configurations—six, including one rally hill climb stage
Jacksonville Super Speedway
Location—Jacksonville Florida, USA
Length—Jacksonville 500—4.02 Km/2.50 miles
Type—Super speedway
Image Space Incorporated
Page 43
7/27/2006
Number of Configurations—One fixed layout super speedway
Barcelona
Location—Barcelona, Spain
Length—4.62 Km
Type—Road Course
Number of Configurations—One road course layout
Northamptonshire
Location—Northamptonshire, UK
Length—British Grand Prix course 5.141 Km
RF3 Championship course
Sports Car Championship course
Type—Road course
Number of Configurations—Three road course layouts
Nuerburg
Location—Nurburg, Germany
Length—European Grand Prix course 5.149 Km
Nuerburg Sprint course
Type—Road course
Number of Configurations—Two road course layouts
Essington Park
Location—Bolsover, Derbyshire, UK
Length—Essington Grand Prix—4.012 Km/2.5 miles
Type—Road course
Number of configurations—One permanent road course layout
Image Space Incorporated
Page 44
7/27/2006
Sanctioned Class Season Schedules
Event Series
Race Locations
Rhez Amateur GP-GT3
Mills Short
Joesville Speedway
Toban Short
Rhez Unlimited-GT2, GT1
Mills Short
Orchard Lake Road Course
Toban Short
Sardian Heights, Short Course
Mills Long
ZR Challenge—ZR
Toban Long
Mills Short
Orchard Lake Road Course
Toban Short
Sardian Heights, Short Course
Mills Long
ZR-Z Invitational
Toban Long
Orchard Lake Road Course
Mills Long, Reverse Layout
Sardian Heights, Short Course
Mills Long
Toban Long, Reverse Layout
rFactor Basic Trainer
Mills Short
Joesville Speedway
Toban Short
rFactor Academy Racer
And Trainer
Toban Long, Reverse Layout
Orchard Lake Oval
Mills Long, Reverse Layout
Toban Short
FIS Championship
Mills Long
Joesville Speedway
Toban Long
Orchard Lake Oval
Mills Short
Orchard Lake Road Course
Toban Long, Reverse Layout
Image Space Incorporated
Page 45
7/27/2006
Kodi Rayzor
Takamaya Venom
Altstadt
GP Layout
GP Layout Long
24 Hours Course
Scoring, SR Series
Place
Point Award
First
Second
Third
Fourth
Fifth
Sixth
Seventh
Eighth
No Further Point Awards
10
8
6
5
4
3
2
1
--
Scoring, OW Series
First
Second
Third
Fourth
Fifth
No Further Point Awards
Image Space Incorporated
8
5
3
2
1
--
Page 46
7/27/2006
Multiplayer
There are two types of servers—dedicated and non-dedicated. The dedicated server
does not have any graphics or sound and can run on a fairly low-end machine
(because of low CPU and memory usage). It can respond to and transmit networking
messages much quicker than a non-dedicated server. To use this special server,
double click on ‘Dedicated.exe’ and use the options tables to configure the server to
your tastes. Non-dedicated servers are set up through the normal game, by clicking
on the ’Create’ button under the Connect icon in the main options. On non-dedicated
servers, the host can race with the clients. The host of a non-dedicated server is also
in complete control of the game flow—the clients cannot vote to change sessions or
add AI.
To run a server, you may first have to make sure it works with your firewall. With a
non-dedicated server, there is actually a Firewall Test button that you can use. In
fact, in order to announce your non-dedicated server to the Internet, you must pass
this Firewall Test first. It is found under the multiplayer Settings page (a submenu of
the Connect icon in the main options). For further help with firewall issues and
setting up ports, please consult the Firewall Guide in the Support directory where
rFactor was installed. If you still do not see your game on the Internet, make sure
the ‘Matchmaker Announce’ option is enabled.
Image Space Incorporated
Page 47
7/27/2006
It is very important to set up the bandwidth options for a server. You can find
information about Connection Types and Upload/Download Speeds at the top of the
Multiplayer Client Setup section. However, the server has more considerations than
the clients when setting these options up. For one thing, the upload capacity is more
important for a server than the download capacity.
By default, rFactor will use as much bandwidth as allowed to create the highest
quality multiplayer experience possible given the connection. The bandwidth
allowance is determined by a combination of the server and client's connection
options. More to the point, though, even though your connection may support 1000
kbits/sec (1Mbit), it doesn't mean you should configure rFactor to use 1000
kbits/sec. If you plan on running several rFactor servers, or want some extra
bandwidth available for other uses (web-browsing and other networking
applications), you should reduce the connection type and/or ‘share’ the
upload/download speeds. For example, if you want to run 4 rFactor servers sharing
a 5000 kbits/sec (5Mbit) upload connection, then each server should be configured
to use no more than (5000/4) = 1250 kbits/sec. While we are talking about
multiple rFactor servers running on the same machine, it should be noted that each
one should use a separate profile (or ‘player file’); otherwise options may get mixed
up between them.
Another way of limiting the bandwidth is available through editing the multiplayer
configuration file (found by default at UserData/<your name>/multiplayer.ini). You
can limit bandwidth on a per-client basis by changing the Max Data per Client
setting. For example, say you have some clients joining with cable connections (let's
say 256kbit connections) and others joining using ISDN (64kbit). You may want
everyone to experience the same connection type to your server, so you could
change the Max Data per Client to 64, which will limit even the cable clients'
connection to be the same as the ISDN clients. Clearly, you can then easily calculate
the maximum upload bandwidth you will be using. With 15 clients, you will be using
no more than 15 * 64 = 960 kbits/sec. You might note that if this exceeds the
Upload Speed you configured, bandwidth will be limited to the Upload Speed
instead.
Servers have many options available to them. One of the first and most important is
what Race Series (or ‘game database’) to use, which will partially dictate what
vehicles and tracks can be used. After that, you will want to set up the vehicle filters
to allow only the vehicles you want. Vehicle filters were discussed above in the
‘Game play Summary’ section.
Selecting “RaceCast’ (dedicated server) or ‘Post On RaceCast’ (non-dedicated
server) will have the timing and other information sent to RaceCast so others can
view the race results on your server. There are many other options, such as which
driving aids to allow, various race options and so forth that you will encounter, and
most are discussed elsewhere in this document. Also of interest are some more
special options in the multiplayer configuration file. For dedicated servers only, you
can configure the voting so it is not too easy or too hard to change sessions, add AI,
Image Space Incorporated
Page 48
7/27/2006
restart races, etc. For these and other options, please look under the "External
Options" section later in this document.
Finally, once the server is set up and clients have joined, you have the option of
booting or banning people for poor behavior. Booting people is temporary—the
player could simply choose to re-join the server immediately assuming the race
session hasn't started. Banning people puts their IP in a list and prevents them from
re-joining. The full list of banned IPs is stored by default in UserData/<your
name>/bans.xml, so you can share it with friends or edit/delete it at a later time.
RaceCast
RaceCast is a powerful utility that is just one of the new features to be found in
rFactor, and one of the most entertaining from a driver’s point of view. Once you
have your password and login information gathered and properly entered, you can
use this powerful utility to track all of your online activities, and display them in
numerous ways. Total laps, total miles, cars driven, tracks raced—you name it, and
RaceCast has it covered, as well as a very useful *.XML output of the race that can
be parsed to display the race results however the user chooses.
Image Space Incorporated
Page 49
7/27/2006
The RaceCast main window allows the user to login, check the status of any server
running that is using RaceCast, and gives an overall statistical picture of all the laps
and miles that have been run cumulatively. From this main screen, you can click on
a server name, and an informational window will appear below the server list,
providing the user with the rules and other relevant information from that particular
race. If you chose, you can simply click on the WATCH link, and will be taken to a
real-time display of all drivers on that server, what session they are in; times they
are running, and total amount of laps. Feel like a race? Then pick one of your
buddies servers, or hop on one that has no password protection—but remember
your manners here, as pickup races are only as ‘clean’ as the drivers allow them to
be. If the server is password protected, you will be prompted for that password
before you are allowed to join the server.
RaceCast also provides an immense database of driver statistics, results, and
ranking information. By using the powerful search functions, you can obtain, for
example, a complete list of every race entered in the course of a driver’s online
‘career’. Also for observation is the rRank, a ranking based on your online
performance, the higher the number—the better.
And the best part? Through an exclusive agreement between the principals at
rFactor Motorworks and several broadcasting networks…it’s free! No longer will you
wonder where you stack up in the grand scheme of your racing class, RaceCast can
provide any information you need and it is just a few mouse clicks away.
For more information, visit the RaceCast site at: http://racecast.rfactor.net
Multiplayer Client Setup
To join an Internet game for the first time, you need to set up your connection first.
Go to Settings under the Connect icon on the main page. Pick the Connection Type
that is equal to or less than the real connection you have. For example, if you have a
Cable or DSL line with 192kbits upload capacity, we recommend choosing the
Cable/DSL 128K Up selection.
If you have tested your connection and know that your precise upload and download
capacity is not comparable to one of the existing Connection Types, then choose
Custom and specify those capacities directly in Upload Rating and Download Rating.
Warning: picking a connection type faster than what you actually have will likely
lead to a unsatisfactory multiplayer experience.
After you have set up your connection, click Join under the Connect icon. A list of
games should appear showing the Game Name, the Circuit, the number of Players
out of the maximum allowed, and finally the Ping. Just to clarify, the Ping is not your
ping to the server. Rather, it is the average ping of the players that are currently
Image Space Incorporated
Page 50
7/27/2006
connected (and 0 if nobody is connected). Lower pings (under 150 or so) indicate
that the server has a good connection to its existing clients.
To get more information about a particular game, simply click on it. At the bottom
of the screen, there are three tabs, each of which has information about the game
you have clicked on. A lock beside the name of the game indicates there is a
password (meaning that the server has probably invited specific people to join).
Another important piece of information is which Race Series (rFm) is being run. The
two series that ship with the game are SR Grand Prix Season and the Open Wheel
Challenge, which were described earlier in this document. If you may want to race a
particular type of car, also check under the News/Info tab for the Allowable
Vehicles.
Back under the Settings tab, you will see which driving aids are allowed. A green box
indicates that you are allowed to use the given driving aid. If you depend on Traction
Control to get around the tracks, it is recommended that you not join games that
disallow Traction Control.
You should also check the current Session that the game is in. You cannot currently
join a game that is already in the Race session. The Laps Remaining and Time
Remaining show you how much longer the current session will last (unless the
participants or server choose to change sessions before it ends). The Flag Rules are
described elsewhere in this document, and the Damage Multiplier tells you how
realistic the damage is. 100% is realistic, 50% is pretty forgiving, and 0% causes no
damage at all.
Under the Advanced tab, the only current important piece of information is the Data
Rate of the server. Higher data rates (1000+ kbps) indicate that the server can
handle many cars with good quality. Finally, other miscellaneous information can be
found under the News/Info tab.
If you have decided on which game to join, go ahead and click it and then click Load
Game at the bottom-right hand corner of your screen. At that point you will need to
choose a vehicle that matches the server's Allowed Vehicles. When you are done,
click Load Circuit and you will be in the game.
More information about participating in multiplayer games, including voting, is
covered above in the Monitor section.
More Multiplayer Features
On the Join page (found under the Connect icon in the main options), you will find
three tabs at the top - Server List, Friends List, and Chat. The Server List is where
you are taken to by default and lists the games you can join.
Under Friends List, you can specify friends by their profile name and clicking the
Plus icon to add them. Later on, you will be able to see which of your friends are
Image Space Incorporated
Page 51
7/27/2006
racing right now. In the right pane you will see games you have bookmarked. Once
you are in a race, you can bookmark the server by pressing the call-vote button in
the bottom-left portion of the monitor and then pressing the "Bookmark" button.
From then on, just go to the Friends List, pick the bookmarked server and hit Join
Race.
Under Chat, you can participate in rFactor chats using IRC. Simply hit Connect, and
assuming your nickname is not already taken (it defaults to your profile name) you
will be able to chat with anybody listed in the lower pane.
On the multiplayer Settings Page (found under the Connect icon in the main
options), you will see RaceCast settings in the lower part of the screen. RaceCast is
an exciting new feature that allows you to watch live timing, find games, and view
results and rankings. To enable RaceCast to keep your statistics, you must first
register with RaceCast by typing in an e-mail address and password, then clicking
the "RC Register" button. If Registration succeeds, you can then press the "Sign on
RaceCast" button to sign on. When RaceCast is activated, the RaceCast Status
indicator will light up green. From then on, the game will attempt to log in
automatically whenever you start up. To view results and so forth, open up your web
browser and go to racecast.rfactor.net. You will need to log in using your profile
name (not the e-mail address) and password that you registered with.
Image Space Incorporated
Page 52
7/27/2006
Control Commands List
This is the complete control list for rFactor. Note that several commands are
unmapped. The free roaming camera control is described in more detail in the
‘Extra Features’ section.
Default Key Map
ACTION
Accelerate
Brake
Steer Left
Steer Right
Shift Up
Shift Down
Neutral
Clutch
LCD Mode
Request/Cancel Pit Stop
LCD Up
LCD Down
LCD Increase
LCD Decrease
TC Override
Launch Control
RPM Limiter
Brake Bias (Forward)
Brake Bias (Rear)
Look Left
Look Right
Look Behind
Steering Assistance
Opposite Lock Assistance
Braking Point Assistance
Stability Assistance
Spin Recovery
Invulnerablity
Auto Shifting
Traction Control
Anti-Lock Brakes
Pit Lane Assistance
Clutch Assistance
Take Screenshot
Cockpit Cameras
Onboard Cameras
Swingman Cameras
Circuit Cameras
Bounce to Vehicles Ahead
Bounce to Vehicles Behind
Image Space Incorporated
DEFAULT KEY DEFAULT CONTROLLER
A
Axis Y (-)
Z
Axis Y (+)
,
Axis X (-)
.
Axis (+)
Left Alt
B1
Right ALT
B2
N/A
Q
ENTER
S
UP arrow
DOWN arrow
RIGHT arrow
LEFT arrow
O
/
L
[
]
V
N
B
F1
F2
F3
F4
F5
F6
F7
F8
F9
F10
F11
F12
INSERT
HOME
PAGE UP
PAGE DOWN
Keypad +
Keypad -
Page 53
7/27/2006
Instant Replay
Display Driver Details
Pause
Restart Race
End Session/Race
Pan Up
Pan Down
Rotate L
Rotate R
Zoom In
Zoom Out
Display Vehicle Labels
Toggle AI control
Driver Hot Swap
Passenger Select
Increment Boost
Decrement Boost
Temporary Boost
Toggle Free Move
Zero Free Move
Ignition
Starter
Horn
Headlights
Handbrake
Look Up
Look Down
Look Roll Left
Look Roll Right
Adjust Seat Fore
Adjust Seat Aft
Adjust Seat Up
Adjust Seat Down
Time Acceleration
Toggle Mirrors
Toggle HUD Stats Bar
Toggle HUD Tachometer
Cycle HUD MFD’s
Toggle Overlays
Real-time Chat
Quick Chat #1
Quick Chat #2
Quick Chat #3
Quick Chat #4
Quick Chat #5
Quick Chat #6
Quick Chat #7
Quick Chat #8
Quick Chat #9
Quick Chat #10
Image Space Incorporated
R
TAB
P
Y
ESC
Keypad 8
Keypad 2
Keypad 4
Keypad 6
Keypad 9
Keypad 7
TAB
I
W
P
UNMAPPED
UNMAPPED
UNMAPPED
UNMAPPED
UNMAPPED
UNMAPPED
UNMAPPED
UNMAPPED
H
UNMAPPED
UNMAPPED
UNMAPPED
UNMAPPED
UNMAPPED
UNMAPPED
UNMAPPED
UNMAPPED
UNMAPPED
UNMAPPED
NUM_3
NUM_4
NUM_5
NUM_6
NUM_7
T
UNMAPPED
UNMAPPED
UNMAPPED
UNMAPPED
UNMAPPED
UNMAPPED
UNMAPPED
UNMAPPED
UNMAPPED
UNMAPPED
Page 54
7/27/2006
Quick Chat #11
Quick Chat #12
External Signal Up
External Signal Down
External Signal Left
External Signal Right
External Signal Select
External Signal Cancel
Camera Slow Move
Camera Move Forward
Camera Move Backward
Camera Move Left
Camera Move Right
Camera Move Up
Camera Move Down
Camera Tilt Up
Camera Tilt Down
Camera Tilt Left
Camera Tilt Right
Camera Turn Left
Camera Turn Right
Camera Zoom In
Camera Zoom Out
Toggle Use of Hardware Plugin
Push to Talk Control for Voice
Chat
Push to Change Camera View
Reset FFB
Standard Display
Pit Display
Driving Aids
Vehicle Status
Extra Info
Race Info
Standings Display
Image Space Incorporated
UNMAPPED
UNMAPPED
UNMAPPED
UNMAPPED
UNMAPPED
UNMAPPED
UNMAPPED
UNMAPPED
UNMAPPED
UNMAPPED
UNMAPPED
UNMAPPED
UNMAPPED
UNMAPPED
UNMAPPED
UNMAPPED
UNMAPPED
UNMAPPED
UNMAPPED
UNMAPPED
UNMAPPED
UNMAPPED
UNMAPPED
UNMAPPED
UNMAPPED
UNMAPPED
UNMAPPED
UNMAPPED
UNMAPPED
UNMAPPED
UNMAPPED
UNMAPPED
UNMAPPED
Page 55
7/27/2006
Appendix A: Tuning For Speed—The Garage
In order to be quick, besides having the line down, you need to understand how the
car is behaving and how you can change that behavior if it does not feel right to you.
Car setup is an art, as well as a science, and this section will provide you with a
good idea of just where to start. After a bit of practice and time in the garage, your
driving and car setup skills will rapidly improve. You will now be taken through a
detailed track run-through with setup-guru Achim-T at the challenging Mills track.
Ladies and Gentlemen, strap yourselves as in as we examine Mills from both the
driver and the engineer’s point of view.
The first thing you need to do is become intimately familiar with is the track. If you
have not yet done so, take the Howston out onto the tarmac and drive fifteen–to–
twenty laps using the default setup.
On your first five laps, try and follow the racing line as close as you can. The main
goal at this stage is to memorize the sequence of corners and to identify landmarks
that will trigger the necessary memory-actions later on when you’ll be driving too
fast to see every detail.
After five laps, speed up a tad and follow the racing line more competitively. Not
quite at race speed yet, but fast enough for it to be interesting. Release the throttle
considerably earlier than you normally would, and start braking earlier as well, so
that you’re not hard on the brakes and are slow enough to be able to examine each
corner in order to understand how you will need to attack it. These five laps are for
Image Space Incorporated
Page 56
7/27/2006
understanding how each corner works, and your attention should be drawn, in
particular, to the entry and exit phases for each turn.
By lap ten, you should have determined approximate braking points as well as the
correct gear for each turn, and you should also know exactly what follows each turn.
Now it's time to go fast. For another five laps, try to go as fast as you—safely—can.
The emphasis is on ‘safe’. Still brake earlier than you think you should—it'll be too
late quite often anyway—and focus on the racing line, memorizing what the car does
in every corner.
Asking the right questions is a crucial part of setting-up the car for speed and
here’re some things you should be paying attention to: Does the car oversteer or
understeer, and, if so, where, and what were you doing at the time with the throttle,
steering wheel and brake? Are there bumps before–in–or after the corner that
upset the car? Are there any spot that seems particularly slippery? Are the curbs
usable or not? Is the perspective deceiving you as to the actual trajectory of the
corner and the appropriate racing line? Is the corner followed by a high-speed
section (which would mean that exit speed is dramatically more important than
entry or mid-corner speed)? Is the apex where it seems to be or is it earlier–later,
and what errors are you making—in other words, what are you trying to do naturally
and is this optimal for the corner or not, and if not, in which way (for instance, are
you trying to jump on the throttle too early, are you taking the wrong line, braking
too late–early?) are you inducing either understeer or oversteer?
Is a corner followed by another corner and does using the optimal line or speed
through one corner compromise the line or speed for the subsequent corner? Do
you reach something just short of the redline on the tachometer at the fastest spot
on the track when you entered the section smooth and fast? Do the gears match
your cornering speeds, or are you at a very high or very low RPM somewhere
through a corner but cannot shift to a better gear because that then would again be
too high or low in terms of RPM?
Does the rear end get very loose as you shift down for some corners? (A remedy to
this is to shift down later or to move the brake balance further to the front, but the
latter has severe tradeoffs, so if you're still on the default settings, you should only
choose the first option.) Do the front wheels tend to lock-up excessively? Does the
car over or under steer during acceleration out of the corner? Can you point it
towards the straight quickly after the apex?
Does the car follow your steering input well, and where does it not do this? Does it
do things you do not want it to do? If so, where?
If five laps at speed were not enough to answer these questions, drive another five.
After twenty laps, however, you should have enough information to return to the
garage and start discussing the driving and setup of the car for this track.
Image Space Incorporated
Page 57
7/27/2006
All right, I assume you've driven those twenty laps now and have the answers to the
questions that will come up during the following discussion.
Let me now take you on a lap at Mills so that you can reflect upon the differences
between my perception and yours, and see the things I watch out for in such
situations. I always drive with all driving aids off, so keep that in mind while reading
this little guide. However, since there are racing series that feature traction control,
anti-lock/ABS systems and other electronic driving aids, feel free to enable them as
you wish. But be aware that they will change the car's behavior, so some of the
things we say here may no longer apply when driving aids are enabled.
Let’s assume we've completed a warm-up lap and are now on that short straight
preceding the final left-hander leading back onto the main straight.
I try to enter the final left-hander from the right hand curb; since this corner is
followed by a long straight, any bit of speed advantage I can take with me out of
this corner will remain effective for (in racing terms) a very long time.
Therefore I will, if necessary, sacrifice some speed before entering the corner in
order to make sure I am able to accelerate as soon—and as hard—as possible out of
the turn. I need to have absolute control of the car around the apex to be able to
point it into the right direction for the subsequent acceleration.
I start from the right-hand curb; I steer early and use the lower part of the left-hand
curb when I'm in the race (I might use the higher part of the curb in qualifying, but
only after I've made sure my setup permits this). Softer suspension settings may
allow the car to feel smoother across the high curb, stiffer settings may not.
Basically, I will point the car to a point somewhere at the end of the right-hand curb
following the corner by gradually reducing the steering lock. Smooth driving is an
absolute must in rFactor, as it is in a real car. Therefore, I will not nail the throttle,
but will depress the pedal further in three or four steps while gradually opening the
steering lock. The car will probably snake a little, but all that matters is that I can
continuously accelerate as hard as my rear wheels' grip allows. If I can do this then
for now, everything is optimal. If I cannot, I'll need to change something either in the
setup, or in my driving.
Assuming then, that I am comfortable with the car’s handling coming out of this
turn, I'll accelerate flat-out until I see the right-hand curb preceding T1L (Turn One, a
Left-hander).
Again I will aim and drive onto that curb. Then, as I reach the end of that curb, I will
remain on the throttle and steer left a tad earlier than my eyes would make me
believe since, at this speed, the centrifugal forces will drive the car towards the
outside of the corner. So I need to make some provisions for counter-balance to still
be able to touch the inside curb at the apex of the corner (or wherever I am aiming
for), and have the car pointed into the right direction for optimal exit.
Image Space Incorporated
Page 58
7/27/2006
It is fairly easy to get through this corner if you follow this advice. However, do not
make the mistake to dwell on the satisfaction of your success. This is one of the
major errors a driver can commit—keeping your mind focused on the past instead of
on what is ahead of you. No matter whether maneuvers went well or not, store it in
memory for later reviewing (when you're back in the garage) and concentrate on
what is ahead of you.
Having reached the apex of T1L—provided you have the speed you should have in
the Howston—you have to start braking for T2R. Most of you will have had problems
getting through T2R in one piece—this is simply because, no matter how happy you
are about the speed you carried through T1L, you have to immediately sacrifice that
speed to prepare yourself in time for T2R.
Obviously the car will not want to slow down; it will wiggle and buck. Concentrate on
braking and on smoothly bringing the car over to the left-hand curb before T2R.
Despite the default setup being a fairly stable one, the car will still feel very much
on edge under brakes here—but making the car even more stable would simply
make it too slow. So we'll have to live with this for now.
I imagine a line through T2R ending on the left-hand curb behind the corner and try
to find the right combination of speed and control input to keep the car on that line.
T2R is followed by a straight, so exit speed is more important than speed before the
apex, and I'll act accordingly by trying to prepare for an optimal exit rather than
trying to maintain speed through the corner.
As I pass the apex and try to get on the throttle early, I notice that the car pushes
badly towards the outside curb. I have problems getting it to steer to the right while
at the same time under acceleration it seems very ‘snakey’.
So here is the first thing we need to address setup-wise: I make a mental note that I
will reduce the differential lock on the power side, or the preload, to dial some
oversteer into the car. I may choose only to reduce the preload since the problem
mainly exists while the throttle is fully depressed. Of course, the preload also affects
the coast side, so I'll have to decide whether I want the car to oversteer more on the
coast side (off-throttle) as well. If I perhaps only want it a little more loose on the
power side with a little less than full throttle applied and would like to regain that
extreme stability with the throttle fully depressed, I would reset the preload to, say,
three.
Of course, I could change the overall balance of the car by adjusting the weight
balance, or the anti-roll bars. Or even by changing the suspension settings—namely,
the slow-action side of the shocks to use weight transfer to achieve a change in the
car's balance in specific circumstances. But the differential lock is a nice way of
achieving the same effect without changing the car's balance, or introducing
unwanted side effects. More rear weight will reduce the steering precision; stiffer
Image Space Incorporated
Page 59
7/27/2006
anti-roll bars will increase tire wear and also reduce the oversteer tendency in static
situations. Increasing weight transfer will only have an effect while the weight is
being transferred. The diff’ lock is really the best option for me at the moment.
The camber is already high enough—or even too high. The car feels nicely responsive
with more camber, but increasing it does not always increase the overall grip, and it
will also increase tire wear on the inside of the tire.
I could, of course, decrease the camber at the rear end to get more grip under
acceleration, since under acceleration the rear suspension gets compressed which
turn increases the camber and might lead to the effect that, under acceleration, the
rear wheels only have contact with the asphalt on the inside instead of on their
entire width. I might end up with more rear end grip under acceleration like this—
which might actually be a point to note if I feel that I don't have enough rear end
grip under acceleration. But right here, the diff’ remains the best solution.
As for gearing: you can use either third or second gear. Second feels faster, but third
may actually be faster as the car will not become so untidy under acceleration, and
also because shifting down to second under braking might upset the car
unnecessarily, thereby preventing me from aligning it for the fastest possible exit.
For now, though, I will try and modulate the throttle and steering wheel to get the
car pointed in the right direction. Since the car, depending on the setup, responds
differently to control input, I'll just have to experiment with which combination of
control inputs gets the desired response from the car. The theory is to upset the car
moderately and perhaps lose a bit of grip at one end of the car (the rear end in this
case) to make it easier to point the car into the right direction.
Again, once the car is pointed in the right direction, it is time to return to
‘smoothness’. I accelerate flat-out towards the right-hand curb preceding T3L. This is
a very slow left-hander, and you know by now that it is a hairpin-type of corner. I
start braking smoothly quite a bit before the tire marks—at least for the Howston.
(The skid-marks generally start too late to serve as definitive brake-markers and are
best used as relative brake markers-only.).
I notice that, as I jump off the throttle and under-braking, the car pushes quite hard
—that is, it understeers. Too much brake balance set to the front wheels can cause
this. It is now on 69/31, so I'll set this to 60/40 later on. A wheel can only generate
so much grip, and this overall available grip is distributed among, and shared by, all
the forces applied to the wheel (or rather, the contact patch, the patch of rubber
which is actually touching the road). Hence, when the brakes are applied at the front
end, the grip remaining available for steering will be reduced—or be completely
annihilated should I lock up the front wheels entirely.
I must be careful, though, not to shift the brake balance too far to the rear, because
that again will make the car hard to control under braking. Directional stability will
be lost by having too much brake balance shifted to the rear wheels. I will instead
Image Space Incorporated
Page 60
7/27/2006
again use the differential lock to increase oversteer, but this time I'll use the coast
side. I'll reduce the lock on the coast side from fifty to twenty-five to force the car to
oversteer more in off-throttle situations.
The reduced preload will help, but I'll reduce the coast lock setting as I want a
stronger effect, and I want that effect at every throttle position and speed situation.
Perhaps a short explanation of the preload and lock settings is due.
The higher the preload, the sooner (in terms of throttle position and speed
differential between the wheel on the left and the one on the right) the lock will kick
in. With no preload and a high lock, you get max lock when the speed differential
between the left and right wheel becomes very high. In this case, the lock kicks in
late and hard. With a high preload setting, the lock kicks in early and softly—in other
words, at low speed differentials between left and right wheel.
With that cleared up, let’s get back to Mills, where I am in the process of turning-in
following the tire marks closely and once again using the right-hand curb before the
corner, and the inside curb at the apex. Be aware that the apex in this corner is very
late due to the high degree of directional change of the turn itself. For optimal
acceleration out of this corner—and this is, yet again, a corner followed by a long
fast section, hence exit speed is more essential than entry or mid-corner speed—I
actually try to hit the inside curb at a point somewhere following the actual apex.
The criterion is to get the car aligned as early as possible in such a way that you
have a fairly straight line ahead of you for early and determined acceleration into
that fast section.
I won't describe where that line is since it is clearly apparent.
During exit, I will once again allow the car to drift over to the right-hand curb and
even use it. If you get on the grass, don't panic. As long as you don't steer hard, the
car will let you get away with getting half a wheel on the green.
The combination of corners we are approaching now is the most fun part of the
track: a left-hander over a hill, followed by a kink to the right and another fairly tight
left-hander. For reference, we'll refer to them as T4L, T5R and T6L.
Although I hate to lose speed and want to keep the speed up through these corners,
the fastest way through this section is to drive the optimal line—and this means
having to sacrifice maximum speed.
You have to enter T4L from the right while aiming to be on the left where those two
infamous little blue plastic cabins are. This, for practical purposes, is the apex of
this corner—and in this case, the apex is not a point, it's a stretch. Do not accelerate
at the apex, but wait a tad and only accelerate when you are sure that you will not
hit the wall of T6L on the right. From that location after the apex of T4L, you drive a
straight line to the left-most point of that wall. Just before you get there, you turn
Image Space Incorporated
Page 61
7/27/2006
left and aim to get your left front wheel into the grass to the left of that curb, and
way before the apex of that corner.
Cutting across the grass will not be a problem—you're carrying too much speed and
the contact with the grass will be too brief to cause any problems—and your speed
will carry you nicely over to the right and back onto the tarmac.
As you approach that wall to the right before you turn left into T6L, do not
accelerate for too long—and then aim to coast at half or zero throttle through T6L. If
you are too fast into T6L, you will get sucked over to the right on the exit from T6L
and you won’t be able to accelerate properly for the short straight following T6L.
Let the car drift over to the right as far as necessary. Hit the throttle once you've
aligned it with a point allowing you to accelerate without danger of getting carried
over to the right and off the track,.
Again, like in T2R, you can chose between two gears—this time, between fourth or
third. Fourth is probably fastest, as the car will not become so untidy under
acceleration. Third may feel faster, but shifting down to third under braking might
have upset the car unnecessarily, keeping you from aligning it for the fastest
possible exit.
The next corner, T7R, is tricky in that this section is obscured by shade. For several
hours of the day you won't be able to see your braking points as your eyes are not
able to adapt quickly enough from the light to the shadow.
The secret is to brake a tad early. It's not a great problem, as this corner allows a
nice drift across the inside curb at the apex and hence a fairly high cornering speed.
If you've braked a little early but not too hard, you will hardly lose any time as you
can keep the mid-corner speed up.
So brake a little early but not too much and try to almost hit the grass on the inside
curb with your right front wheel before the actual apex. Considering the high speed,
this should take you through this corner in a nice four wheel drift. Once out, though,
do not over-accelerate. If you start accelerating too hard and then have to make
corrections as you get carried over to the left, this will cost you more time than
being smooth and accurate and perhaps a little late on the throttle. It is crucial that
you make sure that the car is pointed in the right direction before you accelerate.
For T8L, you need to use the right-hand curb before entry. Again, try to almost touch
the grass at the inside apex of T8L with your left front wheel, but not as much
before the actual apex as in the preceding corner—simply because this is a slower
corner.
A clean, early, and uninterrupted acceleration out of this corner is absolutely
essential because the following straight is the longest on the track. Hence, sacrifice
everything necessary for a clean, smooth exit.
Image Space Incorporated
Page 62
7/27/2006
As you brake for T9L (start braking before the track darkens from skid-marks), you
will notice that your front wheels lock-up even before the crest of that little climb
preceding that corner. This is because there's a bump that will briefly reduce the
wheel's contact with the road.
Assuming that you hit the bump, braking optimally for T9L will require that you
release the brake pedal—briefly and entirely. Releasing the brake pedal only a bit
won't work as well as simply releasing the brake—which will allow the wheels to
start rotating again—and then re-applying the brakes. For those of you who are
interested, the theory behind releasing the brake entirely is that without the torque
(the momentum of the rotating wheel), there simply is not enough grip at the
contact patch to get the wheel turning again. You have to add the wheel’s own
torque to the equation as quickly as possible to find grip—and grip, obviously, is
essential to braking.
T9L holds no secrets—enter from the right, pull over to the apex on the left—again, a
tad early— find a straight line to a point before the apex of T10R, and turn left into
T11L from that point. For T12R, again you need to turn-in early and remain glued to
the inside curb for a moment. If you do this, you can accelerate early and hard, but
do not wait too long before you brake as, once again, you need to align the car
optimally for the final corner.
If you feel courageous, you can try to hook the right front wheel onto the curb to
counter the centrifugal forces (using it as a rail-road), but it is easy to upset the car
badly this way—try at your own risk!
Setup considerations
We've already addressed the differential lock issue. In general, the default setup is
quite stable and easy to drive. However, it emphasizes directional stability over
agility, which, in turn, limits the ability to achieve lower lap-times.
I would not touch the suspension for now. The default settings allow pretty fast laps
and offer was is essentially a very usable car.
I'd set the brake balance more to the rear because, in the default setup, the front
wheels lock up too soon.
I'd set the transmission ratios to match the track's fastest straight. You should find
that you are just under the redline at the fastest point on the track.
I've increased the rev limit to the maximum—trusting that the engine will be well
manufactured and be able to take the strain. In extreme endurance races, or on
very hot days, you might reduce this again—or simply shift earlier.
Image Space Incorporated
Page 63
7/27/2006
I've set the weight distribution to 50/50 as I feel it gives me more control over the
car. With a front bias, the car will be more stable and precise in terms of directional
control, but with a 50/50 weight distribution, you leave its characteristic more open,
and can decide for yourself whether you want it to over or understeer. The downside
of this is—the car may surprise you as you don't know for sure in advance whether it
will over or understeer. In order for the car to offer you no harsh surprises, you will
have to introduce that certainty through the setup.
I've reduced the brake pressure because the front wheels lock up too frequently.
With reduced brake pressure, this is more easily controllable, but too little pressure
would prevent me from getting maximum braking force.
I've changed the differential as described in the text above.
I've softened the front anti-roll bar one notch to get a little more grip at the front end
through the turns. This minor modification did not reduce the directional stability,
but works towards creating less understeer.
I've reduced the front camber to –2.5 because, at the default setting, only the inside
section of the tires ever touch the ground—clearly visible through the temp
distribution across the tires. Good temp deltas from inside to outside are below ten
degrees.
I've also reduced the camber at the rear. –1.5 may not give me optimal lateral grip
in high speed corners, but I get more tire on the asphalt (thus increasing the contact
patch) under hard acceleration.
I've changed the tire pressures to get evenly distributed tire temps and the caster
from 3.0 to 5.0 for more directional stability. For those who don't know what caster
is—it's nicely visible on motorcycles. Race bikes have a low caster. Their front fork is
a lot more vertical than that of a custom chopper like in the famous Easy Rider
movie. Lower caster values make the steering more nervous and agile. Higher
caster settings add directional stability at the cost of agility.
But since my setup is oversteering anyway, I don't need that much directional
stability. Sometimes setting the front to a higher negative value can also help you
turn-in—but it didn't seem necessary to use this at Mills.
Well there it is: now you have driven a lap around Mills, and I have given you
solutions to any problems you may encounter setup-wise. Good luck out there on
the track, and don't forget the golden rule of racing—to finish first, first you must
finish!
Image Space Incorporated
Page 64
7/27/2006
Appendix B: Extra Features
Free Roaming Track Cameras—Spectator Camera
One of the most unique ways to enjoy rFactor is through the use of the trackside
stationary camera, accessed by default by pressing the END key. Once this key is
pressed and with the proper control mappings entered, the camera can be zoomed
in or out, moved freely around a viewpoint with the mouse, and elevated up or
down. By moving the camera up high enough, you can keep an eye on every car on
the track! And you will also see the incredible detail that makes up the rFactor world
—hidden lakes, lush rolling hills, and other gorgeous scenery provide for a beautiful,
and rarely seen, backdrop to the action on the track. Coupled with the features of
the replay engine, this camera can be used to display some breathtaking race
footage.
Replay Fridge
rFactor features a brand new replay system, where you can create your own videos.
You will find the Replay Fridge under the Control icon in the main options. On that
page, you will find some replay options at the top of the screen, and assuming you
Image Space Incorporated
Page 65
7/27/2006
have already run at least one race, you will find a list of replays to choose from in
the left pane and the bottom of the screen.
Clicking on a replay will bring up information about it in the right pane. If you have
found a replay you want to watch or edit, click the Play Replay. You also have the
option of manually deleting or renaming replays. By default, the replay system
stores the last 5 replays at each track. If you don't want rFactor to ever delete a
specific replay, you must rename it to something without the full track name.
Once you have started up a replay, you can play it using the standard VCR controls.
Maximize the screen for a better view. If you want to toggle the onscreen graphics
off, hit the Enter key.
To Edit a Replay
Click in the middle of the long bottom window. Then use the Split button.
You now have two clips. You can continue to create more.
Clips can be moved, copied or deleted.
Each clip is like a piece of an editor's film, but much more powerful as the image on
it is not fixed.
In each clip you can specify a vehicle to focus on and a camera to switch to (please
note, however, that free-look cameras are not currently supported).
Specifying and arranging these clips, you can create dramatic films switching to the
right car at the right moment using the right camera.
When complete save your creation to a movie format to share with your friends.
Experiment, it’s fun!
If you want to create a video, first check the Output Settings. When you are ready,
press the Export button. Note that exporting a video takes a long time - a 30-second
clip may take a half-hour or more to create. The quality and amount of time taken
depends on the video codec used. You can change the video codec by opening your
player file (found by default at UserData/<your name>/<your name>.PLR) and
changing the setting for "AVI compressor fourcc". It must be a fourcc video codec you can find out more information about this standard (and available codecs) at
fourcc.org. Note that very few of the codecs seems to be affected much by the
Quality setting in the Output Settings.
Career Checklist
Image Space Incorporated
Page 66
7/27/2006
The career paths of rFactor are challenging and rewarding—use these tables as
baseline templates for tracking your progress.
Car
Race
Image Space Incorporated
Date Purchased
Odometer
Series
Qual Result
Page 67
Race Result
7/27/2006
*.PLR FILE—LINES OF INTEREST
LCD Display Modes="31" // Add the modes to allow them: 1=status 2=aids
4=engine/brake temps 8=race info 16=standings
AVI compressor fourcc="cvid" // Changes compression algorithm
Command Line Options
Some people may find a need to use one of our command-line options. To use
command-line options, create a shortcut to the executable (rFactor.exe for the
normal game and rFactor Dedicated.exe for running a dedicated server). Right-click
on the shortcut and select Properties. Add one or more of the following command
line switches at the end of the Target:
trace=<1-3>
// this generates a file whose default location is
UserData/Log/trace.txt that may be helpful in diagnosing problems with running
the game.
config=<file>
config.ini
// run game using a config file different than the default
perfhud
// testing/debugging graphics
+profile "<name>"
name.
// this will run the game with the given player file
+oneclick
// this allows a dedicated server to start up and load a track
without user intervention.
+host
// auto-host (unsupported?)
+gamename "<name>"
// set auto-hosted game name
+password "<pswd>"
// set auto-hosted game password
+maxplayers <num>
// set auto-hosted maximum number of players
+connect <address:port> // auto-join at given address & port. If port given is 0,
will use multiplayer.ini value "Query Port Start".
+fullproc
// use dual processors if available (should only be used with
Microsoft’s dual processor fix for Windows XP SP2)
+nosound
Image Space Incorporated
// completely disable sound to diagnose problems
Page 68
7/27/2006
Modding Notes
While rFactor is very open to modding, there is some basic information that you
should know before doing so. First off, it's done completely at your own risk, as is
downloading mods from other people.
Second, if you wish to modify existing tracks and vehicles, you should NOT touch
any information that can affect physics in any way. Doing so will prevent you from
joining multiplayer races. This includes GDB files, RFM files, much of the SCN and
MAS files (any geometry that affects physics), HDV files, parts of the VEH (such as
the HDVehicle and Upgrades entries), TBC files, PM files, *gears.INI, *engine.INI,
and parts of the *upgrades.INI (any HDV= line, for example).
If you absolutely must change one of the above (for participation in a league for
example), we would recommend that everybody that you will be racing against save
off the original and then get a copy of the changed file. If anybody's version doesn't
match the server's version, then that person can't join.
The basic structure of rFactor starts with the rFm files in the RFM directory, which
define separate race series. In it you will find filters for which tracks and vehicles to
allow. The special * symbol is a wildcard which will allow everything. These filters
are used to compare against entries in the track GDB files ("Filter Properties") and
vehicle VEH files ("Classes"). When you pick or change the Race Series in game, it
will load only the tracks and vehicles appropriate for the new Race Series.
The rFm file also contains scoring info and seasons that you can race. While the
original release version of rFactor doesn't include any examples, you can create
your own seasons without editing the rFm file. You do this by creating a file ending
in .AOS (for Add-On Season). Its contents should look something like this:
RFM = SR Grand Prix Season // this must match the name of an existing race
series
Season = MySeason // must be 19 character or less
{
FullSeasonName = Super Multi-Class Racing Challenge // name override
SceneOrder // order of events in the season
{
Mills_Long // name from the top of an existing track GDB
}
}
You can also add other information to the above (new points systems, different
credit earnings, etc.) - just look for examples from the existing rFm files to see what
can be done.
Track Naming Convention—(ISI Mike D)
Image Space Incorporated
Page 69
7/27/2006
Every track should have a unique name that it would be referred to as in the
Locations folder. The ONLY exception I can think of here would be Monaco. This is
strictly for simplicity's sake, and to provide a basic template. So...for the Aussie
tracks out there...
Locations
--->Albert_Park
--->Canberra
--->Eastern_Creek
--->Surfers_Paradise
I think this will cause fewer headaches for everyone, and it's a convention that
should be followed in all cases if possible.
More extensive modding (new skins, 3d models, and physics) is beyond the scope of
this document.
Known Issues
Some software products may interfere with the normal startup procedure or
multiplayer capabilities. In some cases VET anti-virus software will cause the
rFactor startup procedure to take an exceptionally long time. If rFactor seems to be
stuck on the rFactor logo screen and you have VET anti-virus installed, at this time
the only known work around is to uninstall VET.
Setting Force Feedback Effects to anything higher than Low on a Microsoft wheel
may result in a loss of forces after going over curbs. There are now two possible
workarounds, both of which reset the force feedback effects on the fly. The first is a
Controller Mapping "Reset FFB" that you can use to manually reset the force
feedback. The second is a controller.ini option which can be used to reset the force
feedback automatically every X seconds. To enable it, open the file
UserData//controller.ini and change the value of "Reset FFB Time".
Requesting a replay from the server in multiplayer is unimplemented.
Force Cockpit, Upgrade Credits, and Duplicate Vehicle checking are all
unimplemented. There is no wet weather driving yet.
There are a few issues associated with the instant replay at the monitor. The timeof-day is not correct, and sometimes brake glows and other special effects flash or
work intermittently.
Image Space Incorporated
Page 70
7/27/2006
Appendix C: Firewall Guide
Note—this guide is also found under the Support menu in the main rFactor install
directory.
Running Multiplayer Races Using rFactor 1.0
http://www.rfactor.net
Overview
This document is to help the average computer user setup their firewall and or
router so that they can play and host rFactor races.
Section 1: Hosting a race versus joining a race
To join a race you do not need to change anything to your existing Internet
connection. To host a race you will need to all other drivers to connect to your
computer. By hosting the race you can specify the rules, track and allowable cars. In
order to have other drivers join your race you will have to open ports in any existing
firewall.
Section 2: Port Information
To host games or a dedicator server you will need to open some ports so that other
drivers can connect to your game. There are three types of games you can host. You
can host a LAN only game, an Internet only game, or a LAN and Internet game. For
any game you want to host on a LAN you will need to open up the ports in Table 2.1.
Table 2.1 Ports required for successfully hosting LAN races
Port Number
Transport
Description
34447
TCP
Session, Race and Chat
Information
34297
UDP
LAN Query Information
34397
UDP
Race Event Information
If want to host the game only over the Internet you only need to open up the ports in
Table 2.2.
Image Space Incorporated
Page 71
7/27/2006
Table 2.2 Ports required for successfully hosting Internet only races
Port Number
Transport
Description
34447
TCP
Session, Race and Chat
Information
34397
UDP
Race Event Information
Section 3: Port Forwarding and Firewall Exceptions
3.1 Section Overview
In general, some type of firewall protects computers on the Internet. If you are not
behind any type of firewall you can ignore this section. Also if you never intend on
hosting any races you can skip this section.
3.2 Description of a firewall
A firewall is either a piece of software that runs on your computer or a hardware
device that sits between your modem and your computer. A router that performs
network address translation is considered to be a firewall. Common software
firewalls are Zone Alarm, Black ICE, Norton Internet Security, McAfee Firewall and
Windows XP Service Pack 2 firewall. LinkSys, Net gear, Dlink, Belkin and Cisco
manufacture common hardware firewalls.
Driver Join Sequence
When a driver attempts to join your race, that driver will get the address of your race
from either a matchmaker service or by direct IP. Regardless of which way the
driver gets this information, the driver will attempt to connect and be confronted by
your firewall. If your firewall does not let him in, he cannot join your race. You
firewall must be setup so that when the driver attempts to connect to your race it
forwards his connection request to computer hosting the race instead of blocking
the request. Once your firewall is setup correctly the driver will be able to join your
race.
3.4 Allowing access
In order to host a race you will need to configure your software and/or hardware
firewall to allow other drivers to connect to your computer. To do this you will need
to enable port forwarding or add exceptions to your firewalls rules. It is beyond the
scope of this document to give detailed instructions on how to enable port
forwarding or exceptions for every possible software and hardware firewall. Section
4 attempts to give instructions for the most popular firewall solutions. Please
consult documentation that came with your firewall product.
Once you have discovered how to setup port forward and/or setup firewall
exceptions you will need to make sure those changes reflect the ports listing in
Table 2.1 and 2.2.
Section 4. Setting up port forwarding and firewall exceptions
Section 4.1 Windows Xp Service Pack 2 Software Firewall
Image Space Incorporated
Page 72
7/27/2006
Right Click on My Network and Select Properties you should see a window like
Figure 4.1.1.
Figure 4.1.1
Right click on your network adapter and select Properties. You should see a screen
like Figure
4.1.2.
Figure 4.1.2
Select the Advanced tab and then click on the settings then you should see a screen
like Figure 4.1.3.
Image Space Incorporated
Page 73
7/27/2006
Figure 4.1.3
Click on the Exceptions tab. You should see a screen like Figure 4.1.4.
Figure 4.1.4
Image Space Incorporated
Page 74
7/27/2006
Click on Add Port… You should see a screen like Figure 4.1.5.
Figure 4.1.5
Enter in the information based on Tables 2.1 and 2.2. You will have to add a port for
each row of those tables. Once you’re done you should see something like Figure
4.1.6.
Figure 4.1.6
At this point you have successfully setup Windows XP Service Pack 2 Firewall to
allow hosted races on this computer to be joined. Make sure that any other
hardware firewalls are also properly configured.
Image Space Incorporated
Page 75
7/27/2006
Stat Send.exe
Located in the support directory is a utility, Statsend.exe that examines the system
for informational and troubleshooting purposes. Here is an example output:
DX: DirectX 9.0c (4.09.00.0904)
CPU: AMD Athlon(tm) XP 3200+ @ 2.20 GHz
SRAM: 1024 MB
OS: Windows XP Service Pack 2 Build 2600
GPU: RADEON X800 XT Platinum Edition
VRAM: 489 MB
DRIVER: 6.14.0010.6583
GUID: D7B71EE2-0910-11CF-056A-0820A1C2CB35
rF Config.exe
Found in the root directory, this utility runs the first time rFactor is installed and can
be manually accessed at any time later by double clicking on the exe file. With this
utility, the user can set the screen resolution, refresh rate, FSAA level, and Direct X
rendering path version (Supports DX7, DX8, and DX9). If you are having
performance difficulties, use this utility to alter the settings until a good balance
between playability and graphics is obtained. When used in combination with the in
game graphical settings, an attractive balance is easily obtained.
Image Space Incorporated
Page 76
7/27/2006
NOTES
_______________________________________________________________________
_______________________________________________________________________
_________________________________________
_____________________________________________________________
_____________________________________________________________
_____________________________________________________________
_____________________________________________________________
_____________________________________________________________
_____________________________________________________________
_____________________________________________________________
_____________________________________________________________
_____________________________________________________________
_____________________________________________________________
_____________________________________________________________
_____________________________________________________________
_____________________________________________________________
_____________________________________________________________
_____________________________________________________________
_____________________________________________________________
_____________________________________________________________
_____________________________________________________________
_____________________________________________________________
_____________________________________________________________
_____________________________________________________________
_____________________________________________________________
_____________________________________________________________
_____________________________________________________________
_____________________________________________________________
_____________________________________________________________
_____________________________________________________________
_____________________________________________________________
_____________________________________________________________
_____________________________________________________________
_____________________________________________________________
_____________________________________________________________
_____________________________________________________________
_____________________________________________________________
_____________________________________________________________
_____________________________________________________________
_____________________________________________________________
_____________________________________________________________
_____________________________________________________________
_____________________________________________________________
_____________________________________________________________
_____________________________________________________________
Image Space Incorporated
Page 77
7/27/2006
User Warnings
Projection TV Owners Warning
Still pictures or images may cause permanent picture-tube damage or mark the
phosphor of the cathode ray tube. Avoid repeated or extended use of video games
on large-screen projection televisions.
Epilepsy Warning
Please read before using this game or allowing your children to use it.
Some people are susceptible to epileptic seizures or loss of consciousness when
exposed to certain flashing lights or light patterns in everyday life.
Such people may have a seizure while watching television images or playing certain
video games. This may happen even if the person has no medical history of epilepsy
or has never had any epileptic seizures.
If you or anyone in your family has ever had symptoms related to epilepsy (seizures
or loss of consciousness) when exposed to flashing lights, consult your doctor prior
to playing.
We advise that parents should monitor the use of video games by their children. If
you or your child experience any of the following symptoms: dizziness, blurred
vision, eye or muscle twitches, loss of consciousness, disorientation, any involuntary
movement or convulsion, while playing a video game, discontinue use
IMMEDIATELY and consult your doctor.
Precautions to follow during use
• Do not stand too close to the screen. Sit a good distance away from the
screen, as far away as the length of the cable allows.
• Preferably play the game on a small screen.
• Avoid playing if you are tired or have not had much sleep.
• Make sure that the room in which you are playing is well lit.
• Rest for at least 10 to 15 minutes per hour while playing a video game.
Image Space Incorporated
Page 78
7/27/2006
Legal and Warranty
This End User License Agreement ("EULA") is a legal agreement between you (either
an individual or a single entity) and Image Space Incorporated ("ISI") for the
software product "rFactor", which includes computer software, data files and
associated documentation ("Software"). The Software also includes any updates
and supplements to the original Software provided to you by ISI. Any product
provided along with the Software that is associated with a separate end-user license
agreement is licensed to you under the terms of that license agreement. By
installing, copying, accessing or otherwise using the Software, you agree to be
bound by the terms of this EULA. If you do not agree to the terms of this EULA, do
not install or use the Software. ISI reserves all rights not expressly granted under
this EULA. ISI may update this agreement at any time and without notice by
publishing this update on the rFactor website, http://www.rFactor.net/legal.html.
GRANT OF LICENSE
Image Space Incorporated grants to you the right to use one copy of the Software
on a single computer. You may load one copy into permanent memory of one
computer and may use that copy only on that same computer.
LIMITED USE
Without the prior written consent of Image Space Incorporated, you shall not,
directly or indirectly, at any time:
* Exploit, or permit the exploitation of, this Software or any of its parts
commercially.
* Publicly display or permit the display of or charge a fee for the use of this
Software or any of its parts.
* Reverse engineer, derive source code, modify, decompile, disassemble this
Software, in whole or in part.
* Remove, disable or circumvent any copy protection or proprietary notices or labels
contained on or within the Software.
OWNERSHIP OF THE SOFTWARE
All title, ownership rights and intellectual property rights in and to the Software and
all copies are owned or expressly licensed by Image Space Incorporated. The rights
of the Software are protected by national copyright laws and by international
treaties.
PROPRIETARY INFORMATION
Any file, information, content, ideas, or other parts relating to this product or its
development is proprietary to Image Space Incorporated.
NO WARRANTY, LIMITATION OF LIABILITY
ISI HEREBY DISCLAIM ALL WARRANTIES, EXPRESS, IMPLIED AND STATUTORY,
INCLUDING, WITHOUT LIMITATION, THE IMPLIED WARRANTIES OF
MERCHANTABILITY, FITNESS FOR A PARTICULAR PURPOSE, TITLE AND NONINFRINGEMENT OF THIRD PARTY RIGHTS WITH RESPECT TO THE SOFTWARE
Image Space Incorporated
Page 79
7/27/2006
PRODUCT. ISI DO NOT WARRANT THAT THE SOFTWARE PRODUCT IS ERROR-FREE
OR THAT ACCESS TO THE SOFTWARE PRODUCT WILL BE UNINTERRUPTED AND
WITHOUT COMPROMISE TO SECURITY SYSTEMS. YOU ACKNOWLEDGE AND AGREE
THAT YOUR USE OF THE SOFTWARE PRODUCT IS "AS IS," AND "AT YOUR OWN
RISK."
ISI WILL NOT BE LIABLE FOR ANY SPECIAL, INCIDENTAL, INDIRECT, OR
CONSEQUENTIAL DAMAGES (INCLUDING, WITHOUT LIMITATION, DAMAGES FOR
PERSONAL INJURY, LOSS OF BUSINESS PROFITS, BUSINESS INTERRUPTION, LOSS
OF BUSINESS OR CONFIDENTIAL INFORMATION, LOSS OF PRIVACY, OR ANY OTHER
PECUNIARY LOSS) ARISING OUT OF THE USE OF OR INABILITY TO USE THE
SOFTWARE, EVEN IF ISI HAVE BEEN ADVISED OF THE POSSIBILITY OF SUCH
DAMAGES. IN ANY CASE, THE ENTIRE LIABILITY OF ISI UNDER THIS AGREEMENT
AND LIMITED WARRANTY SHALL BE LIMITED TO THE AMOUNT ACTUALLY PAID BY
YOU FOR THE SOFTWARE THAT CAUSES THE DAMAGE.
Note: Third-party brands and names are the property of their respective owners.
rFactor (c) 2005 Image Space Incorporated. All Rights Reserved.
Image Space Incorporated
Page 80
7/27/2006