1
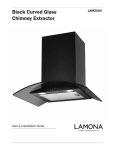
Angled Glass Chimney Extractor User & Installation Guide LAM2701 LAM2702 LAMONA Appliances Dear Customer, Congratulations on your choice of a LAMONA domestic appliance which has been designed to give you excellent service. The user manual will help you use your product quickly and safely. Please read this user manual before installing and using the product. Always follow the safety instructions. Keep this user manual within easy reach for future reference. Please read any other documents supplied with the product. Explanation of symbols Throughout this user manual the following symbols are used: Important information or useful tips about usage. Warning for possible hazards to health and property. Warning possibility of electric shock. This product’s packaging material is recyclable. Help recycle it and protect the environment by dropping it off in the municipal receptacles provided for this purpose. Your product also contains a great amount of recyclable material. It is marked with this label to indicate the used appliances that should not be mixed with other waste. This way, the appliance recycling organised by your manufacturer will be done under the best possible conditions, in compliance with European Directive 2002/96/EC on Waste Electrical and Electronic Equipment. Contact your town hall or your retailer for the used appliance collection points closest to your home. We thank you doing your part to protect the environment. Page _ 2 www.howdens.com LAMONA Appliances User Manual LAM2701/2 Index Before Using The Extractor 04 Safety General Fire Safety Safety for Children Safety When Working With Electricity 04 04 05 05 05 Filters Carbon Fitler Grease Filter 06 06 07 Installation Methods of Extraction Extraction Via Ducting Extraction Via Recirculation Hanging Your Extractor Fitting Glass Decorative Chimney Fitting 07 07 07 07 08 09 11 Maintenance 12 Electrical Connections 13 Controls Setting Time of Day Light Control Speed Selection Replacing Lamps Cut Off Timer Remote Control Connecting the Remote Control 14 14 14 14 14 15 16 17 Technical Specification 18 Troubleshooting 18 Your Guarantee 19 Exclusive to Howdens Joinery.co Page _ 3 LAMONA Appliances Before Using the Extractor Make sure that you have removed all packaging, wrappings, stickers and from the Extractor It is recommended that you clean the extractor’s surface before using for the time. Safety Product This appliance is for domestic extraction purposes only. It must not be used for other purposes. Commercial use will void the guarantee. Repair The manufacturer shall not be liable for any damage caused by improper use, installation or handling errors General procedures must always be performed by qualified service agents. The manufacturer shall not be held responsible for damages arising from procedures carried out by unauthorised persons, which may also void the guarantee. Keep This product is not intended to be used by persons with physical, sensory or mental disorders or unlearned or inexperienced people (including children) unless they are supervised by a person who will be responsible for their safety or who will instruct them accordingly in the use of the product. must be disconnected from the mains during installation, maintenance, cleaning and repair procedures. Connect the product to an earthed outlet protected by a fuse of suitable capacity as stated in the “Technical Specifications” table. Our company shall not be liable for any problems arising due to the product not being earthed in accordance with local regulations Do not operate the product if the power cable is damaged. Call a qualified service agent. all ventilation slots clear of obstructions, as this may cause premature failure of the appliance Do not trap the mains cable and do not route it over surfaces which may become hot. The cable insulation my melt and cause a fire as a result of a short circuit. Make sure that the product function buttons are switched off after every use. Product must be installed by a qualified person in accordance with the regulations in force otherwise, the guarantee may become void. The hood must be installed in accordance with the installation instructions and all measurements followed If the cooker hood is installed for use above gas appliance then the provision Do not carry out repairs or modifications on the product. However, you may remedy some for ventilation must be in accordance with the Gas Safety Codes of Practice of the problems that do not require any repairs or modifications. BS.6172, BS.5440 & BS.6891 (Natural See “Troubleshooting”, at the rear of this Gas) and BS.5482 (LP Gas) 1994, the manual. Gas Safety (Installation & Use) Never wash down the product with excessive Regulations, the Building Regulations water, as there is a risk of electric shock issued by the Department of the Environment, the Building Standards Never use the product when your judgment (Scotland) (Consolidated) Regulations or coordination is impaired by the use of alcohol and/or drugs. issused by the Scottish Development Department Page _ 4 www.howdens.com LAMONA Appliances Do not set your cooker hood less than 700mm above your cooker When installed between adjoining wall cabinets, the cabinets must not overhang the hob. The edges of the cooker hood may be sharp - be mindful of this as you handle your appliance, especially during installation and cleaning Do not clean behind the grease filter! When installing the hood, ensure that the following recommended distances are observed between the heighest point on the hob top (including the burners) and the bottom of the cooker hood: Electric Cookers: 700 mm Gas Cookers: 700 mm Coal / Oil Cookers: 800 mm Never If the room where the cooker hood is to be used contains a fuel burning appliance such as a central heating boiler then its flue must be of the sealed or balanced flue type. If other types of flue or appliances are fitted, ensure that there is an adequate supply of air in the room When the hood is being used in extraction mode, ensure that the ducting is fire retardant and that there are no bends greater than 90 degrees as this will reduce the effiency of the hood Ensure the ducting for the extractor r mode has the same diameter as the outlet hole all the way through. Always put lids on pans and ensure that pans are always on hobs when burners are lit. Remember that when in extraction mode, your cooker hood is removing air from your room. Ensure that proper ventilation measures are being observed. Page _ 5 Fire Safety flambé cook under this cooker hood. Dirty cooking oil is an even greater fire risk Do not install above a cooker with a high level grill. Safety for Children Electrical products can be dangerous to children. Keep children away from the product when it is operating and do not allow them toplay with or near the product. The packaging materials will be dangerous for children. Keep the packaging materials away from children. Please dispose of all parts of the packaging according to the environmental standards Safety When Working with Electricity In case of any damage, switch off the product and disconnect it from the mains. To do this, turn off the fuse at the fuse box. Make sure that the fuse rating is compatible with the product. Exclusive to Howdens Joinery.co User Manual LAM2701/2 LAMONA Appliances Filters Carbon Filter Carbon filters have a limited life. We advise you to change them when there is a noticeable drop in performance. The intervals between changing the will depend entirely upon the amount of cooking you do, but on average they will last about 3 - 6 months. Please quote the part reference number HJA2906 (pack of 2) when re-ordering. To gain access to the carbon filters, first of all remove the grease filter as below. Remove the old filter and install new charcoal filters by turning them gently Make sure each filter is securely locked. Otherwise, it could loosen and cause damage to the unit When the activated carbon filters are attached, the suction power will be lowered as a result The carbon filter cannot be washed or recycled. Carbon Filter The Grease Filter Grease Filter Clean the grease filter every month; an excessive build-up of grease can become a fire hazard. The filter collects grease, smoke and dust, so the filter directly affects the efficiency of the cooker hood. If it’s not cleaned, the grease residue (potentially flammable) will saturate on the filter. Remove the filter as shown above. Clean it with a soft nylon brush in a mild solution of hot water and a small amount of washing up liquid. Washing up liquid alone should not be used. After cleaning, allow the filter to drain and then dry thoroughly before replacing into the unit. The grease filter may also be dishwasher cleaned; using a 60 or 65 degree C programme, with the filter upright (short sides upright) in the lower basket... Please be aware some dishwasher cleaning agents can permanently discolour the filter, though this will not affect its performance. www.howdens.com Page _ 6 LAMONA Appliances User Manual LAM2701/2 Installation Methods of Extraction The very best method of clearing the kitchen of unwanted odours is by connecting the appliance to an exhaust duct and venting to the outside atmosphere via the ceiling or an exterior wall. (Suitable ducting kits may be purchased from the depot where you bought the extractor.) You do not need charcoal when using the external ducting mode. Fig 1. Ducting mode (No charcoal Fig 2. Recirculation mode (Charcoal HJA2906 required) required) Extraction Via Ducting Extraction Via Recirculation Never use the hood in areas where devices with exhaust pipes connected to the outside are already operating unless perfect ventilation can be guaranteed. For extraction via recirculation, attach 2 charcoal to the sides of the motor inside the hood. These can be ordered separately quoting part reference HJA2906 Connect the external ducting kit to the outlet of the extractor. switched off. Charcoal are not required if the extractor is to be ducted out. Page _ 7 Remove the grease filter Align the carbon filters over the pins located on either side of the fan motor. Turn the carbon gently, until you feel them click into position. Replace the grease filters before the power supply it turned back on. Exclusive to Howdens Joinery.co LAMONA Appliances 8VHU0DQXDO/$0 Hanging Your Extractor This instruction must be strictly adhered to. Failure to comply could result in overheating and serious damage to your appliance. It is recommended that the installation is carried out by two people. 1 Before drilling or chiselling the ceiling or wall, check for pipes and power cables. ,IGXFWLQJexWHUQDOO\HQVXUHWKHGXFWLQJWXEHLVkHSWDVVKRrWDVSRVVLEOHDQGZLWKWKHPLQLPXP RIEHQGVWRSHUPLWWKHVPRRWKHVW 0D[LPXPOHQJWK3PeWUHV'XFWHGairPXVWnRWEH GLVFKDUJHGinWRa ZKLFKisXVHGfRUe[KDXVWLQJIXPHVfrRPappliancesVXSSOLHGZLWKHQHUJ\RWKHU WKDQHOHFWULFLWy(JJDVERLOHrV (QVXUHWKHUHqXLUHPHQWVRIWKHORFDODXWKRULWLHVDUHDGKHUHGWRFRQFHUQLQJWKHGLVFKDUJHRIe[KDXVW air (QVXUHDGHqXDWHrRRPvHQWLODWLRQLVSrRYLGHGZKHQWKHe[WUDFWRULVXVHGLQWKHVDPHrRRPDV DSSOLDQFHVVXSSOLHGZLWKHQHUJ\RWKHUWKDQHOHFWULFLWy NeverGXFWinWRaKRWair VXFKasaFHQWUDOKHDWLQJGXFW RHPRveWKHJUHDVH EHfRUHWr\LQJWRLQVWDOO 7KHUHFRPPHQGHG KHLJKWfRUWKHKRRGisPPDERveWKHZRrkWRS7KLVcanEHUHGXFHGWRa PLQLPXPRIPPLIUHqXLUHG MarNDQGGULOOWKHKROHVUHqXLUHGWRPRXQWWKHe[WUDFWRUERGy 7KHSULQFLSDOVHFXULQJSRLQWLVWKHKDQJLQJEUDFNHWIL[WKLVILUVW :LWKWKHKHOSRIDQDVVLVWDQWKDQJWKHe[WUDFWRUERG\RQWKHEUDFNHWOevHODQGVHFXUHLQSRVLWLRQ WKrRXJKWKHORZHUWZRVFUHZV ZZZKRZGHQVFRP 3DJHB LAMONA Appliances User Manual LAM2701/2 Installation 1. Before installation, ensure you have not connected the appliance to the mains supply. 2. The cooked hood should be placed at a distance of 70 - 80cm above the cooking plane for best effect. 3. Insert the glass into the panel groove at the control panel of the cooker hood, then gently lower glass (dull side up) and fit into position. Use 4 screws (4 x 25mm), inserting them through 4 x rubber cushions to fix the glass into the cooker hood (see diagrams) Installation Height Minimum: 2400mm Maximum: 2550mm Groove √ Glass X Make sure that the extractor is level to avoid grease collection at one end. Page _ 9 Exclusive to Howdens Joinery.co LAMONA Appliances User Manual LAM2701/2 4. (If Ducting) Attach the exhaust pipe onto the connector as shown below, fix the pipe on the connector by cable tie. The 120mm adaptor can be used at this stage, if you already have an existing smaller diameter ducting. 5. Measure and drill 3 holes to accomodate the extractor body wall bracket. Screw and tighten the wall bracket onto the wall with the screws (4mm x 40mm) and wall plugs provided. 6. Hang the appliance onto the wall bracket. Also, fix the cooker hood to the wall by two 4 x 30mm screws and wall plugs through the back of the cooker hood. Wall plug Screw (4mm x 40mm) Wall bracket * CAUTION: Extractor and Glass May Be Heavy 2 Person Lift 7. Put the inner chimney on the outer chimney. Install inner chimney plate on the chimney by two screws (4mm x 8mm). NOTE: Remember not to fix the screws (4mm x 8mm) too tightly; 1mm loose is recommended, so that later height adjustment can be done more easily. www.howdens.com Page _ 10 LAMONA Appliances User Manual LAM2701/2 8. Drill 2 holes to accomodate the chimney wall bracket. Screw and tighten the plate onto the wall with the screws (4mm x 40mm) and wall plugs provided. NOTE: Plate I is used to fix the chimney. The below diagram is for reference. Fixing the chimney to wall plate is done at the end of installation. 10. Before use, read all instructions and make sure that the voltage (V) and frequency (Hz) indicated on the identification plate (found inside the cooker hood) and all the data inside the appliance are exactly the same as the voltage and frequency in your home. Then plug the power lead into the power socket (unless you are hard-wiring in to the mains) and start the cooker hood. Plate I Decorative Chimney Fitting (* Vented Installation) 1. Connect the extractor to the electricity supply (see electrical connections page). We recommend an isolation switch that is accessible after installation. 2. The outlet reducer maybe required depending on your ducting kit (supplied separately). 3. Fit the appropriate ducting kit if venting externally. 4. Rest the chimney sections on the main extractor body and extend the upper section to the ceiling 5. Use the extended chimney sections to mark-up the appropriate position of the bracket 6. Remove the chimney sections, drill and secure upper fixing bracket with appropriate fixings. 7. Resit the chimney sections on to the extractor body and secure to the wall using the screws provided 9. Lift the inner chimney and fix to bracket by using 2 screws (4mm x 8mm) Page _ 11 Exclusive to Howdens Joinery.co DO NOT: Operate the extractor without the grease filters in position LAMONA Appliances User Manual LAM2701/2 Maintenance Before cleaning, switch the unit off and pull out the plug, or switch off at the relevant mains switch if the unit had been hard-wired in. Make sure the unit has no power supply. Regular Cleaning Use a soft cloth moistened with handwarm mildly soapy water or household cleaning detergent. Never use metal pads, chemical, abrasive material or a stiff brush to clean the unit. NOTE: Do not use a steam-cleaner to clean the hood; electrical components could be damaged or short-circuit as a result www.howdens.com Page _ 12 LAMONA Appliances Electrical Connections IMPORTANT: Ensure that the electricity supply is switched off before connecting. wiring via the use of a double pole switched fused spur outlet Your appliance must be connected to with at least 3mm contact separation, The isolation switch must be accessible after installation. (See technical data for fuse rating). The terminology DOUBLE POLE -/+ means that both the live and neutral supplies are switched and disconnected at the same time. The terminations labelled SUPPLY are the connections for the internal house wiring and the terminations labelled LOAD are for connection to the appliance. IMPORTANT: The wires in the mains lead are coloured in accordance with the following code:Blue.....................Neutral Brown..................Live Green/ Yellow.....Earth As the colours of the wires in the mains lead of this appliance may not correspond with the coloured markings identifying the terminals in your spur box, proceed as follows; The wire which is coloured blue must be connected to the terminal which is marked with the letter ‘N’ or coloured BLACK. The wire which is coloured brown must be connected to the terminal which is marked with the letter ‘L’ or coloured RED. The wire which is coloured Green and Yellow must be connected to the terminal which is marked with the letter ‘E’ or Symbol Blue. (Neutral) L LOAD L N SUPPLY LOAD FUSE DP 13A 250V~ ON N SUPPLY Fig 3. Page _ 13 Fig 4. Exclusive to Howdens Joinery.co Brown. (Live) LAMONA Appliances User Manual LAM2701/2 Controls There are several buttons on the control panel, which perform seperate functions. When you initially connect your hood to the electrical supply, the LCD display backlight will turn on. The backlight will turn off after 30 seconds if no buttons are pressed. 1 2 3 On/Off Setting the Time of Day (1) When the cooker hood lights have on been turned on and a motor speed has not been selected, you are able to set the time of day as shown on the LCD display. Press and hold the timer button for about 3 seconds to enter the time setting mode. “12:00” will appear on the display and the “12” will flash. Use the speed selection button to increase the hours shown or the light on/off button to decrease the hours shown. When the correct number of hours is shown on the display, press the timer button again to confirm. The “00” will flash. Again, use the speed selection button to increase the minutes shown or the light on/off button to decrease the minutes shown. When the correct number of minutes is shown on the display , press the timer button to confirm and set the time of day. Light Control (2) Press the light on/off button once to turn the cooker hood lights on. The lamp symbol will light on the LCD display. Press the light on/off button again to turn the cooker hood lights off. The lamp symbol with disappear on the LCD Display Speed Selection (3) If you press the speed selection button once, the motor will run at LOW speed. The speed symbol and the power symbol will light on the LCD display Press the speed selection button twice and the motor will run at MEDIUM speed. Press the speed selection button three times and the motor will run at HIGH speed. Another press of the button will return the motor to LOW speed. To turn the hood off, press the on/off button. The speed and power symbols will disappear from the LCD display. When you next press the on/off button, the cooker hood will continue working at the speed it last selected set on. The speed and power symbols will light on the LCD display. Replacing the Lamps The extractor hood is fitted with x2 LED lamp units that must only be replaced by a suitable qualified person. The lights are powered by an electronic driver device and neither part is repairable. We recommend that you call the Service Line if light replacement is needed. www.howdens.com Page _ 14 LAMONA Appliances User Manual LAM2701/2 Cut Off Timer When a motor speed has not been selected you are able to program a delay timer function which allows you to set a countdown time for the hood to automatically switch off. You can program the delay timer from 1 to 60 minutes. Press the timer button to enter the delay timer setting mode. The LCD display will show “5:00”. Use the speed selection button to increase the number of minutes shown and the light on/off button to decrease the number of minutes shown. When the display shows the desired countdown time, press the timer button again to confirm. The countdown will begin immediately on the display. You can then proceed to select a motor speed. When the countdown time reaches “00:00” the cooker hood will automatically switch off and the LCD display will return to showing the time of day. The next time you press the timer button to set a delay timer function, if the countdown time is not changed, the hood will automatically count down for the time previously set after 5 seconds. Page _ 15 Exclusive to Howdens Joinery.co LAMONA Appliances User Manual LAM2701/2 Remote Control Lighting Press button once, the light activates, press button again, the light will be turned off. The lighting button is controlled separately and will not affect any other functions Turning On / Increasing Fan Speed 1st Press, LOW speed 2nd Press, MEDIUM speed 3rd Press, HIGH speed Turning Off / Decreasing Fan Speed Press the button and the motor begins to adjust to a lower setting and the LCD screen displays the speed. If it is pressed again it will decrease to the ‘off’ setting. Timer Press the timer button, this turns the timer setting function onRII. Battery The remote control requires a CR2025 battery. The battery can be accessed from the bottom, as shown in the below picture Carefully release the tab and pull the battery tray out www.howdens.com Page _ 16 LAMONA Appliances User Manual LAM2701/2 Connecting The Remote Control (For Replacement Handsets etc.) A new remote control has to estabish a connection to the cooker hood when used for the first time. (One remote control could possibly control several cooker hoods at the same time). Connection Process Between Remote Control And Cooker Hood: 1. Press any button on the LCD touch control panel on the cooker hood, the backlight display is lit and the cooker hood is in stand-by mode. 2. Press “ ” for 10 seconds, the indicator lights begin flashing from one button to another:- the cooker hood is in connection mode. The press any button on the remote control to confirm the connection. The connection process is finished and the remote can be used for speed selection, lighting and timer setting. 3. If you want to connect again you will need to clear the code that has been entered previously: 3.1 To clear: Press the “ ” for 10 seconds, the indicator lights begin flashing one button to another:- the cooker is in connection mode. Then, press the “ ” for 10 seconds immediately again: the previous connection code is cleared 3.1 To After the previous connection code is cleared. Press “ ” for 10 seconds:- the indicator lights begin flashing from one button to another:- the cooker hood is in connection mode. Then press any button of the remote control to confirm connection. Page _ 17 Exclusive to Howdens Joinery.co LAMONA Appliances User Manual LAM2701/2 Troubleshooting TROUBLESHOOTING GUIDE Symptoms Possible Cause Solutions Lamps fail to operate? Contact Service Line A replacement lamp is probably necessary (Remember that the lamps are not covered by the guarantee.) The extractor lamps may become hot; therefore ensure before any replacement the bulb has cooled or cleaning. Power is cut. Check if there is power. Check the fuses in the fuse box. If necessary, replace or reset the fuses. The motor is on, but fan does not seem to be as efficient as usual? can reduce the Clogged product’s Check the grease and charcoal (if also ensure any venting is not obstructed? Clean the grease with warm water and mild detergent, and/or replace any charcoal The extractor works normaly but smells linger? can reduce the Clogged product’s and may cause unwanted smells. with warm water and mild Clean the grease detergent, and/or replace any charcoal Product does not operate? The mains fuse maybe defective or has tripped Check fuses in the fuse box. If necessary, replace or reset them. Product is not connected properly. Check all power connections. Remote control not working. Check / Change battery. If you cannot eliminate the problem after following the instructions in this section, consult your depot or the Authorized Service Agent. Never try to repair a nonfunctional product yourself. TECHNICAL INFORMATION General Total power consumption 101 W Fuse 3A Voltage /Frequency 220-240 V ~ 50 Hz Cable type / section 0.75mm², 3 core or equivalent Cable length max. 1.5m Lamps LED www.howdens.com Page _ 18 LAMONA Appliances Your Guarantee Product Guarantee Details (UK only) breakdown repairs. (Details of which are shown on your Proof of Purchase Document). Any claim during the period of the guarantee (MUST BE ACCOMPANIED BY THE PROOF OF PURCHASE) The product must be correctly installed and operated in accordance with the manufacturer’s instructions and used for normal domestic purposes. This guarantee does not cover accidental damage, misuse or alternations which are likely to affect the product. The guarantee is invalid if the product is tampered with, or repaired by any unauthorised person. (The guarantee in no way affects your statutory or legal rights) What to do if you need to report a problemPlease ensure you have ready: The product’s model & serial numbers Howdens Proof of Purchase document Your full contact details Call the Service Line on 0845 00 60 006 Page _ 19 Exclusive to Howdens Joinery.co LAMONA Appliances User Manual LAM2701/2 LAM2701/LAM2702 91.3 kWh/a 1.4 15.9 81.9 313.2 m³/h 318 Pa 585.7 m³/h 173.8 W 1.0 W 52 lux 0.43 W 69 dB www.howdens.com Page _ 20 Issue: 0/2015 BS If supplied, please stick your self adhesive product rating plate here, or make a note of the product serial number below in the box below for future reference. Serial Number : ...........................................................................................