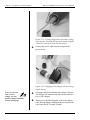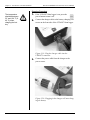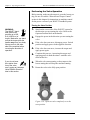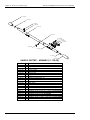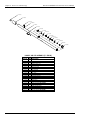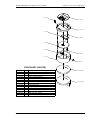
1
VITALS™-Ready Handheld
Valve Exerciser
User’s Manual
E.H. Wachs
600 Knightsbridge Parkway
Lincolnshire, IL 60069
www.ehwachs.com
Model P2, VITALS™-Ready
E.H. Wachs Part No. 11-MAN-02
Rev. 1-0611, June 2011
Revision History:
Original December 2005
Copyright © 2011 E.H. Wachs. All rights reserved.
This manual may not be reproduced in whole or in part
without the written consent of E.H. Wachs.
VITALS™-Ready Handheld Valve Exerciser
Part No. 11-MAN-02, Rev. 1-0611
E.H. Wachs
WAVE™ Handheld Valve Exerciser User’s Manual
Contents
Table of Contents
Chapter 1: About This Manual . . . . . . . . . . . . . . . . . . . . . . . . . . . . . . . . . . . . . . . . . . . . . . . . . 1
Purpose of This Manual . . . . . . . . . . . . . . . . . . . . . . . . . . . . . . . . . . . . . . . . . . . . . . . . . . . . . . . . . 1
How to Use The Manual . . . . . . . . . . . . . . . . . . . . . . . . . . . . . . . . . . . . . . . . . . . . . . . . . . . . . . . . 2
Symbols and Warnings . . . . . . . . . . . . . . . . . . . . . . . . . . . . . . . . . . . . . . . . . . . . . . . . . . . . . . . . . 2
Manual Updates and Revision Tracking . . . . . . . . . . . . . . . . . . . . . . . . . . . . . . . . . . . . . . . . . . . . 3
Chapter 2: Safety . . . . . . . . . . . . . . . . . . . . . . . . . . . . . . . . . . . . . . . . . . . . . . . . . . . . . . . . . . . . . 5
Operator Safety . . . . . . . . . . . . . . . . . . . . . . . . . . . . . . . . . . . . . . . . . . . . . . . . . . . . . . . . . . . . . . . 5
Protective Equipment Requirements . . . . . . . . . . . . . . . . . . . . . . . . . . . . . . . . . . . . . . . . . . . . 6
Operating Recommendations . . . . . . . . . . . . . . . . . . . . . . . . . . . . . . . . . . . . . . . . . . . . . . . . . . 7
Safety Labels . . . . . . . . . . . . . . . . . . . . . . . . . . . . . . . . . . . . . . . . . . . . . . . . . . . . . . . . . . . . . . . . . 7
Machine Safety . . . . . . . . . . . . . . . . . . . . . . . . . . . . . . . . . . . . . . . . . . . . . . . . . . . . . . . . . . . . . . . 8
Electric System . . . . . . . . . . . . . . . . . . . . . . . . . . . . . . . . . . . . . . . . . . . . . . . . . . . . . . . . . . . . 8
Hydraulic System . . . . . . . . . . . . . . . . . . . . . . . . . . . . . . . . . . . . . . . . . . . . . . . . . . . . . . . . . . . 8
Pneumatic System . . . . . . . . . . . . . . . . . . . . . . . . . . . . . . . . . . . . . . . . . . . . . . . . . . . . . . . . . . 8
Chapter 3: Introduction to the WAVE™ Handheld Valve Exerciser . . . . . . . . . . . . . . . . . . 9
Usage and Applications . . . . . . . . . . . . . . . . . . . . . . . . . . . . . . . . . . . . . . . . . . . . . . . . . . . . . . . . . 9
Valve Maintenance Program . . . . . . . . . . . . . . . . . . . . . . . . . . . . . . . . . . . . . . . . . . . . . . . . . 10
Mechanical Overview . . . . . . . . . . . . . . . . . . . . . . . . . . . . . . . . . . . . . . . . . . . . . . . . . . . . . . . . . 11
Electric Drive . . . . . . . . . . . . . . . . . . . . . . . . . . . . . . . . . . . . . . . . . . . . . . . . . . . . . . . . . . . . . 11
Hydraulic Drive . . . . . . . . . . . . . . . . . . . . . . . . . . . . . . . . . . . . . . . . . . . . . . . . . . . . . . . . . . . 12
Pneumatic (Air) Drive . . . . . . . . . . . . . . . . . . . . . . . . . . . . . . . . . . . . . . . . . . . . . . . . . . . . . . 13
Safety Labeling . . . . . . . . . . . . . . . . . . . . . . . . . . . . . . . . . . . . . . . . . . . . . . . . . . . . . . . . . . . . . . 14
Control Unit and Keypad . . . . . . . . . . . . . . . . . . . . . . . . . . . . . . . . . . . . . . . . . . . . . . . . . . . . . . . 14
Special Functions . . . . . . . . . . . . . . . . . . . . . . . . . . . . . . . . . . . . . . . . . . . . . . . . . . . . . . . . . . 15
Display Window Features . . . . . . . . . . . . . . . . . . . . . . . . . . . . . . . . . . . . . . . . . . . . . . . . . . . 15
Keypad Features . . . . . . . . . . . . . . . . . . . . . . . . . . . . . . . . . . . . . . . . . . . . . . . . . . . . . . . . . . 15
VITALS™ Data Logger . . . . . . . . . . . . . . . . . . . . . . . . . . . . . . . . . . . . . . . . . . . . . . . . . . . . . . . 16
Data Entry Functions . . . . . . . . . . . . . . . . . . . . . . . . . . . . . . . . . . . . . . . . . . . . . . . . . . . . . . . 16
Data Logger System Menu . . . . . . . . . . . . . . . . . . . . . . . . . . . . . . . . . . . . . . . . . . . . . . . . . . 17
Battery-Powered Components . . . . . . . . . . . . . . . . . . . . . . . . . . . . . . . . . . . . . . . . . . . . . . . . . . . 18
Control Unit Battery (Hydraulic/Pneumatic) . . . . . . . . . . . . . . . . . . . . . . . . . . . . . . . . . . . . . 18
Charging Procedure . . . . . . . . . . . . . . . . . . . . . . . . . . . . . . . . . . . . . . . . . . . . . . . . . . . . . 18
Control Unit Memory Backup Battery . . . . . . . . . . . . . . . . . . . . . . . . . . . . . . . . . . . . . . . . . 21
Replacement Procedure . . . . . . . . . . . . . . . . . . . . . . . . . . . . . . . . . . . . . . . . . . . . . . . . . . 21
VITALS™ Data Logger Battery . . . . . . . . . . . . . . . . . . . . . . . . . . . . . . . . . . . . . . . . . . . . . . 23
Charging Procedure . . . . . . . . . . . . . . . . . . . . . . . . . . . . . . . . . . . . . . . . . . . . . . . . . . . . . 24
VITALS™ Data Logger Memory Backup Battery . . . . . . . . . . . . . . . . . . . . . . . . . . . . . . . . 25
Replacement Procedure . . . . . . . . . . . . . . . . . . . . . . . . . . . . . . . . . . . . . . . . . . . . . . . . . . 25
Packaging . . . . . . . . . . . . . . . . . . . . . . . . . . . . . . . . . . . . . . . . . . . . . . . . . . . . . . . . . . . . . . . . . . . 27
E.H. Wachs
Part No. 11-MAN-02, Rev. 1-0611
i
Contents
WAVE™ Handheld Valve Exerciser User’s Manual
Machine Specifications . . . . . . . . . . . . . . . . . . . . . . . . . . . . . . . . . . . . . . . . . . . . . . . . . . . . . . . .
Electric Drive Torque Performance . . . . . . . . . . . . . . . . . . . . . . . . . . . . . . . . . . . . . . . . . . . .
Hydraulic Drive Torque Performance . . . . . . . . . . . . . . . . . . . . . . . . . . . . . . . . . . . . . . . . . .
Pneumatic Drive Torque Performance . . . . . . . . . . . . . . . . . . . . . . . . . . . . . . . . . . . . . . . . .
Physical Specifications . . . . . . . . . . . . . . . . . . . . . . . . . . . . . . . . . . . . . . . . . . . . . . . . . . . . .
Accessories . . . . . . . . . . . . . . . . . . . . . . . . . . . . . . . . . . . . . . . . . . . . . . . . . . . . . . . . . . . . . .
27
27
29
29
30
31
Chapter 4: Assembly, Disassembly, and Storage . . . . . . . . . . . . . . . . . . . . . . . . . . . . . . . . . .
Environmental Requirements . . . . . . . . . . . . . . . . . . . . . . . . . . . . . . . . . . . . . . . . . . . . . . . . . . .
Long-Term Storage . . . . . . . . . . . . . . . . . . . . . . . . . . . . . . . . . . . . . . . . . . . . . . . . . . . . . . . . . . .
Shipping . . . . . . . . . . . . . . . . . . . . . . . . . . . . . . . . . . . . . . . . . . . . . . . . . . . . . . . . . . . . . . . . . . . .
33
33
33
34
Chapter 5: Operating Instructions . . . . . . . . . . . . . . . . . . . . . . . . . . . . . . . . . . . . . . . . . . . . .
Site Preparation . . . . . . . . . . . . . . . . . . . . . . . . . . . . . . . . . . . . . . . . . . . . . . . . . . . . . . . . . . . . . .
Set-Up . . . . . . . . . . . . . . . . . . . . . . . . . . . . . . . . . . . . . . . . . . . . . . . . . . . . . . . . . . . . . . . . . . . . .
Operation . . . . . . . . . . . . . . . . . . . . . . . . . . . . . . . . . . . . . . . . . . . . . . . . . . . . . . . . . . . . . . . . . . .
Operator Position . . . . . . . . . . . . . . . . . . . . . . . . . . . . . . . . . . . . . . . . . . . . . . . . . . . . . . . . . .
Powering on the System . . . . . . . . . . . . . . . . . . . . . . . . . . . . . . . . . . . . . . . . . . . . . . . . . . . .
Electric Drive . . . . . . . . . . . . . . . . . . . . . . . . . . . . . . . . . . . . . . . . . . . . . . . . . . . . . . . . . .
Hydraulic Drive . . . . . . . . . . . . . . . . . . . . . . . . . . . . . . . . . . . . . . . . . . . . . . . . . . . . . . . .
Pneumatic Drive . . . . . . . . . . . . . . . . . . . . . . . . . . . . . . . . . . . . . . . . . . . . . . . . . . . . . . .
Direction and Torque Control . . . . . . . . . . . . . . . . . . . . . . . . . . . . . . . . . . . . . . . . . . . . . . . .
Electric Drive . . . . . . . . . . . . . . . . . . . . . . . . . . . . . . . . . . . . . . . . . . . . . . . . . . . . . . . . . .
Hydraulic Drive . . . . . . . . . . . . . . . . . . . . . . . . . . . . . . . . . . . . . . . . . . . . . . . . . . . . . . . .
Pneumatic Drive . . . . . . . . . . . . . . . . . . . . . . . . . . . . . . . . . . . . . . . . . . . . . . . . . . . . . . .
Starting a New Activity . . . . . . . . . . . . . . . . . . . . . . . . . . . . . . . . . . . . . . . . . . . . . . . . . . . . .
Performing the Valve Operation . . . . . . . . . . . . . . . . . . . . . . . . . . . . . . . . . . . . . . . . . . . . . .
Zeroing the Valve Position . . . . . . . . . . . . . . . . . . . . . . . . . . . . . . . . . . . . . . . . . . . . . . .
Exercising the Valve . . . . . . . . . . . . . . . . . . . . . . . . . . . . . . . . . . . . . . . . . . . . . . . . . . . .
Resetting the Valve . . . . . . . . . . . . . . . . . . . . . . . . . . . . . . . . . . . . . . . . . . . . . . . . . . . . .
Logging an Unknown Valve Rotation Direction . . . . . . . . . . . . . . . . . . . . . . . . . . . . . . . . . .
Two-Person Operation . . . . . . . . . . . . . . . . . . . . . . . . . . . . . . . . . . . . . . . . . . . . . . . . . . . . . .
Storing and Transferring Data . . . . . . . . . . . . . . . . . . . . . . . . . . . . . . . . . . . . . . . . . . . . . . . . . . .
Using the VITALS™ Data Logger . . . . . . . . . . . . . . . . . . . . . . . . . . . . . . . . . . . . . . . . . . . .
Logging Data Manually . . . . . . . . . . . . . . . . . . . . . . . . . . . . . . . . . . . . . . . . . . . . . . . . . . . . . . . .
35
35
36
38
38
39
39
40
41
41
41
43
44
45
46
46
47
50
52
53
55
55
64
Chapter 6: Routine Maintenance . . . . . . . . . . . . . . . . . . . . . . . . . . . . . . . . . . . . . . . . . . . . . . . 65
WAVE™ Gearbox Lubrication . . . . . . . . . . . . . . . . . . . . . . . . . . . . . . . . . . . . . . . . . . . . . . . . . . 65
Calibrating the Torque Sensor . . . . . . . . . . . . . . . . . . . . . . . . . . . . . . . . . . . . . . . . . . . . . . . . . . . 66
Chapter 7: Service and Repair . . . . . . . . . . . . . . . . . . . . . . . . . . . . . . . . . . . . . . . . . . . . . . . . . 67
Mechanical Problems . . . . . . . . . . . . . . . . . . . . . . . . . . . . . . . . . . . . . . . . . . . . . . . . . . . . . . . . . 67
Electrical Problems . . . . . . . . . . . . . . . . . . . . . . . . . . . . . . . . . . . . . . . . . . . . . . . . . . . . . . . . . . . 70
ii
Part No. 11-MAN-02, Rev. 1-0611
E.H. Wachs
WAVE™ Handheld Valve Exerciser User’s Manual
Contents
Chapter 8: Parts Lists and Drawings . . . . . . . . . . . . . . . . . . . . . . . . . . . . . . . . . . . . . . . . . . . . 75
Electric System Assemblies . . . . . . . . . . . . . . . . . . . . . . . . . . . . . . . . . . . . . . . . . . . . . . . . . . . . . 76
Hydraulic Assembly Drawings . . . . . . . . . . . . . . . . . . . . . . . . . . . . . . . . . . . . . . . . . . . . . . . . . . 83
Pneumatic Assembly Drawings . . . . . . . . . . . . . . . . . . . . . . . . . . . . . . . . . . . . . . . . . . . . . . . . . . 88
Common Assemblies . . . . . . . . . . . . . . . . . . . . . . . . . . . . . . . . . . . . . . . . . . . . . . . . . . . . . . . . . . 92
Chapter 9: Accessories . . . . . . . . . . . . . . . . . . . . . . . . . . . . . . . . . . . . . . . . . . . . . . . . . . . . . . 101
Chapter 10: Ordering Information . . . . . . . . . . . . . . . . . . . . . . . . . . . . . . . . . . . . . . . . . . . . 103
Ordering Replacement Parts . . . . . . . . . . . . . . . . . . . . . . . . . . . . . . . . . . . . . . . . . . . . . . . . . . . 103
Repair Information . . . . . . . . . . . . . . . . . . . . . . . . . . . . . . . . . . . . . . . . . . . . . . . . . . . . . . . . . . . 103
Warranty Information . . . . . . . . . . . . . . . . . . . . . . . . . . . . . . . . . . . . . . . . . . . . . . . . . . . . . . . . 104
Return Goods Address . . . . . . . . . . . . . . . . . . . . . . . . . . . . . . . . . . . . . . . . . . . . . . . . . . . . . . . . 104
E.H. Wachs
Part No. 11-MAN-02, Rev. 1-0611
iii
Contents
iv
WAVE™ Handheld Valve Exerciser User’s Manual
Part No. 11-MAN-02, Rev. 1-0611
E.H. Wachs
WAVE™ Handheld Valve Exerciser User’s Manual
Chapter 1: About This Manual
Chapter 1
About This Manual
PURPOSE OF THIS MANUAL
This manual explains how to operate and maintain your
WAVE™ (Wachs Automated Valve Equipment) handheld
valve exerciser. It includes instructions for assembly, set-up,
operation, and maintenance. It also contains parts lists,
assembly diagrams, and troubleshooting instructions to help
you order replacement parts and perform user-serviceable
repairs.
In This Chapter
PURPOSE OF THIS MANUAL
HOW TO USE THE MANUAL
SYMBOLS AND WARNINGS
MANUAL UPDATES
Before operating your WAVE™ handheld unit, you should
read through this manual and become familiar with all
instructions. At a minimum, make sure you read and understand the following chapters:
•
•
•
•
Chapter 1, About This Manual
Chapter 2, Safety
Chapter 3, Introduction to the WAVE™ Handheld
Chapter 5, Operating Instructions.
If you will be performing service or repairs, make sure you
read and understand these chapters:
•
•
•
•
Chapter 1, About This Manual
Chapter 4, Assembly and Disassembly
Chapter 6, Routine Maintenance
Chapter 7, Service and Repair.
You will also want to refer to Chapter 8, Parts Lists and
Drawings.
E.H. Wachs
Part No. 11-MAN-02, Rev. 1-0611
1
Chapter 1: About This Manual
WAVE™ Handheld Valve Exerciser User’s Manual
HOW TO USE THE MANUAL
Throughout this manual, refer
to this column for warnings,
cautions, and notices with
supplementary information.
This manual is organized to help you quickly find the information you need. Each chapter describes a specific topic on
using or maintaining your WAVE™ handheld valve exerciser.
Each page is designed with two columns. This large column
on the inside of the page contains instructions and illustrations. Use these instructions to operate and maintain your
WAVE™ valve exerciser.
The narrower column on the outside contains additional
information such as warnings, special notes, and definitions.
Refer to it for safety notes and other information.
SYMBOLS AND WARNINGS
The following symbols are used throughout this manual to
indicate special notes and warnings. They appear in the outside column of the page, next to the section they refer to.
Make sure you understand what each symbol means, and
follow all instructions for cautions and warnings.
WARNING
This symbol indicates a safety warning.
A warning means that there is a risk of
operator injury.
CAUTION
This symbol indicates a caution alert. A
caution means that there is a risk of damage to the equipment or to the component
being serviced.
2
Part No. 11-MAN-02, Rev. 1-0611
E.H. Wachs
WAVE™ Handheld Valve Exerciser User’s Manual
Chapter 1: About This Manual
NOTE
This symbol indicates a user notice.
Notices provide additional information to
supplement the instructions, or tips for
easier operation.
MANUAL UPDATES AND REVISION TRACKING
Occasionally, we will update manuals with improved operation or maintenance procedures, or with corrections if necessary. Revised chapters will be available for customers. If
you receive revised chapters for your manual, remove the
old chapters from your binder and replace them with the
new chapters.
Current versions of E.H.
Wachs Company manuals
are also available in PDF format. You can request an
electronic copy of this manual
by emailing customer service
at [email protected].
When a manual is revised, we will update the revision history on the title page and at the bottom of the pages in the
revised chapters. It is important to put the current title page
with the revision history in your manual. This will help you
make sure you have all current information.
You may have factory service or upgrades performed on
your WAVE™ handheld exerciser. If this service changes
any technical data or operation and maintenance procedures, we will include revised sections of the manual when
we return the equipment to you. Remove the old chapters
from your manual and replace them with the revised chapters.
E.H. Wachs
Part No. 11-MAN-02, Rev. 1-0611
3
Chapter 1: About This Manual
4
WAVE™ Handheld Valve Exerciser User’s Manual
Part No. 11-MAN-02, Rev. 1-0611
E.H. Wachs
WAVE™ Handheld Valve Exerciser User’s Manual
Chapter 2: Safety
Chapter 2
Safety
The E.H. Wachs Company takes great pride in designing
and manufacturing safe, high-quality products. We make
user safety a high priority in the design of all our products.
In This Chapter
OPERATOR SAFETY
SAFETY LABELS
Read this chapter carefully before operating your WAVE™
handheld valve exerciser. It contains important safety
instructions and recommendations.
MACHINE SAFETY
OPERATOR SAFETY
Follow these guidelines for safe operation of your WAVE™
handheld system.
•
•
•
•
READ THE OPERATING MANUAL. Make sure you
understand all setup and operating instructions before
you begin.
INSPECT MACHINE AND ACCESSORIES. Before
starting the machine, look for loose bolts or nuts, leaking lubricant, rusted components, and any other physical
conditions that may affect operation. Properly maintaining the machine can greatly decrease the chances for
injury.
ALWAYS READ PLACARDS AND LABELS. Make
sure all placards, labels, and stickers are clearly legible
and in good condition. You can purchase replacement
labels from E.H. Wachs Company.
KEEP CLEAR OF MOVING PARTS. Keep hands,
arms, and fingers clear of all rotating or moving parts.
E.H. Wachs
Part No. 11-MAN-02, Rev. 1-0611
Look for this symbol
throughout the manual. It indicates a
safety warning.
5
Chapter 2: Safety
WAVE™ Handheld Valve Exerciser User’s Manual
•
•
Always turn machine off before doing any adjustments
or service.
SECURE LOOSE CLOTHING AND JEWELRY.
Secure or remove loose-fitting clothing and jewelry, and
securely bind long hair, to prevent them from getting
caught in moving parts of the machine.
KEEP WORK AREA CLEAR. Keep all clutter and
nonessential materials out of the work area. Only people
directly involved with the work being performed should
have access to the area.
WARNING
When using the electric powered WAVE™
handheld system, avoid standing water
whenever possible. To avoid electrical
shock, do not expose electrical cord to
water.
Protective Equipment Requirements
WARNING
Always wear impact resistant eye protection while operating or working near
this equipment.
For additional information on eye and face protection, refer
to Federal OSHA regulations, 29 Code of Federal Regulations, Section 1910.133., Eye and Face Protection and
American National Standards Institute, ANSI Z87.1, Occupational and Educational Eye and Face Protection. Z87.1 is
available from the American National Standards Institute,
Inc., 1430 Broadway, New York, NY 10018.
CAUTION
Personal hearing protection is recommended when operating or working near
this tool.
6
Part No. 11-MAN-02, Rev. 1-0611
E.H. Wachs
WAVE™ Handheld Valve Exerciser User’s Manual
Chapter 2: Safety
Hearing protectors are required in high noise areas, 85 dBA
or greater. The operation of other tools and equipment in the
area, reflective surfaces, process noises, and resonant structures can increase the noise level in the area. For additional
information on hearing protection, refer to Federal OSHA
regulations, 29 Code of Federal Regulations, Section
1910.95, Occupational Noise Exposure and ANSI S12.6
Hearing Protectors.
Operating Recommendations
CAUTION
Some people experience chronic pain in
their hands and arms when performing
repetitive tasks or operating vibrating
equipment. Repetitious, forceful exertion of
the hands and arms can cause or aggravate disorders such as carpal tunnel syndrome and tendonitis.
•
•
•
•
•
Use minimum hand grip force.
Keep your wrists straight.
Avoid prolonged, continuous exposure to vibration.
Avoid repeated bending of your wrists and hands.
Keep your hands and arms warm and dry.
SAFETY LABELS
The operator position label is affixed to the handle of the
WAVE™ handheld system. It shows where you should
stand depending on direction of rotation.
Figure 2-1. Operator Position Label
E.H. Wachs
Part No. 11-MAN-02, Rev. 1-0611
7
Chapter 2: Safety
WAVE™ Handheld Valve Exerciser User’s Manual
MACHINE SAFETY
To avoid damaging your WAVE handheld valve exerciser,
follow these usage guidelines.
•
•
•
Check gearbox oil level at least once every month.
Don’t store any other equipment in the WAVE handheld
system’s storage box.
Keep the end cap tightly screwed into the end of the
handle to keep out dirt and moisture.
Electric System
•
•
Make sure that the voltage output from your electrical
power supply is correct for requirements of your
WAVE™ handheld system.
Do not submerge the electric motor or allow it to get
excessively wet.
Hydraulic System
•
•
•
Do not exceed hydraulic flow of 8 gallons per minute
(gpm)/30 liters per minute (lpm).
Do not exceed hydraulic pressure of 1800 psi/124 bar.
Every time you connect hydraulic power to the machine,
check hoses and fittings to make sure there are no leaks.
Pneumatic System
•
•
•
8
Use an inline filtration system to prevent water and airborne contaminants from getting into the air motor.
Use an inline oiling system to lubricate the motor.
Use antifreeze oil when operating the system under continuous load and high torque settings to reduce ice
buildup.
Part No. 11-MAN-02, Rev. 1-0611
E.H. Wachs
WAVE™ Handheld Valve Exerciser User’s Manual
Chapter 3: Introduction to WAVE Handheld
Chapter 3
Introduction to the
WAVE™ Handheld
Valve Exerciser
Read this chapter carefully to become familiar with the
components of your WAVE™ handheld valve exerciser.
For convenient access to a power source, the WAVE™
handheld valve exerciser is available with three different
motor drives: electric, hydraulic, and compressed air. This
manual provides instructions for all three power versions.
In This Chapter
USAGE AND APPLICATIONS
MECHANICAL OVERVIEW
SAFETY LABELING
CONTROL UNIT AND KEYPAD
VITALS™ DATA LOGGER
USAGE AND APPLICATIONS
The WAVE™ line of handheld valve exercisers redefines
portable valve exercising and testing. This versatile unit is
light enough to be used by one operator, yet is rugged
enough to operate valves up to 60 inches. It’s designed for
efficient valve exercising and testing, and is perfect for
hard-to-reach valves.
BATTERY-POWERED
COMPONENTS
PACKAGING
MACHINE SPECIFICATIONS
The WAVE™ handheld systems provide you with the following capabilities:
•
•
•
•
•
•
•
Operation of 3 times more valves per day in your valve
exercising program.
Readiness for fast emergency shut-offs.
Elimination of operator fatigue and back injury.
Reduced valve damage during exercising.
Operation of valves where access is limited.
Easy storage and transport.
Easy use by one operator.
E.H. Wachs
Part No. 11-MAN-02, Rev. 1-0611
9
Chapter 3: Introduction to WAVE Handheld
WAVE™ Handheld Valve Exerciser User’s Manual
Valve Maintenance Program
When a valve that has not
been operated for a long time
is turned continuously in the
closing direction, the tuburculation and sediment built up
inside it get compacted. This
causes the torque to increase
as the valve is turned. As a
result, the valve stem can
break, or the sediment can
jam the gates or slides before
the valve is fully closed.
The “back and forth”
approach recommended here
is much like operating a hand
tap or die. Backing the tap out
clears chips between the cutting surface and the new
threads. Likewise, backing up
the valve releases debris that
has been loosened from the
gates, stem, and slides inside
it. Water in the system can
then flush this debris away.
Once the valve has been fully
closed, it should be opened a
few turns so that the higher
velocity water flowing under
the gates can move the
remainder of the sediment
downstream.
A valve that has not been operated for a number of years
needs to be closed by using a series of up and down
motions. Occasionally, crews attempting to close a difficult
valve use a T-handle or a cheater bar, applying a great deal
of pressure in one direction simply to force the valve closed.
This approach can break the valve stem and make the valve
inoperable, requiring expensive repairs.
The correct way to exercise a valve is to begin with a steady
amount of torque in the direction necessary to close the
valve, moving through five to ten rotations. Then reverse
the direction for two or three revolutions, followed by up to
ten more turns in the closing direction. This procedure,
illustrated in Figure 3-1, should be repeated until the valve
is fully closed.
2-3 rotations
10 rotations
10 rotations
Figure 3-1. Closing a valve using a “back and forth”
process to prevent jamming.
After the valve is reopened, turn it in the closing direction
one or two revolutions. The next time the valve is operated,
the nut and stem will not be jammed against the bonnet and
the valve will be free. (If the operator trying to close the
valve turns it the wrong way, a positive stop will occur after
one or two turns. The operator can then reverse direction to
fully operate the valve.)
The steady torque applied by the WAVE™ handheld system
is less likely to damage valve components than turning the
valve by hand. With the optional VITALS™ data logger,
detailed information on torque and valve position can be
stored for each valve that is exercised.
10
Part No. 11-MAN-02, Rev. 1-0611
E.H. Wachs
WAVE™ Handheld Valve Exerciser User’s Manual
Chapter 3: Introduction to WAVE Handheld
MECHANICAL OVERVIEW
Electric Drive
Power head
Lifting handle
Electric motor
Control unit
Power cord
Ground fault
circuit interrupt (GFCI)
Direction switch
Power switch
Figure 3-2. WAVE™ handheld system mechanical
components—electric motor drive.
E.H. Wachs
Part No. 11-MAN-02, Rev. 1-0611
11
Chapter 3: Introduction to WAVE Handheld
The pressure
gauge only displays the hydraulic
pressure to the pump. Use
the torque display on the control unit for an accurate reading of torque being applied to
the valve.
WAVE™ Handheld Valve Exerciser User’s Manual
Hydraulic Drive
Power head
Lifting handle
Hydraulic motor
Control unit
Pressure gauge
Torque control knob
Hydraulic outlet
Hydraulic inlet
Power lever
Figure 3-3. WAVE™ handheld system mechanical
components—hydraulic motor drive.
12
Part No. 11-MAN-02, Rev. 1-0611
E.H. Wachs
WAVE™ Handheld Valve Exerciser User’s Manual
Chapter 3: Introduction to WAVE Handheld
Pneumatic (Air) Drive
Power head
Lifting handle
Air motor
Control unit
Power lever
Pressure gauge
Air valve
Air inlet
Figure 3-4. WAVE™ handheld system mechanical
components—pneumatic motor drive.
E.H. Wachs
Part No. 11-MAN-02, Rev. 1-0611
13
Chapter 3: Introduction to WAVE Handheld
WAVE™ Handheld Valve Exerciser User’s Manual
SAFETY LABELING
To avoid injury, it is
important that the
operator stands so
that the rotation of
the machine pulls
the handle away from his
body when turning the valve
key.
The operator position label, shown in Figure 3-5, is affixed
to the handle of the WAVE™ handheld system to indicate
where the operator should stand during use.
Figure 3-5. Operator position label
CONTROL UNIT AND KEYPAD
Use the electronic control unit to monitor torque and revolutions, and to change data collection settings. Figure 3-6
illustrates the controller keypad. Chapter 5, “Operating
Instructions”, explains how to use the controller.
The controller stores revolution and torque data for the current valve operation. You can save this data for later analysis using the optional VITALS™ data logger. See “Storing
and Transferring Data” in Chapter 5.
To switch torque
units between lb-ft
and N-m, press the
RESET COUNT and ZERO
TORQUE buttons together.
NOTE: Torque values on the control unit display are in the
currently selected units—lb-ft or N-m. Current units are displayed on the start-up screen when you power up the controller.
14
Part No. 11-MAN-02, Rev. 1-0611
E.H. Wachs
WAVE™ Handheld Valve Exerciser User’s Manual
Revolution count
Chapter 3: Introduction to WAVE Handheld
Display Window
Features
Current torque
Maximum applied
torque
Torque
limit
Battery charge level
Mode
(one/two person)
Mode—Displays if controller
is in one-person or two-person mode.
Revolution count—Number
of revolutions in the current
operation (since last reset).
The number can be positive
or negative. Positive indicates right-hand (clockwise)
direction.
Battery charge level—Displays remaining battery
charge in percentage.
Current torque—Shows currently applied torque in lb-ft
or N-m.
Maximum applied torque—
Shows the maximum torque
applied during the current
operation.
Torque limit—Shows the
current torque limit setting.
Keypad Features
Increase
torque
limit
Decrease
torque
limit
Over
torque
limit
indicator
Figure 3-6. WAVE™ Control Unit
Special Functions
•
Press RESET COUNT and ZERO
TORQUE together to switch torque units
(lb-ft or N-m).
E.H. Wachs
Part No. 11-MAN-02, Rev. 1-0611
RESET COUNT—sets the
counter back to zero.
MODE—Toggles between
one-person and two-person
mode.
ZERO TORQUE—Sets the
current torque display to
zero.
NEW ACTIVITY—Resets
activity data in memory.
NOTE: all data for the current
activity is lost when you push
this button.
Increase torque limit—
Increases the current torque
limit by 10 lb-ft or N-m.
Decrease torque limit—
Decreases the current torque
limit by 10 lb-ft or N-m.
Over torque limit indicator—Lights when current
torque exceeds torque limit.
15
Chapter 3: Introduction to WAVE Handheld
WAVE™ Handheld Valve Exerciser User’s Manual
•
Data Entry Functions
BACK—Goes to the previous
data entry screen.
NEXT—Goes to the next
data entry screen.
Left arrow/right arrow—
Highlights characters for editing in menu selections.
Up arrow/down arrow—
Scroll up and down through
selections in a menu.
MENU—DIsplays/closes system menu.
POWER—Turns controller on
and off.
Press Increase Torque Limit and Decrease
Torque Limit together to turn LCD backlight on and off.
VITALS™ DATA LOGGER
The optional VITALS™ controller/data logger stores data
from up to 100 valve operations (maximum of 3000 revolutions) for transfer to a PC application. It attaches directly to
the WAVE™ control unit for data transfer. Figure 3-7 illustrates the features of the VITALS™ data logger.
NOTE: Not all functions of
the VITALS™ Data Logger
are used for data transfer
from the WAVE™ handheld
system. (These are machine
control functions for other
valve exercising systems.)
The following buttons are not
used:
STOP
START
DIR
MODE
NEW ACTIVITY
RESET COUNT
Figure 3-7. VITALS™ controller/data logger
16
Part No. 11-MAN-02, Rev. 1-0611
E.H. Wachs
WAVE™ Handheld Valve Exerciser User’s Manual
Chapter 3: Introduction to WAVE Handheld
Data Logger System Menu
Press the MENU button to display the system menu
on the data logger screen.
To exit the menu,
press the Menu
button again.
Figure 3-8. Data logger system menu. Use the up and
down arrow buttons to highlight the options. Scroll
past the bottom of the menu to display the second
screen of commands. Press the NEXT button to select
the highlighted option.
•
•
•
•
DATA TRANSFER—Puts the controller into data transfer mode for transferring data to or from a PC.
BACKLIGHT—Turns the LCD backlighting on and off.
VIEW STORED EXERCISE—Displays a list of valve
operation datasets in memory.
INFORMATION—Displays system information.
Figure 3-9. Data logger system menu (screen 2). Use
the up arrow to scroll back up to the first menu screen.
•
•
•
SET DATE AND TIME—Lets you change current date
and time settings.
UNITS—Lets you change units between lb-ft and N-m.
MASTER RESET—Erases all stored datasets from
memory.
E.H. Wachs
Part No. 11-MAN-02, Rev. 1-0611
17
Chapter 3: Introduction to WAVE Handheld
WAVE™ Handheld Valve Exerciser User’s Manual
•
•
ENABLE VITALS—Allows you to turn data logging
features on and off. With VITALS data logging off, the
controller/data logger is used only for control of the TM
valve exerciser.
ENABLE GPS READ—Allows you to turn GPS data
logging on and off. With GPS Read off, the data logger
will not display the READING GPS screen.
BATTERY-POWERED COMPONENTS
The electric-powered system does
not have a control
unit battery. The control unit
is powered on when power is
supplied to the entire system.
The WAVE™ handheld system’s control unit and the
optional VITALS™ data logger are powered by built-in
rechargable batteries. There are also non-rechargable memory backup batteries in the control unit and data logger,
which maintain data in memory when the units are turned
off.
The following sections describe the battery care procedures.
Control Unit Battery (Hydraulic/Pneumatic)
NOTE: Only the hydraulic and pneumatic powered systems
include the integrated battery for powering the control unit.
The operating time
on a battery charge
will be reduced if
you use the backlight on the
control unit screen.
The WAVE™ control unit is powered by a 7.2 V rechargable NiMH battery in the end of the machine’s handle. The
control unit will operate about 20 hours on a full charge.
Two chargers are available to charge the battery: a 110/
220 V AC adapter, and a 12 V DC cigarette lighter adapter.
Use the same procedure below for either adapter.
Charging Procedure
The temperature
should be between
32° and 104° F (040° C) when
charging the battery.
1. If the control unit is on, press the power switch to turn
18
Part No. 11-MAN-02, Rev. 1-0611
off power.
E.H. Wachs
WAVE™ Handheld Valve Exerciser User’s Manual
Chapter 3: Introduction to WAVE Handheld
Figure 3-10. Control unit power switch (hydraulic
and pneumatic systems only). Press the button and
release it to toggle the control unit on and off.
2. Unscrew the cap on the end of the WAVE™ handle to
access the battery charging connector.
Figure 3-11. The cap on the end of the handle
unscrews to charge the battery.
3. Connect the charger cable to the battery charging connector.
E.H. Wachs
Part No. 11-MAN-02, Rev. 1-0611
19
Chapter 3: Introduction to WAVE Handheld
WAVE™ Handheld Valve Exerciser User’s Manual
Figure 3-12. Charger plugged into the battery charging connector. Note that the connector must be aligned
correctly to line up the pins with the sockets.
4. Connect the power cable from the charger to the
power source.
Figure 3-13. Plugging in the charger will start charging the battery.
If you do not have
time for a full
charge, you can
partially charge the battery
without damaging it.
5. Charging a fully drained battery takes about 2-4 hours.
The charger will automatically shut off when the battery is fully charged.
6. When you are finished charging, remove the charger
cable from the battery charging connector. Replace the
cap on the WAVE™ system’s handle.
20
Part No. 11-MAN-02, Rev. 1-0611
E.H. Wachs
WAVE™ Handheld Valve Exerciser User’s Manual
Chapter 3: Introduction to WAVE Handheld
Control Unit Memory Backup Battery
A standard size 3 V watch battery (CR1632 or equivalent)
maintains data in memory when the control unit is turned
off. This keeps your settings as well as the valve operation
data from the most recent activity.
Replacement Procedure
1. If the control unit is on, turn off power to it:
•
•
On electric powered systems, press the OFF button on
the GFI.
On hydraulic and pneumatic systems, press the power
switch on the side of the control unit.
If the control unit
starts to lose data
or revert to its
default settings when it is
turned off, replace the memory backup battery.
Data stored in the
control unit will be
lost when you
remove the battery.Transfer
any data you need to the
VITALS™ data logger before
turning off the control unit.
Figure 3-14. Control unit power switch (hydraulic
and pneumatic systems only). Press the button and
release it to toggle the control unit on and off.
2. Remove the 4 screws on the face plate of the control
unit.
E.H. Wachs
Part No. 11-MAN-02, Rev. 1-0611
Use a 5/64” hex
wrench to turn the
screws.
21
Chapter 3: Introduction to WAVE Handheld
WAVE™ Handheld Valve Exerciser User’s Manual
Figure 3-15. Remove the screws on the control unit
face plate to open the control unit.
CAUTION:
Make sure the
control unit is
turned off before
opening it.
3. Carefully remove the face plate and turn it over to
access the circuit board inside the control unit. The
battery is in a socket mounted on the circuit board, as
shown in Figure 3-16.
Figure 3-16. The replaceable battery is mounted in a
socket on the control unit circuit board.
22
Part No. 11-MAN-02, Rev. 1-0611
E.H. Wachs
WAVE™ Handheld Valve Exerciser User’s Manual
Chapter 3: Introduction to WAVE Handheld
4. Using your fingernail or a non-metallic tool, remove
CAUTION:
Do not touch any
other components on the circuit board, or use
any metallic tools.
the battery from the socket.
Figure 3-17. Remove the old battery from the socket.
5. Press a new battery into the socket, with the plus side
Use a standard
CR1632 3 V (or
equivalent) watch
facing up.
battery.
Figure 3-18. Slide the new battery into the socket,
with the plus side (+) up.
6. Replace the face plate on the control unit and insert
the screws.
VITALS™ Data Logger Battery
The VITALS™ data logger is powered by a 7.2 V rechargable NiMH battery pack. It will operate about 6-8 hours on a
full charge.
Some WAVE™
units have gaskets and some
have silicone
sealer. Make sure
you put on the
gasket or re-apply the sealer
when replacing the face
plate.
Two chargers are available to charge the battery: a 110/
220 V AC adapter, and a 12 V DC cigarette lighter adapter.
Use the same procedure below for either adapter.
E.H. Wachs
Part No. 11-MAN-02, Rev. 1-0611
23
Chapter 3: Introduction to WAVE Handheld
WAVE™ Handheld Valve Exerciser User’s Manual
Charging Procedure
The temperature
should be between
32° and 104° F (040° C) when
charging the battery
1. If the VITALS™ data logger is on, press the
power button to turn it off.
2. Connect the charger cable to the battery charging connector on the front side of the VITALS™ data logger.
Figure 3-19. Plug the charger cable into the
VITALS™ connector.
3. Connect the power cable from the charger to the
power source.
Figure 3-20. Plugging in the charger will start charging the battery.
24
Part No. 11-MAN-02, Rev. 1-0611
E.H. Wachs
WAVE™ Handheld Valve Exerciser User’s Manual
4. Charging a fully drained battery takes about 2-4 hours.
The charger will automatically shut off when the battery is fully charged.
5. When you are finished charging, remove the charger
Chapter 3: Introduction to WAVE Handheld
If you do not have
time for a full
charge, you can
partially charge the battery
without damaging it.
cable from the battery charging connector.
VITALS™ Data Logger Memory
Backup Battery
A standard size 3 V watch battery (CR1632 or equivalent)
maintains data in memory when the data logger is turned
off. This keeps your settings as well as the stored valve
operation data.
Replacement Procedure
1. If the data logger is on, turn off power using
the power button.
2. Remove the 4 screws on the back of the data logger.
3. Carefully remove the back cover and turn it over to
access the circuit board inside the data logger. The
battery is in a socket mounted on the circuit board, as
shown in Figure 3-21.
If the data logger
starts to lose data
or revert to its
default settings when it is
turned off, replace the memory backup battery.
Any data stored in
the data logger will
be lost when you
remove the battery. If you
need to keep data stored in
the data logger, transfer it to
your PC before removing the
battery.
Use a 5/64” hex
wrench to turn the
screws.
Figure 3-21. The memory battery is in a socket on the
circuit board.
E.H. Wachs
Part No. 11-MAN-02, Rev. 1-0611
25
Chapter 3: Introduction to WAVE Handheld
CAUTION:
Do not touch any
other components on the circuit board, or use
any metallic tools.
WAVE™ Handheld Valve Exerciser User’s Manual
4. Using your fingernail or a non-metallic tool, remove
the battery from the socket.
Figure 3-22. Remove the old battery from the socket.
Use a standard
CR1632 3 V (or
equivalent) watch
battery.
5. Slide a new battery into the socket, with the plus side
up.
Figure 3-23. Slide the new battery into the socket,
with the plus side (+) up.
CAUTION:
Make sure you reinstall the gasket
before replacing
the cover.
6. Replace the back cover on the data logger and insert
26
Part No. 11-MAN-02, Rev. 1-0611
the screws.
E.H. Wachs
WAVE™ Handheld Valve Exerciser User’s Manual
Chapter 3: Introduction to WAVE Handheld
PACKAGING
The WAVE™ handheld valve exerciser is shipped and
stored in a custom steel case. Figure 3-24 shows the
WAVE™ system in the case with the extension handle. Use
the storage case to transport your WAVE™ system.
Figure 3-24. WAVE™ handheld system in its storage
case.
MACHINE SPECIFICATIONS
Electric Drive Torque Performance
The torque performance in Table 1 is for WAVE™ handheld
systems equipped with 110 V electric power. Table Figure 2
presents torque performance for systems with 220 V electric
power.
E.H. Wachs
Part No. 11-MAN-02, Rev. 1-0611
27
Chapter 3: Introduction to WAVE Handheld
WAVE™ Handheld Valve Exerciser User’s Manual
High speed/low torque
setting
lb-ft (N-m)
RPM
AMPS
100 (136)
10
200 (271)
8
300 (407)
Low speed/high torque
setting
RPM
AMPS
8.6
6
4
8
6.5
6
7
11
4
7
375 (509)
6
12
4
8
500 (678)
5
15
4
10
600 (813)
3.6
12
700 (949)
3
12.5
800 (1084)
3
13.5
Table 1: WAVE™ 110 V Electric Power Handheld
Torque Performance
Shaded rows are factory rated continuous loads
High speed/low torque
setting
Low speed/high torque
setting
lb-ft (N-m)
RPM
AMPS
RPM
AMPS
100 (136)
10
8.6
6
4
175 (237)
8
8
6.5
6
300 (407)
7
11
4
7
375 (509)
6
12
4
8
500 (678)
5
15
4
10
600 (813)
3.6
12
700 (949)
3
12.5
800 (1084)
3
13.5
Table 2: WAVE™ 220 V Electric Power Handheld
Torque Performance
Shaded rows are factory rated continuous loads
28
Part No. 11-MAN-02, Rev. 1-0611
E.H. Wachs
WAVE™ Handheld Valve Exerciser User’s Manual
Chapter 3: Introduction to WAVE Handheld
Hydraulic Drive Torque Performance
The torque performance in Table 1 is based on hydraulic
flow of 8 gpm at 1800 psi. (30 lpm at 124bar).
lb-ft (N-m)
RPM
100 (136)
24
200 (271)
22
300 (407)
20
400 (542)
17
500 (678)
10
600 (813)
8
700 (949)
6
800 (1084)
1
Table 3: WAVE™
Hydraulic Power Handheld
Torque Performance
Shaded row is factory
rated continuous load
Pneumatic Drive Torque Performance
The torque performance in Table 1 is based on hydraulic
flow of 8 gpm at 1800 psi. (30 lpm at 124
lb-ft (N-m)
RPM
100 (136)
13
200 (271)
11
300 (407)
7
400 (542)
5
500 (678)
4
600 (813)
3
700 (949)
2
800 (1084)
1
Table 4: WAVE™
Pneumatic Power Handheld
Torque Performance
Shaded row is factory
rated continuous load
E.H. Wachs
Part No. 11-MAN-02, Rev. 1-0611
29
Chapter 3: Introduction to WAVE Handheld
WAVE™ Handheld Valve Exerciser User’s Manual
Physical Specifications
Capacity:
Operates all gate valves 6" to 60" (15.3
to 152.4 cm) and other equipment requiring mechanized turning.
Drive:
High durability bronze/steel gear train
Power
Electric: options for 110 V 60 Hz; 110 V
Requirements:
50 Hz; 220 V.
Hydraulic: 8 gpm (30 lpm) hydraulic flow
@1800 psi (124 bar).
Pneumatic: 90 psi (6.2 bar) air supply at
60 cfm (1,700 lpm).
Peak Torque:
800 lb-ft (1084 N-m)
Motor Control:
Adjustable torque setting valve from 0 to
800 lb-ft with pressure gauge and electronic torque indicator.
Reversing valve, spring-loaded self centering automatic stop after release.
Revolution
Built in electronic counter display; counts
Counter:
in 1/10 revolution increments, forward
and reverse automatically.
Electronic keypad button reset.
Torque Display
Electronic readout of current and maximum torque, with torque limit display and
warning indicator.
Valve Operation Storage of torque values for 5000
Data Storage:
rotation positions (in increments of 1/10
rotation). Push-button memory reset.
Pressure Gauge: 0 to 800 lb-ft
Finish:
30
Powder coated casting, nickel plated
handles and accessories.
Part No. 11-MAN-02, Rev. 1-0611
E.H. Wachs
WAVE™ Handheld Valve Exerciser User’s Manual
Chapter 3: Introduction to WAVE Handheld
Valve Key Size: 1" square solid (2.54 cm)
Socket:
2" square. AWWA standard (5 cm).
Dimensions:
Length: 40” (102 cm)
Width: 7-3/4” (20 cm)
Height: 7-1/4" (18 cm)
Weight:
36 lbs (16 kg)—Electric
40 lbs (18 kg)—Hydraulic
37 lbs (17 kg)—Pneumatic
Storage Case:
Length: 42” (107 cm)
Width: 11-1/2” (29 cm)
Height: 8-1/2” (22 cm)
Accessories
Standard
Torque arm extension for two operators
Optional
• 8 ft. (244 cm) valve key
• 4 ft. (122 cm) valve key extension
• 2" square AWWA standard ductile iron
socket
• Stop collar
• 15/16” drive socket
• Control unit battery charging kit
• VITALS™ controller/data logger
• Cigarette lighter adapter to charge controller/data logger
• VITALS™ 2.0 valve performance analysis software
E.H. Wachs
Part No. 11-MAN-02, Rev. 1-0611
31
Chapter 3: Introduction to WAVE Handheld
32
WAVE™ Handheld Valve Exerciser User’s Manual
Part No. 11-MAN-02, Rev. 1-0611
E.H. Wachs
WAVE™ Handheld Valve Exerciser User’s Manual
Chapter 4: Assembly and Disassembly
Chapter 4
Assembly, Disassembly,
and Storage
Your WAVE™ handheld valve exerciser is shipped fully
assembled from the factory. It is ready to operate as soon as
you remove it from its storage case.
Use of some optional equipment requires that you install it
onto the WAVE™ system:
•
•
In This Chapter
ENVIRONMENTAL
REQUIREMENTS
LONG-TERM STORAGE
SHIPPING
For instructions on transferring data to the VITALS™
data logger, see “Storing and Transferring Data” in
Chapter 5.
For instructions on installing the extension handle, see
“Two-Person Operation” in Chapter 5.
ENVIRONMENTAL REQUIREMENTS
Machine operation-4° to 158° F
(-20° to +70° C)
Battery charging 32° to 104° F
(0° to +40° C)
LONG-TERM STORAGE
The WAVE™ handheld system should be kept in its storage
case when not in use. Environmental requirements for storage are as follows:
E.H. Wachs
Part No. 11-MAN-02, Rev. 1-0611
33
Chapter 4: Assembly and Disassembly
WAVE™ Handheld Valve Exerciser User’s Manual
Machine
-22° to 176° F
(-30° to +80° C)
Batteries
-4° to 113° F
(-20° to +45° C)
SHIPPING
Before transporting or shipping the WAVE™ handheld system, secure it in its storage case using the fasteners provided. Figure 4-1 indicates the fastener locations.
Figure 4-1. Insert the pins to secure the WAVE handheld system and the extension handle into the storage
case.
34
Part No. 11-MAN-02, Rev. 1-0611
E.H. Wachs
WAVE™ Handheld Valve Exerciser User’s Manual
Chapter 5: Operating Instructions
Chapter 5
Operating
Instructions
In This Chapter
SITE PREPARATION
SITE PREPARATION
Select the appropriate length valve key so that the top of the
key is at least waist-high when inserted on the valve nut. If
necessary, use the optional valve key extension.
Make sure you have a place to stand with sure footing for
both feet. If you have the electric drive WAVE™ handheld
system, make sure that you are not standing in water when
plugging in or operating the machine.
SET-UP
OPERATION
STORING AND TRANSFERRING
DATA
LOGGING DATA MANUALLY
Keep vehicles and any other equipment far enough away so
that the handle of the WAVE™ handheld system can rotate
around the valve key without obstruction.
E.H. Wachs
Part No. 11-MAN-02, Rev. 1-0611
35
Chapter 5: Operating Instructions
WAVE™ Handheld Valve Exerciser User’s Manual
SET-UP
1. Insert the socket onto the end of the valve key and
insert the pin.
Figure 5-1. Install the socket onto the end of the valve
key and insert the pin through the socket and key.
2. Insert the valve key and socket onto the drive nut on
the valve.
Figure 5-2. Put the socket onto the valve nut.
Typically, the most
comfortable height
is between your
waist and shoulders.
3. Loosen the locking knob on the stop collar and slide
36
Part No. 11-MAN-02, Rev. 1-0611
the collar to a comfortable working height for the
WAVE™ exerciser. Tighten the locking knob.
E.H. Wachs
WAVE™ Handheld Valve Exerciser User’s Manual
Chapter 5: Operating Instructions
Figure 5-3. Slide the stop collar onto the key and use
the set knob to fasten it at an appropriate height.
4. Remove the WAVE™ handheld system from its case
and place it on the valve key, as shown in Figure 5-4.
Slide the head of the machine down onto the stop collar.
Figure 5-4. Slide the WAVE™ handheld system down
onto the valve key and rest it on the stop collar.
E.H. Wachs
Part No. 11-MAN-02, Rev. 1-0611
37
Chapter 5: Operating Instructions
WAVE™ Handheld Valve Exerciser User’s Manual
OPERATION
Operator Position
WARNING:
The WAVE™ handheld system can
produce up to 800
lb-ft (1085 N-m) of
torque. To avoid possible
injury, always stand so that
the torque pulls the handle
away from your body.
Always stand so that the rotation of the valve pulls the handle of the WAVE™ system away from you. If you are standing on the wrong side of the machine and the valve sticks,
the increase in torque can knock you off balance or pin you
against an obstacle, causing injury. Refer to the Operator
Position label on the handle during use.
You can operate
the WAVE™ handheld exerciser without turning on the control unit.
However, you will not be able
to monitor torque or rotations,
or save any data.
When standing on the correct side of the machine, you will
always push the power handle away from you. To drive the
valve key in a right-hand (clockwise) direction, stand on the
motor side of the handle. To drive the valve key in a lefthand (counter-clockwise) direction, stand on the side opposite the motor. Figure 5-5 illustrates the correct operator
position.
38
Part No. 11-MAN-02, Rev. 1-0611
E.H. Wachs
WAVE™ Handheld Valve Exerciser User’s Manual
Chapter 5: Operating Instructions
Figure 5-5. The operator should always stand so that
the handle of the WAVE™ machine pulls away from
his body.
Powering on the System
Electric Drive
1. Plug the power cord into the appropriate electric
source (110 V or 220 V).
2. Press the reset button on the ground fault interrupt
(GFI) to power up the system.
E.H. Wachs
Part No. 11-MAN-02, Rev. 1-0611
If the GFI “pops”
while operating the
machine, reset it
and try turning the valve
again. If the GFI still pops,
switch to the low speed/high
torque setting.
39
Chapter 5: Operating Instructions
WAVE™ Handheld Valve Exerciser User’s Manual
Off
Reset
Figure 5-6. Press the reset button on the GFI to
power on the electric WAVE handheld.
Hydraulic Drive
CAUTION:
Do not connect or
disconnect the
hydraulic hoses
while the machine
is operating.
1. Connect the hydraulic hoses as shown in Figure 5-7.
Figure 5-7. Attach the return hydraulic hose first.
(The photo shows quick-fit connectors installed. These
connectors are optional, or you can install your own.)
2. Turn on the WAVE™ control unit by pushing the
power button on its side (Figure 5-8). The start-up
screen will appear, and then the data display screen
will indicate that the control unit is ready.
40
Part No. 11-MAN-02, Rev. 1-0611
E.H. Wachs
WAVE™ Handheld Valve Exerciser User’s Manual
Chapter 5: Operating Instructions
Figure 5-8. Press the power button on the control unit
to turn it on.
Pneumatic Drive
1. Connect the air hose to the fitting on the WAVE™ system.
2. Turn on the WAVE™ control unit by pushing the
power button on its side (Figure 5-8). The start-up
screen will appear, and then the data display screen
will indicate that the control unit is ready.
You should use an
in-line oiling system with the pneumatic WAVE™ handheld
system. Use an antifreeze oil
when operating with continuous load and high torque.
Figure 5-9. Press the power button on the control unit
to turn it on.
Direction and Torque Control
Electric Drive
1. Set the direction of rotation using the direction control
switch on the handle. Push the switch forward (toward
the control unit) to set the rotation in the right-hand
direction. Push the switch backward to set the rotation
in the left-hand direction.
E.H. Wachs
Part No. 11-MAN-02, Rev. 1-0611
41
Chapter 5: Operating Instructions
WAVE™ Handheld Valve Exerciser User’s Manual
forward
reverse
Figure 5-10. Set the direction of rotation using the
direction control switch. The forward position sets the
rotation in the right-hand direction. The reverse position sets the rotation in the left-hand direction.
You may have to
engage the power
switch when
changing the speed switch
setting. Press the power
switch briefly while moving
the speed switch into the
other position. The switch is
seated when the screw head
retracts into the switch.
2. There are two speed/torque settings on the electric
motor. For normal operation, keep the speed switch in
the high speed/low torque position (see Figure 5-11).
If higher torque is required (for instance, when unseating a valve), use the low speed/high torque setting.
low speed/
high torque
high speed/
low torque
Figure 5-11. The speed switch is on the bottom of the
electric motor housing.
42
Part No. 11-MAN-02, Rev. 1-0611
E.H. Wachs
WAVE™ Handheld Valve Exerciser User’s Manual
Chapter 5: Operating Instructions
3. Torque is controlled using the torque control buttons
on the control unit. Increase torque with the up arrow,
or decrease torque with the down arrow.
Hydraulic Drive
1. Direction of rotation is controlled by the power lever.
Push the lever toward the handle to rotate the head in
the right-hand direction. Push the lever away from the
handle to rotate the head in the left-hand direction.
Forward (right-hand)
direction
Reverse (left-hand)
direction
Figure 5-12. Direction control on the hydraulic powered WAVE™ handheld system.
2. Torque is controlled using the torque knob on the
hydraulic motor. Turn the torque knob counter-clockwise to increase torque. Turn the knob clockwise to
decrease torque.
E.H. Wachs
Part No. 11-MAN-02, Rev. 1-0611
43
Chapter 5: Operating Instructions
WAVE™ Handheld Valve Exerciser User’s Manual
Figure 5-13. Set the torque using the torque controlled knob. Before starting, turn the knob to the lowest torque setting.
Pneumatic Drive
1. Direction of rotation is set by the direction control ring
on the air motor. Turn the indicator on the ring to the
“F” position (up) to set the rotation to the right-hand
direction. Turn the indicator to the “R” position
(down) to set the rotation in the left-hand direction.
forward
reverse
Direction control ring
Figure 5-14. Setting the direction of rotation on the
air motor. Forward is right-hand rotation; reverse is
left-hand rotation.
44
Part No. 11-MAN-02, Rev. 1-0611
E.H. Wachs
WAVE™ Handheld Valve Exerciser User’s Manual
Chapter 5: Operating Instructions
2. Torque is controlled using the air valve on the handle.
Turn the valve handle out to decrease torque; turn it in
to increase torque.
increase
torque
decrease
torque
Figure 5-15. Use the air flow valve to adjust the
torque.
Starting a New Activity
1. Press and hold the NEW ACTIVITY button
on the control unit for two seconds.
The New Activity
button resets the
revolution count
and torque settings to 0. It
also erases the previous
activity from memory. If you
need to save the activity data,
transfer it to the VITALS™
data logger first.
2. Check the mode indicator to make sure it is correct for
one-person operation. (If you are using the machine in
two-person mode, see “Two-Person Operation” later
in this chapter.)
Control unit screen showing
one-person mode.
E.H. Wachs
Part No. 11-MAN-02, Rev. 1-0611
45
Chapter 5: Operating Instructions
WAVE™ Handheld Valve Exerciser User’s Manual
Performing the Valve Operation
Before starting, make sure the torque is set to the lowest setting. Be sure to read the “Direction and Torque Control”
section in this chapter for instructions on machine control
for the power version of your WAVE™ handheld system.
Zeroing the Valve Position
WARNING:
The WAVE™ handheld system can
produce up to 800
lb-ft (1085 N-m) of
torque. Make sure you stand
so that the torque pulls the
handle away from your body.
Always move to the other
side of the machine before
reversing the direction of
operation.
1. Stand on the correct side of the WAVE™ system for
the direction you are turning the valve. Refer to the
Operator Position label on the handle.
2. Engage the power in the direction you are turning the
valve.
3. If the valve does not move, disengage power. Switch
position and apply power in the opposite direction.
4. If the valve does not move, increase the torque and
apply power again.
5. Continue this process—increasing the torque and
applying power in both directions—until the valve
stem breaks free.
If you do not know
the rotation direction of the valve,
see “Logging an Unknown
Valve Rotation Direction”
later in this section.
6. When the valve starts turning, reduce torque to the
lowest setting that will keep the machine running.
7. Rotate the valve to the fully open position.
Figure 5-16. Open the valve completely to set the
start position.
46
Part No. 11-MAN-02, Rev. 1-0611
E.H. Wachs
WAVE™ Handheld Valve Exerciser User’s Manual
Chapter 5: Operating Instructions
Exercising the Valve
1. When the valve is fully opened, press the
RESET COUNT button.
2. Set the torque limit to a reasonable value,
If the valve’s manufacturer provides a
specification for
maximum torque, you can
use this value for the torque
limit.
3. Stand in the correct position to rotate the valve in the
To switch torque
units between lb-ft
and N-m, press the
Reset Count and Zero Torque
buttons together.
4. Apply power. Use the minimum torque setting
WARNING:
Stand so that the
torque pulls the handle away from your
body. Always move
to the other side of the
machine before reversing the
direction of operation.
depending on the size and condition of the
valve. Press the up arrow to increase the
torque limit. The torque limit setting will increase by
50 units (either lb-ft or N-m) each time you press the
button.
NOTE: On hydraulic and pneumatic WAVE™ systems, setting the torque limit is optional. Exceeding
the torque limit will not stop the machine. You can use
the torque limit feature to activate the Over Torque
Limit Indicator.
closing direction.
required to keep the valve turning.
5. Watch the Current Torque reading on the control unit
screen. As you turn the valve, the torque level will
probably increase as loosened debris builds up in the
valve gate slides.
6. Turn the valve for about 10 rotations in the
closing direction, then disengage power. If the
torque limit indicator lights before 10 rotations, disengage power immediately.
E.H. Wachs
Part No. 11-MAN-02, Rev. 1-0611
The WAVE™ control unit will store
all forward and
reverse motion data. The
rotation counter displays
absolute rotations from the
starting point.
47
Chapter 5: Operating Instructions
WAVE™ Handheld Valve Exerciser User’s Manual
10 rotations
Figure 5-17. Drive the valve about 10 rotations in the
closing direction.
This “back and
forth” process
allows water flowing through the valve to clear
away loosened debris.
7. Switch sides and apply power to turn the valve back in
the other direction. Turn it for 2-3 rotations.
2-3 rotations
Figure 5-18. Back the valve up 2-3 rotations.
8. Continue this back-and-forth procedure until you
reach the end of travel.
48
Part No. 11-MAN-02, Rev. 1-0611
E.H. Wachs
WAVE™ Handheld Valve Exerciser User’s Manual
Chapter 5: Operating Instructions
2-3 rotations
10 rotations
Figure 5-19. Continue driving the valve down. Turn
10 rotations in the closing direction, then 2-3 in the
opening direction.
Figure 5-20. Continue until the valve is completely
closed, without exceeding the maximum torque setting.
9. Switch sides and back the valve off 2-3 rotations.
E.H. Wachs
Part No. 11-MAN-02, Rev. 1-0611
49
Chapter 5: Operating Instructions
WAVE™ Handheld Valve Exerciser User’s Manual
2-3 rotations
Figure 5-21. Turn the valve back up 2-3 rotations to
clear loosened debris.
10. Switch sides and drive the valve back to the end of
travel. Repeat the back-and forth motion two more
times to make sure all debris is cleared from the slides
and the valve is fully seated at the end of travel.
2-3 rotations
End of travel
Figure 5-22. Turn the valve up and down two times
against the end of travel to fully seat it in the closed
position.
Resetting the Valve
1. When you have driven the valve to the end of
travel in one direction, press the RESET
COUNT button.
50
Part No. 11-MAN-02, Rev. 1-0611
E.H. Wachs
WAVE™ Handheld Valve Exerciser User’s Manual
Chapter 5: Operating Instructions
2. Start turning the valve back in the other direction. It
should operate freely.
Figure 5-23. Turn the valve continuously in the opening direction.
3. When you approach the opposite end of travel, the
torque may begin to increase. If it exceeds the torque
limit, use the back-and-forth process to drive the valve
to the end of travel.
Figure 5-24. If necessary, turn the valve back and
forth to loosen it as you approach the end of travel.
4. When you have reached the end of travel, back the
valve up 2-3 rotations and drive it to the end again.
Repeat this step two more times.
E.H. Wachs
Part No. 11-MAN-02, Rev. 1-0611
51
Chapter 5: Operating Instructions
WAVE™ Handheld Valve Exerciser User’s Manual
End of travel
2-3 rotations
Figure 5-25. Turn the valve up and down two times
against the end of travel to fully seat it in the open
position.
5. Write down the total number of rotations, or transfer
the valve data to the VITALS™ data logger.
Logging an Unknown Valve Rotation
Direction
If you do not know the rotation direction for closing the
valve, use the following procedure to document the operation.
1. Press the NEW ACTIVITY button and hold it
for two seconds until the rotation and torque
reading reset to zero.
2. Select a direction and apply torque at the lowest
torque setting.
3. If you feel resistance, stop and reverse direction.
4. If necessary, increase by the torque by turning the
torque knob clockwise one-half turn. If you feel resistance, reverse direction again and apply the same
amount of torque.
5. Continue this procedure, reversing direction when you
feel resistance, until you get the valve turning freely in
one direction.
52
Part No. 11-MAN-02, Rev. 1-0611
E.H. Wachs
WAVE™ Handheld Valve Exerciser User’s Manual
Chapter 5: Operating Instructions
6. Turn the valve to the end of travel in this direction.
7. Document the direction of rotation and number of
turns required.
8. Turn the valve back in the opposite direction to its
original position (when the revolution counter returns
to zero).
9. You can transfer the data to the VITALS™ data logger
and record an “UNKNOWN” valve position.
Two-Person Operation
Read the previous sections of this chapter before using the
WAVE™ handheld exerciser in two-person mode. This section describes only the procedure for setting up the machine
for two-person mode.
1. Insert the extension handle into the side of the
When the extension handle is
attached, the
WAVE™ handheld system
can be used as a manual “T”
wrench.
WAVE™ head opposite the handle, as shown in
Figure 5-26.
2. Insert the attached pin through the handle and extension.
Figure 5-26. Attaching the extension handle.
E.H. Wachs
Part No. 11-MAN-02, Rev. 1-0611
53
Chapter 5: Operating Instructions
Torque is measured in the main
handle of the
WAVE™ handheld system.
When two people are operating the machine, this reading
is only half the total torque.
Putting the control unit in twoperson mode doubles the
measured torque to accurately display total torque
being applied to the valve
key.
WAVE™ Handheld Valve Exerciser User’s Manual
3. The second operator should stand on the opposite side
of the machine as the primary operator, as shown in
Figure 5-27. The torque should be pulling the handle
away from both operators.
Figure 5-27. Operating the WAVE™ handheld system
in two-person mode.
4. Start the valve operation as described under “Starting
a New Activity” earlier in this section.
5. After pressing the NEW ACTIVITY button,
press the MODE button to switch to two-person mode. The mode indicator on the LCD
will show the current mode.
Control unit screen showing
two-person mode
54
Part No. 11-MAN-02, Rev. 1-0611
E.H. Wachs
WAVE™ Handheld Valve Exerciser User’s Manual
Chapter 5: Operating Instructions
STORING AND TRANSFERRING DATA
Using the VITALS™ Data Logger
If you have the optional VITALS™ data logger, you can
transfer valve exercising data from the control unit and store
it for later analysis. The data logger will hold datasets from
up to 100 valve operations (maximum of 3000 turns), allowing you to save data in the field and download it at a convenient time to a PC-based application such as VITALS™
valve performance analysis software.
The control unit on
the WAVE™ handheld system only
stores the most recent dataset. Transfer the data to the
VITALS™ data logger after
each valve operation.
The VITALS™ data logger fits onto the front of the
WAVE™ control unit. Four holes in the back of the data
logger align with the four screw heads on the front of the
control unit. Data is transferred through the two infrared
ports on the face of the control unit to two ports on the back
of the data logger.
If you are unable to
transfer data successfully, the windows on the infrared ports
may be dirty. Wipe them
clean with a soft, dry cloth
and try the transfer again.
Clean the ports on both the
data logger and the control
unit. You can use glass
cleaner if necessary. DO
NOT USE SOLVENTS OR
OTHER CLEANERS ON
THE INFRARED PORT WINDOWS.
You can enter valve and operator information on the data
logger before you attach it to the WAVE™ control unit.
1. Press and hold the POWER button on the
VITALS™ data logger until the power-up
screen appears.
Figure 5-28. VITALS™ data logger power-up screen.
2. Release the power button. The SELECT OPTION
screen appears.
E.H. Wachs
Part No. 11-MAN-02, Rev. 1-0611
55
Chapter 5: Operating Instructions
WAVE™ Handheld Valve Exerciser User’s Manual
Use the RESUME
command to continue completing
and storing the last dataset
that was in the controller/data
logger.
Figure 5-29. SELECT OPTION screen.
You must select or
create a valve ID in
order to transfer
data. If there are no valve IDs
in the list, you must create
one on the ENTER VALVE ID
screen below.
3. Use the up or down arrow to highlight NEW ACTIVITY, then press the NEXT button. The SELECT
VALVE ID screen appears.
Figure 5-30. SELECT VALVE ID screen
You can enter new
valve IDs at the
VITALS™ data logger, or download them to the
data logger from a PC using
the VITALS™ valve performance software.
4. Use the up and down arrows to highlight the
valve ID. (If you need to create a new valve
ID, select any ID in the list.) Press the NEXT
button to continue.
Figure 5-31. Selecting a valve ID
56
Part No. 11-MAN-02, Rev. 1-0611
E.H. Wachs
WAVE™ Handheld Valve Exerciser User’s Manual
Chapter 5: Operating Instructions
5. The ENTER VALVE ID screen appears.
Figure 5-32. ENTER VALVE ID screen
•
•
To continue with the selected valve ID, push the NEXT
button.
To create a new valve ID, edit the ID on the screen. Use
the left and right arrows to highlight a character, and use
the up and down arrows to change the value of the highlighted character.
Use the left and
right arrows to highlight characters.
Use the up and
down arrows to change the
value of the current character.
Figure 5-33. Creating a new valve ID
6. When you have edited the valve ID, push the
NEXT button. The ENTER OPERATOR
screen appears. The most recent operator is
displayed.
E.H. Wachs
Part No. 11-MAN-02, Rev. 1-0611
57
Chapter 5: Operating Instructions
WAVE™ Handheld Valve Exerciser User’s Manual
Figure 5-34. ENTER OPERATOR screen
•
•
To continue with the displayed operator, push the
NEXT button.
To change the operator, edit the operator ID on
the screen. Use the left and right arrows to highlight a
character, and use the up and down arrows to change the
value of the highlighted character. Push the NEXT button when you are finished.
7. The DOWNLOAD screen appears. The data logger is
now ready to download data from the WAVE™ system.
Figure 5-35. DOWNLOAD screen
Make sure the
WAVE™ control
unit is powered on
before you connect the data
logger.
8. Align the data logger in the same direction as the con-
58
Part No. 11-MAN-02, Rev. 1-0611
trol unit, as shown in Figure 5-36. Four holes in the
back of the data logger fit onto the four screw heads
on the front of the control unit.
E.H. Wachs
WAVE™ Handheld Valve Exerciser User’s Manual
Chapter 5: Operating Instructions
Figure 5-36. Aligning the VITALS™ data logger with
the WAVE™ handheld control unit. The four holes in
the back of the data logger fit onto the screws on the
face plate of the control unit.
9. Set the data logger onto the control unit and hold it
firmly in place while performing the download.
E.H. Wachs
Part No. 11-MAN-02, Rev. 1-0611
59
Chapter 5: Operating Instructions
WAVE™ Handheld Valve Exerciser User’s Manual
Figure 5-37. Downloading data to the data logger.
If you did not select
a valve ID at the
beginning of the
data transfer, you will have to
go back (using the left arrow
button) to the ENTER VALVE
ID screen and create a valve
ID. You can then go forward
(with the right arrow button)
to this point. All data will be
saved.
10. Press the right arrow button. The RETRIEVING
DATA screen will appear while data is downloaded to
the data logger.
Figure 5-38. RETRIEVING DATA screen
60
Part No. 11-MAN-02, Rev. 1-0611
E.H. Wachs
WAVE™ Handheld Valve Exerciser User’s Manual
11. When the data transfer is finished, the TURNS
data screen appears with the number of turns
recorded. Push the NEXT button to continue.
Chapter 5: Operating Instructions
If the data logger
returns to the
“PRESS > TO
DOWNLOAD” screen, the
data transfer was unsuccessful. Reposition the data logger on the control unit and try
the transfer again.
Figure 5-39. TURNS data screen
12. The MAX TORQUE data screen appears with
the maximum torque value recorded. Push the
NEXT button to continue.
If there is no
TURNS or MAX
TORQUE data in
the data set from the
WAVE™ handheld (or if you
turned the valve manually),
you can enter TURNS and
MAX TORQUE values manually. Use the up arrow on the
keypad to increment the values on each screen.
Figure 5-40. MAX TORQUE data screen
13. The VALVE POSITION screen appears. Use
the up and down arrows to highlight the position the valve was left in. Push the NEXT button to continue.
E.H. Wachs
Part No. 11-MAN-02, Rev. 1-0611
Use the up and
down arrows to select the
valve position.
61
Chapter 5: Operating Instructions
WAVE™ Handheld Valve Exerciser User’s Manual
Figure 5-41. VALVE POSITION screen
Remarks can be
defined using the
VITALS™ valve
performance analysis software and downloaded to the
data logger.
14. The REMARKS screen appears. Use the up
and down arrows to highlight remarks. Press
the right arrow button to select the currently
highlighted remark. You can select up to 10 remarks
for an activity. Selected remarks are indicated with an
asterisk (*). When you are finished selecting remarks,
push the NEXT button to continue.
Use the up and
down arrows to highlight
remarks.
Use the right arrow to
select the highlighted remark.
Figure 5-42. REMARKS screen. Selected remarks are
indicated by asterisks (*).
A separate cable
(Wach part no. 17234-00) is required
to connect a GPS receiver to
the data logger.
15. The READING GPS screen appears. If you are storing
You can turn off the
READING GPS
feature. Press the
MENU button and scroll
down to the ENABLE GPS
command; press NEXT and
then select the OFF option.
•
62
Part No. 11-MAN-02, Rev. 1-0611
GPS data and have not yet connected your GPS
receiver to the data logger, connect it now.
If you are not storing GPS data, press the NEXT button
and skip to step 17.
E.H. Wachs
WAVE™ Handheld Valve Exerciser User’s Manual
Chapter 5: Operating Instructions
.
Figure 5-43. READING GPS screen, showing readings for latitude and longitude. (READINGS is the
number of GPS data samples integrated by the data
logger.)
16. The data logger and GPS receiver will take
about 30-60 seconds to synchronize. When the
values for latitude and longitude appear on the
data logger screen, press the NEXT button to continue.
The data logger will
continue receiving
GPS data until you
press the NEXT button. However, only the first 99 readings will be averaged.
17. The PRESS > TO STORE screen appears.
Push the right arrow button to save the dataset.
The data logger will return to the SELECT
VALVE ID screen.
Figure 5-44. PRESS > TO STORE screen
E.H. Wachs
Part No. 11-MAN-02, Rev. 1-0611
63
Chapter 5: Operating Instructions
WAVE™ Handheld Valve Exerciser User’s Manual
LOGGING DATA MANUALLY
You can download
a copy of the log
sheet from our
website at
www.ehwachs.com.
If you are logging valve operations manually, a valve exercising log sheet is provided in Appendix A.
64
Part No. 11-MAN-02, Rev. 1-0611
E.H. Wachs
WAVE™ Handheld Valve Exerciser User’s Manual
Chapter 6: Routine Maintenance
Chapter 6
Routine Maintenance
WAVE™ GEARBOX LUBRICATION
Once a month, check the oil level in the gearbox.
1. Lay the WAVE™ handheld system upside down, as
In This Chapter
GEARBOX LUBRICATION
CALIBRATING THE TORQUE
SENSOR
shown in Figure 6-1.
2. Using a 3/16” hex wrench, remove the filler plug and
vent hole plug, as shown in Figure 6-1.
Figure 6-1. Removing the filler and vent plugs.
E.H. Wachs
Part No. 11-MAN-02, Rev. 1-0611
65
Chapter 6: Routine Maintenance
WAVE™ Handheld Valve Exerciser User’s Manual
3. Look into either hole to check the oil level. Oil should
be visible in the hole.
The maximum
capacity of the gearbox is 5 oz (148 ml).
4. If no oil is visible, pour oil into either hole until you
can see oil in the other hole. See Figure 6-2.
The recommended oil is
123 Kent Gear Oil with Moly
(90 wt.), part no. 02-401-00.
Figure 6-2. Adding oil to the gearbox.
5. Replace both plugs.
CALIBRATING THE TORQUE SENSOR
Normally, the torque sensor will not need to be recalibrated.
However, if the handle has been over-extended, the sensor
may become mis-calibrated. (If this has happened, the “Current Torque” reading on the control unit display screen will
not return to 0 when you press the RESET TORQUE button.)
Calibration of the sensor is a factory service procedure. See
Chapter 10, Ordering Information, for requesting factory
service.
66
Part No. 11-MAN-02, Rev. 1-0611
E.H. Wachs
WAVE™ Handheld Valve Exerciser User’s Manual
Chapter 7: Service and Repair
Chapter 7
Service and Repair
MECHANICAL PROBLEMS
PROBLEM: There is fresh oil in the bottom of the storage
box or on the gear head of the machine.
In This Chapter
MECHANICAL PROBLEMS
ELECTRICAL PROBLEMS
CAUSE: An oil seal in the gear head is leaking. There are
seals on the top and bottom of the head. You can replace
them if you have machine press equipment to insert the new
seal. Otherwise, return the machine for factory service.
Oil seals are part number 05-014-00.
1. Using a small flat-blade screwdriver, pry out the leaking seal. You may have to pry alternately on opposite
sides of the seal to remove it.
Figure 7-1. Pry out the old oil seal with a flat-blade
screwdriver.
E.H. Wachs
Part No. 11-MAN-02, Rev. 1-0611
67
Chapter 7: Service and Repair
WAVE™ Handheld Valve Exerciser User’s Manual
2. Select a press fitting that fits snugly inside the new
seal, and the appropriate sleeve for the fitting.
3. Lay the WAVE™ system on a solid workbench or
other level surface and put the press fitting in place.
Figure 7-2. Put the press fitting in place over the
bearing.
4. Slide the seal down over the fitting, with the flat side
of the seal facing up.
Figure 7-3. Slide the seal down onto the fitting.
68
Part No. 11-MAN-02, Rev. 1-0611
E.H. Wachs
WAVE™ Handheld Valve Exerciser User’s Manual
Chapter 7: Service and Repair
5. Slide the sleeve over the press fitting.
Figure 7-4. Put the appropriate sized sleeve over the
press fitting onto the top of the seal.
6. Tap the sleeve down onto the seal with a hammer until
the sleeve is flush with the machine surface.
Figure 7-5. Tap the seal into place with a hammer
until the sleeve is flush against the housing.
PROBLEM: The current torque reading on the WAVE™
control unit doesn’t go to zero when you press the Reset
Torque button.
E.H. Wachs
Part No. 11-MAN-02, Rev. 1-0611
69
Chapter 7: Service and Repair
WAVE™ Handheld Valve Exerciser User’s Manual
CAUSE: The torque sensor is mis-calibrated. You can
return the WAVE™ machine to the factory for calibration.
(See Chapter 10 for ordering information.)
ELECTRICAL PROBLEMS
PROBLEM: The control unit screen displays nonsense
characters.
CAUSE: The control unit may have lost battery power. If
you have valve operation data you want to save, transfer it
immediately to the VITALS™ data logger.
1. Press and hold the NEW ACTIVITY button for two
seconds. The screen should return to normal.
2. If pushing the NEW ACTIVITY button does not correct the problem, power the control unit off and then
power it on again.
PROBLEM: Valve operation data is being lost before you
can transfer it to the VITALS™ data logger.
CAUSE: The memory backup battery is running dead.
Replace the battery using the following procedure.
Data stored in the
control unit will be
lost when you
remove the battery. Transfer
any data you need to the
VITALS™ data logger before
turning off the control unit.
3. If the control unit is on, turn off power to it:
•
On electric powered systems, press the OFF button on
the GFI.
Reset
Off
Figure 7-6. Press the Off button on the GFI to power
down the electric WAVE handheld.
70
Part No. 11-MAN-02, Rev. 1-0611
E.H. Wachs
WAVE™ Handheld Valve Exerciser User’s Manual
•
Chapter 7: Service and Repair
On hydraulic and pneumatic systems, press the power
switch on the side of the control unit.
Figure 7-7. Control unit power switch (hydraulic and
pneumatic systems only). Press the button and release
it to toggle the control unit on and off.
4. Remove the 4 screws on the face plate of the control
unit.
Use a 5/64” hex
wrench to turn the
screws.
Figure 7-8. Remove the screws on the control unit
face plate to open the control unit.
5. Carefully remove the face plate and turn it over to
access the circuit board inside the control unit. The
battery is in a socket mounted on the circuit board, as
shown in Figure 7-9.
E.H. Wachs
Part No. 11-MAN-02, Rev. 1-0611
CAUTION:
Make sure the
control unit is
turned off before
opening it.
71
Chapter 7: Service and Repair
WAVE™ Handheld Valve Exerciser User’s Manual
Figure 7-9. The replaceable battery is mounted in a
socket on the control unit circuit board.
CAUTION:
Do not touch any
other components on the circuit board, or use
any metallic tools.
6. Using your fingernail or a non-metallic tool, remove
the battery from the socket.
Figure 7-10. Remove the old battery from the socket.
Use a standard
CR1632 3 V (or
equivalent) watch
battery.
7. Press a new battery into the socket, with the plus side
facing up.
Figure 7-11. Slide the new battery into the socket,
with the plus side (+) up.
72
Part No. 11-MAN-02, Rev. 1-0611
E.H. Wachs
WAVE™ Handheld Valve Exerciser User’s Manual
8. Replace the face plate on the control unit and insert
the screws.
PROBLEM: The VITALS™ data logger loses settings or
data when it is powered off.
CAUSE: The memory backup battery is running dead.
Replace the battery using the following procedure.
9. If the data logger is on, turn off power using
the power button.
10. Remove the 4 screws on the back of the data logger.
11. Carefully remove the back cover and turn it over to
access the circuit board inside the data logger. The
battery is in a socket mounted on the circuit board, as
shown in Figure 7-12.
Chapter 7: Service and Repair
Some WAVE™
units have gaskets and some
have silicone
sealer. Make sure
you put on the
gasket or re-apply the sealer
when replacing the face
plate.
Any data stored in
the data logger will
be lost when you
remove the battery. If you
need to keep data stored in
the data logger, transfer it to
your PC before removing the
battery.
Use a 5/64” hex
wrench to turn the
screws.
Figure 7-12. The memory battery is in a socket on the
circuit board.
12. Using your fingernail or a non-metallic tool, remove
the battery from the socket.
E.H. Wachs
Part No. 11-MAN-02, Rev. 1-0611
CAUTION:
Do not touch any
other components on the circuit board, or use
any metallic tools.
73
Chapter 7: Service and Repair
WAVE™ Handheld Valve Exerciser User’s Manual
Figure 7-13. Remove the old battery from the socket.
Use a standard
CR1632 3 V (or
equivalent) watch
battery.
13. Slide a new battery into the socket, with the plus side
up.
Figure 7-14. Slide the new battery into the socket,
with the plus side (+) up.
CAUTION:
Make sure you reinstall the gasket
before replacing
the cover.
14. Replace the back cover on the data logger and insert
the screws.
PROBLEM: The control unit battery does not fully charge
(the battery indicator won’t go to 100%), or it loses its
charge quickly.
CAUSE: The battery needs to be replaced. Contact E.H.
Wachs Company to arrange for factory service. (See Chapter 10 for ordering information.)
74
Part No. 11-MAN-02, Rev. 1-0611
E.H. Wachs
WAVE™ Handheld Valve Exerciser User’s Manual
Chapter 8: Parts Lists and Drawings
Chapter 8
Parts Lists and
Drawings
Refer to the parts lists and associated drawings in this chapter for ordering and maintenance.
There are separate sets of drawings with BOMs for the electric, hydraulic, and pneumatic versions of the WAVE™
handheld exerciser. There is also a section of this chapter for
common assemblies, which are the same for versions of the
machine.
E.H. Wachs
Part No. 11-MAN-02, Rev. 1-0611
In This Chapter
ELECTRIC DRAWINGS/BOMS
HYDRAULIC DRAWINGS/BOMS
PNEUMATIC DRAWINGS/BOMS
COMMON ASSEMBLIES
75
Chapter 8: Parts Lists and Drawings
WAVE™ Handheld Valve Exerciser User’s Manual
ELECTRIC SYSTEM ASSEMBLIES
11-215-00
11-195-00
VITALS Ready (ELECT)
MAIN HEAD ASSY
11-103-00
11-194-00
90-029-16
11-080-00
11-304-ES
11-503-00
11-041-00
11-184-00
11-061-00
11-069-00
11-183-00
11-188-00
WAVE HANDHELD 110V ( 11-000-12 )
Part No.
11-041-00
11-061-00
11-069-00
11-080-00
11-103-00
11-183-00
11-184-00
11-188-00
11-195-00
11-215-00
11-304-ES
11-400-00
11-501-00
11-503-00
11-MAN-02
90-029-16
90-042-06
90-501-01
90-501-42
90-501-49
76
Qty. Description
1
1
1
1
1
1
1
1
1
1
1
1
2
1
1
7
1
1
1
2
Gfi, 110v
Breaker, 8 Amp
Label, Gfi Reset
Bushing
Gear, Planetary
Plate, Blanking
Plate, Blanking
Relief, Strain
Plate, Blanking
Gasket
110v Assy,Eibenstock
Case, Storage NOT SHOWN
Brush, Eibenstock 16/2 R/L NOT SHOWN
Switch, Gear
Manual NOT SHOWN
LHCS, 8-32 X 1
BHCS, 10-32 X 3/8 NOT SHOWN
Terminal, Ring #10 18-14GA NOT SHOWN
Terminal, Bullet-M 16GA NOT SHOWN
Terminal, Flag 1/4 16-14 GA INSULATI NOT SHOWN
Part No. 11-MAN-02, Rev. 1-0611
E.H. Wachs
WAVE™ Handheld Valve Exerciser User’s Manual
Chapter 8: Parts Lists and Drawings
11-215-00
11-195-00
VITALS READY (ELEC)
MAIN HEAD ASSY
11-103-00
90-029-16
11-194-00
11-080-00
11-041-02
11-304-ES
11-503-00
11-184-00
11-061-00
11-069-00
11-183-00
11-138-00
11-188-00
WAVE HANDHELD 110v U.K. (11-000-16)
Part No.
11-041-02
11-061-00
11-069-00
11-080-00
11-103-00
11-138-00
11-183-00
11-184-00
11-188-00
11-195-00
11-215-00
11-304-ES
11-400-00
11-501-00
11-503-00
11-MAN-02
90-029-16
90-501-01
90-501-42
90-501-43
90-501-49
E.H. Wachs
Qty. Description
1
1
1
1
1
1
1
1
1
1
1
1
1
2
1
1
7
1
4
4
2
GFI, 110v (EXPORT)
Breaker, 8 AMP
Label, GFI Reset
Bushing
Gear, Planetary
Plug, U.K.
Plate, Blanking
Plate, Blanking
Releif, Strain
Plate, Blanking
Gasket
110v Assy, Eibenstock
Case, Storage NOT SHOWN
Brush, Eibenstock 16/2 R/L NOT SHOWN
Switch, Gear
Manual NOT SHOWN
LHCS, 8-32 THD. X 1” LNG.
TERMINAL, RING #10 16-14GA, NOT SHOWN
TERMINAL, BULLET-M 16GA, NOT SHOWN
TERMINAL, BULLET-F 16GA, NOT SHOWN
TERMINAL, FLAG 1/4 16-14 GA INSULATED, NOT SHOWN
Part No. 11-MAN-02, Rev. 1-0611
77
Chapter 8: Parts Lists and Drawings
WAVE™ Handheld Valve Exerciser User’s Manual
11-215-00
11-195-00
VITALS Ready (ELECT)
MAIN HEAD ASSY
11-103-00
11-194-00
90-029-16
11-080-00
11-307-ES
11-503-00
11-041-01
11-184-00
11-061-04
11-069-00
11-183-00
11-188-00
WAVE HANDHELD 220V ( 11-000-15 )
Part No.
11-041-01
11-061-04
11-069-00
11-080-00
11-103-00
11-183-00
11-184-00
11-188-00
11-195-00
11-215-00
11-307-ES
11-400-00
11-MAN-02
11-501-00
11-503-00
90-029-16
90-042-06
90-501-01
90-501-42
90-501-43
90-501-49
78
Qty. Description
1
1
1
1
1
1
1
1
1
1
1
1
1
2
1
7
1
1
1
4
2
Gfi, 240v
Breaker, 4 Amp
Label, Gfi Reset
Bushing
Gear, Planetary
Plate, Blanking
Plate, Blanking
Relief, Strain
Plate, Blanking
Gasket
220v Assy, Eibenstock
Case, Storage NOT SHOWN
Manual NOT SHOWN
Brush, Eibenstock 16/2 R/L NOT SHOWN
Switch, Gear
LHCS, 8-32 X 1
BHCS, 10-32 X 3/8 NOT SHOWN
Terminal, Ring #10 18-14GA NOT SHOWN
Terminal, Bullet-M 16GA NOT SHOWN
TERMINAL, BULLET-F 16GA NOT SHOWN
Terminal, Flag 1/4 16-14 GA INSULATI NOT SHOWN
Part No. 11-MAN-02, Rev. 1-0611
E.H. Wachs
WAVE™ Handheld Valve Exerciser User’s Manual
E.H. Wachs
Part No. 11-MAN-02, Rev. 1-0611
Chapter 8: Parts Lists and Drawings
79
Chapter 8: Parts Lists and Drawings
WAVE™ Handheld Valve Exerciser User’s Manual
11-196-00
11-135-00
11-214-00
11-066-00
11-219-00
90-901-18
90-042-06
11-123-00
11-132-00
11-124-00
11-047-00
11-194-01
11-134-00
11-054-00
HANDLE, ELECTRIC - ASSEMBLY (11-194-00)
Part No.
11-047-00
11-054-00
11-066-00
11-123-00
11-124-00
11-132-00
11-134-00
11-135-00
11-194-01
11-196-00
11-214-00
11-219-00
90-042-06
90-501-01
90-501-04
90-501-14
90-501-17
90-501-19
90-501-42
90-501-49
90-501-50
90-901-18
80
Qty. Description
1
1
35"
1
1
6
1
1
1
1
1
2
2
3
1
1
1
1
3
1
1
20"
Grommet, 7/16 ID x 9/16 Grip OD x 1/8 Grip Thk
Grip, Rubber
WIRE, BELL 3-WIRE
Housing, Switch
Switch, Modified
Terminal, End
Plug, #4 Rubber
Plug, #6 Rubber
Weldment, Switch Handle - DT
Cover, Strain Gages
Grommet, 3/16 IDx 5/16 Grip OD x 1/8 Grip Thk
Strain Gauge
BHCS, 10-32 X 3/8
TERMINAL, RING #10 16-14GA NOT SHOWN
TERMINAL, Closed End 16-20 GA Insulated NOT SHOWN
TERMINAL, RING 1/4 YEL NOT SHOWN
TERMINAL, Spade .250 Female 2-10 GA Insulated NOT SHOWN
TERMINAL, Flag .250 12-10 Insulated NOT SHOWN
TERMINAL, BULLET-M 16GA NOT SHOWN
TERMINAL, FLAG 1/4 16-14 GA INSULATED NOT SHOWN
TERMINAL, SPADE 1/4" MALE 16 AWG INSULATED NOT SHOWN
Wire, 16 GA 10 Cond. Cable
Part No. 11-MAN-02, Rev. 1-0611
E.H. Wachs
WAVE™ Handheld Valve Exerciser User’s Manual
E.H. Wachs
Part No. 11-MAN-02, Rev. 1-0611
Chapter 8: Parts Lists and Drawings
81
Chapter 8: Parts Lists and Drawings
WAVE™ Handheld Valve Exerciser User’s Manual
11-189-10
11-191-00
90-112-01
11-223-00
11-212-00
11-213-00
90-002-24
90-050-05
90-120-07
11-225-00
11-193-00
90-050-07
11-190-00
VITALS READY - (ELECTRIC)
Part No.
11-100-00
11-101-00
11-153-00
11-189-10
11-190-00
11-191-00
11-192-00
11-193-00
11-212-00
11-213-00
11-220-00
11-221-00
11-222-00
11-223-00
11-224-00
11-225-00
90-002-24
90-050-05
90-050-07
90-112-01
90-120-05
90-120-07
90-501-36
90-901-12
90-901-21
90-901-22
90-901-23
82
90-120-05
Qty. Description
1
1
1
1
1
1
1
1
1
1
2
1
15
3
1
1
3
2
2
9
2
1
2
4"
4"
4"
4"
Holder, Fuse NOT SHOWN
Fuse, 1/2 AMP NOT SHOWN
CPU, P2 VITALS NOT SHOWN
Keypad, P2-DT
Housing, Controller
Cover, Top
Plate, Cover
Bracket
Board, Round Control
Display Assembly
Connector, 6 Plc NOT SHOWN
Connector, 3 plc NOT SHOWN
Terminal NOT SHOWN
Stand Off
Relay
Transformer
PHMS, 6-32 x 7/16 - Phillips
SHCS, 1/4-20 X 1/2
SHCS, 1/4-20 X 3/4
BHCS, 6-32 x 5/8 - SS
SHCS, 8-32 X 1/2 - SS
SHCS, 8-32 X 3/4 - SS
Terminal, Buttsplice 16-14 GA NOT SHOWN
Wire, 22 GA Red NOT SHOWN
Wire, 22 GA Black NOT SHOWN
Wire, 22 GA White NOT SHOWN
Wire, 22 GA Yellow NOT SHOWN
Part No. 11-MAN-02, Rev. 1-0611
11-224-00
11-192-00
E.H. Wachs
WAVE™ Handheld Valve Exerciser User’s Manual
Chapter 8: Parts Lists and Drawings
HYDRAULIC ASSEMBLY DRAWINGS
VITALS READY (AIR/HYD)
11-215-00
11-195-00
90-050-05
11-198-00
11-202-00
MAIN HEAD ASSY
11-103-00
11-207-00
90-029-16
90-050-05
90-050-08
90-050-57
11-108-00
90-050-62
11-071-00
11-092-00
11-302-00
Wave Handheld Hyd (11-000-14)
Part No.
11-071-00
11-092-00
11-103-00
11-108-00
11-195-00
11-198-00
11-207-00
11-215-00
11-302-00
11-400-00
11-MAN-02
90-029-16
90-050-05
E.H. Wachs
Qty. Description
1
1
1
1
1
1
1
1
1
1
1
7
3
Adaptor, Hyd. Motor
Motor
Gear, Planetary
Coupler, Hyd. Motor
Plate, Blanking
Plate, Base (Hyd)
Battery Assembly
Gasket
Manifold Assembly
Case, Storage NOT SHOWN
Manual NOT SHOWN
LHCS, 8-32 X 1
SHCS, 1/4-20 X 1/2
90-050-08
1
SHCS,
90-050-57
90-050-62
1
5
SHCS, 1/4-28 X 3/4
SHCS, 1/4-28 X 1-1/4
Part No. 11-MAN-02, Rev. 1-0611
83
Chapter 8: Parts Lists and Drawings
WAVE™ Handheld Valve Exerciser User’s Manual
90-061-16
05-151-00
11-110-00
90-075-65
11-089-00
11-088-00
90-060-10
05-116-00
11-141-00
90-028-01
11-142-00
90-178-01
MANIFOLD ASSEMBLY 11-302-00
Part No.
05-116-00
05-151-00
11-088-00
11-089-00
11-110-00
11-141-00
11-142-00
90-028-01
90-060-10
90-061-16
90-075-65
90-178-01
84
Qty. Description
1
1
2
1
1
1
1
6
3
4
1
2
Relief Valve
Reversing_valve
Hose, Hydraulic
Handle, Tapered
Gauge, Torque (Replaces P/N 05-115-00)
Manifold
Regulator, Priority Flow
SPP, 1/8 X 1/4 DRYSEAL
SHCS, 5/16-18 X 1
HHCS 5/16-18 X 1-3/4
SSS, 3/8-16 X 1-1/2
ADAPTER, 3/8 NPT F X 3/8 NPT M HP - 45
Part No. 11-MAN-02, Rev. 1-0611
E.H. Wachs
WAVE™ Handheld Valve Exerciser User’s Manual
Chapter 8: Parts Lists and Drawings
(Note that the same handle assembly is used for both hydraulic and pneumatic systems.)
E.H. Wachs
Part No. 11-MAN-02, Rev. 1-0611
85
Chapter 8: Parts Lists and Drawings
WAVE™ Handheld Valve Exerciser User’s Manual
11-135-00
11-196-00
11-214-00
11-066-00
11-202-01
11-219-00
11-206-00
11-205-00
11-209-00
11-217-00
11-216-00
60-151-00
11-204-00
11-209-00
11-208-00
90-029-02
11-203-00
HANDLE, AIR-HYD ASSEMBLY (11-202-00)
Part No. Qty. Description
11-066-00
11-135-00
11-196-00
11-202-01
11-203-00
11-204-00
11-205-00
11-206-00
11-208-00
11-209-00
11-214-00
11-216-00
11-217-00
11-218-00
11-219-00
21-025-01
21-025-02
60-151-00
90-029-02
90-901-12
90-901-21
90-901-23
86
35"
1
1
1
1
1
1
1
1
2
1
1
1
2
2
4
2
1
1
32"
32"
32"
Wire, Bell 3-Wire
Plug, #6 Rubber
Cover, Strain Gages
Handle, Hyd, Air - DT
Cap, Handle
Panel, Connector
Spacer
Stop, Bulkhead
O-Ring (-023)
Ring, Snap
Grommet, 3/16 IDx 5/16 Grip OD x 1/8 Grip Thk
Connector, DIN 3 Pin
Molex Shell
Molex Terminal NOT SHOWN
Strain Gauge
Cable, .034 Od Nylon NOT SHOWN
Cable Loop Sleeve NOT SHOWN
Washer, Spring
PHMS, Type 25 Phillips
Wire, 22 GA Red NOT SHOWN
Wire, 22 GA Black NOT SHOWN
Wire, 22 GA Yellow NOT SHOWN
Part No. 11-MAN-02, Rev. 1-0611
E.H. Wachs
WAVE™ Handheld Valve Exerciser User’s Manual
Chapter 8: Parts Lists and Drawings
(Note that the same control unit assembly is used for both hydraulic and pneumatic systems.)
90-112-01
11-189-10
11-191-00
11-213-00
11-223-00
11-212-00
11-210-00
90-002-24
11-197-00
11-211-00
VITALS READY (AIR/HYD)
Part No.
11-153-00
11-189-10
11-191-00
11-197-00
11-198-00
11-199-00
11-210-00
11-211-00
11-212-00
11-213-00
11-220-00
11-222-00
11-223-00
90-002-24
90-112-01
E.H. Wachs
Qty. Description
1
1
1
1
1
1
1
1
1
1
2
12
3
3
8
11-198-00 (HYD)
CPU, P2 VITALS NOT SHOWN
Keypad, P2-DT
Cover, Top
Housing, Controller (Air/Hyd)
Plate, Base (HYD)
Plate, Base (AIR)
Switch
Boot
Board, Round Control
Display Assem bly
Connector, 6 Plc NOT SHOWN
Terminal NOT SHOWN
Stand Off
PHMS, 6-32 x 7/16 - Phillips
BHCS, 6-32 x 5/8 - SS
Part No. 11-MAN-02, Rev. 1-0611
11-199-00 (AIR)
87
Chapter 8: Parts Lists and Drawings
WAVE™ Handheld Valve Exerciser User’s Manual
PNEUMATIC ASSEMBLY DRAWINGS
11-215-00
11-195-00
VITALS READY (AIR/HYD)
90-060-22
90-050-15
11-200-00
11-199-00
11-202-01
11-207-00
MAIN HEAD ASSY
90-050-10
11-201-00
90-050-15
11-107-00
11-095-00
90-060-10
11-096-00
11-093-02
11-094-00
11-137-00
11-093-01
90-098-62
WAVE HANDHELD AIR (11-000-13)
Part No.
11-199-00
11-200-00
11-201-00
11-093-01
11-093-02
11-094-00
11-095-00
11-096-00
11-107-00
11-137-00
11-195-00
11-207-00
11-215-00
11-400-00
11-MAN-02
90-050-10
90-050-15
90-060-22
90-060-10
90-098-62
88
Qty. Description
1
2
1
1
1
1
1
1
1
1
1
1
1
1
1
1
3
8
6
1
Plate, Base (Air)
Spacer, Handle - DT Air
Guard, Finger - DT Air
Regulator*
Gauge,1.5"X1/8"Pipe
Label,Gauge Overlay
Adapter, Motor
Motor, Pneumatic
Coupler
Nipple
Plate, Blanking
Assembly, Battery
Gasket
Case, Storage NOT SHOWN
Manual NOT SHOWN
SHCS, 1/4-20 X 1
SHCS, 1/4-20 X 1-1/2
SHCS, 5/16-18 X 2-1/4
SHCS, 5/16-18 X 1
ADAPTER, 1/2 NPT M X 1/2 NPT F - 45
Part No. 11-MAN-02, Rev. 1-0611
E.H. Wachs
WAVE™ Handheld Valve Exerciser User’s Manual
Chapter 8: Parts Lists and Drawings
(Note that the same handle assembly is used for both hydraulic and pneumatic systems.)
11-135-00
11-196-00
11-214-00
11-066-00
11-202-01
11-219-00
11-206-00
11-205-00
11-209-00
11-217-00
11-216-00
60-151-00
11-204-00
11-209-00
11-208-00
90-029-02
11-203-00
HANDLE, AIR-HYD ASSEMBLY (11-202-00)
Part No. Qty. Description
11-066-00
11-135-00
11-196-00
11-202-01
11-203-00
11-204-00
11-205-00
11-206-00
11-208-00
11-209-00
11-214-00
11-216-00
11-217-00
11-218-00
11-219-00
21-025-01
21-025-02
60-151-00
90-029-02
90-901-12
90-901-21
90-901-23
E.H. Wachs
35"
1
1
1
1
1
1
1
1
2
1
1
1
2
2
4
2
1
1
32"
32"
32"
Wire, Bell 3-Wire
Plug, #6 Rubber
Cover, Strain Gages
Handle, Hyd, Air - DT
Cap, Handle
Panel, Connector
Spacer
Stop, Bulkhead
O-Ring (-023)
Ring, Snap
Grommet, 3/16 IDx 5/16 Grip OD x 1/8 Grip Thk
Connector, DIN 3 Pin
Molex Shell
Molex Terminal NOT SHOWN
Strain Gauge
Cable, .034 Od Nylon NOT SHOWN
Cable Loop Sleeve NOT SHOWN
Washer, Spring
PHMS, Type 25 Phillips
Wire, 22 GA Red NOT SHOWN
Wire, 22 GA Black NOT SHOWN
Wire, 22 GA Yellow NOT SHOWN
Part No. 11-MAN-02, Rev. 1-0611
89
Chapter 8: Parts Lists and Drawings
WAVE™ Handheld Valve Exerciser User’s Manual
(Note that the same control unit assembly is used for both hydraulic and pneumatic systems.)
90
Part No. 11-MAN-02, Rev. 1-0611
E.H. Wachs
WAVE™ Handheld Valve Exerciser User’s Manual
Chapter 8: Parts Lists and Drawings
90-112-01
11-189-10
11-191-00
11-213-00
11-223-00
11-212-00
11-210-00
90-002-24
11-197-00
11-211-00
VITALS READY (AIR/HYD)
Part No.
11-153-00
11-189-10
11-191-00
11-197-00
11-198-00
11-199-00
11-210-00
11-211-00
11-212-00
11-213-00
11-220-00
11-222-00
11-223-00
90-002-24
90-112-01
E.H. Wachs
Qty. Description
1
1
1
1
1
1
1
1
1
1
2
12
3
3
8
11-198-00 (HYD)
CPU, P2 VITALS NOT SHOWN
Keypad, P2-DT
Cover, Top
Housing, Controller (Air/Hyd)
Plate, Base (HYD)
Plate, Base (AIR)
Switch
Boot
Board, Round Control
Display Assem bly
Connector, 6 Plc NOT SHOWN
Terminal NOT SHOWN
Stand Off
PHMS, 6-32 x 7/16 - Phillips
BHCS, 6-32 x 5/8 - SS
Part No. 11-MAN-02, Rev. 1-0611
11-199-00 (AIR)
91
Chapter 8: Parts Lists and Drawings
WAVE™ Handheld Valve Exerciser User’s Manual
COMMON ASSEMBLIES
90-050-10
90-001-06
11-027-00
11-144-00
90-050-12
11-009-00
56-035-00
11-068-00
11-026-00
11-072-00
11-026-00
90-060-20
11-030-00
11-029-00
11-194-20
90-071-10
11-064-00
90-056-05
11-006-00
11-118-00
11-149-00
90-046-05
11-145-00
90-006-54
11-146-00
90-005-01
90-046-10
11-147-00
11-015-01
90-008-01
90-024-02
11-007-00
90-056-05
90-028-01
05-014-00
11-022-00
MAIN HEAD ASSEMBLY
PART NO.
92
QTY.
PART DESCRIPTION
05-014-00
11-005-00
11-006-00
11-007-00
11-009-00
11-015-01
11-019-00
11-020-00
11-021-00
11-022-00
11-023-00
11-024-00
11-026-00
11-027-00
11-029-00
11-030-00
11-064-00
11-068-00
11-072-00
11-074-00
11-118-00
11-144-00
11-145-00
11-146-00
11-147-00
11-149-00
56-035-00
90-001-06
90-005-01
90-006-54
2
1
1
1
1
1
1
1
1
2
1
1
2
2
2
2
1
1
1
1
1
1
2
1
1
1
1
1
1
2
SEAL
GEAR, WORM
SHAFT, WORM
HOUSING
CAP, BRG.RETAINER
WASHER, SPUR GEAR
BLOCK, MOTOR MOUNT
BEARING, WORM SHAFT
CAP, WORM GEAR BRG.
BEARING
O-RING
RING, SNAP
BEARING
SEAL
CLAMP, LOWER
CLAMP, TOP
PLATE, HANDLE
WASHER, LOCK
SHIM, BEARING
SEAL, DRIVE ADAPTOR
HANDLE, TAPERED
GASKET
SENSOR, POSITION
CLIP, SENSOR RETAINER
GEAR, COUNTER
COVER, COUNTER SENSR
LOCKNUT, BEARING
SHCS, 6-32 THD X 5/8” LNG.
NUT, 6-32 HEX
PIN, 5/64 DIA. X 7/16” LNG ROLL
90-008-01
90-024-02
90-028-01
90-046-05
1
2
2
2
SPP, 1/16-27 Dryseal
SSS, 8-32 X 14
SPP, 1/8 X 1/4 DRYSEAL
PIN, 3/16 DIA X 1/2 LNG DOWEL
11-005-00
11-020-00
11-022-00
11-024-00
11-019-00
90-070-17
11-074-00
11-023-00
11-021-00
90-060-15
90-050-06
05-014-00
PART NO.
QTY. DESCRIPTION
90-046-10
90-050-06
90-050-10
90-050-12
90-056-05
90-060-15
90-060-20
90-070-17
90-071-10
90-194-20
1
8
4
6
6
4
8
1
1
1
PART NO.
QTY.
11-070-00
90-501-36
90-900-01
1
1
1
6"
.5"
.5"
PIN, 3/16 DIA X 1” LNG DOWEL
SHCS, 1/4-20 THD. X 5/8” LNG.
SHCS, 1/4-20 THD. X 1" LNG.
SHCS, 1/4-20 THD. X 1-1/4” LNG.
PIN, 1/4 DIA. X 1/2" LNG. DOWEL
SHCS, 5/16-18 THD. X 1-1/2” LNG.
SHCS, 5/16-18 THD. X 2” LNG.
SHCS, 3/8-16 THD. X 1 3/4" LNG.
HHCS, 3/8-16 THD. X 1” LNG.
SSS, 1/2-13 THD. X 2” LNG.
NOT SHOWN
90-901-13
90-901-14
90-901-15
PART DESCRIPTION
LABEL, OPERATOR POS.
BUTTSPLICE 16-14 GA, TERMINAL
LABEL, MAUNUAL INSTR.
WIRE, 24 GAUGE, BLACK
SHRINK-TUBING, BLUE
SHRINK-TUBING, RED
Part No. 11-MAN-02, Rev. 1-0611
E.H. Wachs
WAVE™ Handheld Valve Exerciser User’s Manual
Chapter 8: Parts Lists and Drawings
11-054-00
11-044-00
90-042-02
62-121-00
11-045-00
HANDLE EXTNSN ASSY (11-303-00)
Part No.
11-044-00
11-045-00
11-054-00
62-121-00
90-042-02
E.H. Wachs
Qty. Description
1
1
1
1
1
Assy, Handle EXT
Pin, Quick 3/8 X 1-1/2
Grip, Rubber
Lanyard 6"Lg
BHCS, 10-32 X 1/4
Part No. 11-MAN-02, Rev. 1-0611
93
Chapter 8: Parts Lists and Drawings
94
WAVE™ Handheld Valve Exerciser User’s Manual
Part No. 11-MAN-02, Rev. 1-0611
E.H. Wachs
WAVE™ Handheld Valve Exerciser User’s Manual
Chapter 8: Parts Lists and Drawings
05-035-00
05-034-00
11-037-00
05-036-00
90-078-75
8' VALVE KEY (05-402-00)
Part No.
05-034-00
05-035-00
05-036-00
05-037-00
90-076-75
E.H. Wachs
Qty. Description
1
1
1
1
1
Stop Collar
Locking Screw
Socket 2" Opening
Key, 1" Square - 8 Feet Long
PIN, ROLL 3/8 X 2-1/2
Part No. 11-MAN-02, Rev. 1-0611
95
Chapter 8: Parts Lists and Drawings
WAVE™ Handheld Valve Exerciser User’s Manual
05-035-00
05-034-00
05-081-00
4' KEY EXTENSION (05-403-00)
Part No.
05-034-00
05-035-00
05-081-00
96
Qty. Description
1
2
1
Stop Collar
Locking Screw
4 Ft. X 1" Key Coupling
Part No. 11-MAN-02, Rev. 1-0611
E.H. Wachs
WAVE™ Handheld Valve Exerciser User’s Manual
E.H. Wachs
Part No. 11-MAN-02, Rev. 1-0611
Chapter 8: Parts Lists and Drawings
97
Chapter 8: Parts Lists and Drawings
WAVE™ Handheld Valve Exerciser User’s Manual
90-099-35
90-075-01
09-037-01
11-151-00
09-038-01
09-038-02
09-038-03
90-073-12
UNIV HANDWHEEL ADAPTER (11-401-00)
Part No.
09-037-01
09-038-01
09-038-02
09-038-03
11-151-00
90-073-12
90-075-01
90-099-35
98
Qty. Description
3
3
3
3
1
3
3
3
Clamp, Straddle - Large
Torque Arm - Short
Torque Arm - Medium
Torque Arm - Long
Adapter, Univ Hndwhl
FHCS, 3/8-16 X 1-1/4
NUT, 3/8-16 HEX
SSS, 1/2-13 X 3-1/2 CP.PT
Part No. 11-MAN-02, Rev. 1-0611
E.H. Wachs
WAVE™ Handheld Valve Exerciser User’s Manual
Chapter 8: Parts Lists and Drawings
11-057-00
11-056-00
11-308-00
CHARGING KIT (11-406-00)
Part No.
11-056-00
11-057-00
11-308-00
E.H. Wachs
Qty. Description
1
1
1
Adaptor, AC power for Charger
Cable, Vehicle Accessory for Charger
Charger, P2-DT (Air, Hyd)
Part No. 11-MAN-02, Rev. 1-0611
99
Chapter 8: Parts Lists and Drawings
100
WAVE™ Handheld Valve Exerciser User’s Manual
Part No. 11-MAN-02, Rev. 1-0611
E.H. Wachs
WAVE™ Handheld Valve Exerciser User’s Manual
Chapter 9: Accessories
Chapter 9
Accessories
Table 1 lists accessories available for the WAVE™ handheld valve exerciser.
Part No.
Description
05-402-00
4’ Valve key extension assembly (includes stop collar)
05-403-00
8’ Valve key assembly (includes 2” socket and stop collar)
07-408-00
2” square AWWA standard ductile iron socket
05-034-00
Stop collar
17-304-01
VITALS™ data logger/controller for capturing and entering valve information
Table 1: Accessories for WAVE™ Handheld Valve Exerciser
E.H. Wachs
Part No. 11-MAN-02, Rev. 1-0611
101
Chapter 9: Accessories
WAVE™ Handheld Valve Exerciser User’s Manual
Part No.
Description
17-227-00
VITALS™ 110/220 V charger and data transfer cable with
transfer program and download access code
17-409-00
VITALS™ 2.0 valve performance analysis software for
Windows
11-406-00
Charger kit for WAVE™ control unit battery (includes AC
and 12 V DC chargers)
17-228-00
Cigarette lighter adapter to charge/power VITALS™ data
tracking and logging controller during independent use
17-234-00
GPS receiver interface cable
11-401-00
Universal Valve Handwheel Adapter
Table 1: Accessories for WAVE™ Handheld Valve Exerciser
102
Part No. 11-MAN-02, Rev. 1-0611
E.H. Wachs
WAVE™ Handheld Valve Exerciser User’s Manual
Chapter 10: Ordering Information
Chapter 10
Ordering Information
To place an order, request service, or get more detailed
information on any E.H. Wachs Company products, call us
at one of the following numbers:
In This Chapter
REPLACEMENT PARTS
REPAIR INFORMATION
U.S.
800-323-8185
WARRANTY INFORMATION
International: 847-537-8800
RETURN GOODS ADDRESS
ORDERING REPLACEMENT PARTS
When ordering parts, refer to the parts lists in Chapter 8.
Please provide the part description and part number for all
parts you are ordering.
REPAIR INFORMATION
Please call us for an authorization number before returning
any equipment for repair or factory service. We will advise
you of shipping and handling. When you send the equipment, please include the following information:
•
•
•
•
Your name/company name
Your address
Your phone number
A description of the problem or the work to be done.
E.H. Wachs
Part No. 11-MAN-02, Rev. 1-0611
103
Chapter 10: Ordering Information
WAVE™ Handheld Valve Exerciser User’s Manual
Before we perform any repair, we will estimate the work
and inform you of the cost and the time required to complete it.
WARRANTY INFORMATION
Enclosed with the manual is a warranty card. Please fill out
the registration card and return to E.H. Wachs Company.
Retain the owner’s registration record and warranty card for
your information.
RETURN GOODS ADDRESS
Return equipment for repair to the following address.
E.H. Wachs
600 Knightsbridge Parkway
Lincolnshire, Illinois 60069 USA
104
Part No. 11-MAN-02, Rev. 1-0611
E.H. Wachs
600 Knightsbridge Parkway • Lincolnshire, IL 60069
847-537-8800 • www.ehwachs.com