1
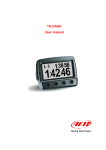
MyChron3 Dash
User Manual
INDEX
Chapter 1 – The dash......................................................................................................... 3 1.1 – Part number ........................................................................................................................................ 3 Chapter 2 – MyChron3 Dash connection scheme ........................................................... 4 Chapter 3 – Menu functions .............................................................................................. 5 Chapter 4 – Data visualization while running .................................................................. 7 4.1 – EVO3 Pro and EVO3 Pista ................................................................................................................. 7 4.2 – EVO4 and EVO3 Pro/Pista with GPS expansion ............................................................................. 8 4.2.1 – GPS Signal and split times setting (EVO4, EVO3 Pro/Pista with external GPS) ......................... 9 Chapter 5 – Data recall .................................................................................................... 11 5.1 – Key functions in data recall ............................................................................................................ 11 Chapter 6 – MyChron3 Dash configuration ................................................................... 12 Appendix – Connection cable ......................................................................................... 13 MyChron3 Dash
User Manual
Release 1.01
0
Chapter 1 – The dash
MyChron3 Dash is the perfect replacement of the stock dash and allows to show and
customize EVO3 Pro, EVO3 Pista and EVO4 channels with RPM, speed, engaged gear,
temperatures, oil pressure, lap time, alarms, etc…, as well as all signals coming from the
vehicle ECU.
MyChron3 Dash allows to show:
•
•
•
•
•
•
•
•
•
7
speed;
RPM (digital value and graph bar);
shift lights;
up to 4 configurable channels;
channel alarm led;
lap time;
split time;
best lap;
GPS signal status (if present).
1.1 – Part number
MyChron3 Dash part number is:
X30VDAM01
www.am-sportline.com
3
MyChron3 Dash
User Manual
Release 1.01
1
Chapter 2 – MyChron3 Dash connection scheme
To connect MyChron3 Dash to AIM loggers just plug the dash cable in the logger
connector labelled “Exp.”
Warning: when connecting the Dash to the logger both devices must be OFF.
To connect other expansions additional to MyChron3 Dash an optional Data Hub is
needed as shown here below.
www.am-sportline.com
4
MyChron3 Dash
User Manual
Release 1.01
2
Chapter 3 – Menu functions
MyChron3 Dash menu functions are only accessible when the dash is not recording.
Warning: functionalities described in this tutorial have been implemented from
firmware version 15.15 onward.
To enter the menu press “MENU/<<” button.
The display shows some pages: here they are shown in the same order as they appear:
Night Vision (ON/OFF)
Switches on/off the display backlight; if
EVO is sampling data it is possible to
switch on/off the backlight pressing
“MENU/<<” button.
Start Gear Calc
This screen only appears if calculated
gears have been set on the master logger
and restarts that computation on the
master.
Pressing “MEM/OK” the message “Gear
Calc Cleared” appears: the dash erases
the previous computation; then “Start
Gear Calc” appears again. Starting the
vehicle the computation start.
Total Running
Allows to see the total sampling time.
The page shows total sampling time of the
logger in minutes and hours – non
resettable on bottom (2.38 that is 2 hours
38 minutes) and partial one – resettable
on top (10 minutes); it is possible to erase
data pressing twice “MEM/OK” button
Odometer
Allows to show run kilometres.
The pages shows total run kilometres from
the first acquisition (non resettable – 147)
and partial run kilometres (since last reset
– 15).
To erase partial kilometres it is necessary
to erase partial run kilometres in TOTAL
RUNNING page
www.am-sportline.com
5
MyChron3 Dash
User Manual
Release 1.01
Firmware Version
Allows to have information concerning
firmware version (1) and logger serial
number (2)
www.am-sportline.com
6
MyChron3 Dash
User Manual
Release 1.01
3
Chapter 4 – Data visualization while running
MyChron3 Dash shows data sampled by the logger instantaneously and very easily.
According to the model of EVO and to the connected expansions refer to the following
paragraphs.
8
4.1 – EVO3 Pro and EVO3 Pista
The main window shows:
RPM graph bar (1)
Three fields set by default (2) and shown in sequence pressing “VIEW”:
•
•
•
Speed (226 Km/h in the above figure).
Best lap time;
Digital RPM value;
Four configurable fields (3) visible two by two (on the first and on the second page). To
switch from first page to second one press “>>”.
In the above figure the shown channel is a temperature and T (field T1) appears beside
the channel value. In case the channel shown is a pressure P (field P1) appears beside
the channel value; in case other kind of channels are sampled the display shows only a
numeric identifier.
Lap/split times (4)
www.am-sportline.com
7
MyChron3 Dash
User Manual
Release 1.01
10
4.2 – EVO4 and EVO3 Pro/Pista with GPS expansion
The images below show on the left the display main page in recording mode and on the
right GPS diagnostic page reached using “VIEW” button:
RPM graph bar (1);
Five fields set by default (2) and visible in sequence:
•
•
•
•
•
Digital RPM value
Best lap time
Speed (226 Km/h in the above figure)
GPS Signal status
Lap and split settings
Four configurable fields (3) visible two by two (on the first and on the second page). To
switch from the first page to the second one press “>>” button.
In the above figure the shown channel is a temperature and T (field T1) appears beside
the channel value. In case the channel shown is a pressure letter P (field P1) appears
beside the channel value; in case other kind of channels are sampled the display shows
only a numeric identifier.
Lap/split time (4);
GPS signal status (5);
www.am-sportline.com
8
MyChron3 Dash
User Manual
Release 1.01
11
4.2.1 – GPS Signal and split times setting (EVO4, EVO3 Pro/Pista with external GPS)
GPS lap timer allows to record lap/split times with no need of transmitter/receiver.
It is possible to set lap and split directly through the logger (EVO4, EVO3 Pro/Pista with
external GPS 1 )following the procedure explained in these pages.
Warning: setting “Use GPS Lap timer” in system configuration layer of Race Studio
Configuration – as shown here below – the logger will automatically sample lap and
split time using only the GPS lap timer and the optical receiver, also if connected, is
disabled. The below image shows EVO4 System configuration layer.
To set Lap and Split times using the GPS Laptimer:
•
set GPS lap timer in Race Studio 2 and transmit the configuration to the logger
(see Race Studio Configuration user manual for further information on AIM
loggers configuration).
1
External GPS is to be connected and EVO3 Pro/Pista configuration must include an external GPS Module
as CAN expansion. See Race Studio Configuration user manual for further information about how to
configure AIM loggers and how to configure CAN expansions.
www.am-sportline.com
9
MyChron3 Dash
User Manual
Release 1.01
•
press “VIEW” on MyChron3 Dash until “OK SET GPS MARKER” appears (see
below).
OK SET GPS MARKER
Press “MEM/OK” button to start lap/split
setting procedure.
•
Enter the track with the vehicle and choose the physical points where to record
laps and splits and follow this procedure.
OK TO SET SPLIT 1
This page appears only in case splits have
been set in configuration and appears as
many time as many split have been set.
Press “MEM/OK” on MyChron3 Dash in
the point where the split is to be fixed.
OK TO SET LAP
Press “MEM/OK” button in correspondence
of the point where the lap marker is to be
set.
GPS MARKER END
This page means GPS lap timer setting is
over and it appears only if the setting
procedure has been successful.
GPS ERROR
In case during GPS Lap timer setting there
is a lack of satellite signal for any reason,
the display shows GPS ERROR and the
procedure is to be repeated.
www.am-sportline.com
10
MyChron3 Dash
User Manual
Release 1.01
4
Chapter 5 – Data recall
When the session is over it is possible to recall stored data pressing “MEM/OK”.
The display shows, under the RPM Bar graph, test and lap number the data showed in the
other fields refer to: in the above image: “TEST 02 – LAP 001”.
First shown page is best lap of the last test.
Bottom right box shows lap time of each lap of all sessions.
Best lap time of each session blinks.
9
5.1 – Key functions in data recall
“MEM/OK” enters data recall.
•
•
“>>”, “MENU/<<” scroll between all test laps of the session.
“VIEW” shows max RPM digital value and max speed value of the shown lap.
Pages are shown in loop, to say in circular sequence.
•
“MEM” shows max and min values of the selected lap for all channels shown by
Mychron3 Dash.
NOTE: transmitting a new configuration to the logger all recorded data are deleted.
www.am-sportline.com
11
MyChron3 Dash
User Manual
Release 1.01
5
Chapter 6 – MyChron3 Dash configuration
To configure MyChron3 Dash:
•
•
•
run Race Studio 2 software.
select the logger MyChron3 Dash is connected to pressing the corresponding
button on the software left vertical keyboard.
activate “display” layer and this window appears:
•
click on “Available displays” drop down menu and select M3-Dash.
The configuration window shown here below appears:
This window sets:
•
•
Shift lights values.
Channels and alarm 1 and 2 of pages 1 and 2; this means that it is possible to set
the four channels displayed (two by two) by MyChron3 Dash and link their Max
and Min threshold values (Max/Min cases) to two led that switches on when these
threshold values are reached.
Please note: “RPM scale”, “Split Number” and “Speed” setting (shown in data
visualization), is made through “System Configuration” layer.
www.am-sportline.com
12
MyChron3 Dash
User Manual
Release 1.01
6
N.rev
Appendix – Connection cable
Nota sulla revisione
Data
Firma
Controllo
MyChron 3 Dash cable for DaVid Stand Alone, EVO3 Pro/Pista, EVO4
1
Hirose - 12 pins
female connector
12
Binder 712 - 5 pins
male connector
Cable connection on Binder connector
5
1
2
4
3
Binder 712 - 5 pins
male connector
Solder termination view
Rif.
Quantità
Progettato da
1
2
3
4
5
WHITE
CAN 0+
BROWN
GND
YELLOW
+Vb
GREEN
CAN 0-
12
n.c.
Hirose - 12 pins
female connector pinout
top view
Titolo/Nome, materiale
Controllato da
1
9
12
10
8
N. articolo/Riferimento
Approvato da - Data
Nome file
Data
Scala
20/04/2005
Titolo / Nome
Cavo MyChron3 Dash per DaVid Stand Alone, EVO3 Pro/Pista, EVO4
Numero disegno
Modifica
04.555.08
Racing Data Power
www.am-sportline.com
Foglio
1 of 1
13