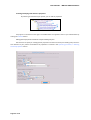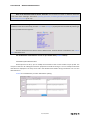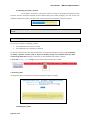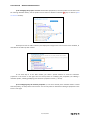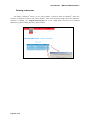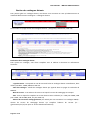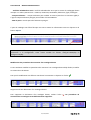
1
User Manual – MDweb administration Version Comments 1 2 2.1 Author : Jean Christophe Desconnets ([email protected]) Date of creation : 01/03/2006 Author : Jean Christophe Desconnets ([email protected]) Translation : Kim Agrawal ([email protected]) Modified at : 03/07/2008 11:00:00 Comments on modification content : english screen shot entry Author : Jean Christophe Desconnets ([email protected]) Modified at : 03/07/2008 11:00:00 Comments on modification content : adding the content of different technical notes for customazing MDweb Montpellier January 2008 User Manual - MDweb Administration Introduction to MDweb administration .................................................................................................. 2 Configuring MDweb ................................................................................................................................ 3 Managing users ....................................................................................................................................... 8 Managing text labels ............................................................................................................................. 11 Creating or modifying a catalog ............................................................................................................ 15 Managing a metadata profile ................................................................................................................ 18 Managing a thesaurus ........................................................................................................................... 40 Adding external catalogs ....................................................................................................................... 51 Managing a geographic database ......................................................................................................... 59 Editing Map client.................................................................................................................................. 69 Introduction to MDweb administration Our tool includes a module called ‘Administration module’ which is only available to those users having the role of administrator (see Concepts of roles and associated functionalities). The administration module offers a set of sub‐modules for the tool’s administration (configuration, user management, customization of pages and text labels), for managing databases used by MDweb – metadata bases (definition of templates), spatial databases (for the cartographic client) and thesauri (entry of and search by keywords) – as well as for configuring the cartographic client. To be able to do this, the administrator is given special privileges under MDweb because he can read/write all the references of other users as well as modify contacts, predefined values and keywords defined by each user, within a framework of maintenance and consistency of catalogs. This section of the user manual covers all the features available in the administration module. Accessing the administration module After logging in as administrator, click on Administration. This menu item appears only if you are logged in as administrator. Page 2 of 76 User Manual - MDweb Administration Configuring MDweb Menu > Options MDweb is configured using a sub‐module. The administrator can: • Modify the rule for validating metadata records • Add or delete a language • Manage contacts and predefined values of the users 1‐ Modifying the rule for validating metadata records The MDweb administrator can choose one of two rules for validating metadata records in catalogs: • Manual • Automatic Manual validation rule: With the first rule selected, before a record can be published, i.e., become accessible to users via the search form (search module), it should first be validated by a user with suitable rights, either an administrator or a validator. Until this is done, the record is not published. Automatic validation rule: With this second option selected, a record becomes automatically accessible from the search form as soon as it is created and entered. Naturally, we recommend that the manual validation rule be selected. Description of the procedure 1 – Go to Menu > Options > Publication rule. 2 – Click the Modify button to toggle between Automatic and Manual. When you toggle to Automatic, all existing records are automatically validated. 03/07/2008 Page 3 of 76 User Manual - MDweb Administration 2. Adding or deleting a language MDweb is an application that can be configured for use in several languages. The default language is English; it cannot be deleted. Other languages, however, can be added and deleted. In this version, two additional languages are offered: French and Portuguese. Deleting a language from this menu will mean that all the text labels in that language will be permanently deleted from the MDweb database; it will not be possible to restore them. Adding a language from this menu will create a new language entry in the database. All the text labels will have to be translated into this new language and added using the Menu >Labels> Add command. Description of the procedure for deleting a language 1 – Go to Menu > Options > Language. 2 – Click the beside the language you want to delete. 3 – Warning: Before the language is definitively deleted, a dialogue box will warn you and ask you to confirm your action. 4 – Confirm by clicking OK if you really want to delete the language. All the text labels of that language will be permanently deleted. Page 4 of 76 User Manual - MDweb Administration Description of the procedure for adding a language 1 – Go to Menu > Options > Language. 2 – Defining the language to be added: Two fields (both required) in the ‘Add another language’ form have to be filled in: ‐ the name of the language or its descriptor ‐ the three‐letter code for the language. For the latter field, it is recommended that the ISO 636‐3 standard be consulted; it lists three‐character codes for most world languages. 3 – Add. After filling in both fields, click Add. The language is created. Now you will have to translate all the text labels that appear in the MDweb interface by using the Menu >Labels> Add sub‐module. 03/07/2008 Page 5 of 76 User Manual - MDweb Administration 3. Managing users’ predefined values Using the Menu >Options > Predefined values command, the administrator can modify MDweb users’ predefined values (the concept of predefined values is presented in §5 of the Management guide in this document). This feature allows the administrator to verify the consistency of predefined values and to correct them if necessary. Description of the procedure 1 – Go to Menu > Options > Predefined values. 2 – Selecting the user and resource type: The form on the first page allows you to filter predefined values based on the user’s login name and resource type. Once you do so, the list of predefined values is displayed. By default, all users’ predefined values are selected. 3 – Viewing predefined values and selecting the one to modify: In the list of predefined values that meet your filtering criteria, you will see each predefined value’s properties, resource type and the last update date. Click on to edit the chosen values. 4 – Modifying the predefined values: To modify the values, use the forms in the three tabs (Metadata, Dataset and Distribution), corresponding to the three sections of the standard in which predefined values are extracted. Page 6 of 76 User Manual - MDweb Administration 5 – Validate your modifications: Note that you have to validate your changes by clicking Submit before going to the next tab. Should you not do so, your changes will not be taken into account. 4. Managing users’ contact details In a manner similar to that for changing users’ predefined values, the administrator can change the MDweb user’s contacts (the concept of contacts is presented in §5 of the Management guide in this document). This feature allows the administrator to verify the consistency of the contact information attached to a metadata record and to correct it if necessary. Description of the procedure 1 – Go to Menu > Options > Contacts. 2 – Selecting the user: The form on the first page allows you to filter contacts based on the user’s login name. Once you do so, you will see the user’s contacts. By default, you will see the contact information entered by all the users. 3 – Viewing contacts and selecting one to modify: The contact list displayed will be either for the selected user or for all users. Each contact will show the owner’s login name and when it was last updated. Click to edit the contact. 4 – Modifying the contact information: A form corresponding to contact information as specified in the ISO 19115 standard will allow you to modify existing entries. Fields marked by red asterisks* are required fields. 5 – Validate your changes: Note that you have to validate and save your changes by clicking Submit. Should you not do so, your changes will not be taken into account. 03/07/2008 Page 7 of 76 User Manual - MDweb Administration Managing users Menu > Users The MDweb administrator is in charge of managing authenticated‐user accounts (management and administration module). The Menu > Users sub‐module allows him to manage user accounts, i.e., to modify the properties of user accounts, most notably the role assigned to the user within MDweb. He can also add or delete users. 1. Adding a new user A new user is added to MDweb via a two‐stage process: a) Online registration by a prospective user The prospective user registers himself or herself using a registration form which is accessible from the menu on the left on the MDweb home page. When the user Submits the filled‐in form, an e‐mail is sent to the administrator informing him of the request and a confirmation e‐mail is sent to the prospective user. This action creates a user account in MDweb. Page 8 of 76 User Manual - MDweb Administration b) Activation of the account by the administrator For the user account to be usable, it has to be activated by the administrator who will assign a role to the user (administration, validation, cataloging, consultation). Description of the procedure 1 – Go to Menu > Users > Udapte. 2 – Select an account to modify in the user list. 3 – Allocate to him a role and a working catalog by default. 4 ‐ Submit. An e‐mail is sent to the user informing him of his login name, password and MDweb role. 03/07/2008 Page 9 of 76 User Manual - MDweb Administration 2. Modifying the properties of an existing user account The administrator can modify the properties of an existing user account in a manner similar to that described above. All the properties of an account can be changed. Note: The e‐mail address of the user is the identifier of the account. 3. Deleting an account To delete a user account use the Menu > Users > Delete command. Description of the procedure 1 – Go to Menu > Users > Delete. 2 – Select an account to delete from the list of users. 3 – Click on the cross to delete the account. A dialogue box will seek confirmation. 4 – Click OK to delete the account. Note: A user cannot be deleted if the catalog contains one or more of his records. Page 10 of 76 User Manual - MDweb Administration Managing text labels Menu > Labels What is meant by label management in MDweb? All html pages with which the user interacts are constructed using PHP scripts that use text labels stored in the MDweb database. Depending on the language selected by the user, the script for label management will display the pages in English, French or other language. By default, if a label does not exist in the database for a particular language, it will be displayed in English. In the database, the labels are divided into categories so each can be easily located when it needs to be modified. The following table lists the label types and their descriptions. Label type Help page Tooltips Catalog Items of the standard Items of the thesauri Predefined lists of the interface Predefined lists of the standard Menu items E‐mail messages Interface messages Resource types Description Labels on the home pages of the management and administration modules that describe the available sub‐modules Labels that appear when the mouse overs over certain elements of the pages Labels of the catalog(s) as they appear in the search results Labels relating to the items of the ISO 19115 standard Labels relating to the items of the thesauri included with MDweb, by default the Global Change Master Directory (GCMD) of NASA Labels relating to the items for list control in pages, except those that appear in the forms that are predefined lists of the ISO 19115 standard Labels relating to the items for list control that appear in the forms which are predefined lists of the ISO 19115 standard Labels relating to the menu items in the management and administration module Words and sentences of e‐mails that are sent when a prospective user submits the online registration form Labels relating to messages displayed to users when executing an operation and all other labels that do not belong to other categories Labels of resource types or templates used in MDweb The Menu > Labels command allows labels to be added or modified. These commands are rarely used though it may be necessary to modify labels to make pages more comprehensible for a particular targeted group of users. Modifying an existing label Labels can be modified using the Menu >Labels> Modify command. Description of the procedure 1 – Go to Menu > Labels > Modify 2 – Select the type of label to modify from the drop‐down list and Submit. 03/07/2008 Page 11 of 76 User Manual - MDweb Administration 3 – A filter with four criteria allows you to refine the search of your label: language, label text, label description and label name. If you do not know the exact label text, you can use the % meta‐character in one of the filter fields. It will result in all the labels corresponding to the type selected being displayed. 4 – Select the label to modify from the list. If there are more than 10 labels that meet your search criteria, you can skip to the next 10 labels by using the ‘next’ arrow at the bottom. 5‐ Modify the label and submit. The description of the label is compulsorily required. The modification is immediately applied and will be visible when the concerned page is next displayed. Page 12 of 76 User Manual - MDweb Administration Adding a label (when a new language is added) Labels are added with the Menu >Labels> Add command. The use of this command is limited to the translation of labels when a language is added to MDweb. By default, MDweb is supplied with English and French. When a language is added (see MDweb configuration, section on adding/deleting a language), all the labels have to be translated into the new language. This command allows an administrator to do so. Description of the procedure 1 – Go to Menu >Labels > Add. 2 – Select the language and the type of label to translate and Submit your choice. 3 – Filtering: In the same way as described for modifying a label, you can use a filter based on three criteria to refine the search for your label, using preferably the label text, the label description or the label name. If you do not know the exact label text, you can use the % meta‐character in one of the filter fields. It will result in all the labels corresponding to the type selected being displayed. 03/07/2008 Page 13 of 76 User Manual - MDweb Administration 4 – Select the label to translate from the list. 5‐ Translate the label and submit. The label description is compulsorily required. Page 14 of 76 User Manual - MDweb Administration Creating or modifying a catalog Menu > Catalog Concept of the catalog In MDweb, each reference (metadata record) is part of a catalog. MDweb can contain several catalogs. The decision to store references within catalogs was taken to facilitate their management. In fact, we can define for each user a working catalog where his or her reference will be stored. The creation of several catalogs allows easy management of a large number of references and to divide them thematically: by team, project or organization, etc. To allow the entry and addition of a reference in MDweb, at least one catalog has to exist. The Menu > Catalogs sub‐module allows the administrator to create, modify or delete a catalog. Adding a catalog For adding a catalog, the Menu > Catalogs > Add command is used. Description of the procedure 1 – Go to Menu > Catalogs > Add. 2 – Enter the name of the catalog and select a country. 3 – Submit. The catalog is created and can be used to store references. 03/07/2008 Page 15 of 76 User Manual - MDweb Administration Modifying a catalog For modifying a catalog, the Menu > Catalogs > Modify command is used. Description of the procedure 1 – Go to Menu > Catalogs > Modify. 2 – Select the catalog to be modified by clicking on the tick mark in the Modify column. 3 – Modify the name and Submit. 4 – A modification is validated only if the catalog in question is empty. Page 16 of 76 User Manual - MDweb Administration Deleting a catalog For deleting a catalog, the Menu > Catalogs > Delete command is used. Description of the procedure 1 – Go to Menu > Catalogs > Delete. 2 – Select the catalog to be deleted by clicking on the cross in the Delete column. 3 – Confirm the deletion of the catalog by clicking OK. 4 – The catalog is deleted only if it is empty. 03/07/2008 Page 17 of 76 User Manual - MDweb Administration Managing a metadata profile SOME BASIC IDEAS BEFORE WE START… ............................................................................ 18 Concept of profile or metadata profile ............................................................................................................... 18 Concept of resources .......................................................................................................................................... 19 Concept of metadata sheets or references ......................................................................................................... 20 Concept of data‐entry levels of a metadata sheet ............................................................................................. 21 METADATA PROFILES MANAGER .................................................................................... 22 What does it do and who should use it? ............................................................................................................. 22 Limitations of the current version ....................................................................................................................... 22 Operating procedure .......................................................................................................................................... 23 Accessing the profiles manager module ............................................................................................................. 27 Adding a metadata profile.................................................................................................................................. 28 Modifying a metadata profile............................................................................................................................. 36 Deleting a metadata profile ............................................................................................................................... 38 Some basic ideas before we start… Concept of profile or metadata profile A profile, or adaptation, is a document or schema (in the sense of a data structure) that specifies the implementation options of a standard for a particular purpose. In essence, a profile does not contradict the standard to which it refers and does not introduce, in principle, new concepts. Rather, it describes the standard or a sub‐set of it so that it can be implemented and used in a particular context. However, elements that do not exist in the standard (extended elements) can be included in it. These description elements will complement the standard and will be useful in the specific context in which the profile is going to be used. In addition, a profile of a standard allows an international standard to be adapted culturally or linguistically for a particular national or regional context. A community can thus define profiles for particular types of data sets. For example, a profile for matrix or ‘raster’ data sets will retain only those elements specific to this data type. A profile can also manage certain specifics or rules that an organization may want to apply to metadata elements. A profile, for example, could specify which elements are mandatory and which are optional in a metadata sheet. Page 18 of 76 User Manual - MDweb Administration MDweb includes 9 profiles as standard. They correspond to 9 data types: • Types of data series : o Geographical database or geodatabase o Temporal databases o Digital map Types of data series : o hardcopy map o Vector layer o image – aerial picture o Text document o Spreadsheet data o Bibliographical references Concept of resources In principle, metadata standards, the international standard in particular, apply to digital data but they can also be applied to analogue documents such as maps, plans, aerial photographs, etc. In such cases, the documentation of the data and its cataloging always reference the actual document. Moreover, data sets of this type usually consist of a clearly identifiable collection of documents. On the other hand, for digital data, the definition of what is data, or a data set, is more difficult and often depends on the institutional or technological context of the organization that produced the data. In general, digital data can be broken up into a hierarchy going from data attribute to entity type to data set to, finally, data series. This perspective of data can be more simply described with the general term ‘resource’. It covers all the concepts associated with the data hierarchy shown in the figure. To illustrate this concept, we have chosen as example the land use maps of a territory, in this case that of Oued Mird (Morocco). This resource, of type ‘digital map’, can be broken up into the hierarchy of resources mentioned above in a perspective of UML formalism. If we consider the highest level, we can speak of a data series. This is represented here by the collection of maps on the same theme but produced during different observation periods, those for land use in the 1990s, those for land use in the 2000 decade, etc. At the data set level, we will consider just one item from this collection, for example, the land use map of the 1990s. The next lower level, entity type, will correspond to all the thematic layers that make up the land use map of the 1990s. In our example, we have selected the ‘polygon’ layer of land‐use classes. Other layers, such as the village layer, can be part of the map. Finally, the most basic level, or attribute type, is the set of properties of the ‘polygon’ layer. An example of this attribute type is given by the attribute ‘percentage of ligneous cover’. The levels handled by MDweb are limited to: data series data sets Definitions Data series: A collection of distinct data sets related to each other by common characteristics such as their mode of acquisition or processing (satellite images), their spatial extent, the type of their contents, for 03/07/2008 Page 19 of 76 User Manual - MDweb Administration example, a data series is synonymous with a data collection. This denomination is used in MDweb for the data types: ‘digital map’, ‘geodatabase’ and ‘Temporal database’. Data set: Set of related data, unmistakeably identifiable as connected to each other by common characteristics such as their mode of acquisition or processing, their spatial extent, etc. A data set can be considered as a small set of data or a sub‐set of it. This denomination is used in MDweb for the data types: ‘hardcopy map’, ‘vector layer, ‘image – aerial photo’, ‘text document’, ‘Spreadsheet data’ and ‘bibliographical reference’. Hierarchy between data series and data sets MDweb establishes a hierarchy between data types using the concept of parent and child profiles (see Concept of profile or metadata profile). In the standard version, this is the hierarchy: Concept of metadata sheets or references Page 20 of 76 User Manual - MDweb Administration In this document, the concepts of the metadata sheet and of the reference are used in the same way. They both apply to the same object. A metadata sheet or reference is defined as a set of metadata elements filled in by a user to describe a data collection or data set or, more generally, a resource. The concept of a metadata sheet relates to the structure and nature of the metadata elements that it consists of, with these elements originating from the ISO 19115 standard. The concept of a reference additionally relates to a perspective of metadata as an item of a data catalog managed by MDweb. Concept of data‐entry levels of a metadata sheet The data‐entry level relates to the number of elements (and their characteristics) used for describing a resource. It corresponds to different levels of metadata usage. In fact, the information required to describe a resource depends on the purpose of the metadata usage. For example, for purposes of searching and locating resources, information that is less detailed and less complete will suffice as compared to for documentation purposes, which will need greater detail and completeness because resources will need to be distributed and transferred. Thus, for cataloging of resources, which is the basis of searches for them, simplified metadata could be sufficient. These different contexts or levels of metadata usage can lead to the definition of several metadata‐ detail levels. The international standard defines two levels of details or conformity. The first conformity level or ‘basic’ level corresponds to the purposes of resource cataloging. For this, it proposes a set of mandatory elements or ‘metadata core profile’ that consists of elements necessary to identify the resource and to provide a summary of its contents. It can only be used for cataloging services and as a basis for metadata services designed for locating resources. A second conformity level or ‘complete’ level includes metadata elements necessary to fully document a resource. This conformity level defines metadata elements necessary to identify, evaluate, extract, use and manage geographic resources. On the basis of the international standard’s definitions, we have identified three levels of detail in the profiles for the metadata: 9 a basic level, 9 an extended level, 9 and a complete level. The basic level is based on the minimum metadata elements specified in the standard. The extended level is based on the basic level and additionally includes those metadata elements that would allow the exchange and transfer of the resource and the accurate description of the resource’s origins (source data and processes used). This latter requirement is essential for the reuse of a resource for scientific purposes. For data types offered in the standard MDweb version, the extended and the complete levels are one and the same. 03/07/2008 Page 21 of 76 User Manual - MDweb Administration Metadata profiles manager What does it do and who should use it? The profiles manager is the core of the MDweb tool because it allows the user to define the structures and descriptive elements on which the entry forms and the search engine are based. Because of its powerful nature, its use should be limited to the application’s administrator having an in‐depth knowledge of metadata and associated standards. Ill‐advised changes in these structures and their modifications in the MDweb database can lead to serious malfunctioning of the tool. General features of the profiles manager The administrator can use the profiles manager to define (add) a new profile, modify the structure or properties of existing ones or delete them. Concepts of metadata profiles and of the hierarchy between profiles are provided in this document’s introduction. Limitations of the current version The profiles manager is currently in its initial version. Several limitations exist: - Choice of the standard: the ISO 19115 (TC/211) standard in its FDIS 2003 version (http://jc.desconnets.free.fr/mdweb/docs/FDIS‐19115.pdf) is the only standard we can currently use to construct a profile. All the sections of this standard are not described completely in MDweb. This is the list of the sections with the degree of completeness: • • • • • • • • • • • MD_Identification (only the MD_DataIdentification class) MD_Constraints DQ_DataQuality MD_MaintenanceInformation MD_SpatialRepresentation MD_ReferenceSystem MD_ContentInformation MD_PortrayalCatalogueReference MD_Distribution MD_MetadataExtensionInformation MD_ApplicationSchemaInformation - Definition or modification of predefined lists attached to the elements: the capability of modifying or defining lists of predefined values associated with the metadata elements has not yet been implemented. So additions or modifications have to be made directly in the MDweb database in the elmnt_mtd tables (list_short_name field used to define a predefined list for an element), code_list (definition of a new list of values) and the elmnt_code_list table (definition of elements). An added element is translated into other languages by the insertion of a new label in the label_stand table. - Operations for the definition or modification of a standard have not been implemented in this version. If you want to add a standard or complement the existing one, you have to insert elements in Page 22 of 76 User Manual - MDweb Administration the elmnt_mtd and est_inclus tables and translate labels of the added elements in the label_stand table. - The requirement of defining a minimal sub‐set (metadata core) is not enforced. You have to study the ISO 19115 standard and ensure that the profile you build respects the standard’s core if you want to be compatible with it (this sub‐set is discussed in the following section). Operating procedure Before running the profiles manager The definition and editing of a profile are crucial stages that require you to select descriptive elements that are relevant to the data set you want to catalog. In collaboration with your project partners, you have to carefully arrive at a correct and functional definition of your profiles. Towards this end, we recommend an operating procedure which we break up into 5 steps: 1. Studying and choosing your profile’s structure 2. Defining element properties 3. Details on the definition of element properties 4. Finalizing the creation or modification of the profile 5. Testing the created profile 1. Studying and choosing your profile’s structure Before even using MDweb, it is necessary to study the cataloging you want to do for your project and to specify how you want to describe your data sets. Some questions that help you do so are: What information will the users of the catalog (those who will search my data sets) need to locate the data set? Which elements will they need to judge the relevance to their requirements? Do I want my application to allow users to access the data sets? What is the number of metadata elements that the users will be ready to enter? 10, 20, 100, 200? Using these questions, and others like them, as a starting point you can narrow down on descriptors required for your project, those that will be optional, etc. To define the structure of your profile (the different sections) and the elements therein (the fields in which data will be entered), it is necessary to match your requirements with the elements proposed in the ISO 19115 standard (http://jc.desconnets.free.fr/mdweb/docs/FDIS‐19115.pdf). This will lead you to a first prototype profile. You can also rely on the profiles that are included as standard with MDweb. There are nine of them and you can view their structures from the ‘Utilities’ section in the MDweb home page (Structure of profiles used) http://localhost/mdweb‐demo15/test/test_gabarit.php The essential elements (metadata core) of ISO 19115 The standard defines a sub‐set of mandatory elements for referencing a data set. MDweb does not verify the conformity of your profile to this sub‐set. These are the elements that are part of this sub‐set: 03/07/2008 Page 23 of 76 User Manual - MDweb Administration Element label ISO element name MDweb’s handling Record identifier mdFileID automatic Metadata language mdLang automatic Metadata character set mdChar automatic Organization name rpOrgName manual entry Organization role role manual entry Record creation date mdDateSt assisted Metadata standard name mdStanName automatic Metadata standard version mdStanVer automatic Abstract of contents of the set idAbs manual entry Title of the data set resTitle manual entry Keywords keyword assisted Data set creation date refDate assisted Western‐most extent westBL assisted Eastern‐most extent eastBL assisted Northern‐most extent northBL assisted Southern‐most extent southBL assisted Once you have defined the structure of your profile, you can start its construction using the Adding a profile module by using an existing profile (see the ‘Adding a metadata profile’ section). At this stage, you have defined the structure of your profiles, i.e., the sections and the elements that the users will use to describe their data sets. But the construction of the profile is not yet complete. In fact, before MDweb can construct data‐entry forms, store metadata, and provide search results, it is necessary to specify how each element has to be processed in MDweb (required field, level of entry, type of the field of the form, etc.). 2. Defining element properties The profiles manager automates to some extent the definition of profiles. This has to be done after the construction of the profile’s structure (addition of elements). To automatize the processing of a profile’s elements in the data‐entry forms and their display in the detailed records available during consultation, some properties have to be defined for each element. We provide here the list of these properties as well as their default values, if any. Properties differ depending on item type (section, class or element). The profiles manager allows you to define four types of properties: • • • • Attributes that specify an element of the standard General properties that extend the standard’s properties Properties for the construction of the data‐entry forms within MDweb Translation of the label of the element in the languages used by MDweb An element’s attributes Some elements of the standard can possess attributes that specify an element’s characteristics (for example, an attribute ‘measurement unit’ would allow the specification of the unit in which the element would be filled in). When an element has one or more attributes, the profiles manager proposes a default value per profile and per attribute (free‐form value or to be selected from a predefined list). General properties of profile elements Page 24 of 76 User Manual - MDweb Administration Property name Definition Range Mandatory Used to specify whether a value for the element is List of values: Entry level mandatory or optional ‘true’, ‘false’ Used to specify the data‐entry level of an element. There List of values: are three levels. This property is used to offer the user a ‘basic’, ‘extended’, ‘complete’ form with minimal elements (basic level) and to complement the entry forms with additional elements by attributing a higher entry level to them (extended, complete). Number of occurrences Used to specify the number of occurrences of an element in Integer: the form. This property applies both to headings and Between 1 and 62 (both inclusive) elements. Ensure, however, that the value chosen conforms to the standard. Default value Specifies an element’s default value. This allows some elements to have a predefined constant value irrespective of the data set being described. Appearance in the entry Specifies the form in which the element will appear. To List of values: form reduce as much as possible the task of entering elements, ‘Entry forms only’, MDweb offers different processing for different elements. ‘automatic insertion (default value)’, They can be entered: ‘Management of predefined form values’, • in the main entry form accessible via the ‘Create’ or ‘Modify’ modules • ‘contacts directory’ in the contacts directory only for the headings providing contact address information (CI_ResponsibleParty class) • by automatic insertion for those elements with constant default values • predefined values manager Preferences module > Predefined values which allows several sets of default values per profile. These sets of values are then used to fill in a record during its creation. In this way, these elements do not appear in the entry forms. Contact type This property is valid only for contact headings and List of values: elements (CI_ResponsibleParty class). It is used to specify ‘Metadata’, the section (Metadata, Data set or Distribution) to which ‘Data set’, this element will be attributed. ‘Distribution’ General properties of elements of type section or heading of the profiles This table complements the previous one by providing properties specific to sections and headings. Property name Definition Range Appearance in the entry Additional values for this property are available for List of values (complements those from the form elements of type section and heading. They define the previous table): appearance of the label in the section or the heading and ‘Invisible’, not the elements actually contained therein: ‘Visible in all forms’, • Invisible: the label will not appear in any of the ‘Entry form and predefined values’, forms ‘Entry form and contacts directory’, • Visible in all forms ‘Contacts directory and management of • Entry form and predefined values predefined values’ • Entry form and contacts directory • Contacts directory and management of predefined values 03/07/2008 Page 25 of 76 User Manual - MDweb Administration Tips: Lighten your forms: When the default value is constant, you can select as property value ‘Appearance in the entry form’: Automatic insertion. Thus, this element’s entry field will not appear in any form. Lighten your forms (2): by defining an element with the value ‘Management of predefined form values’ for its ‘Appearance in the entry form’ property. Properties for constructing entry forms specific to MDweb These properties apply only to elements of description to which we can assign values. They are used to define properties that will allow us to construct entry forms (type of entry field, data‐entry control, type of value, number of characters, etc.). Property name Field type Definition Range Defines the type of entry field that will appear in the form. Six List of values: values are allowed: ‘textarea’ ‐ textarea: a text area (number of lines and number of ‘text’ columns) for entering text of more than 200 characters ‘url’ ‐ text: a text field in which any text can be entered (text, ‘mail’ integer, real, date) except those that are of the following ‘list’ types. ‘read only’ ‐ url: text field for entering a url of type http://www.domain.com/. By thus using this field, it will be treated as a link (in the html sense) in the detailed sheet shown during consultation. ‐ mail: text field for entering an e‐mail address. It will be treated as a mailto (in the html sense) in the detailed sheet shown during consultation. ‐ list: when a list of predefined values of the standard is attached to the element that you are defining. In this case, the list of values is proposed to you. ‐ read only: text field in which nothing can be entered. Field width Defines the width of a text or textarea field List of values: 5 to 60 Field height Only for a textarea field, specifies the number of lines List of values: Name of the javascript control 6 javascript controls are available for being attached to the List of values: defined field: ‘maximum character length’, ‐ maximum character length controls the number of ‘test for a real field’, characters entered in the field. This control should be ‘test for an integer field’, accompanied by the value of the number of characters in the ‘test for a mail field’, 1 to 10 ‘Number of characters’ property. ‘test for a url field’, ‐ test for a real field is used to verify whether the value ‘date format verification’ entered is truly a real. ‐ test for an integer field, ditto for an integer ‐ test for a mail field, ditto for a field of type ‘mail’ (see ‘Field type’ property) ‐ test for a url field, ditto for a field of type ‘url’ (see ‘Field type’ property) ‐ date format verification, ditto for a text field in which we want to enter a date Events associated with the javascript control User event that triggers the javascript control defined in the List of values: ‘Name of the javascript control’ property. Two values are ‘onKeyPress’ available: ‘onChange ‐ onKeyPress: event triggered on entry of each character in a Page 26 of 76 User Manual - MDweb Administration field ‐ onChange: event triggered on exit from a field after having modified its value Number of characters Specifies the maximum number of characters the user can List of values: enter into a field of type text. A value is mandatory for 25, 30, 50, 100, 200, 500 configuring the ‘maximum character length’ javascript control The translation of the label of the element in the languages used by MDweb The profiles manager allows you to translate or modify labels of metadata elements in all the languages used by MDweb (English, French, Portuguese). This can be done during the definition of the properties of the profile’s elements. 3. Finalizing the creation or modification of a profile The last stage is the finalization of the created or modified profile. It should only be undertaken when all the elements have been chosen and their properties defined in extenso. Use the ‘Modify your profile’ button (frame at the bottom of the manager) to finalize your profile. The conformity of the defined properties will be verified and a position index calculated for each profile element. This index is especially useful for managing the multi‐occurrence of headings and elements. 4. Test of the created profile using the entry form Apart from the profiles manager, it is essential to test the structure and each element’s properties by creating test sheets. This will allow you to verify the operational correctness of your profile – and to take remedial measures, if necessary, by adding or modifying some field properties – before starting using the profile for entering actual metadata sheets. In fact, when one or metadata sheets are created using a given profile, it becomes impossible to modify the profile’s structure without first deleting those sheets. However, you can always modify element properties. In any case, a comprehensive verification is strongly advised before any large scale use of the profile for entering sheets. Accessing the profiles manager module Access to the profiles manager module is available only to you if you are logged in as an administrator. Go to the MDweb Administration module and click on ‘Profiles’ on the Administrator menu bar. Three major functions are available in the Profiles manager: • • Add: to create a new profile using an existing one or from a standard Modify: to modify a profile’s structure or the properties of its elements 03/07/2008 Page 27 of 76 User Manual - MDweb Administration • Delete: to delete an existing profile Adding a metadata profile 1. Go to the Adding a profile page from the Administration module 2. Define the new profile by filling in the form that opens. Page 28 of 76 User Manual - MDweb Administration A maximum of 5 fields will have to be filled in: • Name of the metadata standard: The metadata standard you want to use to create your new profile. In the current version, only the ISO 19115 standard can be used (FDIS 2003 version). • Profile name: By default, you have to provide the name in English of the profile you want to create with a maximum length of 50 characters (no special characters). It should be self‐explanatory. You can translate it subsequently into your language by using the Labels > Add module. • Profile code: The profile code is the profile’s internal name. It should be short, explanatory and without spaces with a maximum length of 20 characters. For example, ‘vector_layer’ for the ‘Data vector’ profile. • Parent profile: MDweb allows you to define a profile as a data collection or a data set. This permits you to create a hierarchy between different profiles (see Concept of resources). If you do not attach a parent profile to your new profile, it will be considered a data set. • • • Child profile: ditto as for the previous field but for creating a profile that will be considered a data collection if you define a child profile. Create your profile from an existing profile: allows you to create your new profile based on one of the standard MDweb profiles. If you want to create a profile that is similar to an existing one, this option gains you substantial time, especially for defining properties. Help on fields of the form In the same way as for entry forms, each field has text help available for it. Move the mouse over the icon to view it. 03/07/2008 Page 29 of 76 User Manual - MDweb Administration Managing the hierarchy between profiles Case of a new profile, child of an existing profile When creating a new profile, you can define it as a data set (see ‘Concept of resources’ section) and attach to it an existing profile as ‘parent profile’. See screen example below. Case of a new profile, parent of an existing profile In the opposite case to the one above, you can define a profile as a data collection (see ‘Concept of resources’ section) and attach to it an existing profile as ‘child profile’. See screen example below. Page 30 of 76 User Manual - MDweb Administration The layout of the profiles manager The profiles manager page consists of 3 frames: • • • Frame on the left to display the profile as a tree structure Frame on the right for modifying element properties Frame at the bottom for finalizing the profile 03/07/2008 Page 31 of 76 User Manual - MDweb Administration 3. Adding elements to your profile To add an element to a profile, use the tree‐structure representation of the standard used. Case of creation using the standard If you have chosen to create a new profile from the standard used, you have to add elements in two steps: a) Select the elements you want to include in your profile Note: only the tree structure of one heading can be displayed at a time. If you select elements from within a heading, then go to another heading, you will lose the selection of the previous heading’s elements. b) Validate the selected elements by click the ‘Add selected elements’ button The checkboxes of the selected elements then becomes grey Page 32 of 76 User Manual - MDweb Administration c) Repeat this process by selecting and validating elements from every heading that you want to include in your profile Case of creating a profile from a copy of an existing profile If you have chosen to create a new profile from an existing one, all the elements of the source profile will appear already selected and the properties attached to them already defined. To add additional elements, proceed as above. 03/07/2008 Page 33 of 76 User Manual - MDweb Administration 4. Editing/modifying each element’s properties By selecting an element of your profile, you can edit its properties. They appear in the frame on the right. The modifications are applied as soon as you validate them by clicking the Validate button. Editing general properties and those used for building the form Use this form to specify or modify general properties and those necessary for building entry forms for each element of your profile. The definition of properties is covered in the Operating procedure, 2. Defining element properties section. Page 34 of 76 User Manual - MDweb Administration Note on the properties linked to chosen ‘field type’: the properties proposed are different depending on the value of the ‘field type’. See section Operating procedure, 2. Defining element properties, Properties for constructing entry forms (p.12 ‐13). Note on the entering of a default value. In the case of an element attached to a code list (list of predefined values of the standard), the value ‘list’ of the ‘field type’ property becomes available. By selecting it, the list of predefined values appears: Click the element that you want to have as default value. It will be directly transmitted to the ‘default value’ field of the form. The modifications will be effective as soon as you validate them (Validate button) Translation of the element’s label Should you wish to do so, you can modify the translation of the current element of your profile. The last part of the form for editing the element’s properties has fields for doing so. You can modify the element label which is displayed in the entry forms and in the detailed sheet shown during consultation. You can also add a definition. Validate the modifications you have made before quitting. 03/07/2008 Page 35 of 76 User Manual - MDweb Administration 5. Validating your profile’s creation A final stage is necessary to create your profile. It consists of verifying the consistency of the elements and the properties attached to them. Before exiting the profiles manager, you have to click the ‘Validate modifications’ button; this will launch a series of internal operations to verify your profile. Note: After having created a profile, if you want to modify it, you will have to use the Modify profile module. Modifying a metadata profile There are two aspects to modifying a profile: • The modification of its structure and/or • The modification of its elements’ properties To limit the inconsistencies that would result from any large‐scale changes to profiles, it is not possible to modify a profile’s structure (add or delete an element) except if no metadata sheet has been created using that profile. Elements’ properties can be modified for all profiles, however. 1. Go to the Modifying a profile page from the menu of the administration module. 2. Select the profile The page that opens will allow you to choose the profile you want to modify. 3. Modifying the profile Page 36 of 76 User Manual - MDweb Administration a) For modifying the profile’s structure and element properties (in case the profile has not been used for entering metadata sheets), use the profile’s tree structure to delete an element ( icon) or add one (‘Add an element’ button). Should you choose to add an element, the display will change to the tree structure of the standard, as described in the ‘Add a profile’ module. In the same way as in the ‘Add’ module, you select a profile element to access the element’s properties in the frame on the right. Use the same process for modifying the properties (see ‘Adding a metadata profile, 4. Editing/modifying each element’s properties’ section, p. 20‐21). b) For modifying only the element properties (in case there already exist metadata sheets created with this profile), use the profile’s tree structure. You can only select an element for editing its properties in the frame on the right. 03/07/2008 Page 37 of 76 User Manual - MDweb Administration Use the same procedures as described above for modifying properties (see ‘Adding a metadata profile, 4. Editing/modifying each element’s properties’ section, p. 20‐21). 4. Validating your profile’s modification A final stage is necessary to modify your profile. It consists of verifying the consistency of the elements and the properties attached to them. Before exiting the profiles manager, you have to click the ‘Validate modifications’ button; this will launch a series of internal operations to verify your profile. Deleting a metadata profile A profile can only be deleted if and only if no sheet has been created using it. 1. Go to the Deleting a profile page from the menu of the administration module. 2. Select the profile you want to delete. Only the profiles that can be deleted will be listed on this page. Caution: the deletion will be irreversible; the profile with its elements and their properties will be deleted from the MDweb database. Page 38 of 76 User Manual - MDweb Administration 3. Validate your action. The selected profile will be permanently deleted. 03/07/2008 Page 39 of 76 User Manual - MDweb Administration Managing a thesaurus Idea of the thesaurus .......................................................................................................................... 40 MANAGING CONCEPTS ............................................................................................ 43 Description of the procedure to add a concept ................................................................................... 44 Description of the procedure for modifying a concept ....................................................................... 45 Description of the procedure for deleting a concept ........................................................................... 46 MANAGING RELATIONSHIPS ..................................................................................... 46 Description of the procedure to add a relationship ............................................................................ 47 Description of the procedure for deleting a relationship .................................................................... 49 DELETING A THESAURUS .......................................................................................... 50 The Administration section of MDweb allows the administrator to manage thesauri, i.e., to create and import a thesaurus, modify the application’s thesaurus and delete a thesaurus. To begin with, it is important to distinguish between the two types of thesauri that can be used: external thesauri imported into MDweb and the application’s thesaurus which is created within the cataloging service. Idea of the thesaurus A thesaurus is a controlled vocabulary consisting of a set of terms that represent concepts in a particular domain. These concepts are structured between themselves by semantic relationships: hierarchical links (generalization and specialization), synonymy, linked to, definition, etc. Each concept has a descriptor term that allows it to be be given a convenient name (because it is normally identified by a URI which is usually not very informative). Terms in a thesaurus can be used to index documents, and that is how they are used in MDweb. The search for documents thus becomes easier by the use of thesauri. Creating or importing a thesaurus The Add thesaurus section allows a new application thesaurus to be created1 or an external thesaurus to be imported2. Page 40 of 76 User Manual - MDweb Administration 1 – Creating a thesaurus A new thesaurus is created when a name is entered for it in the relevant field2 and the Submit3 button then clicked. The thesaurus is added to the relevant database and a confirmation message displayed. However, to use the newly created thesaurus as the application’s thesaurus, i.e., to be able to enrich it using MDweb’s thesaurus management tools, it is first necessary to update the ‘config.inc.thesaurus.php’ file in the config folder of the MDweb installation: replace the value of the $thésaurus_appli variable by the name of the thesaurus you have just created. 2 – Importing a thesaurus It is possible to import a thesaurus in SKOS/RDF format on condition that the Jena Java library has first been installed. This open source library can be downloaded from http://jena.sourceforge.net/. The Jena libraries To run the thesaurus importation, all these Jena libraries are mandatories. They are all including in Jena version 2.5.x: - antlr‐2.7.5.jar arq.jar concurrent.jar iri.jar icu4j_3_4.jar json.jar junit.jar jenatest.jar log4j‐1.2.12.jar 03/07/2008 Page 41 of 76 User Manual - MDweb Administration commons‐logging‐1.1.jar xercesImpl.jar xml‐apis.jar wstx‐asl‐3.0.0.jar stax‐api‐1.0.jar To connect Jena to your thesaurus database, you should install a jdbc library for postgresql : pg73jdbc3‐ 2001‐08‐20.jar (ou equivalent) All libraries of Jena 2.5 and jdbc can be also download from http://www.mdweb‐ project.org/16/components/jena/ To run this batch file, you should verify if the path to java or javaw runtime is in your environment variable PATH. Also, the ‘import_thésaurus.bat’ file (Windows) or the ‘import_thésaurus.sh’ file (Linux) in the admin folder has to be correctly configured. The CP variable has to be updated with the correct paths to the Jena library. Then the ‐‐db parameter should be changed to indicate the address of the database server and the name of the thesaurus database (the name is the same as the $db_nom_thésaurus variable in the ‘config.inc.thésaurus.php’ file of the config folder). For example, the ‐‐db parameter will be: ‐‐db jdbc:postgresql://localhost/thesaurus‐fra if localhost is the server address and the thesaurus database is thesaurus‐fra. Example of import_thesaurus.bat file This example of import_thesaurus.bat allows to import a RDF_SKOS file in MDweb database called thesaurus‐fra using the postgres user account postgres and password: postgres on localhost server: @echo off rem the librairies used come from Jena versions 2.5.x set CP="C:/Jena/lib/pg73jdbc3‐2001‐08‐20.jar";"C:/Jena/lib/antlr‐ 2.7.5.jar";"C:/Jena/lib/arq.jar";"C:/Jena/lib/concurrent.jar";"C:/Jena/lib/iri.jar";"C:/Jena/lib/icu4j_3_4.jar";"C:/Jena/lib/jena. jar";"C:/Jena/lib/jenatest.jar";"C:/Jena/lib/json.jar";"C:/Jena/lib/junit.jar";"C:/Jena/lib/log4j‐ 1.2.12.jar";"C:/Jena/lib/commons‐logging‐1.1.jar";"C:/Jena/lib/xercesImpl.jar";"C:/Jena/lib/xml‐apis.jar";:/Jena/lib/wstx‐asl‐ 3.0.0.jar";:/Jena/lib/stax‐api‐1.0.jar" java ‐classpath %CP% ‐Djdbc.drivers=org.postgresql.Driver jena.dbcreate ‐‐db jdbc:postgresql://localhost/thesaurus‐ fra ‐‐dbUser postgres ‐‐dbPassword postgres ‐dbType PostgreSQL java ‐classpath %CP% ‐verbose ‐Djdbc.drivers=org.postgresql.Driver jena.dbload jdbc:postgresql://localhost/thesaurus‐fra ‐‐dbUser postgres ‐‐dbPassword postgres ‐dbType PostgreSQL %1 Page 42 of 76 ‐‐db User Manual - MDweb Administration In this example, the Jena librairies are stored on the folder C:/Jena/lib/ Once these conditions are met, the thesaurus is imported by choosing the SKOS/RDF file containing the thesaurus4, giving the thesaurus a name so that it can be created in the database5 and choosing the import language6, and then clicking Submit7. Depending on the size of the thesaurus, the operation may last a long time. A confirmation message is displayed once the thesaurus is successfully imported. Managing the application’s thesaurus The Modify a thesaurus1 section allows the administrator to manage the application’s thesaurus and modify concepts and relationships contained in it. Remember, you should not confuse the thesaurus of the cataloging service with reference thesauri such as Agrovoc, Gemet, etc.; this sub‐module operates only on the cataloging service’s own thesaurus. 1 – Managing concepts a) Adding concepts It is possible to add new concepts to the application’s thesaurus to enrich it. These concepts can originate from the included reference thesauri or created from scratch. The administrator uses a term to designate the concept that he wants to add. The auto‐complete feature helps him by showing matching concepts in the reference thesauri. Once the concept is chosen, he can modify some of its properties. The view of the thesaurus’s tree structure is used to verify that the new concept was added correctly. 03/07/2008 Page 43 of 76 User Manual - MDweb Administration Description of the procedure to add a concept 1 – Choose to ‘Add a concept’. 2 – Choose a term that you want to add 3 – From amongst those offered, choose the concept that you want to import into the thesaurus or choose to create a new concept. 4 – Select the type of concept to add (thematic, temporal or spatial). If the chosen type is ‘spatial’, the geographic layer associated with the concept will have to be specified. The thesaurus is displayed on the right in its current state. Page 44 of 76 User Manual - MDweb Administration 5 – A message confirms that the concept was correctly added to the database and we can see the term, in red, in the thesaurus and its description on the right. b) Modifying concepts The facility for modifying concepts allows the administrator to modify a concept’s properties (concept type, status, name of the associated layer, etc.). In a manner similar to that for adding a concept, the administrator selects a concept using the auto‐complete feature which, here, shows terms only from the application’s thesaurus. Description of the procedure for modifying a concept 1 – Choose to ‘update a concept’ and select the concept by its term. 03/07/2008 Page 45 of 76 User Manual - MDweb Administration 2 – You can modify the properties of the selected concept: type, layer name (if the concept is spatial) and status. As for the addition of a concept, we can see the thesaurus’s tree structure and the compete description of the concept on the right. 3 – A message confirms the modification. c) Deleting concepts Finally, the administrator can delete concepts as long as they are not being used to reference any metadata record. In a manner similar to that of modifying a concept, he chooses the concept with the help of the auto‐complete feature. The concept and all its relationships are deleted from the thesaurus. The thesaurus’s tree structure changes to reflect the deletion. Description of the procedure for deleting a concept 1 – Choose to ‘Delete a concept’ and designate the concept by its term. 2 –Select the concept you want to delete. 3 – You are asked for confirmation before deletion. 4 – A message confirms the deletion from the database (or indicates the failure of the deletion because the concept is indexing a metadata record). 2 – Managing relationships Page 46 of 76 User Manual - MDweb Administration Each concept has several different relationships that link it to other concepts or provide sundry information. To add, modify or delete a relationship, one must first select the concerned concept. We use the auto‐complete feature, as described above in the ‘Managing concepts’ section, to do so. a) Adding relationships A relationship can be described by a <subject, predicate, objet> triplet. The subject is the concept that we have chosen, the predicate is the type of relationship and the object is the target concept, a literal, etc. To add a relationship to a concept, the administrator first has to select the type of relationship. A drop‐down list shows him all available relationship types (based on the SKOS thesaurus description language) and allows him to choose one. Depending on the selected relationship type, a field appears in which he has to specify the object of the relationship. Description of the procedure to add a relationship 1 – Choose to ‘Add a relationship’ and select the concerned concept by its term. 2 – Select the relationship type. On the right, we can see the thesaurus’s tree structure with the concerned concept in red with its current properties. 3 – For each different relationship type, a different Object field will be displayed. Fill it and click ‘Add’ to validate the new relationship. A confirmation message will appear. 03/07/2008 Page 47 of 76 User Manual - MDweb Administration b) Modifying relationships A relationship can always be modified. The administrator has to select the concept and then the concerned relationship. The value of the object can then be modified. The procedure to modify a relationship is similar to that for adding one. If the modification concerns a hierarchy relationship, the thesaurus’s tree structure automatically reflects the change, which can be verified by its display. c) Deleting relationships And, finally, it is possible to delete a particular relationship of a concept, except the relationship relating to the concept’s descriptor term (a concept should always retain the term that designates it). In the same way as for modifying a relationship, the administrator chooses the concept and then the concerned relationship. After seeking confirmation, MDweb deletes the relationship. If it was a hierarchy relationship, the thesaurus’s tree structure is reconstructed. Page 48 of 76 User Manual - MDweb Administration Description of the procedure for deleting a relationship 1 – Choose to ‘Delete a relationship’ and select the concerned concept by its term. 1 2 – Choose the relationship to delete from those available . A message seeks confirmation for the deletion . 2 03/07/2008 Page 49 of 76 User Manual - MDweb Administration Deleting a thesaurus The Delete a thesaurus1 section can be used to delete a thesaurus from the database2. Select the thesaurus to delete from the list and confirm deletion3. Note: if the thesaurus being used as the application thesaurus is deleted, the ‘config.inc.thesaurus.php’ file in the config folder will have to be updated ($thesaurus_appli and $lang_thesaurus_appli variables). Page 50 of 76 User Manual - MDweb Administration Adding external catalogs Gestion des catalogues distants ............................................................................................................ 52 Les fichiers de configurations ................................................................................................................ 54 Fichier de configuration des catalogues z3950 : config.inc.z3950.php ......................................................... 55 Fichier de configuration des catalogues CSW 2.0 : config.inc.csw.php ........................................................ 56 Configuration de MDweb pour interroger un catalogue via le protocole Z39.50 ................................ 57 Pré requis pour le client d’interrogation Z39.50 MDweb ............................................................................ 57 Sous Windows ............................................................................................................................................... 57 Sous Linux ...................................................................................................................................................... 58 Introduction A partir de la version 1.6, MDweb via son client de recherche (cartographique ou multi‐critères) peut interroger simultanément et en temps réel des catalogues distants hébergés par MDweb, Geonetwork 2.1 et Deegree si ces derniers ont un protocole ou un service web standard qui permet de poser des interrogations soient en Z39.50 conforme OGC ou en utilisant le web service de catalogage CSW 2.0.1. De manière plus détaillée, le tableau suivant donne les interrogations distantes possibles selon les versions des outils testés et ouverts pour répondre à ces interrogations. Il est possible aussi d’interroger de manière distante des catalogues MDweb 1.5 via le port d’écoute PostgreSQL (5432). Outil Version Protocole d’interrogation distante Profil testé MDweb 1.5 Postgresql (5432) ISO 19139 et ISO 19139 FRA MDweb 1.6 Postgresql (5432) ISO 19139 et ISO 19139 FRA Geonetwork 2.1 CSW 2.0.1 Dublin Core Deegree 2.1 CSW 2.0.1 ISO 19115 Deegree Z39.50 (synchrone) ISO 19139 FRA MDweb avec Z39.50 activé serveur 1.6 de métadonnées Le client d’interrogation MDweb 1.6 supporte des interrogations sur un catalogue MDweb local ou distant et sur des catalogues distants implémentant les spécifications de l’OGC : Specifications for catalogue Service for the Web 2.0.1. Ces interrogations distantes des différents outils sont testées sur le site http://demo16.mdweb‐ project.org/ . Les tests sont réalisés, en interrogations distantes, sur Geonetwork 2.1, Deegree 2.1, Géosource 1.1, MDweb 1.6. 03/07/2008 Page 51 of 76 User Manual - MDweb Administration Gestion des catalogues distants Pour pouvoir gérer un catalogue distant, vous devez vous connectez en tant qu’administrateur au module d’administration Catalogues > Catalogues distants Vous accédez à la page Gestion de catalogues distants ‐ (PostgreSQL, Z39.50 OGC, CSW 2.0) Déclaration d’un catalogue distant Pour ajouter un catalogue, vous devez compléter avec le tableau en donnant les informations suivantes : ‐ Type de service : correspond au nom du service d'accès au catalogue distant. actuellement, deux valeurs possibles : SGBD, Z3950 ou CSW 2.0 ‐ Nom du Catalogue : Libellé du catalogue distant qui apparaît dans les pages de recherche de MDweb. ‐ Nom du serveur : IP ou adresse du serveur sur lequel le service de catalogage est invoqué ‐ Port : Port sur lequel les requêtes au serveur distant seront réalisées (ex : 5432 pour SGBD, 2100 pour z3950 ; 80 ou 8080, 8045, etc pour CSW 2.0) ‐ Adresse du service de catalogage distant (non utilisé pour une connexion à un catalogue Z3950) : chemin du service de catalogage distant qui complète l'adresse du serveur (ex : /geonetwork/srv/en/csw pour un service CSW de Geonetwork) Page 52 of 76 User Manual - MDweb Administration ‐ Profil de métadonnées servis : Profil de métadonnées servis par le service de catalogage distant invoqué. Les valeurs peuvent être : iso19115, iso191139, iso19139fra, dublincore, fgdc, isoDeegree ‐ Compte utilisateur : : compte utilisateur pour accéder au service (activé sur la connexion sgbd). Il s’agit du compte utilisateur postgres pour accéder à la base MDweb ‐ Mot de passe : mot de passe de l’utilisateur postgres L’ajout du catalogue est effectif lorsque vous aurez soumis les informations saisis en cliquant sur le bouton Ajouter Attention, Les modifications, ajout ou suppression doivent être faites en ayant tous les éléments nécessaires à la configuration. Cette action modifie les fichiers config.inc.z3950.php et config.inc.csw.php. Modification des paramètres de connexion d’un catalogue distant Si vous souhaitez modifier les paramètres de connexion à un catalogue distant déjà déclaré, modifiez ses valeurs dans le tableau. Pour que la modification soit effective vous devez la soumettre en cliquant sur l’icône Suppression d’une déclaration d’un catalogue distant Pour supprimer la déclaration d’un catalogue distant, utilisez l’icône connexion de ce catalogue seront définitivement supprimés. . Les paramètres de 03/07/2008 Page 53 of 76 User Manual - MDweb Administration Les fichiers de configurations L’ajout, la modification ou la suppression de catalogues distants via le module d’administration affecte trois fichiers de configuration de MDweb dans lequels sont stockés les informations permettant la connexion aux catalogues définis avec les interfaces utilisateurs. Ces trois fichiers sont : ‐ config/config.inc.sgbd.php ‐ config/config.inc.z3950.php ‐ config/config.inc.csw.php Nous donnons dessous l’explication des variables écrites dans ces fichiers et les informations permettant de les modifier si besoin. Fichier de configuration des catalogues MDweb (1.5 et 1.6) : config.inc.sgbd.php Le fichier config/config.inc.sgbd.php contient le paramétrage pour interroger des catalogues distants MDweb via adodb (couche d’abstraction) via le port 5432 (par défaut) TCP/IP de postgreSQL. La déclaration d’un catalogue se fait en instanciant un objet Serveur comme dans l’exemple suivant : $s1=new serveur("193.48.189.28","5432","cat_test","mdweb_test","iso19139fra","sgbd","postgres","postgres"); Où • paramètre 1 : "193.48.189.28" : est l’IP ou le nom de la machine qui héberge le catalogue distant • paramètre 2 : "5432" : est le port d’écoute du SGBD postgresql • paramètre 3 : "cat_test" : est le libellé que l’on veut donner au catalogue auquel on se connecte • paramètre 4 : "mdweb_test" : le nom de la base de donnée MDweb distante • paramètre 5 : "iso19139fra" : profil de métadonnées utilisé. Six valeurs acceptées : ‐ ‐ ‐ ‐ ‐ ‐ "fgdc" : métadonnées au format FGDC " dublincore" : métadonnées au format Dublin Core "iso19139" : métadonnées au format ISO 19139 "iso19115" : métadonnées au format ISO 19115 " iso19139fra" : métadonnées au format ISO 19139, profil français " isoDeegree" : métadonnées au format ISO 19139 Deegree • paramètre 6 : "sgbd" est le protocole de connexion au catalogue distant. trois valeurs sont possibles : "sgbd" pour une connexion via le postgresql sur un catalogue distant 1.5 ou 1.6 ‐ "z3950" pour une connexion via le protocole Z3950 spécifié selon le document de l’OGC ‐ Catalog service for the Web version 2.0.1 "csw" pour une connexion via le protocole Z3950 spécifié selon le document de l’OGC Catalog ‐ service for the Web version 2.0.1 • paramètre 7 : "postgres" : compte utilisateur postgres pour se connecter à la base de données MDweb distante • paramètre 8 : " postgres": mot de passe de l’utilisateur postgres Puis à l’ajoutant à la liste de serveur $config_s Page 54 of 76 User Manual - MDweb Administration $config_s‐>add_serveur($s1); Attention : Dans le cas de l’activation du module de consultation à distante vers d’autres catalogues MDweb ($sgbd_serveur = true), vous devez déclarer la base de données géographiques du catalogue distant déclaré dans le fichier config.inc.sgbd.php. Cette déclaration permet de réaliser des recherches cartographiques sur les catalogues MDweb distants. Par défaut, la dernière ligne du fichier config.inc.carto.php déclare la base de données locale (mdweb‐demo16‐ fra) avec la base de données spatiale locale geo‐demo16 dans cette ligne : $config_s_geo‐>add_serveur(new Serveur($server_carto_host,$server_carto_port,"mdweb‐demo16‐ fra",$db_nom_sig,$type_norme,"sgbdgeo",$server_carto_user,$server_carto_pwd)); Vous devez ajouter autant de déclarations de base de données spatiales que de catalogues distants. Dans l’exemple ci‐dessous, un nouveau serveur déclare une base de données spatiale distante rattachée à la base de données MDweb distante appelée : mdweb_distant : $config_s_geo‐>add_serveur(new Serveur("193.48.189.22","5432","mdweb_distant","geo‐ mdweb_dist","iso19139fra","sgbdgeo","mdweb_geo_dist", "pwd_geo_dist")); Avec 193.48.189.22 : IP du serveur hébergeant la base de données MDweb, 5432 : port d’écoute postgresql mdweb_distant : nom base de données MDweb distante geo‐mdweb_dist : nom de la base de données spatiale distante donnant les emprises des jeux de données stockés dans mdweb_distant iso19139fra : profil de métadonnées servis par la base mdweb_distant mdweb_geo_dist : nom utilisateur de la base de données spatiale distante pwd_geo_dist: mot de passe Fichier de configuration des catalogues z3950 : config.inc.z3950.php Le fichier config/config.inc.z3950.php contient le paramétrage des catalogues distants atteignables via z3950. La déclaration d’un catalogue se fait en instanciant un objet Serveur comme dans l’exemple suivant : $config_s‐>add_serveur(new Serveur("193.48.189.28","9999","z3950_syscolag151","","iso19139fra","z3950","","")); 03/07/2008 Page 55 of 76 User Manual - MDweb Administration Où • paramètre 1 : "193.48.189.28" : est l’IP ou le nom de la machine qui héberge le catalogue distant • paramètre 2 : "9999" : est le port du protocole z3950 • paramètre 3 : " z3950_syscolag151" : est le libellé que l’on veut donner au catalogue auquel on se connecte • paramètre 4 : "" : non utilisé • paramètre 5 : "iso19139fra" : profil de métadonnées utilisé. Six valeurs acceptées : ‐ ‐ ‐ ‐ ‐ ‐ "fgdc" : métadonnées au format FGDC " dublincore" : métadonnées au format Dublin Core "iso19139" : métadonnées au format ISO 19139 "iso19115" : métadonnées au format ISO 19115 " iso19139fra" : métadonnées au format ISO 19139, profil français " isoDeegree" : métadonnées au format ISO 19139 Deegree • paramètre 6 : "z3950" est le protocole de connexion au catalogue distant. trois valeurs sont possibles : "sgbd" pour une connexion via le postgresql sur un catalogue distant 1.5 ou 1.6 ‐ "z3950" pour une connexion via le protocole Z3950 spécifié selon le document de l’OGC ‐ Catalog service for the Web version 2.0.1 "csw" pour une connexion via le protocole Z3950 spécifié selon le document de l’OGC Catalog ‐ service for the Web version 2.0.1 • paramètre 7 : "" : non utilisé • paramètre 8 : "" : non utilisé Fichier de configuration des catalogues CSW 2.0 : config.inc.csw.php Le fichier config/config.inc.csw.php contient le paramétrage des catalogues distants atteignables via CSW. La déclaration d’un catalogue se fait de la manière suivante : $s3=new Serveur("demo.deegree.org","8080","csw‐deegree","/deegree‐csw/services","isoDeegree","csw","",""); Où • paramètre 1 : " demo.deegree.org" : est l’IP ou le nom de la machine qui héberge le catalogue distant • paramètre 2 : "8080" : est le port du service web • paramètre 3 : "csw‐deegree" : est le libellé que l’on veut donner au catalogue auquel on se connecte • paramètre 4 : "/deegree‐csw/services" : chemin d’accès au service web • paramètre 5 : "iso19139fra" : profil de métadonnées utilisé. six valeurs acceptées : ‐ ‐ ‐ ‐ ‐ ‐ "fgdc" : métadonnées au format FGDC " dublincore" : métadonnées au format Dublin Core "iso19139" : métadonnées au format ISO 19139 "iso19115" : métadonnées au format ISO 19115 " iso19139fra" : métadonnées au format ISO 19139, profil français " isoDeegree" : métadonnées au format ISO 19139 Deegree • paramètre 6 : "csw" est le protocole de connexion au catalogue distant. trois valeurs sont possibles : "sgbd" pour une connexion via le postgresql sur un catalogue distant 1.5 ou 1.6 ‐ Page 56 of 76 User Manual - MDweb Administration "z3950" pour une connexion via le protocole Z3950 spécifié selon le document de l’OGC ‐ Catalog service for the Web version 2.0.1 ‐ "csw" pour une connexion via le protocole Z3950 spécifié selon le document de l’OGC Catalog service for the Web version 2.0.1 • paramètre 7 : "" : non utilisé • paramètre 8 : "" : non utilisé Puis à l’ajoutant à la liste de serveur $config_s $config_s‐>add_serveur($s3); Configuration de MDweb pour interroger un catalogue via le protocole Z39.50 Pré requis pour le client d’interrogation Z39.50 MDweb L’interrogation d’un catalogue distant z39.50 nécessite un client d’interrogation z39.50, c'est‐à‐dire des pages et des bibliothèques qui permettent d’adresser une demande au serveur z39.50. Pour cela, les extensions PHP et bibliothèques YAZ ( http://www.indexdata.dk/software/ ) sont requises. Sous Windows Avec MS4W Pour une installation de MDweb via l’installeur (installation de MS4W : Apache/PHP/Mapserver), l’extension php_yaz.dll est copiée dans le répertoire php/ext/ et déclarer dans le php.ini : extension=php_yaz.dll De même, l’installeur copie la bibliothèque yaz.dll dans le répertoire Apache/cgi‐bin/ Les versions de ces fichiers sont les suivantes : • php_yaz.dll : 5.2.1.1 YAZ • yaz.dll : 2.1.8.1 Yaz Toolkit • Veillez à ce que les bibliothèques suivantes soient présentes et compatibles avec yaz.dll, voici les versions qui testées et compatibles. Ce qui n’exclut pas d’autres versions. • • • • iconv.dll : 1.9.0.0 LGPLed libiconv for Windows NT/2000/XP libxml2.dll (non connue) msvcr71.dll : 7.10.3052.4 Microsoft® C Runtime Library zlib1.dll : 1.2.2.0 zlib data compression library Pour des installations sous Wamp ou EasyPHP ou autre. Il sera nécessaire de procéder manuellement à la déclaration de l’extension php_yaz.dll et sa présence dans le répertoire des extensions de php, de veiller à la présence et à la compatibilité des bibliothèques suivantes avec l’extension php_yaz : • yaz.dll • iconv.dll • libxml2.dll 03/07/2008 Page 57 of 76 User Manual - MDweb Administration • • msvcr71.dll zlib1.dll Les extensions php_yar pour PHP 5.2.1 et 5.1.2 et les dll sont disponibles à l’adresse suivante : http://www.mdweb‐project.org/15/z3950/client/ Le téléchargement du Toolkit YAZ (http://www.indexdata.dk/software/) pour Windows permet de trouver toutes ces bibliothèques. Il est disponible à l’adresse http://www.mdweb‐ project.org/15/z3950/client/yaz_2.1.8.exe Sous Linux De la même manière que sous Windows, il est nécessaire d’installer l’extension php5_yaz pour php. La modification du php.ini est normalement réalisée à l’installation de l’extension .so Il est aussi nécessaire mettre les librairies libyaz2, yaz et yaz‐dev si vous avez besoin de compiler la extension php_yaz. Vous pouvez trouver des ressources, informations et forum utilisateurs : http://www.indexdata.dk/phpyaz/ Page 58 of 76 User Manual - MDweb Administration Managing a geographic database Preamble: This document lists the operations necessary to create a new geographic database and to insert the vector layers (shapefiles) used in MDweb’s cartographic client. It not covers the use of the cartographic editor, especially for selecting the layers to display, and for setting their display properties and their legend. Recap ............................................................................................................... 59 Accessing the geo database management module .............................................................. 60 Creating a geographic database .................................................................................. 61 Modifying a geographic database ................................................................................ 64 Deleting a geographic database .................................................................................. 66 Configuring the connection to the geographic database ........................................................ 67 Recap Utility and use of the geographic database for the cartographic client The geographic database which is associated with MDweb contains the layers of geographic information that we want to display during the searches and cartographic data‐entry. These information layers within the cartographic client are used: • • during the creation of a metadata record, to allow the user to define the geographic extent and the toponym of the data set he is describing, and during searches, to allow the user to define a zone or a toponym over which he wants to conduct his data search. To offer the user relevant geographic objects during data‐entry as well as during searches, it is necessary to define a set of information layers representing geographic objects of interest to the cataloguing project which can be used to reference the data sets. MDweb’s module for creating and managing the geographic database can be used when MDweb is being installed to create a database, insert information layers without having any specialized knowledge of the PostgreSQL/PostGIS management system and then to configure the cartographic client. Current limitations Limitations in constructing the database 03/07/2008 Page 59 of 76 User Manual - MDweb Administration The geographic database has to be created using shapefiles (or vector layers) in the ESRI shape format on data that is georeferenced in a system of projection. The shapefiles should be accompanied by their *.proj projection definition files. Keep in mind that MDweb’s cartographic module is not a detailed navigation or display module but a basis for entering the spatial extent and of data searches based on location. These two functions necessitate the inclusion of necessary objects of interest but do not require a very precise representation. Limitations of the geographic database management module The geographic database is constructed using PostgreSQL/PostGIS. During the creation or modification of the geographic database, the server hosting MDweb and the server hosting the database should be the same. In addition, the GEOS and PROJ4 libraries should be installed as should the proj and invproj executables. In fact, the scripts used for creating and modifying the database execute SQL commands via PHP scripts. The module has been implemented and tested only on PostgreSQL/Postgis 8.1 and 8.2 under Windows and Linux. Only projected shapefiles can be inserted (use of the shp2psql function). Because of the execution of PostgreSQL functions via PHP, the execution time of postgres commands depends on the max_execution_time php.ini directive which we should set to 180 s. In view of this, the insertion of large shapefiles can prove problematic. Accessing the geo database management module The geographic database management module can be accessed only if you are logged into MDweb as administrator. Go to MDweb’s administration module. All the features of the module are accessible via the ‘Geo DB’ command in the administrator menu. The geographic database management module offers five major functions: • • • • Add: to create a new geographic database Modify: to insert or delete information layers from an existing geographic database Delete: to delete a geographic database Configuring the connection: to set the parameters for connecting to a PostgreSQL server and to a geographic database that will be used with the cartographic client Page 60 of 76 User Manual - MDweb Administration • Cartographic editor: to specify the layers that will appear (and configure their legends) in the cartographic client Updating the spatial and thesaurus DBs: to update the ‘hierarchiespatiale’ table with terms of type ‘spatial’ of the application’s thesaurus. (For details, consult the ‘Note on thesaurus management’.) • Creating a geographic database - This module allows you to create a new geographic database under PostgreSQL/PostGIS. This module requires the PostGIS spatial extension to be installed on your PostgreSQL server. During the creation of a geographic database, the MDweb scripts execute SQL commands and use PostGIS’s lwpostgis.sql and spatial_ref_sys.sql files. Tables created and their use The tables created in the geographic database: by default, on creation of a database containing geographic objects of type GEOM, PostgreSQL creates two tables: • geometry_columns which references all the tables containing the geometry (field of type GEOM) and their properties • spatial_ref_sys which contains the definition of the system of projection. Three additional tables required by MDweb are created: • objet_geom which contains the geographic objects that are to be used to define the extents of the metadata records of your catalog • metadata_link, a table that links the metadata record identifiers with the extents (geometry) stored in the objet_geom table • hierarchiespatiale, a table for storing the hierarchy between layers of the geographic database. This hierarchy is used to display the information layers in the cartographic module. Creation of the database using MDweb’s ‘Geo DB’ module 1. Go to the Add a geographic database page from the administration module. 2. Fill in the form that opens. First review the pre‐filled default values. If they are not suitable, modify them. As a subsequent step, you will have to modify the default configuration of the connection to the geographic database by going to the ‘Connection to the Geo DB’ page of the same module. 03/07/2008 Page 61 of 76 User Manual - MDweb Administration Seven fields relate to the creation of a database: • IP address of the DBMS: Name or IP address of the server hosting the geographic database. • TCP/IP port of the DBMS: Access port number of the database server. By default, the port is 5432. • User account: Name of the user allowed to access the geographic database. He should have write rights on the database. He should also be able to create a database. • Password: The user’s password. • Name of the geographic database: Select a name that does not include spaces or special characters (? ;: ! &, etc.) • Full path of the lwpsotgis.sql file: The full path should include the drive letter for a Windows installation. Normally, this file is located in the share/contrib/ folder of your PostgreSQL installation. If it is not, the PostGIS extension has not been installed. This file is absolutely necessary for the correct execution of the database‐creation scripts. • Full path of the spatial_ref_sys.sql file: The full path should include the drive letter for a Windows installation. Normally, this file is located in the share/contrib/ folder of your PostgreSQL installation. This file is absolutely necessary for the correct execution of the database‐creation scripts. 3. Once the form is filled in, Submit it. A new page will open for you to fill in the final details for the creation of the geographic database. 4. Choice of the srid (spatial reference identifier) Page 62 of 76 User Manual - MDweb Administration You have to provide the srid of the system of projection being used. This is a unique numeric identifier. A list of srid’s is stored in the spatial_ref_sys table of your database. a) The ‘Spatial reference identifier’ field allows you to access the list of the stored srid’s and to select the appropriate one (the same as of your *.proj file). By clicking on one of the items of the list, you will automatically fill in the two fields ‘Spatial reference identifier’ and ‘System description’. Or b) Load the project definition file of your shapefile using the ‘Browse’ button. c) Submit the form. Help in identifying the srid: The srid is not stored in the definition file of your shape. However, it contains the name of the system of projection: You can search for the srid of the system of projection on the site of OGP Surveying & Positioning Committee (www.epsgs.org), EPSG Geodetic Parameter Dataset section. If your system of projection is not referenced by this organisation, there are others, for example, ESRI. We make available a file for download, srid.sql, which contains additional systems. Make a text search for the name of your system in this file and you will, no doubt, find the srid corresponding to your system of projection. The file is located with the MDweb scripts at: create_geo_db/srid.sql 03/07/2008 Page 63 of 76 User Manual - MDweb Administration Modifying a geographic database 1. Go to the Modify a geographic database page from the administration module Inserting a new layer of geographic information 2. Click on the Modify button to access fields that will allow you to change the shapefile and associated files (shx, dbf). 3. Enter paths of the shapefile that you want to insert into the database. Three files are necessary for the importing of the layer: • The shp shapefile itself • The shx index file • The dbf file containing the attributes. Note: The dbf file has to have a column called ‘toponym’ of type ‘text’ of a maximum of 50 characters. This column is used to display the toponym. Page 64 of 76 User Manual - MDweb Administration 4. You then have to provide a name for the table that will be created in the database. This table name will then be used during editing in the cartographic client. 5. Submit the completed form. Remark: An information layer can only be inserted when it is already projected in a system and is accompanied by its *.proj projection definition file. Deleting a geographic information layer You delete a table starting from the same page used for inserting a table. 1. Go to the Modify a geographic database page from the administration module. 2. Select the database from which you want to delete a table. 3. Delete the table that you want removed. The deletion is immediate and irreversible.. 03/07/2008 Page 65 of 76 User Manual - MDweb Administration Deleting a geographic database 1. Go to the Delete a geographic database page from the administration module. 3. Select the database that you want to delete. Page 66 of 76 User Manual - MDweb Administration 4. Validate. The database is immediately deleted. Configuring the connection to the geographic database This module is used to configure the connection to a PostgreSQL server and to a geographic database that will be used with the cartographic client. Use of this module leads to changes in the values of the connection variables contained in the config/config.inc.carto.php file. Access this module: Geo DB > Configuration > Geo DB connection A form will allow you to change the existing or default configuration: Seven fields allow you to change the settings for connecting to the geographic database: • • • • IP address of the DBMS: (see p.5) TCP/IP port of the DBMS: (see p.5) User account: (see p.5) Path to the inverse projection script (invproj): Path to the inverse projection executable. The default values are invproj.exe for a Windows installation and /usr/local/bin/invproj for Linux. If you provide a relative path to this executable, its absolute path should be included in the PATH variable of your system. If that is not the case, you will have to change your PATH system variable and restart the server (Windows OS). 03/07/2008 Page 67 of 76 User Manual - MDweb Administration • • Path to the projection script (proj): Path to the projection executable. The default values are proj.exe for a Windows installation and /usr/local/bin/proj for Linux. If you provide a relative path to this executable, its absolute path should be included in the PATH variable of your system. If that is not the case, you will have to change your PATH system variable and restart the server (Windows OS). Name of the geographic database: A drop‐down list allows you to choose the geographic database present on your PostgreSQL server with which the cartographic client will be used. After modification and verification of the values entered into the fields, validate your choices with the ‘Creation of the geographic module’s configuration file’. The config/config.inc.carto.php file will be modified. Remark: For this operation to succeed, it is necessary for the ‘apache’ user (user of the httpd service) to have write rights for the directory where the MDweb scripts are stored. Page 68 of 76 Editing Map client Preamble: This document describes in detail the operations necessary to configure the Mapbuilder cartographic client which is used in the MDweb search and data‐entry modules. This configuration consists of choosing the layers that will appear in the cartographic client and setting their properties. Using the editor ..................................................................................................... 69 How it works ........................................................................................................ 74 Troubleshooting ..................................................................................................... 75 Configure the cartographic client using the sld editor that is accessible via the administration module > Geo DB > Configuration > Cartographic editor Using the editor The cartographic editor allows you to select, and configure the display of, geographic information layers in the MDweb cartographic client. This operation consists of 3 or 4 steps: • • • • Selecting an available information layer Defining its legend (name, background and line colours, type of figuration) Creating and defining layer groups Saving the edited information Step 1: Selecting geographic layers On first use of the cartographic editor, the Available layers tab is displayed. Use the icon to select a layer. A dialogue box ‘Name of the group?’ will open with the name Others already filled in. Click OK (the creation of a specific group is covered in step 3). The selected layer will be displayed in the cartographic client. User Manual - MDweb Administration Step 2: Editing the geographic layer’s legend Page 70 of 76 User Manual - MDweb Administration To edit the selected layer’s legend, first click on the Legend tab. To edit your layer’s legend, click on the icon. The style editor will open. The style editor will allow you to provide the name of the layer which will appear in the legend. For a layer of type polygon, you can choose a background colour (fill colour) and outline colour. For selecting the colours, a palette is available. To validate your modifications, click the ‘Save change’ button before exiting the style editor. 03/07/2008 Page 71 of 76 User Manual - MDweb Administration Managing transparency of layers The map editor can manage for each layer chosen the transparency of display. For this, you can use the combox box and choose a level of transparency from 0 (entirely transparent) to 1.0 (any transparency). Remark: All style modifications are applied immediately when you save your changes. Step 3: Creation of a layer group and adding layers to the group For a better view of the displayed layers, the cartographic editor allows you to include layers within a layer group. You have to first create a group, then add one or more layers to the group. You can also remove a layer from a group and even delete a whole group. To create a group, click on the Group tab, enter the name of the group, validate with the Ok and Done buttons. Subsequently, you can use the Modify group option to add one or more layers to a group or remove a layer from a group. Validate your changes by clicking Done. Page 72 of 76 User Manual - MDweb Administration The result: Step 4: Saving the changes made during the editing session Before exiting the cartographic editor, you can save the changes your have made. Do so by clicking on the icon; a ‘File saved’ message should appear. 03/07/2008 Page 73 of 76 User Manual - MDweb Administration How it works MDweb’s cartographic editor module creates several types of files necessary for the Mapserver map server and the Mapbuilder client. When the cartographic editor is invoked for the first time, files mapserver_carto/config/default/carto.map and mapserver_carto/config/default/carto.map.save are created. They are created by reading the geographical database (geometry_columns table) in the config/config.inc.carto.php file. Also created automatically are the context files (with the legend) of the different encountered found in the database. They are created in the mapserver_carto/config/sld/ directory, one xml file per layer. Finally, during the final saving of your client’s composition, the mapserver_carto/config/default/context.xml file is created. It contains all the information on displaying layers and their properties as they will appear in the cartographic client. Remark: In case you encounter problems in using the cartographic editor, you can delete all these files. When the cartographic editor is next run, it will be as if it is being invoked for the first time and the carto.map and legend files will be recreated. Reinitilization of map context In the case that you install MDweb on localhost (demonstration version) and that you want to modify the address of web server (production mode) and give a new IP or domain address, the version 1.6 proposes to the administrator to reinitialize the map context to recreate a new files for map context using the new IP or address of your web server. Page 74 of 76 User Manual - MDweb Administration Troubleshooting Common errors that can prevent the editor from running (error messages and warnings) can be divided into three major categories: • • • Problem of connecting to the geographic database Write rights for the MDweb directories Inconsistencies in the geographic database The following table can serve as a first troubleshooting guide: Type of problem To verify: Connection to the geographic • database The parameters for connecting to the geographic database in the config/config.inc.carto.php file • The postgresql user who connects to the database should be the owner of, and have read/write rights for, all the tables Inconsistencies in the • geographic database The geometry_columns table that references the layers of the geometric tables should contain the tables corresponding to your database • The srid (spatial reference identifier, i.e., system of projection identifier) used by your information layers should be present in the spatial_ref_sys table Problem configuration files creating The Apache user (depending on the system: apache, httpd, etc.) does not have write rights on the MDweb directories. You have to assign these rights. Under linux : chown –R apache:apache mdweb (for example). 03/07/2008 Page 75 of 76 User Manual - MDweb Administration Contacts IRD / SPACE unit (US 140) 500, rue Jean François Breton, 34093 Montpellier Cedex 05, France TEL : +33 (0)4 67 54 87 02 J.C Desconnets [email protected] MDweb project site: www.mdweb‐project.org Online demo: demo.mdweb‐project.org Page 76 of 76