1
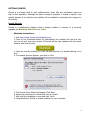
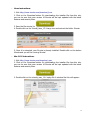
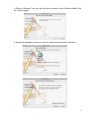
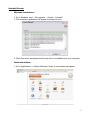
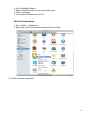
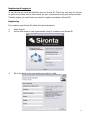
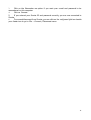
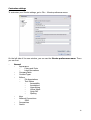
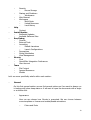
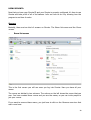
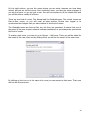
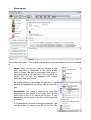
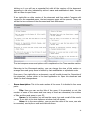
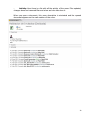
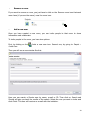
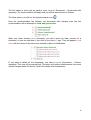
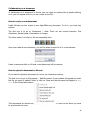
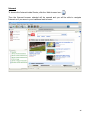
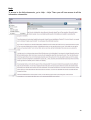
Sironta user guide
1
Sironta user guide
GETTING STARTED
– Install Sironta
– Uninstall Sironta
– Registering & Logging in
– Customize settings
– Explore Sironta features
– Privacy
– Keyboard shortcuts
USING SIRONTA
– Screens
– Rooms & Workspaces
– Synchronization
– Collaborating on a document
– Icons
– Views
– Indexing & Searching
– Time machine
– Internet
– Chat
– Update
– Help
FAQs
TROUBLESHOOTING
2
GETTING STARTED
Sironta is a program used to work collaboratively, share files and information based on
Peer-to-Peer operation. Although the basic concept of operation is simple to explain, now
specific aspects of its interface and usability will be detailed to understand the program in
its entirety.
Install Sironta
Sironta is a collaboration platform that is already installed in minutes. It is currently
available for Windows, Mac OS X and Linux.
– Windows instructions:
1. Visit http://www.sironta.com/download_win
2. Click on the Download button. By downloading the installer file from this site,
you can be sure that your version of Sironta will be kept updated with the latest
features and security fixes.
3. Save the sironta_windows_10.1.exe file and execute it by double-clicking on its
icon.
4. If a window like this appears, just click on Run:
5. The Sironta Setup Wizard will appear. Click Next.
6. Select the components to install and click on Install.
7. Wait until the installation is over and click Finish.
8. Congratulations! Sironta is already installed on your computer.
3
– Linux instructions:
1. Visit http://www.sironta.com/download_linux
2. Click on the Download button. By downloading the installer file from this site,
you can be sure that your version of Sironta will be kept updated with the latest
features and security fixes.
3. Save the file sironta_linux_10.1.tar.gz
4. Double click on the sironta_linux_10.1.tar.gz icon and extract the folder Sironta.
5. Once it is extracted, your Sironta is already installed. Double-click on the button
Sironta and you will be running Sironta!
– Mac OS X instructions:
1. Visit http://www.sironta.com/download_mac
2. Click on the Download button. By downloading the installer file from this site,
you can be sure that your version of Sironta will be kept updated with the latest
features and security fixes.
3. Double-click on the sironta_mac_10.1.mpkg file. A window like this will appear:
4
4. Click on Continue. Then you will see the first screen of the Sironta installer. Click
on Continue again:
5. Select the destination where you wish to install Sironta and click Continue:
5
6. Now you will see an advice window. Click on Install:
7. Now you have Sironta installed on your Mac. Click Close and Enjoy it!
6
Uninstall Sironta
– Windows instructions:
1. Go to Windows start → All programs → Sironta → Uninstall.
2. The uninstaller application will appear and begin to work.
3. Click Close when completed and Sironta will be uninstalled from your computer.
– Linux instructions:
1. Go to Applications -> Ubuntu Software Center. A new window will appear.
7
2. Go to Installed Software.
3. Select Sironta and click on the arrow at the right.
4. Click on Uninstall.
5. You removed Sironta from your PC.
– Mac OS X instructions:
1. Go to Finder → Applications.
2. Right click on the Sironta icon and select Move to trash.
3. Sironta is already uninstalled.
8
Registering & Logging in
To use Sironta you must be identified via your Sironta ID. This is the only way for Sironta
to grant your privacy and to know which are your rooms and to bring you access to them.
Therefor, before you use Sironta you need to register and obtain a Sironta ID.
Registering
If you want a new Sironta ID, follow the next instructions:
1.
2.
Enter Sironta.
On the first screen in the Login window, click on Create a new Sironta ID.
3.
Fill in the fields of the new window and click on Next.
9
4.
Check your e-mail inbox. You will be sent an e-mail with your Sironta ID
confirmation.
5.
Click on the e-mail's link to activate your membership.
6.
A message saying 'Your account has already been validated. You can log-in
Sironta!''.
Logging in
Now that you have a Sironta ID, it's time to use it.
1.
2.
Enter Sironta.
In the Login window, enter your Sironta ID (e-mail) and your confirmed password.
10
3.
Click on the Remember me option if you want your e-mail and password to be
remembered on this computer.
4.
Click on Connect.
5.
If you entered your Sironta ID and password correctly, you are now connected to
Sironta.
6.
To connect/disconnect from Sironta, you can click on the red/green light icon beside
your Avatar icon or go to File → Connect / Disconnect menu.
11
Customize settings
To customize your Sironta settings, go to File → Sironta preferences menu.
On the left side of the new window, you can see the Sironta preferences menu. There
you can find:
–
General
–
Appearance
–
Colors and Fonts
–
Label Decorations
–
Compare/Patch
–
Content Types
–
Editors
–
File Associations
–
Text Editors
–
Accessibility
–
Annotations
–
Hyperlinking
–
Linked Mode
–
Quick Diff
–
Spelling
–
Keys
–
Network Connections
–
SSH2
–
Perspectives
–
Search
12
–
–
–
–
–
–
–
–
–
Security
–
Secure Storage
Startup and Shutdown
–
Workspaces
Web Browser
Workspace
–
Build Order
–
Linked Resources
–
Local History
Help
–
Content
Install/Update
–
Automatic Updates
–
Available Software Sites
Run/Debug
–
Console
–
External Tools
–
Launching
–
Default Launchers
–
Launch Configurations
–
Perspectives
–
String Substitution
–
View Management
Sironta
–
Chat
–
OpenOffice Integration Preferences
–
User Account
Team
–
File Content
–
Ignored Resources
–
Models
Let's see more specifically what's within each section:
–
General
On this first general section we can find general options as if we want to always run
in background, show heap status or if we want to open the documents with a single
or a double click.
–
Appearance
Here we can choose how Sironta is presented. We can choose between
some templates or themes and enable/disable animations.
–
Colors and Fonts
13
This is where you can personalize the fonts, the font size and the
colors of the fonts used by Sironta.
–
Label Decorations
Label decorations show extra information about an item on its label or
icon. You can select which additional decorations should be displayed.
–
Compare/Patch
This are the options for the time machine and compare documents function
of Sironta. You will be able to select how you want to see the compared texts
and the differences between them.
–
Content Types
Here you can configure your Sironta content type based file associations.
–
Editors
This is where you can edit all the editors related options.
–
File Associations
This is the section to associate file types to the editors.
–
Text Editors
In this field you can configure the text editor options and the
appearance options.
–
Accessibility
Here you can edit the caret options or choose if you want to
use characters to show changes in vertical ruler.
–
Annotations
Here you can modify the views and colors of the annotation
types.
–
Hyperlinking
To choose the style navigation to enable on demand hyperlink.
–
Linked Mode
14
To modify the way of linked ranges are shown.
–
Quick Diff
Enable and configure Quick Diff.
–
Spelling
Right now, the spelling service is not installed.
–
Keys
Configure Sironta's shortcut keys.
–
Network Connections
Here we can configure Sironta's networks connections and its hosts and
ports.
–
SSH2
These are the configuration options for SSH2, generation of DSA and
RSA keys, etc.
–
Perspectives
Here you can manage the perspectives, views and projects. The available
perspectives are:
Debug
Initial perspective
List room perspective
Resource
Room perspective
Sironta perspective
Team synchronizing
–
Search
To configure the searching option like reuse the editors to show matches,
ignore potential matches and others.
–
Security
–
Secure Storage
Here you can manage your passwords and the secure contents.
–
Startup and Shutdown
15
This section is used to configure the options incumbent to the startup and
the shutdown.
–
–
Workspaces
Here you can configure the number of workspaces to remember and if
you want to prompt for workspace on startup.
Web Browser
To configure which web browser do you want to use in Sironta.
–
Workspace
To modify the workspaces options. Here you can decide when do you want
to refresh your workspace, etc.
–
Build Order
To define the project build order.
–
Linked Resources
Enable linked resources and specify their locations.
–
Local History
To choose the parameters of the local history storage.
–
Help
To specify how help information is displayed.
–
Content
To include help content from a remote infocenter.
–
Install/Update
Optimize the updating options.
–
Automatic Updates
Configure the automatic updates.
–
Available Software Sites
To choose the websites to download the updated software.
16
–
Run/Debug
General settings for running and debugging.
–
Console
Debug console settings.
–
External Tools
External tools project builders stored in an old format will be migrated to a
new format when edited. Projects which store builders are using an old
format will be migrated whenever a change is made. Once migrated, project
builders will not be understood by installations using these older formats.
Here you can configure if you want Sironta to ask before act.
–
Launching
General options for launching.
–
Default Launchers
The settings on this page specify which launcher to use when multiple
launchers are available for a configuration and launch mode.
–
Launch Configurations
Configure launch configuration filters.
–
Perspectives
These settings control perspectives for running and debugging. A perspective
can automatically open when launching or when an application suspends.
–
String Substitution
Create and configure string substitution variables.
–
View Management
The debug view can automatically open and close views based on selection.
Here you can choose in which perspectives this feature should be enabled.
–
Sironta
To restore default settings.
–
Chat
17
Chat preferences.
–
OpenOffice Integration Preferences
Choose the OpenOffice.org libraries directory.
–
User Account
To configure your user settings such as Name, Location, e-mail or Password.
–
Team
General team preferences.
–
File Content
To change and/or remove file extensions and content of this files.
–
Ignored Resources
Use this page to specify a list of resource name patterns to exclude from
version control.
–
Models
Select the model types that should be available when synchronizing.
18
Explore Sironta features
Sironta connects two or more users without making any network changes to share files of
any type and any size from anywhere in the world without violating the terms of
confidentiality or the NDA that such documents may have.
The application has Windows, Mac and Linux versions.
- Peer-to-Peer
Direct communication tool. A peer-to-peer is a
distributed network architecture composed of
participants that make a portion of their resources
directly available to other network participants,
without the need for central coordination instances
(such as servers or stable hosts). Peers are both
suppliers and consumers of resources, in contrast to
the traditional client – server model where only
servers supply, and clients consume.
- Distributed network
Not centralized on an external server. This means that documents are not stored
anywhere that users do not have access or control.
These P2P approach makes that every user has the information on its
computer, so we can have a distributed repository and multiple backups not
centralized on an external server.
- OpenOffice.org embedded to create and edit documents
Shared documents can be modified directly in Sironta without the need to open another
office suite. If, moreover, you decide to create a new document, it can be created in
Sironta as it incorporates OpenOffice.org.
- Sharing files of any type and any size, without limitations or restrictions.
The only limitation is your computer. The shared files can be of any size and any type
without the typical constraints of online storage services. Sironta is ideal for large files
because there is no storage limit.
Traditional collaboration tools are managing all the time the whole file. When
you need to change even one word in a large document of 30 Megabytes, you
have to download it from the server, open it with the office suite, change the
word, save the document and upload the 30 Megabytes again to the server.
With Sironta, you open the document inside Sironta because it has
OpenOffice.org embedded, you change the word and synchronize. Only the
word changed is sent through the network.
19
This resources saving implies that you can work with all the files you want and
with files as large as you want.
- You can work collaboratively from anywhere at anytime
You only need a computer. Not depending on updates or errors on the server.
- No modification of the documents type
Unlike other services that modify the documents type to transform them into their own
type, Sironta always keeps the document in its original form, without changing the
extensions.
- No network congestion
All SaaS applications always handle the whole file. With Sironta, after editing a document,
only changes are sent through the network, not entire files. So, if you work with big files,
there is no network congestion because only file changes are submitted.
- It is not an online application
The majority of collaborative tools are web-based, not installed on users machines. Thus,
is required to access the Internet to access to such software (Software as a Service
(SaaS)). Sironta, communicates users directly, does not depend on a browser.
- Possibility of editing documents off-line
As a program installed on the computer and not a SaaS, Sironta can boot without network
connection and can work on documents even if that computer is offline. Once you
reconnect to the network, the changes will be synchronized with the other users.
For example, If we are on a plane, we can connect our PC, work with Sironta offline and when we arrive to the airport we can upload the changes done.
- It is open source, AGPL v3 license
Sironta is created with an open source license, bringing advantages to read, modify,
redesign, develop or improve the product code.
It is developed on Eclipse with an AGPL v3 license and uses XMPP protocol to
manage the communications between peers.
Why open source? The only way to keep the pace with the huge players is to
engage a huge community of developers that help you to develop and evolve
appliance to your application.
What will happen if Sironta dies?
20
The answer is: If Sironta dies, you can manage it, you can evolve the software
or you can hire developers that can evolve your software because it is open
source. So this is why we use this kind of approach with Sironta, because is
the only way to go fast and to keep the pace with the other people that are
developing team collaboration software.
- Works with files of any type of application you already have installed on your
computer
From sharing calendars files (*.ics files) to Matlab files. If you have already installed on
your computer the application to manage any kind of file, Sironta will manage it.
- As a global application it runs smoothly on any Microsoft, Linux or Mac
computer
Sironta has been developed in three different versions to work on the three most common
operating systems.
You can use Sironta if you have Windows, you have a Linux or even if you have
a Mac. Sironta is the only collaboration platform that works on Mac OS X. You
can even collaborate if we have Linux and our partners have Windows or Mac
OS X.
- Room metaphor
Sironta is based on the room metaphor, first proposed by researchers at the
University of Calgary in Canada on the article 'Heuristic evaluation of
groupware based on the Mechanics of Collaboration' in 2001.
Sironta is divided into different rooms or workspaces, in which every user that
has access to a room shares the files he wants in that room, all the other users
of the room can see this files and a user can access to different rooms or
workspaces.
- People management
You, as a Sironta user, can invite people to Sironta, you can invite people to
your rooms or if they already are Sironta users, you can share files and
information or chat with them.
- Documents management
Inside Sironta you can Index & Search your documents and others documents,
you have a time machine to manage and compare the different versions of a
document and the changes updated by every user, and you can synchronize
21
every time you want to update your changes or to see the changes that other
users have created on the different documents.
- Rooms management
Presence awareness: you see who is connected when you enter to a room on
Sironta, you have chat rooms to easily collaborate, and you can monitor the
activity of the software to know what is happening at every moment.
- European research projects
Sironta is encompassed within the DEN4DEK (Digital Ecosystems Network of
regions for DissEmination and Knowledge Deployment) and OPAALS (Open
Philosophies for Associative Autopoietic Digital Ecosystems) European projects.
22
Privacy
Traditional solutions are not a bad solutions for students or single works, but
they are not applicable to a company. Why?
Have you thought on what is happening if you are leaving your confidential
information on an external server, outside your company?
If you are working on any patent, if you store it outside your company you can
not register it as a patent later.
The other possibility is to ask to your partners
to open the server of their company to you and
then you have access to their server, take their
info and upload yours. These is not an option
because
the
network
and
systems
administrators don't want to open the
resources of the company to other companies,
which is quite logical because they are afraid of
hacking.
So our solution
solution. Why?
was
to
approach
a
P2P
These P2P approach makes that every user
has the information on its computer, so we can
have a distributed repository and multiple
backups not centralized on an external server.
Unlike web-based products, Sironta maintains the
confidentiality of documents and file sharing. These documents don't loose their
confidentiality or NDA because of the P2P nature of the software. There is no
information leakage.
You only share the documents with the people you want, not with the whole community.
23
Keyboard shortcuts
These are the default keyboard shortcuts. You can change them by going to Files →
Sironta Preferences → General → Keys.
Command
Binding
When
Category
Delete
Delete
In Windows
Edit
Next View
Ctrl+F7
In Windows
Window
Rename
F2
In Windows
File
Refresh
F5
In Windows
File
Show View Menu
Ctrl+F10
In Dialogs and Windows
Window
Delete Line
Ctrl+D
Editing Text
Text Editing
Print
Ctrl+P
In Windows
File
New
Ctrl+N
In Windows
File
Close All
Ctrl+Shift+W
In Windows
File
Previous
Ctrl+,
In Windows
Navigate
Next Word
Ctrl+Right
Editing Text
Text Editing
Switch to Editor
Ctrl+Shift+E
In Windows
Window
Debug Last Launched
F11
In Windows
Run/Debug
Select Next Word
Ctrl+Shift+Right
Editing Text
Text Editing
Copy
Ctrl+C
In Dialogs and Windows
Edit
Show Ruler Context Menu
Ctrl+F10
Editing Text
Window
New Rendering
Ctrl+N
In Memory View
Run/Debug
Copy
Ctrl+Insert
In Dialogs and Windows
Edit
Save
Ctrl+S
In Windows
File
Step Return
F7
Debugging
Run/Debug
Incremental Find Reverse
Ctrl+Shift+J
Editing Text
Edit
Select Previous Word
Ctrl+Shift+Left
Editing Text
Text Editing
Show View (View: Outline)
Alt+Shift+Q, O
In Windows
Views
Previous Perspective
Ctrl+Shift+F8
In Windows
Window
Step Over
F6
Debugging
Run/Debug
Move Lines Down
Alt+Down
Editing Text
Text Editing
New menu
Alt+Shift+N
In Windows
File
Show View (View: Search)
Alt+Shift+Q, S
In Windows
Views
Next
Ctrl+.
In Windows
Navigate
Open Resource
Ctrl+Shift+R
In Windows
Navigate
Quick Diff Toggle
Ctrl+Shift+Q
Editing Text
Edit
Toggle Overwrite
Insert
Editing Text
Text Editing
Show View (View: Breakpoints) Alt+Shift+Q, B
In Windows
Views
Close All
Ctrl+Shift+F4
In Windows
File
Cut
Ctrl+X
In Dialogs and Windows
Edit
Previous Word
Ctrl+Left
Editing Text
Text Editing
Save All
Ctrl+Shift+S
In Windows
File
Show Tooltip Description
F2
Editing Text
Text Editing
Text Start
Ctrl+Home
Editing Text
Text Editing
24
Close
Ctrl+F4
In Windows
File
Insert Line Above Current Line Ctrl+Shift+Enter
Editing Text
Text Editing
Next Perspective
Ctrl+F8
In Windows
Window
Move Lines Up
Alt+Up
Editing Text
Text Editing
Select All
Ctrl+A
In Dialogs and Windows
Edit
Scroll Line Up
Ctrl+Up
Editing Text
Text Editing
Show View (View: Problems)
Alt+Shift+Q, X
In Windows
Views
Word Completion
Alt+/
Editing Text
Edit
Previous Sub-Tab
Alt+PageUp
In Dialogs and Windows
Navigate
Maximize Active View or Editor Ctrl+M
In Windows
Window
Show View (View: )
Alt+Shift+Q, L
In Windows
Views
Find Previous
Ctrl+Shift+K
Editing Text
Edit
Quick Fix
Ctrl+1
In Dialogs and Windows
Edit
Use Step Filters
Shift+F5
In Windows
Run/Debug
To Upper Case
Ctrl+Shift+X
Editing Text
Text Editing
Properties
Alt+Enter
In Windows
File
Go to Address
Ctrl+G
In Table Memory Rendering Run/Debug
Content Assist
Ctrl+Space
In Dialogs and Windows
Edit
Context Information
Ctrl+Shift+Space
In Dialogs and Windows
Edit
Redo
Ctrl+Y
In Dialogs and Windows
Edit
Previous View
Ctrl+Shift+F7
In Windows
Window
Next Editor
Ctrl+F6
In Windows
Window
Show View (View: Synchronize) Alt+Shift+Q, Y
In Windows
Views
EOF
Ctrl+Z
In I/O Console
Run/Debug
Find Next
Ctrl+K
Editing Text
Edit
Find Text in Workspace
Ctrl+Alt+G
In Windows
Search
Collapse
Ctrl+Numpad_Subtract
Editing Text
Text Editing
To Lower Case
Ctrl+Shift+Y
Editing Text
Text Editing
Copy File
Ctrl+C
Docs context
Uncategorized
Delete to End of Line
Ctrl+Shift+Delete
Editing Text
Text Editing
Text End
Ctrl+End
Editing Text
Text Editing
Line Start
Home
Editing Text
Text Editing
Backward History
Alt+Left
In Windows
Navigate
Show View (View: Console)
Alt+Shift+Q, C
In Windows
Views
Toggle Insert Mode
Ctrl+Shift+Insert
Editing Text
Edit
Previous Editor
Ctrl+Shift+F6
In Windows
Window
Select Line End
Shift+End
Editing Text
Text Editing
Duplicate Lines
Ctrl+Alt+Up
Editing Text
Text Editing
Next Page
Alt+F7
In Windows
Navigate
Show In...
Alt+Shift+W
In Windows
Navigate
Quick Access
Ctrl+3
In Windows
Window
Step Into
F5
Debugging
Run/Debug
Show Key Assist
Ctrl+Shift+L
In Dialogs and Windows
Window
Reset Structure
Ctrl+Shift+Numpad_Multiply Editing Text
Text Editing
Delete Next Word
Ctrl+Delete
Text Editing
Editing Text
25
Close User Assistance Tray
Ctrl+F4
In Dialogs
Help
Collapse All
Ctrl+Shift+Numpad_Divide
In Windows
Navigate
Resume
F8
Debugging
Run/Debug
Add Memory Block
Ctrl+Alt+M
In Memory View
Run/Debug
Next Sub-Tab
Alt+PageDown
In Dialogs and Windows
Navigate
Paste
Shift+Insert
In Dialogs and Windows
Edit
Join Lines
Ctrl+Alt+J
Editing Text
Text Editing
Close Rendering
Ctrl+W
In Memory View
Run/Debug
Run Last Launched
Ctrl+F11
In Windows
Run/Debug
Paste file
Ctrl+V
Docs context
Uncategorized
Next Memory Monitor
Ctrl+Alt+N
In Memory View
Run/Debug
Toggle Block Selection
Alt+Shift+A
Editing Text
Edit
Close
Ctrl+W
In Windows
File
Line End
End
Editing Text
Text Editing
Activate Editor
F12
In Windows
Window
Select Line Start
Shift+Home
Editing Text
Text Editing
Show View (View: Cheat Sheets) Alt+Shift+Q, H
In Windows
Views
Expand All
Ctrl+Numpad_Multiply
Editing Text
Text Editing
Paste
Ctrl+V
In Dialogs and Windows
Edit
Close User Assistance Tray
Ctrl+W
In Dialogs
Help
Toggle Memory Monitors Pane Ctrl+T
In Memory View
Run/Debug
Expand
Ctrl+Numpad_Add
Editing Text
Text Editing
Next Page of Memory
Ctrl+Shift+.
In Table Memory Rendering Run/Debug
Cut
Shift+Delete
In Dialogs and Windows
Edit
Open Search Dialog
Ctrl+H
In Windows
Search
Terminate
Ctrl+F2
Debugging
Run/Debug
Previous Page of Memory
Ctrl+Shift+,
In Table Memory Rendering Run/Debug
Copy Lines
Ctrl+Alt+Down
Editing Text
Text Editing
Incremental Find
Ctrl+J
Editing Text
Edit
Forward History
Alt+Right
In Windows
Navigate
Toggle Breakpoint
Ctrl+Shift+B
In Windows
Run/Debug
Run to Line
Ctrl+R
Debugging
Run/Debug
Toggle Folding
Ctrl+Numpad_Divide
Editing Text
Text Editing
Go to Line
Ctrl+L
Editing Text
Navigate
Show Sironta Team
Ctrl+6
In Windows
Uncategorized
Delete Previous Word
Ctrl+Backspace
Editing Text
Text Editing
Show System Menu
Alt+-
In Windows
Window
Insert Line Below Current Line Shift+Enter
Editing Text
Text Editing
Find and Replace
Ctrl+F
In Windows
Edit
Show View (View: History)
Alt+Shift+Q, Z
In Windows
Views
Collapse All
Ctrl+Shift+Numpad_Divide
Editing Text
Text Editing
Show View
Alt+Shift+Q, Q
In Windows
Views
Last Edit Location
Ctrl+Q
In Windows
Navigate
Build All
Ctrl+B
In Windows
Project
Scroll Line Down
Ctrl+Down
Editing Text
Text Editing
26
Quick Switch Editor
Ctrl+E
In Windows
Window
Previous Page
Alt+Shift+F7
In Windows
Navigate
Show View (View: Variables)
Alt+Shift+Q, V
In Windows
Views
Undo
Ctrl+Z
In Dialogs and Windows
Edit
27
USING SIRONTA
Now that you have your Sironta ID and your Sironta is properly configured, it's time to use
Sironta and take profit of all of its features. Let's see how to do it by showing how the
program is and how it works.
Screens
Basically, there are two kind of screens on Sironta. The Room list screen and the Room
screen.
–
Room list screen
This is the first screen you will see once you log into Sironta. Here you have all your
rooms.
The rooms are divided in two columns. The column on the left shows the rooms that you
own. You have created these rooms and you are the owner, so you can invite people to
join your rooms.
If you want to remove these rooms, you just have to click on the Remove room icon that
each room have.
28
On the right column, you see the rooms where you can enter, because you have been
invited, but you are not the owner. Once inside the room, you have the same privileges if
you are the owner or you are just a user. You will have access to all the shared files and
you will be able to modify all of them.
There are two kind of rooms. The Normal and the Dedicada ones. The normal rooms are
Peer-to-Peer rooms, so you will need at least another Sironta user logged in to
synchronize the changes that you have realized in this kind of rooms.
The Dedicada rooms are Peer-to-Peer too, but they are persistent. It means that one of
the peers of the peer-to-peer network is always connected, so you always can synchronize
this kind of rooms.
To create a new room, you have to go to Rooms → Add room. There you will be asked for
the name of the new room and by clicking finish you will be the owner of this new room.
By clicking on the icon or in the name of a room you can access to that room. There you
will see the Room screen.
29
–
Room screen
This is the room screen. This is what you see when you enter inside a room. It is divided
in:
–
Users: Here you can see who can access to the
room and who is connected. If the user's avatar
frame is green, the user is connected right now. If
the avatar frame is red, the user is not connected, so
he/she will not see the changes until he/she
reconnects and synchronize.
By double-clicking on the avatar of one user, a chat
window will appear and we will be able to chat with
him.
–
Documents: This space is reserved to show the
documents or files shared in the room. You can see
which kind of file is by looking at the icon. If you
double-click on the name of the file, it will be opened
in Sironta.
If the document has been revised and changed, you
will see a plus (+) sign on the left of the icon. By
30
clicking on it you will see a expanded list with all the versions of the document
appearing in red color, indicated by author's name and modification's date. You can
click on them to open them.
If we right-click an older version of the document and then select Compare with
current on the expanded menu, the text compare space will be opened. There, we
will be the two versions of the document and their differences.
The text compare screen and options will is explained on the Time machine section.
Returning to the Documents section, you can change the view of this section or
arrange icons and group them in folders by last modification or alphabetic order.
Even more, if we right-click on a document, we will be able to see the Properties of
the document, choose which is the best application to Open the document and
Undo the local changes done.
–
Room description: This is the main section of the room. It is divided in four more
parts:
–
Title: Here you can see the title of the room, if its persistent or not, the
number of users of the rooms and how many of them are connected, the number
of files and the used space in your PC.
–
Owner: In this section you will see the name, icon and e-mail of the room's
owner. If you click in the chat options a window chat will appear.
–
Users: As in the users section, you can see the users of the room, see who
is connected, see his/her e-mail and chat with them.
31
–
Activity: Here there is a list with all the activity of the room: Files updated,
changes done and removed files and when and who has done it.
When you open a document, this room description is minimized and the opened
document appears as the main section of the room.
32
Rooms & Workspaces
As said before, Sironta is based on the Room metaphor. Sironta is divided into
different rooms or workspaces, in which every user that has access to a room
shares the files he wants in that room, all the other users of the room can see
this files and a user can access to different rooms or workspaces.
Let's see how to manage it.
–
Create a room
To create a new room, you have to go to Rooms → Add room. There you will be asked for
the name of the new room and by clicking finish you will be the owner of this new room.
You have created a new room and you are the owner, so you can invite people to join
your rooms.
–
Edit the room's information
Once you have created a room, if you enter inside the room and double-click on the icon
of the room you will be able to change it and add a description of the room.
33
–
Remove a room
If you want to remove a room, you just have to click on the Remove room icon that each
room have (if you are the owner) near the room icon.
–
Add a new user
Once you have created a new room, you can invite people to that room to share
information and collaborate.
To invite people to the room, you have two options:
First, by clicking on the
Invite User.
Invite a new user icon. Second one, by going to People →
Then you will see a new window like this:
Here you can search a Sironta user by name, e-mail or ID. Then click on Search and
Sironta will give you back the results of the search. Select the one you want to invite and
click Finish. This user will receive en e-mail with the invitation.
34
If the people you want to invite is not a Sironta user yet, introduce his/her e-mail and click
on Finish to invite him/her to Sironta. This user will receive en e-mail with the invitation.
–
Accept or reject an invitation
To accept or reject an invitation, you just have to go to Views → Show Invitation View. A
new window will appear.
There, you will see all your pending invitations. Click on Accept or Reject if you want to
accept or reject the invitation.
–
Remove a user
To remove a user from a room you must be the owner of the room. If you are the owner,
select the user on the Users section and go to People → Remove user. Click Ok in the new
window and the user will be removed.
You cannot remove a user from Sironta.
35
Synchronization
As you know, Sironta is based on a Peer-to-Peer network. This, as already said at Explore
Sironta features, has a lot of advantages. One of them, when synchronizing with your
peers, is to only send changes through the network, not the whole file. But let's see how
to synchronize with your partners to collaborate on the right way.
The first thing an user of Sironta should know, is that when you click Save in an
application inside Sironta, you are only saving the changes on your local PC. This means
that your partners, the other users of the room, will not see the changes until you
Synchronize.
So, if you want the other users of the room to see the changes you have done in a
document, you have to Synchronize the room. Let's see how to do it.
First of all, it's important to know that you can only synchronize if you are inside a room.
You have two reasons to synchronize. The first one is to upload the changes you have
done or the new files you have inserted in a room. The second one is to see the changes
that other users have done in the room.
1.
If you want to synchronize to see the changes realized in the room since the last
synchronization, you have two options.
The first option is, when you are inside a room, to go to Documents → Synchronize with
repository. The synchronization will begin and you will be warned when it finishes.
The other option is to click on the Synchronization icon:
As in the other option, you will be warned when the synchronization is over.
If somebody change a document in a room and you are using Sironta, you will be warned
which changes had been made and who has done them.
2.
If you want to synchronize to upload the changes you have made, it's simply too.
First of all, you have to save your changes done on the opened document or upload a new
documents. This implies changes in the room that we would like to synchronize.
If you locally modify and save a document already uploaded in a room, it will be displayed
in the documents section in bold and blue color and with an (M) indicating Modified.
If you want to upload this changes to enable your partners to see your work, you have
two options.
36
The first option is, when you are inside a room, to go to Documents → Synchronize with
repository. The synchronization will begin and you will be warned when it finishes.
The other option is to click on the Synchronization icon:
Once the synchronization has finished, the documents with changes since the last
synchronization will be displayed in bold and green color.
When you make changes on a document, you don't loose the older versions of a
document, so you can see them if you click on the plus (+) sign. They will appear in red
color, with the name of the author and ordered by date of modification.
If you want to delete all the documents, you have to go to Documents → Recover
repository. Then you will be warned that This action will remove all documents from room
and all changes made will be lost. Click Ok to delete all the documents.
37
Collaborating on a document
To collaborate on a document in Sironta you can open an existing file by double-clicking
on it, you can upload a file or you can create a new file.
How to create a new document
Inside Sironta you can create a new OpenOffice.org document. To do it, you have two
options.
The first one is to go to Documents → New. There we can choose between Text
Document, Spread sheet, Presentation or Image.
The other option is to click on the corresponding icon:
Once you create a new document, you will be asked a name for it in a new window:
Insert a name and click on Ok and a new document will be opened.
How to upload a document to Sironta
If you want to upload a document to a room you have three options.
The first one is to go to Documents → Add Document. A new window will appear to select
the file you want to upload. Select it, click on Open and the document will appear in gray
color in the Documents section.
This documents are saved only locally. If you want the other users to see them you have
to synchronize the room.
38
The second option is to click on the Add a document icon:
The third option is to drag and drop as many documents as you want to the Documents
section and they will be directly uploaded.
Remember always to synchronize if you want your room partners to see the documents.
How to delete a document
To delete a document you can select it in the Documents section and press the Delete
button on your keyboard.
The other option is to select a document by clicking on it. Then go to Documents →
Delete document and click Ok.
The document will be deleted from the room and the other users will not see it too.
39
Icons
Let's resume the icons inside Sironta and what are they used for:
This icon is to go out of the room when you are in one and return to the Room list
screen.
This is the synchronization icon. Click it to synchronize your work with your partners.
Invite a new user icon. Used to invite people to Sironta or to a room.
To upload a new document to the room, just click on this icon.
OpenOffice.org Writer icon. To open a new odt document.
OpenOffice.org Calc icon. To open a new ods document.
OpenOffice.org Impress icon. To open a new odp document.
OpenOffice.org Draw icon. To open a new odg document.
This is the web browser icon. Click here to sail the Internet.
40
Views
Let's explain what we can find in Views. If we are in the Room list screen, we have this
options:
–
–
–
Show log view.
Show progress view.
Show Invitation view.
Once we enter in a room, we will have access to:
–
Show room history view.
So, if you click on this options, you will open new windows with the information explained
below.
–
Show log view
If you go to Views → Show log view a new window will appear with the messages that
Sironta generates:
If you click on the icons at the right bottom, you can Export the log, Import a log, Clear
the log viewer, Delete the log, Open a log, Restore the log and put filters on it.
–
Show progress view
Go to Views → Show progress view to open a new window with:
41
If you click on the two crosses icon
, you will remove all the finished operations.
If you click on the View Menu Icon , you will be able to set the preferences and
configure if you want to see or not the sleeping and system operations.
–
Show invitation view
Go to Views → Show progress view to open a new window with the pending invitations:
Here you will see all your pending invitations. Click on Accept or Reject if you want to
accept or reject the invitation.
–
Show room history view
Go to Views → Show room history view. A new window will appear.
42
Here you will see an historic of all the changes realized in the room, who has done it and
when they did them.
43
Indexing & Searching
To search files containing a word. Go to the top of you screen and type the word in the
search box.
Then press enter or click on the lens icon and you will be returned the results of your
searching, detailed by Name, Author, Date and Version of the document.
If you double-click on the document you were searching, it will be opened.
44
Time machine
As explained before, if we right-click an older version of the document and then select
Compare with current on the expanded menu, the text compare space will be opened.
There, we will be the two versions of the document and their differences.
The text on the right is the original one, the previous version. The text on the left is the
latest version, the new one. You can see the changes and differences between both
documents inside the box and marked up. In the other document you can see where
would be integrated this change or difference.
A change is something that was in the previous document and has been replaced in the
new one.
Differences are the things added in the new document.
On the top right you can see four icons:
Click this icon to see the next difference between documents.
Click this icon to see the previous difference between documents.
Click this icon to see the next change between documents.
Click this icon to see the previous change between documents.
45
Internet
To browse the Internet inside Sironta, click the Web browser icon:
Then the Internet browser selected will be opened and you will be able to navigate
Internet as if you were in your traditional web browser.
46
Chat
To chat with other Sironta users, you have to be in the same room. Once you are inside a
room, you can chat with other users by double-clicking on the user you want to chat or
clicking on the word Chat inside the room description.
A new window will be opened and you will be able to chat with the other Sironta user.
To Multi-Chat with more than one user, go to People → Multi-Chat. A new window will be
opened to Multi-Chat with the other users.
47
Update
Sironta is always being updated and incorporating new features. To maintain your Sironta
up-to-date, go to Help → Check for Updates.
If there's a new Sironta version, you will be warned and you will be able to download it on
the new window. Click on the version you want to download and click on Download.
If your Sironta is up-to-date, a message saying ' There is nothing to update' will appear in
the new Information window.
48
Help
To access to the Help documents, go to Help → Help. There you will have access to all the
information documents.
49
FAQs
Here you can find a selection of the frequently asked questions about Sironta. We hope
you find the one you are searching for.
–
What is Sironta?
Sironta is a program used to work collaboratively, share files and information based on
Peer-to-Peer operation.
–
Why do I need Sironta?
Do you work with partners? Do you share files with your friends and family? Are you sick
of your e-mail limitations? You need Sironta, just try it.
–
How can I get Sironta? Do I need an invitation to use Sironta?
No, you do not need an invitation. Just go to www.sironta.com and download it for free!
–
How many ads will I have to endure?
There are no ads inside Sironta.
–
Can I find Sironta in the social networks?
Of course! Just go to http://companies.to/sironta to go to Sironta's Facebook page, go to
https://twitter.com/sironta
to
access
Sironta's
Twitter
account,
go
to
http://www.linkedin.com/groups?mostPopular=&gid=2869176
to access the Linkedin
group or click on http://www.youtube.com/sironta2010 to enter Sironta's Youtube
channel.
–
Does Sironta store information about my documents?
No, your documents and the information about them is only visible for the users of the
room. Sironta, as an enterprise, have not got access to your documents.
–
Is Sironta secure?
Sironta is completely secure because of its Peer-to-Peer structure. It does not violate the
terms of confidentiality or the NDA that documents inside Sironta could have.
50
–
What will happen if Sironta dies?
If Sironta dies, you can manage it, you can evolve the software or you can hire
developers that can evolve your software because it is open source. So this is
why Sironta is open source, because is the only way to go fast and to keep the
pace with the other people that are developing team collaboration software.
–
Which is the difference between local changes and synchronized files?
The local changes are only stored in your PC and you are the only one who sees these
changes. If you synchronize the room, changes will be seen by all users.
–
Can I use Sironta in my Smartphone, Iphone or Ipad?
Not yet, but we are working on it.
–
How many files can I share with Sironta for free?
As many as you want.
–
Does the free version include all Sironta features?
Yes, it does.
–
Is there a Spanish version of Sironta?
Of course, Sironta is available in English, Spanish and Catalan versions.
–
Once I enter Sironta, are the rooms synchronized?
Yes, all rooms are synchronized once you enter to Sironta. If you want to watch the
synchronization progress, go to Views -> Show Progress View. Then, in the Progress
section, select Preferences and make click on the option Show sleeping and system
operations.
–
Do I need to make any changes in my network?
No, you don't need to change nothing. Just be sure that ports 5222 XMPP, 80, 22, SSH are
opened.
51
–
Can I change my user name?
Of course. Go to File → Sironta Preferences → Sironta → User account. There you can
change your user name, e-mail and location.
–
Which are the differences between a room and a Dedicada room?
There are two kind of rooms. The Normal and the Dedicada ones. The normal rooms are
Peer-to-Peer rooms, so you will need at least another Sironta user logged in to
synchronize the changes that you have realized in this kind of rooms.
The Dedicada rooms are Peer-to-Peer too, but they are persistent. It means that one of
the peers of the peer-to-peer network is always connected, so you always can synchronize
this kind of rooms.
–
Can I change the name of a room?
No. Due to secure questions it is not possible to change the name of a room.
–
How can I invite other people to Sironta?
Go to People → Invite user and follow the instructions.
–
Do I have a invitation limit?
No, you can collaborate with many people as you want.
–
What's the difference between Sironta for free and the payment version?
The difference between the versions relies in the storage and provided backup in the
company TechIDEAS. In the Professional one, you have backup on our servers, not as a
central server, but as a peer more in the Peer-to-Peer paradigm.
In the enterprise one, Sironta will be personalized at the needs of the enterprise user.
–
How can I change my avatar picture?
Double-click on the picture and a new window will appear. There you can select the
picture you want to be your avatar.
52
–
How do I know if somebody has invited me?
You will receive an e-mail warning you.
–
Can I recover an older version of a document?
Of course you can, just double-click on the version you want to open.
–
How can I remove a document from Sironta?
Yes. Just click on the document in the Documents section and press the Delete key.
–
Can I open an AutoCAD file, Matlab file, etc. with Sironta?
Yes, you can. You just need the application that runs the file installed in your PC and
Sironta will recognize and manage it.
–
For how long can I travel using Sironta?
Sironta gives you unlimited possibilities. You can travel as far as you want and still use
Sironta.
–
Which platforms does Sironta support?
Sironta is available for Microsoft Windows, Linux and Mac OS X.
–
Can I use Sironta with Windows and collaborate with my Linux or Mac
users partners?
Of course, as if all were using the same OS.
–
Can I use Sironta to collaborate in my enterprise?
Of course you can. Sironta is for collaboration work. Is there a better place for
collaboration work than companies?
–
Can I use Sironta off-line?
Sironta was developed to work. So it wouldn't be logical that Sironta worked only on-line,
as the traditional collaboration software. Sironta can be used on-line and off-line, so you
can work anytime you want even if you don't have an Internet connection.
53
–
Can I use Sironta from multiple locations and different PCs?
Yes, you just need to enter your Sironta ID once you open Sironta.
–
Are there any keyboard shortcuts?
Yes, you can look at them on Sironta Help or going to File → Sironta Preferences →
General → Keys.
–
Wow, 240 Mb! This is too much, isn't it?
No, it isn't. If you download Sironta you are downloading a collaboration software and an
office suite, because Sironta has OpenOffice.org embedded. So you will have an office
suite for free in your computer with Sun Microsystems and Oracle guarantee. And
remember that only OpenOffice.org is already 143 Mb, but is the slightest office suite in
the market.
–
You say it is open source. Where can I find the source?
You can find it at http://sourceforge.net/projects/sironta/ . Any contribution is welcomed.
54
TROUBLESHOOTING
–
I forgot my password. What should I do?
Enter Sironta and in the Login window click on I forgot my password. You will be
redirected to a webpage where you will introduce your e-mail and your password will be
sent.
–
My friends have invited me but I have not received any mail.
Look in the e-mail spam folder. If you don't find your e-mail there, contact Sironta on
www.sironta.com
–
I have registered but I haven't received an e-mail confirmation.
Look in the e-mail spam folder. If you don't find your e-mail there, contact Sironta on
www.sironta.com
–
A user have uploaded a document to Sironta, but I don't see it.
Are you in the same room? Has he synchronized the room? And you?
–
What should I do if I find a bug?
We are trying to improve Sironta every day, so it would be very helpful if you could report
it to us. The best way to do it is to visit www.sironta.com and leave a message in the
Feedback section with as much details as possible as to what the bug is, how it occurred
and a little bit about you computer setup.
–
I'm clicking on the synchronization icon, but my friends say that they
don't see the changes.
Remember that Sironta is Peer-to-Peer. It means there is no central server, so when you
synchronize your partners must be connected to see the changes. If you are the only one
inside the room, you cannot synchronize because anybody will see the changes. You can
only do this if you have a Dedicada room. So remember, when synchronizing, you must
see other users in the room to synchronize correctly.
–
It always appears a 'Java null pointer exception' error.
Just update your Sironta and this error will never appear again.
55
–
I have problems synchronizing, Sironta always says 'It was impossible to
synchronyze'.
Maybe you have a firewall in your computer blocking the ports used by Sironta: 5222
XMPP, 80, 22, SSH.
–
You say that Sironta synchronizes all the rooms when initializing, but I
don't see it.
Go to Views → Show Progress View and in the new window menu select Preferences →
Show sleeping and system operations . There you will see how Sironta is synchronizing the
rooms.
–
Can I contact you for any troubleshooting?
Of course you can. Go to http://www.sironta.com/feedback and tell us your problem. We will
answer you as soon as possible.
56