1
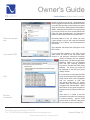
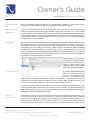
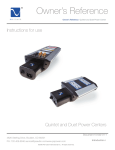
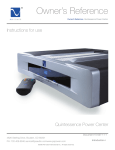
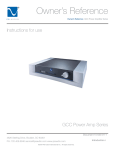
Owner’s Reference
®
Owner’s Reference NuWave Phono Converter
Instructions for use
NuWave® Phono Converter™
4826 Sterling Drive, Boulder, CO 80301
PH: 720.406.8946 [email protected] www.psaudio.com
©2013 PS Audio International Inc. All rights reserved.
Introduction i
Introduction
®
Important Safety
Instructions
Owner’s Reference NuWave Phono Converter
Read these instructions
Heed all warnings
Follow all instructions
WARNING. TO REDUCE THE RISK OF FIRE OR ELECTRICAL SHOCK, DO NOT EXPOSE THIS
APPARATUS TO RAIN OR MOISTURE.
Clean only with a dry cloth.
Do not place flammable material on top of or beneath the component.
All PS Audio components require adequate ventilation at all times during operation. Rack
mounting is acceptable where appropriate.
Do not remove or bypass the ground pin on the end of the AC cord unless absolutely necessary
to reduce hum from ground loops of connected equipment. This may cause RFI (radio frequency
interference) to be induced into your playback setup. All PS products ship with a grounding type
plug. If the provided plug does not fit into your outlet, consult an electrician for replacement of the
obsolete outlet.
Protect the power cord from being walked on or pinched particularly at plugs, convenience
receptacles, and the point where they exit from the apparatus. Unplug this apparatus during
lightning storms or when unused for long periods of time.
When making connections to this or any other component, make sure all components are off. Turn
off all systems’ power before connecting the PS Audio component to any other component. Make
sure all cable terminations are of the highest quality.
There are no user serviceable fuses inside this product.
THERE ARE NO USER-SERVICEABLE PARTS INSIDE ANY PS AUDIO PRODUCT. REFER ALL
SERVICING TO QUALIFIED SERVICE PERSONNEL
Please contact your authorized dealer, distributor, or PS Audio if you have any questions not
addressed in this reference manual.
PS Audio® is a registered trademark of PS Audio Inc., and is restricted for use by PS Audio,
Inc., its subsidiaries, and authorized agents.
4826 Sterling Drive, Boulder, CO 80301
PH: 720.406.8946 [email protected] www.psaudio.com
©2013 PS Audio International Inc. All rights reserved.
Introduction ii
®
Unit Weight
Unit Dimensions
Shipping Weight
Shipping Dimensions
Input Power
Power Consumption
Phono Audio Input
Connector
Cartridge type
Cartridge Output (5cm/s)
Cartridge load impedance
Specifications
Owner’s Reference NuWave Phono Converter
14 lbs [6.4 kg]
14” x 8.3” x 2.4” [ 36cm x 21cm x 6.1cm]
20 lbs [9.1 kg]
22.5”x 13” x 6” [57cm x 33cm x 15cm] Model specific 100VAC, 120VAC, or 230VAC
15W
50 or 60Hz
RCA (X2)
Moving Coil or Moving Magnet
0.2mV to 220mV
60Ω(80nF), 100Ω(47nF), 160Ω(33nF), 600Ω(8.0nF), 1.0KΩ(4.7nF), 1.6KΩ(3.3nF),
50KΩ(100pF), 100KΩ(47pF)
Analog Audio Input
Connector
RCA (X2)
Input level
3.15 VRMS (+10dBV) maximum
Input impedance
47KΩ
Analog Audio Output
Connector
RCA/XLR Unbalanced /Balanced (X2)
Output level, nominal
1.0 VRMS (0dBV)/2.0 VRMS (+6dBV)
(@ rated cartridge input)
Output level, maximum
3.15 VRMS (+10dBV)/6.3 VRMS (+16dBV)
Output Impedance
100Ω/200Ω
Frequency Response
20Hz to 20kHz ± 0.25 dB (RIAA)
THD (5.0)
0.03%
(Balanced, +6dBV, 1KHz)
Signal to Noise Ratio
87dB
(MM-5.0mV)
(Balanced output, referenced to +6dBV nominal output level A-weighted)
Signal to Noise Ratio
72dB
(MC-0.6mV)
(Balanced output, referenced to +6dBV nominal output level A-weighted)
Equivalent input noise
<200nV
(maximum gain phono)
Signal to Noise Ratio
107dB
(Aux analog input)
(Balanced output, referenced to +6dBV nominal output level A-weighted)
A/D Converter
Format
PCM or DSD
Sample rate (PCM)
44.1kHz, 48.0kHz, 88.2kHz, 96.0kHz, 176.4kHz, 192kHz
Word length (PCM)
16b, 18b, 20b, 24b
Data rate (DSD)
Standard (2.8MHz) or Double (5.6MHz)
S/PDIF Digital Output
Connector
RCA (Coax)
4826
Sterling Drive, Boulder, CO 80301
Impedance
75Ω
Page
Format
PCM
or
DoP
v1.1
(DSD over PCM)
PH: 720.406.8946 [email protected] www.psaudio.com
I2S Digital Output
©2013 PS Audio International Inc. All rights reserved.
Connector
HDMI
Format
PCM or DSD
D
Output level, maximum
Output Impedance
Frequency Response
THD (5.0)
(Balanced, +6dBV, 1KHz)
Signal to Noise Ratio
(MM-5.0mV)
®
Signal to Noise Ratio
(MC-0.6mV)
Equivalent input noise
(maximum gain)
A/D Converter
Format
Sample rate (PCM)
Word length (PCM)
Data rate (DSD)
S/PDIF Digital Output
Connector
Impedance
Format
I2S Digital Output
Connector
Format
USB Digital Output
Connector
Format
Transfer mode
3.15 VRMS (+10dBV)/6.3 VRMS (+16dBV)
100Ω/200Ω
20Hz to 20kHz ± 0.25 dB (RIAA)
0.03%
Specifications
87dB
(Balanced output, referenced to +6dBV nominal output level)
72dB
Owner’s Reference NuWave Phono Converter
(Balanced output, referenced to +6dBV nominal output level)
<200nV
PCM or DSD
44.1kHz, 48.0kHz, 88.2kHz, 96.0kHz, 176.4kHz, 192kHz
16b, 18b, 20b, 24b
Standard (2.8MHz) or Double (5.6MHz)
RCA (Coax)
75Ω
PCM or DoP v1.1 (DSD over PCM)
HDMI
PCM or DSD
USB “B” Type
PCM or DoP v1.1 (DSD over PCM)
Asynchronous
4826 Sterling Drive, Boulder, CO 80301
PH: 720.406.8946 [email protected] www.psaudio.com
©2013 PS Audio International Inc. All rights reserved.
Page D
®
Thank you
Introduction
Owner’s Reference NuWave Phono Converter
Thank you for your purchase of the PS Audio® NuWave® Phono Converter (NPC).
The NPC is a no-compromise approach to vinyl and analog reproduction in a high end audio
system. Recordists and archivists will also enjoy the performance quality of the NPC.
Analog inputs
The NPC accepts inputs from any analog source such as a turntable, tuner, tape recorder, iPod,
recording console, DVD audio outs or even the audio outputs of a VCR (does anyone own a VCR
anymore?).
Output digital or
analog
Once connected you can play vinyl discs, or any analog source, either directly into your preamplifier,
through the NPC’s analog outputs, or DAC, mixing console, DSP, or digital pro music gear through
the NPC’s multiple asynchronous digital outputs. You can also connect the NPC to your computer
and RIP (record) content in single or double DSD as well as 44.1kHz/16 up to 192kHz/24 PCM
through its asynchronous USB output.
DSD and PCM
The NPC produces both DSD and PCM from its digital outputs and high resolution fully balanced
analog from its audio outputs. Use the NPC as the vinyl heart of your purely analog setup or digital
setup.
Theory of
operation
The NPC combines a state-of-the-art Analog to Digital Converter along with an analog phono
preamplifier. The two systems built into the NPC can be run independently of each other or in
combination.
The Analog to Digital Converter (ADC) is based on the Burr Brown PCM4222 Delta Sigma Analog
to Digital Converter.
Always
converting to
DSD
This architecture runs as a core DSD converter, sampling at a constant rate of 352,800Hz
(5.6MHz), for any analog input signal. The ADC’s digital output can be either DSD (Direct Stream
Digital) or PCM (Pulse Code Modulation) chosen through the front panel UI. Because the ADC is
fundamentally a multi-bit DSD based ADC, conversion to PCM is handled post digital. This means
that the NPC is always running at the highest speed and greatest bit depth, regardless of what the
user selects on the front panel as the output.
Pure analog path
The analog phono preamplifier is a passive EQ 3-stage architecture based on a THAT 1532
programmable input stage The 1532 is a major breakthrough in performance with 60dB of
programmable gain and noise specified at an incredibly low 1.9nV/√Hz and wide bandwidth to
well over 1mHz. Cartridges can range from several hundred millivolts to just 0.3mv with little
increase in noise. Following the passive RIAA EQ stage is a fully discrete, balanced, analog all
FET output stage.
Built to the
highest standards
The PS NuWave Phono Converters should provide years of trouble free performance for your
connected equipment with the peace of mind it will always sound its best.
The NPC is proudly designed and Built in Boulder Colorado by hand.
4826 Sterling Drive, Boulder, CO 80301
PH: 720.406.8946 [email protected] www.psaudio.com
©2013 PS Audio International Inc. All rights reserved.
Introduction v
®
Getting Started
Owner’s Reference NuWave Phono Converter
Location
Once your NPC is unpacked, you’ll need to find a convenient place to set it. We recommend
shelf mounting as close to the analog source (such as a turntable or recording console) if at all
possible. Long interconnects between turntables can be problematic with hum. The NPC has
a considerable amount of gain in its analog phono stage, so keeping the input cables short is
helpful.
Keep the
protective cover
If you are in the process of evaluating the NPC, please keep the protective plastic cover on
the mirror finish top during the entire evaluation process. Any damage to the top cover will be
charged to you if you decide to return the product for credit to PS Audio or your dealer.
Power Cables
Once you have chosen the location for the NPC you can use the supplied AC power cord
to connect it to the supported equipment or you can use an aftermarket power cord. We
recommend you use a heavy gauge shielded power cable to connect the NuWave Phono
Converter to the AC wall receptacle or Power Plant.
We strongly recommend the use of a PS Audio PerfectWave® Power AC cable or any good
aftermarket power cable for best results as it is always preferable to feed your equipment with
the best power cables possible. Choosing any PerfectWave Power cable will make a significant
performance improvement over the stock power cable.
Conditioners
Country specific
AC voltages
The NPC should be fed from a Power Plant® to improve its effectiveness. Use of other power
conditioners with the NPC is fine as long as you make sure the unit is performing a beneficial
result. We do not recommend assuming a passive power conditioner is going to make the NPC
sound its best. Our experience is such that most passive conditioners rob the unit of its rich
qualities to the sound, so as the Grail Knight in Indiana Jones says “Choose wisely. While a
Power Plant will bring you rich sounds, some conditioners will rob it of its very life”.
The NPC, as with all PS Audio products, is country specific to its incoming AC voltage. This
means the units can only be operated at its preset voltages, such as 230 for most of Europe and
Asia, 100 volts for Japan and 120 for the US and other similar countries.
Immediate damage can occur if you try and power the NPC on a voltage it was not designed to
operate on.
Connect two at a
time
You can connect a turntable as well as an auxiliary analog input to the NPC at the same time if
you wish. Once connected, it is an easy matter to select which of the two inputs you wish to use
from the NPC’s front panel.
4826 Sterling Drive, Boulder, CO 80301
PH: 720.406.8946 [email protected] www.psaudio.com
©2013 PS Audio International Inc. All rights reserved.
Getting Started 1
®
Owner’s Guide
Owner’s Reference NuWave Phono Converter
Power down first
Our attorney (overly cautious by nature) would recommend that you power down your preamplifier,
DAC or even your entire system before connecting the NPC to be super safe. If, however, you are
like us, you’ll want to simply make sure the preamplifier or DAC is properly muted, as connecting
up a new piece of gear can make some ugly noises if you’re not careful. Show respect.
Plug in the
NuWave Phono
Plug the NuWave Phono Converter into an AC receptacle with the proper voltage for the unit,
preferably using a Power Plant, Dectet or appropriate power conditioner or, at least, a dedicated
AC line fed from a PS Audio Power Port AC receptacle. A dedicated line means there is nothing
else plugged into the wiring feeding the AC receptacle and that wiring returns directly to the AC
breaker box.
While the NPC can be connected to a two-prong ungrounded outlet, it is recommended that you
use a 3-prong (in the US) grounded outlet. Most countries use grounded AC outlets as a matter
of course. Yours is most likely a grounded outlet already.
Use the best
power cable you
can find
Use the best shielded AC power cable you can to connect a NuWave Phono Converter to its AC
source. The better the power cable the less chance for a loss of all the rich musicality the NPC
provides.
The blue PS logo
light
When first powered up the NPC will display a flashing PS logo light on the front panel. This is
the Blue PS Audio logo. The logo is not a standby power button, as it is on some PS products,
but rather a power indicator on the front panel. Once the logo light stops flashing the front panel
display will illuminate.
The display turns
off automatically
The display is designed to turn off, automatically, after approximately 24 seconds. To turn the
display back on, simply press any of the 4 front panel buttons.
Once power is applied to the unit it will be necessary for you to reach around to the back of the
unit and turn on the AC power switch. This is the master AC power switch and can be used at
any time to power on and off the unit. When powering on or off the unit, please make sure your
preamplifier or DAC is muted so you don’t get a power down “pop”.
We recommend leaving the NPC powered on at all times.
Break in or burn in
time
The unit will require a break in period to sound its best. We typically recommend leaving it powered
up for at least several weeks to reach its maximum sound quality. This practice of burn in may
seem overly “tweaky” to some but there is no doubt one will hear a change in the overall character
of the sound quality over time.
Getting inside
There are no user serviceable parts inside including a fuse. The top panel is held on with a
magnetic passive fastening system and can be simply popped off. Underneath is a subplate that
must be removed to access the insides if you insist on looking there. Show respect.
4826 Sterling Drive, Boulder, CO 80301
PH: 720.406.8946 [email protected] www.psaudio.com
©2013 PS Audio International Inc. All rights reserved.
Owner’s Guide 2
®
Owner’s Guide
Owner’s Reference NuWave Phono Converter
Connect the inputs Connect the inputs of the NPC to the proper source equipment. The phono inputs are specific to
a turntable while the auxiliary inputs can be just about any analog source.
Connecting the
Phono Input
The phono inputs must be connected only to a turntable setup. Connecting a standard analog
source into these inputs is going to sound pretty strange as there is what is known as an RIAA EQ
curve built into this phono stage. The RIAA EQ curve is useful only for vinyl record reproduction
and will make your records sound right, your flat analog sources sound weird.
Provided your turntable is a normal, highend unamplified table, plug its RCA outputs
directly into the NPC’s inputs labeled Phono.
Make sure left and right are actually correct,
their sections are marked Left and Right.
Attach the
ground wire
Most turntables have a ground wire, in addition
to the RCA output cables. This ground wire
is important because it will help lower the
chances for hum. Connect the turntable
ground wire to the rear panel ground binding
post located in the top right hand corner of
the rear of the NPC.
Set the cartridge
loading
Once connected it probably makes sense to
set the cartridge loading switches at this time
since you may forget to do this and have to
pull the unit out again. The system is easy to select. With all the switches down, the cartridge
loading is quite high at 100K Ohms. To set the load, simply push the appropriate switches to the
up position. The switches must be moved in pairs (one for the left and one for the right channel).
For Moving Magnet cartridges, the typical load will be 47K. Move switches 1 and 2 up, keeping
4826 Sterling Drive, Boulder, CO 80301
PH: 720.406.8946 [email protected] www.psaudio.com
©2013 PS Audio International Inc. All rights reserved.
Owner’s Guide 3
®
Owner’s Guide
Owner’s Reference NuWave Phono Converter
the other switches (3-10) in the down position. For a moving coil cartridge, the typical load would
be 100 Ohms. Move switches 9 and 10 to the up position keeping all the other switches (8-1) in
the down position. You can also see some other groupings on the back panel. For example, 60
Ohms can be achieved by placing switches 7,8,9,10 in the up position while all others are down.
600 Ohms can be achieved with switches 3,4,5,6 in the up position while all others down.
Other analog
sources
If you are only using the NPC for phono, you can skip this next bit and go directly to connecting its
outputs up. If you are also - or only - connecting a flat analog source to the NPC, such as a tape
deck, tuner, iPod, VCR analog outputs, etc., then this next part is for you.
If you are planning on using the NPC for analog sources other than a turntable, you will connect
the source to the left and right inputs labeled Line In. Line In is a single ended RCA input that
can accept the output from just about any analog source such as a tuner or tape deck. The input
impedance is a fairly easy load of 47k Ohm which should accommodate a tube, solid state or
transformer coupled output with ease. Again, make sure these inputs are connected to the correct
channels for proper left and right reproduction. Maximum input voltage is 3vrms and the bandwidth
extends to 80kHz.
It is fine to have both the Phono Inputs as well as the analog inputs connected at the same time.
Selection of the two inputs is chosen from the front panel display.
Analog outputs
There are two analog outputs on the NPC: balanced XLR analog output and unbalanced, RCA
analog output. You may connect either or both of these outputs to any preamplifier or analog
mixing console you wish. They may be used separately or at the same time if needed. Only the
phono input will come through the analog outputs.
Digital Outputs
There are 4 digital connectors on the rear panel of the NPC. From left to right as you face the rear
of the unit those connectors are labeled: Firmware, S/PDIF, I2S, USB.
Firmware Upgrades The firmware connector is used only for firmware updates SHOULD there be any released from us.
To use this input you will insert a USB memory stick containing the firmware update, power cycle
the unit and it will take care of the rest. With the NPC rear panel power switch in the off position,
insert the USB firmware memory upgrade if you are ever instructed to do so (normally you will not
need to do this). Once inserted, turn the rear panel power switch to the ON position and refer to
the front panel display. Do not remove power until the front panel blue logo light stops flashing
or the unit reboots. The new firmware will be installed. Once installed, turn the rear panel power
switch to the OFF position, remove the USB memory stick, and return power to the unit.
S/PDIF Output
S/PDIF is a digital output that can be used to feed a DAC (Digital to Analog Converter), digital
mixing console or computer sound card. This output uses the S/PDIF (Sony Phillips Digital
Interface) standard and will send either PCM and DSD to any compatible receiver. PCM can be
sent from 44.1kHz/16 bit through 192kHz/24 bit and all standard variations between these two
extremes. DSD is sent using the DoP protocol (DSD over PCM) and produces single or double
DSD rate. The DoP protocol maintains the original DSD data without corruption to the original
source. To do this, it breaks up the DSD stream into smaller individual packets that resemble
PCM. Your DSD capable DAC will recombine these packets back together to give you perfect
4826 Sterling Drive, Boulder, CO 80301
PH: 720.406.8946 [email protected] www.psaudio.com
©2013 PS Audio International Inc. All rights reserved.
Owner’s Guide 4
®
Owner’s Guide
Owner’s Reference NuWave Phono Converter
DSD. If you are using this output be sure and use the highest quality connecting cable appropriate
for data transmission.
I2S Output
I2S is a digital output utilizing the HDMI connector on the back of the NPC. The output of this
connector is NOT compatible with a standard HDMI connected unit of any kind. There are no
HDMI compatible signals here, do not try and plug this into an HDMI input. This output uses the
I2S interface protocol standard developed by PS Audio. Multiple manufacturers have adopted this
standard in their equipment and the standards are freely given to any audio manufacturer wishing
to follow them.
For most of you, the PS Audio PerfectWave series will be the main devices that can take advantage
of this output. The I2S output carries full PCM and DSD at all sample rates and bit depths just
described in the Coax section. I2S is the native protocol for digital audio used in all DACS, CD
players and transports. I2S is the NATIVE format used by these devices and it is this protocol that
is COMPRESSED to S/PDIF for transmission over Coax, XLR or Optical outputs on devices.
I2S contains separate clocks and data lines and does not have jitter related issues. Most jitter
problems arise from the use of the S/PDIF protocol because compressing the native I2S data
and clocks together into one stream and then unravelling this compressed format back to I2S
(as is required for it to work) is typically where jitter is introduced. I2S should be the transmission
medium of choice if you have a compatible receiver to accept it.
USB Output
The USB output is intended to feed a computer, not the USB input on a DAC or similar device. Do
NOT attempt to plug the USB digital output of the NPC into the USB input of your DAC. Frustration
and silence will be your only reward for doing so. The USB output of the NPC connects the NPC
to your computer. The NPC will look like a peripheral device to your computer. The NPC is a
SLAVE and your computer is the MASTER in the same way you might connect up any USB source,
printer or peripheral.
The USB output of the NPC will work with both Windows and Mac PC’s. Windows will require you
4826 Sterling Drive, Boulder, CO 80301
PH: 720.406.8946 [email protected] www.psaudio.com
©2013 PS Audio International Inc. All rights reserved.
Owner’s Guide 5
Owner’s Guide
®
Owner’s Reference NuWave Phono Converter
to install a driver, that same driver is built into Mac’s running OSX. Once connected to the USB
input on your computer, it will be necessary to activate the USB output from the front panel of the
NPC. Detailed instructions are included later in this manual.
Reset Function
Between the Firmware input and the Coax digital output is a small hole in the rear panel labeled
RESET. Activating this function will reset all settings on the NPC back to factory defaults. The
NPC will remember all user settings once selected. If you make some selection and find yourself
lost or cannot get back to where you were through the front panel controls, certainly an unlikely
situation, you can activate the RESET button at any time. Use a small object such as a ballpoint
pen, pencil or toothpick to press the recessed internal button for 2 seconds if necessary.
Front panel
Controls
The normal default mode for the front panel display is off. To conserve the longevity of the OLED
screen for many years, the NPC will turn its display to off after 24 seconds of display. To reactivate
the display, simply press any of the four front panel buttons. Once activated, the display will
remain active for approximately 24 seconds.
There are two sets of front panel buttons: MODE up and down and SELECT up and down. The
MODE buttons are on the left side of the display screen.
The MODE toggles through the 7 available menu screens.
•
•
•
•
•
•
•
Play Screen
Play
Input
A/D Mode
PCM or DSD sample rate
Gain
Brightness
Version
The PLAY screen offers two menu choices: In phase/Out of phase and stereo/mono. The top
SELECT button chooses between In Phase and Out of Phase. The bottom SELECT button
chooses between Stereo and Mono.
4826 Sterling Drive, Boulder, CO 80301
PH: 720.406.8946 [email protected] www.psaudio.com
©2013 PS Audio International Inc. All rights reserved.
Owner’s Guide 6
Owner’s Guide
®
Owner’s Reference NuWave Phono Converter
Phase and stereo/mono select choices apply ONLY to the phono stage and not the analog inputs.
The choices of phase and stereo/mono will be presented on both the pure analog outputs and the
digital outputs of the NPC.
Input Screen
The INPUT screen offers two menu choices: Analog/Phono and Play/Mute. The top SELECT
button chooses between the two available inputs, ANALOG and PHONO.
The Analog Input accepts any analog output up to 3vrms input level (a direct analog output from
a CD player, for example, is typically 2vrms) at up to 80kHz. The bottom SELECT Button chooses
between PLAY and MUTE. PLAY and MUTE functions are active only on the Analog Outputs and
do not affect the digital data stream output of the NPC.
A/D Screen
The A/D Mode screen offers two menu choices: PCM/DSD and USB Disabled/Enabled. The
top SELECT button chooses between PCM and DSD and the bottom SELECT button chooses
whether USB is disabled or enabled.
PCM/DSD Select
Selecting PCM (Pulse Code Modulation which is commonly referred to as Digital Audio and is
the standard for CD’s) or DSD (Direct Stream Digital which is sometimes referred to as SACD) will
determine the digital output stream of the NPC. The three available connections for the digital
datastreams are I2S (through a rear panel HDMI connector), COAX (through a rear panel RCA
connector) and USB (through a rear panel “B” type USB connector). Whichever format is chosen
on the front panel display, PCM or DSD, will always be available at the I2S and COAX outputs.
USB will only be active when it is enabled.
USB Select
USB is a type B output, meaning it is a slave device and suitable to connect to a computer only.
You may not connect the USB output of the NPC to a USB input on a DAC. Enabling the USB
output from the NPC front panel should only be done if you are actually connecting to a computer.
Once enabled, the next screen on the NPC display, that selects the sample rate of the chosen
audio format, is disabled. To change the sample rate of the NPC when in the USB Enabled mode
you must use your connected computer as the User Interface. Please refer to the section specific
to USB setup and recording in this manual for further details.
PCM Select
If you have selected PCM as the digital output audio format (and USB is disabled), the next screen
available by pressing the UP on MODE is the PCM SR screen. The choices on this screen are
FREQ and BITS and these control the SR (Sample Rate) and bit depth.
The upper select button toggles through the available frequencies:
•
•
•
•
•
•
44.1kHz
48kHz
88.2kHz
96kHz
176.4kHz
192kHz
4826 Sterling Drive, Boulder, CO 80301
PH: 720.406.8946 [email protected] www.psaudio.com
©2013 PS Audio International Inc. All rights reserved.
Owner’s Guide 7
®
Sample rate select
affects only the
output
Owner’s Guide
Owner’s Reference NuWave Phono Converter
Select which of these output sample rates you wish to use. Selecting any of these sample rates
does NOT affect the A/D Converter’s input sample rate, which is a constant 5.6MHz, (352.8kHz)
irrespective of the output sample rate or digital audio format selected.
The NPC’s A/D Converter features zero group delay for any PCM sample rate up to 96kHz. The
two higher sample rates, 176.4kHz and 192kHz use a more conventional digital filter that does not
enjoy the benefits of zero group delay in the PCM mode. DSD does not use similar filtering.
Use 96kHz as your
standard output
Our recommended maximum sample rate for all vinyl phono or Analog inputs that do not exceed a
usable input bandwidth of 48kHz, is 96kHz. As there is no usable information on a vinyl LP above
30kHz, it will always sound preferable to restrict the maximum output sample rate to 96kHz. If you
have an Analog input source that exceeds 48kHz in useful information you wish to preserve, use
either 176.4kHz or 192kHz output sample rates. The maximum input bandwidth of the NPC’s A/D
Converter is 80kHz (it is -3dB at 80kHz) and is always running at 352.8kHz sample rate.
Bit Depth Select
The lower SELECT button chooses the bit depth of the output digital audio stream. Selecting any
of the available bit depths, 16, 18, 20 or 24 does not affect the input bit depth which is always at
maximum. We recommend to always keep the bit depth selected at 24 bits.
DSD Select
If you have selected DSD as the digital output audio format (and USB is disabled), the next
screen available is the DSD screen. Using the upper SELECT button labeled RATE, choose either
Standard Rate or Double Rate DSD. Standard Rate is the same as you would find on an SACD
(Sony Super Audio Compact Disc) and is the equivalent of 176.4kHz in PCM. If you are recording
vinyl LP’s it probably doesn’t make any sense to use Double Rate DSD as the Standard Rate DSD
is more than capable of perfectly preserving all the information possible on an LP.
If you have a live performance you are recording and using the NPC as the A/D Converter, you will
have increased performance sound quality using the Double DSD rate, analogous to 352.8kHz
sample rate in PCM.
DSD uses DoP
DSD output is sent using the DoP format (Digital over PCM). This format takes the raw, bit perfect
DSD stream and chops it up into smaller sized identical packets. Each of the packets is wrapped
in a PCM acceptable frame so that to a DAC or computer, the output format is the same as
PCM. This then permits PCM based programs, such as Audacity, to record the DSD files as well
it permits computers, both Windows and Mac, to manage and accept DSD files despite the fact
those files are not natively acceptable for the computer to recognize or manage.
While the DoP standard permits computers to easily handle DSD files without any additional
software or configuration, it should be noted that only programs specifically designed for DSD
playback will playback the DoP DSD files. Other programs, such as Audacity, cannot playback
DSD even though it can record it. Refer to the section on USB and recording for further details and
suggestions.
USB Select
If you have USB enabled the control for sample rates will be transferred to the computer connected
to the NPC via the USB cable. To enable or disable USB go to the 3rd screen A/D Mode on the
NPC front panel. You should only enable USB if you are actually connected to a computer and
4826 Sterling Drive, Boulder, CO 80301
PH: 720.406.8946 [email protected] www.psaudio.com
©2013 PS Audio International Inc. All rights reserved.
Owner’s Guide 8
®
Owner’s Guide
Owner’s Reference NuWave Phono Converter
intend to use the computer as a recording or playback device.
If you have USB enabled and are connected to a Windows Computer, you will need to install the
PS Audio Windows Driver available through this link or through our web site. If you are using a
Mac computer it will not be necessary to download and install any drivers as Macs have this driver
built in.
In both cases, Windows or Macs, it will be necessary to setup the NPC on the computer.
Setup on
Windows
Setting up on a Windows Computer (we show setup on Windows 7.0 here) requires the
installation of our USB driver available for free download here: http://updates.psaudio.com/
MarkIIUSBDriver/PSAudio-USBAudio2.0DriverLatest.zip
Download the
driver
Once you have downloaded the driver, but before you install the driver, connect the NPC to the
computer’s USB input and make sure USB is enabled. For help enabling USB, see the section
above this titled USB Select.
Connect and
power the NPC
With the NPC powered on, connected to the computer through a USB cable not to exceed 5
meters in length, (5 meters is generally accepted as the maximum length for a USB cable but
we would recommend something a lot shorter to be safe and yes, the quality of the USB cable
matters a lot to the sound quality. Don’t cheap out) install the driver on your computer.
Install the new
driver
Properly installed, the driver and NPC are now communicating with other successfully.
Setup on a
Windows PC
If you have PCM
selected
Use 96kHz
It will now be necessary to setup the sample rate and bit depth for the NPC. The computer is now
the master, the NPC the slave, and will control the NPC when USB is enabled.
Open the computer’s Control Panel. From the Control Panel open Hardware and Sound. From
the Hardware and Sound menu open Sound-> Manage
Audio Devices. From the Manage Audio Devices menu,
select the Recording Tab. From the Recording tab menu
select Properties. You should see Line PS Audio NuWave
Phono as one of the devices. Select the NPC. Then select
properties. From the Properties menu select Advanced.
If you have PCM selected on the NPC as the audio format
you wish to use, the format select window in the Advanced
Properties window drop down menu will display the available
sample rates and bit depths to choose from. Using the drop
down box as in the picture, select an acceptable sample rate
between 44.1kHz and 192kHz.
We recommend for most users 96kHz and nothing higher. As
previously explained, 96kHz provides full bandwidth for any LP or, for that matter, anything most
4826 Sterling Drive, Boulder, CO 80301
PH: 720.406.8946 [email protected] www.psaudio.com
©2013 PS Audio International Inc. All rights reserved.
Owner’s Guide 9
®
Owner’s Guide
Owner’s Reference NuWave Phono Converter
people are likely to want to play. Using 96kHz and
below engages the best sounding decimation filters
in the NPC and provides a near-perfect zero group
delay for PCM users. 96kHz gives full bandwidth to
48kHz, exceeding the threshiold of human hearing
by twice (and vinyl LP’s don’t exceed 30kHz even
under the best circumstances), and maintaining
perfect phase relations within the audible band.
Select the sample
rate
Exceeding 96kHz is fine, but unless you have
a good reason to do so and need the extended
bandwidth of up to 80kHz, not recommended for
best sound.
Once selected, the sample rate will appear on the
NPC screen.
If you have DSD selected on the NPC as the
audio format you wish to use, the format select
window in the Windows Advanced Properties
screen will display only two available
sample rates: 176.4kHz and 352.8kHz.
Choosing 176kHz will net Standard
DSD rate and choosing 352.8kHz
will result in Double Rate DSD being
selected. The choice you make will
be displayed on the NPC front panel
display window.
If you select DSD
It is instructive to remember that DSD
will be sent using the DoP (Digital over
PCM) format which while compatible
with any computer or DAC that
can accept PCM data, you cannot
playback DSD data without installing
a program that supports DSD. JRiver
and Foobar are two good examples of
programs that will playback DSD over
DoP.
DoP
Test the
connection
Once setup it is useful to test the
connection and make sure everything
is working properly. Use the PCM
format mode on the NPC (see above
for instructions how to select PCM).
4826 Sterling Drive, Boulder, CO 80301
PH: 720.406.8946 [email protected] www.psaudio.com
©2013 PS Audio International Inc. All rights reserved.
Owner’s Guide 10
®
Owner’s Guide
Owner’s Reference NuWave Phono Converter
If you do not yet have your turntable connected to the NPC it may be convenient to simply use an
iPhone or iPod to feed the Analog Inputs (not the Phono inputs) for this test. Set the output level
of the device to maximum, connect a 3.5mm male to dual RCA connecting cable and start playing
music on the mobile device. In the Properties menu of the Recording tab you will see a graphic
representation of a VU meter next to the NPC and this should show music playing if everything is
setup properly. If your computer monitor speakers are on, you should hear the music playing. If
you hear no sound it may be necessary to reboot your computer and follow the setup procedure
again.
Once you have verified everything is playing properly use any recording program, such as Audacity,
as you wish. Instructions on the use of Audacity or other similar recording programs are beyond
the scope of this manual. Please refer to the owner’s manual of the recording program you’re
using for further instructions.
Setup on a Mac
To setup on a Mac computer there are no drivers to download and install with OSX. However,
we do recommend downloading and installing a free program from Rogue Amoeba called Line
In. This small program will help you make sure the NPC is working properly on your Mac. These
instructions will assume you have downloaded and installed Line In. Line In is available for free
download for Mac OSX here: http://www.rogueamoeba.com/freebies/.
Making sure USB is Enabled on the NPC screen A/D Mode, connect a USB cable to the Mac USB
input. Keep in mind there is a maximum length for USB cables that should be observed for good
communication between devices. 5 meters is generally accepted as the maximum length for a
USB cable but we would recommend something a lot shorter to be safe and yes, the quality of the
USB cable matters a lot to the sound quality. Don’t cheap out.
Launch the Audio
Midi Panel
Next, go to Finder->Utilities>Audio Midi Setup and launch
it. You should see the NPC
displayed as a choice and it
will be called PS Audio USB 2,0
Audio In. Select this and, using
the secondary mouse option
(right click) choose Use this
device for sound input. If your
mouse does not have a right
click or secondary option, you
can alternatively hold the control
key on your keyboard down and
click the mouse. This will place a
small icon of a microphone next
to the NPC. If the NPC does not
show up as a device, make sure it has been enabled as above and the cable is connected. If you
still do not see the device, remove the USB cable and plug it in again. That should do the trick
and if not, reboot the computer.
4826 Sterling Drive, Boulder, CO 80301
PH: 720.406.8946 [email protected] www.psaudio.com
©2013 PS Audio International Inc. All rights reserved.
Owner’s Guide 11
®
Owner’s Guide
Set the sample
rate
Next you will need to set the sample rate you wish the NPC to operate at. The computer is now
the master, the NPC the slave, and will control the NPC when USB is enabled.
Set the correct
sample rate!
If you have PCM selected on the NPC as the audio format you wish to use, the format select
window in the Audio Midi will display the available sample rates to choose from. On some Mac
operating systems, we’ve noticed that the default sample rate is 352,800kHz the first time the Mac
is connected to the NPC. This is wrong and the NPC will not work on your computer if you leave
this sample rate selected. Using the drop down box as in the picture, select an acceptable sample
rate between 44.1kHz and 192kHz.
Use 96kHz
We recommend for most users 96kHz and nothing higher. As previously explained, 96kHz provides
full bandwidth for any LP or, for that matter, anything most people are likely to want to play.
Using 96kHz and below engages the best sounding decimation filters in the NPC and provides a
near-perfect zero group delay for PCM users. 96kHz gives full bandwidth to 48kHz, exceeding
the threshiold of human hearing by twice (and vinyl LP’s don’t exceed 30kHz even under the
best circumstances), and maintaining perfect phase relations within the audible band. Exceeding
96kHz is fine, but unless you have a good reason to do so and need the extended bandwidth of
up to 80kHz, not recommended for best sound.
Owner’s Reference NuWave Phono Converter
Once selected, the sample rate
will appear on the NPC screen.
24 bits will be the default bit rate,
while in USB enabled mode,
regardless of any lower bit depth
setting you may have selected.
If you select DSD
If you have DSD selected on the
NPC as the audio format you
wish to use, the format select
window in the Audio Midi will
display only two available sample rates: 176.4kHz and 352.8kHz. Choosing 176kHz will net
Standard DSD rate and choosing 352.8kHz will result in Double Rate DSD being selected. The
choice you make will be displayed on the NPC front panel display window.
It is instructive to remember that DSD will be sent using the DoP (Digital over PCM) format which,
while compatible with any computer or DAC that can accept PCM data, you cannot playback DSD
data without installing a program that supports DSD. JRiver and Foobar are two good examples
of programs that will playback DSD over DoP.
Test the
connection
Once setup it is useful to test the connection and make sure everything is working properly. Use
the PCM format mode on the NPC (see above for instructions how to select PCM). Open the
program Line In that we encouraged you to download from Rogue Amoeba’s website. It’s a
free program for Mac. Using the top selection window on Line In select the NPC as shown in
the picture and your computer’s line out or wherever you choose to monitor the sound on your
4826 Sterling Drive, Boulder, CO 80301
PH: 720.406.8946 [email protected] www.psaudio.com
©2013 PS Audio International Inc. All rights reserved.
Owner’s Guide 12
Owner’s Guide
®
Owner’s Reference NuWave Phono Converter
Use Line In
computer. Select the Pass Through button while you are playing music into the NPC. The music
should now be audible through your computer monitor loudspeakers.
Use an alternate
source
If you do not yet have your turntable connected to the NPC it may be convenient to simply use
an iPhone or iPod to feed the Analog Inputs (not the Phono inputs) for this test. Set the output
level of the device to maximum, connect a 3.5mm male to dual RCA connecting cable and start
playing music on the mobile device. Line In will now play the music on your computer, showing
you everything is setup properly. If you hear no sound, make sure the Pass Thru button on Line
In has been activated and your settings match those displayed in the screen shot provided in this
manual. Should the sound be distorted, or if any problem arises after several minutes of play, it
may be necessary to reboot your computer.
Once you have verified everything is playing properly through the Linein program, you will no longer
need its services. Simply close Line In and use any recording program, such as Audacity, as you
wish. Instructions on the use of Audacity or
other similar recording programs are beyond
the scope of this manual. Please refer to the
owner’s manual of the recording program
you’re using for further instructions.
The analog phono stage has variable gain
settings that you can access from the unit’s front panel User Interface.
Cartridge gain
setting
The gain of the phono preamplifier can range from 18dB to 78dB selected in 3dB increments.
The gains are referenced to the cartridge output at 5cm/s and the balanced outputs of the NPC
relative to 0dB.
So, for example, a 220mv moving magnet cartridge, playing a reference track (5cm/s) on a record,
will produce 2vrms (+6dB) at the output of the NPC if the gain select is set for a 220mv cartridge.
To adjust the gain of the phono cartridge, use the MODE button to scroll up to the 5th screen
labeled GAIN. The possible settings are:
18dB (220mv)
21dB (160mv)
24dB (110mv)
27dB (80mv)
30dB (56mv)
33dB (40mv)
36dB (28mv)
39dB (20mv)
42dB (14mv)
45dB (10mv)
48dB (7.0mv)
51dB (5.0mv)
4826 Sterling Drive, Boulder, CO 80301
PH: 720.406.8946 [email protected] www.psaudio.com
©2013 PS Audio International Inc. All rights reserved.
Owner’s Guide 13
Owner’s Guide
®
Owner’s Reference NuWave Phono Converter
54dB (3.5mv)
57dB (2.5mv)
60dB (1.8mv)
63dB (1.2mv)
66dB (0.9mv)
69dB (0.6mv)
72dB (0.4mv)
75dB (0.3mV)
78dB (0.2mv)
These gain setting may be adjusted on the fly and there’s no need to worry about changing them
as you listen to a recording. The easiest way to adjust the gain is to start with a number close
to what your cartridge rated output is and while playing a record, adjust the gain relative to the
volume control on the output DAC or preamplifier you’re using.
For example, if you normally listen to a loud passage on an LP at 70% of your preamplifier or
DAC’s volume control, this would be a good reference to try and match. Set the volume control of
your preamplifier or DAC at 70 and play the track you are familiar with. Adjust the NPC cartridge
gain up or down to match your memory of the appropriate loudness.
Display screen
brightness
The second to the last screen on the NPC User Interface is the Display Brightness screen. There
are three levels of display screen brightness you can set the NPC to.
The display will always turn off after 24 seconds regardless of brightness level. This is because
the screen is an OLED (Organic Light Emitting Diode) type that has a restricted lifespan if used
constantly. To avoid any chance of degradation over the years, auto shutdown of the display helps
considerably. As designed, the OLED display screen in your NPC should last for many decades.
4826 Sterling Drive, Boulder, CO 80301
PH: 720.406.8946 [email protected] www.psaudio.com
©2013 PS Audio International Inc. All rights reserved.
Owner’s Guide 14
Questions And Answers
®
Owner’s Reference NuWave Phono Converter
Should the unit
be on all the
time?
The NuWave Phono Converter is best left plugged in, and on, at all times. The current draw is
negligible and keeping it powered on will make sure the internal components sound their best.
Fuses?
There are no user serviceable fuses or circuit breakers inside the NuWave Phono Converter.
Placement?
Placement of the NuWave Phono Converter is not critical but some care should be taken to make sure
whatever it sits on is reasonably steady and hum free. Any equipment with a large power transformer
would be a good source of hum and should be avoided if you’re using the phono preamplifier.
Break in?
The NPC benefits from break in and takes approximately 24 hours to begin to smooth out and sound
open. An additional week of use puts the finishing touches on this piece of high end audio equipment.
There is no harm in leaving the unit on at all times as the lifespan of the NuWave Phono Converter will
be unaffected by leaving it on.
USB doesn’t work The USB output on the NPC is not designed to feed a D to A converter (DAC) and is only able to feed
a computer. If you have a Mac computer running OSX you should be able to plug the NPC directly into
on my DAC?
the USB input and the PC will communicate. If you have a Windows based PC you will need a Windows
driver to communicate with the NPC. The driver can be downloaded free from the PS Audio website.
http://updates.psaudio.com/MarkIIUSBDriver/PSAudio-USBAudio2.0DriverLatest.zip
Why doesn’t my
computer see the
NPC?
If your computer does not see the NPC there is a very good chance you did not enable the USB
option on the front panel of the NPC. Go to the NPC user Interface display and make sure USB is
enabled. Enable USB only if you need to connect to the computer as enabling this feature disables
other features of the NPC.
Why does the
display turn off?
If you see the display going off that is normal. The display on the front panel of the NPC is designed to
auto-shutdown every 24 seconds if it is not being used. This helps protect the longevity of the OLED
screen.
Change the gain
of the Aux input?
You cannot change the gain for the Aux analog input. The gain of the phono cartridge is set via the
front panel display. This gain setting does not affect the analog auxiliary input, which has a fixed 1:1
input gain.
The blue PS logo
isn’t a button?
The blue PS logo light is not a power or standby button. It is only an on indicator and pushing it will
not do anything.
Can I change
the input sample
rate?
The input sample rate of the A/D Converter is always high, sampling at a constant 352.8kHz (5.6MHz)
in DSD. This rate cannot be changed. From this digital converted stream we derive the PCM signals
by a decimation and reconstruction filter. DSD is native to the NPC.
What is DoP?
DSD is sent by a protocol known as DoP (DSD over PCM). The DSD signal purity is never sacrificed
to do this. DoP works by cutting the DSD stream into packets acceptable to the PCM digital audio
4826 Sterling Drive, Boulder, CO 80301
PH: 720.406.8946 [email protected] www.psaudio.com
©2013 PS Audio International Inc. All rights reserved.
Questions and Answers 15
Questions And Answers
®
How does DoP
work?
Owner’s Reference NuWave Phono Converter
format. The NPC will then add a PCM acceptable wrapper around the packet of pure DSD data to
“fool” the DAC or computer attached to the NPC into believing the data is acceptable PCM. The
wrapper is nothing more than a small bit of code known as a header which contains information about
the packeted material length, etc.
This is the same sort of method used in another format called TCP/IP, the basis of the internet (invented
in 1974 by Vint Cerf and Bob Kahn). Using this packet based system, any type of information can be
cut up and sent over any network without molestation or change if it has the correct packet size and
wrapper information. In this same way, one can send images, music and data in any form over the
home network or the web to anywhere in the world.
What can play
the DSD?
Once received, the accepting device will have to be able to remove the wrapper, figure out what the
data format is and what to do with it. This is why any PCM based audio program can record DSD if it
is sent using the DoP protocols, but only very specific devices capable of playing DSD files can actually
playback DSD or DoP.
Both PCM and DSD (over DoP) are available to connect to your DAC, recorder, mixing panel or
computer through any of the three available digital outputs. The choice of PCM or DSD is available
through the front panel display. You can only output one digital audio format at a time.
What type of
PCM filters are in
use?
The filters used in the Burr Brown PCM4222 A/D Converter, which is the heart of the NPC digital
stream, are linear phase filters in the PCM mode. DSD filters are not related to PCM filtering and
decimation. In the PCM mode, downsampling to 44.1kHz through 96kHz/24 bits uses low group
delay linear phase filtering and is the best sounding option for PCM on most systems. The two higher
downsampled sampled rates, 176.2kHz and 192kHz use the PCM4222’s linear phase “conventional
decimation filter” which has a slightly higher group delay at the upper frequency extremes.
Why do you
recommend only
96kHz/24 bit?
It is recommended that if you are playing to a DAC or recording to a simple recorder such as Audacity,
that you use 96kHz/24 bits as standard. Use of higher sample rates should include the careful
addition of digital EQ on the top end to compensate for the slight group delay of the conventional linear
phase filter. We recommend use of the two higher PCM sample rates only for recording studios and
knowledgeable recording and mastering engineers. Use of the two higher sample rates may result in
a slightly thinner sound to the midbass areas and a somewhat brighter top end, which can certainly
be compensated for through experienced implementation of digital EQ.
Should I be
concerned about
loss of resolution
or detail?
There should be no concern over restricted dynamics, low level detail or presence when listening to
or recording LP’s or tape at the recommended 96kHz/24 bit settings. Because the NPC is always
sampling at an extremely high frequency, the -3dB point for any incoming AC signal is 80kHz and the
dynamic range and signal to noise ratio is better than 120dB (which far exceeds the 87dB best case
S/N Ratio of the NPC phono stage and LP’s of any type). LP’s and tape never approach anywhere
near these figures and using 96kHz/24 bit resolution gives the user 120dB of dynamic range (107dB
in practice) and frequency response extending out to 48kHz without any phase shift.
Certainly feel free to experiment to your heart’s content but our recommendation is to stay at 96kHz/24
bits for all the reasons just detailed.
4826 Sterling Drive, Boulder, CO 80301
PH: 720.406.8946 [email protected] www.psaudio.com
©2013 PS Audio International Inc. All rights reserved.
Questions and Answers 16
®
Troubleshooting
Owner’s Reference NuWave Phono Converter
NuWave Phono
Converter won’t
turn on
Check to make sure power is going into the NuWave Phono Converter and its rear panel power
switch is in the ON position. You can verify AC power available by testing the outlet it is plugged into
with another device such as a lamp. Sometimes we find NuWave Phono Converters plugged into
switched wall outlets. These are typically the lower of the two AC receptacles and are controlled by a
light switch. If you have no power to the receptacle, check the circuit breaker feeding the receptacle.
Besides, you should be using a Power Plant to feed the NPC anyway. Shame on you.
Check the logo
If you have verified there is power to feed the NuWave Phono Converter, check the NuWave Phono
Converter’s blue PS logo to see if it is lit. A lit PS logo indicates there is power, but the display may
be blank. That is normal. To activate the display touch any of the 4-buttons on the NPC front panel.
If you have hum
If you are connecting a turntable to the phono inputs on the NPC you need to be very careful so
you do not get hum. The NPC has an extraordinary amount of gain available for low output moving
coil cartridges and it is possible to pickup radiated hum from power cords, transformers and radio
stations if you’re not careful. Always make sure you tie the turntable ground wire to the NPC’s ground
lug binding post. If you hear hum through the speakers, try moving the phono leads between the
turntable/arm/cartridge setup to the NPC around. If the hum varies when you move them you need to
find the lowest hum point and keep the cables there, get better shielded cables, or remove the source
of hum being picked up by the cables.
Hum of this type (induced) is typically a low frequency hum (50Hz or 60Hz) without any buzzing
artifacts part of the signal. If your hum is a sharper buzzing noise, it may be from a light dimmer in the
room or another piece of equipment nearby. Try turning any dimmer circuit all the way bright (or off)
and moving the NPC and the input cables around to best noise levels.
Ground loops
If this doesn’t solve the problem this would indicate you probably have a ground loop between
equipment and next you should follow these easy humbusting tips.
The easiest way to figure out where ground loop problems lie is by the process of elimination. You
need to determine where the hum or buzz is coming from within your system.
If the hum/buzz goes away when you remove the inputs to the power amp, your next step will be to
reconnect the amp and move further down the chain. It is important to do this in the correct order and
take the time to perform the test in a methodical step-by-step manner.
If you have a preamp, or processor that is feeding the power amp, your next step would be to
disconnect all inputs to the preamplifier or processor. Once these are disconnected, and the preamp
or processor is connected only to the power amplifier, turn the system on and again, listen for hum.
Should the hum now appear, it is a problem with your preamp or processor or their interaction with
the power amp. Before returning the preamp or processor to the manufacturer, try a cheater plug to
break a ground loop. Cheater plugs are simple devices that convert a three prong AC plug into a two
prong AC plug and in the act of converting three prongs, to two prongs, they disconnect the ground
from the wall socket. Try one of these on the preamp, or the power amp, or both.
4826 Sterling Drive, Boulder, CO 80301
PH: 720.406.8946 [email protected] www.psaudio.com
©2013 PS Audio International Inc. All rights reserved.
Troubleshooting 17
®
Troubleshooting
Owner’s Reference NuWave Phono Converter
If you determine that there is still no hum present when the preamp, processor or receiver is connected
with no inputs, then selectively begin plugging in your various inputs one at a time. After each
connection, check for hum until you discover the humming culprit. Use the same method described
above to remove the ground on the offending piece of kit.
It may be
something
unrelated causing
the hum
VCR’s, surround processors, and any device that is connected to a television cable or satellite dish
can cause a loud buzz and should always be suspect. If, by the process of elimination described
above, you determine it is a component like a cable TV box that is causing the hum/buzz to occur, and
using a cheater plug doesn’t help matters, it may be necessary to isolate the cable connection (CATV)
with an isolation transformer. This inexpensive device is available at most Wal Mart, Radio Shack or
department store type outlets and is sometimes called a ‘matching transformer’. If you have problems
finding one, call your local cable TV company for advice. The matching transformer will be placed
between the cable TV cord and the cable box, TV or processor.
Just remember, take the system down to its simplest level of connection. Find a way to hook the
system up with as many pieces of the system missing or not connected. Keep it simple and get it
to the point where the hum’s gone. Then start adding back components one at a time until the hum
returns.
Finding the problem is 9/10th of the work in finding a solution.
Computer does
not see the NPC
If your computer does not see the NPC there is a very good chance you did not enable the USB
option on the front panel of the NPC. Go to the NPC user Interface display and make sure USB is
enabled. Enable USB only if you need to connect to the computer as enabling this feature disables
other features of the NPC.
Can’t play DSD
You must have a DSD compatible DAC or computer program to play DSD files. Most DACS and
computer programs (as of this writing) are not DSD compatible.
How can I tell
if I am getting
the same quality
from the ADC as
the pure analog
output?
The easiest way to determine how close the digital output of the NPC is to the analog output is to
connect both outputs (the NPC analog output and your DAC’s analog output) up to your preamplifier
and switch between the two and listen. The gains between the DAC output and the pure analog
output of the NPC may or may not be matched. Sans any measurement equipment to test the gains,
do your best to set the two inputs as close to each other as possible.
Can’t set the
sample rate?
When recording a record or a tape recording onto your computer for later transfer to CD, DVD or hard
drive, the NPC will deliver a near-perfect digital datastream through its asynchronous USB output at
the sample rate you have set on the computer. Remember that if you have the USB output option on
If you are running the ADC at the recommended 96kHz/24 bit rate and have a good DAC connected
to it, you should be able to compare the analog output of the NPC to the analog output of your DAC,
through a preamplifier, and hear little to no difference between the two. Much of this, of course,
depends on the quality of your DAC, so if you’re hearing a bigger than acceptable difference, you
might want to try another DAC to see.
4826 Sterling Drive, Boulder, CO 80301
PH: 720.406.8946 [email protected] www.psaudio.com
©2013 PS Audio International Inc. All rights reserved.
Troubleshooting 18
®
Troubleshooting
Owner’s Reference NuWave Phono Converter
the NPC enabled, you can no longer set or change the sample rate or bit depth on the NPC front panel
display. This restriction applies to both PCM and DSD data. The restriction exists because as soon
as you enable the USB option on the NPC and connected it to the PC, you have effectively disabled
the front panel control of the NPC and given that control to the computer. This is because the NPC is
now a slave device and the computer becomes the master device.
Follow the instructions in this manual to set the sample rate and bit depth of PCM (sample rate of DSD)
on your PC.
Once you disable the USB option on the NPC display, master control of the A/D Converter returns to
the NPC itself. Please see the instructions for setting the sample rates and bit depths in this manual.
The LP recording
doesn’t show the
tracks!
When recording through a typical computer based program like Audacity, the program records
everything, including the spaces between the tracks of the record or tape. There is no way for the
program to know one track has started or stopped. Unless you have a program that handles this
automatically (there are a few but be careful they don’t rob you of the low detail surface noise of the
record) you must take the time to cut the tracks up into individual files and name them before making
your CD, DVD or hard drive based album for later playback.
How do I get
cover art?
Most recordings you are likely to make, either in PCM or DSD, will most likely be in the WAV format,
the most common of the uncompressed formats. WAV files will not support cover art or fancy naming
schemes to look nice. WAV files are pretty crude in their ability to give you anything other than great
sounding music.
If it’s important to have cover art and good looking titles, you might consider as an alternative AIFF or
ALAC (for Mac) or FLAC for Windows. These file types are lossless and support the metadata needed
for cover art and good looking tiles of tracks and numbering schemes.
What if my
turntable sounds
bright?
If the turntable setup sounds thin or bright, you may have forgotten to set the cartridge load resistors
on the back panel of the NPC. Refer to the section on setting the cartridge loading and remember,
the less resistance load you have set on the cartridge, the thinner the system will sound. There is a
perfect setting for each cartridge and it is ok to experiment.
4826 Sterling Drive, Boulder, CO 80301
PH: 720.406.8946 [email protected] www.psaudio.com
©2013 PS Audio International Inc. All rights reserved.
Troubleshooting 19
Warranty
®
TERMS AND
CONDITIONS
Conditions
Remedy
Owner’s Reference NuWave Phono Converter
PS Audio warrants the product designated herein to be free of manufacturing defects in material
and workmanship, subject to the following conditions, for a period of 90 days from the date
of purchase by the original purchaser or date of shipment from the authorized PS Audio dealer,
whichever comes first. This warranty period can be extended to three (3) years by registering your
product. To register, go online www.psaudio.com.
This Warranty is subject to the following conditions and limitations: the Warranty is void and inapplicable
if the product has been used or handled other than in accordance with the instructions in the owner’s
manual, abused, or misused, damaged by accident or neglect or in being transported, or the defect is
due to the product being repaired or tampered with by anyone other than PS Audio or an authorized
PS Audio repair center.
he product must be packaged and returned to PS Audio or an authorized PS Audio repair
a. T
center by the customer at his or her sole expense in the original packing material. PS Audio
will pay return freight of its choice for original purchasers.
b. Return Authorization Number (RMA Number) is required before any product is returned
to our factory for any reason. This number must be visible on the exterior of the
shipping container for PS Audio to accept the return. Units shipped to us without a
Return Authorization Number or without a visible RMA Number on the exterior of the
shipping container will be returned to the sender, freight collect.
c. RETURNED PRODUCT MUST BE ACCOMPANIED BY A WRITTEN DESCRIPTION OF
THE DEFECT.
PS Audio reserves the right to modify the design of any product without obligation to purchasers of
previously manufactured products and to change the prices or specifications of any product without
notice or obligation to any person.
In the event the product fails to meet this Warranty and the above conditions have been met, the
purchaser’s sole remedy under this Limited Warranty shall be to return the product to PS Audio or
an authorized PS Audio repair center where the defect will be repaired, replace or refund through
the original point of purchase without charge for parts or labor.
This Warranty is for the benefit of the original purchaser of the covered product if the product has been
purchased through an authorized PS Audio dealer, distributor or agent. PS Audio will not honor this
warranty without valid proof of purchase from an authorized PS Audio dealer, distributor or agent and
or a valid serial number as proof the product is a valid PS Audio product manufactured by PS Audio
International.
This warranty does not cover the cost of custom installation, customer instruction, setup adjustments
or signal reception problems.
Miscellaneous
This warranty does not cover cosmetic damage or any damage due to accident, misuse, abuse,
negligence or modification of, or to any part of the Product, without initial express consent from
PS Audio. This warranty does not cover damage due to improper operation or maintenance,
connection to improper voltage supply, or attempted repair by anyone other than a facility
authorized by PS Audio to service the Product.
4826 Sterling Drive, Boulder, CO 80301
PH: 720.406.8946 [email protected] www.psaudio.com
©2013 PS Audio International Inc. All rights reserved.
Warranty 20
Warranty
®
Owner’s Reference NuWave Phono Converter
This warranty is invalid if the factory applied serial number has been altered or removed from the
Product.
This warranty is invalid if proof of manufacture by PS Audio International cannot be determined to the
satisfaction of the company either by verification of a valid serial number and or a valid receipt that
includes the serial number from an authorized PS Audio dealer, distributor or agent.
To locate the servicer or dealer nearest you, or for service assistance or resolution of a service problem,
or for product information or operation, call or email PS Audio.
ANY IMPLIED WARRANTIES RELATING TO THE ABOVE PRODUCT SHALL BE LIMITED TO THE
DURATION OF THIS WARRANTY. THE WARRANTY DOES NOT EXTEND TO ANY INCIDENTAL OR
CONSEQUENTIAL COSTS OR DAMAGES TO THE PURCHASER. Some states do not allow limitations
on how long an implied warranty lasts or an exclusion or limitation of incidental or consequential
damages, so the above limitations or exclusions may not apply to you. This Warranty gives you specific
legal rights, and you may also have other rights that vary from state to state.
Inquiries regarding the above Limited Warranty may be sent to the following address: PS Audio
International, Inc., 4826 Sterling Drive, Boulder, Colorado 80301 ATTN: Customer Service; Email:
[email protected]; Voice 720-406-8946; FAX: 720-406-8967.
Outside the US
PS Audio has authorized distribution in many countries of the world. In each country, the authorized
importing retailer or distributor has accepted the responsibility for warranty of products sold by that
retailer or distributor. Warranty service should normally be obtained from the importing retailer or
distributor from whom you purchased your product. In the unlikely event of service required beyond
the capability of the importer, PS Audio will fulfill the conditions of the warranty. Such product must
be returned at the owner’s expense to the PS Audio factory, together with a photocopy of the bill of
sale for that product, a detailed description of the problem, and any information necessary for return
shipment.
4826 Sterling Drive, Boulder, CO 80301
PH: 720.406.8946 [email protected] www.psaudio.com
©2013 PS Audio International Inc. All rights reserved.
Warranty 21
Service
®
Owner’s Reference NuWave Phono Converter
If you require
service in North
America
In the unlikely event there is a problem with your PS Audio component, please contact your dealer,
distributor, or PS Audio corporate to discuss the problem before you return the component to our
Colorado manufacturing facilities for repair. Products shipped to either the factory or the corporate
center may be refused if not accompanied by a PS Audio Service Department issued return
authorization number (RMA Number).
Obtain an RA
number
It’s easy to obtain an RMA number. Simply email or call us in Colorado and we’ll be happy to take
care of you. Return authorization numbers should be prominently displayed on the outside of the box
and an accompanying letter describing the problem and re-listing the RMA number must be inside the
box to qualify for service.
Contact
information
To contact the PS Audio Service Department:
If you are in the
United States or
Canada
TELEPHONE
HOURSM/F
FAX
E-MAIL
WEBSITE 720.406.8946
9:00 am to 5:00 pm MST
720-406-8967
[email protected]
http://www.psaudio.com
If you are in the United States or Canada use the following procedure:
1. Obtain a Return Authorization Number (RMA number) and shipping address from the PS Audio
Service Department.
2. Insure and accept all liability for loss or damage to the product during shipment to the PS Audio
factory and ensure all freight (shipping) charges are prepaid.
The product may also be hand delivered to our Colorado facilities if arrangements with the Service
Department have been made in advance. Proof of purchase from an authorized PS Audio dealer,
distributor or agent may be required for warranty validation at the time of hand delivery.
Use original
packing
Use the original packaging to ensure the safe transit of the product to the factory, dealer, or distributor.
PS Audio may, at its discretion, return a product in new packaging and bill the owner for such packaging
if the product received by PS Audio was boxed in nonstandard packaging or if the original packaging
was so damaged to the point it was unusable. If PS Audio determines that new packaging is required,
the owner will be notified before the product is returned.
To purchase additional packaging, please contact your authorized PS Audio dealer, distributor, or the
PS Audio Service Department for assistance.
If you are outside If you are outside the United States or Canada and require service you must contact your country’s
the US or Canada dealer or distributor for instructions. PS Audio warranties its products (see warranty section) worldwide.
Service for PS Audio products outside the United States and Canada is handled through your country’s
distributor or dealer.
4826 Sterling Drive, Boulder, CO 80301
PH: 720.406.8946 [email protected] www.psaudio.com
©2013 PS Audio International Inc. All rights reserved.
Service 22
Service
®
Owner’s Reference NuWave Phono Converter
1. Obtain a Return Authorization Number (RMA number) and shipping address from your dealer or
distributor’s Service Department.
2. Insure and accept all liability for loss or damage to the product during shipment to the dealer or
distributor’s Service Department and ensure all freight (shipping) charges are prepaid.
If you have
problems
If you feel your country’s authorized dealer or distributor is either unwilling or unable to service your
PS Audio products, please contact our service department at [email protected] or at the above
contact numbers to discuss the situation.
Your serial
number
Your PS Audio product serial number is:
Please fill in the dealer or distributor’s information from where you originally purchased the unit.
Your purchase
information
Date of purchase
4826 Sterling Drive, Boulder, CO 80301
PH: 720.406.8946 [email protected] www.psaudio.com
©2013 PS Audio International Inc. All rights reserved.
Service 23