1
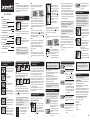
Helpful Tip
The skin depth varies for various people at different
sample sites. The lancing device adjustable tip allows
the best depth of skin penetration for an adequate
sample size. A beginning setting of three (3) is
recommended.
User Manual
02 Using Lancing Device at
Fingertip Sample Site
INDEX
01
02
Preparing Lancing Device for
Blood Sampling
Using Lancing Device at
Fingertip Sample Site
2
3
03 Testing Your Blood Glucose Level
4
04 Viewing Test Results in Meter Memory
6
05 Checking the System
6
06 “HI” and “Lo” Messages
8
07 Error Messages and Troubleshooting
10
08 Replacing Battery
11
09 Please Note
12
10 CareSens N Mini Blood Glucose
Monitoring System Specifications
13
11 Warranty Information 14
Step3
The test result will appear after the meter counts
down from 5 to 1. The result will be automatically
stored in the meter’s memory. If the test strip is
removed after the test result is displayed, the meter
will automatically switch off after 3 seconds. Discard
used test strips safely in biohazard containers.
Step1
Place the cocked lancing device
against the pad of the finger. The
best puncture sites are on the
middle or ring fingers.
Helpful Tip
Choose a different site each time you test. Repeated
puncturing at the same sample site may cause pain
or skin calluses.
Step2
Press the release button.
Remove the device from the finger.
Wait a few seconds for a blood
drop to form.
• The
lancing device should be used by one individual.
• Use a soft cloth or tissue to wipe the lancing
device. If necessary, a small amount of alcohol
on a soft cloth or tissue may be used.
PGA1E3182 REV2 08/2012
3
1
01 Preparing Lancing Device for
Blood Sampling
Step1
Wash your hands and the sample
site with soap and warm water.
Rinse and dry thoroughly.
Step2
Unscrew and remove
the adjustable tip.
Step3
Insert a new disposable lancet
firmly into the carrier.
03 Testing Your Blood Glucose Level
Step4
Twist off and set aside the
protective cover of the disposable
lancet and replace the adjustable
tip.
Step2
Use your lancing device to get blood sample.
A minimum volume of 0.5 microliter is needed to fill
the confirmation window (actual size of 0.5 µL : ).
After the symbol appears on the screen, apply the
blood sample to the narrow end of the test strip until
the meter beeps.
Step5
Choose a depth of penetration
by rotating the top portion of the
adjustable tip until the setting
number matches the arrow.
To avoid infection when drawing a sample, use a
lancet only one time, and :
• Do not use a lancet that has been used by others.
• Always use a new sterile lancet.
• Keep the lancing device clean.
Step6
To cock the lancing device, hold
the tip in one hand. Pull the
sliding barrel on with the other
hand. The lancing device is
cocked when you feel a click. 2
<o>
<X>
NOTE
The meter may switch off if the blood sample is not
applied within 2 minutes of the symbol appearing
on the screen. If the meter turns off, remove the strip
and reinsert it, and apply the blood sample after
symbol appears on the screen.
NOTE
Results from alternative site and fingertip samples
may appear different as there is a time lag for the
glucose levels to reach the same value.
Use a fingertip for drawing if you suffer from
hypoglycemia or have experienced hypoglycemic
shock or symptoms.
NOTE
If the sample drop of blood runs or spreads due to
contact with hair or with a line in your palm, do not
use that sample. Try puncturing again in a smoother
area.
5
04Viewing Test Results in
Meter Memory
The meter memory can store up to ten (10) results
at one time. The results will be saved in the order it
was measured, and you can view stored results by
pushing the button. When the button is pushed,
number “1” will appear on the screen for one
second, and then the result will be shown.
This is the most recent test result that is saved in
the memory. To go on to the second recent result,
press the button again. Now number “2” will
appear for one second and the next result will be
displayed. By repeating this process, you can go
through to result number 10 which is the oldest
data saved in the memory.
To exit from the memory mode, press and hold
down the button for about two (2) seconds. The
meter will turn off.
Step1
Insert a test strip with contact bars facing up into the
test strip port. Push the strip gently until the meter
beeps. Then the symbol will appear.
Step2
Shake the CareSens Control
Solution bottle before each test.
Remove the cap and squeeze the
bottle to discard the first drop.
Then wipe the tip with a clean
tissue or cloth. After the
symbol appears on the display,
apply the solution to the narrow
edge of the test strip until the
meter beeps.
Make sure the confirmation
window fills completely.
NOTE
If the test strip does not take in the blood sample,
please contact your authorized i-SENS sales
representative.
05 Checking the System
You may check your meter and test strips using the
CareSens Control Solution(control A and/or B).
NOTE
The meter may switch off if the control solution drop
is not applied within 2 minutes of the symbol
appearing on the screen. If the meter turns off, remove
the strip, reinsert it. Then start from step 1.
Step3
A test result will appear after the meter counts down
from 5 to 1.
Step4
Compare the result displayed on
the meter to the range printed on
the test strip vial. The result should
fall within that range.
Used strips should be discarded
safely in biohazard containers. 7
Caution
The range printed on the test strip vial is for the
CareSens Control Solution only. It does not have
any connection to your blood glucose level.
CareSens Control Solution Storage and Handling
For accurate results:
• Close the control solution bottle tightly and store at
a temperature of 8-30˚C/46-86°F.
• Do not refrigerate or freeze.
• Make sure your meter, test strips, and control
solution are at room temperature before testing.
Control solution tests must be done at room
temperature (20-25˚C/68-77˚F).
The CareSens Control Solution can be purchased
separately. Please contact your authorized i-SENS
sales representative.
06 “HI” and “Lo” Messages
The CareSens N Mini Meter displays test results
between 20 to 600 mg/dL (1.1-33.3 mmol/L), and
a “HI” or “Lo” message outside this range .
Control Solution Testing
If the confirmation window is not
filled in time because of
abnormally high viscosity or
insufficient volume, Er4
message will appear.
Step1
Insert a test strip into the meter’s
test strip port, with the contact
bars facing upwards until the
meter beeps. Be careful not to
bend the strip while pushing it in.
The symbol will be displayed on
the screen.
4
6
HI Message
Lo Message
If your test result is above 600
mg/dL (33.3 mmol/L), “HI”
appears on the display. A test
result above 600 mg/dL (33.3
mmol/L) indicates hyperglycemia
(high blood glucose).
If your test result is below 20 mg/dL
(1.1 mmol/L), “Lo” will appear on
the display.
This indicates hypoglycemia (low
blood glucose).
8
※ If a “Lo” message blinks when the meter is
turned on or a test strip is inserted, it means the
battery needs to be replaced. It may also
appear when the meter battery seems
temporarily discharged due to exposure to cold or
low temperature. Take the meter to an area where
the temperature is within the operating range
(10-40˚C/50-104˚F) and repeat the test after the
meter and test strips have reached a temperature
within the operating range.
If you get a “HI” or “Lo” message, repeat the test.
If the “HI” or “Lo” message is displayed again on
retesting, please contact your healthcare
professional immediately.
If “HI” or “Lo” message appear irrespective of
your condition, contact your authorized i-SENS
sales representative.
Normal Blood Glucose Results
The range of a normal fasting* blood glucose level
for non-diabetic adults is between 70-99 mg/dL
(3.9-5.5 mmol/L). Two(2) hours after a meal, the
range of a normal blood glucose level for nondiabetic adults is between 100-139 mg/dL (5.6-7.7
mmol/L).(1)
*Fasting is defined as no caloric intake for at least
eight (8) hours.
9
07 Error Messages and Troubleshooting
A used test strip was inserted.
→ Repeat the test with a new test strip.
The blood or control solution sample
was applied before the symbol
appeared.
→ Repeat the test with a new test strip
and wait until the symbol appears
before applying the blood sample.
The temperature during the test was
above or below the operating range.
→ Move to an area where the
temperature is within the operating
range(10-40°C/50-104˚F) and repeat
the test after the meter and test strips
have reached a temperature within
the operating range.
The blood sample has abnormally
high viscosity or is insufficient.
→ Repeat the test after inserting a new
test strip.
This error message may appear when
the wrong blood glucose test strip is
used instead of CareSens N blood
glucose test strip.
→ Repeat the test with a CareSens N
test strip.
10
There is a problem with the meter.
→ Do not use the meter. Contact your
authorized i-SENS sales
representative.
08 Replacing Battery
If “Lo” message blinks when the meter is turned
on or a test strip is inserted, it means there is not
enough power for tests. So, the battery needs to
be changed. Use only non-rechargeable,
replaceable, type CR2032 lithium battery with 3 V
nominal voltage, 220 mAh nominal capacity, and
a 0.2 mA nominal standard discharge.
Step1
To replace the battery, make sure
that the meter is turned off. Turn
the meter over, press down slightly
and push the battery compartment
cover in the direction of arrow
shown to remove it.
Step2
Remove the old battery by gently
pushing the edge of the battery.
Insert a new battery and make
sure the positive (+) side of the
battery is facing up.
※The meter will not operate if the
battery is placed upside down.
Step3
Place the cover over the battery
compartment. Push it down until
you hear the tab click into place. 11
Caution
There is a risk of explosion if the battery is
replaced with an incorrect type. Please dispose
of the used battery according to your local
regulations.
09 Please Note
The unit of measurement is fixed.
Caring for the Meter
• Do not expose the meter to direct sunlight or heat
for an extended period of time.
• Prevent the entry of dirt, dust, blood or water at
the meter's test strip port.
• Do not drop the meter or submit it to strong shocks.
• Do not try to fix or alter the meter in any way.
• Keep the meter away from strong electromagnetic
fields such as cell phones and microwave ovens.
• Keep the meter in a cool and well ventilated place.
CareSens N Mini BGM System Components
• CareSens N Mini Blood Glucose Meter • CareSens N Blood Glucose Test Strips
• Lancing Device
• User Manual
• Quick Reference Guide • Battery
• Lancets
• Carrying Case
12
• Certain components may not be included
depending on the place of purchase.
• Check all the components after opening the
CareSens N Mini Blood Glucose Monitoring
System package. The exact contents are listed on
the main box.
• Please contact your authorized i-SENS sales
representative if any component is missing or
damaged.
Strip information
The device can be sent back to the manufacturer
for recycling or proper disposal after its useful life.
Alternatively the device should be disposed in
accordance with national laws after its useful life.
10 CareSens N Mini Blood Glucose
Monitoring System Specifications
• Model : GM505VAA
• Test Range : 20-600 mg/dL (1.1-33.3 mmol/L)
• Sample Size : Minimum 0.5 µL
• Test Time : 5 seconds
• Test Sample : Fresh capillary whole blood
• Calibration : Plasma-equivalent
• Assay Method : Electrochemical
• Operating Range
Temperature : 10-40˚C/50-104˚F
Relative Humidity : 10-90%
Hematocrit : 20-60%
IMPORTANT
Please read this information and the CareSens N
Mini User Manual before using CareSens N Test
Strips.
INTENDED USE AND TEST PRINCIPLE
The CareSens N Test Strips work with the CareSens N
Mini Blood Glucose Meter to quantitatively measure
glucose in capillary whole blood. The CareSens N Mini
Blood Glucose Monitoring Systems are for self-testing
outside the body (in vitro diagnostic use). The
CareSens N Mini Blood Glucose Monitoring Systems
should not be used for the diagnosis of diabetes or for
testing newborns. The glucose in a blood sample
mixes with special test strip chemicals where a small
electrical current is produced. The CareSens N Mini
Blood Glucose Meter detects the electrical current
which reflects the amount of glucose in the blood
sample.
13
STORAGE AND HANDLING
• Store vial in a cool and dry place between 1-30°C
(34-86°F). Do not freeze.
• Keep the vials of test strips away from direct
sunlight or heat.
• Store unused test strips in their original vials to
1
Manufacturer’s Warranty
i-SENS, Inc. warrants that the CareSens N Mini
Meter shall be free of defects in material and
workmanship in normal use for a period of five (5)
years. The meter must have been subjected to
normal use. The warranty does not cover
tampering, improper handling, use, or service of
the meter. Any claim must be made within the
warranty period.
The i-SENS company will, at its discretion, repair or
replace a defective meter or meter part that is
covered by this warranty. As a matter of warranty
policy, i-SENS will not reimburse the consumer’s
purchase price.
Obtaining Warranty Service
To obtain warranty service you must return the
defective meter or meter part along with proof of
purchase to your authorised i-SENS sales
representative.
avoid damage or contamination.
• Close the vials tight immediately after taking out
a test strip in order to maintain airtightness.
Exposing test strips to humidity for a long period
of time can produce incorrect test results even if
the test strips are new.
• Handle test strips only with clean and dry hands.
• Use the test strip immediately after taking it out of
the vial.
• Do not bend, cut, or alter the test strips in any way.
• Do not force a test strip into the meter. Gently push
it into the meter’s test strip port.
• Apply only fresh capillary whole blood for testing.
• Use all of the test strips within the expiration date
printed on the test strip box and vial label.
• Dispose of test strips past the expiration date
immediately because using test strips past their
expiration date can produce incorrect test results.
• Test strips in new, unopened vials and test strips in
vials that have been opened can be used up until
the expiration date printed on the test strip box and
vial label if the test strips are used according to its
storage and handling methods.
11 Warranty Information
14
WARNINGS AND PRECAUTIONS
• Keep test strips and test strip vial away from
children. The test strips and vial cap may be
choking hazards. Drying agents in the vial cap
may be harmful if inhaled or swallowed or may
cause skin or eye irritation.
• Test strips are for single use only. Do not reuse.
• If the test strip does not absorb the blood sample
properly, please contact your authorized i-SENS
sales representative.
Please note that:
• An abnormally high or low red blood cell count
(hematocrit level over 60% or below 20%) may
produce inaccurate results.
• Severe dehydration (excessive water loss) may cause
false low results. If you believe you are suffering
from severe dehydration, consult your physician
immediately.
• There is no effect from altitude up to 3,000 m
(10,000 ft) above sea level.
METER AND TEST STRIP PERFORMANCE CHECK
The CareSens Control Solution contains a known
amount of glucose that reacts with the CareSens N
Test Strip in combination with the CareSens N Mini
Meter to make sure they are working properly
together and the correct testing procedure is being
followed.
You may run a check with the control solution when you:
• Want to practice the test procedure using the
control solution instead of blood.
• Use the meter for the first time.
• Open a new vial of test strips.
• Have symptoms that are inconsistent with your
blood glucose test results.
• Believe your test results are not accurate.
• Suspect your meter and test strips are not properly
performing.
If your control solution test results do not fall within
the range printed on the test strip vial, repeat the
test. Out of range results may be due to one or more
of the following factors:
3
• Error in performing the test.
• Expired or contaminated control solution.
• Expired or damaged test strip.
• Failure to shake control solution bottle.
• Failure to discard first drop of control solution and
wipe bottle tip clean.
If results continue to fall outside the range printed on
the test strip vial, the CareSens N Test Strip and Meter
may not be working properly. If so, do not use your
system and contact your authorized i-SENS sales
representative.
CHEMICAL COMPOSITION
• Glucose oxidase : 2.7 units
• Hexaamineruthenium(III) chloride : 45.7 ㎍
• Other ingredients : 1.6 ㎍
1.0132
1.0053 mg/dL
(0.0559 mmol/L)
0.9864
600
33-455 mg/dL
(1.8333–25.278 mmol/L)
For in vitro diagnostic use
Consult instruction for use
Manufacturer
Do not reuse
Accuracy results for glucose concentration
< 75 mg/dL (4.2 mmol/L)
CareSens N Mini (Model GM505VAA)
Within ± 5 mg/dL
(Within ± 0.28 mmol/L)
71/84 (85%)
Within ± 10 mg/dL
(Within ± 0.56 mmol/L)
84/84 (100%)
Within ± 15 mg/dL
(Within ± 0.83 mmol/L)
84/84 (100%)
Temperature limitations
Use by (unopened or opened test strip
vials)
Batch code
Authorized representative
Accuracy results for glucose concentration
≥ 75 mg/dL (4.2 mmol/L)
CareSens N Mini (Model GM505VAA)
Within ± 5%
268/516 (52%)
Within ± 10%
461/516 (89%)
Within ± 15%
511/516 (99%)
Within ± 20%
516/516 (100%)
CE Mark reg. IVDD 98/79/EC
Serial number
Do not discard this product with other
household-type waste
5
7
PRECISION
The precision studies were performed in a
laboratory using CareSens N Mini BGM Systems.
Within Run Precision
• Blood avg.
• Blood avg.
• Blood avg.
• Blood avg.
• Blood avg.
35 mg/dL (1.9 mmol/L)
SD = 1.9 mg/dL (0.1 mmo/L)
83 mg/dL (4.6 mmol/L)
SD = 2.3 mg/dL (0.1 mmo/L)
128 mg/dL (7.1 mmol/L)
CV = 3.5%
288 mg/dL (16.0 mmol/L)
CV = 3.3%
347 mg/dL (19.3 mmol/L)
CV = 2.7%
Total Precision
• Control avg.
37 mg/dL (2.1 mmol/L)
SD = 1.7 mg/dL (0.1 mmol/L)
122 mg/dL (6.8 mmol/L)
• Control avg.
CV = 2.8%
• Control avg.394 mg/dL (21.9 mmol/L)
CV = 3.1%
PERFORMANCE CHARACTERISTICS
The performance of CareSens N Mini BGM System
has been tested in laboratory and clinical studies.
The testing range of the CareSens N Mini BGM
System is 20-600 mg/dL (1.1-33.3 mmol/L).
ACCURACY
The accuracy of the CareSens N Mini BGM System
(Model GM505VAA) was assessed by comparing blood
glucose results obtained by patients with those
obtained using a YSI Model 2300 Glucose Analyzer, a
laboratory instrument . The following results were
obtained by diabetic patients at clinic centers.
The results were:
2
• Slope
• Y-intercept
• Correlation coefficient(r)
• Number of Sample
• Range tested
4
i-SENS, Inc.
465-6 Wolgye4-dong, Nowon-gu
Seoul 139-845, Korea
www.i-sens.com
Medical Technology Promedt
Consulting GmbH,
Altenhofstrasse 80, D-66386
St. Ingbert, Germany
This Study shows that there could be variation of
up to 3.5%.
Reference
1. American Diabetes Association. “Standards of
Medical Care in Diabetes – 2012.” Diabetes Care.
January 2012; 35(1):S11-S63.
6
Ⓒ 2012 i-SENS, Inc. All Rights Reserved.