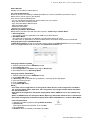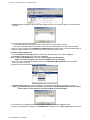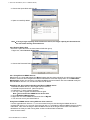
1
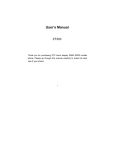
MU-7000AV
3.5" Network Multimedia Player
User’s Manual
Declaration of Conformity
We, Manufacturer/Importer
OvisLink Corp.
5F., NO.6, Lane 130, Min-Chuan Rd.,
Hsin-Tien City, Taipei County, Taiwan
Declare that the product
3.5" Network Multimedia Player
MU-7000AV
is in conformity with
In accordance with 89/336 EEC-EMC Directive and 1999/5 EC-R & TTE Directive
Clause
Description
■ EN 55022:1998/A1
Limits and methods of measurement of radio disturbance
characteristics of information technology equipment
:2000/A2:2003
■ EN 61000-3-2:2000/
A1:2001/A2:2005
■ EN 61000-3-3:1995/
A1:2001/A2:2005
■ EN 55024:1998/A1
:2001/A2:2003
Disturbances in supply systems caused by household appliances
and similar electrical equipment "Harmonics"
Disturbances in supply systems caused by household appliances
and similar electrical equipment "Voltage fluctuations"
Information Technology equipment-Immunity characteristics-Limits
And methods of measurement
■ CE marking
Manufacturer/Importer
Signature:
Name
:
Position/ Title :
Albert Yeh
Vice President
Date: 2007/4/30
(Stamp)
MU-7000AV CE Declaration Statement
Country
cs
Česky [Czech]
Declaration
OvisLink Corp. tímto prohlašuje, že tento MU7000AV je ve shodě se základními požadavky a
dalšími příslušnými ustanoveními směrnice
1999/5/ES.
da
Undertegnede OvisLink Corp. erklærer herved,
Dansk [Danish] at følgende udstyr MU-7000AVoverholder de
væsentlige krav og øvrige relevante krav i
direktiv 1999/5/EF.
de
Hiermit erklärt OvisLink Corp., dass sich das
Deutsch
Gerät MU-7000AVin Übereinstimmung mit den
[German]
grundlegenden Anforderungen und den übrigen
einschlägigen Bestimmungen der Richtlinie
1999/5/EG befindet.
et
Käesolevaga kinnitab OvisLink Corp. seadme
Eesti [Estonian] MU-7000AV vastavust direktiivi 1999/5/EÜ
põhinõuetele ja nimetatud direktiivist tulenevatele
teistele asjakohastele sätetele.
en
Hereby, OvisLink Corp., declares that this MUEnglish
7000AV is in compliance with the essential
requirements and other relevant provisions of
Directive 1999/5/EC.
es
Por medio de la presente OvisLink Corp. declara
Español
que el MU-7000AVcumple con los requisitos
[Spanish]
esenciales y cualesquiera otras disposiciones
aplicables o exigibles de la Directiva 1999/5/CE.
el
ΜΕ ΤΗΝ ΠΑΡΟΥΣΑ OvisLink Corp. ΔΗΛΩΝΕΙ
Ελληνική [Greek] ΟΤΙ MU-7000AV ΣΥΜΜΟΡΦΩΝΕΤΑΙ ΠΡΟΣ ΤΙΣ
ΟΥΣΙΩΔΕΙΣ ΑΠΑΙΤΗΣΕΙΣ ΚΑΙ ΤΙΣ ΛΟΙΠΕΣ
ΣΧΕΤΙΚΕΣ ΔΙΑΤΑΞΕΙΣ ΤΗΣ ΟΔΗΓΙΑΣ
1999/5/ΕΚ.
fr
Par la présente OvisLink Corp. déclare que
Français [French] l'appareil MU-7000AV est conforme aux
exigences essentielles et aux autres dispositions
pertinentes de la directive 1999/5/CE
it
Con la presente OvisLink Corp. dichiara che
Italiano [Italian] questo MU-7000AV è conforme ai requisiti
essenziali ed alle altre disposizioni pertinenti
stabilite dalla direttiva 1999/5/CE.
lv
Ar šo OvisLink Corp. deklarē, ka MU-7000AV
Latviski [Latvian] atbilst Direktīvas 1999/5/EK būtiskajām prasībām
un citiem ar to saistītajiem noteikumiem.
sv
Härmed intygar OvisLink Corp. att denna MUSvenska
7000AV står I överensstämmelse med de
[Swedish]
väsentliga egenskapskrav och övriga relevanta
bestämmelser som framgår av direktiv
1999/5/EG.
Country
lt
Lietuvių
[Lithuanian]
Declaration
Šiuo OvisLink Corp. deklaruoja, kad šis MU-7000AV
atitinka esminius reikalavimus ir kitas 1999/5/EB
Direktyvos nuostatas.
nl
Hierbij verklaart OvisLink Corp. dat het toestel MUNederlands [Dutch 7000AV in overeenstemming is met de essentiële
eisen en de andere relevante bepalingen van richtlijn
1999/5/EG.
mt
Hawnhekk, OvisLink Corp, jiddikjara li dan MUMalti [Maltese]
7000AV jikkonforma mal-ħtiġijiet essenzjali u ma
provvedimenti oħrajn relevanti li hemm fid-Dirrettiva
1999/5/EC.
hu
Magyar
[Hungarian]
pt
Português
[Portuguese]
Alulírott, OvisLink Corp nyilatkozom, hogy a MU7000AV megfelel a vonatkozó alapvetõ
követelményeknek és az 1999/5/EC irányelv egyéb
elõírásainak.
Niniejszym OvisLink Corp oświadcza, że MU-7000AV
jest zgodny z zasadniczymi wymogami oraz
pozostałymi stosownymi postanowieniami Dyrektywy
1999/5/EC.
OvisLink Corp declara que este MU-7000AVestá
conforme com os requisitos essenciais e outras
disposições da Directiva 1999/5/CE.
sl
Slovensko
[Slovenian]
OvisLink Corp izjavlja, da je ta MU-7000AV v skladu
z bistvenimi zahtevami in ostalimi relevantnimi
določili direktive 1999/5/ES.
pl
Polski [Polish]
sk
OvisLink Corp týmto vyhlasuje, že MU-7000AV spĺňa
Slovensky [Slovak] základné požiadavky a všetky príslušné ustanovenia
Smernice 1999/5/ES.
fi
Suomi [Finnish]
OvisLink Corp vakuuttaa täten että MU-7000AV
tyyppinen laite on direktiivin 1999/5/EY oleellisten
vaatimusten ja sitä koskevien direktiivin muiden
ehtojen mukainen
Hér með lýsir OvisLink Corp yfir því að MU-7000AV
Íslenska [Icelandic] er í samræmi við grunnkröfur og aðrar kröfur, sem
gerðar eru í tilskipun 1999/5/EC.
no
OvisLink Corp erklærer herved at utstyret MUNorsk [Norwegian] 7000AV er i samsvar med de grunnleggende krav og
øvrige relevante krav i direktiv 1999/5/EF.
A copy of the full CE report can be obtained from the following address:
OvisLink Corp.
5F, No.6 Lane 130,
Min-Chuan Rd, Hsin-Tien City,
Taipei, Taiwan, R.O.C.
This equipment may be used in AT, BE, CY, CZ, DK, EE, FI, FR, DE, GR, HU, IE, IT, LV, LT, LU, MT, NL, PL, PT, SK,
SI, ES, SE, GB, IS, LI, NO, CH, BG, RO, TR
MU-7000AV
User’s Manual
FCC COMPLIANCE STATEMENTS
This equipment has been tested and found to comply with the limits for a Class B digital device, pursuant to
Part 15 of the FCC Rules. These limits are designed to provide reasonable protection against harmful
interference in a residential installation. This equipment generates, uses and can radiate radio frequency
energy and, if not installed and used in accordance with the instructions, there is no guarantee that
interference will not occur in a particular installation. If this equipment does cause harmful interference to
equipment off and on, the user is encouraged to try to correct the interference by one or more of the
following measures:
Reorient or relocate the receiving antenna.
Increase the Distance between the equipment and receiver.
Connect the equipment into an outlet on a circuit different from that to which the receiver is connected.
Consult the dealer or an experienced radio/TV technician for help.
TRADEMARKS
MS-DOS, Windows, Windows 95/98/NT/2000/me/XP are trademarks of Microsoft Corporation.
Macintosh and Mac are trademarks of Apple Computer
*All of the third-party brands and names are the property of their respective owners.
AirLive Mu-7000AV User’s Manual
Table of Contents
Table of Contents
1. Before You Get Started .......................................................................................................... 1
1.1 Safety Instructions........................................................................................................ 1
1.2 Preliminary Tools .......................................................................................................... 1
1.3 Take a look to the MU-7000AV ..................................................................................... 1
2. Easy Installation Guide .......................................................................................................... 2
2.1 Package Contents ......................................................................................................... 2
2.2 Specifications................................................................................................................ 2
2.3 Supported Hard Disk Formats ..................................................................................... 2
2.4 Minimum System Requirements.................................................................................. 2
2.5 Supported Media Playback Formats ........................................................................... 2
2.6 Hardware Installation.................................................................................................... 3
3. Using MU-7000AV ................................................................................................................... 3
3.1 USB Enclosure .............................................................................................................. 3
3.1.1 USB OTB (One Touch Backup) .........................................................................3
3.2 Media File Playback Mode............................................................................................ 4
3.2.1 MU-7000AV Firmware Upgrade .........................................................................4
3.2.2 TV Lock Function ...............................................................................................4
3.3 LAN Share Device Setup Overview ( NDAS Mode ) ................................................... 5
3.4 Switching between Media File Playback Mode and NDAS mode ............................. 5
4. Remote Control Features ....................................................................................................... 6
5. Starting Quick Media Play...................................................................................................... 8
5.1 PHOTO PLAY MODE ..................................................................................................... 8
5.2 MUSIC PLAY MODE..................................................................................................... 10
5.3 VIDEO PLAY MODE ..................................................................................................... 11
5.4 FILE LIBRARY.............................................................................................................. 12
5.5 OTHER SETUP............................................................................................................. 12
6. Network Hard Disk ( NDAS Mode ) ...................................................................................... 13
6.1 Use With NETDISK Mode in Windows System......................................................... 13
6.1.1 Install LAN Share Device Management in Windows XP、Windows 2000
and Server 2003.........................................................................................................13
6.1.2 Install NDAS Device Management in Windows ME and Windows 98SE .....13
6.1.3 NDAS Administrator.........................................................................................14
6.1.4 Add / Register a New NDAS Device using the Registration Wizard ............14
6.1.5 Add / Register a New NDAS Device without using the Registration
Wizard.........................................................................................................................15
6.1.6 Found New Hardware Wizard..........................................................................15
6.1.7 Sharing NDAS Device ......................................................................................16
6.2 Introduction to NDAS Device Management .............................................................. 17
6.2.1 NDAS Device Status Modes ............................................................................17
i
AirLive MU-7000AV User’s Manual
Table of Contents
6.2.2 NDAS Device Management..............................................................................17
6.3 NDAS Device Functions ............................................................................................. 18
6.3.1 NDAS Device Management..............................................................................18
6.3.2 Changing from Read/Write Mode to Read-Only Mode..................................19
6.3.3 Changing from Read Mode to Read/Write Mode ...........................................19
6.4 Use With LAN Share Mode in Mac OS X ................................................................... 20
6.4.1 Install NDAS Device Management.............................................................20
6.4.2 Add / Register NDAS Device......................................................................20
6.4.3 Using NDAS Device Admin .............................................................................20
6.4.4 Using NDAS Device..........................................................................................21
6.4.5 Uninstall NDAS............................................................................................21
6.5 NDAS Bind Management ............................................................................................ 22
6.5.1 Bind ...................................................................................................................22
6.5.2 Unbind ...............................................................................................................23
6.6 Other NDAS Bind Management Functions ............................................................... 25
6.6.1 Add Mirror .........................................................................................................25
6.6.2 Migrate...............................................................................................................25
6.6.3 Replace Device .................................................................................................25
6.6.4 Replace HDD.....................................................................................................25
6.6.5 Add Spare Disk.................................................................................................25
6.6.6 Remove Spare Disk..........................................................................................26
6.6.7 Using Mirrored NDAS Devices ........................................................................26
6.7 Formatting NDAS Device............................................................................................ 27
6.7.1 Initialize NDAS Device .....................................................................................27
6.7.2 Partition NDAS Device .....................................................................................27
6.7.3 Format NDAS Device Through My Computer................................................27
6.8 Uninstall ....................................................................................................................... 28
6.9 Use NDAS Device in Linux ......................................................................................... 28
7. FAQ......................................................................................................................................... 29
ii
AirLive Mu-7000AV User’s Manual
1. Before You Get Started
1. Before You Get Started
1.1 Safety Instructions
1. Always unplug the power cord before inserting Hard Drive.
2. Using a power supply with a different voltage rating will damage the product and void its warranty.
3. Keep this equipment away from humidity or any type of moisture.
4. Do not drop or shack the device.
5. Do not press or put any weight on the device.
6. Do not clean the device with alcohol, thinner or benzene.
1.2 Preliminary Tools
To install Hard Drive into your MU-7000AV, you need a cross screwdriver for following procedures.
1.3 Take a look at the MU-7000AV:
1
AirLive Mu-7000AV User’s Manual
2. Easy Installation Guide
2. Easy Installation Guide
2.1 Package Contents
MU-7000AV x 1
Power Adapter x 1、Power Adapter Cable x 1
Audio cable x 1、Video cable x 1
USB cable x 1、Ethernet Cable x 1
Remote control
User Manual x 1、Software Installation CD x 1
2.2 Specifications
Application:Any 3.5 inch hard disk (IDE interface)
Output Port:Composite video(NTSC/PAL)、S-video(NTSC/PAL)、Stereo Audio jack
2.3 Supported Hard Disk Formats
USB Enclosure:FAT32、NTFS
Media File Playback Mode:FAT32 only
NDAS Mode:FAT32、NTFS
2.4 Minimum System Requirements
Windows® 98SE / ME / 2000 / XP / Server 2003(32bit)
233 MHz Pentium® II or higher
128 MB RAM (256 MB recommended)
USB 1.1 Port (USB 2.0 recommended)
CD-ROM drive for installation
100Base-T full duplex switch for NDAS mode
Mac® OS
Mac OS X 10.3 or greater
128 MB RAM (256 MB recommended)
USB 1.1 Port (USB 2.0 recommended)
CD-ROM drive for installation
100Base-T full duplex switch for NDAS mode (for Lan Share Only)
2.5 Supported Media Playback Formats
Video:MPEG1(VCD、SVCD、DAT)、 MPEG2(AVI、VOB)、MPEG4(AVI、DivX、XviD)
Subtitle:ass、psb、smi、ssa、srt、sub-txt
Music:MP3
Photo:JPEG
2
AirLive Mu-7000AV User’s Manual
2. Easy Installation Guide
// 3. Using MU-7000AV
2.6 Hardware Installation
Step1
Step2
Step3
Step4
3. Using MU-7000AV
3.1 USB Enclosure
1. Connect the power cable then power on it (push the power button for 2~4 seconds).
2. Connect the USB cable to your computer.
3. When your hard disk is detected by your computer, LED1 is on.
3.1.1 USB OTB (One Touch Backup)
1. Install the Setup_v1.5.exe from OTB in the Software Install CD.
2. Setup the folder or partition you want to copy, and push the button. The OTB function will start
automatically.
Note: If you plug the MU-7000AV into computer with USB, media file playback and NDAS
will not work.
3
AirLive MU-7000AV User’s Manual
3. Using MU-7000AV
3.2 Media File Playback Mode
1.
2.
3.
4.
5.
Please connect the Audio and Video cables between MU-7000AV and TV as shown in the figure
below.
Please plug in the power adaptor and power on your TV.
Please change your TV mode to AV mode.
Push the POWER button for 2~4 seconds.
Now, you can enjoy it.
※ Note: If your image and subtitle are separated, please put them in the same folder and then
copy to your MU-7000AV. Remember that the image and the subtitle must have the
same filename.
3.2.1 MU-7000AV Firmware Upgrade
1.
Please copy the new firmware file that you want to update from CD to your first partition of the hard
disk. (Please confirm that the first partition is FAT32.)
2.
Please connect the Video and power cable, and power on the MU-7000AV.
3.
Enter the TV mode, and move your cursor on the new firmware “Mu7000.rom”.
4.
Push the “OK” key to enable the upgrade procedure.
※ Attention: Do not turn off the power when firmware upgrade procedures are under processing.
It will fail upgrade procedures and damage the MU-7000AV.
5.
When the upgrade screen is gone, it means firmware upgrade has already finished.
3.2.2 TV Lock Function
1. This function will only lock the second partition if there are several partitions in your hard disk. You
cannot enter the partition unless input correct password.
2. The screen will display a keyboard when you want to enter locked partition, Please input the default
password (the default password is 0000)when you use this function for the first time.
3. Please use the up、down、left、right and play key on the remote control to move or execute input
function.
4. If you want to change the password, please choose the change key in the keyboard. Input the old
password and then input the new password, then press OK. Now the new password is that you want
4
AirLive Mu-7000AV User’s Manual
3. Using MU-7000AV
3.3 LAN Share Device Setup Overview ( NDAS Mode )
1. Connect the included Ethernet cable from the Ethernet port on LAN Share to a switch (100 Base-T).
2. Wireless users: Connect LAN Share to your wireless router or access point with included Ethernet cable.
3. Make sure the power connector is firmly attached to the LAN Share and connect the power adapter to
a power source.
3.4 Switching between TV Mode and NDAS mode
Push the “Power” button on the MU-7000AV or the remote control, then the LED will light up between “MP4”
and “NET HDD“. When the “MP4” LED is on, Media File Playback mode is active. When the
“NET HDD” LED is on, NDAS mode is active.
5
AirLive MU-7000AV User’s Manual
4. Remote Control Features
4. Remote Control Features
Key pad
OK
UP
DOWN
LEFT
RIGHT
PHOTO
MUSIC
VIDEO
FILE
MAIN
MENU
SETUP
Function Description
Plays or executes the current selection.
Moves the cursor up on the screen.
Moves the cursor down on the screen.
Moves the cursor left on the screen.
Moves the cursor right on the screen.
PHOTO Mode.
MUSIC Mode.
VIDEO Mode.
FILE Mode.
Go to the main menu.
Setup and customize the settings of MU-7000AV.
INFO
See the information of the file.
REV
Fast reverse in Music or Video.
PAUSE
Interrupts file playback.
FWD
Fast forward in Music or Video.
LASTPAGE
Jump to last page.
PLAY
Continue play back.
NEXTPAGE Jump to next page.
PREVIEW
Previous file.
STOP
Terminate the selected mode.
NEXT
Next file.
VOL+
Increase the volume.
VOL Decrease the volume.
MUTE
Turn off the sound.
AUDIO
Choose the sound channel.
Repeat setup when photo、music
REPEAT
and video are playing.
Music playback under slideshow
SLIDESHOW
with photo.
ROTATE
Rotate the photo.
ZOOM
TRANSITION
TV/VGA
Zoom-in control (1x, 3x, off)
Allows you to choose the sound
mode.
Change display between VGA
and TV
6
AirLive Mu-7000AV User’s Manual
4. Remote Control Features
PLAY/OK
Takes you to play or execute the current selection.
UP
Direction button to move cursor on the screen.
DOWN
Direction button to move cursor on the screen.
LEFT
Direction button to move cursor on the screen.
RIGHT
Direction button to move cursor on the screen.
MAIN
MENU
Takes you to the main menu.
POWER
Power switch
7
AirLive MU-7000AV User’s Manual
5. Starting Quick Media Play
5. Starting Quick Media Play
To start Quick Media Play, do the followings:
1. Press ’Setup’ button to enter the SETUP MENU-MAIN PAGE.
2. Choose ’Preferences’ and check ’TV TYPE’ is ’MULTI SYSTEM’ or not
3. After setup, choose ’Exit Setup’ return to main menu.
Notes:
1. Default setup of TV type is MULTI SYSTEM.
2. MULTI SYSTEM includes NTSC type and PAL type.
3. NTSC(Taiwan, US, Japan…etc)
4. PAL(Mainland China / European countries)
5.1 PHOTO PLAY MODE
You can press arrow key to select ’PHOTO’ mode in MAIN MENU or press ’PHOTO’ on the remote control,
or you can press ’FILE’ to enter ’ File Library’ to search the file you want to play.
FULL SIZE DISPLAY
You can press ’ OK’ button on the remote control to
show the Full-size picture. The screen will be shown as right.
ZOOM IN DISPLAY
You can press ’Zoom’ button on the remote control to zoom in the picture and press ’Zoom’ button again to
disable. You can press arrow keys to move picture. The screen will be shown as below.
Zoom Off
Zoom In × 1
Zoom In × 3
ROTATE SIDPLAY
You can press ’ROTATE’ button on the remote control to rotate the picture in clockwise direction.
8
AirLive Mu-7000AV User’s Manual
5. Starting Quick Media Play
SLIDE SHOW SETUP
Press ’Setup’ button to enter the SETUP MENU-MAIN PAGE and select SLIDESHOW SETUP for
play-mode selection.
MANUAL:You must press ’▲’ or ’▼’button to change your picture.
AUTO:Pictures will change automatically.
FOLDER REPEAT
This item can setup folder repeat in slideshow.
Press ’▲’ or ’▼’button on the remote control to
select your play mode.
ON:All photo files display automatically.
OFF:Single photo file display automatically.
INTERVAL TIME
This item can setup interval time between every picture
Press ’▲’ or ’▼’ button on the remote control to select
slideshow interval time
TRANSITION
This item can setup transition between every picture, there are fourteen items let you to choose.
9
AirLive MU-7000AV User’s Manual
5. Starting Quick Media Play
FULL SCREEN:Change picture with full screen.
TOP->BOTTOM:Change picture from top to bottom.
BOTTOM->TOP:Change picture from bottom to top.
T/B->CENTER:Change picture from top and bottom to center.
CENTER->T/B:Change picture from center to top and bottom.
BLIND:T->B:Change picture from top to bottom like blind.
LEFT->RIGHT:Change picture from left to right.
RIGHT->LEFT:Change picture from right to left.
L/R->CENTER:Change picture from left and right to center.
CENTER->L/R:Change picture from center to left and right.
IMPLODE:Change picture from around to center.
BLIND:L->R:Change picture from left to right like blind.
CROSS FADE:Change picture cross fade.
RANDOM:Change picture in random mode.
AUTO START
This item allows you to play your video files without going to MAIN MENU
Press ’▲’ or ’▼’ button on the remote control to select your play mode.
ON:Video file will play automatically when you power on MU-7000AV.
OFF:You must play video file manually.
5.2 MUSIC PLAY MODE
MUSIC mode allows you to view your MP3 files.
You can press arrow key to select ’MUSIC’ mode in MAIN MENU or press ’MUSIC’ on the remote control, or
you can press ’FILE’ to enter ’ File Library’ to search the file you want to play.
PLAYBACK
Press ’▲’ or ’▼’button on the remote control to select the file you want to play.
You can press ’EQ’ button on the remote control to change the EQ mode.(Classic、Jazz、Rock、PoP、
Ballad、Dance)
10
AirLive Mu-7000AV User’s Manual
5. Starting Quick Media Play
REPEAT PLAY
Press ’Setup’ button to enter the SETUP MENU-MAIN PAGE and select MUSIC SETUP to select your play
mode.
You can press ’▲’ or ’▼’button on the remote control to select your play mode
ONE:The same song will play repeatedly.
OFF:Music will stop to play when songs played once
from first to last.
ALL:All songs will repeatedly play continued.
5.3 VIDEO PLAY MODE
VIDEO mode allows you to view your video files.
You can press arrow key to select ’VIDEO’ mode in MAIN MENU or press ’VIDEO’ on the remote control, or
you can press ’FILE’ into’ File Library’ to search the file you want to play.
● Pause or start/resume playback, press the button ’PAUSE’ on your remote control.
● Stop playback, press the button ’STOP’ on your remote control.
● To move to previous video file, press the button ’PREVIOUS’ or ’REV’ on your remote control.
● To move to next video file, press the button ’NEXT’ or ’FWD’ on your remote control.
11
AirLive MU-7000AV User’s Manual
5. Starting Quick Media Play
5.4 FILE LIBRARY
File library allows you to view all your media files and browse your play list.
● Use the arrow keys on your remote control to quick search the file you want to play.
● Press ’OK’ button on your remote control to play the file
DELETE、RENAME、NEW FOLDER、CANCEL
Press ’ INFO’ button on the remote control in the file library, you
can delete、rename the file and folder, you also
can create a new folder.
DELETE:Delete file.
RENAME:Create new file name of file.
NEW FOLDER:Create a new folder.
CANCEL:Cancel the function that you want to do
5.5 OTHER SETUP
You can execute the setup of OSD LANG、OSD MESSAGE and SETUP VALUES in PREFERENCES
PAGE.
OSD LANG:Choose the language that you want to use.
PREVIEW:Preview window on/off.
OSD MESSAGE:Turn on or turn off OSD MESSAGE.
Notes:If you turn on this item, you can see the icon at your TV upper left corner when you execute REV
or FWD function.
SETUP VALUES:Setup VALUES in default mode.
Notes:If you execute this item, all setup values will return to default values.
12
AirLive Mu-7000AV User’s Manual
6. Network Hard Disk (AirLive NDAS Mode)
6. Network Hard Disk (AirLive NDAS Mode)
6.1 Use With NETDISK Mode in Windows System
6.1.1 Install LAN Share Device Management in Windows XP、Windows 2000 and Server 2003
1. Find NDAS control AP in the driver CD, double click setup.exe, than choose the language what
you need
2. Install Shield Wizard will appear. Click the Next button to continue to next step.
3. Accept License Agreement and the click Next to continue installation.
4. Click the Install button to install drivers.
5. Click Continue Anyway to continue installation.
6. Click the Finish button to complete.
7. Click on the Yes button to restart your computer now, or No to restart later.(Propose reboot)
6.1.2 Install NDAS Device Management in Windows ME and Windows 98SE
1. Find the LAN Share control AP from the driver CD, double click it and start to install.
2. Install Shield Wizard will appear,click Next.
3. Select I accept the terms in the license agreement, then click Next.
4. Click Install.
5. Put in the Windows 98SE CD, click OK.
6. Select Yes, I want to restart my computer now then click Finish restart the computer.
13
AirLive MU-7000AV User’s Manual
6. Network Hard Disk (AirLive NDAS Mode)
7. If this is your first time installing LAN Share, Add New Hardware Wizard will appear. Click Next
and follow further instructions. Otherwise, MU-7000AV will be listed as a local drive on My Computer.
Driver letter and name may vary between Personal Computers.
8. Select Search for the best driver for your device. Click Next.
9. Select Specify a location and click Browse button. From the Browse for Folder window, search for
NDASUSB folder and click OK. Once the location is set, click Next from the Add New Hardware
Wizard window.
10. Click Next.
11. Driver has been successfully installed, click Finished.
6.1.3 NDAS Administrator
When software installation is completed, you will find a NDAS Launcher Icon on your desktop screen and
a NDAS Administrator Tool icon on the system tray.
1. NDAS Launcher (desktop icon) activates and loads the NDAS Administrator Tool onto the system tray.
2. NDAS Administrator Tool (system tray icon) performs the following functions:
- Refresh NDAS Status
- Enable Read Only Access
- Add a NDAS
- Disable a NDAS
- Display Software Version
- Edit NDAS Name
- Enable Read / Write Access
- Display NDAS Properties
6.1.4 Add / Register a New NDAS Device using the Registration Wizard
Icon located on the system tray.
1. Click on the NDAS Device Management
2. Select Register A New Device.
3. NDAS Device Registration Wizard will appear. Click Next to continue.
4. Enter a name for the NDAS Device and click Next.
5. Add your NDAS Device ID and Write Key. Write Key is needed to write to NDAS Device. Click
Next to continue.
- If the Write Key was entered in the previous step, the NDAS is registered as Read / Write Mode.
- If the Write Key was not entered in the previous step, the NDAS is registered as Read Only Mode.
Note: NDAS Device ID and Write Key do not contain the letter O. Please use the number 0 for all
letter 0’s.
14
AirLive Mu-7000AV User’s Manual
6. Network Hard Disk (AirLive NDAS Mode)
6. Checking NDAS Device status.
7. Select how you want to mount the NDAS Device
Read/Write Mode: Mounts NDAS Device as Read/Write Mode.
Read-Only Mode: Mounts NDAS Device as Read-Only Mode.
Don’t Mount: NDAS Device is left in Connected (Unmounted) Mode.
Note: Read/Write Mode will be disabled if a user did not enter the Write Key during step 5.
8. Registration is finished. Click Finish
6.1.5 Add / Register a New NDAS Device without using the Registration Wizard
1. Click on the NDAS Device Management
icon located on the system tray.
2. Select Register A New Device.
3. The Register a new NDAS Device window will appear.
4. Enter in a NDAS Device Name.
5. Type in NDAS Device ID and Write Key. Write Key is needed to write to NDAS Device.
Leave the Activate this device after registration box checked to automatically enable the device after
registration.
Note: NDAS Device ID and Write Key do not contain the letter O. Please use the number 0 for all
letter 0’s.
6.1.6 Found New Hardware Wizard
1. After you have registered, the Found New Hardware Wizard may appear.
If the window appears, click Next to install the new NDAS Device.
It should automatically find the appropriate drivers for your NDAS Device.
Note: For Windows 2000, Upgrade Device Driver Wizard will appear instead.
15
AirLive MU-7000AV User’s Manual
6. Network Hard Disk (AirLive NDAS Mode)
2. If the Windows Logo Testing message comes up, click Yes or Continue Anyway to finish the
installation.
3. Registration is completed.
Click NDAS Device Management
to see the registered NDAS Device
Read/Write Mode
Read-Only Mode
Note: If you cannot see your NDAS Device, please click Refresh Status and check again.
4. Using NDAS Device
Now that you have successfully installed NDAS Device, it’s time to
familiarize yourself with using the NDAS Device. Your NDAS Device
will show up as a local drive in My Computer. Drive letter and
NDAS Device name may vary between Personal Computers.
You can use NDAS Device like a local drive on your PC.
1. Drag and drop files to NDAS Device.
2. Copy and paste data to NDAS Device.
3. Make and delete folders.
4. Share files and folders.
5. Backup your data
6.1.7 Sharing NDAS Device
NDAS Device is connected to your network, it can be accessed from any computer on your LAN.
To share NDAS Device, the following must occur:
Windows 2000/XP /Server 2003(32bit)Environment:
1. All computers and NDAS device must be on the same LAN.
2. NDAS device must be connected via Ethernet or Wireless Router.
3. To share Read and Write access, all computers on the network using the NDAS device must have
the NDAS driver version 3.1.x installed.
4. NDAS device must be registered onto each computer.
Windows ME//98SE Environment:
1. All computers and NDAS device must be on the same LAN.
2. NDAS device must be connected via Ethernet or Wireless Router.
3. To share Read and Write access, all computers on the network using the NDAS device must have
the NDAS driver version 1.x installed.
4. NDAS Device must be registered onto each computer.
Mixed Environment with Windows and Mac:
1. All computers and NDAS must be on the same LAN.
2. NDAS must be connected via Ethernet or Wireless Access Point.
3. To share NDAS each computer on the network must install the corresponding NDAS Driver.
- On Windows XP/2000, install NDAS driver v2.4 (do not use 3.x.x).
- On Windows 98 SE/ME, install NDAS Driver 1.x
- On Mac OSX, install NDAS driver 1.x
4. NDAS must be registered onto each computer.
5. Write access is assigned to one user at a time and is passed from one user to another.
6. In this mode, if there have a Windows XP or Windows 2000 system already mount NDAS Device under
Read/Write Mode, others Windows XP or Windows 2000 system in the same work group can mount
NDAS Device under Read/Write Mode alone or at the same time, but Windows ME、Windows 98SE and
Mac OS system just can mount NDAS Device under Read only Mode alone or at the same time.
7. At any time, any Windows ME、Windows 98SE and Mac OS system want to mount NDAS Device under
Read/Write Mode, others computers must mount NDAS Device under Read Only Mode, they can’t
mount NDAS Device under Read/Write Mode alone or at the same time.
16
AirLive Mu-7000AV User’s Manual
6. Network Hard Disk (AirLive NDAS Mode)
NOTE : LAN Share is preformatted in NTFS. In order to use LAN Share in mixed environments,
LAN Share must be formatted in FAT32. If you use the “Disk Management” utility in
Windows XP、Windows 2000 or Server 2003 to format your LAN Share,, then your LAN
Share will be re-formatted in NTFS. NTFS is not a compatible file system format with Mac
and Windows 98SE; thus your computers on these OS will not recognize LAN Share. You
can use a third party format utility to choose the file format your LAN Share is formatted
in.
Warning:
1. DO NOT perform disk operations (format, partition and chkdsk) when multiple PCs have the NDAS
mounted.
2. NDAS Device can be formatted, partitioned, chkdsk, aggregated or mirrored ONLY when one PC is
connected.
3. When sharing LAN Share between Windows 2000、Windows XP and Server 2003, perform chkdsk.
6.2 Introduction to NDAS Device Management
6.2.1 NDAS Device Status Modes
NDAS device provides users with six basic Modes.
Below is a chart describing each of the NDAS device Modes and the icons that correspond with each
mode.
6.2.2 NDAS Device Management
Click the NDAS Device Management
located on the system tray. All registered NDAS Device(s)
will be displayed on the NDAS Device Management Menu.
1. When you click on the
icon - Lists all NDAS Devices that are registered.
17
AirLive MU-7000AV User’s Manual
6. Network Hard Disk (AirLive NDAS Mode)
2. Register a New Device - Registers a NDAS Device to your computer.
3. Refresh Status - Updates status of your NDAS Device.
4. About - Displays NDAS Device software version information.
Check for Updates:Check software update.
5. Options - Can customize NDAS Device Management features and error messages/ dialogs.
6. Exit - Exits NDAS Device Management.
NDAS Device Management can be restored by double clicking the icon on the Desktop.
6.3 NDAS Device Functions
6.3.1 NDAS Device Management
Click NDAS Device Management and place the cursor on a NDAS Device to view its functions.
Below is a list of NDAS Device Modes and related functions.
Note: The Yellow box is there to show the current mode status of your NDAS Device. It
cannot be selected.
A. NDAS Device mounted in Read/Write Mode
Mounted (RW) - The current state of NDAS Device.
Unmount - Enables users to change NDAS Device mode to Connected Mode.
Properties - Displays properties of the NDAS Device
B. NDAS Device mounted in Read-Only Mode
Mounted (RO) - The current state of NDAS Device.
Unmount - Enables users to change NDAS Device mode to Connected Mode.
Properties - Displays properties of the NDAS Device.
C. NDAS Device in Disconnected Mode
Disconnected - The current state of NDAS Device.
Unregister - Enables users to un-register NDAS Device.
18
AirLive Mu-7000AV User’s Manual
6. Network Hard Disk (AirLive NDAS Mode)
Properties - Displays properties of the NDAS Device
D. NDAS Device in Connected Mode
Connected - The current state of NDAS Device.
Mount (Read-Only) - NDAS Device can be mounted into Read-Only Mode.
Mount (Read/Write) - NDAS Device can be mounted into Read/Write Mode.
Unregister - Enables users to un-register NDAS Device.
Properties - Displays properties of the NDAS Device.
E. NDAS Device in Deactivated Mode
Deactivated - The current state of NDAS Device.
Activate - Enables NDAS Device to be activated into Connected Mode.
Once activated NDAS Device will be indicated by white colored box.
Unregister - Enables users to un-register NDAS Device.
Properties - Displays properties of the NDAS Device.
6.3.2 Changing from Read/Write Mode to Read-Only Mode
and select the NDAS Device you want to change from
1. Click NDAS Device Management
Read/Write to Read-Only.
2. Select Unmount.
3. A warning message will appear. Click Yes.
The Blue Square will change to a White Square indicating Connected Mode.
and select the NDAS Device you
4. Click NDAS Device Management
have just umounted.
5. Select Mount (Read-Only).
The White Square will change to a
Green Square indicating Read-Only Mode
6.3.3 Changing from Read Mode to Read/Write Mode
1. Click NDAS Device Management
and select the NDAS Device you
want to change from Read-Only to Read/Write.
2. Select Unmount
3. A warning message will appear. Click Yes.
19
AirLive MU-7000AV User’s Manual
6. Network Hard Disk (AirLive NDAS Mode)
The Green Square will change to a White Square indicating Connected Mode.
and select the NDAS Device you have just umounted.
4. Click NDAS Device Management
5. Select Mount (Read/Write).
The White Square will change to a
Blue Square indicating Read/Write Mode.
6.4 Use With LAN Share Mode in Mac OS X
6.4.1 Install NDAS Device Management
1. Authenticate
Enter Admin Name and Password. Then click OK.
2. Welcome to the Lan Share Installer
Click Continue.
3. Important Information
Click Continue.
4. Software License Agreement
Click Continue.
If you want to continue installation, please click Agree. Otherwise click Disagree.
5. Select a Destination
Click Continue.
6. Easy Install
Click Upgrade.
7. Install Software
When software successfully finishes install, click Close.
8. Restart your computer
NOTE:Once NDAS Device Management is installed, NDAS Device needs to be Added / Registered
to your computer before you can start using NDAS Device.
6.4.2 Add / Register NDAS Device
1. Double click Macintosh HD icon in the install CD.
2. Double click Applications folder.
3. Double click NDAdmin icon.
4. NetDiskAdmin window will appear.
- Enter LAN Share ID and Write Key.
- Click Add.
- Added NDAS Device will be displayed in NDAS IDs window.
NOTE:To add a new NDAS Device, repeat the Add / Register a NDAS Device steps.
6.4.3 Using NDAS Device Admin To Get NetDiskAdmin
1. Double click Macintosh HD icon on your desktop.
2. Double click Applications folder.
3. Double click NetDiskAdmin icon.
4. NetDiskAdmin window will appear.
NetDiskAdmin has six functions:
Add - Add / Register a NDAS Device to your computer.
Delete - Delete a NDAS Device from your computer.
Disable - Disable Reading and Writing to NDAS Device.
Enable RW- Enable NDAS Device into Read/Write Mode.
Enable RO - Enable NDAS Device into Read Only Mode.
Quit - End NDAS Device Admin.
NDAS Device IDs Window
Displays all the NDAS Device that are registered in the computer.
Configuration Window
Displays NDAS Device status user wants to achieve for that Lan Share.
20
AirLive Mu-7000AV User’s Manual
6. Network Hard Disk (AirLive NDAS Mode)
Status Window
Displays current status of NDAS Device.
6.4.4 Using NDAS Device
Now that you have successfully installed NDAS Device, it’s time to familiarize yourself on using it.
NDAS Device can be found on the desktop.
Here are few uses for NDAS Device:
- You can use NDAS Device like any other hard drive on your system.
- Drag and drop files into NDAS Device.
- Copy and paste data to NDAS Device.
- Make and delete folders.
- Share files and folders.
- Backup files to NDAS Device.
Read Only and Read / Write Mode
NDAS Device provides users with two basic functions;Read Only and Read / Write.
1. Read Only Mode
- Any number of users or applications can read from a NDAS Device.
2. Read/Write Mode
- Only one user or application can write to a specific NDAS Device at a time.
- No other users or applications can write to NDAS Device until Read / Write Access is transferred.
Changing Read Only or Read/Write Mode
If NDAS Device Admin window is not already opened, double click Macintosh HD icon on your desktop,
double click Applications folder and double click NDAS Device Admin icon.
Changing to Read Only Mode:
1. Select a NDAS Device from NDAS IDs window.
2. Click Enable RO button.
3. Both Configuration and Status will change to Read Only.
4. Now NDAS Device is in Read Only Mode.
Changing to Read / Write Mode:
1. Select a NDAS Device from NDAS IDs window.
2. Click Enable RW button.
3. If Write Key was not entered during registration, a warning window will appear.
4. Close the warning window.
5. Fill in the Write Key.
6. Click Enable RW button.
NOTE:
- If no other users or applications are using Read / Write Access, both Configuration and Status
will change to Read / Write. Otherwise, the Configuration will change to Read / Write and Status
will stay as Read Only.
- Until both the Configuration and Status display Read / Write, NDAS Device is still in Read Only
Mode.
Status of NDAS Device will changed to Read / Write only after Read / Write Access is transferred.
- Once both Configuration and Status displays Read / Write, NDAS Device is in Read / Write Mode.
6.4.5 Uninstall NDAS
1. Start the Uninstaller by double clicking NDAS Uninstaller.
2. Authenticate
Enter Admin Name and Password. Then click OK.
3. Click Uninstall.
4. NDAS has been successfully uninstalled. Click Quit.
21
AirLive MU-7000AV User’s Manual
6. Network Hard Disk (AirLive NDAS Mode)
6.5 NDAS Bind Management
Using NDAS Bind Management users can create and manage a NDAS RAID.
There are 3 different buttons in the NDAS Bind Management window.
- Bind: Used for Aggregation, RAID 0, and RAID 1.
- Unbind: Used to Unbind your Bound NDAS Devices.
- Refresh: Used to refresh status of your NDAS Devices.
6.5.1 Bind
There are three ways to bind:Aggregation、RAID0 and RAID1.
Aggregation
- Allows any number of NDAS Device units between 2~8 to be recognized as a single large disk drive.
- Extremely useful when a larger storage device is needed.
- No fault tolerance. If one unit fails, all data is lost.
RAID0 - (Disk Striping without Parity)
- Allows 2, 4, or 8 NDAS Device units to be recognized as a single large disk drive.
- Extremely useful when a larger storage device is needed.
- No fault tolerance. If one unit fails, all data is lost.
- Type of Aggregation method used for faster performance when writing to NDAS Devices
RAID1 - Mirroring
- Allows 2, 4, 6 or 8 NDAS Device units to be mirrored at the same time.
- Fault tolerant. If one unit fails, data is retrieved from other units.
- Can also Mirror NDAS Devices that have been Aggregated.
Requirements for Bind
- Each NDAS Device must have a Write Key.
- Cannot Bind NDAS Device that are already Bound.
- NDAS Devices that are being Bound must be in Connected Mode on all PCs, including the PC which
is performing the Bind.
- Bound NDAS Devices must be formatted.
- Other users can Mount the Bound NDAS Devices once Binding is completed.
NOTE : Aggregation、RAID0 and RAID1 can only be performed in Windows XP、Windows 2000 and
Server 2003.
Before NDAS Devices can be Bound, they must be in Connected Mode.
1. Go to NDAS Device Management, choose a NDAS Device you want to Bind.
- If the NDAS Device is in Mounted Mode, select Unmount.
- If the NDAS Device is in Connected Mode, leave it as it is.
- If the NDAS Device is in Disconnected Mode, try to reconnect it.
- If the NDAS Device is in Deactivated Mode, Activate the device.
2. A waning message may appear.
3. Click Yes.
4. Wait few seconds for changes to occur. If the color of the NDAS Device does not changed to White,
click Refresh Status.
5. Repeat above steps for all NDAS Device you want to Bind.
6. Make sure other PCs that are accessing the NDAS Devices have also Unmounted the NDAS Devices
as Connected Mode.
Instructions for Bind
1. Two or more NDAS Devices need to be in Connected Mode.
All of the NDAS Devices must have the Write Key.
2. Go to Start > Programs > NDAS Software > NDAS Bind.
3. Click the Bind button.
4. Select a binding type and number of disks to be Bind.
- Aggregation can bind any number of units between 2 and 8.
- RAID0 can bind 2, 4 or 8 units.
- RAID1 can bind 2, 4, 6 or 8 units.
Note : Currently RAID4 is not supported.
22
AirLive Mu-7000AV User’s Manual
6. Network Hard Disk (AirLive NDAS Mode)
5. Move a NDAS Device from the left window to the right window by first selecting a NDAS Device
from the left window and then clicking the 'Add' button.
6. Repeat the above step for the rest for the NDAS Device you want to Bind and click Finish.
7. Two warning messages will appear.
- Once NDAS Devices are bound, all of the data will be lost. Click Yes to continue.
- The new bound NDAS Devices must be mounted and formatted before it can be used. Click Finish.
- Your NDAS Devices should now be bound
8. Go to the NDAS Device Management and Mount the Bound NDAS Devices.
- To do so, select any one of the Bound NDAS Device and select Mount (Read-Only) or Mount
(Read/Write).
9. Found New Hardware Wizard may appear. Click Next and proceed in finishing the wizard.
10. Before Bound NDAS Device can be used, it must be formatted.
6.5.2 Unbind
You can unbind one or all of the NDAS Devices from a bound group.
Unbind All
1. Go to NDAS Device Management and select a Bound NDAS Device you want to Unbind.
2. Unmount the NDAS Device by clicking on Unmount.
Note : If the bound NDAS Device is in use, a warning message will appear.
Make sure that no programs are using the NDAS Device and try again.
3. After you have unmounted the NDAS Devices, go to NDAS Bind Management.
4. From the NDAS Bind Management, select the Bound NDAS Device you have just unmounted. Click
the Unbind button
23
AirLive MU-7000AV User’s Manual
6. Network Hard Disk (AirLive NDAS Mode)
5. Unbind window will appear. Make sure these NDAS Devices are ones that needs to be unbound and
click Yes
6. Two warning messages will appear.
- Once NDAS Devices are bound, all of the data will be last. Click Yes to continue.
- The new bound NDAS Devices must be mounted and formatted before it can be used. Click OK.
7. Now you can go back into the NDAS Device Management and Mount each of unbound NDAS Device.
8. Before using the NDAS Devices, please format each of the unbound device.
Unbind a Single NDAS Device
1. Go to NDAS Device Management and select a Bound NDAS Device you want to Unbind.
2. Unmount the NDAS Device by clicking on Unmount.
Note:If the bound NDAS Device is in use, a warning message will appear.
Make sure that no programs are using the NDAS Device and try again.
3. After you have unmounted the NDAS Devices, from NDAS Bind Management select one NDAS
device you want to unbind.
4. Right click on the NDAS Device and select Single.
5. All data will be lost if you want to convert it to a Single disk. Click Yes if you want to continue.
Note:Once the Binding has been broken, you cannot re-add any NDAS Devices to the broken
Bound device. You will have to recreate the Bind and format it again.
6. For formation of the NDAS Device, please refer to Chapter 9 Formatting NDAS Device.
7. When you are finished formatting, your NDAS Device should show up in My Computer as a local drive.
24
AirLive Mu-7000AV User’s Manual
6. Network Hard Disk (AirLive NDAS Mode)
6.6 Other NDAS Bind Management Functions
The NDAS 3.11 Bind Management software also comes with new added features such as
- Add Mirror
- Migrate
- Replace Device
- Replace HDD
- Add Spare Disk
- Remove Spare Disk
6.6.1 Add Mirror
Adds a mirrored disk to a basic disk by adding a empty disk to a original disk which is in use, you can build a
RAID 1 which contains data of original disk.
1. Right click on the Disk you wish to Mirror, Click Add Mirror.
2. Select the Disk to Mirror with and click OK.
6.6.2 Migrate
Migrate needs to be done with bound disks if upgrading from a older version of NDAS Device software.
Migrate makes the bind compatible with the new software. You will receive a notification if you attempt to
mount a previously binded drive without Migrate first.
6.6.3 Replace Device
Replaces the selected device in RAID with another one when one NDAS device is missing or out of order in
RAID 1, you can replace it with a new NDAS device. The disk in the new NDAS device should have enough
capacity and will be synchronized automatically.
6.6.4 Replace HDD
Replaces the HDD in the selected device with another one. When one disk in a NDAS device is missing or
out of order in RAID 1, you can replace it with a new disk.
The new disk should have enough capacity and will be synchronized automatically.
6.6.5 Add Spare Disk
You can add a NDAS device to RAID 1 as spare disk so that the NDAS device is replaced automatically
when any disk in RAID goes missing or out of order.
1. Right click on your Mirror then select Add Spare Disk.
25
AirLive MU-7000AV User’s Manual
6. Network Hard Disk (AirLive NDAS Mode)
2. Choose the Spare Disk and click OK.
3. Spare successfully added
Note:If using a larger capacity drive to add to the mirror, the larger capacity will be matched to
the size of the existing mirrored drives.
6.6.6 Remove Spare Disk
Removes a spare disk from the fault tolerant RAID disk group.
1. Right click, select Remove Share Disk.
2. Choose the Removed Disk and click OK.
6.6.7 Using Mirrored NDAS Devices
NDAS Driver 3.11 does not support the Mirror feature that have been offered by our earlier driver versions.
However, the driver does recognize the Mirrored NDAS device and will display them on the NDAS Bind
Management. Users can continue to use Mirrored NDAS devices as before. But users cannot modify the
Mirrored NDAS devices. If so, the Mirrored devices will break.
Upgrading the driver without breaking the Mirrored NDAS device
1. Disable all NDAS devices. (both single and bind devices)
2. Uninstall the previous driver. (reboot required)
3. Install the 3.11 driver. (reboot required)
4. You may need to register the NDAS devices again.
Note:Do not mount the NDAS Device at this time.
5. Go to NDAS Bind Management.
6. Right click one of the NDAS Devices and click on Migrate.
7. You can now mount your NDAS Device.
Using Bound NDAS device among different driver versions
If a user upgrades their driver to 3.11, we recommend everyone else sharing the NDAS devices to
upgrade their driver to 3.11 as well. Once the user with 3.11 migrates the Mirrored NDAS device’s binding
information, other users sharing the Mirrored NDAS device will no longer have access to the Mirrored
NDAS devices if they are still running older versions of NDAS Device software.
Here are some notes:
26
AirLive Mu-7000AV User’s Manual
6. Network Hard Disk (AirLive NDAS Mode)
1. We recommend all users sharing the Mirrored NDAS devices upgrade their driver to 3.11.
2. Migrate only needs to be done on one computer in the network.
3. Once the Mirror NDAS device have been Migrated all other users with 3.11 can mount the drives.
6.7 Formatting NDAS Device
When formatting NDAS device all other users must be unmounted.
6.7.1 Initialize NDAS Device
1. Right click My Computer and select Manage.
2. Computer Management window will appear. Click Disk Management under Storage.
3. Computer Management window will list all the disks in the computer.
4. Find the NDAS Device you want to initialize.
- The NDAS Device is usually indicated by Not Initialized.
- If the NDAS Device is described as Basic or Healthy, skip to 6.7.2 Partition NDAS Device.
Otherwise, go to next step.
5. Initialize NDAS Device
- Right click on the Disk # that pertains to your NDAS Device and select Initialize Disk.
- Initialize Disk window will appear. Select the NDAS Device and click OK.
6. NDAS Device will be automatically initialized.
- Unknown
becomes Basic
.
Note:It is VERY important that your NDAS Device is listed as a Basic Disk and not a Dynamic
one.
7. Initialization is completed.
- Before NDAS Device can be used, it must be partitioned. See 6.7.2.
6.7.2 Partition NDAS Device
1. From the Computer Management window, find the NDAS Device you want to format.
2. Right click and select New Partition.
3. New Partition Wizard: Click next.
4. Select Partition Type:
- Select Primary partition.
- Click Next.
5. Specify Partition Size:Click Next.
NOTE:The partition size is automatically set. Do not change the size.
6. Assign Drive Letter or Path:
- Select Assign the following driver letter.
- Choose a letter for the drive from list.
- Click Next.
7. Format Partition:
- Select Format this partition with the following Settings .
- File System: NTFS
- Allocation unit size: Default
- Volume Name: Enter a name for the disk.
- Select Perform a quick format (Recommended).
- Click next.
8. Partitioning is finished. Click Finish.
- You can see the partitioned disk.
6.7.3 Format NDAS Device Through My Computer
1. Double click on My Computer.
2. My Computer window will appear.
Right Click on your NDAS Device choose Format.
3. The Format window will appear with a few options.
Check the box that says Quick Format (Recommended)
4. A Warning will appear asking if you are sure you want to format the drive. Click on OK.
5. Click on OK once the format has completed.
27
AirLive MU-7000AV User’s Manual
6. Network Hard Disk (AirLive NDAS Mode)
6.8 Uninstall
Before you can uninstall a NDAS Device, you must close all applications using the NDAS Device. NDAS
Disk Management, NDAS Bind Management, Windows Explorer and Internet Explorer must also be
closed.
1. Close NDAS Disk Management by selecting Exit.
2. Uninstall NDAS Device.
- Go to Start > Programs > NDAS Software > Uninstall NDAS Software
- Windows Installer will appear. Click Yes if you want to continue. Otherwise click No.
NOTE:A warning window may appear if any of the NDAS Device is still in mounted state. Click
Cancel and unmount the NDAS Devices.
3. Restart the PC once uninstall is finished.
6.9 Use NDAS Device in Linux
Please go to below web site to download driver and user menu.
http://www.ximeta.com/web/support/download/linux/index.php
28
AirLive Mu-7000AV User’s Manual
6. Network Hard Disk ( AirLive NDAS Mode )
7. FAQ
Media File Playback
1. I can see files when connected with the computer but can't see them on the TV?
A:MU-7000AV can only recognize FAT32 partitions. If the hard drive is partitioned using NTFS, No files can
be displayed on the TV.
2. I Cannot format the hard drive larger than 32 GB (FAT32) using Disk Management under Windows XP?
A:That is the limitation by design of WinXP. You need an additional formating utility to do the format for you.
You can find a very useful program as below.
3. I Cannot detect MU-7000AV when I connect to a Win98 computer?
A:USB drivers have to be installed for Win98 systems to recognize USB devices. The Driver is included in
the package.
4. Does MU-7000AV support multi-partitions?
A:Yes, no problem it does.
5. Why can I not play some AVI files?
A:Some AVI files use non standard video codecs. MU-7000AV has all the standard video codecs loaded in
the firmware. You need to update the firmware in order to play those files.
6. What is DivX® ?
A:DivX is high quality and most commonly used video compression/decompression(codec) technology
used for video distribution format. MU-7000AV can decode DivX® 3.x, 4.x and 5.x without any problem.
7. What are RM or RMVB files?
A:RM/RMVB is the file format developed from Real Network, MU-7000AV cannot play these files.
8. Where can I find some more resources about DVD backup?
A:This is a very good web http://doom9.cdpa.cc/. You can find most video utilities and backup tools. They
have some excellent user guides about subtitles too.
9. What is the biggest file size for FAT32 partition ?
A:File size is limited to 2GByte by design.
10. What TV standard does MU-7000AV support?
A:MU-7000AV supports both NTSC and PAL.
11. Why does my TV screen display in black and white and jump continuously when I play video file?
A:Please confirm what kind the standards of your TV and setup it correctly.(Please refer to page 27)
NDAS
General
1. For NDAS mode, do I need drivers installed on each computer using NDAS?
Yes, the drivers need to be loaded on each computer that wants access to NDAS. However, if you
are using Windows Sharing, only one computer will need the software installed. The other computers
will not need it.
LAN Share for Windows 2000 / XP / Server 2003
1. I am having trouble using Multi-write over wireless connection. What do you recommend?
Try a wired connection for our 3.X drivers and compare how it works. If you are using wireless with
other computers, we recommend enabling the hard-wired computer first, then the wireless computer.
When using wireless, we also recommend 802.11g. When using 802.11b, we highly recommend
hardwiring your computer when doing large file transfers because of the low bandwidth associated
with 802.11b.
2. How should I format NDAS?
Please refer to Chapter 6.7 Formatting NDAS Device.
3. How do I disconnect NDAS?
We always recommend using the Disable option from your NDAS Device Administrator Tool if
connected via NDAS (Ethernet). You can use the "Unplug or Eject Hardware" icon in your System
Tray to stop the LAN Share before disconnecting (this applies to either USB or NDAS mode). Close all
windows that may be accessing the NDAS.
4. When I try to write to NDAS, I get the following error message: "LAN Share is being used
by non-compatible software on another PC. You can use read-access only for now." What does
this mean?
This means that there is another computer on the network that has a different version of the NDAS
software installed. All machines must have the same exact version of our software. Please make
29
AirLive MU-7000AV User’s Manual
7. FAQ
sure that all computers have the same exact version of NDAS software installed.
5. Why can’t my computer go into hibernation or standby?
You must have customer select the Allow suspend/hibernation box from the Options menu in NDAS
Device Management.
6. When I try to copy something to my NDAS, why does the following show up: “Cannot copy
NDAS Administrator: The disk is write-protected. Remove the write-protection or use
another disk.”?
You do not have Read/Write access. Click on the NDAS Icon in your bottom-right system tray.
Go to your NDAS and then click on "Enable Read/Write."
7. Why can't I format my whole NDAS to FAT32?
Windows 2000/XP/Server 2003 comes with a limitation of only 32GB partitions that it can create. This is a
Windows limitation and the only resolution is to use a 3rd party partitioning software or use a
Windows 98SE/ME computer to format the entire drive to FAT32. With our Multi-Write drivers,
NTFS is recommended anyways for stability and performance purposes.
LAN Share for Windows 98SE/ME
1. How do I disconnect NDAS?
We recommend using the Disable option from your NDAS Administrator Tool if connected via
NDAS (Ethernet). You can also use the "Unplug or Eject Hardware" icon in your System Tray to stop
the LAN Share before disconnecting it (this applies to either USB or NDAS mode).
2. I have just installed NDAS, why does NDAS show up as a red color?
Try turning off your MU-7000AV power cord, wait about 10 seconds, and turn it on. If this
doesn't work, try restarting your computer as well.
LAN Share for Mac OS X
1. How do I disconnect NDAS?
To disconnect NDAS, we always recommend using the Eject option. If you CRTL+click on
the NDAS on your Desktop, then you will be given an option to Eject the NDAS. After
that, you can go into LAN Share Admin and Disable your NDAS.
If you are using USB, then Ejecting the NDAS is all that is needed.
2. How should I format NDAS?
It is recommended to format LAN Share to Mac OS Extended format. If you also have a Windows
computer as well, and would like to use it between the two, then you must format it to FAT32 for it to
be recognized on both computers. You may need a 3rd party partitioning utility to format the entire
drive to FAT32.
Aggregation & Mirroring
1. What is the maximum number of LAN Share that support aggregation?
Aggregation can currently be done using eight (8) NDAS units
USB
1. My LAN Share shows up as a Black dot when used with USB.
When used with USB mode, the software is not needed, therefore you will see a black dot (disconnected)
in the system tray as that is an indicator for NDAS (Ethernet) mode.
30
AirLive Mu-7000AV User’s Manual