1
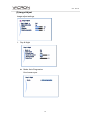
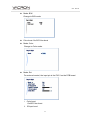
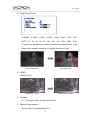
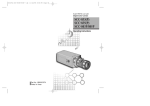
User Manual 5 MegaPixel Color Camera 2013. NOV V1.0 User Manual User Manual Safety Precautions Before using the product, please ensure that you read the safety precautions described below. Always ensure that the product is used correctly. Use only recommended power sources. Do not attempt to disassemble, alter or apply heat to the product. Avoid dropping or subjecting the product to severe impacts. To avoid the risk of injury, do not touch the interior of the product if it has been dropped or otherwise damaged. Stop using the product immediately if it emits smoke, a strange smell, or otherwise behaves abnormally. Do not use organic solvents such as alcohol, benzene, or thinner to clean the product. Do not allow liquids or foreign objects to enter the camera. Do not place the camera near or in direct flame. Do not handle the power cord with wet hands. Do not use the equipment in a manner that exceeds the rated capacity of the electrical outlet or wiring accessories. Do not use if the power cord or plug are damaged, or not fully plugged into the outlet. Do not allow dirt or metal objects (such as pins or keys) to contact the terminals or plug. User Manual Index A. Features ....................................................................................................................... 1 B. Specifications ............................................................................................................... 2 C. OSD Operation ............................................................................................................. 4 Main menu .................................................................................................................... 4 (1) AE Mode Setting.................................................................................................. 5 (2) Color Adjust ......................................................................................................... 9 (3) Image Adjust...................................................................................................... 10 (4) Intelligent ........................................................................................................... 14 (5) System setting ................................................................................................... 17 (6) Information......................................................................................................... 18 Attachment A: UTC Controller Installation ........................................................................... 19 User Manual A. Features 1/3” 5 Mega Pixel Color Camera 2D/3D Noise Reduction (HDNR) Optics Double Frequency WDR(128dB) Digital Slow Shutter from x2 up to x512 (Max) Adaptive Backlight compensation function ( BLC ) / Anti-Headlight (HLC) e-PTZ (Zoom x 4) Privacy Mask x 8 (Color) Multi object tracking D-Zoom x 4 High Contrast Images Ideal for Backlight Environment Digital Demist Process Intelligent IR Exposure (Smart IR) Color Rolling Suppression UTC Controller OSD Remote control 1 User Manual B. Specifications Video System NTSC / PAL Pick Up Element 1/3” 5 MegaPixel Image Sensor Image Signal Process Digital Signal Processor Number OF Pixels 2592 (H) × 1920 (V) Picture Elements Approx. 5000K Power Supply DC +12V Power Consumption 530 mA Synchronization Internal Synchronization Scanning System 2 : 1 Interlace Minimum Illumination 0.1Lux (0Lux, IR-ON) S/N Ration Max. 48 dB OSD Menu Build-in Multi-layers semi-opacity Menu Setting Camera Title Camera Title Function Enable Display Function Enable Display Wide Dynamic Range DWDR Digital Slow Shutter X2 ~ X512 Backlight compensation function HLC / BLC / off ( AGC ) Automatic Gain Control on ( DNR ) Digital noise reduction 2D / 3D-NR Digital Demist Process on / off / Auto Digital Zoom Zoom 4X 2 User Manual (D&N) digital day & night mode Color / B&W /Auto-Progressive/Auto-General/External input Motion detecting function on / off (Multi object tracking D-Zoom x 4) Flash suppression function on / off Privacy masking function on / off (8 Editable area) Blemish Compensation Static & Dynamic (4096 points) Image quality adjustment Hue / Contract / Saturation / Sharpness Auto white balance AWB / ATW Language English / Simplified Chinese / (support multi-language) Auto:1/60(50)S TO 1/100,000 S Electronic shutter speed Manual: 1/60(50)S, FL1/120(100)S, 1/250S, 1/500S, 1/1,000S, 1/2,000S, 1/4,000S, 1/10,000S, 1/100,000S Video signal output 1 Vp-p standard video signal output, 75 Ohms Operation temperature - 5°C ~ +40°C 3 User Manual C. OSD Operation Main menu OSD Setup Setup: 1.Click one time to enter the Main menu Click twice ( to Exit OSD menu, Reload Fty , Return to Previous page, Exit & Save) UP / Down: Selection. Left / Right: Enter & Return. 4 User Manual (1) AE Mode Setting 1. Standard AE Under Standard mode AE, symbol corner of Live view. Smart WDR:Value 0~3 Frame Rate:Indoor/ Outdoor Standard will be shown on the upper left SWDR 5 User Manual 2. BLC Back light compensation Level: (Auto, Low, Middle, High) Symbol will be shown on the upper left corner of Live view. Normal Back light compensation 6 User Manual 3. HLC High light compensation Set Range: Click Right button to enter the menu, press SETUP button in order to set up next corner point. (in this area, any brighter light source will be blocked) Normal HLC on Detection are (area marked in Red) Level: Low, Middle, High. Mask Grayscale: (Value: 1-6) Mask color set up, the color is closer to white when the value is higher. Symbol will be shown on the upper left corner of Live view 7 User Manual 4. Demist Demist: Set the level of Demist. If set Auto, the DSP will turn on/off the function and decide the level of demist (Auto, Low, Middle, High). 3D-NR: On/Off the 3D-NR function Symbol will be shown on the upper left corner of Live view Normal Demist activated (Heavy Fog) Demist Off (Middle Fog) Demist Off (LIght Fog) Demist Off 8 User Manual (2) Color Adjust Color adjust settings 1. White Balance Tracking Mode 2-8.5k、Tracking Mode 2-10k 2. Brightness 0~99 3. Color-Red Red (0~99) 4. Color-Green Green (0~99) 5. Color-Blue Blue (0~99) 6. Contrast 0~99 7. Saturation 0~99 8. CR suppress ON/OFF 9 User Manual (3) Image Adjust Image adjust settings 1. Day & Night Mode: Auto-Progressive Like human eyes 10 User Manual Mode: B/W Change to B/W mode Color burst: On/Off Color burst Mode: Color Change to Color mode. Mode: Ext For external control, the input pin is the PIO 0 on the PCB board. i. Color burst On/Off Color burst ii. IR Input level 11 User Manual Set Input level (High, Low) to make it work! iii. Smart IR Set 0~6 to adjust the curve of brightness to prevent overexposure/underexposure of image blocks. iv. IR CUT Output Via GPIO 3, output high/low level for IR-CUT use. Mode: Ext When reaching assigned brightness, change to BW. i. Color burst On/Off Color burst ii. Delay control Delay time for changing Day/Night mode (0~255) iii. Day→Night Set the start point from Color mode to BW mode. Day->Night value must be greater than Night->Day value. iv. Night→Day Set the recovery point from BW mode to Color mode. Day->Night value must be greater than Night->Day value. v. IR CUT Output By GPIO 3, output high/low level for IR-CUT use. Mode (High/Low/Off) 12 User Manual 2. Digital Slow Shutter 1/100000,1/10000,1/5000,1/2000,1/500,1/240,1/120,1/60, AUTO,2x,3x,4x,5x,8x,16x,32x,64x,128x,256x,512x To extend the photoperiod in order to enhance the sensitization. It will help to have brighter images in a condition with lack of light. Slow shutter OFF Sow shutter ON 3. HDNR HDNR (0~32) HDNR On/Auto Clearly HDNR OFF: Noisy 4. Sharpen 0~7, The higher value, the stronger effects. 5. Blemish compensation Set the effect of compensation(0-2) 13 User Manual (4) Intelligent Intelligent surveillance setting 1. Multi object tracking Sensitivity (-4~4) Warning trigger Level: (High/Low/Off) An alarm outputs when a motion is detected. Default output port: PIO2. Alarm time (0~3600) D-Zoom Set Zoom factor (1.0~4.0) Set Range Motion detection area set up ( Click Right button to set up / click setup to remove the area and Exit). Switch ON/OFF Mask Color 14 User Manual (0~15) Hot Zone Display ON/OFF, Symbol will be shown on the upper left corner of Live view. Normal 2. Multi object tracking On D-Zoom D-Zoom: Set Zoom factor(1.0~4.0) Tilt: When using D-Zoom, adjust the tilt degree, value (-10~10) Pan: When using D-Zoom, adjust the pan degree, value (-10~10) 15 User Manual 3. Privacy Mask Opacity (0~3), Mask transparency setting. Mask Select (1~8), Select and set up the mask, maximum 8. Set Mask Area Mask range set up (click Right button to set up) Switch ON/OFF Mask Color (0~65535) , Masks color setting 4. Symbol will be shown on the upper left corner of Live view. Close IS Close intelligent function 16 User Manual (5) System setting System setting 1. 2. Lens Mode: To select lens type, DC in door/ DC outdoor/ Manual. Brightness: only be activated with DC IRIS (-50~50). Aperture speed: only available for Lens of DC IRIS (0-7) Type: set lens type (0~4) RS485 Camera ID: Pepco ID (0~255) Baud rate: (1200, 2400, 4800, 9600, 19200, 38400, 57600, 115200, 230400, 460800). 3. Language switch (English, Traditional Chinese, português) 17 User Manual 4. 5. Monitor selection Select monitor: LCD/CRT Brightness: set the brightness level(0~37) Others Mirror: Horizontal/Vertical/Off Show ID/Icon: OFF/ Show ID/Icon/ Show ID/ Show Icon (6) Information Display Version Information 18 User Manual Attachment A: UTC Controller Installation 19 FUHO TECHNOLOGY Co., LTD No. 30, Lane 726, Jinma Rd, Sec. 3, Chang Hua City, Taiwan. TEL:886-4-751-2881 FAX:886-4-751-5860 Made in Taiwan http://www.vacron.com