1
A reference manual for
The ACTION! System
A complete programming environment designed
for your Atari home computer system.
The programs, cartridges, ROMs, and manuals
comprising the ACTION! system
are Copyright (c) 1983, 2012 by
Clinton Parker
This book is Copyright (c) 1983, 2012 by
Clinton Parker.,
This manual was written in August, 1983
All rights reserved. Reproduction or translation of any part of this work
beyond that permitted by sections 107 and 108 of the United States
Copyright Act without the permission of the copyright owner is unlawful.
This version of the manual was done with the permission of the copyright
owner, Clinton Parker. It was edited by James Patchell in June 2012. All
efforts were made by the editor to make certain that this is an accurate
version of the original, however, it was made by doing an OCR on the
original manual, and then editing the resulting text in Microsoft Word. It is
possible that many of the errors that were created by the OCR process were
missed. On the other hand, I managed to correct some of the errors that
were in the original manual. It took me several months to complete this
task, but it was done mostly to preserve what I consider to be one of the most
impressive programs that came out in the early days of computing.
ACTION!, was, without any doubt on my part, the best compiler that was
ever written for the 6502, as it was tailored to what that processor was
capable of doing.
Preface by the Editor
This was a work of love for me. I bought the ACTION! Compiler when
it first came out, however, it was about a year before I actually used it. And
when I did use it, I was sorry I had waited.
My first foray into High Level Programming Languages on the Atari
Computer was FORTH. I know for some that what I am about to say is
heresy, but I was just never able to get the hang of it. This is probably more
likely due to my lack of exposure to structured programming.
I did not have that problem with ACTION!. ACTION! Was the very first
structured language I had ever used. Up to that point, BASIC and
FORTRAN were the only high level languages I used, but if I was serious
about the code, I used assembly. ACTIOON! gave me enough of a leg up
that when I got a job that required I program in PL/M, I was right at home.
I do not know Clinton Parker, and I wish I did. I have been in contact
with him and he was gracious enough to allow me to publish this document.
The main reason I did this transcription was because I had always wanted to
write a compiler, and ACTION! was the first one I attempted to duplicate. At
that time, I did not have at my disposal the software tools that make doing
such a job a lot easier. When I became disabled due to blindness, I decided
I would do my darnedest to accomplish that task. Hence, this transcription.
It, along with the ZoomText screen reader allow me to read this document.
Jim Patchell
August 17, 2012
THE ACTION! SYSTEM
PART I: Introduction to ACTION!
1
2
The ACTION! System
How to Write and Run a Program
PART II: The ACTION! Editor
Table of Contents
1
2
3
4
Introduction
The Editor Commands
Atari ACTION! Editor
Technical Considerations
PART III: The ACTION! Monitor
Table of Contents
1
Introduction
2
ACTION! Monitor Commands
3
Program Debugging Facilities
PART IV: The ACTION! Language
Table of Contents
1
Introduction
2
ACTION! Vocabulary
3
Fundamental Data Types
4
Expressions
5
Statements
6
Procedures and Functions
7
Compiler Directives
8
Extended Data Types
9
Advanced Concepts
PART V: The ACTION! Compiler
Table of Contents
1
Introduction
2
Compiler Operation
3
Using the Options Menu
4
Technical Information
PART VI: The ACTION! Library
Table Of Contents
1
Introduction
2
Output Routines
3
Input Routines
4
5
6
7
File manipulation Routines
Graphics and Game Controllers
String Handling / Conversion
Miscellaneous Routines
APPENDICES
A
B
C
D
E
F
G
H
I
ACTION! Language Syntax
ACTION! Memory Map
Error Code Explanation
Further Reading & References
Editor Commands Summary
Monitor Commands Summary
Options Menu Summary
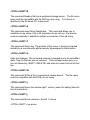
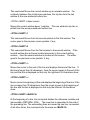
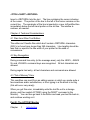
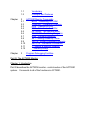
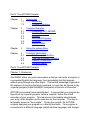
"PRIMES" Benchmark
BASIC to ACTION! Conversions
Part I: Introduction to ACTION!
Welcome to ACTION! We're here to introduce you to a complete software
development system - one in which you can perform all of your programming
tasks.
If you have programmed your Atari using Atari BASIC,
you will discover that ACTION! runs a lot faster, has a better editor, and is
just as easy to learn.
If you have ever done assembly language programming, you will find that
ACTION! is almost as fast as assembly language, as far as program
execution is concerned. You will also find that programming ACTION! is
much quicker and easier due to the nature of the language, its editor, and its
library of routines.
For those of you with very little or no previous programming experience, we
suggest that you read this manual very carefully, and be sure you
understand one concept before moving on to the next. We say this because
this is not a tutorial to teach you the ACTION! system, but rather a reference
manual of all the capabilities of the system.
That is not to say that you won't understand what you're reading (quite the
contrary); it simply means that we don't discuss every possible programming
use of the concepts involved. We respect your ingenuity and curiosity and
believe that you yourself will find some uses we haven't even dreamt of.
1. Notes On This Manual
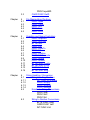
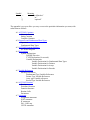
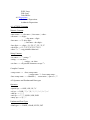
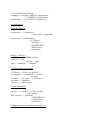
The manual itself is separated into six parts and a group of appendices.
Each of the parts exclusively discusses one facet of the ACTION! system,
thus enabling you to learn about the different components of ACTION!
without having to keep flipping pages. Each part is prefaced by a table of
contents, an introduction, and a vocabulary.
The one drawback to separating the ACTION! system into its component
parts is that you will learn everything about one part before starting the next
part. To help alleviate this problem we suggest that you read the introduction
section of each of the parts before reading one part in depth. Also, the last
chapter of this introduction shows you how the ACTION! components work
together to allow you to run programs.
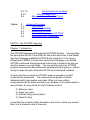
Chapter 1: The ACTION! System
The ACTION! system is made up of five different parts:
The ACTION! Monitor
The ACTION! Editor
The ACTION! Language
The ACTION! Compiler
The ACTION! Library
The Monitor is the boss of the ACTION! system. Through it you can call the
Editor, the Compiler, or get access to some system options. This is the
monitor's only job, but it is a important one, allowing you to decide which part
of the ACTION! system you want to use at any given time.
The Editor is where you create new programs and modify old ones. It
doesn't know anything about the ACTION! language or compiler (that is, it's
simply a text editor and doesn't check language syntax), so you can use it for
other word processing or program entry applications. The Editor also allows
you to save the text in the editor buffer or read text from a peripheral device
(disk drive, cassette, et) into the editor buffer.
The ACTION! Language is what you use to communicate with the ATARI
machine and tell it to do things- You write a program in the ACTION!
Language, and then tell the ACTION! Compiler to translate it into a form the
computer can understand (machine language), and then you run the
program.
"Why is this such an involved process? BASIC isn't like that.”' First of all,
the process isn't that involved once you understand what's going on and
why. Secondly, BASIC isn't like that because it is an Interpreter, not a
Compiler. BASIC translates each line as the program is running, and it takes
some time to do that, thereby slowing down the speed of your program*
ACTION!, on the other hand, breaks the running and syntax checking of your
program into two parts* The Compiler checks your program for proper
syntax, and does the translating* When it is through, your program can be
run directly, i.e-, without any syntax checking. This makes your program run
with incredible speed.
As mentioned in the previous paragraphs:, the ACTION! Compiler translates
an ACTION! program into machine code. The only thing it requires is that the
program be in proper ACTION! form. The compiler will give you an error if
you use syntax which is illegal in the ACTION! Language just like an
English teacher would give you an error (Or red mark) if you used improper
English in class.
The ACTION! system also contains a group of prewritten routines which you
can use in your programs. This group of routines is called the ACTION!
Library, and it enables you to do all the things you can do in BASIC (i.e. ,
PLOT, DRAWTO, PRINT, etc.) and much more without writing any special
subroutines of your own.
TECHNICAL NOTE: although the ACTION! compiler does translate an
ACTION! program to 6502 machine language, that compiled code will not
run without the ACTION! cartridge because it (the code) does some calls to
routines in the cartridge. If you are writing products for resale, a runtime
version of ACTION! which will make your program work without the cartridge
can be licensed from OSS Inc.
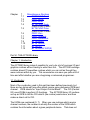
Chapter 2: How To Write and Run an ACTION! Program
This chapter is designed to let you "get your feet wet" and become more
familiar with the ACTION! System. We're going to write a little program in
the Editor, Compile that program, and Run it.
When you go to the cartridge from DOS you will be in the ACTION! Editor, so
the program can be entered immediately. We're going to assume that you
won't make any typos, but if you do, you can use the cursor control keys (
<CTRL><up arrow>, etc. ) to move around and fix them. When you read the
Editor part you will find out about many more editor features and commands,
but these are all you need for this program.
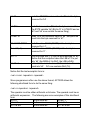
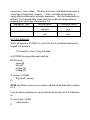
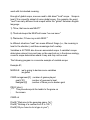
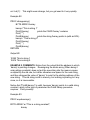
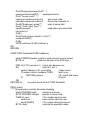
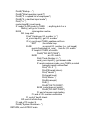
Now let’s look at the program. Enter it exactly as you see it here (no special
commands are required to enter text):
PROC hello()
PrintE("HelLo Worl ")
RETURN
Before we compile this program, let's discuss what's going on. The 'PROC’
and ‘ RETURN’ statements are required by the ACTION! language, and
make up the bones of a procedure. The language is structured into a group
of subroutines called procedures and functions, with each routine doing a
specific task which you define. This might seem strange at first, but it allows
you to write programs in components so that you can concentrate on one
part of the program at a time. It also makes programs written by others much
easier to read.
The above procedure is called "hello", namely because it will print out the
line "Hello World" to the screen when the program is run.
The statement starting with 'PrintE' is a library routine call. Here we are
making use of one of the prewritten routines in the ACTION! library. This one
will print out the specified string, and put out a <RETURN> at the end. This
routine call is the only statement in the procedure ‘hello’ (because it is the
only statement between the 'PROC’ and ' RETURN’).
Now that we have the program in the Editor buffer, how are we going to
compile and run it? The Editor certainly can't do it for us, so we need to get to
the Monitor and call the ACTION! Compiler from there. The Editor command
<CTRL><SHIFT>M takes us to the Monitor, so we'll use that.
Now that we're in the Monitor, we need to call the Compiler to check the
syntax of our program and translate it into machine language. This is done
by typing the command 'COMPILE <RETURN>' to the Monitor,
The compiler takes over and does its job. If it finds an error, it will print out an
error message and return you to the monitor. If it finds no errors, the
Compiler will return us to the Monitor. From there we can run the compiled
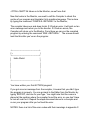
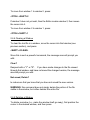
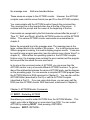
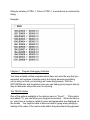
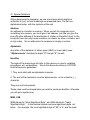
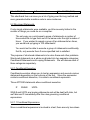
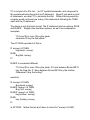
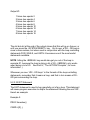
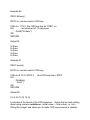
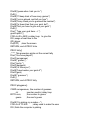
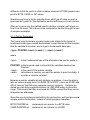
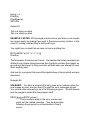
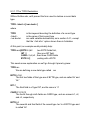
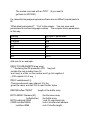
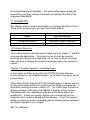
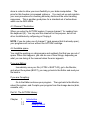
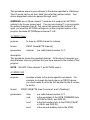
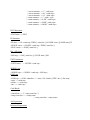
program by entering the command 'RUN <RETURN>'. The screen should
look like this after you've run the program:
+----------------------------------------+
|>
|
+----------------------------------------+
| Hello World
|
|
|
|
|
|
|
|
|
|
|
|
|
|
|
|
|
+----------------------------------------+
You have written your first ACTION! program!
If you got an error message from the compiler, it means that you didn't type
the program in properly. You can go back to the Editor from the Monitor by
typing 'EDITOR', and can fix your typo. You might note that the cursor is
placed at the position where the compiler found the error, so you don’t have
to look all over for it. Repeat the steps discussed above to re-compile and
re-run your program after you've fixed the error.
NOTES: there is a list of the error codes with their meanings in appendix C.
Part II: The ACTION! Editor
Chapter
1
1.1
1.2
Introduction
Special Notations
Editor Concepts and Features
Chapter
2
2.1
2.2
2.3
2.3.1
2.3.2
2.4
2.4.1
2.4.2
2.5
2.5.1
2.5.2
2.5.3
2.5.4
2.5.5
2.5.6
2.5.7
2.6
2.6.1
2.6.2
2.6.3
2.6.4
2.6.5
2.7
2.8
The Editor Commands
Getting to the Editor
Leaving the Editor
Text Entry
Text File I/O
Setting the Line Length
Cursor Movement
Tabs
Finding Text
Correcting Text
Deleting a Character
Inserting/Changing a Character
Deleting Lines
Inserting Lines
Breaking an Recombining Lines
Substituting Text
Restoring a Changed Line
Windows
Window Movement
Creating a Second Window
Moving Between Windows
Clearing a Window
Deleting a Window
Moving/Copying Blocks of Text
Tags
Chapter
3
3.1
3.2
3.3
Comparing ACTION! and Atari Editors
Identical Commands
Differing Commands
Commands Unique to ACTION!
Chapter
4
4.1
Technical Considerations
Files from Other Text Editors
4.2
4.3
Key Recognition
"Out of Memory” Error
Part II: The ACTION! Editor
Chapter 1: Introduction
The Editor is where you create new ACTION! programs and edit old ones. If
you have used a program editor before, you will notice that the ACTION!
Editor is far more sophisticated than most others: in fact, it could almost be
called a word processor because it does so much.
Although it is capable of many things, you will find that the ACTION! Editor is
easy to work with. If you have never been exposed to anything but the Atari
screen editor, then you are in for pleasant surprise. You can use the
ACTION! Editor for any editing you want to do, not just editing ACTION!
programs. You could do all your editing (correspondence, programs in other
languages, etc.).
1.1 Special Notations and Vocabulary
USAGE OF SINGLE QUOTE MARKS (‘)
Unless format and context make the use of quotes unnecessary, commands
and special characters will be enclosed in single quotes.
USAGE OF '<’ AND ‘>'
When talking about a key on the Atari keyboard, we will enclose it with the
characters '<’ and ‘>’ thus:
<BACK SP> (the backspace key)
Some of the keys have more than one label written on them. In these cases,
the label best describing the Editor command will be used.
There is one exception to the above; the character (A - Z) and digit {0 – 9}
keys are not enclosed by the angle brackets.
MULTI-KEYSTROKE COMMANDS
Some of the Editor commands require that you press more than one key at a
time. For these commands, the keys required are given back to back in the
order in which you should press them. For example:
<SHIFT><DELETE>
means that you should hold the key marked ‘SHIFT’ down, and then press
the key marked 'DELETE'.
THE MESSAGE AREA
Throughout this part of the manual the term "message area" will be used.
This area is simply the inverse video line you will notice at the bottom of your
screen when you enter the Editor. This line normally has
ACTION! (c)1983 ACS
written on it, but is used by some of the editor commands to ask you
questions, give you information, or report an error.
When you are using two windows (see section 3.4), the message area line
separates the two windows.
DEFAULT USER RESPONSE
Some of the commands which use the message area to exchange
information with you remember the information you gave the last time you
used the command. This information is called the "default user response". If
the default user response you see in the message area is what you want,
you simply press <RETURN>. This saves you time because you don't have
to retype the same response many times. If you don't want to use the
default user response, you have the ability to change either part or all of it.
1.2 Editor Concepts and Features
TEXT WINDOWS
When you look at your TV or monitor screen, imagine that you are looking
through a window. At any one time you can only see 23 lines of 38
characters each. This seems very limiting, and would be if you couldn't
move the window around. The ACTION! Editor makes it possible for you to
move this window around, both horizontally and vertically, so that you can
look at your whole program.
But the Editor is even more sophisticated than that! If you are looking
through the window, and you want to look at one line which extends beyond
the bounds of the window, you can move to that line and look at the whole
thing. The line will move to fit into the window, but the window stays right
where it was. When you move off that line, it pops back into its proper place
(with respect to the window).
The Editor even allows you to split your screen into two windows, each of
which you can control separately. This enables you to look at two different
programs, or different parts of the same program, at the same time.
TEXT LINES
The ACTION! Editor is designed so that your program can be read easily. It
allows lines up to 240 characters long (even though the window only shows
38 characters at a time), so you can use indentation to clarify your program
without worrying about making lines too long. The Editor also allows blank
lines, so you can separate the components of your program with white
space.
NOTE: you also have control over the maximum line length, so you pick a
line length you think best (or will fit on your printer). The Editor even buzzes
when you reach the limit, to let you know it’s time to go to the next line.
NOTE: if a text line is longer than the window (if it extends beyond the left or
right bounds of the window), the character at the edge of the window is
shown in inverse video to make you aware of this.
FIND and SUBSTITUTE
The Editor allows you to search for a given string, and will move the cursor to
the first match found in the program.
The Editor also allows an extension of this. You can tell it to search for a
given string, and then replace the first match with another string you specify,
all with one command.
MOVING TEXT BLOCKS
Have you ever entered a program and wished that a group of lines which you
entered at one location could be conveniently moved to another location? In
ACTION!, this is a snap!
Saving those lines (called a text block) in the copy buffer (that's where a text
block is temporarily saved) allows you to move the cursor to where you want
the text block placed. You may then "paste" the contents of the copy buffer
(the lines you wanted to move) back into the program. You can paste the
text block at its original location, and then move somewhere else and paste it
there too, thus enabling you to copy text blocks.
CURSOR MOVEMENT
The cursor is controlled not only by the movement keys on the keyboard
(e.g., <CTRI>><up arrow>) but can also be made to move to a specified
places in your text through the use of tags and the ‘FIND' command.
TAGS
You can mark any location in your text with an invisible marker called a "tag".
The Editor allows you to move the cursor to this tag (no matter where the
cursor was before) through the use of a simple command.
The number of tags you allowed is limited only to the number of keys on the
keyboard, since you must give a one character label to each tag you define.
Chapter 2: The Editor Commands
This chapter is devoted to the Editor commands themselves. Instead of
presenting the commands in this form:
2.2 <CTRL><SHIFT>M
where you can't tell what the section discusses (unless you already know the
Editor), the commands are presented by their function, e.g.;
2.2 Leaving the Editor
We hope this form makes things clearer and easier to follow.
Before going into the commands themselves, we should tell you how to stop
execution of a command if you made a mistake. You can do this by
pressing the <ESC> Key. Doing this will get you out of any command
safely.
NOTE: appendix E provides a summary of the Editor commands, listed by
the command itself instead of what it does.
2.1 Getting to the Editor
When you first enter the ACTION! system, you will automatically be put into
the Editor, so there is nothing involved in "getting to" it. You're already
there.
If you leave the ACTION! system and go to DOS (OS/A+, DOS XL, or Atari
DOS), you will be in the Monitor when you re-enter ACTION! (there is one
exception to this; see NOTE below). To get to the Editor from the Monitor,
you need only type
E<RETURN>
This will put you directly into the editor.
NOTE: if you are using OS/A+ or DOS XL, and you execute a DOS extrinsic
command before returning to the ACTION! system, you will not be put into
Monitor as stated above, but straight into the Editor. This is not the case
with Atari DOS, since it has no extrinsic commands.
2.2 Leaving the Editor
There is only one way to leave the Editor (aside from turning off the
computer):
<CTRL><SHIFT>M
This command will cause you to go from the Editor to the Monitor, where you
may call the other components of the ACTION! system or leave the system
altogether and go to DOS.
2.3 Text Entry
There is no special Editor command to allow you to enter text. You simply
type it in, as on a typewriter. When you have reached the maximum line
length, the Editor will buzz every time you put in another character (see 2.3.2
for more information).
If you want to type a control character, you must press the <ESC> before
doing so. This lets the Editor know that the control character should be
interpreted as text, and not as an Editor command.
"What happens when I try to type over something I've already written?" The
ACTION! Editor allows you two options in this case. Text can be entered in
either “Replace" or "Insert" mode.
When in Replace mode, the text you enter will overwrite whatever was there
before, replacing the old with the new character by character.
When in Insert mode, the text you enter will be inserted wherever the cursor
is, and move all the previous text over without overwriting it.
The Editor command <CRTL><SHIFT>I allows you to change from one
mode to another. When you use this command, the mode you have changed
to will be printed in the message area (see section 2.5*2 for more
information).
NOTE: the Editor is in Replace mode when you first enter it.
If you want to erase all the text in a file, just put the cursor into the window
you want to clear and press <SHIFT><CLEAR>. This will clear not only
what you see in the window, but the entire file (see section 2.6.4 for more
Information).
2.3.1 Text File I/O
If there were no way to save the program in the Editor buffer, you would have
to retype it every time you wanted to use it. The Editor allows you both to
read and to write files to any peripheral storage device (Disk Drive, Cassette,
etc.) to save you all this trouble.
To save a program in the Editor buffer, you must first put the cursor into the
window which contains the file you want saved (if you are using only one
window, you needn’t worry about this). Then you enter the command
<CTRL><SHIFT>W
In the message area you will see:
Write?
Simply type in the file name you want the program saved to, and press
<RETURN>. The file name must be compatible with the DOS you are
using. If you are not using a DOS, the file will consist only of a character
representing the device (C for cassette, P for printer, etc.) followed by a
colon.
Reading a file into the Editor buffer is just as easy. Move the cursor to the
line preceding the line where you want the file you're reading in to start, and
enter the command
<CTRL><SHIFT>R
In the message area you will see:
Read?
Type in the name of the file you want read in, following the conventions
outlined above.
If you are using floppy disks, you can read the directory on a given disk by
replying with the following to the "Read?" prompt in the message area:
Read? ?1:*.*
This will read the directory of the disk in drive number 1. If you want to read
the directory of a disk in some other drive, simply change the '1' in the above
example to the number of the drive. This ability is very useful, because you
needn't go to DOS to find out what is on a disk.
2.3.2 Setting the Line Length
As mentioned in the first paragraph of section 2.3, you can set the
maximum line length. You can find out how to do this in part III, section 2.5,
so we need not show you here.
2.4 Cursor Movement
To move the cursor left one character, press:
<CTRL><left arrow>
To move the cursor right one character, press:
<CTRL><right arrow>
To move the cursor up one line, press:
<CTRL><up arrow>
To move the cursor down one line, press:
<CTRL> <down arrow>
The commands above are simply the normal cursor movement Keys the
Atari screen editor understands. The ACTION! Editor, however, allows you
some more cursor movement commands designed to increase your program
writing speed.
You can make the cursor go to the beginning of the line its on by pressing:
<CTRL><SHIFT><
and go to the end of the line by pressing:
<CTRL><SHIFT>>
These two commands will take you to the true beginning or end of the line
even if it (the beginning or end) is not visible in the window. The line will
simply be shifted over so that it (again, the beginning or end) is visible in the
window. When you move the cursor off the shifted line, the line will be moved
back to its proper position.
You can go to the beginning of the file by pressing;
<CTRL> <SHIPT>H
2.4.1 Tabs
You can move the cursor to the next tab stop by pressing <TAB>.
To set a tab stop, move the cursor where you want the tab, and then press
<SHIFT><SET TAB>.
To clear a tab stop, move to the tab stop you want cleared, and press
<CTRL><CLR TAB>.
2.4.2 Finding Text
The Editor allows you to "find" a specified string of characters (1 - 32), and
can be very useful when skipping from place to place in your file. To do this
enter the command:
<CTRL><SHIFT>F
The message area will prompt you with
Find?
If you have previously used the Find command, you will see the string you
last tried to find following the prompt. If you want to find the next occurrence
of this string, simply press <RETURN>. If you want to find a different string,
type in the new string and press
<RETURN>. You will notice that the old string disappears as soon as you
start typing.
If this is the first time you are using the Find, you will see nothing following
the prompt, and you should type in the string you want found and press
<RETURN>.
This command will start at the current cursor position and look for the first
occurrence of the string you specified. If the string is found, the Editor will
move the cursor to the first character in the found string and make the
window move to display the surrounding section of text. If the string isn't
found, the message area will display the line:
not found
2.5 Correcting Text
The following six sections will give you information on how to correct and
delete text from the Editor buffer. The seventh sections shows you how to
undo certain deletions if you have made a mistake.
2.5.1 Deleting a Character
To delete the character under the cursor (the one the cursor is flashing on
top of), press:
<CTRL><DELETE>
The characters to the right of the character just deleted will move left to fill
the empty space left by the deleted character.
To delete the character to the left of the cursor, press:
<BACK S>
If you are in Replace mode, this will replace the character to the left of the
cursor with a space. If you are in Insert mode, this will delete the character to
the left of the cursor, and then move all the following characters over to fill
the empty space.
2.5.2 Inserting/Changing a Character
As mentioned in section 2.3, there are two different modes for text entry:
Replace mode and Insert mode. When you first enter the ACTIOMI Editor,
it is in Replace mode. To change from one mode to the other, press:
<CTRL><SHIFT>I
Some of the Editor commands are mode dependent; that is, they operate
differently, depending on the text entry mode.
You can insert a blank character at the cursor position by entering
<CTRL><INSERT>. The text from the cursor to the right end of the line
moves right one space and a blank space is inserted at the cursor position.
NOTE: if you are in Insert mode, you can simply press the space bar.
2.5.3 Line Deletions
To delete a whole line, place the cursor on the line you want deleted, and
press:
<SH1FT><DELETE>
The succeeding lines move up to fill the empty space.
2.5.4 Line Insertions
To insert a blank line above the line the cursor is on, press:
<SHIFT><INSERT>
The succeeding lines move down to allow space for the new blank line.
2.5.5 Breaking & Recombining Lines
To break a single line into two adjacent lines, first position the cursor on the
character you want as the first character in the second line, and then press:
<CTRL> <SHIFT><RETURN>
NOTE: if you are in Insert mode, simply position the cursor and press
<RETURN>.
Succeeding lines of text are moved down to allow room for the new line.
To combine two adjacent lines into a single line, first position the cursor on
the first character in the second line, and then press:
<CTRL><SHIFT><BACK S>
Succeeding lines are moved up to fill the empty space.
2.5.6 Substituting Text
The ACTION! Editor allows you to substitute a "new" string for an "old" one.
You are prompted for the "new" string, and then for the "old" one. The Editor
searches for the first occurrence of the "old" string (starting at the cursor
position), and replaces it with the "new" string. To begin this command,
press:
<CTRL><SHIFT>S
The message area will display the prompt:
Substitute?
If you have previously used this command, you will see the last "new" string
you used following the prompt. If you want to keep this "new" string, simply
press <RETURN>- If you want a different "new" string, type it in and press
<RETURN>.
If this is the first time you are using Substitute, you will see nothing following
the prompt, and you should type in the "new" string you want and press
<RETURN>.
After you press the <RETURN>, the message area will prompt you with:
for?
You will see the last "old" string you used following this prompt if you have
used the Substitute before. If you want to keep this "old" string, simply
press <RETURN>. If you want a different "old" string, type it in and then
press <RETURN>.
If this is the first time you are using Substitute, you will see nothing following
the prompt, and you should type in the "old" string you want changed and
press <RETURN>.
After you press this second <RETURN>, the Editor will try and do the
substitution. If it can’t find the "old" string you've given, the message area will
show the following:
not found
If you press <CTRL><SHIFT>S again before you do any other editing, the
Editor will execute the same substitution again. This enables you to
substitute more than one occurrence of the "old" string with the "new" one
without having to keep responding to the "Substitute?" and "for?" prompts.
HINT: you can delete the next occurrence of a string by using this ommand
with the "new" string being nothing.
This with substitute the "old" string with nothing, and so (in effect) delete it.
2.5.7 Restoring a Changed Line
The ACTION! Editor allows you to restore a line to its previous form if you
have made an error while editing it. To do this, you must remain on the
changed line and press:
<CTRL><SHIFT>U
WARNING: if you leave the line and then come back to it, this command will
not work, because the Editor only remembers what the line was before you
started editing it while you remain on the line.
If you have accidentally deleted a whole line, you can retrieve it by pressing:
<CTRL><SHIFT>P
More information about this command may be found in section 2.7.
NOTE: the tags on the changed or deleted line are not restored.
2 .6 Windows
The displayed contents of the central portion of the screen is called a
window. The following five sections describe the Editor commands used to
manipulate, create, and delete windows. In these sections we use the term
"current window" to mean the window which the cursor is in.
2.6.1 Window Movement
You can make the window scroll up or down one line simply by moving the
cursor. If you try and move the cursor off the top of the screen, the window
moves up one line to keep the cursor on the screen. The same works with
the bottom of the screen. This type of vertical scrolling could take a long time
if your program were big, so the Editor also allows you to make the window
scroll by the size of the window itself.
To move up one window, press:
<CTRL><SHIFT><up arrow>
For the sake of continuity, what was the top line in the old window is now the
bottom line of the new window.
To move down one window press:
<CTRL><SHIFT><down arrow>
For the sake of continuity, what was the bottom line in the old window is now
the top line of the new window.
The Editor also allows you to scroll the window horizontally. That is you
can make the window's left margin start at any column (instead of the first
column). If a line is longer than the window (if it extends beyond the left or
right bounds of the window), the character at the edge of the window is
shown in inverse video to make you aware of this.
To move the window one character to the right, pressi
<CTRL><SHIFT>]
To move the window one character to the left, press:
<CTRL><SHIFT>[
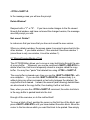
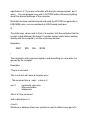
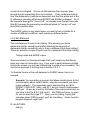
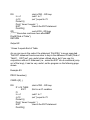
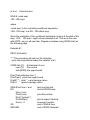
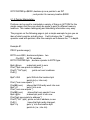
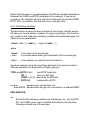
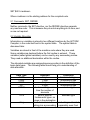
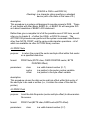
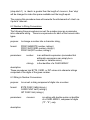
2.6.2 Creating a Second Window
When you first enter the ACTION! Editor there is only one window. You can
create a second window by pressing:
<CTRL><SHIFT>2
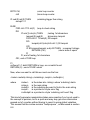
The screen will now look like this:
+--------------------------------------------------+
|
|
|
|
|
|
|
|
+--------------------------------------------------+
| ACTION! (c)1993 ACS
|
+--------------------------------------------------+
|
|
|
|
+--------------------------------------------------+
The window above the message area is window 1 and the window below it
is window 2. You can use each window Independently, so you could be
working on two entirely different files without having to keep clearing window
1 and reading in a file.
NOTE: the size of the window 1 can be set using the Options Menu available
from the monitor. For more information on how to do this, see part III,
section 2.5.
2.6.3 Moving Between Windows
To move from window 1 to window 2, press:
<CTRL> <SHIFT>2
If window 2 does not yet exist, then the Editor creates window 2, then moves
the cursor into it.
To move from window 2 to window 1, press:
<CTRL><SHIFT>1
2.6.4 Clearing a Window
To clear the text file in a window, move the cursor into that window (see
previous section), and press:
<SHIFT><CLEAR>
Since this is such a powerful command, the message area will prompt you
with:
Clear?
Respond with a "Y" or "N". If you have made changes to the file viewed
through that window, and have not saved the changed version, the message
area will prompt you with:
Not saved, Delete?
to make sure that you know that you have not saved the new version.
WARNING: this command does not simply delete the portion of the file
visible in the window, but rather deletes the entire file.
2.6.5 Deleting a Window
To delete a window (i.e., make the window itself go away), first position the
cursor in the desired window, and then press:
<CTRL><SHIFT>D
In the message area you will see the prompt:
Delete Window?
Respond with a "Y" or "N”. If you have made changes to the file viewed
through that window, and have not saved the changed version, the message
area will prompt you with:
Not. saved. Delete?
to make sure that you know that you have not saved the new version.
When you delete a window, the screen space it occupied is given bach to the
other window. If you delete window 1, then window 2 becomes window 1
(since there is only one window, it must be window 1).
2.7 Moving/Copying Blocks of Text
The ACTION! Editor allows you to move or copy text blocks through the use
of a copy buffer. Whenever you use the command <SHIFT><DELETE> to
delete a text line, that line is temporarily stored in a region called the copy
buffer. You may then "paste" that deleted line using <CTRL> <SHIFT>P.
The copy buffer is cleared every time you use the <SHIFT><DELETE>, with
one exception. If you use the <SHIFT><DELETE> consecutively (i.e.,
without doing any other commands or text entry between the deletes), the
copy buffer is not cleared. Instead, the second (and following) deleted lines
are also stored in the copy buffer, thus loading it with a text block.
Now, when you use the <CTRL><SHIFT>P command, the entire text block
in the copy buffer is pasted back into the text.
Enough of the overview; on to the method itself.
To move a block of text, position the cursor on the first line of the block, and
press <SHIFT><DELETE> until you have deleted the entire block. Move the
cursor to the line above which you want the block to be pasted. Now simply
press <CTRL><SHTFT>P, and the block will be pasted.
To copy a block of text, use the same method as for moving a block, but first
paste the block back into its original position before moving to place where
you want it copied. Since pasting does not clear the copy buffer you can
paste the same block (or line) in many different places, thus allowing multiple
"copy"s,
2.8 Tags
Tags allow you to mark any location in your text. To set a tag at a given
cursor position, press:
<CTRL><SHIFT>T
The message area will display the prompt:
tag id:
Enter the one character identification you want for that tag and press
<RETURN>. If the id you give already has a tag associated with it, the old tag
will be lost, and the id will refer to the new tag,
To move to a specified tag, press:
<CTRL><SHIFT>G
The message area will display the prompt:
tag id:
Enter the id character of the tag you want to go to. If the tag exists, the
cursor will be moved to it, and the window will be moved to display the
surrounding text. If the tag doesn’t exist, the Editor will print tag not set in the
message area. This means that no tag with the given id character exists.
WARNING: Any operation which alters the contents of the line (character
insertions, deletions, or changes, line breaking or recombining) clears the
tags in the line.
HINT: if you use the digits (0 - 9) as tag ids, you are more likely to remember
the id character.
Chapter 3: Comparing ACTION! and ATARI Editors
3.1 Identical Commands
<SHIFT>
Used in conjunction with letter keys to change the caee of the letters or used
to enter either an alternate character or command. Hold the <SHIFT> key
down while pressing the following key in the sequence (e.g. <SHIFT>_,
symbolizing the underline character “_”, means that you should hold the
<SHIFT> key down while pressing the “_” key) .
<CTRL>
Used in conjunction with one or more other keys to communicate a
command or special character to the editor. Hold the key down while
pressing the following key in the sequence (e.g., <CTRL><up arrow>,
symbolizing the command to move the cursor up one line, means that you
should hold the <CTRL> key down while pressing the <up arrow> key).
<Atari>
Display succeeding characters in inverse video. Press key a second time to
return to normal video display of entered characters.
<ESC>
Allows the following control character to be entered as text.
<LOWR>
Shift letter entry to lower case (like unlocking the shift lock on a regular
typewriter).
<SHIFT><CAPS>
Shift letter entry to upper case letters only (like pressing shift and shift lock
keys simultaneously on a regular typewriter).
<SHIFT><INSERT>
Inserts a blank line on the line where the cursor is. The line where the cursor
was and succeeding text lines are moved down to make room for this line.
<CTRL> <INSERT>
Inserts a blank space where the cursor is. Succeeding characters on the
same line are moved right one character to make room for the inserted
space.
<CTRL><up arrow>
Moves cursor up one text line.
<CTRL><down arrow>
Moves cursor down one text line.
<TAB>
Move to the next set TAB location, if any. Do not move if no additional TAB
exists. Inserts spaces if no text (or spaces) exist here already.
<SHIFT><SET TAB>
Establish a TAB location at the current position of the cursor.
<CTRL><CLR TAB>
Clear the TAB, if any, at the current cursor location.
3.2 Differing Commands
<BREAK>
This key is not used by the ACTION! editor.
<SHIFT><CLEAR>
Clears file in the current window. The editor warns you when the file has not
been saved since the last text modification and allows you to cancel the
command.
<RETURN>
In Replace mode, this moves the cursor to the beginning of the next line. In
Insert mode, it inserts a <RETURN> into the text.
<SHIFT> <DELETE>
Removes the line the cursor is on (like Atari screen editor). Succeeding lines
are moved up to replace the deleted line. Can be used repeatedly.
Removed line(s) is(are) stored in a temporary holding area (called the copy
buffer) for text copy/move processing. See <CTRL><SHIFT>P description
and section 2.7.
<BACK S>
If in Replace mode (see <CTRL><SHIFT>I), then this replaces the character
to the left of the cursor with a space. In Insert mode, this removes the
character to the left of the cursor and scrolls the rest of the line left to fill the
empty space.
<CTRL><right arrow>
This moves the cursor right one character, stopping at the end of the line.
Upon encountering the right margin of the window, the editor keeps the
cursor within the display by scrolling the line contents to the left one
character.
<CTRL><left arrow>
This moves the cursor left one character at a time, stopping at the beginning
of the line. When at the left margin of the window but not yet at the Left end
of the line, the editor keeps the cursor within the display by scrolling the line
contents right one character.
3.3 Commands Unique to the ACTION! Editor
<CTRL><SHIPT>D
This deletes the current window from the screen. The window contents are
cleared from memory and the window itself disappears from the screen.
<CTRL><SHIFT>F
This finds a specified group of alphanumeric characters in text. If the
character string is found, the cursor and window are moved to display it.
<CTRL><SHIFT>G
This finds a user-specified tag anywhere in file (from any starting location).
If found, the surrounding text is displayed and the cursor is positioned at the
tag.
<CTRL><SHIFT>H
Moves cursor to the beginning of the file (home).
<CTRL><SHIFT>I
Alternates between the character Replace and the character Insert modes
(the editor starts out in replace mode). The mode being switched to Is shown
in the message area,. This command affects "<BACK S>” and "<RETURN>"
handling.
<CTRL><SHIFT>M
Goes to the ACTION! Monitor (Part III).
<CTRL><SHIFT>P
After one or more lines are loaded into the copy buffer using
<SHIFT><DELETE>, the cursor can be moved anyplace in the text.
Pressing <CTRL><SHIFT>P causes the lines in the copy buffer to be pasted
at the current cursor location. Succeeding text (with tags) is moved down,
<CTRL><SHIFT>R
This command Reads a file from a peripheral storage device. The file name
given must be compatible with the DOS you are using. If no device is
specified in the file name, D1: is assumed.
<CTRL><SHIFT>S
This command does String Substitution. This coimnand allows you to
substitute a new string of up to 32 characters for an old one. Can also be
used successively to substitute multiple occurrences of the old string.
<CTRL><SHIFT>T
This command Sets a tag. The position of the cursor in the text is marked
invisibly by a one-character alpha-numeric tag assigned to that location.
<CTRL><SHIFT>U
Undo text changes. This command restores a changed line to its unmodified
state. Tags for that line are not restored. This command works only on a
line not deleted by <SHIFT><DELETE> and while the cursor has not left that
line.
<CTRL><SHIFT>W
This command Writes a file to a peripheral storage device. The file name
must be compatible with the DOS you are using .
<CTRL><SHIFT>]
This command Moves the window right 1 column (useful for editing files with
lots of indentation).
<CTRL><SHIFT>[
This command Moves window to the left 1 column.
<CTRL><SHIFT><up arrow>
This command Moves the current window up a complete window. For
continuity between the old and new windows, the top line from the last
window is the new window's bottom line.
<CTRL><SHIFT><down arrow>
Moves the current window down 1 window. The new window's top line is
pulled from the previous window's bottom line.
<CTRL><SHIFT>1
This command Moves from the second window to the first window. The
cursor goes to the previous cursor position, if any.
<CTRL><SHIFT>2
This command Moves from the first window to the second window. If the
second window has not been created previously in the current editing
session, then the second window is created on the screen. The editor
goes to the previous cursor position, if any.
<CTRL><SHIFT> >
Moves the cursor to the end of the line and displays that end of the line. If
the line is longer than 36 characters , then the cursor moves to the end of the
line and the line is displayed so that only the rightmost 38 characters show.
<CTRL><SHIFT> <
Moves cursor to beginning of line and displays the beginning of the line. If the
line is longer than 38 characters, then the cursor moves to the beginning of
the line and the line is displayed so that only the leftmost 38 characters
show.
<CTRL><SHIFT><BACK S>
At the beginning of a line, this command deletes the otherwise invisible and
inaccessible <RETURN> (EOL). The lower line is appended to the end of
the preceding line. The succeeding lines are moved up one line, as needed.
At all other times, this command acts the same as <BACK S>.
<CTRL><SHIFT><RETURN>
Insert a <RETURN> Into the text. The line containing the cursor is broken
at the cursor. The portion of the line to the left of the cursor remains on the
current line. The remainder of the line is inserted in a new, left-justified line
immediately below the left-hand portion or the old line. The window is
redrawn, as needed.
Chapter 4: Technical Considerations
4.1 Files from Other Text Editors
The editor can't handle files which don't contain <RETURN> characters
(EOL's) or have Lines longer than 240 characters. Line lengths should be
less than or equal to the line width of your printer for the sake of
convenience.
4.2 Key Recognition
During command line entry (in the message area), only the <ESC>, <BACK
S> and <CLEAR> command keys are recognized. All text characters are
allowed.
During regular text entry, all text characters and commands are allowed.
4.3 "Out of Memory" Error
This condition can result from an editing session in which you made quite a
few insertions and/or substitutions, or from typing in a file which is too big
(this will occur very rarely).
When you get this error, immediately write the text file out to a storage
device, and then restart ACTION! (using the 'BOOT' command in the
Monitor). You can then go back to the Editor and read your text file back in,
and continue working on it.
Part III: The ACTION! Monitor
Chapter
1
Introduction
1.1
1.2
Vocabulary
Concepts and Features
Chapter
2
ACTION! Monitor Commands
2.1
BOOT - Restarting ACTION!
2.2
COMPILE - Compiling Programs
2.3
DOS - Transfer to DOS
2.4
EDIT - Transfer to the Editor
2.5
OPTIONS - The Options Menu
2.6
PROCEED - Restarting Programs
2.7
RUN - Program Execution
2.8
SET - Setting a Memory Value
2.9
WRITE - Saving Compiled Programs
2.10
XECUTE - Immediate Commands
2.11
? - Display a Memory Location
2.12
* - Memory Dump
Chapter
3
Program Debugging Facilities
Part III: The ACTION! Monitor
Chapter 1: Introduction
Part III describes the ACTION! monitor - control center of the ACTION!
system. It connects to all of the functions in ACTION!.
The monitor is characterized by an inversee video line across the top of the
screen, containing the prompt '>' and the cursor at the left margin.
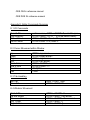
1.1 Vocabulary
Term
<address>
<compiler constants>
<filespec>
<Identifier>
<statement>
<value>
Where Defined
Part IV
Part IV
Below
Part IV
Part IV
Part IV
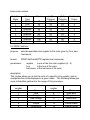
When the term '<filespec>' is used in this part, it refers to a standard Atari file
specifier consisting of a device (P:, C:, D1:, D2:, etc.) and a file name in the
case of disk drives.
1.2 ACTION! Monitor Concepts and Features
The ACTION! monitor contains two chief features – the command line and
the message area.
Both are described below.
These areas are unique to the ACTION! monitor. However, the ACTION!
compiler uses a similar screen format (see part IV on the ACTION! compiler).
You communicate with the ACTION! monitor through the command line.
The command line is the inverted video line at the top of the screen. It
contains both the prompt and the cursor at the beginning of the line.
Commands are recognized by the first character entered after the prompt ‘>’.
Thus, 'E’, 'Edit', and 'Ejunk’ all tell the ACTION! monitor to call the ACTION!
Editor. The various ACTION! monitor commands are summarized in
chapter 2.
Below the command line is the message area. The message area is the
large, outlined block in the middle of the screen. It is a multi-purpose area.
When a program is running, it is used to display program results. It can also
be used to trace program execution (see the options menu choice 'trace?' in
chapter 2). When either the operating system or the ACTION! compiler
finds an error, the message area contains the error number and the program
text around the line where the error was found.
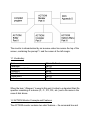
In its role as the command center of ACTION!, you can move from the
ACTION! monitor to any of several different ACTION! functions. To get an
idea of the relationship between the various ACTION! parts, see the diagram
on the preceding page. You can execute a compiled ACTION! program (see
the ACTION! Monitor’s RUN command in Chapter 2). You can also call the
ACTION! Editor (described In Part II) or call the ACTION! Compiler
(described in Part V). If you are using disk drives, you can even call the
DOS (see the ACTION! monitor DOS command, mentioned in Chapter 2).
Chapter 2: ACTION! Monitor Commands
2.1 BOOT - Restarting ACTION!
Sometimes you need to restart ACTION! from the ACTION! Monitor. This
might, occur after a fatal error or upon return from DOS, You can restart
ACTION! by entering 'BOOT’, then pressing <RETURN>.
Examples: BOOT <RETURN>
B <RETURN>
WARNING: text in the ACTION! Editor will be lost. Compiled programs and
their program variables will also be lost.
2.2
COMPILE - Compiling Programs
In ACTION!, a program must be processed by the ACTION! compiler before
it can be run from the monitor. You can call the ACTION! compiler from the
monitor, using:
FORMAT: COMPILE "<filespec>'”
The "<filespec>" is an option which allows you to compile programs which
are stored on a peripheral device (disk, cassette, etc.). If no "<filespec>" is
specified, then the contents of the Editor buffer is compiled. If you are using
two windows, the file in the window which contained the cursor when you left
the Editor is compiled.
If the Compiler finds a syntax error while compiling the program, the error
number and the line on which the error occurred are display in the Monitor's
message area. The Compiler then returns control back to the Monitor.
Examples r
COMPILE <RETURN> (compile the program in the current Editor window.)
C <RETURN>
C "C:" <RETURN>
(compile from cassette)
C "D1:PRIME.ACT" <RETURN>
COMPILE "PRIME.ACT" <RETURN>
(compile PRIME.ACT
from disk drive #1.)
Notice that the file name specified in the last example does not have a device
given. If no device is given, the device D1: is assumed.
2.3 DOS - Transfer to DOS
You can transfer to OS/A+, DOS XL, or Atari DOS by entering 'DOS', then
pressing <RETURN>.
Examples: DOS <RETURN>
D <RETURN>
NOTE: Since Atari DOS and some of Its utilities use the same memory that
ACTION! uses, you should always take the precaution to save all files before
going to Atari DOS.
2.4 EDIT - Transfer to the ACTION! Editor
You can transfer to the ACTION! editor by entering 'EDITOR’ then pressing
<RETURN>.
Examples: EDITOR <RETURN>
E <RETURN>
NOTE: if you were just compiling a program from the editor and the compile
failed due to a syntax error, you will find that the ACTION! editor cursor is on
the line following the error.
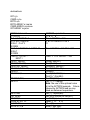
2.5 OPTIONS - The Options Menu
The options menu allows you to alter certain operational parameters of the
ACTION! Monitor, Compiler, and Editor. Enter the options menu by
entering ‘OPTIONS’ then pressing <RETURN>.
Examples: OPTIONS <RETURN>
O <RETURN>
Each option is displayed in the command line. If you want to change that
option, type in the value you want, and press <RETURN>. If you don't want
to change that option, simply press <RETURN>. If you want to exit the
options menu all together, press <ESC>.
NOTE: a summary of the options available may be found in appendix G.
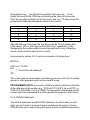
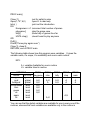
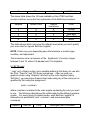
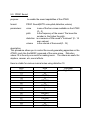
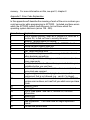
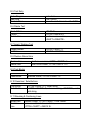
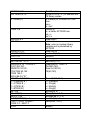
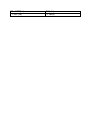
Following is a description of each of the options Available. Each description
contains the command line prompt for that option, the initial state of that
option, and the components of the ACTION! system that option affects (M =
Monitor, C = Compiler, E = Editor).
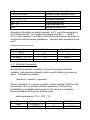
Display?
Y
M,C,E
The screen display can be turned off for greater speed during disk l/O and
during ACTION! Compiler processing. You can turn the screen display off
(enter ‘N') or you can leave it on (enter 'Y’).
Bell?
Y
M,C,E
The bell rings whenever errors are encountered in the ACTION! Monitor,
Compiler, or Editor. It also rings whenever the ACTION! monitor is called.
You can turn that bell off (enter ‘N') or you can leave the bell on (enter ‘Y’).
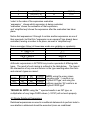
Case sensitive?
N
C
When this option is 'Y', distinction is made in variable names between upper
and lower case letters (i.e., 'count' differs from 'Count’ and 'COUNT') and the
language statements (e.g., FOR, WHILE, DO etc.) must be in upper case.
However, for the ease of beginning ACTION! programmers, case sensitivity
is turned off when you enter the ACTION! system.
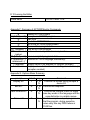
Trace?
N
C
With this option you can control the compiler's ability to trace program
compilation. When this option is enabled ('Y'), the compiler will note in the
Monitor's message area every routine call, together with the parameters
passed to that routine. See chapter 4 for more information on the usage of
this option.
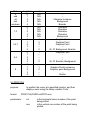
List?
N
C
The ACTION! compiler can be commanded to display the current line being
compiled in the message area of the screen. Enter 'Y' to enable this listing or
enter 'N' to disable this listing.
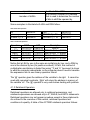
Window 1 size?
18
E
The size of the ACTION! Editor's window 1 is set explicitly. Window 2 size
is set implicitly by the relationship with window 1 -- the two windows have a
combined size of 23 lines. When there are two windows, each can contain
no less than 5 lines and no more than 18 lines. Enter the number of lines for
window 1, then press <RETURN>. An entry greater than I8 is converted to
18 and an entry less than 5 is converted to 5.
Line size?
120
E
The line length is the number of characters in the line, counting from the left
margin (see next option). The line length is used to help you control the size
of lines listed to the printer. The bell sounds whenever the actual number of
characters in the line exceeds the entered line length. You enter the
number of characters of the line length.
WARNING: you can set the line length to a value which is out of the correct
range.. The options menu does not check for this error. Lines longer than
240 characters are arbitrarily shortened by the ACTION! Editor.
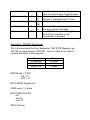
Left margin?
2
M,E
The left margin is the starting point for the line count mentioned earlier. This
option is offered so that you can get the full use of a screen which displays
the leftmost 2 characters (not all TV screens can do this!). It is suggested
that you keep the left margin as close to the left edge of the screen as you
feel comfortable with. Normally set at 2, you can set the left margin as low
as 0 and as high as 39. Enter the appropriate left margin location and then
press <RETURN> .
WARNING: Do not enter a number greater than 39 when using an Atari
system with the standard display.
EOL character?
(blank)
E
The EOL (End Of Line) character is the character displayed by the ACTION!
editor at the end of a line. Enter the character which you want to see
displayed as the visible EOL character then press <RETURN>. Changing
from a space to a visible character would generally only be useful for
removing trailing spaces from lines. However, you may prefer a visible EOL
for reasons of your own. If you desire such, we suggest any of the Atari
graphics characters (e.g. , <CTRL>T is a solid circle).
2.6 PROCEED - Restarting a Halted Program
Restart a halted program (continue from a stop caused by pressing the
<BREAK> key using the ‘Break' Library routine) by entering 'PROCEED’,
then pressing <RETURN>. The program continues as if the interruption
had not occurred.
Examples:
PROCEED <RETURN>
P <RETURN>
2.7 RUN - Program Execution
You can run any program which has just been compiled and is still In the
program area. The command has the following formats:
RUN
RUN "<filespec>"
RUN <address>
RUN <routine>
where <routine> ia a valid PROC or FUNC identifier (e.g., for 'PROC
Prime()' you would use 'Prime' as the routine identifier).
The first format is used to run a program you have compiled from the Editor
buffer.
The second allows you to run programs stored on peripheral devices. If the
program is still in the ACTION! language, it is first compiled by the Compiler,
and then it is run. If it is in machine code ( i,e., you saved the compiled
version of your program using the ‘WRITE' Monitor command), the program
runs immediately.
The third format allows you to run a program (or routine) which begins at a
given address. This is useful when you are trying to debug a program which
calls a machine language routine you have written.
The fourth is used to run only one routine from a program which you have
compiled.
After program execution, control returns to the ACTION! monitor. When
some kind of significant error occurs (e.g., an infinite loop), control does not
return to the ACTION! Monitor. Such an error requires pressing the
<SYSTEM RESET> key in order to return to the ACTION! monitor.
Additional information on the behavior of running programs is in the next
chapter.
Examples:
RUN <RETURN> (run a program compiled
R <RETURN>
from the Editor buffer.)
RUN “C:" <RETURN>
(pull a program from cassette,
compile it, then run it)
RUN "PRIME.ACT" <RETURN>
R "D1:PRIME.ACT" <RETURN>
(pull PRIME.ACT from
disk #1, compile it, then run it)
R $400 <RETURN> (run a program at addre&s $400)
RUN 1024 <RETURN> (run a program at address 1024)
R Prime <RETURN> (run the just-compiled procedure “Prime()”)
RUN PrintE() <RETURN> (run the library function to print a string to the
screen)
2.8 SET - Setting a memory value
The SET command in the Monitor works exactly as in the Language itself, so
we will refer you there for a description of its usage. See part IV, section
7.3.
2.9 WRITE - Saving Compiled Programs
You can write a compiled program (called a binary file) to disk for later
execution directly from DOS by entering 'WRITE', then, in quotes, a valid file
specification. The format is:
WRITE "<filespec>" <RETURN>
The binary file in memory is saved to the specified file on the disk. The file
is created, if necessary. If there isn't sufficient room on the disk, or the disk
is write-protected, you are warned with an error message and can try again.
Examples:
WRITE "PRIME.BIN" <RETURN>
W "D1: PRIME.BIN" <RETURN>
(save a compiled version of the PRIME program to disk 1)
W "C:" (save the compiled program to cassette)
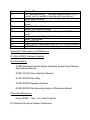
The OS or DOS command to execute a machine language program can be
used to execute a program saved to by the 'W command. See the
references mentioned in Appendix D.
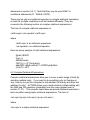
2.10 XECUTE - Immediate Commands
You can execute any ACTION! language command or any ACTION!compiler
directive (except MODULE and SET) from the ACTION! Monitor. Preface
any such command with the command XECUTE, then the statement(s).
Press <RETURN>.
Examples:
XECUTE PrintE(“'Hello World"!)<RETURN>
X trace = 255 <FETURN>
NOTE: using this command is very similar to the BASIC direct mode.
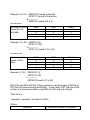
2.11 ? - Display a Memory Location
You can display the value either of a variable or of a specified memory
location. Enter ‘?', Then enter a compiler constant, Press <RETURN>. The
format is:
? <compiler constant> <RETURN>
The ACTION! monitor shows you the actual memory location (expressed in
both decimal and hexadecimal formats), followed by the printable ATASCII
value of that location, its four-digit hexadecimal value, the decimal value of
the BYTE, and the decimal value of the CARD starting at the specified
location. If the identifier is not in the ACTION! compiler's symbol table, then
a "variable not declared error” occurs,
Example:
NOTE: the results might not be what you expect if memory has been altered
since the compile - see SYMBOL TABLE in Part V.
2.12 * Memory Dump
Starting from a specified memory address, you can display the memory
contents of sequential locations in a format identical to that described just
above. Simply enter ‘*’ and the <address>. The format is:
* <address> <RETURN>
The monitor returns a list of the memory contents in the variety of formats
(mentioned above) at the rate of one line per memory location. You can
stop the listing by pressing <space bar>. You can temporarily halt the
listing by entering <CTRL> 1, Press <CTRL> 1 a second time to continue the
listing.
Example:
Chapter 3: Program Debugging Facilities
You have probably written programs which have not work the way that you
expected, not because of syntax errors, but simply because something
you're doing (or think you're doing) isn't executing properly. With the
ACTION! Monitor and its options menu you can debug your program step by
step to determine where the error is occurring.
The TRACE Option
One of the options available in the options menu is 'Trace?’. If this option
is enabled (‘Y'), you can follow your program's execution. When the trace is
on, every time a routine is called its name and parameters are displayed on
the screen. You might be able to discover what is going wrong simply by
looking at the order of the routine calls and/or the parameters being passed.
If this is so, fantastic! If not, you probably need to do some major
debugging.
The first thing you need to do before doing any major debugging is to stop
your program sometime during its execution. There are two ways to do this
in ACTION I:
The <BREAK> key and the Library routine 'Break'.
The <BREAK KEY>
Although the <BREAK> key is disabled during use of the ACTION! Editor, it
is usable during program execution with certain restrictions. The <BREAK>
key will stop program execution only if you are:
1) doing some sort of I/O
2) calling a routine with more than 3 parameters
These might seem strange circumstances, but there is a good reason for
them. The ACTION! System itself does not check to see if the <RREAK> key
has been pressed during program execution, but the system does make
calls to CIO in the above two circumstances, and CIO checks to see if the
<BREAK> key has been pressed,
Library PROC Break()
If you want program execution to stop at any given place, simply make a call
to this Library routine at that point. This routine acts exactly like the
<BREAK> key, except that it works under all circumstances. Using this
method to stop a program is more reliable than pressing <BREAK> because
you know exactly where you are in the program when the program stop
occurs.
NOTE: you may use this routine more than once in one program if you want
to break execution at more than one place.
Now that you have stopped the program, you can use the Monitor
commands and ‘?’ to look at the value of the variables you're using. If this
method of debugging is used with the 'Trace’ option on, you can even find
out where you are in your program (if you are using the Library break, you
already know where you are) and so look at the variables local to the
procedure you're in as well as the global ones.
If this method doesn't work, we can only suggest that you insert diagnostic
'Print' statements into your program (e.g.., PrintE("In loop FOR x=1 to 100")
PrintBE(x) might be used to debug a FOR loop which has run amuck).
Part IV: The ACTION! Language
Chapter
1
Introduction
Chapter
2
2.1
ACTION! Vocabulary
Special Notations
Chapter
3
Fundamental Data Types
3.1
Variables
3.2
Constants
3.3
Fundamental Data Types
3.3.1
BYTE
3.3.2
CARDinal
3.3.3
INTeger
3.4
Declarations
3.4.1
Variable Declaration
3.4 .2
Numeric Constants
Chapter
4
Expressions
4.1
Operators
4.1.1
Arithmetic Operators
4.1.2
Bit-wise operators
4.1.3
Relational Operators
4.1.4
Operator Precedence
4.2
Arithmetic Expressions
4.3
Simple Relational Expressions
4.4
Complex Relational Expressions
Chapter
5
Statements
5.1
Simple Statements
5.1.1
Assignment Statement
5.2
Structured Statements
5.2.1
Conditional Execution
5.2.1.1
Conditional Expressions
5.2.1.2
5.2.2
5.2.3
5.2.3.1
5.2.3.2
5.2.4
5.2.4.1
5.2.4.2
5.2.4.3
5.2.5
IF Statement
Null Statement
Loops
DO and OD
EXIT Statement
Loop Controls
FOR Statement
WHILE Statement
UNTIL Statement
Nesting Structured Statements
Chapter
6
Procedures and Functions
6.1
PROCedures
6.1.1
PROC Declaration
6.1.2
RETURN
6.1.3
Calling Procedures
6.2
FUNCtions
6.2.1
FUNC Declaration
6.2.2
RETURN
6.2.3
Calling Functions
6.3
Scope of Variables
6.4
Parameters
6.5
MODULE
Chapter
7
7.1
7.2
7.3
Chapter
8
Extended Data Types
8.1
POINTERS
8.1.1
Pointer Declaration
8.1.2
Pointer Manipulation
8.2
ARRAYS
8.2.1
Array Declaration
8.2.2
Internal Representation
8.2.3
Array Manipulation
8.3
Records
8.3.1
Declaring Records
8.3.1.1
The TYPE Declaration
Compiler Directives
DEFINE
INCLUDE
SET
8.3.1.2
8.3.2
8.4
Chapter
9
9.1
9.2
9.3
9.4
9.5
Declaring Record Variables
Record Manipulation
Advanced Use of Extended Types
Advanced Concepts
Code Blocks
Addressing Variables
Addressing Routines
Assembly Language and ACTION!
Advanced Use of Parameters
PART IV: The ACTION! Language
Chapter 1: Introduction
The ACTION! language is the heart of the ACTION! System. It incorporates
the good points of both C and PASCAL and at the same time, is the fastest
high level language available for ATARI home computers. If you have a
background in BASIC or some other unstructured language, you will find
ACTION! a welcome change because its structure is similar to the way we
structure ideas in our own minds. You can actually look at an ACTION!
program someone else has written and understand what is going on, without
having to wade through a thousand GOTOs and undeclared variables.
Program structure is simple in ACTION!, because programs are built
component by component. The components are groups of related
statements which accomplish some task. When you have written
components for all the tasks required in your program, it is a simple matter to
execute them. It's very similar to a list of Chores such as
1.) Make your bed
2.) Clean your room
3.) Dust the living room furniture
4.) Wash the Dog
except that the computer will do the tasks in the order in which you present
them, not in whatever order it likes best.
Having separate components also makes it very easy for you to do a single
task over and over, or do the same task in ten different situations and places.
The only requirement this structured approach imposes is that a program
must consist of proper components (in ACTION! they are called procedures
and functions) for It to be valid. A program usually contains many
components, but at least one is required. This is not a restrictive
requirement at all, as you will soon find out. In fact, it makes your program
more comprehensible to yourself and others.
NOTE: when compiling and running a program with many routines the last
routine is considered to be the main one, so you should use it to control your
program.
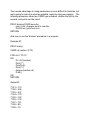
Chapter 2: ACTION! Vocabulary
In our discussion of ACTION! we will use some terminology that we should
explain. We'll use as little jargon as possible, but some is required to
differentiate between parallel but different concepts later on. What terms
we don't present here will be explained when they are first used. Before
going into the special notations used in this part, we'll give you a list of the
keywords in ACTION!. A "keyword" is any word or symbol the ACTION!
compiler recognizes as something special, whether it be an operator, a data
type name, a statement, or a compiler directive:
AND
ARRAY
BYTE
CARD
CHAR
DEFINE
DO
ELSE
ELSEIF
EXIT
FI
FOR
FUNC
IF
INCLUDE
INT
LSH
MOD
MODULE
OD
OR
POINTER
PROC
RETURN
RSH
SET
STEP
THEN
TO
TYPE
UNTIL
WHILE
XOR
+
*
/
&
%
!
=
<>
#
>
>=
<
<=
$
^
@
(
)
.
[
]
“
‘
;
WARNING: You may not use the above keywords in an context other than
the one defined in the ACTION! Language; specifically, you may not use
these words as identifiers.
2.1 Special Notations
When discussing the language, we use some terms which might be
unfamiliar to you, so their meanings are presented here. The list is in
alphabetical order, with the symbols at the end.
Address
An address is a location in memory. When you tell the computer to put
something into memory, you must give it an address, just like you give the
post office the address of the destination of a letter on the letter's front. In the
computer there are only house numbers, no streets, no cities, no states, and
no zip codes. So an address to the computer is simply a number.
Alphabetic
Any letter of the alphabet, in either upper (ABC) or lower (abc) case''Alphanumeric" includes the digits "0" through "9'* as well.
Identifier
Throughout the manual we will refer to the names you give to variables,
procedures, etc. as identifiers. We do this because names in ACTION!
must follow some guidelines:
1. They must start with an alphabetic character.
2. The rest of the characters must be alphanumeric, or the underline (_ )
character.
They may not be keywords.
These rules must be obeyed when you wish to create an identifier, otherwise
you will get a syntax error.
MSB, LSB
MSB stands for "Most Significant Byte”, and LSB stands for "Least
Significant Byte". In the decimal system we have significant digits, not
bytes. For example, the most significant digit of “54” is '5’, and the least
significant is ‘4'. If you are un-familiar with the byte storage system, don’t
worry. You can program very well in ACTION! without knowing anything
about the internal workings of the computer.
Note that two-byte numbers stored and used by ACTION! are generally in
LSB, MSB order, as is conventional on 6502 based machines.
$
The dollar sign, when used In front of a number, tells the computer that the
number is hexadecimal (the base 16 number system useful when working
directly with the computer), not the customary decimal.
Examples:
$24fC
$0D
$86
$F000
;
The semicolon is the comment symbol, and everything on a line after it is
ignored by the compiler.
Examples:
;This Is a comment
This is not and will cause a compiler error
; This comment has a ; semi ;colon in it
var=3
;comments can come
;after executable
;statements
;this is a 3 line comment
;
;with a blank line in it
< and >
Whatever is between these two symbols is used to define some part of a
format. It is never a keyword, and usually is a term describing what goes in
its place in the construction (e.g., <ldentifier> means a valid identifier should
be used).
{ and }
Whatever is between these is optional in the format construction ( {
<identifier>} means that a valid identifier may be used here, but is not
required).
|: and :|
As in music, these symbols denote repetition. Anything between them is
repeatable from zero times on up (e.g., I:<ldentifier>:| means that you could
have a list of zero or more identlflers here).
|
This symbol shows an 'or' situation (e.g., <tdentifier> I <address> means you
could use either an identifier or an address, but not both.
Chapter 3: Fundamental Data Types
Before discussing the Fundamental Data Types, something must be said
about variables and constants, since they are the basic data objects the
computer manipulates.
3.1 Variables
Legal variable names must be valid identifiers. Other than this there is no
restriction on variable names.
Because a working knowledge of functions and procedures is required
before discussing the scope of a variable, the topic is presented later in
section 6 .3.
3.2 Constants
There are three types of constants in ACTION!, numeric constants, string
constants, and compiler constants.
Numeric constants may be entered in three different formats:
1.) Hexadecimal
2.) Decimal
3.) Character
Hexadecimal constants are represented by a dollar sign ($) in front of the
number.
Examples:
$4A00
$0D
$300
Decimal constants require no special character to define them as decimal.
Examples:
65500
2
324
46
NOTE: Both hexadecimal and decimal numeric constants may have a
negative sign in front of them, thus:
-$8C
-4360
Character constants are represented by a single quote (‘) preceding the
character. Characters are numeric constants because they are internally
represented as one byte numbers, as per the ATASCII character code set.
Examples:
‘A
‘@
‘”
‘v
String constants consist of a string of zero or more characters enclosed by
double quotes ("). When stored in memory, they are preceded by their
length. The double quotes are not considered as part of the string; if you
want a " in your string, place two double quotes together (see examples).
Examples:
"This is a string constant"
"a double quote in a string""56395"
"q" (a single character string constant)
Compiler constants are different from the above types of constants, in that
they are used at compile time to set certain attributes of variables,
procedures, functions, and code blocks, and are not evaluated at run-time.
The following formats are valid:
1) A Numeric Constant
2) A Predefined Identifier
3) A Pointer Reference (see section 8.1.2)
4) The Sum of Any Two of the Above
We have already talked about the first format, but the other three require
some explanation. When you use a predefined identifier (i.e., a variable,
procedure or function name) in a compiler constant, the value used is the
address of that identifier. The third format allows pointer references as
compiler constants. The last one permits you do simple addition of a
combination of any two of the other three types. Here are some examples
which show the valid formats in use:
cat
$6000
dog^
;uses the address of the variable 'cat'
;a hex constant
;a pointer reference as a constant
5+ptr^
$80+p
;5 plus the contents of the pointer *ptr'
;evaluates to $80 plus the address of *p'
3.3 Fundamental Data Types
Data types allow humans to make sense out of the stream of bits the
computer understands and manipulates. They allow us to use concepts we
understand, so we need not know how the computer does what it does.
ACTI0N! supports three fundamental types and some advanced extensions
of these {see chapter 8 for the extended types). The basic ones are BYTE,
CARD, and INT, and each is detailed below. All of the fundamental types
are numeric, and so allow you to use numeric format when entering data,
3.3.1 BYTE
The type BYTE is used for positive integers less than 256. It is internally
represented as a one-byte, unsigned number — its values range between 0
and 255. At first glance this might seem a useless type but it has two worth
while applications. When used as a counter in loops (WHILE, UNTIL, FOR)
program speed will increase because it's easier for the computer to
manipulate one byte than many.
Also, since characters are represented inside the computer as one-byte
numbers, BYTE is also useful as a character type. In fact, the ACTION!
compiler allows you to use the keywords BYTE and CHAR interchangeably,
so those of you with PASCAL or C experience can use CHAR when dealing
with characters and feel more at home.
3.3.2 CARDinal
The CARD type is very similar to the BYTE type, except that It handles much
larger numbers. This is because it is internally represented as a two-byte
unsigned number. Hence its values range from 0 to 65,535.
TECHNICAL NOTE: a CARD is stored in the LSB, MSB form which is
standard on 6502-based machines.
3.3.3 INTeger
This type is like BYTE and CARD in that it is integer only, and can be entered
in numeric format, but that is where the similarity ends. INT allows both
positive and negative numbers ranging from -32768 to 32767. It is
internally represented as a two byte signed number.
TECHNICAL NOTE: INTs are Stored LSB, MSB like CARDS.
3.4 Declarations
Declarations are used to let the computer know that you wish to define
something. For example, if you want the variable 'cost’ to be of the type
CARD, somehow you have to tell this to the computer. Otherwise the
computer won't know what to do when it sees ‘cost'.
Every identifier you use must be declared before it is used, whether it's a
variable, procedure, or function name. Variable declarations will be
explained here, followed by a note about numeric constant declarations;
procedure and function declarations are explained in chapter 6.
3.4.1 Variable Declaration
The procedure for declaring a variable is the same no matter what
fundamental type you want it to be. The basic format is:
<type> <ident> {=<inlt info>} |:,<ident>{=<init info>}:I
where
<type>
is the fundamental type of the variable(s) being declared
<ident>
is an identifier naming the variable
<init lnfo> allows you to initialize the value of the variable, or define the
memory location of that variable
‘<init info> ' "has the form:
<addr> I [<value>]
Where
<addr> is the address of the variable and must be a compiler constant
<value> is the initial value of that variable, and must be a numeric constant
NOTE: an explanation of <, >, {, } , |:,:|, and | can be found in the vocabulary
(chapter 2).
Notice that you can optionally have more than one variable declared by one
<type>. You can also optionally tell the compiler where you want each
variable to reside in memory or initialize the variable to a value. The following
examples should help clarify this format:
BYTE top,hat
; declare 'top’ and ‘hat' as BYTE variables
INT num=[0]
;declare ‘num’ as an INT variable and initialize it to 0
BYTE x=$8000,y= [0] ;declare 'x' as BYTE, placing it
;at memory location $8000
;declare and initialize 'y' to zero
CARD ctr=[$83D4],
;declares and initializes
bignum=[0],
;three variables as CARD
cat=[30000]
;type
In the last two examples you may note that the variables need not be on the
same line. The ACTION! compiler will keep reading in variables of the type
given as long as there are commas separating them, so remember not to put
a comma after the last variable in a list (strange things will happen if you do).
Variable declarations must come immediately after a MODULE statement
(see section 7.4) or at the beginning of a procedure or function {see sections
6.1*I and 6.2.1). If you use them anywhere else you will get an error.
3.4.2 Numeric Constants
Numeric constants are not explicitly declared. Their usage declares their
type. A numeric constant is considered to be of type BYTE if it is less than
256, otherwise it is considered to be of type CARD. For all practical
purposes, negative constants (e.g. -7) are treated as type INT:
Constant
543
$0D
$f42
‘w
Type
CARD
BYTE
CARD
BYTE
Chapter 4: Expressions
Expressions are constructions which obtain values from variables,
constants, and conditions using a specific set of Operators. For example,
'4+3' is an expression that equals ‘7' as long as we take the operator to mean
addition. If the operator were instead *, multiplication would result, and the
expression woul<l equal ‘12’ (4*3=12). ACTION! has two types of
expressions, arithmetic and relational. The example given above is an
arithmetic expression. Relational expressions are those which involve a
'true' or 'false' answer. '5 >=7' is false if we take '>=' to mean "is greater than
or equal to”. This type of expression is used to evaluate conditional
statements (see section 5.2.1). A conditional statement in every day life
might be, "If it Is five o'clock or later, then it's time to go home." An ACTION!
relational expression for this might be:
hour >= 5
You yourself make this check (and many others) automatically when you
look at a clock, but the computer needs to be told exactly what to check for.
Before going into the expressions themselves, we need to define the
operators that apply to each type of expression. After that we'll discuss
each expression, and then go into some special extensions of relational
expressions.
4.1 Operators
ACTION! supports three kinds of operators:
1) Arithmetic operators
2) Bit-wise operators
3) Relational operators
As suggested by the names of the first and last, they specifically pertain to an
expression type. The second class of operators performs arithmetic and
addressing operations at bit level.
4.1.1 Arithmetic Operators
The arithmetic operators are those we commonly use in math, but some are
modified so that they can be typed in from a computer keyboard. Here is a
list of those ACTION! supports, each followed by it’s meaning:
- unary minus (the negative sign) Example: -5
* multiplication Example: 4*3
/ integer division Example: 13/5 (this equals 2, since the remainder is
dropped)
MOD remainder of integer division Example: 13 MOD 5 (this equals 3, since
13/5 =2 with a remainder of 3)
+ addition Example 4+3
- subtraction Example: 4-3
Notice that ‘=' is not an arithmetic operator. It is used only in relational
expressions, certain declarations, and assignment statements.
4.1.2 Bit-wise Operators
Bit-wise operators manipulate numbers in their binary form. This means
that you can do operations similar to those the computer does (since it
always works with binary numbers). The following list summarizes the
operators;
& bit-wise 'and
% bit-wise 'or’
! bit'-wise 'exclusive or'
XOR same as “!”
LSH left shift
RSH right shift
@ address of
The first three compare numbers bit by bit and return a result dependent on
the operator, as seen below.
Table 1:Bit-Wise AND
& compare the
two bits, returning
a value based on
this table.
Bit A
0
0
1
1
Bit B
0
1
0
1
Result
0
0
0
1
Example: 5 & 39 --- 00000101 (equals 5 decinial)
00100111 (equalH 39 decimal)
& -----------00000101 (result of & is 5)
Table 2:Bit-Wise OR
% returns a value
dependent on
this table.
Bit A
0
0
1
1
Bit B
0
1
0
1
Result
0
1
1
1
Example: 5 % 39 -- 00000101 (5)
00100111 (39)
%------------00100111 (result of % is 39)
Table 3:Bit Wise XOR
! returns a value
based on this
table.
Bit A
0
0
1
1
Bit B
0
1
0
1
Result
0
1
1
0
Example: 5 ! 39 --- 00000101 (5)
00100111 (39)
! -------------00100010 (result of 1 is 34)
Both LSH and RSH shift bits. If they operate on two-byte types (CARD and
INT) the shift occurs through both bytes. In the case of INT, the sign of the
number is not preserved when using RSH or LSH, and may change.
Their form is:
<operand> <operator> <number of shifts>
Where:
<operand>
Is a numeric constant or variable
<operator>
<number of shifts>
Is either LSH or RSH
Is a numeric constant or a variable
that is used to determine the number
of bits to shift the operand by.
Some examples to illustrate both LSH and RSH follow:
Table 4:8 bit shift operations
(5)
(5 LSH 1) = 10
(5 RSH 1) = 2
00000101
00001010
00000010
(39)
(39 LSH 1) = 78
(39 RSH 1) = 19
00100111
01001110
00010011
Table 5: 16 Bit Shift Operations
Operation
---LSH 1
RSH 1
LSH 2
RSH2
MSB
01010110
10101101
00101011
01011011
00010101
LSB
Description
11001010
$56CA
10010100 $56CA LSH 1 = $AD94
01100101 $56CA RSH 1 = $2B65
00101000 $56CA LSH 2 = $5B28
10110010 $56CA RSH 2 = $15B2
Notice that a LSH by one is the same as multiplying by two, and a RSH by
one is like division by two (for positive numbers). In fact, this method of
multiplication and division is faster than using '*2’ and ‘/2 ‘ because it is closer
to what the computer understands, so the computer doesn't need to translate
the expression into its own binary operation format.
The ‘@’ operator gives the address of the variable to its right. It cannot be
used with numerical constants. ‘@ctr’ will return the address in memory of
the variable 'ctr’. The '@' operator is very useful when dealing with pointers.
4.1.3 Relational Operators
Relational operators are allowed only in relational expressions, and
relational expressions are allowed only in IF, WHILE, and UNTIL statements.
Relational operators may not appear anywhere except in these statements.
As outlined in the overview of this section, relational operators test
conditions of equality. A table of the ACTION! relational operators follows:
Table 6: Relational Operators
=
Test for equality
#
<>
>
>=
<
<=
AND
OR
Test for inequality
Same as #
Test for greater than
Test for greater than or equal to
Test for less than
Test for less than or equal to
Logical AND
Logical OR
Example: 4=7 (this is obviously
false).
Example: 4#7 (True)
Example: 9>2 (True)
Example: 5>= 5 (True)
Example: 2 < 9 (True)
Example: 5 <= 5 (True)
See section 4.4
See section 4.5
Both ‘#’ and '<>’ mean the same thing to ACTION!, so you may use the one
you prefer. 'AND' and 'OR' are special relational operators, and are
discussed in 'Complex Relational Expressions', section 4.4.
TECHNICAL NOTE: the ACTION! Compiler does comparisons by
subtracting the two values in question and comparing the difference to 0.
This method works correctly with one exception -- if you are comparing a
large positive INT value with a large negative INT value, the outcome could
be wrong (since INTs use the highest bit as a sign bit).
4.1.4 Operator Precedence
Operators require some kind of precedence, a defined order of evaluation, or
we wouldn't know how to evaluate expressions like:
4+5*3
Is this equal to (4+5)*3 or 4+(5*3)? Without operator precedence it's
impossible to tell, ACTION!'s precedence is very precise but can be
circumvented by using parentheses, since they have the highest
precedence. In the following table the operators are listed in order of
highest to lowest precedence. Operators on the same line have equal
precedence and are evaluated from left to right in an expression (see
examples).
Table 7: Operator Precedence Highest to Lowest
( )
Parentheses
- @
* / MOD LSH RSH
+= # <> > >= < <=
AND &
OR %
XOR !
Unary minus, address of
Multiply, Divide, Modulus, Shifts
Addition and Subtraction
Relational Operators
Logical/bitwise AND
Logical/Bitwaise OR
Bitwise Exclusive OR
According to this table, our earlier example, 4+5*3, would be evaluated as
4+(5*3) because the ‘*' is of higher precedence than the ‘+’. What if
(4+5)*3 were intended? You'd have to include the parentheses, as shown, to
override the normal operator precedence. Here are some examples to look
over?
Table 8:Examples of operator precedence
Expression
4/2*3
5<7
43 MOD 7 * 2 + 19
-((4+2) / 3)
Result
6
True
21
-2
Evaluation order
/,*
<
MOD,*,+
+,/,-
4. 2 Arithmetic Expressions
An arithmetic expression consists of a group of numerical constants,
variables and operators ordered in such a way that there is a numerical
result. The order is as follows:
<operand> <operator> <operand>
Where '<operand>’ is a numeric constant, numeric variable, FUNCtion call
(see section 6.2.3), or another arithmetic expression. The first three
possibilities are straightforward enough, but the last one is a problem.
Here's an example to show you what we mean:
starting expression: 3*'(4 + (22/7 ) *2 )
Order
Start
1
Expression
3*(4+(22/7)*2)
(22/7)
Evaluation
--3
Simplified expr
--3*(4+3*2)
2
3
4
(22/7)*2
(4+(22/7)*2)
3*(4+(22/7)*2)
6
10
30
3*(4+6)
3*10
30
'order’ is the order of the expression evaluation
‘expression’ shows which expression is being evaluated,
'evaluation’ shows the evaluation of that expression,
and 'simplified exp' shows the expression after the evaluation has taken
place.
Notice that expressions 2 through 4 contain another expression as one of
their operands, but that this "expression as an operand" has already been
evaluated, leaving a number in its place, as seen in 'simplified exp' .
Some examples follow (all lowercase words are variables or constants):
Expression
Evaluation order
‘A * (dog +7)/3
+,*,/
564
None
Var & 7 MOD 3
MOD, &
Ptr+@xyz
@,+
Arithmetic expressions in ACTION! may involve operands of differing data
types The result of such mixing is outlined in the table below. The type at
the intersection of any row and column is the type resulting when the row's
and column's types are mixed:
BYTE
INT
CARD
BYTE
BYTE
INT
CARD
INT
INT
INT
CARD
CARD
CARD
CARD
CARD
NOTE: using the unary minus
(negative sign '-‘) results in an
Implied INT type, and using the
address operator '@' results in an
implied CARD type.
TECHNICAL NOTE: using the ‘*’ operand results in an INT type, so
multiplication of very large CARD values (> 32767) will not work properly.
4.3 Simple Relational Expressions
Relational expressions are used in conditional statements to perform tests to
see whether a statement should be executed (more on conditional
statements in section 5.2.1) . Note that they may be used ONLY in
conditional statements (IF WHILE, UNTIL).
There may be only one relational operator in a simple relational expression,
so tests for multiple conditions must be handled differently (They are
covered in the following section on complex relational expressions).
The form of a simple relational expression is:
<arith expxr><rel operator><arith exp>
where
<arith exp> is an arithmetic expression
<rel operator> is a relational operator
Here are some samples of valid relational expressions:
@cat<=$22A7
Var<>’y
5932#counter
(5&7)*e >= (3*(Ccat+dog))
addr/SPF+(@ptr+offset) <> SF03D-ptr&offset
(5+4)*9 > ctr-1
4.4 Complex Relational Expressions
Complex relational expressions allow you to cover a wider range of tests by
including multiple tests. If you want to do something only on Sundays in
July, how do you get the computer to test whether it's Sunday and then test
whether it's July? ACTION! allows you to do this kind of multiple testing with
the AND and OR operators (remember how they were glossed over in
section 4.1.3?). The compiler treats these as special relational operators to
test a condition using simple relational expressions. The form is:
<rel exp><sp op><rel exp>|:<sp op><rel exp>:|
where
<rel exp> is a simple relational expression
<sp op> is one of the special operators AND or OR
NOTE: there are no exceptions to this form. If you try something else, you
will usually get the compiler error 'Bad Expression’.
The truth table below shows what each of these operators will do in a given
situation. ‘exp 1' and 'exp 2' are the simple relational expressions on either
side of the special operator; 'true' and 'false' are the possible results of a
relational test.
RELATIONALS
Exp1
Exp2
False
False
False
True
True
False
True
True
RESULTS
AND
False
False
False
True
OR
False
True
True
True
NOTE: you may use parentheses around one segment of a complex
relational expression to insure the order of evaluation. If you don't do this,
the expressions are evaluated in left to right order. (see Examples)
WARNING: at the writing of this manual, the ACTION! compiler sees the
pairs AND -- &, and OR -- % as synonyms, and they are evaluated in the
same way (bit-wise). If you follow the rules outlined above when using them
you should have no problems. Also, if you stick to using 'AND' and 'OR’ only
in the relational sense, and '&* and *%' only in the bit-wise sense, your
programs will be compatible with possible upgrades of ACTION!.
Here are some samples of valid complex relational expressions:
cat <= 5 AND dog<>13
(@ptr+7)*3 # $60FF AND @ptr <= $1FFF
X ! $F000 OR dog>=100
(8 & cat)<10 OR ptr<>$0D
cat<>0 AND tdog>=400 OR dog< -400)
ptr=$D456 OR ptr=$E000 OR ptr = $600
Here's a confusing situation:
$F0 AND $0F
is false because the 'AND’ is seen as a bit-wise operator being used in an
arithmetic expression, whereas
$F000 AND $0F00
is true because the 'AND' join two simple relational expressions and so is a
special operator as used in complex relational expressions.
Chapter 5: Statements
A computer program would be useless if it could not actively operate on data.
You would be allowed to declare variables, constants, etc., but there would
be no way to manipulate them. Statements are the active part of any
computer language, and ACTlON! is no exception. Statements translate an
action you want to do into a form which the computer can understand and
execute properly. This is why statements are sometimes referred to as
executable commands.
There are two classes of statements in ACTION!: simple statements and
structured statements. Simple statements contain no other statements
within themselves whereas structured statements are collections of other
statements (either simple or structured) put together following a certain
order. Structured statements may be broken down into two categories:
1) Conditional Statements
2) Looping Statements
Each category is discussed separately in the section on structured
statements.
5.1 Simple Statements
Simple statements are those which do one thing only. They are the basic
building blocks of a program, since any action the computer performs is a
simple statement of one kind or other. There are two simple statements in
ACTION!:
1) Assignment Statement (including FUNCtion Calls)
2) PROCedure Calls
PROCedure and FUNCtion calls are discussed in chapter 6, and the
assignment statement follows. There are two keywords that are also simple
statements,
EXIT section 5.3.3.2
RETURN sections 6.1.2 and 6.2.2
but the last two are used in specific constructs, and so are discussed where
appropriate to their usage.
5.1.1 Assignment Statement
The assignment statement is used to give a value to a variable. Its most
common form is;
<variable> = <arithmetic expression>
NOTE: <variable> may be a variable of a fundamental data type, or it can be
an array, pointer, or record reference.
NOTE: the expression MUST be arithmetic. If you try to use a relational
expression, you will get an error because the ACTION! compiler does not
assign a numerical value to the evaluation of a relational expression.
The assignment operator is ‘=’. It tells the computer that you want to assign
a new value to the given variable. Do not confuse it with the relational ‘=’.
Although they are the same character, the compiler reads them differently,
each according to its context.
The following examples illustrate the assignment statement. You'll notice a
variable declaration section preceding the examples themselves. It's there
because some of the examples show what happens when you mix types (i.e.
the variable and value being assigned to it are not of the same data type).
BYTE b1,b2,b3,b4
INT i1
CARD c1
b3=’D
puts the ATASCII code number for ’D’ into the byte
reserved for 'b3' .
b4=$44
puts the hex number $44 into the byte reserved for
the BYTE variable 'b4' ($44 is ‘D’ in ATASCII and so
'b3’ and ‘b4’ now contain the same thing).
b1=b4+16
adds 16 to the numerical value of ‘b4’, and puts the
result into the byte reserved for ‘b1'.
C1=23439-$07D8
puts the value 21431 (S53B7) in the two bytes
reserved for ‘c1’.
puts the value -21431 (SAC49) in the two bytes
reserved for 'i1’ .
i1 = c1 * (-1)
b2 = i1
b2=b2+1
puts the value $49 (73) into the byte reserved for 'b2'.
Notice that the computer takes the LSB of 'il' to put
into 'b2’ (the MSB of il is $AC, the LSB is $49).
adds 1 to the current value of 'b2’ and stores the sum
back into ‘b2'. 'b2' now contains $4A (74).
Notice that the last example's form is:
<var>=<var> <operator> <operand>
Since programmers often use the above format, ACTION! allows the
following shorthand form to do the same thing:
<var>==<operator> <operand>
The operator must be either arithmetic or bit-wise. The operand must be an
arithmetic expression. The following are some examples of this shorthand
form:
b2==+1
is the same as
b2=b2+1
b2==-b1
is the same as
b2= b2-b1
b2 ==& $0F
is the same as
b2 = b2 & $0f
b2 ==LSH (5+3)
is the same as
b2 = b2 LSH (5+3)
This shorthand form can save you a lot of typing over the long method and
even generates better machine code in some instances.
5.2 Structured Statements
If only simple statements were available, you'd be severely limited in the
number of things you could do on a computer:
The only way you could repeat a group of statements a number of
times would be to type them out in the same order the right number of
times. If you wanted to repeat a group of ten statements ten times,
you would end up typing in 100 statements!
You would not be able to execute a group of statements conditionally,
that Ib, only execute them if some specified test is satisfied.
The purpose of structured statements is to solve these and other problems.
Structured statements as a whole are divided into two separate categories;
Conditional Statements and Looping Statements. We will discuss each of
these categories separately.
5.2.1 Conditional Execution
Conditional execution allows you to test an expression and execute various
statements depending on the outcome of the test. Since the expression
controls conditional execution, it is called a conditional expression.
Three ACTION! statements allow conditional execution:
IF
WHILE
UNTIL
WHILE and UNTIL are looping statements and will be dealt with later, but
we'll discuss IF immediately after the rules governing conditional
expressions.
5.2.1.1 Conditional Expressions
Since a conditional expression is involved in a test, there are only two values
it may have -- true or false. This does not mean a conditional expression is
a new type of expression, however. In fact, a conditional expression is
simply either a relational or arithmetic expression. Only the interpretation is
different. The following table shows what the conditional interpretation is,
depending on which type of expression it is:
Expression Type
Normal Result
Conditional Result
arithmetic
zero (0)
false
non-zero
true
relational
false
false
true
true
5.2.1.2 IF Statement
The IF statement in ACTION 1 is much li"ke the 'if’ conditional statement in
English. For example:
"If I have $9 or more, I’ll buy the steak."
In ACTION! the same statement might be:
BYTE money,
steak=[9],
fish=[8],
chicken [6],
hotdog=[2]
IF money>=9 THEN
Buy( steak, money)
FI
NOTE: buy(Steak, money) is a procedure call and will be dealt with in section
6.1.3.
From the above example you can see that the basic form of the IF statement
is:
IF <cond. exp.> THEN
<statements)>
FI
'FI’ is not part of fe fi fo fom, but ‘IF' spelled backwards, and a keyword to
the compiler showing the end of an IF statement. Since IF can work on a list
of statements, we need 'FI’ to terminate that list. Without this keyword the
compiler would not know how many of the statements following the THEN
went with the IF statement.
The above is only the basic format. The IF statement has two options, ELSE
and ELSEIF. English also has these options, so we’ll use comparative
examples:
"If I have $9 or more I'll buy the steak,
otherwise I’ll buy the fish platter."
The ACTION! equivalent of this is:
IF money>=9 THEN
buy(steak , money)
ELSE
Buy(fish, money)
FI
ELSEIF is somewhat different:
"If I have $9 or more I'll buy the steak. If I have between $8 and $9 I'll
buy the fried fish, If I have between $6 and $8 I'll buy the chicken.
Otherwise I'll buy the hotdog."
would be:
IF money>=9 THEN
Buy(steak, money)
ELSEIF money>=8 THEN
Buy( fish, money)
ELSEIF money>=6 THEN
buy(chicken, money)
ELSE
buy (hotdog, money)
FI
in ACTION!. Notice that we don't have to check for "money>=8 AND
money<9 as in English. We can do this because the computer goes
through the list sequentially from top to bottom. If any conditional case is
true, the statements it controls are executed, and then the whole rest of the
IF statement (including all following ELSEIF and ELSEs) is skipped. So, if
the computer does get to "money>=8", we already know that we have less
than $9, because the proceeding conditional tested for "money>=9” and
found that condition false.
The ELSEIF option is very useful when you want to test a variable for a
number of different conditions, each requiring a different action.
5.2.2 Null Statement
The null statement is used to do nothing. After showing you some
statements that do something and after stressing the necessity of
statements that do something, why is there a statement that does nothing?
There are actually a couple of good uses for a statement that does nothing:
Timing Loops and ELSEIF cases.
Since we haven't yet (discussed loops at all, we’ll simply say that timing
loops are used as a time delay (e.g., if you want to pause between printing
lines to the screen, you just use a timing loop to waste a few moments). You
can find an example of a timing loop in section 5.2.4.1.
To illustrate the use of the null statement in ELSEIF cases, here is an
example:
Scenario: You are writing a program that allows stock brokers to find
out information about certain stocks, using the commands you have
made available! The commands you're implementing are: BUY,
DOWN?, FIND, QUIT, SELL, and UP?, but you haven't Implemented
FIND yet. All you do is test the first letter of the entered command, so
you have to test for B,D,F,Q,S, and U. But FIND isn't done, so what
do you do when they type ‘F'? Easy, you do nothing, hoping that
someday (when FIND is ready) you'll do something. Here's how the
program fragment might look:
IF chr='B THEN
dobuy()
ELSEIF chr=’D THEN
dodown()
ELSEIF chr='F THEN
;**** here's the null statement
ELSEIF chr='Q THEN
doquit()
ELSEIF chr='S THEN
dosellt)
ELSEIF Chr='U THEN
doup()
ELSE
doerror(); no command match
FI
All the 'do--- 's are procedures to do the given command. If you look at the
case of "chr ='F", you see that nothing is done. That's the null statement.
When FIND is ready, all you need to do is put the 'dofind()’ procedure in
Where the null statement now is, and you'll have it in the look-up table and
ready for use.
5.2.3 Loops
Loops are used to repeat things, specifically statements. If, for some
strange reason, you wanted to fill the screen with stars (*) you could either
send out each star with a separate statement, or you could use a loop to do
this for you. All you need to do is tell the loop how many times you want it to
put out a single star, and it will do it (if you use the proper statement format
of course).
There are two ways to tell a loop how many times you want it to do
something. You can give it an explicit number, or you can give it a
conditional expression and execute the loop depending on the outcome of
that expression. The FOR statement uses the first method, and both
WHILE and UNTIL use the second.
What happens when you don’t tell the loop how many times it should
execute? What happens when the conditional expression never evaluates
to a value that will stop the loop? You get what is known as an 'Infinite
Loop’. There is only one way to get out of an infinite loop; you have to push
the <SYSTEM RESET> key.
ACTION! approaches loops in the following manner. There is a basic loop,
which, when used alone, is infinite. Then there are some loop controlling
statements (FOR, WHILE, UNTIL) which limit the number of times this
infinite loop executes. We'll follow the same pattern; first a discussion about
the basic loop structure, followed by an in depth look at the loop controlling
statements.
5.2.3.1 DO and OD
'DO' and 'OD' are used to mark the beginning and end, respectively, of the
basic loop. Everything between them is considered to be part of that loop.
As mentioned above, a loop alone (i.e. without any loop controlling
statement) is an infinite loop, and you must force a break out of it. Following
ia a program example to illustrate the DO - OD loop. Don't worry about the
‘PROC' and 'RETURN' statements; they're just there so that the program will
compile and run properly, and will be discussed In full in the procedures and
functions chapter (6).
Example 1:
PROC timestwo()
CARD i=[0], j
DO
;start of DO - OD loop
I==+1
;add 1 to 'i'
J=i*2
;set 'j' equal to i*2
PrinteC(i)
;*** See the following
Print(“ times 2 equals “ ) ; PROGRAMMING NOTE for
PrintCE(j)
;an explanation
OD
;end of DO - OD loop
RETURN
PROGRAMMING NOTE: the mixed case words (PrintC, Print, PrintCE) you
see in the example above are ACTION! library functions and procedures.
You may learn more about them (although their jobs here are fairly obvious)
in Part VI, 'The ACTION! Library’, You will see library routines used
throughout the rest of this chapter, so don't be alarmed; they're only there
because they do things that make the examples more visually instructive.
Output #1:
1 times two equals 2
2 times two equals 4
3 times two equals 6
4 times two equals 8
5 times two equals 10
6 times two equals 12
7 times two equals 14
8 times two equals 16
:
:
The dot dot dot at the end of the output shows that this will go on forever, or
until you press the <SYSTEM RESET> key. On its own, a DO - OD loop is
more or less useless, but when used in conjunction with the loop controlling
statements FOR, WHILE, and UNTIL it becomes one of the most useful
statements available.
NOTE: hitting the <BREAK> key would also get you out of the loop in
example #1, because the loop is doing a lot of I/O. (<BREAK> only works
when doing a lot of l/0. See Part IV, ‘The ACTION! Compiler', for more
information. )
Whenever you see ‘<D0 - OD loop>’ in the fromats of the loop controlling
statements, remember that it means a loop, and that in turn means a DO OD pair surrounding the loop.
5.2.3.2 EXIT Statement
The EXIT statement is used to hop gracefully out of any loop. This statement
will cause program execution to skip to the statement following the next 'OD’.
Here's an example:
Example 2:
PROC timestwo()
CARD i=[0], j
DO
;start of DO - OD loop
;add 1 to 'i'
;set 'j' equal to i*2
I==+1
J=i*2
PrinteC(i)
Print(“ times 2 equals “ )
EXIT
;Here’s the EXIT statement
PrintCE(j)
OD
;end of DO - OD loop
;******* Execution continues here after EXIT
PrintE(“End of Table”);
RETURN
Output #2
1 times 2 equals End of Table
As you can see in the output, the statement ‘PrintCE(j)’ is never executed.
The EXIT statement forces execution to hop to the statement 'PrintE("End of
Table"). EXIT isn't very useful when utilized alone, but if you use it in
conjunction with an IF statement (i.e., make the EXIT into a conditional jump
out of the loop), it can be very useful, as the program on the following page
shows.
Example #3:
PROC timestwo()
CARD i=[0], j
DO
;start of DO - OD loop
IF i=15 THEN
EXIT
;Exit in an IF condition
FI
I==+1
;add 1 to 'i'
J=i*2
;set 'j' equal to i*2
PrinteC(i)
Print(“ times 2 equals “ )
EXIT
;Here’s the EXIT statement
PrintCE(j)
OD
;end of DO - OD loop
;******* Execution continues here after EXIT
PrintE(“End of Table”);
RETURN
Output #3:
1 times 2 equals 2
2 times 2 equals 4
3 times 2 equals 6
4 times 2 equals 8
5 times 2 equals 10
6 times 2 equals 12
7 times 2 equals 14
6 times 2 equals 16
9 times 2 equals 18
10 times 2 equals 20
11 times 2 equals 22
12 times 2 equals 24
13 times 2 equals 26
14 times 2 equals 28
15 times 2 equals 30
End of Table
This usage turns an infinite loop block into a finite one. EXIT can control the
execution of a loop, but is not considered a structured loop controlling
statement because it doesn’t stand on its own; that is, it is only useful when
used in conjunction with the structured 'IF’ statement.
5.2.4 Loop Controls
ACTION! has three structured statements that control the basic DO - OD
loop:
1 ) FOR
2) WHILE
3) UNTIL
By saying that they "control the basic DO - OD loop", we mean that they limit
the number of times the infinite loop executes, thus making it a finite loop.
Controllable loops are one of the devices that make computers very useful.
If someone told you to write "I’ll never throw spitwads again" one thousand
times, you would call that punishment, but if you told the computer to do tbe
same thing (with a controlled loop, of course), it would think that the task was
easy and mundane.
Now we'll take a look at each loop controlling statement in depth, and then go
into a property of all ACTION! structured statements: nesting.
5.2. 4.1 FOR Statement
The FOR statement is used to repeat a loop a given number of times. It
requires its own special variable, commonly called a counter. In the
examples the counter will be called ctr, to remind you of this, but you could
call it anything you like. The format of the FOR statement is:
FOR <counter>=<initial valued> TO <final value> {STEP <inc>}
<D0 - OD loop>
where
<counter> is the variable used to keep track of the number of times the loop
has executed
<initial value> ia the starting value of the counter
<final value> is the ending value of the counter
<inc> is the amount by which the computer increments the counter after
every iteration
<D0 - OD loop> is a DO - OD infinite loop
NOTE: the 'STEP <inc>’ is optional
Instead of trying to explain this to you using metaphors, we'll throw a few
examples at you, because they more or less speak for themselves.
Following each is its output.
Example #lr
PROC hithere()
BYTE ctr ;counter used in FOR loop
FOR ctr= 1 TO 5 ;this FOR loop has no 'STEP', so
DO
;an increment of 1 is assumed.
PrintE("Hi there")
OD
RETURN
Output #1:
Hi there
Hi there
Hi there
Hi there
Hi there
Example f2:
PROC evens()
BYTE ctr ;counter used in FOR loop
FOR ctr=0 TO 16 STEP 2
DO
PrintB(ctr)
Print(“ ”)
OD
RETURN
;this FOR loop has a 'STEP’
Output #2:
0 2 4 6 8 10 12 14 16
Look back at the format of the FOR statement. Notice that we said nothing
about using numeric variables as <initial value>, <final value>, or <inc>.
Doing this is legal, and allows you to make FOR loops execute a variable
number of times.
If you change the value of the variables used as <initial value>, <final value>,
or <inc> in the loop itself, you won't change the number of times the loop is
executed. This is true because <initial value>, <final value>, and <inc> are
set with a constant value when you enter the loop. If you do use variables,
the value used when setting these is the value the variable had when the
loop was first entered.
If you change the value of <counter> in the Ic op, you will change the number
of times the loop executes, because <counter> is a variable in the loop. It. is
variable in the loop because the FOR statement itself must change the value
of <counter> every time it goes through the loop (for increments <counter>
by the STEP value). Following is an example to illistrate changing <initial
value>, <final Value>, and <counter> in the FOR loop itself:
Example #3:
PROC changeloop))
BYTE ctr,start=[1], end=[50]
FOR ctr=start TO end
DO
Start=100 ;doesn’t affect number of repetitions
End=10 ;doesn't affect number of repetitions
PrintBE(ctr)
Ctr==*2
;DOES affect number of repetitions
OD
RETURN
Output #3:
1
3
7
15
31
Below is a table to show what is going on each time
through the Loop. ‘rep' tells which repetition the loop is on, ‘inc ctr’
shows the result of the FOR loop incrementing the value of the counter,
'Print' shows what is printed out to the screen, and ‘ctr==*2' shows how this
assignment statement changes the value of the counter:
rep
1
2
3
4
5
inc ctr
--3
7
15
31
Print
1
3
7
15
31
ctr==*2
2
6
14
30
62
After the fifth loop is through, the counter equals 62. This is greater than
<final value> (50), so the loop is exited after only 5 repetitions, not 50.
Manipulating the counter within its own loop can lead to very Interesting
results, some of which night even be useful.
As promised in section 5.2.2, here's an example of a timing loop:
BYTE ctr
FOR ctr=1 TO 250
DO
;*** here's the null statement
OD
This is just used as a time-waster; something you'll use a lot if you're writing
games or other programs which involve careful timing.
PROGRAMMING NOTE: If you write a FOR loop which continues to the limit
of the data type of the counter (e.g., 'FOR ctr=0 TO 255' if ctr is a BYTE, or
'FOR ctr=0 TO 65535’ if ctr is a CARD), the loop will be infinite because the
counter can't be Incremented to a value greater the the given <final value>.
5.2.4.2 WHILE Statement
The WHILE statement (and the UNTIL statement, for that matter) is used
when you don't want to execute a loop a predetermined number of times.
WHILE allows you to keep looping as long as a given conditional expression
is ‘true’. It has the form:
WHILE <cond exp>
<D0 - OD loop>
where
<cond exp> is the controlling conditional expression
<DO - OD Ioop> is a DO - OD infinite loop
Since the evaluation of the conditional expression is done at the start of the
loop, ‘<DO OD loop>' might not be executed at all. This is not the case
with UNTIL, as you will see later. Program examples using WHILE start on
the following page.
Example #1:
PROC factorials()
;*** This procedure will print out the factorials
; up to some specified number (the variable ‘amt')
CARD fact=[1], ;the factorial of num
num=[1], ;the counter
amt=[6000]; the upper bound
Print("Factorials less than ")
PrintC(amt) ;prints the upper bound
PrintE(":") ;print ‘.’ a and carriage return
PutE()
;prints a carriage return
WHILE fact*num < amt
DO
fact==*num
PrintC(num)
Print(" factorial “)
PrintCE(fact)
Num==+1
OD
RETURN
;test next factorial
;start of WHILE loop
;print the number
;print number's factorial
;increment number
;end of WHILE loop
;end of PROC factorials
Output #1:
Factorials less than 6000:
1 factorial is 1
2 factorial is 2
3 factorial is 6
4 factorial is 24
5 factorial is 120
6 factorial ie 720
7 factorial is 5040
PROGRAMMING NOTE: If you go Over "Factorials less than 40000", you
will discover that the compiler does no overflow error checking, because
you'll see the output 'wrap around’; that is, you'll get a number larger than the
maximum a CARD allows (65,535 ); and start at zero again. If you got up to,
say, 66000, the output would show 66000*65536=464 because it went as
high as it could go, and then wrapped around. The technical term for this
kind of thing is 'overflow', and you can find out more about it in Part IV: 'The
ACTION! Compiler'.
Example #2:
PROC guesswhlle()
;**** This procedure plays a gueesing game with
;the user, using a WHILE loop to keep the game
;going
BYTE nuiti, ;the number to guess
guess=[200] ;guess is initialized to an impossil5le value
PrintE("Welcome to the guessing game- I'm")
PrintE( "thinking of a number from 0 to 100")
num=Rand(101) ;gete the number to guess
WHILE guess <> num
DO ;start of WHILE loop
Print("What's your gueas? ")
guess=InputB() ;get user's guess
IF guess <nun THEN ;guess too low
PrlntE(“Too low, try again”)
ELSEIF guess>num THEN ;guess too high
PrintE(“Too high, try again”)
ELSE ;guess just right
PrintE("Congratulations ! ! ! !")
PrintE("You got it")
FI ;end of guess testing
OD :end of WHILE loop
RETURN :end of PROC guesswblle
Output #2:
Welcome to the guessing game
I'm thinking of a number from 0 to 100 What's your guess?
50 Too low, try again
What s your guess?
60
Too highf try again
What's your guess?
55
Too low, try again
What's your guess?
57
Congratulations!! ! !
You got it
Notice how powerful manipulating conditionals like IF within a loop can be.
It allows the computer to take care of multiple possible outcomes every time
it goes through the loop.
5.2.4.3 UNTIL Statement
In the last, section we said that a WHILE loop could execute zero times
because its conditional expression was evaluated before loop execution
began. The form of the UNTIL statement is such that this loop always
executes at least once. After you see the form you'll probably understand
why this is so:
DO
< statement>
:
:
<stetement>
UNTIL <cond exp>
OD
This looks like a common DO - OD loop until you get to the statement just
before the ‘OD’. This UNTIL controls the infinite loop using the outcome of
the conditional expression. If <cond exp> is true, then execution will
continue at the statement after the ‘OD’, otherwise it will loop back up to the
‘DO'. Notice that the until must be the statement directly before the ‘OD’.
A program example should clarify this somewhat:
#1)
PROC gueesuntil()
;This procedure plays a guessing game with
;the user using an UNTIL loop
BYTE num, ;the number to guees
guess ;the user's guess
PrintE("Welcome to the guessing game. I'm")
PrintE( "thinking of a number from 0 to 100”)
num=Rand(101) ;get the number to guess
DO ;start of UNTIL loop
Print("What is your guess? ")
Guess=inputB() ;get the user’s guess
IF guess<num THEN ;guess too low
PrintE(“Too low, try again")
ELSEIF guess>num THEN ;guess too high
PrirtEt("Too high, try again")
ELSE ;guess just right
PrintE( "Congratulations !!!")
PrintE(“You got it”)
FI ;end of guess testing
UNTIL guess=num
;floop control
OD ;end of UNTIL loop
RETURN ;end of PROC guessuntil
Output #1:
Welcome to the guessing game. I'm
thinking of a number from 0 to 100
What's your guesa? 50
Too low, try again
What's your guees? 60
Too high, try again
What’s your guess? 55
Too low, try again
What’s your guess? 57
Congratulations!!!
You got it
This is the same example as in the WHILE section, but this time
implemented using an UNTIL loop. Notice that guess is not initialized in the
variable declaration as it was in the WHILE equivalent. We can do this
because the conditional expression 'guess=num' is not evaluated until we
have gotten a guess from the user. This is one of the advantages of the
UNTIL loop, and stems from the fact that the controlling conditional
expression is at the end of the loop. WHILE requires evaluation of the
conditional expression at the beginning of the loop, and so requires that
'guess' have a value.
5.2.5 Nesting Structured Statements
As mentioned in the overview of statements, structured statements are
made up of other statements, together with some execution controlling
information particular to a given structured statement. The statements
within the structured statement may be either simple statements or other
structured statements. Putting one structured statement inside of another
is called nesting (because one of them is ‘nested' inside the other).
In sections 5.2.4.2 (WHILE) and (UNTIL), you can see examples of nesting
an IF statement into WHILE and UNTIL loops. This type of nesting is very
straightforward, and needn't be discussed further.
This section will deal with multiple nesting of the same type of structured
statement (IFs inside IFs, FORs inside FORs, etc...).
When the IF statement is nested inside itself, confusion might seem to arise
when trying to figure out what ELSE goes with which IF as you go deeper
into the nested statements. The compiler avoids any confusion by IF-FI
pairing. A FI is paired to the first preceding IF that doesn't already have a FI
paired to it. For example:
+ IF <expA> THEN
|
+ IF <expB> THEN
|
|
<statement9>
|
+ ELSEIF <expC> THEN ;**** ELSEIF of IF <expB>
|
|
+ IF <expD> THEN
|
|
|
<statements>
|
|
+ ELSE ;**** else of IF <expD>
|
|
|
<stateinents>
|
|
+ FI ;**** end of IF <expD>
|
+ FI ;**** of IF <expB>
+ ELSEIF <expE> THEN ;**** ELSEIF of IF <expA>
|
<«tateinents>
+ ELSE ;**** else of IP <expA>
|
<statements >
+ FI ;****FI of IF <expA>
The dashed lines show the IF-FI pairings the comments show which IF
statement a particular FI or ELSEIF pertains to; and the indentation shows a
change of nexting levels.
The following program example contains nested FORs. This one even does
something worthwhile, it prints out the multiplication table up to ten times ten.
PROC timestable()
;*** This procedure prints out the moltlplication ;table up to 10 times 10
BYTE c1, ;*counter for outer FOR loop
c2 ;*counter for inner FOR loop
FOR C1=1 TO 10
;*outer loop control
DO ;*start of outer loop
IF c1<10 THEN ;*single digits need a space
Print(" ") ;before them in the first column
FI
PrintB(c1) ;*print 1st number in column
FOR c2-2 TO 10 ;* inner loop control
DO
;*start of inner loop
IF c1*c2 < 10 THEN ;*single digits need 3
PrintC" ") ;spaces
ELSEIF c1*c2< 100 THEN ;*double digits )
Print(" ") ;need 2 spaces
ELSE
;*triple digits need 1
Print(" ") ;space only
FI
;*end of digit spacing
PrintB(c1*c2)
;*print the result
OD
;*end inner loop
PutE()
;*put out a carriage return
OD
;*end of outer loop
RETURN
;*end of PROC timestables
Output:
1 2
2 4
3 6
4 8
5 10
6 12
7 14
8 16
9 18
10 20
3
6
9
12
15
18
21
24
27
30
4
8
12
16
20
24
28
32
36
40
5
10
15
20
25
30
35
40
45
50
6 7 8
12 14 16
18 21 24
24 28 32
30 35 40
36 42 48
42 49 56
48 56 64
54 63 72
60 70 80
9 10
18 20
27 30
36 40
45 50
54 60
63 70
72 80
81 90
90 100
As you can see from the above examples, nesting can be used to
accomplish quite a bit, if you know what you're doing. Fortunately,
"knowing what you're doing" doesn't take too much time, because the
concept of nesting is universal to all structured statements. Once you
understand it as applied to one statement, you can apply it to all of them.
Chapter 6: Procedures and Functions
Procedures and functions are used to make your ACTION!program more
readable and usable. Almost everything we do is a procedure or function in
some way or other. For example, look at this table:
Procedures
Washing the car
Doing dishes
Driving to work
Going to school
Functions
Balancing your checkbook
Looking up a phone number
What makes these procedures and functions? Well, for each there's
1) a group of related actions done to accomplish the task
2) an accepted order in which these actions are done
Drying the dishes before you wash them breaks the accepted order, and
taking off your left sock is not an action related to "Doing the dishes". We
know these things from experience, and have lumped the proper group of
actions done in the proper order into a procedure, one which we call "Doing
the dishes".
In computer languages it's the same way. You make a group of actions that
accomplish a single large task into a procedure or function, which you then
give a name. When you want to execute this task, all you do is use the
procedure or function name (with some extras we'll discuss later). This is
referred to as a procedure or function call. The procedure or function must
have already been defined, just like in English (e.g., you wouldn't know what
to do if someone told you to "readjust the widget" unless you already knew
the actions required to do this).
Now, what is the difference between procedures and functions? They both
go through a series of ordered steps to accomplish a task, so why two names
for the same construct? That is because they're not exactly the same
construct. Functions have an added property, they do their task, and then
return a value.
In the table at this section's beginning we see ■Balancing your checkbook"
given as a function example. Why? Well, when you balance your
checkbook you go through a series of steps to bring your records up to date,
and come up with a (hopefully positive) number at the end. This number is
returned and can be used to do other things (like determine the size of your
next check).
If we wanted to make "Doing the dishes" a function, we could change the
statement to the question "Do the dishes need doing?", hoping that the
person would answer the question, and then do the dishes if required. This
would get the dishes done (like the procedure), but also return a value
(whether the dishes needed doing in the first place), and thus make it a
function.
NOTE: Throughout the rest of this manual we will use the word "routine”,
instead of saying "procedure or function". Doing this makes the concepts
easier to follow. When you see "procedure" or "function", it means the
concept or idea being discussed is specific to that class of routines and not
applicable to both classes.
6.1 PROCedures
Procedures are used to group some statements which accomplish a task
into a named block that can be called on to do this task. To utilize
procedures in ACTION!, you must learn how to do two things:
1) declare procedures
2) call procedures
The following three sections will show you how to do the above and give
some examples to let you see procedures in ACTlON! (small pun intended).
6.1.1 PROC Declaration
The ACTION! "keyword PROC is used to denote the start of a PROCedure
declarationt PROCedure construction looks quite like a group of statements
with a name and some other Information at the beginning, and a funny
RETURN statement at the end. Below is a diagram of the construction.
PROC <identifier>[=<addr>](( parameter list>))
{<variable declarations>}
{ <statement list>}
RETURN
where
PROC
is the keyword denoting a procedure declaration
<identlfier> is the name of the procedure
<addr>
9.3)
optionally specifies the starting address of the procedure (See
parameter list> is the list of parameters required by the procedure (see
section 6.4 for an explanation of parameters)
<variable declaration> is the list of variables declared local to this procedure
[see 3.4.1] for variable declaration and 6,3 for scope of variables)
<statement list> is the list of statements In the procedure
RETURN denotes the end of the procedure (see next section)
NOTE: <paramet«r list>, < variable decl>, and <statem«nt list> are all
optional. You will probably use at least some of them, but the following
would be a valid procedure declaration:
PROC notbing() ;the parenthesee ARE required
RETURN
It does nothing, but this type of "empty" procedure is useful when you are
writing a program made up of many procedures. If, for example, you have
written a program that calls a procedure named "dotest", but you haven t yet
written "dotest", you could make it an empty procedure so you could test the
rest of the program without getting an "Undeclared Variable" error.
Don't worry about '<parameter list>’ and "RETURN’ in the format, because
they’ll be discussed later. The rest should look somewhat familiar, so we'll
give an example:
PROC gueesuntil()
;This procedure plays a guessing game with
;the user using an UNTIL loop
BYTE num, ;the number to guees
guess ;the user's guess
PrintE("Welcome to the guessing game. I'm")
PrintE( "thinking of a number from 0 to 100”)
num=Rand(101) ;get the number to guess
DO ;start of UNTIL loop
Print("What is your guess? ")
Guess=inputB() ;get the user’s guess
IF guess<num THEN ;guess too low
PrintE(“Too low, try again")
ELSEIF guess>num THEN ;guess too high
PrirtEt("Too high, try again")
ELSE ;guess just right
PrintE( "Congratulations !!!")
PrintE(“You got it”)
FI ;end of guess testing
UNTIL guess=num
;floop control
OD ;end of UNTIL loop
RETURN ;end of PROC guessuntil
This is just the program example from section 5.2.4.3, but now you
understand why the PROC statement and the variable declaration section
are there. As mentioned in the introduction, an ACTION! program requires
a procedure declaration or a function declaration to be compilable. The
above example has a procedure declaration, so it is a valid ACTION!
program and, as such may be compiled and run. It’s output is the same as
that given in the UNTIL section, namely:
Welcome to the guessing game
I'm thinking of a number from 0 to 100
What's your guees? 50
Too low, try again
What’s your guess? 60
Too high, try again
What's your guess? 55
Too low, try again
What's your gueas? 57
Congratulations!i !!
You got it
If you look back at the above example, you’ll see 'RETURN' as the last
statement. We'll now cover why it's there.
6.1.2 RETURN
RETURN is used to tell the compiler to leave the procedure and return
control to whatever called the procedure. If your program calls a procedure,
execution will continue with the statement after the procedure call. If you
are compiling a single procedure (or a one procedure program), control will
be returned to the ACTION! Monitor.
WARNING: the compiler cannot detect a missing RETURN. Strange and
disastrous things can happen if you leave out a RETURN. This also goes
for RETURNs at the end of functions as well.
There can be more than one RETURN in a procedure. For example, if your
procedure has an IF statement with lots of ELSEIFs, you might want to
RETURN after one or more of the ELSEIF cases. The example on the
following page illustrates this possibility.
PROC testcommand( )
;This procedure tests a command to see if it is ;valid. Valid commands
;are 0, 1, 2, and 3. If the ;command is none of these, an error message
;is printed, and control is returned to whatever called this procedure
BYTE cmd
Print("Command>> ")
cmd=InputB()
IF cmd>3 THEN
PrintE ( "Command Input ERROR")
RETURN ; get out before command tests
ELSEIF cmd=0 THEN
<statement0>
ELSE IF cmd =1 THEN
<statement1>
ELSEIF cmd=2 THEN
<statement2>
ELSEIF cmd-=3 THEN
<statement3>
FI
RETURN
Note the 'RETURN' after the first condition, which tests for Illegal input; You
don't want to go through all the command tests if the command isn't a valid
one, so you just print your error message and hop out of the procedure with a
RETURN. Voila!
6.1.3 Calling Procedures
You've already seen some procedure calls, although you probably don’t
know it. Almost every time we used a library routine in an example, we
were making a procedure call. The format is simple enough:
<identifier>({<parameter list>})
where
<identifier> is the name of the procedure you want to call
<parameter list> contains the values you want to send to the procedure as
parameters
Here are a couple of examples (don’t worry about the parameters for now, a
whole section is devoted to them later):
PrintE{ "Welcome to Joe's Deli, the only”)
PrintE("computerized deli in the world,")
factorials()
gueasuntil()
BYTE z
CARD add
signoff(add,z)
Of course you must already have declared the procedures 'factorials’,
'gueseuntll', and 'signof’ before using them here. ‘PrintE' is a library
procedure, so it's not declared by you but is declared in the ACTION! Library.
Notice that the parentheses are required even when the procedures have no
parameters. When a procedure you call has parameters, the call must have
no more parameters than the procedure declaration (but it may have fewer).
See section 6.4 for a discussion of parameters.
6.2 FUNCtions
As mentioned in the overview of procedures and functions, the fundamental
difference between the two is that functions return a value. This makes the
way in which they are declared and called somewhat different from
procedure declarations and calls. Since functions return a numeric value,
they must be used where a number is valid (e.g., in arithmetic expressions).
6.2.1 FUNC Declaration
Declaring a function is similar to declaring a procedure, except that you must
be able to show both what type of number the function returns (BYTE,
CARD, or INT) and what that number is. The format is:
<type> FUNC <identifier> { = <addr>} ( {< parameter list>})
{<variable decl>}
{<statement list>}
RETURN (<arith exp> )
where
<type>
FUNC
< identifier>
<addr>
<parameter list>
<variable decl>
<statement list>
RETURN
<arith exp>
is the fundamental data type of the value the function
returns
is the keyword denoting a function declaration
is the name of the function
optionally specifies the starting address of the
function (see 9.3)
is the list of parameters required by the function {see
section 6,4 for an explanation of parameters)
is the list of variables declared local to this function (
see section 3.4.1 for variable declaration, and 6.3 for
scope of variables)
is the list of statements in the function
denotes the end of the function
is the value you wish returned from the function
As in procedure declarations, <parameter list>, <variable decl>, and
<statement list> are all optional. In the case of procedures, leaving them
out was useful only in one instance. In functions, doing this sort of thing has
another (more worthwhile) use, as the following example shows:
Example fit
CARD FUtNC square(CARD x)
RETURN (x*x)
This function takes a CARD number and returns its square. Don't worry
about the parameter list, as we will discuss it a little later. It was mentioned
above that the value returned is in the form of an arithmetic expression. In
example 1, you can see this being done in "(x*x)".
In the following example, the arithmetic expression used to return a value is
simply a variable name.
Example #2;
BYTE FUNC getcommand()
;*** This function reads in a command number, and
;then passes it out if it's 1 through 7 inclusive.
;Otherwise, the function will reprompt the user
BYTE command,
error
;this variable holds the command
;set to 1 If an error is found
DO
Print("COMMAND> ")
Cominand = lnputB()
IF command<1 OR command>7 THEN ;invalid command
Error = 1
PrintE("Command Error: Only 1-7 valid.")
ELSE
;valid command
Error=0
FI
UNTIL error=0 ;exit loop if command is valid
OD
RETUEIN (command)
NOTE: the parentheses around <arith exp> are always required in the
RETURN statement.
The above is a simple example: Functions can be used to do quite
complicated operations, but even the most convoluted functions must follow
the format outlined In this section.
6.2.2 RETURN
As you probably noticed in the format of the FUNCtion declaration the
RETURN isn’t used in the same way as in PROCedure declarations. In
functions it is followed by “(<arith exp>)”. This feature allows a function to
return a value. If you tried to put (<arith exp> ) after the RETURN in a
procedure declaration, you would get an error, because procedures can't
return a value.
Although there are dissimilarities between RETURNs in functions and
procedures, there is one convenient similarity: you may have more than one
RETURN in both procedures and functions. The following example shows
usage of multiple RETURNs in a function;
Scenario: Example #1 in the function declaration section (6.2.1) returned the
square of a CARD, but it did no checking for overflow. If you squared 256
you would get 65536, 1 greater than the maximum CARD value allowed.
There are two ways to fix this problem:
1) Require that the number being squared be of BYTE type, thus making it
impossible to enter a number greater than 255.
2) Check for overflow in the function itself.
The following example illustrates the second method:
CARD FUNC square(CARD x)
;***** This function tests 'x' for overflow, and
;returns its square if valid. IF invalid, the
;function prints an error message and returns 0.
IF x>255 THEN ;number would cause overflow
PrintE("Number too big")
RETURN (0) ;return a zero
FI
RETURN (x*x) ;return 'x' squared
See how easy it is? The use of multiple RETURNS can come in very handy
when you are testing a lot of different conditions, each requiring that a
different value be returned.
NOTE: As mentioned in section 6.1.2, the compiler can't tell if you leave out a
RETURN, so you must make sure you have one.
6.2.3 Calling Functions
You have already seen two examples of function calls. They can be found
in section 5.2.4.2 (WHILE), example #2, and section 5.2.4.3 (UNTIL),
example #1. If you look at those programs, you'll see the lines:
num = Rand(101)
guess=InputB()
The first is an example of calling a function that requires parameters, and the
second an example of calling one without parameters. Both ‘Rand' and
‘InputB’ are library functions. 'Rand’ returns a random number between 0
and the number you give it (in the above case, 101) minus one. ‘InputB'
reads a byte value from the default device (the screen). Notice that both of
them returns a value. Because this value must go somewhere or be used
somehow, function calls must be used in arithmetic expressions. In the
above two cases, the arithmetic expressions consist of the function call only
and are used in assignment statements (a valid use of arithmetic
expressions).
Function calls can be used in any arithmetic expression, with one exception:
Functions calls may NOT be used in an arithmetic expression when
that expression is used as a parameter in a routine call or declaration.
Example:
x = square(2 *Rand(50))
;INVALID
Here are some examples of valid function calls:
x=5*Rand(201)
c = square(x)-100/x
IF ptr<>Peek($8000)
chr=uppercaae(chr)
'Peek' and 'Rand' are library functions, so they needn't be declared by you,
but 'square' and ‘uppercase’ are user written functions, and so they must be
declared before they are called here.
PROGRAMMING NOTE: although it is not recommended, you can call
functions as though they were procedures. If you do this, the value returned
is ignored.
6.3 Scope of Variables
The term “Scope of a Variable" is used to express the range of a variable’s
legitimacy. To help you understand what this means, let’s apply the
concept of "Scope" to a more familiar situation; the English language.
Below is a table of British English words, followed by their American English
equivalent:
British
BONNET
LORRY
LIFT
FAG
American
HOOD
TRUCK
ELEVATOR
CIGARETTE
Each pair of words means the same, but the words' scopes are different.
"Bonnet" (when used to mean the moveable cover over an auto's engine) is
legitimate only when used in countries that speak the King's English.
"Hood", on the other hand, is valid only in countries that speak American
English. Hence they have ranges of legitimacy, or Scope. The words in the
left column could be considered "global" to British English in the sense that
any average Brit would understand what was meant by each word, and the
words in the right column could be considered "global" to American English
because everyone who speaks American English would associate each
word with its intended meaning.
Enough of global scope, now we need to talk about "local" scope. Scope is
local if it is a specific subset of some global scope. For example, the word
"neat" has many different local scopes within the "global" American English
language:
1) "Wow, that movie was NEAT!"
2) "Gertrude keeps the NEATest house I've ever seen."
3) "Bartender, I'll have my scotch NEAT."
In different situations "neat" can mean different things (i.e., the meaning is
local to the situation), and these meanings don't overlap.
Variables in ACTION! also have an associated scope. A variable's scope
determines where it may and may not be used just as, in the above analogy,
a word's scope determines where it may and may not be used.
The following program is a concrete example of variable scope:
Example #1;
MODULE ;we're going to declare some variables
;as global
CARD numgames=[0], ; number of ganiee played
goal=[10],
;nurober of guesses to beat
beatgoal=[0]
;number of times you've beaten goal
PROC intro()
;**** This procedure puts the leadin to the game on
;
the screen.
CARD ctr
PrintE( "Welcome to the guessing game. I'm”)
PrintE( "thinking of a number from 0 to 100.")
PrintE("All you have to do is type in your")
PrlntE("guess when I ask you to.")
PutE()
PrintE(“I'll keep track of how many games")
PrintE("you’ve played, and tell you how")
PrintE("many times you've guessed the number")
PrintE("in fewer tries than your goal, but")
PrintE("first yoo have to give me your goal.")
PutE()
Print(" Type your goal here --> ")
goal=InputC( )
FOR ctr=0 to 2500 ;a delay loop to give the
DO ;senge of real-time to the
OD ;player.
Put($7D) ;clear the screen
RETURN ;end of PROC Intro
PROC tally()
;***** This procedure prints out the current tally
Print("Vou have played”)
PrintC(numgames)
PrintE(" games,")
Prlnt("and in ")
PrlntC(beatgoal)
PrintE(“of those you")
PrintE("have beaten your goal of")
PrlntC(goal)
PrintE(" guesses.”)
PutE()
RETURN ;end of PROC tally
PROC playgame()
CARD numguesses, ;tbe number of guesses
ctr
;counter used in (delay loop
BYTE num,
;the number to guess
guess
;the user's guess
PrintE(“I'm picking my number---")
FOR ctr=0 TO 450
;delay used to make the user
DO ;thiink the computer is picking
OD ;a number
PutE()
PrintE(" OK, here we gol")
PutE()
Num=Rand(101)
;get the number to guess
Numgueeses=0
;set number of guesses to 0
DO ;start of UNTIL loop
Print( "What' s your guess?” )
Guess=InputB() ;get the user's guess
Nujnguesses==+ 1 ;add 1 to number of guesses
IF guess<num THEN ;guess too low
PriritE(“Too low, try again")
ELSEIF guess>num THEN ;guess too high
PrintE("Too high, try again")
ELSE
;guess just right
PrintE("Congratulations !!!!")
Print("You got it in ")
PrintCE(numguesses)
IF numguesses<goal THEN
beatgoal==+1
FI
FI ;end of guess testing
UNTIL guess=num ;loop control
OD ;end of UNTIL loop
RETURN ;end of PROC playgame
BYTE FUNC stop()
;**** This function finds out if the player wants ;to play another game.
BYTE again
PrintE(“Do you want to play'*)
Print(''another game? (Y or N) ")
again=GetD(1) ;get player's response
;from K: to avoid getting a RETURN as
;the first guess of the next game.
PutE()
IF again= ‘N OR again=’n THEN ;doesn't
RETURN (1)
;want to play
FI
RETURN (0) ;end of FUNC stop
PROC main()
Close( 1)
;just for safety's sake
Open(1,"K:",4,0)
;open K: to read only
Intro( )
;print out the introduction
DO
Numgames==+1 ;increment total number of qames
playgame()
;play the game once
tally()
;show tally of games thus far
UNTIL stop()
;doesn't want to play anymore
OD
PutE()
PrintE("Come play again soon”)
Close(1) ;close K:
RETURN ;end of PROC main
The following table shows how this program uses variables. It gives the
variable name, it’s scope, it’s availability and use in each routine:
KEY:
A = variable Available for use in routine
U = variable Used in routine
VARIABLE
PROC
NAME
SCOPE playgame
numgames
global
A
goal
global
A,U
beatgoal
global
A,U
numguesses
local
A,U
num
local
A,U
guess
local
A,U
ctr
local
A,U
again
local
ctr
local
PROC
intro
A
A,U
A
PROC
tally
A,U
A,U
A,U
PROC
stop
A
A
A
PROC
main
A,U
A
A
A,U
A,U
You can see that the global variables are available for use in every one of the
routines, whereas the local variables are available only in the routine in
which they are declared. Notice that there are two local variables called
'ctr', one in PROC playgame, and the other in PROC intro. Although they
have the same name, these two variables are not the same just as ‘neat’
meaning "clean" and 'neat' meaning "undiluted" were not the same earlier.
The two 'ctr's have different local scopes (because they are declared in two
different procedures).
6.4 Parameters
Parameters allow you to pass values into a routine. You may wonder wliy
this is necessary, since you could use global variables for passing values
into and between routines. Well, there are two reasons that parameters
exist:
1) They make your routines capable of multipurpose use.
2) They allow you to manipulate variable values within a routine
without changing the value of any global variable.
We'll discuss each of these advantages separately, following the above
order; but first we should give the format of a parameter list, for those of you
who already know all about parameters:
** Parameters in PROC or FUNC declarations:
({<variable decl>} |: ,<variable decl> :l)
where
<variable decl> is a variable declaration, except that it may not contain the
' = <addr> or [<const>]' option
Examples:
PROC test(BYTE Chr,num,i, CARD x,y)
INT FUNC docommand( INT cmd, CARD ptr, BYTE offset)
CARD FUNC square (BYTE t)
PROC jump()
** Parameters in PROC or FUNC calls:
({<arith exp>} |:,<arith exp>:|)
where
<arith exp> is an arithmetic expression
Examples:
Test(cat,dog,ctr,2500,$8D00)
sqr=square(num)
jump()
x=docommand (temp, var, 'A)
NOTE: A routine may have up to 8 parameters. Use any more, and you will
get a compiler error.
We need to do some explaining now. The following example will show you
how to use parameters, and clarify the first of the two advantages to using
parameters.
The following function checks to see if the BYTE variable 'chr’ is a lowercase
letter. If it is, the function will return the uppercase of it. Otherwise the
function will simply return 'chr’. Notice that we don't declare 'chr' anywhere.
We'll discuss where it should be declared after the example.
BYTE FUNC lowertoupper()
IF chr>='a AND chr<=’z THEN ;$20 is the offset
RETURN (chr-$20)
;between lower and upper
FI
;case in the ATASCII set
RETURN (chr)
Now we must decide where to declare ‘chr'. We already know that we could
declare it global, or just local to ‘lowertoupper'. If we declare it locally, how
will we give it a value? There seems to be no use to having it local, because
then the function itself would have to give the variable a value, and that's not
what we want the function to do. We want to be able to call lowertoupper' in
a form similar to
chr=lowertoupper()
and have the function test 'chr' and make It uppercase if necessary. So we
won't declare it local. How about declaring it global? That would do what
we wanted, because now the 'chr' in the function call and the 'chr’ in the
function itself would be the same global variable. There's only one
drawback to declaring 'chr' as a global variable every time we wanted to use
‘lowertoupper', we would get the uppercase of ’chr'. If we want to uppercase
the variable 'cat', we would have to do the following:
chr=cat
chr= lowertoupper()
cat=chr
This could get very tiresome if you wanted to uppercase a lot of different
variables. Also, if you wanted to use 'lowertoupper' in another program, you
would have to declare a global variable ‘chr' there too.
What if we declared 'chr' as a parameter to the function? "HOW...?" you
ask. Here's how:
BYTE FUNC lowertoupper(BYTE chr) ;<- the parameter declaration
IF chr>='a AND chr<='z THEN
RETURN (chr-$20)
FI
RETURN (chr)
"But now how do we call it now?" Easy. All you have to do is give it the
variable you want tested as a parameter. Examples:
chr=lowertoupper(chr)
cat=lowertoupper(cat)
var=lowertoupper(‘a)
Making 'chr' a parameter to the function allows you to use it for testing any
variable in any program, because ‘lowertoupper' now stands on its own. It
uses no variables declared elsewhere (i.e., global variables), and yet you
can give it a variable to test. We have overcome the pitfalls of declaring 'chr'
either locally or globally. Tah dahl This is what we meant by "multipurpose".
The second advantage to using parameters is more difficult to illustrate, but
we're going to make it as clear as possible, again by using an example. The
following procedure takes two CARD type numbers, divides the first by the
second, and prints out the result:
PROC division(CARD num,div)
num==/div ;changes num to num/div
PrintC(nun) ;print out num
RETURN
And now to use the 'division' procedure in a program:
Example #1;
PROC main()
CARD ctr,nuirber=-[713]
FOR ctr=1 TO 10
DO
Pr i ntC(number)
Prlnt("/")
PrintC(ctr)
Print("=”)
division(number,ctr)
PutE()
OD
RETURN
Output #1;
713/1 = 713
713/2 = 356
713/3 = 237
713/4 = 178
713/5 = 142
713/6 = 118
713/7 = 101
713/8 = 89
713/9 = 79
713/10 = 71
Notice that 'number' remains constant, although 'num' changes. The value
of 'number’ is passed into ‘num’ when the procedure is called, but the value
of ‘num’ is not passed back into 'number’ when the procedure is exited. If
the value of 'nun' were passed back into ‘number' the output would be:
713/1 = 713
713/2 = 356
356/3 = 118
118/4 = 29
29/5 = 5
5/6 = 0
0/7 = 0
0/8 = 0
0/9 = 0
0/10 = 0
The flow of information through parameters is one-way. Information can be
sent to a routine through parameters, but information generally may not be
sent out using parameters. If you want to send a single value back from a
routine, make that routine a function, and then you can send it back in the
function RETURN statement. If you want to send out more things, you can
uee global variables or you can pass pointers as parameters (see 9.5).
A Note On Parameter Pairing:
When you call a routine that has parameters, the first parameter you give in
the call will go into the first variable in the list of parameters in the routine
declaration, the second will go into the second, and so on.... You can pass
fewer parameters than the routine requires, but no more. For example, if
there are 5 parameters in the declaration, you could pass the routine 0 to 5
parameters. This allows you to write routines that, require a variable
number of parameters, depending on the job it must do. HINT: if you do this,
the first parameter should probably be the number of parameters being
passed.
A Note On Type Compatibility:
If the value you pass as a parameter and the value expected by the routine
are of different data types, you won't get a compiler error because the
ACTION! compiler insures parameter type compatibility. For example, if
you pass a CARD when the procedure wants a BYTE, the LSB of the CARD
will be put into the BYTE variable, and the procedure will carry on as though
you had passed it a BYTE (see Part IV for more info).
A Note On Parameter Variable Types:
All of the following are valid as parameters:
1) Fundamental Data Type variables
2) Array, Pointer, and Record References
3) Array, Pointer, and Record Names
In the third case, the names are used as pointers to the first element, the
value, or the first field in the named variable.
6.5 MODULE
MODULE is a very Simple directive. It’s form is:
MODULE
It simply tells the compiler that you wish to declare some more global
variables. It is useful when you have vritten a large program in sections,
each with its own global variables. If you say MODULE at the beginning of
each section, then the compiler will add all the global variables to the global
variable table.
A program need not have a MODULE directive, because the compiler
assumes one MODULE directive at the beginning of the program, whether
you put it there or not.
The declaration of global variables must come either immediately after a
'MODULE', or at the very beginning of the program (which is really right after
the ‘MODULE’ assumed by the compiler).
Chapter 7: Compiler Directives
Compiler directives are different from the standard language commands in
that they are executed at compile-time rather than run-time. A language
command, such as an assignment statement (see section 5.1.2) is evaluated
after you tell the ACTION! Monitor to RUN your program, when your program
has control over what is being done. A compiler directive is evaluated when
you tell the monitor to COMPILE your program, so the compiler, not your
program, has control. The ramifications of this will soon become apparent.
7.1 DEFINE
The DEFINE directive is very similar to the editor's substitution (<CS> S)
command, except that it does the substitution at compile time. To clarify
this, we first need to show the format:
DEFINE <ident>=<str const>{,<ident>=<str const>}
where
<ident> is a valid identifier
<str const> is a valid ACTION! string constant (That is, with surrounding
double quotes)
DEFINES are not really used in generating any object code when the
program is compiled, but are used to clarify ACTION! source programs. The
compiler substitutes <str const> for <ident> every time <ident> is used in a
program. For example, when you compile a program with the line
DEFINE size = "256"
in it, the compiler will replace every occurence of 'size' with '256’. This allows
for some interesting options (and problems if misused). Since DEFINE will
replace any string, you can change the keywords themselves. If you don't
like the keyword CARD, you could change it to, say, FROG with this
command:
DEFINE FROG = "CARD"
Now whenever you compile the program, every time the compiler sees
'FROG', it will think to Itself, " Oh, he really means CARD, so I'll just put that
in instead."
Here are some more examples to let you become thoroughly familiar with the
form:
DEFINE listen = ''SET $49A=1"
DEFINE begin = "DO", end = "OD"
DEFINE one = "1"
NOTE: Don't forget that the string constant must have double quotes around
it (see section 3.2).
To better show you what DEFINE does and doesn't do, here’s a table
showing the effects of a DEFINE on different program parts.
statement
DEFINE four = " 4 "
PrintBE(four)
; four score and
; four-score and
PrintE("four score")
comments
the directive
prints *4' with EOL
converts 'four' to '4'
does not alter ' four'-score'
does not replace inside quotes
7.2 INCLUDE
The INCLUDE directive allows you to include other programs into the
program being compiled. Suppose you have a program named
'IOSTUFF.ACT' that does input/output functions and you want to use the I/O
routines it offers in some other program you're writing now. All you need to
do is put the following command in the program you're writing:
INCLUDE "D1:IOSTUFF.ACT"
NOTE: The file specifier must have double quotes around it.
The above statement must come before you use any of the I/O routines in
the file ‘IOSTUPF.ACT'. Note that this example assumes that the diskette
with 'IOSTUFF.ACT' on it is in disk drive D1:. If you don’t specify a device
with your file name, the compiler assumes the device is "D1:". You can
INCLUDE files from any readable device {i,e,, "P:" isn't valid). Here are
some more examples:
INCLUDE “D2:IOLIB.ACT"
INCLUDE "PROG.DAT"
INCLUDE "C:"
NOTE: Most operating systems require that the file specifiers be in
uppercase.
A useful feature of the INCLUDE command is that you can have an
INCLUDE in a program which you are already INCLUDEing {i e., it can be
nested). ACTION! Allows you to nest it to a maximum of 6 levels, but
peripheral devices and the operating system have other limits. When the
OS limits are ignored, error # 161 (too many files open) occurs. The cassette
limit is 1 INCLUDE, and the disk drive limit Is 3 INCLUDES. If no program is
currently in the ACTION! editor buffer, then the maximam number of levels of
INCLUDE commands is reduced by one.
7.3 SET
The SET directive is used to modify the computer's RAM (Random Access
Memory). SET pokes a new value into a specified memory location at
compile time. In most cases, this command is used for changing Editor and
Compiler options from a user program, but it can be used to modify user
operating system and hardware variables as well. The format of the SET
command is:
SET <address> = <value>
NOTE: <address> and <value> must be compiler constants.
The result of the set statement is to set memory location <address> to
<value>. If <value> is greater than 255, then memory locations <address>
and <address> + 1 are assigned <value>. This occurs because 255 ($FF)
is the biggest decimal number that can fit into one byte, so any number
greater than this requires two bytes for storage.
Examples:
SET $600=64 ;sets address $600 equal to 64
SET max=16 ; sets max =16
SET 10000=$FFFF ;sets 10000 and 10001 to $FFFF
SET $CF00=cat ;sets $CF00 and $CF01 =cat
DEFINE add=-"$7000"
SET add=$42
The last example shows a DEFINEd numeric constant used in a SET
statement. Since DEFINES are constants at compile time, they are valid in
the SET directive. Just make sure you DEFINE the constant before you use
it in a SET statement.
NOTE: do not confuse the compile-time effect of SET with the similar
run-time effect of Poke and PokeC.
Chapter 8: Extended Data Types
The extended data types make the ACTION! language more flexible than
many others available on the ATARI. Just as the structured statements
manipulate groups of simple statements thereby extending the capabilities of
the ACTION! language, the extended types manipulate groups of
fundamental type variables and extend the language capabilities even more.
The three extended data types in ACTION!are:
1) Pointers
2) Arrays
3) Records
We will discuss each separately, following the order of the above list.
8.1 POINTERS
Pointer. Sounds like the thing the weatherman uses to show us a place on
his map. Well, it is. In the context of ACTION!, "pointer" means something
very similar.
Pointers contain a memory address, and so point to a memory location.
You can change the value of a pointer and make it point to a new place, just
like moving the weatherman's pointer to another place on the map. The big
difference is that he points to cities or states, whereas ACTION! pointers can
point to BYTE, CARD, or INT values.
Somehow we have to let the compiler know what type of value we want a
given pointer to point to. The declaration section will show you how to do this.
After we’ve gone over the method used to declare a pointer, we'll show you
how it can be used. This is done in the manipulation section through the use
of program examples.
8.1.1 Pointer Declaration
The format used to declare a pointer looks quite similar to the format of
fundamental data type variable declarations, except that we tell the compiler
that the variable Is a pointer, and not just a fundamental data type:
<type> POINTER <ident>{=<addr>} |:,<ident>{=<addr>}
where
<type>
is the fundamental type of the information the pointer points to.
POINTER is the keyword used to show that the variables declared are
Pointers.
<ident>
is the name of the pointer variable
<addr>
tells where in memory you want the pointer to point to initially. It
must be a compiler constant.
Because a pointer variable actually contains an address, it must be able to
take on values ranging from 0 to 65535 ($0 to $FFFF), since an ATARI with
64k of memory has that many separate memory locations. Pointers are
stored as a two byte unsigned numbers (in LSB, MSB order) to allow this
range. That means that they are stored as CARDs, except that they can be
interpreted as addresses.
Since the use of pointers is dealt with in the next section, we'll just give some
sample pointer declarations, instead of whole program examples:
BYTE POINTER ptr
CARD POINTER cpl
;declares ptr as a pointer to a BYTE value
;declares cpl as a pointer to a CARD
INT POINTER ip=$8000 ;declares ip as a pointer to an INT
;, and points it to memory location $8000
6.1.2 Pointer Manipulation
Pointers can be used to manipulate a variety of things in ACTION! for the
simple reason that they can easily be made to point to different memory
locations. This makes cataloguing and tabulating information very easy.
The program on the following page is just a simple example to give you an
idea of what a pointer actually does. It will introduce the ‘^’ address
operator used with pointers; after the example we'll discuss the ‘^’ in depth.
Example #1
PROC pointeruaage()
BYTE num=$E0, ;declare and place two
Chr=$E1 ;BYTE variables,
BYTE POINTER bptr ;declare a pointer to BYTE type.
Bptr=@num
;make bptr point to num
Print(“ bptr now points to address ")
PrintF( "%H",bptr)
;prints out num’s address
PutE()
Bptr^=255
;puts 255 into the location bptr
;points to(i.e, into num)
Print ("num now equals “)
PrintBE(num)
;shows that 255 really went into num
Bptr^=0
;puts 0 into num
Print("num now equals ")
PrintBE(num)
;shows that num equals 0 now
Bptr=@chr
;makes bptr point to chr now.
Print('bptr now points to address ")
PrintF(''%H" ,bptr) ;prints out chr's address, so we
PutE()
;know that bptr really changed,
Bptr^=’q
;puts ‘q’ into the location bptr
;points to (i.e., into chr)
Print(chr now equals ")
Put(chr)
;shows that chr really equals ‘q’
PutE()
Bptr^='z
;changed chr to 'z
Print("chr now equals ")
Put(chr)
;shows that chr is equal to *z PutE()
RETURN
Output #1:
bptr now points to address $E0
num now equals 255
num now equals 0
bptr now points to address $E1
chr now equals q
chr now equals z
Notice that we use the ‘^’ operator when we want to put a value into the place
the pointer points to. So the line "bptr^=0" in the above example is the same
as saying "num=0", because 'bptr' is pointing to 'num' at that time. Although
we don't use it in the above example pointer references can be used in
arithmetic expressions, as follows:
X=ptr^
Also notice that "PrintF("%H", bptr)" is valid. What this means is that ‘bptr'
can be accessed as a CARDinal number as well as an address. This is
useful when debugging your program, because you can find out where the
pointer is pointing easily.
8.2 ARRAYS
Arrays allow you to manipulate lists of variables by making each variable in
the list accessible using only the array name and a subscript. The variables
in the list must be of the same data type, and only the fundamental data
types are allowed. The array name tells which array you want and the
subscript tells which element of that array you want. The subscript is just a
number, so what you're really saying when you reference an array element
is, "I want the n’th element of array x," where ‘n’ is the subscript and 'x' is the
array name.
In the following section we will discuss the internal representation of an
array. After that we'll show you how to declare arrays and manipulate them,
and then we'll talk about the limitations of arrays in ACTION!.
8.2.1 Array Declaration
Declaring arrays is easy in ACTION!, but that doesn't mean that you don't
have much control over what's going on. There are many options you can
use to define different characteristics of the array, including its address, its
size, and even its initial contents. Because of all these options, the format
looks somewhat cluttered, but the examples should clear up any confusion.
<type> ARRAY <var init>|:,<var init>:|
where
<type> is the fundamental type of the elements of the array.
ARRAY is the keyword denoting an array.
<var init> is the information required to declare one variable as an array of
<type> data type elements.
<var init> has the form:
<ident>{( size ) }{=<addr> | [<values>] | <str const> }
where
<ident>
<size>
<addr>
is the name of the variable
is the size of the array, and must be a numeric constant
is the address of the first element of the array, and must be a
compiler constant
[<values>] sets the initial values of the elements of the array. Each value
must be a numeric constant.
<str const> sets ' the initial values of the elements of the array to the string
constant, with the first element being the length of the string
We warned you that it was cluttered! But now to organize some of this
clutter with some instructive (hopefully) examples:
BYTE ARRAY a,b
;declares two arrays with BYTE elements without
;sizes declared
INT ARRAY x(10)
;deelares ‘x’ as an INT array,
;and dimensions its size to 10 elements
BYTE ARRAY str=”This is a string constant" ;this declares 'str’ as a BYTE
;array, and ;fills it with a string
;constant
CARD ARRAY junk=$8000 ;declares 'junk’ as a CARD array, which starts
;at $8000 in memory, without any size implied
BYTE ARRAY tests=[4 7 19] ;declares 'tests’ as a BYTE array and fills in its
;values
PROGRAMMING NOTES: You should dimension the size of an array
whenever possible, but there are some instances where you can't or needn't;
1) When you don't know how big it's going to be (i.e., as in a routine
parameter, when you don't know how big an array Is going to be
passed).
2) When you are filling the array in the declaration (using either the
‘[<values>]' or '<str conat>' construction), and you aren't planning to
add to the array.
Also remember that the first byte of a string constant contains the length of
that string. So, to make a string longer, first you must change the length
byte (which is element 0 of the array that contains the string).
8.2.2 Internal Representation
The internal representation of an array is very much like that o0f a pointer.
This is because the array name is actually a pointer to the first element of the
array. The array itself is simply a contiguous group of cells, each containing
an array element. The size of a cell is determined by the data type of the
elements: one byte cells for BYTE type, two byte cells for both INT and
CARD types. However, having the array name be a pointer leads to some
very interesting ramifications, as shown in examples 2 through 4 of the
following section.
8.2.3 Array Manipulation
Using and manipulation arrays is not very difficult once you know how to
declare the array and reference its elements. You already know how to
declare arrays, so now we’ll show you how to reference elements:
Example #1:
PROC reftest()
BYTE x
BYTE ARRAY nums(10)
FOR x=0 TO 9
;although nums is ten elements
;long, the subscripts run from 0 to 9, not 1 to 10
DO
nums(x) = x + ‘A ;creates the alphabet, the xth element of
;nums is assigned x + ‘A
Put(nums(x))
;output the xth element of nums to the screen
Print(“ “)
;put a space between characters
OD
PutE()
RETURN
Output #1:
ABCDEFGHIJ
There are two array references in the above program -- ‘nums(x)' in the
assignment statement, and 'nums(x)' as a parameter to the 'Put’ library
procedure. They, and all other array references, have the form:
<identifier> (<subscript>)
where
<identifier>
is the name of the array you want to reference
<subscript>
is the number of the element in that array, and is an
arithmetic expression
As mentioned In the comment explaining the FOR loop, array subscripts do
not start at 1, as you might expect. The first element in array 'cat’ is 'cat(0)’,
not ‘cat(1)’. This might seem strange, but you get used to it very quickly.
Example #2:
PROC changearray()
BYTE ARRAY barray
barray="This is string 1”
PrintC(barray)
;prints the CARD 'barray' contains
Print(" ")
PrintE(barray)
;prints the string 'barray points to (with an EOL)
barray= “This is string 2”
PrintC(barray)
Print(“ “)
PrintE(barray)
RETURN
Output #2:
10352 This Is string 1
10414 This is atring 2.
EXAMPLE 2 COMMENTS: Notice from the output that the address to which
‘barray' is pointing changes. Reassigning the whole array (When doing it
using string constants) does not put the new string into the memory space
occupied by the old one, but rather allocates new space for the new string,
and then changes the value of 'barray” to point to the starting address of the
new string. The old string is still in memory, but nothing is pointing to it any
more, so it is inaccessible.
Notice that "PrintE(barray)" is valid, because ‘barray’ points to a valid string
constant, which is the type of parameter the PrintE library procedure
requires. Pretty sneaky!
Example #3:
PROC equatearrays()
BYTE ARRAY a="This is a string constant",
barray
barray = a
PrintE(a)
PrintE(barray)
RETURN
Output #3:
This is a string constant
This is a string constant
EXAMPLE 3 NOTES: All this program does is show you that you can equate
two arrays simply by making them point to the same memory location, in this
case it's a string constant they're both pointing to.
You might have noticed that we have not done anything like
BYTE ARRAY a=['A ' ‘s 't 'r 'i 'n 'g]
PrintE(a)
That's because the above won't work. Remember that string constants are
different from simple strings because their first byte contains their length, so
procedures that expect a string constant will balk when you attempt to send
them anything else.
And now for a program that uses all the applications of arrays which we have
discussed.
Example #4:
SCENARIO: You have a program that only gives error numbers when the
user makes an error, and you want it to print out error messages as well.
You could do this using arrays, as in the following program. We will discuss
how the program works after the program itself.
PROC doerror(BYTE errnum)
;**** This procedure reads in the error number and
;prints out the related message. See the discussion
;following the program for an explanation of how it
;works.
BYTE ARRAY errmsg
CARD ARRAY addr(6)
;the message printed out
;holds the addresses of the
;error medsages
addr(0)="lllegal command"
;|
addr(1)="Illegal character"
;|
See
addr(2)="Bad File Name"
;| Example 4
addr(3)="Number Too Large"
;| Note for an
addr(4)="Wrong Type Of Number”
;| explanation
addr(5)="Unknown Error"
;|
errmsg=addr(errnum) ;puts the error message asso<
Print("ERROR :")
;ciated with 'errnum’ in
PrintB(errnum)
;'errmsg’ and prints it
Print(": ")
;out after the error numPrintE(errmsg)
;ber itself
PutE()
RETURN
;**** End of procedure doerror
PROC main()
;This procedure is just a dummy used to call
;the above procedure, using all valid error numbers,
;to show that the table works
BYTE error
FOR error=0 TO 5
DO
doerror(error)
OD
RETURN ;**** End of procedure main
Output 14:
ERROR #0 Illegal command
ERROR #1 Illegal character
ERROR #2 Bad File Name
ERROR #3 Number Too Large
ERROR #4 Wrong Type Of Number
ERROR #5 Unknown Error
EXAMPLE 4 NOTES: The way in which we fill the CARD array in this
example is strange (how can you fill a CARD array element with a string?)
but is perfectly valid because the string constant itself is not being assigned
to the array element, rather Its address is. This makes each element of the
array an implicit pointer to a string. All we have to do is assign the value of
the proper array element (i.e , the one pointing to the needed error message)
to the BYTE array 'errmsg' thus making 'errmsg’ point to the proper
message. Then we just print out the message.
We understand that the above program is very confusing until you
completely understand the concept of arrays and their internal
representation, but it is here so that you can see some of the advanced
capabilities of arrays.
8.3 Records
Records are constructions which allow you to group together some pieces of
information, which, although related in some way, are not of the same type.
Your driver's license is an example of a record. It has your name, photo,
address, and license number all together. These pieces of information
belong together in that they all describe you to some degree, but they are of
different types. Your name is a character string, your photo is a picture, and
your address is made up of both numbers and characters, as is your license
number. Of course the ACTION! language doesn't support all these types.
Instead it groups together only the types of information the compiler
understands, the fundamental data types.
8.3.1 Declaring Records
ACTION! records manipulate the fundamental data types by creating a new
data type composed of one or more of the fundamental types. Then you
declare variables of that type just as you declare variables of type BYTE,
INT, or CARD. This allows you to declare as many variables of one record
type as you want, without having to redeclare the format of the record type
every time.
The next section (8.3.1,1) shows bow to create a record data type, and
section 8.3.1.2 demonstrates how to declare variables of a predefined record
type.
8.3.1.1 The TYPE Declaration
Without further ado, we'll present the form used to declare a record data
type:
TYPE <ident>=[<var decls>]
where
TYPE
<ldent>
<var decls>
is the keyword denoting the definition of a record type
is the name of that record type
are valid variable declarations( as in section 3.4.1, except
that the ‘<lnit info>’ option shown there is forbidden
At this point, an example would probably help:
TYPE rec=[BYTE b1,b2
;two BYTE fields first,
INT i1
;then one INT field,
CARD c1,c2,c3 ; tben three CARD fields
BYTE b3]
;ending with a BYTE
This needs some explanation so we'll go through it piece by piece:
TYPE rec
We are defining a new data type called rec
BYTE b1,b2
The first two fields of this type are of BYTE type, and are called ‘bl’ and
'b2 '
INT i1
The third field is of type INT, and its name is ‘i1’
CARD C1,C2,C3
The fourth through sixth fields are CARD type, and are named c1, c2,
and c3, respectively
BYTE b3
The seventh and final field of the record type 'rec' is of BYTE type and
is called 'b3’
Notice that there are no commas between the different variable declarations
(between the CARD and BYTE declarations, for example). If you do put
commas in, the compiler will try to read the fundamental type words (CARD,
BYTE, INT) as variables, and that will cause a compiler error.
8.3.1.2 Declaring Variables
The last section showed you bow to declare a record type, and this section
will show you how to declare variables of a given record type. The format is
very similar to that used when declaring variables of fundamental types, but
it does have its peculiarities:
<ident> <var> { = <addr>} |: , <var> {=<addr> } :|
where
<ident>
< var>
is the name of the record type
is a varible whose data type is declared to be the record type
<addr>
is the address you want the record located at
Here's an example using the record type declared in the previous section.
After the example is an explanation of what's going on.
TYPE rec=[BYTE b1,b2
;two BYTE fields first,
INT i1
;then one INT field,
CARD c1,c2,c3 ; tben three CARD fields
BYTE b3]
;ending with a BYTE
rec arec,
;declares arec as data type ‘rec’
brec=$8000 ;declares brec as type ‘rec’ and places it at address $8000
EXPLANATION:
rec
Shows that the following variables are of data type ‘rec’, just as BYTE,
INT, and CARD (when used in variable declarations) show that the
following variables are of those types.
arec
Declares 'arec' to be a variable of data type 'rec’
brec=$8000
Declares ‘brec’ to be a variable of data type 'rec', and places it at
memory location $8000
So now that you know how to declare a record data type, and then declare
variables of that type, it’s time to find out how to reference and manipulate
records.
8.3.2 Record Manipulation
To learn how to manipulate records, we first must learn how to reference a
field within a record. The following program does just that, using the period
(‘.’) operator. We’ll discuss its usage after the program itself.
Example #1;
PROC recordreference()
;*** This procedure reads in some information about
;an employee, and then prints it out to let the
;empIoyee know it's correct.
TYPE idinfo [BYTE level
CARD idnum,
entry_year]
idinfo rec
;employee’s level
;his I,D. number
;year he started
;declaring ‘rec’ as record type ‘idinfo’
Print('What is your I.D. number? ")
rec.idnum=InputC( ) ;get his I.D. number
Print("What is your employment level (A-Z)? ")
rec.level=GetD(7)
;get his employment level
Print("In what year did you start working here? ")
rec.entry_year=InputC()
;get his entry year
PrintE("O.K Here’s what I have.")
PutE()
Print(“I.D. # ")
;|
PrintCE(rec.idnum)
;| Print
Print("Level: ")
;| out the
Put(rec.level)
;| information
PutE()
;| the employee
Print("Entry year: ")
;| entered
PrintCE(rec.entry_year)
;|
RETURN ;end of PROC recordreference
Output #1:
What is your I.D. nunber? 4365
What is your employment level? L
In what year did you start working here? 1975
O.K. Here's what I have:
I.D. # 4365
Level: L
Entry year: 1975
The ‘.’ is used to notify the compiler that you are making a record reference
(and is only valid in record references). From the above program example
you can see that the format of a record reference is:
<record name>.<f ield name>
Note that < field name> and < record name> are defined in different
declaration statements, as shown in the previous section. <field name> is
defined in the TYPE declaration, when you define the fields of a record type,
whereas <record name> is defined in a variable declaration, when you
declare the variable to be of a record type.
8.4 Advanced Use of the Extended Types
The extended data types seem to be limited by the fact that they may only
operate on the fundamental types, that is, you cannot have arrays of records,
an array field in a record, etc.. However, there are ways to get around these
limitations, as seen in example 4, section 8.2.3. In that example we created
an array of pointers by using the elements of a CARD array as pointers, not
cardinal numbers. In this section we’ll demonstrate some other ways to get
more out of the extended types, including a program using records with array
fields, and another program which uses an array of records.
"But you just said that was illegal." It is illegal if you try it directly, but, as we
mentioned above, there are ways around, over, under, and between the
literal definition of the extended types.
The following example will fill an undimensioned array with a list of records.
The way it does this is simple once we define a "virtual record", because the
array is actually a BYTE array with blocks of bytes being grouped into virtual
records.
A virtual record is not a record in the sense that we declare It as a record
type. It is a record only because we access a section of memory as though
it were a record, although it is really just a atring of bytes. All we do is fill a
BYTE array so that it looks like contiguous records, not bytes. This is done
by declaring a record data type, and then declaring a pointer to that data
type. Then we manipulate the array in blocks the size of one record by
making the pointer jump through the array in leaps the size (in bytes) of one
record. We will expand on this in the technical discussion following the
example itself.
Example #1:
MODULE ;declaring some global variables
TYPE idinfo=[CARD idnum, ;employee's I.D. number
codenum ;his access code
BYTE level] ;his employment level
BYTE ARRAY idarray(1000) ;enough space to hold 200 records
DEFINE recordsize="5"
CARD recount=[0]
PROC fillinfo()
;**** This procedure will take some information
;on a given employee, put it into an array of
;records using a pointer to the record type and
; indexing that pointer in the array. This process
; will continue as long as the user desires
;to input more information
idinfo POINTER newrecord
BYTE continue
DO
newrecord = idarray+ (reccount * recordiize)
Print("I.D. number ")
newrecord,idnum=InputC() ;get I.D. number
Print("Employment level (A-Z)”)
newrecord.level=GetD(7)
;employment level
Print("Access code? ”)
newrecord.codenum=InputC() ; get secret code
recount==+1
PutE()
Print("Input another record (Y or N)? ")
continue=GetD(7)
PutE()
UNTIL continue = ‘N OR continue=’n
OD
RETURN
PROGRAMMING NOTE: This procedure does not make sure you're within
the bounds of the array, nor does ACTION! itself, so you might want to add a
boundary checking routine.
EXAMPLE 1 NOTES: There are a couple things this procedure does that
require a detailed explanation, including these procedure lines:
DEFINE recordsize="5"
idinfo POINTER newrecord
newrecord=idarray+(reccount*recordsize)
newrecord.XXX = xxx
reccount==+1
We’ll go through these one by one. This should not only explain the
statements themselves, but should also clarify the concept we're using to
accomplish the array of records.
DEFINE recordsize="5''
This DEFINE is used as the "jump" size when we are going through the
array. The record type 'idinfo' is 5 bytes long (2 CARDS and 1 BYTE),
so this will allow us to go through the array in 5-byte leaps. Every time
we leap like this we will skip over one record, thus eliminating the
possibility of writing one record partially on top of another.
idinfo POINTER newrecord
Here we are defining a pointer to the type 'idinfo'. We can fill fields of
a virtual record in the array simply by pointing the pointer to the first
field in one of the virtual records, and then using the pointer in a record
reference to access a single field.
newrecord= idarray+ ( recount * recordsize)
This assignment makes the pointer point to the end of the array. It does
this by adding the space occupied by all the other records to the
starting address of the array. The space occupied by all the other
records is simply the number of records ('reccount’) times the size of
each record (‘recordsize’).
newrecord.XXX=xxx
'XXX’ is one of the field names of the record type, and 'xxx’ is the
corresponding input function used to fill the array. Since we made
'newrecord’ point to the end of the array, we can start filling in the new
record. We can use the pointer in the record reference because we
declared it as a pointer to that record type.
recount==+1
Here we are simply incrementing the variable that keeps track of the
number of records currently in the array. We do this because we just
put another one in.
In example #4 we will use this array we’ve filled to verify the information
typed in by someone trying to gain entrance into a restricted area (by making
sure they key in the proper secret code), but we'll have to remember to
access the array as an array of records, using the same format in which the
array was filled, otherwise some strange problems will arise.
Before we go on to show the program that looks into the filled array, let's first
modify the records a little bit. We'll add one more field which will contain the
employee's name in the form:
Las Name, First Name
To do this we must somehow make the field an array. Or must we? Instead,
let’s simply add a BYTE field to the end of the record type, and then change
the DEFINE directive to make the size given each record increase. If we
increase it by 20, suddenly we have 25 bytes reserved for 6 bytes of field (2
CARDs and 2 BYTEs). Then we just put the string in the extra space, by
accessing the last field (our new BYTE field) and putting in a string instead of
a byte. The string can't be longer than 19 characters (recall the first byte of
a string is its length), so we'll have to make sure the string is short enough.
Without further ado, we'll move onto the extended version of the 'idinfo’
procedure, complete with strings.
Example #2:
MODULE ;declaring some global variables
TYPE idinfo=[CARD idnum,
codenum
BYTE level,
name]
;employee'a I.D. number
;his access code
;his employment level
;first letter of name
BYTE ARRAY idarray(1000) ;enough space to hold 40 records.
DEFINE recordsize="25",nameoffset="5”
CARD reccount=[0]
PROC fillinfo()
;***** This is simply the modified version of the
;previous example
idinfo POINTER newrecord
BYTE POINTER nameptr ;pointer to 'name' field
BYTE continue
DO
newrecord=idarray+(reccount*recordsize)
Print("I.D. number? ")
newrecord.idnum=InputC() ;get I.D, number
Print("Employment level (A-Z)? ")
newrecord.level=GetD(7)
;employtnent level
Print( "Access code? “)
newrecord.codenum=InputC()
;get secret code
nameptr=newrecord+nameoff
;set pointer 'nameptr' to
PrintE("Employee’s name? ")
;start of name field
Print (“'( form: Last, First) ")
InputS(nameptr)
;read name into name field
reccount==+1
PutE()
Print("Input another record (Y or N)? ")
continue=GetD(7)
PutE()
UNTIL continue=’N OR continue=’n
OD
RETURN
EXAMPLE 2 NOTES: As in the previous example, there are some program
lines which need explanation, including:
nameoffset="5"
BYTE POINTER nameptr
nameptr=newrecord+nameoffset
Inputs(nameptr)
Before discussing the lines individually, let's go over the method used to put
the name into the array of records. First of all, we need to find where to put
the name once we've read it in, then we need to figure out a way to read the
name in. The explanations of the above statements show you how we do it:
nameoffset = “5”
This DEFINEs the distance you have to go into a single record to get to
the first byte of the string, and is used when getting the pointer to the
string to point to the right position.
BYTE POINTER nameptr
This pointer is used to point to the first byte of the 'name’ field in a
record.
nameptr=newrecord+nameoffset
Here we are setting the value (i.e., where we want the pointer to point)
of the pointer ‘nameptr’. It's set by taking the address of the start of the
record (‘newrecord’) and adding the offset distance to the first byte of
the string storage location.
InputS(nameptr)
This is used to read in the name, and uses 'nameptr' as a pointer to the
storage location just as shown in section 8.2.3 (example 2), except that
we are using a pointer instead of an array name (which is just a pointer
to the first element anyway).
Now that we have a way to put the records into the array, we need a way to
search through the array record by record when looking for a match. The
following is a function designed to do just that. It will access the array as
using the record format of example 2, and return the address of the start of
the first record with an 'idnum' matching the one passed in as a parameter.
If no match is found, then 0 is returned as the address. Note that this
function uses variables declared in the global statement section {i.e,, after
the MODULE) of the previous example.
Example #3:
CARD FUNC findmatch(CARD testidnum)
idinfo POINTER seeker ;points to each record ln turn to do test
BYTE ctr
;used as a counter in the FOR loop
FOR ctr=0 TO (reccount-1) ;minus one because we
DO
;start at 0, not 1
seeker=idarray+( ctr* recordsize)
; index record
IF seeker. idnum= testidnun THEN
;test for an
RETURN (seeker)
;I.D. match and return
FI
;if found
OD
RETURN (0)
;no match found. End of FUNC findmatch
This function needs very little explanation, since it's straightforward
compared to the previous examples. All we do is go to every record and
test its ‘idnum' field for a match with ‘testidnum'. Now let’s turn the past two
examples into a true program by putting a shell around it.
Example #4:
MODULE ;declaring some global variables
TYPE idinfo=[CARD idnum,
codenum
BYTE level,
name]
;employee'a I.D. number
;his access code
;his employment level
;first letter of name
BYTE ARRAY idarray(1000) ;enough space to hold 40 records.
DEFINE recordsize="25",nameoffset="5”
CARD reccount=[0]
PROC fillinfo()
;***** This is simply the modified version of the
;previous example
idinfo POINTER newrecord
BYTE POINTER nameptr ;pointer to 'name' field
BYTE continue
DO
newrecord=idarray+(reccount*recordsize)
Print("I.D. number? ")
newrecord.idnum=InputC() ;get I.D, number
Print("Employment level (A-Z)? ")
newrecord.level=GetD(7)
;employtnent level
Print( "Access code? “)
newrecord.codenum=InputC()
;get secret code
nameptr=newrecord+nameoff
;set pointer 'nameptr' to
PrintE("Employee’s name? ")
;start of name field
Print (“'( form: Last, First) ")
InputS(nameptr)
;read name into name field
reccount==+1
PutE()
Print("Input another record (Y or N)? ")
continue=GetD(7)
PutE()
UNTIL continue=’N OR continue=’n
OD
RETURN
CARD FUNC findmatch(CARD testidnum)
idinfo POINTER seeker ;points to each record ln turn to do test
BYTE ctr
;used as a counter in the FOR loop
FOR ctr=0 TO (reccount-1) ;minus one because we
DO
;start at 0, not 1
seeker=idarray+( ctr* recordsize)
; index record
IF seeker. idnum= testidnun THEN
;test for an
RETURN (seeker)
;I.D. match and return
FI
;if found
OD
RETURN (0)
;no match found. End of FUNC findmatch
PROC main()
;**** This procedure controls the whole shebang
Idinfo POINTER recptr
;pointer to a record
BYTE POINTER nameptr
;pointer to 'name' field
CARD id_num,
;I.D. nximber input by user
code num, ;
code number input by user
keyid=[65535]
;I.D. number allowing loop exit
BYTE mode
;controls the operation mode
PrintE("Startup….")
PrintE("What operation mode?")
PrintE("X = expand list of employees")
PrlntE("A = alert/test input mode")
Print(">> “')
mode=InputB() ;read mode
IF mode='A OR mode='a THEN ; anything but A or a
fillinfo() ;will go to X mode
ELSE
;interrogation routine
DO ;loop start
Print(" Employee I.D. number >> ")
id_num=InputC() ;get I.D. number
IF id_nuni=keyid THEN ;enables exit from
EXIT
;the infinite loop
ELSE
;a normal I.D. number (i.e., not keyed)
recptr=findmatoh( id_nuin) ;look for I,D- match
IF recptr=0 THEN ;no match
PrintE("DO NOT PASS")
ELSE
;an I.D. match
Print(“Code Number >> ")
code_num=InputC() ;get access code
IF recptr.codenum=code_num THEN ;a match
nameptr=recptr+nameoffset
Print("I.D. # “) ;
PrintCE(recptr.idnum)
Print("Levels ")
Put(recptr.level)
Print(“Name: “)
PrintE(nameptr)
PutE( )
PrintE("OK TO PASS")
ELSE ;code does not match
PrintE("DO NOT PASS")
FI ;end of access code testing
FI ;end of I D. number verification
FI ;end of 'keyld' check
OD ;end of infinite loop
FI ;end of 'IF mode=’A
PrintE("System Shutdown...")
RETURN ;end of PROC main
All the main procedure does is go through a series of checks to determine
what needs to be done at any given point. The nested IFs are somewhat
confusing, but they are lined up (that is, indented the same amount) so you
can do IF-FI paring by placing a ruler vertically on the page and sliding it
back and forth to change levels of nesting.
Chapter 9: Advanced Concepts
This chapter deals with some techniques the experienced programmer might
find useful. Thus far, we have limited our discussion of the ACTION!
language to a study of the language with respect to itself; that is, without
reference to the rest of the computer. Most of this chapter is devoted to
interfacing ACTION! to information external to ACTION! itself, including
operating system routines and system variables.
9.1 Code Blocks
Code blocks allow you to include machine code in your program. When the
compiler sees a code block, it will put the values in the block into the code
generated, just as though it were code generated by the compiler. No
checks are made, so we don't recommend that you use code block unless
you know quite a bit about assembly and machine language.
The format for a code block is:
[<value>|: <value>:| ]
where
<value>
is one of the values In the code blocks. It must be a compiler
constant (see section 3,2). If it is greater than 255, then it is
stored in LSB, MSB order.
Examples:
[$40 $0D $51 $F0 $600]
BYTE b1,b2,b3
[‘A b1 342 b3 4+$A7]
DEFINE on=1
[54 on on+'t $FFFa]
Code blocks are useful for including small machine code routines, but it's too
much trouble to insert a large one. If you want to use a lot of machine code
routines, see section 9.4 for some hints.
9.2 Addressing Variables
In sections 3.4.1, 8.1.1, and 8.2.1 (Fundamental, POINTER, and ARRAY
variable declarations) we showed that a variable's address could be
specified when that variable was declared, but we didn't really make use of
that option. We didn't even explain the usefulness of doing this.
This option allows you to declare an ACTION! variable which has the same
address as any hardware register. Then you can manipulate graphics and
sound directly, change operating system characteristics, etc.. To illustrate
the advantages of this, we're going to present a graphics program which
makes the background color change and scroll. To do this we can't use the
normal (shadow) color registers, because they're only looked at every T.V.
frame. Instead, we'll directly manipulate the hardware color registers. In
this way we can change the background color during one frame. In fact, we
can do it 12 times (and so get 12 colors in graphics 0). We have to make sure
that we don't change colors in the middle of a scan line, so we'll make use of
the hardware variable WSYNC, which tells when a scan line is done, and the
next one has not yet begun. The variable VCOUNT tells how many scan
lines have been put out, and we use it to time the scrolling.
Example #1:
PROC scrollcolors()
BYTE wsync=54282,
vcount=54283,
clr=53272,
ctr,chgclr=[0],
incclr
;the "wait for sync" flag
;the "scan line count" flag
;hardware register for background
; a counter and a color changer
;increments color luminance
Graphics(0)
;set graphics 0
PutE()
FOR ctr=1 TO 23
‘print Out demo message
DO
PrintE("A DEMO OF SHIFTING BACKGROUND COLORS")
OD
Print(“A DEMO OF SHIFTING BACKGROUND COLORS")
DO
;Start of infinite scrolling loop
FOR ctr=l1TO 4
DO
incclr=chgclr
;set base color to Increment
DO ;start of UNTIL loop
wsync=0 ;waits for end of scan line
clr=incclr ;change displayed color
incclr==+1 ;change luminance
UNTIL vcount&128 ;end of screen test
OD ;end of UNTIL loop
OD ; end of FOR loop
chgclr= +l ;change the base color OD rend of infinite scrolling loop
RETURN ;end of PROG scrolIcolora
9.3 Addressing Routines
The concept behind specifying the address of a routine is similar to that of
specifying the address of a variable. Only the reason behind the concept
changes. In the last section we talked about using Atari system registers
directly by addressing an ACTION! variable to the proper location. Because
you can define a routine's address, you can make direct calls to OS and
hardware routines directly, and do your own manipulation of I/O. The
method used will be discussed in the following section, because this method
applies to all machine language routines, whether written by you, resident on
the OS, or resident in the ROMs.
9.4 Assembly Language and ACTION!
ACTION! allows you to make calls to machine language routines very easily.
There are only two requirements:
You need to know the starting address of the routine
The routine must end with an "RTS” (if you want to
get back to ACTION!)
For assembly language programmers these are not difficult requirements to
fill.
"What about parameters?" "Yes" is the answer. You can even send
parameters to machine language routines. The compiler stores parameters
in this way:
Address
A register
X register
Y register
$A3
$A4
:
:
$AF
nth byte of parameters
1st
2nd
3rd
4th
5th
:
:
16 th
And now for an example:
PROC CIO=$E456(BlfTE areg,xreg)
;**** Declaring the OS procedure CIO. 'xreg' will
;contain the iocb number times 16
;and ‘areg’ is a filler, so the number won't go into register A
; (CIO expects it ln X reg . )
PROC reatichannel2 ()
;This procedure will open channel 2 to the
;given file name, and call CIO to read ‘buflen’ bytes
DEFINE buflen="$2000”
; length of the buffer array
BYTE ARRAY fIlename(30),
buffer(buflen)
BYTE iocb2cmd=$362
CARD locb2buf=$364,
iocb2len=$368
;the file name array
;the buffer array
; iocb 2’s command byte
;iocb 2,s buffer start address
;iocb 2’s buffer length
PutE()
Print(“File name >> “)
InputS(filename)
Open(2,filename,4,0)
iocb2cmd=7
iocb2buf=buffer
iocb21en=buflen
CIO(0,$20)
Close(2)
RETURN
;get the filename
;open channel 2 for read only
; get binary record command
;set iocb buffer to our buffer
;set Iocb buffer length
;***** the call to CIO *****
;closing channel 2
See how easy it is? For those of you with an extensive set of assembly
language routines, this ability of ACTION! allows you to use them in a high
level language, where building the framework of a program is easy.
9.5 Advanced Use of Parameters
In section 6.4 we discussed parameters and their usage, mentioning that you
couldn't pass a value out of a routine using a parameter. Well, that was a
little white lie. You can pass values out through parameters, if you use
pointers. All you do is create a pointer which points to the variable you
really want to pass into a routine, and pass the pointer instead. Then, when
you access what the pointer is pointing to, you are really accessing the
variable you wanted to pass. You can then change the value of that variable
using a pointer reference.
This method involves some indirection (i.e., using a pointer to a variable
instead of the variable itself) but is very efficient and useful in some cases, as
the following example shows.
Example #1:
BYTE FUNC substr(BYTE ARRAY str,sub BYTE POINTER errptr, notfound)
;**** This function will search *str* looking for the substring 'sub’. If it's
;found, the function returns the index onto the string. If the substring is
;longer than the main string an error is returned via pointer. If the substring
;isn’t found, that is returned via another pointer.
BYTE ARRAY tempstr
;holds temporary substring for test
BYTE Ctrl,
ctr2
;outer loop counter
;linnar loop counter
IF sub(0)>str(0) THEN
errorptr^=1
;substring bigger than string
ELSE
FOR ctrl=1 TO str(0) ;loop to check string
DO
IF sub(1)=str(ctr) THEN
;testing 1st characters
tempstr(0)=sub(0)
;dimension tempstr
FOR ctr2=1 TO sub(0) ;fill tempstr
DO
tempstr(ctr2)=str(ctr2+ctrl-1) ;fill tempstr
OD
IF SCompare(tempstr, sub)=00 THEN ;compare 2 strings
RETURN (Ctrl)
;return index if equal
FI
FI ;end of testing 1st chsractere
OD ; end of FOR loop
FI
notfound^=1 ;didn't RETURN in loop, so no match found
RETURN (0) ; end of FUNC substr
Now, when we want to call this we must use the forn:
<index>=substr(<string>,<substring>,<errptr>,<nofindptr>)
where
<index>
is the index into <string> where 'substring' starts.
<string>
is the main string
<substr> is the substring we want to find in the main string
<errptr>
is a pointer to a byte error flag
<nofindptr> is a pointer to a byte ‘substring not found’ flag
This kind of parameter manipulation takes some practice if you're not used to
the concept of pointers, but is a quick and easy way get more information
passed out of a routine without having to resort to using global variables.
This means that the routine remains "multipurpose” , as discussed in section
6.4.
Part V: The ACTION! Compiler
Chapter
1
1.1
1.2
Introduction
Vocabulary
Compiler Directives
Chapter
2
2.1
2.2
2.3
2.4
2.5
2.6
Compiler Operation
Comments, SET, DEFINE
Variable Allocation
Routines
INCLUDEd Programs
MODULE
Symbol Tables
Chapter
3
Using the options Menu
Chapter
4
4.1
4.2
4.3
4.4
Technical Information
Overflow and Underflow
Type and Boundary Checking
Channel 7 Restriction
Available Space
Part V: The ACTION! Compiler
Chapter 1: Introduction
Atari BASIC offers you great convenience in that you can write a program in
a somewhat English-like language, then immediately test that program
without going through any other steps. This twofold advantage is gained at
the expense of requiring that each command, on each line be figured out by
a special program (called the BASIC interpreter) at the time of execution.
ACTION! is somewhat more sophisticated. It requires that your program be
figured out by a special program, called a compiler, before the actual
execution of your program. This requires an intermediate step between
your entry of the program and its execution by the computer. The step is
technically known as "the compile". During the compile, the ACTION!
compiler analyzes your program on a line-by-line basis. Your program is
converted into a different language (called machine language) with storage
for both global and local variables. The converted program can then be
executed by your Atari, running at a speed much greater than that of the
interpreted Atari BASIC.
1.1 VOCABULARY
This chapter refers to several terms which you first learned about in Part IV.
Those terms are listed here, with each term briefly defined:
term
<ident>
<value>
<compiler constant>
<address>
comments
any valid identifier
any valid hex or decimal value
evaluates <ident>'s address
memory location
1.2 Compiler Directives
The compiler directives are discussed in depth in part IV, chapter 7, and little
more need be added here. We simply remind you that the compiler
directives are executed at compile time, not run time, so do not use them
when you want to change an operational parameter while your program is
running.
Chapter 2: Compiler Operation - Allocating Space
In this chapter we'll discuss how the the ACTION! Compiler allocates
memory space for your compiled program, its variables, its routines, and its
symbol tables.
When called, the first thing the ACTION! Compiler does is to decide where to
put the code it will generate as it compiles your ACTION! source program. It
does this by looking at memory location 14. The CARD value this and the
following location contain gives the address of the start of free memory.
This address will vary, depending on the size of the Editor buffer (see
appendix B). Unless you specify otherwise, the compiler will put your
compiled code in memory starting with this address. To tell the compiler
where you want your program compiled, give the following two commands to
the Monitor right before you compile:
SET 14=<address>
SET $491=<address>
Where <address> is the starting address for the compiled code.
2.1 Comments, SET, DEFINE
Neither comments, the SET directive, nor the DEFINE directive generate
any machine code. This is because they do not do anything at run time, and
so are not required.
2.2 Variable Allocation
Information on variables is stored in two different locations by the ACTION!
Compiler, in the code itself and in the symbol table. The symbol table is
discussed later.
Variables are stored in front of the machine code where they are used.
Some variables are declared before the first routine is entered. These
variables (called global variables) can be used by any succeeding routine.
They need no additional declaration within the routine.
The allocated variables are assigned space according to the definition of the
basic data types. The following table should help your understanding of
data allocation.
Data Type
BYTE
CHAR
CARD
INT
ARRAY
TYPE
string
Allocated
1 byte
1 byte
2 byte
2 byte
fundamental type size
time the number of
elements
sum of sizes of
fundamental types, as
given in the declaration
all characters in the
string plus a preceeding
Comments
fundamental type
fundamental type
fundamental type
fundamental type
extended type
extended type
each string is allocated
separately even if set
byte to denote length
equal to the same
identifier
2.3 Routines
The compiler allocates space for routines (procedures and functions)
following that space allocated to the declared global variables. The
variables declared local to a given routine precede the executable language
statements in that routine. Program text (statenents within procedures
and/or functions) is evaluated and converted directly into machine code.
2.4 INCLUDEd Programs
Programs can be INCLUDEd at any place in the program. Of course, the
INCLUDEd text must not conflict with the text currently being processed.
The things to watch out for are conflicting identifiers and out-of-context
insertions. When errors are detected in the INCLUDEd text, they are
usually displayed in the message area. The error # is always shown in the
Monitor s command line and the bell sounds.
2.5 Additional global variables - MODULE
Additional global variables, arrays, and records can be added, as needed,
through the use of the MODULE keyword . The variables are assigned
space following the last previous routine. The identifiers are also included
in the compiler's global symbol table.
2.6 Symbol Tables
The ACTION! Compiler maintains two symbol tables -- one for the global
variables and one for the local variables from the last-compiled routine. The
symbol tables are accessible from the ACTION!Monitor through the ‘?’, ‘*’,
and SET commands (see Part III). They are also used by the ACTION!
compiler whenever a variable's address is required.
The Compiler allocates 8 memory pages (2K) for these tables, located right
at the top of available memory. Because they are placed there, you can
wipe them out if you run a program which changes into a graphics mode
which requires more memory than graphics 0. This means that you won't be
able to go back to the Monitor during program execution and look at the
values in your variables. The Compiler will have no record of their
existence since you just overwrote them,
Chapter 3: Usinq The Options Menu
The options menu offers you several ways to enhance or alter the
performance of the ACTION! compiler. The various options are discussed
here and in part III. The options are also summarized in Appendix G.
Increasing compiler speed:
You can gain at least a 30% improvement in compilation speed by
using the options menu to turn off the screen display during both disk
l/O and program compilation. Simply press 'N<RETURN>' to the
'Screen?’ prompt in the options menu.
NOTE; this also turns off the screen for other ACTION! system
functions, so you should turn t.he display back on after you have
finished compiling
Turning the bell off:
When you are debugging a new program and have lots of errors,
such as typographical errors, you might want to turn the bell off.
Simply press 'N<RETURN>' to the 'Bell?' prompt in the options
menu.
Making the Compiler case sensitive:
Sometimes, particularly as you get more sophisticated in your
programming style, you might desire that the compiler help you in your
programming by reminding you whenever you forget to enter an
ACTION! key word in upper case. You also might wish to benefit from
the increased flexibility of using different or mixed cases in your
identifiers. You can do both by pressing ‘Y<RETURN>' to the options
menu prompt ‘Case sensitive?’.
Use of this option is not necessary to successful ACTION!
programming. However, it is useful as an aid to documentation and in
providing a much greater diversity in identifiers.
Listing the compiled code:
You can command the Compiler to list each program line as it is
evaluated. This may seem unnecessary because most errors which
occur are noted and displayed on the screen during the compiling
process. However, you might have a long program which includes
routines from other sources (remember the INCLUDE command?). If
this is so, then you might never be able to get the source code together
for a complete listing otherwise. You can get such a listing, and even
redirect it to the printer (see part VI, section 7.9). To enable the listing,
press ‘Y<RETURN>' to the 'List?’ options menu prompts.
Chapter 4: Technical Considerations
4.1 Overflow and Underflow
The ACTION! Compiler does no checks for mathematical overflow or
underflow. " What is overflow and underflow anyway?” They are opposite
sides of the same coin.
If you have a BYTE variable which currently equals 255, and you add 1 to it,
you won’t get 256 (because a single byte can only contain values up to 255),
you'll get 0. Similarly, if you are using the decimal system, and only have
two digits of display, you can run into the same problem if you add 1 to 99.
You know that it equals 100, but you only have two digits of display, so you
see "00”.
Underflow is the exact opposite of this. If you subtract 1 from 0, you get
255.
As mentioned in part IV, section 4.2, some of the mathematic operators
result in a specified type of output, so you can sometimes avoid the above
problems by making use of these automatic type changes.
Likewise, shift operations can cause overflow and underflow. A shift of the
contents of a variable produces similar (but not identical) results to those
achieved by multiplying or dividing by 2.
4.2 Type Compatibility and Boundary Checking
You must also be careful because the ACTION! compiler supports no
boundary checking of simple variables or ARRAYS. This is deliberately
done in order to allow you more flexibility in your data manipulation. The
price for this freedom is increased vigilance. You must set up and maintain
your own procedures for checking boundary limits and the error-handling
responses. This is another good place for a standard set of subroutines
which can be iNCLUDEd.
4.3 Channel 7 Restriction
When you enter the ACTION! system. It opens channel 7 for reading from
the keyboard (K:). You may use this channel for this purpose, bot do not
alt.er its attributes by reOpening or Closjng it.
NOTE: if you do make use of channel 7 (and assume that its already open),
your programs will not run without the ACTION! cartridge.
4.4 Available space
You might be working on a big program and suddenly find that you are out of
space. When this happens, you can do one of three things, depending on
what you are doing at the moment when the error appears.
If you are Editing:
Immediately save your file (<CTRL><SHIFT>W), go to the Monitor,
and reboot the system (BOOT), you may go back to the Editor and read your
file back in.
If you are Compiling:
Go to the Editor and save your program. Then go back to the Monitor,
reboot the system, and Compile your program from the storage device (disk,
cassette, etc.).
Part VI: The ACTION! Library
Chapter
1
1.1
1.2
Introduction
Vocabulary
Library Format
Chapter
2
Output Routines
2.1
The Print Procedures
2.1.1
Printing Strings
PROC Print
PROC PrintE
PROC PrintD
PROC PrintDE
2.1.2
Printing BYTE Numbers
PROC PrintB
PROC PrintBE
PROC PrintBD
PROC PrintBDE
2.1.3
Printing CARD Numbers
PROC PrintC
PROC PrintCE
PROC PrintCD
PROC PrintCDE
2.1.4
Printing INT Numbers
PROC PrintI
PROC PrintlE
PROC PrintID
PROC PrintlDE
2.1.5
PROC PrintF - Formatting Output
2.2
The Put Procedures
PROC Put
PROC PutE
PROC PutD
PROC PutDE
Chapter
3
3.1
3.2
Input Routines
Numeric Input
BYTE FUNC InputB
CARD FUNC InputC
INT FimC InputI
BYTE FUNC InputBD
CARD FUNC InputCD
INT FUNC InputID
String Input
PROC InputS
PROC InputSD
3.3
PROC InputMD
CHAR FUNC GetD
Chapter
4
4.1
4.2
4.3
4.4
4.5
File Manipulation Routines
PROC Open
PROC Close
PROC XIO
PROC Note
PROC Point
Chapter
5
Graphics and Game Controllers
5.1
PROC Graphics
5.2
PROC SetColor
5.3
BYTE color
5.4
PROC Plot
5.5
PROC DrawTo
5.6
PROC Fill
5.7
PROC Position
5.8
BYTE FUNC Locate
5.9
PROC Sound
5.10
PROC SndRst
5.11
BYTE FUNC Paddle
5.12
BYTE FUNC PTrig
5.13
BYTE FUNC Stick
5.14
BYTE FUNC Strig
Chapter
6
String Handling / Conversion
6.1
String Handling Routines
6.1.1
INT FUNC SCompare
6.1.2
PROC SCopy
6.1.3
PROC SCopyS
6.1.4
PROC SAssign
6.2
Number to String Conversions
PROC StrB
PROC StrC
PROC StrI
6.3
String to Number Conversions
BYTE FUNC ValB
CARD FUNC ValC
INT FUNC ValI
Chapter
7
7.1
7.2
7.3
7.4
7.5
7.6
7.7
7.8
7.9
7.10
7.11
7.12
Miscellaneous Routines
BYTE FUNC Rand
PROC Break
PROC Error
BYTE FUNC Peek
CARD FUNC PeekC
BYTE FUNC Poke
CARD FUNC PokeC
PROC Zero
PROC SetBlock
PROC MoveBlock
BYTE device
BYTE TRACE
BYTE LIST
BYTE ARRAY E0F(8)
Part VI: THE ACTION! Library
Chapter 1: Introduction
The ACTION! library makes it possible for you to do a lot of common l/O and
graphics routines without having to write them first. The ACTlON! cartridge
contains almost 70 prewritten routines which you can call as though they
were routines written by you. This convenience can save you quite a bit of
time and effort whether you are a beginning or advanced programmer.
1.1 Vocabulary
Most of the vocabulary used in this part has been defined previously, but
there are two terms we'll use often which require some discussion IOCB and
channel. IOCB stands for “Input Output Control BlocK”. The CIO (Central
l/O) uses ICOBs to perform l/O functions. The ACTION! library I/O routines
set up an lOCB to tell the CIO what it (the routine) wants done, and then
makes a direct call to CIO.
The IOCBs are numbered (0- 7). When you use routines which require
channel numbers, the number is actually the number of the lOCB which
contains the information about a given peripheral device. That does not
mean that certain lOCBs handle certain peripherals. You must set up one
of the lOCBs so that it will handle the peripheral you want it to. This ie done
using the Library routine "Open", and so is not a difficult task to accomplish.
When you see the term "default channel" it refers to the IOCB ACTION! sets
up and uses for screen display purposes. This means that routines which
do l/O using "default channel" will get and put information from and to the
screen (device "E:").
NOTE: the default channel is channel 0.
NOTE: for more information on lOCBs, see your Operating System
reference manual.
1.2 Library Format
The library routines are presented in a manner which makes it very easy to
understand how to use and call them. To show you what we mean, let’s
take one of the routines and explain what information each part of the
presentation format can tell you. The routine we'll look at is "Locate".
Example:
5.8 BYTE FUNC Locate
purpose: determine the color or character at a given screen location
format: BYTE FUNC Locate (CARD col, BYTE row)
parameters: col - is a column number valid in the current graphics mode
row - is a row number valid in the current graphics mode
description:
This routine retrieves the ATASCII code of the character or the number of the
color at the specified location. The registers this routine uses are
incremented so as to point to the adjacent horizontal position (the first
position in the next line if you located the last position on a line). All of the
Get, Put, Print, and Input routines also use these registers as references for
the current cursor location, so you can use this to move to any position and
then use another routine to manipulate what's there.
The first thing you see is the section number and name of the routine,
including what type of routine it is (in this case a BYTE FUNCtion). This is
followed by a short description of the purpose of the routine. The format of
the routine itself is then given in the form of a routine declaration. The
declaration form is used instead of the form used to call that routine because
it tells you more information about the routine in question, including:
1) the routine's type (PROC or FUNC)
2) all the parameters
3) the data type of each parameter
After the format of the routine is given the parameters required by that
routine are explained one by one. The last piece of information is a
description which discusses the use of the routine in general and its
performance in certain special conditions.
Chapter 2: Output Routines
The ACTION! Library provides an extremely extensive group of routines to
put both numeric and string data out to any channel.
The two basic output routines -- Print and Put -- have options which allow
you to direct the output to a specific channel and/or output an EOL (End of
Line, a.k.a. <RETURN>) following the data. We'll go into these options in
more detail in the following sections.
2.1 The Print Procedures
The procedures we are about to discuss all have one thing in common: they
begin with the word "Print". From this alone you can tell that they print
something out somewhere, but who knows what and where? The answers
to these questions can be found by looking at the option(s) tagged onto the
end of the word "Print".
These options all consist of a single letter, but you can employ up to three
options at one time because different options control different aspects of the
output. "Is this ever confusing?", it might seem that way, but let's look at the
format of Print to see how these options are grouped:
Print<data type>{d}{e}(<parameters>)
where
Print
is the basic function name.
<data type>
tells what type of data you want to output. The options here
are:
B
(BYTE type data)
C
(CARD type data)
I
(INT type data)
<nothing> (a string)
D
stands for "device", and is used when you want to define
which device ( channel ) you want the output to go to.
stands for EOL (End Of Line), and is used to ouput a
<RETURN> after the data.
are the parameters required by the procedure, and range
in number.
E
<parameters>
NOTE: Both the 'D' and 'E’ are optional, but a data type is always specified
(because 'a string' is assumed to be the type of data output if no type is
explicitly given).
From the above format you can see that the following are all the possible
Print routines:
No Options
With EOL
To Device
Both Options
string
Print
PrintE
PrintD
PrintDE
BYTE
PrintB
PrintBE
PrintBD
PrintBDE
CARD
PrintC
PrintCE
PrintCD
PrintCDE
INT
PrintI
PrintIE
PrintID
PrintIDE
Notice that we have grouped the procedures according to the type of data
which they output. This is the way in which we group them in the following
sections, with each section giving the purpose, format, parameters, and
discussion for each option of the Print procedure basic to that type of data.
There is one Print procedure not in the above list because it is a very special
case as far as output is concerned. Its name is PrintF, and it allows you to
format output which contains numbers and strings. A separate section is
devoted to this routine alone.
2.1.1 Printing Strings
There are four string printing procedures, thus making all the options
discussed in the previous section available.
purpose:
to print out a string, uajng some format options
formats:
PROC Print(<string>)
PROC PrintE(<strinq>)
PROC PrintD(BYTE channel, <string>)
PROC PrintDE(BYTE channel, <string>)
parameters:
<string>
is either a string constant with double quotes or
the identifier of a BYTE ARRAY (which you
want printed out as a string)
channel
is a valid channel number (0 - 7)
descriptions:
These four procedures print out strings, thus;
Print
PrintE
PrintD
PrintDE
outputs the string to the default channel
without a <RETURN> at the end.
outputs the string to the default channel
with a <RETURN> at the end.
outputs the string to a specified channel
without a <RETURN> at the end.
outputs the string to a specified channel
with a <RETURN> at the end.
Their usage is very straightforward and simple, but you must remember that,
with the procedures which require a channel, the channel must first be
opened.
2.1.2 Printing BYTE Numbers
The following four procedures are used to print BYTE type data in decimal
format. They start with the ‘PrintB' base, and then add the possible options.
purpose:
formats:
to output one byte of data as a decimal number.
PROC PrintB(BYTE number)
PROC PrintBE(BYTE number)
PROC PrintBD(BYTE channel, number)
PROC PrintBDE(BYTE channel, number)
parameters:
number
is an arithmetic expression (remember that
arithmetic expressions can simply be a
const, int or variable name).
channel
is a valid channel number (0- 7)
description:
The above procedures output BYTEs as follows:
PrintB
PrintBE
PrintBD
PrintBDE
outputs the byte to the default channel
without a <RETURN> at the end.
outputs the byte to the default channel
with a <RETURN> at the end.
outputs the byte to a specified channel
without a <RETIJRN> at the end,
outputs the byte to a specified channel
with a <RETURN> at the end,
2.1.3 Printing CARD Numbers
purpose:
to output numbers as CARDs in decimal format.
formats:
PROC PrintC(CARD number)
PROC PrintCE(CARD number)
PROC PrintCD(CARD channel, number)
PROC PrintCDE(CARD channel, number)
parameters:
number
is an arithmetic expression (remember that
arithmetic expressions can simply be a
constant or variable name).
channel
is a valid channel number (0- 7)
description:
The above procedures output CARDs as follows:
PrintC
outputs the CARD to the default channel
without a <RETURN> at the end.
PrintCE
outputs the CARD to the default channel
with a <RETURN> at the end.
PrintCD
outputs the CARD to a specified channel
without a <RETURN> at the end.
PrintCDE outputs the CARD to a specified channel
with a <RETURN> at the end.
2.1.4 Printing INT Numbers
purpose:
to output numbers as INTs in decimal format.
formats:
PROC PrintI(INT number)
PROC PrintIE(INT number)
PROC PrintID(INT channel, number)
PROC PrintIDE(INT cbarinel, number)
parameters:
number
is an arithmetle expression (remember that
arithmetic expressions can simply be a
constant or variable name).
channel
is a valid channel number (0-7)
description:
The above procedures output INTs as follows:
PrintI
PrintIE
PrintID
PrintIDE
outputs the INT to the default channel without a
<RETURN> at the end.
outputs the INT to the default channel with a <RETURN>
at the end.
outputs the INT to a specified channel without a
<RETlfRN> at the end.
outputs the INT to a specified channel with a <RETURN>
at the end,
2.1.5 PROC PrintF - Formatted Output
The PrintF procedure allows you to output numbers and strings on the same
line through the use of a "format control string". This string tells the
procedures exactly how you want the output to look.
purpose:
formatted output of data
format:
Pr intF( “<control string>", <data> |:, <data> :|)
arguments:
<control string> the control string is made up of format
controls and string text. The text is
output directly, and the controls
(maximum of 5) give information for
outputting the <data> parameters given.
<data>
is an arithmetic expression, which will be
formatted according to its format control.
The first control tells how to output the
first <data>, the second control tells how
to output the second <data>, and so on.
description:
This is a sophisticated procedure enabling you to output formatted data to
the default channel. Up to five different data elements can be interspersed
into a string, each with its own output format. The format controls are as
follows:
<control>
%S
%I
%U
%C
%H
%%
%E
formatted data type
output data as a string
output data as an INT
output data as an Unsigned CARD
output data as a CHARacter
output data in unsigned hexadecimal
output the % character
output an EOL (<RETURN>)
Notice that two of the controls (%E and %%) do not manipulate or require
data elements. They are used to change the page formatting, not the data
element formatting.
A maximum of five controls are allowed, and each data element requires its
own control.
Characters in the control string which are not themselves controls are output
directly, that is, exactly as they are in the string.
2.2 The Put Procedures
The "Put" group of library routines are used to output single characters (i.e.,
output BYTE type data as an ATASCII character). These routines use
options very similar to those in "Print", and so the options need not be
re-introduced here.
purpose:
to output a single ATASCII character, using specified format
options.
formats:
PROC Put(CHAR character)
PROC(PutE()
PROC PutD(BYTE channel, CHAR character)
PROC PutDEBYTE channel, CHAR character)
parameters:
character
channel
is an arithmetic expression (remember
that arithmetic expressions can simply be
a constant or variable name).
is a valid channel number(0 - 7)
description:
These procedures output characters as follows:
Put
PutE
PutD
PutDE
outputs the character to the default channel without a
<RETURN> at the end,
outputs an EOL (<RETURN>) character to the default
channel.
outputs the character to a specified channel without a
<RETURN> at the end,
outputs the EOL (<RETURN>) character to a specified
channel.
Chapter 3: Input Routines
In this chapter we discuss the routines which complement the Print and Put
routines, that is, they input data from somewhere. Similar to the Output
routines, the type of data that is input and where it comes from is defined
through the use of options.
‘Input' and 'Get’ are the input routines, and each has its own set of options
very similar to those available in the output routines.
The Input routines are grouped into two categories: those which input
numeric data, and those which input string data. Each will be dealt with
separately.
There is only one Get routine (GetD), and it will be discussed in the last
section of this chapter.
3.1 Numeric Input
The following six functions allow you to input any type of numeric data from
any channel. We have grouped them all together because they are very
easy to understand and so do not require separate sections, as did the
routines used to output numbers did.
purpose:
to input numeric data
formats:
BYTE FUNC InputB()
BYTE FUNC InputBD(BYTE channel)
CARD FUNC inputC()
CARD FUNC InputCD(BYTE channel)
INT FUNC InputI()
INT FUNC InputID(BYTE channel)
parameters:
channel
is a valid channel number (0-7)
description:
The functions input data as follows:
InputB
InputBD
InputC
InputCD
InputI
InputID
inputs a BYTE number from the default channel.
inputs a BYTE number from a specified channel.
inputs a CARD number from the default channel.
inputs a CARD number from a specified channel.
inputs an INT number from the default channel.
inputs an INT number from a specified channel.
3.2 String Input
String inputting is accomplished by suffixing the "Input" base with the
character "S". There are three such procedures in the ACTION! Library, and
they allow you to input a string from any channel and/or define the maximum
length of the input string.
purposes:
to input string data
formats:
PROC Inputs(<string>)
PROC InputSD(BYTE channel, <string>)
PROC InputMD(BYTE channel, <string>, BYTF max)
parameters:
<stririg>
channel
max
is the identifier of a BYTE ARRAY
is a valid channel number (0 - 7)
is the maximum length allowable for the input
string. The string is truncated to 'max’ length if
it is too long.
description:
Here is an outline of what each procedure does:
InputS
inputs a string of up to 255 characters from the default
channel.
InpatSD
inputs a string of up to 255 characters from a specified
channel.
inputs a string of up to 'max' characters from a specified
channe].
InputMD
3.3 CHAR FUNC GetD
purpose:
to input a single character from a given channel.
format:
CHAR FUNC GetD(BYTE channel)
parameters:
channel
is a valid channel number (0-7)
description:
This function is used to get one character from the device specified by
'channel'. The character is returned through the function as its ATASCII
character set number.
Chapter 4: File Manipulation Routines
This chapter is devoted to those routines which deal with external devices
(printer, disk drive, caeaette, etc.). With these routines you can open a
channel (an lOCB), close a channel, and do extensive disk file manipulation.
4.1 PROC Open
purpose:
format:
set up an lOCB channel to allow i/o using a peripheral device.
PROC Open(BYTE channel, <filestring>, BYTE mode, aux2)
parameters:
description:
channel
<filestring>
mode
is a valid channel number (0-7)
is the string constant (or array identifier of
that string constant) used as the device
(D:, P:, S: etc.) being opened on the
given channel (lOCB) number. "D:" files
also require a filename.
is the number designating the type of I/O,
thus:
4 - read only
6 - read directory
8 - write only
9 - write append
12 - read/write (update)
aux2
a device dependent value (usually zero).
This procedure opens a given channel to the device specified in <filestring>.
The I/O mode can be set (see ‘table’ above for the number codes). Any
device dependent codes are passed through ‘aux2’.
WARNING: do not Open channel 7, because it is used by the ACTION!
system to do its own screen input. You can use channel 7 in your program
for getting characters from K:, but, since that assumes that channel 7 is
open, you need the ACTION! cartridge to run the compiled version of the
program (because ACTION!opens channel 7 to K:.
4.2 PROC Close
purpose:
to close an IOCB channel to a device
format:
PROC Close(BYTE channel)
parameters:
channel
is a valid channel number (0-7)
description:
This procedure closes the specified channel. At the end of a program you
should always close any devices that you have opened in the course of that
program.
NOTE: DO NOT Close channel 7, as ACTION! uses it.
4.3 PROC XIO
purpose:
format:
provides access to the device specific commands. For
example, to change the baud rate on an RS232 device,
you would make a call to the XIO handler for the R: device
to do this.
PROC XIO(BYTE chan,0,cmd,aux1,aux2,<filestring>)
parameters:
chan
cmd
aux1
axu2
is a valid channel number (0-7)
is the equivalent of the IOCB COMMAND byte
(ICCOM in OS/A+ and DOS XL)
is the first auxiliary byte in the IOCB (ICAUX1
in OS/A+ and DOS XL)
is the second auxiliary byte in the IOCB
(ICAUX2 in OS/A+ and DOS XL)
<filestring> is a character string specifying a standard
device (with a file name in the case of D:).
description:
This procedure is a system call designed to provide access to DOS. Those
of you familiar with Atari Basic, BASIC A+, or BASIC XL will recognize XIO
as a direct translation of BASIC’s XIO statement.
Rather than give a complete list of all the possible uses of XIO here, we will
refer you to chapter 8 of either the OS/A+ or DOS XL manual. The
ACTION! XIO procedure can perform all the system commands listed therein
other than NOTE, POINT, and the various data transfer operations – all of
which are available via other ACTION! library routines.
4.4 PROC Note
purpose:
to return the current file sector and byte offset within that sector
on a specified disk drive.
format:
PROC Note (BYTE chan, CARD POINTER sector, BYTE
POINTER Offset)
parameters:
chan
sector
offset
is a valid channel number (0- 7)
is a pointer to the sector number variable.
is a pointer to the byte offset variable.
description:
This procedure returns the disk sector and byte offset within that sector of
the next byte to be read or written (i.e., it returns the value of the disk file
pointer).
4.5 PROC Point
purpose:
to set the disk file pointer (sector and byte offset) to allow random
file access.
format:
PROC Point(BYTE chan,CARD sector,BYTE offset)
parameters:
chan
is a valid channel number (0-7)
sector
offset
is a valid sector number (1- 720)
is the byte offset within that sector.
description:
This procedure allows you to set the disk file pointer to any location within a
disk file, thus enabling random access of information.
NOTE: the disk file must have been Opened mode 12 (update) for the Point
routine to work.
Chapter 5: Graphics and Game Controllers
The ACTION! Library contains quite a few routines designed specifically to
make game writing (using visual and sound effects) easy and quick. At your
fingertips you have the ability to manipulate bit-map graphics (i.e., the BASIC
graphics modes), the myriad of sounds available on the ATARI, and get
information about the game controllers (both paddle and joystick).
Since the description of each routine best illustrates its usage, we'll jump
right into the routines themselves without further discussion.
5.1 PROC Graphics
purpose:
to enable bit-map ATARI graphics.
format:
PROC Graphics(BYTE mode)
parameters:
mode
is the number of the graphics mode, as in the
BASIC 'Graphics' routine.
(see table below)
description:
This procedure is exactly equivalent to the BASIC command of the same
name, and allows you access to the many varied graphics modes available
on the ATARI.
The following table gives some information about the 9 base graphics
modes. These modes are all split screen, to get full screen, add 16 to the
base mode number, to preserve the current screen as you change modes,
add 32 to the base mode number, to get both of these options, add 48 to the
base mode number.
Graphics
Mode
0
1
2
3
4
5
6
7
8
Mode
Type
Text
Text
Text
Graphics
Graphics
Graphics
Graphics
Graphics
Graphics
Rows
40
20
20
40
80
80
160
160
320
(split)
Columns
NA
20
10
20
40
40
80
80
160
(full)
Columns
24
24
12
24
48
48
96
96
192
Number of
Colors
2
5
5
4
2
4
2
4
1/2
5.2 PROC SetColor
purpose:
sets the specified color register to the color given by 'hue’ and
'luminance'.
format:
PROC SetColor(BYTE register,hue,luminance)
parameters:
register
is one of the five color registers (0 - 4)
hue
is the hue of the color.
luminance is the luminaire of the color.
description:
This routine allows you to set the color of a specific color register, and so
manipulate the colors displayed in a given mode. The following tables give
some information pertinent to the usage of this procedure.
Set Color hue
number
0
1
2
3
4
5
6
Color
Gray
Gold
Orange
Red-Orange
Pink
Purple
Purple-Blue
Set Color Hue
number
8
9
10
11
12
13
14
Color
Blue
Light Blue
Turquoise
Green Blue
Green
Yellow-Green
Orange-Green
7
Blue
15
Light Orange
The above table shows the 16 hues available on the ATARI and their
numeric code for use as the 'hue’ parameter of the SetColor procedure.
Register
Default Color
0
1
2
3
4
2
12
9
4
0
Default
Luminance
8
10
4
6
0
Color
Orange
Green
Dark Blue
Pink or Red
Black
This table shows which colors are the defaults used when you don't specify
your own color for a given SetColor 'register'.
NOTE: Colors may vary depending upon the television or monitor type,
condition, and adjustment.
The luminance value (a measure of the brightness" of a color) ranges
between 0 and 15, where 0 is darkest and 15 is brightest.
5.3 BYTE color
‘color’ isn't a library routine, but a variable defined in the library for use with
the 'Plot’, 'DrawTo', and 'Fill’ library procedures. After you pick your
graphics mode (using 'Graphics’) and set up the color registers (using
'SetColor'), you can plot and draw in that mode using any of the colors you've
specified by first using the assignment:
color= <number>
where <number> is related to the color register containing the color you want
to use. The following table shows this relationship for the different graphics
modes. For every group of related modes, each SetColor 'register' is
followed by its associated 'color’ <number>, and some descriptive
comments.
Graphics
SetColor
Color
Description and Comments
‘register’
0
1
2
3
4
0
1
2
3
4
0
1
2
3
4
0
1
2
3
4
0
1
2
3
4
Mode
0
and
all
text
windows
1,2
3,5,7
4,6
8
number
N/A
N/A
N/A
N/A
N/A
N/A
N/A
N/A
N/A
N/A
1
2
3
-0
1
---0
-1
0
---
--Character Lumance
Background
Boarder
Character
Character
Character
Character
Background
Graphics Point
Graphics Point
Graphics Point
-Gr. Pt. Background, Boarder
Graphics Point
---Gr. Pt. Boarder, Background
-Graphics Point Luminance
Graphics point Background
-Border
5.4 PROC Plot
purpose:
format:
to position the cursor at a specified location, and then
display a color using the library variable 'Color’.
PROC Plot(CARD col,BYTE row)
parameters:
col
row
is the horizontal colum number of the point
being plotted
is the vertical row number of the point being
plotted,
description:
This procedure is used in graphics modes 3 - 8 to plot a point on the screen.
The size of the point displayed depends on the graphics mode, and the color
of the point depends on the current value of the library variable 'Color' (see
previous section).
5.5 PROC DrawTo
purpose:
(must be preoeeded by a ‘Plot') to draw a line between the
point just Plotted and the specified position.
format:
PROC DrawTo(CARD col,BYTE row)
parameters:
col
row
is the horizontal column number of the end
point of the line.
is the vertical row number of the end point of
the line.
description:
This procedure is used in graphics modes 3 - 8 to draw a line from the point
just plotted (using 'Plot') and the position given by the parameters. The
color of the line depends on the current value of the library variable ‘Color'
(see section 5.3).
5.6 PROC Fill
purpose:
(must be preceded by a 'Plot') fills a box with a color.
format:
PROC Fill(CARD col,BYTE row)
parameters:
col
is the horizontal column number of the lower right
corner of the box being filled,
row is the vertical row number of the lower right corner of
the box being filled.
description:
This Allows you to make boxes of color in graphics modes 3 – 8. The upper
left corner of the box is defined by the position of the 'Plot' immediately
before the ‘Fill’, and the lower right corner is given by the parameters. The
color used is decided by the contents of the library variable 'Color'.
5.7 PROC Position
purpose:
to position the cursor anywhere on the screen
format:
PROC Position(CARD col,BYTE row)
parameters:
col
is the horizontal column number of the position
desired.
row is the vertical row number of the position desired.
description:
This procedure sets the cursor location to the specified position in any
graphics mode. The library routines Print, Put, Input, and Get use the
cursor registers this command sets when doing their respective functions.
5.8 BYTE FUNC Locate
purpose:
determine the color or character at a given screen location.
format:
BYTE FUNC Locate(CARD col, BYTE row)
parameters:
col
row
is a column number valid in the current
graphics mode.
is a row number valid in the current graphics
mode.
description:
This routine retrieves the ATASCIT code of the character or the number of
the color at the specified location. The registers this routine uses are
incremented so as to point to the adjacent horizontal position (the first
position in the next line if you Located the last position on a line). All of the
Get, Put, Print, and Input routines also use these registers as references for
the current cursor location, so you can use this to move to any position and
then use another routine to manipulate what’s there.
5.9 PROC Sound
purpose:
to enable the sound capabilities of the ATARI.
format:
PROC Sound(BYTE voice,pitch,distortlon,volume)
parameters:
voice
is one of the four voices available on the ATARI
(0 – 3)
pitch
is the frequency of the sound. The lower the
number is, the higher the pitch.
distortion is a measure of the sound’s "fuzziness" (0 - 14
even values).
volume
is the volume of the sound(0 - 16)
description:
This procedure allows you to control the sound-generating apparatus on the
ATARI, much like the BASIC command of the same name. Distortion
values 10 is the only one useful for making music. The others are useful for
airplane, racecar, etc, sound effects.
Here is a table for various musical notes using distortion 10.
‘pitch’
29
31
33
35
37
40
42
45
47
50
53
57
60
64
68
Note
C
B
A# (Bb)
A
G# (Ab)
G
F# (Gb)
F
E
D# (Eb)
D
C# (Db)
C
B
A# (Bb)
Comment
High Notes
72
76
81
85
91
96
102
108
114
121
128
136
144
153
162
173
182
193
204
217
230
243
A
G# (Ab)
G
F# (Gb)
F
E
D# (Eb)
D
C# (Db)
C
B
A# (Bb)
A
G# (Ab)
G
F# (Gb)
F
E
D# (Eb)
D
C# (Db)
C
Middle C
Lower Notes
5.10 SndRst
purpose:
to reset all the sound voices.
format:
PROC SndRat()
parameters:
none
description:
This procedure resets all the sound voices to produce no sound.
5.11 BYTE FUNC Paddle
purpose:
to return the current numeric value (position) of one of the
paddles.
format:
BYTE FUNC Paddle(BYTE port)
parameters:
port
is the port number (0 - 7) of the
desired paddle.
description:
This function returns the current value of the specified paddle port.
5.12 BYTE FUNC PTrig
purpose:
to determine whether a paddle trigger has been pressed.
format:
BYTE FUNC PTrig(BYTE port)
parameters:
port is the port number (0 - 7) of the desired paddle.
description:
This function returns the current value of the given paddle's trigger. A value
of 0 is returned if the trigger is pressed, otherwise the value returned is
non-zero.
5.13 BYTE FUNC Stick
purpose:
to return the current numeric value of a specified joystick.
format:
BYTE FUNC Stick(BYTE port)
parameters:
port is the port number (0-3) of the desired joystick.
Description:
This function returns the current position of the joystick, using codes as in the
following diagram:
14
10 | 6
\ | /
\ |/
11------15-----7
/|\
/ | \
9 |
5
|
13
5.14 BYTE FUNC STrig
purpose:
to determine whether a joystick trigger has been pressed.
format:
BYTE FUNC STrig(BYTE port)
parameters:
port
is the port number (0 - 3) of the desired
joystick.
description:
This function returns the current value of the given joystick's trigger. A value
of 0 is returned if the trigger is pressed, otherwise the value returned is
non-zero.
Chapter 6: String Handling / Conversion
The routines discussed in this chapter allow you to manipulate strings,
change a number to a string, and change a string into a number. No further
discussion is necessary since the routine descriptions speak for
themselves.
6.1 String Handling Routines
The following four routines make possible some advanced string
manipulation, including string comparison, string copying, and substring
insertion. There is one caution, however, and that is: remember that the
maximum length of a string is 255 characters, so don’t try to use these
routines to create or to manipulate big CHARacter arrays.
6.1.1 INT FUNC SCompare
purpose:
to compare alphabetically two strings.
format:
INT FUNC SCompare(<string1>,<string2>)
parameters:
<string1>
<string2>
is a string with double quotes, or the
identifier of a CHAR ARRAY which is a
string.
is a string with double quotes, or the
identifier of a CHAR ARRAY which is a
string.
description:
This function returns a value dependent on the following tables:
comparison
<string1> < <string2>
<string1> = <string2>
<string1> > <string2>
value returned
value < 0
value = 0
value > 0
The comparison is alphabetic, so this is a good way to alphabetize a list of
strings.
6.1.2 PROC SCopy
purpose:
to copy one string into another.
format:
PROC SCopy(<dest>,<soorce>)
parameters:
<dest>
is the identifier of the destination string (CHAR
ARRAY) for the string copy.
<soorce> is the string with double quotes or identifier of
the CHAR ARRAY used as the source string
for the copy.
description:
This procedure copies the contents of <source> into <dest>. If <dest> is
dimensioned to be shorter than the length of <source>, then only the part of
<source> which fits into <dest> will be copied, if <dest> is longer than
<source>, then SCopy will copy all of <source> into <dest>, but not alter the
rest of <dest>.
HINT: don't dimension <dest> to avoid all the above problems.
6.1.3 PROC SCopyS
purpose:
to copy part of a string into another string.
format:
PROC SCopyS( <dest> , <source> , BYTE start, stop)
parameters:
<dest>
is the identifier of the destination string (CHAR
ARRAY) for the string copy.
<source> is the string with double quotes or identifier of
the CHAR ARRAY used as the source string
for the copy.
start
is the starting point in <source> for the copy.
stop
is the stopping point in <source> for the copy.
If 'stop’ is greater than the length of <source>,
it is changed to equal the length of <source>.
description:
This procedure will copy the elements of <source> from element 'start' to
element ‘stop’ into <dest>. In essence, this works just like SCopy, but
copies only a part of <source> instead of the whole thing.
6.1.4 PROC SAssign
purpose:
to copy one string into part of another string.
format:
PROC SAssign(<dest>,<source>, BYTE start,stop)
parameters
<dest>
is the identifier of the destination string (CHAR
ARRAY) for the string copy.
<source> is the string with double quotes or identifier of
the CHAR ARRAY used as the source string
for the copy.
start
is the starting point in <dest> for the copy.
stop
is the stopping point in <dest> for the copy. If
'stop’ is greater than the length of <<dest>,
then the length of <dest> is changed to ‘stop’.
description:
This procedure is used to copy one string (<source>) into part of another
(<dest>). <source> will be copied starting at element 'start’ of <dest>, and
the copying will stop at element 'stop' of <dest>. If the space allowed
(stop-start+1) in <dest> is greater than the length of <source>, then 'stop’
will be changed to make the space available and the length equal.
The copying this procedure does will overwrite the old elements of <dest> as
it puts in <source>.
6.2 Number to String Conversions
The following three procedures convert the number given as a parameter
into a character string. There is one procedure for each of the numeric data
types.
purpose:
to change a number into a character string,
format:
PROC StrB(BYTE number,<string>)
PRCC StrC(CARD number,<string>)
PROC StrI(INT number,<string>)
parameters:
number
<string>
is an arithmetic expression (remember that
arithmetic expressions can simply be a
constant or variable name).
is the identifier of a CHAR ARRAY.
description:
These procedures turn BYTE, CARD, or INT values into character strings
composed of the digits of the given number.
6.3 String to Number Conversions
purpose:
to convert a string composed of digits into a number.
format:
BYTE FUNC ValB(<string>)
CARD FUNC ValC(<string>)
INT FUNC ValI(<string>)
parameters:
description:
<source>
is a string with double quotes or identifier
of a CHAR ARRAY, composed of digits
("0" - "9” ) only.
These functions will return the numeric value (BYTE, CARD, or INT,
depending on the function used) of the given string.
Chapter 7: Miscellaneous Routines
This chapter contains those routines which don’t really fit into any category,
but are useful nonetheless. The routines themselves are:
Rand
Break
Error
Peek
PeekC
Poke
PokeC
Zero
SetBlock
MoveBlock
Device
Trace
List
EOF
a random number generator
a routine useful when debugging
a system routine you can replace
view a byte of memory
view two bytes of memory (as a CARD)
put a BYTE value into memory
put a CARD value into memory
zero out a section of memory
fill a block of memory with a value
move a block of memory
the "default device" variable
controls the ‘TRACE’ compile option
controls the 'LIST' compile option
contains EOF status for all channels
As you can see, the tasks these routines perform are quite diverse; hence
their own chapter.
7.1 BYTE FUNC Rand
purpose:
to generate a random number
format:
BYTE FUNC Rand(BYTE range)
parameterss
range
is the upper limit for the random number.
description:
This function will return a random number between 0 and ‘range’. If 'range’
is 0, then a random number between 0 and 255 is returned.
7.2 PROC Break
purpose:
to stop program execution*
format:
PROC Break()
parameters:
none
description:
This procedure allows you to stop your program's execution to examine
variables and do other debugging. You can continue program execution
starting with the statement following the 'Break’ routine call by using the
‘PROCEED' monitor command.
7.3 PROC Error
This is the procedure the ACTION! system itself calls when it (or CIO)
encounters an error. If you want to trap your own errors, you could write a
routine to do this, and then make ACTION! use your error routine instead of
its own simply by having the following statements in your program:
PROC MyError(BYTE errcode)
;*** this is your error routine, and the error
; code number is passed to it by the ACTION! system.
; your error handling routines go here
RETURN ;end of PROC MyError
PKOC main() ;your main procedure
CARD temperr ;holds the address of the system's error routine (PROC Error)
temper=Error ;save the address of the system error routine
Error=MyError ;make the address of the system error routine point to the
;start of your error routine
;the body of your program goes here,
Error=temperr
;reset the address of the system error
;routine back to the real system error rroutine not yours*
RETURN ;end of program*
All you are really doing is changing the pointer to the system error routine so
that it points to your error routine instead. You don't have to call this routine
because it will be called by the ACTION! system when an error is
encountered.
Notice that we saved the original error routine pointer, and then, at the end of
the program, we reset that pointer (which was changed to point to your error
routine) back to the system error routine. This was done so that the system
could again use its error routine after your program finished running.
WARNING: the capability of substituting your error routine for the system's
should be used very carefully, because you might forget to check for
something in you routine, and thereby cause the entire system to crash.
7.4 BYTE FUNC Peek and CARD FUNC PeekC
purpose:
to return the value (BYTE or CARD) at a given memory location.
format:
BYTE FUNC Peek(CARD address)
CARD FUNC PeekC(CARD address)
parameters:
address
is the address of the memory location you
desire to look at.
description;
These two functions allow you to look at memory during program execution,
either as a BYTE or a CARD In LSB,MSB order.
7.5 PROC Poke and PROC PokeC
purpose:
location.
to insert new values (BYTE or CARD) into a specified memory
format:
PROC Poke(CARD address, BYTE value)
PROC: PokeC(CARD address, value)
parameters:
address
value
is the address of the memory location you
desire to change.
is the value you want put into the memory
location specified by ‘address’. When using
PokeC, the CARD value is stored in ‘address’
and 'address'+1 in LSB, MSB order.
description:
These procedures allow you to change the contents of memory during
program execution by changing the given address to the specified value.
7.6 PROC Zero
purpose:
to zero out a block of memory.
format:
PROC Zero(BYTE POINTER address, CARD size)
parameters:
address
size
is a pointer to the starting address of the block
you want zeroed.
is the size of the block you want zeroed.
description:
With this procedure you can set all the values of the memory locations in a
block to 0- This block starts at 'address' and ends at location ‘address’ +
‘size'-1.
7.7 PROC SetBlock
purpose:
to set the memory locations of a memory block to a specified
value.
format:
PROC SetBlock (BYTE POINTER addr, CARD size, BYTE val)
parameters:
addr is a pointer to the starting address of the block you
want to set.
size is the size of the block you want to set.
val is the value you want the bytes in the block set to.
description::
With this procedure you can set all the values of the memory locations in a
block to ‘val’. This block starts at ‘addr’ and ends at location ‘addr’ + ‘size’ –
1.
7.8 PROC MoveBlock
purpose:
to move the contents of a block of memory.
format:
PROC MoveBlock(BYTE POINTER dest,source, CARD size)
parameters:
dest
source
size
is a pointer to the start of the destination
memory block.
is a pointer to the start of the source memory
block.
is the size of the block you want to move.
description:
This procedure moves the values in a block starting at address 'source and
ending at address 'source'+ ‘size’-1 to a block starting at address ‘dest’ and
ending at address ‘dest'+‘size'-1. If ‘dest' is greater than 'source’, and
there is not 'size' space between them, then the move will not work properly
because part of the 'source' you are trying to move is in the 'dest' space.
7.9 BYTE device
'device' is a variable defined in the ACTION! Library, and allows you to
control the 'default channel' (device) for i/o. The number contained by
'device' is the channel number of the default device, so, for example, you
send default output to the printer using the following statements:
Close(5) ;avoid a 'File already Opened' error
Open(5,"P:",8)
device=5
and then reset it to the screen (when you want to) using the following
statements:
Close(5)
device=0
;close "P:"
7.10 BYTE TRACE
This library variable allows you to control the 'TRACE' compiler option from
within your program. You must use it with the ‘SET’ compiler directive,
and it must come at the beginning of your program. Setting 'TRACE’ to 0
turns off the option and setting it to 1 turns it on.
Example:
SET TRACE=0
7.11 BYTE LIST
This library variable controls the ‘LIST’ compiler. As with 'TRACE above,
this variable must be used in a ‘SET’ directive, and it must come at the
beginning of your program. A 0 turns the listing off, and a 1 turns it on.
7.12 BYTE ARRAY E0F(8)
With this library variable you can find out if you've reached the End Of File on
any channel. Simply give the number of the channel as the subscript to the
EOF array. For example, if you wanted to find out if you have reached the
End of File on channel 1 (the channel must be open), then you would use:
IF EOF(1) THEN
;do something here
:
:
FI
EOF equals 1 when the End Of File has been reached, otherwise it is 0.
Appendix A: ACTION! Language Syntax
Retyped in by Jim Patchell on February 13, 2010
It should be noted that I have made some additions to and correction to this BNF grammar. I
added in the assign ops and also “fixed” the complex rel production. Maybe they were correct in
the original, but I have a hard time reading these days. Anyway, the grammar seems to more or
less work this way.
The following is the syntax of the ACTION! Language in Backus-Naur form (BNF). This form
has a couple of special characters:
Symbol
:=
|
[]
Meaning
“is defined as”
“or”
“optional”
The appendix is set up to allow you easy access to the particular information you want, with
subsections as follows:
A.1 ACTION! Constants
Numeric Constant
String Constant
Compiler Constnat
A.2 Operators and Fundamental Data Types
Operators
Fundamental Data Types
A.3 ACTION! Program Structure
ACTION! Program
A.4 Declarations
System Declarations
DEFINE Directive
TYPE Declaration (for records)
Variable Declarations
Variable Declaration for Fundamental Data Types
Variable Declaration for Pointers
Variable Declaration for Arrays
Variable Declaration for Records
A.5 Variable References
Memory References
Fundamental Type Variable References
Pointer Type Variable References
Array type Variable references
Record Type Variable References
A.6 ACTION! Routines
Routines
Procedure Structure
Function Structure
Routine Calls
Parameters
A.7 statements
Assignment statement
EXIT statement
IF statement
DO – OD Loop
UNTIL statement
WILE Loop
FOR Loop
Code Blocks
A.8 Expressions
Relational Expressions
Arithmetic Expressions
A.1 ACTION! Constants
Numeric Constant
<num const> ::= <dec num> | <hex num> | <char>
<dec num> ::= <digit>
| <dec num> <digit>
<hex num> ::= '$' <hex digit>
| <hex num> <hex digit>
<hex digit> ::= <digit> | 'A' | 'B' | 'C' | 'D' | 'E' | 'F'
<dec digit> ::= '0' | '1'|'2'|'3'|'4'|'5'|'6'|'7'|'8'|'9'
<char> ::= ' ' ' <any printable character>
String Constant
<str const> ::= '”' <string> '”'
<string> ::= <str char>
| <string> <str char>
<str char> ::= <all possible characters except '”'>
Compiler Constant
<comp const> ::= <base comp const>
| <comp const> '+' <base comp const>
<base comp const> ::= <identifier> | <num const> | <ptr ref > | '*'
A.2 Operators and Fundamental Data types
Operators
<special op> ::= AND | OR | '&' | '%'
<rel op> ::= XOR | '!' | '=' | '#' | '>' | '<' | '<>' | '>=' | '<='
<add op> ::= '+' | '-'
<mul op> ::= '*' | '/' | MOD | LSH | RSH
<unary op> ::= '@' | '-'
Fundamental Data Types
<fund type> ::= CARD | CHAR | BYTE | INT
A.3 ACTION! Program Structure
<program> ::= <program> MODULE <prog module>
| < [MODULE] <prog module>
<prog module> ::= [<system decls>] <routine list>
A.4 Declarations
System Declarations
<system decls> ::= <system decl>
| <system decls><system decl>
<system decl> ::= <DEFINE decl>
| <TYPE decl>
| <fund decl>
| <POINTER decl>
| <ARRAY decl>
| <record decl>
DEFINE Directive
<DEFINE decl> ::= DEFINE <def list>
<def list> ::= <def>
| <def list> ',' <def>
<def> ::= <identifier> '=' <constant>
TYPE Declaration (for records)
<TYPE decl> ::= TYPE <rec ident list>
<rec ident list> ::= <rec ident list> <rec ident>
| <rec ident>
<rec ident> ::= <rec name> = '[' <field init> ']'
<rec name> ::= <identifier>
<field init> ::= <fund var decl>
Variable Declarations
<var decl> ::= <var decl:> [','] <base var decl>
| < base var decl>
<base var decl> ::= <fund decl>
| <POINTER decl>
| <ARRAY decl>
| <record decl>
Variable Declaration for Fundamental Data Types
<fund cecl> ::= <fund type> <fund ident list>
<fund type> ::= CARD | CHAR | BYTE | INT
<fund ident list> := <fund ident>
| <fund ident list> ',' <fund ident>
<fund ident> ::= <identifier> [ '=' <init opts>]
<init opts> ::= <addr> | '[' <value> ']'
<addr> ::= <comp const>
<value> ::= <num const>
Variable Declaration for Pointers
<POINTER decl> ::= <ptr type> POINTER <ptr ident list>
<ptr type> ::= <fund type> | <rec name>
<ptr ident list> ::= <ptr ident>
| <ptr ident list> ',' <ptr ident>
<ptr ident> ::= <identifier> [ '=' <value> ]
Variable Declarations for Arrays
<ARRAY decl> ::= <fund type> ARRAY <arr ident list>
<arr ident list>::= <arr ident>
| <arr ident list> ',' <arr ident>
<arr ident> ::= <identifier> [ '(' <dim> ')' ] [ '='<array init opts>]
<dim> ::= <num const>
<arr init opts> ::= <addr> | '[' <value list> ']' | <str const>
<value list> ::= <value>
| <value list> <value>
<value>::= <comp const>
Variable Declaration for Records
<record decl> ::= <identifier> <rec ident list>
<rec ident list> ::= <rec ident>
| <rec ident list> ',' <rec ident>
<rec ident> ::= <identifier> [ '=' <address> ]
<address> ::= <comp const>
A.5 Variable References
Memory References
<mem reference> ::= <mem contents> | '@'<identifier>
<mem contents> ::= <fund ref> | <arr ref> | <ptr ref> | <rec ref>
<fund ref> ::= <identifier>
<arr ref> ::= <identifier> '(' <arith exp> ')'
<ptr ref> ::= <identifier> '^'
<rec ref> ::= <identifier> '.' <identifier>
A.6 ACTION! Routines
<routine list> ::= <routine>
| <routine list> <routine>
<routine> ::= <proc routine> | <func routine>
Procedure Structured
<proc routine> ::= <PROC decl> [ <system decls> ][stmt list>][RETURN]
<proc decl> ::= PROC <identifier> [ '=' <addr>] '(' [ <param decl>] ')'
<addr> ::= <comp const>
Function Structure
<func routine> ::= <FUNC decl> [ <system decls> ] [<stmt list>][RETURN '(' <arith exp> ')']
<FUNC decl> ::= <fund type> FUNC <identifier> ['=' <addr>] '(' [<param decl>] ')'
<addr> := <comp const>
Routine calls
<routine call> ::= <FUNC call> | <PROC call>
<FUNC call> ::= <identifier> '(' [ <params>] ')'
<PROC call> ::= <identifier> '(' [<params>] ')'
Parameters
<param decl> ::= <var decl>
NOTE: maximum of 8 paramters allowed.
A.7 Statements
<stmt list> ::= <stmt>
| <stmt list> <stmt>
<stmt> ::= <simp stmt> | <struct stmt> | <code block>
<simp stmt> ::= assign stmt> | <EXIT stmt> | <routine call>
<struct stmt> ::= <IF stmt> | <DO loop> | <WHILE loop> | <FOR loop>
Assignment Statements
<assign stmt> ::= <mem contents> '=' <arith expr>
| <mem contents> “==+” <arith expr>
| <mem contents> “==-” <arith expr>
| <mem contents> “==/” <arith expr>
| <mem contents> “==*” <arith expr>
| <mem contents> “==&” <arith expr>
| <mem contents> “==%” <arith expr>
| <mem contents> “==|” <arith expr>
| <mem contents> “==LSH” <arith expr>
| <mem contents> “==RSH” <arith expr>
| <mem contents> “==MOD” <arith expr>
EXIT Statement
<EXIT stmt> ::= EXIT
IF Statement
<IF stmt> ::= IF <cond exp> THEN [ <stmt list>] [<ELSEIF exten>][<ELSE stmt>] FI
<ELSEIF exten> ::= ELSEIF <cond exp> THEN [<stmt list>]
<ELSE exten> ::= ELSE [<stmt list>]
DO – OD Loop
<DO loop> ::= DO [<stmt list>] [<UNTIL stmt>] OD
UNTIL statement
<UNTIL stmt> ::= UNTILE <cond exp>
WHILE Loop
<WHILE loop> ::= WHILE <cond exp> <DO loop>
FOR Loop
<FOR loop> ::= FOR <identifier> '=' <start> TO <finish> [STEP <inc>] <Do loop>
<start: ::= <arith exp>
<finish> ::= <arith exp>
<inc> ::= <arith exp>
Code Blocks
<code block> ::= '[' <comp const list>']'
<comp const list> ::= <comp const>
| <comp const list> <comp const>
A.8 Expressions
Relational Expressions
<complex rel> ::= <complex rel> <special op> <simp rel exp>
| <simp rel exp>
<simp rel exp> ::= arith exp> <rel op> <arith exp>
| <arith exp>
Arithmetic Expressions
<arith exp> ::-= <arith exp><add op> <mult exp>
| <mult exp>
<mult exp> ::= <mult exp><mult op><value>
| <value>
<value> ::= <num const> | <mem reference> | '(' <arith exp> ')'
Appendix B: ACTION! Memory Map
Address
$00-$C9
$CA-$CD
$CE-$D3
$D4-$FF
$100-$3FF
$400-$4FF
$500-$5FF
$600-MEMLO-1
MEMLO
MEMLO+$200
MEMLO+$300
MEMLO+$750
TOP-$800
MEMTOP
$A000
$C000-$FFFF
Description
OS and ACTION! Variables
Free Space
ACTION! Variables
Atari Floating Point Registers
Operating System
ACTION! Variables
Atari Floating Point Buffer
Operating System
ACTION! compiler STACKS
ACTION! Editor Line Buffer
ACTION! Hash Tables
ACTION! Editor Text Buffer
ACTION! Compiler Code Space
ACTION! Compiler Symbol Table
Screen Memory
ACTION! Cartridge
O.S., ROMS, etc.
NOTE: the Compiler Code Space starts wherever the Editor Text Buffer
ends. This makes both the Editor Buffer and the Compiler Buffer dynamic in
memory. For more information on this, see part V, chapter 2.
Appendix C: Error Code Explanation
In this appendix we'll describe the meaning of each of the error numbers you
could encounter while programming in ACTION!. Included are those errors
which the ACTION! system itself discovers, but not those which the
operating system discovers (errors 128 - 255).
Error Code
0
1
2
3
4
5
6
7
8
9
10
11
12
13
14
15
16
17
18
Explanation
Out of system memory. See Part II, section 4.3, and Part V,
section 4.4, to find out how to remedy this error.
Missing " (double quote) in a string.
Nested DEFINES. You can not nest the DEFINE directive.
Global variable symbol table full.
Local variable symbol table full
SET directive syntax error
Declaration errorp You used the wrong declaration format
when declaring something
Invalid argument list. You gave a statement or routine too
many arguments
Variable not declared. Remember, you must declare your
variables before you use them
Not a constant. You used a variable where a constant of
some kind was required
Illegal assignment. You are trying to do some sort of
assignment that is not allowed (e.g., var=5>7 is illegal)
Unknown error. You have somehow impaired the ACTION!
system error routines, so it can't tell you which error you have
made
Missing THEN
Missing FI
Out of code space. See Part V, section 4.4, for more
information
Missing DO
Missing TO
Bad Expression. You have used an illegal expression
format
Unmatched parentheses
19
20
21
22
23
24
25
26
27
28
61
128
Missing OD
Can’t allocate memory. You have impaired the ACTION!
system, and it is uneble to allocate any more memory
Illegal array reference
The input file is too large. You need to break it into smaller
pieces
Illegal Conditional Expression
Illegal FOR statement syntax
Illegal EXIT. There is no DO - OD loop for the EXIT to exit
out of
Nesting too deep (16 levels maximum)
Illegal TYPE syntax
Illegal RETURN
Out of Symbol Table space. See Part IV for more information
<BREAK> key was used to stop program execution
Appendix D: Bibliography and References
D.1 Atari 400/800 Hardware Systeins
Atari Publications:
ATARI Personal Computer System Operating System User's Manual
and Hardware Manual
ATARI 810 Disk Drive Operator's Manual
ATARI 400/800 Disk Utility
ATARI 400/800 Operating Systems
ATARI 400/800 Disk Operating Systems II Reference Manual
Other Atari References:
Poole, McNiff, Cook - Yoor Atari Computer
D.2 Optimized Systems Software References
OSS OS/A+ reference manual
OSS DOS XL reference manual
Appendix E: Editor Commands Summary
E.1 I/O Commands
Read A File
Disk Directory
Write a File
List to Printer
position cursor, <CTRL><SKIFT> R, enter file spec
<CTRLi <SHIPT> R ?n:*.* (n is the device name)
<CTBL><SHIFT> W, enter fllespec
<CTRL><SHIPT> W, enter P:
E.2 Cursor Movement within Window
Up
Down
Right
Left
Start of Line
End of Line
Next Line
Tab
<CTRL><up arrow>
<CTRL><down arrow>
<CTRL><right arrow>
<CTRL><left arrow>
<CTRL><SHIPT> <
<CTRL><SHIFT> >
<RETl]RN>
<TAB>
E.3 Tab Handling
Set Tab
Clear Tab
<SHIFT><SET TAB>
<CTRL><CLR TAB>
E.4 Wlndcmr Movement
Start of File
Up one screen
Down one Screen
Left 1 Char
Right 1 Char
<CTRL> <SHIFT> H
<CTRL><SHIFT><up arrow>
<CTRL><SHTFT><down arrow>
<CTRL><SHIFT> ]
<CTRL><SHIFT> [
E.5 Text Entry
Enter Program
Next Line
Control Chars
enter text
<RETURN>
precede each character with <ESC>
E.6 Delete Text
Back 1 Char
Cursor
Delete Line
<BACK S>
<CTRL><DELETE>
position cursor on line,
<SHIFT><DELETE>
E.7 Insert / Replace Text
Toggle Modes
Insert Line
<CTRL><SHIFT> I
<SHIFT><INSERT>
E.8 Restore Altered Line
Restore Line
Recall Line
don't move cursor, <CTRL><SHIFT> U
don't move cursor, <CTRL><SHTPT> P
E.9 Text Blocks
Load Block
Paste Block
position cursor, <SHIFT><DELETE> until done
position cursor, <CTRL><SHIFT> P
E.10 Searches / Substitutions
Find String
Substitute
<CTRL><SHIFT> F, enter string
<CTRL><SHIFT> S, enter new string, <RETIIRN>, enter
old string
E.11 Breaking & Combining Lines
Break Line
Combine
Line
position cursor, <CTftL><SHlFT> <RETURN>
put cursor at front of second line,
<CTRL><SHIFT> <BACK S>
E.12 Leaving the Editor
Leave Editor
<CTRL><SHIPT> M
Appendix F: Summary of ACTION! Monitor Commands
B
C {"<flleftpec>"}
D
E
O
P
R {"<fllespec>"}
SET <address> =
<value>
W {"<flleflpec>"}
X <statement> |:
<statement> :|
? <address>
* <address>
restart ACTION! system
compile an ACTION! program
call DOS
go to the ACTION! Editor
go to the ACTION! Options Menu
proceed from program halt
run an ACTION! program
sets a value in a specified memory location
save a compiled program to disk
execute ACTION! language statement(s)
display value of an address (or compiler constant)
display values of all addresses, starting at an address (or
compiler constant)
Appendix G: Options Menu Summary
prompt
Display on?
default range
Comment
Y
Y or
Controls the screen during compile &
N
device l/O
Bell off?
N
Y or Controls bell response.
N
Case insensitive?
N
Y or
Controls the compiler check for upper
N
case key words in the language and the
case distinction in variable names.
Trace on?
N
Y or Controls compiler setup of programs so
N
that the program, during execution,
notes entry into any PROCedure or
FUNCtion.
List on?
N
Window size?
18
Line size?
120
Left margin?
2
EOL character?
$9B
Y or
N
5 to
18
1 to
240
0 to
39
Controls compiler listing of program
lines to screen during compile process
Controls window 1 size. Window 1 and
window 2, combined, use 2 3 lines
Controls line length
Controls left margin in window; set as
low as you find comfortable
any ATASCII character Change the
End-Of-Line character to aid
visualization of program
Appendix H: "PRIMES" Benchmark
This is the benchwark that from September, 1981 BYTE Magazine, pp.
160-198, as implemented in ACTION!. Here is a table of our times to
compare with those in the magazine:
Mode
Compilation
Display OFF
Display ON
DEFINE size = "8190",
ON -="1",
OFF = "0"
BYTE ARRAY flags(size+1)
CARD count, I, k, prime
BYTE DISPLAY=$22F,
iter,
tick=20,
tock=19
PROC Primes()
Time
~0.25sec
12.2sec
17.9sec
DISPLAY = 0 ;comment this line to leave display On
tick = 0
tock=0
FOR iter=1 TO 10
DO
count = 0
; turn flags on (non-zero)
SetBlock(flags, size, ON)
FOR i = 0 TO size
DO
IF flags(i) THEN
prime = i+i+3
;PrintCE(prime) ;Uncomment to print primes
k = prime + i
WHILE k <= size
DO
flags(k) = OFF
k ==+ prime
OD
count ==+ 1
FI
OD
OD
i=tick+256*tock
DISPLAY = $22 :turn display back on
PrintF("%U Primes done in %U ticks %E", count, i)
RETURN
Appendix I: Converting BASIC Concepts to ACTION! Programs
This appendix presents several BASIC functions, routines, statements, etc.
For each BASIC example given, a corresponding ACTION! example is also
given.
In the BASIC examples given, no line numbers are shown unless necessary
for illustration purposes-. You should assume the existence of appropriate
line numbers in most cases.
In the ACTION! examples shown, assume the following variable
declarations:
INT i,j,k
CARD c,d,e
BYTE a,b
BYTE ARRAY s,t,aa,ba
CARD ARRAY ca,da,ea
INT ARRAY ia,ja,ka
BASIC statements
C = D+I*A
IF A <>0 THEN B=1
10 IF A=0 THEN 30
20 B=1 : C=A*3
30 REM
10 IF A=0 THEN B =1 GOTO 30
20 B=7
30 REM
FOR I=1 TO 100 …
NEXT I
PRINT "HELLO"
PRINT "HELLO";
PRINT #5;' HELL0"
PRINT #5;"HELLO";
PRINT I
PRINT “I=”;I
PRINT #3;B*3;
INPUT I
INPUT B$
PUT #0,65
GET #C,B
OPEN #1,4,0, “K:”
CLOSE #3
NOTE #1,C,B
ACTION! equivalents
c=d+i*a
IF a<>0 THEN b=1 FI
IF a<>0 THEN b=1 c=a*2
FI
IF a=0 THEN b=1 ELSE b=7 FI
FOR i = 1 TO 100 DO … OD
PrintE("HELLO")
Print("hello")
PrintDE(5,"HELLO")
PrintD(5,"HELLO")
PrintlE(i)
PrintF(“I=%I%E”,I) or
Print(“I=”) PrintIE(I)
PrintBD(3,b*3)
Put(‘?) : I = InputI()
Note: the use of tbe optional colon
(s) in the ACTION! example. Colons
ignored by ACTION! and so may
used as statement separators.
Put(‘?) : InputS(ba)
Put(‘A) or Put(65) or Put($41)
b = GetD(c)
Open(1, "K:" 4, 0)
Close(3)
Note (1,@c, @b)
POINT #1,C,B
XIO 18,#6,0,0,"S:"
B = PEEK(C)
POKE C,B
GRAPHICS 8
COLOR 3
DRAWTO C,D
LOCATE C,D,B
PLOT C,D
POSITION C,D
SETCOLOR 0,1,C
GRAPHICS 24 : COLOR C :
PLOT 200,150 :
DRAWTO 120,20 :
POSITION 40,150 :
POKE 765,C :
XIO I8,#6,0,0,"S;"
SOUND 0,121,10,6
C = PADDLE( B )
C = PTRIG( B )
C = STICK( B )
C =STRIG( B )
B$ = S$
B$ = S$(3,5)
B$(3,5) = S$
B=INT(6*RND(0) )+ 1
FOR C = 4000 TO 5000 :
POKE C,0 : NEXT C
STOP
Point(1, c, b)
XIO(6,0,18,0,0,"S:") or see also the
Fill library routine
b =Peek(c) or, in better ACTION!
form:
ba=c
b = ba^
Poke(c,b)
or, in better ACTION! form,
ba = c
ba^= b
Graphics(8)
color = 3
Note: color is a system library
variable and is predefined by
ACTION!
DrawTo(c,d)
b = Locate(c,d)
Plot(c,d)
Position(c,d)
SetColor(0,1,c)
Graphlcs(24) : color = c
Plot(200,150)
DrawTo(120,20)
Fill(40,150)
Sound(0,121,10,6)
c = Paddle(b)
c = Ptrig(b)
c = Stick(b)
c = Strig(ti)
SCopy(ba, s)
SCopyS(ba,s, 3, 5)
SAssign(ba, s, 3, 5)
b = Rand(6) + 1
Zero(4000, 1001)
Break()
B$ = STR$( I )
I = VAL (S$)
StrI(i, ba)
i = ValI(s)