1
The Last Word 3.0 Reference Manual
The Last Word
Professional Word Processing
for the Atari XL/XE
With dual 40 and 80 column displays.
Written by and Copyright © Jonathan Halliday 1999-2009
1-1
The Last Word 3.0 Reference Manual
Contents
1
INTRODUCTION..................................................................................... 1-5
1.1
OVERVIEW OF THE LAST WORD......................................................... 1-5
1.2
ABOUT THE MANUAL ........................................................................... 1-6
1.3
STARTING LW ....................................................................................... 1-6
1.3.1
1.4
2
THE EDIT SCREEN............................................................................. 1-7
1.4.2
TEXT BANKS ...................................................................................... 1-9
1.4.3
SAVING AND LOADING TEXT ........................................................... 1-9
1.4.4
THE FILE SELECTOR ...................................................................... 1-11
1.4.5
BASIC CONFIGURATION................................................................. 1-11
1.4.6
LEAVING THE PROGRAM ............................................................... 1-12
EDITOR COMMANDS .......................................................................... 2-13
2.1
CURSOR MOVEMENT ......................................................................... 2-13
2.2
TEXT ENTRY MODES .......................................................................... 2-13
2.3
INSERTING AND DELETING TEXT ..................................................... 2-14
2.4
MOVING AND COPYING WITH TEXT BLOCKS .................................. 2-15
2.5
FINDING AND REPLACING TEXT ....................................................... 2-16
5
SEARCHING WITH WILDCARDS ..................................................... 2-17
ADDITIONAL EDITOR FEATURES ..................................................... 3-18
3.1
COUNTING WORDS............................................................................. 3-18
3.2
EDITED TEXT INDICATOR .................................................................. 3-18
3.3
TABULATION ....................................................................................... 3-18
3.3.1
4
BASIC OPERATION ............................................................................... 1-7
1.4.1
2.5.1
3
LOADING LW FROM SPARTADOS X ................................................ 1-6
TABULATION MODES ..................................................................... 3-18
3.4
BOOKMARKS ...................................................................................... 3-19
3.5
TEXT AND DOCUMENT MODES ......................................................... 3-19
3.6
USER OPTIONS ................................................................................... 3-20
3.7
EDITING MULTIPLE FILES .................................................................. 3-20
3.8
HANDLING LARGE FILES ................................................................... 3-21
DISK OPERATIONS ............................................................................. 4-23
4.1
DISK OPERATIONS FROM THE EDITOR ........................................... 4-23
4.2
THE DISK MENU .................................................................................. 4-23
4.2.1
ADDITIONAL COMMANDS .............................................................. 4-26
4.2.2
SUBDIRECTORY FEATURES .......................................................... 4-26
PRINTING WITH LW ............................................................................ 5-27
5.1
PREVIEWING TEXT ............................................................................. 5-27
1-2
The Last Word 3.0 Reference Manual
5.2
KEEPING TRACK OF PAGINATION .................................................... 5-27
5.3
EDITOR PRINT COMMANDS ............................................................... 5-27
5.4
EMBEDDED COMMANDS ................................................................... 5-28
5.4.1
STAGE 1 COMMANDS ..................................................................... 5-28
5.4.2
STAGE 2 COMMANDS ..................................................................... 5-32
5.4.3
CREATING HANGING INDENTS ...................................................... 5-33
5.5
5.5.1
5.6
6
7
INTERNATIONAL CHARACTERS .................................................... 5-33
CONFIGURING THE PRINT FORMATTER .......................................... 5-34
CONFIGURING LW FOR YOUR PRINTER .......................................... 6-35
6.1
PRINTER DRIVERS .............................................................................. 6-35
6.2
CREATING A PRINTER DRIVER ......................................................... 6-35
6.2.1
PRINT TOGGLES ............................................................................. 6-36
6.2.2
CONTROL STRINGS ........................................................................ 6-36
6.2.3
INTERNATIONAL CHARACTERS .................................................... 6-36
6.2.4
STYLES ............................................................................................ 6-37
MACROS ............................................................................................... 7-39
7.1
LOADING MACROS ............................................................................. 7-39
7.2
RUNNING MACROS ............................................................................. 7-40
7.2.1
8
OTHER PRINT FEATURES .................................................................. 5-33
AUTORUN MACROS ........................................................................ 7-40
7.3
WRITING AND EDITING MACROS ...................................................... 7-41
7.4
SPECIAL MACRO COMMANDS .......................................................... 7-41
7.4.1
DISABLING THE SCREEN FROM MACROS ................................... 7-44
7.4.2
SPECIAL CHARACTERS ................................................................. 7-44
7.4.3
ENTERING OTHER COMMANDS FROM MACROS......................... 7-45
7.4.4
THE SPECIAL MACRO FONT .......................................................... 7-45
7.4.5
KEYBOARD CONVENTIONS FOR MACROS .................................. 7-45
7.5
CREATING AND EDITING MACROS ................................................... 7-46
7.6
EXAMPLE MACROS ............................................................................ 7-47
CONFIGURING LW............................................................................... 8-50
8.1
CONFIGURATION OPTIONS IN THE EDITOR .................................... 8-50
8.2
.CFG CONFIGURATION FILES............................................................ 8-51
8.2.1
8.3
THE DEFAULT DRIVE ...................................................................... 8-52
THE LW.SYS FILE................................................................................ 8-53
8.3.1
CONFIGURATION USING A SUPPORTED DOS ............................. 8-53
8.3.2
CONFIGURATION USING OTHER DOS PACKAGES ..................... 8-54
8.3.3
THE SEARCH PATH ......................................................................... 8-55
8.3.4
THE KEYBOARD BUFFER ............................................................... 8-56
8.4
USING MULTIPE TEXT BUFFERS....................................................... 8-56
1-3
The Last Word 3.0 Reference Manual
8.5
CUSTOM FONTS .................................................................................. 8-56
8.6
CUSTOMISING THE KEYBOARD ........................................................ 8-57
9
8.6.1
THE KEYBOARD TABLE ................................................................. 8-57
8.6.2
REMAPPING COMMANDS USING MACROS .................................. 8-59
8.6.3
1200 XL KEYS .................................................................................. 8-60
DOS PACKAGES AND LW .................................................................. 9-61
9.1
MEMORY REQUIREMENTS ................................................................. 9-61
9.2
ATARI DOS 2.5..................................................................................... 9-61
9.3
ATARI DOS XE ..................................................................................... 9-61
9.4
MYDOS 4.5 ........................................................................................... 9-61
9.5
DISK-BASED SPARTADOS ................................................................. 9-62
9.6
SPARTADOS X .................................................................................... 9-62
10
9.6.1
THE SPARTADOS X “LWPATH” ENVIRONMENT VARIABLE ....... 9-63
9.6.2
SPARTADOS X MEMORY CONFIGURATIONS ............................... 9-63
LW COMMAND SUMMARY ............................................................ 10-65
10.1
EDITOR COMMANDS ........................................................................ 10-65
10.2
SPECIAL KEYS .................................................................................. 10-67
10.3
MACRO COMMANDS ........................................................................ 10-68
11
PRINT FORMATTING COMMANDS ............................................... 11-69
12
PROGRAMMER'S TECHNICAL NOTES......................................... 12-71
12.1
ASSEMBLY LANGUAGE ADD-INS ................................................... 12-71
12.2
MEMORY USAGE .............................................................................. 12-71
12.3
PROGRAM DESIGN ........................................................................... 12-72
12.4
DEVELOPMENT AND TESTING ........................................................ 12-73
12.5
WHY LW CAME INTO BEING ............................................................ 12-73
12.6
DEVELOPMENT ................................................................................. 12-76
12.7
CORRESPONDENCE ......................................................................... 12-77
1-4
The Last Word 3.0 Reference Manual
1 INTRODUCTION
1.1 OVERVIEW OF THE LAST WORD
Welcome to THE LAST WORD, the brand new 80 column word processor for Atari
XL/XE computers, and one of the most powerful text editors ever written for the 8-bit
Atari. The Last Word (LW) combines many of the innovative features found in public
domain text editors like TextPro with capabilities of established commercial packages
such as AtariWriter Plus and The First XLEnt Word Processor. This means LW offers:
Full 80 column editing on-screen (switchable to 40 columns at any time)
Horizontally scrolling editing window of up to 240 columns
Editing of up 10 files simultaneously on a memory expanded machines
Sophisticated keyboard macro language
80 column print preview
Versatile cut and paste features
Search and replace, including reverse search
High speed editing, even at the top of large files
Comprehensive on-line help system
Feature-packed file selector/file management menu with up to 80 filenames in
a scrolling window and support for SpartaDOS X directories with time/date
stamps
Support for SpartaDOS X, MyDOS, DOS 2.5 and many DOS 2 derivatives
User-definable tab ruler
Customizable, plain-text printer drivers
Plain-text configuration files
Completely redefinable keyboard layout
All international characters visible on the screen
Comprehensive print formatting commands
Automatic heading levels
Indents, hyphenation, and much more...
First written in 1999 and completely revamped ten years later to use an 80 column
display, LW is one of the few word processors to be written for the Atari XL/XE in the
last twenty years.
1-5
The Last Word 3.0 Reference Manual
1.2 ABOUT THE MANUAL
This manual assumes basic familiarity with the Atari screen editor and keyboard.
Command keystrokes are enclosed in angle brackets ("<" and ">") which should NOT
be typed in. Where two or more keys need to be pressed together, these keys are
linked with the plus sign "+".
1.3 STARTING LW
Boot the computer with the LW disk in drive 1 while holding down the <Option> key. (If
you don’t hold down <Option> and the BASIC “Ready” prompt appears, type DOS and
press <Return>). The DOS menu will appear. LW should be started with Binary Load
(option L) on the DOS 2.5 menu. Press “L” and type “LW.COM”, then press <Return>.
Note: unlike prior versions of the program, LW 3.0 is NOT compatible with DOS
XE, nor with any DOS which uses RAM under the Operating System.
When LW loads, it looks on the default drive (“D:”) for the following files, and if it finds
them, loads them. If a file isn't found, default "built-in" values are used.
LW.SYS
System configuration file: sets up memory usage, keyboard buffer,
keyboard redefinition and path for help and system files.
LW.CFG
Configuration file: contains editor settings, preferences, and default
drive settings.
LW.FNT
Standard graphics 0 font which will be used in the editor and
throughout the program.
LW.F80
Special 80 column font for 80 column editing mode.
LW.PDR
Plain-text printer driver file, which can be edited in LW.
LW.MAC
Macro file, containing automated, user-written command sequences.
If a macro is defined for the "@" key, it will be run immediately. See
section 6.
LW.EXT
Machine code extensions (expanded memory machines only).
Contains extra program functionality such as character maps,
calculators, etc.
1.3.1 LOADING LW FROM SPARTADOS X
Under SpartaDOS X, LW is launched by typing
X LW
Note: LW 3.0 is NOT compatible with versions of SpartaDOS prior to SpartaDOS
X. Also, SpartaDOS X MUST be configured to use BANKED memory in order to
1-6
The Last Word 3.0 Reference Manual
work with LW. This means you can’t run SpartaDOS X and LW on a machine with
less than 128K.
With SpartaDOS X, you can specify a file to edit on the command line after the
program name, such as:
X LW LETTER.TXT
LW will attempt to load LETTER.TXT automatically. If the file isn't found, LW will
present you with an empty file bearing the name that you typed on the command line.
1.4 BASIC OPERATION
You can begin using LW without reading this manual. If you get stuck, press the
<HELP> key, then a number 1 to 9 or 0. If you don't read the manual, however, you'll
be missing out on a huge amount of invaluable information.
1.4.1 THE EDIT SCREEN
To begin using LW, load the program as described above and take a moment to
familiarize yourself with the editing screen. The first thing you’ll notice is that there are
80 columns of text on the screen.
LW defaults to an 80 column display, but you can get the 40 column display back at
any time (and make the program default to 40 columns). To switch to a 40 column
display, press:
<SHIFT+CTRL+W>
At the lower left of the screen, you’ll see:
80 Columns [Y/N]?
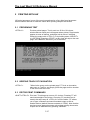
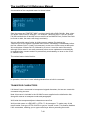
Press the “N” key, and for the moment, just press <Return> when you see the “Width”
prompt. A 40 column display will then appear:
1-7
The Last Word 3.0 Reference Manual
You can get the 80 column display back by performing the same procedure in reverse:
type <SHIFT+CTRL+W>, type “Y” for 80 columns, then press <Return> at the “Width”
prompt.
In this manual, many illustrations depict LW’s 40 column display. This is merely for
reasons of clarity, and operation of the program is essentially identical in 40 and 80
column modes.
On both 40 and 80 column screens, you'll see a tab ruler line along the top (which
scrolls horizontally if you define a screen wider than the limits of the display) below that
a 20 line editing window, and, at the foot of the screen, two lines for status information.
The flashing cursor indicates the current typing position.
Until you press a key, the first line of status information will be the title and version # of
the program; thereafter it will default to the name of the file currently in memory. Until
you load a file or give it a name, it will be called UNNAMED.TXT.
Entering text in LW is easy: just type as you normally would, pressing <RETURN> only
at the end of a paragraph and letting the program wrap words at the ends of lines.
Cursor keys, <DELETE/BK SP>, and <INSERT> keys behave exactly as you would
expect.
In 80 column mode, you’ll notice the editor works more slowly than in 40 column mode.
However, LW still keeps up with your typing and doesn’t “drop” keystrokes. This is
because it has its own type-ahead keyboard buffer. Note that if you’re using
SpartaDOS X and the DOS keyboard buffer (KEY.COM) is turned on when you run
LW, the SpartaDOS keyboard buffer will supersede LW’s built in buffer. To force use of
the LW keyboard buffer (which doesn’t buffer auto-repeated keys, preventing the
cursor from “running away”), simply ensure the SDX keyboard buffer is turned off
(“KEY OFF”) before running LW.
When you're ready to save your text, you can follow one of two procedures, outlined
below.
1-8
The Last Word 3.0 Reference Manual
1.4.2 TEXT BANKS
If you have a machine with at least 128K of RAM running SpartaDOS X, DOS 2.5 or
MyDOS, LW will try to use the extra banks of memory for additional text buffers for the
editing of up to ten files at once. You can switch between these banks with:
<SHIFT+CTRL+n>
where “n” is one of the number keys, with “0” denoting the tenth bank. The program is
smart enough not to overwrite any RAMdisks which are installed, so even if you have
extra memory, LW may still present you with only one text banks if there are RAMdisks
active.
You can see how many text banks are active by pressing:
<SHIFT+CTRL+?>
Will display:
n banks (n), using [low/banked], n reserved.
This command reports how many text buffers are available, how many free banks in
total are detected on the computer, whether the program has its internal buffers in
main (“Using Low”) or extended (“Using banked”) memory, and how many (if any) of
the selected memory banks are reserved for use by extensions.
See “Setting up Multiple Text Buffers” in Chapter 8 for more information.
1.4.3 SAVING AND LOADING TEXT
To save the text in memory to disk for the first time, press <CTRL+S> Save text. A
prompt will appear with a default filename. Either press <RETURN> to accept this
name, or type a new one: the old one will disappear automatically. After you press
<RETURN>, your text will be written to disk. If an error occurs, you'll be informed. To
abort the save operation, just press <Esc>.
If you type no extender, LW will append one of your choosing before opening the file.
The default extender and that defined in the supplied configuration file "LW.CFG" is
".TXT". You can change this, however, or disable it altogether by using the
configuration editor.
The first time you save a file, the name you give it becomes the default for subsequent
save operations. Once the file has been saved once, pressing <CTRL+S>
subsequently will “silently” save the file to disk with the original name it was saved
under. To save the file with a different name or to a different folder on disk, use
<SHIFT+CTRL+S> Save As
which always brings up the Save As> prompt.
When using “Save As”, if LW finds a file on disk of the same name, you will be
warned. The program will ask:
[Filename] exists: Overwrite [Y/N]?
1-9
The Last Word 3.0 Reference Manual
If you type “Y”, the existing file will be overwritten. Typing “N” will return you to the
editor without doing anything.
To load previously written text, press:
<CTRL+L> Load text
A prompt will appear with a default drive specifier. Type the name of the file you wish
to load (you needn’t type a drive specifier), and press <Return>.
1-10
The Last Word 3.0 Reference Manual
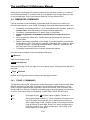
1.4.4 THE FILE SELECTOR
What if you can’t remember which files are on the disk? LW has a file selector which is
accessible from any filename input dialogue. Just press the <Tab> key when the
program is waiting for a filename, and the file selector will appear, listing all the files in
the current folder on disk.
Just highlight the file you want and press <Return> to load it. See “THE DISK MENU”
in Chapter 4 for more information about the file selector.
1.4.5 BASIC CONFIGURATION
You can configure LW to suit yourself. Pressing:
<SHIFT+CTRL+Q> Save configuration
will allow you to save the configuration to disk. The file will automatically be given the
default extender CFG, and you should call the file LW.CFG if you want your new
preferences to be available the next time you boot the program.
As described above, LW normally wraps words to the next line if they don't fit as you
type. You can turn this feature off with:
<CTRL+W> Word wrap toggle
1-11
The Last Word 3.0 Reference Manual
By default in LW, <RETURN> characters appear as curved arrows. You can make
them invisible with:
<SHIFT+CTRL+CLR> Toggle visible returns
These are just a few of the settings saved in the configuration. For further information
on configuring LW, see section 7.
1.4.6 LEAVING THE PROGRAM
To finish using LW and go to DOS, type:
<CTRL+X>
Exit to DOS
and respond "Y" to the prompt. If any text in memory hasn’t yet been saved, you’ll be
offered the chance to save before the program shuts down.
1-12
The Last Word 3.0 Reference Manual
2 EDITOR COMMANDS
LW's commands are all accessed by key combinations. Once you become familiar
with LW's keystrokes, a huge number of commands becomes instantly available.
2.1 CURSOR MOVEMENT
The following commands allow rapid cursor movement around the text:
<CTRL+LEFT ARROW>
<CTRL+RIGHT ARROW>
<CTRL+UP ARROW>
<CTRL+DOWN ARROW>
<Tab>
<CTRL+A>
<CTRL+Z>
<SHIFT+LEFT ARROW>
<SHIFT+RIGHT ARROW>
<SHIFT+UP ARROW>
<SHIFT+DOWN ARROW>
<SHIFT+CTRL+UP ARROW>
<SHIFT+CTRL+DOWN>
<CTRL+H or START>
<CTRL+E>
Cursor left
Cursor right
Cursor up
Cursor down
Next tab stop (if in Over-Type Mode)
Start of line
End of line
Previous start of word
Start of next word
Previous start of paragraph
Start of next paragraph
Screen up
Screen down
Top of screen, then top of file
End of file
2.2 TEXT ENTRY MODES
These commands affect various setting in the editor:
<SHIFT+CTRL+INS>
Toggle Insert and Over-type modes. In Insert mode, text after
the cursor is pushed along as you type, and closes up when
you press <DELETE>. In Over-type mode, new text
overwrites existing text. Notice that the operation of the
<TAB> key differs depending on which mode the editor is in:
in Over-type mode, the <TAB> key simply skips to the next
tab stop, whereas in Insert mode, <TAB> inserts spaces up to
the next tab stop.
<CAPS>
Toggle upper/lowercase.
<CTRL+CAPS>
Forced control key mode toggle. Allows entry of control codes
without pressing <CTRL+ESCAPE> or <SHIFT+ESC> first.
The current case is saved when you save the configuration
(see later), and becomes the default next time you load the
program.
<SHIFT+CAPS>
Uppercase lock.
<INVERSE>
Toggle inverse video on and off.
2-13
The Last Word 3.0 Reference Manual
<CTRL+ESCAPE>
Allow subsequent control key to be entered as normal text (same
as pressing <ESCAPE> in the normal Atari screen editor. Also
de-selects a marked block of text.
<SHIFT+ESCAPE>
Alternative to <CTRL+ESCAPE>.
<CTRL+W>
Turn word-wrap on and off. Saved in config file.
<SHIFT+CTRL+W> Set screen editing width. Using this command, you can select the
display mode (40 or 80 characters), and type the number of
characters per line you want - anything from 5 to 240. If the line
length becomes longer than the physical width of the screen, the
screen will become a horizontal as well as a vertical window onto
your text. Setting the editor line length to the same length as
printed lines means you can set tables out almost exactly as they
will print. You can skip setting the number of columns by just
pressing <Return>, and the value will be set to match the
physical width of the screen. The screen mode is saved in the
config file.
2.3 INSERTING AND DELETING TEXT
The following commands allow simple insertion and deletion of text:
<DELETE>
Delete character to left of cursor
<CTRL+INSERT>
Insert a space at the cursor
<TAB>
Insert spaces to next tab stop (if in Insert Mode)
<CTRL+DELETE>
Delete character to right of cursor
<SHIFT+DELETE>
Displays the prompt:
Delete Word, Line, Sentence, Paragraph?
Respond by pressing the highlighted letter, or <ESCAPE> to
cancel. Pressing <RETURN> defaults to DELETE LINE.
Deleted text will fill up the paste buffer from the beginning.
Paste the text back into the main buffer with <CTRL+P> or
<SHIFT+INSERT>.
<SHIFT+INSERT>
Insert previously deleted text
<CTRL+P>
Paste, or insert previously deleted text (same as above)
<CTRL+CLEAR>
Erase all text
<SHIFT+CLEAR>
Erase all text (same as above)
2-14
The Last Word 3.0 Reference Manual
2.4 MOVING AND COPYING WITH TEXT BLOCKS
The following commands allow blocks of text to be marked, then moved, copied or
deleted:
<CTRL+M>
Mark or highlight block. Before a block can be copied, moved or
deleted, it must be marked. Use this command to define the
starting point of your block. Subsequently, as you move the
cursor, the text between the marked beginning and the cursor
position will be inverted. You can also mark the end of a block,
then cursor back to the beginning. Several other block commands
only work once a block has been defined in this way. To un-mark
a highlighted block of text, press <CTRL+ESCAPE>.
<CTRL+C>
Cut block. Use this command once a block has been marked as
outlined above. The marked text will be copied from the main
buffer to the paste buffer, providing the block is not too large. Note
that any text already in the paste buffer will be overwritten. The
text will then be erased from the main buffer, and block mode is
cancelled. You can paste text back with the Paste command.
<CTRL+O>
Copy block. This copies text to the paste buffer exactly like the
Cut option, but the text also remains in the main buffer, still
highlighted.
<DELETE>
Delete block. This deletes a marked block without copying it to the
paste buffer. Because text deleted this way is irretrievable, you
are first asked for confirmation. Note that the block to be deleted
may be of any length, regardless of paste buffer size.
<SHIFT+CTRL+I> Write block to a file. Supply a filename at the prompt and the block
- which may be of any length - will be written to disk. The file will
have the extension "BLK" unless you supply a different one. This
option, along with the merge command, allows for the transfer of
large blocks of text between different files.
<CTRL+I>
Insert, or merge, file. Allows a file to be inserted into the middle of
the text in memory. The filename you type will have the usual text
file extender appended to it unless you supply another. If the file
you attempt to insert exceeds in size the available space, the text
will remain unchanged.
<CTRL+N>
Displays size of file, cursor position, and the number of words and
bytes in the file (or the block if any text is marked)
<CTRL+Y>
Convert block to lowercase
<SHIFT+CTRL+Y> Convert block to uppercase
<CTRL+[>
Un-invert text in block
<CTRL+]>
Invert text in block
2-15
The Last Word 3.0 Reference Manual
2.5 FINDING AND REPLACING TEXT
LW has extensive search features which work both forwards and backwards through
the text. Searches can be either case sensitive or insensitive. Search and replace
operations can be performed either individually or on the whole file, with or without
confirmation.
<SHIFT+CTRL+F> Define find string. This option allows you to type in the text you
wish to search for (up to 30 characters).
<CTRL+F>
Find string. This will move the cursor to the next occurrence of the
previously defined string.
<CTRL+U>
Upwards find string. Searches backwards for the previously
defined string.
<CTRL+R>
Replace string. Once a string has been "found" with <CTRL+F> or
<CTRL+U>, this command will change it to the "replace" string.
<SHIFT+CTRL+R> Define replace string
<CTRL+G>
Global search and replace. Allows you to type a search string and
a replace string, then attempts to replace each occurrence of the
search string with the replace string. Unless the command is run
from a macro, the first time the string is found, a menu will appear,
asking if you wish to
Change, All, To End, Skip?
Press the highlighted letter of the option you want, or <ESCAPE>
to cancel. "Change" replaces the string and moves to the next
occurrence. “All” will change all occurrences of the string
throughout the entire document, looping around to the start of the
document when it reaches the end. “To End" does a global
replace, but without looping around to the top of the document.
“Skip” simply ignores the text and moves on to the next
occurrence of the string.
LW always returns you to the original point in the document after a
global replace operation. When a global replace is in progress, the
display is not updated to show each replacement. However, you
can cancel the operation at any time with the Break key.
Whether or not search/replace operations are case sensitive is one option set with the
<SHIFT+CTRL+U> set options command. If “Match Case” is false (“N”), LW will not
differentiate between upper and lower case when searching. You can also deselect the
use of wildcards using this command, allowing for literal searching for the inverse “?”
character.
2-16
The Last Word 3.0 Reference Manual
2.5.1 SEARCHING WITH WILDCARDS
In find strings, the inverse question mark (?) will match any character, just as in DOS
filenames:
Find>TH?S?
will match both "THESE" and "THOSE". Wildcards in replace strings leave the relevant
characters in the text unchanged, so:
Find>(?)
Change to>(?.)
will place a dot after any single, unknown parenthesized character.
Search strings may be surrounded by spaces to ensure that only whole words are
matched. In the case of words followed by punctuation symbols, a macro to perform
multiple search/replaces through the text could be written. See macros (section 6).
Note that in order to search/replace the inverse question mark literally, you must turn
wildcard searching off with the “Set Options” command (see above).
2-17
The Last Word 3.0 Reference Manual
3 ADDITIONAL EDITOR FEATURES
LW includes many features to aid in the editing of text, such as place markers,
pagination guides, and tabulation. The range of facilities available makes LW one of
the most complete word processors for the Atari.
3.1 COUNTING WORDS
LW's fast word count will instantly tell you how many words are in the current
document.
<CTRL+N>
Will display the position of the cursor in the file and the number of
bytes in the file (in the form n of n). It also displays the number of
words in the file and a byte count (if text is marked, it will display
the number of words and bytes in the marked text).
Unlike many other word processors, LW's word count only counts actual text and not
embedded printer commands. Anything typed in reverse video is ignored by the word
count. Unfortunately this does mean that header/footer definitions and filename
arguments are still counted, since these are typed in normal video, so you will need to
allow for this when counting words.
3.2 EDITED TEXT INDICATOR
If text in any LW memory bank has been changed without being saved, an asterisk will
appear to the left of the filename on the message line. This is to remind you to save
any vulnerable work. The reminder will vanish once your text has been saved.
3.3 TABULATION
LW's tab ruler can be set up with your own tab stops, which can then be saved with
the configuration file. These are the commands for editing the tab ruler:
<SHIFT+TAB>
Set tab at cursor position.
<CTRL+TAB>
Clear tab at cursor position.
<SHIFT+CTRL+TAB> Reset default tab stops.
<SHIFT+CTRL+E> Erase ALL tab stops.
3.3.1 TABULATION MODES
In insert mode, the <TAB> key will insert as many spaces as necessary to get to the
next tab stop. In over-type mode, <TAB> will just skip over existing text and on to the
next tab stop.
3-18
The Last Word 3.0 Reference Manual
3.4 BOOKMARKS
LW has a system of invisible markers which make navigating your text simplicity itself.
If you're working on a section of text which you want to leave but will need to return to
later, mark it with a place marker.
<CTRL+B>
Set bookmark at cursor position. Asks for which bookmark (1-4) to
set.
<SHIFT+CTRL+G> Go to bookmark. Asks for number of the bookmark to find.
Providing the marker has been set, and doesn't reside in text
which has been deleted, the cursor will jump to the position of the
relevant marker.
Bookmarks are saved with the file if you’re working in document mode.
3.5 TEXT AND DOCUMENT MODES
LW can save files is two different formats: Text files (.TXT) and Document files (.DOC).
While TXT files are plain text files, DOC files contain the tab line and any place
markers which have been set. You won’t see the header information in LW because it
is always hidden, and LW can sense on loading whether a file is a DOC or TXT file
regardless of its file extension. If you want to use LW to edit source code files for
compilers, etc, you should always save files as plain text (TXT) files.
When you save a file, LW will include the DOC header information only if the program
is in “Doc” mode. You can tell by looking at the status bar which mode the program is
in, and you can toggle between Doc and Text mode with the Editor Options command
(see below).
3-19
The Last Word 3.0 Reference Manual
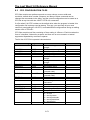
3.6 USER OPTIONS
Several options and toggles are accessed using:
<SHIFT+CTRL+U> User Options
This command presents a list of options which are either switched on or off. The
current state of the item appears to the right of the prompt.
Option
Match case [N] (Y/N)?
Warnings [Y] (Y/N)?
Wildcards [Y] (Y/N)?
False spaces [N] (Y/N)?
Doc mode [N] (Y/N)?
Meaning
Differentiate between upper
and lowercase characters
when searching
Display warning before
abandoning file edits or
overwriting an existing file
Use “?” as a wildcard
character in search and
replace operations
Display false spaces in the
editor
Operate in document mode
Default
Off
On
On
On
Off
To leave an option as it is and step on to the next, press <Return>. Press <Y> to
switch the option ON, <N> to switch it off, and <Esc> to return to the editor at any
point.
3.7 EDITING MULTIPLE FILES
On expanded memory machines, LW allows you to edit several files at once. Setting
up LW for your memory configuration is explained later in Configuring LW (section 8).
Using DOS 2.5, MyDOS or SpartaDOS X without a custom LW.SYS file which sets up
expanded memory, LW will use any RAM banks not in use by RAMdisks. You can
control which and how many banks LW uses by creating a suitable LW.SYS
configuration file. This step is essential when using a DOS not directly supported by
LW: with an unsupported DOS, LW will work out how much memory is attached to the
machine, but won’t use any banks unless told to do so. This way, you can set up a
RAMdisk to use certain banks, and tell LW to use the rest. The supplied SYS files
incorporate various sample memory set-ups. To use them, rename the config file you
want to use to LW.SYS and reload LW from DOS. If you use one of the supported
DOSes, however, LW does all the work for you.
You can access extended text banks with:
<SHIFT+CTRL+n> Select memory bank
where <n> is a number from 1 to 9, or 0, which denotes 10. Note that banks beyond 5
can only be accessed when LW is configured for machines expanded to 192K and
beyond (see section 7: Configuring LW). Bank 1 (main memory) is ALWAYS the main
bank, so you can see that a maximum of 9 banks of expanded RAM can be made
3-20
The Last Word 3.0 Reference Manual
available. Each bank has the same 16K capacity and its own set of place markers and
its own filename. You can cut and paste between banks with ease, and by keeping all
the files of a large document in separate banks and by using the include bank print
commands from the main file, you can keep track of pagination as if you were editing a
single, contiguous file.
If your Atari XL/XE has no extended RAM (or you chose not to use extended memory),
you’ll only have one 16K text bank and the paste, macro, and disk directory buffers will
all be very small (only about 1K each).
3.8 HANDLING LARGE FILES
Although the largest text buffer LW can provide is around 19K when using a machine
with extended memory (as well additional banks which are fixed at 16K in size), it’s still
possible to handle much larger files by splitting them across banks. Text banks can
therefore hold separate files, different segments of the same large file, or a mixture
thereof. Even if you’re using a machine with no extended memory and only one 16K
bank, it’s still possible to edit larger files.
When you load a file into a text bank, the message “Linked Load” will display if the file
didn’t fit completely into memory. The buffer will contain as much of the file as would
fit, together with 255 bytes of free space for editing (Note: because of the way LW
works, any file longer than the total buffer size minus 255 bytes will be classed as a
“Linked Load”, even if the file would otherwise have fit into the buffer).
To protect against accidental obliteration of the original file on disk when only the first
segment has been loaded, linked segments will not “Auto” save with <CTRL+S>.
Instead, <CTRL+S> ALWAYS brings up the “Save As” prompt, as does
<SHIFT+CTRL+S>. Thus the user will always be warned before overwriting an existing
file. Beyond that, it’s up to the user to ensure that segments are saved in the correct
order.
So – having loaded the first part of a segmented file, we can proceed in one of two
ways:
1. Edit the first segment, save it under a new name, then repeat the process until
all segments of the original file have been loaded, edited, and appended to a
new file.
2. Load all segments of the original file into separate banks, edit them
simultaneously, then save the segments in order, either to a new file or
overwriting the original.
In either case, the procedure for LOADING the second and subsequent segments of a
linked file is to follow the filename with the “/C” switch (without quotes). For example:
Load>REPORT.DOC/C
This simply loads the next segment of the file, providing (obviously) that the filename
given is always that of the original file. The name of the “Last File Loaded” can be
obtained on the input line with <CTRL+L>, which is useful shortcut when loading
successive segments of the same file. The final segment of a file, when loaded, will not
display the “Linked Load” message and thereafter the “/C” switch will simply cause an
end of file error.
3-21
The Last Word 3.0 Reference Manual
The “/A” switch should be appended to the filename when saving all but the first
segment of a linked file. For example:
Save As>D:REPORT.DOC/A
This will cause the contents of the buffer to be appended to the file on disk (the “/A”
switch also works with file copying on the disk menu). As a time saver, the “/A” switch
will automatically be appended to filenames when saving all but the first segment of a
linked file. And to assist further with the saving sequence of segmented files, the
filename on the message line is followed by the number of the loaded segment. For
example:
2:D:THESIS.TXT[2]
This denotes bank 2, containing the second segment of THESIS.TXT. In this case,
even if the contents of buffer 2 are saved under a new name (without the “/A”) switch,
the [2] suffix will remain until another file is loaded into that bank or the text buffer is
cleared.
Although the linked file feature of LW offers a partial solution to the problem of editing
large files, the best way to organize your files is to keep them small enough to fit
comfortably into the text buffers. With the include file feature of the print formatter, it’s
easy and good practice to keep files below 16K and link them together when printing.
The main reason for including segmented file support in LW was to enable the
conversion of large, unmanageable files into smaller ones. There’s a macro called
SPLIT.MAC on the distribution disk which will perform precisely this task.
3-22
The Last Word 3.0 Reference Manual
4
DISK OPERATIONS
LW allows full manipulation of files and directories, and has support for many different
DOS packages. The mini DOS menu allows viewing, loading, deleting, renaming and
copying of files at the touch of a key. The menu displays a paged window, showing up
to 80 filenames at a time. Files can be previewed on screen just as they appear in the
editor without being loaded into memory.
4.1 DISK OPERATIONS FROM THE EDITOR
In addition to the <CTRL+L>oad, <CTRL+S>ave and <SHIFT+CTRL+S>ave As...
commands, the following file handling features are available from the editor:
<CTRL+I>
Insert, or merge, file. Allows a file to be inserted into the middle of
the text in memory. The filename you type will have the usual text
file extender appended to it unless you supply another. If the file
you attempt to insert exceeds in size the available space, the text
will remain unchanged.
<SHIFT+CTRL+I> Write block to a file. Supply a filename at the prompt and the block
- which may be of any length - will be written to disk. The file will
have the extension "BLK" unless you supply a different one. This
option, along with the merge command, allows for the transfer of
large blocks of text between different files.
<CTRL+J>
View file. From the editor, this allows you to enter a filename and
view the file in a scrolling window on the screen, complete with
word-wrap. Pause the listing with <CTRL+1> or by holding down
one of the three console keys. Viewing can be aborted at any time
with the <Break> key. If you include the “/P” switch after the
filename, the text will be displayed in paged rather than scrolling
format.
4.2 THE DISK MENU
The functions of the disk menu are accessed by pressing the highlighted keys on the
menu at the foot of the screen. The highlight bar is moved with the cursor keys,
pressed either with or without <CTRL>. When you reach the limits of the screen in any
direction, the display will “page” to the next screen of files.
<CTRL+D>
Call up the disk menu from the editor screen. The program will
read in the current directory and display up to 80 filenames (if in
80 column mode) on the screen.
<SHIFT+CTRL+H> As above, but allows the user to specify the directory file mask
before calling the disk menu.
4-23
The Last Word 3.0 Reference Manual
The following options are available on the menu, selected by pressing the highlighted
letter:
Spec
Set the directory search mask. Use this to narrow or expand the
criteria for the directory search.
Ret
If the disk menu was called with <CTRL+D> from the editor,
<Return> will load the file under the cursor. If the disk menu was
called with <Tab> while entering a filename on the input line,
<Return> will return the highlighted filename for use in the current
load or save operation (if you were currently saving or outputting a
file, you’ll be returned to the original input line with the selected
filename replacing the originally displayed filename).
View
View the file under the selector bar. Same as view from the editor
without the “/P” switch.
Note: You can also obtain a paged listing (same as from the
editor using the “/P” switch) by pressing <CTRL+V>.
^Del
Delete the file under the selector bar. If the deletion is successful,
the filename is removed from the list. Press <CTRL+D> to delete
all tagged files.
Ren
Asks for a new name and renames the highlighted file. The entry
in the list is changed to the new name. Wildcards are supported.
^Copy
Asks for the name of the new file into which you want to copy the
contents of the highlighted file. You can type a new drive number,
add a subdirectory path if your DOS supports them, and include
wildcards. If you want to make a copy of the file under the same
name but on a different drive, type the drive identifier, then "*.*".
Files of any length may be copied, even those which won't fit into
the LW editor. NOTE: The copy operation utilizes the unused part
of the current text bank as a buffer. The more unused memory
4-24
The Last Word 3.0 Reference Manual
there is, the faster the copy operation will be, so you will want to
be in the bank with plenty of unused memory before you copy
anything. A completely full bank actually has 1 spare byte, so
copy will still work with it, albeit agonizingly slowly!
Press <CTRL+C> to copy tagged files. Wildcards are fully
supported. For example, you could tag all files on the disk and
then press <CTRL+C> to copy them to “D2:*.BAK”. All files on the
destination drive will have the .BAK extender.
Mdir
Create a new directory in the current directory, providing DOS
used supports subdirectories.
Esc
Exit the directory menu.
UnLock
Lock or unlock the highlighted file.
^UnTag
Tag/Untag the highlighted file with <T>. <CTRL+T> will tag all
files, while <CTRL+U> will untag all files.
Format
Format the disk. You’ll be asked for confirmation first.
EXit
Leave the program and go to DOS.
1-0
Catalogue drive. 1-9 denote the corresponding drive number, and
0 denotes an unnumbered drive ("D:"). This is important if you
want to open MyDOS subdirectories.
SOrt
This option will present a menu asking whether to sort the
directory by name, extender, date, size, or none. Any other key
will leave the setting, which is saved in the configuration,
unaltered. "None" will turn off the sorting function.
Tab
Toggle short/long directories (SpartaDOS X only). Pressing <Tab>
will switch between DOS 2.5 directory listings and the full
SpartaDOS listings.
Avail
Under DOS 2.5, displays the number of free sectors remaining on
the disk. With SpartaDOS X, this option displays the number of
free bytes on the disk.
4-25
The Last Word 3.0 Reference Manual
4.2.1 ADDITIONAL COMMANDS
There are several additional commands not listed on the disk menu.
<CTRL+R>
Refresh file list. Simply re-reads the displayed
directory from disk.
<CTRL+H>
Cursor home. Moves cursor to the first filename in
the directory.
<CTRL+E>
Moves the cursor to the last filename in the
directory.
<SHIFT+CTRL+UP ARROW>
Moves the cursor up by a screenful of filenames
<SHIFT+CTRL+ DOWN>
Moves the cursor down by a screenful of filenames
4.2.2 SUBDIRECTORY FEATURES
The following options only work with DOSes which support subdirectories.
Return or >
Catalogue the highlighted directory. Only used with Subdirectory
oriented DOSes.
<
Go back up one level towards the root directory. DOS-specific,
as above.
4-26
The Last Word 3.0 Reference Manual
5 PRINTING WITH LW
LW's print processor is one of the most comprehensive of any Atari word processor.
Useful features abound to make life easier when printing complex documents.
5.1 PREVIEWING TEXT
<CTRL+V>
Preview printed pages. Text is sent to a 20 line, 80 column
window almost exactly as it will appear when printed. Page breaks
appear as rows of dashes, and page wait is active if selected.
Pause the output with <CTRL+1> or by holding down <SELECT>
or <OPTION>. Pressing <START> at any time will skip to the next
page, and <BREAK> will return you to the editor.
5.2 KEEPING TRACK OF PAGINATION
<CTRL+?>
"Where's the cursor on the printed page?" This is an innovation
also seen on TextPro, and simply prints the page and line number
of the text under the cursor.
5.3 EDITOR PRINT COMMANDS
<SHIFT+CTRL+P> Print text. This brings up a menu of 3 choices. Pressing "P" will
send text straight to the printer. Choosing "S" previews text in
exactly the same way as <CTRL+V> from the editor. "D" allows
you to type a filename and send formatted output to disk or
another device (default filename extender is "PRN"). Note that the
preview screen always becomes active when printing documents.
Output can be abandoned by pressing <BREAK>.
5-27
The Last Word 3.0 Reference Manual
All the above commands will read any included files (see later) unless you comment
out include statements. This means that you can always know exactly where you are
on the printed page, even in documents made up of many different files.
5.4 EMBEDDED COMMANDS
LW has a wealth of print formatting commands which will allow you to tailor your
printed output exactly to your needs. Formatting commands follow these simple rules:
Formatting commands consist of 1 or 2 letter alphanumeric symbols, entered in
reverse video, often followed by numeric or textual arguments.
Formatting commands may be in either upper or lowercase.
Numeric arguments of formatting commands are entered in reverse
video.
String arguments (footer lines, header lines and filenames) are entered in
normal video.
Stage 1 formatting commands, either singly or grouped together, must be the
first things on a line. They may be optionally terminated with a <Return>. Note:
if a string of Stage 1 formatting commands end in <Return>, a blank line will
NOT be output in the printed document.
Formatting commands must not contain extraneous spaces.
Here are some examples of print formatting commands:
l20<Return>
Sets the left margin to 20.
l20r60hello<Return>
Sets the left margin to 20, the right to 60, then prints "hello." 20 spaces from the left of
the page.
fcPage #<Return>
Defines a running footer which prints the current page number.
5.4.1 STAGE 1 COMMANDS
The following commands, entered as inverse characters in upper or lower case, affect
the size and layout of the page. Generally, they should be the first things on a line.
Where numeric arguments are required (n), these are entered, also in reverse video,
directly after the command. Several commands may be placed together consecutively
on a line. Commands may be followed by a <RETURN> (which will NOT print).
a<n>
First page to print. a2 will start output at page 2. Default is 1.
b<n>
Set bottom margin, default 61. This is measured in lines from the
top of the page, and is the last line on which body text will print.
With a page length of 66, a bottom margin of 61 will print 5 blank
lines at the foot of each page. Ensure you leave enough lines to
print your footer (if any), which may be up to 3 lines long. If the
footer doesn't fit, it won't print.
5-28
The Last Word 3.0 Reference Manual
f<[n]text>
Define running footer to be printed at the bottom of each page.
<n> is an OPTIONAL offset, in lines, from the bottom page
margin, and should be typed in inverse video immediately before
the text of the footer. For example:
f3Footer<Return>
Will print the running footer “Footer” 3 lines below the last line of
the printed page. Actual footer text should be in normal video,
except where Stage 2 formatting commands appear (Stage 1
commands cannot appear in headers or footers), and must end
with a <Return>. Use the # symbol to print the page number. A
footer or header can consist of up to 8 lines, each terminated by a
<Return>. These lines must each be preceded by the f symbol
and must be defined on consecutive lines. If the footer is
redefined elsewhere in the text, the lines already defined are
discarded. To get rid of a footer, just include f<Return> in your
text.
g<n>
Get text bank. Should be on a line on its own, followed by
<Return>. The contents of the text bank will be read and printed in
place of the command.
g<fspec>
Get file from disk. This command should be on a line on its own,
terminated by a <Return>. The contents of the file will be read and
printed in place of the command. This works very quickly, even
when reading a file from disk, because a double-buffering system
is used to eliminate slow single-byte read commands.
Any formatting commands in the included files will be carried out.
The advantage that this method has over the link commands of
many word processors is that the same file will be in the edit
buffer after printing. You can have a main file with include
statements and using the "where's the cursor?" command and
print preview, always see the correct pagination. Note that due to
memory constraints on buffering this command is NOT nestable,
i.e. an included file may NOT in turn include another, although an
included BANK may include a FILE.
h<n/text>
This defines a running header to be printed at the top of each
page, and works identically to the footer command. The optional
number specifies the offset from the top of the page, and the
default value is 2.
jl
Justify text left. All text following this command will be aligned with
the left margin.
jr
Justify text right. All text following this command will be aligned
with the right margin.
jc
Justify centre. All following text will be centred on the page.
jf
Justify fully. All following text will be aligned flush with both the left
and right margins.
5-29
The Last Word 3.0 Reference Manual
l<n>
Set the left margin. The default is 10.
m<n>
Margin outdent by <n> chars, as in this line. This outdents the
next line of text. Subsequent lines revert to the normal margin.
The line is properly lengthened to fill the extra space. This
paragraph uses a paragraph indent and a margin outdent on the
first line, creating a hanging indent. NOTE: To aid in alignment,
the outdented part of the line will be unaffected by full justification.
Also, an outdented line cannot be centred or flushed right.
n<n>
New page. The optional argument will make the command begin a
new page only if fewer than <n> lines remain on the current page.
p<n>
Page length. This is the overall length of the page, including the
top and bottom margins. Default is 66.
r<n>
Set Right margin. This is the rightmost column in which text will
print. Default is 70.
s<n>
Print style. <n> is 0-9. This sends one of 10 non-printing control
sequences to the printer. These sequences are set up in the
printer driver editor and can each consist of any codes you like, up
to 7 bytes each. Handy for selecting fonts or print styles not
supported by print style directives (see later).
t<n>
Set top margin, default 5. This sets the number of blank lines
which will print at the top of each page. Leave enough lines for
your running header, if you've set one up.
v<fspec>
Verbose include file. This sends the named file to the printer
regardless of its contents. The file could be a printable bit-image,
enabling you to include graphics in your document (this won't
show on the preview screen, however). If you include a graphic,
ensure you adjust the page length and bottom margin accordingly.
w<n>
Turn page wait on 1, or off 0. The default may be either,
depending on the configuration. Used for single sheet printing, it
will pause and wait for a keystroke at the end of each page. This
also works during print preview. Press escape at the prompt to
abandon the print/preview operation. Note that the key press is
NEVER taken from a macro. This is so that page prompts won't
steal subsequent macro keystrokes and knock a macro out of step
when printing is finished.
y<n>
Line spacing, default of 1 means no blank lines between each line
of text. 2 will print in double-spacing.
z<n>
Last page to print. Stops printing at page <n>.
><n>
Left paragraph indent. All following text up to the next <Return>
will be indented by <n> spaces from the left margin.
<<n>
Right paragraph indent. All following text up the next <Return> will
be indented by <n> spaces from the right margin.
5-30
The Last Word 3.0 Reference Manual
[<n>
Left header/footer margin, default 10. This works like the l
command, but sets the margin for the headers and footers, which
don't obey the normal left margin. The reason for this is in case
the left and right margins are altered within the text. If these
alterations crossed a page boundary, headers and footers which
shared those margins might not be properly aligned.
]<n>
Right header/footer margin, default 70. As above, but for the right
margin.
?<n>
Set starting page number, default is 1. To begin numbering a
document with a page number of 3, set <n> to 3.
@<n>
Page select. <n> is the number of pages to skip during printing,
and defaults to 0. Use this command with a parameter of 1 to print
only the odd pages in a document, 2 to print every third page, etc.
To print the even pages, set page select to 1 and use a2 to start
printing at page 2 Useful for creating multi-pass double-column
documents or pages where the headers and footers are offset for
binding purposes. You can print the odd pages with blocked right
footers, then set up blocked left footers and print the even
numbered pages.
!<n>
Set heading level. <n> can range from 1-9. This prints an
automatic section heading in place of the command. You can
follow the command with a space and a line of text for a title.
Say you structured your text as follows (with your body text between these headings):
!1 TRANSPORT
!2 BUSES
!2 TRAINS
!1 AMENITIES
!2 LIBRARIES
!2 LEISURE
!3 SWIMMING
!3 OTHER SPORTS
The printout will be:
1 TRANSPORT
1.1 BUSES
1.2 TRAINS
2 AMENITIES
2.1 LIBRARIES
2.2 LEISURE
2.2.1 SWIMMING
2.2.2 OTHER SPORTS
The print formatter will work out the section headings when you print the text, so you
don't need to renumber the headings whenever you reorganize the document.
5-31
The Last Word 3.0 Reference Manual
&
5.4.2
Reset heading levels. This character simply resets all heading
levels to their initial values of 1. Allows you to use more than one
sequence of headings in a document.
STAGE 2 COMMANDS
The following commands can appear anywhere on a line, even in headers and footers,
and affect individual lines of text or characters. Some take parameters, but most don't.
A handy way to enter these commands which saves pressing the inverse key two
times is to enter them in conjunction with <Select>.
#
Print page number. Embed in header and footer lines to print the
current page number.
c
Centre line. Following text on the line is centred. This command
can be used to centre header/footer text or any individual lines.
The centred line should end in a <Return>. This command need
not be first character on the line - you can have text blocked left,
centred and edged right all on the same line. NOTE: This
command is NOT that same as centre justify, which works on ALL
following text. If you centre or edge right individual lines in
paragraphs justified by the Stage 1 justify command, justification
will suppressed on that line.
d
Toggle double strike on or off. Block any text you want printed in
boldface in <d> characters, i.e. dthis is boldd. This feature is set
up by the printer driver editor. Your printer may not support
boldface, however.
e
Edge right. Forces subsequent text on the line up against the right
margin. See Centre Line.
i
Toggle italics on or off. d
u
Toggle underline on or off.
o<n>
Output ASCII char. This outputs the ASCII code <n>. The
character is NOT counted as a printable character, so it won't
affect the formatting or word-wrap. Handy for sending any control
codes to the printer which aren't covered by the printer driver.
x<n>
Send printable code. Works like output ASCII, but the character is
counted as printed matter by the formatter and appears on the
preview screen as a question mark. Handy for printing any
international characters not supported by the printer driver.
-
Soft hyphen (dash). Insert in the middle of especially long words.
When these words won't fit onto a line during printing, the word
will be broken where the soft hyphen is embedded, and a hyphen
printed at the end of the line. If the word fits onto the line, no
hyphen is printed.
5-32
The Last Word 3.0 Reference Manual
_
Hard hyphen (underscore). Normal hyphens between words allow
the line to be split at that point. Use a hard hyphen instead to
prevent this happening.
.
Hard space (can also be an inverse space). Use hard spaces
between words to force them to always be printed on the same
line. A quick way to enter a hard space is with
<SHIFT+CTRL+SPACE>.
(
Ignore to closing brace ). Everything up to the next inverse closing
brace is ignored by the print processor.
;
Comment line: everything until the next <Return> is ignored by the
print processor.
œ
Toggle superscript on or off
Toggle subscript on or off
Add-in #3
Ÿ
Add-in #4
*
Add-in #5
%
Add-in #6
5.4.3 CREATING HANGING INDENTS
It's easy to create hanging indents using LW's paragraph indent and margin release
commands. Say you wanted to indent the next paragraph by 15 columns, but have the
first line flush with the original left margin. Just include the line:
>15m15<Return>
5.5 OTHER PRINT FEATURES
Extraneous spaces following the end of a line not terminated by a <Return> are
suppressed at the beginning of the next line. This means sentences with two or more
spaces following the full stop will not leave extra spaces at the start of the next line,
should the line break occur directly after the full stop.
Missing arguments and illegal commands will produce error messages and halt
printing.
5.5.1 INTERNATIONAL CHARACTERS
LW supports the Atari international character set with printed output which directly
matches the preview display. Characters with ASCII codes from 0-26, and codes 96
and 123, can be re-defined so they send the actual codes to the printer which
correspond to the foreign characters in the Atari international character set. You can
set up any characters you like, but unless they correspond to the standard
5-33
The Last Word 3.0 Reference Manual
international set, they won't be represented correctly on the preview screen. This
feature is set up with the printer driver editor (see PRINTER DRIVERS).
5.6 CONFIGURING THE PRINT FORMATTER
The print formatter defaults for the following margins can be set in the CFG
configuration file:
LEFT/RIGHT MARGIN
LEFT/RIGHT HEADER/FOOTER MARGIN
TOP/BOTTOM MARGINS
HEADER/FOOTER OFFSETS
See Section 8, Configuring LW, for more information.
5-34
The Last Word 3.0 Reference Manual
6 CONFIGURING LW FOR YOUR PRINTER
You can customize LW's print styling commands to suit any kind of printer. Toggles
can be set up for italics, bold, underlining, superscript and subscript, and up to 10
further styling commands can be defined for any purpose you can think of.
6.1 PRINTER DRIVERS
LW uses printer driver files (with the extension "PDR") to configure itself for various
printers. At run-time, LW will attempt to load LW.PDR, so you can have the settings in
this file available every time you run the program. If LW.PDR can't be found, LW uses
its own default printer driver, which supports no special formatting and will send
documents to the printer completely "clean". You can load printer drivers at any time
during an editing session with:
<SHIFT+CTRL+D> Load printer driver. Just type a filename as usual - ".PDR" will be
appended if you supply no extender.
Printer driver files translate the styling commands for italics, underline, boldface, etc.,
as well as international characters, into codes specific to your printer.
6.2 CREATING A PRINTER DRIVER
Although previous versions of LW used the LWPD.COM printer driver editor, that
program is no longer necessary when editing LW 3.0 printer drivers, which are now
stored as plain text files. Several printer drivers are supplied with the program, but it’s
easy to write your own if you know the escape codes for your printer.
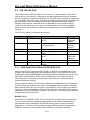
Printer driver commands must be placed one per line in the printer driver file and
terminated with <Return>. The following statements are available:
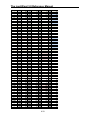
Statement
Arguments
Comments
UNDERLINE ON¦OFF
ITALIC ON¦OFF
BOLD ON¦OFF
SUPERSCRIPT ON¦OFF
SUBSCRIPT ON¦OFF
INTERNATIONAL ON¦OFF
CRLF
INIT
CODE
STYLE
n,n,n...
n,n,n...
n,n,n...
n,n,n...
n,n,n...
n,n,n...
n,n,n...
n,n,n...
char,n
<1 - 10>,n,n,n...
Underline on and off
Italics on and off
Bold on and off
Superscript on and off
Subscript on and off
International character set on and off
Carriage return/linefeed codes
Printer initialisation codes
Assign international character code
Assign styles 1 - 10
Let's step through creating a printer driver for an EPSON compatible STAR LC-10
printer (not that you need to, since an EPSON driver is supplied, but it will do as an
example).
6-35
The Last Word 3.0 Reference Manual
6.2.1 PRINT TOGGLES
Start LW with an empty text file. In your printer manual, find the codes for "ITALICS
ON". For the EPSON compatible example, the sequence is 27, 52. In the editor, type:
ITALICS ON 27,52 <Return>
Italic off would be 27,53, so on the next line needs to be:
ITALICS OFF 27,53 <Return>
All 6 pairs of ON/OFF toggles (underline, italic, bold, superscript, subscript and
international font) work the same way. In a document, the first i in a file will turn italics
on, the second off, the third on again, and so on (see initialization string later). The
only exception are the “International ON¦OFF” code sequences. These are
automatically sent before and after any international characters in the document. This
means you can select any font built-into the printer, without affecting the rest of your
text when printing non-international characters.
6.2.2 CONTROL STRINGS
The CRLF statement allows you to set up a code string for the carriage return/linefeed
sequence you want to send to the printer at the end of every line. For an EPSON
compatible printer, you would type:
CRLF 13,10
This will sent an ASCII carriage return and linefeed sequence to the printer at the end
of each line. The ICD Printer Connection sends the line feeds for you, however, so
most of the time you can just have:
CRLF 155
This is Atari’s normal End of Line character and is the default in LW, so unless you
want the CRLF sequence to be anything other than 155, you needn’t include a CRLF
instruction in your printer driver.
The INIT code is just sent to the printer at the top of every document you print. You
might want to send a printer reset code every time you print. To do so, type:
INIT
Follow this with a space and a comma-separated list of the escape codes for “Reset
Printer” in your printer manual. If you don't want an initialization string sent to the
printer, simply remove the “INIT” line from the printer driver file.
6.2.3 INTERNATIONAL CHARACTERS
LW includes 29 special “International” characters. These are the characters
<CTRL+A> to <CTRL+Z>, <CTRL + comma>, <CTRL + full stop> and <CTRL+ semi
colon>. When using a font which redefines these characters and accented or
“International” characters, it’s important to be able to coax the same accented
6-36
The Last Word 3.0 Reference Manual
character out of the printer. However, EPSON international codes and ATASCII codes
are rarely the same, so using the CODE statement, you can assign an ASCII code to
any of the 29 international character codes.
CODE 1,129
Will sent ASCII code 129 to the printer every time <CTRL+A> is encountered in the
document. You need to set up the codes for all 29 characters in the same way.
The STAR LC-10 manual has various character sets, selectable from software or DIP
switches. We're interested in IBM character set #2, since it contains most of the Atari
international character set in the codes 128-255. Normally these print as italicised
versions of normal characters, so you will want to select the IBM set #2 with the DIP
switches. There is a main bank of 12 DIP switches on the LC-10. To get the characters
we want out of the printer, set switch 1-6 (Printer Mode) to ON (Standard), and 1-7 to
OFF (Graphics). The other switches can be set according to your preferences. There
is one character still missing from the printer's character set ("u" with an acute accent)
which has to be coaxed out by software. The country-specific character set we need
for the "u" acute can't be selected with the DIP switches, so the printer driver needs to
send out the appropriate codes before printing international characters. We can do this
with the INTERNATIONAL statement:
INTERNATIONAL ON 27,82,12
INTERNATIONAL OFF 27,82,0
Every time an international character is sent to the printer, ASCII 27,82,12 will first be
sent to the printer, selecting IBM character set #2. Once the international character
has been sent, the original character set will be selected with 27,82,0.
6.2.4 STYLES
You can also set create up to ten print styles:
STYLE 1,27,45,8
STYLE 2,27,83,2
The first number is the style ID, and the rest are the characters which should be sent
to the printer when the style is selected in the document with s<n>.
Save your printer driver with <CTRL+S> and call it LW.PDR if you want it to load as
the default every time you start LW.
The procedure for most EPSON compatibles should be very similar to the method
outlined above, although unfortunately I haven't had access to such equipment while
writing this manual.
I used to use a Canon BJ-200ex bubble-jet printer set up in Epson emulation mode
with an ICD Printer Connection, and the EPSON.PDR printer driver worked perfectly
with the Canon once the DIP switches were set correctly.
I've supplied the EPSON printer driver along with drivers for all the Atari printers.
Although I don't own an Atari printer, I was able to figure out the codes they use by
6-37
The Last Word 3.0 Reference Manual
making AtariWriter Plus think I had one hooked up, then printing to disk and studying
the output. Note that not all Atari printers support features like italics and boldface. I
trust these drivers work well with the actual equipment.
Some work may be required to coax international characters out of your printer.
However, even if your printer doesn't support them, there are plenty of utilities for
downloading fonts to printers. Just download a font which emulates the Atari
international character set, set up a printer driver, and you're good to go. Being able to
print international characters without fuss was one of the key reasons that LW was
written in the first place. I wanted a word processor which had them visible on the
screen and didn't require special commands in the middle of a document.
6-38
The Last Word 3.0 Reference Manual
7 MACROS
LW’s Macro facility is among the most powerful of any Atari 8-bit word processor.
Macros allow you to automate frequent tasks, redefine the keyboard layout, call up
passages of text with a single keystroke, create interactive menu systems, and
construct entirely new commands by combining existing features of the program.
What’s more, macros can now be attached to standard command keystrokes, so they
can work like built-in features of the program. Macros can even disable screen updates
and prompts while they work, so all you see is the end result.
LW’s macro commands are really a superset of the commands found in the Public
Domain word processor TextPro, and any users familiar with the way macros work in
that program will have little difficulty in understanding how they are implemented in
LW. Macros are written as plain text files (NOT .DOC document files) containing one
macro definition after another. A macro is defined as follows:
<Macro ID>=<Macro Definition>
Where Macro ID is the keystroke the macro is called with, the equate symbol is an
inverse equals sign, and Macro Definition is simply the string of characters and
commands the macro issues. Macros are NOT terminated with <Return>. The end of a
macro definition is merely marked by another definition following it or by the end of the
macro file.
Macro files can be up to 4K in length when using “Banked” memory, otherwise the size
limit is 1K. Macros can “chain” other macro files, and even selectively run macros in
the target macro file.
7.1 LOADING MACROS
Macros are loaded with the <Shift+Ctrl+M> Load Macros command. If the file contains
a macro attached to the “&” character, this “autoexec” macro will be run immediately
after the macro file has loaded, unless you add the “/N” switch after the macro
filename on the input line.
When the macro load command is issued from within a running macro, it’s possible to
pre-select a different macro to run instead of the “&” macro. See the pre-select macro
command later in this chapter for details.
When LW first starts, it looks for the macro file LW.MAC and tries to run the “@” macro
if one exists. This “start-up” macro is only ever run when the program first loads
LW.MAC. SpartaDOS X users can disable the start-up macro from the command line
or even select a different macro in LW.MAC to execute at start-up. Users of other DOS
packages can disable autoexec and start-up macros by holding down the <Option>
key during the loading process.
7-39
The Last Word 3.0 Reference Manual
7.2 RUNNING MACROS
Macros are executed in one of three ways:
Pressing <ESCAPE>, then the key the macro is attached to.
Holding down <Option> then pressing the keystroke the macro is attached to.
Pressing the key combination the macro is attached to.
An important change has been implemented in LW 3.0 regarding macros. In response
to requests from several users to be able to enter <CTRL+KEY> characters into the
editor without pressing <CTRL+Escape> first, keystrokes are now scanned against
macro definitions BEFORE they are scanned against the list of internal commands.
This means you can now write a macro which totally supersedes a built-in command.
You can, for example, attach a macro to the <CTRL+L> keystroke, and this macro will
override the “Load” command. Note that the load command will be completely lost
unless you implement a way of calling the <CTRL+L> command in another way. The
only way you can now override a macro which replaces an internal command and get
the internal command back from the keyboard is by holding down <Option> while
typing the command keystroke.
There is one other special macro keystroke:
<Start>
Pressed on its own will run the <#> macro, should one exist. This
is another throwback to TextPro. However, in LW, use of the Start
key has been augmented. Holding down <Start> while pressing
another key combination will by-pass macro scanning. This
means you can selectively run the underlying built-in command,
even if its keystroke has been “stolen” by a macro definition.
The way <Escape> triggers macros is one of the reasons <CTRL+ESCAPE> or
<SHIFT+ESCAPE> is necessary to enter control characters in the editor and input
dialogues. Another reason is that I wanted to make <ESCAPE> an abort key at all
other times.
7.2.1 AUTORUN MACROS
LW has two kinds of “autorun” macros: The Startup macro and the Autoexec macro.
The Startup macro is attached to the “@” key and is only run when LW first loads:
therefore, the “&” needs to be defined in LW.MAC.
The second kind of autorun macro is the autoexec macro, which is should be defined
on the “&” key. This macro is run when a macro is loaded during an editing session
with the <SHIFT+CTRL+M> command. Note that the autoexec macro will not be run
in LW.MAC when it is loaded at startup (the startup macro is run instead); if LW.MAC
is re-loaded later in an editing session, however, the autoexec macro (&) will be run
instead of the startup macro.
7-40
The Last Word 3.0 Reference Manual
You can disable the startup macro (@) in one of several ways:
Specify the “/M” switch on its own on the SpartaDOS X command line
Hold down <Option> while LW is loading
You can disable the autoexec macro (&) as follows:
Hold down <Option> when loading a macro with <SHIFT+CTRL+M> (press
<Option> after pressing <Return> and hold it down until the macro file has
loaded.
Specify the “/M” switch immediately after the macro filename when issuing the
<SHIFT+CTRL+M> command.
7.3 WRITING AND EDITING MACROS
Because macros tend to contain lots of control codes, it’s best to load in the special
macro editing font before you start. It substitutes special alphabetic characters for the
control codes and makes macros much more readable. Load the macro font with:
<Shift+Ctrl+N> then type MACRO and press <Return>
The above will work in either 80 or 40 column modes because there’s a macro font for
each mode: MACRO.F80 for 80 column mode and MACRO.FNT for 40 column mode.
You may find it much preferable to switch to 40 column mode when editing macros
simply because the 40 column font is easier to read and accuracy is important when
writing macros.
Switch to 40 column mode with:
<Shift+Ctrl+W>
You may need to go through the procedure to load the 40 column macro font if you
haven’t already done so.
All the examples here are illustrated by screen shots of the macros in 40 column mode
with the MACRO.FNT character set loaded.
7.4 SPECIAL MACRO COMMANDS
As with TextPro, the special macro commands are entered as INVERSE
<CTRL+KEY> characters, and are only available from within macros. You type these
with <CTRL+ESCAPE> followed by either <INVERSE>, <CTRL+KEY>, then
<INVERSE> again, or <SELECT+CTRL+KEY>, which is another TextPro feature
which has been emulated to make the typing of the odd inverse character less of a
hassle.
<CTRL+A>
Ask for Input String. This command obtains string input from the
user on the command line. Follow the command with message,
ending in <RETURN>, just as you would with the macro print
message command. This message becomes the input prompt.
Any following text appears as the default contents of the input
7-41
The Last Word 3.0 Reference Manual
field. To actually get input from the user, you MUST include the
<CTRL+L>ine Input macro command as normal. The macro will
then pause, allowing the text entry until <RETURN> is pressed.
The input is sent to the paste buffer and overwrites its contents,
even if a null string was entered. If the <CTRL+B>ranch Macro is
used before the Ask command, the branch will occur if the input
string was EMPTY.
The input string can be pasted into the document in the same way
as any normal paste operation. It can also be inserted into a
filename/search/replace input line with the <CTRL+B> command
(see below).
The Ask for Input command has virtually unlimited scope for
macro development, allowing the creation of truly interactive,
professional looking applications. Just remember that the contents
of the paste buffer are lost when this command is used.
<CTRL+B>
Branch to macro. Use this macro to create a branching condition.
Follow with a macro identifier before a LOAD MACROS
command, and the program will attempt to run this macro as soon
as the new macros are loaded. Used before a FIND command,
LW will branch to the macro if the string is NOT FOUND. Used
before a GOTO MARKER/NEXT MARKER/PREVIOUS MARKER
command, the branch will occur if the marker is NOT FOUND.
Used before a special macro CONFIRM (Y/N) command
<CTRL+C>, the macro will be branched to if the user responds
NO. Used before a <CTRL+A> Macro Ask for Input String, the
branch will occur if the subsequent input string is EMPTY. See the
<CTRL+Z> command for more conditional branching commands.
<CTRL+C>
Confirm (Y/N). Follow with a message terminated with
<RETURN>. LW will print the message, followed by a question
mark, then "(Y/N):". The user responds with the appropriate key.
"Y" will allow the macro to continue. "N" will terminate all macros
(even if the macro running is nested), or, if a branch macro is
pending after a <CTRL+B>ranch command, that macro will be
run. NOTE: Before the introduction of "macro conditionals" in later
TextPro versions, that program's <equivalent "Y/N" command,
<SELECT+CTRL+A>sk, always attempted to run the "&" macro if
"N" was pressed. LW does NOT include this feature: use the
<CTRL+B>ranch to pre-select a macro to run if "N" is pressed.
<CTRL+J>
Macro menu. Follow with a line of text terminated with
<RETURN>. The text should be in the form of some kind of small
menu. This message will be printed, then the program will run the
macro attached to the next key pressed.
The macro menu has been augmented somewhat since version
2.1 of LW. Since the macro menu command is by definition the
last command in a macro, it’s now possible to add two extra
parameters after the menu text. On a new line, type all the valid
keystrokes for the menu options, ending in <Return>. Then, on
the next line, type the ID characters for the macros you want each
7-42
The Last Word 3.0 Reference Manual
keystroke to run (in the same order), ending the line with
<Return>.
For example, you could say:
#=<INV CTRL+J>Load, Save, Print<Return>
LSP<Return>
LSP<Return>
The above macro will display:
Load, Save, Print
when <Start> is pressed, and wait for a keystroke. Pressing <L>
will run the macro attached to the inverse L character, <S> the
macro on the inverse S character, and <P> will attempt to run the
inverse P macro. This way, you can keep all your macros off
commonly used keystrokes, but still invoke them using simple
keystrokes from within menus.
Note: It’s still possible to omit these two extra lines of information,
and the menu will simply run the macro attached to whichever key
the user presses.
<CTRL+K>
Get key. Simply waits for a key, then continues the macro.
<CTRL+L>
Accept line. In either the editor or an input dialogue, this character
will pause the macro and allow user keyboard input until
<RETURN> is pressed or the macro is stopped with <BREAK>.
Note that many features of the editor, including the icon bar, are
disabled in Accept Line mode. If you run another macro whilst in
accept line mode, the current macro will be abandoned and
accept line mode terminated. NOTE: TextPro input mode always
works in OVERTYPE mode - LW accept line mode works IN
WHATEVER MODE THE EDITOR IS IN AT THE TIME. Also, the
colon delimiters of TextPro are NOT supported by LW.
The Accept Input command no longer filters out cursor movement
other than left/right as did Version 1.0. Only a few commands mostly those requiring input - are now disabled during macro input
mode. This change was implemented to allow interactive macros
far greater scope. A macro can now, for example, pause while the
user marks a block of text, then, when return is pressed, operate
on the defined block.
<CTRL+V>
Print message. Follow with text terminated by <RETURN>. LW
will print the message, which will clear on the next keystroke.
<CTRL+X>
Execute macro. Follow with a macro identifier. LW will attempt to
execute the macro in the form of a SUBROUTINE or
PROCEDURE. This means when the executed macro terminates,
the calling or parent macro will resume from the next instruction
following the execute command. Macros calls can be nested in
this way up to a depth of 128.
7-43
The Last Word 3.0 Reference Manual
<CTRL+Z>
Set toggles and test flags. Follow with one of the characters
below:
U
L
I
O
1-9 or 0 (0=10)
Put the keyboard into uppercase.
Put keyboard into lowercase.
Set insert mode.
Set overtype mode.
Select the appropriate text bank when
multiple banks are set up. Bank 1 is
always the MAIN (unextended) bank, and
2-10 correspond to banks of extended
memory.
Select the text bank the program was in
when the macro was called.
Hide the screen display.
Turn the screen on again.
B
H
U
These parameters should be in normal video and each setting
requires a separate <CTRL+Z>.
As well as setting flags, the <CTRL+Z> command can also test
certain conditions:
M
S
C
Test for block marking.
Test if any text is already selected.
Test for file edits since the text in memory
was last saved.
Test if file has already been saved.
A
You would precede these tests with a macro branch command.
The branch will occur if the above conditions are FALSE.
7.4.1 DISABLING THE SCREEN FROM MACROS
You can use the:
<SELECT+CTRL+Z> set toggles command
to turn the display on and off from within a macro. Follow with an "H" to "hide" any
screen updates, and a "V" to make them visible. Nothing is actually printed to the
screen when the display is disabled - the display will immediately change to reflect any
changes made by the macro when it is switched on again. This is a great way to make
macros run as if they were built-in commands, bypassing the prompts that usually
whizz by on the command line. Certain commands - such as print, view, spool, disk
menu and the four macro commands which display prompt information - re-enable the
display automatically.
7.4.2 SPECIAL CHARACTERS
<CTRL+P>
Entered in a filename dialogue will enter the device, path and
name of the current file.
7-44
The Last Word 3.0 Reference Manual
<CTRL+N>
Entered in a filename dialogue will enter name of current file
without device.
<CTRL+B>
When pressed in ANY input dialogue (unless preceded by
<CTRL+ESCAPE>), <CTRL+B> will place the contents of the
paste buffer (or as much of it as will fit) into the input line. Using
this method, if you previously captured text with the Ask for
Input command, it can be transferred into any LW command
which requires input. Similarly, you could cut text from the
document and feed it into an LW command. Note that if the
input dialogue is associated with a filing operation, the string
will appear in uppercase.
<CTRL+L>
Will insert the name of the last file loaded in any bank (see
“Linked Files”).
In order to make these new commands as flexible as possible, the device/path/name
and path/name variables are now accessible from ANY input dialogue. Precede them
with <CTRL+ESCAPE> to type them literally.
7.4.3 ENTERING OTHER COMMANDS FROM MACROS
While <ESCAPE> is used to start macros from the editor, from within a macro,
<CTRL+X> does this job. This means that FROM MACROS, <ESCAPE> PERFORMS
ITS USUAL JOB OF PRECEDING CONTROL CHARACTERS. If you want to enter
any command code from within a macro as part of your text rather than as a
command, just precede it with an <ESCAPE> character in the macro. Many LW
commands are attached to <SHIFT+CTRL> key combinations. Obviously these have
no ASCII equivalents, so how are these commands denoted in macros? Simple - from
a macro, just think <INVERSE CTRL> instead of <SHIFT+CTRL>. So, to enter
the<SHIFT+CTRL+F>ind string command from within a macro, you would type
an:<INVERSE CTRL+F>instead, or:<SELECT+CTRL+F>This is why the special
macro commands use only those characters that relate to illegal <CTRL+SHIFT> key
presses.
When a macro is running, the only keys read from the keyboard are get key
commands, confirm commands, text entered during accept line mode, and characters
pressed during printing when page wait is on. The "Press a key" prompt after a file
view/print operation requires a keystroke from the active macro to clear it and return to
the editor.
7.4.4 THE SPECIAL MACRO FONT
The font MACRO.FNT/MACRO.F80 font on the distribution disk can be loaded by
typing:
<SHIFT+CTRL+N> New font, typing MACRO <RETURN>. This works in both 80 and
40 column modes. These fonts define all the control keys as special, heavy characters
instead of international characters in order to make editing macros a little easier.
7.4.5 KEYBOARD CONVENTIONS FOR MACROS
Understanding how the keys in LW work may seem complex at first, so before we step
through some example macros, let's recap:
7-45
The Last Word 3.0 Reference Manual
<CTRL+ESCAPE> or <SHIFT+ESC> allows you to enter control codes into the
editor or into an input dialogue, as <ESCAPE> on its own normally does in
BASIC, etc. To get the escape code itself (which appears in LW as a curved
downward pointing arrow) in the text, press <CTRL+ESCAPE> or
<SHIFT+ESCAPE> twice.
You can also press <SHIFT+CTRL+ESC> to put the Escape character directly
into the text.
<CTRL/ SHIFT+ESCAPE> pressed when text is marked will unmark the text,
as will <BREAK> or any text typed.
The <ESCAPE> symbol in a macro duplicates <CTRL/SHIFT+ESCAPE> typed
at the keyboard. To make a macro put the <ESCAPE> symbol into the editor,
include two consecutive <ESCAPE> symbols in the macro.
<ESCAPE> pressed at the keyboard runs macros from the editor.
<ESCAPE> pressed outside the editor aborts the current operation.
In macros, special macro commands and <SHIFT+CTRL> commands are
entered as INVERSE <CTRL+KEY> COMMANDS.
The best way to consolidate our understanding of macros is with a couple of
examples. Studying the macros supplied on the distribution disk will also help you to
understand the LW macro language.
7.5 CREATING AND EDITING MACROS
Because macros tend to contain lots of control codes, it’s best to load in the special
macro editing font before you start. It substitutes special alphabetic characters for
the control codes and makes macros much more readable. Load the macro font with:
<Shift+Ctrl+N> then type MACRO and press <Return>
The above will work in either 80 or 40 column modes because there’s a macro font for
each mode: MACRO.F80 for 80 column mode and MACRO.FNT for 40 column mode.
You may find it much preferable to switch to 40 column mode when editing macros
simply because the 40 column font is easier to read and accuracy is important when
writing macros.
Switch to 40 column mode with:
<Shift+Ctrl+W>
You may need to go through the procedure to load the 40 column macro font if you
haven’t already done so.
All the examples here are illustrated by screen shots of the macros in 40 column mode
with the MACRO.FNT character set loaded.
7-46
The Last Word 3.0 Reference Manual
7.6 EXAMPLE MACROS
The best way to illustrate the creation of macros is with some useful examples.
DUAL FONT LOADER
When loading fonts into LW, only the font relevant to the current display mode is
normally loaded, i.e. if LW is in 80 column mode and you specify a font to load, only
the 80 column (.F80) font is loaded, while the 40 column font remains unchanged. You
can, however, load the “other” font by specifying the file extender when loading fonts.
For example, if LW is in 40 column mode and you load the “MACRO.F80” font, the
underlying 80 column font will be loaded while the current 40 column font will remain
unchanged.
What if you wanted to load both the 40 and 80 column fonts at the same time? We can
write a macro which will function as a new command for loading both types of font.
We’ll put the macro on the <SHIFT+CTRL+O> keystroke, so create an empty file and
type <Shift+Esc>, then <Select+ Ctrl+O>. Then type <Shift+Esc>, <Select+=> to get
the assignment character. Now we can type the commands which actually make up
the macro.
The first thing we want to do is capture the name of the font set to load. We do this
using the Macro Ask command. So we type <Shift+Esc>, <Select+Ctrl+A> to get the
macro ask character. This is followed by the input prompt we wish to appear on the
screen. Type:
Font Set
Press <Return> to end the string. Next, we need to stop the macro issuing keystrokes
until the user has a chance to type the name of the font set and press <Return>. This
is done with the macro input command, so we type:
<Shift+Esc>, <Select+Ctrl+L>
Now press <Return> - this adds the <Return> which the macro will issue to terminate
the user’s input (when the user presses <Return> while the macro is suspended during
input, that <Return> is not issued to the input line: it merely tells the macro we have
finished entering text. That’s why we have to issue the <Return> character explicitly to
terminate text input to the macro ask command.
The string captured by the macro ask command is stored in the paste buffer. It’s stored
there because it allows the resulting text to be easily inserted into the document. We
can also place the contents of the paste buffer back into the input line of another
command, using the <CTRL+B> (Paste Buffer) command. That’s what we’re going to
do now: place the font name the user provided into the Load Font command’s input
line.
So the next character we need in the macro is <Shift+Esc>, <Select+Ctrl+N>. We then
type <Shift+Esc>, <Ctrl+B>, followed by .F80, and finally a <Return>. This simply adds
“.F80” to the name the user typed, signifying that we wish to load the 80 column font.
To load the corresponding 40 column font, we type the same line again, except that
this time we add “.FNT”.
7-47
The Last Word 3.0 Reference Manual
A screenshot of the completed macro is shown below.
Save the macro as “FONTSET.MAC” and then load it with <Shift+Ctrl+M>. Now, when
you press <Shift+Ctrl+O> and type – for example – MACRO at the “Font set” prompt,
LW will load both the 40 and 80 column versions of the MACRO font (if either font can’t
be found on disk, the macro will simply terminate).
We can refine this macro further by hiding screen updates. By placing the
<Select+Ctrl+Z> set options command in the macro, followed by H immediately before
the first <Select+Ctrl+F> Load Font command, we can turn off the screen at that point.
We could place <Select+Ctrl+Z> followed by V to turn it on at the end of the macro,
although in this case it’s not really necessary since screen updates are automatically
re-enabled when a macro ends or is prematurely terminated by an error or the <Esc>
or <Break> keys.
The revised macro looks like this:
In operation, the macro is now indistinguishable from a built-in command.
TRANSPOSE CHARACTERS
LW doesn't have a command to transpose mistyped characters, but we can create this
command using a macro.
Note: this macro is included in the LW.MAC macro supplied on the distribution disk,
along with macros to transpose words and paragraphs.
We'll write the transpose adjacent characters macro first.
We'll put this macro on <ESCAPE> <CTRL+T> for transpose. To make entry of this
macro easier, first type <CTRL+CAPS> to go into "control" mode. This feature disables
LW's commands, enabling you to type control keys without preceding them with
7-48
The Last Word 3.0 Reference Manual
<CTRL+ESCAPE>. If you need to make corrections, type <CTRL+CAPS> again to
turn off control mode.
Now, with an empty editor as before, type <CTRL+T>.
Now type <SELECT+EQUALS SIGN>.
Type <CTRL+M>. This means we are about to mark a block.
Now type <CTRL+RIGHT ARROW>. When the macro runs, this will define the
character under the cursor as a marked block. Next, type <CTRL+C>. This is the Cut
Marked Text command, and will send that character to the paste buffer.
Now type <CTRL+RIGHT ARROW> again to move the cursor over the next character.
Next, type <CTRL+P>. This will paste the original character to the right of the
character that followed it. Finally, type <CTRL+LEFT ARROW> to move the cursor
back to its original position.
We'll finish with a message for a neat effect.
Type <CTRL+V> (the "print message" command) then type "Characters Transposed",
and end with <RETURN>.
You'll now need to take the editor out of control mode by typing <CTRL+CAPS>. Save
the macro, then load it as described previously. Now when you press <ESCAPE>,
then <CTRL+T>, then character under the cursor will swapped with the one to its right,
and a message to that effect will be displayed.7.5. MACRO SUMMARY
As you can see, the scope of the macro language is governed only by your
imagination. If you think of something LW doesn't do, chances are it's possible to
construct the feature you want using a macro. And LW is fast enough to make your
macros execute seamlessly, as if they were built-in features of the program. You can
have your address or other frequently used text passages attached to a macro, or
have a macro which merges in sections of text from disk at the cursor position. Check
the supplied macro files to get an idea of the diverse applications of macros.
7-49
The Last Word 3.0 Reference Manual
8 CONFIGURING LW
You can configure LW so that it always loads with the settings you prefer. You can
even load different configurations part way through an editing session. You can set up
everything from screen colour to additional banks of RAM for text.
LW supports two kinds of configuration files. LW.SYS is loaded when the program first
starts and contains information about the memory configuration, keyboard buffer and
keyboard redefinition. LW.SYS is read once when the program starts and any settings
it contains cannot be changed once the program is loaded.
8.1 CONFIGURATION OPTIONS IN THE EDITOR
The following commands toggle or set up various LW features, and these settings are
all saved in the configuration file. They can all be set up from the configuration
program, with the exception of the tab ruler. Not all the options in the configuration
program can be altered from the editor during an editing session: only those options
which are likely to need changing once the program is up and running are available.
<CTRL+W>
<SHIFT+CTRL+W>
<CTRL+TAB>
<SHIFT+TAB>
<SHIFT+CTRL+E>
<SHIFT+CTRL+TAB>
<SHIFT+CTRL+W>
<SHIFT+CTRL+INS>
<CAPS>
<SHIFT+CTRL+U>
Toggle word-wrap
Set screen resolution and number of columns
Clear tab stop at current column
Set tab stop at current column
Erase all tab stops
Reset default tab stops
Set number of screen columns (5-240)
Toggle Insert/Over-type modes
Toggle Upper/Lower case
User options
Several settings from the disk menu are also saved in the config file:
<S>pec
<1-0>
Set the directory filename mask
Set the current drive #
Use the following commands to load and save different configurations during an
editing session:
<CTRL+Q>
<SHIFT+CTRL+Q>
Load config
Save config
Unless you supply your own filename extender, ".CFG" will be appended during both
save and load.
One other command from the editor is:
<SHIFT+CTRL+N>
Install/Load alternative character set
The character set information isn't saved in the config file. To make a character set of
your choice load a run-time, rename it "LW.FNT" and put it on your LW disk.
8-50
The Last Word 3.0 Reference Manual
8.2 .CFG CONFIGURATION FILES
CFG files contain user preferences such a screen colours, screen width and
resolution, default drive number, filespecs, etc. Many of these command can be
changed via commands in the editor, and the current configuration can be saved as a
CFG file at any time with the <SHIFT+CTRL+Q> command.
If a file called “LW.CFG” resides on the default drive when the program is loaded, this
configuration file is always used at startup. This way, you can keep all your most
commonly used settings in LW.CFG, and load different configurations during an editing
session with <CTRL+Q>.
CFG files are plain text files consisting of lines ending in <Return>. Each line takes the
form of a keyword, followed by a space, and then one or more numeric or textual
arguments separated by commas or spaces.
The full list of CFG file keywords is shown below:
Numeric Settings Argument
Comments
Default
TMARGIN
0-255
5
BMARGIN
LMARGIN
RMARGIN
PAGELEN
HFLEFTMARG
0-255
0-255
0-255
0-255
0-255
HFRIGHTMARG
0-255
SPACING
HEADOFF
FOOTOFF
EOLCHAR
0-255
0-255
0-255
0 or 219
PADCHAR
0 or 125
TEXTCOL
SCREENCOL
PROMPTCOL
0-255
0-255
0-255
BORDERCOL
KEYDELAY
KEYREPEAT
TABWIDTH
FILESORT
0-255
0-255
0-255
0-255
0-4
PAGEWIDTH
5-240
Set default top printed
margin
Default bottom margin
Set left margin
Set right margin
Set page length
Set left header/footer
margin
Set right header/footer
margin
Set line spacing
Set header offset
Set footer offset
Set end-of-line character
(internal code)
Set false space character
(internal code)
Set text luminance
Set editor screen colour
Set message line text
luminance
Set border colour
Set initial key delay
Set key repeat rate
Set default tab width
Set file sort type:
0 = no sort
1 = sort by name
2 = sort by extender
3 = sort by date/time
4 = sort by size
Set editor column width
8-51
61
10
70
66
10
70
1
2
2
219
0
10
148
10
0
30
3
5
0
The Last Word 3.0 Reference Manual
Flags (ON/OFF)
Argument
Comments
Default
80COLUMNS
PAGEWAIT
ON ¦ OFF
ON ¦ OFF
ON
OFF
WORDWRAP
INSERT
CASESENS
ON ¦ OFF
ON ¦ OFF
ON ¦ OFF
CAPSLOCK
KEYCLICK
SIONOISE
WILDCARDS
ON ¦ OFF
ON ¦ OFF
ON ¦ OFF
ON ¦ OFF
Set 80 / 40 column mode
Set page wait mode during
printing
Word wrap on/off
Insert mode on/off
Case sensitivity (search
and replace)
Caps lock on/off
Set key click noise on/off
Set I/O noise on/off
Set wildcards in
search/replace on/off
Flags (ON/OFF)
Argument
Comments
Default
ATTRACT
ON ¦ OFF
ON
DOCMODE
SDXDIR
ON ¦ OFF
ON ¦ OFF
Enable/Disable OS colour
cycling
Set document/text mode
Set long directory style
(SDX only)
Text Settings
Argument
Comments
Default
FILEEXT
<EXT>
DRIVE
FILESPEC
Set default text mode
extender.
Should be entered
WITHOUT leading period.
Dn:
Set default drive ID
<filemask.ext> Set default file mask for
disk menu
ON
ON
OFF
OFF
ON
ON
ON
OFF
OFF
TXT
D:
*.*
A good way to understand CFG files is to load the LW.CFG file into the editor. You
might also save the current configuration with <SHIFT+CTRL+Q>, giving it the name
TEST.CFG to see how any settings you have altered in the editor are reflected in the
CFG file. There’s nothing to stop you loading a CFG file into the editor and changing it
manually, although you should take care not to introduce syntax errors into the file.
Some settings – like the default print margins – require you to edit the CFG file by
hand, since there is no command in LW to changed them.
Note: Prior to version 3.0, LW configuration files were binary files and were edited
using the supplied configuration editor. Now, however, LW’s config files are plain text
files and the configuration editor is no longer required. Note also that configuration
(.CFG) files from earlier versions of LW are totally incompatible with version 3.0.
8.2.1 THE DEFAULT DRIVE
The DRIVE instruction in a configuration file sets the default drive in LW. This is the
device ID which is added to any filenames you type without Dn: at the front. It is also
used as the drive number when cataloguing files using the disk menu.
DRIVE D1:
The above line simply sets the default drive to drive 1.
8-52
The Last Word 3.0 Reference Manual
8.3 THE LW.SYS FILE
The LW.SYS file is read once when LW first starts up. The information in the file is
used to set-up LW’s memory configuration and other settings that can’t be changed
once the program has finished setting itself up. LW.SYS must be written as a plain text
file in the editor. Most of the time, the memory configuration commands in LW.SYS will
be unnecessary, since the settings it affects are usually automatically configured.
However, there may be occasions when it’s desirable to override these settings.
LW.SYS is also necessary if you wish to manually disable LW’s built-in keyboard
buffer or remap the keyboard, or define the LW search path on non-SpartaDOS X
systems.
LW.SYS may contain the following instructions:
Instruction
Arguments
Comments
Default
BANKED
ON¦OFF
Turn banked memory usage on
or off
BANKS
n,n,n,n…
Specify banks to be used (from
LW’s internal list)
RESERVE
EXTPAGES
n
n
BUFFER
ON¦OFF
Reserve # banks for extensions
Reserve # pages for extension
code
Turn internal keyboard buffer on
or off
ON (with
supported
DOSes)
Depends on
available
memory
0
0
PATH
KEY
Dn:<path>
code,atascii
Set LW search path
Attach code “atascii” to keycode
“code”
ON (unless
SDX buffer
installed)
none
none
8.3.1 CONFIGURATION USING A SUPPORTED DOS
When using LW with a supported DOS (DOS 2.5, MyDOS, and SpartaDOS X), the
program will automatically detect any extended memory on the machine and avoid
those banks used by DOS/RAMdisks (providing the default RAMdisk drivers are used
with DOS 2.5 and MyDOS). While manual configuration of the memory banking
scheme should be unnecessary under these circumstances, it’s still possible to
override the default settings.
Using a supported DOS, LW will scan the hardware to establish how many extended
memory banks are installed in the system, then subtract from the resulting list those
banks used by DOS (the only exception is SpartaDOS X, which helpfully provides its
own built-in list of unused banks). The result is a list of the free banks on the system,
rather than a list of all the banks installed on the machine. You may specify a selection
of banks from this list as follows:
BANKS 1,2,3,4
Under DOS 2.5, MyDOS or SDX, this line will tell LW to use the first four banks from
the list of free banks the program generated when it first initialized (the banks are
ordered numerically according to the PORTB banking value, and are numbered
beginning at 1). If there aren’t enough free banks to fulfil the amount requested by
“BANKS”, as many as are available will be allocated. In the above example –
8-53
The Last Word 3.0 Reference Manual
assuming there were at least four free banks on the target machine – LW would
allocate one bank for the macro/paste/directory buffer (which it always does when
using extended memory, before allocating any other banks as text buffers), three
banks for extra text buffers, and it would enlarge the main text buffer to 19K.
The RESERVE instruction is intended to allocate banks of extended memory for use
by machine code extensions. It’s envisaged that in the future, applications such as
proofreaders and table of contents generators will be written as extensions for LW.
The extensions load at $3300 and must first have space allocated for them with the
EXTPAGES statement, which merely allocates the specified number of 256 byte
memory blocks (to a maximum of 12) above $3300 to house the executable code of
extension programs (this memory is taken from the 19K main text buffer: extensions
are only available when LW is using BANKED memory).
EXTPAGES 4
RESERVE 1
The above statements in LW.SYS will reserve four pages of RAM from main memory
at $3300 for extension code, and a single bank of extended RAM for use by
extensions which require it. If there is insufficient extended memory, or if LW is not
using banked memory, these instructions will have no effect.
Another example:
BANKED ON
BANKS 1,2,3,4,5,6
RESERVE 1
EXTPAGES 8
On a 320K machine running DOS 2.5 with a 64K RAMdisk installed, the LW.SYS file
above will configure LW with four extended text buffers, and one bank for the
macro/paste/directory buffers, reserving a single bank (actually the last in the list) for
use by extensions. Since LW is using banked memory, the main text buffer would be
19K. However, the EXTPAGES statement has reserved 8 pages (2K) at $3300 for use
by extension executable code, reducing the size of the main text buffer to 17K.
You can disable banked memory use altogether by including the following line in
LW.SYS:
BANKED OFF
This will cause LW to ignore any BANK, EXTPAGES or RESERVED statements in
LW.SYS. The main (and only) text buffer will be 16K in size and the paste, macro and
directory buffers will each be only 1K long. This is the same configuration LW will
adopt when run on a standard 64K XL/XE machine.
8.3.2 CONFIGURATION USING OTHER DOS PACKAGES
When LW is loaded on a system using an unsupported DOS (anything other than
SpartaDOS X and DOS 2.5 or MyDOS with the standard RAMdisk drivers), it makes
no assumptions about whether the operating system is using extended memory for
RAMdisks or other purposes. Therefore the default behaviour of the program under
these circumstances is NOT to use banked memory. To use banked memory when
8-54
The Last Word 3.0 Reference Manual
running LW under an unsupported DOS, you MUST create a custom LW.SYS file
containing the following line:
BANKED ON
Since LW can’t differentiate between used and free banks when running under an
unsupported DOS, the internal list it builds when it first starts up is of ALL the extended
memory banks present on the system. Therefore, if you wish to configure LW to use
only specific banks of extended memory while co-existing with any installed RAMdisks
or other parts of DOS residing in extended RAM, you must first know which banks of
RAM are used by the operating system and specify only UNUSED banks after the
“BANKS” statement.
Examples:
BANKED ON
BANKS 1,2,3,4
The above LW.SYS file used with an unsupported DOS on a 128K machine will cause
LW to allocate three extended text banks, a 19K main text bank, and a single extended
bank for its macro/paste/directory buffer.
BANKED ON
BANKS 5,6,7,8,9,10,11,12
RESERVE 1
In the above example, assuming LW is running on a 320K machine under an
unsupported DOS which is using the lowest four banks of extended memory as a
RAMdisk, LW will allocate one bank for its macro/paste/directory buffer, six banks for
extended text buffers, and reserve a single bank for use by extensions. It will do this
while avoiding the lowest four banks of extended RAM (those in use by the operating
system’s RAMdisk, and having the banking values $23, $27, $2C, $2F).
Clearly when using unsupported RAMdisks with LW, careful planning is required.
However, when using an unsupported DOS with no RAMdisks or other components
residing in extended memory, it’s safe to have an LW.SYS consisting of just a
“BANKED ON” instruction. This will simply cause LW to use as many banks as it
needs (up to a maximum of 16), yielding up to ten text banks. If there aren’t 16 banks
fitted to the system, LW will simply use as many as it can find.
8.3.3 THE SEARCH PATH
The search path allows you to access LW’s config, macro, printer driver and font files
from specified drives/paths on the system without typing the pathnames every time
you load the files.
PATH D8:;D1:>LW
This line in a config file will cause LW to first search the current directory of drive 8
followed by the folder “LW” on drive 1 when loading fonts, macros, printer drivers and
config files, when no other path has been supplied. Note that if the file is not found by
searching the specified paths, the default drive will ALWAYS be searched last. Note
also that LW’s default drive is not necessarily the same as DOS’s default drive (usually
“D:”). LW’s default drive specifier is the same as the disk menu drive number and is
prepended to all filenames for which no device identifier has been explicitly provided. If
8-55
The Last Word 3.0 Reference Manual
for any reason you want to ensure that the default DOS drive is searched, include “D:”
(without quotes) as an entry in the path.
8.3.4 THE KEYBOARD BUFFER
The fifth kind of instruction in LW.SYS is the “BUFFER” statement (followed by ON or
OFF). This simply turns the keyboard buffer on or off. The keyboard buffer will always
default to on, unless it detects that another keyboard buffer (such as the SpartaDOS X
keyboard buffer) is active. You can force LW’s keyboard buffer off or on with this
statement (although forcing the buffer on while the SDX buffer is active will cause
undesirable results).
8.4 USING MULTIPE TEXT BUFFERS
Multiple buffers can allow the loading of up to 160K of text in memory at any one time.
The files are always kept separate (unlike AtariWriter Plus), but may be linked together
when printed by using include bank commands. You can also append text banks when
saving using the /A switch on the command line. By having "include bank #"
commands in the main bank (bank #1), you can keep track of pagination with the
<CTRL+?> command, or preview the whole document with <CTRL+V> without once
having to access a file.
From the main program, banks are selected with:
<SHIFT+CTRL+n> Select bank command
where <n> is any one of the number keys. <1> always calls up the main (unexpanded)
bank, while the other 9 numbers can be set up any way you wish. From macros, these
same numbers follow the <SELECT+CTRL+Z> Settings command.
8.5 CUSTOM FONTS
Several alternative character sets are supplied on the disk. Many fonts are supplied in
both 80 and 40 column versions. 80 column fonts are 512 bytes long and have “.F80”
extenders, while 40 column fonts are in standard Atari format and have the extender
“.FNT”. These can be loaded at any time with <SHIFT+CTRL+N>. Depending on
whether the editor is in 40 or 80 column mode, leaving the font extender off the
filename will automatically load the font appropriate to the editor mode. You can,
however, “force” loading of 40 or 80 column versions of a font by specifying the
extender on the input line. The MACRO.FNT/MACRO.F80 font is most suited to editing
macros, since the control characters are specially emboldened and easy to distinguish
from alphanumeric characters in the 80 column version. The other fonts provide many
different styles and weights, and all provide full international characters.
8-56
The Last Word 3.0 Reference Manual
8.6 CUSTOMISING THE KEYBOARD
LW allows you to customise the keyboard in two ways: by using macros, and by using
a custom keyboard layout (in the LW.SYS file). Redefining the keyboard using the
macro is the best way to reassign keystrokes, while a keyboard definition file allows
you to totally remap the keyboard (to create a DVORAK layout, for example).
8.6.1
THE KEYBOARD TABLE
First, let’s look at the KEY statement, which should appear in the LW.SYS file.
The keyboard customisation contains lines of the form:
KEY n,n
The KEY statement takes two numeric arguments. The first number is an index to the
hardware scan code table. The scan code table is 256 bytes long, and is divided into
four groups of 64 bytes. The first 64 bytes represent normal keys (without Shift or
Control), the next 64 bytes are the Shifted characters, and the next 64 bytes are
Control characters. The final 64 bytes represent keys pressed while both Shift and
Control are held down together (<Shift+Ctrl> keys in this manual). LW’s keyboard table
is exactly like the table contained in the Atari’s operating system ROM, except for the
Shift and Control block (the Atari OS’s keyboard table is only 192 bytes long).
The table on the following page shows the entire default key mapping of LW. The keys
are shown in the left column, and the grey columns represent the code offsets for the
normal, shifted, control and Shift+Ctrl characters.
8-57
The Last Word 3.0 Reference Manual
Key
l
j
;
F1
F2
k
+
*
o
Invalid
p
u
Return
i
=
v
Help
c
F3
F4
b
x
z
4
Invalid
3
6
Esc
5
2
1
,
Space
.
n
Invalid
m
/
Inverse
r
Invalid
e
y
Tab
t
w
q
9
Invalid
0
7
Backspace
8
<
>
f
Help
d
Invalid
Caps
g
s
a
0
1
2
3
4
5
6
7
8
9
10
11
12
13
14
15
16
17
18
19
20
21
22
23
24
25
26
27
28
29
30
31
32
33
34
35
36
37
38
39
40
41
42
43
44
45
46
47
48
49
50
51
52
53
54
55
56
57
58
59
60
61
62
63
Normal
108
106
59
28
29
107
43
42
111
200
112
117
155
105
45
61
118
200
99
30
31
98
120
122
52
200
51
54
27
53
50
49
44
32
46
110
200
109
47
129
114
200
101
121
127
116
119
113
57
200
48
55
126
56
60
62
102
104
100
200
130
103
115
97
Shift
64
65
66
67
68
69
70
71
72
73
74
75
76
77
78
79
80
81
82
83
84
85
86
87
88
89
90
91
92
93
94
95
96
97
98
99
100
101
102
103
104
105
106
107
108
109
110
111
112
113
114
115
116
117
118
119
120
121
122
123
124
125
126
127
Ctrl
76
74
58
8
5
75
92
94
79
200
80
85
155
73
95
124
86
200
67
1
26
66
88
90
36
200
35
38
27
37
34
33
91
32
93
78
200
77
63
129
82
200
69
89
159
84
87
81
40
200
41
39
156
64
125
157
70
72
68
200
131
71
83
65
128
129
130
131
132
133
134
135
136
137
138
139
140
141
142
143
144
145
146
147
148
149
150
151
152
153
154
155
156
157
158
159
160
161
162
163
164
165
166
167
168
169
170
171
172
173
174
175
176
177
178
179
180
181
182
183
184
185
186
187
188
189
190
191
8-58
12
10
123
19
12
11
30
31
15
200
16
21
155
9
28
29
22
200
3
4
22
2
24
26
200
200
5
200
27
200
253
200
0
32
96
14
200
13
224
129
18
200
5
25
158
20
23
17
200
200
200
200
254
200
125
255
6
8
4
200
132
7
19
1
192
193
194
195
196
197
198
199
200
201
202
203
204
205
206
207
208
209
210
211
212
213
214
215
216
217
218
219
220
221
222
223
224
225
226
227
228
229
230
231
232
233
234
235
236
237
238
239
240
241
242
243
244
245
246
247
248
249
250
251
252
253
254
255
Shift+Ctrl
200
200
200
200
200
200
200
200
143
200
144
149
155
137
223
252
200
200
200
200
200
200
200
200
164
200
163
166
200
165
162
161
128
160
224
142
200
141
221
129
146
200
133
153
220
148
151
145
168
200
169
167
222
192
219
222
134
136
132
200
132
135
147
129
The Last Word 3.0 Reference Manual
By working out where in the table the key combination you want to redefine resides,
you can totally remap the keyboard. For example, you could have the following line in
LW.SYS:
KEY 10,97
This will redefine the <P> key so that when you press it, the lowercase letter “a” will
be produced. Note that this means that pressing <P> will produce the letter “a”
everywhere in the program. The most useful application for this would be to produce
things like DVORAK keyboard layouts.
You could use this tool to redefine the commands in LW, too. As another example,
perhaps we want to put the “Cut” command on <Ctrl+X>, as it is in all Microsoft
Windows applications. First, we work out where <Ctrl+X> is in the keyboard table. “X”
is character 22 in the table, and the control characters are in the third block of 64
bytes, so we add 128 (to skip the first two blocks) to 22 and we get 150. LW’s “Cut”
command is called with ATASCII code 3 (Ctrl+C), so this is the code we want <Ctrl+X>
to produce. So we write:
KEY 150,3
This statement in LW.SYS will redefine <Ctrl+X> so that it produces the <Ctrl+C>
character. Not only does this mean that <Ctrl+X> will now be a “Cut” command, but it
also means that <Ctrl+Esc>,<Ctrl+X> will now (perhaps confusingly) put the <Ctrl+C>
character into your document. One advantage of this method is that it won’t upset
macros in any way: <Ctrl+C> in a macro will still call LW’s “Cut Block” routine.
Something to consider when redefining the keyboard in this way is that for every key
you redefine, you need to redefine its “complement”, otherwise you will have two
keys producing the same code. For example, if you’ve redefined <Ctrl+X> to call the
cut command (which was on <Ctrl+C>), you need to redefine another key to produce
the ATASCII code 24 (Ctrl+X) in order to operate the “Exit to DOS” command. It’s wise
to plan things out beforehand, otherwise it can become confusing. However, it’s
perfectly possible to remap the keyboard so that many of the keyboard commands
follow the mnemonics of those in Microsoft Windows applications, and such a
keyboard file (WINKEYS.SYS) is supplied on the distribution disk as an example.
Note that the 1200XL’s function keys are fully supported by LW, and you can assign
the commands of your choice to the twelve possible key combinations.
8.6.2 REMAPPING COMMANDS USING MACROS
The second way of redefining the keyboard takes advantage of LW’s macro capability
and has the advantage that each key will still produce the expected character. Using
macros, however, it’s possible to translate a command keystroke into a different one
before it gets processed by the program.
8-59
The Last Word 3.0 Reference Manual
Looking again at our Windows cut and paste shortcuts, consider the following macro
(we’ve already loaded the MACRO.FNT character set before typing in the text):
There are five macros in this file. The first is mapped to <Ctrl+X>, and simply issues
<Ctrl+C> whenever <Ctrl+X> is pressed in the editor. The second issues <Ctrl+P> when
<Ctrl+V> is pressed and so on. The last two macros assign keys to the two functions
whose original keystrokes have now been reassigned (Print Preview and Exit to DOS).
Save the file with <SHIFT+CTRL+S> and call it TEST.MAC.
8.6.3 1200 XL KEYS
1200XL users can assign LW commands to function keys. The 1200XL’s four function
keys appear in the scan code table and should be defined in the same way as other
keys using the KEY command.
8-60
The Last Word 3.0 Reference Manual
9 DOS PACKAGES AND LW
LW works with and configures itself for many of the popular DOS packages for Atari
XL/XE computers. Supported DOSes include:
Atari DOS 2.5
MyDOS 4.5
SpartaDOS X (using BANKED memory)
Even if your DOS isn't in this list, LW may well work with it, providing it follows the
same basic CIO protocols as Atari DOS and does NOT use any RAM under the
operating system.
Note: up to and including version 2.1, LW used to work with disk-based versions of
SpartaDOS, Atari DOS XE, and many other DOS packages which used RAM under
the computer’s operating system. However, since LW 3.0 uses the 14K of RAM
between $C000 and $FFFF, it will no longer work with any DOS which uses the same
memory space. If you need to use LW with SpartaDOS 3.2 or DOS XE, download a
copy of LW 2.1 at www.atari8.co.uk.
9.1 MEMORY REQUIREMENTS
Whichever DOS you use, you must ensure that it has a MEMLO setting ($2E7,$2E8)
no higher than $2000. For this reason, LW works best with SpartaDOS X which –
when using BANKED memory (as it must with LW) – boasts an impressively low
MEMLO.
LW works well with DOS 2.5 and MyDOS using normal sector buffer configurations.
Resident handlers and TSR programs are unlikely to work with LW using these DOS
packages.
As well as all conventional memory from $2000 to $9FFF, and the cartridge memory
from $A000 to $BFFF, LW also uses 14K of RAM under the operating system between
$C000 and $FFFF. LW will switch out internal BASIC when using DOS 2.5 or MyDOS,
but SpartaDOS X users must run LW with the “X” command, since the library must be
disabled.
9.2 ATARI DOS 2.5
These systems require no special handling by LW and special DOS features such as
subdirectory and command line support will be inactive. LW will disable internal BASIC
automatically with this DOS. By default, LW will use all available extended memory
(not occupied by a RAMdisk) for extra text buffers under DOS 2.5.
9.3 ATARI DOS XE
LW 3.0 will not work with DOS XE.
9.4 MYDOS 4.5
9-61
The Last Word 3.0 Reference Manual
This DOS works well with LW. Subdirectory names are preceded by a colon on the
disk menu, and traversal of the directory tree is catered for, as well as the creation and
deletion of subdirectories. To display the contents of the active directory, don't forget to
remove the drive number from the device spec by first pressing <0> on the disk menu.
LW will correctly detect and avoid RAMdisks under this DOS. With careful
configuration, it’s possible to have a large RAMdisk present and ten text banks
alongside one another on machines with sufficient RAM.
9.5 DISK-BASED SPARTADOS
LW 3.0 does NOT work with disk-based versions of SpartaDOS. You must use
SpartaDOS X with LW 3.0.
9.6 SPARTADOS X
When running LW with SpartaDOS X, you can specify command line options as
follows:
X LW [files] [/M[c]] [/Ppath] [/Q] [/X]
M
P
Q
X
: Disable autorun macro or run macro “c”
: Set Search Path
: Disable Splash Screen
: Load “Clean” (without any config, font, printer drivers or macros)
(Note there is no space between the /M and /P switches and their arguments. If you
set the LW search path on the command line, it will override the LWPATH environment
variable. The argument for the /P switch takes exactly the same as the argument for
the SET LWPATH command. See the next section for a full explanation.)
X LW TEST.DOC /M% /PD1:>LW>
The command line above cause LW to attempt to load the file “TEST.DOC”. If the file
doesn’t exist, an empty file will be presented in the editor bearing the name
“TEST.DOC”. LW will also attempt to run the “%” macro in LW.MAC. Finally, the LW
search path (LWPATH) will be set to “D1:>LW>”.
Note that in recent version of SpartaDOS X, it’s possible to automate the “X” command
by renaming the executable with an “EXE” extension. Thus, if you rename “LW.COM”
to “LW.EXE”, it’s possible to load the program by simply typing the following at the
SDX command prompt:
LW
LW was originally developed under SpartaDOS X, and takes advantage of many of its
advanced features, including subdirectories (folders), time/date stamping of files, and
command line support. LW has one of the most feature-packed file management
utilities of any Atari8 application, and this is especially true when using SpartaDOS X.
LW’s keyboard buffer will deactivate automatically if the program detects that the SDX
keyboard buffer is ON. If you prefer to use LW’s built-in buffer, be sure to do a “KEY
9-62
The Last Word 3.0 Reference Manual
OFF” at the SDX command prompt before loading the program. You could write a
batch file as follows:
KEY OFF
X LW.EXE
KEY ON
The above will ensure the SDX key buffer is off, run LW, then turn the key buffer on
again.
9.6.1 THE SPARTADOS X “LWPATH” ENVIRONMENT VARIABLE
SpartaDOS X users may be familiar with that operating system’s PATH environment
variable. LW has its own path, and under SpartaDOS X this path is defined using the
LWPATH environment variable. LWPATH can contain multiple paths, just like the SDX
PATH, is this path is searched every time an LW system file is loaded unless a
different path is explicitly provided by the user. This means LW fonts, macros, printer
drivers, etc, can all be stored in the same folder and accessed without typing any path
names or drive identifiers. To set up the LWPATH variable, you would include a line
similar to the following in your CONFIG.SYS:
SET LWPATH=D8:;D1:\LW
This will cause LW to first search the current directory of drive 8 followed by the folder
“LW” on drive 1 when loading fonts, macros, etc, when no other path has been
supplied. Note that if the file is not found by searching the paths in LWPATH, the
default drive will ALWAYS be searched last. Note also that LW’s default drive is not
necessarily the same as DOS’s default drive (usually “D:”). LW’s default drive specifier
is the same as the disk menu drive number and is prepended to all filenames for which
no device identifier has been explicitly provided. If for any reason you want to ensure
that the default DOS drive is searched, include “D:” (without quotes) as an entry in
LWPATH.
Another point to note about the search path is that since it is also part of the config
(CFG) file, it’s possible that the path defined via a PATH command in LW.CFG might
immediately overwrite the path defined via the LWPATH environment variable when
LW loads. Careful synchronisation of configuration files is clearly required. If you want
to make sure only the path in LWPATH is used, remove all PATH lines from you CFG
files.
9.6.2 SPARTADOS X MEMORY CONFIGURATIONS
LW 3.0 requires that SpartaDOS X is using “BANKED” memory. This is because the
program loads under the operating system (making a “USE OSRAM” configuration
unusable), and if SpartaDOS X uses conventional (LOW) memory, MEMLO will be too
high for LW to load. So, unless you have more than 128K fitted to your machine, you
must boot SDX with a CONFIG.SYS which contains the following line:
USE BANKED
If your Atari has more than 128K, SDX will automatically use BANKED RAM unless
you tell it otherwise.
9-63
The Last Word 3.0 Reference Manual
As with DOS 2.5 and MyDOS, LW will automatically detect the number of RAM banks
not used by DOS and will grab up to ten of them for its own use. If you have a RAM
disk set up (with RAMDISK.SYS), LW will avoid this too, only using those areas of
memory DOS has certified as unused.
9-64
The Last Word 3.0 Reference Manual
10 LW COMMAND SUMMARY
Below is a complete list of every command in the LW editor and print formatter. In the
first section, editor commands are described with their equivalent macro commands
(where different) in the third column. Where no macro command is listed, the
command is the same from within macros. Remember that macro commands which
duplicate <SHIFT+CTRL> keystrokes are entered as INVERSE <CTRL> keystrokes.
10.1 EDITOR COMMANDS
COMMAND
CTRL A
CTRL B
CTRL C
CTRL D
SHIFT+CTRL D
CTRL E
SHIFT+CTRL E
CTRL F
SHIFT+CTRL F
CTRL G
SHIFT+CTRL G
CTRL H
SHIFT+CTRL H
CTRL I
SHIFT+CTRL I
CTRL J
CTRL K
CTRL L
CTRL M
SHIFT+CTRL M
CTRL N
SHIFT+CTRL N
CTRL O
SHIFT+CTRL O
CTRL P
SHIFT+CTRL P
CTRL Q
SHIFT+CTRL Q
CTRL R
SHIFT+CTRL R
CTRL S
SHIFT+CTRL S
CTRL T
SHIFT+CTRL T
CTRL U
SHIFT+CTRL U
CTRL V
CTRL W
FUNCTION
Start of Line
Set Bookmark
Cut Marked Block
Disk Menu
Load Printer Driver
End of File
Erase all Tab Stops
Find String
Select Find String
Global Search & Replace
Goto Place Marker
Home/Start of Text
Set Disk Menu file mask
Merge File
Write Block to Disk
View File
Change Screen Colours
Load File
Mark Text Block
Load Macros
Show Number of Words
Install/Load Font
Copy Marked Text
Add-in #3
Paste Text Block
Print File
Load Configuration
Save Configuration
Replace Found String
Select Replace String
Save File
Save As...
Add-in #1
Add-in #2
Find String Upwards
Set Options
Preview Text
Word Wrap Toggle
10-65
MACRO EQUIVALENT
INVERSE CTRL D
INVERSE CTRL E
INVERSE CTRL F
INVERSE CTRL G
INVERSE CTRL H
INVERSE CTRL I
INVERSE CTRL M
INVERSE CTRL N
INVERSE CTRL O
INVERSE CTRL P
INVERSE CTRL Q
INVERSE CTRL R
INVERSE CTRL S
INVERSE CTRL T
INVERSE CTRL U
The Last Word 3.0 Reference Manual
COMMAND
SHIFT+CTRL W
CTRL X
CTRL Y
SHIFT+CTRL Y
CTRL Z
CTRL CTRL =
CTRL +
CTRL *
SHIFT SHIFT =
SHIFT +
SHIFT *
SHIFT+CTRL SHIFT+CTRL =
CTRL [
CTRL ]
SHIFT+CTRL [
SHIFT+CTRL ]
TAB
CTRL TAB
SHIFT TAB
SHIFT CTRL TAB
ESCAPE
CTRL ESCAPE
CTRL ?
SHIFT+CTRL ?
CTRL ;
CTRL <
SHIFT <
SHIFT+CTRL <
CTRL >
SHIFT >
SHIFT+CTRL >
CTRL DELETE
SHIFT DELETE
RETURN
CAPS
CTRL CAPS
SHIFT CAPS
INVERSE
SHIFT CTRL INV
SHIFT CTRL SPC
CTRL 1
SHIFT+CTRL 1
SHIFT+CTRL 2-0
START
SELECT+CHAR
OPTION
HELP
FUNCTION
Set Screen Mode and Width
Exit to DOS
Char/Block Lowercase
Char/Block Uppercase
End of Line
Previous Line
Next Line
Column Left
Column Right
Paragraph Left
Paragraph Right
Word Left
Word Right
Screen Up
Screen Down
Sentence Left
Sentence Right
Un-Invert marked text
Invert marked text
Next Tab Stop
Erase Tab Stop
Set Tab Stop
Reset Default Tab Stops
Run a Macro
Enter Control Character
Display Print Position
Display Program Information
Display Cursor Position
Erase All Text
Erase All Text
Toggle Visible Returns
Insert Space
Paste Deleted Text
Toggle Insert/Over-Type
Delete Char at Cursor
Del Word/Line/Sent/Para
End of Paragraph
Toggle Upper/Lower Case
Control Lock
Uppercase Lock
Inverse/Normal Toggle
Convert Normal/Inverse
Hard Space
Pause Listing
Select Main Text Bank
Select Extended RAM Bank
Run # Macro (If pressed with
character, runs built-in
command on that key)
Enter Inverse Character
Run Macro
Help System
10-66
MACRO EQUIVALENT
INVERSE CTRL W
INVERSE CTRL Y
[NONE]
[NONE]
[NONE]
[SEE MACRO GOSUB]
[ESCAPE]
[NONE]
[SEE "SET" COMMAND]
[NONE]
[SEE "SET" COMMAND]
[SEE "SET" COMMAND]
[SEE "SET" COMMAND]
[NONE]
[NONE]
[SEE "SET" COMMAND]
[SEE "SET" COMMAND]
The Last Word 3.0 Reference Manual
10.2 SPECIAL KEYS
These characters have special meanings when entered on the command line unless
preceded by <CTRL+ESCAPE> (<ESCAPE>,<ESCAPE> from macros):
KEY
SPACE or CTRL+P
CTRL+N
CTRL+L
ESCAPE or BREAK
CTRL or SHIFT+ESCAPE
FUNCTION
If typed when a filename is requested, prints the
device/path/name of the current file in the editor.
If typed when a filename is requested, prints just the
path/name of the current file.
If typed when a filename is requested, prints the complete
path name of the last file loaded into any bank.
Abandons input.
Allows entry of control characters on the input line.
10-67
The Last Word 3.0 Reference Manual
10.3 MACRO COMMANDS
The following commands are only available from within macros and are entered in
inverse video.
COMMAND FUNCTION
INV CTRL
Macro Ask command. Follow with prompt message ending in return
A
and optional default input string. Follow with an Accept Line command
<INV CTRL+L>.
INV CTRL
Branch Macro <macro key>. Selects a macro to run after negative
B
confirm, a macro load, negative find string/next/goto marker. Also runs
the selected macro if a load operation results in an incomplete (linked)
load.
INV CTRL
Confirm (Y/N). Continues macro if "Y" pressed, else aborts or runs preC
selected macro.
INV CTRL J Macro Menu <menu text><RETURN>. Prints message and runs macro
attached to next key press.
INV CTRL
Wait for a key from user
K
INV CTRL
Accept Line Mode. Accepts keyboard input until <RETURN> is
L
pressed. Also works in input dialogues.
INV CTRL
Print message <message><RETURN>.
V
INV CTRL
Execute macro <macro key>.
X
INV CTRL
Set options/test conditions <option>. Follow with one of the following
Z
characters (in normal video) to set various options and test various
conditions:
U
L
R
N
I
O
H
V
1
2-0
X
B
M
S
C
A
Uppercase
Lowercase
Inverse
Normal
Insert Mode
Over-Type Mode
Hide screen updates
Make screen visible
Select Main Text Bank
Select Extended banks 2-10
Clear Edited Text Flag
Switch to text bank editor was in when macro was called
Test for block marking (even if nothing selected: precede with
branch command)
Check for selected text (precede with branch command)
Check for changes to text since last save (precede with branch
command)
Check if file has already been saved (precede with branch
command)
10-68
The Last Word 3.0 Reference Manual
11 PRINT FORMATTING COMMANDS
These commands affect the printed document, and are entered in inverse video, in
lower or upper case. All numeric arguments should also be in inverse video (use
<SELECT+KEY> to enter a single character in inverse video). Filenames and
header/footer lines should be entered as normal text, terminated with <RETURN>.
COMMAND
A<n>
B<n>
C<line>
D
E<line>
F<line>
G<file>
G<n>
H<line>
I
J<n>
L<n>
M<n>
N<n>
O<n>
P<n>
R<n>
S<n>
T<n>
U
V<file>
W<n>
X<n>
Y<n>
Z<n>
><n>
<<n>
[<n>
]<n>
?<n>
#
@<n>
!<n>
&
(
_
;
.
UP ARROW
DOWN ARROW
FUNCTION
First page to print
Bottom Margin
Centre Line
Double strike Toggle
Edge Line Right
Define Running Footer
Include File
Include Text Bank
Define Running Header
Italic Toggle
Justification
Left Margin
10
Margin Outdent
New Page (conditional #)
Output Control Code
Page Length
Right Margin
Print Style
Top Margin
Underline Toggle
Verbatim dump to Printer
Page Wait
Output Printing Code
Line Spacing
Last Page to Print
Left Paragraph Indent
Right Paragraph Indent
Left Head/Footer Margin
Right Head/Footer Margin
Set Starting Page Number
Insert Page Number
Skip <n> Pages During
Print
Heading Level
Reset Heading Levels
Ignore to next )
Hard Hyphen
Comment line
Soft Hyphen
Hard Space
Superscript Toggle
Subscript Toggle
11-69
DEFAULT VALUE
1
61
0
0
66
70
5
0
1
10
70
1
The Last Word 3.0 Reference Manual
COMMAND
LEFT ARROW
RIGHT ARROW
*
%
FUNCTION
Add-in #3
Add-in #4
Add-in #5
Add-in #6
11-70
DEFAULT VALUE
The Last Word 3.0 Reference Manual
12 PROGRAMMER'S TECHNICAL NOTES
This section first outlines LW's memory map, then goes on to discuss some of the
general ideas behind the program. It isn’t a guide to writing extensions for LW (please
refer to the extension developer’s documentation). If you're having problems running
LW, you'll want to check out the section on memory usage. I'll also be talking about
various tricks that LW employs, and why it has turned out the way it has.
12.1 ASSEMBLY LANGUAGE ADD-INS
From version 2.1 onwards, LW has presented assembly language programmers with
the interesting opportunity to writing their own machine code routines to extend the
functionality of the software. These pure machine code files must adhere to strict
guidelines, and are (as of version 3) only available when using extended RAM. Add-ins
(or extensions) are loaded at $3300 and can be up to 3K in size. They can hook into
editor keystrokes, the reset routine, the print formatter, etc, and potentially provide
anything from a character map to a spelling checker.
A toolkit for writing add-ins is available with the retail version of The Last Word, and
will include a full equate list for the program, example add-ins, code samples, and
guidelines for writing your own modules.
12.2 MEMORY USAGE
Although the LW.EXE executable is over 31K long, about 4K is initialisation code
which is jettisoned once the program is up and running. 14K of the program code goes
straight under the OS ROM between $C000-$CFFF and $D800-$FFFF, and memory
between $2000 and $3200 is a mixture of program code, data and buffers. When using
BANKED memory, the main text buffer occupies memory from $3300-$7FFF
(depending on the size of the add-in buffer which resides at $3300 when active), and
the $4000-$7FFF area is a window onto any text buffers which reside in banked
memory. When banked memory is turned off, the main text buffer occupies the area
$4000-$7FFF, $3300-$3FFF being used by internal buffers.
LW also uses several other regions for data storage, including the entire upper half of
page zero ($80-$FF). ALL memory from $3FD to $6FF is used by LW for buffers. This
area includes the OS cassette buffer, which you're (hopefully) unlikely to need. Note
that it’s no longer possible (as of version 3.0) to re-enter LW using “Run at Address”
from the DOS menu. This is because the program unhooks itself completely from
beneath the OS ROM when you exit to DOS.
You should ensure that no resident handlers use memory from $400-$6FF, otherwise
conflicts with LW will certainly occur. Similarly, and TSRs or resident handlers must not
extend about $2000. SpartaDOS X set-ups can provide very low MEMLO values which
can allow for resident handlers to be installed. However, with DOS 2.5 systems,
there’s unlikely to be any room for additional sector buffers, etc.
One of LW’s largest memory demands is for the 80 column screen display, which
consumes about 9K of RAM. For this reason, it has proved quite a feat to shoe-horn all
of LW’s functionality into the remaining memory space. Even so, LW still remains true
to its original remit: that it should run on an unexpanded 800XL.
12-71
The Last Word 3.0 Reference Manual
One thing which has allowed LW to be crammed into such a small amount of code is
the placing of almost all the program's variables in Page Zero RAM. The entire upper
half of Page Zero is used by LW. This is made possible by the fact LW makes no calls
to the OS's floating point arithmetic routines, which require $D4-$FF for themselves. In
fact, LW doesn't even make any calls to CIO for screen output: it uses its own
sophisticated formatted print routine. The screen editor device is abandoned when the
program starts and only opened again upon exit to DOS. This use of page 0 instead of
absolute addresses makes LW between twenty and thirty percent smaller than it might
otherwise have been. It also means the program runs significantly faster than it would
had it relied more heavily on absolute addresses.
There are other techniques which save on code space. LW uses many memory
locations as flags, which are only ever on or off. These flags are tested using the 6502
"BIT" instruction, which means only bit 7 needs to be set or cleared. So instead of
storing 0 in the flag to clear it and 128 to set it, to clear it I use:
LSR <address>which puts a 0 in bit 7 with only 2 bytes of code.
To set it, I have used:
SEC
ROR <address>
Which is only 3 bytes (providing <address> is on page 0). The other bits in the byte are
of no significance, although occasionally more precision is required if both bits 6 and 7
of the byte are used. Bit 6 is also tested with the "BIT" command and will be
transferred to the overflow flag. Branching is done with "BVC" and "BVS". These
techniques don't really yield space savings when long strings of flags are being
cleared: it's as easy to load a 0 and store it in the flags. But when widely dispersed flag
sets/clears are necessary, the savings can soon mount up.
12.3 PROGRAM DESIGN
LW handles the text in memory in a special way in order to achieve its speed. While
many word processors hold text contiguously in memory, LW uses a pointer system to
ensure that the free memory in the buffer is always directly in front of the cursor.
Therefore, when you type, there is no slowdown in the editor regardless of the size of
the file. The text is moved through memory as you move the cursor through the it.
When the screen refresh routine hits the location of the cursor, it jumps over the free
memory in the buffer and displays the rest of the text, which is right at the top of the
buffer.
Although LW is written in compact assembly language, it is still a modular program.
Hardly any code is duplicated and – to save space – subroutines are used instead of
in-line macro code. The reduction in code size achieved by using subroutines can be
considerable. In spite of the fact LW 2.1 was thought to be a “finished” program in
2000, eight years later there were still significant space savings and efficiency gains to
be had from continuous revision of the source code.
This 80 column version of LW copes some 20 years after my first experiments with the
8-bit Atari. I began programming in BASIC, then I moved on to C, and finally to
Assembler. Having looked at CC65, Action!, PL65, and many other languages, I
honestly think that machine code is still the best language to use when compactness is
12-72
The Last Word 3.0 Reference Manual
as critical a factor as it has always been with LW. After many years trying to get the
Atari Macro Assembler to co-operate with SpartaDOS X, I finally wrote my own Macro
Assembler. The result - MA65 – was used in emulation until quite recently to compile
LW. It was only when the superb WUDSN IDE cross-development platform for Eclipse
was published that I finally ported LW’s 20,000 lines of source code to the PC, where I
continued to develop the software using the superb WUDSN plug-in for the Eclipse
platform, along with the ATASM cross-assembler. It now only takes a second to
compile the whole program. Nevertheless, MA65 remains my disk-to-disk assembler
of choice on the Atari platform.
12.4 DEVELOPMENT AND TESTING
After nine years of thinking about writing a word processor, I finally began LW at the
start of 1999. It took only 3 months to get a fully working version, and a further 2
months to produce one which was reliable. It was this test period, during which I used
LW to write utility macros and the bulk of this documentation, that highlighted bugs and
design faults for later correction. During this time probably hundreds of complete recompilations were done. The program culminated in version 2.1 in 2000.
After version 2.1 was published (to an audience of none!) in 2000, there was a hiatus
of eight years while my Atari lay in a storage box on top of a wardrobe. Then, in
November 2008, a nostalgic conversation with a friend who was also interested in
programming led me to retrieve the Atari. Amazed to find it still worked, I soon set
about porting my files over to the PC using the fantastic new gadgets that had become
available in the intervening time, and by the turn of the year LW 2.1 finally found
publication. It drew such interest among Atarians that it became obvious the program
would have to be updated to take advantage of all the new hardware that had been
developed. 320K was now virtually the minimum amount of memory fitted to an Atari
XE, while 1MB was common. Disk storage was almost unlimited thanks to SIO2IDE,
SIO2SD and SIO2PC, and emulation meant the program development time could be
dramatically lessened. The number one feature people wanted to see in a new word
processor for the Atari8 was a fast 80 column display which didn’t use any hardware
add-ons. The 80 column display only took a few weeks to write. Then I began to see
other things I could improve...
12.5 WHY LW CAME INTO BEING
As well as being popular gaming machines, the Atari 8-bit line of computers have a
huge catalogue of “serious” application titles, including many word processors. The
most popular commercial offerings back in the Eighties included AtariWriter (and later,
AtariWriter Plus), Paperclip, The First XLEnt Word Processor, and Superscript,
although there were also dozens of other, less “heavyweight” word processors. Many
public domain and open source text editors and word processors were also written for
the Atari 8, including Speedscript and TextPro, the latter going through many
incarnations and being one of the few word processors to offer tight integration with
SpartaDOS, the advanced disk operating system by ICD. AtariWriter 80 and
TurboWord used 80 column displays (most Atari 8 word processors were limited to the
Atari’s 40 column screen), although these programs required special hardware in the
form of the XEP-80 device.
I got my first Atari 8 – a 65XE – in the late Eighties while still at school and as soon as
I got a disk drive I began using TextPro for word processing. At the same time, I
started to learn to program: first using Atari BASIC, then Turbo BASIC XL, then C and
finally Assembly Language. Having written a database, a drawing program, various
12-73
The Last Word 3.0 Reference Manual
SpartaDOS utilities, and a Macro Assembler, it was always my ambition to write a
word processor for the Atari 8 which coupled the innovative and flexible approach of
public domain programs like TextPro with the robustness and professional,
commercial-quality presentation of PaperClip and AtariWriter.
In 1989 I began sketching out rough ideas on paper, but it wasn’t until nearly ten years
later that I’d acquired the necessary skills in Assembly Language to actually start
writing the program. After six months and hundreds of hours of work, version 1.0 of
The Last Word was complete. At the time, the program was only 19K long, occupied
no memory under the Operating System ROM (making it compatible with SpartaDOS
3.2 and DOS XE), and included several innovations, such as a ten line scrolling print
preview window in 80 columns, a keyboard macro language, a built-in mini DOS menu,
the ability to load several documents at once on an expanded memory machine, and a
non-linear text buffer model which overcame the sluggishness many word processors
exhibited when inserting and deleting text at the top of large files.
The finished program was sent off to New Atari User (formerly Page 6) Magazine in
mid 1999, but by that time the title’s publication was sporadic at best and I never heard
anything back from Les Ellingham, the magazine’s editor. At around the same time,
New Atari User ceased publication entirely, and without access to the Internet, what
contact I had with the Atari fraternity was completely severed. However – and
somewhat incredibly – I was still using the Atari as my main (and only) computer for
word processing. Since I still enjoyed programming, I continued to update the program
up to version 2.1 which was completed in 2001. I felt that the program did just about
everything it had set out to do and I couldn’t think of anything else I wanted to add to it.
In the same year a 286 IBM PC compatible came into my possession, and The Last
Word was somewhat overshadowed by Windows 3.1 and Word for Windows 2.0. Even
though I was still somewhat behind the times, the PC opened up a whole new world
and began to make writing programs for the Atari seem like a rather pointless exercise
(especially without any kind of user base for my software). Within a couple of years,
with access to the Internet and a more powerful Windows computer, I began to
concentrate on PC construction and maintenance. The Atari was consigned to a box
on top of a cupboard and for years I thought no more about it.
It wasn’t until late 2008 after a nostalgic conversation with a friend who, like me, had
fond recollections of 6502 assembly language programming that I decided to retrieve
the Atari and find out if there were still any Internet forums dedicated to the old
computer. I was surprised to discover there was still a thriving online Atari community,
and astonished by the number and variety of technological developments that had
been devised in the intervening years.
Fortunately, my 65XE (which had been upgraded to 130XE standard some fifteen
years previously) and XF551 disk drive were both still fully functional (not to mention
surprisingly well preserved) and it wasn’t long before I’d bought an SIO2SD device,
transferred most of my 5¼” floppy disks to the PC, and ran The Last Word 2.1 on an
emulated Atari for the first time. Soon afterwards, I set up a website at
www.atari8.co.uk and released the word processor, along with the macro assembler
and some other utilities. After adopting the forums at www.atariage.com as my second
home, I received immediate (and mostly positive) feedback on the word processor,
although I was also alerted to a fatal bug which meant the program wouldn’t work on
NTSC Ataris. Fortunately the bug was easily fixed and LW soon built up a following
among fans of “serious” Atari applications.
12-74
The Last Word 3.0 Reference Manual
Although I’d always considered version 2.1 of LW the “final” version, people soon
came up with new things they’d like to see included in the program. Far and away top
of the list was support for 80 column displays (including devices such as XEP-80 and
VBXE). I was reluctant to try this, not least because I didn’t have access to the
necessary hardware and emulator support for XEP-80 and VBXE was limited at the
time. The only alternative was to attempt a software 80 column display driver, which is
was hesitant to do since I couldn’t see it being fast enough. However, after some
discussion with Claus Bucholz and having borrowed some ideas from his Ace-80
display driver, I figured out something that worked with similarly impressive speed. Key
to the efficiency of the 80 column display is the way in which it only redraws those
areas of the screen which have changed following edits. It also uses a dynamic display
list to handle scrolling.
The original intention was to have two separate versions of the program: one which
worked in 80 columns and another which worked in 40 columns. However, not only did
it soon become difficult to synchronise the development of two different versions of the
program, but an easy way became apparent to switch between the two display modes.
Thereafter, LW had a dual display and to my knowledge is the only Atari 8-bit word
processor capable of switching from a 40 to an 80 column display and back again at
any time, and without any hardware add-ons, and without changing the cursor position
in the current document.
A side-effect of the 80 column display was an increased memory footprint, which
necessitated the positioning of 14K of the program code under the Atari’s Operating
System ROM. This meant the program was no longer compatible with DOS XE and
disk-based versions of SpartaDOS. However, this change also allowed for extra
features to be added to the program, and during the first half of 2009 most of the
program was revamped and support was added for long SpartaDOS time/date
stamped filenames on the disk menu, and for splitting large files across text banks.
One of the most important enhancements to the program was the font collection
designed by Paul Fisher. This large selection of matching 80 and 40 column font pairs,
specially created for LW, together with the new title screen and product logo, lent the
program an even more professional edge and elevated the quality of the product
beyond all expectations. Paul’s contribution to the design side of The Last Word 3.0
cannot be overestimated, and I hope to make use of his considerable flair and skill in
future projects.
In June 2009, having up until then developed the program entirely using my own
XEDIT text editor and MA65 Macro Assembler – initially on real hardware and latterly
under emulation on the PC – I migrated to the ATASM cross-compiler and the newly
released WUDSN integrated development environment. Fond as I was of using my
own Atari-based development tools, there was no doubt that developing under
WUDSN more than doubled my productivity, and by mid October 2009 The Last Word
3.0 (now almost 32K in size) was at last ready for release.
The Last Word would never have seen the light of day If it wasn’t for the
encouragement and help I’ve received from members of the Atari community in
Europe and the United States. Special thanks must go to Paul Fisher and Konrad
Kokoszkiewicz, without whom the completion of the program as it stands would have
been impossible. I must also thank all the beta testers who spent time reporting bugs
and making suggestions on the AtariAge forums; thanks to Sebastian Bartkowicz and
Cabell Clarke for help with SpartaDOS, and to Claus Bucholz for the source code and
inspiration provided by Ace-80, Marcin Prusisz for SIO2SD and SIO2IDE, and to Mark
Grebe for his continued improvements to the Atari800MacX emulator.
12-75
The Last Word 3.0 Reference Manual
So what’s next for The Last Word? With the advent of video enhancements such as
VBXE, larger memory capacities as standard on Atari 8 computers, almost unlimited
mass storage, and readily available flash cartridges, the time seems right for a fully
WYSIWYG word processor for the Atari 8. Many commendable attempts at graphical
operating systems (or applications employing GUIs) have been made on the Atari
since the mid Eighties. One of the earliest was Diamond GOS by Alan Reeve, which
closely emulated the look and feel of GEM on the Atari ST. Sadly it was let down by a
lack of application support, which seems to be where many GUI operating systems fall
down. More recently we’ve seen many ambitious GUIs, but none have seemed quite
as cohesive and useable as GEOS on the Commodore 64, which was written in the
1980s. My intention is ultimately to make The Last Word the centrepiece application
for a new Atari GUI which is able to take advantage of the hardware enhancements
we’ve seen over the past few years.
In the meantime, I hope to release various add-ons for LW 3.0 such as a spellingchecker, character map, calculator, and a programmer’s toolkit. There’ll also be a
special VBXE-compatible edition of LW 3.0 at some point, offering clearer 80 column
fonts (in fact it will do away with the need for special 80 column fonts altogether) and
faster operation in 80 column mode. There’s also the possibility of a cartridge-based
version of the program one day, or at least a cartridge version of the GUI it will
eventually run on.
12.6 DEVELOPMENT
There are still many features I’d like to implement in future versions of LW. These
include:
Proportional fonts available in different typefaces with underline, bold and italic
effects.
Larger, seamless text buffers capable of holding files up to 32K.
Support for mouse input, complete with a menu system and dialogues.
Whether any of these features see the light of day remains to be seen. Only with the
advent of fast PC based emulation and through the medium of Internet-based
communities has The Last Word finally seen the light of day. It’s still fun to see what
can be done with the 8-bit Atari!
12-76
The Last Word 3.0 Reference Manual
12.7 CORRESPONDENCE
Any enquiries, bug reports, etc, should be addressed to me, Jonathan Halliday at
[email protected].
12-77