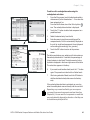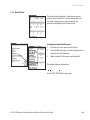
1
ACCU-CHEK姞 Pocket Compass
Software with Bolus Calculator
User Guide
Version 4.0
ACCU-CHEK Pocket Compass Software with Bolus Calculator, Version 4.0 User Guide
Installation, use and maintenance/backup of the ACCU-CHEK Pocket Compass software lie in the full responsibility of
the user. Roche Diagnostics does not accept responsibility for damage caused by failure to comply with this guide.
In addition, it is recommend that you do not install any software on your computer from a non-trusted source and
that you protect your computer from unauthorized access by third parties. This especially applies to the security of an
existing Internet access. If possible, use the latest anti-virus and firewall software and install the security updates and
patches recommended by the respective manufacturers.
Date of issue: July 2008
䊚2008 Disetronic Medical Systems Inc. All rights reserved.
ACCU-CHEK Pocket Compass
1
Contents
Introduction .........................................................................................................................................................................7
2
2.1
2.2
2.3
2.4
3
Getting Started .............................................................................................................................................................. 15
Preparing your Handheld ................................................................................................................................................... 15
Installing the ACCU-CHEK Pocket Compass Software ............................................................................................ 17
First Configuration – which devices would you like to use with the
ACCU-CHEK Pocket Compass Software? .................................................................................................................... 18
Synchronizing the ACCU-CHEK Pocket Compass Software and the Selected Devices ............................. 23
Care and Maintenance .......................................................................................................................................... 27
4
Overview of Software Functions ................................................................................................................... 29
4.1
4.2
4.3
4.4
4.5
Data Transfer Menu ............................................................................................................................................................... 29
Diary Function ......................................................................................................................................................................... 30
Reports Function .................................................................................................................................................................... 30
Health Management Menu ................................................................................................................................................. 31
Options Menu ......................................................................................................................................................................... 31
5.1
5.2
5.3
5.4
5.5
5.6
5.7
5.8
5.9
5.10
Diary ........................................................................................................................................................................................ 33
General Information ............................................................................................................................................................. 33
Manual Data Entry ................................................................................................................................................................ 37
Deleting Manually Entered Diary Entries ...................................................................................................................... 39
Manually Converting “not in sync” Data to “in sync” Data ..................................................................................... 40
Blood Glucose ........................................................................................................................................................................ 41
Insulin ....................................................................................................................................................................................... 42
Carbohydrates ....................................................................................................................................................................... 46
Timeblocks ............................................................................................................................................................................. 50
Reminders ............................................................................................................................................................................... 51
Events and Comments ........................................................................................................................................................ 55
5
ACCU-CHEK Pocket Compass Software with Bolus Calculator User Guide
3
Contents
6
6.1
6.2
6.3
6.4
6.5
6.6
6.7
6.8
6.9
6.10
6.11
6.12
6.13
6.14
Reports.................................................................................................................................................................................. 59
Report Selection and Settings .......................................................................................................................................... 60
Trend .......................................................................................................................................................................................... 63
Average Day ............................................................................................................................................................................ 70
Average Week ........................................................................................................................................................................ 73
Daily Sums ............................................................................................................................................................................... 76
Logbook .................................................................................................................................................................................... 78
Distribution .............................................................................................................................................................................. 80
Reminder .................................................................................................................................................................................. 83
Basal Rate ................................................................................................................................................................................ 85
Basal Profiles .......................................................................................................................................................................... 89
Pump Events ........................................................................................................................................................................... 93
HbA1c ........................................................................................................................................................................................ 95
Ketones ..................................................................................................................................................................................... 97
Blood Pressure ....................................................................................................................................................................... 98
7.1
7.2
7.3
Health Management ..............................................................................................................................................101
HbA1c ......................................................................................................................................................................................101
Ketones ...................................................................................................................................................................................103
Blood Pressure .....................................................................................................................................................................105
8.1
8.2
8.3
8.4
Options................................................................................................................................................................................107
General Setup .......................................................................................................................................................................108
Personal Setup .....................................................................................................................................................................110
Transfer Setup ......................................................................................................................................................................118
Foods .......................................................................................................................................................................................119
9.1
9.2
9.3
9.4
Data Transfer .................................................................................................................................................................129
Transferring (“Reading Out”) Device Data .................................................................................................................130
Exporting Data ......................................................................................................................................................................132
Synchronizing Devices ......................................................................................................................................................133
Information ............................................................................................................................................................................136
10.1
Data Backup ..................................................................................................................................................................137
Conduit Software and HotSync Function ....................................................................................................................138
7
8
9
10
4
ACCU-CHEK Pocket Compass
ACCU-CHEK Pocket Compass Software with Bolus Calculator User Guide
ACCU-CHEK Pocket Compass
11
Contents
Indicators and Displays ......................................................................................................................................139
11.1
12
Icons Used in the Software ..............................................................................................................................................139
System Requirements ..........................................................................................................................................141
12.1
12.2
12.3
12.4
Compatible Handheld Devices .......................................................................................................................................141
Computer System Requirements ...................................................................................................................................141
Compatibility Requirements for Data Transfer .........................................................................................................142
Support for New Devices ..................................................................................................................................................143
1.1
1.2
1.3
1.4
1.5
Bolus Calculator Basics......................................................................................................................................145
Who Can Use the Bolus Calculator? .............................................................................................................................146
How Does the Bolus Calculator Support You? .........................................................................................................147
How Does the Bolus Calculator Operate? ..................................................................................................................149
How Are Exceptional Circumstances Handled? .......................................................................................................155
Example of the Personal Parameter Table ..................................................................................................................156
2.1
2.2
2.3
Using the Bolus Calculator ..............................................................................................................................157
Bolus Calculator Setup ......................................................................................................................................................160
Performing a Bolus Calculation ......................................................................................................................................169
Your Personal Parameter Table ......................................................................................................................................177
A
B
Index......................................................................................................................................................................................179
ACCU-CHEK Pocket Compass Software with Bolus Calculator User Guide
5
Contents
6
ACCU-CHEK Pocket Compass
ACCU-CHEK Pocket Compass Software with Bolus Calculator User Guide
Chapter 1, Introduction
1
Introduction
The ACCU-CHEK Pocket Compass software allows you to
record diabetes data anywhere with an easy-to-use handheld device and to evaluate this data in a legible and
understandable form.
A variety of symbols are used in this guide to identify
warnings, cautions, notes, and references. The symbols
and their meanings are listed in the table below. You will
not see these symbols on your handheld.
Symbols used in the User Guide
Symbol
Name
Description
Warning
Indicates important health or safety information.
Caution
Indicates information that must be observed when using the
ACCU-CHEK Pocket Compass software.
Note
Provides additional information, helpful tips, or other information.
Reference
Indicates that you should refer to other reference material for
more information.
Manufacturer
Catalog number
0088
This product fulfills the requirements of Directive 93/42/EEC on
medical devices.
ACCU-CHEK Pocket Compass Software with Bolus Calculator User Guide
7
Chapter 1, Introduction
Glossary of terms
Some terms used in this manual may be new to you. To
help you understand these terms and their usage in this
User Guide, refer to the table below.
Terms used in this guide
Term
Carbohydrates
Conduit
Docking station
Event
HotSync
Infrared (IR)
Insulin types
Insulin names
Overlapping time ranges
Palm OS
PDF
Personal Computer (PC)
Software
Timeblocks
Time periods
8
Meaning
This term designates the corresponding food intake of
carbohydrates.
A communication program that allows data to be transferred (in
conjunction with the HotSync function) from a compatible
handheld to a PC.
Adapter for connecting a handheld to a computer, often
simultaneously used to charge the handheld.
Everyday events that have an effect on your treatment.
A function for exchanging data between the compatible
handheld and the computer.
A means of data transfer using light frequency.
Distinction between bolus and basal insulins.
The names of (up to 3) insulins can be freely defined for display
with the ACCU-CHEK Pocket Compass software.
As a result of date and time changes (e.g. with intercontinental
flights) more than one data situation is available for a selected
time range.
The system software that controls all the programs on the
handheld.
The file format of the electronic User Guide.
The computer you use to exchange data (via the HotSync
function) with your handheld and to access this User Guide.
Program that serves to perform specific user tasks (e.g. the
ACCU-CHEK Pocket Compass software).
Timeblocks are freely defined time periods within a day that are
frequently used to represent intervals between tests.
One time period describes the number of days whose values
are displayed together in a report (e.g. 1…30 days or all values)
ACCU-CHEK Pocket Compass Software with Bolus Calculator User Guide
Chapter 1, Introduction
Talk to your healthcare professional about using the
ACCU-CHEK Pocket Compass software as part of your
diabetes therapy. Always ask your healthcare professional
if you have queries regarding your diabetes care.
Please make sure that you fully understand how to use the
handheld prior to installing the ACCU-CHEK Pocket
Compass software. The features of your handheld device
are described in detail in the manual provided by the
manufacturer.
This introduction provides a short summary of the most
important features and functions of the software. Each of
the features and functions are described in greater detail
in the subsequent sections of this user guide.
If you have any questions, please contact ACCU-CHEK
Pump Support at 1-800-688-4578 – 24 hours a day,
365 days a year.
ACCU-CHEK Pocket Compass Software with Bolus Calculator User Guide
9
Chapter 1, Introduction
Software overview
2
The following section provides an overview of the most
important items you may encounter when using the
ACCU-CHEK Pocket Compass software. For a complete
description of all icons (including the ones not mentioned
here), see page 139.
3
4
Palm OS
Description
1
2
3
4
Displays all available application icons.
Displays current handheld system time.
Displays remaining battery life.
Allows you to choose applications displayed in
the Applications Launcher.
Applications Launcher
Time display
Battery symbol
Application pick list
1
5
ACCU-CHEK Pocket Compass
Software
5 Application menu
6
7
10
6
Time and date display
7
Main menu
Description
Provides information on the ACCU-CHEK
Pocket Compass software.
Displays the time and date of the handheld
system.
Displays the main menu with all available
functions.
ACCU-CHEK Pocket Compass Software with Bolus Calculator User Guide
Chapter 1, Introduction
ACCU-CHEK Pocket Compass
Software
8 Icons for additional
information
11
Description
Shows additional information or allows entry:
Timeblocks,
Carbohydrates,
12
13
8
14
10
9
16
9 Menu button
10 Diary button
11 Arrow buttons
(left and right)
12 Area for additional information on the diary entry
13 Blood glucose result
15
14 Measurement units
15 Area for additional information provided by the meter
Pump Insulins,
Insulins,
Reminders,
Events and Comments.
Switches to the main menu.
Switches to the Diary screen for the day displayed.
Display the previous and following entry or time
period.
Possible additional information:
Manual diary entry ,
Values entered with bolus calculator ,
Value read out from meter ,
Value read out from insulin pump
.
Display the blood glucose result. Results
outside the measuring range are displayed as
HI/LO (just as in the meter).
Displays the currently selected unit of measurement.
Extreme temperature while testing
Expired test strip being used
16 Hypo-/hyperglycemic display Indicates hypoglycemic or hyperglycemic blood
glucose results.
17 Numerical keypad
18
19
20
17
21
23
24
18
19
20
21
22
23
Title bar
Numerical display
Unit
Numbers 0 – 9
Delete key
Decimal separator
22
24 +/- key
ACCU-CHEK Pocket Compass Software with Bolus Calculator User Guide
Appears with all input fields for which numbers
must be entered (e.g. carbohydrates).
Displays the name of the input field.
Displays the number being entered.
Displays the unit used for the entry.
Numeric keys
Deletes the most recent entry.
Is used to enter the decimal separator (e.g.
comma or point).
Is used to change the +/- sign (positive/
negative) in front of a number.
11
Chapter 1, Introduction
Before installing the software
Your handheld device as well as your ACCU-CHEK meters
and insulin pump must meet certain requirements in order
to be usable with the ACCU-CHEK Pocket Compass
software. The devices (and features) that are suitable are
described in Chapter 12, “System Requirements”.
Installing software components later
If you have forgotten to install a component (e.g. the Food
List) during the initial installation or want to replace an
installed component, you can do that at any time. Each
application that is provided for selection during the
installation process can be installed at a later time. For
further information, read the (printed) Getting Started
Guide supplied with the software package, and repeat the
installation. This time, however, select only the
components that were missing or the new components to
be installed.
During subsequent installation, you can also change, for
example, the units used for solids and liquids or the language of the food list by simply installing the food list in the
desired version. Foods, meals and units (e.g. cup or spoon)
that you have already self-defined will not get lost.
How to use this guide
This guide provides step-by-step instructions on how to
install, operate, and maintain your software. These
instructions must be followed for your software to operate
correctly. The operating instructions for your handheld are
provided by the respective manufacturer. Safe operation
requires that you fully understand the underlying concepts of user prompts, all displays, the individual functions
of your handheld, the Palm operating system (Palm OS),
and the ACCU-CHEK Pocket Compass software.
12
ACCU-CHEK Pocket Compass Software with Bolus Calculator User Guide
Chapter 1, Introduction
To access Adobe Reader Help
If you need help using or navigating this guide:
■
Choose “Help”
■
Press F1.
“Reader Help”, or
Information on installing the software and this guide
can be found in a separate quick reference guide, the
ACCU-CHEK Pocket Compass “Getting Started Guide”.
Palm OS information
For information on Palm OS, go to the Palm Corporation
company website at www.palm.com.
Do NOT use hardware accelerator programs, replacement
programs for the Applications Launcher or system-wide
enhancements if you are using the ACCU-CHEK Pocket
Compass software. This includes programs that accelerate
the clock speed of the microprocessor, provide alternative
interfaces for the Palm OS software, and create new system
enhancements that can cause priority conflicts with other
software programs.
ACCU-CHEK Pocket Compass Software with Bolus Calculator User Guide
13
Chapter 1, Introduction
14
ACCU-CHEK Pocket Compass Software with Bolus Calculator User Guide
Chapter 2, Getting Started
2
Getting Started
2.1
Preparing your Handheld
Your handheld needs to be set up for normal use as
outlined in the manual provided by the manufacturer. You
must have a compatible handheld with a compatible Palm
OS in order to use the ACCU-CHEK Pocket Compass
software (see Chapter 12, “System Requirements”).
To configure the following settings on the handheld, please
adhere to the instructions provided in the manufacturer’s
manual.
Check the following system data
■
Determine the available disk space in order to see
whether the ACCU-CHEK Pocket Compass
software can be installed.
Carry out the following system settings
The following settings on the handheld are particularly
important for using the ACCU-CHEK Pocket Compass
software. It is therefore better to implement these settings
on the handheld prior to installation.
ACCU-CHEK Pocket Compass Software with Bolus Calculator User Guide
15
Chapter 2, Getting Started
■
–
–
–
–
Select the correct display formats for
date
time
week start
decimal separator
The display format settings you make in the handheld apply
for the entire system, i.e. the settings you make here also
apply, for example, to display numerical values in the
ACCU-CHEK Pocket Compass software. Therefore adjust
the following settings to your normal system or the standard
system for your country.
■
Set the correct date.
■
Set the correct time.
The correct time setting for both the handheld and all
meters or insulin pumps used with the ACCU-CHEK Pocket
Compass software is of fundamental importance. An overall
evaluation of the data stored on the different devices can
only be meaningful if they are correctly correlated in time. If
the times on the devices deviate too much from each other
(more than 5 minutes), the read out data is (depending on
the report type) either flagged specifically, displayed
separately (in so-called “not in sync” areas) or not taken
into account at all. You should not use such data to draw
conclusions for treatment.
■
Set the auto-off time to at least 2 minutes.
The auto-off time must be set long enough to guarantee
sufficient time for correct infrared data transfer.
It is recommended that you activate password protection if
you want to protect your data from unauthorized access.
16
ACCU-CHEK Pocket Compass Software with Bolus Calculator User Guide
Chapter 2, Getting Started
2.2
Installing the ACCU-CHEK Pocket Compass Software
If you have not already done so, install the software on
your PC according to the instructions given in the separate ACCU-CHEK Pocket Compass software “Getting
Started Guide”.
The program files of the ACCU-CHEK Pocket Compass
software for the handheld have been copied to the
computer (into the Install folder of the Palm user selected
during installation). They can now be transferred (using
the docking station or another suitable connection cable)
to the compatible handheld using the HotSync function.
To install the ACCU-CHEK Pocket Compass software
on your handheld (via the HotSync function)
1
Insert the handheld into the docking station or
connect the connection cable.
2
Press the HotSync button on the docking station or
on the handheld.
The program files for the ACCU-CHEK Pocket Compass
software are installed on the handheld during HotSync
data transfer.
Selecting the language when you first start
the program
When you start the ACCU-CHEK Pocket Compass
software for the first time, dialog boxes prompting you to
configure the software appear automatically. To ensure
that these dialog boxes appear in your language of choice,
select the language immediately after starting the program.
1
Touch the desired language. The selected language
is highlighted.
2
Confirm your selection with OK.
ACCU-CHEK Pocket Compass Software with Bolus Calculator User Guide
17
Chapter 2, Getting Started
2.3
First Configuration – which devices would you like to use with the ACCU-CHEK Pocket Compass
software?
The ACCU-CHEK Pocket Compass software transfers
data from insulin pumps and meters. For the data to be
assigned and managed correctly, each device must be
connected to the ACCU-CHEK Pocket Compass software
before it is used for the first time. This is called
synchronization (this has nothing to do with the handheld HotSync function). The ACCU-CHEK Pocket Compass software makes initial contact with your devices and
in doing so ensures that the date and time settings of all
devices agree.
Without this adjustment, it is impossible to transfer the
data stored in your devices.
You must first define the basic settings described below.
Their dialog boxes are displayed automatically (immediately after language selection) following the initial program start (later changes to these settings are possible,
see Chapter 8).
Please have all the devices that you want to use ready at
the initial start of the ACCU-CHEK Pocket Compass software. If you have not already done so, please set the correct date and time on your devices. During synchronization, the ACCU-CHEK Pocket Compass software connects
with all devices and checks for agreement of date and
time (with a maximum tolerance of ± 2 minutes).
If you are not using either meters or insulin pumps, you
must still choose some basic settings.
18
ACCU-CHEK Pocket Compass Software with Bolus Calculator User Guide
Chapter 2, Getting Started
To select the device types for data transfer
Immediately after starting the program for the first time
and selecting the language, the dialog box for selecting
the device types used appears. Here you can choose
whether you want to transfer data from ACCU-CHEK
meters and/or an ACCU-CHEK insulin pump. If you select
neither of the two options, you can only enter data
manually. Each selection made here can be changed or
expanded later. However, if you add another device, a new
synchronization of all devices will be needed (see Chapter 8.3, “Transfer Setup”).
1
If you use a compatible ACCU-CHEK meter and you
want to transfer its data using the ACCU-CHEK
Pocket Compass software, activate the Meter
checkbox. You can use up to 16 meters with the
ACCU-CHEK Pocket Compass software.
2
If you use a compatible ACCU-CHEK insulin pump
and you want to transfer its data using the ACCU-CHEK
Pocket Compass software, activate the Pump
checkbox. In this case the Bolus Calculator checkbox
appears as another option that you can activate.
3
If you activate the Bolus Calculator checkbox, a
dialog box informs you of the Bolus Calculator being
available after you have synchronized your pump.
Confirm the dialog box with OK.
4
If you do not want to transfer data from either of the
device types, deactivate both checkboxes.
5
Touch OK to continue with other basic settings.
ACCU-CHEK Pocket Compass Software with Bolus Calculator User Guide
19
Chapter 2, Getting Started
It is not guaranteed that the times of the devices agree
before synchronization takes place. Therefore only the data
that has been stored in the devices after initial synchronization is displayed without any restrictions. The data prior to
synchronization is (depending on the report type) either
flagged specifically, displayed separately (in so-called “not in
sync” areas) or not taken into account at all. This also applies
to data with a date/time deviation that lies outside the
allowed tolerance of 5 minutes. You should not use such data
to draw conclusions for treatment.
20
ACCU-CHEK Pocket Compass Software with Bolus Calculator User Guide
Chapter 2, Getting Started
To make basic settings for the ACCU-CHEK Pocket
Compass software
After having selected the devices, you must enter the basic
system settings. Here you define the language and the
standard units to be used. In addition, you decide here
whether you want to use the carbohydrate calculator. The
default settings are printed in bold in the table below.
Name
Language
Description
Select the language of choice from the
list.
■ Deutsch
■ English
■ Français
■ Español
■ Italiano
■ Nederlands
■ Svenska
■ Português PT
■ Português BR
Glucose unit
Select the appropriate blood glucose
unit that you use in your meter and your
diabetes care plan from the list:
■ mg/dL
■ mmol/L
ACCU-CHEK Pocket Compass Software with Bolus Calculator User Guide
21
Chapter 2, Getting Started
Name
Carbohydrates
Description
Select the appropriate carbohydrate unit
from the list:
■ g
■ BE (12g)
■ CU (10g)
■ BW (10g)
■ CC (15g)
Carbohydrate
calculator
Activate this checkbox if you want to use
the carbohydrate calculator:
■ On
■ Off
After you have confirmed your preferred settings with OK,
the selected devices must be synchronized.
22
ACCU-CHEK Pocket Compass Software with Bolus Calculator User Guide
Chapter 2, Getting Started
2.4
Synchronizing the ACCU-CHEK Pocket Compass Software and the Selected Devices
As described previously, the synchronization process is of
fundamental importance for evaluating meter or insulin
pump data. A time deviation (between insulin pump and
meter) would mean that the times of insulin administration and blood glucose test results are no longer correctly
related to each other in the report. This could result in
misleading conclusions being drawn from the therapyrelevant data.
For this reason, the ACCU-CHEK Pocket Compass
software considers the following criteria:
■
Data is only transferred from devices that have
previously been synchronized with the ACCU-CHEK
Pocket Compass software.
■
The dates and times of the devices involved must
agree in order to be displayed in the reports without
any restrictions. If the system detects a time deviation of at least ± 4 minutes while reading out the
devices, a message is displayed prompting you to
correct the deviation as soon as possible while
performing a new synchronization.
■
If the system detects a deviation of ± 5 minutes outside the tolerance range while transferring devices,
the read out data is (depending on the report type)
either flagged specifically, displayed separately (in
so-called “not in sync” areas) or not taken into
account at all. You should on no account use such
data to draw conclusions for treatment.
Confirm the dialog box with OK, to continue with
synchronization.
ACCU-CHEK Pocket Compass Software with Bolus Calculator User Guide
23
Chapter 2, Getting Started
To prepare for initial synchronization
Ensure that all the devices you use (handheld, meters and
insulin pump) have the same date and time settings. Small
deviations (max. ± 2 minutes during synchronization) are
tolerated.
1
Have all devices ready from which you want to
transfer data. You will synchronize them one at a
time (not all at the same time, because infrared
communication can be disrupted if multiple devices
try to communicate simultaneously).
2
The infrared windows of the devices currently being
synchronized (i.e. handheld/pump or handheld/
meter) must be facing each other at a distance of
about 10-15 cm (4-6 inches).
3
Depending on the devices you have selected,
proceed as follows:
– If you are using an insulin pump and meter(s), the
pump must be synchronized first. Leave the meters
turned off until synchronization of the pump is
complete. Activate infrared communication for the
pump.
– If you are using meters exclusively, first turn on only
one meter and activate infrared communication for
this device.
If you have activated the use of an insulin pump and/or
meters in the settings, you are prompted to perform a synchronization at each program start until a synchronization
has been successfully completed. If you have activated this
option by mistake or decided at a later time to not read out
the devices, deactivate the corresponding checkboxes via
Transfer Setup in the Options menu. This prevents synchronization from being started automatically.
24
ACCU-CHEK Pocket Compass Software with Bolus Calculator User Guide
Chapter 2, Getting Started
To perform initial synchronization
If you have prepared the devices according to the above
instructions, you can start synchronization. If you cancel
the synchronization process (with No), it will automatically
be repeated with each program start (until it is successfully completed for the first time).
Synchronization runs in the order:
insulin pump – meter 1 – meter 2 …, and non-selected
devices are omitted. Depending on the selected device
types for data transfer, you will now see either the dialog
box for pump synchronization or the dialog box for meter
synchronization.
To synchronize the insulin pump
1
To start synchronization, touch Yes.
2
Activate infrared communication. Confirm preparation completion with OK.
3
Confirm that you wish to use the newly detected
insulin pump with Yes. If you have not selected to use
any meters, confirm successful synchronization of
the pump with Finish.
4
If you have selected to use meters, confirm continuation of meter synchronization with Yes.
5
Deactivate infrared communication of the insulin
pump.
6
Take the pump out of the range of infrared communication. Switch the insulin pump back to RUN
mode.
ACCU-CHEK Pocket Compass Software with Bolus Calculator User Guide
25
Chapter 2, Getting Started
To synchronize the first meter
1
To start synchronization, touch Yes.
2
Activate infrared communication of the meter.
Confirm preparation completion with OK.
3
Confirm that you wish to use the newly detected
meter with Yes.
4
If you want to use only one meter, answer the
question requesting another synchronization with
No.
5
Turn the meter off and take it out of the range of
infrared communication.
To synchronize the second meter
6
If you want to use another meter, answer the
question requesting another synchronization with
Yes.
7
Activate infrared communication of the meter.
8
Proceed with synchronization as for the first device.
Once the ACCU-CHEK Pocket Compass software has
synchronized all devices, this setup process is complete.
26
ACCU-CHEK Pocket Compass Software with Bolus Calculator User Guide
Chapter 3, Care and Maintenance
3
Care and Maintenance
It is very important to properly care for your compatible
handheld as recommended by its manufacturer.
The ACCU-CHEK Pocket Compass software is stored on a
handheld that, depending on the model, has no powerindependent storage media (i.e. a device used to keep and
retrieve data); therefore, the permanent preservation of all
stored data depends on power supply. The remaining
battery life is displayed by a battery symbol in the upper
part of the handheld screen.
Drained batteries may lead to deletion of the handheld
memory. Battery life varies depending on use.
In order to avoid loss of data, it is recommended that you
recharge the batteries before they are empty. Consult your
handheld manual for more detail.
It is important to HotSync on a regular basis. This backs up
the data stored on the handheld onto your PC, and in case
data is lost (e.g. due to drained batteries), the records can
easily be copied back on to your handheld. For further
information on data backup, see Chapter 10.
ACCU-CHEK Pocket Compass Software with Bolus Calculator User Guide
27
Chapter 3, Care and Maintenance
28
ACCU-CHEK Pocket Compass Software with Bolus Calculator User Guide
Chapter 4, Overview of Software Functions
4
Overview of Software Functions
Functions are arranged in groups that are accessible via
corresponding menu items. To select the desired function,
touch the appropriate menu item. The functions and
related menus are described later in this manual.
The Bolus Calculator function is only available if you have
synchronized an insulin pump with the ACCU-CHEK
Pocket Compass software and have activated the Bolus
Calculator option in the Transfer Setup menu. For the sake
of completeness, the following guide sections show all
menu items relating to the bolus calculator. They may,
however, not appear in your software configuration.
4.1
Data Transfer Menu
Touch Data Transfer to open the Data Transfer menu of the
same name. Here you can edit all operations relating to
infrared data transfer from or to other devices. This includes
the following options:
■
Transferring (“Reading out”) data from a suitable
blood glucose meter and/or an insulin pump via
infrared transfer;
■
Exporting data for editing with the ACCU-CHEK
Camit Pro software and the ACCU-CHEK Compass
software or ACCU-CHEK Smart Pix System for
printing;
■
Synchronizing devices for use with the ACCU-CHEK
Pocket Compass software (subsequent synchronization or re-synchronization);
■
Retrieving information about completed data transfers and synchronizations.
ACCU-CHEK Pocket Compass Software with Bolus Calculator User Guide
29
Chapter 4, Overview of Software Functions
4.2
Diary Function
The Diary function provides an overview of all information
entered manually and data transferred from the devices.
The data is displayed with the respective date and time. All
(synchronized) data that is transferred from the devices
cannot be deleted. The Diary function allows you to:
4.3
■
Retrieve all diary entries;
■
Manually create new entries or enter additional
information;
■
Change or delete manually entered entries.
Reports Function
The Reports function enables you to review your therapy
data easily and effectively. The software allows analysis
of available data for certain time periods. Using the
Reports function you can, for example:
30
■
Analyze trends in blood glucose levels together
with insulin dosages and carbohydrate intake;
■
Display results either as a graph or a table.
ACCU-CHEK Pocket Compass Software with Bolus Calculator User Guide
Chapter 4, Overview of Software Functions
4.4
Health Management Menu
This area allows you to enter additional information that
will be useful in assessing the course of your therapy.
4.5
■
HbA1c
■
Ketones
■
Blood pressure
Options Menu
The Options menu allows you to:
■
Set general software parameters, such as glucose
units, carbohydrate units, language and use of the
carbohydrate calculator (General Setup);
■
Customize the software with your personal limits,
adjust timeblocks, indicate the names of the insulins used and set the events display sequence
(Personal Setup);
■
Modify the basic selection of devices (insulin pump
and/or meters) for transferring data (Transfer
Setup);
■
Define the basic settings required for the bolus calculator (Bolus Calc. Setup, if available);
■
Edit and supplement the food list of the carbohydrate calculator if you have activated the carbohydrate calculator (Foods).
ACCU-CHEK Pocket Compass Software with Bolus Calculator User Guide
31
Chapter 4, Overview of Software Functions
32
ACCU-CHEK Pocket Compass Software with Bolus Calculator User Guide
Chapter 5, Diary
5
Diary
5.1
General Information
Using the Diary function, you can edit and add data. A
maximum of 3000 diary entries may be saved.
All diary entries are saved with a date and time. As the
maximum memory capacity is reached, the oldest entries
are deleted when new entries are made. The original
source of the record (insulin pump, meter, bolus calculator
or manually made entry) is displayed by the appropriate
icon. A calculator is displayed for entries created using the
bolus calculator. Entries that were manually created
without the bolus calculator are marked by a pen.
You can save information about insulin dosages, the
amount of carbohydrates taken in, reminders and events.
This information can be linked with a blood glucose test
or entered independently of such a test. Using this
information, you can get a clearer picture of your blood
glucose levels. Regularly recording and reviewing this
information assists you and your healthcare professional
in improving your treatment.
ACCU-CHEK Pocket Compass Software with Bolus Calculator User Guide
33
Chapter 5, Diary
You can enter data manually or transfer data from a suitable
blood glucose meter or insulin pump by infrared data
transfer. Manually entered blood glucose and insulin results
are marked as such and may be changed and deleted by
the user.
It is not possible to edit results transferred from a meter or
insulin pump. You can, however, change all additional
information linked to a diary entry or exempt individual
records from the reports using the “Invalid” event.
In order to avoid manually entered blood glucose or pump
insulin results being duplicated in the diary by subsequently
transferring data from the meter or insulin pump (and thus
being incorporated in reports twice), the manually entered
result is replaced by the result being transferred. These
replaced results are marked by the letter -R- and can no
longer be changed manually. By touching such a result, you
will get information on the originally entered result.
34
ACCU-CHEK Pocket Compass Software with Bolus Calculator User Guide
Chapter 5, Diary
To view the diary
■
From the main menu screen, touch Diary. The Diary
screen is displayed.
The existing data of each day is arranged in lines and
sorted by time. The associated date appears in the upper
right corner of the screen. Diary entries for this day appear
in the center. The left column contains icons indicating the
source of the entry (insulin pump, meter, bolus calculator
or manual entry). This list displays the following information for an entry:
■
Time
■
Blood glucose result
■
Insulin dosage
■
Carbohydrate intake
Additional information is shown on the Detail screen for
an entry.
To move between sequential days:
■
Touch the arrows on the left and/or right of the
date.
ACCU-CHEK Pocket Compass Software with Bolus Calculator User Guide
35
Chapter 5, Diary
To display detailed information for a diary entry
■
From the Diary screen, touch the icon ( , , or
) on the left of the diary entry. The Detail screen
for that entry is displayed.
To move between sequential diary entries
■
Touch the arrows on the left and/or right of the
date.
To return to the Diary screen
■
From the Detail screen, touch the Diary button.
To return to the main menu
■
36
From the Diary or Detail screen, touch the Menu
button.
ACCU-CHEK Pocket Compass Software with Bolus Calculator User Guide
Chapter 5, Diary
5.2
Manual Data Entry
■
Information (blood glucose, insulin and carbohydrates) on manually entered diary entries may be
changed subsequently at any time (unless the
entries have been replaced). These entries are
marked by an icon shown above the blood glucose
value
(manual entry).
■
Manually entered pump insulin values can be
edited until the data is transferred from the insulin
pump. The insulin amounts stored via the bolus
calculator, which can no longer be changed, are an
exception. You can change the information on the
type of insulin administration (pump or syringe)
until the data is transferred from the insulin pump.
■
You can directly add or change information on
carbohydrate intake at any time by touching the
respective field. The information on carbohydrate
intake entered via the bolus calculator, which can
no longer be changed, is an exception. For further
details and explanations on entering additional
information on the Detail screen, see the following
chapters.
■
Generally, you cannot manually change imported
blood glucose values, imported insulin values and
entries made through the bolus calculator (or
related date and time information), but you can add
additional information to this data. These entries
are marked by the icons (meter),
(insulin
pump) or (bolus calculator).
ACCU-CHEK Pocket Compass Software with Bolus Calculator User Guide
37
Chapter 5, Diary
To manually add a diary entry
1
From the Diary screen, touch the New button. The
New Entry screen is displayed.
2
If you want the current time to become the time of
entry, activate the Now checkbox. The current date
and time are adopted. Or:
3
Enter the date by touching the Date field and
selecting the applicable date from the calendar
displayed.
4
Touch the Time field and enter the time using the
numerical keypad displayed.
5
If you want to set a timeblock other than the default,
touch the small triangle next to the Timeblock entry
and select the desired timeblock from the list.
6
Touch the OK button to save the new entry. This
entry is then displayed at the top of the Diary screen.
For the time being, the diary entry does not yet contain
further information. For information on how to manually
enter information directly on the Diary and Detail screens,
see the following sections.
38
ACCU-CHEK Pocket Compass Software with Bolus Calculator User Guide
Chapter 5, Diary
5.3
Deleting Manually Entered Diary Entries
To delete manually entered diary entries
1
From the main menu screen, touch the Diary button.
The Diary screen is displayed.
2
To select the diary entry you want to delete, touch the
symbol ( ) on the left of the diary entry on the Diary
screen. The Detail screen for that entry is displayed.
Only manually created diary entries (
) can be deleted.
3
Touch the Delete button. A screen confirming the
request for deletion is displayed.
4
Touch Delete to permanently delete the record, or
touch Cancel to return to the Detail screen.
Individual records transferred from a meter or an insulin
pump can be exempted from the reports using the “Invalid”
event (see page 57).
ACCU-CHEK Pocket Compass Software with Bolus Calculator User Guide
39
Chapter 5, Diary
5.4
Manually Converting “not in sync” Data to “in sync” Data
Device data that was, for example, created before initial
synchronization or whose time and date is not clearly
identifiable due to other reasons (e.g. time deviation of the
devices), is displayed as “not in sync” data. This data is
marked (e.g. in the diary or logbook) by the
icon. It is
not used in statistical reports such as the Average Day or
Average Week report.
If you are sure that the time given is correct or you know the
exact time deviation, you can convert the record to an “in
sync” record.
1
Touch the
message.
icon next to the Data “not in sync”
2
Activate the Convert to “sync record” checkbox.
3
Touch OK to accept the data in the “in sync” area.
The converted data is managed in the same way as manual
entries. Should the “not in sync” categorization be due to a
time deviation that is known to you, it is recommended that
you manually correct this deviation.
Using the respective filter option (All or Sync. Data) in the
diary view, you can specify whether “not in sync” data
should be displayed.
40
ACCU-CHEK Pocket Compass Software with Bolus Calculator User Guide
Chapter 5, Diary
5.5
Blood Glucose
You can directly enter the three most important values
(blood glucose, insulin and carbohydrates) in both the
Diary and Detail screens. Other information, such as
reminders, events or comments, is only entered in the
Detail screen.
To add or edit a manually entered blood glucose
result
1
From the Diary or Detail screen, touch the displayed
blood glucose result (or the three dashes --- if no
blood glucose result has been entered yet). The
numerical keypad is displayed for entering the blood
glucose result.
2
Enter the desired blood glucose result using the
numerical keypad.
3
Touch the OK button to save the new or edited entry.
Leave the bG (blood glucose) field blank if you only want to
retain information on timeblocks, insulin dosages, carbohydrate intake, reminders or events rather than a new result.
If you enter a blood glucose result that is subsequently
transferred from the meter (with the corresponding value
and time tolerances), the manually entered result is
replaced by the transferred result. These results are marked
by the letter -R- (Replaced) and can no longer be changed
manually. By touching such a result, information on the
originally entered result will appear.
ACCU-CHEK Pocket Compass Software with Bolus Calculator User Guide
41
Chapter 5, Diary
5.6
Insulin
The assigned insulin amount is displayed in both the Diary
and Detail screens. The insulin amount can be manually
entered (and in this case also edited) in both screens.
To process insulin information if data is transferred
from an insulin pump
The insulin pump supplies information about the time and
the dosage of insulin administered. These values are also
displayed in the Diary and Detail screens and cannot be
edited manually. This is shown by the Pump
icon. You
can, however, add additional information to the diary
entry.
42
ACCU-CHEK Pocket Compass Software with Bolus Calculator User Guide
Chapter 5, Diary
To add or edit the type and dosage of syringe insulin
if you are using an insulin pump with the ACCU-CHEK
Pocket Compass software
1
From the Diary screen, touch the displayed insulin
dosage (or the three dashes --- if no dosage has
been entered yet), or:
From the Detail screen, touch the Insulin
icon. The
Edit Insulin screen is displayed.
2
Select Syringe as the desired administration method.
3
Touch the input field for the desired insulin type
— bolus or basal (for details on distinguishing
between short- and long-acting insulin types, see
page 112) — and enter the dosage using the numerical keypad displayed.
4
Confirm the insulin information displayed (depending on your selection) to accept the entries in the
diary.
To add or edit the type and dosage of pump insulin if
you are using an insulin pump with the ACCU-CHEK
Pocket Compass software
Just as you cannot change or delete transferred blood
glucose results, similar restrictions apply for pump insulin:
If you use a pump with the ACCU-CHEK Pocket Compass
software, insulin values can be both transferred and
added manually. Transferred values (Pump
icon)
cannot be edited but additional information can be added.
ACCU-CHEK Pocket Compass Software with Bolus Calculator User Guide
43
Chapter 5, Diary
1
From the Diary screen, touch the displayed insulin
dosage (or the three dashes --- if no dosage has
been entered yet), or:
From the Detail screen, touch the Insulin
icon. The
Edit Insulin screen is displayed.
2
Select Pump as the desired administration method
(the selected option is highlighted). If you manually
enter insulin pump dosages and then transfer pump
data for the same time period, the manual entry will be
replaced by the transferred value and can no longer
be changed. In this case, the Pump
icon is displayed and the information -R- for Replaced is shown
instead of the insulin value. This does not affect
syringe insulin values. They can still be added or
edited.
To manually enter an insulin pump dosage
44
3
Touch the input field and enter the dosage using the
numerical keypad displayed.
4
Select the bolus type (Standard, Extended or MultiWave) from the list.
5
If you select Extended, enter the duration for that
dosage. Touch the input field and enter the duration
using the numerical keypad displayed.
6
If you select MultiWave, enter the duration and the
immediate portion for that dosage. Touch the input
fields and enter both values using the numerical
keypad displayed.
7
Confirm the insulin information displayed (depending on your selection) to accept the entries in the
diary.
ACCU-CHEK Pocket Compass Software with Bolus Calculator User Guide
Chapter 5, Diary
To add or edit the type and dosage of syringe insulin
if you are not using an insulin pump with the
ACCU-CHEK Pocket Compass software
1
From the Diary screen, touch the insulin dosage
displayed (or the three dashes --- if no dosage has
been entered yet), or:
From the Detail screen, touch the Insulin
icon.
The Edit Insulin screen is displayed.
2
Touch one of the input fields (Bolus 1, Bolus 2 or
Basal) and enter the dosage using the numerical
keypad displayed.
3
Touch the OK button to confirm and save the
settings in the diary.
By selecting Bolus or Basal, you can distinguish between
short- and long-acting insulin (see page 112).
ACCU-CHEK Pocket Compass Software with Bolus Calculator User Guide
45
Chapter 5, Diary
5.7
Carbohydrates
The carbohydrate value per diary entry is displayed in both
the Diary and Detail screens. This information can be
changed at any time as long as it was entered without
using the bolus calculator. The amount of carbohydrates is
indicated in the units you defined during setup of the
system.
The procedure used for entering carbohydrate amounts
differs depending on whether you have activated the
carbohydrate calculator or not.
To add or edit a carbohydrate value with deactivated
carbohydrate calculator
46
1
From the Diary screen, touch the displayed carbohydrate amount (or the three dashes --- if no value has
been entered yet), or:
From the Detail screen, touch the Carbohydrate
icon. The Carbohydrates numerical keypad is
displayed.
2
Enter the amount using the numerical keypad.
3
Touch the OK button to return to the previous screen.
ACCU-CHEK Pocket Compass Software with Bolus Calculator User Guide
Chapter 5, Diary
To add or edit a carbohydrate value using the
carbohydrate calculator
1
From the Diary screen, touch the displayed carbohydrate amount (or the three dashes --- if no value has
been entered yet), or:
From the Detail screen, touch the Carbohydrates
icon. The carbohydrate calculator is displayed.
2
Touch the “+” button to add a food component or a
predefined meal.
3
Select the desired entry from the list.
4
Enter the amount using the numerical keypad. For
composed meals, Portion is automatically displayed as
the unit; for single food components, the unit depends
on the settings you made (e.g. liter, gram etc.).
5
Touch the OK button to return to the previous
screen.
The table now displays your selection with information on
the carbohydrate amount. If available, the percentage of
fat and proteins is also listed. The total amount of carbohydrates is displayed in the lower right corner of the table.
This value then appears in the diary.
6
If you want to add another food, touch the “+” button
again. The procedure is identical for all other foods.
7
After having selected all foods, touch the OK button to
add the calculated carbohydrate amount to the diary
entry.
If the carbohydrate calculator is activated, you can also
enter the carbohydrate amount directly into the sum field.
Depending on your needs and habits, you can compose
your meals from several components and save them (see
Chapter 8.4). You can mark food components or meals that
are used particularly frequently as favorites so that they can
be located more quickly in the list.
ACCU-CHEK Pocket Compass Software with Bolus Calculator User Guide
47
Chapter 5, Diary
To change the amount of a food in the carbohydrate
calculator
If you want to change the amount of an existing food:
1
Touch the number field preceding the unit of
reference. The numerical keypad is displayed again.
2
Enter the new amount using the numerical keypad.
3
Touch the OK button to return to the previous screen.
To delete a food from the list
If you want to delete an existing food component or meal
from the current list:
1
Touch the name of the food component or meal to be
deleted. The entry is highlighted.
2
Touch the “-” button.
The entry is immediately deleted.
48
ACCU-CHEK Pocket Compass Software with Bolus Calculator User Guide
Chapter 5, Diary
To display detailed information for a meal
If you want to display detailed information on the
composition of a selected meal:
1
Touch the name of the meal. The entry is highlighted.
2
Touch the Detail
button to retrieve the respective
detailed information.
3
Touch the OK button to close this screen.
For information on editing and adding to the food list, see
Chapter 8.4.
ACCU-CHEK Pocket Compass Software with Bolus Calculator User Guide
49
Chapter 5, Diary
5.8
Timeblocks
The timeblock assignment for each entry is shown in the
Detail screen. These timeblocks are used to sort and
group values in various reports (e.g. Average Day report).
The timeblock assignment is defined using the Personal
Setup option and is made automatically for each diary
entry. Manual changes can be made at any time.
To assign a different timeblock to an entry (for
instance in the case of a late breakfast)
50
1
From the Diary screen, touch the time of the appropriate entry or, from the Detail screen, touch the
Timeblocks
icon. The Edit Date/Time screen is
displayed.
2
Touch the small triangle next to the Timeblock entry.
3
Select the desired timeblock from the pick list.
4
Touch the OK button to adopt the changes and
return to the Detail screen.
ACCU-CHEK Pocket Compass Software with Bolus Calculator User Guide
Chapter 5, Diary
5.9
Reminders
The Detail screen for each diary entry allows you to define
(up to 7) reminders. A reminder is a particular point in
time at which (depending on your system preferences) an
acoustic signal occurs and the reason for that reminder
(e.g. performing a test, inject insulin etc.) is displayed.
To define a reminder
Reminders can only be entered in the Detail screen.
1
From the Detail screen, touch the Reminders
icon. The Reminders screen is displayed.
2
Before activating the checkbox with the desired
reminder reason, you must first enter the remaining
time or point in time for the reminder. You can also
select several reasons and (if required) change the
predefined text for the first five reasons.
3
If you want to add a new reason, activate one of the
empty lines and enter the reason. If you frequently
use the same user-defined reasons, you can save
them permanently (in the template, see the following
section).
4
Touch the field on the right of the selected reason to
enter the reminder time.
5
Enter the reminder time either indirectly by specifying the remaining time (e.g. “Remind in 20 minutes”)
or directly by entering a date and time. The information entered is automatically converted.
ACCU-CHEK Pocket Compass Software with Bolus Calculator User Guide
51
Chapter 5, Diary
6
After having made all entries, touch the Done button
to save the reminders and return to the Detail screen.
Your handheld will (depending on your system preferences) sound an acoustic signal and show the corresponding information on the display when the specified
time has been reached. The reminder also occurs when
the device is turned off.
To adjust the reason template
The default reasons offered for selection are adopted from
a template. If you want to permanently add your own
reasons to this selection, you can adjust the template
accordingly.
1
From the Reminders screen, touch the Templates
button.
2
Activate one of the empty lines and enter the desired
reason, or:
3
Change one of the (existing) reasons from the upper
list. The reasons from the lower list cannot be
changed or deleted.
4
If you also want to set a default time that is to elapse
before the reminder is triggered (i.e. in how many
minutes or hours the reminder is to occur), touch the
field on the right of the selected reason to make your
entry.
5
After having made the desired changes, touch the
Save button to adopt the changed template.
The new and changed entries appear each time the
Reminders screen is opened.
52
ACCU-CHEK Pocket Compass Software with Bolus Calculator User Guide
Chapter 5, Diary
To change or delete a saved reminder
1
From the Detail screen, touch the Reminders icon.
The Reminders screen is displayed.
2
If you want to delete a single reminder, remove the
checkmark next to the reason for that reminder.
3
Confirm the request for deleting that (single)
reminder by touching the Delete button.
4
If you want to add a reminder, activate the desired
checkbox.
5
If you want to change the reminder time, touch the
field on the right of the reason. Change the time as
desired.
6
If you want to change the reason for a reminder,
touch the appropriate line. Change the text using the
screen keyboard or the Graffiti function.
7
After having made all changes, touch the Done
button to save the changes and return to the Detail
screen.
ACCU-CHEK Pocket Compass Software with Bolus Calculator User Guide
53
Chapter 5, Diary
What happens to reminders if you delete the diary
entry?
All reminders are always transferred from the ACCU-CHEK
Pocket Compass software to the calendar in the Palm OS.
Thus, you can retain a reminder even if you have deleted
the related diary entry.
However, if you delete the entry from the Palm OS calendar, the reminder is automatically deleted from the diary.
What happens to reminders when you change the
date and/or time in your handheld?
Do not change the date and time of your handheld without
any reason if you have saved reminders.
By changing the date/time settings of your handheld,
pending reminders are triggered at the wrong point in
time or are mistakenly treated as already triggered.
Therefore, only change the date and time with good
reason, or better still, when no more reminders are
pending. If this is not possible:
54
1
Display the list of pending reminders before
changing the time setting (see page 83).
2
Write down the reminder times and reasons.
3
Then save again the reminders that are affected by
the time change.
ACCU-CHEK Pocket Compass Software with Bolus Calculator User Guide
Chapter 5, Diary
5.10 Events and Comments
You can assign up to four special events (e.g. exercise,
medication, etc.) to the respective diary entry in the Detail
screen. This data can be manually changed at any time.
Assigning events provides additional information that
improves the evaluation of blood glucose test results and
the adjustment of therapy. The table below contains all
event entry choices.
Event
Before Meal
After Meal
Snack
Fasting
Feel Hypo
Stress
Illness
B Exercise
A Exercise
Oral Med.
Other’s Result
Invalid
User Defined
Used to indicate the following situation
Before a meal
After a meal
Snack
While fasting
If symptoms of hypoglycemia occur
Result when you feel stressed
Result when you feel ill
Before exercise
After exercise
In combination with oral intake of antidiabetic drugs
Diary entry for another person (not for your own reports)
Diary entry is invalid
Entry of a non-specific event, the interpretation of which lies
with the user.
You can define your own comments in addition to these
predefined events. While events are defined as frequently
or periodically occurring situations and are largely
predefined, comments can be used to freely describe the
event (e.g. before exercise) in more detail (tennis or golf).
ACCU-CHEK Pocket Compass Software with Bolus Calculator User Guide
55
Chapter 5, Diary
To add or edit an event or a comment
56
1
From the Detail screen, touch the Event/Comment
icon.
2
Touch the appropriate check box(es)( in the upper
screen area) to indicate the event(s). Up to four
events can be selected per diary entry.
3
Enter your comment (in the lower screen area; up to
64 characters) using the screen keyboard or the
Graffiti function.
4
Touch the small field in the center of the comment
field. A list for entering and selecting personal
comments is displayed.
5
Enter the comments that you want to use regularly.
6
Put a checkmark in the field preceding each comment that is to be assigned to the current diary entry.
7
Touch the OK button to automatically insert the
selected comments in the comment text field.
8
After having made all entries, touch the OK button to
save the entries and return to the Detail screen.
ACCU-CHEK Pocket Compass Software with Bolus Calculator User Guide
Chapter 5, Diary
Some events cannot be selected simultaneously (e.g.
“Before a meal” and “After a meal”). If you attempt to select
two opposing events, only the last one you selected will be
checked.
The sequence of event choices can be changed under
Personal Setup (refer to page 117) to place frequently-used
entries at the top of the list and allow easier access.
Labeling a diary entry with the event “Other’s Result” or
“Invalid” prevents these entries from being used in reports.
You can therefore use these events specifically to leave a
(non-deletable) entry out of the report.
To prevent a diary entry from being used in the
reports
If the comment screen is displayed:
1
Put a checkmark in the field preceding the Other’s
Result and/or Invalid comments.
2
Touch the OK button to exclude all values (blood
glucose, insulin and carbohydrates) of this diary
entry from being used in reports.
ACCU-CHEK Pocket Compass Software with Bolus Calculator User Guide
57
Chapter 5, Diary
58
ACCU-CHEK Pocket Compass Software with Bolus Calculator User Guide
Chapter 6, Reports
6
Reports
The ACCU-CHEK Pocket Compass software can display
saved therapy-relevant information in a variety of ways.
Graph and table views make it easier to assess the effects
of events and changes in behavior. This allows you and
your healthcare professional to evaluate and improve the
overall course of your diabetes care over a longer period
of time.
Adjust your personal settings to your specific care plan.
Wrong information can distort data analysis and the
interpretation of results. For detailed information on
personal settings, see page 110.
ACCU-CHEK Pocket Compass Software with Bolus Calculator User Guide
59
Chapter 6, Reports
6.1
Report Selection and Settings
The Reports function displays the report type last used.
The software offers different report options:
■ Trend
■ HbA1c
■ Average Day
■ Ketones
■ Average Week
■ Blood Pressure
■ Daily Sums
■ Logbook
■ Distribution
■ Reminder
■ Basal Rate
■ Basal Profiles
■ Pump Events
The Basal Rate, Basal Profiles and Pump Events reports are
only available if you are using an insulin pump with the
ACCU-CHEK Pocket Compass software.
Several time periods are available for reports. Average
values and further statistical information are calculated
using the data available for the selected time period.
60
ACCU-CHEK Pocket Compass Software with Bolus Calculator User Guide
Chapter 6, Reports
To select a report type
1
From the main menu screen, touch Reports.
2
Touch the upper left corner of the screen to open the
pick lists (Reports or Health Mgmt.) Here, select the
desired report type.
3
Touch the Menu button to return to the main menu
screen or select another report type from the pick
list.
To select a report time period
1
From the desired report screen, touch the down
arrow in the lower part of the screen. A pick list of
time periods appropriate for this report type is
displayed.
2
Select the desired time period. The corresponding
date range is displayed in the upper right corner of
the report screen, with the end date (on the right)
being retained.
ACCU-CHEK Pocket Compass Software with Bolus Calculator User Guide
61
Chapter 6, Reports
To move between sequential time periods
■
Touch the arrows on the left and/or right of the
date.
To move directly to a certain time period
1
Touch the date display in the upper right corner of
the report screen.
2
On the calendar displayed, touch the day on which
you want the selected time period to end.
To display general explanations on reports
In each report, you can show an information text that
briefly describes the report contents.
62
1
Touch the
button).
icon (in the left corner above the Menu
2
Close the information window after reading the text
using the OK button.
ACCU-CHEK Pocket Compass Software with Bolus Calculator User Guide
Chapter 6, Reports
6.2
Trend
The Trend report shows a graph or table of the following:
■
Blood glucose results (black)
■
Bolus insulins (purple)
■
Carbohydrate intake (brown) and/or
■
Basal rates (blue, only with insulin pump)
All blood glucose values (black squares) determined
within the selected time period are shown as a curve. This
curve allows you to identify the progression of blood
glucose levels (increasing/decreasing) at a glance. The
blood glucose values shown in the curve can be read
using the scale on the left. Values above the maximum
display range (indicated by an up arrow ) are not
included in the curve. Values outside the measurement
range of your blood glucose meter are not taken into
account. The green area indicates the current target
range. If blood glucose tests are more than 9 hours apart,
they are not linked. The currently set hypoglycemic limit is
displayed as a red line.
Carbohydrate intake is shown at the lower edge of the
diagram in the form of upwardly progressing bars
(brown). Information on carbohydrate intake is entered
either directly in the diary (if used) or during the course of
a bolus calculation. The scale for carbohydrate intake is
displayed at the lower right edge of the diagram in the unit
selected (here: 0 – 100 g).
ACCU-CHEK Pocket Compass Software with Bolus Calculator User Guide
63
Chapter 6, Reports
Bolus insulins, shown as descending bars (purple), are
determined and displayed using manual entries (and the
corresponding insulin pump data, if available). The dose
can be read using the scale (from 0 to 20 IU) in the top
right corner of the screen.
– A standard bolus is shown as a solid bar with a
horizontal line on the end (shown in the screen
shot: 2nd bar from the left). Multiple horizontal lines
in a vertically displayed bolus (1st bar from the left)
represent the simultaneous delivery of different
bolus amounts (e.g. pump and syringe/pen).
– An extended bolus appears as a broader bar
(shown in the illustration: 4th bar from the left); the
width represents the duration of the delivery.
– A multiwave bolus is shown as a solid bar (shown
in the illustration: 3rd bar from the left), with a
horizontal line on the end. The length of this bar
stands for the immediate portion of the delivery.
The vertical starting point of the “flag” represents
the amount of the extended portion, and its
(horizontal) extension represents the duration of
the delivery.
64
ACCU-CHEK Pocket Compass Software with Bolus Calculator User Guide
Chapter 6, Reports
If you use an insulin pump with the ACCU-CHEK Pocket
Compass software, basal rates are also displayed. In this
case, the appropriate basal rate (blue) is also displayed in
the upper part of the graph. The corresponding scale in the
unit IU/h is displayed in the upper left edge of the graph.
If no basal rate data is available in the selected time
period, this (upper) scale does not appear. The scale for
the blood glucose results is expanded upwards instead.
On the lower horizontal axis the usual non-working days
(weekends) are marked in light blue.
ACCU-CHEK Pocket Compass Software with Bolus Calculator User Guide
65
Chapter 6, Reports
To display the Trend report
1
From the main menu screen, touch Reports.
2
Touch the title of the report currently displayed in the
upper left corner of the screen.
3
Select the Trend report from the pick list.
To select a report time period
66
1
Touch the down arrow on the lower edge of the
screen. A pick list of time periods is displayed.
2
Select the desired report time period. The corresponding date range is displayed in the upper right
screen corner, with the end date (on the right) being
retained.
ACCU-CHEK Pocket Compass Software with Bolus Calculator User Guide
Chapter 6, Reports
To move between sequential time periods
■
Touch the arrows on the right and/or left of the
date.
■
Touch the arrows on the right and left of the
diagram base to move the displayed time period by
one day.
To move directly to a certain time period
1
Touch the date display in the upper right corner of
the report screen.
2
On the calendar displayed, touch the day on which
you want the selected time period to end.
To move between overlapping time periods
If overlapping time periods are detected (e.g. after
intercontinental flights), another button is displayed in
the lower right screen corner. The number pair above the
icon indicates the number of overlapping time periods as
well as the number of the currently displayed time period
(in this illustration: 1st period of 2).
■
Touch the button to toggle between the overlapping time ranges shown. This button is also
displayed if the selected time period contains “not
in sync” data. When “not in sync” data situations
are displayed, an appropriate text is shown above
the buttons.
Information on basal rates is discarded in “not in sync” data
situations. For further information on handling “not in sync”
data, see page 40.
ACCU-CHEK Pocket Compass Software with Bolus Calculator User Guide
67
Chapter 6, Reports
To switch to the Trend table
Information can be displayed as a table instead of a graph.
■
Touch the Table
button to switch to table view.
After switching views, the last day shown in the graph is
shown in table form with the blood glucose, bolus insulin
and carbohydrate columns. Blood glucose results below
the hypo limit are shown in red. You can switch this view
to display bolus/basal insulin values and additional
information (in addition to blood glucose results).
■
Touch the Basal Rates
button to switch the view.
The appropriate diary details on blood glucose results and
insulin amounts are available through the
icon. Basal
insulin amounts are displayed in blue, bolus insulin
amounts in purple. All other information refers to the basal
rate. RUN or STOP indicates whether the insulin pump is
started or stopped. The number of basal insulin units is
the amount of insulin administered since the last entry.
You will find a summary of the meaning of the entries in
the right-hand column of the following table.
68
Example
Meaning
Basal profile A, possible displays: A, B, 1 … 5
RUN
STOP
110%
Insulin pump started
Insulin pump stopped
Temporary increase/reduction of the basal
profile active at the respective point in time
More information available
ACCU-CHEK Pocket Compass Software with Bolus Calculator User Guide
Chapter 6, Reports
To move between sequential days:
■
Touch the arrows on the left and/or right of the
date.
To display detailed information on an entry
1
Touch the
icon in the right table column. The
data shown in the displayed Detail screen cannot be
changed.
2
Touch the Back button to return to the report screen.
To return to the Trend graph
■
Touch the Graph
graph.
button to return to the Trend
To return to the main menu
■
Touch the Menu button to return to the main menu
screen.
To select another report type
1
Touch the title of the report currently displayed in the
upper left corner of the screen.
2
Select another report type from the pick list.
ACCU-CHEK Pocket Compass Software with Bolus Calculator User Guide
69
Chapter 6, Reports
6.3
Average Day
The Average Day report shows all blood glucose results
recorded in the selected time period, grouped by different
timeblocks (horizontal axis). For each of these value
groups, the average is calculated and indicated by a small
black square. The rectangle represents the standard
deviation (spread of values) for the respective timeblock
and is open at the top if values exceed 20 mmol/L (or
350 mg/dL). The horizontal lines on the vertical bars mark
the highest and lowest values respectively. If only one
value is available or if all values from a timeblock are
identical, a short line running through the square is
displayed instead of a bar and a rectangle. The block with
the green background indicates the current target range.
The currently set hypoglycemic limit is displayed as red
line.
You have the option of displaying the Average Day report
in graph or table form.
The report does not take “not in sync” data into account.
To view the Average Day report
70
1
From the main menu screen, touch Reports.
2
Touch the title of the report currently displayed in the
upper left corner of the screen.
3
Select the Average Day report from the pick list.
ACCU-CHEK Pocket Compass Software with Bolus Calculator User Guide
Chapter 6, Reports
To select a report time period
1
Touch the down arrow on the lower edge of the
screen. A pick list of time periods is displayed.
2
Select the desired time period. The corresponding
date range is displayed in the upper right screen
corner, with the end date (on the right) being
retained.
To move between sequential time periods
■
Touch the arrows on the left and/or right of the
date.
To move directly to a certain time period
1
Touch the date display in the upper right corner of
the report screen.
2
On the calendar displayed, touch the day on which
you want the selected time period to end.
To view timeblock information
1
Touch the area within the rectangle or the black
square itself. The screen that appears shows detailed
information on the selected timeblock.
2
Touch the OK button to return to the report screen.
ACCU-CHEK Pocket Compass Software with Bolus Calculator User Guide
71
Chapter 6, Reports
To switch to the Average Day table
■
Touch the Table
button to switch to table view.
After switching views, the statistical evaluation of the
selected time period is shown in table form. The following
information is displayed in columns, sorted by timeblock:
–
–
–
–
Minimum blood glucose result (Min)
Average blood glucose result (Avg)
Maximum blood glucose result (Max)
Standard deviation (SD)
Blood glucose results below the hypo limit are shown in
red. Hidden columns can be displayed using the scroll bar
located below the table.
The column at the right edge shows the number of
evaluated tests in the respective timeblock (Res).
To return to the Average Day graph
■
Touch the Graph
representation.
button to return to the graphic
To return to the main menu
■
Touch the Menu button to return to the main menu
screen.
To select another report type
72
1
Touch the title of the report currently displayed in the
upper left corner of the screen.
2
Select another report type from the pick list.
ACCU-CHEK Pocket Compass Software with Bolus Calculator User Guide
Chapter 6, Reports
6.4
Average Week
The Average Week report shows all blood glucose results
recorded in the selected time period, grouped by different
weekdays (horizontal axis). On the horizontal axis the
usual non-working days (weekends) are marked in light
blue. For each of these value groups, the average is
calculated and indicated by a small black square. The
rectangle represents the standard deviation (spread of
values) for the respective weekday and is open at the top
if values exceed 20 mmol/L (or 350 mg/dL). The horizontal
lines on the vertical bars mark the highest and lowest
values respectively. If only one value is available or if all
values from a timeblock are identical, a short line running
through the square is displayed instead of a bar and box.
The green area indicates the current target range. The
currently set hypoglycemic limit is displayed as a red line.
You have the option of displaying the Average Week report
in graph or table form.
The report does not take “not in sync” data into account.
To view the Average Week report
1
From the main menu screen, touch Reports.
2
Touch the title of the report currently displayed in the
upper left corner of the screen.
3
Select the Average Week report from the pick list.
ACCU-CHEK Pocket Compass Software with Bolus Calculator User Guide
73
Chapter 6, Reports
To select a report time period
1
Touch the down arrow on the lower edge of the
screen. A pick list of time periods is displayed.
2
Select the desired time period. The corresponding
date range is displayed in the upper right screen
corner, with the end date (on the right) being
retained.
To move between sequential time periods
■
Touch the arrows on the left and/or right of the
date.
To move directly to a certain time period
1
Touch the date display in the upper right corner of
the report screen.
2
On the calendar displayed, touch the day on which
you want the selected time period to end.
To display weekday information
74
1
Touch the area within the rectangle or the black
square itself. The screen that appears shows detailed
information on the selected weekday.
2
Touch the OK button to return to the report screen.
ACCU-CHEK Pocket Compass Software with Bolus Calculator User Guide
Chapter 6, Reports
To switch to the Average Week table
■
Touch the Table
button to switch to table view.
After switching views, the statistical evaluation of the
selected time period is shown in table form. The following
information is displayed in five columns, sorted by
weekday:
–
–
–
–
Minimum blood glucose result (Min)
Average blood glucose result (Avg)
Maximum blood glucose result (Max)
Standard deviation (SD)
Blood glucose results below the hypo limit are shown in
red. Hidden columns can be displayed using the scroll bar
located below the table.
The column at the right edge shows the number of
evaluated tests for the respective weekday (Res).
To return to the Average Week graph
■
Touch the Graph
representation.
button to return to the graphic
To return to the main menu
■
Touch the Menu button to return to the main menu
screen.
To select another report type
1
Touch the title of the report currently displayed in the
upper left corner of the screen.
2
Select another report type from the pick list.
ACCU-CHEK Pocket Compass Software with Bolus Calculator User Guide
75
Chapter 6, Reports
6.5
Daily Sums
The Daily Sums report lists in one table the quantities of
insulin and carbohydrates taken in every day. The usual
non-working days (weekends) are marked with a light
blue bar. For additional information on calculating or
assigning insulin quantities, see “Naming your insulins”
on page 112.
The report does not take “not in sync” data into account.
To display the Daily Sums report
1
From the main menu screen, touch Reports.
2
Touch the title of the report currently displayed in the
upper left corner of the screen.
3
Select the Daily Sums report from the pick list.
To select a report time period
76
1
Touch the down arrow on the lower edge of the
screen. A pick list of time periods is displayed.
2
Select the desired time period. The corresponding
date range is displayed in the upper right screen
corner, with the end date (on the right) being
retained.
ACCU-CHEK Pocket Compass Software with Bolus Calculator User Guide
Chapter 6, Reports
To move between sequential time periods
■
Touch the arrows on the left and/or right of the
date.
To move directly to a certain time period
1
Touch the date display in the upper right corner of
the report screen.
2
On the calendar displayed, touch the day on which
you want the selected time period to end.
To return to the main menu
■
Touch the Menu button to return to the main menu
screen.
To select another report type
1
Touch the title of the report currently displayed in the
upper left corner of the screen.
2
Select another report type from the pick list.
ACCU-CHEK Pocket Compass Software with Bolus Calculator User Guide
77
Chapter 6, Reports
6.6
Logbook
The Logbook report displays the blood glucose results in
a table, sorted by days (vertical axis) and grouped by timeblocks (horizontal axis). Any additional values for a single
timeblock are shown in an additional row.
Blood glucose results below the hypo limit are shown in
red. Hidden columns can be displayed using the scroll bar
located below the table.
The report contains “not in sync” data that is flagged accordingly. This data was transferred by “not in sync” device(s).
Therefore, the times of the individual values might not be
correctly related to each other. It is recommended that you do
not use such data to draw therapy-relevant conclusions. Using
the respective filter option (All or Sync. Data), you can specify
whether “not in sync” data should be displayed.
To display the Logbook report
1
From the main menu screen, touch Reports.
2
Touch the title of the report currently displayed in the
upper left corner of the screen.
3
Select the Logbook report from the pick list.
To select a report time period
78
1
Touch the down arrow on the lower edge of the
screen. A pick list of available time periods is
displayed.
2
Select the desired time period. The corresponding
date range is displayed in the upper right screen
corner, with the end date (on the right) being
retained.
ACCU-CHEK Pocket Compass Software with Bolus Calculator User Guide
Chapter 6, Reports
To move between sequential time periods
■
Touch the arrows on the left and/or right of the
date.
To move directly to a certain time period
1
Touch the date display in the upper right corner of
the report screen.
2
On the calendar displayed, touch the day on which
you want the selected time period to end.
To display detailed information for an entry
1
Touch one of the entries. The data shown in the
displayed Detail screen cannot be changed.
2
Touch the Back button to return to the report screen.
To return to the main menu
■
Touch the Menu button to return to the main menu
screen.
To select another report type
1
Touch the title of the report currently displayed in the
upper left corner of the screen.
2
Select another report type from the pick list.
ACCU-CHEK Pocket Compass Software with Bolus Calculator User Guide
79
Chapter 6, Reports
6.7
Distribution
The Distribution report shows the distribution of the blood
glucose results for the respective timeblocks in bar chart
or table form. It tells you which proportion of your blood
glucose results is within the target range (green portion)
and which proportion is outside (orange or blue portion)
or below/above the hypo/hyperglycemic limit (red or
purple portion). The last bar of the chart (All) summarizes
information for the entire selected report time period.
The report does not take “not in sync” data into account.
Assignment to one of the five categories depends on the
target range settings that were applicable at the time the
blood glucose results were entered. Later modification of
the target range settings has no effect on the assignment of
a blood glucose result that has already been entered.
To display the Distribution report
80
1
From the main menu screen, touch Reports.
2
Touch the title of the report currently displayed in the
upper left corner of the screen.
3
Select the Distribution report from the pick list.
ACCU-CHEK Pocket Compass Software with Bolus Calculator User Guide
Chapter 6, Reports
To select a report time period
1
Touch the down arrow on the lower edge of the
screen. A pick list of available time periods is
displayed.
2
Select the desired time period. The corresponding
date range is displayed in the upper right screen
corner, with the end date (on the right) being
retained.
To move between sequential time periods
■
Touch the arrows on the left and/or right of the
date.
To move directly to a certain time period
1
Touch the date display in the upper right corner of
the report screen.
2
On the calendar displayed, touch the day on which
you want the selected time period to end.
To display distribution details
1
Touch one of the bars in the chart. A screen with
detailed information on the selected timeblock is
displayed.
2
Touch the OK button to return to the report screen.
This screen also appears when you touch a timeblock in
table view.
ACCU-CHEK Pocket Compass Software with Bolus Calculator User Guide
81
Chapter 6, Reports
To switch to the Distribution table
■
Touch the Table
button to switch to table view.
The table view shows the percentage of the particular
range and the number of test results within the selected
time period (lowest row).
To return to the Distribution graph
■
Touch the Graph
representation.
button to return to the graphic
To return to the main menu
■
Touch the Menu button to return to the main menu
screen.
To select another report type
82
1
Touch the title of the report currently displayed in the
upper left corner of the screen.
2
Select another report type from the pick list.
ACCU-CHEK Pocket Compass Software with Bolus Calculator User Guide
Chapter 6, Reports
6.8
Reminder
The Reminders report shows all saved and pending
reminders in list form. The next reminder to occur is
shown at the top of the list.
Use the scroll bar located on the right of the screen (if
required) to move the list up and down.
To display the Reminders report
1
From the main menu screen, touch Reports.
2
Touch the title of the report currently displayed in the
upper left corner of the screen.
3
Select the Reminder report from the pick list.
ACCU-CHEK Pocket Compass Software with Bolus Calculator User Guide
83
Chapter 6, Reports
To display details on a reminder
1
Touch the reminder for which you want to display
details. The data shown on the displayed Detail
screen cannot be changed.
2
Touch the Back button to return to the report screen.
To return to the main menu
■
Touch the Menu button to return to the main menu
screen.
To select another report type
84
1
Touch the title of the report currently displayed in the
upper left corner of the screen.
2
Select another report type from the pick list.
ACCU-CHEK Pocket Compass Software with Bolus Calculator User Guide
Chapter 6, Reports
6.9
Basal Rate
If you use the ACCU-CHEK Pocket Compass software
with an insulin pump, you can evaluate the basal rate
information transferred from the pump (a maximum of
6000 basal rate entries are saved). This report provides a
more exact graphic presentation and a table view of the
basal rate for a single day.
The report does not take “not in sync” data into account.
To display the Basal Rate report
1
From the main menu screen, touch Reports.
2
Touch the title of the report currently displayed in the
upper left corner of the screen.
3
Select the Basal Rate report from the pick list.
To move between sequential days:
■
Touch the arrows on the left and/or right of the
date.
To move directly to a certain day
1
Touch the date display in the upper right corner of
the report screen.
2
Select the desired day from the calendar displayed.
ACCU-CHEK Pocket Compass Software with Bolus Calculator User Guide
85
Chapter 6, Reports
To change the presentation size of the basal rate
The presentation of the basal rate can be adjusted
(vertically). The best setting is determined by the highest
value to be displayed. The figure shown at the top is based
on the setting “2 IU/h”, i.e. the basal rate can be displayed
with values up to 2 IU/h (at the upper end of the scale).
After changing the value to a suitable value (here:
“1 IU/h”, since the maximum basal rate value is approx. 0.9
IU/h), the space available for displaying the graph is
utilized as best as possible. This allows the individual
values of the basal rate to be read more precisely.
86
1
Touch the Scale
button to select the value
desired for the presentation size (vertical).
2
Select the scale. Simply use the maximum basal rate
as a guide and select the next possible scale setting
above this value.
3
Touch the OK button to accept the new scale.
ACCU-CHEK Pocket Compass Software with Bolus Calculator User Guide
Chapter 6, Reports
To switch to the Basal Rate table
■
Touch the Table
button to switch to table view.
After switching views, the amount of insulin delivered
through the basal rate is shown in table form (for the
selected day). By touching the arrows on the right and left
of the date, you can switch between sequential days.
Time, additional information and basal rates are presented
in four columns, with the basal rate information being
displayed both as the amount released and the resulting
rate for the time period since the last entry. The table footer
contains information on the daily total amount of released
basal insulin. The following table lists the entries displayed
in the Info column and their meaning.
Example
Meaning
Basal profile A, possible displays: A, B, 1 … 5
RUN
STOP
110%
Insulin pump started
Insulin pump stopped
Temporary increase/reduction of the basal
profile active at the respective point in time
ACCU-CHEK Pocket Compass Software with Bolus Calculator User Guide
87
Chapter 6, Reports
To return to the Basal Rate graph
■
Touch the Graph
representation.
button to return to the graphic
To return to the main menu
■
Touch the Menu button to return to the main menu
screen.
To select another report type
88
1
Touch the title of the report currently displayed in the
upper left corner of the screen.
2
Select another report type from the pick list.
ACCU-CHEK Pocket Compass Software with Bolus Calculator User Guide
Chapter 6, Reports
6.10 Basal Profiles
The basal profiles predefined in the pump can be compared in graph or table form. For each basal profile, you
can make a comparison using the current and two
previously used settings for the basal profiles.
To display the Basal Profiles report
1
From the main menu screen, touch Reports.
2
Touch the title of the report currently displayed in the
upper left corner of the screen.
3
Select the Basal Profiles report from the pick list.
The basal profiles are referred to as
,
,
,
,
for the ACCU-CHEK Spirit insulin pump.
ACCU-CHEK Pocket Compass Software with Bolus Calculator User Guide
89
Chapter 6, Reports
To select the profile to be displayed
■
Touch the down arrow on the left of the profile, and
select the desired profile from the list.
Using the pick lists, you can retrieve each current and the
two previously used profiles for the insulin pump.
– If there is no data stored for the selected profile, a
message to this effect is displayed.
– If an older profile exists for the profile selected, you
can call it up by touching the arrow on the left of
the date stamp. The date stamp shows when this
basal profile was defined.
If you have selected the last basal profile (i.e. the one
preceding the current profile) for display, an asterisk (e.g.
*) appears next to the pick list for the basal profiles. Two
asterisks (e.g. **) are displayed for the second-last basal
profile. These two superseded basal profiles are grayed
out in the graph.
90
ACCU-CHEK Pocket Compass Software with Bolus Calculator User Guide
Chapter 6, Reports
To change the presentation size of basal profiles
1
Touch the scale icon to select the value desired for
the presentation size (vertical).
2
Select the scale. Simply use the maximum rate in the
basal profile as a guide and select the next possible
scale setting above this value.
3
Touch the OK button to accept the new scale.
For a detailed description of the scale setting, see page 86.
ACCU-CHEK Pocket Compass Software with Bolus Calculator User Guide
91
Chapter 6, Reports
To switch to the Basal Profiles table
■
Touch the Table
button to switch to table view.
The table shows the basal rate defined per hour for the
profile currently selected.
■
Touch the down arrow on the left of the profile and
select the desired profile from the list.
Using the pick lists, you can retrieve each current and the
two previously used profiles for the insulin pump.
– If no data has been stored for the selected profile,
the column contains dashes.
– If an older profile exists for the profile selected, you
can call it up by touching the arrow on the left of
the date stamp located above the respective
column. The date stamp shows when this basal
profile was defined.
To return to the Basal Profiles graph
■
Touch the Graph
representation.
button to return to the graphic
To return to the main menu
■
Touch the Menu button to return to the main menu
screen.
To select another report type
92
1
Touch the title of the report currently displayed in the
upper left corner of the screen.
2
Select another report type from the pick list.
ACCU-CHEK Pocket Compass Software with Bolus Calculator User Guide
Chapter 6, Reports
6.11 Pump Events
In addition to purely insulin-related information, pumps
can also store and/or transmit messages. These include
date/time settings and alarms. Use the Pump Events report
to view messages stored by the pump. Filters are provided
to allow you to search specifically for certain types of
information.
To display the Pump Events report
1
From the main menu screen, touch Reports.
2
Touch the title of the report currently displayed in the
upper left corner of the screen.
3
Select the Pump Events report from the pick list.
To switch between sequential blocks in the Pump
Events report
■
The Pump Events report evaluates the values in
blocks of 10. Touch the arrows on the left and/or
right of the date to go to the next block (and/or
day).
To move directly to a certain day
1
Touch the date display in the upper right corner of
the report screen.
2
Select the desired day from the calendar displayed.
ACCU-CHEK Pocket Compass Software with Bolus Calculator User Guide
93
Chapter 6, Reports
To select only certain events for display
1
Touch the down arrow on the lower edge of the
screen. A pick list of filters is displayed.
2
Select the desired filter. Only appropriate events are
displayed.
As the names indicate, the filters affect the display as
follows:
– The All filter displays all events transferred from the
insulin pump.
– The Alarms filter displays only the alarms and error
messages transferred from the insulin pump.
– The Insulins filter displays the amounts (and
additional information such as date, time, duration
and immediate portion) of the insulin delivered by
the insulin pump.
– The Misc. filter shows information such as changing the time, changing the basal profiles, etc.
To return to the main menu
■
Touch the Menu button to return to the main menu
screen.
To select another report type
94
1
Touch the title of the report currently displayed in the
upper left corner of the screen.
2
Select another report type from the pick list.
ACCU-CHEK Pocket Compass Software with Bolus Calculator User Guide
Chapter 6, Reports
6.12 HbA1c
The HbA1c report shows the entered HbA1c results in a
graph or table. Values above the maximum display range
of 15 % (indicated by an up arrow) are not included in the
curve. A maximum time period of 4 years can be shown
and a total of 12 HbA1c values can be saved and displayed.
HbA1c values are manually entered in the Health Management area (see page 101).
To display the HbA1c report
1
From the main menu screen, touch Reports.
2
Touch the title of the report currently displayed in the
upper left corner of the screen.
3
Touch the Health Mgmt. menu, which appears on the
right.
4
Select the HbA1c report from the pick list.
ACCU-CHEK Pocket Compass Software with Bolus Calculator User Guide
95
Chapter 6, Reports
To switch to the HbA1c table
■
Touch the Table
button to switch to table view.
In the table view, all results are sorted in descending order
(by date).
To return to the HbA1c graph
■
Touch the Graph
representation.
button to return to the graphic
To return to the main menu
■
Touch the Menu button to return to the main menu
screen.
To select another report type
96
1
Touch the title of the report currently displayed in the
upper left corner of the screen.
2
Select another report type from the pick list.
ACCU-CHEK Pocket Compass Software with Bolus Calculator User Guide
Chapter 6, Reports
6.13 Ketones
The Ketones report shows the ketones results entered in
table format.
Ketone results are manually entered in the Health
Management area (see page 103).
To display the Ketones report
1
From the main menu screen, touch Reports.
2
Touch the title of the report currently displayed in the
upper left corner of the screen.
3
Touch the Health Mgmt. menu, which appears on the
right.
4
Select the Ketones report from the pick list.
To return to the main menu
■
Touch the Menu button to return to the main menu
screen.
To select another report type
1
Touch the title of the report currently displayed in the
upper left corner of the screen.
2
Select another report type from the pick list
ACCU-CHEK Pocket Compass Software with Bolus Calculator User Guide
97
Chapter 6, Reports
6.14 Blood Pressure
The Blood Pressure report displays the entered blood
pressure values. The maximum time period that can be
displayed in the graph is 30 days, and a maximum of 90
paired blood pressure values can be saved.
Each systolic pressure is shown as a small solid square,
and each diastolic pressure is marked by a small square
frame. Values above the maximum display range of 250
mmHg are marked by an up arrow
. If paired blood
pressure values are more than 7 days apart, they are not
linked. A table view is also available.
Blood pressure values are manually entered in the Health
Management area (see page 105).
To display the Blood Pressure report
1
From the main menu screen, touch Reports.
2
Touch the title of the report currently displayed in the
upper left corner of the screen.
3
Touch the Health Mgmt. menu, which appears on the
right.
4
Select the Blood Pressure report from the pick list.
To select a report time period
98
1
Touch the down arrow on the lower edge of the
screen. A pick list of time periods is displayed.
2
Select the desired time period. The corresponding
date range is displayed in the upper right screen
corner, with the end date (on the right) being
retained.
ACCU-CHEK Pocket Compass Software with Bolus Calculator User Guide
Chapter 6, Reports
To move between sequential time periods
■
Touch the arrows on the left and/or right of the
date.
■
Touch the arrows on the right and left of the
diagram base to move the displayed time period by
one day.
To move directly to a certain time period
1
Touch the date display in the upper right corner of
the report screen.
2
On the calendar displayed, touch the day on which
you want the selected time period to end.
ACCU-CHEK Pocket Compass Software with Bolus Calculator User Guide
99
Chapter 6, Reports
To switch to the Blood Pressure table
■
Touch the Table
button to switch to table view.
In the table view, all blood pressure results are sorted in
descending order (by date).
To return to the Blood Pressure graph
■
Touch the Graph
representation.
button to return to the graphic
To return to the main menu
■
Touch the Menu button to return to the main menu
screen.
To select another report type
100
1
Touch the title of the report currently displayed in the
upper left corner of the screen.
2
Select another report type from the pick list.
ACCU-CHEK Pocket Compass Software with Bolus Calculator User Guide
Chapter 7, Health Management
7
Health Management
The Health Management option allows you to save
additional information. The evaluation of this information
is presented either in graph or table form. Within Health
Management, you can capture the following information:
7.1
■
HbA1c
■
Ketones
■
Blood Pressure
HbA1c
You can add new or edit existing HbA1c values. The most
recent record is shown at the top of the list. If more entries
(maximum of 12) exist than can be displayed, a scroll bar is
displayed on the right of the screen.
To enter a new HbA1c result
1
From the HbA1c screen, touch the New button. The
New HbA1c screen is displayed.
2
Enter the date by touching the Date field and
selecting the relevant date from the calendar
displayed.
3
Touch the Result input field and enter the result
using the numerical keypad displayed.
4
Touch the OK button to save the new result.
ACCU-CHEK Pocket Compass Software with Bolus Calculator User Guide
101
Chapter 7, Health Management
To edit or delete an existing HbA1c result
1
From the HbA1c screen, touch the icon of the entry
you want to change.
2
Enter the date by touching the Date field and
selecting the relevant date from the calendar
displayed.
3
Touch the Result input field and enter the result
using the numerical keypad displayed.
4
Touch the OK button to save the result, or:
5
Touch the Delete button if you want to delete the
entire entry.
To return to the Management menu
■
Touch the Back button to return to the Health
Management menu.
To return to the main menu
■
102
Touch the Menu button to return to the main menu
screen.
ACCU-CHEK Pocket Compass Software with Bolus Calculator User Guide
Chapter 7, Health Management
7.2
Ketones
You can add new or edit existing ketone results. The most
recent record is shown at the top of the list. If more entries
(maximum of 50) exist than can be displayed, a scroll bar
is displayed on the right of the screen.
To enter a new ketone result
1
From the Ketones screen, touch the New button. The
New Ketones screen is displayed.
2
Enter the date by touching the Date field and
selecting the relevant date from the calendar
displayed.
3
Touch the Time field and enter the time using the
numerical keypad displayed.
4
Adjust the Result field by touching the down arrow
and selecting the appropriate result from the pick
list.
5
Touch the OK button to save the new entry.
ACCU-CHEK Pocket Compass Software with Bolus Calculator User Guide
103
Chapter 7, Health Management
To edit or delete an existing ketone result
1
From the Ketones screen, touch the icon of the entry
you want to change.
2
Enter the date by touching the Date field and
selecting the relevant date from the calendar
displayed.
3
Touch the Time field and enter the time using the
numerical keypad displayed.
4
Adjust the Result field by touching the down arrow
and selecting the appropriate result from the pick
list.
5
Touch the OK button to save the result, or:
6
Touch the Delete button if you want to delete the
entire entry.
To return to the Health Management menu
■
Touch the Back button to return to the Health
Management menu.
To return to the main menu
■
104
Touch the Menu button to return to the main menu
screen.
ACCU-CHEK Pocket Compass Software with Bolus Calculator User Guide
Chapter 7, Health Management
7.3
Blood Pressure
You can add new or edit existing blood pressures. The
most recent record is shown at the top of the list. If more
entries (maximum of 90) exist than can be displayed, a
scroll bar is displayed on the right of the screen.
To enter a new blood pressure result
1
From the Blood Pressure screen, touch the New
button. The New Blood Pressure screen is displayed.
2
Enter the date by touching the Date field and
selecting the relevant date from the calendar
displayed.
3
Touch the Time field and enter the time using the
numerical keypad displayed.
4
Touch the Result input field and enter the result
using the numerical keypad displayed.
5
Touch the OK button to save the new blood pressure
result.
ACCU-CHEK Pocket Compass Software with Bolus Calculator User Guide
105
Chapter 7, Health Management
To edit or delete an existing blood pressure result
1
From the Blood Pressure screen, touch the icon of
the entry you want to change.
2
Enter the date by touching the Date field and
selecting the relevant date from the calendar
displayed.
3
Touch the Time field and enter the time using the
numerical keypad displayed.
4
Touch the Result input field and enter the result
using the numerical keypad displayed.
5
Touch the OK button to save the result, or:
6
Touch the Delete button if you want to delete the
entire entry.
To return to the Health Management menu
■
Touch the Back button to return to the Health
Management menu.
To return to the main menu
■
106
Touch the Menu button to return to the main menu
screen.
ACCU-CHEK Pocket Compass Software with Bolus Calculator User Guide
Chapter 8, Options
8
Options
Via Options, you have access to the following functions:
■
General Setup
■
Personal Setup
■
Transfer Setup
■
Bolus Calc. Setup (see Appendix B)
■
Foods
The settings for the bolus calculator (and the bolus
calculator itself) are only displayed when you use a pump
with the ACCU-CHEK Pocket Compass software and you
have selected this option in Transfer Setup.
The food list (and the carbohydrate calculator itself) is
only available if you activated the corresponding option
under General Setup.
ACCU-CHEK Pocket Compass Software with Bolus Calculator User Guide
107
Chapter 8, Options
8.1
General Setup
Here you define the language and the standard units to be
used. In addition, you decide here whether you want to
use the carbohydrate calculator. The default settings are
printed in bold in the table below.
Name
Language
Glucose unit
108
Description
Select the language of choice from the
list.
■ Deutsch
■ English
■ Français
■ Español
■ Italiano
■ Nederlands
■ Svenska
■ Português PT
■ Português BR
Select the appropriate blood glucose
unit that you use in your meter and your
diabetes care plan from the list:
■ mg/dL
■ mmol/L
ACCU-CHEK Pocket Compass Software with Bolus Calculator User Guide
Chapter 8, Options
Name
Carbohydrates
Carbohydrate
calculator
ACCU-CHEK Pocket Compass Software with Bolus Calculator User Guide
Description
Select the appropriate carbohydrate unit
from the list:
■ g
■ BE (12g)
■ CU (10g)
■ BW (10g)
■ CC (15g)
Activate this checkbox if you want to use
the carbohydrate calculator:
■ On
■ Off
109
Chapter 8, Options
8.2
Personal Setup
Personal settings are important if the blood glucose
results and all related information are to be evaluated
correctly. Personal settings include the following:
Defining targets and limits
110
■
Target range
■
Insulins
■
Timeblocks
■
Events
Work with your healthcare professional to specify the
appropriate limits for your blood glucose. Your healthcare
professional may also give you specific instructions to
follow if your blood glucose value falls below the hypoglycemic limit (hypo limit) or rises above the hyperglycemic
limit (hyper limit). If your blood glucose value falls below
your hypoglycemic limit, the word “Hypo” appears in the
Detail screen just below the test result shown in red.
Similarly, “Hyper” is displayed if your blood glucose value
rises above your hyperglycemic limit.
ACCU-CHEK Pocket Compass Software with Bolus Calculator User Guide
Chapter 8, Options
To define a target range
1
From the main menu screen, touch Options.
2
From the Options menu, touch Personal Setup.
3
Touch Target Range. The Target Range screen is
displayed.
4
Enter values for the limits. Touch each input field and
change the value using the numerical keypad
displayed.
5
Touch the OK button to save the value.
6
Touch the Back button to return to the Options menu,
or the Menu button to return to the main menu.
The target range you define here (using the upper and the
lower limit) is graphically displayed in many reports (as a
green area). The Hypo limit is shown as a red line.
ACCU-CHEK Pocket Compass Software with Bolus Calculator User Guide
111
Chapter 8, Options
Naming your insulins
The ACCU-CHEK Pocket Compass software allows you to
assign specific labels or “names” to three insulins. These
labels are displayed later in the diary when you use that
type of insulin. When entering insulin names, please
distinguish between pump insulin and syringe/pen insulin.
If you are using the ACCU-CHEK Pocket Compass
software with an insulin pump, Pump is set for pump
insulin. Enter the name of your pump insulin here.
If you also use a syringe or pen, enter the name of your
short-acting insulin under Bolus, and the name of your
long-acting insulin under Basal. In the Daily Sums report
(see Chapter 6.5), the total insulin amounts are displayed
as follows:
■
Long-acting insulin plus basal rate insulin delivered
by the pump in the “Basal” column (blue values)
■
Pump and Bolus in the “Bolus” column (purple
values)
If you do not use a pump, enter the names of your shortacting insulins under Bolus 1 and Bolus 2. Enter the name
of your long-acting insulin under Basal. In the Daily Sums
report, these total insulin amounts are displayed as
follows:
112
■
Long-acting insulin in the “Basal” column (blue
values)
■
Bolus 1 and Bolus 2 in the “Bolus” column (purple
values)
ACCU-CHEK Pocket Compass Software with Bolus Calculator User Guide
Chapter 8, Options
To enter insulin labels/names
1
From the main menu screen, touch Options.
2
From the Options menu, touch Personal Setup.
3
Touch Insulins. The Insulins screen is displayed.
4
Touch the input fields next to the description Bolus 1,
Bolus 2 or Basal (or Pump, Bolus or Basal).
5
Enter your preferred label/name (up to 10 characters) in the field provided using the screen keyboard
or the Graffiti function.
6
Touch the Back button to return to the Options menu,
or touch the Menu button to return to the main
menu.
Please take care that if you change existing insulin names at
a later date, you do not wrongly interpret entries that have
already been saved because the old insulin name is no
longer visible. This is especially important if your new insulin
works in a different way (e.g. when you change from human
insulin to analog insulin).
ACCU-CHEK Pocket Compass Software with Bolus Calculator User Guide
113
Chapter 8, Options
Timeblock definition
By setting up timeblocks, you divide a 24-hour day into
eight time periods, each one defined by important regular
events (e.g. main meals). You can adjust the start time of
each time period. The table below provides detailed
information on timeblocks.
You need to enter only the start time for each timeblock.
The ACCU-CHEK Pocket Compass software automatically
calculates the end time as soon as you enter the start time
for the following timeblock. Example:
■
When you enter the start time for the period “BB”
(Before Breakfast), the software automatically
calculates the end time for the period “Nt” (Night).
■
When you set the start time for “AB” (After Breakfast), the software automatically calculates the end
time for “BB” (Before Breakfast).
Talk to your healthcare professional about setting up
timeblocks. Decide together which settings suit your
habits best and allow therapy-relevant conclusions to be
drawn.
114
ACCU-CHEK Pocket Compass Software with Bolus Calculator User Guide
Chapter 8, Options
The following table shows the default timeblocks defined
in the software.
Timeblock
Description
Setting for the start time
Timeblock
example
Nt
(Night)
The period that begins one hour after going
to bed and ends at the time you wake up.
1 hour after the time when you go to bed.
BB
(Before
Breakfast)
AB
(After
Breakfast)
BL
(Before
Lunch)
AL
(After
Lunch)
BD
(Before
Dinner)
AD
(After
Dinner)
Ev
(Evening)
The period from the time when you wake up
until the time when you finish breakfast.
The time when you wake up.
The period from the time when you finish
breakfast until 1 1/2 hours before lunch.
The time when you finish your breakfast.
The period beginning 1 1/2 hours before
lunch and continuing until you finish your
lunch.
The period from the time when you finish
lunch until 1 1/2 hours before your dinner.
1 1/2 hours before your usual lunch time.
12:00 am
– 5:29 am
(00:00 – 5:29)
5:30 am
– 7:59 am
(5:30 – 7:59)
8:00 am
– 10:59 am
(8:00 – 10:59)
11:00 am
– 12:29 pm
(11:00 – 12:29)
12:30 pm
– 4:59 pm
(12:30 – 16:59)
5:00 pm
– 6:29 pm
(17:00 – 18:29)
6:30 pm
– 9:29 pm
(18:30 – 21:29)
9:30 pm
– 11:59 pm
(21:30 – 23:59)
The period beginning 1 1/2 hours before
dinner and continuing until you finish your
dinner.
The period from the time when you finish
your dinner until 1 1/2 hours before the time
when you normally go to bed.
The period beginning 1 1/2 hours before you
usually go to sleep and ending 1 hour after
the time you normally go to bed.
The time when you finish your lunch.
1 1/2 hours before your usual dinner time.
The time when you finish your dinner.
1 1/2 hours before the time you go to bed.
ACCU-CHEK Pocket Compass Software with Bolus Calculator User Guide
115
Chapter 8, Options
To define a timeblock
116
1
From the main menu screen, touch Options.
2
From the Options menu, touch Personal Setup.
3
Touch Timeblocks. The Timeblocks screen is displayed.
4
Touch the timeblock you want to change. If required,
use the scroll bar to move to the desired timeblock.
5
Touch the Start input field and enter the time using
the numerical keypad displayed.
6
Touch the OK button to save the value.
7
Touch the OK button to save the setting and return to
the Options menu, or touch the Menu button to
return to the main menu.
ACCU-CHEK Pocket Compass Software with Bolus Calculator User Guide
Chapter 8, Options
Presettings for the Events option
For each diary entry, you can enter certain events as
additional information. These events are presented for
selection in a list. To enable easy access to these events,
you can define the order in which the events are listed.
Place the events needed most often at the top of the list.
To change the order of events
1
From the main menu screen, touch Options.
2
From the Options menu, touch Personal Setup.
3
Touch Events. The Events screen is displayed.
4
Touch the event you want to move.
5
Touch the arrow(s) in the upper right corner of the
screen to move the event up or down in the list.
6
Touch the OK button to save the setting and return to
the Options menu, or touch the Menu button to
return to the main menu.
ACCU-CHEK Pocket Compass Software with Bolus Calculator User Guide
117
Chapter 8, Options
8.3
Transfer Setup
Here you select the device types you want to transfer data
from (“Read out”) using the ACCU-CHEK Pocket Compass
software:
■
Meter(s)
■
Pump
If you have selected Pump, the Bolus Calculator checkbox
also appears and can be activated. Information on the
bolus calculator is provided in Appendix B of this User’s
Manual.
If you want to add a device type at a later time (i.e., after the
first program start), all devices must be resynchronized.
118
ACCU-CHEK Pocket Compass Software with Bolus Calculator User Guide
Chapter 8, Options
8.4
Foods
The ACCU-CHEK Pocket Compass software features a
carbohydrate calculator that accesses the food list
selected during installation. By installing the food list, the
most common food components and their characteristic
values are available for selection.
In addition, you can add your own food components and
combine them into entire meals. This combination option
allows you to access most often selected values more
quickly and is always useful when you eat certain meals
regularly.
The carbohydrate calculator is available both during
carbohydrate entry in the diary and in the bolus calculator.
The calculated result is exclusively based on the food you
selected, the related nutritive values and the quantities you
entered. Therefore, it is very important (especially for
self-defined food and meals) that you enter the nutritive
values and amounts correctly for the calculation results to
be applicable.
If data entered while adding components is incorrect and
lies outside the ranges defined in the software, a message is
displayed to this effect. If, however, the data is wrong, but
plausible, no message is displayed. Therefore, it is important
that you always carefully review your entries.
The food list is intended as a guideline for estimating
nutrient values when dealing with food and drinks in your
day-to-day life. Please note that the information represents
average values and that these values can vary from country
to country.
ACCU-CHEK Pocket Compass Software with Bolus Calculator User Guide
119
Chapter 8, Options
List of components and meals
To display the food list
120
1
From the main menu screen, touch Options.
2
From the Options menu, touch Foods.
3
Touch Food List. The list of pre-loaded and manually
entered food items is opened.
4
Touch Meals if you want to display or edit defined
meals.
5
Touch Components if you want to display or edit
single food components.
6
Touch the Back button to return to the Foods menu,
or the Menu button to return to the main menu.
ACCU-CHEK Pocket Compass Software with Bolus Calculator User Guide
Chapter 8, Options
To locate certain food components
You can switch the sort order. Either choose an alphabetic
sort order of all food components or a sort order by the
criterion “Editable”. You can only edit self-defined food
( ). The values of predefined food components ( )
cannot be changed.
1
Touch the arrow next to Sort by.
2
Select either Component to alphabetically sort all
components by name, or Editable to list (in alphabetic order) the components whose values can be
edited.
You can also search for specific entries in the list:
1
Touch the input field next to Search.
2
Enter the name (or part of the name) of the food you
are searching for.
3
Touch the up or down arrow (on the right of the input
field) to search the list up or down (starting from the
current position).
ACCU-CHEK Pocket Compass Software with Bolus Calculator User Guide
121
Chapter 8, Options
To add a new food component
1
Touch New Component. The corresponding entry
screen is displayed.
2
Enter a unique name (not yet used) for the food
component.
3
Select the unit to be used for measuring the food
component.
4
Enter the amount for which the subsequent nutritive
value is valid.
5
Enter the related portions of carbohydrates, fat and
protein, with protein and fat being optional parameters.
6
If you want to add this food component to your
favorites, leave the Save as favorite checkbox
activated. Otherwise, remove the checkmark.
7
Touch the OK button to save your entries. The new
food component is added to the list.
For self-defined food components, it is very important that
you enter the amounts and nutritive values correctly for the
calculation results to be applicable.
122
ACCU-CHEK Pocket Compass Software with Bolus Calculator User Guide
Chapter 8, Options
To change or delete a food component from the list
You can only edit self-defined food (marked by the
icon).
1
Touch the food component to be changed. The
corresponding entry screen is displayed.
2
Make the desired changes.
3
Touch the OK button to save the changes, or the
Delete button to remove the entire entry from the list.
ACCU-CHEK Pocket Compass Software with Bolus Calculator User Guide
123
Chapter 8, Options
To add a new meal
124
1
Touch New Meal. The corresponding entry screen is
displayed.
2
Touch the + (plus) button to add a new component
to the meal.
3
Select the first component of the meal from the list
opened.
4
Enter the amount of this component in your typical
meal and confirm your entry with OK.
5
Repeat this for all other components that are to
belong to the meal.
6
Enter a unique name (not yet used) in the Meal input field.
7
If you want to add this meal to your favorites, leave
the Save as favorite checkbox activated. Otherwise,
remove the checkmark.
8
Touch the OK button to save your entries. The new
meal is added to the list.
ACCU-CHEK Pocket Compass Software with Bolus Calculator User Guide
Chapter 8, Options
To change or delete a meal
1
Touch the meal to be changed. The corresponding
entry screen is displayed.
2
If you want to change the amount of a component,
touch the specified amount below the component
name. Change the value as desired.
3
If you want to delete a component from the meal,
touch the component name (which is then highlighted) and then the – (minus) button. The component is
deleted from the meal.
4
Touch the OK button to save your changes, or the
Delete button to remove the entire meal from the list.
ACCU-CHEK Pocket Compass Software with Bolus Calculator User Guide
125
Chapter 8, Options
Favorites
You can arrange your favorite food in a favorites list. This
list provides quicker access to frequently eaten food and
meals.
A component or meal is originally assigned to the favorites
list during its entry. If you later want to change this
assignment, the favorites management offers the easiest
way to do that.
Predefined food components are originally not assigned
to the favorites list.
To change the favorites status
126
1
From the Foods menu, touch Favorites. The Favorites
screen is opened.
2
Remove the checkmark from those foods you want
to delete from the Favorites screen. After a confirmation request, these foods are now listed alphabetically in the lower part of the list.
3
Put a checkmark in the box preceding the food you
want to add to the Favorites screen.
4
Touch Back to return to the Foods menu.
ACCU-CHEK Pocket Compass Software with Bolus Calculator User Guide
Chapter 8, Options
To make editing easier, you can sort this list by certain
criteria:
1
Touch the arrow next to Sort by.
2
Select either Fav. to list the foods that have already
been flagged as favorites at the top of the list (in
alphabetical order), or select Name to display the
foods in alphabetical order.
You can also search for specific entries in the list:
1
Touch the input field next to Search.
2
Enter the name (or part of the name) of the food you
are searching for.
3
Touch the up or down arrow (on the right of the input
field) to search the list up or down (starting from the
current position).
ACCU-CHEK Pocket Compass Software with Bolus Calculator User Guide
127
Chapter 8, Options
Units
The carbohydrate calculator is able to manage up to 20
units for food entry. Standard units, such as gram (g) or
liter (L), are predefined in the software, if the food list has
been installed. If not, the list of units is empty. But you can
also define your own units, such as “cup” (if you always
use the same cup and know the corresponding nutritive
values) or “spoon”.
These self-defined units may assist you in entering
information when using the carbohydrate calculator.
During installation, you were able to select the units to be
used for the food list (g/L or oz/fl.oz). Please note that the
unit “fl.oz” is based on the American definition
(1 US.fl.oz = 1/128 US.liq.gal. = 29.5735 mL)
and not according to the British definition
(1 Imp.fl.oz = 1/160 Imp.gal. = 28.4131 mL).
For notes on subsequently installing the food list or changing
the installed food list, see page 12 and the printed Getting
Started Guide.
To manage the food list units
128
1
From the Foods menu, touch Units. The Units screen
is opened.
2
Enter the desired unit in an empty line (maximum 10
characters) or edit an existing unit.
3
To remove a unit, simply delete the related text.
4
Touch OK to save the changes and return to the
Foods menu.
ACCU-CHEK Pocket Compass Software with Bolus Calculator User Guide
Chapter 9, Data Transfer
9
Data Transfer
The data of the following meters can be transferred
(“Read out”) via integrated infrared windows:
■
ACCU-CHEK Active
■
ACCU-CHEK Aviva
■
ACCU-CHEK Compact
■
ACCU-CHEK Compact Plus
The following meter can also be used for transferring data
using the ACCU-CHEK IR Key (available separately):
■
ACCU-CHEK Advantage
The following insulin pump is suitable for transferring data
to a compatible handheld:
■
ACCU-CHEK Spirit
Please note: Not all devices are available in all countries.
ACCU-CHEK Pocket Compass Software with Bolus Calculator User Guide
129
Chapter 9, Data Transfer
9.1
Transferring (“Reading Out”) Device Data
Only transfer data from your own devices. Otherwise, other
peoples’ results could get mixed with yours and lead to
misinterpretations. If invalid data (e.g. from other people) is
stored in your ACCU-CHEK Pocket Compass software, you
must mark these as “Other’s Result” or “Invalid”. Appropriate events are available to do this (see Chapter 5.10). Data
marked like this will no longer be used in reports.
Ensure that all the devices you use have the same time and
date settings. If this is not the case, data transferred from
“not in sync” devices is (depending on the report type)
either flagged specifically, displayed separately (in so-called
“not in sync” areas) or not taken into account at all.
If an imminent time deviation is detected while transferring
data from a device, a corresponding warning message is
displayed. This enables you to transfer all data from your
devices in time, correct the time settings and then resynchronize the devices.
Transfer data from meters and pumps regularly (at least
every 2 weeks). If you are not sure when the last data
transfer was performed and which meter was used, you
can display this information (see page 136).
130
ACCU-CHEK Pocket Compass Software with Bolus Calculator User Guide
Chapter 9, Data Transfer
To transfer (“Read out”) data from blood glucose
meters and insulin pumps to a compatible handheld
1
Read the sections on data transfer in the manual for
the meter or insulin pump and prepare the device for
data transfer. You will transfer data from your
devices one at a time (not all at the same time,
because infrared communication can be disrupted
if multiple devices try to communicate simultaneously).
2
Place your handheld’s infrared window no more than
10-15 cm (4-6 inches) away from the device’s
infrared window. The infrared windows must be
positioned facing each other and must not be moved
during transfer. Avoid potential sources of interference such as strong sources of light or other devices
with infrared interfaces.
3
From the main menu screen, touch Data Transfer.
4
Touch Read out Pump or Read out Meter. Several
dialog boxes show the progress of the transfer.
Follow the instructions on the screen.
5
When data transfer is completed, turn the meters off
and switch the insulin pump back to RUN mode.
ACCU-CHEK Pocket Compass Software with Bolus Calculator User Guide
131
Chapter 9, Data Transfer
9.2
Exporting Data
To transfer data from the ACCU-CHEK Pocket
Compass software to other systems for further
analysis
132
1
Prepare the target system to receive data from the
ACCU-CHEK Pocket Compass software.
2
Place your handheld’s infrared window 10-15 cm
(4-6 inches) in front of the infrared cable/window
(ACCU-CHEK Universal Cable, ACCU-CHEK
IR Cable or ACCU-CHEK Smart Pix systems).
3
Turn the handheld on and start the ACCU-CHEK
Pocket Compass software.
4
From the main menu screen, touch Data Transfer.
5
Touch Export Data.
6
Activate the function for receiving data in the target
system.
7
If required, turn off the handheld after data transfer
is complete.
ACCU-CHEK Pocket Compass Software with Bolus Calculator User Guide
Chapter 9, Data Transfer
9.3
Synchronizing Devices
Normally your devices are synchronized directly after
installation of the ACCU-CHEK Pocket Compass software
(see Chapter 2.4). Manual synchronization must be
carried out if you want to use a new or additional device, if
you have changed the date and/or time or you have
noticed discrepancies in the time settings during data
transfer.
The synchronization process sets a new “start point” in time
for data transfer. If your devices have already been synchronized, you should transfer all stored data to the ACCU-CHEK
Pocket Compass software before you start a new
synchronization. After synchronization, device data stored
with time information prior to synchronization will be
adopted as “not in sync” data (see Chapter 5.4).
To ensure that the date and time settings of all devices
match, all devices used (for transferring data) must be
synchronized at the same time. Subsequent synchronization
of individual devices is not supported.
ACCU-CHEK Pocket Compass Software with Bolus Calculator User Guide
133
Chapter 9, Data Transfer
To prepare for synchronization
Ensure that all the devices you use (handheld, meters and
insulin pump) have the same date and time settings. Minor
differences (max. ± 2 minutes) are tolerated.
134
1
Have all devices ready from which you want to
transfer data. You will synchronize them one at a
time (not all at the same time, because infrared
communication can be disrupted if multiple devices
try to communicate simultaneously).
2
The infrared windows of the devices currently being
synchronized (i.e. handheld/pump or handheld/
meter) must be facing each other at a distance of
about 10-15 cm (4-6 inches).
3
Depending on the devices you have selected,
proceed as follows:
– If you are using an insulin pump and meter(s), the
pump must be synchronized first. Leave the
meters turned off until the pump is synchronized.
Activate infrared communication for the pump.
– If you are using only meters, first turn on only one
meter and activate infrared communication for this
device.
ACCU-CHEK Pocket Compass Software with Bolus Calculator User Guide
Chapter 9, Data Transfer
To perform synchronization
4
From the main menu screen, touch Data Transfer.
5
Touch Sync. Devices.
6
If the devices have already been used, a warning
message is displayed indicating that the data stored
in the devices must be transferred (“Read out”)
before synchronization. For control purposes, you
can check the time and date of the last transfer in
the list displayed.
7
If you want to transfer data before synchronization,
touch the Pump or Meter button under Read out. The
Pocket Compass software prompts you to prepare
the respective device for data transfer (see
page 131).
8
Touch Start to start synchronization. Depending on
the device(s) you selected in the Transfer Setup
menu, the pump (if selected) or the first meter is now
synchronized. Follow the instructions on the screen
as described in Chapter 2.4.
To ensure that the date and time settings of all devices
match, all devices used (for transferring “Reading out” data)
must be synchronized at the same time. Subsequent
synchronization of individual devices is not supported.
After synchronization, turn off the meter(s) and/or switch
the insulin pump back to RUN mode.
ACCU-CHEK Pocket Compass Software with Bolus Calculator User Guide
135
Chapter 9, Data Transfer
9.4
Information
You can display information on when you last performed
data transfer or synchronization and which meter or pump
was used. In addition to the handheld’s record of the time
of the last performed data transfer or synchronization, the
deviation between handheld and device time is displayed.
1
From the main menu screen, touch Data Transfer.
2
Touch Information.
Information on the last data transfer is displayed. To view
information on the last synchronization, touch the corresponding button.
3
If you want to return to the Data Transfer menu,
touch the Back button.
4
If you want to return to the main menu, touch the
Menu button.
Devices which are “not in sync” are marked by an additional warning triangle.
136
ACCU-CHEK Pocket Compass Software with Bolus Calculator User Guide
Chapter 10, Data Backup
10 Data Backup
To prevent data loss, it is recommended that you regularly
back up the data of your ACCU-CHEK Pocket Compass
software. In addition to the backup options offered by your
handheld, you can also use the data generated by the
ACCU-CHEK Pocket Compass Conduit software.
For information on data backup and the HotSync function,
please refer to your handheld manual provided by the
manufacturer.
Back up your data regularly. Roche recommends that you
work with your healthcare professional to develop a suitable
backup plan for your therapy.
ACCU-CHEK Pocket Compass Software with Bolus Calculator User Guide
137
Chapter 10, Data Backup
10.1 Conduit Software and HotSync Function
The ACCU-CHEK Pocket Compass Conduit software allows
you to transfer data from your handheld to a computer. The
data is transferred as a file export using the HotSync
function and the docking station (or HotSync cable) of the
compatible handheld. The ACCU-CHEK Pocket Compass
Conduit software is provided along with the ACCU-CHEK
Pocket Compass software on CD-ROM. With each new
backup process, the current date and time are added as
an extension to the file name to prevent previously
backed-up data from being overwritten.
The ACCU-CHEK Pocket Compass Conduit software saves
a *.csv and a *.cef file on your computer. The *.csv files
can be edited using widely available PC programs (e.g.
Microsoft Excel), *.cef files can be imported by the
ACCU-CHEK Camit Pro and the ACCU-CHEK Compass
software. The files are saved in the directory you selected
during installation.
For instructions on importing *.cef files, see the ACCU-CHEK
Compass software or the ACCU-CHEK Camit Pro software
manual. Refer to the help file of your spreadsheet program
for instructions on importing comma separated records
(*.csv file).
138
ACCU-CHEK Pocket Compass Software with Bolus Calculator User Guide
Chapter 11, Indicators and Displays
11 Indicators and Displays
The ACCU-CHEK Pocket Compass software uses a series
of icons that are displayed in dialog boxes and screens. The
icons have already been introduced in this manual within
various procedures. For a complete summary, see below.
It is important that you are familiar with the icons and
understand their meanings. Please refer to this section
whenever an icon appears on the screen that you are not
familiar with or do not understand.
11.1 Icons Used in the Software
Icon
Appears…
Meaning
in the Diary
Additional information: Timeblock
in the Diary
Additional information: Insulin
in the Diary
Additional information: Data transfer from the insulin pump.
Value cannot be edited.
in the Diary
“Not In Sync” data from the insulin pump
in the Diary
Additional information: Data transfer from the meter. Value
cannot be edited.
in the Diary
“Not In Sync” data from the meter
in the Diary
Additional information: Event/Comment
in the Diary screen and the Trend report
Additional information: Carbohydrates (Diary screen)
Switch to the carbohydrate display (Trend report)
in the Diary
Additional information: Diary entry created or managed by the
bolus calculator
in the Diary
Manually entered entry, values can be edited
in the Diary
Additional information: Reminder
in the Diary
Temperature during testing outside permitted range
ACCU-CHEK Pocket Compass Software with Bolus Calculator User Guide
139
Chapter 11, Indicators and Displays
Icon
Appears…
Meaning
in the Diary
Use of a test strip which is past its expiry date
in reports
Switch to table view
in reports
Switch to graph view
in the Basal Rate/Basal Profiles reports
Change vertical scale
in the Trend report (table view)
More information available
in the carbohydrate calculator (selected meal)
140
in reports
(above the Menu button)
Display general information on current report
in reports
Switch between different data situations within a time period
in the carbohydrate calculator
Food component cannot be edited (blocked)
in dialog boxes (also Palm OS)
Information
in dialog boxes (also Palm OS)
Question
in dialog boxes (also Palm OS)
Warning,
also indicates “not in sync” data or data situations
in dialog boxes (also Palm OS)
Error message
for notes
Useful information, hint
during data transfer
Computer (as receiver of data)
during data transfer
Insulin pump (as sender of data)
during data transfer
Meter (as sender of data)
during data transfer
Handheld (as receiver of data)
during data transfer
Handheld (as sender of data)
ACCU-CHEK Pocket Compass Software with Bolus Calculator User Guide
Chapter 12, System Requirements
12 System Requirements
12.1 Compatible Handheld Devices
With each program start, the ACCU-CHEK Pocket
Compass software checks automatically whether the
handheld is compatible. Three possible situations could
arise:
■
The testing of this handheld with the ACCU-CHEK
Pocket Compass software has indicated that the
device is not compatible. In this case, the message
shown here will be displayed. The ACCU-CHEK
Pocket Compass software cannot be started, you
cannot work with the program.
■
Compatibility with this handheld has not been
tested. In this case, a warning message is displayed
but you can use the software at your own risk.
■
This handheld has already been tested with the
ACCU-CHEK Pocket Compass software, the device
is compatible. No message is displayed and you
can work with the program as planned.
Should you have any questions regarding the compatibility
of your handheld, please contact your local customer
support and service center.
12.2 Computer System Requirements
Computer system requirements are defined by the
manufacturer of your compatible handheld. Please refer to
the user’s manual for your handheld. The system requirements for your computer are important since the HotSync
function is the only method for software installation and a
good means of data backup.
ACCU-CHEK Pocket Compass Software with Bolus Calculator User Guide
141
Chapter 12, System Requirements
12.3 Compatibility Requirements for Data Transfer
The following meters are suitable for transferring data to a
compatible handheld:
■
ACCU-CHEK Active
■
ACCU-CHEK Aviva
■
ACCU-CHEK Compact
■
ACCU-CHEK Compact Plus
The following meter can also be used for transferring data
using the ACCU-CHEK IR Key (available separately):
■
ACCU-CHEK Advantage
The following insulin pump is suitable for transferring data
to a compatible handheld:
■
ACCU-CHEK Spirit
Please note: Not all devices are available in all countries.
The ACCU-CHEK Pocket Compass software tests the
compatibility (via infrared) of connected devices. If you are
not sure about the compatibility of a device, please contact
ACCU-CHEK Pump Support at 1-800-688-4578
24 hours a day, 365 days a year.
142
ACCU-CHEK Pocket Compass Software with Bolus Calculator User Guide
Chapter 12, System Requirements
12.4 Support for New Devices
The ACCU-CHEK Pocket Compass software obtains
information about support for certain meters or handhelds
from a configuration file that is stored in the handheld
when the software is installed. Since new devices (meters
or handhelds) frequently appear on the market, this file is
updated by Roche from time to time so that new devices
can also be used with the ACCU-CHEK Pocket Compass
software.
To find out if an updated configuration file is available to
support a certain device, please contact ACCU-CHEK
Pump Support at 1-800-688-4578. When you call, have the
version numbers of your current software on hand, which
are displayed in the information screen of your
ACCU-CHEK Pocket Compass software. The version
number of the configuration file is listed under PTV
(Parameter Table Version). If a newer file exists, you can
obtain it from ACCU-CHEK Pump Support.
The configuration file that contains information about
support for devices is a PDB file (Palm DataBase file,
*.pdb). This file is sent to you by Roche Diagnostics as a
compressed ZIP archive (*.zip). Extract the contents of this
file into a suitable folder of your choice. Install the file
using the Palm Desktop Software (or the related Install
Tool) that you also used to install the ACCU-CHEK Pocket
Compass software on your handheld.
The instructions for installing the file are provided in the
next section.
ACCU-CHEK Pocket Compass Software with Bolus Calculator User Guide
143
Chapter 12, System Requirements
To install new software components for the
ACCU-CHEK Pocket Compass software
■
Open the Windows Start menu on your computer.
Under All Programs, select Palm Desktop.
■
Start the Install Tool.
■
Click the Add… button.
■
In the dialog box displayed, select the extracted
PDB file in the appropriate folder. The file name is
ACCU-CHEK PCDParamTableDB.pdb
■
Select this file and click Open. The file is now
displayed in the list of the Install Tool.
■
Click Done. The file is copied from your folder to a
folder created for it in the Palm Desktop software.
Run HotSync data alignment. The file is automatically
installed on your handheld computer.
The next time the program is started, devices that were
added using the new configuration file can be used with
the ACCU-CHEK Pocket Compass software.
144
ACCU-CHEK Pocket Compass Software with Bolus Calculator User Guide
Appendix A, Bolus Calculator Basics
A
Bolus Calculator Basics
The following pages provide you with a detailed explanation of the principles behind the bolus calculator. Here
you will find answers to important questions about the
functions of the bolus calculator and how it operates,
such as:
■
Who can use the bolus calculator?
■
How does the bolus calculator support you?
■
How does the bolus calculator operate?
■
How are exceptional circumstances handled?
ACCU-CHEK Pocket Compass Software with Bolus Calculator User Guide
145
Appendix A, Bolus Calculator Basics
1.1
Who Can Use the Bolus Calculator?
As with any specialized tool, you need to know certain
things in order to use the bolus calculator. You need to be
completely familiar with your insulin pump therapy and be
able to judge yourself and your own current physical state
as well as possible.
The bolus calculator does exactly what the name says: it
calculates. This can make it much easier to determine the
currently required bolus. You and your healthcare provider
provide the values on which these calculations are based.
Though this may be simple enough as long as it involves
determining a current blood glucose test result, it can be a
real challenge if you have to estimate an increased or
decreased insulin requirement under certain conditions.
It is therefore very important that you follow the
safety information listed in the chapter, “Using the
Bolus Calculator”. The safety information is based mainly
on the fact that the benefit and correctness of the calculated results depend on many factors, but primarily on the
care with which you handle them.
For this reason, the bolus calculator is intended exclusively for use only by well-trained individuals who manage
insulin pump therapy for themselves or others.
You can use the bolus calculator only if you have synchronized an ACCU-CHEK Spirit insulin pump with the
ACCU-CHEK Pocket Compass software.
146
ACCU-CHEK Pocket Compass Software with Bolus Calculator User Guide
Appendix A, Bolus Calculator Basics
1.2
How Does the Bolus Calculator Support You?
What the bolus calculator can do
Actually, the name “bolus calculator” already precisely
describes the function of this tool:
The bolus calculator calculates insulin boluses on the basis
of current blood glucose test results, intended food intake
and other individual user parameters.
The parameters used for this purpose and the values
included in the calculation are fully explained on the
following pages. Terms used here such as “parameter”
may seem complicated, but the bolus calculator of the
ACCU-CHEK Pocket Compass software carries out its
functions simply and clearly: The complexity remains
hidden “behind” the program’s user interface, invisible
to the user.
The bolus calculator evaluates information from two
sources: the settings (“parameters”) in which you have
stored your own diabetes-related values, and the currently recorded values for blood glucose and carbohydrates. A bolus is calculated in three easy steps:
ACCU-CHEK Pocket Compass Software with Bolus Calculator User Guide
147
Appendix A, Bolus Calculator Basics
1
Enter the current blood glucose result.
2
If you want to eat, enter the corresponding carbohydrate amount either directly or by means of the
carbohydrate calculator.
3
If necessary, adjust the calculation for individual
changes in your metabolic situation.
The bolus is now calculated, based on the information you
entered and the settings mentioned before.
What the bolus calculator cannot do
The bolus calculator is a calculator. It is not able to judge
your current physical state independently of your own
estimation nor can it correct possible input errors. This is
particularly true for the carbohydrate amount entered or
the entries you made to calculate the carbohydrate
amount using the carbohydrate calculator.
Entries that exceed plausible limits are recognized as
such. In this case, you will be prompted to check the entry
and correct it, if necessary. As long as the entries fall
within a plausible range, however, their accuracy cannot
be checked. This is where, as already mentioned, a precise
awareness of your actual current physical state is of
crucial importance.
148
ACCU-CHEK Pocket Compass Software with Bolus Calculator User Guide
Appendix A, Bolus Calculator Basics
1.3
How Does the Bolus Calculator Operate?
Along with the basic values, blood glucose and carbohydrates, there is a whole series of information required in
order to optimize the calculation to match your needs to
the greatest possible extent. Different people have
different sensitivities to insulin (“insulin sensitivity”), for
example due to differences in their constitutions, or
different daily rhythms. These factors must be taken into
account in order for the result of a bolus calculation to be
correct.
This is why you must make certain settings. No bolus
calculation is possible without these entries. It is important that you discuss this step with your healthcare
professional. The following is an overview of the information that must be entered into the ACCU-CHEK Pocket
Compass software. For an example of the personal
parameter table that you generate together with your
healthcare professional, see page 156.
ACCU-CHEK Pocket Compass Software with Bolus Calculator User Guide
149
Appendix A, Bolus Calculator Basics
Units
This data provides information on the Units used:
The right choice of units is crucial if the calculated results
are to be accurate. All other input values (page 151) as
well as the personal parameters determined together with
your healthcare professional (see page 156) refer to the
units you select here.
■
The unit for carbohydrates
■
The unit for blood glucose
■
The unit for the carbohydrate ratio
■
The unit for insulin sensitivity.
The carbohydrate ratio defines the amount of insulin
needed to compensate for a certain amount of carbohydrates consumed.
The insulin sensitivity (correction factor) describes the
“sensitivity” to a dose of insulin, i.e. the decrease in blood
glucose in response to a predefined amount of insulin.
The input fields for carbohydrate ratio and insulin sensitivity shown here are just for selecting the units or ratios
(that are used in the calculations). The values themselves
are actually entered in the Factors menu option described
in the next section.
150
ACCU-CHEK Pocket Compass Software with Bolus Calculator User Guide
Appendix A, Bolus Calculator Basics
Factors
The Factors area allows you to make settings to take
account of the following important aspect: Your insulin
requirement varies depending on the time of day. Using
the same values and factors throughout the course of the
day would not necessarily match your own personal
metabolism and daily rhythm. This could lead to inappropriate or poorly adjusted dosages of insulin.
Here you can define up to eight blocks (time periods)
– depending on your own personal daily rhythm – for the
time-dependent factors used in calculating a bolus. In
order to match your changing insulin requirement you
might, for example, define different ranges and values for
morning or evening hours than for the middle of the day or
at night.
You are free to choose when a time period is to begin or
end to suit your personal lifestyle. You do not have to fit
any predetermined time grid.
Your target range for blood glucose results, defined by an
upper and a lower value, may change over the course of
the day, as can the carbohydrate ratio and the insulin
sensitivity. You can define all of these values separately for
each block. Depending on the time of day at which the
calculation is performed, the bolus calculator then
automatically takes these values into account.
ACCU-CHEK Pocket Compass Software with Bolus Calculator User Guide
151
Appendix A, Bolus Calculator Basics
General parameters
After having defined the units and factors used, you then
enter special limits. These limits enable the bolus calculator to issue warnings that call your attention to any
undesirable development in your blood glucose values.
The High bG Warning sets the corresponding limit for
blood glucose results that are too high. When this blood
glucose value is reached or exceeded, a warning message
is issued to regularly control your blood glucose and
insulin dosage.
The Low bG Warning sets the corresponding limit for blood
glucose results that are too low. Here, too, a warning
message appears, in this case prompting you to eat
fast-acting carbohydrates.
The Low bG Alert (hypoglycemic alarm threshold) is below
the Low bG Warning along the test result scale. If your
blood glucose result reaches or falls below this limit, you
are also prompted to eat fast-acting carbohydrates. In this
case, the appropriate carbohydrate amount that you
should consume according to your current blood glucose
value is calculated as well. No bolus calculation is carried
out, however.
152
ACCU-CHEK Pocket Compass Software with Bolus Calculator User Guide
Appendix A, Bolus Calculator Basics
The Meal Excursion parameter (post-meal blood glucose)
takes another normal event into consideration. In the
period of time following a meal, the blood glucose result
usually increases by an appreciable amount. The following
diagram illustrates a typical progression of the blood
glucose level after a meal (blue line).
Acting time
Bolus
Meal
bG [mmol/L]
10,0
Offset time
Tolerance range
(for meal excursion)
6,7
Target range
Progression of post-meal blood glucose levels
Target
value
The bolus calculator takes the rise following a meal into
account and tolerates an increase in the blood glucose
result within a certain range (green area), without
calculating an additional correction bolus.
The duration (width of the green field) is determined by
the Acting Time parameter. The Acting Time describes the
entire time period for which the increase in blood glucose
following a meal is taken into account.
The fall in the curve (start of a decreasing blood glucose
value) shown in the diagram starts after the so-called
Offset Time has expired. The Offset Time describes the first
time period within the Acting Time by which the fall in the
blood glucose level is offset.
If you eat another meal during the time in which your
blood glucose value falls within the green area, the
allowed increase following a meal is again taken into
consideration.
ACCU-CHEK Pocket Compass Software with Bolus Calculator User Guide
153
Appendix A, Bolus Calculator Basics
Offset Time and Acting Time also apply for correction
boluses. These parameters help to prevent potential
sources of error, such as double or overdosage due to
underestimation of the acting time of an insulin dose. This
could lead to hypoglycemia.
The Acting Time can be set in a range from 90 to 480
minutes, depending on the “speed” of your own metabolic
processes. The Offset Time must be at least 45 minutes
and is limited upwards by the acting time.
The Snack Size is another default parameter that defines a
certain amount of carbohydrates for which a meal bolus is
calculated but no Meal Excursion is triggered. No Meal
Excursion is tolerated for this amount of carbohydrates. A
correction bolus would then be used to compensate for
any increase in blood glucose caused by a snack.
The Daily Insulin Dose serves as additional information for
reviewing the relation between the daily insulin dose and
the calculated single dose. Unusually high values trigger a
warning message, thus prompting you to check your
entries.
The last parameter of the default settings is the Bolus
Increment of the insulin pump that you are using. This
serves to round off the calculated bolus quantities to
match your insulin pump’s input requirements, thereby
allowing you to enter the values directly, after you review
them in detail.
154
ACCU-CHEK Pocket Compass Software with Bolus Calculator User Guide
Appendix A, Bolus Calculator Basics
1.4
How Are Exceptional Circumstances Handled?
If your daily routine were to always remain absolutely
identical from one day to the next, then the settings
mentioned above would provide enough information to
calculate suitable boluses. This is usually not the case,
however.
In order to handle certain exceptional circumstances, you
need to be able to calculate a bolus that differs from the
“normally” calculated result.
Examples of such exceptional circumstances are changes
in metabolism. Activities such as sports or physical work
may change the insulin requirement, just as illnesses or
the menstrual cycle can, too. Since these deviations do
not occur at perfectly regular intervals, using blocks (daily
time periods) to account for them is both senseless and
impossible.
For this reason, you can define an exceptional insulin
requirement for recurring events. This deviation is specified in the basic setup parameters of the bolus calculator
(as a percentage of the insulin requirement) – for example, “When playing badminton, my insulin requirement is
50% lower”.
If a bolus is then calculated, you can select the desired
adjustment whenever one of the given situations arises.
If none of the adjustments that you have defined applies
to the situation, you are also free to directly modify the
calculated value manually, either as a percentage or as an
absolute value. Here again, the ability to accurately
estimate your own condition is of crucial importance.
ACCU-CHEK Pocket Compass Software with Bolus Calculator User Guide
155
Appendix A, Bolus Calculator Basics
1.5
Example of the Personal Parameter Table
Name: John Q. Public
Date: 7.11.2007
Carbohydrates unit
bG Unit
g
mg/dL
Parameter
Unit
Block Start
Block End
Upper bG Target
Lower bG Target
Carbohydrate Ratio
Insulin Sensitivity
Parameter
Offset Time
Unit
Value
mmol/L
g
Minutes
(90-480)
Minutes
(45-480)
Daily Insulin Dose
IU
Bolus Increment
IU
156
BW (10g)
CC (15g)
2
Value for the day segment (block)
3
4
5
6
7
8
5:01 am 10:01 am 10:01 pm
hh:mm 5:00 am 10:00 am 10:00 pm 11:59 pm
mmol/L 7.8
7.2
7.2
7.8
mmol/L 5.6
5.0
5.0
5.6
IU
1
1
1
1
g
15
10
15
15
IU
1
1
1
1
mmol/L 2.8
1.7
2.8
2.8
Meal Excursion
Acting Time
1
12:00 am
Low bG Warning
Snack Size
CU (10g)
mmol/L
hh:mm
High bG Warning
Low bG Alert
BE (12g)
13.9
3.9
3.3
2.8
9
240
60
50
0.5
ACCU-CHEK Pocket Compass Software with Bolus Calculator User Guide
Appendix B, Using the Bolus Calculator
B
Using the Bolus Calculator
The bolus calculator is only available to users who have
synchronized an insulin pump with the ACCU-CHEK
Pocket Compass software and have activated the Bolus
Calculator option in the Transfer Setup menu.
The bolus calculator calculates a bolus for you that is
adapted to changing times of day and situations.
Safety information regarding the
configuration and use of the bolus
calculator
Important information regarding the configuration (Bolus
Calc. Setup) and use of the bolus calculator is presented
below. Please read it through completely before you
continue.
Safety information on bolus calculator settings
It is very important to discuss the required basic settings
with your healthcare professional. In fact, the best approach
is to set up the bolus calculator together with your healthcare professional.
The calculated result is based exclusively on your default
settings and entries. Therefore, before you use the bolus
calculator, you must be familiar with your therapy data and
able to enter it correctly.
If data entered during configuration is incorrect and lies
outside the ranges defined in the software, a warning
message is displayed to this effect. If, however, the data is
wrong but plausible, no message is displayed.
Therefore it is important that you carefully review your
entries.
ACCU-CHEK Pocket Compass Software with Bolus Calculator User Guide
157
Appendix B, Using the Bolus Calculator
How to use the bolus calculator
The bolus calculator calculates insulin doses based on
many different pieces of information, such as
– the values you entered in the setup;
– your current blood glucose result;
– the carbohydrate amount you entered either
directly or using the carbohydrate calculator.
Always compare your result with the way you actually feel
and adjust it, if necessary.
Always carry out the actions entered in the bolus calculator
without delay.
The following information is not taken into account
when the bolus calculator is used
It is possible that the values entered during configuration do
not match the way your body actually feels. In this case,
you can increase or reduce the calculated insulin dose to
adjust it to your needs.
Insulin doses and meals taken before the bolus calculator is used for the first time cannot be reflected in the
calculation. The same applies for insulin doses and meals
that were taken without using the bolus calculator.
Before calculating a bolus, the bolus calculator checks
whether you have entered insulin amounts or carbohydrates in the diary without using the bolus calculator. If
you did, a warning message is displayed notifying you
that these insulin amounts saved independently of the
bolus calculator cannot be taken into account in the
current calculation.
158
ACCU-CHEK Pocket Compass Software with Bolus Calculator User Guide
Appendix B, Using the Bolus Calculator
The following circumstances can affect the results of
the bolus calculator
Do not change the time in the handheld without good
reason when you are using the bolus calculator.
The bolus calculator stores a few time values (for use in
future calculations). Since the handheld does not log a
change in system time, the bolus calculator cannot take
this time change into account. This time change influences,
among other things, the duration of an acting time that is
currently in effect. Therefore, make necessary time and
date changes only when no acting time is in effect.
Warning messages about your blood glucose level
After your blood glucose result has been entered (or read
out), warning messages about your blood glucose level
may be displayed. Please take careful note of these
messages. If your blood glucose result is much too low,
you will be prompted to eat a certain amount of carbohydrates, for example, to prevent the risk of hypoglycemia.
Summary
■
It is essential that you discuss the necessary basic
settings with your healthcare professional.
■
Check all your entries thoroughly.
■
Calculate every bolus using the bolus calculator.
■
Do not change the time in your handheld without
good reason.
■
Take note of all warning messages, especially those
about undesirable blood glucose results.
ACCU-CHEK Pocket Compass Software with Bolus Calculator User Guide
159
Appendix B, Using the Bolus Calculator
2.1
Bolus Calculator Setup
The bolus calculator is only available to users who use a
compatible insulin pump with the ACCU-CHEK Pocket
Compass software and have synchronized it. If this applies
to you, the bolus calculator can be activated as an option
in Transfer Setup (see page 118).
To ensure that the calculations made by the bolus calculator are as individualized as possible, you must make a few
basic settings before using the bolus calculator for the
first time. Bolus calculations cannot be carried out until
these basic settings have been completely entered.
It is essential that you discuss the necessary basic settings
with your healthcare professional before you start using the
bolus calculator. These settings must be made with the
greatest care since they affect all future calculations.
Always compare your result with the way you actually feel
and adjust it, if necessary.
Of the four setup areas provided, you must set up the first
three completely and in the order given (starting with
Units, since the settings that follow are based on what you
enter here). Small asterisks appear to the left of the menu
items and they indicate that a setup is incomplete or
missing. Once setup is complete, the asterisks change to
checkmarks.
The fourth setup area (Adjustment) is not mandatory for
using the bolus calculator. However, this area gives you
the option of predefining percentage increases or decreases in the calculated insulin dose, which may be
called for in certain conditions (e.g. physical activity,
stress, illness). These adjustments can then be called up
and applied later “at the touch of a button” (see page 172).
160
ACCU-CHEK Pocket Compass Software with Bolus Calculator User Guide
Appendix B, Using the Bolus Calculator
Setting up units
To set up units for bolus calculation
1
From the Options menu, touch Bolus Calc. Setup.
2
Touch Units.
3
Define the units for carbohydrates and blood
glucose that apply to you.
4
Define the basis for calculation that was used to
determine your personal carbohydrate ratio. Select
one of the following ratios:
Carbohydrate ratio
(carbohydrate-dependent insulin requirements)
either
or
Amount of carbohydrates
Insulin quantity
5
e.g.
g
IU
Insulin quantity
Amount of carbohydrates
e.g.
IU
g
Define the basis for calculation that was used to
determine your insulin sensitivity. Select one of the
following ratios:
Insulin sensitivity
either
Blood glucose decrease
Insulin quantity
or
e.g.
mmol/L
IU
Insulin quantity
Blood glucose decrease
IU
e.g. mmol/L
6
If you need additional information about the settings,
touch Help.
7
When you have entered all settings, confirm your
settings by touching OK.
If all required information has been entered, a checkmark
appears next to Units in the Bolus Calc. Setup menu.
ACCU-CHEK Pocket Compass Software with Bolus Calculator User Guide
161
Appendix B, Using the Bolus Calculator
If you subsequently change the unit settings, all
calculation factor data based on these settings are deleted
(see below). You must then repeat your entries to again
complete the required basic settings.
It is important to make the correct selection for carbohydrate ratio and insulin sensitivity. If you select the wrong
ratio (calculation basis), all future results will be incorrect.
Calculation factors
The result of a bolus calculation depends on the time the
bolus is administered. Insulin sensitivity and carbohydrate
ratio (and consequently insulin requirements) may
change several times over the course of a day. To reflect
this situation, you can create different parameter records
for different parts of the day (up to 8 blocks).
As long as you have not defined these blocks of time,
there is only one block that covers 24 hours. The parameters assigned to this block therefore apply to the entire
day. As soon as you define an end time for this block that
is not 11:59 pm, another block appears that starts one
minute after the first block ends, and this second block
ends at 11:59 pm. When an end time is entered for the
second block, the third block appears, etc., up to a
maximum of 8 blocks. This principle (entering the end
time for a block sets the starting time for the next block)
also applies to subsequent changes made to an already
defined block. So, if you want a block to start earlier or
later, just change the end time of the previous block. To
merge blocks, move the end time of the first relevant block
to the end time of the last relevant block.
162
ACCU-CHEK Pocket Compass Software with Bolus Calculator User Guide
Appendix B, Using the Bolus Calculator
To set up personal calculation factors
1
From the Options menu, touch Bolus Calc. Setup.
2
Touch Factors.
3
To open the settings for the first block, touch the
appropriate end time.
4
Enter the desired end time for the first block (e.g.
5:59 am). Touch the input field and use the screen
keypad to enter the desired time. In the background,
a second block is then automatically created.
5
Touch the following input fields and use the screen
keypad to enter the following values:
– Blood glucose target range with lower and upper
limit
– Carbohydrate ratio
– Insulin sensitivity
6
When you have entered all settings, confirm your
settings by touching OK.
7
Repeat these steps for the next block.
8
When all necessary blocks have been defined and
the appropriate values have been entered, touch
Done on the Factors screen.
On the Bolus Calc. Setup screen, Factors is flagged with a
checkmark when all relevant information has been
entered for the blocks you created.
ACCU-CHEK Pocket Compass Software with Bolus Calculator User Guide
163
Appendix B, Using the Bolus Calculator
General Parameters
This setup area is for parameters that are independent of
the time of day.
To set up general parameters
1
From the Options menu, touch Bolus Calc. Setup.
2
Touch General Parameters.
3
Touch the appropriate input field to enter the desired
value.
4
Use the screen keypad in the appropriate dialog box
to enter the desired values. A more detailed description of the input fields is provided on the following
pages.
5
When you have entered all settings, confirm your
settings by touching OK.
Once these settings are entered, the basic requirements
for bolus calculation are complete and Settings complete
is displayed below the menu items. Now you have the
option to use Adjustment (see page 168) to enter increases or decreases in the calculated insulin dose for specific
situations. These may later be retrieved “at the touch of a
button”.
164
ACCU-CHEK Pocket Compass Software with Bolus Calculator User Guide
Appendix B, Using the Bolus Calculator
High bG Warning
Enter the desired blood glucose limit value for the High bG
Warning (hyperglycemic threshold). If your blood glucose
result reaches or exceeds this limit, you are prompted to
check your blood glucose level and insulin dose (more
regularly).
Low bG Warning
Enter the desired blood glucose limit for the Low bG
Warning (hypoglycemic threshold). If your blood glucose
result reaches or falls below this limit, you are prompted to
eat fast-acting carbohydrates.
Low bG Alert
Enter the desired blood glucose limit for the Low bG Alert
(hypoglycemic alarm threshold). If your blood glucose
result reaches or falls below this limit, you are also
prompted to eat fast-acting carbohydrates. In this case,
the appropriate carbohydrate amount for your current
blood glucose value is calculated but no bolus calculation
is carried out.
ACCU-CHEK Pocket Compass Software with Bolus Calculator User Guide
165
Appendix B, Using the Bolus Calculator
Meal Excursion
During or after meals, an increase in blood glucose levels
is considered normal within a certain range, even though
a meal bolus has been delivered. Enter here the maximum
increase in your blood glucose result that is to be tolerated
without an additional correction bolus. This tolerance
applies to the Acting Time described below.
Acting Time
The Acting Time parameter allows factors such as the
acting time of the insulin and the increase in blood
glucose value after the meal to be taken into account. You
can adjust the length of the acting time to your individual
needs, within a specified interval (90 to 480 minutes). The
acting time is divided in two areas by the Offset Time.
Offset Time
The first part of the Acting Time (Offset Time) takes into
account the expected delay for the blood glucose level to
actually fall due to the acting insulin.
The second part of the acting time assumes a linear
decrease of the blood glucose level (see pages 153-154).
166
ACCU-CHEK Pocket Compass Software with Bolus Calculator User Guide
Appendix B, Using the Bolus Calculator
Snack Size
Enter the maximum amount of carbohydrates that is not to
be counted as a regular meal with the expected Meal
Excursion. In this case (in contrast to regular meals), an
increase in your blood glucose result is not tolerated since
the Meal Excursion factor is not triggered as an additional
calculation basis.
Daily Insulin Dose
The Daily Insulin Dose is the total amount of bolus and
basal insulin you need on average daily. Single doses
calculated by the bolus calculator are always checked for
their proportion to the Daily Insulin Dose entered here.
Excessively high single doses lead to warning messages.
Bolus Increment
Select the increment that you entered on your insulin
pump (e.g. 0.1 or 0.5 IU). You can only enter the values
calculated by the bolus calculator into the pump exactly
as they are if the increments in the bolus calculator and
the pump are the same (and rounded accordingly).
ACCU-CHEK Pocket Compass Software with Bolus Calculator User Guide
167
Appendix B, Using the Bolus Calculator
Adjustment
In addition to all generally applicable and time-dependent
settings you have already entered, you have the option of
taking special physiological conditions into account. An
adjustment may be necessary for a variety of reasons.
Activities (such as exercising) can reduce your body’s
insulin requirement, it can also be increased or reduced
during an illness or during the menstrual cycle. With the
bolus calculator, you can define up to three personal
adjustments (based on percentage). To include them in
the bolus calculation, simply select the appropriate adjustment as needed.
To name an adjustment
1
From the Options menu, touch Bolus Calc. Setup.
2
Touch Adjustment.
3
To define an adjustment, touch the appropriate line
of text.
4
Use the screen keypad to enter the desired name.
To enter the value for the adjustment
168
5
Touch the input field to define an adjustment value.
6
Use the screen keypad to enter the desired percentage adjustment. Positive values indicate an increase
and negative values indicate a decrease in the
calculated bolus by the stated percentage amount.
7
Use this procedure to enter settings for up to three
different adjustments.
8
When you have entered all settings, confirm them by
touching OK.
ACCU-CHEK Pocket Compass Software with Bolus Calculator User Guide
Appendix B, Using the Bolus Calculator
2.2
Performing a Bolus Calculation
To start the bolus calculator
1
From the main menu screen, touch Bolus Calculator.
The first time the bolus calculator is started, a message
appears stating that existing bolus and carbohydrate
information will not be included in the calculation.
2
Touch the OK button to acknowledge this
information.
Every time the bolus calculator is started, a message will
appear indicating that the calculated bolus may not
necessarily match your actual current physical state. In
such a case, you can adjust the calculated value using the
Adjustment function (see page 172).
3
Acknowledge the information by touching the OK
button to start the calculation.
ACCU-CHEK Pocket Compass Software with Bolus Calculator User Guide
169
Appendix B, Using the Bolus Calculator
To use the current test result
First, the bolus calculator checks to see whether there is a
current blood glucose value (not older than 5 minutes) in
the diary of the ACCU-CHEK Pocket Compass software.
1
Touch Yes if you want to use this value.
Touch No if you want to manually enter or transfer
(“Read out”) a more recent value.
To make sure that this is the current test result, it is
recommended that you compare the displayed value with
the test result.
To enter the test result manually
2
Touch the input field for the test result.
3
Use the screen keypad to enter the desired value
and confirm your entry by touching OK.
To transfer (“Read out”) the most current test result
for the bolus calculator
2
Prepare the meter for data transfer.
3
Touch the Read out button.
A test result is transferred (“Read out”) only if the test
itself was performed within the last 5 minutes. If you are
unable to transfer (“Read out”) a result because it is too
old, perform another test and enter the result manually in
the bolus calculator.
4
170
Touch Next to continue with the calculation.
ACCU-CHEK Pocket Compass Software with Bolus Calculator User Guide
Appendix B, Using the Bolus Calculator
To select the carbohydrate amount
After you confirm the blood glucose test result, enter the
amount of carbohydrates in your meal. If you use a blood
glucose test result from the Diary function for which a
carbohydrate entry already exists, that entry will be
displayed by default.
1
Check whether the adopted value corresponds to
the actual carbohydrate amount.
2
Touch Next if you want to use this value, or proceed
as described below to enter a different amount.
To enter the carbohydrate amount manually
3
Touch the input field for the carbohydrate amount.
4
Use the screen keypad to enter the desired value
and confirm your entry by touching OK.
5
Touch Next to continue with the calculation.
To enter the carbohydrate amount using the
carbohydrate calculator
3
Touch the Carb. Calc. button.
4
Enter the desired components of your meal as
described in the section “To add or edit a carbohydrate value using the carbohydrate calculator” from
page 47.
5
Touch OK to accept the result in the bolus calculator.
ACCU-CHEK Pocket Compass Software with Bolus Calculator User Guide
171
Appendix B, Using the Bolus Calculator
To adjust the calculation to your current situation
When you entered the basic parameters, you had the
option of defining up to three adjustments with an
increased or reduced insulin requirement. If the calculated bolus is greater than “0”, you can select an adjustment. A checkmark appears in the Normal field (i.e. no
adjustment = 0 %) by default.
172
1
Touch the checkbox of the desired adjustment to
select it. The selected adjustment is flagged with a
checkmark and included in the calculation.
2
Touch Next to display the result of the calculation.
ACCU-CHEK Pocket Compass Software with Bolus Calculator User Guide
Appendix B, Using the Bolus Calculator
The bolus calculator now displays the result. This display
shows the values that were included in the calculation
and their conversion to the calculated dose. The total dose
calculated from these individual values (rounded for the
bolus increment of your pump) is displayed at the bottom.
If the calculated bolus does not reflect how you actually
feel, you can manually correct the previously selected
adjustment and its reason.
1
Touch the value displayed for the percentage
adjustment (“-50 %” in this example) or touch the
value for the dose (“-1.6 IU” in this example) to enter
the values directly.
2
Use the screen keypad to enter the desired value
and confirm your entry by touching OK.
If the calculated bolus is equal to “0”, touch Next to return
directly to the diary entry. In this case, no further information about the bolus delivery type is required.
If the calculated value is greater than “0”, touch OK to
confirm that you will deliver this dose as shown.
For the bolus information manually generated by the bolus
calculator to be correctly processed with the pump data
that is later transferred, it is important that you enter the
correct delivery type (pump or syringe) in the next step. The
information you provide is then saved in the diary (together
with the test result used).
3
Touch OK to go to the delivery type selection.
ACCU-CHEK Pocket Compass Software with Bolus Calculator User Guide
173
Appendix B, Using the Bolus Calculator
To enter the bolus delivery type of the calculated
bolus for the pump
1
2
Touch Pump to select this type of delivery.
Select the type of delivery (the list is specific to the
pump used):
– Standard
– Extended
– MultiWave
If you select Standard, no further information needs to be
entered. Touch the OK button to confirm.
If you select Extended:
3
Touch the Duration input field.
4
Use the screen keypad to enter the desired duration
(at least 15 minutes), then touch OK to confirm.
If you select MultiWave:
174
3
Touch the Immediate input field.
4
Use the screen keypad to enter the value desired for
the immediate portion (up to 0.1 IU below the total
bolus quantity). Touch the OK button to confirm.
5
Touch the Duration input field.
6
Use the screen keypad to enter the desired duration
of the extended bolus portion (at least 15 minutes).
Touch the OK button to confirm.
7
Touch OK to finish your entries.
ACCU-CHEK Pocket Compass Software with Bolus Calculator User Guide
Appendix B, Using the Bolus Calculator
To enter bolus delivery type of the calculated bolus
for syringe/pen
If you want to deliver the bolus with a syringe rather than
a pump:
1
Touch Syringe to select this type of delivery.
2
Touch OK to confirm this selection.
The diary entry that was created based on the previous
bolus calculation and the subsequent entries is then
displayed.
The icon
indicates a diary entry that was created using
the bolus calculator. If you touch this icon, the overview of
the calculation is displayed.
ACCU-CHEK Pocket Compass Software with Bolus Calculator User Guide
175
Appendix B, Using the Bolus Calculator
The following information is available in the Detail screen:
176
■
If you touch the Insulin
icon, the screen for
selecting the bolus type is shown again (see
page 174 and page 175).
■
The boluses created with the bolus calculator are
initially stored in the diary as “manual values
generated by the bolus calculator” (Insulin
icon). The insulin dose cannot be changed. The
type of delivery (pump or syringe/pen) can be
changed up to the point when values are read out
from the pump for the period of time that includes
this entry. If you have selected Pump as the type of
delivery and later transfer data from the pump for
the period of time that includes this entry, the icon
changes to “data transfer from the pump” (
).
In the Diary and Detail screens, -R- or Replaced is
still displayed instead of the insulin value. To view
the manual entries you originally made, touch the
letter -R- (in list view) or the Pump
icon (in the
Detail screen).
ACCU-CHEK Pocket Compass Software with Bolus Calculator User Guide
Appendix B, Using the Bolus Calculator
2.3
Your Personal Parameter Table
Date:
Name:
Carbohydrates unit
bG Unit
g
mg/dL
Parameter
Unit
Block Start
hh:mm
Block End
hh:mm
BE (12g)
CU (10g)
BW (10g)
CC (15g)
mmol/L
1
2
Value for the day segment (block)
3
4
5
6
7
8
12:00 am
Upper bG Target
Lower bG Target
Carbohydrate Ratio
Insulin Sensitivity
Parameter
Unit
Value
High bG Warning
Low bG Warning
Low bG Alert
Meal Excursion
Snack Size
Acting Time
Offset Time
Minutes
(90-480)
Minutes
(45-480)
Daily Insulin Dose
IU
Bolus Increment
IU
ACCU-CHEK Pocket Compass Software with Bolus Calculator User Guide
177
Appendix B, Using the Bolus Calculator
178
ACCU-CHEK Pocket Compass Software with Bolus Calculator User Guide
Index
Index
A
Acting time ..........................................................153–154, 166
Adjustment
Defining ............................................................................168
Adobe Reader
Help ..................................................................................... 13
Application menu .................................................................. 10
Applications Launcher ........................................................ 10
Arrow buttons ......................................................................... 11
Average
Daily average .................................................................... 70
Weekly Average ............................................................... 73
Average day ......................................................................70–72
Table view .......................................................................... 72
Average week ..................................................................73–75
Table view .......................................................................... 75
B
Bar chart ............................................................................80–82
Basal profile ........................................................ 68, 87, 89–92
Scale .................................................................................... 91
Table view .......................................................................... 92
Basal rate ....................................................................65, 85–88
Scale .................................................................................... 86
Table view .......................................................................... 87
Basic settings ...................................................................18–22
Battery charge ................................................................. 10, 27
Block (time period) .............................................................163
Blood glucose ......................................................................... 41
Blood pressure ...........................................98–100, 105–106
Bolus
Extended ..........................................................................174
MultiWave .......................................................................174
Bolus calculator .......................................................... 145–177
Acting time ...................................................153–154, 166
Adjusting the calculation ...........................................172
Adjustment ......................................................................168
Basics ...................................................................... 145–156
Block (time period) .......................................................163
Bolus increment ............................................................167
Calculation factors ....................................151, 162–163
Carbohydrate value ......................................................171
Delivery type ......................................................... 174–175
General parameters ........................................... 164–167
Offset time ............................................................. 153, 166
Parameter table ................................................... 156, 177
Performing a bolus calculation ...................... 169–176
Result ................................................................................173
Safety information .............................................. 157–159
Setting up units ................................................... 150, 161
Setup ....................................................................... 160–168
Test result ........................................................................170
Button
Data Transfer .................................................................... 29
Diary .................................................................................... 30
Health Management ...................................................... 31
Options ............................................................................... 31
Reports ............................................................................... 30
C
Carbohydrate calculator ............................................47, 171
Amount ............................................................................... 48
Meal ..................................................................................... 49
Carbohydrate ratio .................................................... 161, 163
Carbohydrates ................................................................. 46, 63
Meal excursion .................................................... 153, 166
Snack size ........................................................................167
Comments .........................................................................55–57
Conduit ......................................................................8, 137–138
Configuration ...................................................................18–22
ACCU-CHEK Pocket Compass Software with Bolus Calculator User Guide
179
Index
Configuration file .................................................................143
F
Filter ............................................................................................ 94
D
Daily insulin dose .................................................................167
Daily sums .........................................................................76–77
Data
Reading out ........................................................... 130–131
Transferring .......................................................... 130–131
Data backup ................................................................ 137–138
Data export ............................................................................132
Data transfer ........................................................ 29, 129–136
Information ......................................................................136
Date display ............................................................................. 10
Diary .............................................................................30, 33–57
Blood glucose .................................................................. 41
Carbohydrates ................................................................. 46
Displaying .......................................................................... 35
Entries ................................................................................. 33
Events and comments ............................................55–57
Insulin ..........................................................................42–45
Insulin pump ..................................................................... 42
Manual data entry ...................................................37–39
Not in sync data ............................................................... 40
Reminders ..................................................................51–54
Timeblocks ........................................................................ 50
Displays ......................................................................... 139–140
Distribution .......................................................................80–82
Docking station ........................................................................ 8
E
Event order .............................................................................117
Events .................................................................................55–57
Export .......................................................................................132
Extended (bolus) ..................................................................174
180
G
General setup .................................................................21, 108
Glossary of terms ..................................................................... 8
H
Handheld
Preparing ....................................................................15–16
HbA1c ..............................................................95–96, 101–102
Health Management ............................................................ 31
Health management ................................................. 101–106
Blood Pressure ..................................................... 105–106
HbA1c ..................................................................... 101–102
Ketones .................................................................. 103–104
Help
Adobe Reader .................................................................. 13
High bG warning ........................................................ 152, 165
HotSync ..............................................................8, 17, 137–138
Hyper limit ..............................................................................111
Hyper/Hypoglycemic display ............................................. 11
Hypo limit ................................................................................111
I
Icons ............................................................................... 139–140
Additional information .................................................. 11
Arrow buttons .................................................................. 11
In User’s Manual ............................................................... 7
Information (for reports) ..................................................... 62
Information (transfer, synchronization) .......................136
Install Tool .................................................................... 143–144
Installation ................................................................................ 17
Compatibility ..................................................................141
Components (subsequent installation) ................... 12
ACCU-CHEK Pocket Compass Software with Bolus Calculator User Guide
Index
Insulin .................................................................................42–45
Delivery type (bolus calculator) ..................... 174–175
Extended ..........................................................................174
MultiWave .......................................................................174
Naming ................................................................... 112–113
Insulin names ............................................................................ 8
Insulin pump ............................................................................ 42
Bolus increment ............................................................167
Insulin pump (compatible) ..................................... 129, 142
Insulin sensitivity ........................................................ 161, 163
Insulin types ............................................................................... 8
Invalid (Event “invalid”) ....................................................... 57
K
Ketones .................................................................. 97, 103–104
L
Limits
High bG warning ................................................. 152, 165
Low bG alert ......................................................... 152, 165
Low bG warning .................................................. 152, 165
Logbook .............................................................................78–79
Low bG alert ................................................................ 152, 165
Low bG warning ......................................................... 152, 165
M
Manual data entry ..........................................................37–39
Meal excursion ........................................................... 153, 166
Measurement unit ................................................................. 11
Meters (compatible) ................................................. 129, 142
MultiWave ..............................................................................174
N
Not in sync data ..................................................................... 40
Numerical keypad ................................................................. 11
O
Off time ...................................................................................... 16
Offset time .................................................................... 153, 166
Options ................................................................... 31, 107–118
P
PDF ............................................................................................... 8
Personal parameter table ..................................................177
Personal parameter table (example) ............................156
Personal setup ............................................................ 110–117
PTV ............................................................................................143
Pump events .....................................................................93–94
Filter ..................................................................................... 94
R
Reading out data ....................................................... 130–131
Reminder ...........................................................................83–84
Reminders .........................................................................51–54
Replaced (-R-) ........................................................................ 41
Report
Average Day ..............................................................70–72
Average Week ...........................................................73–75
Basal Profiles .............................................................89–92
Basal Rate ...................................................................85–88
Blood Pressure ....................................................... 98–100
Daily Sums ..................................................................76–77
Distribution ................................................................80–82
HbA1c ..........................................................................95–96
Ketones .............................................................................. 97
Logbook ......................................................................78–79
Pump Events ..............................................................93–94
Reminder ....................................................................83–84
Report type ........................................................................ 60
Trend ............................................................................63–69
Reports ......................................................................30, 59–100
ACCU-CHEK Pocket Compass Software with Bolus Calculator User Guide
181
Index
S
T
Scale .................................................................................... 86, 91
Selecting devices ................................................................... 19
Selecting report time period .............................................. 61
Selecting report type ............................................................ 61
Settings ......................................................................... 107–118
Bolus calculator ................................................... 160–168
Calculation factors (bolus calculator) 151, 162–163
Events ................................................................................117
General parameters (bolus calculator) ....... 164–167
General setup ..........................................................21, 108
Insulins ................................................................... 112–113
Personal setup ..................................................... 110–117
Target range ...................................................................111
Timeblocks ............................................................ 114–116
Transfer setup ................................................................118
Units (bolus calculator) .................................... 150, 161
Snack size ...............................................................................167
Software functions .........................................................29–31
Software installation .......................................... 17, 143–144
Start time ................................................................................114
Synchronization ...........................................18–26, 133–135
Performing ........................................................25–26, 135
Preparing ..................................................................24, 134
System requirements
Computer .........................................................................141
Handheld .........................................................................141
System settings
Handheld ....................................................................15–16
Terms ........................................................................................... 8
Test result
Additional information .................................................. 11
Time deviation ......................................................................... 23
Time display ............................................................................. 10
Timeblocks ............................................................ 50, 114–116
Transfer setup .......................................................................118
Trend ...................................................................................63–69
Basal rate ........................................................................... 65
Bolus insulin ..................................................................... 64
Carbohydrates ................................................................. 63
Table view .......................................................................... 68
182
ACCU-CHEK Pocket Compass Software with Bolus Calculator User Guide
ACCU-CHEK Pocket Compass Software with Bolus Calculator User Guide
183
0088
Manufactured by:
Roche Diagnostics GmbH
68298 Mannheim, Germany
accu-chek.ca
ACCU-CHEK, ACCU-CHEK ACTIVE, ACCU-CHEK AVIVA, ACCU-CHEK COMPACT, ACCU-CHEK COMPASS,
ACCU-CHEK SMART PIX, ACCU-CHEK SPIRIT, ADVANTAGE, CAMIT, DISETRONIC and LIVE LIFE THE WAY
YOU WANT are trademarks of Roche.
Microsoft, Windows, Windows 2000/XP/MCE/Vista are registered trademarks of Microsoft in the United States
and/or other countries.
Adobe, Acrobat and Adobe Reader are registered trademarks of Adobe Systems Incorporated.
Palm, Palm OS, Graffiti, HotSync and the HotSync Logo are registered trademarks of Palm Trademark Holding
Company, LLC.
Food list powered by CalorieKing Food Database 䊚 2008.
Other product and corporate names may be trademarks of other companies and are used only for explanation
and to the owner’s benefit. There is no intent to infringe.
䊚2008 Disetronic Medical Systems Inc. All rights reserved. 11760V01 1108 PW
0 5436575001 (01)
Distributed by:
Disetronic Medical Systems Inc.
11800 Exit 5 Parkway, Suite 120
Fishers, IN 46037
Phone 1-800-280-7801
Fax 1-888-810-0758