Download Manual
Transcript
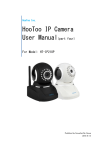
HooToo Inc. HooToo IP Camera User Manual(part two) For Model: HT-IP210P Published by SunvalleyTek Group 2014/9/14 Content 1. IPCamClient (windows software)......................................................3 Set up...............................................................................................3 CAM............................................................................................... 13 Local Setting.................................................................................. 13 Remote Settings.............................................................................15 SYS..................................................................................................18 Record (Note: Change setting here will apply to all cameras.)....18 Alarm............................................................................................. 18 Auto run.........................................................................................19 Devices list.....................................................................................19 Search file...................................................................................... 20 Version...........................................................................................20 Remote View From Internet.........................................................21 2. IP Camera Tool(MJPEG)................................................................ 22 IE (Internet Explorer) Browser..................................................... 25 - Live Video................................................................................ 25 - Multi-Device............................................................................ 27 - Network................................................................................... 28 - Audio video..............................................................................30 - System......................................................................................31 - Other........................................................................................34 Fire Fox & Chrome Browser..........................................................37 How to Setup HT-IP210P on Windows PC 1.IPCamClient (windows software) Set up a. Insert the attached CD in your PC and find IPCamClient setup.exe file , double click to install it to your PC. Note: You can also download it in www.hootoo.com, b. Open IPCamClient, click “ADD”, c. Click “next”, d. Click ‘search’, e. Select camera IP address from the result and then click ‘OK’ f. Device Name: Enter a customized name for your camera. Device ID: UID code (p2p) of this Camera Account: admin (default) Password: 000000 (default) g. Click ‘finish’ to go to the next step h. Select your camera, click “play”, and then you can view the live video feed i. Here is an example of live video feed j. Please click the “CAM” to configure camera wireless parameters. Then select “Wireless LAN Settings” option. k. Click “Join a new wireless network” l. Click “search” to scan nearby wireless network m. Select the wireless network you wish to connect to. Then enter password, and then click “join” n. Wait for counting down to finish, and then click ok. o. Click “Next” after counting down finished. p. Unplug the network cable that connects the camera to the router, then click “Next” q. Wait for counting down, click “Finish” r. Wait few seconds for camera to be connected with router wirelessly. “Close”, camera will rotating for a while to check its on status, and then click video feed will show up. , live CAM CAM (camera settings) Local Setting Here is the basic information of your camera Device Name: editable name of your camera IP Address: The code shown here is the camera’s UID Port: this is camera’s P2P server port number View Account / Password: can be customized Support PTZ: enable camera title or router to monitor different area from various angles. Support Audio: enable two way audio communications. Flip Image: make the video image upside down Mirror Horizontal: reverse the video image from left to right. Record Regular Record Before you start to record, please click “SYS” and set a record save path in your PC by clicking “Add”. Left click the round icon to start to record, once recording begin, it will turns to red 1 2 3 4 SYS Add: to select record saving path Record icon: Stop Record, Record has been (start record), Plan Record To set record file length Schedule Record: Go to “CAM”, tick to enable record, you can either set a specified recording period, or keep camera recording all the time. Remote Settings Video Info To select different video definition for camera Password Settings: To change password Motion Detection: To set details for camera to record a short video when any motion detected. 1. Select motion detection sensitivity. 2. Go to > alarm, tick “Alarm Record”, and select video length. Wireless Lan Settings: Please refer to “wireless connection set up” section. SYS Record (Note: Changes set here will be applied to all cameras) - to select a save path for record files - to set the record length - add timestamp on record - Automatically cover the earliest clips when recording space is not enough. Alarm Auto run Enable/disable this IPCamClient software to start up with computer. Devices list Check the list of the cameras on board. Search file Search and play record files. Version Check version number of this CMS (IPCamClient software) Remote View From Internet After you finished previous settings, you can view this camera from anywhere via internet access. Note: Please make sure you record its UID and keep the record with you when heading out. Also, your camera needs to connect to an internet enabled network. 1. Go towww.hootoo.com, download the “IPCamClient” software and install it on a windows PC. 2. Open IPCamClient > click “ADD”> enter your camera’s UID code > input a name for camera > Account & Password > Next > Finish 2.IP Camera Tool(MJPEG) a. Please find the IP Camera Tool in the installation CD, it is a portable software that can be used directly without installation. b. After you finished camera hardware connection, double click on this software; wait for a while, camera IP address will show up. c. Double click this IP address, it will lead you to camera web manage interface. Sign in with Username: admin (default), password: empty (leave it blank) d. Before sign in, download and install the plug-in “active-x”,. e. If it is the 1st time you use IE browser to connect this camera, there may be no image displaying on the screen. In this case, you should see an ActiveX prompt, please click the prompt and choose Run Add-on. Then refresh the IE interface and login the camera again. You will now be able to see live video. IE (Internet Explorer) Browser - Live Video Start to viewing live video Stop viewing Capture a snapshot Start/stop record Click to listen Click to talk Pan & tilt wheel 1 Set current camera view direction as a preset position (1-15, X to delete) 2 Select 1-15 preset positions, camera will turn to 3 4 5 6 7 8 selected position immediately Vertical cruise on Horizontal cruise on I/O external alarm/volume/etc device on Vertical cruise off Horizontal cruise off I/O external alarm/volume/etc device off There are 9 icons at the bottom of the UI which show the status of each channel of the camera. : Grey color means there is no device connected to the main device from this channel. : Green color means the device is connected to this channel, and it works well. : Red color means the device of this channel is recording. : Yellow color means multi devices have been set to this channel however it fails to connect to the main device. 原句:set this channel in multi-device already, but it fails to connect to the main device. - Multi-Device Multi-device settings To add cameras in local network, just click Refresh > select camera’s IP address > enter camera name (Alias), user name, password > add, submit To add a camera in different network via internet, you need to setup DDNS & port forwarding first, after that, enter camera’s DDNS address to Host, along with http port number, Alias, user name, password, Add, submit. Restore Factory Settings: to reset this camera Reboot this device: to restart camera - Network Basic Network settings a. Obtain IP from DHCP Server: On: get IP address automatically from router Off: need set static IP address for this camera manually b. IP Addr: IP address c. Subnet Mask d. Gateway: your router’s host address e. DNS server: generally the same as Gateway f. Http Port: camera’s port# Wireless Lan Settings a. b. c. d. e. f. Wireless Network List: Click “scan” to view nearby network SSID Wireless Lan Enabled: to turn on/off camera wireless function SSID: your selected wifi network SSID (wifi name) Network Type: infra/adhoc Encryption: none/WEP/WPA/WPA2 Share Key: password of selected wifi network PPP settings Here you can tick to enable PPP (ADSL) service: connect camera with internet directly, and enter PPP (ADSL) user & password provided by your ISP (internet service provider) UPnP Settings UPnP service is used for automatic port forwarding configuration. If your router also has this function, once you enabled both camera and router UPnP function, port forwarding will be set automatically. Port forwarding: also called port mapping. Basic working theory: It is by forwarding the local IP address and the port number of the camera to the connected router which will then forward them to an external IP address on internet to enable camera’s DDNS service. After DDNS service enabled, you can login camera with DDNS and camera port remotely via internet by using a web browser. DDNS Service Settings This function is used for login camera via internet from remote place. Please refer to FAQs part to learn more about it. Manufacturer’s DDNS: We’ve embedded a free DDNS in this camera, and its default status is off. 3rd party DDNS: you can register a private DDNS domain yourself. P2P settings P2P setting is also used for camera remote viewing, which is much easier than DDNS + Port forwarding settings. GUID (camera’s P2P UID code), it is a sole code of every single camera, which is used on IPCamClient, please refer to HT-IP210P user manual part 1 (windows). - Audio video OSD: Means “On-Screen Display”, click “Audio video” ->“OSD”, set display date and time on the video. Disabled: Click this one to clear the OSD. Color: To set the OSD text color to black, yellow, red, white, blue etc. Add time stamp on record: Click this to enable time OSD on record video files. Audio buffer: set different audio buffer Reversal: turn camera’s image upside down Mirror: turn camera’s image side-inverted Add time stamp on camera record: enable or disable time stamp - System Device Info Here you can find current status of this camera: - Firmware & web UI version number - DDNS status is off on default status (camera is not accessible via internet) - Alias: camera’s name - Alarm Status - UPnP Status (default: off) Alias settings: Change a name for this camera Date & Time Settings Set camera’s time zone or select a sync time update server for camera. Users Settings Here you can add more account of this camera for different purposes: Administrator: full privileges of this camera Operator: limited operate authority of this camera Visitor: View this camera only PT Settings To adjust the camera cruise speed: the smaller number you select, the faster camera moves. Indicator Settings Change the red indicator status here. Backup & Restore Settings Make a record for current camera settings, save it for future restore for applying to another camera. Log Find all setting or operating history of this camera here. Upgrade Device Firmware We recommend contacting us before using firmware upgrade feature to avoid problems caused by improper operation. PS: please use firmware files published by HooToo for HooToo Cameras only; Applying 3rd party firmware to HooToo camera will break product warranty as misuse. - Other Mail Service Settings This email alert works with motion detection. After finishing the configuration, the camera will send you email alerts once it captures any movements. Please input your email server parameters, email account & password, etc. Test if this setting is available or not before submitting. Then submit to initiate email alert. FTP Service Settings FTP upload service also works with motion detection. Once motion detection triggered, camera will upload snapshot images to FTP server. Test after input all parameters to ensure this service is available or not. If it prompts error information as follows: 1) Cannot connect to the server. Please check FTP Server is correct or not. 2) Network Error. Please try later. 3) Server Error. 4) Incorrect user or password. Please check the username and password is correct or not. 5) Cannot access the folder. Please be sure the folder exists and your account is authorized 6) Error in PASV mode. Please be sure the server support PASV mode 7) Error in PORT mode. PASV mode should be selected if the device is behind a NAT 8) Cannot upload file. Please be sure your account is authorized Please check if parameters you filled in are correct or not. The format of image is like 000DC5D008FA (IPCAM) _0_20101115152525_25.jpg Please check if your FTP server supports this format of file name Alarm Service Settings - Motion detect armed: tick to enable motion detection. - Motion detect sensitivity: to adjust motion detection sensitivity - Start the motion detection compensation: tick to reduce false alarm of light mutation - Alarm input armed: tick to enable external alarm devices (attaches to camera I/O interface) to transfer alarm signal to camera. - Trigger level: low/high - IO Linkage on alarm: tick to enable camera to trigger alarm signal received from or send alarm order to external alarm devices. - Alarm notification by http: tick to enable, once motion detection triggered, web page will pop up as set URL. - Send mail on alarm: tick to enable email alerts (or email alerts would not available) - Call the preset position: select a preset position; when motion detection triggered, camera will turn lens to that position immediately. - Upload image on alarm: tick to enable camera to upload snapshot to FTP server. - Upload interval (seconds): adjust image upload frequency - Schedule: set a schedule for camera motion detection alarm One little grid stands for 15 min in that hour. - Sound on alarm: tick to enable camera to send alarm signal to your computer, making your PC give beep sound. - Record on alarm: tick to enable camera start recording when motion detection triggered, you may find these records in the file folders (path settings >alarm record path) Path Settings - Record path: regular record file storage folder - Alarm record path: to storage alarm clips Fire Fox & Chrome Browser It is almost the same when login HT-IP210P via Fire fox or Google Chrome browser: - Please install the VLC player in installation CD, or download it fromhttp://www.videolan.org/vlc/, as fire fox & chrome has no active-x plug-in, only support push mode to view camera. - Some features like record, two way audio features are also not available on fire fox and chrome browser, here we recommend you to download a plug-in: IE Tab 2 to solve this problem. This add-on will transfer current tab into an IE core tab, then you can use all features like you do on IE.


