1
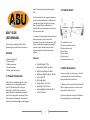
and the like trying, buying and showing their skills. ABU® GLIDE USER MANUAL Thank you for purchasing the ABU® Glide. Please keep this manual for future reference. Contents 1. Product introduction 2. Product details 3. Safety precautions 4. Usage instructions 5. Battery usage and storage 1. Product Introduction ABU is short for Auto Balancing Unit. A two wheel smart scooter designed around the popular "Self Balancing Electric Unicycle Technology". The ABU Glide is similar to a Segway, but with no handlebars and easier to learn than its single wheel counterpart. These little machines are flooding the international market with celebrities, bloggers, video bloggers 2. Product Details We have worked with our engineering partners to create an Auto Balancing Unit (ABU) which is more durable, longer lasting, faster charging than the cheap Chinese units which are available. We have also engineered them to be fit for commercial hire. As always we have opened a full support system offering warranties, repairs, spares and discounted services such as domain names, SEO reports, Social Media management, managed business listings. None of these after-sales support services are offered with any other supplier. Features: Product Weight: 27 lbs Max speed: 10 miles per hour Single Charge Range: 10 Miles Maximum Weight Capacity: 220 lbs Auto Power Off. Max Angle Alarm Charge time 2 – 2.5 hours Operating Time 2-4 hours Interchangeable product shell in a choice of colours 1) Tyre protection cover 2) Pressure sensitive foot pads 3) Status indicator lamp 4) Drive wheels 5) Power switch 6) Charge socket 7) Chassis protection cover 3. Safety Precautions In order to reduce the risk of injury to the rider or other people, please read the following safety precautions fully before use: 1 ) Before each use check if the body of the ABU Glide is complete, without any cracks or Ioose parts, and if the tyres are firm. 2) Switch on the power and check if the battery has enough charge for its intended usage. 1 3) Do not wear high-heeled shoes or any sharp accessories. We suggest you wear safety protection gear such as safety helmet, gloves, leg and knee protectors. 4) In the event of a fall or tumble, always remember to protect yourself first before protecting the ABU Glide. For example do not run into the road to retrieve the ABU if there is a danger of being hit. 5) DO NOT ride on public roads, motorways or in busy public spaces. 6) Please do not ride on wet or bumpy surfaces or on slopes exceeding 15°. 7) We recommend children under the age of 15 are accompanied by a parent or guardian. 8) It is not recommended to ride the ABU Glide on snow or ice. 9) Please do not ride with both hands occupied or full. You will need them to protect yourself in any emergency or fall. 10) Do not lean too far forward, backward or to each side as this will cause a fall. 11) The ABU Glide can be used in light rain for a short period of time but please keep to a minimum. Do not submerge the unit in water. 4. Usage Instructions Please follow these instructions when using the ABU Glide. 1 ) Unit Start-up Place the ABU Glide on the ground and switch on the power. The power indicator lamp will come on and the buzzer will give one “beep”. Note: After starting up the ABU Glide, do not lift it up as when the wheels leave the ground the unit will sound an alarm due to its intelligent protection system. 2) Getting on the ABU Glide Put one foot on the pressure pad and then the other foot. When both feet are on the foot pads you must keep your balance. You can use a wall, tree or doorway to steady yourself until you get used to keeping your balance on your own. The ABU Glide is now ready to move forward. 3) Riding the ABU Glide If at first you find it difficult to get your balance You should use a wall, guardrail or another person to support you until you get familiar with the sensation of self-balancing. Lean forward and the ABU Glide will move 2 forward in an attempt at keeping you upright. To slow or stop moving gradually start leaning back and the ABU Glide will slow to a stop. Use the same technique but in reverse to make the ABU Glide move backwards. Make sure you are always looking where you are going! 4) Turning the ABU Glide After mastering forwards and backward motions you can turn the ABU Glide by leaning your upper body to the side. It is easier to master when the turning angle is relatively large and you only need to pay attention to slight adjustments to your center of gravity. 5) Dismounting the ABU Glide Please reduce your speed to a stop or at least a crawl before dismounting. If the ABU Glide is going too fast you may cause injury to yourself or anybody in the path of the moving unit. 6) Shutdown Power should always be switched off after use. Pick up the ABU Glide and use the power switch on the underside of the unit. 5. Battery Usage and Storage 1) Charging Check the charge interface and ensure it is dry. First plug the output terminal of charger into the charge interface of the ABU Glide and then plug the charger into an AC power source. Please do not plug the charger into a power socket before connecting to the battery. During charging process, the indicator lamp of charger will be red. When charging is complete the indicator lamp of the charger turns green. You can then disconnect the charger from the mains before unplugging the battery. It takes about two hours to fully charge the battery from empty. For your safety you MUST stop using the ABU Glide as soon as you hear the warning beep. The battery low indicator lamp will also flash red. This will extend the service life of the battery and protect from injuries caused by the ABU Glide losing power whilst in use. Please do not use any other chargers or batteries than the ones provided by us as we cannot guarantee the safety or performance of such items and they may affect warranty terms. 2) Swapping to standby battery Gently lay the ABU Glide on a soft surface with the battery compartment facing upwards. Unscrew the battery compartment with a cross head screwdriver, open the plastic case and unscrew the battery rack. Unplug the battery connecting line from the interface install plug-in component; take out the battery, insert the backup battery and plug the battery connecting line into the interface install plug-in component. 3) Battery life If the battery is not being used for long periods of time, we suggest you charge the battery once a month to keep the battery in good condition. 4) Battery storage and maintenance Store the ABU Glide and its components at a temperature between 10 - 30°C. Higher or lower temperatures might affect the performance of the lithium battery. We suggest storing in a ventilated, dry and cool place. 3 AEM Leisure Ltd 22a Trebarwith Crescent Newquay Cornwall TR7 1DX Telephone: 0800 4880108 Email: [email protected] Website: www.AbuGlide.co.uk