1
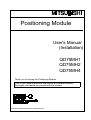
Positioning Module
User's Manual
(Installation)
QD75MH1
QD75MH2
QD75MH4
Thank you for buying the Positioning Module.
Prior to use, please read both this manual and detailed manual
thoroughly and familiarize yourself with the product.
©2005 MITSUBISHI ELECTRIC CORPORATION
‚ SAFETY INSTRUCTIONS ‚
(Always read these instructions before using this equipment.)
Before using this product, please read this manual and the relevant manuals introduced in this manual
carefully and pay full attention to safety to handle the product correctly.
The instructions given in this manual are concerned with this product. For the safety instructions of the
programmable controller system, please read CPU module User's Manual.
In this manual, the safety instructions are ranked as "DANGER" and "CAUTION".
DANGER
Indicates that incorrect handling may cause hazardous conditions,
resulting in death or severe injury.
CAUTION
Indicates that incorrect handling may cause hazardous conditions,
resulting in medium or slight personal injury or physical damage.
Note that the ! CAUTION level may lead to a serious consequence according to the circumstances.
Always follow the instructions of both levels because they are important to personal safety.
Please store this manual in a safe place and make it accessible when required. Always forward it to the
end user.
[INSTALLATION PRECAUTION]
!
CAUTION
‚ Use the PLC within the general specifications environment given in the CPU module User's
Manual to use.
Using this PLC in an environment outside the range of the general specifications may cause
electric shock, fire, malfunction, and damage to or deterioration of the product.
‚ While pressing the installation lever located at the bottom of module, insert the module fixing tab
into the fixing hole in the base unit until it stops. Then, securely mount the module with the fixing
hole as a supporting point.
Incorrect loading of the module can cause a malfunction, failure or drop.
When using the module in the environment of much vibration, tighten the module with a screw.
Tighten the screws within the specified torque range.
Undertightening can cause a drop, short circuit or malfunction.
Overtightening can cause a drop, short circuit or malfunction due to damage to the screws or
module.
‚ Completely turn off the externally supplied power used in the system before installing or
removing the module. Not doing so may damage the product.
‚ Do not directly touch the module's conductive parts and electronic components of the module.
Touching the conductive parts and electronic components of the module could cause an
operation failure or give damage to the module.
A-1
[WIRING PRECAUTION]
!
DANGER
‚ Completely turn off the externally supplied power used in the system before installing or placing
wiring.
Not doing so may cause electric shock or damage to the product.
!
CAUTION
Check the layout of the terminals and then properly route the wires to the module.
Solder connector for external input signal cable properly.
Insufficient soldering may cause malfunction.
Be careful not to let foreign matter such as sawdust or wire chips get inside the module.
These may cause fires, failure or malfunction.
The top surface of the module is covered with protective films to prevent foreign objects such as
cable off cuts from entering the module when wiring.
Do not remove this film until the wiring is complete.
Before operating the system, be sure to remove the film to provide adequate ventilation.
Securely connect the connector for SSCNET cable to the bottom connector on the module.
When removing the cable or power supply cable from the module, do not pull the cable. When
removing the cable with a connector, hold the connector on the side that is connected to the
module.
Pulling the cable that is still connected to the module may cause malfunction or damage to the
module or cable.
The cable used for connecting the QD75MH external input signal cable and SSCNET cable
should not be routed near or bundled with the main circuit cable, power cable and/or other such
load carrying cables other than those for the PLC. These cables should be separated by at least
100mm (3.94inch). They can cause electrical interference, surges and inductance that can lead
to mis-operation.
When pulling out SSCNET cable from SSCNET connector, be sure to put the cap on
SSCNET connector. If the end face of SSCNET connector is dirty, optical transmission is
interrupted and it may cause malfunctions.
Do not see directly the light generated from SSCNET connector of servo amplifier or
QD75MH. When the light gets into eye, may feel something is wrong for eye.
(The light source of SSCNET corresponds to class1 defined in JISC6802 or IEC60825-1.)
If SSCNET cable is added a power such as a major shock, lateral pressure, haul, sudden
bending or twist, its inside distorts or breaks, and optical transmission will not be available.
SSCNET cable should be given loose slack to avoid from becoming smaller than the
minimum bend radius, and it should not be twisted.
Make sure to use SSCNET cable within the range of operating temperature described in this
manual. The optical cable and code part melts down if being left near the fire or high
temperature.
Therefore, do not make it touched the part which becomes high temperature, such as radiator
or regenerative brake option of servo amplifier, or servomotor.
A-2
!
CAUTION
‚ Make sure to lay SSCNET
cable with greater radius than the minimum bend radius.
(Refer to the Section 5.2 Precautions for SSCNET cable wiring.)
‚ Fix the optical cable at the closest part to the connector with bundle material in order to prevent
SSCNET cable from putting its own weight on SSCNET connector.
‚ Never use vinyl tape for optical cord. Plasticizing material in vinyl tape goes into optical fiber and
lowers the optical characteristic. At worst, it may cause wire breakage. If using adhesive tape
for the optical cable laying, the fire resistant acetate cloth adhesive tape 570F (Teraoka
Seisakusho Co., Ltd) is recommended.
If laying with other wires, do not make the optical cable touched wires or cables made from soft
polyvinyl chloride (PVC), polyethylene resin (PE), teflon (Fluorocarbon resin) or nylon which
contains plasticizing material.
‚ If the adhesion of solvent and oil to the code part of SSCNET cable may lower the optical
characteristic and machine characteristic. If it is used such an environment, be sure to do the
protection measures to the optical cord.
‚ When storing, put a cap on the connector part for preventing the connector edge of SSCNET
from getting dirt, dust and so on.
‚ SSCNET connector is put a cap to protect light device inside connector from dust.
For this reason, do not remove a cap until just before mounting SSCNET cable.
Then, when removing SSCNET cable, make sure to put a cap.
‚ Keep the cap for SSCNET connector and the tube for protecting light code end of SSCNET
cable in a plastic bag with a zipper of SSCNET cable to prevent them from becoming dirty.
‚ When changing the servo amplifier or QD75MH, make sure to put cap on SSCNET connector.
When asking repair of servo amplifier for some troubles, make sure to put a cap on SSCNET
connector. When the connector is not put a cap, the light device may be damaged at the transit.
In this case, exchange and repair of light device is required.
A-3
REVISIONS
Print Date
May, 2005
* Manual Number
IB (NA) 0300099-C First Edition
Revision
This manual confers no industrial property rights or any rights of any other kind, nor does it confer any patent
licenses. Mitsubishi Electric Corporation cannot be held responsible for any problems involving industrial property
rights which may occur as a result of using the contents noted in this manual.
ø 2005 MITSUBISHI ELECTRIC CORPORATION
A-4
CONTENTS
1. Overview .......................................................................................................................... 1
2. Specifications ................................................................................................................... 2
3. Handling ........................................................................................................................... 3
3.1 Handling Precautions................................................................................................. 3
4. Part Identification Nomenclature...................................................................................... 4
5. Wiring ............................................................................................................................... 7
5.1 Wiring Precautions..................................................................................................... 9
5.2 Precautions for Wiring The SSCNET Cable ..........................................................12
5.3 SSCNET Cable Wiring ...........................................................................................14
5.4 External Interface.......................................................................................................15
6. External Dimensions ........................................................................................................16
A-5
About Manuals
There are following manuals for this product.
If it is required, please make this table reference and request it.
Relevant Manuals
Manual Number
Manual Name
(Model Code)
Type QD75MH Positioning Module User’s Manual (Details)
IB-0300117
GX Configurator-QP Version2 Operating Manual
SH-080172
(1XB917)
(13JU19)
Conformation to the EMC Directive Instruction
For details on making Mitsubishi PLC conform to the EMC directive instruction when installing it in
your product, please refer to Chapter 3, "EMC Directive and Low Voltage Instruction" of the using
PLC CPU module User's Manual (Hardware).
The CE logo is printed on the rating plate on the main body of the PLC that conforms to the EMC
directive instruction.
For the other EMC Directive guidelines on the servo amplifier and the servomotor, refer to the"
EMC INSTALLATION GUIDELINES" (IB (NA)-67303).
A-6
1. Overview
This manual explains how to handle the Positioning Module, model
numbers QD75MH1, QD75MH2, QD75MH4 (hereinafter collectively
referred to as the QD75MH).
After unpacking the QD75MH, please verify that the corresponding
product as listed below is enclosed in the package.
Model name
QD75MH1
QD75MH2
QD75MH4
Description
QD75MH1 Positioning Module (Single-axis SSCNET type)
QD75MH2 Positioning Module (Dual-axis SSCNET type)
QD75MH4 Positioning Module (Four-axis SSCNET type)
Quantity
1
1
1
Important
The user should arrange for a connector for external input signal cable and SSCNET
provided in the package.
* Connector type
‚ A6CON1 (Soldering type)
‚ A6CON2 (Crimp-contact type)
‚ A6CON3 (Pressure-displacement type)
‚ A6CON4 (Soldering type, useable for straight out and diagonal out)
* A6CON2 Crimp-contact tool
‚ Model name: FCN-363T-T005/H
* A6CON3 Pressure-displacement tool
‚ Model name: FCN-367T-T012/H (Locator Plate)
: FCN-707T-T001/H (Cable Cutter)
: FCN-707T-T101/H (Hand Press)
‚ Supplier’s offices :
cable since it is not
FUJITSU COMPONENTS AMERICA,INC 250E Caribbean Drive Sunnyvale, CA 94089
U. S. A
Tel : (1-408) 745-4900
FUJITSU COMPONENTS EUROPE B.V. Diamantlaam 25, 2132 WV Hoofddorp, The Netherlands
Tel : (31) 23-5560910
FUJITSU COMPONENTS ASIA PTE LTD 102E Pasir Panjang Road, # 04-01 Citilink Warehouse Complex, Singapore
118529
Tel : (1-408) 745-4900
FUJITSU COMPONENTS HONG KONG Suite 913 Ocean Centre, 5 Canton Road. TST,
CO., LTD.
Kowloon, Hong Kong
Tel : (852) 2881-8495
FUJITSU ELECTRONIC COMPONENTS Rm 3105, Bund Center, 222 Yan An Rd(E), Shanghai, 200002
(SHANGHAI) CO., LTD.
Tel : (86) 21-6335-2560
1
2. Specifications
(1) The specifications for the QD75MH1, QD75MH2 and QD75MH4
Item
Number of axes (axis)
SSCNET
cable
SSCNET
length
cable over all
Applicable wire size
Applicable connector
Number of I/O occupied points
(points)
5 V DC current consumption (A)
External dimensions (mm/inch)
Weight (kg/lb.)
Specification
QD75MH2
QD75MH1
QD75MH4
1
2
4
‚ Connection between QD75MH and MR-J3-¸B.
‚ Connection between MR-J3-¸B and MR-J3-¸B.
MR-J3BUS M
‚ Standard code for inside panel.
(Note-1)
‚ 0.15m(0.49ft.), 0.3m(0.98ft.), 0.5m(1.64ft.),
1m(3.28ft.), 3m(9.84ft.)
‚ Connection between QD75MH and MR-J3-¸B.
‚ Connection between MR-J3-¸B and MR-J3-¸B.
MR-J3BUS M-A
‚ Standard code for outside panel.
(Note-1)
‚ 5m(16.40ft.), 10m(32.81ft.), 20m(65.62ft.)
‚ Connection between QD75MH and MR-J3-¸B.
‚ Connection between MR-J3-¸B and MR-J3-¸B.
MR-J3BUS M-B
‚ Long distance cable.
(Note-1)
‚ 30m(98.43ft.), 40m(131.23ft.), 50m(164.04ft.)
The cable length of the SSCNET cable depends on the cable type.
MR-J3BUS¸M: The cable length is 3m(0.98ft.) max. /
MR-J3BUS¸M-A: The cable length is 20m(65.62ft.) max. /
MR-J3BUS¸M-B: The cable length is 50m(164.04ft.) max.
2
0.3 mm (when A6CON1/A6CON4 is used),
AWG#24 to 28 (when A6CON2 is used),
AWG#28 (twised) or AWG#30 (single wire) (when A6CON3 is used)
A6CON1, A6CON2, A6CON3, A6CON4 (sold separately)
32 (I/O assignment: Intelligent function module 32 )
0.60
0.60
0.60
98 (3.86) (H) · 27.4 (1.08) (W) · 90 (3.54) (D)
0.15 (0.33)
0.15 (0.33)
0.16 (0.35)
(Note-1) : ¸ = Cable length
(015: 0.15m (0.49ft.), 03: 0.3m (0.98ft.), 05: 0.5m (1.64ft.), 1: 1m (3.28ft.), 3: 3m (9.84ft.), 5: 5m
(16.40ft.), 10: 10m (32.80ft.), 20: 20m (65.62ft.), 30: 30m (98.43ft.), 40: 40m (131.23ft.), 50: 50m
(164.04ft.) )
(Note-2) : For the general specifications of the QD75MH, see the "User's Manual for the CPU module used".
2
3. Handling
!
CAUTION
‚
Use the PLC within the general specifications environment given in the CPU module
User's Manual to use.
Using the PLC outside the general specification range environment could lead to
electric shocks, fires, malfunctioning, product damage or deterioration.
‚ While pressing the installation lever located at the bottom of module, insert the
module fixing tab into the fixing hole in the base unit until it stops. Then, securely
mount the module with the fixing hole as a supporting point.
Incorrect loading of the module can cause a malfunction, failure or drop.
When using the module in the environment of much vibration, tighten the module
with a screw.
Tighten the screws within the specified torque range.
Undertightening can cause a drop, short circuit or malfunction.
Overtightening can cause a drop, short circuit or malfunction due to damage to the
screws or module.
‚ Completely turn off the externally supplied power used in the system before
installing or removing the module. Not doing so may damage the product.
‚ Do not directly touch the module's conductive parts and electronic components of
the module. Touching the conductive parts and electronic components of the
module could cause an operation failure or give damage to the module.
3.1 Handling Precautions
(1) Since the module case is made of resin, do not drop it or subject it to strong impact.
(2) The module can easily be secured to the base unit using the hooks located at the top of
the module. However, if the module is to be placed in an area that is subject to strong
vibration or impact, we recommend that it is secured with module mounting screws (to
be provided by the user). In this case, tighten the module mounting screws within the
following torque range.
Module mounting screws (M3 · 12): Tightening torque range is from 0.36 to 0.48 N©m.
3
4. Part Identification Nomenclature
(1) Part identification nomenclature
(a) QD75MH1
(b) QD75MH2
QD75MH1
RUN
(c) QD75MH4
QD75MH2
AX1
RUN
1)
ERR
QD75MH4
AX1
AX2
RUN
1)
ERR
ERR
AX1
AX2
AX1
AX3
AX4
2)
QD75MH1
1)
QD75MH4
AX1
AX2
2)
2)
3)
3)
QD75MH2
3)
Number
AX1
AX2
AX3
AX4
Name
Number
1)
LED display
3)
2)
External device connector
Name
SSCNET
cable connector
(2) LED display contents
QD75MH4
RUN
ERR
AX1
AX2
AX3
AX4
LED name
Display contents
RUN
On: Operating normally
Off: Hardware error/ watch dog timer error
occurrence
AX1
On: Axis 1 is operating
Flashing: Axis 1 error
Off: Axis 1 is stopped
AX2
On: Axis 2 is operating
Flashing: Axis 2 error
Off: Axis 2 is stopped
AX3
On: Axis 3 is operating
Flashing: Axis 3 error
Off: Axis 3 is stopped
AX4
On: Axis 4 is operating
Flashing: Axis 4 error
Off: Axis 4 is stopped
ERR
On: System error occurrence
Flashing: Axis error
Off: Normal
All LED on the QD75MH may be ON when there is an error in the QD75MH hardware.
4
(3) External device connector signal layout
Pin layout
B20
B19
B18
B17
B16
B15
B14
B13
B12
B11
B10
B9
B8
B7
B6
B5
B4
B3
B2
B1
A20
A19
A18
A17
A16
A15
A14
A13
A12
A11
A10
A9
A8
A7
A6
A5
A4
A3
A2
A1
Front view of the
module
Axis 4 (AX4)
Axis 3 (AX3)
Axis 2 (AX2)
Axis 1 (AX1)
Pin No. Signal name Pin No. Signal name Pin No. Signal name Pin No. Signal name
2B20
2B19
2B18
2B17
2B16
2B15
2B14
2B13
2B12
2B11
2B10
2B9
2B8
2B7
2B6
2B5
2B4
2B3
2B2
2B1
No connect
No connect
No connect
No connect
No connect
No connect
No connect
No connect
No connect
No connect
No connect
No connect
No connect
COM
COM
CHG
STOP
DOG
RLS
FLS
2A20
2A19
2A18
2A17
2A16
2A15
2A14
2A13
2A12
2A11
2A10
2A9
2A8
2A7
2A6
2A5
2A4
2A3
2A2
2A1
No connect
No connect
No connect
No connect
No connect
No connect
No connect
No connect
No connect
No connect
No connect
No connect
No connect
COM
COM
CHG
STOP
DOG
RLS
FLS
1B20
1B19
1B18
1B17
1B16
1B15
1B14
1B13
1B12
1B11
1B10
1B9
1B8
1B7
1B6
1B5
1B4
1B3
1B2
1B1
PULSER BPULSER ANo connect
No connect
No connect
P5
SG
No connect
No connect
No connect
No connect
No connect
EMI.COM
COM
COM
CHG
STOP
DOG
RLS
FLS
1A20
1A19
1A18
1A17
1A16
1A15
1A14
1A13
1A12
1A11
1A10
1A9
1A8
1A7
1A6
1A5
1A4
1A3
1A2
1A1
PULSER B+
PULSER A+
No connect
No connect
No connect
P5
SG
No connect
No connect
No connect
No connect
No connect
EMI
COM
COM
CHG
STOP
DOG
RLS
FLS
( Note-1): Pin No. "1
" indicates the pin No. for the right connector. Pin No. "2
"
indicates the pin No. for the left connector.
( Note-2): When 1-axis module is used, pin Nos. 1B1 to 1B7 are "No connect".
( Note-3): For 1-axis module and 2-axis module do not have AX3 and AX4 connector of the
left side.
5
5. Wiring
!
‚
DANGER
Completely turn off the externally supplied power used in the system before
installing or placing wiring.
Not doing so may cause electric shock or damage to the product.
!
CAUTION
‚
Check the layout of the terminals and then properly route the wires to the module.
‚ Solder connector for external input signal cable properly.
Insufficient soldering may cause malfunction.
‚ Be careful not to let foreign matter such as sawdust or wire chips get inside the
module. These may cause fires, failure or malfunction.
‚ The top surface of the module is covered with protective films to prevent foreign
objects such as cable off cuts from entering the module when wiring.
Do not remove this film until the wiring is complete.
Before operating the system, be sure to remove the film to provide adequate
ventilation.
‚ Securely connect the connector for the SSCNET cable to the bottom connector
on the module.
‚ When removing the cable or power supply cable from the module, do not pull the
cable. When removing the cable with a connector, hold the connector on the side
that is connected to the module.
Pulling the cable that is still connected to the module may cause malfunction or
damage to the module or cable.
‚ The cable used for connecting the QD75MH external input signal cable and
SSCNET cable should not be routed near or bundled with the main circuit cable,
power cable and/or other such load –carrying cables other than those for the PLC.
These cables should be separated by at least 100mm (3.94inch) They can cause
electrical interference, surges and inductance that can lead to mis-operation.
‚ When pulling out the SSCNET cable from SSCNET connector, be sure to put
the cap on the SSCNET connector. If the end face of SSCNET connector is
dirty, optical transmission is interrupted and it may cause malfunctions.
‚ Do not see directly the light generated from SSCNET connector of servo amplifier
or QD75MH. When the light gets into eye, may feel something is wrong for eye.
(The light source of SSCNET corresponds to class1 defined in JISC6802 or
IEC60825-1.)
‚ If optical fiber is added a power such as a major shock, lateral pressure, haul,
sudden bending or twist, its inside distorts or breaks, and optical transmission will
not be available.
Optical cord should be given loose slack to avoid from becoming smaller than the
minimum bend radius, and it should not be twisted.
6
!
CAUTION
‚
Make sure to use SSCNET cable within the range of operating temperature
described in this manual. The optical cable and code part melts down if being left
near the fire or high temperature.
Therefore, do not make it touched the part which becomes high temperature, such
as radiator or regenerative brake option of servo amplifier, or servomotor.
‚ Make sure to lay SSCNET cable with greater radius than the minimum bend
radius. (Refer to the Section 5.2 Precautions for SSCNET cable wiring.)
‚ Fix the optical cable at the closest part to the connector with bundle material in
order to prevent SSCNET cable from putting its own weight on SSCNET
connector.
‚ Never use vinyl tape for optical cord. Plasticizing material in vinyl tape goes into
optical fiber and lowers the optical characteristic. At worst, it may cause wire
breakage. If using adhesive tape for the optical cable laying, the fire resistant
acetate cloth adhesive tape 570F (Teraoka Seisakusho Co., Ltd) is recommended.
If laying with other wires, do not make the optical cable touched wires or cables
made from soft polyvinyl chloride (PVC), polyethylene resin (PE), teflon
(Fluorocarbon resin) or nylon which contains plasticizing material.
‚ If the adhesion of solvent and oil to the code part of SSCNET cable may lower the
optical characteristic and machine characteristic. If it is used such an environment,
be sure to do the protection measures to the optical cord.
‚ When storing, put a cap on the connector part for preventing the connector edge of
SSCNET from getting dirt, dust and so on.
‚ SSCNET connector is put a cap to protect light device inside connector from dust.
For this reason, do not remove a cap until just before mounting SSCNET cable.
Then, when removing SSCNET cable, make sure to put a cap.
‚ Keep the cap for SSCNET connector and the tube for protecting light code end of
SSCNET cable in a plastic bag with a zipper of SSCNET cable to prevent them
from becoming dirty.
‚ When changing the servo amplifier or QD75MH, make sure to put cap on
SSCNET connector. When asking repair of servo amplifier for some troubles,
make sure to put a cap on SSCNET connector.
When the connector is not put a cap, the light device may be damaged at the
transit. In this case, exchange and repair of light device is required.
7
5.1 Wiring Precautions
(1) Use separate cables for connecting to the QD75MH and for the power cable that create
surge and inductance.
(2) The cable for connecting QD75MH can be placed in the duct or secured in place by
clamps. If the cable is not placed in the duct or secured by clamps, unevenness or
movement of the cable or careless pulling on it could result in damage to the unit or
cable or defective cable connections could cause mis-operation of the unit.
(3) If a duct is being used and cables to connect to QD75MH are separated from the power
line duct, use metal piping.
Ground the pipes securely after metal piping.
(4) The cable is to use the twisted pair shielded cable (wire size 0.3 mm 2 ). The shielded
must be grounded on the QD75MH side. (The following figure shows a wiring example.)
(5) Use separate shielded cables of the forced stop input signal (EMI, EMI.COM), limit
signal (FLS, RLS, DOG, STOP, CHG, COM) and etc., and manual pulse generator
signal (PULSER A+, PULSER A-, PULSER B+, PULSER B-, P5, SG) for connecting to
the QD75MH. They can cause electrical interference, surges and inductance that can
lead to mis-operation.
[Wiring example of shielded cable]
The following shows a wiring example for noise reduction in the case where the
connector (A6CON1) is used.
Connector
(A6CON1)
For forced stop
input signal
Shielded
cable
For limit signal and etc.
For manual pulse generator signal
To QD75MH
The length between the connector and the shielded
cables should be the shortest possible.
8
Use the shortest possible length to
ground the 2mm or more FG wire.
(The shield must be grounded on
the QD75MH side.)
[Processing example of shielded cables]
Connections of FG wire and each shielded cable
Remove the covering from all shielded cables and bind
the appeared shield with a conductive tape.
Coat the wire with
insulaing tape.
Solder the shield of any one of the
shielded cables to the FG wire.
Assembling of connector (A6CON1)
Wrap the coated parts
with a heat contractile
tube.
9
(6) To make this product conform to the EMC directive instruction, be sure to used of a
AD75CK type cable clamp (manufactured by Mitsubishi Electric) for grounding
connected to the control box and the shielded cable/ the shielded cable.
Inside control box
QD75MH
20cm(7.88inch)
to 30cm(11.82inch)
AD75CK
[How to ground shielded cable using AD75CK]
Shielded cable
Shield
Ground terminal
Ground terminal installation screw (M4 8 screw)
Installation screw to control box (M4 screw)
Using the AD75CK, you can tie four cables of about 7mm outside diameter together
for grounding.
10
5.2 SSCNET
Cable Precautions
SSCNET cable is made from optical fiber. If optical fiber is added a power such as a
major shock, lateral pressure, haul, sudden bending or twist, its inside distorts or
breaks, and optical transmission will not be available. Make sure to use SSCNET
cable within the range of operating temperature described in this manual. The optical
cable and code part melts down if being left near the fire or high temperature.
Therefore, do not make it touched the part which becomes high temperature, such as
radiator or regenerative brake option of servo amplifier, or servomotor.
(1) Ambient temperature
Ambient temperature [°C ] ([°F ]) (Note-1)
cable
SSCNET
MR-J3BUS
M
MR-J3BUS
M-A
MR-J3BUS
M-B
-40 to 80 (-40 to 176)
-20 to 70 (-4 to 158)
( Note-1): It is a value in optical cable (code) unit.
(2) Minimum bend radius
Make sure to lay SSCNET cable with greater radius than the
minimum bend radius.
If the SSCNET cable is less than the minimum bend radius,
optical transmission is interrupted and it may cause malfunctions.
Minimum bend radius [mm] ([inch])
cable
SSCNET
MR-J3BUS
M
25 (0.98)
MR-J3BUS
M-A
Reinforcement film cable : 50 (1.97)
Code part : 25 (0.98)
MR-J3BUS
M-B
Reinforcement film cable : 50 (1.97)
Code part : 30 (1.18)
11
(3) Tension
If tension is added on SSCNET cable, the increase of
transmission loss occurs because of external force which
concentrates on the fixing part of SSCNET cable or the
connecting part of SSCNET connector. At worst, the breakage of
SSCNET cable or damage of SSCNET connector may occur.
For SSCNET cable laying, handle without putting forced tension.
cable
SSCNET
Maximum tension [N]
MR-J3BUS
M
The cable length is 0.15 [m](0.49 [ft.]) : 70/
The cable length is 0.3 to 3 [m](0.98 to 9.8 [ft.]) : 140
MR-J3BUS
M-A
The cable length is 5 to 20 [m](16.40 to 65.62 [ft.]) : 420
(Reinforcement film cable)
MR-J3BUS
M-B
The cable length is 30 to 50 [m](98.43 to 164.04 [ft.]) : 980
(Reinforcement film cable)
(4) Lateral pressure
If lateral pressure is added on SSCNET cable, the optical cable
itself distorts, internal optical fiber gets stressed, and then
transmission loss will increase. At worst, the breakage of
SSCNET cable may occur. As the same condition also occurs at
cable laying, do not tighten up optical cable with a thing such as
nylon band (TY-RAP).
(5) Twisting
If SSCNET cable is twisted, it will become the same stress added
condition as when local lateral pressure or bend is added.
Consequently, transmission loss increases, and the breakage of
SSCNET cable may occur at worst.
12
cable wiring
Fix the cable at the closest part to the connector with bundle
material in order to prevent SSCNET cable from putting its own
weight on SSCNET connector.
• Wiring duct
If the duct is below the bottom of the module, leave sufficient
clearance to eliminate effects on the SSCNET cable, limit the
space height to 70 mm (2.76 inch) MIN.
Unit : mm (inch)
70(2.76)
5.3 SSCNET
• Bundle fixing
Optical cord
Loose slack
Bundle
materialRecommended:
Cable
NK clamp SP type(NIX, INC.)
13
5.4 External Interface
The internal circuits of interface for connecting external devices to the QD75MH are
shown by the schematic diagrams in the tables below.
(1) Input
External wiring
When upper-limit
switch is not used
Pin No.
Internal circuit
Upper-limit LS signal
1A1
(Note-4)
When lower-limit
switch is not used
Lower-limit LS signal
1A2
(Note-4)
Near-point dog signal
1A3
(Note-4)
(Note-2)
24 V DC
(Note-1)
FLS
RLS
DOG
1A4
Stop signal
1A5
External command
CHG
signal/switching signal
1A6
Need for wiring
Signal name
STOP
Common
COM
Forced stop input
signal
EMI
1A7
1A8
1B8
5V
A
B
OV
Manual pulse
generator
(MR-HDP01)
(+)
1A19
Manual pulse
generator A phase
(-)
1B19
(+)
1A20
(-)
1B20
(5V)
1A15
(5V)
1B15
(0V)
1A14
(0V)
1B14
Manual pulse
generator B phase
5VDC
EMI.COM
PULSER A+
PULSER APULSER B+
PULSER B-
Manual pulse
generator power supply
P5
(+5VDC)
(Note-3), (Note-5)
Manual pulse
generator power supply SG
(GND) (Note-5)
1A10
—
—
—
( Note-1): The symbols in Need for wiring column indicate the following meanings:
•
: Wiring is necessary for positioning. •
: Wiring is necessary depending on the situation.
( Note-2): Either polarity can be connected to the common (COM).
( Note-3): If using separately-placed power supply as manual pulse generator power supply, do not connect power supply
5V(P5) on QD75MH side. Use separately-placed power supply as 5V stabilized power supply. Using power
supply of different voltage between P5 and SG could lead to faults.
( Note-4): When using external input signal of servo amplifier, set the detailed parameters 1. In addition, refer to "Type
QD75MH Positioning Module User’s Manual (Details)".
( Note-5): Do not use P5 and SG for other than manual pulse generator power supply.
14
6. External Dimensions
QD75MH1
QD75MH2
QD75MH4
QD75MH1
QD75MH2
QD75MH4
RUN
AX1
RUN
ERR
RUN
AX1
AX2
ERR
ERR
AX1
AX2
AX3
AX4
QD75MH4
AX1
AX2
AX1
AX3
AX4
AX1
AX2
QD75MH2
QD75MH1
70(2.76)
98(3.86)
27.4(1.08)
90(3.54)
46(1.81)
136(5.35)
Unit : mm (inch)
15
Warranty
Mitsubishi will not be held liable for damage caused by factors found not to be the cause of Mitsubishi;
machine damage or lost profits caused by faults in the Mitsubishi products; damage, secondary damage,
accident compensation caused by special factors unpredictable by Mitsubishi; damages to products other
than Mitsubishi products; and to other duties.
! For safe use of the product
• This products have been manufactured as a general-purpose part for general industries, and has not been
designed or manufactured to be incorporated in a device or system used in purposes related to human
life.
• Before using the product for special purposes such as nuclear power, electric power, aerospace, medicine
or passenger movement vehicles, consult with Mitsubishi.
• This product has been manufactured under strict quality control. However, when installing appropriate
backup or failsafe functions in the system.
HEAD OFFICE : 1-8-12, OFFICE TOWER Z 14F HARUMI CHUO-KU 104-6212, JAPAN
NAGOYA WORKS : 1-14, YADA-MINAMI5, HIGASHI-KU, NAGOYA, JAPAN
When exported from Japan, this manual does not require application to the Ministry of Economy,
Trade and Industry for service transaction permission.
Specifications subject to change without notice.
Printed in Japan on recycled paper.