1
Manual
Nero Recode
Copyright and Trademark Information
Copyright and Trademark Information
This document, like the software described therein, is provided as a license and may only be used or reproduced in accordance with
the licensing agreement. The contents of this document, as well as the associated software, is subject to change without prior notice.
Nero AG rejects any responsibility for the correctness of the contents of this document and rejects any claims that transcend the
clauses of the guarantee agreement.
This document and all of its contents are protected by copyright and are the property of Nero AG. All rights reserved. In addition, this
document contains material that is protected by internationally valid copyright. This document may not be reproduced, transmitted, or
transcribed in whole or in part without the express written permission of Nero AG.
Please keep in mind that existing graphics, pictures, videos, music titles or other materials that you may wish to insert or transcribe
into projects may be protected by copyright. The unauthorized use of this type of material in your projects may violate the rights of
the owner of the copyright. Make sure that you obtain all necessary authorizations from the owner of the copyright.
Unless you own the copyright, have permission from the copyright owner or your actions fall under the "fair use" provisions of copyright law, you may be violating national or international copyright laws. The transcribing, re-formation, modification or publication of
copyright-protected material may lead to claims for damages and the enforcement of other legal measures against you. If you are
unsure of your rights, you should contact your legal advisor.
Some Nero Suite applications require technologies developed by third-party manufacturers, some of which are contained in the Nero
Suite as demo versions. These applications can be activated online free of charge or by sending an activation fax to have unlimited
use of the version. Nero will only transmit the data necessary for activation of the technology licensed from third parties. For unlimited use of Nero Suite, it is therefore necessary to have an Internet connection or a fax machine.
Copyright © 2006-2008 Nero AG and its licensors. All rights reserved.
Nero, the Nero logo, Nero Digital, Nero LiquidTV, Nero RescueAgent, Nero SmartDetect, NeroMAX, NeroMix and UltraBuffer are
brands or protected trademarks of Nero AG.
Adobe, Acrobat, Acrobat Reader and Premiere are brands or protected trade names of Adobe Systems, Incorporated.
AMD Athlon, AMD Opteron, AMD Sempron, AMD Turion, ATI Catalyst and ATI Radeon are brands or registered trademarks of Advanced Micro Devices, Inc.
Apple, iPhoto, iPod, iTunes, iPhone, iPhoto, FireWire, and Mac are brands or registered trade names of Apple, Inc.
Blu-ray Disc is a brand of Blu-ray Disc Association.
DLNA is a registered trademark of Digital Living Network Alliance.
Dolby, Pro Logic and the double-D symbol are brands or registered trademarks of Dolby Laboratories, Inc.
DTS and DTS Digital Surround are brands or registered trademarks of DTS, Inc.
Gracenote, CDDB, CDKey, MusicID, DVD Key, Playlist, Playlist Plus and More Like This are brands or registered trademarks of
Gracenote, Inc.
Intel, Pentium and Core are brands or registered trademarks of Intel Corporation.
Linux is a registered trademark of Linus Torvalds.
Memorex is a registered trademark of Memorex Products, Inc.
ActiveX, ActiveSync, DirectX, DirectShow, Internet Explorer, Microsoft, HDI, MSN, Outlook, Windows, Windows Mobile, Windows
NT, Windows Server, Windows Vista, Windows Media, Xbox, the Windows Vista start button and the Windows logo are brands or
registered trademarks of Microsoft Corporation.
NVIDIA, GeForce and ForceWare are brands or registered trademarks of NVIDIA Corporation.
Nokia is a registered trademark of Nokia Corporation.
CompactFlash is a registered trademark of SanDisk Corporation.
Sony, Memory Stick, PlayStation, PLAYSTATION and PSP are brands or registered trademarks of Sony Corporation.
UPnP is a registered trademark of the UPnP Implementers Corporation.
Labelflash is a registered trademark of Yamaha Corporation.
The trademarks mentioned here are named for information purposes only. All trade names and trademarks are the property of their
respective owners.
Nero AG, Im Stoeckmaedle 13-15, D-76307 Karlsbad, Germany
Nero Recode
Table of contents
Table of contents
1
1.1
1.2
1.3
Start Successfully
About the manual
About This Application
Working with Nero Recode
5
5
5
6
2
Launching the program
8
3
3.1
3.1.1
3.2
3.2.1
3.2.2
3.2.3
3.2.4
3.2.5
3.3
3.3.1
3.3.2
3.3.3
3.4
3.4.1
3.5
3.5.1
User interface
Main window
Extended area - Main window
Basic settings
General tab
DVD tab
Nero Digital tab
Audio tab
File I/O tab
Import screen
DVD-Video Files/Nero Digital Titles tab
Data Files tab
Title import profiles
Screen Burn Settings
Extended area (Burn Settings)
Recoding and Burning screen
Extended Area - Recoding and Burning
9
9
10
11
12
12
13
14
15
15
16
18
19
20
22
23
25
4
4.1
4.2
Recoding an Entire DVD
Setting Options for Recoding and Entire DVD
Recoding an entire DVD to DVD
26
26
27
5
5.1
5.2
5.3
5.4
Recoding a main movie to DVD
Setting Options for Recoding a Main Movie to DVD
Trim Movie window
Default Streams window
Recoding a main movie to DVD
30
30
31
33
34
6
6.1
6.2
Compiling a DVD
Setting Options for Compiling a DVD
Compiling a DVD
36
36
38
7
7.1
7.2
7.2.1
7.2.2
7.2.3
7.2.4
Recoding a DVD to Nero Digital
Setting Options for Recoding a DVD to Nero Digital
Nero Digital Video Settings
Deinterlace tab
Framerate Tab
Crop tab
Resolution tab
41
41
44
45
45
46
47
Nero Recode
III
Table of contents
7.2.5
7.3
7.3.1
7.3.2
7.3.3
7.3.4
7.4
7.5
7.5.1
7.6
7.7
Plug-ins tab
Encoder settings
General settings
Encoding Tools
Visual Enhancements
Multithreading
Nero Digital Audio Settings
Nero Digital™ Subtitle Settings
Subtitle formats
Chapter window
Recoding DVD's and videos to Nero Digital
47
48
49
50
51
51
52
52
55
55
56
8
8.1
8.2
Recoding a Main Movie to Nero Digital
Setting Options for Recoding a Main Movie to Nero Digital
Recoding a main movie to Nero Digital™
60
60
61
9
9.1
9.2
Technical Information
System requirements
Versions of Nero Recode
64
64
64
10
Glossary
65
11
Index
68
12
Contact
71
Nero Recode
IV
Start Successfully
1
Start Successfully
1.1
About the manual
This manual is intended for all users who want to learn how to use Nero Recode. It is process-based and explains how to achieve a specific objective on a step-by-step basis.
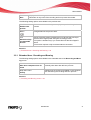
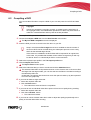
In order to make best use of this documentation, please note the following conventions:
Indicates warnings, preconditions or instructions that have to be precisely followed.
Indicates additional information or advice.
1. Start …
A number at the beginning of a line indicates a request for action. Carry out these actions in the order specified.
Indicates an intermediate result.
Indicates a result.
1.2
OK
Indicates text passages or buttons that appear in the program interface. They are displayed in bold print.
(see...)
Indicates references to other chapters. They are executed as links
and are shown in red and underlined.
[…]
Indicates key combinations for entering commands.
About This Application
Nero Recode allows you to copy non-copy-protected DVD videos to DVD, which is a method
of archiving your content. If the source video is larger than 4.7 GB, it is compressed to fit on
a single-layer DVD without loss of quality.
You can also exclude unwanted material on the source DVD from the copying process (including subtitles or soundtracks) thereby making space for additional videos or for better video quality. The target DVD can also be written to the hard drive as a DVD video index or as
a so-called disc image.
Of course, you can also compile content from different (non-copy protected) DVDs, export
them to the innovative Nero Digital MPEG-4/H.264 AVC format and burn them to create your
own collection.
No matter whether the video is intended for playing on mobile devices or HDTV, the various
export profiles allow you to adjust the output format to your requirements - and you always
get the best quality for your respective file size thanks to the various export profiles.
Thus, Nero Recode lets you copy, recompile, and recode the content of DVs and DVDs and
then to burn the results to disc.
Nero Recode
5
Start Successfully
1.3
Working with Nero Recode
Basically, choose the task you wish from the selection in the Nero Recode main window.
This manual contains a chapter for each task that describes all of the steps required for its
completion.
To complete the task, you simply navigate through the different steps (a new screen is displayed for each step). For each screen, the manual contains a chapter in which all areas are
described in detail.
All the tasks that you can carry out with Nero Recode are basically divided into four steps:
Selecting the required task
Importing the files you want to recode
Setting the options for Nero Digital and for the burn process
Recoding and Burning the disc
Use the Next and Back buttons to move back and forth through the three screens while performing a task. This means that you can also change settings that you have already made
and undo actions.
Each screen contains tool tips, detailed information and explanations for the
buttons, icons and menus. Move the mouse pointer over a control element for a
few seconds to see the tooltip.
You should know the following definitions in Nero Recode:
Encode
Means the conversion of a video of any format into another format, e.g.
MPEG-2 or Nero Digital (MPEG-4). A corresponding encoder is required
for each target format.
Transcoding
Means the conversion of a video from one particular format into another,
e.g. from Xvid to MPEG-2.
In this manual transcoding is used synonymously with encoding.
Recoding
Means the conversion of an existing video with certain properties (e.g. bit
rate 2500 kbps) into the same format with different properties (e.g. bit rate 1990 kbps).
Decoding
Means opening or playing a video that has been encoded in a particular
format.
The best way to create a simple 1:1 copy of a DVD is by using Nero Express or
Nero Burning ROM. There is no compression whatsoever in this case. The recordable disc used must have as much free disk space as is shown for the content of the original DVD. You can find detailed instructions on how to work with
the application in the separate Nero Express and Nero Burning ROM user
manuals.
Nero Recode
6
Start Successfully
Copyright
Unless you possess the copyright yourself, or at least have the permission of
the copyright holder, the unauthorized reproduction of discs may be a breach of
national or international law and may lead to severe penalties!
Nero Recode
7
Launching the program
2
Launching the program
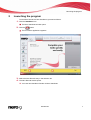
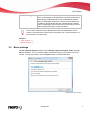
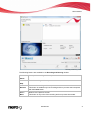
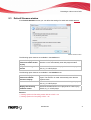
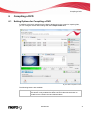
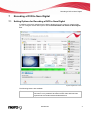
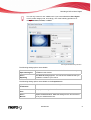
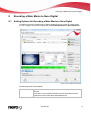
To start Nero Recode via Nero StartSmart, proceed as follows:
1. Click the StartSmart icon.
The Nero StartSmart window opens.
2. Click the
button.
The list of Nero applications appears.
Nero StartSmart window
3. Select the Nero Recode entry in the selection list.
4. The Nero Recode window opens.
You have launched Nero Recode via Nero StartSmart.
Nero Recode
8
User interface
3
User interface
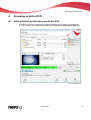
3.1
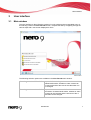
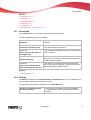
Main window
The user interface for Nero Recode consists of a main window and an expandable area. After selecting a task in the Nero Recode screen, complete the task by navigating through the
various steps with a new screen displayed for each.
Main window
The following selection options are available in the Nero Recode main window:
Recoding an entire DVD to DVD
Imports DVDs including their menus and extras. Unwanted audio tracks, subtitles or video content can
be removed and the structure of the video titles can
be changed.
Recoding a main movie to DVD
Imports the main movie on a DVD without menus
and extras. Unwanted audio tracks, subtitles or video
content can be removed and the structure of the video titles can be changed.
Nero Recode
9
User interface
Compiling a DVD
Imports video titles and compiles an individual DVD
from one or more DVDs. Unwanted audio tracks,
subtitles or video content can be removed and the
structure of the video titles can be changed.
Recoding DVDs and videos to
Nero Digital
Imports video titles from one or more DVDs and converts them to Nero Digital (MPEG-4) files. Unwanted
audio tracks, subtitles or video content can be removed and the structure of the video titles can be
changed.
Recoding the main movie to Nero Digital
Imports the main movie from a DVD without menus
and extras and converts it to Nero Digital (MPEG-4)
files. Unwanted audio tracks, subtitles or video content can be removed and the structure of the video
titles can be changed.
The following buttons are available:
More
Opens and closes the extended area in which the basic Nero Recode settings
can be made.
?
Displays the online help as well as the version and manufacturer information.
Exit
Closes Nero Recode.
Each screen contains tool tips, detailed information and explanations for the
buttons, icons and menus. Move the mouse pointer over a control element for a
few seconds to see the tooltip.
See also:
Extended area - Main window 10
3.1.1 Extended area - Main window
The Nero Recode user interface consists of a main window and an extended area. Clicking
the More button opens the expanded area.
The following buttons are available in the extended area:
Options
Calls up a window containing various tabs that allow you set the
way the program operates.
Erasing a Disc
Erases a rewritable disc.
Disc Info
Calls up information about the disc in the drive.
Nero Recode
10
User interface
Nero CoverDesigner
Launches Nero CoverDesigner in a new window.
Nero CoverDesigner is an application in the Nero 8 Suite and is
automatically installed during the main installation procedure.
Nero CoverDesigner allows you to create and print labels and
booklets for burned DVDs and CDs. Please see the separate
Nero CoverDesigner user manual for full instructions on how to
make professional looking covers and labels.
Each screen contains tool tips, detailed information and explanations for the
buttons, icons and menus. Move the mouse pointer over a control element for a
few seconds to see the tooltip.
See also:
Main window 9
Basic settings 11
3.2
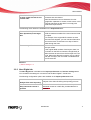
Basic settings
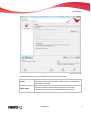
The Nero Recode Options window has the General, DVD, Nero Digital, Audio, and File
I/O tabs available. You can customize Nero Recode according to your preferences in this
window. To open the window, click the Options button in the extended area.
Nero Recode Options window
Nero Recode
11
User interface
See also:
General tab 12
DVD tab 12
Nero Digital tab 13
Audio tab 14
File I/O tab 15
Extended area - Main window 10
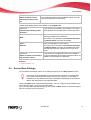
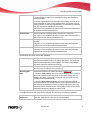
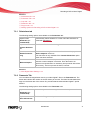
3.2.1 General tab
On the General tab, you can define general Nero Recode settings.
The following setting options are available:
Button
This enables all warnings if these have been disabled
manually.
Enable All
Check box
If this check box is enabled, the program is minimized
to the status bar when minimized.
If minimize, minimize to tray
Check box
If this check box is enabled, the disc is not ejected after
the burn process.
Do not eject the disc after encoding/burning
Check box
If this check box is enabled, brief explanation texts appear when you move the cursor over individual items of
the Nero Recode interface.
Show help dialogs
Check box
Offer to save detailed report
after successful burn process
If this check box is enabled, Nero Recode offers the
option, after each burn process, of saving a report that
was created during the burn process.
See also:
Basic settings 11
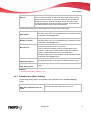
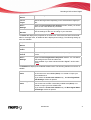
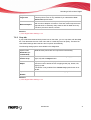
3.2.2 DVD tab
The DVD tab is divided into the Import DVD and Output DVD areas. You can define the settings for DVD importing and outputting in this tab.
The following check boxes are available on the Import DVD area:
Prompt to include DVD data files when importing
If this check box is enabled, content is transferred,
i.e. copied as well, when a DVD with data content is
imported.
Nero Recode
12
User interface
Relax DVD-Video specification
to allow 16-bit Unicode for the
volume label
If this check box is enabled, limitations on the use of
character sets are relaxed.
Nero Recode does not use characters from languages like Japanese or Korean, which have a 16-bit
Unicode character set that does not comply with
DVD-Video requirements.
The following check boxes are available on the Output DVD area:
Remove P-UOPs (Prohibited
User Operations) from target
disc
If this check box is enabled, the locked areas of a
DVD are made accessible to the user when the DVD
is copied.
For example, if the original DVD contains an area
that cannot be skipped, you can use Nero Recode to
remove the block so that users can skip or fast forward through the area.
Remove Layer Break
If this check box is enabled, Nero Recode removes
the layer break.
If the original DVD consists of two layers, there is a
command on the DVD to freeze the image briefly to
allow the laser to switch from the first layer to the second. When Nero Recode is used to copy to a DVD
with just one layer, this command is redundant and
can be removed.
See also:
Basic settings 11
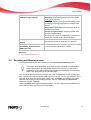
3.2.3 Nero Digital tab
The Nero Digital tab is divided into the Import preferences and Various settings areas.
You can define the settings for conversion into the Nero Digital™ format here.
The following configuration options are available in the Import preferences area:
Check box
Analyze files while importing
Check box
Keep interlaced content if
possible
If this check box is enabled, Nero Recode performs an
analysis of the video file during the importing process.
If this check box is enabled, Nero Recode keeps the
interlaced content of a video file, provided that this is
possible.
Nero Recode
13
User interface
Check box
Keep input resolution for interlaced encodings
If this check box is enabled, Nero Recode keeps the input resolution of the video file if encoding should be carried out with the interlaced feature.
The resolution is not changed and picture edges are not
trimmed.
Check box
Prefer motion adaptive deinterlacing method
If this check box is enabled, Nero Recode selects the
motion-adaptive deinterlacing method as the preferred encoding method.
Even quick motion sequences are extremely sharp and
detailed. However, burning is slower.
Drop-down menu
Selects the method for changing video resolution.
Default resizing method:
Bilinear interpolation is selected by default.
The following check boxes are available in the Various settings area:
Enable classic set of Nero
Digital profiles
Activates the classical set of Nero Digital Profiles, available in the screens My Nero Digital Disc and My Nero
Digital Film Backup in the drop-down menu Nero Digital Profiles.
If the check box is disabled, Nero Digital AVC and Nero
Digital Standard are offered.
Auto-close iTunes after iPod
transfer
If this check box is enabled, iTunes is automatically
closed after transcoding into Apple iPod video.
Never write extra track to allow low-memory device
playback
If this check box is enabled, the creation of a special extra track is prevented.
Certified players with low RAM can play long movies.
See also:
Basic settings 11
3.2.4 Audio tab
The Audio tab is divided into the Preview and Decoding areas. You can define audio quality settings in this tab.
The Preview area features a drop-down menu. You can use this menu to choose the preview mode for audio that is best suited to your hardware and to your speakers.
The Decoding area features the Use dynamic range compression for decoding Dolby
Digital tracks check box. If this check box is enabled, the level control for Dolby® Digital
tracks is adjusted in order to reduce hissing and static noise.
See also:
Basic settings 11
Nero Recode
14
User interface
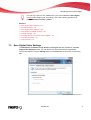
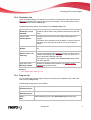
3.2.5 File I/O tab
On the File I/O tab you can define the method for accessing a drive for direct conversion.
You can choose the SPTI/ASPI or Windows File System entries from the drop-down menu.
When read with SPTI/ASPI, non-copy-protected DVD's that feature a copyright
bit will display a message stating that the DVD cannot be copied due to copy
protection. In this case, you should choose the Windows File System option
when reading.
See also:
Basic settings 11
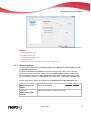
3.3
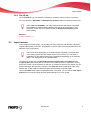
Import screen
In the screen for importing files, you can add your DVD video title, add data files, adjust the
required video quality for the title, and transfer or remove audio tracks and subtitles from the
selection of the original DVD.
The screen varies depending on the selected task. Following is an explanation
of the setting options that are always shown on this screen. You can find the
explanation for the setting options that are displayed depending on the selected
tasks in the description for the individual tasks.
The screen is divided into the DVD-Video Files/Nero Digital Titles and Data Files tabs.
A capacity bar below shows how much space is occupied on the disc graphically. As long
as the bar is green, all the content fit on the disc. If a red bar is shown on the display, the data volume is larger than the disc's capacity. The Total size area, located to the right of the
capacity bar, is also used to indicate the space that is already occupied, in MB.
Clicking the More button opens the extended area. In this area, you can use the Title import
profile area to create and save required quality settings in your own profile.
Nero Recode
15
User interface
Import Files screen
See also:
DVD-Video Files/Nero Digital Titles tab 16
Data Files tab 18
Title import profiles 19
3.3.1 DVD-Video Files/Nero Digital Titles tab
You can use the DVD-Video Files and Nero Digital Titles tabs to add your DVD tracks and
video files.
Both tabs are divided into a content area, a preview area beneath it to the left, and the Audio/Subtitle/Info tabs, which show the audio tracks and subtitles on the original DVD, to the
right.
Nero Recode
16
User interface
The screen varies depending on the selected task. Following is an explanation
of the setting options that are always shown on this screen. You can find the
explanation for the setting options that are displayed depending on the selected
tasks in the description for the individual tasks.
The following setting options are available:
Button
Opens a window to import the required DVD and/or video title.
Import DVD / Import Titles
Check box
Fit to target
Drop-down menu
Fit to target
If this check box is enabled, the content of the imported disc is recoded automatically in such a way that it can fit on the inserted recordable disc. The check box is enabled by default.
If the box is not checked, the size of the copy can be defined irrespective of the limitation of a disc. Although it may not be possible
to burn the resulting DVD structure onto a typical commercial blank
disc, the DVD-Video title could certainly be played from the hard
drive.
This shows the target medium.
This drop-down menu is active when the Fit to target box is checked.
The imported video titles are shown on the content area. The following information on the
individual titles is available:
Column
Shows the structure transferred from the DVD.
Content
Column
Shows the duration of the respective area, folder, or video title.
Duration
Column
Shows the memory size of the respective area, folder, or video title.
Size
Feature limitation.
Column
Shows the quality (in percentage) in which Nero Recode can recode
the area, folder, or video title.
Video quality
If the content of the imported disc must be recoded in such a way
as to fit it on a smaller target recordable disc, the quality of all video
titles is adjusted uniformly.
You can play a preview of the imported video title in the preview area. The following setting
options are available:
Button
Ends playback.
Nero Recode
17
User interface
Button
Starts playback.
Slider
Skips to particular points.
Button
Enlarges/reduces the preview area.
The Audio/Subtitle/Info tabs show the audio tracks and subtitles on the original DVD. You
can select any desired video title in the content area in order to see the corresponding audio
and subtitle tracks. These are imported according to the profile chosen during the import
process. The following tabs are available:
Audio
Displays the audio tracks imported in line with the import profile.
Subtitles
Displays the audio tracks imported in line with the import profile.
Info
Displays information about the imported video title.
See also:
Import screen 15
3.3.2 Data Files tab
Data files can be burned onto the disc as well as the film. These files are imported using the
Data Files tab.
The screen varies depending on the selected task. Following is an explanation
of the setting options that are always shown on this screen. You can find the
explanation for the setting options that are displayed depending on the selected
tasks in the description for the individual tasks.
The following buttons are available:
Add Files
Opens a window for adding the desired data files.
Erase
Removes a selected data file.
This is enabled only if at least one data file has been added.
Returns to the next higher level in the folder structure.
This is only active when the user is located in a subfolder.
Opens a window for creating a new folder inside the disc's data area.
Opens a menu for changing the way/view in which the files appear in the
folders.
Nero Recode
18
User interface
See also:
Import screen 15
3.3.3 Title import profiles
You can select the desired profile for importing a DVD or create and manage your own import profile in the Title import profile area.
Clicking the Profiles.. button opens the Nero Recode profile window. You can make adjustments in the Video, Audio, and Subtitle tabs.
The following buttons are available:
Drop-down menu
Shows the current selected profile.
Current Profile
If you create your own import profiles, these are listed in the drop-down
menu as entries.
Button
Calls up a window where a new profile can be created.
New
Button
Erase
Deletes the current profile displayed in the Current Profile drop-down
menu.
The following settings are available on the Video tab:
Quality distribution
Defines the quality ratio between the main movie and the extras.
Menus
Indicates whether the menus contained in the video file can be copied in original quality.
The following setting options are available on the Audio tab:
Check box
Preselect the following
audio tracks
Button
Add
Button
Remove
Drop-down menu
From multiple tracks of
the same language select
If this check box is enabled, only audio tracks in the specified languages are imported when the DVD is imported.
Opens a window in which the desired languages for importing audio tracks can be selected.
This button is enabled only if the Preselect the following
audio tracks box has been checked.
Removes languages from the list box.
This button is only enabled if the Preselect the following
audio tracks check box is enabled and at least one language has been selected for removal from the list box.
Specifies the audio format used if there are several audio
tracks in the same language on the DVD.
Nero Recode
19
User interface
Check box
Select all tracks if none
meets my selection criteria
If this check box is enabled and none of the audio tracks on
the corresponding DVD meet the defined criteria, all audio
tracks are imported as an alternative.
The following setting options are available on the subtitles tab:
Check box
If this check box is enabled, only subtitles in the specified languages are imported when a DVD is imported.
Preselect the following subtitle tracks
Button
Opens a window in which the desired languages for
importing subtitles can be selected.
This button is only enabled if the Preselect the following subtitle tracks check box is enabled.
Add
Button
Removes languages from the list box.
This button is only enabled if the Preselect the following subtitle tracks check box is enabled and at least
one language has been selected in the list box for removal.
Remove
Check box
Select all tracks if none meets
my selection criteria
If this check box is enabled and none of the subtitles
on the corresponding DVD meet the defined criteria, all
subtitles are imported as an alternative.
See also:
Import screen 15
3.4
Screen Burn Settings
You can define the desired options for recoding and writing on the Burn Options screen.
The screen varies depending on the selected task. Following is an explanation
of the setting options that are always shown on this screen. You can find the
explanation for the setting options that are displayed depending on the selected
tasks in the description for the individual tasks.
Clicking the More button opens the extended area. You can configure certain additional options inside this area, e.g. the burn process priority.
Once you have defined all the settings you want, click the Burn button on the bottom right to
start the recording and burn process.
Nero Recode
20
User interface
Screen Burn Settings
The following setting options are available in the top area of the screen:
Drop-down menu
Target
Input field
Target folder
This specifies the destination for the compilation. You can use a
CD/DVD recorder to burn the data, store the data on a hard drive or
generate an image file.
Specifies the target folder in which the compilation is stored and in
which the temporary files created during burning are stored.
The temporary files are automatically deleted after burning.
Nero Recode
21
User interface
Button
Opens a window showing the computer's directory tree.
Browse
You can use this window to select the target folder where the compilation should be saved, or where the temporary files that are created during the burn process should be stored. The path is referenced automatically in the target folder input field. Temporary files
are deleted after the burn process automatically.
The following setting options are available in the bottom area of the screen:
Drop-down menu
Write speed
Input field
Number of copies
Check box
Burn-at-once
Specifies the writing speed.
This drop-down menu is only enabled when a CD/DVD recorder
is selected in the Target list box.
Shows the number of copies to be burned.
This drop-down menu is only enabled when a CD/DVD recorder
is selected in the Target list box.
If this check box is enabled, the DVD structure is not buffered
on the hard drive before the burn process.
If this check-box is enabled, the burn process takes longer.
However, if you want to create several copies, this method is
quicker, since the data only has to be recoded once.
This drop-down menu is only enabled when a CD/DVD recorder
is selected in the Target list box.
Check box
Advanced analysis
Check box
High quality mode
Improves the quality of a DVD's encoding process considerably.
Recoding takes place in two steps and therefore takes longer.
Improves the quality of the recoding process. Recoding takes
longer.
See also:
Extended area (Burn Settings) 22
3.4.1 Extended area (Burn Settings)
The following setting options are available in the expanded area of the Burn Settings
screen:
Check box
Shut down computer when finished
If this check box is enabled, the computer is automatically shut down after the burn process.
Nero Recode
22
User interface
Drop-down menu
Determines the specification of a DVD.
DVD Book Type settings:
Automatic: Automatically selects the most suitable
book type for this DVD.
DVD-ROM: Sets the book type to DVD-ROM. Select
this setting if the DVD should play on multiple DVD
players.
Physical disc type: Selects the book type which is
specified on the DVD.
Current recorder settings: Lets the recorder choose the book type setting.
This drop-down menu is enabled only if you have selected your computer's disc drive as a target.
Drop-down menu
Defines how the resources available on the computer
are used during the recoding and burn process.
Priority
Check box
Creates a subfolder VIDEO_TS in your target folder
in which the DVD-Video files are saved.
Use VIDEO_TS subfolder for
DVD-Video files
See also:
Screen Burn Settings 20
3.5
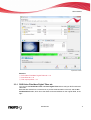
Recoding and Burning screen
The recoding and burn process is carried out in the Recoding and Burning screen.
The screen varies depending on the selected task. Following is an explanation
of the setting options that are always shown on this screen. You can find the
explanation for the setting options that are displayed depending on the selected
tasks in the description for the individual tasks.
You can find all the information necessary to track the individual steps of the recoding and
burn process on the top area of the screen. Below, on the left, you can play a preview of the
imported video title in the preview area. On the right, the Status area displays information
regarding the progress of the recoding and burn process. Additionally, a progress bar
shows the progress graphically.
Clicking the More button opens the extended area. You can configure certain additional options inside this area, e.g. the burn process priority.
Nero Recode
23
User interface
Recoding and Burning screen
The following buttons are available in the Recoding and Burning window:
Button
Interrupts the recoding and burn process.
Pause
Button
Ends the recoding and burn process.
Stop
Button
Resume
Button
Back
Resumes the recoding and burn process.
This button is enabled only if the recoding and burn process was interrupted
with the Pause button.
Returns to the previous screen.
This button is only active if the recoding and burn process has ended.
Nero Recode
24
User interface
Button
Next
Displays the What do you want to do now? screen.
This button is only active if the recoding and burn process has ended.
The following setting options are available in the preview area:
Check box
Enable video
preview
If this check box is enabled, you can play the preview during the burn
process.
Button
Enlarges/reduces the preview area.
Link
Opens a browser window containing a list of devices that can reproduce the Nero Digital profile during the encoding process.
This option is enabled only if you recode files into the Nero Digital™
format.
This function requires a fully functional Internet connection.
Show Nero Digital compatible
devices
See also:
Extended Area - Recoding and Burning 25
3.5.1 Extended Area - Recoding and Burning
The following setting options are available in the extended area of the Recording and Burning screen:
Check box
Shut down computer when finished
Drop-down menu
If this check box is enabled, the computer is automatically shut down after the burn process.
Defines how the resources available on the computer
are used during the recoding and burn process.
Priority
See also:
Recoding and Burning screen 23
Nero Recode
25
Recoding an Entire DVD
4
Recoding an Entire DVD
4.1
Setting Options for Recoding and Entire DVD
In addition to the basic settings that are always displayed on the screen for importing files,
you can configure certain additional settings with the Recode an Entire DVD to DVD task.
Screen My DVD Backup
Nero Recode
26
Recoding an Entire DVD
The following buttons are available:
Removes video titles on the original DVD from your compilation.
Disable
This way, you can disable, e.g. unnecessary extras, and create more
space on the target DVD. Disabled files are not transferred to the copy
during the burn process.
This button is only enabled if at least one DVD video title has been imported into the Content area and selected there.
Activate
Enables video titles that were previously disabled. The files that are added again are transferred to the target DVD when the compilation is
written.
This button is only enabled if at least one DVD video title has been disabled in the Content area and selected there.
Lock Ratio
Locks the automatic change of recoding quality for a DVD-Video title. It
is still possible to make manual changes to the quality settings by moving the slider.
It could be a good idea to lock individual video titles if you want to improve the quality of other content (and therefore, the quality of the remaining content is lowered proportionately). A locked title is protected
from the proportional adjustment in this case.
This button is only enabled if at least one DVD video title has been imported into the Content area and selected there.
Unlock Ratio
Unlocks automatic recoding quality changes for a video title.
This button is only enabled if at least one DVD video title has been locked in the Content area and selected there.
See also:
Recoding an entire DVD to DVD 27
Import screen 15
4.2
Recoding an entire DVD to DVD
When copying a DVD, including the menu, you can use Nero Recode to adjust and modify
the structure of a DVD in such a way that the data can be written to a conventional recordable disc with perfect video quality. You can remove undesired subtitles or audio tracks.
Copyright
Unless you possess the copyright yourself, or at least have the permission of
the copyright holder, the unauthorized reproduction of discs may be a breach of
national or international law and may lead to severe penalties!
To recode a DVD, proceed as follows:
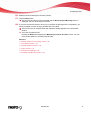
1. Choose the Recode an Entire DVD to DVD task from the Nero Recode main window.
Nero Recode
27
Recoding an Entire DVD
The My DVD Backup screen is displayed.
2. Insert the DVD you want to recode in the disc drive on your PC.
Keep in mind that the Fit to target check box is enabled so that the content of
the source DVD can be recoded during the subsequent process in such a way
that it fits the selected target format.
If the check box is disabled, the DVD-Video will be imported in its original size.
In this case, it is possible that the data volume will be so large that you will only
be able to store it on a double-layer DVD or on the hard drive.
3. If you created your own import profile and want to select it:
1. Click the More button.
The extended area will open.
2. Select the required import profile in the Title import profile area.
4. Click the Import DVD button.
The Browse Folder window is opened.
5. Select the drive or hard drive folder containing the DVD that you want to recode and click the
OK button.
The DVD's individual video titles are imported and shown in the Content area. If the
source DVD is larger than the target media, you can also use this area to see how the
DVD is recoded according to the selected profile.
Underneath, the capacity bar shows how much disk space is occupied by the imported files on the disc graphically.
6. If there is an individual video title you do not want to copy:
1. Select the required video title.
2. Click the Disable button.
The Disable Item window is opened.
3. Select the desired deletion method from the drop-down menu and click the OK button.
The video title is disabled.
7. If you want to re-enable an disabled video title:
1. Select the required video title.
2. Click the Enable button.
The video title is re-enabled.
8. If you want to lock an individual video title to protect it from loss of quality during recoding:
1. Select the required video title.
2. Click the Lock Ratio button.
The video title is locked.
9. If you want to unlock a locked video title in order to adjust the quality proportionally to the
quality of the other titles while recoding:
1. Select the required video title.
2. Click the Unlock Ratio button.
Nero Recode
28
Recoding an Entire DVD
The video title is unlocked.
In order to adjust the quality of a desired video title individually, you can move
the slider in the Video Quality column under the Content area. The quality of
the remaining DVD content is lowered proportionally to the quality improvement
of an individual piece of content.
The sliders in the Video Quality area are enabled only when the Fit to target
check box is deactivated.
10. Enable the check boxes for the audio tracks that you want to copy on the Audio tab. Accordingly, disable the check boxes for the audio tracks that you don't want to copy.
11. Enable the check boxes for the subtitle tracks that you want to copy on the Subtitle tab.
Accordingly, disable the check boxes for the subtitle tracks that you don't want to copy.
12. Click the Next button.
The Burn Settings screen appears.
13. Make the required settings for the burn process.
14. Click the Burn button.
The recoding and burn process is started and the Recording and Burning screen is
displayed. You can track the process here.
15. If you have chosen the the disc drive of your computer as the target of the compilation, you
will be prompted to insert an empty writable disc in the drive.
The burn process is complete when the relevant message appears in the information
window.
You have recoded a DVD.
Clicking the Next button displays the What do you want to do now? screen. You can
select further options here or exit Nero Recode.
See also:
Setting Options for Recoding and Entire DVD 26
Import screen 15
Screen Burn Settings 20
Recoding and Burning screen 23
Nero Recode
29
Recoding a main movie to DVD
5
Recoding a main movie to DVD
5.1
Setting Options for Recoding a Main Movie to DVD
In addition to the basic settings that are always displayed on the screen for importing files,
you can configure certain other settings with the Recode Main Movie to DVD task.
Screen My Movie Backup
The following buttons are available:
Trim Movie
Opens the Trim Movie window, where the selected video title can
be trimmed.
This button is only enabled if at least one DVD video title has been
imported into the Content area and selected there.
Nero Recode
30
Recoding a main movie to DVD
Default Streams
Opens the window Default Streams in which the streams for audio
and subtitles can be selected.
This button is only enabled if at least one DVD video title has been
imported into the Content area and selected there.
See also:
Trim Movie window 31
Default Streams window 33
Recoding a main movie to DVD 34
Import screen 15
5.2
Trim Movie window
You can use the Trim Movie window to trim a video title that you do not want to use in its
entirety down to a special section.
The window is divided into two areas. The left side - the area for the first frame - is used to
select the frame with which the video title should start. The right side - the area for the last
frame - is used to define the frame with which the video title should end.
Trim Movie window
The following setting options are available:
Button
Skips forwards a few frames.
Button
Skips forwards 6 seconds.
Nero Recode
31
Recoding a main movie to DVD
Button
Skips 6 seconds back.
Button
Skips a few frames back.
Slider
Manually regulates determination of the desired frames.
Drop-down menu
Selects the chapter markers of the video title directly.
It is only possible if the video title contains chapter markers.
Display
Indicates the start frame of the video title.
Start Frame
Display
Indicates the end frame of the video title.
End frame
Display
Indicates the length of the video title.
Total duration
Display
Indicates the overall size of the video title.
Total size
See also:
Setting Options for Recoding a Main Movie to DVD 30
Setting Options for Compiling a DVD 36
Setting Options for Recoding a DVD to Nero Digital 41
Setting Options for Recoding a Main Movie to Nero Digital 60
Nero Recode
32
Recoding a main movie to DVD
5.3
Default Streams window
In the Default Streams window you can define the settings for audio and subtitle streams.
Default Streams window
The following option buttons are available in the Audio area:
Let the DVD player decide which audio stream
to play
Allows the DVD player to choose which audio stream to play.
Selection occurs automatically when title playback starts.
Play the following audio
stream
Selects the audio stream to be played when a title is played
back, e.g. in a DVD player.
The following option buttons are available in the Subtitles area:
Let the DVD player decide which subtitle
stream to display
Lets the DVD player decided which subtitle stream will be
played. The selection is made automatically when the title
playback starts.
Hide subtitles
Hides the subtitles. No subtitles are shown during title playback, e.g. in a DVD player.
Display the following
subtitles stream
Selects the subtitles stream to be played when a title is played back, e.g. in a DVD player.
See also:
Setting Options for Recoding a Main Movie to DVD 30
Setting Options for Compiling a DVD 36
Nero Recode
33
Recoding a main movie to DVD
5.4
Recoding a main movie to DVD
You can use Nero Recode to copy the main movie of a DVD without additional extras. You
have the option of customizing and modifying the main movie's structure so that the data can
be written to a conventional recordable disc with perfect video quality.
Copyright
Unless you possess the copyright yourself, or at least have the permission of
the copyright holder, the unauthorized reproduction of discs may be a breach of
national or international law and may lead to severe penalties!
In order to recode the main movie of a DVD, proceed as follows:
1. Select the Recode Main Movie to DVD task in the Nero Recode start screen.
The My Movie Backup screen is displayed.
2. Insert the DVD you want to recode in the disc drive on your PC.
Keep in mind that the Fit to target check box is enabled so that the content of
the source DVD can be recoded during the subsequent process in such a way
that it fits the selected target format.
If the check box is disabled, the DVD-Video will be imported in its original size.
In this case, it is possible that the data volume will be so large that you will only
be able to store it on a double-layer DVD or on the hard drive.
3. Select the required import profile in the Title import profile area.
4. Click the Import DVD button.
The Browse Folder window is opened.
5. Select the drive or hard drive folder containing the DVD that you want to recode and click the
OK button.
The main movie of the DVD is imported and shown in the Content area. If the source
DVD is larger than the target media, you can also see how the DVD is recoded according to the chosen profile here.
Underneath, the capacity bar shows how much disk space is occupied by the imported files on the disc graphically.
6. If you want to trim an individual video title:
1. Select the required video title.
2. Click the Trim Movie button.
The Trim Movie window opens.
3. Choose the first and last frames and click the OK button.
The video title is trimmed.
7. If you wish to configure the default streams:
1. Select the required video title.
2. Click the Default streams button.
Nero Recode
34
Recoding a main movie to DVD
The Default streams window opens.
3. Choose the desired option buttons and click the OK button.
The video title's streams are adjusted.
8. Enable the check boxes for the audio tracks that you want to copy on the Audio tab. Accordingly, disable the check boxes for the audio tracks that you don't want to copy.
9. Enable the check boxes for the subtitle tracks that you want to copy on the Subtitle tab.
Accordingly, disable the check boxes for the subtitle tracks that you don't want to copy.
10. Click the Next button.
The Burn Settings screen appears.
11. Make the required settings for the burn process.
12. Click the Burn button.
The recoding and burn process is started and the Recording and Burning screen is
displayed. You can track the process here.
13. If you have chosen the the disc drive of your computer as the target of the compilation, you
will be prompted to insert an empty writable disc in the drive.
The burn process is complete when the relevant message appears in the information
window.
You have recoded the main movie of a DVD.
Clicking the Next button displays the What do you want to do now? screen. You can
select further options here or exit Nero Recode.
See also:
Setting Options for Recoding a Main Movie to DVD 30
Trim Movie window 31
Default Streams window 33
Import screen 15
Screen Burn Settings 20
Recoding and Burning screen 23
Nero Recode
35
Compiling a DVD
6
Compiling a DVD
6.1
Setting Options for Compiling a DVD
In addition to the basic settings that are always displayed on the screen for importing files,
you can configure certain other settings with the Compile a DVD task.
My Own DVD Compilation Screen
The following buttons are available:
Erase
Deletes imported video titles from your compilation.
This button is only enabled if at least one DVD video title has been imported into the Content area and selected there.
Nero Recode
36
Compiling a DVD
Lock Ratio
Locks the automatic change of recoding quality for a DVD-Video title. It is
still possible to make manual changes to the quality settings by moving
the slider.
It could be a good idea to lock individual video titles if you want to improve
the quality of other content (and therefore, the quality of the remaining
content is lowered proportionately). A locked title is protected from the
proportional adjustment in this case.
This button is only enabled if at least one DVD video title has been imported into the Content area and selected there.
Unlock Ratio
Unlocks automatic recoding quality changes for a video title.
This button is only enabled if at least one DVD video title has been locked
in the Content area and selected there.
Trim Movie
Opens the Trim Movie window, where the selected video title can be
trimmed.
This button is only enabled if at least one DVD video title has been imported into the Content area and selected there.
Merge Titles
Merges selected video titles and pastes them to a common folder, Merged Titles. You can rename the folder according to your own preferences.
This button is enabled only if at least two DVD video title's have been imported into the Content area and selected there.
Split
Splits merged video titles.
This button is enabled only if at least two DVD video titles have been merged into one.
Default
Streams
Opens the window Default Streams in which the streams for audio and
subtitles can be selected.
This button is only enabled if at least one DVD video title has been imported into the Content area and selected there.
See also:
Compiling a DVD 38
Trim Movie window 31
Default Streams window 33
Import screen 15
Nero Recode
37
Compiling a DVD
6.2
Compiling a DVD
You can use Nero Recode to compile a DVD of your own with parts from a DVD and data
files.
Copyright
Unless you possess the copyright yourself, or at least have the permission of
the copyright holder, the unauthorized reproduction of discs may be a breach of
national or international law and may lead to severe penalties!
To compile a DVD, proceed as follows:
1. Choose the Compile a DVD task from the Nero Recode main window.
The My Own DVD Compilation screen is displayed.
2. Insert the DVD you want to recode in the disc drive on your PC.
Keep in mind that the Fit to target check box is enabled so that the content of
the source DVD can be recoded during the subsequent process in such a way
that it fits the selected target format.
If the check box is disabled, the DVD-Video will be imported in its original size.
In this case, it is possible that the data volume will be so large that you will only
be able to store it on a double-layer DVD or on the hard drive.
3. Select the required import profile in the Title import profile area.
4. Click the Import Titles button.
The Import Titles window opens.
5. Select the video titles that you want to recode and click the Add titles button.
The selected video titles are imported and shown on the Content area. If the source files
are larger than the target media, you can also see how the files are recoded according to
the selected profile here.
Underneath, the capacity bar shows how much disk space is taken up by the imported files on the disc graphically.
6. If you want to delete a single video title:
1. Select the required video title.
2. Click the Erase button.
The video title is removed from the compilation.
7. If you want to lock an individual video title to protect it from loss of quality during recoding:
1. Select the required video title.
2. Click the Lock Ratio button.
The video title is locked.
8. If you want to unlock a locked video title in order to adjust the quality proportionally to the
quality of the other titles while recoding:
Nero Recode
38
Compiling a DVD
1. Select the required video title.
2. Click the Unlock Ratio button.
The video title is unlocked.
In order to adjust the quality of a desired video title individually, you can move
the slider in the Video Quality column under the Content area. The quality of
the remaining DVD content is lowered proportionally to the quality improvement
of an individual piece of content.
The sliders in the Video Quality area are enabled only when the Fit to target
check box is deactivated.
9. If you want to trim an individual video title:
1. Select the required video title.
2. Click the Trim Movie button.
The Trim Movie window opens.
3. Choose the first and last frames and click the OK button.
The video title is trimmed.
10. If you want to merge several video titles:
1. Select at least two video titles.
2. Click the Merge Titles button.
The video titles are compiled in a newly created folder, Merged Titles.
Video titles can only be merged if they all have the same audio track.
11. If you wish to separate merged video titles:
1. Select the Merged Titles folder.
2. Click the Split Titles button.
The video titles are shown separately again; the Merged Titles folder is deleted.
12. If you wish to configure the default streams:
1. Select the required video title.
2. Click the Default streams button.
The Default streams window opens.
3. Choose the desired option buttons and click the OK button.
The video title's streams are adjusted.
13. Enable the check boxes for the audio tracks that you want to copy on the Audio tab. Accordingly, disable the check boxes for the audio tracks that you don't want to copy.
14. Enable the check boxes for the subtitle tracks that you want to copy on the Subtitle tab.
Accordingly, disable the check boxes for the subtitle tracks that you don't want to copy.
15. Click the Next button.
The Burn Settings screen appears.
Nero Recode
39
Compiling a DVD
16. Make the required settings for the burn process.
17. Click the Burn button.
The recoding and burn process is started and the Recording and Burning screen is
displayed. You can track the process here.
18. If you have chosen the the disc drive of your computer as the target of the compilation, you
will be prompted to insert an empty writable disc in the drive.
The burn process is complete when the relevant message appears in the information
window.
You have compiled a DVD.
Clicking the Next button displays the What do you want to do now? screen. You can
select further options or exit Nero Recode here.
See also:
Setting Options for Compiling a DVD 36
Trim Movie window 31
Default Streams window 33
Import screen 15
Screen Burn Settings 20
Recoding and Burning screen 23
Nero Recode
40
Recoding a DVD to Nero Digital
7
Recoding a DVD to Nero Digital
7.1
Setting Options for Recoding a DVD to Nero Digital
In addition to the basic settings that are always displayed on the screen for importing files,
you can configure certain other options with the Recode DVDs and Videos to Nero Digital
task.
My Nero Digital Disc Screen
The following buttons are available:
Erase
Deletes imported video titles from your compilation.
This button is only enabled if at least one DVD video title has been
imported into the Content area and selected there.
Nero Recode
41
Recoding a DVD to Nero Digital
Lock Ratio
Locks the automatic change of recoding quality for a DVD-Video title.
It is still possible to make manual changes to the quality settings by
moving the slider.
It could be a good idea to lock individual video titles if you want to improve the quality of other content (and therefore, the quality of the remaining content is lowered proportionately). A locked title is protected
from the proportional adjustment in this case.
This button is only enabled if at least one DVD has been imported into
the Content area and selected there.
Unlock Ratio
Unlocks automatic recoding quality changes for a video title.
This button is only enabled if at least one DVD video title has been locked in the Content area and selected there.
Trim Movie
Opens the Trim Movie window, where the selected video title can be
trimmed.
This button is only enabled if at least one DVD video title has been
imported into the Content area and selected there.
Chapter
Opens the window Chapter where chapter markers can be set.
This button is only enabled if at least one DVD video title has been
imported into the Content area and selected there.
The following drop-down menus are available:
Profile category
Changes the Nero Digital™ category. This setting refers to the respective target media for which encoding takes place. The result has
different sizes depending on the selection; the entries in the Profile
drop-down menu are adjusted accordingly.
Profile
Changes the Nero Digital profile. The setting relates to the target medium for which encoding is being carried out.
Encoding Method
Selects the method to be used to encode the MPEG-4 file.
If you select Fast (1-pass), the movie only undergoes one conversion
pass. This method requires less time but has lower quality than encoding in two steps. The movie is analyzed and converted with the
available bit rate simultaneously.
If you select High quality (2-pass), the movie undergoes several
conversion passes. The quality is better, but the process takes longer.
The first pass analyzes the movie and creates a temporary file (*log).
The second pass converts the file. During this process, the bit rate data that was stored in the temporary files is used.
The Video tab shows the video title's properties. The following information is available:
Column
Properties
Shows the video properties stored on the DVD, e.g. resolution, frame rate, pixel format, video structure, and duration.
Nero Recode
42
Recoding a DVD to Nero Digital
Column
Shows the original size.
Source
Column
Target
Button
Settings
Button
Encoder
Shows the target sizes depending on the selected Nero Digital profile.
Opens the Nero Digital Video Settings window, where you can define how the video should be processed.
Opens the Nero Digital Video Properties window. You can configure the settings for the AVC encoding of your data here.
The Audio tab displays the properties of an audio track. If there are two audio tracks available for the target video, an additional tab is displayed accordingly. The following setting options are available:
Drop-down menu
Used to choose the audio track desired for the video file.
Source
Drop-down menu
Used to choose the desired audio codec.
Codec
Display
Format
Button
Settings
Shows the target data of the audio track, depending on the selected
codec.
Opens the Nero Digital Audio Properties window. You can define
the settings for the audio encoder here.
Only available if you have selected the Nero Digital™ audio codec
(AAC).
The Subtitle tab displays the available subtitle tracks. The following selection menus are available:
Main subtitle
track:
Used to select a desired subtitle track for the video file. You can also choose not to use subtitles (None) or to create or import your
own subtitle track.
If you select the Create new subtitle entry , the Nero Digital Subtitle Settings window is opened.
Secondary subtitle
track:
Chooses a secondary subtitle track in addition to the main one. You
can choose not to select a secondary subtitle track (None) or to
create or import your own subtitle track.
If you select the Create new subtitle entry, the Nero Digital Subtitle Settings window is opened.
Nero Recode
43
Recoding a DVD to Nero Digital
You can only insert our own subtitle track if you have selected the Nero Digital
or AVC profile category and, accordingly, one of the following profiles for encoding: Standard, Cinema, or HDTV.
See also:
Nero Digital Video Settings 44
Encoder settings 48
Nero Digital Audio Settings 52
Nero Digital™ Subtitle Settings 52
Chapter window 55
Recoding DVD's and videos to Nero Digital 56
Trim Movie window 31
Import screen 15
7.2
Nero Digital Video Settings
The Deinterlace, Framerate, Crop, Resize, and Plug-Ins tabs are available on the Nero
Digital Video Settings window. You can define how video should be processed here.
To open this window, click the Settings button on the Video tab on the screen for importing
files.
Nero Digital Video Settings window
Nero Recode
44
Recoding a DVD to Nero Digital
See also:
Deinterlace tab 45
Framerate Tab 45
Crop tab 46
Resolution tab 47
Plug-ins tab 47
Setting Options for Recoding a DVD to Nero Digital 41
7.2.1 Deinterlace tab
The following setting options are available on the Deinterlace tab:
Option button
Automatic (recommended)
Option button
Automatically selects whether or not the video title should be encoded with deinterlace.
Enables the Enable deinterlacing check box.
Custom Deinterlace
Check box
Enable Deinterlacing
Check box
Motion-adaptive
Enabled deinterlacing for the current video title and displays the
Motion-adaptive check box.
This check box is only available if the Custom Deinterlace option
button has been selected.
If the check box is enabled, improved video quality can be achieved with a motion-adaptive conversion. Even fast motion sequences are reproduced in an extremely sharp manner with full detail accuracy. The burn process is slower, however.
See also:
Nero Digital Video Settings 44
7.2.2 Framerate Tab
You can select the target frame rate for your Nero Digital™ file on the Framerate tab. The
frame rate indicates the number of frames shown per second. The Nero Recode default settings use the frame rate of the source file, provided that the selected Nero Digital™ profile
allows it.
The following setting options are available in the Framerate area:
Option button
Automatically selects how many frames are shown per second.
Automatic (recommended)
Option button
Enables the Target rate drop-down menu.
User-defined rate
Nero Recode
45
Recoding a DVD to Nero Digital
Drop-down menu
Target rate
Check box
Motion-adaptive
Selects how many frames per minute to show.
This drop-down menu is only available if you selected the Userdefined rate option button.
If the check box is enabled, improved video quality can be achieved
with a motion-adaptive conversion. Even fast motion sequences are
reproduced in an extremely sharp manner with full detail accuracy.
The burn process is slower, however.
See also:
Nero Digital Video Settings 44
7.2.3 Crop tab
If your DVD-Video features black picture bars on the sides, you can crop them with the Crop
tab. This decreases the size of the video and as a result improves its quality. The Nero Recode default settings detect the bars and crop them automatically.
The following setting options are available in the Crop area:
Option button
Detects black picture bars and crops them automatically.
Automatic (recommended)
Option button
Custom Crop
Button
Adjust
Enables the four text boxes for the manual cropping (top, bottom,
right, left) and the Adjust button.
Opens a dialog box and displays a frame from the video. You can
use the mouse to define the four cropping areas (top, bottom, left,
right) by hand.
The button is only enabled if the Custom Crop option button is selected.
Option button
Allows the video to be converted without cropping the borders.
Disable
See also:
Nero Digital Video Settings 44
Nero Recode
46
Recoding a DVD to Nero Digital
7.2.4 Resolution tab
Under the default settings, the selection of a profile for converting the DVD video title to the
MPEG-4 format defines the size of the picture to be created. You can adjust these picture
sizes individually under the Resize tab.
The following setting options are available in the Custom resize area:
Option button
Automatic (recommended)
Option button
Custom Resize
Automatically adjusts the frame size to the selected Nero Digital
profile so that the frame size generated matches the output medium.
Activates the two text boxes for the page format (width and
height).
The values to be entered must be multiples of 16 and must be in
the range 16 to 720 pixels for width and 16 to 576 pixels for
height.
Option button
Disable
Check box
Square Pixels / Letterboxing
Drop-down menu
Resizing method
Allows the video to be converted without changing the frame size.
If this check box is enabled, a Nero Digital™ file that consists of
square pixels and uses the Letterbox method is created. This increases compatibility with some players. This can, however, result in black bars inside the video file.
This option is only available if the Custom resize option button
has been selected.
Selects the desired resizing method, e.g. bilinear, bicubic,
Lanczos and superresolution.
See also:
Nero Digital Video Settings 44
7.2.5 Plug-ins tab
You can select and configure plug-ins that have already been installed for use in Nero Recode under the Plug-Ins tab.
The following setting options are available:
Selection list
Displays the installed plug-ins.
Installed plug-ins
Selection list
Displays the selected plug-ins.
Selected plug-ins
Button
Adds installed plug-ins to the Selected Plug-ins selection list.
Add
Nero Recode
47
Recoding a DVD to Nero Digital
Button
Removes plug-ins from the Selected plug-ins list box.
Remove
Button
Sorts the items in the Selected plug-ins selection list.
Upward / downward
Button
Opens the Plug-ins Editor window, where you can define settings
for the respective plug-ins.
Options
The setting options depend on the selected plug-in. You can track
your adjustments in the preview area on the right side of the window. Clicking on the Reset button undoes all changes.
The Nero Recode default settings include the Color Correction and Denoise
plug-ins.
You can adjust brightness, contrast and saturation of your video files with sliders in the Color Correction plug-in.
Noise interference can removed from video files with the sliders in the Denoise
plug-in.
See also:
Nero Digital Video Settings 44
7.3
Encoder settings
You can configure settings for AVC encoding of your data, save the settings you have configured, or load saved setting configurations in the Nero Digital Video Properties window,
under the Encoder configuration tab. The different setting areas are selected with the directory tree on the left side of the window.
You can open the window by clicking the Encoder button on the Video tab in the screen for
importing files.
The following setting options are available under the MPEG-4 AVC Encoder entry:
Button
Loads existing encoder settings. A window opens.
Load settings
Button
Saves newly created encoder settings.
Save Settings
Nero Recode
48
Recoding a DVD to Nero Digital
Nero Digital Video properties window
See also:
General settings 49
Encoding Tools 50
Visual Enhancements 51
Multithreading 51
Setting Options for Recoding a DVD to Nero Digital 41
7.3.1 General settings
You can configure settings for Decision quality and Properties for video sequence under
the General settings entry.
The slider in the Decision quality area specifies how good the quality of the output file
should be in relation to the time used for encoding. High quality provides the best quality,
but the longest encoding time. High speed takes up the least encoding time and provides
the worst available quality. It is advisable to use a value in the middle within the Best range.
The following setting options are available in the Properties for video sequences area:
Input field
Maximum reference
frames
Input field
Specifies how many frames from which a P-frame or B-frame
may query information.
Defines the range for the size of the GOP.
Maximum keyframe
interval
Nero Recode
49
Recoding a DVD to Nero Digital
See also:
Encoder settings 48
7.3.2 Encoding Tools
You can define settings for the encoding process under Encoding tools.
The following check box is available in the Baseline Profile area:
Deblocking
If this check box is enabled, a soft-focus effect is applied to the
sharp edges of the macroblocks. You can configure the intensity by
using the Deblocking strength slider.
The following setting options are available in the Main profile area:
Check box
Bidirectional prediction
Input field
Maximum consecutive
B-frames
Check box
If this check box is enabled, encoding is carried out with the
help of B-VOP's.
Specifies the maximum number of B-frames that can be used in
a GOP.
This input field is enabled only when the Bidirectional prediction check box in enabled.
If this check box is enabled, the Context Adaptive Binary Arithmetic Coding encoding method is used.
CABAC
Check box
If this check box is enabled, reference frames can be reweighted during motion predictions. This increases the encoding efficiency especially, during cross fading.
Weighted prediction
Check box
If this check box is enabled, interlaced-encoded output material
can be saved as interlaced material again.
Interlaced encoding
Only possible if the source video file is interlaced.
The following check box is available in the High profile area:
8 x 8 Transform
If this check box is enabled, the default 4x4 transform used by the
encoder is changed to an 8x8 transform. This allows for better compression with high-definition resolutions.
This setting depends on the chosen profile.
See also:
Encoder settings 48
Nero Recode
50
Recoding a DVD to Nero Digital
7.3.3 Visual Enhancements
The settings in the Visual Quality Level entry use human perception patterns to achieve
better overall quality.
This means, for example, that the quality is better in the middle of the picture than at the outer edges because the eyes tend to focus on the middle and do not notice slight blurring at
the edge. Because quality is "saved" at the edge, you can either improve overall quality or
achieve greater compression.
This means that you can achieve greater compression without any appreciable loss of quality.
The following check boxes are available in the Psychovisual enhancement area:
Focal plane
If this check box is enabled, human perception is taken into account
in order to achieve better compression for individual pictures at certain spots in the video.
Macroblock level
If this check box is enabled, human perception is taken into account
in order to achieve better compression for macroblocks in certain
areas in the picture.
See also:
Encoder settings 48
7.3.4 Multithreading
You can configure multithreading settings under the Multithreading entry.
Nero Recode supports multi-core processors. If you have one of these, you can
distribute the encoding process over the desired number of threads.
The following drop-down menu is available:
Number of
threads/slices
Defines whether the encoding process should be performed by multiple threads (Multithreading). The number of processor cores used
corresponds to the number of threads you have selected.This ensures optimal use of a multi-core processor system. This ensures
optimal use of a multi-core processor system.
See also:
Encoder settings 48
Nero Recode
51
Recoding a DVD to Nero Digital
7.4
Nero Digital Audio Settings
You can define settings for the audio encoder in the Nero Digital Audio Properties window.
You can open the window by clicking the Settings button on the Audio tab in the screen for
importing files.
The following setting options are available in the Audio Settings area:
Option button
Automatic (recommended)
Option button
Automatically adapts the audio profiles to the Nero Digital profile, so that
the quality of the audio track best corresponds to the output medium.
User-defined
Activates the combo boxes Audio channels, Mode, Scan rate and Bit
rate.
Drop-down menu
Selects the audio channels. Depending on the selected Nero Digital™
profile, Stereo, Mono, and 5.1 are available for selection.
Channels
Drop-down menu
fashion
Selects the mode with which the audio channels are processed. Depending on the Nero Digital profile selected, Low complexity and High
efficiency are available.
The selection affects the scan and bit rate.
Drop-down menu
Selects the scan rate.
The scan rate is the frequency that a signal is scanned per time interval.
Sample Rate
Drop-down menu
Selects the bit rate.
The bit rate is the quantity of data transmitted within a time unit.
Bit rate
The following drop-down menu is available in the Audio volume area:
Drop-down menu
Sets the required volume.
Volume
See also:
Setting Options for Recoding a DVD to Nero Digital 41
7.5
Nero Digital™ Subtitle Settings
The Nero Digital Subtitle Settings window allows you to create your own subtitle track. You
can also import a subtitle track that is already available. In order to be able to import the
track, the file must be saved in one of the following formats: SUB, SRT, SMI, SSA, ASS,
PSB.
Nero Recode
52
Recoding a DVD to Nero Digital
You can only insert our own subtitle track if you have selected the Nero Digital
or AVC profile category and, accordingly, one of the following profiles for encoding: Standard, Cinema, or HDTV.
Nero Digital Subtitle Settings Window
The following setting options are available:
Button
Open existing file
Button
Exporting
Opens a window. You can select subtitle files that are already
available in this window.
The Save as dialog appears. You can save a subtitle file that you
created in a folder of your choice.
The following setting options are available on the Properties tab:
Input field
Allocates a name to a subtitle track you have created.
Track name
Area
Displays the settings from the Font window.
Font
Button
Browse
Opens the Font window. Make the settings for the font and the size of your subtitle track here.
Nero Recode
53
Recoding a DVD to Nero Digital
Drop-down menu
Specifies the color of your subtitle track.
Text Color
Area
Position
Specifies the coordinates of the text box where the subtitle track is
displayed.
Drop-down menu
Specifies the subtitle track language to be declared.
Language
Button
Goes to the end of the current subtitle line or the beginning of the
next.
Only available if subtitle lines have already been created.
Button
Goes to the beginning of the current subtitle line or the end of the
next.
Only available if subtitle lines have already been created.
Slider
Selects the desired frames.
The Edit tab shows the individual subtitle lines. The following information on the individual
lines is available:
Column
Start timecode
Column
Shows the start time for the subtitle line.
You can adjust the start time according to your preferences. Click
inside the column in order to edit the duration of an interval.
End timecode
Shows how long the subtitle lines are displayed.
You can adjust the ending time according to your preferences. Click
inside the column in order to edit the duration of an interval.
Column
Displays the subtitle text for an interval.
Text
You can enter or edit the desired text by using the Edit button.
The following buttons are available on the Edit tab:
Button
Adds a new line to the end of the frame.
Append
In the standard setting the interval between the start and end of the time
code is 4 seconds.
Button
Edit
Opens the Edit Subtitle Line window. You can enter or edit the desired
text for a subtitle line in this window.
Button
Deletes a previously selected subtitle line.
Erase
See also:
Subtitle formats 55
Setting Options for Recoding a DVD to Nero Digital 41
Nero Recode
54
Recoding a DVD to Nero Digital
7.5.1 Subtitle formats
The individual subtitles in files in SUB (preSub) format consist of a single line. The lines are
separated from each other by paragraph marks and must have the following form:
{0}{50}Sample subtitle text
The first and last frame in which the text should be displayed are shown between curly
frames. The subtitle text is shown after them, without a space between.
The SRT (SubRip) subtitle format consists of 3-line blocks. They are separated from each
other by empty breaks and must have the following format:
1
Continuous number that begins with one and is increased by one for each block.
00:01:36,480 --> 00:01:38,360
The first time indication specifies in hours, minutes, seconds, and milliseconds when the
text begins to be displayed.
An arrow that consists of two hyphens and a angle bracket follows, separated by a space.
After another space, the time indication that specifies when the text should cease to be
displayed follows.
Sample subtitle text
Contains the subtitle's text.
The SMI (SAMI) subtitle format is based on HTML syntax. Milliseconds are used as the basis
for time values. This format is a standard developed by Microsoft and is intended mainly for
the use of subtitles in videos. SMI can only be played back with Windows Media® Player and
other Microsoft products.
The subtitle format SSA (Sub Station Alpha) has the widest range of functionality. The syntax consists of sections and the included code lines. The sections begin with a bracket (e.g.
"[Script Info]“) followed by predefined code lines (e.g. Title, Original timing), containing the
respective information. This allows the use of colors, fonts, font sizes and similar.
The subtitle format ASS (Advanced Sub Station Alpha) is an enhanced version of SSA and
offers all the features of SSA. It also allows subtitles to be graphically edited, e.g. for Karaoke.
The PSB (MPsub) subtitle format was developed for the Mplayer, a movie player for Linux.
Its main feature is the use of dynamic time dependencies. The code consists of numbers and
of the subtitle's text. The first number in the code represents the waiting time, in seconds, for
the next subtitle to be displayed after the last subtitle has elapsed. The second number
shows the current subtitle for the time, in seconds, that it represents.
See also:
Nero Digital™ Subtitle Settings 52
7.6
Chapter window
In the Chapter window, you can add your own chapter markers to those already on the
DVD. Chapter markers subdivide the content of a DVD. It is possible to access them, as
chapters, with the DVD player.
Nero Recode
55
Recoding a DVD to Nero Digital
The following setting options are available:
Display panel
Current frame
Display area
Shows the current playing time of the video displayed in the preview
window.
Chapter
Shows the chapter markers already set and the starting time for every chapter marker.
Button
Adds a chapter marker at the selected point in the video.
Add
Button
Deletes the selected chapter marker.
Erase
Slider
Jumps to the desired frame.
Button
Starts playback.
Button
Pauses playback.
Button
Skips 6 seconds back.
Button
Skips a few frames back.
Button
Skips forwards a few frames.
Button
Skips forwards 6 frames.
See also:
Setting Options for Recoding a DVD to Nero Digital 41
Setting Options for Recoding a Main Movie to Nero Digital 60
7.7
Recoding DVD's and videos to Nero Digital
You can use Nero Recode to encode all video formats supported by Nero into Nero Digital™
files. The Nero Digital™ codec is MPEG-4-compliant. These files can be played in Nero
ShowTime and in other common programs.
Nero Recode
56
Recoding a DVD to Nero Digital
Copyright
Unless you possess the copyright yourself, or at least have the permission of
the copyright holder, the unauthorized reproduction of discs may be a breach of
national or international law and may lead to severe penalties!
To recode a DVD or video to Nero Digital, proceed as follows:
1. Select the Recode DVDs and Videos to Nero Digital task in the Nero Recode start screen.
The My Nero Digital Disc screen appears.
2. Insert the DVD you want to recode in the disc drive on your PC.
Keep in mind that the Fit to target check box is enabled so that the content of
the source DVD can be recoded during the subsequent process in such a way
that it fits the selected target format.
If the check box is disabled, the DVD-Video will be imported in its original size.
In this case, it is possible that the data volume will be so large that you will only
be able to store it on a double-layer DVD or on the hard drive.
3. Select the required import profile in the Title import profile area.
4. Click the Import Files button.
The Import Titles window opens.
5. Select the video titles that you want to recode and click the Add titles button.
The selected video files are imported and displayed in the Content area.
If the source files are larger than the target media, you can also see how the files are recoded according to the selected profile here.
Underneath, the capacity bar shows how much disk space is taken up by the imported files on the disc graphically.
6. If you want to delete a single video title:
1. Select the required video title.
2. Click the Erase button.
The video title is removed from the compilation.
7. If you want to lock an individual video title to protect it from loss of quality during recoding:
1. Select the required video title.
2. Click the Lock Ratio button.
The video title is locked.
8. If you want to unlock a locked video title in order to adjust the quality proportionally to the
quality of the other titles while recoding:
1. Select the required video title.
2. Click the Unlock Ratio button.
The video title is unlocked.
Nero Recode
57
Recoding a DVD to Nero Digital
In order to adjust the quality of a desired video title individually, you can move
the slider in the Video Quality column under the Content area. The quality of
the remaining DVD content is lowered proportionally to the quality improvement
of an individual piece of content.
The sliders in the Video Quality area are enabled only when the Fit to target
check box is deactivated.
9. If you want to trim an individual video title:
1. Select the required video title.
2. Click the Trim Movie button.
The Trim Movie window opens.
3. Choose the first and last frames and click the OK button.
The video title is trimmed.
10. If you want to add additional chapters to individual video titles:
1. Select the required video title.
2. Click the Chapters button.
The Chapter window opens.
3. Add the desired chapter markers and click the OK button.
The chapters are added.
11. Choose the desired Nero Digital™ category in the Profile Category drop-down menu.
12. Select the required Nero Digital profile in the Profile drop-down menu.
13. Select the desired encoding method from the Encoding Method drop-down menu.
14. If you want to change the video settings for a video title, click the Settings button under the
Video tab and configure the settings according to your preferences.
15. If you wish to modify the encoder settings of a video title, click the Encoder button on the
Video tab and make the required settings.
16. Select the audio tracks of a video title that you want to copy on the Audio #1 and #2 tabs.
17. If you want to change other audio settings for an audio track, click the Settings button under
the corresponding Audio tab and configure the settings according to your preferences.
18. Select the subtitle tracks (of a video title) that you want to copy under the Subtitle tab.
19. Click the Next button to define the burn settings.
The Burn Settings screen appears.
20. Make the required settings for the burn process.
21. Click the Burn button.
The recoding and burn process is started and the Recording and Burning screen is
displayed. You can track the process here.
22. If you have chosen the the disc drive of your computer as the target of the compilation, you
will be prompted to insert an empty writable disc in the drive.
Nero Recode
58
Recoding a DVD to Nero Digital
The burn process is complete when the relevant message appears in the information
window.
You have recoded a DVD or a video into Nero Digital™.
Clicking the Next button displays the What do you want to do now? screen. You can
select further options or exit Nero Recode here.
See also:
Setting Options for Recoding a DVD to Nero Digital 41
Nero Digital Video Settings 44
Encoder settings 48
Nero Digital Audio Settings 52
Nero Digital™ Subtitle Settings 52
Chapter window 55
Trim Movie window 31
Import screen 15
Screen Burn Settings 20
Recoding and Burning screen 23
Nero Recode
59
Recoding a Main Movie to Nero Digital
8
Recoding a Main Movie to Nero Digital
8.1
Setting Options for Recoding a Main Movie to Nero Digital
In addition to the basic settings that are always displayed on the screen for importing files,
you can configure certain other settings with the Recode Main Movie to Nero Digital task.
Screen My Nero Digital Movie Backup
The following buttons are available:
Trim Movie
Opens the Trim Movie window, where the selected video title can be
trimmed.
This button is only enabled if at least one DVD video title has been
imported into the Content area and selected there.
Nero Recode
60
Recoding a Main Movie to Nero Digital
Opens the window Chapter where chapter markers can be set.
This button is only enabled if at least one DVD video title has been
imported into the Content area and selected there.
Chapter
The following drop-down menus are available:
Profile category
Changes the Nero Digital™ category. This setting refers to the respective target media for which encoding takes place. The result has
different sizes depending on the selection; the entries in the Profile
drop-down menu are adjusted accordingly.
Profile
Changes the Nero Digital profile. The setting relates to the target medium for which encoding is being carried out.
Encoding Method
Selects the method to be used to encode the MPEG-4 file.
If you select Fast (1-pass), the movie only undergoes one conversion
pass. This method requires less time but has lower quality than encoding in two steps. The movie is analyzed and converted with the
available bit rate simultaneously.
If you select High quality (2-pass), the movie undergoes several
conversion passes. The quality is better, but the process takes longer.
The first pass analyzes the movie and creates a temporary file (*log).
The second pass converts the file. During this process, the bit rate data that was stored in the temporary files is used.
See also:
Chapter window 55
Recoding a main movie to Nero Digital™ 61
Import screen 15
Trim Movie window 31
8.2
Recoding a main movie to Nero Digital™
You can use Nero Recode to encode the main movie of a DVD without additional extras into
Nero Digital™. The Nero Digital™ codec is MPEG-4-compliant. These files can be played in
Nero ShowTime and in other common programs.
Copyright
Unless you possess the copyright yourself, or at least have the permission of
the copyright holder, the unauthorized reproduction of discs may be a breach of
national or international law and may lead to severe penalties!
In order to recode the main movie of a DVD to Nero Digital™, proceed as follows:
1. Select the Recode Main Movie to Nero Digital task in the Nero Recode main window.
The My Nero Digital Movie Backup screen is displayed.
Nero Recode
61
Recoding a Main Movie to Nero Digital
2. Insert the DVD you want to recode in the disc drive on your PC.
Keep in mind that the Fit to target check box is enabled so that the content of
the source DVD can be recoded during the subsequent process in such a way
that it fits the selected target format.
If the check box is disabled, the DVD-Video will be imported in its original size.
In this case, it is possible that the data volume will be so large that you will only
be able to store it on a double-layer DVD or on the hard drive.
3. Select the required import profile in the Title import profile area.
4. Click the Import DVD button.
The Browse Folder window is opened.
5. Select the drive or hard drive folder containing the DVD that you want to recode and click the
OK button.
The DVD's main movie is imported and shown in the Content area. If the source DVD is
larger than the target media, you can also see how the DVD is recoded according to the
selected profile here.
Underneath, the capacity bar shows how much disk space is occupied by the imported files on the disc graphically.
6. If you want to trim an individual video title:
1. Select the required video title.
2. Click the Trim Movie button.
The Trim Movie window opens.
3. Choose the first and last frames and click the OK button.
The video title is trimmed.
7. If you want to add additional chapters to individual video titles:
1. Select the required video title.
2. Click the Chapters button.
The Chapter window opens.
3. Add the desired chapter markers and click the OK button.
The chapters are added.
In order to adjust the quality of a desired video title individually, you can move
the slider in the Video Quality column under the Content area. The quality of
the remaining DVD content is lowered proportionally to the quality improvement
of an individual piece of content.
The sliders in the Video Quality area are enabled only when the Fit to target
check box is deactivated.
8. Choose the desired Nero Digital™ category in the Profile Category drop-down menu.
9. Select the required Nero Digital profile in the Profile drop-down menu.
10. Select the desired encoding method from the Encoding Method drop-down menu.
Nero Recode
62
Recoding a Main Movie to Nero Digital
11. If you want to change the video settings for a video title, click the Settings button under the
Video tab and configure the settings according to your preferences.
12. If you want to change the encoder settings for a video title, click the Encoder button under
the Video tab and configure the settings according to your preferences.
13. Select the audio tracks of a video title that you want to copy on the Audio #1 and #2 tabs.
14. If you want to change the audio settings for an audio track, click the Settings button under
the Audio tab and configure the settings according to your preferences.
15. Select the subtitle tracks (of a video title) that you want to copy under the Subtitle tab.
16. Click the Next button to define the burn settings.
The Burn Settings screen appears.
17. Make the required settings for the burn process.
18. Click the Burn button.
The recoding and burn process is started and the Recording and Burning screen is
displayed. You can track the process here.
19. If you have chosen the the disc drive of your computer as the target of the compilation, you
will be prompted to insert an empty writable disc in the drive.
The burn process is complete when the relevant message appears in the information
window.
You have recorded a DVD's main movie to Nero Digital™. Clicking the Next button displays the What do you want to do now? screen, where you can select other options or
exit Nero Recode.
See also:
Setting Options for Recoding a Main Movie to Nero Digital 60
Trim Movie window 31
Chapter window 55
Import screen 15
Screen Burn Settings 20
Recoding and Burning screen 23
Nero Recode
63
Technical Information
9
Technical Information
9.1
System requirements
Nero Recode is installed along with the Nero Suite. Its system requirements are the same.
You can find more detailed information on the system requirements under www.nero.com.
9.2
In addition, the following requirements apply:
Optional: DVD-Video Plug-in for DVD-Video recordings and the "DVD-9 to DVD-5" function
Multi-core processor (recommended)
Versions of Nero Recode
Nero Recode is also offered in versions different from the full version. These versions differ
from the full version in the scope of their features, i.e. they cannot perform all the tasks described in this manual, and the user interface is adapted to the specific version.
The following versions are available:
Nero Recode
Full version
Nero Recode Essentials
The following features of the full version may not be included:
PSP export function
iPod export function
Nero Recode Essentials SE
Exclusive features:
Recode an entire DVD to DVD
Burn function (via Nero API)
Nero Recode Essentials CE
The following features of the full version are not included:
Recode an entire DVD
Recoding a main movie to DVD
Change the structure of a DVD
Nero Recode
64
Glossary
10
Glossary
AAC
Advance Audio Coding is an audio compression method defined under the MPEG-4 standard. AAC has a higher compression ratio than other comparable formats (e.g. MP3) and
achieves high audio quality starting at 64 kbit/s already. This encoding format is used, e.g. in
online music stores and online radios.
AVC
Advanced Video Coding is a video compression standard. AVC was developed for maximum
encoding efficiency and makes it possible to produce good quality video compression at low
bit rates. It is one of the mandatory video compression methods for high-definition television
transmissions and for mobile devices (e.g. cell phones, PDA's).
Bicubic interpolation
Bicubic interpolation is an image processing method. If an image is enlarged beyond its original size, not only are the four neighboring pixels analyzed to calculate the new resulting
pixel, but other nearby pixels are analyzed as well. This way, the new pixel is interpolated
based on eight neighboring pixels.
Bilinear Interpolation
Bilinear interpolation refers to an image processing method. If a picture is enlarged beyond
its original size, the resulting new image pixels are calculated based on the average between
the four neighboring pixels. The more a picture is enlarged with this method, the less sharp it
becomes.
Bit rate
Bit rate refers to the amount of data (binary digits) that is transmitted within a time unit (generally 1 second), i.e. in bits/s. The higher the bit rate, the better the image quality.
Book Type
The book type defines the specification (e.g. DVD-, DVD+, DVD-ROM) of a DVD. In order to
ensure correct playback, the DVD specifications are defined in books so that all media can
be read correctly. The specifications are defined in the so-called Rainbow Books, which are
distinguished by means of their color (e.g. Yellow Book).
CABAC
Context Adaptive Binary Arithmetic Coding refers to an encoding method for digital video files. CABAC is an integral part of the H.264/MPEG-4 AVC encoding standard. Instead of variable-length bit strings, a different arithmetic encoding method that makes it possible to reduce the bit rate between 10% and 20% (and therefore reduces space requirements) is used.
Nero Recode
65
Glossary
Deinterlace
The deinterlacing process converts interlaced video files into complete frames (progressive),
since computer displays and modern televisions do not work with the deinterlaced system
anymore, but rather with complete frames.
Encode
Encoding refers to creating a video in a defined video format, e.g. MPEG-2 or Nero Digital™
(MPEG-4) through data compression. A corresponding encoder is required for each video
format.
GOP
A Group of Pictures refers to a group of consecutive individual pictures in the picture flow of
a video file. Each movie or video flow consists of consecutive GOP's. The viewable individual
pictures are generated from them.
Interlace
The interlacing process, which is used to display a TV picture in PAL standard, displays two
half frames in succession. As the frame is generated, only the odd lines from the output device are displayed for the first half frame. When this is complete, the second half frame is
generated from the even lines. The two frames are encoded separately. The relatively high
refresh frequency means that the eye picks this up as a single frame.
Lanczos interpolation
Lanczos interpolation refers to an image enlargement method. The method was developed
according to an algorithm created by Cornelius Lanczos. This interpolation method provides
high quality and good sharpness levels. However, the actual visual resolution of the images
is not increased.
Letterbox
Letterbox refers to an aspect ratio transferring method with which, e.g. a video file with 16:9
aspect ratio is adjusted for the 4:3 television aspect ratio. Black bars are placed above and
below the picture.
Macroblock
A macroblock refers to a block consisting of 16x16 pixels, and constitutes the basic unit in
the MPEG standard, on which motion encoding is based as well. A macroblock contains information regarding the brightness and color distribution of a video picture.
MPEG-2
The Moving Picture Experts Group defined this industry standard for video and audio codecs. There is little difference between MPEG-1 and MPEG-2: MPEG-2 is a broadcast standard and better for televisions that are interlaced. MPEG-2 is used as a video format for
DVDs.
MPEG-4
The Moving Picture Experts Group defined this industry standard for video and audio codecs. MPEG-4 is the latest MPEG standard for video and audio. MPEG-4 combines several
Nero Recode
66
Glossary
functions from MPEG-1, MPEG-2 and other standards. Nero Digital™ Video and Nero Digital™ Audio are based on this standard.
Multithreading
Multithreading refers to a processor's capability of processing several tasks simultaneously.
In the field of software, it also refers to the distribution of computing work for a certain task
among several processors.
P-frame
P-frames (predicted frames) refer to predicted pictures in MPEG compression. They are based on predictions and guesses from previous intra-frames (I-frames) and P-frames. They
only include the change information in comparison the the previous frame. Since P-frames
feature a higher compression ratio than I-frames, the compressed data volume is smaller,
since only the changes are saved in the frame.
Streaming
Streaming refers to the continuous transmission of data that can already be played during
the transmission procedure. This means that it is not necessary to wait until a media file has
been transmitted completely before it can be played back. A TV channel can be received
and displayed at the same time without it first having to be saved to the hard drive.
Nero Recode
67
Index
11
Index
1
1:1 copy................................................... 6
A
Activate ................................................. 27
Audio channels...................................... 52
Audio codec .......................................... 43
Audio encoder ....................................... 43
Audio preview:....................................... 14
Audio Settings ....................................... 52
Audio streams ....................................... 33
Audio tab ................................... 18, 19, 43
Audio tracks ........................ 18, 19, 39, 43
B
Baseline Profile ..................................... 50
Basic settings .......... 10, 11, 12, 13, 14, 15
Bit rate................................................... 52
Book type .............................................. 23
Burn process ............................. 20, 23, 25
Burn progress........................................ 23
Burn Settings............................... 6, 20, 22
Burn Settings screen............................... 6
Burn-at-once ......................................... 22
B-VOP ................................................... 50
C
CABAC.................................................. 50
Capacity bar .......................................... 15
Chapter ..................................... 42, 55, 61
Chapter window ........................ 42, 55, 61
Color Correction .................................... 48
Compiling a DVD................... 5, 10, 36, 38
Conventions, manual .............................. 5
Copy DVD ........................................... 5, 6
Copy protection ..................................... 15
Copyright............................................... 15
Crop ...................................................... 46
Crop tab ................................................ 46
Customizing Image size........................ 47
Nero Recode
D
Data Files tab .................................. 15, 18
Deblocking ............................................ 50
Decoding ........................................... 6, 14
Default Streams ........................ 31, 33, 37
Default Streams window ....................... 33
Deinterlace ............................................ 45
Deinterlace tab ...................................... 45
Deleting a video title........................ 36, 41
Denoise ................................................. 48
Disable .................................................. 27
Disabling video titles ............................. 27
Disc image .............................................. 5
Disc Info ................................................ 10
Dolby Digital .......................................... 14
DVD tab................................................. 12
DVD-Video Files tab ....................... 15, 16
E
Enabling video titles .............................. 27
Encode .................................................... 6
Encoder........................................... 43, 48
Encoder configuration tab ..................... 48
Encoder settings ................. 48, 49, 50, 51
Encoding Method ............................ 42, 61
Encoding precision................................ 49
Erase............................................... 36, 41
Erasing a Disc ....................................... 10
Extended area..... 9, 10, 15, 20, 22, 23, 25
F
File I/O tab............................................. 15
Focal plane............................................ 51
Frame rate............................................. 45
Framerate tab........................................ 45
Full version............................................ 64
G
General tab ........................................... 12
GOP ................................................ 49, 50
68
Index
H
High quality mode ................................. 22
I
Image file................................................. 5
Import DVD ..................................... 12, 17
Import Files .. 6, 16, 18, 19, 26, 30, 36, 41,
60
Import Files screen .. 6, 15, 16, 18, 19, 26,
30, 36, 41, 60
Import Title ............................................ 17
Info tab .................................................. 18
Interlaced .............................................. 50
Interlaced encoding............................... 13
iPod ....................................................... 14
iTunes ................................................... 14
L
Layer break ........................................... 13
Letterbox ............................................... 47
Lock Ratio ................................. 27, 37, 42
Locking a video title .................. 27, 37, 42
M
Macroblock level ................................... 51
Main window ........................................... 9
Manual, conventions ............................... 5
Merge Titles .......................................... 37
Merge video title.................................... 37
Motion-adaptive............................... 14, 45
Multi-Core processors........................... 51
Multithreading........................................ 51
My DVD Backup.................................... 26
My Movie Backup.................................. 30
My Nero Digital Disc Screen ................. 41
My Nero Digital Movie Backup screen .. 60
My Own DVD Compilation Screen........ 36
N
Nero Burning ROM ................................. 6
Nero CoverDesigner ............................. 11
Nero Digital 10, 14, 15, 25, 42, 44, 45, 46,
47, 48, 49, 50, 51, 52, 53, 60, 61
Nero Digital Audio ................................. 43
Nero Recode
Nero Digital Audio properties window .. 43,
52
Nero Digital Subtitle Settings window .. 43,
52
Nero Digital tab ..................................... 13
Nero Digital Titles tab............................ 16
Nero Digital Video properties window .. 43,
48, 49, 50, 51
Nero Digital Video Settings 43, 44, 45, 46,
47
Nero Digital Video Settings window43, 44,
45, 46, 47
Nero Express .......................................... 6
Nero Recode main window ..................... 6
Nero Recode Options window . 11, 12, 13,
14, 15
Nero Recode profile window ................. 19
O
Options.................... 10, 11, 12, 13, 14, 15
Output DVD........................................... 13
P
Picking a task. ..................................... 6, 9
Plug-ins ........................................... 47, 48
Plug-ins tab ........................................... 47
Preview ........................................... 17, 25
Preview window tab .............................. 14
Priority ....................................... 20, 23, 25
Profile categories ............................ 44, 53
Profile category ............................... 42, 61
Profiles .............. 14, 19, 25, 42, 44, 53, 61
Program
Launching the Program...................................... 8
Startup ............................................................... 8
Program versions .................................. 64
Progress bar.......................................... 23
Psychovisual enhancement .................. 51
P-UOP................................................... 13
Q
Quick info .................................... 6, 10, 11
R
Recoding ......................... 6, 20, 22, 23, 25
69
Index
Recoding a main movie to DVD.. 9, 30, 34
Recoding an entire DVD to DVD. 9, 26, 27
Recoding and burn process .................... 6
Recoding and Burning screen..... 6, 23, 25
Recoding DVDs and videos to Nero
Digital .............................................. 10, 41
Recoding DVD's and videos to Nero
Digital .................................................... 57
Recoding process ..................... 20, 23, 25
Recoding the main movie to Nero Digital
.................................................. 10, 60, 61
Resolution ............................................. 47
Resolution tab ....................................... 47
S
Sample Rate ......................................... 52
Scope of features .................................. 64
Screen Burn Settings ...................... 20, 22
Screen My DVD Backup ....................... 26
Screen My Movie Backup ..................... 30
Setting chapter markers............ 42, 55, 61
Split ....................................................... 37
Startup
Program............................................................. 8
Subtitle formats ..................................... 55
Subtitle settings..................................... 52
Subtitle streams .................................... 33
Subtitle tab ................................ 18, 19, 43
Subtitle Tracks .. 18, 20, 43, 44, 52, 53, 55
Subtitles .......................................... 44, 53
System requirements ............................ 64
T
Target folder.......................................... 22
Task-specific setting options.... 15, 17, 18,
20, 23, 27, 30, 36, 41, 60
Temporary files ..................................... 22
Title import profiles.......................... 15, 19
Tool tips....................................... 6, 10, 11
Transcoding ............................................ 6
Trim Movie .................... 30, 31, 37, 42, 60
Trim Movie window ............................... 31
U
Unlock Ratio.............................. 27, 37, 42
Unlocking a video title ..................... 27, 37
Unlocking video titles ............................ 42
User Interface.......................................... 9
V
Versions ................................................ 64
Video quality 17, 27, 29, 37, 39, 42, 58, 62
Video resolution .................................... 14
Video sequence properties ................... 49
Video Settings ............... 43, 44, 45, 46, 47
Video tab ......................................... 19, 42
Video title .............................................. 39
Visual Enhancement ............................. 51
Volume .................................................. 52
W
Write speed ........................................... 22
Writing ................................. 20, 22, 23, 25
Other................................................................ 64
Nero Recode
70
Contact
12
Contact
Nero Recode is a Nero AG product.
Nero AG
Im Stoeckmaedle 13-15
Web:
www.nero.com
76307 Karlsbad
Help:
http://support.nero.com
Germany
Fax:
+49 724 892 8499
330 N Brand Blvd Suite 800
Web:
www.nero.com
Glendale, CA 91203-2335
Help:
http://support.nero.com
USA
Fax:
(818) 956 7094
E-mail:
[email protected]
Rover Center-kita 8F-B, 1-2-2
Nakagawa-chuou Tsuzuki-ku
Web:
www.nero.com
Yokohama, Kanagawa
Help:
http://support.nero.com
Nero Inc.
Nero KK
Japan 224-0003
Copyright © 2008 Nero AG and its licensors. All rights reserved.
Nero Recode
71