1
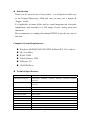
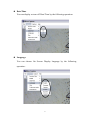
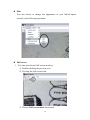
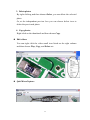
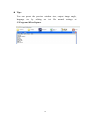
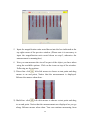
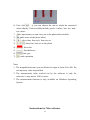
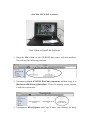
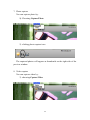
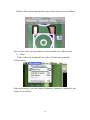
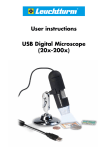
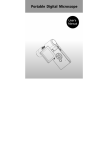
User’s Manual
(Win & Mac)
Introduction
Thank you for your choice of our product - it is a high-tech while easy
to use Digital Microscope. With this unit you may see a unique &
“bigger” world.
It is applicable in many fields such as visual inspection on electronic
components, and materials in a full range of uses, beauty shop and
education.
We recommend you reading this manual FIRST to get the best out of
this unit.
Computer System Requirements:
Windows 98SE/ME/2000/XP/VISTA & Mac OS X 10.5 or above
P4 1.8 or above
RAM: 256M
Video Memory: 32M
USB port: 2.0
CD-ROM Drive
Technical Specifications
Image sensor
1.3 Mega Pixels (interpolated to 2M)
Still capture resolution
1600x1200, 1280x960, 800x600, 640x480, 352x288, 320x240,
160x120
Video capture resolution
1600x1200, 1280x960, 800x600, 640x480, 352x288, 320x240,
160x120
Color
24 bit RGB
Flicker Frequency
50Hz/60Hz
Frame Rate
Max 30f/s under 600 Lus Brightness
Magnification Ratio
20X to 400X
Shutter Speed
1 sec. to 1/1000 sec.
Video format
AVI
Photo format
JPEG or BMP
White balance
Auto
Exposure
Auto
Light source
8 LED (switchable by software)
1
PC interface
USB2.0
Power source
5V DC from USB port
Operation system
Windows2000/XP/Vista, Mac OS X 10.5 or above
OSD language
English, German, Spanish, Korean, French, Russian
Bundle software
MicroCapture with measurement & calibration function
Size
125mm (L) x 33mm (R)
Install the software
Insert the driver CD into CD-ROM Drive and this will automatically
display the following interface:
1. Install the driver by clicking Microscope Driver
A Install Shield Wizard will walk you through the whole process. Click
the “Next” button to continue.
In this process a message box will appear on the screen. Please click on
“Continue Anyway”. (Some versions of drivers may not be tested by
Windows Lab testing. However it is safe for both your software and
hardware)
2
2. Install the MicroCapture software
Click install MicroCapture software and then reboot the system when
asked.
3. You can also browse the User’s manual in PDF format and the CD
contents by choosing the corresponding menus.
Connecting the Microscope to Computer
1.
When using a Windows XP operating system, the following “Found
New Hardware Wizard” screen will appear upon connecting the unit
to your PC via the USB port.
Select the “Install the software automatically (Recommended)”
option and click the “Next” button.
3
2. Click the “Continue Anyway” button on the message box that appears.
4
3. Click the “Finish” button to exit the wizard. Now you may begin to
use the Digital Microscope.
5
Quick Look at the Digital Microscope
1) Use the FOCUS WHEEL to focus the microscope on the subject.
2) The SNAPSHOT BUTTON enables user capture snapshots by
hardware; please refer to photo capture by software later.
3) Calibration ruler provides the magnification ratio at which a focus got.
6
Start Microscope
Connect your Microscope directly to your PC USB port, start the
software by clicking the icon
generated on the desktop after
installation and then you will see the following box popped up.
1. Once the Microscope is disconnected from your PC USB port,
box showed on Step 1 will pop up as “No Device detected, please
connect your Microscope directly to your PC USB port.”
Change preview size
7
You can change the preview size by the following operation:
Note: The size of the photo taken is equivalent to the preview size
selected in the Options menu/Preview Size.
Rotate the output image angle
You can rotate the output image clockwise and counter-clockwise.
8
Date/Time
You can display or turn off Date/Time by the following operation:
Language
You can choose On Screen Display language by the following
operation:
9
Skin
You can choose to change the appearance of your MicroCapture
screen by the following operation:
Full screen
1. You can enter & quit full screen mode by:
1) Double-clicking the preview area.
2) Clicking the full screen icon:
3) Choose Full screen mode from menu.
10
When in full screen mode, click on the Full screen icon to turn off
and restore toolbars and menus.
Preferences
11
Major operations under preferences are as follows:
1. LED on/off
You can choose from Aux LED Mode the LED status as Off/On/Auto
and click Apply. Click OK to continue.
2. Brightness
You can adjust the brightness best suitable for object observed.
3. Image Mirror and Image Flip option:
Image Mirror and Image Flip options are also available. Please ensure
that these options are deselected for correct image capture.
Capture
1. Photo capture
You can take photos by either of the following ways:
1) Click the camera button
2) Choose Capture and then click Photo
3) By pressing F11
12
Captured photos are saved automatically and image thumbnails will
be available on the right side of the MicroCapture screen for further
editing. For editing photo, please refer to later operations.
2. Video capture
13
You can record video by either of the following two ways:
1) Click the video camera button
2) Choose from the menu bar Capture and then click Video
When recording, there is a red dot flashing on the video camera
button.
The video is saved in AVI format.
Stop capture:
1) Click the flashing video camera button
2) Choose Capture and then click Stop capturing
Note: Please note the best pixels for video capturing is 640x480.
14
Edit photos
1. Preview photos
1) Clicking on an image thumbnail will display the image selected on
the preview area, with its size displayed on the left-bottom corner.
2) You can double click the image thumbnail and an independent
preview box will pop up as shown below:
15
2. Save photos
You can save photo by right clicking on the thumbnail and then
choose Save.
The file can be saved in either jpeg or bmp. The jpeg size in which the
photo is saved is the maximum allowed for jpeg. You can choose to
decrease the size by adjusting quality. Click the Advanced button to
view and select jpeg save options.
16
3. Delete photos
By right clicking and then choose Delete, you can delete the selected
photo
Or, at the independent preview box you can choose delete icon to
delete the previewed photo.
4. Copy photos
Right click on the thumbnail and then choose Copy.
Edit videos
You can right click the video small icon listed on the right column
and then choose Play, Copy, and Delete etc.
Quit MicroCapture
17
Tips:
You can preset the preview window size, output image angle,
language
etc
by
editing
an
C:\Programs\MicroCapture.
18
.ini
file
named
settings
at
How to use measurement & calibration function
1
Point the magnifier onto a target object e.g. a ruler; rotate the focus
wheel to get a clear focus.
2
When the focus at the clearest point, take a snapshot
3
Watch the calibration at the lower-end of the focus wheel; note down
the magnification value that corresponds to the indicator marker on
the magnifier body a shown below. That value is the magnification at
which the focus got and the photo taken. (This is very important,
since only with the magnification ration noted down, can the object
size be worked out at later steps!!)
4
Open the captured photo double clicking on the thumbnail. A preview
window will open
19
5
Input the magnification ratio noted down into the box indicated at the
top right corner of the preview window. (Please note it is necessary to
input the magnification ratio noted down on step3; otherwise the
measurement is meaningless.)
6
Now you can measure the size all or part of the object you have taken
using the available options. Click on the icons on top of the window.
Following are the options:
1) Direct line: click
, left-click mouse to choose a start point and drag
mouse to an end point, Notice that the measurement is displayed.
Release the mouse when done. .
2) Multi-line: click
, left-click mouse to choose a start point and drag
to an end point. Notice that the measurements are displayed as you go
along. Release mouse when done. You can continue measuring from
20
the previous end point to a next point and so on.
3) Circle-radius: click
, left-click to choose a start point for a circle;
draw the circle to an end point, release the mouse, and the radius of
the circle will be displayed.
4) Circle-diameter: click
, left-clicking to choose a start point for a
circle; draw the circle to an end point, release the mouse, and the
radius of the circle will be displayed.
5) Angle: click
, left-click to choose a start point for an angle, draw
the line to another point and then release the mouse to create one line
for an angle. Move your mouse to bring out another line of the angle,
left-click when the angle is ok. The angle value will then display.
21
, you can choose the unit at which the measured
6) Unit: click
values display. Units available include: pixels / inches / km / mt / mm /
cm / micro
7
Other operations you can carry out to the photo taken include:
1)
: make notes on the photo taken
: select font, font style, font size etc
2)
3)
: draw line, box etc on the photo
4)
: line color
5)
: line thickness
6)
: line type
7)
: undo operation
Note:
1. The magnification ratio you are allowed to input is from 20 to 400. Do
not input any value beyond that.
2. The measurement value worked out by the software is only for
reference; it may not be 100% correct.
3. The measurement function is only available on Windows Operating
System.
Instructions for Mac software
22
(for Mac OS X 10.5 or above)
Part I How to Install the Software
1. Open the Mac folder on the CD-ROM that comes with the machine.
You will see the following contents:
2. Uncompress Sonix SN9C201 WebCam.component and then copy it to
Macintosh HD\Library\Quicktime\. If the file already exists, replace
it with the current one.
3. Uncompress MicroCapture and Copy it onto your desktop for daily
23
use.
Part II
How to use MicroCapture
1. Plug your Magnifier into USB port.
2.
Double click MicroCapture icon to open the MicroCapture window.
The magnifier is now ready to use.
3. Preview
At the central window, you can preview the magnified subject.
4. Click LED on/off to turn on the LED!!!
24
5. Change preview resolution
From Options, you can choose the preview resolution. The current
resolution will be displayed at the left bottom corner of the preview
window.
Please note that the preview window size always remains at 640x480 but
the current resolution will show at the left bottom corner.
6. Date/Time
From Options, you can turn the date/time on or off.
25
7. Photo capture
You can capture photo by:
1) Choosing Capture/Photo
2) clicking photo capture icon
The captured photos will appear as thumbnails on the right side of the
preview window.
8. Video capture
You can capture video by:
3) choosing Capture/Video
26
4) clicking video capture icon
Note: After clicking on the icon, the video capture icon will turn
red to indicate video clip recording. Click the red icon again, to stop
recording!!
The captured videos will be appear as thumbnails on the right side of
the preview window under Video tab.
9. Photo & Video editing
Captured photo & video appear as thumbnails on the right side of the
preview window.
1) photo
27
Double click a photo thumbnail to open in the main preview window
You can then carry out operations as you normally do on Mac system.
2) Video
Click a video clip thumbnail, the video will play automatically.
10. Preferences
Under preferences, you can change brightness, sharpness, saturation, hue,
format etc as follows:
28
Note: if your Mac has a built-in camera, do not use the camera under
MicroCapture; otherwise the software will not work normally and you
have to restart MicroCapture.
29
11. Help info
By choosing About MicroCapture, you can get help info from your
local agent.
12. Quit MicroCapture
Choose Quit MicroCapture as follows, you can quit the software.
30
Safety:
The Magnifier is not waterproof, so keep it dry.
Do not use it in a humid place like bathrooms. A dry environment will
maintain its life to maximum.
Use the Magnifier only at -5℃-50℃.
Sudden temperature change may form dew inside the Magnifier like
entering a warm room in cold winter. Put it inside a handbag or plastic
bag to slow down temperature changes.
Do not point Magnifier lens to the sun or strong light for a long time.
Powerful light may hurt the light-sensitive electronics.
Avoid touching the lens.
The white LEDs which illuminate the Magnifier target field are very
bright. Do not stare directly into these LEDs as it may damage your
eyes.
The clear plastic distance shell sometimes picks up dirt or toxic
material from a microscopically observed surface. Be careful that this
doesn’t get in contact with the human skin. Always wash carefully or
disinfect as needed.
Do not unplug the Magnifier from USB port when LEDs are on. This
may cause information loss or circuit damage. Please always close
MicroCapture and then unplug the Magnifier.
31