1
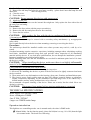
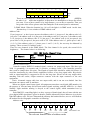
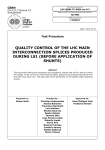
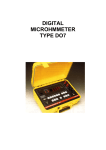
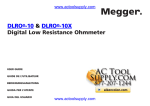
1
DMX 3000W Strobe
Using Manual
Thank you for having chosen our company’s products. For your own safety, please read this user manual
carefully before installing the device.
SAFETY INTRODUCTION
1、If the device has been exposed to temperature changes due to environmental changes, do not
switch it on immediately. The arising condensation could damage the device. Leave the device
switched off until it has reached room temperature.
2、This device falls under protection-class I. Therefore it is essential that the device be earthed. A
qualified person must carry out the electric connection.
3、Make sure that the available voltage is not higher than stated at the end of this manual.
4、Make sure the power cord is never crimped or damaged. If it is damaged, ask your dealer or
authorized agent to replace the power cord.
5、Always disconnect from the mains, when the device is not in use or before cleaning it.
6、Only handle the power cord by plug. Never pull out the plug by tugging the power cord.
CAUTION:
1. Be very careful during installation. Since you can suffer a life-threatening electric shock when
touching live wires.
2. Don’t touch the crust; be careful of scald. Because the temperature of crust is high when the
light is in use.
3. Never look directly into the light source, as sensitive persons may suffer an epileptic shock.
4. Keep light away from children and non-professionals.
GENERAL GUIDELINES
1、This device is a stroboscope for decorative effects. This device is only allowed to be
operated with and alternating current of max. 220-240VAC/50Hz and was designed for
indoor use only.
2、Do not shake the device. Avoid brute force when installing or operating it. Don’t operate it
for a long continual long time.
3、When choosing the installation spot, please make sure that the device is not exposed to
extreme heat, moisture or dust. The minimum distance between light-output from the
projector and the illuminated surface must be more than 0.5 meter.
4、Please use the safe and proper line to connect the light equipment.
5、Operate the device only after having familiarized yourself with its functions. Do not permit
operation by person not qualified for operating the device. Most damages are the result of
unprofessional operation.
6、Please use the original packaging if the device is to be transported.
7、For safety reasons, please be aware that all modifications on the device are forbidden.
Furthermore, any other operation may lead to short-circuit, burns, electric shock, lamp
explosion, crash, etc. If this device will be operated in any way different to the one
described in this manual, the product may suffer damages and the guarantee becomes void.
INSTALLATION INSTRUCTIONS
a) Installing or replacing the lamps
1、Before replacing the lamps let the lamps cool down, because during operation, the lamps
can reach temperatures of up to 700℃. Wait at least 10 minutes after use before opening
the housing.
2、During the installation of the lamp do not touch the glass bulb bare handed. Always use a
cloth to handle the lamp during insertion and removal.
3、Do not install lamps with a higher wattage. They generate higher temperatures than for
which the device was designed for.
4、For the installation, you need a pulse strobe lamp.
Procedure:
1) Remove the screw
2
2) Carefully remove the glass cover
3) Remove the old lamp and place the new lamp carefully. ( please don’t insert the lamp line and
other lines
into a wrong socket.)
4) Close the cover
5) Fasten the screw
CAUTION: Do not operate this device with open cover!
b) Replacing the fuse
If the lamp burns out, chances are the internal fuse might too. Only replace the fuse with a fuse of
the same type and rating.
Procedure:
1)、Remove the fuse socket with the proper screwdriver.
2)、Remove the old fuse and place the new fuse carefully.
3)、Fasten the fuse socket.
CAUTION: Only replace the fuse with the device unplugged from the mains!
c) Mounting the device
The installation must always be secured with a secondary safety attachment, e.g. an appropriate
safety cable.
Never stand directly below the device when mounting, removing or servicing the device.
Procedure:
The stroboscope should be installed outside areas where persons may reach it, walk by or be
seated.
Overhead mounting requires extensive experience, including amongst others calculating working
load limits, installation material being used, and periodic safety inspection of all installation
material and the device. If you lack these qualifications, do not attempt the installation yourself.
Improper installation can result in bodily injury.
Before mounting make sure that the installation area can hold a minimum point load of 10 times
the device s weight.
CAUTION: When installing the device, make sure there is no highly inflammable
material within a distance of min. 0.5m!
CLEANING AND MAINTENANCE
The following points have to be considered during the inspection:
1) All screws for installing the devices or parts of the device has to be tightly connected and must
not be corroded.
2) There must not be any deformations on the housing, glass pane, fixations and installation spots.
3) The electric power supply cables must not show any damage, material fatigue or sediments.
Further instructions depending on the installation spot and usage have to be adhered by a
skilled installer and any safety problems have to be removed.
We recommend a frequent cleaning of the device. Please use a moist, lint-free cloth. Never use
alcohol or solvents.
CAUTION:
Disconnect from mains before starting maintenance operation!
TECHNICAL SPECIFICATIONS
Power supply: 220-240VAC/50Hz
Power consumption: 3000W
Fuse: F 30A, 250VAC
Lamps: two 1500W strobe lamp
Operation introduction
This light has two controlling modes: one is manual mode; the other is DMX mode.
1) Manual Mode: On the function panel, please dial 10(that is to say, 10 is ON) then the light
is in manual mode. The detail is as following:
3
1
2
3
4
5
6
7
8
9
10
OFF
ON
There are two handspikes on the panel: one is to adjust the speed
(SPEED);
the other is to
adjust the brightness. Adjust these two handspikes to choose the effects
you want. If you want to control it by long-distance, you can buy a controller. Then you
can get the same effects (please make the handspike of the master panel be minimum).
2) DMX Mode: When the function key 10 is off, the light is in DMX mode. At this time,
function keys 1-9 are switches of DMX address code.
Address Code:
If you just press 1 or don’t press anyone, the address code is 1; just press 2, the address code is 2;
just press 3, the address code is 4; just press 4, the address code is 8; just press 5, the address code
is 16; just press 6, the address code is 32; just press 7, the address code is 64; just press 8, the
press code is 128; just press 9, the press code is 255. If the address code is 3, please press 1 and 2
(1+2=3); if the address code is 5, please press 1 and 3 (1+4=5); the rest may be deducted by
analogy. There are total 512 address codes.
There are two channels in the DMX Mode. The first channel is for speed, the second id for
brightness。 The channel value is as following:
SE011 DMX Strobe Channel Value
DMX
Channel
DMX Channel
Detail
value
CH1(speed)
0-255
The speed is from 0 to the fastest.
CH2(brightness) 0-255
The brightness is from mini to max.
DMX512 Connection
Controller output DMX512 standard signal, connects via output and input…The three pin
XLR 1 is grounding, 2 is negative and 3 is positive, or change 2 and 3 (The controller generally
don’t need to change these two pins). The length of signal cable should be within 100 meters, to
avoid the interference by other electric appliances because of too long signal cable. Big electric
cable or signal-amplifier is suggested to use for the long time. Please use the step output cable;
matching with the socket, output connector connects with the input connector of the next
equipments.
Don't dismantle output cable into two ouput cable, and it can not over-loaded. One line
maximan can connect with 32 machines.
When use digital control input signal, all equipments must have one digital ADD number, for
the purpose of relevant lamp and relevant control signals working, and this ADD No. is a band
Number. Light machine starting is obeyed to the control signal, which transmitted out by
controller.
Each DMX512 controlling light is to obey a group of band signal, they all start with the one
given digital ADD signal that is given in advance, and the allotment of these addresses is set by the
light DIP address code. We have illustrated the arbitrary dial method before, now we will illustrate
the method for the idiographic controller as following:
Address code:
1
1
2
3
4
5
6
7
2
4
8
16
32
64
8
9
128 256
The relevant formula value of address codes
10
automatism
4
Example 1: If the controller has 10 channels, so the first light ADD is 1, the relevant ADD is 1,
so the first light should turn on ADD 1; the formula of the second light is 1 add the number of
channels 10=11(11=1+2+8), then the second lamp should turn on 1, 2 and 4 addresses of…the
sixth light formula is 1+10+10+10+10+10=51(51=1+2+16+32), so the sixth lamp should pull out 1,
2, 5 and 6. And so on.
Example 2: If the controller has 16 channels, the start address of the first light is 1, and the
relevant address is 1, so the first light should turn on ADD 1 or don’t turn on any one; the formula
of the second light is 1 and the number of channels 16, which equals 17(17=1+16), so the second
lamp should turn on ADD 5 and 1…the formula value of the sixth light is
1+16+16+16+16+16=81(81=1+16+64), so the sixth light should turn on1, 5 and 7. And so on.
Take the usual DMX512 controller as an example, the controller has16 channels; so the ADD
of each light can turn on to take the row as follows:
The first light=1 (1)
the seventh one =1+16×6=97 (1、6、7 )
The second one=1+16×1=17 (1、5)
the eighth one=1+16×7=113 (1、5、6、7)
The third one=1+16×2=33(1、6)
the ninth one=1+16×8=129 (1、8)
The fourth one=1+26×3=49 ( 1、5、6)
the tenth one=1+26×9=145 (1、5、8)
The fifth one=1+16×4=65 (1、7)
the eleventh one=1+16×10=161 (1、6、8)
The sixth one=1+16×5=81 (1、5、7)
the twelfth one=1+16×11=177 (1、5、6、8)