1
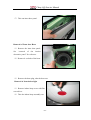
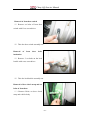
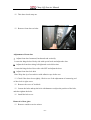
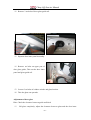
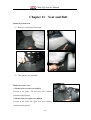
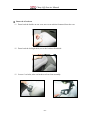
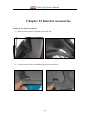
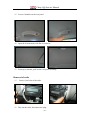
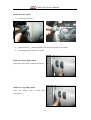
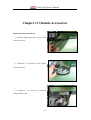
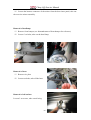
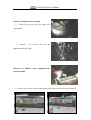
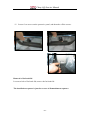
Chery QQ Service Manual
Chapter 10 Door
Disassembly of front door
Removal of inner door panel of front door
(1)Remove set bolt on the fixed handle base
plate with cross screwdriver.
(2)Remove bolts of fixed handle with
cross screwdriver.
(3)Remove 4 set bolts of inner door panel.
- 232 -
Chery QQ Service Manual
(4)Sway the door inner door panel from top to bottom by hand, take out the inner
door panel upwards.
(5)From the rear of inner door panel, separate the connecting rod of fixed handle,
then take out the fixed handle.
(6)Disconnect the wire harness plug of central lock main switch from the rear of
door inner door
panel, and then take out the base plate of door handle.
- 233 -
Chery QQ Service Manual
(7)Take out inner door panel.
Removal of Front door Horn
(1)Remove the inner door panel;
See
“removal
of
the
interior
decorative panel” for reference.
(2)Remove 4 set bolts of the horn.
(3)Remove the horn plug, take the horn out.
Removal of front indoor light
(1)Remove indoor lamp cover with flat
screwdriver.
(2)Take the indoor lamp assembly out.
- 234 -
Chery QQ Service Manual
Removal of front door switch
(1)Remove set bolts of front door
switch with Cross screwdriver.
(2)Take the door switch assembly out.
Removal
of
front
door
locks
institution
(1)Remove 2 set bolts on the lock
buckle with cross screwdriver.
(2)Take the lock buckle assembly out.
Removal of door check strap and set
bolts of front door
(1)Remove Bolts on door check
strap and vehicle body
- 235 -
Chery QQ Service Manual
(2)Take door check strap out.
(3)Remove front door set bolts
Adjustment of front door
1. Adjust front door frontward, backwards and vertically
Loosen the hinge bolts of body side with special tools and adjust the door.
2. Adjust the front door along left/right and vertical direction.
Loosen the hinge bolts of door side with SST and adjust the door.
3. Adjust front door lock hole
Hint: Wrap the tip of screwdriver with adhesive tape before use.
(1)Check if the door closes tightly; Check to see if the adjustment of connecting rod
of door lock is right or not.
(2)Remove the cover of lock hole.
(3)Loosen the bolts and tap the hole with hammer to adjust the position of the hole,
and then tighten the bolts.
(4)Install the bolt cover.
Removal of door glass
(1)Remove outside rearview mirror.
- 236 -
Chery QQ Service Manual
(2)Remove 2 set bolts of door glass guide rail.
(3)Separate door inner panel Assembly.
(4)Remove set bolts on upper part of
door glass guide; Take out the door inner
panel and glass guide rail.
(5)Loosen 2 set bolts of window winder and glass bracket.
(6)Take the glass out upwards.
Adjustment of door glass
Hint: Check the clearance between guide and block
(1) Lift glass completely; adjust the clearance between glass and the door inner
- 237 -
Chery QQ Service Manual
panel.
(2) Fix the guide, block and 2 nuts after adjustment.
(3)Lift glass again and check to see if the installation is good or not.
Removal of window winder
(1)Take out the door inner panel.
(2)Loosen 2 set bolts of the window winder and
glass bracket
Hint: Stuff a piece of cloth inside the door inner
panel, so as not to cut the surface of the glass.
(3)Loosen 6 set bolts of the window winder.
The tighten torque: 5.5N·m (56kg-m, 491b-ft)
(4)Loosen the harness connector of the window winder; Take the window winder
assembly out.
Removal of front door weather strip
(1)Loosen screws and nuts.
(2)Take out the two sided adhesive tape from backward with scraper.
The installation sequence is in the reverse direction of the dismantle sequence.
As to dismantle of other door, you can see “dismantle of front door” for reference.
- 238 -
Chery QQ Service Manual
Chapter 11
Seat and Belt
Removal of front seat
(1)Remove 4 set bolts of front seat
(2)Take out the seat assembly
Removal of rear seat
1. Removal of rear left seat cushion
Loosen 4 set bolts, lift left rear seat cushion
frontward and upward.
2. Removal of rear right seat cushion
Loosen 4 set bolts, lift right rear seat cushion
frontward and upward.
- 239 -
Chery QQ Service Manual
3. Removal of backrest
(1)Draw back the buckle on rear seat, move seat cushion frontward from the rear.
(2)Draw back the left/right bolts, move the backrest frontward.
(3)Loosen 3 set bolts, take out backrest of rear Seat assembly.
- 240 -
Chery QQ Service Manual
4. Dismantlement of backrest lock
(1) Loosen outer cover of the seat.
(2)Loosen 2 set bolts, take out rear back lock.
5. Removal of safety belt of rear seat
(1)Draw back the buckle, move the seat pad frontward;
(2)Loosen set bolt of the safety belt handspike, take out the bolts.
(3)Loosen set bolts of the left/right safety belt;
(4)Use special tools to loosen the clamp buckle, move the footrest.
(5)Loosen 3 set bolts of the left/right acoustics horn, move the bolts. Loosen 2
upper and lower set bolts; take off the safety belt.
- 241 -
Chery QQ Service Manual
Chapter 12 Interior accessories
Removal of vehicle roof panel
(1)Pull out inner panel of A pillar on the left side.
(2)Loosen bolts on the sun shading panel with screwdriver.
- 242 -
Chery QQ Service Manual
(3)Loosen 3 handles on the roof panel.
(4)Open the 8 latch hooks with flat screwdriver.
(5)From top to bottom, pull out the roof panel assembly.
Removal of radio
(1) Loosen 2 set bolts of the radio.
(2)Take out the radio, disconnect the plug.
- 243 -
Chery QQ Service Manual
Removal of A/C panel
(1)Loosen 4 set screws.
(2)Open fixed clip
(make the mark) and loosen the cable on air outlet.
(3)Loosen plug, pull out the A/C panel
Removal of back light switch
Open the switch with a small Screwdriver.
Removal of fog lamp switch
Open the switch with a small Flat
screwdriver.
- 244 -
Chery QQ Service Manual
Removal of antenna
(1)Remove set bolts of antenna.
(2)Remove the launching wire of the antenna.
The installation sequence is in the reverse direction of the dismantle sequence.
- 245 -
Chery QQ Service Manual
Chapter 13 Outside Accessories
Removal of rearview mirror
(1)Remove plastic protective Cover of the
rearview mirror.
(2)Remove 2 set screws of the outside
rearview mirror.
( 3 ) Remove 3 set screws of rearview
mirror plastic parts.
- 246 -
Chery QQ Service Manual
(4)Loosen the harness connector of the mirror from the door inner panel; take out
the rearview mirror assembly.
Removal of headlamp
(1)Remove front bumper (see dismantlement of front bumper for reference)
(2)Loosen 3 set bolts, take out the head lamp.
Removal of horn
(1)Remove tire plate
(2)Loosen set bolts, take off the horn.
Removal of tail surface:
Loosen 3 set screws, take out tail wing
- 247 -
Chery QQ Service Manual
Removal of high-mount stop lamp
(1) Loosen 2 set screws, pull out lamp cover
downwards
( 2 ) Loosen 3 set screws, take out the
high-mounted stop lamp.
Removal of number plate lamp/protective
panel assembly
(1)Loosen 4 set screws of the license plate lamp with screw driver to take them off.
- 248 -
Chery QQ Service Manual
(2)Loosen 2 set screws on the protective panel, and then take off the screws.
Removal of fuel tank lid
Loosen set bolt of fuel tank lid; remove the fuel tank lid.
The installation sequence is just the reverse of dismantlement sequence
- 249 -