Transcript
Insert the ProScan CD into your PC’s CD-ROM drive.
Installation should begin automatically. If installation does not
begin, click Start → Run, and type “D:\setup.exe”, and click
OK.
ProScan requires that your PC have the Microsoft .NET
Framework installed. If your PC doesn’t have the latest version of
the .NET Framework installed, you should elect to install the
.NET Framework when prompted to do so.
Follow the instructions provided on the dialogs to complete
installation.
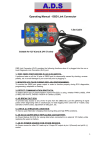
Use the serial cable to connect the interface module to your PC’s 9-pin
serial port.
If your PC does not have a serial port, you will need a USB-to-Serial
adapter (sold separately). Inexpensive USB-to-Serial adapters can be
purchased from our web site or from your local computer store.
Run ProScan by selecting it from the Start menu or by using the desktop
icon. Clicking the Connect button will attempt to establish a connection
with the vehicle.
Before attempting to use ProScan you should read the user’s manual. The
user’s manual can be accessed from within ProScan via the Help menu,
or it can be browsed from our web site.
The 16-pin diagnostic link connector (DLC) should be located
under the dashboard within 3-feet of the steering column.
Connect the OBD-II cable from the DLC to the interface module.
The Power LED on the interface module should light up.
Online Support Site:
Technical Support E-Mail:
Visit our web site frequently for important news and free software upgrades!
http://www.gore-research.com/support
[email protected]
http://www.MyScanTool.com


