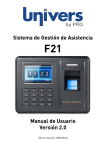
Download Software Tutorial For Color Fingerprint Model User Manual
Transcript
Software Tutorial For Color Fingerprint
Model
User Manual
Version 2.0
1 of 48
TABLE OF CONTENTS
1.
2.
Introduction .................................................................................................................................. 3
Interface Preview ......................................................................................................................... 3
2.1
Main Window ......................................................................................................................... 3
2.2
Child Window ......................................................................................................................... 4
3. Software configuration (Basic Part) .............................................................................................. 5
3.1
Holiday Management ............................................................................................................. 5
3.1.1
Add Holiday .................................................................................................................. 6
3.1.2
Holiday Allotment ........................................................................................................ 9
3.2
Shift Management ................................................................................................................ 11
3.2.1
Add a Shift .................................................................................................................. 11
3.2.2
Shift Pattern Management ......................................................................................... 16
3.2.3
Staff Shift Schedule ................................................................................................... 18
3.3
Attendance Analysis ............................................................................................................ 22
3.3.1
Analysis Configuration .............................................................................................. 22
3.3.2
Do Analysis ................................................................................................................ 24
3.4
Generate Reports ................................................................................................................ 26
3.4.1
Raw Swipe Record Report ........................................................................................ 26
3.4.2
Attendance Detail Report .......................................................................................... 27
4. Software Operation (Advanced Part) .......................................................................................... 28
4.1
Temp Shift Management ...................................................................................................... 28
4.1.1
Add Temp Shift .......................................................................................................... 28
4.2
Absence Management ......................................................................................................... 30
4.2.1
Define Absence Reason ............................................................................................ 30
4.2.2
Add Single Absence/Leave Record .......................................................................... 32
4.2.3
Batch Absence/Leave Record Registration ............................................................. 34
4.3
Manual Adjustment .............................................................................................................. 36
4.3.1
Add Swipe Record ..................................................................................................... 36
4.4
Check Raw Swipe Record ................................................................................................... 39
4.5
Check System Log ............................................................................................................... 40
5. Other System Operation ............................................................................................................. 40
5.1
Path Setting ......................................................................................................................... 41
5.2
Database Backup ................................................................................................................ 41
5.3
Rebuild Database Index....................................................................................................... 42
5.4
Compact Database .............................................................................................................. 42
5.5
Remove Antique Record ...................................................................................................... 43
5.6
Export Attendance Record ................................................................................................... 44
5.7
Import Staff .......................................................................................................................... 46
6. Trouble-shooting ........................................................................................................................ 47
6.1
Cannot see new department after adding the department. ................................................... 47
6.2
Cannot execute download module ....................................................................................... 48
2 of 48
1. INTRODUCTION
This manual is to teach you how to install and use the Attendance Management system . The system is
for attendance management and communication with fingerprint or proximity card device.
It will teach you how to install the software and show you step by step how to input critical data into the
software. Lastly, it will show you some troubleshooting techniques in solving problems for the
software.
When launch the software, The default login account is “system”, and the password is blank (no
password).
Click
beside the Language field, can switch to other language, now it can support English,
Spanish and French.
2. INTERFACE PREVIEW
The software is window based. The interface between the software and user is through each window.
After authentication, it will show you the main window. For each item, it will show the child window.
The child window must locate inside the main window.
2.1 Main Window
The main window consists of the title bar, top pulled-down menu, hot menu, the content area and the
status bar. The title bar shows the software name. The top pulled-down menu covers all the items in the
software. The hot menu provides the quickest way for accessing the critical item. Finally, the status bar
shows the status of the system such as the current date and time.
3 of 48
2.2 Child Window
The child window is invoked when you select a menu item. Each child window has its layout. Some are
similar and some are different. Most of child windows have the icon bar located at the top for choosing
different actions.
4 of 48
Icon Bar
3. SOFTWARE CONFIGURATION (BASIC PART)
(For Department,Staff,Device,Download, it has been covered by the quick guide)
Then, there is below step sequence, just follow that one by one and complete the configuration based
on your company fact/requirement.
3.1 Holiday Management
Holiday is to identify the date for public holiday. In public holiday, staff need not be on duty.
To invoke the holiday management, just click the icon “Holiday Management”.
5 of 48
3.1.1 Add Holiday
To add a holiday calendar per year, click the button “Add Holiday”.
Input “Year” and “Category Name”. Click “OK” to proceed.
After the input of holiday calendar, you can add detail date for the public holiday.
6 of 48
Then, you will see an input window for the date range and the holiday name.
Input the “Begin Date”, “End Date” and “Holiday Name”. Click “OK” to confirm. New holiday will be
added. Repeat the adding till public holidays have been added.
When you find some error in adding, you are free to choose to modify or delete the public holiday.
There is a quick setup that you can set up all Sunday as public holidays. So, you do not need to set them
one by one. To do so, click the button “Quick setup”.
7 of 48
You will see an input window with several check boxes.
Check the check box “all Sunday” to assign all Sundays as public holiday.
Besides, you can select “Customize” to define a customized day off.
Click “Alternate Weekend” for alternate long week and short week.
8 of 48
Click “OK” to proceed. The system will generate a new holiday category with selected day in whole
year.
3.1.2 Holiday Allotment
After defining Public Holidays, the holiday must be allotted to staff before they are taking effect.
To invoke the “Holiday Allotment”, click the icon “Holiday Allotment”.
In the holiday allotment window, you can allot holiday calendar to one department or a list of
departments. Single Allotment is to allot holiday calendar to the highlighted department. Batch
Allotment is for multi departments.
9 of 48
For single allotment, highlight the department and click “Single Allotment”.
For batch allotment, just click the button “batch allotment” and a multi-selection window will be seen.
Tick any departments that you want to allot and select the appropriate holiday. Click button “ok” after
the input.
The Holiday will be allotted to selected departments.
10 of 48
Continue the above process till all allotment has been done.
3.2 Shift Management
Shift refers to the preset in and out time in a date. For example, you can input the in and out time
as 09:00 and 18:00 correspondingly in a day. Or, you can input 09:00 and 13:00 for a shift to
represent half day in Saturday.
It consists of header and detail (time zones). You need to input both the header and detail to finish
the setup of shift management.
To invoke the shift management module, click the icon “Shift Management”.
3.2.1 Add a Shift
Click the top button “New Shift” to add a new header.
11 of 48
You will see an edit window for input of Shift header. The first field is order number. It is to control the
arrangement of the shift. Input “Shift No.” and provide a “Name” for the new shift. If it is the default
shift, click the check box “default shift”. If a staff does not have any shift arrangement, the system will
get the default shift automatically. Lastly, input any remark that you may want the system to keep.
Finally, click “OK” to save the shift header.
To add a detail information (time zone) for a shift, select the new shift and then click “Add Detail”.
12 of 48
Then, you will see a popup edit window. In this window, you need to input the in time and out time.
Need Swipe
The in time and out time can be chosen for swiping or not. If the check box “need swipe” is not checked, it means that staff
does not need to punch. The system will assign the time for the staff automatically and disregard any swipe time. For
example, if the in time is 08:00, the system will assign the in time to the attendance record.
13 of 48
Earliest In
For in time, you need to input also the earliest in time as a limit. The system will start to count the in time from the earliest in
time onwards. Time before this time will be ignored. For example, the time is set to be 07:00. That means for staff swiping
card on/after 07:00, the swipe records will be considered as a valid clock in record. If staff swipe at 6:59 or before, the
system will ignore those records, and they will be taking into account during attendance analysis. However, those times will
also
be
seen
in
raw
swipe
record.
Latest Out
The possible latest clock out time. The idea is same as the “Earliest In”, but this is for clock out time.
Similarly, the system will ignore the time after latest out time.
(For “Earliest In” and “Latest Out” to take effect, a analysis parameter must be set, refer to Section
14.1 for details)
Count Late Arrival
This check box is to select whether to count late arrival. If you choose not to count late arrival, you will
not get any figure about the late in time. For example, the preset in time is 09:00. If the actual in time is
09:17, the system will show the actual time as usual but the late in column will be blank.
Count Early Out
This check box is to select whether to count early out. If you choose not to check this, the system will
not calculate the early out time. You will see the column blank in attendance report.
14 of 48
Allow Late In
A buffering time zone for late arrival. In this example, the setting is 00:15, which means 15 minutes
buffering time is provided. For staff arriving at 09:15 or before, the system will not count the staff as
late arrival. However, if staff arrives at 09:16, then the staff is late, and the late time will be 16 minutes,
instead of 1 minute.
Allow Early Out
A buffering time zone for early off. The concept is same as “Allow Late In”.
Early In = Overtime
Count the work time before “In Time” as overtime. The default cut off time is “in time” less one
minute. But, you can choose to change the cut off time. For example, you can change the cutoff time to
08:29. If the staff arrives at 08:10, the overtime calculated is 20 minutes instead of 50 minutes.
Late Out = Overtime
Count the work time after “Out Time” as overtime.
OT Shift
It defines whether the shift is an Overtime Shift. If it is overtime shift, the working time will be counted
in the overtime column.
Mid Time
Mid Time is the middle time between in and out for finding the lunch time automatically in the
attendance intelligent report. The report will find out the lunch out and in time by looking for the time
near the mid time, left and right. The default mid time is the middle time between in and out. You can
change it to the time that you want.
Work Time
Work time is the calculated working time by the difference of out and in time. Some customers need to
less the work time from the lunch time. Then, you can input the break time to have the actual work time.
The actual work time is the calculated work time less the break time. Attendance report will show the
actual work time rather than the calculated work time.
15 of 48
3.2.2 Shift Pattern Management
After setting the “Shifts”, user has to define the shift pattern. Shift pattern describes work hour in each
day on a yearly/monthly/weekly base.
Add Weekly-based Shift Pattern
Go to “Attendance Management” and then “Shift Pattern Management”.
Select “Weekly” and then click “New Pattern”.
Input “Name” for new shift pattern.
Select the new shift pattern and then click “Add”.
16 of 48
Select “Begin Date”.
Select “Shift Name” to assign to specified day, and then click
Click “OK” to proceed.
Shift will be assigned to selected day.
17 of 48
.
Repeat Above Step until all work days have been assigned with a shift.
(Notes: If shift in next work day is same as the one in previous day, no shift assignment is required,
as the system will automatically use the shift in previous for days without shift assignment.)
In the following example, the shift pattern will be:
Mon – Fri: Shift 0900-1800
Sat: Shift 0900-1300
Sun: Ignored as it is set to be public holiday (Refer to Section 7 for details)
Click “Close” to exit.
3.2.3 Staff Shift Schedule
After setting shift pattern, user has to assign the shift pattern to staffs. For staffs without any
assigned shift, no attendance records will be shown in attendance reports.
3.2.3.1 Add New Schedule
Click “Batch Scheduling”.
18 of 48
Click “Select staff”.
Click “Click here to select Dept.”, and then select the target department.
Put a tick in the box for all target staff. Or, right-click on the blank area, click “Select All” on the popup
menu to select all listed staffs. Click “OK” to proceed.
19 of 48
Select shift pattern in “Assign Shift”, and then set the “Begin Date” and “End Date”. The system default
setting is no end date.
Un-tick the “No Ending Date” if there is a specify end date for the assigned shift pattern. Click “OK” to
proceed.
20 of 48
The selected shift pattern will then be assigned to the staffs in the specified period. Click “Cancel” to
close the Batch Scheduling Window.
3.2.3.2 Modify/Delete A Shift Schedule
Go to “Attendance Management” and then “Staff Shift Schedule”.
Click on “Click here to select Dept.” and then select the department.
21 of 48
Click on “Click here to select Dept.” and then select the department.
Select particular staff, corresponding shift schedule will be shown. Select the shift schedule which
required being deleted/modified.
Click “Delete”/”Modify” to delete/modify a shift schedules.
3.3 Attendance Analysis
3.3.1 Analysis Configuration
Go to “Attendance Management” and then “Attendance Analysis”.
22 of 48
Click “Analysis Parameter” to configure the analysis rules.
In/Out Attendance Rule: The default setting is “Ignore In/Out”. This one should not be changed.
Work Time Unit (min): Minimum step unit of work time.
Absent Time Unit (min): Minimum step unit of absent time.
Treat invalid Swipes as Absence: If either clock-in or clock-out record is missing, the system will treat
it as absence.
Match I/O record according to Shift def.: Once this option is enabled, system will search for valid
attendance records according to the “Earliest In” and “Latest Out” settings (Refer to Section 8.1.5 for
details)
Click “Save” to save and exit.
23 of 48
3.3.2 Do Analysis
Go to “Attendance Management” and then “Attendance Analysis”.
Click “By Dept.” and then select departments for analysis.
24 of 48
Or, click “By Staff” and then “Select Staff”.
Specify the “Begin Date” and “End Date”, and then click “Analyze” to start the analysis.
Wait until the progress bar reach 100%.
25 of 48
Click “Close” to exit.
3.4 Generate Reports
3.4.1 Raw Swipe Record Report
Show all swipe record for selected staffs.
Go to “Report” and then “Raw Swipe Record”.
Click “Select Dept.” or “Select Staff” to select department or staff.
26 of 48
Specify the “Begin Time” and “End Time” and then click “Search”.
Raw swipe records will be listed.
Click “Preview” to preview print layout; click “Print” to print the report; click “Export” to export the
report to excel file.
(Notes: To export the report to excel file, Microsoft Excel must be installed on the computer)
3.4.2 Attendance Detail Report
Go to “Report” and then “Attendance Detail Report”.
27 of 48
Click “Select Dept.” or “Select Staff” to select department or staff.
Specify the “Begin Date” and “End Date”.
Click “Preview” to preview print layout; click “Print” to print the report; click “Excel” to export the
report to excel file.
(Notes: To export the report to excel file, Microsoft Excel must be installed on the computer)
4. SOFTWARE OPERATION (ADVANCED PART)
4.1 Temp Shift Management
Instead of assigning shift to staff by shift pattern, user can assign the shift directly to staff on
particular dates, which is called “Temp Shift”. Temp Shift has highest priority in the system.
Once temp shift is assigned on particular date, it will override all Holiday or Shift Schedule
settings.
4.1.1 Add Temp Shift
Go to “Attendance Management” and then “Temp Shift Management”.
28 of 48
Click on “Click here to select Dept.” and then select the department.
Select staff and then click “Add New”.
Select “Shift Name”, and then click
to confirm.
29 of 48
Specify the “Begin Date” and “End Date”, and then click “OK” to save.
The assigned Temp Shift will be displayed.
4.2 Absence Management
“Absence Management” handles all absence records of staffs. The records might be annual leave, sick
leave, etc. User can also add special records such as “Meeting with customer”, “Business trip”, etc.
4.2.1 Define Absence Reason
Go to “Attendance Management” and then “Absence Management”.
30 of 48
Click “Absence Reason”.
Click “New” to add new absence reason. Input all the absence reasons and then click “Save”.
Click “Close” to exit.
31 of 48
4.2.2 Add Single Absence/Leave Record
Go to “Attendance Management” and then “Absence Management”.
Click on “Click here to select Dept.” and then select the department.
Select staff and then click “Add New”.
Select “Off Duty Reason”, and then specify the “Begin Date”, “Begin Time”, “End Date” and “End
Time”.
32 of 48
If staff is absence for half-day or a couple hours, user has to specify whether the staff still need to swipe
card or not. If no swiping card are required, the system regard the “Begin Time” and “End Time” as
clock-in time and clock out time accordingly.
Clock-in Required: Staff has to swipe card during on duty.
Clock-out Required: Staff has to swipe card during off duty.
Specify the number of “Days” that the leave/absence taken. User can input “0.1”, “0.5” or “1”, etc.
33 of 48
Click “OK” to save. The new absence record will be shown.
4.2.3 Batch Absence/Leave Record Registration
Go to “Attendance Management” and then “Absence Management”.
Click “Batch Registration”.
Click “Select staff”.
34 of 48
Click “Click here to select Dept.”, and then select the target department.
Put a tick in the box for all target staff. Or, right-click on the blank area, click “Select All” on the popup
menu to select all listed staffs. Click “OK” to proceed.
35 of 48
After selecting staffs, input all necessary information. (Refer to Step 11.2.4 to 11.2.7 for details)
Click “OK” to save and then click “Cancel” to exit.
4.3 Manual Adjustment
If staff does not have either clock-in or clock-out record, the system will not able to generate an
accurate attendance report. User must add the record manually.
4.3.1 Add Swipe Record
Before adding swipe record, “Adjustment Reason” has to be defined first. Go to “Staff Information”
and then “Basic Information”.
Select “Manual Adjustment Reason”
36 of 48
Click “Add” to add new reason and then click “Save”. Click “Close” to exit.
Go to “Attendance Management” and then “Manual Adjustment”.
37 of 48
Click on “Click here to select Dept.” and then select the department.
Select staff and then click “Add New”.
Specify “Adjustment Date”, “Adjustment Time” and select “Adjustment Reason”. Click “OK” to add
new record.
38 of 48
4.4 Check Raw Swipe Record
Go to “Attendance Management” and then “Raw Swipe Record”
Click on “Click here to select Dept.” and then select the department.
Select target staff and the then specify “Begin Date” and “End Date”. All swipe records in the specified
time period will be listed.
39 of 48
4.5 Check System Log
System log is to check the login and logout status. Besides, it allows you to set the system company
name. And, you can select the default interface language in this window.
When you have input of the company name, remember to click the button “Save Company” to save the
name. Then, the company name will be shown in all reports of the system.
Similarly, when you have selected the interface language, you need to click the button “Save Setting” to
save the selection.
5. OTHER SYSTEM OPERATION
System Tool
System tool is mainly for doing housekeeping job of the system.
40 of 48
5.1 Path Setting
It is for setting the location of different items such as database location, backup location and photo
location. Photo location is to put the file of image for each staff. Backup location is the path for storing
backup data. Database location is the path for storing the access database (imsds.mdb) and the
corresponding system database (system.mdw).
5.2 Database Backup
It is to backup the whole database into other area. Then, you may copy the backup to other removable
media for off-site backup.
41 of 48
The default backup file name will be displayed. If you accept the name, you just click the button “Start”
or you can change it. The default path is the backup location stored in the system. Once you finish the
backup process, you can copy the backup file to other removable media for off-site backup.
To restore the database, you do not need the system interface. You just copy the imsdb_yyyymmdd.mdb
back to the database directory and rename to imsdb.mdb. Please be reminded that the authentication
database “system.mdw” must be present in the same directory as that of imsdb.mdb. Otherwise, you
cannot access to the database.
5.3 Rebuild Database Index
Database use index to search records so that you can get a list of records quickly. Without index, the
searching will take more time. Rebuild database index is to reorganize the index structure so that the
speed of searching will be increased.
5.4 Compact Database
Database operation will cause the fragmentation in the blocks of the database. Block is the basic
component of database. Compact database will do the de-fragmentation of these blocks which will
increase the speed of performance of operation.
42 of 48
5.5 Remove Antique Record
Day by day, the records in the system will be accumulated and the database size will be very large. This
item can be used to remove the old records so that the database size will be cut down.
When you invoke the item, a window will be displayed for asking the “Due Date”.
(Notes: the “Due Date” CANNOT be the date within the nearest 120 days.)
Click the button “Clear Record” to remove all attendance record before the “Due Date”.
43 of 48
Click “Yes” to confirm the removal.
Click “Close” to exit.
5.6 Export Attendance Record
This item is to export the raw swipe record out to text file or database file. This is for other system to
get the data and do processing. For example, you may have a payroll system which can import the raw
swipe record from text file. Then, you can use this item to do the job.
44 of 48
You are asked to select all records or input a data range for output. And, you need to choose the target is
text file or database file. Once you confirm the input, you can click the button “Start” to start the
process.
Then you need to choose the output path and filename for storing the data.
45 of 48
5.7 Import Staff
This item is for importing staff information from an excel file. Many customers have a legacy system or
an excel sheet to keep the staff information. They then can use this item to import the staff information
instead of retyping them one by one.
46 of 48
In the input window, you can see the format of the excel file by clicking the button “Template”. After you
prepare the excel file, you can input the path and file name in the file name box and click the button
“Import” to proceed.
6. TROUBLE-SHOOTING
6.1 Cannot see new department after adding the department.
Click the “update” button in the Department List.
After clicking the button, new department will be shown.
47 of 48
6.2 Cannot execute download module
If you click the download icon with error message of “class not registered”, the device API may be
disconnected from windows. You can register back the API. If your program is installed in \program
files\unionattend, you will see 3 directories in the path. They are api, apinew, apinu3100. Just go the
three directories and execute the batch file reg.bat to restore the registration of API.
--- The End ---
48 of 48


