1
ALPHA
MICROSYSTEMS
RIGHT. FROM THE START.
ALPHA
MICROSYSTEMS
RIGHT. FROM THE START.
ALPHA
MICROSYSTEMS
RIGHT. FROM THE START.
ALPHA
MICROSYSTEMS
RIGHT. FROM THE START.
ALPHA
MICROSYSTEMS
RIGHT. FROM THE START.
ALPHA
MICROSYSTEMS
RIGHT. FROM THE START.
ALPHA
MICROSYSTEMS
RIGHT. FROM THE START.
ALPHA
MICROSYSTEMS
RIGHT. FROM THE START.
ALPHA
MICROSYSTEMS
RIGHT. FROM THE START.
ALPHA
MICROSYSTEMS
RIGHT. FROM THE START.
ALPHA
MICROSYSTEMS
RIGHT. FROM THE START.
ALPHA
MICROSYSTEMS
RIGHT. FROM THE START.
ALPHA
MICROSYSTEMS
RIGHT. FROM THE START.
AlphaVUE
User’s Manual
DSM-00023-02
© 1996 Alpha Microsystems
REVISIONS INCORPORATED
REVISION
DATE
00
March 1988
01
December 1988
02
October 1996
AlphaVUE User’s Manual
To re-order this document, request part number DSO-00023-00.
This document applies to AMOS 2.3 and later.
The information contained in this manual is believed to be accurate and reliable. However, no responsibility
for the accuracy, completeness or use of this information is assumed by Alpha Microsystems.
This document may contain references to products covered under U.S. Patent Number 4,530,048.
The following are registered trademarks of Alpha Microsystems, Santa Ana, CA 92799:
AMIGOS
AlphaBASIC
AlphaFORTRAN 77
AlphaMATE
AlphaWRITE
VIDEOTRAX
AMOS
AlphaCALC
AlphaLAN
AlphaNET
CASELODE
Alpha Micro
AlphaCOBOL
AlphaLEDGER
AlphaPASCAL
OmniBASIC
AlphaACCOUNTING
AlphaDDE
AlphaMAIL
AlphaRJE
VER-A-TEL
The following are trademarks of Alpha Microsystems, Santa Ana, CA 92799:
AlphaBASIC PLUS
AlphaDDE
inFront/am
AlphaVUE
AlphaConnect
ESP
AM-PC
DART
MULTI
All other copyrights and trademarks are the property of their respective holders.
ALPHA MICROSYSTEMS
2722 S. Fairview St.
P.O. Box 25059
Santa Ana, CA 92799
AMTEC
inSight/am
TABLE OF CONTENTS
CHAPTER 1 - INTRODUCTION
1.1 HOW THIS MANUAL IS ORGANIZED . . . . . . . . . . . . . . . . . . . . . . . . . . 1-1
1.2 GRAPHIC CONVENTIONS USED IN THIS BOOK . . . . . . . . . . . . . . . . 1-2
1.3 OTHER ALPHA MICRO BOOKS TO USE WITH THIS BOOK . . . . . . . 1-4
CHAPTER 2 - GETTING STARTED
2.1 YOUR TERMINAL AND KEYBOARD . . . . . . . . . . . . . . . . . . . . . . . . . .
2.1.1 Function Keys . . . . . . . . . . . . . . . . . . . . . . . . . . . . . . . . . . . . .
2.1.2 The CONTROL Key . . . . . . . . . . . . . . . . . . . . . . . . . . . . . . . . .
2.1.3 The ESCAPE Key . . . . . . . . . . . . . . . . . . . . . . . . . . . . . . . . . .
2.1.4 Alpha Micro Compatible Terminals . . . . . . . . . . . . . . . . . . . . .
2.2 LOGGING ON TO YOUR COMPUTER . . . . . . . . . . . . . . . . . . . . . . . . .
2.2.1 Devices and Accounts . . . . . . . . . . . . . . . . . . . . . . . . . . . . . . .
2.2.2 Logging On . . . . . . . . . . . . . . . . . . . . . . . . . . . . . . . . . . . . . . .
2.3 THE ALPHAVUE INITIALIZATION FILE . . . . . . . . . . . . . . . . . . . . . . . .
2.4 USING THE VUE COMMAND . . . . . . . . . . . . . . . . . . . . . . . . . . . . . . . .
2.4.1 Creating an AlphaVUE File . . . . . . . . . . . . . . . . . . . . . . . . . . .
Choosing a File Name . . . . . . . . . . . . . . . . . . . . . . . . . . . . . .
2.4.2 Viewing an Existing File . . . . . . . . . . . . . . . . . . . . . . . . . . . . . .
2.5 USING ALPHAVUE . . . . . . . . . . . . . . . . . . . . . . . . . . . . . . . . . . . . . . . .
2.5.1 Edit Mode . . . . . . . . . . . . . . . . . . . . . . . . . . . . . . . . . . . . . . . . .
2.5.2 Command Mode . . . . . . . . . . . . . . . . . . . . . . . . . . . . . . . . . . .
The HELP Command . . . . . . . . . . . . . . . . . . . . . . . . . . . . . . .
The SAVE Command . . . . . . . . . . . . . . . . . . . . . . . . . . . . . . .
2.6 LEAVING ALPHAVUE . . . . . . . . . . . . . . . . . . . . . . . . . . . . . . . . . . . . . .
2.6.1 The FINISH Command . . . . . . . . . . . . . . . . . . . . . . . . . . . . . .
2.6.2 The GO Command . . . . . . . . . . . . . . . . . . . . . . . . . . . . . . . . .
2.6.3 The QUIT Command . . . . . . . . . . . . . . . . . . . . . . . . . . . . . . . .
2-1
2-2
2-3
2-3
2-3
2-3
2-3
2-4
2-4
2-5
2-5
2-6
2-7
2-7
2-7
2-8
2-8
2-9
2-9
2-10
2-10
2-10
CHAPTER 3 - MOVING AROUND IN YOUR FILE
3.1 MOVING THE CURSOR ON THIS SCREEN . . . . . . . . . . . . . . . . . . . . .
3.2 MOVING FROM SCREEN TO SCREEN . . . . . . . . . . . . . . . . . . . . . . . .
3.3 MOVING TO SPECIFIC PLACES IN YOUR FILE . . . . . . . . . . . . . . . . .
3.3.1 Moving To A Particular Line . . . . . . . . . . . . . . . . . . . . . . . . . . .
3.4 REMEMBERING THE CURSOR LOCATION . . . . . . . . . . . . . . . . . . . .
3.4.1 The Push and Pop Features . . . . . . . . . . . . . . . . . . . . . . . . . .
3.4.2 The Previous Change Feature . . . . . . . . . . . . . . . . . . . . . . . . .
3-1
3-2
3-2
3-3
3-3
3-4
3-4
AlphaVUE User’s Manual, Rev. 02
Page ii
Table of Contents
CHAPTER 4 - ALPHAVUE TEXT EDITING FEATURES
4.1 INSERTING TEXT . . . . . . . . . . . . . . . . . . . . . . . . . . . . . . . . . . . . . . . . .
4.1.1 Inserting Characters . . . . . . . . . . . . . . . . . . . . . . . . . . . . . . . .
Character Insert Key . . . . . . . . . . . . . . . . . . . . . . . . . . . . . . .
Character Insert Mode . . . . . . . . . . . . . . . . . . . . . . . . . . . . . .
4.1.2 Inserting A Word . . . . . . . . . . . . . . . . . . . . . . . . . . . . . . . . . . .
4.1.3 Inserting Lines . . . . . . . . . . . . . . . . . . . . . . . . . . . . . . . . . . . . .
The LINE INS Key . . . . . . . . . . . . . . . . . . . . . . . . . . . . . . . . .
Automatic Line Insert Mode . . . . . . . . . . . . . . . . . . . . . . . . . .
The BLANKS Command . . . . . . . . . . . . . . . . . . . . . . . . . . . .
4.2 DELETING TEXT . . . . . . . . . . . . . . . . . . . . . . . . . . . . . . . . . . . . . . . . . .
4.2.1 Deleting Characters . . . . . . . . . . . . . . . . . . . . . . . . . . . . . . . . .
4.2.2 Deleting a Word . . . . . . . . . . . . . . . . . . . . . . . . . . . . . . . . . . . .
4.2.3 Deleting Lines . . . . . . . . . . . . . . . . . . . . . . . . . . . . . . . . . . . . .
4.3 UNDELETING LINES . . . . . . . . . . . . . . . . . . . . . . . . . . . . . . . . . . . . . . .
4.4 REARRANGING TEXT . . . . . . . . . . . . . . . . . . . . . . . . . . . . . . . . . . . . . .
4.4.1 Breaking and Joining Lines . . . . . . . . . . . . . . . . . . . . . . . . . . .
4.4.2 Centering A Line . . . . . . . . . . . . . . . . . . . . . . . . . . . . . . . . . . .
4.4.3 Formatting Paragraphs . . . . . . . . . . . . . . . . . . . . . . . . . . . . . .
4.4.4 Refreshing The Screen . . . . . . . . . . . . . . . . . . . . . . . . . . . . . .
4-1
4-1
4-1
4-2
4-2
4-2
4-2
4-3
4-3
4-3
4-3
4-4
4-4
4-4
4-5
4-5
4-5
4-6
4-6
CHAPTER 5 - ADVANCED EDITING FEATURES
5.1 WORKING WITH BLOCKS OF TEXT . . . . . . . . . . . . . . . . . . . . . . . . . .
5.1.1 Marking Text . . . . . . . . . . . . . . . . . . . . . . . . . . . . . . . . . . . . . .
5.1.2 Clearing Marks . . . . . . . . . . . . . . . . . . . . . . . . . . . . . . . . . . . . .
5.1.3 Copying A Marked Block . . . . . . . . . . . . . . . . . . . . . . . . . . . . .
5.1.4 Deleting A Marked Block . . . . . . . . . . . . . . . . . . . . . . . . . . . . .
5.1.5 Moving A Marked Block . . . . . . . . . . . . . . . . . . . . . . . . . . . . . .
5.2 TRANSFERRING TEXT BETWEEN FILES . . . . . . . . . . . . . . . . . . . . . .
5.2.1 Moving Text Out Of Your File With UNYANK . . . . . . . . . . . . .
5.2.2 Moving Text Into Your File With YANK . . . . . . . . . . . . . . . . . .
5.3 TRANSFERRING TEXT TO AND FROM DISK . . . . . . . . . . . . . . . . . . .
5.4 THE SPLIT AND UNSPLIT COMMANDS . . . . . . . . . . . . . . . . . . . . . . .
5.5 YANKING IN A MODULE . . . . . . . . . . . . . . . . . . . . . . . . . . . . . . . . . . . .
5-1
5-1
5-2
5-2
5-3
5-3
5-3
5-3
5-4
5-5
5-6
5-7
CHAPTER 6 - FEATURES FROM COMMAND MODE
6.1 QUICK COMMAND MODE . . . . . . . . . . . . . . . . . . . . . . . . . . . . . . . . . .
6.2 THE WRAP COMMAND . . . . . . . . . . . . . . . . . . . . . . . . . . . . . . . . . . . . .
6.3 THE WIDTH COMMAND . . . . . . . . . . . . . . . . . . . . . . . . . . . . . . . . . . . .
6.4 THE TAB COMMAND . . . . . . . . . . . . . . . . . . . . . . . . . . . . . . . . . . . . . .
6.5 THE MARGIN COMMAND . . . . . . . . . . . . . . . . . . . . . . . . . . . . . . . . . . .
6.6 THE SHIFT COMMAND . . . . . . . . . . . . . . . . . . . . . . . . . . . . . . . . . . . . .
6.7 THE COLUMN COMMAND . . . . . . . . . . . . . . . . . . . . . . . . . . . . . . . . . .
6.8 THE DIR COMMAND . . . . . . . . . . . . . . . . . . . . . . . . . . . . . . . . . . . . . . .
6.9 THE ERASE COMMAND . . . . . . . . . . . . . . . . . . . . . . . . . . . . . . . . . . . .
6.10 THE TYPE COMMAND . . . . . . . . . . . . . . . . . . . . . . . . . . . . . . . . . . . .
6.11 THE LFONLY COMMAND . . . . . . . . . . . . . . . . . . . . . . . . . . . . . . . . . .
6.12 THE MODEM COMMAND . . . . . . . . . . . . . . . . . . . . . . . . . . . . . . . . . .
6-2
6-2
6-2
6-3
6-3
6-3
6-4
6-4
6-5
6-5
6-6
6-6
AlphaVUE User’s Manual, Rev. 02
Table of Contents
Page iii
CHAPTER 7 - ALPHAVUE’S SEARCH AND REPLACE PROCEDURES
7.1 SETTINGS AFFECTING SEARCH AND REPLACE . . . . . . . . . . . . . . .
7.1.1 The COMPRESS Command . . . . . . . . . . . . . . . . . . . . . . . . . .
7.1.2 The TOKEN Command . . . . . . . . . . . . . . . . . . . . . . . . . . . . . .
7.1.3 The SEARCHFOLD Command . . . . . . . . . . . . . . . . . . . . . . . .
7.1.4 The SBLK Command . . . . . . . . . . . . . . . . . . . . . . . . . . . . . . . .
7.1.5 The WILDCARD Command . . . . . . . . . . . . . . . . . . . . . . . . . . .
7.1.6 A Note About the Accent Grave Character . . . . . . . . . . . . . . .
7.2 THE SEARCH COMMAND . . . . . . . . . . . . . . . . . . . . . . . . . . . . . . . . . .
7.3 THE NEXT COMMAND . . . . . . . . . . . . . . . . . . . . . . . . . . . . . . . . . . . . .
7.4 THE REPLACE COMMAND . . . . . . . . . . . . . . . . . . . . . . . . . . . . . . . . . .
7.5 THE GLOBAL COMMAND . . . . . . . . . . . . . . . . . . . . . . . . . . . . . . . . . . .
7.6 THE WHOLE COMMAND . . . . . . . . . . . . . . . . . . . . . . . . . . . . . . . . . . .
7-1
7-2
7-2
7-3
7-4
7-4
7-5
7-6
7-6
7-7
7-8
7-8
CHAPTER 8 - ALPHAVUE’S CAPTURE AND MACRO FEATURES
8.1 CAPTURING A COMMAND SEQUENCE . . . . . . . . . . . . . . . . . . . . . . .
8.1.1 Starting and Ending A Capture Sequence . . . . . . . . . . . . . . . .
8.1.2 Executing and Adding To A Capture . . . . . . . . . . . . . . . . . . . .
8.2 REPEATING KEYSTROKES . . . . . . . . . . . . . . . . . . . . . . . . . . . . . . . . .
8.3 CREATING AND USING MACROS . . . . . . . . . . . . . . . . . . . . . . . . . . . .
8.3.1 The Basics to Define A Macro . . . . . . . . . . . . . . . . . . . . . . . . .
8.3.2 More About Defining Macros . . . . . . . . . . . . . . . . . . . . . . . . . .
Using Function and Control Keys in Macros . . . . . . . . . . . . .
8.3.3 Defining Macros in Your INI.VUE . . . . . . . . . . . . . . . . . . . . . .
8.3.4 Restrictions . . . . . . . . . . . . . . . . . . . . . . . . . . . . . . . . . . . . . . .
8-1
8-1
8-2
8-2
8-3
8-3
8-4
8-4
8-5
8-6
CHAPTER 9 - ALPHAVUE FEATURES FOR PROGRAMMERS
9.1 ENTRY MODE . . . . . . . . . . . . . . . . . . . . . . . . . . . . . . . . . . . . . . . . . . . .
9.1.1 The ENTRY Command . . . . . . . . . . . . . . . . . . . . . . . . . . . . . .
9.1.2 The COLUMN Command . . . . . . . . . . . . . . . . . . . . . . . . . . . .
9.1.3 The COMMENT Command . . . . . . . . . . . . . . . . . . . . . . . . . . .
9.1.4 The SPACE Command . . . . . . . . . . . . . . . . . . . . . . . . . . . . . .
9.1.5 The FIELD Command . . . . . . . . . . . . . . . . . . . . . . . . . . . . . . .
9.1.6 The COMMA Command . . . . . . . . . . . . . . . . . . . . . . . . . . . . .
9.1.7 The FOLD Command . . . . . . . . . . . . . . . . . . . . . . . . . . . . . . .
9.1.8 The DELTA Command . . . . . . . . . . . . . . . . . . . . . . . . . . . . . .
9.2 THE INDENT COMMAND . . . . . . . . . . . . . . . . . . . . . . . . . . . . . . . . . . .
9.3 THE CONTROL G FEATURE . . . . . . . . . . . . . . . . . . . . . . . . . . . . . . . .
9.4 EDIT HISTORY . . . . . . . . . . . . . . . . . . . . . . . . . . . . . . . . . . . . . . . . . . .
9.5 YANKING IN A PROGRAM MODULE . . . . . . . . . . . . . . . . . . . . . . . . . .
9.6 FIND MATCHING BRACES . . . . . . . . . . . . . . . . . . . . . . . . . . . . . . . . . .
9.7 THE VUE COMMAND’S OPTIONS . . . . . . . . . . . . . . . . . . . . . . . . . . . .
9.7.1 The /NOYANK Option . . . . . . . . . . . . . . . . . . . . . . . . . . . . . . .
9.7.2 The /TRACE Option . . . . . . . . . . . . . . . . . . . . . . . . . . . . . . . . .
9.7.3 The /SUBROUTINE Option . . . . . . . . . . . . . . . . . . . . . . . . . . .
9.7.4 The /R Option . . . . . . . . . . . . . . . . . . . . . . . . . . . . . . . . . . . . .
9.7.5 The /BATCH Option . . . . . . . . . . . . . . . . . . . . . . . . . . . . . . . . .
9-1
9-2
9-2
9-3
9-3
9-3
9-4
9-4
9-4
9-5
9-5
9-6
9-6
9-6
9-6
9-7
9-7
9-7
9-8
9-8
AlphaVUE User’s Manual, Rev. 02
Page iv
Table of Contents
APPENDIX A - ALPHAVUE’S INITIALIZATION FILE
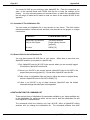
A.1 CREATING AN ALPHAVUE INITIALIZATION FILE . . . . . . . . . . . . . . .
A.1.1 Location Of The Initialization File . . . . . . . . . . . . . . . . . . . . . .
A.1.2 Search Path for the Initialization File . . . . . . . . . . . . . . . . . . . .
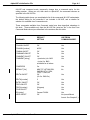
A.2 INITIALIZATION FILE COMMAND LIST . . . . . . . . . . . . . . . . . . . . . . . .
A.3 INITIALIZATION FILE COMMANDS . . . . . . . . . . . . . . . . . . . . . . . . . . .
A.3.1 The START Command . . . . . . . . . . . . . . . . . . . . . . . . . . . . . .
A.3.2 The MODULE Command . . . . . . . . . . . . . . . . . . . . . . . . . . . .
A.3.3 The DEFAULT Command . . . . . . . . . . . . . . . . . . . . . . . . . . . .
A.3.4 The GO Command . . . . . . . . . . . . . . . . . . . . . . . . . . . . . . . . .
A.3.5 The HELP COMMAND . . . . . . . . . . . . . . . . . . . . . . . . . . . . . .
A.4 SAMPLE INITIALIZATION FILE . . . . . . . . . . . . . . . . . . . . . . . . . . . . . . .
A-1
A-2
A-2
A-2
A-4
A-5
A-5
A-6
A-6
A-8
A-8
APPENDIX B - ALPHAVUE ERROR MESSAGES
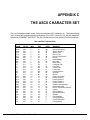
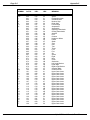
APPENDIX C - THE ASCII CHARACTER SET
APPENDIX D - SYSTEM REQUIREMENTS FOR ALPHAVUE
D.1 OPERATING SYSTEM REQUIREMENTS . . . . . . . . . . . . . . . . . . . . . .
D.2 ALPHAVUE MEMORY REQUIREMENTS . . . . . . . . . . . . . . . . . . . . . . .
D.3 HARDWARE REQUIREMENTS . . . . . . . . . . . . . . . . . . . . . . . . . . . . . .
D.4 TERMINAL DRIVERS . . . . . . . . . . . . . . . . . . . . . . . . . . . . . . . . . . . . . .
D-1
D-1
D-1
D-1
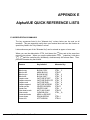
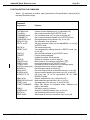
APPENDIX E - ALPHAVUE QUICK REFERENCE LISTS
E.1 SCREEN EDITING COMMANDS . . . . . . . . . . . . . . . . . . . . . . . . . . . . . E-1
E.2 COMMAND MODE COMMANDS . . . . . . . . . . . . . . . . . . . . . . . . . . . . . E-3
E.3 INITIALIZATION FILE COMMANDS . . . . . . . . . . . . . . . . . . . . . . . . . . . E-5
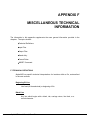
APPENDIX F - MISCELLANEOUS TECHNICAL INFORMATION
F.1 TECHNICAL DEFINITIONS . . . . . . . . . . . . . . . . . . . . . . . . . . . . . . . . . .
Beginning Of Line . . . . . . . . . . . . . . . . . . . . . . . . . . . . . . . . . . . . . . .
Blank Line . . . . . . . . . . . . . . . . . . . . . . . . . . . . . . . . . . . . . . . . . . . . .
End Of Line . . . . . . . . . . . . . . . . . . . . . . . . . . . . . . . . . . . . . . . . . . . .
White Space Character . . . . . . . . . . . . . . . . . . . . . . . . . . . . . . . . . . .
Word . . . . . . . . . . . . . . . . . . . . . . . . . . . . . . . . . . . . . . . . . . . . . . . . .
Word Group . . . . . . . . . . . . . . . . . . . . . . . . . . . . . . . . . . . . . . . . . . . .
F.2 INPUT FILES . . . . . . . . . . . . . . . . . . . . . . . . . . . . . . . . . . . . . . . . . . . . .
F.3 OUTPUT FILES . . . . . . . . . . . . . . . . . . . . . . . . . . . . . . . . . . . . . . . . . . .
F.4 SEARCH KEY . . . . . . . . . . . . . . . . . . . . . . . . . . . . . . . . . . . . . . . . . . . .
F.5 FORMAT RULES . . . . . . . . . . . . . . . . . . . . . . . . . . . . . . . . . . . . . . . . . .
F.6 THE ABORT COMMAND . . . . . . . . . . . . . . . . . . . . . . . . . . . . . . . . . . . .
F-1
F-1
F-1
F-2
F-2
F-2
F-2
F-3
F-3
F-4
F-4
F-4
DOCUMENT HISTORY
INDEX
AlphaVUE User’s Manual, Rev. 02
CHAPTER 1
INTRODUCTION
AlphaVUE is Alpha Micro’s text editor. A text editor is a program you use to enter text into a
computer file, then edit it easily and efficiently. AlphaVUE is used to create and edit text on
your video screen and lets you fix errors, adjust lines and paragraphs, move text lines from one
place to another, and so on.
Generally, AlphaVUE is used in conjunction with other Alpha Micro software. For those of you
writing, letters, reports, etc., you would probably use AlphaVUE in conjunction with TXTFMT.
TXTFMT is Alpha Micro’s text formatting program which controls the appearance of your final
document. People writing computer software programs will use AlphaVUE files in conjunction
with software that interprets human instructions into ones the computer understands.
In any case, before you can have a final product from your file, you need to know how to use
AlphaVUE as a tool. This book describes how to use AlphaVUE: from the basics of creating a
file through using the more advanced editing features.
1.1HOW THIS MANUAL IS ORGANIZED
The AlphaVUE User’s Manual is organized into nine chapters and six appendices. The
following list gives you an overview of Chapters 2 through 9 and each appendix.
Chapter2-"Getting Started" describes where to log and how to use the VUE command
to call up and exit AlphaVUE. Also, each of AlphaVUE’s operating modes is described.
Chapter3-"Moving Around in Your File" discusses all the different ways you can move
the cursor about through your file.
Chapter4-"AlphaVUE Text Editing Features" shows you how to insert and delete text
and how to rearrange lines of text in your file.
Chapter5-"Advanced Editing Features" introduces you to working with blocks of text.
Also described are methods to transfer text between files.
Chapter6-"Features from Command Mode" describes the commands you can use to
affect the file you are currently viewing and AMOS commands available to you while you
are in AlphaVUE.
AlphaVUE User’s Manual, Rev. 02
Page 1-2
Chapter One
Chapter7-"AlphaVUE Search and Replace Procedures" discusses the methods for
locating text in your file and then replacing it with other text.
Chapter8-"AlphaVUE’s Capture and Macro Features" describes how to use these
features to help you reduce the amount of repetitive typing and editing you do.
Chapter9-"AlphaVUE Features for Programmers" talks about special AlphaVUE
capabilities to make writing program code easier.
AppendixA-AlphaVUE’s Initialization File" describes how to create and where to locate
the initialization file and all the parameter settings available.
AppendixB-"AlphaVUE Error Messages" gives you an alphabetic list of error
messages which can occur during AlphaVUE’s operation, and instructions for corrective
action.
AppendixC-"The ASCII Character Set" is a chart providing ASCII values in octal,
decimal and hexadecimal for use with the AlphaVUE COMMENT and FIELD commands.
AppendixD-"System Requirements for AlphaVUE" describes what computer resources
AlphaVUE requires to operate.
AppendixE-"Quick Reference Lists" gives you table summaries for editing features
invoked by using keys, a list of universal key sequences, AlphaVUE Command mode
commands, AlphaVUE initialization file commands, and editing features especially for
programmers.
AppendixF-"Miscellaneous Technical Information" provides more precise definitions
and explanations of AlphaVUE’s behavior than is given in the chapters, which are
written especially for more casual AlphaVUE users.
1.2GRAPHIC CONVENTIONS USED IN THIS BOOK
Like other Alpha Micro documents, this book contains a number of standard symbols
and abbreviations to make the examples easier to read and understand.
SYMBOL
DESCRIPTION
AMOS Prompt:
.
This dot symbol on your terminal screen indicates you are
at AMOS (Alpha Micro Operating System) command level.
The AMOS prompt is user definable, so the prompt you
see may be something other than this dot.
Type
This type face in examples shows the characters the
computer sends and displays on your terminal screen,
used for prompts and other messages.
AlphaVUE User’s Manual, Rev. 02
Introduction
Page 1-3
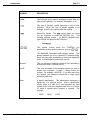
SYMBOL
DESCRIPTION
TYPE
This bold type face is used in examples to show what you
type at your keyboard. For example: LOG DSK0:[1,2]
KEY
This type of "keycap" symbol represents a key on your
keyboard. When this type of symbol appears in an
example, press the key named within the keycap.
RETURN
Return key symbol. The RETURN symbol shows you when
you are expected to press the RETURN key. The
following example means:
"At AMOS command level,
type LOGON and press the RETURN key."
LOGON RETURN
CTRL
/
KEY
This symbol means press the CONTROL
simultaneously with another character, such as CTRL /
D
key
.
>
The AlphaVUE Command mode prompt symbol. This
prompt indicates you are in AlphaVUE Command mode,
where you can enter commands to affect how AlphaVUE
works, or to take special actions with your file.
Account
This is a disk area containing a group of files, identified by
an account number—such as [100,2].
cpuID-
This is the ID number of the computer system you want to
access over a network. A dash "-" always follows the
number. For example, 16842758-. If you have more than
one network, your computer system has a unique cpuID
number for each one.
Devn:
A device specification. This abbreviation represents a
logical unit of a physical device. Such a specification
usually refers to a disk, but it can represent any valid
system device, such as a magnetic tape drive, or a printer
for which a special driver program is required. For
example:
DSK2:
AlphaVUE User’s Manual, Rev. 02
MIN0:
VCR0:
Page 1-4
Chapter One
SYMBOL
DESCRIPTION
Filespec
A file specification identifying a file. A full file specification
has these elements but may contain fewer:
cpuID-Devn:Filename.Extension[p,pn]
{}
Optional elements of a command line are enclosed within
braces.
When these symbols appear in a sample
com\mand line, they designate elements you may omit
from the command line.
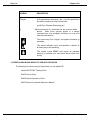
This symbol says "Don’t forget!" and signals information to
remember.
This symbol indicates a hint, and identifies a shortcut or
an easier way to do something.
This symbol means STOP!, and signals an important
warning or restriction you must know about before continuing.
1.3OTHER ALPHA MICRO BOOKS TO USE WITH THIS BOOK
The following list of books may be helpful while you use AlphaVUE:
AlphaVUE/TXTFMT Training Guide
AMOS User’s Guide
AMOS System Operator’s Guide
AMOS System Commands Reference Manual
AlphaVUE User’s Manual, Rev. 02
CHAPTER 2
GETTING STARTED
Most of this book is organized and presented as a reference guide. However, if you are new to
using AlphaVUE, this chapter introduces you to the basics and will help you decide which other
chapters to examine next. This chapter explains:
The terminal and your keyboard.
Logging on to your computer.
How to use AlphaVUE to create a new file.
An overview of AlphaVUE’s operating modes.
Exiting AlphaVUE.
2.1YOUR TERMINAL AND KEYBOARD
Your video-display terminal is composed of a video screen and a keyboard. From the
terminal, you enter commands; on the video screen, the computer displays responses.
In addition to the conventional typewriter keys, the terminal keyboard has a few extras:
KEY NAME
PURPOSE
RETURN
The RETURN key, sometimes labeled as ENTER or with a left pointing
arrow, corresponds roughly to the carriage return on a typewriter.
RETURN advances the cursor to the next line.
RUBOUT
The RUBOUT key, sometimes labeled RUB, DELETE, DEL, or
BACKSPACE, is used to correct errors. When you press this key, the
cursor moves backward one space and erases the previous character. If
your terminal has an automatic repeat feature, holding down RUBOUT
continues to move the cursor backward, deleting each character it
passes.
AlphaVUE User’s Manual, Rev. 02
Page 2-2
Chapter Two
KEY NAME
PURPOSE
ARROW
Keys
In AlphaVUE, you can use the keys labeled with arrows to move the
cursor around without deleting other characters. When you press an
arrow key, the cursor moves in the direction the arrow points.
If you hold an arrow key down, the cursor continues to move without
deleting the characters it passes. When you want to correct a word or
character in the middle of a line, you can use the arrow keys to move the
cursor to the word, then make your correction. There are other, more
efficient ways of moving the cursor back and forth within your document.
Theyare discussed in Chapter3- "Moving Around in Your File."
TAB
Like typewriters, your terminal also has a TAB key. In AlphaVUE, the tab
stops default to every eight spaces or every five spaces, depending on
the extension of the file you’re editing.
After you use TAB , you cannot move the cursor into some parts of a tab
field. If the tab is set to 8 spaces or higher, there will be a "tab character"
acting like a single space even though it appears to be more. You can
delete this tab character by using the CHAR DEL key or any other
method to delete a character.
You can alter the tab stops by using the TAB command. However,
AlphaVUE follows special rules for tab stops set to something other than
every eight spaces. See Chapter 6-"Features from Command Mode" for
complete information on using the TAB command.
2.1.1Function Keys
At the top or side of your keyboard, there may be a set of keys labelled with the letter F
and a number. These are function keys, and you use them to invoke some AlphaVUE
features when you are working in a file.
Because different types of terminal keyboards have different numbers of function keys,
the same function key—for example, F5—may access different features on different
keyboards.
Throughout this manual, we refer to function keys by the name shown in the AlphaVUE
Terminal Keyboard Reference Card—for example, MENU —and never by number, since
the number may vary from terminal to terminal.
If there aren’t any function keys on your terminal keyboard, don’t worry. You can also
perform any AlphaVUE feature by using its universal key sequence, which works on any
terminal, even one without function keys. Universal key sequences are listed in
Appendix E-"AlphaVUE’s Quick Reference Lists."
AlphaVUE User’s Manual, Rev. 02
Getting Started
Page 2-3
2.1.2The CONTROL Key
You can perform certain AlphaVUE operations by using the key labeled CONTROL, or
CTRL. You also use CTRL for some universal key sequences for AlphaVUE features.
For example, when a key sequence requires you to use
to press the keys at the same time. To do this:
-Hold down
CTRL
CTRL
and a character, you need
and press the character key once.
2.1.3The ESCAPE Key
You switch between AlphaVUE’s Command and Editing modes by using the key labeled
ESCAPE, or ESC.
2.1.4Alpha Micro Compatible Terminals
The terminals sold by Alpha Micro have some special features other terminals may not
have—features making it easier and more convenient to use AlphaVUE. For example,
the NEXT SCREEN key advances the screen page.
The information in this book assumes you are using an Alpha Micro compatible terminal.
If you are not and do not have the keys identified in this book, see Appendix E for the
universal key sequence to perform a particular feature.
2.2LOGGING ON TO YOUR COMPUTER
When you first begin work on the computer, you must have some way of addressing it
and identifying the storage device you plan to use. To do this, you use the AMOS LOG
or LOGON command, which designates the disk and account you will use.
2.2.1Devices and Accounts
For organization and ease of use, AMOS can treat a single physical disk drive as if it
were many separate devices. Each such "logical" device is identified by a three-letter
name, which is the same for all logical devices on one physical disk, and a number. For
example, a disk drive could contains the logical devices DSK0:, DSK1:, and DSK2.
Each logical device is further subdivided into accounts. Each account is identified by a
two-part number, such as [100,44]. Every file on the computer is stored in a specific
logical device (often just called a "disk") and account.
An account is not actually a physical area on the disk, but it may be simpler if you think
of it that way. Information in an account may be spread out all over the disk; AMOS
uses a programmed index to keep track of what information is in which account.
AlphaVUE User’s Manual, Rev. 02
Page 2-4
Chapter Two
For example, the Alpha Micro Operating System (AMOS), a set of programs which
controls the execution of utility programs such as AlphaVUE and TXTFMT, is always
located in account [1,4] on device DSK0:.
2.2.2Logging On
To begin work on the computer you must identify the disk and account you want to use
when you log on.
Suppose you want to write a letter and store it on DSK1: in account [20,1]. You begin
from the AMOS prompt and log on to the system. (If you do not see a prompt, press
CTRL /
C . If you still don’t see the prompt, ask someone for help.)
Once you see the AMOS prompt, type:
LOG DSK1:[20,1] RETURN
This LOG command identifies account [20,1] on the DSK1: device as as the place
where you want the computer to store the text for your letter.
The computer confirms your instruction with this message:
Logged into DSK1:[20,1]
When you transfer from one account to another using the LOG command, the message
identifies both accounts:
Transferred from DSK2:[24,3] to DSK1:[20,1].
If you can’t remember what account you are logged into, and you need to know, from
AMOS command level type:
LOG RETURN
AMOS responds by telling you where you are. For example:
Current login is DSK1:[20,1]
After logging on, you are ready to start using AlphaVUE.
2.3THE ALPHAVUE INITIALIZATION FILE
When you use the VUE command, as described in the next section, the AlphaVUE
program reads the AlphaVUE initialization file, INI.VUE. Each of the commands in this
file controls one aspect of the way AlphaVUE works. For example, the COLUMN
command sets whether or not you see the column counter on your screen, while the
WRAP command determines whether you "wrap around" to the next line automatically
while you’re typing in your file.
AlphaVUE User’s Manual, Rev. 02
Getting Started
Page 2-5
Once you’re familiar with AlphaVUE, you can set the options in INI.VUE to match the
way you use AlphaVUE. If you use AlphaVUE for different purposes in different
accounts—for example, writing memos and letters in one account and programming
files in another—you can have separate INI.VUE files in each account, selecting the
options you want in each case.
For a detailed description of the INI.VUE file, see Appendix A.
2.4USING THE VUE COMMAND
To use AlphaVUE, type the command VUE followed by a file name. This can be the
name of either a new file you want to create, or an existing file you want to work with
again. For example:
VUE NOTE.TXT RETURN
This lets you create the file NOTE.TXT if it doesn’t already exist in your account, or
displays the file on your screen and allows you to edit it if it does exist.
The computer’s first response to typing the VUE command is to load the AlphaVUE
program into memory. AlphaVUE searches for the file named NOTE.TXT on the
computer disk. If it finds the file, that file is also loaded into memory. All file creation
and file editing takes place in memory. At your direction, AlphaVUE writes the new or
edited file to disk for permanent storage.
The next two sections describe what happens when you create a new file or call up an
existing one.
2.4.1Creating an AlphaVUE File
When you use the VUE command with a file name which doesn’t exist in the account
you’re in, AlphaVUE asks if you want to create the file. For example, if you use the
name NOTE.TXT, you see this prompt:
NOTE.TXT does not exist, do you wish it created?
To create the file, type Y RETURN . If for some reason you don’t want to create the file, just
press RETURN .
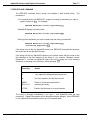
When you create the file, AlphaVUE displays an empty file on your screen. The cursor
is on a blank line at the top of your screen, with asterisks filling the rest of the display.
The end of an AlphaVUE file is always marked by asterisks.
The last line of your screen is the "status line." It shows the version of AlphaVUE you’re
using, the name of the file you’re in and the line you’re on, and various option settings
from the INI.VUE file. For example:
VUE 3.0 File NOTE.TXT:
AlphaVUE User’s Manual, Rev. 02
WIDTH=78
Tab=8
Wrap
Line 00558
Page 2-6
Chapter Two
This is the most common way for a new file to display on your screen. Depending on
the settings in your INI.VUE file, you may see only five asterisks on each line instead of
an entire row. You may also see a mostly blank screen with the cursor at a ">" prompt
near the top. If you see this screen, press ESCAPE and you will see the display described
above.
Choosing a File Name
Like other AMOS file names, AlphaVUE file names consist of up to six letters and/or
numbers, followed by a period and an extension of up to three letters and/or numbers.
The extension can be left blank. In general, the extension describes the type of file
you’re creating. For example, the .TXT extension is for a text file, while program source
files may have an .M68 extension for assembly language, or .BAS for AlphaBASIC and
so on.
You may use any combination of letters and numbers for the name and most
combinations for the extension. However, certain extensions are reserved for use by
specific AMOS programs, and you can’t use AlphaVUE to edit them. The unVUEable
extensions are:
RESERVED FILE EXTENSIONS
ALC
AMX
BAK
CAX
CMN
DVR
FXO
IDV
LDF
LIB
LIT
MIC
MLX
MON
NDV
OBJ
OVR
PDV
RUN
SBR
SYM
SYS
TDV
TMP
UNV
USM
VUX
WRT
WRX
WSV
If you do try to create an AlphaVUE file with one of these extensions, you see the
message:
?Cannot VUE or UNYANK file with .XXX extension.
Where XXX represents the offending extension.
Other file extensions are also reserved, though you could use AlphaVUE to edit them.
However, we recommend that you do not do so because files with the reserved
extensions in the table below are system files and they may undergo unwanted changes
if you VUE them.
RESERVED FILE EXTENSIONS
ATT
MAX
WRM
CBX
MDV
FWD
PFK
IDX
PHN
IDY
RMX
IPF
RP
AlphaVUE User’s Manual, Rev. 02
Getting Started
Page 2-7
2.4.2Viewing an Existing File
When you type the VUE command followed by the name of an existing file, for example:
VUE MYFILE.TXT RETURN
If you do not specify an extension—.TXT in the example above—AlphaVUE refers to a
default extension list.
See the discussion about the DEFAULT command in
AppendixA-"AlphaVUE’s Initialization File" to determine which extension AlphaVUE
will assume.
AlphaVUE loads the file into memory and displays the beginning of the file on your
screen. As with the new file, the cursor is at the top of the screen, and the last line is
the status line. However, instead of asterisks, you see the first lines of the file. If the
whole file fits on one screen, you’ll see asterisks following the last line in your file.
As described in the previous section, depending on your INI.VUE file settings, you may
see a different screen display. It is also possible you will see the last lines of an existing
file instead of the beginning of the file.
Once your file is displayed, you can make changes, add new lines at the end, or just
look at the file. How to do all of these things is described throughout this book.
If you want technical information about the types of files AlphaVUE can edit, please
refer to AppendixF-"Miscellaneous Technical Information."
2.5USING ALPHAVUE
AlphaVUE has two "modes." When you can see your file on the screen, you are in "Edit
mode," and can add new text or change the existing text in your file. AlphaVUE’s other
mode, "Command mode," lets you enter commands to change or move around your file,
view help information, leave AlphaVUE, and so forth.
You switch between AlphaVUE modes by pressing either the
MENU
function key or
ESCAPE
.
2.5.1Edit Mode
Edit mode lets you do just what the name says: edit the text in your file. While you’re in
Edit mode, you can add new text to your file, or change or remove existing text.
To add new text, type it in. Each character you type appears at the cursor position, and
the cursor moves to the next character. When you get to the end of a line, or want to
leave a line blank, press RETURN to go to the next line.
To change existing text, you can type over it. There are also editing features to let you
insert text in the middle of existing text, delete characters, words, lines, or entire
sections of text, move text from one location to another, and so on. These features are
described in Chapters 3 through 5.
AlphaVUE User’s Manual, Rev. 02
Page 2-8
Chapter Two
2.5.2Command Mode
When you’re in Command mode, you can enter AlphaVUE commands to do such things
as: search for a specific word or phrase in your file; see a list of the files in your account;
copy another file into your file; leave AlphaVUE; and many others.
Normally, when you’re in Command mode you cannot see the text of your file on the
screen. Instead, you see a > prompt near the top of your screen, along with the status
line and other information about the settings of the various options. Another form of
Command mode, called "Quick Command mode," is available and displays the
command > prompt on your screen without removing your text. See Chapter 6 for more
information.
The Command mode screen shows information about your file. Lines above the
command > prompt tell you about the options currently set; the size of your file’s text in
bytes; and data regarding the last setting used with the SHIFT command and most
recent SEARCH string.
To use a command, you type the command along with any parameters it requires, such
as the word to search for if you use the "search" command, and press RETURN . Some
commands leave you in Command mode when they finish; others return you to your text
or take you back to AMOS command level.
The HELP Command
AlphaVUE’s HELP command lets you display information explaining various AlphaVUE
features without leaving your current file. To see a list of the topics available with HELP,
in Command mode, type:
HELP RETURN
Or, type:
MENU RETURN
With either command you see a list of help topics available. To see help information on
any of these topics, type HELP, the topic you want, and press RETURN .
One of HELP’s options deserves special mention. You can use HELP to see a list of all
the features and options available in AlphaVUE. To do so, type:
HELP MENU RETURN
This displays all the screen editing features available in Editing mode.
screens list all the commands and options you can use in Command mode.
Successive
When the HELP command is set ON in your INI.VUE file, this menu display will appear
every time you call up AlphaVUE using this INI.VUE file.
AlphaVUE User’s Manual, Rev. 02
Getting Started
Page 2-9
The HELP command can also display any text file you normally have access to on your
computer. If you type HELP followed by a file specification, it displays the file on your
screen, one screen at a time. For example:
HELP DSK0:TEXTFI.LST[22,7] RETURN
The TYPE command also displays a file; it is described in Chapter6-"Features from
Command Mode."
The SAVE Command
As you work in an AlphaVUE file making additions or changes to your text, it’s a good
idea to use the SAVE command from time to time. The SAVE command copies the file
you are working with from memory to the disk without exiting AlphaVUE.
You use SAVE from Command mode by typing:
SAVE RETURN
After pressing RETURN , if your file is a large one, you see a series of dots letting you know it
is being written to disk.
SAVE does not affect the cursor location in your file and when you return to Edit mode,
the cursor will be in the same place as when you left. SAVE creates or updates a
backup file (.BAK) which is described in the discussion about the FINISH command
below.
2.6LEAVING ALPHAVUE
As you enter text into a file, or edit existing text, your input is stored in memory, which is
temporary storage. When you finish with an editing session, you need to tell AlphaVUE
to write your completed file to the disk for permanent storage.
Three commands letting you exit from AlphaVUE will give different results:
FINISH-Writes this file to disk and exits AlphaVUE.
GO-Writes this file to disk, processes GO instructions in INI.VUE, exits.
QUIT-Exits AlphaVUE with no disk updates to your file.
AlphaVUE User’s Manual, Rev. 02
Page 2-10
Chapter Two
2.6.1The FINISH Command
To use the FINISH command, from Command mode type:
FINISH RETURN
Or, abbreviate the command by typing F.
FINISH copies the file currently in memory, called the source file, to the disk. It also
causes AlphaVUE to create a backup file, which is a copy of the file as it appeared
before any changes you just made. The backup file has the same name as the source
file, except its extension is .BAK. Once both the source and backup files are recorded,
AlphaVUE returns to AMOS.
2.6.2The GO Command
To use the GO command, from Command mode type:
GO RETURN
Or, abbreviate the command by typing G.
The GO command performs two functions: it first writes the source file to the disk, and
secondly activates a program to process the file in a certain way or initiates a sequence
of actions. How GO functions depends on the way the GO command is defined in the
INI.VUE file. For more details on the GO command, see Appendix A.
2.6.3The QUIT Command
To use the QUIT command, from Command mode type:
>QUIT RETURN
Or, abbreviate the command by typing Q.
The QUIT command will abandon any changes you have made to your file since the last
time it was saved to disk. Be sure you want to exit without changes before using QUIT.
If, after you create or edit a file, you decide you do not want an updated version copied
to the disk, use QUIT from Command mode. Using QUIT erases the file from memory,
exits AlphaVUE, and returns you to AMOS.
AlphaVUE User’s Manual, Rev. 02
CHAPTER 3
MOVING AROUND IN YOUR FILE
AlphaVUE provides various ways to move the cursor on one screen and move the cursor to
other screens in your file. This chapter describes the ways you can move the cursor with keys
or commands.
3.1MOVING THE CURSOR ON THIS SCREEN
When you work with an AlphaVUE file, you need to move quickly from one place to
another on the screen. To delete a character, word, or line, or insert text, you must first
move the cursor to the place where you want to make the change. The more quickly
you can move the cursor, the more quickly you can begin making changes.
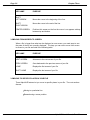
To make this kind of editing easier, AlphaVUE lets you move the cursor quickly with the
keys listed in the table below.
KEY NAME
PURPOSE
RIGHT ARROW
Moves the cursor to the right, character by character.
LEFT ARROW
Moves the cursor to the left, character by character.
UP ARROW
Moves the cursor up, line by line.
DOWN ARROW
Moves the cursor down, line by line.
RETURN
Moves the cursor to the beginning of the next line.
NEXT WORD*
Moves the cursor to the beginning of the next word.
PREV WORD*
Moves the cursor backward to the beginning of the previous word.
*Behavior of NEXT and PREV WORD keys depends on a precise definition of a
"word." See AppendixF-"Miscellaneous Technical Information" for AlphaVUE’s
definition of a "word."
AlphaVUE User’s Manual, Rev. 02
Page 3-2
Chapter Three
KEY NAME
PURPOSE
SHIFT/
LEFT ARROW
Moves the cursor to the beginning of the line.
SHIFT/
RIGHT ARROW
Moves the cursor to the end of the line.
CENTER SCREEN
Positions this screen so the line the cursor is on appears midway
between top and bottom.
3.2MOVING FROM SCREEN TO SCREEN
When a file is longer than what can be displayed on one screen, you need ways to see
the parts of the file not currently displayed. The keys you can use to move from screen
to screen in your file are listed in the following table.
KEY NAME
PURPOSE
NEXT SCREEN
Advances to the next screen of your file.
PREV SCREEN
Goes backward to the previous screen of your file.
HOME
Displays the first screen of your file.
SHIFT/ HOME
Displays the last screen of your file
3.3MOVING TO SPECIFIC PLACES IN YOUR FILE
Three AlphaVUE features let you move to specific places in your file. The next sections
discuss:
Moving to a particular line.
Remembering a cursor position.
AlphaVUE User’s Manual, Rev. 02
Moving Around in Your File
Page 3-3
3.3.1Moving To A Particular Line
The line number where the cursor currently rests is displayed on the bottom status line
of your screen. You can instruct AlphaVUE to move the cursor to a particular line
number in your file with the LINE command.
The format for the LINE command is:
LINE [number] RETURN
Where {+/-} represents an optional symbol to add or subtract and [number] represents a
whole number.
This example moves the cursor to line 5 in your file:
LINE 5 RETURN
By including a plus or minus sign before the number, you can instruct AlphaVUE to
move the cursor that number of lines forward (+) or backward (-) from the cursor’s
present location.
The following example moves the cursor forward three lines from the present cursor
position:
LINE +3 RETURN
And, this next example moves the cursor backward seven lines from the present cursor
position:
LINE -7 RETURN
3.4REMEMBERING THE CURSOR LOCATION
AlphaVUE has three features letting you mark and return to certain locations in your file.
They are:
PUSH
POP
PREVIOUS CHANGE
The push and pop features are discussed together in the next section.
AlphaVUE User’s Manual, Rev. 02
Page 3-4
Chapter Three
3.4.1The Push and Pop Features
AlphaVUE lets you mark the current cursor location, move to another part of the file,
then return to the location you marked. This feature acts much like a book mark in your
file: saving your place so you don’t have to page through screens of text to find where
you left off.
You mark locations with the PUSH function key and return to them by using the POP
function key. There are two steps involved in marking and returning to a location.
1.Marking the position you want to return to:
-To mark the current cursor position, press the PUSH function key.
-Or, from Command mode, type:
PUSH RETURN
2.Returning to the marked position:
-To return to a marked position, press the POP function key.
-Or, from Command mode, type:
POP RETURN
AlphaVUE remembers the location you marked so you can return to it, even though the
place you marked is not highlighted or marked in any way on your screen. You can
mark a second cursor position by moving the cursor and pressing PUSH again. In fact,
AlphaVUE can remember a maximum of 6 cursor locations; if you exceed 6 marks,
AlphaVUE remembers only the 6 most recent ones.
When you use multiple marks, POP returns the cursor to a marked location in reverse
order of how you marked them—the most recent mark first, the next to last mark next,
and so on.
Be careful not to add or delete lines before a PUSH location. If you do, the PUSH mark
will change accordingly.
3.4.2The Previous Change Feature
Another AlphaVUE feature continually keeps track of the last place where you made a
change—deleting a line, adding a character, and the like.
If you leave the line where you’ve made a change to rummage around elsewhere in
your file, you can return to where you were working by pressing the PREVIOUS
CHANGE function key. PREVIOUS CHANGE moves the cursor back to the same
column and line number where you last made a change.
AlphaVUE User’s Manual, Rev. 02
CHAPTER 4
AlphaVUE TEXT EDITING FEATURES
In AlphaVUE it is an easy process to add, delete and rearrange what you write. This chapter
describes the basic editing features you use to work with your file:
Inserting and deleting text.
Undeleting lines.
Rearranging text.
4.1INSERTING TEXT
The next sections describe the methods you use to insert characters, words and lines.
4.1.1Inserting Characters
There are two principle ways to insert characters in your text: with the CHAR INS key or
using Character Insert Mode.
Character Insert Key
The CHAR INS key creates a blank space at the cursor location by moving the entire
text line from the cursor to the end of the line over one character position.
Typically, if you position the cursor at the beginning of an existing sentence and begin to
type, the old characters are replaced by the new ones. If you want to insert one or two
characters somewhere in an existing line, you might use CHARINS to create the blank
spaces, then type the new characters.
AlphaVUE User’s Manual, Rev. 02
Page 4-2
Chapter Four
Character Insert Mode
When you want to insert several characters or words within a line, automatic character
insert mode is more convenient than using the CHARINS key. Some people prefer to
always use automatic insert mode.
Pressing the AUTOINSCHAR function key lets you switch on or off character-insert
mode, allowing you to enter new characters without overwriting existing ones. As you
type, AlphaVUE automatically shifts existing text one space to the right, continually
making room for the new characters on the line.
Using RUBOUT in character insert mode deletes the previous character, and shifts text
on the right of the cursor back to the left to fill the gap.
When you first use the AUTOINSCHAR function key, the terminal beeps and the letter
Q appears in the upper right corner of the screen to remind you character-insert mode
is engaged. To leave character-insert mode, press AUTOINSCHAR again. The
terminal beeps and the Q disappears.
The maximum line length AlphaVUE allows is 510 characters. If you insert more than
510 characters, AlphaVUE will delete all characters after the 510th.
4.1.2Inserting A Word
The WORDINS key causes a temporary character insert mode, letting you insert
characters into the middle of a line until you press SPACEBAR, TAB , or RETURN . If you
only have to insert one word, this is faster than character insert mode, since it "turns off"
automatically.
4.1.3Inserting Lines
You can insert lines in your file using the LINEINS key, automatic line insert mode, or
the BLANKS command. Each of these methods is described below.
The LINE INS Key
The LINEINS key causes everything below and to the right of the cursor to move down
one line, without affecting text above or to the left of the cursor.
AlphaVUE User’s Manual, Rev. 02
AlphaVUE Text Editing Features
Page 4-3
Automatic Line Insert Mode
You can insert lines without having to use the LINEINS key to make blank lines. By
activating line insert mode with the AUTOINSLINE function key, a blank line appears
every time you press RETURN .
Text below the line you are entering moves down one line when you press RETURN , a blank
line is created between the line the cursor is on and the subsequent text, then the
cursor moves to the beginning of the blank line.
When you first press the AUTOINSLINE function key, the terminal beeps and displays
the letter I in the upper right corner of the screen. To turn off line insert mode, press the
AUTOINSLINE function key again. Line insert mode may not engage if the INSERT
command is set to FALSE, OFF or 0 in your INI.VUE file.
The AUTOINSLINE key activates options in addition to line insert because it has two
purposes. Aside from engaging auto insert mode, the AUTOINSLINE function key
also engages AlphaVUE’s Entry mode, used specifically for writing program code files.
See Chapter 8-"AlphaVUE Features For Programmers" for more information about
Entry mode and the AUTOINSLINE key.
The BLANKS Command
You can create many blank lines quickly by using the BLANKS command followed by
the number of blank lines you want.
For example, suppose you want to have 40 blank lines in your file. You could press
LINEINS 40 times, or from Command mode you can enter:
BLANKS 40 RETURN
When you return to your text, you see AlphaVUE has automatically created 40 blank
lines for you.
4.2DELETING TEXT
The next sections describe the methods you use to delete characters, words and lines.
4.2.1Deleting Characters
There are three ways to delete characters individually from your AlphaVUE file: typing
over them, using the CHARDEL key, or using the RUBOUT key.
You can type over characters if character insert is not on—this is called "overwriting."
Using the CHARDEL key deletes the character where the cursor rests, and moves the
rest of the line one space to the left.
AlphaVUE User’s Manual, Rev. 02
Page 4-4
Chapter Four
Pressing the RUBOUT key once moves the cursor back one space and deletes any
character it encounters. When you use RUBOUT, text to the right of the cursor does not
shift and no blank space is left unless character insert mode is on.
4.2.2Deleting a Word
Using the WORDDEL key deletes characters from the cursor position to the beginning
of the next word, and contracts the entire line to fill in the gap.
If the cursor is at the beginning of a word, the WORDDEL key deletes the word it is on
and any blanks following it. If you are in a field of blanks, the WORDDEL key erases all
the blanks in the field to the right of the cursor. If the cursor is in the middle of a word,
the WORDDEL key deletes the rest of the word and any trailing blanks.
However, the WORDDEL key does not delete tab characters. And, if you delete a word
which has tabs and text following it, that text is unaffected by the delete and remains in
the same column as before. To delete a tab, use the RUBOUT key or the CHARDEL
key.
AlphaVUE has a specific definition for what a word is, see AppendixF"Miscellaneous
Technical Information" for details.
4.2.3Deleting Lines
There are two methods for deleting lines in AlphaVUE. One deletes the entire line, the
other deletes only part of a line.
To delete an entire line of text, press the LINEDEL key. The line where the cursor
rests, regardless of the cursor’s position on the line, is deleted and subsequent text
moves up to fill in the gap.
To delete part of a line, position the cursor where you want deleting to begin and use
CTRL /
Y .
CTRL /
Y
deletes from the cursor to the end of the line, without shifting any
text to fill the gap.
4.3UNDELETING LINES
AlphaVUE lets you recover a line of text when you delete it by mistake with the
RESTORE function key.
The RESTORE feature is like a small "waste basket:" it can only hold one deleted line at
a time, so you can only restore the most recent line deleted with LINEDEL.
Immediately after deleting the line, press the RESTORE function key. The line you
deleted is "restored" to where the cursor is currently positioned as long as you have not
typed any characters. However, you can move the cursor in the file, without affecting
AlphaVUE’s ability to restore the line.
AlphaVUE User’s Manual, Rev. 02
AlphaVUE Text Editing Features
Page 4-5
4.4REARRANGING TEXT
AlphaVUE offers a number of ways to rearrange text you write in a file. The ones
described in the next sections are:
Breaking and joining lines.
Centering a line.
Formatting paragraphs.
Refreshing the screen.
4.4.1Breaking and Joining Lines
Two handy editing features let you break a line in two, then rejoin it.
To break a line, position the cursor on the word in the line where you want the break to
appear and press the LINEINS key. The text to the right of the cursor drops down to
the next line and all subsequent text moves down to create room.
To join a line, position the cursor anywhere on the line you want to join and press
CTRL /
O . AlphaVUE automatically moves the cursor to the end of the line and adds
the line of text below the cursor onto the end of the line where the cursor is. All lines
below the cursor move up to fill the gap.
If the new joined line would be longer than 510 characters, AlphaVUE does not attempt
to join the line; instead, the terminal beeps.
4.4.2Centering A Line
You can position a line of text between the left and right columns on your screen by
pressing the CENTERLINE function key. This key centers the line between the
left-most column on the screen and the line length specified by the WIDTH command.
See Chapter 6 for more information about using WIDTH.
Any blank spaces preceding the text are ignored; trailing blanks are not.
The centering feature is also available from Command mode. To use it this way,
position the cursor on the line you want to center, go to Command mode and type:
CENTER RETURN
AlphaVUE User’s Manual, Rev. 02
Page 4-6
Chapter Four
4.4.3Formatting Paragraphs
When you press the FORMAT function key, AlphaVUE formats a set of contiguous lines
up to a blank line, a TXTFMT command, or a line starting with a blank, TAB or carriage
return. Formatting begins on the line where the cursor rests and arranges lines so no
line is longer than the maximum line length set by the WIDTH setting. See Chapter 6
for more information about WIDTH.
The formatting feature is also available from Command mode. To use it this way,
position the cursor on the line where you want formatting to begin, go to Command
mode and type:
FORMAT RETURN
4.4.4Refreshing The Screen
The REFRESH function key causes your screen to re-display, without changing the
cursor’s current position. This is useful if a program outside of AlphaVUE sends a
message to your terminal, disrupting your AlphaVUE screen display.
AlphaVUE User’s Manual, Rev. 02
CHAPTER 5
ADVANCED EDITING FEATURES
This chapter describes how to work with large portions of your file, not just characters, words
and lines. You’ll find information for:
Working with blocks of text.
Transferring text between files, or between memory and disk.
Using prototype file modules.
5.1WORKING WITH BLOCKS OF TEXT
AlphaVUE makes it easy for you to move, copy or delete blocks of text—lines,
paragraphs, even whole sections of your file. The next sections describe:
Marking Text
Clearing Marks
Copying Marked Text
Deleting Marked Text
Moving Marked Text
5.1.1Marking Text
Blocks of text are made up of whole lines in your file. The first step in working with a
block of text is to "mark" the block with the BLOCK MARK function key.
Place the cursor on the first line of your block, and press the BLOCK MARK key. Then
move the cursor to the last line of the block and press BLOCK MARK again. On
terminals capable of displaying in reduced intensity, the text you mark becomes shaded.
If the terminal lacks this capability, the text is still marked although it appears the same
as unmarked text.
AlphaVUE User’s Manual, Rev. 02
Page 5-2
Chapter Five
Once text is marked you can delete, copy or move it. If you choose to move or copy the
marked block, first you must move the cursor out of the marked shaded area because
you cannot move or copy a block on top of itself.
Marking text is also used with the SBLK command to perform search and replace
operations on only a selected block of text in your file. Marked text is also used with the
UNYANK command described later in this chapter.
5.1.2Clearing Marks
It’s good practice to clear marks after you are through working with the marked text.
This will keep you from accidentally working with a part of your file you are already
finished with.
There are three ways to remove marks you make with the BLOCK MARK key:
1.When you MOVE or DELETE the block of text you marked.
2.When you press the BLOCK CLEAR function key.
3.When you go to Command mode and type:
CLEAR RETURN
5.1.3Copying A Marked Block
Once you mark a block, you can copy it to another place in your text by moving the
cursor to the desired location and pressing the BLOCK COPY function key.
When you do, the block of text is copied to the new location, without being deleted at
the original position. The duplicate text is inserted, and does not overwrite existing text.
When you copy text, the block marks are not removed, in case you want to copy the
block to yet another place in your file. If you are through working with this text, be sure
to clear the block marks before continuing.
You can perform the same copy operation with a command.
BLOCK COPY, from Command mode type:
Instead of pressing
COPY RETURN
AlphaVUE User’s Manual, Rev. 02
Advanced Editing Features
Page 5-3
5.1.4Deleting A Marked Block
You can delete text you mark by using the BLOCK DEL function key.
AlphaVUE deletes the block of text along with the block marks, and fills in the resulting
gap by bringing up any text following the deleted block.
You can perform the same delete operation with a command.
BLOCK DELETE, from Command mode type:
Instead of pressing
DELETE RETURN
5.1.5Moving A Marked Block
To relocate a block of text within your document, mark the block using the
BLOCKMARK function key. Then move the cursor to the place in your file you want to
move the block to, and press the BLOCKMOVE function key.
Moved text is relocated from the original position to the new one. Text following the
original position moves up to fill the gap; text following the new position moves down to
make room.
You can perform the same move operation with a command.
BLOCK MOVE, from Command mode type:
Instead of pressing
MOVE RETURN
5.2TRANSFERRING TEXT BETWEEN FILES
Besides deleting, copying, and moving blocks of text within a single file, AlphaVUE can
transfer text from one file to another, saving you from unnecessary retyping. The
commands are described below.
5.2.1Moving Text Out Of Your File With UNYANK
You use the UNYANK command to copy a marked block of text from the current file to a
new file you create just for the marked text block. Here are the steps:
1.In the current file, use the BLOCK MARK function key to mark the text you want to
duplicate in another file.
2.Move the cursor out of the marked area and press MENU to go to Command
mode.
3.At the AlphaVUE prompt, type UNYANK followed by the file specification and
press RETURN .
AlphaVUE User’s Manual, Rev. 02
Page 5-4
Chapter Five
You can assign a one to six character file name to select a file for the block of text being
transferred. You can include a file extension; if you don’t, the new file’s extension is the
same as the one used for the file you are currently editing.
Your file name may not consist entirely of numbers, unless you specify an extension,
otherwise, AlphaVUE assumes you want to UNYANK portions of the file to or from the
disk as described in the next section.
For example, to transfer a block of text from the current file to a new file you want to
name TEMP.TXT, mark the text with BLOCK MARK, move the cursor out of the marked
block, go to Command mode, and type:
UNYANK TEMP.TXT RETURN
If your account already contains a file with the name you specify in the UNYANK
command, AlphaVUE asks you if you want to overwrite the existing file with the prompt:
(file name) already exists.
Overwrite? (Y-N)
You can also use the UNYANK command to copy a file to another device by including
the device name and account number as the file specification in the UNYANK
command. For instance, suppose you want to UNYANK TEMP.TXT from the current file
and send it to DSK2:[20,4]. After marking the block, this is what you’d type to do this:
UNYANK DSK2:TEMP.TXT[20,4] RETURN
However, the account you specify must have the same project number as the one you
are logged into; otherwise, you get a "protection violation" error. In the above example,
you must be logged onto DSK2:, somewhere in the [20,n] account series—[20,1], [20,2],
[20,3], etc.
If you want to copy to or from a device other than a "DSK" device, the driver for the
device to which you are copying (for example, MIN0:) must be loaded into user or
system memory before using AlphaVUE.
If the device driver is not loaded, AlphaVUE displays an error message. For information
about device drivers, see your System Operator.
5.2.2Moving Text Into Your File With YANK
When you need to copy text from another file into the file you are working in now, you
use the YANK command. Here are the steps:
1.Move the cursor to the point in the current file where you want the transferred text
to appear.
2.Switch to Command mode.
AlphaVUE User’s Manual, Rev. 02
Advanced Editing Features
Page 5-5
3.At the AlphaVUE prompt, type YANK followed by the file specification for the file
you want to copy in, and press RETURN .
Your file name may not consist entirely of numbers, unless you specify an
extension; otherwise, AlphaVUE assumes you want to YANK portions of the file to
or from the disk as described in the next section.
4.Switch back to Edit mode.
For example, to copy the text of TEMP.TXT into the current file, position the cursor
where you want the new text to begin in the current file, switch to Command mode, and
type:
YANK TEMP.TXT RETURN
The text of file TEMP.TXT is automatically copied into the current file beginning at the
cursor location, and none of your existing text is over-written.
If you omit the file name extension, AlphaVUE looks for the file to YANK using the same
extension as the file you are currently editing.
If you want to YANK in a file from another device and account, you can include the
device name and account number in the command. For example, the command:
YANK SMD2:TEMP.TXT[20,4] RETURN
copies the file TEMP.TXT from SMD2:[20,4] to file you are working with now.
In order for this operation to be successful, however, the driver for the device from
which you are YANKing (SMD2: in this case) must be loaded into user or system
memory before using AlphaVUE, AND the account from which you are copying must
have the same project number as the one you are logged into. If either of these
conditions is not met, AlphaVUE displays an error message. For information on device
drivers, see your System Operator.
5.3TRANSFERRING TEXT TO AND FROM DISK
The YANK and UNYANK commands are also used to transfer text to and from the disk
when your memory partition is full. Suppose you want to edit a file named FILE.TXT,
which is too large to completely fit into memory. When you use the VUE command, you
see:
Insufficient space to complete transfer!
Suppose the first three-quarters of the file is loaded into memory, but you want to
inspect the last quarter of the file still remaining on disk. To access the unloaded
portion, you must copy the first part of the file to the disk, delete it from memory, and
load the remaining part.
AlphaVUE User’s Manual, Rev. 02
Page 5-6
Chapter Five
If you use the UNYANK command without a filename, UNYANK copies all the text
currently in memory to the disk then deletes it from memory. As the copy progresses,
AlphaVUE displays a period on the screen for each 64 lines of text transferred. When
the AlphaVUE prompt reappears, you then use the YANK command to load the
remaining part(s) of the file from the disk into memory.
If you do not want to delete all of what is in memory, you can specify a number of lines
with the UNYANK and YANK commands. For example, suppose you want to copy to
disk and delete from memory only the first 100 lines of the file. For example:
UNYANK 100 RETURN
The first 100 lines are deleted from memory, making room so you can copy in 100 lines
at the end of the file. To transfer 100 new lines in from the disk, type:
YANK 100 RETURN
If you are entering text at the end of a file and you fill up the memory partition, the
terminal beeps to let you know the partition is full. To continue entering text, you must
use the UNYANK command, as explained above, to delete from memory part of the text
currently filling the partition. You may then return to the end of the file to continue
entering text.
5.4THE SPLIT AND UNSPLIT COMMANDS
When you are working with a very large file on a busy system, sometimes AlphaVUE is
slow on some functions; for example, when you insert or delete a line at the beginning
of the file, AlphaVUE has to change all the lines of text following the cursor. A special
feature called SPLIT can help speed up AlphaVUE operations in just such a case.
SPLIT causes the file you are editing to be divided at the cursor location into two parts.
The part past the cursor is stored away. This leaves you, effectively, at the "end" of the
initial segment of the file, so as you enter text, you will not be affecting the stored away
part. This makes editing faster. When you are done entering text, you can use the
UNSPLIT command to bring the stored part back in.
Using the SPLIT command clears block marks and clears any PUSH locations set in the
part of the file being stored away. After you use the UNSPLIT command, you can
remark them if they are still needed.
When you are in SPLIT mode, the end of file symbols are ampersands (&) instead of
asterisks (*), so you know you are working with only part of the file.
AlphaVUE User’s Manual, Rev. 02
Advanced Editing Features
Page 5-7
5.5YANKING IN A MODULE
Pressing the YANKMOD function key displays a menu of generic program module
names. By pressing a letter key defined on this menu, you can YANK in the desired file
to the current cursor location. You can design your own menu by using the MODULE
command in your INI.VUE file. See Appendix A for creating your own module list. The
YANKMOD key is a predefined YANK command.
AlphaVUE User’s Manual, Rev. 02
CHAPTER 6
FEATURES FROM COMMAND MODE
AlphaVUE can perform many editing functions right on your text screen when you use the keys
on your keyboard. Other AlphaVUE features let you do even more powerful editing operations
in your text. For these features, you work from AlphaVUE’s Command mode. Command mode
is where you enter instructions for AlphaVUE to search for specific words in your text, set word
wrap and so on.
This chapter discusses the following commands:
COMMAND-determines display of full or quick Command mode screen.
WRAP-turns word wrap off or on.
WIDTH-sets the line length for word wrap.
TAB-sets the number of spaces
TAB
inserts.
MARGIN-sets the margin used at your screen display.
SHIFT-moves a marked block of text left or right.
COLUMN-sets column number display on your screen.
DIR-lets you see your account directory.
ERASE-deletes files from this account.
TYPE-shows you the contents of another file.
LFONLY-ends each line with a line feed character only, not a carriage return/line
feed.
MODEM-modifies the screen display for use with slow modems.
Command mode features which let you search for and replace specific text are described in
Chapter 7.
AlphaVUE User’s Manual, Rev. 02
Page 6-2
Chapter Six
6.1QUICK COMMAND MODE
The COMMAND command determines whether you see the AlphaVUE Command mode
command screen or just the command line at the editing screen. COMMAND can be
set either OFF or ON and its default is ON.
When you use quick command mode, you still receive messages you would normally
see on the full command screen. However, the Options, Sizes and Data information
from full Command mode is not displayed in quick Command mode.
When COMMAND is OFF, pressing the MENU key puts the AlphaVUE Command mode
command line on the editing mode screen. If you are experienced in using AlphaVUE,
you may find this more convenient.
6.2THE WRAP COMMAND
The WRAP feature lets you type without having to watch the screen to determine when
you should press RETURN . When set ON, WRAP causes AlphaVUE to do an automatic
carriage return whenever the cursor reaches the maximum line length as defined by the
WIDTH command, described in the next section. With the carriage return, AlphaVUE
creates a blank line, and the cursor moves to the beginning of the new line.
If only part of a word has been typed when the cursor reaches the maximum line length,
all characters back to the last blank space or tab stop—all characters of the word—are
transferred to the new line created by AlphaVUE.
The default setting is WRAP OFF, so you must press
the next line.
RETURN
at the end of the line to go to
You can use the WRAP ON command in your initialization file to always call up
AlphaVUE with the wrap around feature on.
6.3THE WIDTH COMMAND
The column where word wrap occurs in your file is defined by the WIDTH command,
which is available from Command mode and in the initialization file. The WIDTH
command setting is depended upon by four other commands: MARGIN, FORMAT,
WRAP and CENTER.
The format for the WIDTH command is:
WIDTH [number] RETURN
where [number] represents the line length in characters you want to set.
For example, if you want to set 76 as the maximum line length, from Command mode
type:
AlphaVUE User’s Manual, Rev. 02
Features From Command Mode
Page 6-3
WIDTH 76 RETURN
6.4THE TAB COMMAND
The TAB command lets you set the amount of spaces the TAB key will insert into your
text when it is pressed. The format for the TAB command is:
TAB [number] RETURN
where [number] is a decimal number from 1 to 10.
TAB may also be set in your INI.VUE file. The default TAB setting is 5 spaces for some
programming source files, such as .C and .BAS files, and 8 spaces for all other files,
including .M68 files.
If you set TAB to something other than the default, the characters inserted in your file
when you press TAB are spaces not a TAB character.
6.5THE MARGIN COMMAND
The MARGIN command is useful when you have lines of text extending beyond the
number of character-spaces displayable on the screen. To view those lines, you simply
change the left screen margin. The format for the MARGIN command is:
MARGIN [number] RETURN
where [number] is a whole number in the range 1 to 255.
For example, suppose you have lines of text 90 characters long and your terminal
screen can display only 78 at one time. An easy way to see the last 12 characters is to
change the left margin to column 12 or greater.
Using the MARGIN command only sets the AlphaVUE display margin; it does not affect
the margin of printed text.
6.6THE SHIFT COMMAND
The SHIFT command moves a marked block of text to the right or left by the specified
number of columns, or aligns the marked text on a specified column by adding or taking
out leading blanks and tabs. The part of each marked line from the first non-blank
character is shifted. You cannot SHIFT a block to the left of column zero, or so any line
becomes longer than 510 characters.
The format for the SHIFT command is:
SHIFT [mode] [number of spaces] RETURN
AlphaVUE User’s Manual, Rev. 02
Page 6-4
Chapter Six
where [mode] is one of three characters:
Char.
<
>
=
Meaning
Shift the marked block to the left
Shift the marked block to the right
Align the marked block on the numbered
column
where [number of spaces] is a number in the range 1 to 255.
To use SHIFT, first mark the block of text you want to move, then enter the SHIFT
command you want.
For example, if you want to shift a marked block 5 spaces to the right, from Command
mode you type:
SHIFT >5 RETURN
6.7THE COLUMN COMMAND
If COLUMN is set to ON, a counter appears at the top right of your screen. The counter
shows you the number of the column on which the cursor is currently resting in your file.
The terminal display is divided into columns; one column for each character that can be
typed across the screen. If the margin is at 0, the current screen displays columns 0 to
77, or 78 character positions horizontally (this size varies with the terminal). If you
change the margin to 78, the resulting screen displays columns 78 to 156, and so on.
As the cursor moves across the screen, the numbers reflect the column the cursor is on.
This is helpful if you create a chart or input any text that requires you to know column
numbers. You don’t need to count character positions, because AlphaVUE does it
automatically.
The default setting is COLUMN OFF.
6.8THE DIR COMMAND
The DIR command shows you the names of files on the disk—much like the DIR
command you use at AMOS command level. You can use the command in several
different ways, depending on how extensive you want the list to be and where you want
the system to check for file names. DIR supports file name wildcarding only.
For example, you can check for a particular file in this account using this format of DIR:
DIR SAMPLE.TXT RETURN
Or, for all files with the same extension in this account:
AlphaVUE User’s Manual, Rev. 02
Features From Command Mode
Page 6-5
DIR *.TXT RETURN
You can check any account and device you normally have access to; however, you
cannot use wildcarding in account or device specifications. For information about the
AMOS DIR command, see the System Commands Reference Manual.
6.9THE ERASE COMMAND
The ERASE command is used to erase files on the disk—it works the same as the
AMOS ERASE command. It is usually used to erase temporary files created with the
UNYANK command (see below), or to free up disk space. If you omit the file name
extension, AlphaVUE assumes the same extension as the one used by the file you are
editing.
The ERASE command does not allow wildcard symbols and will not allow you to erase
files outside of the account where you are now logged.
6.10THE TYPE COMMAND
AlphaVUE lets you display the contents of other files while you are at Command mode.
You can see files from this account or other accounts when you specify a complete file
specification with the TYPE command.
The format for the TYPE command is:
TYPE filespec RETURN
For instance, if you are editing a text file and want to see another text file, perhaps in
another account or on another disk, you might type:
TYPE DSK0:MEMO.TXT[200,2] RETURN
And the file MEMO.TXT appears at the Command mode screen.
If the file you request is larger than AlphaVUE can display in one terminal screen, the
following message appears:
Type CR to continue AlphaVUE waits for you to press RETURN when you are ready to go on. Then AlphaVUE
continues paging through the file until it reaches the end, until you press CTRL / C , you
press MENU or ESC . When you are through looking at the file, you remain in
Command mode.
AlphaVUE User’s Manual, Rev. 02
Page 6-6
Chapter Six
6.11THE LFONLY COMMAND
Normally, each line of a text file you edit with AlphaVUE ends with a carriage return/line
feed pair of characters. In certain situations, you may want each line to end with a line
feed character only, without a carriage return. The LFONLY command causes the file to
be saved with only a line feed at the end of each line.
The format for LFONLY is:
LFONLY {ON}{OFF}
The default is OFF; this ends each line with a carriage return/line feed.
The LFONLY setting that is in effect when you write your document to the disk (via
SAVE, FINISH, or UNYANK) is the one that matters.
We recommend using LFONLY only if you know a specific application requires it. While
you can use VUE to edit a file you’ve saved with LFONLY on, programming compilers or
other file processing programs may not process it correctly.
6.12THE MODEM COMMAND
You can use the MODEM command either in the initialization file or from Command
mode. You can set MODEM to either ON or OFF.
If MODEM is set to ON, it tells AlphaVUE to simplify certain aspects of your screen
display. This makes screen updates faster, wchih can be important if your terminal is
attached to the computer over a relatively slow modem connection.
The default is MODEM OFF unless your port’s baud rate is less than 2400, in which
case the MODEM default is ON. When MODEM is ON, the default for COMMAND is
OFF, unless you specify COMMAND ON later in the initialization file.
AlphaVUE User’s Manual, Rev. 02
CHAPTER 7
AlphaVUE’S SEARCH AND REPLACE
PROCEDURES
One of the most useful features of Command mode is the ability to search for strings of text
within your document, and the ability to replace strings with other strings. This chapter
discusses:
Parameters affecting how searches and replacements are performed.
The SEARCH command to look for text.
The NEXT command, to look for text starting from the current cursor position.
The REPLACE command, to substitute new text for old, case by case.
The GLOBAL command, to substitute new text for old, in all cases.
The WHOLE command is like GLOBAL, except it is for files too large to fit in
memory.
To make editing easier, AlphaVUE can quickly locate and change characters, words, or
phrases—generically referred to as a "string"—in your text without requiring you to read the
entire file. AlphaVUE has a number of commands to work with strings of text in various ways.
The string you select to find and/or replace may not exceed 78 characters in length. The
SEARCH command can find multiple-word strings which are on more than one line.
7.1SETTINGS AFFECTING SEARCH AND REPLACE
There are commands you can set which alter the way AlphaVUE performs search and
replace operations. The commands you can use are:
The COMPRESS command.
The TOKEN command.
AlphaVUE User’s Manual, Rev. 02
Page 7-2
Chapter Seven
The SEARCHFOLD command.
The SBLK command.
A note about special use of the accent grave (‘) character.
7.1.1The COMPRESS Command
The COMPRESS command can be set off or on, and may be included in INI.VUE or
used from Command mode. The default for COMPRESS is ON.
When the COMPRESS parameter is ON, the SEARCH or REPLACE commands will
ignore extra spaces or tabs in the text when looking for a string. For example, if you
use SEARCH to find:
The third volume
and the text in your file is:
The
third volume
AlphaVUE will consider it as a match despite the spaces between "the" and "third". It
will find the phrase if it spans two different lines in the text.
If COMPRESS is off, spaces, tabs and/or control characters are taken into account to
identify a match. In the preceding example, AlphaVUE would not consider the text with
blank spaces a match for what you specified.
7.1.2The TOKEN Command
The TOKEN command can be set either off or on, and may be included in INI.VUE, or
used from Command mode. The default for TOKEN is OFF.
When the TOKEN command is ON, AlphaVUE identifies a match for any search or
replace operation when both of these conditions are met:
1.The found string begins with a non-alphanumeric character, or is preceded by a
non-alphanumeric chracter, and
2.the found string ends with a non-alphanumeric character, or is followed by a
non-alphanumeric character.
This allows you to search for strings bounded by special characters, such as control
characters.
AlphaVUE User’s Manual, Rev. 02
AlphaVUE’s Search And Replace Procedures
Page 7-3
For example, suppose you wanted to find each time you used the pronoun "I" in your
file. If you SEARCH for the letter "I", AlphaVUE will find each "I" including those in other
words containing the letter "I". However, if you use TOKEN ON from Command mode
before the SEARCH, AlphaVUE will find only the occurrences where "I" is an isolated
character.
7.1.3The SEARCHFOLD Command
The SEARCHFOLD command can be set off or on, and may be included in INI.VUE or
used from Command mode. The default for SEARCHFOLD is ON.
The SEARCHFOLD command lets you tell AlphaVUE to consider or ignore whether or
not letters are upper and lower case in its search for a string.
When SEARCHFOLD is ON, the SEARCH command ignores the difference between
upper and lower case letters when matching the string you specify with the strings in the
file. For example, if you use SEARCH to locate the word:
Text
AlphaVUE considers any word with this combination of characters as valid matches,
such as:
Text
text TEXT
If SEARCHFOLD is OFF, the only valid match would be the word with the same
characters and same use of upper and lower case. In the example, only "Text" would
be a valid match for "Text".
SEARCHFOLD affects the searching operation of REPLACE and GLOBAL the same
way it affects the SEARCH command. However, a convenient feature of the
SEARCHFOLD ON option is brought out when you want to replace one word or string
with a completely different word or string.
For example, suppose you want to replace every instance of "print" in a file with the
word, "display." When SEARCHFOLD is set ON, AlphaVUE finds all instances of the
string, whether characters are upper or lower case. However, if the word being
replaced begins with a capital letter or is all upper case, the word replacing it will be
inserted in the same form. Therefore, in our example, "print" is replaced with "display,"
"Print" with "Display," and "PRINT" with "DISPLAY."
If SEARCHFOLD is OFF, AlphaVUE replaces text exactly as you entered it during the
REPLACE or GLOBAL commands.
AlphaVUE User’s Manual, Rev. 02
Page 7-4
Chapter Seven
7.1.4The SBLK Command
The SBLK command can be set off or on, and may be included in INI.VUE or used from
Command mode. The default for SBLK is OFF.
The SBLK command lets you tell AlphaVUE to perform search and replace operations
on a block of text you mark or on your whole file.
When SBLK is set ON, the SEARCH, REPLACE, GLOBAL, NEXT and WHOLE
commands look for the specified string only in a marked block of text.
When SBLK is OFF, the SEARCH, REPLACE, GLOBAL, NEXT and WHOLE
commands cause AlphaVUE to look for the string throughout the file.
7.1.5The WILDCARD Command
The WILDCARD command lets you define characters as symbols for one-character or
multi-character strings.
You may then use these characters in the SEARCH,
REPLACE, WHOLE, and GLOBAL commands, to represent strings in a certain format
or pattern instead of entering an actual string character-for-character.
Wildcard symbols provide a way to search for strings that are alike but not necessarily
identical. The wildcard symbol can represent one or more characters in a string, so you
don’t have to limit the string by identifying the specific character(s). The wildcard
characters default to:
?-Represents any one character.
*-Represents one or more characters.
You can choose any symbols you like to serve as wildcard characters by specifying
them either in the INI.VUE file or temporarily in Command mode. On the WILDCARD
command line, the wildcard symbol for single characters appears first and the symbol
for multiple characters appears second. For example, if you enter:
WILDCARD %@ RETURN
in Command mode, the % sign and the @ sign become the wildcard symbols. Because
it was entered first, the % sign stands for any one character and the @ sign represents
the multiple character wildcard.
If you just type WILDCARD without specifying any new characters, the wildcard feature
is turned off completely.
To illustrate how wildcards affect a search of your file, take this example, which instructs
AlphaVUE to look for all parentheses containing two characters:
SEARCH (%%) RETURN
AlphaVUE User’s Manual, Rev. 02
AlphaVUE’s Search And Replace Procedures
Page 7-5
The following text in your file would be considered suitable matches:
(RO)
(AB)
(IN)
If you were to use one @ symbol in place of the two percent signs, it instructs
AlphaVUE to look for all parentheses containing one or more characters:
>SEARCH (@) RETURN
(RO)
(AB)
(IN)
(this procedure is of great use)
The multi-character wildcard will match any sequence of one or more characters.
If you need to look for the symbols you’ve assigned as wildcard characters, just use the
WILDCARD command to set the symbols to something new. If your wildcard characters
are % and @, and you need to search for a string containing a % sign or a @ sign, you
may change the wildcard characters. To do this, enter Command mode, type
WILDCARD and a space, enter two new wildcard symbols, and press RETURN .
Be careful when using wildcards with the WHOLE or GLOBAL commands. Because of
the wildcards’ power, you can make changes you do not want and get unexpected
results. See Appendix F for a complete technical explanation regarding wildcard
matches and replacements.
7.1.6A Note About the Accent Grave Character
The accent grave character (‘) (also called a backward single quote) has a special use
with any of the search and replace commands. In either a search or replacement string,
it stands for a line feed (end of line) character. Thus, if you want to find a certain word
only when it occurs at the end of a line, you can follow it with an accent grave. For
example, to find the word END only at the end of the line, you would enter:
SEARCH END‘ RETURN
As a side effect of this feature, if you use the accent grave in your file, you cannot find it
using any search or replace command. These commands always interpret this character
as an end of line.
AlphaVUE User’s Manual, Rev. 02
Page 7-6
Chapter Seven
7.2THE SEARCH COMMAND
To quickly locate a certain string in your file, you can use the SEARCH command.
To do so, switch to Command mode, type SEARCH, a space, the string to be found,
and press RETURN . For example, say you want to find all instances of the string
"company". In Command mode, enter:
SEARCH company RETURN
You can SEARCH for text preceded by blanks by typing the spaces on the command
line. All of the blanks, except the one typed immediately after the command name, are
part of the search string.
If you need to cancel the command line, because you don’t want to do the search,
before pressing RETURN press either the MENU key or ESC .
AlphaVUE automatically switches you back to Screen mode where the cursor is
positioned over the "c" of the first "company" in the file. If the SEARCHFOLD parameter
is ON, AlphaVUE ignores the difference between upper and lower case letters in a
search. Otherwise, it searches for exactly what you entered.
You can move the cursor to the next occurrence of the string by pressing the NEXT
MATCH function key.
Each time you press NEXT MATCH, the cursor advances to the next occurrence of the
string, until there are no more—then NEXT MATCH returns you to Command mode.
If the string you specify in the SEARCH command is not in the file, AlphaVUE displays
this message at Command mode:
String not in file
You can modify the use of the SEARCH command by using the SEARCHFOLD and
SBLK commands, described earlier in this chapter.
7.3THE NEXT COMMAND
The NEXT command operates the same way as the SEARCH command, but it begins
the search at the current cursor location instead of at the beginning of the file.
AlphaVUE User’s Manual, Rev. 02
AlphaVUE’s Search And Replace Procedures
Page 7-7
7.4THE REPLACE COMMAND
The REPLACE command finds a string, and replaces it with another string.
procedure is:
The
1.In Command mode, type REPLACE, a space, the string of characters you want to
replace, and press RETURN . For example:
REPLACE Materials Control Department RETURN
2.AlphaVUE displays a question mark:
REPLACE Materials Control Department RETURN
?
3.Now type the characters you want to replace the first string you specified:
REPLACE Materials Control Department RETURN
?Purchasing Department RETURN
If the string is not in the file, AlphaVUE erases your REPLACE command and positions
the cursor next to the AlphaVUE prompt.
If the string is in the file, AlphaVUE transfers you to Screen mode, with the cursor on the
first character of the first instance of the string (in our example, "Materials Control
Department"). You then tell AlphaVUE what to do next by typing one of the following
characters, or pressing one of the keys, without pressing RETURN .
Char./Key
Result
Y
Yes, replace the string and find the next one.
N
No, don’t replace it, but find the next one.
MENU,
ESC, or Q
Return to Command mode without
replacing this string.
CTRLS
Position line the cursor is on at mid-screen.
The string is changed immediately if you type Y, and AlphaVUE finds the next
occurrence. Repeat the process until all strings have been changed. When REPLACE
is over, AlphaVUE automatically returns you to Command mode.
AlphaVUE User’s Manual, Rev. 02
Page 7-8
Chapter Seven
Like the SEARCH command, the operation of REPLACE is modified by the SBLK and
SEARCHFOLD commands, as described earlier in this chapter.
7.5THE GLOBAL COMMAND
The GLOBAL command does the same thing as the REPLACE command, except it
does not ask you whether or not to replace each string. It simply replaces all instances
of the string in the file, then displays the number of strings replaced. Here is what the
Command mode screen might look like after you’ve used a GLOBAL command:
GLOBAL Materials Control Department RETURN
?Purchasing Department RETURN
10 strings replaced
This command automatically changes the 10 occurrences of "Materials Control
Department" in the file to "Purchasing Department".
Use the GLOBAL command with care; you can easily end up with errors throughout
your file if there are occurrences of the search string you do not anticipate. For
example, if you use GLOBAL to change "is" to "was," AlphaVUE also changes "this" to
"thwas."
The GLOBAL command can be used to replace strings within a limited portion of the
text. If you mark off a section of text using the BLOCK MARK function key, and set
SBLK to TRUE, the GLOBAL command will replace only matching text within the
marked block. Also, AlphaVUE’s recognition of upper and lower case letters during
execution of the GLOBAL command is determined by the SEARCHFOLD command.
7.6THE WHOLE COMMAND
If your entire file does not fit into memory, and you wish to search for a particular string,
use the WHOLE command as you would the SEARCH command. Once WHOLE finds
all instances of the string in the text residing in memory, it saves that text on disk, then
loads in the rest of the file from the disk and continues searching.
AlphaVUE User’s Manual, Rev. 02
CHAPTER 8
AlphaVUE’s CAPTURE AND MACRO
FEATURES
This chapter describes three AlphaVUE features which you can use to "record" keystrokes,
then play them back again. The overall effect of these features is to reduce the amount of
repetitive typing you have to do to give AlphaVUE commands. The features are:
Capturing command sequences.
Repeating key sequences.
Creating and using macros.
8.1CAPTURING A COMMAND SEQUENCE
AlphaVUE gives you a way to "capture" a command or sequence of commands so you
can "replay" it again—as many times as you need. You may capture commands from
both Edit and Command modes, in fact, any sequence of actions you can perform in
AlphaVUE can be captured.
There are three basic steps in using this feature: telling AlphaVUE where to start
remembering commands you type, where to stop and then when to replay the
commands. A fourth step lets you add more commands to a sequence you’ve already
recorded.
8.1.1Starting and Ending A Capture Sequence
First, press the CAPTURE BEGIN function key and this message appears on your
status line as a reminder:
Capture
Now, type the keys you want to be able to replay. You can type any character, use
editing features, even exit to Command mode and use AlphaVUE commands with the
capture feature.
AlphaVUE User’s Manual, Rev. 02
Page 8-2
Chapter Eight
When you are done, press the CAPTURE END function key.
8.1.2Executing and Adding To A Capture
To "play back" a sequence of key strokes you have captured, place the cursor where
you want the commands performed and press the CAPTURE EXECUTE function key.
The commands you saved will then be performed, in the same order as they were
recorded. The commands remain saved until you exit the file, or you record another
sequence of commands with the CAPTURE BEGIN function key.
You might find you want to add keystrokes to a sequence you recorded. Although you
can’t go back and rearrange the order of the commands, you can append new ones to
the end of the list. To do so, press the CAPTURE APPEND function key and type what
you want added to the existing capture sequence. When you are through, press the
CAPTURE END function key.
8.2REPEATING KEYSTROKES
The REPEAT function key lets you instruct AlphaVUE to repeat a keystroke from one to
nine times. To use this feature, press the REPEAT function key, type the number of
times you want to repeat, then press the key you want repeated. You are allowed only
one keystroke, however the SHIFT or CTRL keys do not count.
For example, suppose you wanted the letter "a" to appear in your file eight times:
1.Press
REPEAT
2.Type
8
3.Type
a.
AlphaVUE types the letter "a" eight times on the line where the cursor rests.
A more practical application may involve using REPEAT along with the CAPTURE
BEGIN function key.
Programmers may be interested to know a single keystroke may transmit more than one
character if the key has a multi-character translation specified in the AlphaVUE
translation table associated with the terminal. In this case, the whole translation
sequence is repeated the specified number of times.
AlphaVUE User’s Manual, Rev. 02
AlphaVUE’s Capture and Macro Features
Page 8-3
8.3CREATING AND USING MACROS
A macro lets you store a series of commands and/or keystrokes, and recall the entire
series with one command. The capture feature described at the beginning of this
chapter is a macro, however it is a limited macro because it will remember only one
series of instructions and will be overwritten every time you want another series of
instructions.
AlphaVUE has a MACRO command which lets you store a sequence of keystroke
instructions, identified by a name. This lets you store more than just one series of
instructions and perform them as you choose.
Macro definitions can be created as you work with a file and AlphaVUE will remember
them until you exit. However, you can keep more permanent versions of macros by
including them in your INI.VUE file. In either case, you follow the same steps and
format for defining a macro.
8.3.1The Basics to Define A Macro
The first step in defining a macro is choosing a name. Macro names are no more than
six characters long, begin with a letter and can be in upper or lower case. However,
macro names may not be the same as any AlphaVUE command, such as SEARCH,
SAVE, and so on. Each macro can include a maximum of 80 keystrokes. You can
define as many as 20 different macro names.
The format for the MACRO command is:
MACRO name keystrokes RETURN
You must separate the command name from the macro name, and the macro name
from the keystrokes, with exactly one space. You must use RETURN to end the macro
instructions.
For example, type the following from Command mode:
MACRO date 23 April 1988 RETURN
This macro’s name is "date" and it holds the text "23 April 1988". The format follows the
rules described so far: a space between command name and macro name, a space
between the macro name and first character of the macro keystroke, and the macro is
ended by RETURN .
Now, while you are in this file, you can instruct AlphaVUE to type the date you
recorded—23 April 1988—at the current cursor position. To do so, first place the cursor
where you want this text and go to Command mode, then:
date RETURN
AlphaVUE User’s Manual, Rev. 02
Page 8-4
Chapter Eight
AlphaVUE returns you to Edit mode and inserts "23 April 1988" at the spot where you
left the cursor.
8.3.2More About Defining Macros
The MACRO command offers more than just being able to "yank" text into your file.
You can use both Command and Edit mode features as macro keystrokes, and they
can be instructions for using function or other keys on your keyboard. What’s more,
you can "save" macros by including them as commands in your INI.VUE file. Then,
each time you call up AlphaVUE, you can use the macros you’ve already defined
without re-entering the instructions.
Using Function and Control Keys in Macros
You must provide an instruction the MACRO command will understand as a keystroke.
If you just press the key you want, AlphaVUE will perform that operation. Therefore,
you need a way to instruct AlphaVUE that you are giving it an instruction to remember,
not necessarily to perform right now.
An example. Macros will always begin in Edit mode. Therefore, if you want a MACRO
to first use a Command mode feature, say the SEARCH command, you must first
supply the instruction to return to Command mode, which is pressing ESC .
To signal AlphaVUE to remember the keystroke, you first press
press the key you want AlphaVUE to remember. In this case,
AlphaVUE gives is:
CTRL
/
ESC
. Then, you
. The response
G
^[
The caret bracket represents the universal terminal key sequence for
sequence shown in AppendixE- "AlphaVUE Quick Reference Lists."
ESC
—the same
/ G alone will not place any character on the command line, but it causes
AlphaVUE to interpret the next keystroke it receives as one to perform later, not now.
( CTRL / G is also used when you need to insert a control character directly in your file.
See Chapter 9 - "AlphaVUE Features for Programmers" for more information.)
CTRL
For each keystroke you want in your macro except RETURN , you must press CTRL /
then the key you want used. Using RETURN in a MACRO is the only exception.
G
first,
is reserved as the macro terminator and is only used when you want to end the
macro. To use RETURN as part of your macro keystroke sequence, just type the reverse
single quote mark:
RETURN
‘
AlphaVUE User’s Manual, Rev. 02
AlphaVUE’s Capture and Macro Features
Page 8-5
For example, suppose you want a macro to display this account’s directory. To do so,
you would have to:
1.Press
2.Type
3.Press
to go to Command mode.
ESC
DIR.
RETURN
.
To build a macro to do this for you, from Command mode using the macro name "see"
you enter the commands:
1.Type
MACRO followed by a space.
2.Type
SEE followed by a space.
3.Press
CTRL
/
4.Press
ESC
.
5.Type
DIR
6.Type
‘
7.Press
RETURN
G
.
.
This is what your screen will look like before you press
RETURN
:
>macro see ^[dir‘
The quote mark is the instruction to press RETURN . If you leave the quote off, your macro
will execute only as far as typing the "r" and you will have to press RETURN to see the
directory.
8.3.3Defining Macros in Your INI.VUE
You can define a macro in your INI.VUE file so it is available each time you call up
AlphaVUE using that INI.VUE. This is especially helpful if you perform the same series
of operations for many files—you don’t have to re-enter the macro for each file because
it is already defined.
The format for the MACRO command is the same when it appears in your INI.VUE file
as it is when you use MACRO from Command mode. MACRO in your INI.VUE also
follows the typical conventions for INI.VUE commands. (See AppendixA- "AlphaVUE’s
Initialization File" for more information about your INI.VUE.)
AlphaVUE User’s Manual, Rev. 02
Page 8-6
Chapter Eight
8.3.4Restrictions
There are some restrictions on the features you can use in a macro.
You cannot invoke the CAPTUREBEGIN feature’s capability to start, end or
append a capture with the CAPTURESTART, CAPTUREEND, or
CAPTUREAPPEND function keys. You can, however, perform a captured
sequence using the CAPTUREEXECUTE function key.
You cannot define a new macro command within a macro definition.
A macro can invoke another macro. However, if the other macro contains a
reference to the first macro—a recursive macro—you might become caught in an
endless loop. Be careful if you build recursive macros.
Do not name a macro using any existing AlphaVUE or AMOS command name
available from AlphaVUE because the existing names will always supersede your
macro definition.
AlphaVUE User’s Manual, Rev. 02
CHAPTER 9
AlphaVUE FEATURES FOR
PROGRAMMERS
Most AlphaVUE features can be included as part of the new user’s initial training. However,
some AlphaVUE features are especially designed for people writing software programs. This
chapter describes these features which are of particular use to programmers:
Entry mode.
INDENT command.
Control G feature.
Edit history feature.
VUE command options.
9.1ENTRY MODE
Entry mode provides editing features especially suited for writing software code using
AlphaVUE. There are two ways to turn on Entry mode:
With the ENTRY command from Command mode or in the INI.VUE file
With the AUTOINSLINE key, which turns on Entry mode in addition to turning on
automatic line insertion.
Entry mode parameters operate according to fields AlphaVUE recognizes in the
programming line for files with extensions other than .TXT. In the following diagram, the
numbers show the positions of the four fields recognized for assembly language (.M68)
programs.
AlphaVUE User’s Manual, Rev. 02
Page 9-2
Chapter Nine
0
|
|
|
|
|
|
label
8
16
40
|
|
comment field (40-255)
|
|
|
operand field (16-39)
|
opcode field (8-15)
field (0-7)
The fields for BASIC (.BAS) programs are different:
0
|
|
|
|
label
8
56
|
comment field (56-255)
|
statement field (8-55)
field (0-7)
Each of the commands explained in this section may be executed in Command mode to
affect only the current editing session, or included in the INI.VUE file to apply to all
AlphaVUE editing sessions.
9.1.1The ENTRY Command
You turn on Entry mode by setting ENTRY ON in your INI.VUE file or from Command
mode, or by pressing the AUTOLINEINS key from Screen Mode. A dim-intensity "I"
appears in the top right corner of your screen when Entry mode is ON.
When Entry mode is ON, you can use the COMMENT, SPACE, FIELD, FOLD, INDENT,
and DELTA commands as editing features for writing software code.
You can turn off Entry mode by typing ENTRY OFF at Command mode, including
ENTRY OFF in your INI.VUE file, or pressing the AUTOINSLINE key.
When Entry mode is ON, normally, all characters you type appear in upper case unless
you use the FOLD command to specify otherwise.
The default setting is ENTRY OFF.
9.1.2The COLUMN Command
The COLUMN [number] parameter determines the screen column where you want
software code comments to begin. Entry mode must be on for this command to be
operative.
AlphaVUE User’s Manual, Rev. 02
AlphaVUE Features For Programmers
Page 9-3
The default setting is 40 for all program files except AlphaBASIC (.BAS) files, for which
56 is the default. To have comments begin at a setting other than the default, supply
the command with the number. For example:
COLUMN 45
COLUMN ON and COLUMN OFF control the screen display of the current column
number and is described in Chapter 6.
9.1.3The COMMENT Command
If you are in Entry mode, AlphaVUE automatically inserts a comment character when
the cursor reaches the column defined by the COLUMN command. The default
comment character is semi-colon (;) for .M68 files, exclamation point (!) for .BAS files,
and is undefined for other files.
The COMMENT command defines the comment character and turns the comment
feature on and off. If you want to define a character other than the current one—for
example, an exclamation point, you type:
COMMENT ! RETURN
Once a comment character is defined, COMMENT ON turns on the feature, and
COMMENT OFF turns it off.
9.1.4The SPACE Command
If you want a space to be generated automatically to the right of the comment character,
use SPACE ON which is also the default setting. Entry mode must be on for this
command to be operative.
9.1.5The FIELD Command
With the FIELD command, you define a keyboard character which, when the FIELD
command is ON, will move the cursor directly to the next field, as shown in the diagram
of fields at the beginning of this chapter. Entry mode must be on for this command to be
operative.
The FIELD command format is either FIELD ON, FIELD OFF or FIELD [ASCII value].
The default character is a space for .M68 files and a tab for .BAS files. To change the
default, use the FIELD command followed by the decimal value of the ASCII character
you want to define in the INI.VUE file or from Command mode. See Appendix B for a
list of the ASCII values for numbers and characters.
AlphaVUE User’s Manual, Rev. 02
Page 9-4
Chapter Nine
For example, if you want the @ sign to be the field character, you use this FIELD
command:
FIELD 64
64 is the ASCII value for the @ character.
When the next-field character is defined, you turn the field on and off with FIELD ON
and FIELD OFF. The default setting is FIELD OFF.
If the cursor is in the middle of a line, and you type the FIELD character, the cursor
advances to the beginning of the next field. For example, in a .M68 file, if the cursor is
at column 9 in the opcode field, pressing the FIELD character causes the cursor to
move directly to column 16, the beginning of the operand field.
Typing the FIELD character again moves the cursor directly to the beginning of the
comment field. AlphaVUE assumes you do not want to edit the comment character; if
you do, simply backspace and do so. Once the cursor is in the comment field, typing
the FIELD character has no effect except for the insertion of the FIELD character in the
text if it is a printable character.
9.1.6The COMMA Command
The COMMA command works only in Entry mode. When FIELD is ON, and the
next-field character is a space, pressing the space bar in a data field enters a blank if
COMMA is ON and the previous character is a comma. If COMMA is OFF (the default
setting), pressing the space bar advances the cursor to the next field.
9.1.7The FOLD Command
When you are in Entry mode, setting FOLD to ON causes all alphabetic characters you
type to be upper-case, regardless of how you enter them from the keyboard. The
default setting is FOLD ON. However, the FOLD setting will not affect capitalization of
comment text when the FIELD command is ON.
9.1.8The DELTA Command
The DELTA command turns automatic line numbering on and off, and defines the
increment for the line numbers. Using DELTA ON causes AlphaVUE to generate a new
line number each time you type the FIELD character in column 0. (See the discussion of
the FIELD command, above.) Entry mode must be on for this command to be operative.
You use the DELTA command again to tell AlphaVUE how much to increment the
numbers by. For example, suppose you want program line numbers to appear in
increments of 10. You type:
DELTA 10 RETURN
AlphaVUE User’s Manual, Rev. 02
AlphaVUE Features For Programmers
Page 9-5
The default increment is 5.
When ENTRY mode is on, DELTA is automatically ON if you are editing an AlphaBASIC
file (.BAS). The default for DELTA if you are not in ENTRY mode is off.
9.2THE INDENT COMMAND
The INDENT command, designed for use with structured languages like AlphaPASCAL,
makes it easier to edit programs with indented blocks of text.
When INDENT is set ON in the INI.VUE file or from Command mode, pressing RETURN
moves the cursor to the first character of the next line, regardless of the first character’s
column position.
Likewise, using SHIFTLEFTARROW to move the cursor to the beginning of the line
moves the cursor to the first character of the current line instead of to the first column.
Also, when you press RETURN at the end of your file, it moves the cursor to the next line
and indents the same number of spaces as the line above. If this is not the correct
number of spaces to indent the current line, you can move the cursor forward with
SPACE BAR or the TAB key, or move the cursor backward by erasing spaces with RUBOUT .
INDENT is especially useful for writing program code for structured languages such as
AlphaPASCAL, where blocks of text are often indented. The default value is INDENT
OFF.
9.3THE CONTROL G FEATURE
There may be times when you need to insert a control character directly into the text of
a file or must give an instruction to use a key to the MACRO command. The CTRL / G
key sequence allows you to do this.
To use it, move the cursor to where you want to insert the control character, press
CTRL /
G
then type the control character you want.
For example, suppose you want to put a form-feed command into your text to
automatically generate a form feed at that point in the printed document. You would
move the cursor to that location, then press CTRL / G followed by CTRL / L . A ^L
would appear in the text to indicate that the control character was inserted at that point
(the caret, ^, indicates a control character).
AlphaVUE User’s Manual, Rev. 02
Page 9-6
Chapter Nine
9.4EDIT HISTORY
Pressing the EDIT HIST function key updates the edit history of your program
automatically.
AlphaVUE looks for a VEDIT=nnn line in your file, and adds 1 to the number nnn it finds
there. Then it adds a comment line at the current cursor position to hold the new edit
number, the date and time of the update, and your user name. If AlphaVUE cannot find
a VEDIT line in your program file, it beeps, and does nothing.
9.5YANKING IN A PROGRAM MODULE
Pressing the YANKMOD function key causes a menu to appear at the bottom of your
screen. The default list of program modules may be changed by including a MODULE
command in your INI.VUE file. See Chapter 5 for more information.
9.6FIND MATCHING BRACES
The MATCH command or MATCH BRACE function key finds the matching open/close
brace symbol, {, when the cursor rests on a brace symbol. This is primarily useful for
programming in AlphaC. MATCH will not find braces as part of strings, comments, or
character constants. If the cursor is not on a brace, MATCH will do nothing. If MATCH
cannot find a matching brace, it beeps, and the cursor will be at the beginning or end of
the file.
9.7THE VUE COMMAND’S OPTIONS
The VUE command allows five command line switches:
/NOYANK
/TRACE
/SUBROUTINE
/R
/BATCH
AlphaVUE User’s Manual, Rev. 02
AlphaVUE Features For Programmers
Page 9-7
9.7.1The /NOYANK Option
The VUE command’s NOYANK option makes it easy to add text to the beginning of a
file larger than your memory. If your file is larger than your memory partition, using VUE
to see the file fills up your memory partition. Then, you cannot YANK information into
the beginning of the file from another file on the disk.
If you want to be able to YANK information into a large file, you can specify the
NOYANK command option after the name of the file on the VUE command line. For
example:
VUE FILE1.TXT/NOYANK RETURN
AlphaVUE then opens the file without actually bringing any text into memory. You see a
field of asterisks in screen mode, just as if it were a new file. Now you can YANK in any
text you like.
When you are ready, you can then bring in as much of FILE1.TXT as memory will hold
by using YANK:
YANK RETURN
Now your added text is at the front of FILE1.TXT and you can MOVE it to another part
of the text if you like.
9.7.2The /TRACE Option
The format for using the /TRACE option is:
VUE filespec/TRACE
The /TRACE option causes each command in AlphaVUE’s initialization file to be
displayed on your screen as it is processed.
You can also turn on trace by including the command :T as the first line in the INI.VUE
file. See AppendixA-"AlphaVUE’s Initialization File" for more information about
INI.VUE.
9.7.3The /SUBROUTINE Option
Using the /SUBROUTINE option on the VUE command line executes AlphaVUE in
subroutine mode. You can use this option when calling AlphaVUE from a program
rather than from AMOS command level. /SUBROUTINE suppresses most interactive
input and output.
The format for this option is:
VUE filespec/SUBROUTINE
AlphaVUE User’s Manual, Rev. 02
Page 9-8
Chapter Nine
9.7.4The /R Option
The /R option enables read-only access to a file. This option lets you use AlphaVUE to
see a file located on a device or in an account other than your own. Although you can
make editing changes on your screen when the file is displayed, you will not be able to
retain those changes. The only way to exit a file you call up with the /R option is to use
the QUIT command.
The format for the /R option is:
VUE filespec/R RETURN
9.7.5The /BATCH Option
AlphaVUE’s /BATCH option supresses most screen display output. This option is
especially for use with the Task Manager’s .LOG files, and reduces the amount of
unnecessary screen output recorded in .LOG files. For more information about the Task
Manager, please refer to the Task Manager’s User’s Guide.
AlphaVUE User’s Manual, Rev. 02
APPENDIX A
AlphaVUE’s INITIALIZATION FILE
AlphaVUE’s initialization file controls certain aspects of AlphaVUE’s execution. Although
AlphaVUE has certain default values built in, much of AlphaVUE’s versatility depends on the
creation and alteration of its initialization file.
This appendix describes:
How to create the AlphaVUE initialization file.
Kinds of initialization file commands.
Default initialization file commands.
Command settings available.
A sample initialization file.
A.1CREATING AN ALPHAVUE INITIALIZATION FILE
AlphaVUE comes with an initialization file named INIVUE.NEW located in DSK0:[7,0]. It
is named INIVUE.NEW so it will not overwrite an existing INI.VUE file during software
installation. If you choose to use INIVUE.NEW as your initialization file, you must
rename it to INI.VUE. Or, you can create your own initialization file, either to affect only
some user accounts, or to change the options selected for your entire system.
When you create an initialization file, you must follow these guidelines:
The initialization file must be created with AlphaVUE.
The initialization file name must be INI.VUE.
Each command within the file occupies one line.
AlphaVUE User’s Manual, Rev. 02
Page A-2
Appendix A
You create INI.VUE as you would any other AlphaVUE file. Enter the commands you
want, in the required format and FINISH from the file to keep the settings you’ve
chosen. You may add extra spaces on command lines, or indent the commands from
the left margin to make the file easier to read, as shown in the sample INI.VUE in this
appendix.
A.1.1Location Of The Initialization File
You can locate an initialization file in any account on any device. The file’s location
determines whether it affects all user accounts, user accounts in one project, or a single
user account.
TO AFFECT:
PLACE INI.VUE FILE IN:
Single User, One Account
Users in One Project
This User’s Account
Project Library Account
[project,0]
DSK0:[7,0]
All Users
A.1.2Search Path for the Initialization File
You may have several INI.VUE files on your system. When there is more than one,
AlphaVUE searches your system in a specific way.
1.First, AlphaVUE looks for INI.VUE in the account where you are currently logged.
If found there, AlphaVUE uses this file.
2.If there is no INI.VUE in the current account, AlphaVUE looks for INI.VUE in the
project library account ([project,0]). If found there, AlphaVUE uses this file.
3.Finally, when no initialization files are found in either the current or project library
account, AlphaVUE looks for INI.VUE in DSK0:[7,0].
4.If there is no INI.VUE in any of these accounts, AlphaVUE uses the default
command settings described later in this appendix.
A.2INITIALIZATION FILE COMMAND LIST
There are two kinds of initialization file commands available to you: those available only
in the initialization file, and those which can be used in both the initialization file and
from AlphaVUE Command Mode.
The commands which are effective only from INI.VUE, affect all AlphaVUE editing
sessions until you change the initialization file. The commands effective from both
AlphaVUE User’s Manual, Rev. 02
AlphaVUE’s Initialization File
Page A-3
INI.VUE and command mode, temporarily change how a command works for this
editing session. When you exit, then return to AlphaVUE, the command behaves as
specified in the INI.VUE file.
The following table shows you an alphabetic list of the commands INI.VUE understands,
the default setting for the command if not included in INI.VUE, and a notation for
whether it is available from Command mode.
Those commands available from Command mode have been described elsewhere in
this book. Those available only from the INI.VUE file (noted as "No" in the Use From
Command Mode column) are described in the sections after this table.
COMMAND
DEFAULT
SETTING
USE FROM
COMMAND MODE?
COLUMN ON/OFF
Off
Yes
COLUMN [number]
40/56*
Yes
COMMA ON/OFF
Off
Yes
COMMAND ON/OFF
On
Yes
COMMENT ON/OFF
Off
Yes
COMMENT [string]
; (semicolon) for .M68
Yes
: (colon) for .BAS
undefined for all others
COMPRESS
On
Yes
DEFAULT [list]
M68,TXT,LST,BAS,BSI,
CMD,DO,CTL,C,CBL,
FOR,F77,PAS,INI
Off
(On if a .BAS file)
No
DELTA [number]
5
Yes
ENTRY ON/OFF
Off
Yes
FIELD ON/OFF
Off
Yes
FIELD [number]
32(space)
Yes
FOLD ON/OFF
On
Yes
GO [string]
Causes FINISH
Yes
HELP ON/OFF
Off
No (uses different
DELTA ON/OFF
Yes
format. See Chapter 2.)
AlphaVUE User’s Manual, Rev. 02
Page A-4
Appendix A
COMMAND
DEFAULT
SETTING
USE FROM
COMMAND MODE?
INDENT ON/OFF
Off
Yes
INSERT ON/OFF
Off
Yes
MARGIN [number]
0
Yes
MENU ON/OFF
Off
No
MODEM ON/OFF
Off
Yes
MODULE "text","file"
**
No
SBLK ON/OFF
Off
Yes
SEARCHFOLD ON/OFF
On
Yes
SPACE ON/OFF
On
Yes
START
Home
No
TAB [number]
8
Yes
TOKEN
Off
Yes
WIDTH [number]
78
Yes
WILDCARD [string]
?* (question, asterisk)
Yes
WRAP ON/OFF
Off
Yes
*40 for all program files except AlphaBASIC, AlphaBASIC default is 56.
**Default modules listed in Module section below.
A.3INITIALIZATION FILE COMMANDS
The commands described in the following sections are functional only when included in
the INI.VUE file. The commands are:
START Command
MODULE Command
DEFAULT Command
GO Command
HELP Command
AlphaVUE User’s Manual, Rev. 02
AlphaVUE’s Initialization File
Page A-5
A.3.1The START Command
The START command lets you select whether you see the beginning or end of the file
when you first call it up. The format for START is:
To always begin an AlphaVUE session at the beginning of your file, use:
START = HOME
To always begin an AlphaVUE session at the end of your file, use:
START = END
The default, if no START command appears in the INI.VUE file, is the beginning of your
file.
The START command also lets you set where you begin an edit session with
AlphaVUE. You can begin at Command or Edit mode. To begin an edit session at
Command mode, enter this command in your INI.VUE file:
START COMMAND
If not specified otherwise in INI.VUE, START defaults to Edit mode.
A.3.2The MODULE Command
The MODULE command provides the YANKMOD function key with the file
specifications it lists on its menu. As many as eight MODULE commands can be
included in the INI.VUE file.
The MODULE command has the format
MODULE ["description"],["Filespec"]
For example:
MODULE "BASIC search routine","DSK0:SEARCH.BAS[7,0]"
The text description can be up to 30 characters long, and the filespec is a standard
AMOS file specification. It is a good idea to provide a full file specification, including
device and account numbers, if you want other users to be able to access the modules
also.
AlphaVUE User’s Manual, Rev. 02
Page A-6
Appendix A
A.3.3The DEFAULT Command
DEFAULT lets you give AlphaVUE a list of extensions for it to use when you call up
AlphaVUE without entering a file extension. For example, say your INI.VUE file
contains:
DEFAULT TXT,BAS,DO,CMD,M68,CTL,INV,VUE
and you call up AlphaVUE with the command:
VUE MYFILE RETURN
AlphaVUE looks at the DEFAULT command line in the INI.VUE file, and uses the
extensions listed in their order when searching for the file on the disk. In this case, it
looks first for MYFILE.TXT. If it does not find a MYFILE.TXT, it looks for MYFILE.BAS,
MYFILE.DO, MYFILE.CMD, etc. If it does not find a MYFILE with any of the listed
extensions, it asks you if you want to create MYFILE.TXT.
Using this parameter, you can tailor AlphaVUE to search for the types of files you use
most often.
If DEFAULT does not appear in your INI.VUE, AlphaVUE assumes these extensions in
this order:
M68,TXT,LST,BAS,BSI,CMD,DO,CTL,C,CBL,FOR,F77,PAS,INI
A.3.4The GO Command
The GO command in the INI.VUE file allows you to define the effect of entering GO in
Command mode. The built-in effect of this parameter for all files is to execute a FINISH
command. However, depending on the extension of the file being edited, GO
automatically performs one of several additional functions:
AlphaVUE User’s Manual, Rev. 02
AlphaVUE’s Initialization File
Page A-7
EXT.
DEFAULT GO ACTION
.TXT
.CMD
.DO
.CTL
.BAS
.M68
.PAS
.INI
Format the file using TXTFMT
Execute the command file
Execute the .DO file
Submit the file to the Task Manager
Compile the program using COMPIL
Assemble the program using M68
Compile Pascal program using PC
MONTST a system initialization file,
only if it is in DSK0:[1,4]. Finishes
all others
Compile with C Compiler
Compile with Cobol Compiler
Compile with Fortran Compiler
.C
.CBL
.FOR
You may also enter multiple lines of commands as part of the GO command to initiate
some special processing of your files. For example, suppose you frequently use
TXTFMT (the text formatter program) on files. Suppose further that you always copy
your formatted file (the .LST file created by TXTFMT) from your usual account, [100,10],
to another account, [20,2], then print it out.
The GO command in the INI.VUE file can be defined so that you need only enter GO in
Command mode to perform all these functions. Here’s what the GO command would
look like:
GO TXTFMT %
LOG [20,2]
COPY = [100,10]%.LST
PRINT %.LST
LOG [100,10]
$
The % sign in the GO command always signifies the file you are currently editing. The $
sign indicates the end of the GO command—necessary because the GO command can
occupy more than one line in the INI.VUE file.
A maximum of 100 characters is allowed in a GO command. However, since you can
call a .CMD or .DO file from GO, you should not be restricted by this maximum.
The GO command in INI.VUE does not affect all files. It is executed only when you use
GO to leave a file which has an extension matching the first extension in the DEFAULT
command in your INI.VUE file. For all other types of files, the default action is
performed. If you do not have a DEFAULT command in INI.VUE, the actions in your GO
command are never performed.
AlphaVUE User’s Manual, Rev. 02
Page A-8
Appendix A
The GO command affords much versatility, especially if you are familiar with the
operation of command files. For a complete discussion of command files, see the
Command File User’s Manual for your system.
A.3.5The HELP COMMAND
From Command mode, you can use the HELP command to see information about many
topics related to AlphaVUE, as described in Chapter 2. You can also use the HELP
command in the initialization file.
In the initialization file, the HELP command has this format:
HELP = {ON}{OFF}
If you set HELP to ON, the list of help topics displays every time you go into Command
mode. If you set help to OFF (the default), the list displays only if you enter HELP with
no topic name from Command mode.
A.4SAMPLE INITIALIZATION FILE
SAMPLE INI.VUE FILE
HELP
START
= OFF
= HOME
INSERT
WRAP
DEFAULT
SEARCHFOLD
=
=
=
=
COLUMN
= ON
GO
= TXTFMT HEADER,%
RENAME/D %=HEADER.LST
ON
ON
TXT,CMD,DO,BAS
OFF
;
;
;
;
;
;
;
;
;
;
;
Do not display help screen
Starts at top of file
in Screen mode
Line-insert mode ON
Lines automatically wrap
Extension search list
Search only for exact
matches
Displays cursor column
GO defines what happens
when you GO from a TXT file
$
AlphaVUE User’s Manual, Rev. 02
APPENDIX B
AlphaVUE ERROR MESSAGES
The following error messages may be displayed by AlphaVUE or by the Alpha Micro Operating
System to tell you that you entered an AlphaVUE command incorrectly, or that for some other
reason AlphaVUE cannot carry out your request.
Most of the error messages are
self-explanatory, but to avoid any possible confusion, we discuss each one.
Access denied: (AMOS error message)
This message appears if you use UNYANK or YANK to write to or copy from a device
other than the one you are logged onto and an account with a project number different
from the one you are logged into. For example, you cannot UNYANK data from
DSK1:[20,1] to DSK0:[30,3].
Attempt to SAVE again?
The disk you are trying to SAVE your file to is full; the file cannot be stored. If you
respond Y to this prompt, VUE tries to save the file again. If you respond N, the save is
cancelled; no files are changed. This means the current version of your document is not
stored. If you get this message, you may want to use another terminal to free space on
the disk, then respond Y to this prompt.
Cannot SAVE - file partially on disk
This message appears when the file you are attempting to SAVE is larger than your
memory partition. To keep the changes you’ve made so far to this file, FINISH from the
file then call it up again.
Cannot VUE (filespec) - (AMOS error message)
This error message occurs for various AMOS file system conditions, as indicated by the
(AMOS error message). For example, trying to VUE a file on a write-protected disk,
when the device is full, and so on.
AlphaVUE User’s Manual, Rev. 02
Page B-2
Appendix B
Cannot VUE or UNYANK file with .XXX extension
The file has an extension that indicates that it contains data that is incompatible with
AlphaVUE. See Chapter 2 for a list of restricted extensions.
Cannot VUE or UNYANK file with MEM: or RES: device name
Files currently located in either user memory (MEM:) or system memory (RES:) are not
available for use.
Cursor in block
You tried to perform a block operation with MOVE or COPY when the cursor was in the
marked area of text. Move the cursor out of the block and try again.
%DIR command supports AMOS 2.0 file system only
You cannot use the DIR command on AMOS systems earlier than version 2.0.
Input file already empty
When a file is too large to fit into memory, you can UNYANK the top portion of the file to
the disk, then YANK the last part of the file into memory. If you issue the YANK
command and the last part of the file has already been loaded into memory, this error
message lets you know that the YANK command is unnecessary and has no effect.
Insufficient memory available to perform copy
This message appears when the block being copied is bigger than remaining free
memory and the copy is aborted.
Insufficient memory available to perform shift
The SHIFT command may cause blanks and/or spaces to be inserted in the text. If not
enough memory is available to hold the inserted characters, SHIFT is ignored.
Insufficient memory available to perform yank
You tried to YANK a file from another device, and there was not enough room in your
memory partition to load that file and its device driver if necessary. The device driver
must be loaded into either system or user memory. To remedy, exit your file and
increase your memory allotment, or load the device driver into system memory.
AlphaVUE User’s Manual, Rev. 02
AlphaVUE Error Messages
Page B-3
%Insufficient space to store module specification
MODULE specifications cannot exceed 60 characters and the one being processed
contains more than 60.
!!Insufficient space to complete transfer!!
This message tells you there is not enough free space in memory for AlphaVUE to
perform the operation you requested. When you edit a file that is too large to fit into
memory, AlphaVUE loads all that will fit then displays this message. You can edit the
portion that was loaded into memory and access the remaining part by using the
UNYANK and YANK commands. This message also appears if you try to YANK in a file
or MOVE a block of text when the additional text would exceed the memory capacity.
Invalid initialization command: <command>
This message appears when first calling up AlphaVUE if there is an invalid initialization
file <command> in INI.VUE. Check the commands shown in the message for proper
syntax, spelling errors, etc. and correct the INI.VUE file as necessary.
Invalid shift
This message occurs when there are syntactic errors in the SHIFT command, or you
are trying to SHIFT by an invalid amount—less than zero or more than 510.
Invalid search key
Various combinations of single and multiple wildcard characters are ambiguous. For
example, two contiguous multi character wildcards (**).
Line > 510 characters - line editing will cause truncation
The line you are attempting to edit exceeds the maximum allowed by AlphaVUE. To
avoid loss of characters at the end of the line, break the line so it is less than 510
characters.
No block marked
This error message appears for DELETE, COPY, MOVE, UNYANK when no block is
marked. Mark the text and try again.
AlphaVUE User’s Manual, Rev. 02
Page B-4
Appendix B
Specification error
You made an error when typing the VUE command line at monitor level. For example,
specifying a file name that exceeds six characters results in the display of this error
message, along with a carat symbol (^) marking the erroneous place on the line.
String not in file
This message appears when you SEARCH, REPLACE or GLOBAL and the string you
are searching for is not in your file. If you think the string should be in the file, check the
SFOLD command which affects the way these commands treat capitalization. If SFOLD
is off, AlphaVUE accepts only perfect matches, including capitalization.
Unable to fetch module
The file specification provided in the INI.VUE file for the MODULE command does not
exist as an AMOS file. Be sure the file specification you provide exists as specified.
!!Warning - file partially on disk, saving only what is in memory!!
This message appears during the ABORT command. The data being stored in memory
is saved as IMAGE.VUE. To recapture this data, save IMAGE.VUE from memory and
relocate it to disk.
!!WARNING - Line longer than 510 characters in file!!
In AlphaVUE no single line can be longer than 510 characters. Break up the line so it is
less than 510 characters.
Warning: GO command string truncated
The GO command string exceeds 100 characters, everything following the 100th
character is ignored. Check to be sure the GO command in INI.VUE is terminated by
the dollar sign ($) to signal GO’s end.
What?
This message is AlphaVUE’s response to misspelled commands, or unrecognized
commands in Command mode. Check your spelling or that the command is valid and
try again.
AlphaVUE User’s Manual, Rev. 02
APPENDIX C
THE ASCII CHARACTER SET
The next few pages contain charts listing the complete ASCII character set. The charts include
octal, decimal and hexadecimal representations of the ASCII values for use with the AlphaVUE
commands COMMENT and FIELD. The first 32 characters are non-printing Control-characters.
THE CONTROL CHARACTERS
CHAR.
OCTAL
DECIMAL
HEX
CTRL.
CHAR.
MEANING
NULL
SOH
STX
ETX
ECT
ENQ
ACK
BEL
BS
HT
LF
VT
FF
CR
SO
SI
DLE
DC1
DC2
DC3
DC4
NAK
SYN
ETB
CAN
EM
SS
ESC
FS
GS
RS
US
000
001
002
003
004
005
006
007
010
011
012
013
014
015
016
017
020
021
022
023
024
025
026
027
030
031
032
033
034
035
036
037
0
1
2
3
4
5
6
7
8
9
10
11
12
13
14
15
16
17
18
19
20
21
22
23
24
25
26
27
28
29
30
31
00
01
02
03
04
05
06
07
08
09
0A
0B
0C
0D
0E
0F
10
11
12
13
14
15
16
17
18
19
1A
1B
1C
1D
1E
1F
^@
^A
^B
^C
^D
^E
^F
^G
^H
^I
^J
^K
^L
^M
^N
^O
^P
^Q
^R
^S
^T
^U
^V
^W
^X
^Y
^Z
^[
^\
^]
^^
^_
Null (fill character)
Start of Heading
Start of Text
End of Text
End of Transmission
Enquiry
Acknowledge
Bell code
Back Space
Horizontal Tab
Line Feed
Vertical Tab
Form Feed
Carriage Return
Shift Out
Shift In
Data Link Escape
Device Control 1
Device Control 2
Device Control 3
Device Control 4
Negative Acknowledge
Synchronous Idle
End of Transmission Blocks
Cancel
End of Medium
Special Sequence
Escape
File Separator
Group Separator
Record Separator
Unit Separator
AlphaVUE User’s Manual, Rev. 02
Page C-2
Appendix C
SYMBOL
OCTAL
DEC.
HEX.
MEANING
SP
!
"
#
$
%
&
’
(
)
*
+
,
.
\
0
1
2
3
4
5
6
7
8
9
:
;
<
=
>
?
@
A
B
C
D
E
F
G
H
I
J
K
L
M
N
O
P
Q
R
S
T
040
041
042
043
044
045
046
047
050
051
052
053
054
055
056
057
060
061
062
063
064
065
066
067
070
071
072
073
074
075
076
077
100
101
102
103
104
105
106
107
110
111
112
113
114
115
116
117
120
121
122
123
124
032
033
034
035
036
037
038
039
040
041
042
043
044
045
046
047
048
049
050
051
052
053
054
055
056
057
058
059
060
061
062
063
064
065
066
067
068
069
070
071
072
073
074
075
076
077
078
079
080
081
082
083
084
20
21
22
23
24
25
26
27
28
29
2A
2B
2C
2D
2E
2F
30
31
32
33
34
35
36
37
38
39
3A
3B
3C
3D
3E
3F
40
41
42
43
44
45
46
47
48
49
4A
4B
4C
4D
4E
4F
50
51
52
53
54
Space
Exclamation Mark
Quotation Mark
Number Sign
Dollar Sign
Percent Sign
Ampersand
Apostrophe
Opening Parenthesis
Closing Parenthesis
Asterisk
Plus
Comma
Hyphen or Minus
Period
Slash
Zero
One
Two
Three
Four
Five
Six
Seven
Eight
Nine
Colon
Semicolon
Left Angle Bracket
Equal Sign
Right Angle Bracket
Question Mark
Commercial At
Upper Case Letter
Upper Case Letter
Upper Case Letter
Upper Case Letter
Upper Case Letter
Upper Case Letter
Upper Case Letter
Upper Case Letter
Upper Case Letter
Upper Case Letter
Upper Case Letter
Upper Case Letter
Upper Case Letter
Upper Case Letter
Upper Case Letter
Upper Case Letter
Upper Case Letter
Upper Case Letter
Upper Case Letter
Upper Case Letter
AlphaVUE User’s Manual, Rev. 02
The ASCII Character Set
Page C-3
SYMBOL
OCTAL
DEC.
HEX.
MEANING
U
V
W
X
Y
Z
[
\
]
^
_
‘
a
b
c
d
e
f
g
h
i
j
k
l
m
n
o
p
q
r
s
t
u
v
w
x
y
z
{
|
}
~
DEL
125
126
127
130
131
132
133
134
135
136
137
140
141
142
143
144
145
146
147
150
151
152
153
154
155
156
157
160
161
162
163
164
165
166
167
170
171
172
173
174
175
176
177
085
086
087
088
089
090
091
092
093
094
095
096
097
098
099
100
101
102
103
104
105
106
107
108
109
110
111
112
113
114
115
116
117
118
119
120
121
122
123
124
125
126
127
55
56
57
58
59
5A
5B
5C
5D
5E
5F
60
61
62
63
64
65
66
67
68
69
6A
6B
6C
6D
6E
6F
70
71
72
73
74
75
76
77
78
79
7A
7B
7C
7D
7E
7F
Upper Case Letter
Upper Case Letter
Upper Case Letter
Upper Case Letter
Upper Case Letter
Upper Case Letter
Left Square Bracket
Back Slash
Right Square Bracket
Circumflex
Underline
Grave Accent
Lower Case Letter
Lower Case Letter
Lower Case Letter
Lower Case Letter
Lower Case Letter
Lower Case Letter
Lower Case Letter
Lower Case Letter
Lower Case Letter
Lower Case Letter
Lower Case Letter
Lower Case Letter
Lower Case Letter
Lower Case Letter
Lower Case Letter
Lower Case Letter
Lower Case Letter
Lower Case Letter
Lower Case Letter
Lower Case Letter
Lower Case Letter
Lower Case Letter
Lower Case Letter
Lower Case Letter
Lower Case Letter
Lower Case Letter
Left Brace
Vertical Line
Right Brace
Tilde
Delete
AlphaVUE User’s Manual, Rev. 02
APPENDIX D
SYSTEM REQUIREMENTS FOR
AlphaVUE
D.1OPERATING SYSTEM REQUIREMENTS
AlphaVUE versions 3.0 and later require either AMOS/L 2.0 or later; or AMOS/32 2.0 or
later.
D.2ALPHAVUE MEMORY REQUIREMENTS
AlphaVUE requires at least 32K of usable user memory. Part of this room is for
VUE.LIT and thus may be decreased if the VUE.LIT program is loaded into system
memory.
D.3HARDWARE REQUIREMENTS
AlphaVUE is designed to take advantage of advanced terminal features which have
become fairly standard. In order to keep the memory requirements reasonable, it is
necessary to drop support for terminals lacking these standard features, and to drop
software features which become obsolete or are superseded by others. Terminals
lacking a clear-to-end-of-line function are not supported. In general, AlphaVUE will
perform less than optimally, and some features may not be available at all, on terminals
of capability less than the AM-60, in particular those lacking a status line, insert/delete
line or clear-to-end-of-screen capability.
D.4TERMINAL DRIVERS
If you have an Alpha Micro compatible terminal (such as an AM-60) that uses the
ALPHA.TDV driver, you must have a copy of the translation file ALPHA.VUX in account
[7,0] on DSK0:. A translation file allows AlphaVUE to make use of the Alpha Micro
compatible terminal’s special function keys.
Non-Alpha Micro compatible terminals do not make use of these translation files.
Therefore, if you have a non-Alpha Micro terminal, and you have renamed its terminal
AlphaVUE User’s Manual, Rev. 02
Page D-2
Appendix D
driver, be sure that no .VUX translation file exists with that name. For example, if you
rename a SOROC.TDV file to ALPHA.TDV, you must disable the ALPHA.VUX
translation file or AlphaVUE will not work on your SOROC terminal.
DO NOT disable any other .VUX files - if somebody else on your system has (or ever
gets) an Alpha Micro terminal, their terminal will need the translation table.
AlphaVUE decides which translation file to use by comparing the name of the translation
file with the name of the terminal driver program. The terminal driver program defines
the terminal to the system, giving information about the particular characteristics of the
device.
When your operating system was shipped, it was configured to boot up with a terminal
driver program named ALPHA.TDV which is configured specifically for an Alpha Micro
terminal.
It is possible that another driver program has been renamed to ALPHA.TDV at some
point in your system’s history - therefore, the first thing you need to do is to determine if
the ALPHA.TDV terminal driver defines a non-Alpha Micro terminal. To do this, use the
TRMDEF command at monitor level. You will see a display of the parameters that
define the terminals to the system. The first column contains the terminal name and the
sixth column contains the terminal driver name. If the terminal driver name is ALPHA
and it defines a non-Alpha Micro terminal, then you must disable the ALPHA.VUX file.
To disable a translation file, log into DSK0:[7,0], and rename the file, using a name that
will never be used as a terminal driver name. For example, from AMOS command level:
RENAME XYZZY.VUX=ALPHA.VUX RETURN
AlphaVUE will now work properly on your terminal. Additional information on terminal
drivers, interpreting the results of the TRMDEF command, and renaming files is
included in your System Operator’s Guide.
AlphaVUE User’s Manual, Rev. 02
APPENDIX E
AlphaVUE QUICK REFERENCE LISTS
E.1SCREEN EDITING COMMANDS
The key sequences listed in the "Alternate key" column below can be used on all
terminals. They are especially useful when your terminal does not have the function or
special key listed in the "Key Labeled" column
Letters shown as part of the "Alternate Key" can be entered as upper or lower case.
Where you see the abbreviation CTRL, hold down the CTRL key and at the same time
press the key shown. Where you see the abbreviation CTRL _ (underline), hold down
CTRL , SHIFT and the underline key (shift/dash), simultaneously and release them. Then,
press the character key that follows.
Feature
Key Labeled
Alternate Key
Block copy
Block mark
Block move
Block shift
Capture start
Capture execute
Capture end
Capture append
Center screen
Center line
Char insert mode
Clear marks
Command mode
Cursor down
Cursor left
BLOCK COPY
MARK BLOCK
BLOCK MOVE
BLOCK SHIFT
CAPTURE START
CAPTURE EXECUTE
CAPTURE END
CAPTURE APPEND
CENTER SCREEN
CENTER LINE
AUTO INS CHAR
CLEAR BLOCK
MENU or ESCAPE
DOWN ARROW
LEFT ARROW
CTRL _ C
CTRL P
CTRL _ V
CTRL _ Z
CTRL _ K
CTRL _ P
CTRL _ X
CTRL _ A
CTRL S
CTRL _ L
CTRL Q
CTRL _ Q
-CTRL J
CTRL H
AlphaVUE User’s Manual, Rev. 02
Page E-2
Appendix E
Feature
Key Labeled
Alternate Key
Cursor right
Cursor up
Delete block
Delete character
Delete line
Delete prev char
Delete to end of line
Delete word
End of line
RIGHT ARROW
UP ARROW
DEL BLOCK
CHAR DEL
LINE DEL
RUBOUT
CTRL Y
WORD DEL
Shift/
RIGHT ARROW
FORMAT
HOME
CHAR INS
EDIT HIST
LINE INS
WORD INS
Shift/UP ARROW
Shift/HOME
AUTO INS LINE
PUSH
MATCH BRACE
MATCH NEXT
NEXT SCREEN
NEXT WORD
PREV CHANGE
PREV SCREEN
PREV WORD
REFRESH
REPEAT
RETURN
POP
Shift/LEFT ARROW
RESTORE
YANK MODULE
CTRL L
CTRL K
CTRL _ D
CTRL D
CTRL Z
--CTRL V*
Format paragraph
Home position
Insert character
Insert Edit History
Insert line
Insert Word
Join line
Last page
Line insert mode
Mark for Push
Match brace
Match next
Next page
Next word
Previous change
Previous page
Previous word
Refresh screen
Repeat
Return
Return to Push
Start of line
Undelete line
Yank module
CTRL N
CTRL _ F
CTRL ^
CTRL F
CTRL _ E
CTRL B
CTRL ]
CTRL O
CTRL E
CTRL \
CTRL _ U
CTRL _Y
CTRL X
CTRL T
CTRL W
CTRL _B
CTRL R
CTRL A
CTRL @ or CTRL _@
CTRL _ N
CTRL M
CTRL _ O
CTRL U
CTRL _ R
CTRL _ M
* - Not supported on AM-70 terminal
AlphaVUE User’s Manual, Rev. 02
AlphaVUE Quick Reference Lists
Page E-3
E.2COMMAND MODE COMMANDS
Where: [n] represents a number, {spec} represents a file specification, and [a] and [b]
represent character strings.
Command
/arguments
ABORT
BLANKS [n]
CENTER
CLEAR
COLUMN on/off
COLUMN n
COMMA on/off
COMMAND on/off
COMMENT [n]
COMPRESS on/off
COPY
DELETE
DELTA [n]
DIR {spec}
EDIT
ENTRY on/off
ERASE {spec}
FIELD [n]
FINISH
FOLD on/off
FORMAT
GO
GLOBAL [a] [b]
HELP {name}
INDENT on/off
INSERT on/off
LFONLY on/off
LINE [number]
MACRO (name) (text)
Purpose
Abort editing session.
Insert [n] blank lines at current position.
Center current line between margins.
Clear block marks.
Column counter displayed (on), or supressed (off).
Set comment column at [n] in ENTRY mode.
Comma inserted in AlphaC field (on), or not (off) during
ENTRY mode.
Full command mode (on), or quick command (off).
Set comment character symbol to [n] in ENTRY mode.
Disregard spaces during search (on), or not (off).
Copy marked block to current position.
Delete marked block.
Set auto increment value (on) for AlphaBASIC, or not (off)
in ENTRY mode.
Directory this account, or named by {Devn:[]}.
Return to edit mode
Use programmer’s editing features in ENTRY mode (on),
or not (off)
Erase file.
Set next field character to [n] in ENTRY mode.
Update & exit file.
Fold characters to upper case (on), or not (off) in ENTRY
mode.
Format current paragraph.
Update file on disk, exit & process.
Auto replace each string [a] with string [b].
Display list of topics, or text of topic {name}.
Move to 1st character next line.
Line insert mode on or off in ENTRY mode.
End each line with a linefeed only (no carriage return).
Move cursor to line [number].
Remember this macro (text) as (name).
AlphaVUE User’s Manual, Rev. 02
Page E-4
Command
/arguments
MARGIN [n]
MATCH
MENU
MOVE
NEXT
PUSH
POP
QUIT
REPLACE [a] [b]
SAVE
SBLK on/off
SEARCH [a]
SEARCHFOLD on/off
SHIFT [#]
SPACE on/off
SPLIT
TAB [n]
TOKEN on/off
TYPE {filespec}
UNSPLIT
UNYANK {file} {n}
WIDTH [n]
WILDCARD=[n,...n]
WHOLE [a]
WRAP on/off
YANK {file} {n}
Appendix E
Purpose
Set margin to column [n].
Find matching brace.
Display this menu.
Move marked block.
Find next match for search or replace.
Save this cursor location (up to 10 times).
Return to push location.
Exit with no update.
Search & optional replace string [a] with string [b].
Update file on disk, no exit.
Searches marked block (on), or whole file (off).
Search for string [a].
Make searches case sensitive (off), or not (on).
Shift block right [+#] or left [-#] of spaces.
Generate space (on), or not (off) in ENTRY mode.
Split file.
Set tabs to every [n] columns.
Search for isolated character (on), or not (off).
Display text file named in .
Unsplit file.
Copy marked text to {file} name, or return {n} number of
lines from this file to disk.
Set formatting width of text to [n] columns.
Selects characters search, replace and global use as
wildcards.
Search whole file for string [a].
Words wrap to next line, auto return (on), or not (off).
Copy {file} name to current location, or get {n} more lines
of this file from disk.
AlphaVUE User’s Manual, Rev. 02
AlphaVUE Quick Reference Lists
Page E-5
E.3INITIALIZATION FILE COMMANDS
Where: [n] represents a number, {spec} represents a file specification, and [a] and [b]
represent character strings.
Command
/arguments
COLUMN on/off
COLUMN n
COMMAND on/off
COMMENT [n]
COMPRESS on/off
DEFAULT [list]
DELTA on/off
DELTA [n]
ENTRY on/off
FIELD [n]
FORMAT
GO
HELP [a]
INDENT on/off
INSERT on/off
LFONLY on/off
MACRO (name) (text)
MARGIN [n]
MENU on/off
MODEM on/off
MODULE "A","B"
SBLK on/off
SEARCHFOLD on/off
START on/off
START COMMAND
TAB [n]
TOKEN on/off
WIDTH [n]
WRAP on/off
Purpose
Column counter displayed (on), or supressed (off)
Set comment column at [n] in ENTRY mode
Full command mode (on), or quick command (off)
Set comment character symbol to [n] in ENTRY mode
Disregard spaces during search (on), or not (off)
Set extensions to be assumed
Set auto increment value (on) for AlphaBASIC, or not (off)
in ENTRY mode
Set increment amount
Use programmer’s editing features in ENTRY mode (on),
or not (off)
Set next field character to [n] in ENTRY mode
Format current paragraph
Update file on disk, exit & process
Display list of topics, or text of topic [a]
Move cursor to 1st character next line on RETURN .
Line insert mode on or off in ENTRY mode
End each line with a linefeed only (no carriage return).
Remember this macro (text) as (name)
Set left screen margin to column [n]
See main help screen at command mode (on), or not (off)
Improve screen handling for modem use (on), or not (off).
Set menu text "A" for file specification "B" for YANK
MODULE feature
Search marked block (on), or whole file (off).
Make searches case sensitive (off), or not (on).
See beginning of file first (on), or end of file (off).
Begin edit session at Command mode, otherwise you
begin in edit mode.
Set tabs to every [n] columns.
Search for isolated character (on), or not (off).
Set formatting width of text to [n] columns.
Words wrap to next line, auto return (on), or not (off).
AlphaVUE User’s Manual, Rev. 02
APPENDIX F
MISCELLANEOUS TECHNICAL
INFORMATION
The information in this appendix supplements the more general information provided in the
chapters. The topics include:
Technical Definitions.
Input Files.
Output Files
Search Key.
Format Rules.
ABORT Command.
F.1TECHNICAL DEFINITIONS
AlphaVUE has specific technical interpretations for locations within a file, as described
in the next sections.
Beginning Of Line
Line feed (0A hexadecimal) or beginning of file.
Blank Line
Any line which begins with a blank, tab, carriage return, line feed, or a
control character.
AlphaVUE User’s Manual, Rev. 02
Page F-2
Appendix F
End Of Line
Although AlphaVUE internally ends each line with a line feed, and uses
the line feed to identify an end of line, AMOS automatically appends a
carriage return (OD hexadecimal) to each line feed when the AlphaVUE
file is written to disk. If you want other programs to process an
AlphaVUE disk file, take into account that each line ends with a carriage
return/line feed pair.
If you want each line to end with only a line feed, without a carriage
return, you can use the LFONLY command from command level or in the
initialization file.
White Space Character
Any character with an ASCII value less than or equal to blank (20
hexadecimal).
Word
In practice, a word is usually considered to be a lexicographic word or
number together with any adjacent trailing punctuation; such as a period,
or an isolated symbol such as a dash. The following example is
considered as one word by the preceding definition:
Help!!!
AlphaVUE finds no word break between the characters in the example
because the three exclamation points are adjacent trailing punctuation.
Using the same definition, then the next example is not one word but two
words:
!!!Help
AlphaVUE determines a word break following the third exclamation point,
making two words: "!!!" and "Help".
Word Group
A word group is any contiguous sequence of characters other than
white-space characters which meets one requirement in each of the
following criteria:
AlphaVUE User’s Manual, Rev. 02
Miscellaneous Technical Information
Page F-3
Is preceded by at least one white-space character or the
beginning-of-line instruction. Or, begins with an alphanumeric
character and is preceded by at least one non-alphanumeric
character or a beginning-of-line instruction.
Is followed by at least one white-space character or an end-of-line
instruction. Or, ends with a non-alphanumeric character and is
followed by at least one alphanumeric character or an end-of-line
instruction.
Since the RUBOUT or DEL key (FF hexadecimal) removes an existing
character, in and of itself it has no status and is considered to be a
non-alphanumeric, non-white-space character.
F.2INPUT FILES
AlphaVUE is designed to view and edit ASCII text files, including programming
language source files. It makes implicit assumptions that its input file is formatted as
records of ASCII text characters with upper bit (bit 7) equal to zero. Each record must
be terminated by a carriage return/line feed sequence, and must be 510 or less
characters long excluding the terminating carriage return/line feed.
Files not conforming to this format may still be examined by AlphaVUE but the result of
editing should be checked carefully by some other method. The presence of ASCII
control characters, less than 20 hexadecimal, is a frequent cause of difficulty; in
particular, isolated carriage returns or line feeds or nulls (00 hex) may corrupt the
screen display and/or the file content.
The presence of DEL characters (FF Hex) is also undesirable; AlphaVUE tolerates them
but does not allow you to insert them into your file during editing.
AlphaVUE recognizes some files as binary, such as those with extensions .WRT, .MON,
etc. and disallows them as input files. As other types of binary files acquire standard
extensions, the list of disallowed extensions can be expected to grow. In general, any
file which is not a plain text file or programming language source file is not a suitable
input file.
F.3OUTPUT FILES
AlphaVUE’s FINISH command rewrites file to disk, inserting a carriage return preceding
each line feed in the text. If you have LFONLY set to ON (see Chapter 6), carriage
returns are not inserted.
AlphaVUE User’s Manual, Rev. 02
Page F-4
Appendix F
F.4SEARCH KEY
The SEARCH, WHOLE, REPLACE and GLOBAL commands are initiated by
preprocessing the search key with the search parameters in effect at the time the
command is requested. If you choose to alter any commands affecting search or
replace operations, such as WILDCARD, COMPRESS, and so on, do so before you
request the search or replace operations. Changing any command affecting search and
replace operations in mid-stream produces unreliable results.
A multi-character wildcard matches any sequence of one or more characters; however,
AlphaVUE will not accept two multi-character wildcards adjacent to one another in any
search string for SEARCH, WHOLE, REPLACE, NEXT or GLOBAL. Also, your search
key must contain at least one character which is not a wildcard.
When a multi-character wildcard is used in the search key, an embedded occurrence of
the target can be found within another occurrence. The search algorithm is lenient in
this case and returns each embedded occurrence in turn on NEXT MATCH. For this
reason, use caution when using GLOBAL and a search key containing a multi-character
wildcard.
When a multi-character wildcard appears as the last character of the key, and the initial
segment of the key is matched, the wildcard is defined to match the entire portion of the
line which succeeds the found segment, provided that at least one character is
matched. When a multi-character wildcard appears as the first character of the key, and
the last segment of the key is matched, the wildcard is defined to match the entire
portion of the line which precedes the found segment, provided that at least one
character is matched. For example, the key "token*" will match an occurrence of the
string "token" anywhere in the line except if it occurs as the last five characters in the
line.
F.5FORMAT RULES
The format feature is also capable of formatting paragraphs of M68 style comments
provided the paragraph is aligned on column one. That is, each line of the comment
must contain a semicolon in column zero, and a non-blank, non-control character in
column one. The comment paragraph is terminated by a line that does not begin with a
semicolon, or a line which begins with a semicolon followed by a blank or control
character.
F.6THE ABORT COMMAND
To use the ABORT command, from Command mode type:
ABORT RETURN
ABORT is particularly for rare instances when a disk problem occurs preventing you
from using the FINISH command to update your file and exit AlphaVUE. Rather than
using QUIT to exit and lose your changes, you can use ABORT. The ABORT command
AlphaVUE User’s Manual, Rev. 02
Miscellaneous Technical Information
Page F-5
saves a temporary copy of your file in memory named IMAGE.VUE, and returns you to
AMOS. You can then seek help from your System Operator to fix the disk problem and,
when it is fixed, save IMAGE.VUE to the disk.
If your file was partially on the disk, you can only preserve the part of the file in memory
at the time. If this is the case, DO NOT rename the partial version to the old disk name,
or you will lose part of your original file. Instead, use the YANK function to update the
old file. If all of your file was in memory, and you have successfully saved IMAGE.VUE,
you can rename it as you like.
AlphaVUE User’s Manual, Rev. 02
DOCUMENT HISTORY
Revision A00 - AMOS Release 4.0 - (Printed 1/79)
New Document released under part number DWM-00100-15. This manual documents
AlphaVUE Version 2.0.
Revision B00 - AMOS Release 4.4 - (Printed 5/80)
Documents AlphaVUE Version 2.4. Added introductory information useful to the new
user, and several new commands, such as: Control-P to mark blocks, Control-G for
Control-character insert, automatic line numbering with AlphaBASIC files, text mode,
yanking and unyanking files, WRAP, NEXT, WHOLE, WIDTH, SPLIT, UNSPLIT, and
expanded HELP functions.
Revision C00 - AMOS Release 4.4 - (Printed 5/80)
New Cover.
Revision D00 - AMOS Release 4.6 - (Printed 10/81)
Documents AlphaVUE Version 2.5. Manual has been completely rewritten to include
more examples and more complete descriptions of AlphaVUE functions. New features
include: new disk write-protected error handling and COLUMN command.
Revision D01 - AMOS Release 4.6 and AMOS/L Release 1.0 - (Printed 6/82)
Added new information applicable to AM-100/L systems: expanded HELP command,
new .HLV files, and using the GO command to SUBMIT .CTL files to the AMOS/L Task
Manager. Also revised discussion of HELP command for AM-100 and AM-100/T
systems.
RevisionE00-AMOS/LRelease1.2-(Printed4/84)
The manual was re-written to include information about the function keys of the new
Alpha Micro family of terminals. The /ABORT command was added.
Revision 00 - AMOS/L Release 2.0 - (Printed 3/88)
Documents AlphaVUE Version 3.0. A new part number was assigned to this manual
(DSO-00023-00) and it was rewritten and reorganized. New features documented
include using function keys in place of commands from command mode, VUE command
line switches /TRACE, /SUBROUTINE, /R, /NO YANK, and /BATCH. Also new
commands MODULE, COMPRESS, TOKEN, SHIFT, SPLIT, UNSPLIT, COMMAND,
MATCH, LINE, and MACRO. New editing features available are capturing keystroke
input, restoring a deleted line, refreshing the editing screen, yanking in other files via
menu selection and simplified method to update your file’s editing history.
AlphaVUE User’s Manual, Rev. 02
Document History
Revision 01 - AMOS/L Release 2.0A - (Printed 12/88)
Corrects minor format problems and clarifies information. New information includes
more information on Command mode screen, lines in excess of 510 characters, SPLIT
clearing marks and PUSH locations, clarification on match conditions for TOKEN,
SEARCHing for blanks, FIELD default character, default setting corrections, new
information for GO and MODEM commands, new error messages, and corrections to
function key lists.
Revision 02 - AMOS Release 2.3 - (Printed 10/96)
Many small changes and corrections. Add LFONLY command; move MODEM
command to Chapter 6; Add HELP ON/OFF to Appendix A; correct extension lists.
AlphaVUE User’s Manual, Rev. 02
Index
Page Index-1
INDEX
.BAS files . . . . . . . . . . . . . . . . . . . . . . . . . . .
.C files . . . . . . . . . . . . . . . . . . . . . . . . . . . . .
.CBL files . . . . . . . . . . . . . . . . . . . . . . . . . . .
.CMD files . . . . . . . . . . . . . . . . . . . . . . . . . .
.CTL files . . . . . . . . . . . . . . . . . . . . . . . . . . .
.DO files . . . . . . . . . . . . . . . . . . . . . . . . . . .
.FOR files . . . . . . . . . . . . . . . . . . . . . . . . . .
.INI files . . . . . . . . . . . . . . . . . . . . . . . . . . . .
.LSP files . . . . . . . . . . . . . . . . . . . . . . . . . . .
.M68 files . . . . . . . . . . . . . . . . . . . . . . . . . . .
.PAS files . . . . . . . . . . . . . . . . . . . . . . . . . . .
.TXT files . . . . . . . . . . . . . . . . . . . . . . . . . . .
9-2, A-7
A-7
A-7
A-7
A-7
A-7
A-7
A-7
A-7
9-1, A-7
A-7
A-7
/BATCH option . . . . . . . . . . . . . . . . . . . . . .
/NOYANK option . . . . . . . . . . . . . . . . . . . . .
/R option . . . . . . . . . . . . . . . . . . . . . . . . . . .
/SUBROUTINE option . . . . . . . . . . . . . . . . .
/TRACE option . . . . . . . . . . . . . . . . . . . . . .
9-6, 9-8
9-6 to 9-7
9-6
9-6
9-6
ABORT command . . . . . . . . . . . . . . . . . . . .
Accent grave character (‘)
in SEARCH and REPLACE . . . . . . . . . .
Accessing the Disk . . . . . . . . . . . . . . . . . . .
Account . . . . . . . . . . . . . . . . . . . . . . . . . . . .
Alpha Micro Compatible Terminals . . . . . . .
AlphaVUE
calling up . . . . . . . . . . . . . . . . . . . . . . . .
cursor movement . . . . . . . . . . . . . . . . .
exiting . . . . . . . . . . . . . . . . . . . . . . . . . . .
Hardware requirements . . . . . . . . . . . . .
help menu . . . . . . . . . . . . . . . . . . . . . . .
Memory required . . . . . . . . . . . . . . . . . .
Terminal drivers . . . . . . . . . . . . . . . . . . .
AlphaVUE initialization file . . . . . . . . . . . . .
AlphaVUE prompt . . . . . . . . . . . . . . . . . . . .
AMOS prompt . . . . . . . . . . . . . . . . . . . . . . .
AMOS version required . . . . . . . . . . . . . . . .
Arrow keys . . . . . . . . . . . . . . . . . . . . . . . . .
ASCII character set . . . . . . . . . . . . . . . . . . .
F-4
AlphaVUE User’s Manual, Rev. 02
7-5
2-9
1-3, 2-3
2-3
2-7
2-2
2-9
D-1
2-8
D-1
D-1
A-1
1-3
1-2
D-1
2-2
C-1 to C-3
Index
ASCII values
with FIELD command . . . . . . . . . . . . . . .
Assembly language files . . . . . . . . . . . . . . .
AUTO INS CHAR function key . . . . . . . . . .
AUTO INS LINE function key . . . . . . . . . . .
AUTO INS LINE key . . . . . . . . . . . . . . . . . .
Backup files . . . . . . . . . . . . . . . . . . . . . . . . .
Beginning Of Line
defined . . . . . . . . . . . . . . . . . . . . . . . . . .
Blank line
defined . . . . . . . . . . . . . . . . . . . . . . . . . .
Blank spaces
searching for . . . . . . . . . . . . . . . . . . . . .
BLANKS command . . . . . . . . . . . . . . . . . . .
BLOCK CLEAR function key . . . . . . . . . . . .
BLOCK COPY function key . . . . . . . . . . . . .
BLOCK DELETE function key . . . . . . . . . . .
BLOCK MARK function key . . . . . . . . . . . .
Block marks
cleared by SPLIT . . . . . . . . . . . . . . . . . .
BLOCK MOVE function key . . . . . . . . . . . .
Braces . . . . . . . . . . . . . . . . . . . . . . . . . . . . .
finding matching . . . . . . . . . . . . . . . . . . .
CAPTURE APPEND function key . . . . . . . .
CAPTURE BEGIN function key . . . . . . . . . .
CAPTURE END function key . . . . . . . . . . .
CAPTURE EXECUTE function key . . . . . . .
Capturing commands . . . . . . . . . . . . . . . . .
Carriage return . . . . . . . . . . . . . . . . . . . . . .
Carriage return/line feed . . . . . . . . . . . . . . .
CENTER command . . . . . . . . . . . . . . . . . . .
CENTER LINE function key . . . . . . . . . . . .
CENTER SCREEN function key . . . . . . . . .
CHAR DEL key . . . . . . . . . . . . . . . . . . . . . .
CHAR INS key . . . . . . . . . . . . . . . . . . . . . .
Character
deleting . . . . . . . . . . . . . . . . . . . . . . . . . .
inserting . . . . . . . . . . . . . . . . . . . . . . . . .
CLEAR command . . . . . . . . . . . . . . . . . . . .
COLUMN command . . . . . . . . . . . . . . . . . .
COMMA command . . . . . . . . . . . . . . . . . . .
COMMAND command . . . . . . . . . . . . . . . .
default for . . . . . . . . . . . . . . . . . . . . . . . .
Command File User’s Manual . . . . . . . . . . .
Command files . . . . . . . . . . . . . . . . . . . . . .
Command mode . . . . . . . . . . . . . . . . . . . . .
information display . . . . . . . . . . . . . . . . .
Command mode screen
Page Index-2
9-3
9-1
4-1
9-1
4-3
2-10
F-1
F-1
7-6
4-3
5-2
5-2
5-3
5-1
5-6
5-3
1-4
9-6
8-2
8-1
8-1
8-2
8-1
2-1
6-6
4-5
4-5
3-2
4-3
4-1
4-3
4-1
5-2
6-4, 9-2
9-4
6-2
6-6
A-8
A-8
2-8, 2-10, 5-4 to 5-6, 6-1, 7-1, 7-8, A-5
6-2
AlphaVUE User’s Manual, Rev. 02
Index
Page Index-3
file information . . . . . . . . . . . . . . . . . . . . 2-8
Commands
available from Command mode . . . . . . . A-3 to A-4
default settings for . . . . . . . . . . . . . . . . . A-3 to A-4
list of initialization file . . . . . . . . . . . . . . . A-3 to A-4
reference lists . . . . . . . . . . . . . . . . . . . . . E-1
COMMENT command . . . . . . . . . . . . . . . . . 9-3
Comments
character indicating . . . . . . . . . . . . . . . . 9-3
in program file . . . . . . . . . . . . . . . . . . . . 9-2
COMPRESS command . . . . . . . . . . . . . . . . 7-2
Control characters
inserting . . . . . . . . . . . . . . . . . . . . . . . . . 9-5
searching for . . . . . . . . . . . . . . . . . . . . . 7-2
Control key . . . . . . . . . . . . . . . . . . . . . . . . . 1-3
using . . . . . . . . . . . . . . . . . . . . . . . . . . . . 2-3
COPY command . . . . . . . . . . . . . . . . . . . . . 5-2
Coventions used in this book . . . . . . . . . . . 1-2
CPU Identification . . . . . . . . . . . . . . . . . . . . 1-3
CTRL C . . . . . . . . . . . . . . . . . . . . . . . . . . . . 2-4
CTRL G . . . . . . . . . . . . . . . . . . . . . . . . . . . 8-4, 9-5
CTRL key
using . . . . . . . . . . . . . . . . . . . . . . . . . . . . 2-3
CTRLO key . . . . . . . . . . . . . . . . . . . . . . . . 4-5
CTRLY key . . . . . . . . . . . . . . . . . . . . . . . . . 4-4
Cursor
marking position . . . . . . . . . . . . . . . . . . . 3-3
movement . . . . . . . . . . . . . . . . . . . . . . . 2-2
moving screen to screen . . . . . . . . . . . . 3-2
moving this screen . . . . . . . . . . . . . . . . . 3-1
Data field
command mode . . . . . . . . . . . . . . . . . . .
command mode screen . . . . . . . . . . . . .
DEFAULT command . . . . . . . . . . . . . . . . . .
Default settings
list of . . . . . . . . . . . . . . . . . . . . . . . . . . . .
Definitions . . . . . . . . . . . . . . . . . . . . . . . . . .
DELETE command . . . . . . . . . . . . . . . . . . .
DELETE key . . . . . . . . . . . . . . . . . . . . . . . .
Deleting text
characters . . . . . . . . . . . . . . . . . . . . . . .
lines . . . . . . . . . . . . . . . . . . . . . . . . . . . .
word . . . . . . . . . . . . . . . . . . . . . . . . . . . .
DELTA command . . . . . . . . . . . . . . . . . . . .
defaults . . . . . . . . . . . . . . . . . . . . . . . . . .
Device specification . . . . . . . . . . . . . . . . . .
DIR command . . . . . . . . . . . . . . . . . . . . . . .
Disk drive . . . . . . . . . . . . . . . . . . . . . . . . . .
Documentation . . . . . . . . . . . . . . . . . . . . . .
AlphaVUE User’s Manual, Rev. 02
6-2
2-8
A-6
A-3 to A-4
F-1
5-3
2-1
4-3
4-4
4-4
9-4
9-5
1-3
6-4
2-3
1-4
Index
Page Index-4
DOWN ARROW key . . . . . . . . . . . . . . . . . . 3-1
EDIT HISTORY function key . . . . . . . . . . . .
Edit mode . . . . . . . . . . . . . . . . . . . . . . . . . .
Editing features
reference list . . . . . . . . . . . . . . . . . . . . . .
End of line
defined . . . . . . . . . . . . . . . . . . . . . . . . . .
in SEARCH and REPLACE . . . . . . . . . .
End-of-line character . . . . . . . . . . . . . . . . . .
ENTRY command . . . . . . . . . . . . . . . . . . . .
Entry mode . . . . . . . . . . . . . . . . . . . . . . . . .
and DELTA . . . . . . . . . . . . . . . . . . . . . . .
ERASE command . . . . . . . . . . . . . . . . . . . .
Error messages . . . . . . . . . . . . . . . . . . . . . .
Errors
correcting . . . . . . . . . . . . . . . . . . . . . . . .
ESC key
using . . . . . . . . . . . . . . . . . . . . . . . . . . . .
ESCAPE key
using . . . . . . . . . . . . . . . . . . . . . . . . . . . .
Examples
type face used for . . . . . . . . . . . . . . . . . .
Exiting AlphaVUE . . . . . . . . . . . . . . . . . . . .
9-6
2-7, A-5
FIELD command . . . . . . . . . . . . . . . . . . . . .
and FOLD command . . . . . . . . . . . . . . .
Fields . . . . . . . . . . . . . . . . . . . . . . . . . . . . . .
File
creating . . . . . . . . . . . . . . . . . . . . . . . . .
input . . . . . . . . . . . . . . . . . . . . . . . . . . . .
listing from AlphaVUE . . . . . . . . . . . . . .
naming conventions . . . . . . . . . . . . . . . .
reserved extensions . . . . . . . . . . . . . . . .
seeing existing . . . . . . . . . . . . . . . . . . . .
size . . . . . . . . . . . . . . . . . . . . . . . . . . . . .
File specification . . . . . . . . . . . . . . . . . . . . .
File-to-file movement of text . . . . . . . . . . . .
FINISH command . . . . . . . . . . . . . . . . . . . .
FOLD command . . . . . . . . . . . . . . . . . . . . .
FORMAT command . . . . . . . . . . . . . . . . . .
FORMAT function key . . . . . . . . . . . . . . . . .
Function keys . . . . . . . . . . . . . . . . . . . . . . .
convention for names . . . . . . . . . . . . . . .
9-3 to 9-4
9-4
9-1
2-5
F-3
6-4
2-6
2-6
2-7
2-8
1-4
5-3
2-10
9-4
4-6, F-4
4-6, F-4
2-2
2-2
GLOBAL command . . . . . . . . . . . . . . . . . . .
GO command . . . . . . . . . . . . . . . . . . . . . . .
defaults for . . . . . . . . . . . . . . . . . . . . . . .
maximum characters . . . . . . . . . . . . . . .
Graphic conventions . . . . . . . . . . . . . . . . . .
7-8, F-4
2-10, A-6 to A-7
A-7
A-7
1-2
E-1
F-2
7-5
6-6
9-1 to 9-2
9-1 to 9-4
9-5
6-5
B-1 to B-2, B-4
2-1
2-3
2-3
1-2 to 1-3
2-9
AlphaVUE User’s Manual, Rev. 02
Index
Page Index-5
Hardware Requirements . . . . . . . . . . . . . . .
HELP command . . . . . . . . . . . . . . . . . . . . .
Help menu . . . . . . . . . . . . . . . . . . . . . . . . . .
HOME key . . . . . . . . . . . . . . . . . . . . . . . . . .
D-1
2-8, A-8
2-8
3-2
Icons . . . . . . . . . . . . . . . . . . . . . . . . . . . . . .
IMAGE.VUE . . . . . . . . . . . . . . . . . . . . . . . .
INDENT command . . . . . . . . . . . . . . . . . . .
INI.VUE file . . . . . . . . . . . . . . . . . . . . . . . . .
defining macros . . . . . . . . . . . . . . . . . . .
Sample File . . . . . . . . . . . . . . . . . . . . . .
Initializaiton file
commands . . . . . . . . . . . . . . . . . . . . . . .
Initialization file . . . . . . . . . . . . . . . . . . . . . .
commands . . . . . . . . . . . . . . . . . . . . . . .
location . . . . . . . . . . . . . . . . . . . . . . . . . .
search path . . . . . . . . . . . . . . . . . . . . . .
Initialization file commands . . . . . . . . . . . . .
Input files . . . . . . . . . . . . . . . . . . . . . . . . . . .
Inserting control characters . . . . . . . . . . . . .
Inserting text
BLANKS command . . . . . . . . . . . . . . . .
character . . . . . . . . . . . . . . . . . . . . . . . .
character insert mode . . . . . . . . . . . . . .
line insert mode . . . . . . . . . . . . . . . . . . .
lines . . . . . . . . . . . . . . . . . . . . . . . . . . . .
word . . . . . . . . . . . . . . . . . . . . . . . . . . . .
1-4
F-4
9-5
2-4, A-1, A-7
8-5
A-8
A-4
2-4
A-2
A-2
A-2
A-3 to A-4
F-3
8-4
4-3
4-1
4-1
4-3
4-2
4-2
Keyboard . . . . . . . . . . . . . . . . . . . . . . . . . . . 2-1 to 2-2
Keycap symbols . . . . . . . . . . . . . . . . . . . . . 1-3
Keys
for special features . . . . . . . . . . . . . . . . . 2-3
LEFT ARROW key . . . . . . . . . . . . . . . . . . . 3-1
LFONLY command . . . . . . . . . . . . . . . . . . . 6-6
Line
maximum length . . . . . . . . . . . . . . . . . . . 4-2
LINE command . . . . . . . . . . . . . . . . . . . . . . 3-3
Line counter . . . . . . . . . . . . . . . . . . . . . . . . 2-5
Line feed . . . . . . . . . . . . . . . . . . . . . . . . . . . 6-6
LINE INS key . . . . . . . . . . . . . . . . . . . . . . . . 4-2, 4-5
Line length . . . . . . . . . . . . . . . . . . . . . . . . . . 6-2
Lines
appending . . . . . . . . . . . . . . . . . . . . . . . 4-5
breaking . . . . . . . . . . . . . . . . . . . . . . . . . 4-5
centering . . . . . . . . . . . . . . . . . . . . . . . . 4-5
deleting . . . . . . . . . . . . . . . . . . . . . . . . . . 4-4
inserting . . . . . . . . . . . . . . . . . . . . . . . . . 4-2
undeleting . . . . . . . . . . . . . . . . . . . . . . . . 4-4
LINEDEL key . . . . . . . . . . . . . . . . . . . . . . . 4-4
AlphaVUE User’s Manual, Rev. 02
Index
Page Index-6
LOG command . . . . . . . . . . . . . . . . . . . . . . 2-3 to 2-4
Logging on . . . . . . . . . . . . . . . . . . . . . . . . . 2-3 to 2-4
LOGON command . . . . . . . . . . . . . . . . . . . 2-3
MACRO command . . . . . . . . . . . . . . . . . . .
CTRL G . . . . . . . . . . . . . . . . . . . . . . . . .
MACRO files . . . . . . . . . . . . . . . . . . . . . . . .
Macros . . . . . . . . . . . . . . . . . . . . . . . . . . . .
defining in INI.VUE . . . . . . . . . . . . . . . . .
restrictions . . . . . . . . . . . . . . . . . . . . . . .
MARGIN command . . . . . . . . . . . . . . . . . . .
Marking text . . . . . . . . . . . . . . . . . . . . . . . . .
MATCH BRACE function key . . . . . . . . . . .
MATCH command . . . . . . . . . . . . . . . . . . . .
Maximum line length . . . . . . . . . . . . . . . . . .
Memory . . . . . . . . . . . . . . . . . . . . . . . . . . . .
Memory Requirements . . . . . . . . . . . . . . . .
MENU command . . . . . . . . . . . . . . . . . . . . .
MODEM command . . . . . . . . . . . . . . . . . . .
MODULE command . . . . . . . . . . . . . . . . . .
Module Yanking . . . . . . . . . . . . . . . . . . . . .
MOVE command . . . . . . . . . . . . . . . . . . . . .
Moving the cursor . . . . . . . . . . . . . . . . . . . .
8-3
9-5
9-1
8-3 to 8-6
8-5
8-6
6-3
5-1
9-6
9-6
4-2
2-9, 5-6
D-1
2-8
6-6
5-7, A-5
5-7, 9-6
5-3
3-1
Network
CPU identification . . . . . . . . . . . . . . . . . .
NEXT command . . . . . . . . . . . . . . . . . . . . .
NEXT MATCH function key . . . . . . . . . . . . .
NEXT SCREEN key . . . . . . . . . . . . . . . . . .
NEXT WORD key . . . . . . . . . . . . . . . . . . . .
Non-Alpha Micro Terminals . . . . . . . . . . . . .
1-3
7-6
7-6
3-2
3-1
D-2
Operating system . . . . . . . . . . . . . . . . . . . .
Optional elements . . . . . . . . . . . . . . . . . . . .
Options field
comamnd mode . . . . . . . . . . . . . . . . . . .
command mode screen . . . . . . . . . . . . .
Organization
of this book . . . . . . . . . . . . . . . . . . . . . . .
Output Files . . . . . . . . . . . . . . . . . . . . . . . . .
Overwriting files
with UNYANK command . . . . . . . . . . . .
D-1
1-4
Paragraph reformat . . . . . . . . . . . . . . . . . . .
POP command . . . . . . . . . . . . . . . . . . . . . .
POP function key . . . . . . . . . . . . . . . . . . . .
PREV SCREEN key . . . . . . . . . . . . . . . . . .
PREV WORD key . . . . . . . . . . . . . . . . . . . .
Program files . . . . . . . . . . . . . . . . . . . . . . . .
Programming command sequences . . . . . .
4-6
3-3
3-3
3-2
3-1
9-1
8-1
6-2
2-8
1-1 to 1-2
F-3
5-4
AlphaVUE User’s Manual, Rev. 02
Index
Page Index-7
PUSH
cleared by SPLIT . . . . . . . . . . . . . . . . . . 5-6
PUSH command . . . . . . . . . . . . . . . . . . . . . 3-3
PUSH function key . . . . . . . . . . . . . . . . . . . 3-3
Quick Command Mode . . . . . . . . . . . . . . . . 6-2
QUIT command . . . . . . . . . . . . . . . . . . . . . . 2-10
REFRESH function key . . . . . . . . . . . . . . . .
REPEAT function key . . . . . . . . . . . . . . . . .
REPLACE command . . . . . . . . . . . . . . . . . .
Restore
deleted lines . . . . . . . . . . . . . . . . . . . . . .
RESTORE function key . . . . . . . . . . . . . . . .
RET key . . . . . . . . . . . . . . . . . . . . . . . . . . .
Return key . . . . . . . . . . . . . . . . . . . . . . . . . .
RIGHT ARROW key . . . . . . . . . . . . . . . . . .
RUBOUT key . . . . . . . . . . . . . . . . . . . . . . .
Sample INI.VUE file . . . . . . . . . . . . . . . . . .
SAVE command . . . . . . . . . . . . . . . . . . . . .
SBLK command . . . . . . . . . . . . . . . . . . . . .
Screen
moving cursor . . . . . . . . . . . . . . . . . . . .
refreshing . . . . . . . . . . . . . . . . . . . . . . . .
Screen Line . . . . . . . . . . . . . . . . . . . . . . . . .
SEARCH command . . . . . . . . . . . . . . . . . .
blanks . . . . . . . . . . . . . . . . . . . . . . . . . .
Search key . . . . . . . . . . . . . . . . . . . . . . . . .
Search path
initialization file . . . . . . . . . . . . . . . . . . . .
SEARCHFOLD command . . . . . . . . . . . . . .
SHIFT command . . . . . . . . . . . . . . . . . . . . .
SHIFT RIGHT ARROW key . . . . . . . . . . . .
SHIFT/HOME key . . . . . . . . . . . . . . . . . . . .
SHIFT/LEFT ARROW key . . . . . . . . . . . . . .
Size field
command mode screen . . . . . . . . . . . . .
Sizes field
command mode . . . . . . . . . . . . . . . . . . .
SPACE command . . . . . . . . . . . . . . . . . . . .
SPLIT command . . . . . . . . . . . . . . . . . . . . .
block marks . . . . . . . . . . . . . . . . . . . . . .
PUSH marks . . . . . . . . . . . . . . . . . . . . .
START command . . . . . . . . . . . . . . . . . . . .
edit or command mode . . . . . . . . . . . . .
Status line . . . . . . . . . . . . . . . . . . . . . . . . . .
String . . . . . . . . . . . . . . . . . . . . . . . . . . . . . .
defined . . . . . . . . . . . . . . . . . . . . . . . . . .
Symbols
AlphaVUE User’s Manual, Rev. 02
4-6
8-2
7-7, F-4
4-4
4-4
2-1
1-3, 2-1, 3-1
3-1
2-1, 4-4
A-8
2-9
5-1, 7-4, 7-8
3-2
4-6
3-3
7-6, F-4
7-6
F-4
A-2
7-3, 7-6, 7-8
6-3
3-2
3-2
3-2
2-8
6-2
9-3
5-6
5-6
5-6
A-5
A-5
2-5
7-1
7-1
Index
Page Index-8
printing icons . . . . . . . . . . . . . . . . . . . . . 1-4
TAB command . . . . . . . . . . . . . . . . . . . . . .
TAB key . . . . . . . . . . . . . . . . . . . . . . . . . . . .
Terminal drivers . . . . . . . . . . . . . . . . . . . . .
Terminals . . . . . . . . . . . . . . . . . . . . . . . . . .
function key names . . . . . . . . . . . . . . . .
Text
blocks . . . . . . . . . . . . . . . . . . . . . . . . . . .
copying blocks . . . . . . . . . . . . . . . . . . . .
deleting block . . . . . . . . . . . . . . . . . . . . .
editing features . . . . . . . . . . . . . . . . . . . .
indenting . . . . . . . . . . . . . . . . . . . . . . . . .
locating with SEARCH . . . . . . . . . . . . . .
marking . . . . . . . . . . . . . . . . . . . . . . . . .
moving blocks . . . . . . . . . . . . . . . . . . . .
moving from file . . . . . . . . . . . . . . . . . . .
rearranging . . . . . . . . . . . . . . . . . . . . . . .
search and replace . . . . . . . . . . . . . . . . .
searching for non-alpha-numeric . . . . . .
Text editor . . . . . . . . . . . . . . . . . . . . . . . . . .
TOKEN command . . . . . . . . . . . . . . . . . . . .
Transferring text
between files . . . . . . . . . . . . . . . . . . . . .
from the disk . . . . . . . . . . . . . . . . . . . . . .
to disk . . . . . . . . . . . . . . . . . . . . . . . . . . .
Translation files . . . . . . . . . . . . . . . . . . . . . .
TXTFMT software . . . . . . . . . . . . . . . . . . . .
TYPE command . . . . . . . . . . . . . . . . . . . . .
2-2, 6-3
2-2
D-1
2-3
2-2
5-1
5-2
5-3
4-5 to 4-6
6-3
7-6
5-1
5-3
5-3
4-5
7-2
7-2
1-1
7-2
5-3
5-5
5-5
D-2
1-1
6-5
UNSPLIT command . . . . . . . . . . . . . . . . . . 5-6
UNYANK command . . . . . . . . . . . . . . . . . . 5-3 to 5-4, 5-6
UP ARROW key . . . . . . . . . . . . . . . . . . . . . 3-1
Variables . . . . . . . . . . . . . . . . . . . . . . . . . . .
Video-display terminal . . . . . . . . . . . . . . . . .
VUE
command . . . . . . . . . . . . . . . . . . . . . . . .
command options . . . . . . . . . . . . . . . . .
creating a file . . . . . . . . . . . . . . . . . . . . .
exiting . . . . . . . . . . . . . . . . . . . . . . . . . . .
VUE command
options . . . . . . . . . . . . . . . . . . . . . . . . . .
White Space Character
defined . . . . . . . . . . . . . . . . . . . . . . . . . .
WHOLE command . . . . . . . . . . . . . . . . . . .
WIDTH command . . . . . . . . . . . . . . . . . . . .
Wildcard . . . . . . . . . . . . . . . . . . . . . . . . . . .
WILDCARD command . . . . . . . . . . . . . . . .
7-4
2-1
2-5
9-6
2-5
2-9
9-7
F-2
7-8, F-4
4-5 to 4-6, 6-2
F-4
7-4
AlphaVUE User’s Manual, Rev. 02
Index
Word
defined . . . . . . . . . . . . . . . . . . . . . . . . . .
deleting . . . . . . . . . . . . . . . . . . . . . . . . . .
inserting . . . . . . . . . . . . . . . . . . . . . . . . .
WORD DEL key . . . . . . . . . . . . . . . . . . . . .
Word group
defined . . . . . . . . . . . . . . . . . . . . . . . . . .
WORD INS key . . . . . . . . . . . . . . . . . . . . . .
WRAP command . . . . . . . . . . . . . . . . . . . . .
Page Index-9
F-2
4-4
4-2
4-4
F-2
4-2
6-2
YANK command . . . . . . . . . . . . . . . . . . . . . 5-4 to 5-6
YANK MOD function key . . . . . . . . . . . . . . . 5-7, 9-6
Yanking in a module . . . . . . . . . . . . . . . . . . 5-7
AlphaVUE User’s Manual, Rev. 02