1
DW!v1-CO100—49
'
1Uhmicro
alpha
manual reference
commands system
SOFTWARE MANUAL
AMOS
SYSTEM COMMANDS
REFERENCE MANUAL
CWM-OO100-49
REV A02
alpha
micro
AMOS SYSTEM COMMANDS REFERENCE MANUAL
This printing of the manuaL contains the contents
NOTE:
of
Page ii
Change
Page Packet #1 for the "AMOS System Commands
Reference Manual', (DWM—00100—62), and Change
Page
Packet #2 for the 'AMOS System Commands Reference
Manual",
(DSS—10000—D9),
which
may
be
ordered
separately from ALpha Micro.
First printing:
1
Second printing:
October 1979
1
May 1980
Third printing:
30 ApriL 1981
'ALpha Micro', 'AMOS', 'AIphaBASIC', 'AM—lao',
'ALphaPASCAL', 'ALphaLISP', and 'ALphaSERV'
are trademarks of
ALPHA MICROSYSTEMS
Irvine, CA
92714
This document refLects AMOS Versions 4.5 and Later
©1981 — ALPHA MICROSYSTEMS
ALPHA MICROSYSTEMS
17881 Sky Park North
Irvine, CA
C—2ND—4/81
92714
30 April 1981
\.—
DSS—10000—09
CHANGE PAGE PACKET FOR THE AMOS SYSTEM COMMANDS REFERENCE MANUAL
This
set of documents is the second update package for the AMOS System
Commands Reference ManuaL, (DWM—OO100—49).
Once
you
incorporate these
into your copy of the manual, your manuaL wiLL contain information
that reflects AMOS Versions 4.5 and Later.
pages
NOTE: Look at the title page of your current manuaL. If it says
Revision
Aol,
the manuaL already contains the contents of the first change page
packet for the AMOS System Commands Reference ManuaL; if it
a
does
not
show
revision leveL, you wilt, want to order the first change page packet (part
number DWM—OO100—62) so that you can bring
your
manuaL
completeLy
up
date.
to
This change page packet contains:
1.
Updating instructions.
2.
A new title page for the manuaL (indicating the
current revision Level of the manual, Revision
A02)
3.
The manual pages we have changed.
Each page that was changed contains a Legend at the bottom of the page that
reads: (changed 30 April 1991).
We
have marked with
change bars
(vertical bLack Lines in the left margin) those portions of each page that
have changed.
page that
(30 ApriL 1981).
Each
1.0
is new for this revision of the manuaL contains the Legend
UPDATING INSTRUCTIONS
To make the update process easier, we suggest that you put your AMOS System
Commands
Reference ManuaL in a three—ring binder notebook. If the pages of
the manuaL are secured with a stapLe, remove the staple.
First, remove the titLe page from this change page packet
and
for the titLe page in the AMOS System Commands Reference ManuaL.
exchange
it
CHANGE PAGE PACKET #2 —— AMOS SYSTEM COMMANDS REFERENCE MANUAL
Now
insert
and
replace
Change Pages.
2.0
sheets as described in the next section,
Page 2
List of
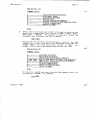
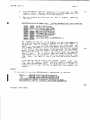
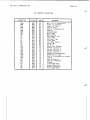
LIST OF CHANGE PAGES
BeLow is the List of change pages in this packet. Remove the originaL pages
Listed beLow and reptace them with the revised pages. Those pages for which
no originals exist are to be inserted into the manuaL in proper aLphabetic
order; these are new reference sheets for AMOS Version 4.5.
Reptace:
OriginaL Page
Title page/li
Revised Pages
Pages 6—1 through 6—5
APPEND reference sheet
with
with
with
with
with
with
with
BITMAP reference sheet
with
Page iii
Page v
Pages 1—1 through 1—5
Page 2—1/2—2
(new)
(new)
COM reference sheet
COMPIL reference sheet
COPY reference sheet
CREATE reference sheet
DATE reference sheet
DDT reference sheet
DO reference sheet
DSKANA reference sheet
DSKCPY reference sheet
with
with
with
with
with
with
with
with
with
ERASE reference sheet
FILDMP reference sheet
with
with
FIX reference sheet
with
with
with
with
with
with
with
(new)
(new)
FIXDVR reference sheet
FMT200 reference sheet
FMT21O reference sheet
FMT400 reference sheet
FMTSOO reference sheet
HASHER reference sheet
(new)
LINK reference sheet
LOAD reference sheet
MACRO reference sheet
MONTST reference sheet
with
with
with
with
TitLe page/u
Page iii
Page v
Pages 1—1 through 1—5
Pages 2-1 through 2—4
Pages 6—1 through 6—5
APPEND reference sheet
BATCH reference sheet
BITMAP reference sheet
CALI2D reference sheet
COM reference sheet
COMPIL reference sheet
COPY reference sheet
CREATE reference sheet
DATE reference sheet
DDT reference sheet
DO reference sheet
DSKANA reference sheet
DSKCPY reference sheet
EMAIL reference sheet
ERASE reference sheet
FILDMP reference sheet
FILTAP reference sheet
FIX reference sheet
FIXDVR reference sheet
FMT200 reference sheet
FMT21O reference sheet
FMT400 reference sheet
FMT500 reference sheet
HASHER reference sheet
LIB reference sheet
LINK reference sheet
LOAD reference sheet
MACRO reference sheet
MONTST reference sheet
CHANGE PAGE PACKET #2 —— AMOS SYSTEM COMMANDS REFERENCE MANUAL
Page 3
(new)
NEWTRM reference sheet
C new)
OPR reference sheet
PARITY reference sheet
(new)
*** Delete PASCAL reference sheet ***
(new)
PC reference sheet
(new)
PCL reference sheet
PRINT reference sheet
SET reference sheet
SYMBOL reference sheet
SYSMEM reference sheet
SYSTEM reference sheet
TIME reference sheet
TXTFMT reference sheet
(new)
(new)
PCLJ reference sheet
PL reference sheet
PRINT reference sheet
with
(new)
(new)
PRIJN reference sheet
PU reference sheet
SET reference sheet
with
with
with
with
SYMBOL reference sheet
SYSMEM reference sheet
SYSTEM reference sheet
(new)
(new)
TAPDIR reference sheet
TAPFIL reference sheet
TIME reference sheet
TXTFMT reference sheet
with
with
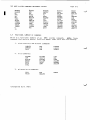
For your quick reference:
The new reference sheets are:
BATCH
PC
CALl 20
EMAIL
FILTAP
PCL
LIB
PRUN
NEWTRM
PU
OPR
TAPDIR
PARITY
TAPFIL
PCLJ
PL
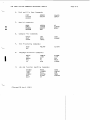
The revised reference sheets are:
APPEND
ERASE
LOAD
BITMAP
FILDMP
MACRO
COM
FIX
MONTST
COMPIL
FIXDVR
FMT200
PRINT
COPY
(For
a
CREATE
DATE
FMT 210
SET
SYMBOL
FMT400
SYSMEM
DDT
FM T5 00
SYSTEM
DO
H AS HE R
TIME
DSKANA
DSKCPY
LINK
TXTFMT
list of the reference sheets grouped by function, see Section 6.3,
'Functional Summary of Commands,' of
Manua L.)
the
AMOS
System
Commands
Reference
1
May 1980
DWM—O01 00—62
CHANGE PAGE PACKET 1 FOR THE AMOS SYSTEM COMMAND REFERENCE MANUAL
1.0
INTRODUCTION
set of documents is the first update package for the AMOS System
Commands Reference Manual,
(DWM—00100—49).
Once
you incorporate these
pages into your copy of the manual, your manuaL wiLL contain information
This
that reflects AMOS Versions 4.4 and Later.
This change page packet contains:
1.
Updating instructions.
2.
A new titLe page for the manua (indicating the
current revision LeveL of the manuaL).
3.
The manuaL pages we have changed.
Each page that was changed contains a Legend at the bottom of the page that
reads: (Changed
May
1980).
We have marked with change bars (verticaL
bLack Lines in the Left margin) those portions of each page that have
1
changed.
Each
(1
2.0
page
that
May 1950).
is new for this revision of the manuaL contains the Legend
UPDATING INSTRUCTIONS
To make the update process easier, we suggest that you put your AMOS System
Commands
Reference Manual in a three—ring binder notebook. If the pages of
the manuaL are secured with a stapLe, remove the stapLe.
First, remove the titLe page from this change page packet and exchange it
for the tifle page in the AMOS System Commands Reference ManuaL. (Notice
that we have not incLuded a new tabLe of contents; the changes we made do
not affect your current tabLe of contents.)
Now
insert
Change Pages.'
and
repLace
sheets as described in the next section,
List of
CHANGE PAGE PACKET #1 —— AMOS SYSTEM COMMANDS REFERENCE MANUAL
3.0
Page 2
LIST OF CHANGE PAGES
BeLow is the List of change pages in this packet
Remove the original pages
Listed beow and replace them with the revised pages. Those pages for which
no originaLs exist are to be inserted into the manuaL in proper aLphabetical
order; these are new reference sheets for AMOS Version 4.4.
Rep Lace:
Original Page
TitLe page
Page 1—1/1—2
Pages 6—1 through 6—5
ATTACH Reference Sheet
BA DBL K Reference Sheet
BITMAP Reference Sheet
Revised Pages
with
with
with
with
with
with
(new)
(new)
(new)
CPY41C Reference Sheet
with
CRT41O Reference Sheet
DEVTBL Reference Sheet
DO Reference Sheet
DSKANA Reference Sheet
DSKCPY Reference Sheet
DUMP Reference Sheet
with
with
with
with
with
with
(new)
(new)
(new)
FIXDVR Reference Sheet
with
(new)
(new)
(new)
(new)
(new)
LOAD Reference Sheet
LOG Reference Sheet
with
with
MACRO Reference Sheet
with
MOUNT Reference Sheet
with
SRCCOM Reference Sheet
SYSACT Reference Sheet
SYSMEM Reference Sheet
SYSTAT Reference Sheet
with
with
with
with
TRMDEF Reference Sheet
VUE Reference Sheet
with
with
(new)
(new)
(new)
(new)
(new)
TitLe page
Page 1—1/1—2
Pages 6—1 through 6—5
ATTACH Reference Sheet
BADBLK Reference Sheet
BITMAP Reference Sheet
CDC21D Reference Sheet
COM Reference Sheet
CONT Reference Sheet
CPY41G Reference Sheet
CREATE Reference Sheet
CRT41C Reference Sheet
DEVTBL Reference Sheet
DO Reference Sheet
DSKANA Reference Sheet
DSKCPY Reference Sheet
DUMP Reference Sheet
EXIT Reference Sheet
FIX Reference Sheet
FIXDVR Reference Sheet
GLOBAL Reference Sheet
GOTO Reference Sheet
HASHER Reference Sheet
ISMFIX Reference Sheet
LABEL Reference Sheet
LOAD Reference Sheet
LOG Reference Sheet
LOOKUP Reference Sheet
MACRO Reference Sheet
MEMERR Reference Sheet
MOUNT Reference Sheet
PAUSE Reference Sheet
SRCCOM Reference Sheet
SYSACI Reference Sheet
SYSMEM Reference Sheet
SYSTAT Reference Sheet
TRACE Reference Sheet
TRMDEF Reference Sheet
VUE Reference Sheet
WNG21O Reference Sheet
CHANGE PAGE PACKET kl —— AMOS SYSTEM COMMANDS REFERENCE MANUAL
Page 3
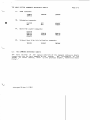
For your quick reference:
The new reference sheets are:
CDC21Q
HASHER
COM
ISMFIX
CONT
LABEL
CREATE
LOCKUP
EXIT
FIX
MEMERR
PAUSE
GLOBAL
TRACE
GOTO
WN6210
The revised reference sheets are:
ATTACH
BADBLK
LOAD
BITMAP
MACRO
CPY41O
CRT41O
DEVTBL
MOUNT
DO
SYSMEM
DSKANA
DSKCPY
SYSTAT
LOG
SRCCOM
SYSACT
TRMDEF
VUE
DU?IP
FT XDVR
(For
a
List of the reference sheets grouped by function,
"FunctionaL
Manual.)
Summary
of
Commands,"
of
see
Section
6.3,
the AMOS System Commands Reference
NOTE: The ISMFIX and MEMERR reference sheets were issued in an informaL
update package with the AMOS Version 4.3 ReLease Notes. If your manuaL
contains these two reference sheets, discard them from this change page
packet; they have not been revised since that time.
'1
AMOS SYSTEM COMMANDS REFERENCE MANUAL
IMPORTANT NOTE
This manual is a reference manuaL for the experienced
user of the AMOS system. Before you use the system for
the
first time, read the Introduction to AMOS,
(DWM—OO100—65),
the
AMOS
User's
Guide,
(DWM—OO100—35),
and
the documents in the AMOS Software
Update Documentation Packet.
You may aLso be interested in
AMOS,
reading Introduction to
(DWM—OO100—65), which contains an introduction to
computers in generaL and the AMOS system in particular.
(Changed 30 April 1981)
Page iii
AMOS SYSTEM COMMANDS REFERENCE MANUAL
Page v
Table of Contents
CHAPTER
1
CHAPTER 2
INTRODUCTION TO THE MANUAL
1.1
PREFACE
1.2
1.3
CONVENTIONS USED tN THIS MANUAL
CONCEPTS
INTRODUCTION TO AMOS COMMANDS
2.1
COMMANDS TO BE USED WITH CAUTION
2.1.1
2.1.2
2.1.3
2.1.4
2.1.5
2.2
2.4
CHAPTER 3
4.2
Commands Onty For the
Use of the System Operator
Access Limitations
2—3
Commands for Experienced Users
2—4
INTRODUCTION
DEFAULTS
Standard System DefauLts
WILDCARD SYMBOLS
4.2.1
2—3
2—4
2—4
3—1
Standard System WiLdcard Symbols
4—1
4—1
4—2
4—2
REFERENCE SHEET FORMAT
5.1
5.2
INTRODUCTION
REFERENCE SHEET SUBHEADINGS
5—1
5—1
THE AMOS SYSTEM COMMANDS REFERENCE SHEETS
6.1
6.2
6.3
6.4
APPENDIX A
2—2
Commands that Destroy Disk Contents ... 2—2
PRIVILEGED COMMANDS
WILDCARD FILE COMMANDS
4.1.1
CHAPTER 6
From the First Memory Partition
FILE SPECIFICATION DEFAULTS AND WILDCARD SYMBOLS
4.1
CHAPTER 5
2—2
Commands that May Only Be Used
FILE SPECIFICATIONS
3.1
CHAPTER 4
1—1
1—2
1—3
INTRODUCTION
ALPHABETIC SUMMARY OF AMOS COMMANDS
FUNCTIONAL SUMMARY OF COMMANDS
THE COMMAND REFERENCE SHEETS
THE ASCII CHARACTER SET
(Changed 30 April 1981)
6—1
6—1
6—2
6—5
A—i
CHAPTER 1
INTRODUCTION TO THE MANUAL
1.1
PREFACE
The purpose of this manual is to help the experienced AMOS user gain quick
access to information on every command on the system. This manual does
not give you the information you need to operate the system. It does serve
as
a
quick reference manua for those occasions when you need to jog your
memory by gLancing at the format of a specific command.
In writing these reference sheets, we've assumed that you are aLready
familiar
with
the
AMOS commands.
to use the system without
reading the
Software Update Documentation Packet.
If
you
quite
If this is not the case, do NOT attempt
AMOS
User's
Guide
and
the
AMOS
find yourseLf confused about the use of a particular command, refer
to the AMOS User's Guide and the AMOS Softuare Update Documentation Packet
for examples of command use. These documents also contain general system
information.
For detaiLed information on the system
Language—
and
text—processors, refer to the specific manuals for those processors.
new
AMOS
user may want to refer to the manuaL Introduction to AMOS,
which contains general background information on the AMOS system and on
computer terms and concepts.
The
(changed 30 April 1981)
INTRODUCTION TO THE MANUAL
1.2
Page 1—2
CONVENTIONS USED'IN THIS MANUAL
make our examples concise and easy to understand, we've adopted a number
of graphics conventions throughout our manua's:
To
A Project—programmer number. This number identifies a
user
account
(e.g., C100,2J). We also represent an
PPN
account number as £p,pnj.
Devn:
Fitespec
device specification.
This symbol represents
a
Logical unit of a physicaL device. Such a specification
usualLy refers to a disk, but can represent any vaLid
system device (e.g., a magnetic tape drive or a printer
for which a speciaL driver program is required).
A
A fiLe specification. Such a specification identifies
fiLe. It usuaLLy has these eLements:
a
Devn:Fi Lename.Extension[p,pnj
defauLt
Information assumed by the system if you omit necessary
data. For exampLe, if you omit an account specification
from a fiLe specification, most AMOS commands assume
that you want to access a fiLe in the account you are
logged into. (In this case, your own account is the
default.)
0-
OptionaL elements of a command line. When these symbos
appear in a sample command line, they designate eLements
that you may omit from the command Line.
UnderLined characters indicate those characters that
AMOS prints on your terminal display.
For example,
throughout this document you see an underlined dot,
which indicates the prompt symbol that the operating
system prints on your terminal when you are at AMOS
command level.
or
Carriage return symbol.
The RET symbol or curly arrow
the place in your keyboard entry to type a RETURN
(i.e., hit the key labeled RETURN). For example:
.LOGOFFfl" tells you After an AMOS prompt, type
marks
LOGOFF and a RETURN."
A
Indicates a Control—character. As you enter characters
from the keyboard directly to AMOS, the system usually
displays these characters on your terminal.
If you type
a Control—C, you see a
on
your terminal display.
(Refer to the AMOS ljsers Guide, (DWM—OO100—35), for
more information on Control—characters.)
(Changed 30 April 1981)
INTRODUCTION TO THE MANUAL
1.7
Page 1—3
CONCEPTS
Below we define several of the terms that appear frequently in the command
reference sheets that folLow. For more information on system concepts, read
'Part I — Getting Started in the AMOS User's Guide, (DWM—OO100—35).
1.
AMOS
COMMAND
LEVEL
— When you are at AMOS command LeveL, you are
communicating directly with AMOS (the ALpha Micro Operating System)
and not with a program (e.g., BASIC or VLJE) that AMOS is executing.
2.
AMOS PROMPT — When you are at AMOS command LeveL you see the AMOS
prompt symboL,
., which teLLs you that the operating system is
ready for you to enter a command.
3.
COMMAND LINE — Whenever you enter a command to AMOS, you incLude
the name of the command optionalLy foLlowed by file specifications
and option switches.
.
caLled a command line.
FILE
SPECIFICATION
(ogicaLty—related
identify a file
specification.
5.
The entire input
—
groups
to
Data
on
called
an
line
a
files.
AMOS
to
up
disk
is
a
is
RETURN
into
organized
to
Whenever you want
command,
enter that
file's
DEFAULTS — When you omit information from a command line, AMOS has
set of information that it substitutes for the missing items.
a
For exampLe, if you do not teLL AMOS what account a fiLe beLongs
to, it usualLy assumes that the file resides in the account you are
currently Logged into. In this case, the default account is your
own -
Check with the reference sheet
for a specific command to see what defaults it uses.
In
particuLar, the speciaL commands caLled wiLdcard fiLe commands
handLe defaults differently than other commands on the system.
NOTE: DefauLts vary among commands.
(See Chapter 9,
The Wi Ldcard FiLe Commands,
Guide for information on these commands.)
6.
in the AMOS User
WILDCARD — A wiLdcard is a speciaL symboL that appears
specification.
in
a
file
WiLdcards enabLe a fiLe søecification to represent
more than one fiLe. For exaripLe, the wiLdcard symbol * in this
file specification:
F*.TXT
a
specification that selects aLt .TXT fiLes whose names
begin with F, regardLess of the rest of the fiLe name.
creates
(Changed 30 ApriL 1981)
INTRODUCTION TO THE MANUAL
Page 1—4
NOTE: The use of wiLdcard symbols varies among
commands
do
not recognize wiLdcards; others
commands.
Some
(the wildcard file
commands) handle wiLdcards differentty than do the rest of the
commands
on
the system.
Refer to the reference sheet for a
particular commAnd to see how it handles wiLdcards.
7.
SWITCH (OR OPTION) — SeveraL AMOS commands and programs
alLow
you
to seLect among several options by inc'uding switches on a command
Line. A switch is a slash (I) folLowed by one or more characters.
You can sonietimes include severaL switches on one command Line.
The
specific
that
form
particular command.
after a slash to
switches
take
varies
depending on the
single character
represent a different switch (e.g., .MAP/FSR);
others require that each switch begin with a new slash (e.g.,
.PRINT NET.BAS/COPIES:2/BANNER/HEADER)
Refer to the reference
sheet for a particular command to see the switches for that
Some commands expect
every
command.
8.
WILDCARD
FILE
SWITCHES
COMMAND
distinction between
two
types
—
of
Wildcard file commands make a
switches: file switches and
If a file switch is placed directly after a
file specification, it affects only that file. For example:
operation
switches.
.ERASE MNTDVR.MAC,MTNDVR.PRG/QUERY,MTNDVR.OBJ
tells ERASE
to
MTNDVR.PRG.
It
ask
for
erases
confirmation, however.
confirmation before erasing the file
other two files without asking for
the
An operation switch affects all
matter
where
it
is
placed.
files
For
affects the directory display for all
where it appears on the command line.
on
the
command
line,
no
example, the DIR/WIDE option
specified files, no matter
NOTE: Wildcard file commands allow you to set the default switch by
placing the switch in front of a file specification. For example:
.ERASE/QLJERY MTNDVR.MAC,MTNDVR.PRG,MINDVR.OBJ/NCQUERY SRCFIL BAS EID
tells
ERASE
to ask for confirmation before erasing the first,
second, and fourth tiles specified on the command tine.
See Chapter 9,
The Wi ldcard File
Commands'
in
the
AMOS
User's
for more information on wildcard file command switches and
default switches.
Guide
9.
COMMAND FILE — A command file is an ASCII text file that contains
valid AMOS system commands and file specifications. It can contain
any commands and data that you can enter at AMOS command level
(including the name of another command file).
(Changed 30 ApriL 1981)
As AMOS processes
a
INTRODUCTION TO THE MANUAL
Page 1—5
command
file, it performs the functions calLed for by each tine of
the fiLe. Command fiLes can aLso contain severaL speciaL symbols
that affect the way the fiLe is displayed on the terminat screen as
it is processed, and that allow the fiLe to ask for input from the
user of the command file. A speciaL kind of command file, caLled a
DO file, aLso aLLows the user of the file to specify text arguments
which AMOS then substitutes into the DO file in the pLace of
speciaL parameter symbols.
(Changed 30 ApriL 1981)
CHAPTER 2
INTRODUCTION TO AMOS COMMANDS
reference sheet in this manuaL gives you detailed information on the
use of a specific command.
Before getting into the use of particuLar
Each
commands, however,
term command.
it's a good idea to discuss exactLy what we mean by the
A command is simp'y a specification that seLects a fiLe on the disk that has
been loaded into memory (a memory module).
AMOS responds to the command
by
trying to locate the memory module and executing it. If the module doesn't
exist, AMOS finds the fiLe on the disk, Loads it into memory, and then
executes it.
The
fiLe seLected by a command must be either a machine
Language program (usuaLly identified by a .PRG fiLe extension) or a command
file (identified by a _CMD or .DO extension.)
In
other
words,
when
you type a command, AMOS Loads into memory the fiLe
Because the programs specified
specified by that command and executes it.
commands
are not actuaLly oart of the operating system, but are simply
files on the disk, you can add to the commands that AMOS recognizes by
by
creating your own machine language programs and command files.
enter a
search procedure as
When
you
command at AMOS command LeveL, AMOS performs a thorough
it
looks for the program or command fiLe specified by
in various accounts on the System Disk and on the
device you are Logged into. For exampLe, if you enter:
the
command.
Tt
Looks
.RECALL
AMOS Looks first for a memory moduLe by that name in system memory or in
your memory partition. If such a moduLe is not there, AMOS next Looks for a
disk file DSKO:RECALL.PRG[1,4J_ If that fiLe is not there, AMOS Looks for
it in your account. If the file is not there either, AMOS assumes that the
file must be a command fiLe, and Looks for it in the System Command FiLe
Library account, DSKO:C2,2J, as DSKO:RECALL.CMDE2,2].
Next it
looks for
RECALL.CMD
in your own account. These are but a few of the steps in the
command search procedure that AMOS foLlows. For an exact outline of the
(Changed 30 ApriL 1981)
INTRODUCTION TO AMOS COMMANDS
Page 2—2
searh procedure, refer to Appendix B, "AMOS Command
Processing" in the AMOS User's Guide, (DWM—OO100—35). At the compLetion of
its search,
it stiLL has not found the fiLe specified by the command,
AMOS echoes the command back to you encLosed in question marks.
Then
it
displays the AMOS prompt to indicate that it is ready for a new command.
For exampLe:
AMOS
command
if
?RECALL?
2.1
COMMANDS TO BE USED WITH CAUTION
This section is a quick reference to those commands which you shouLd use
with caution. Some of these commands can destroy the contents
of your disk.
Others can bring other users on your system to a halt or must onLy be used
under certain conditions. Refer to the reference sheet for a particular
command for more information on that command.
2.1.1
Commands that May Only Be Used From the First Memory Partition
that uses these commands must be running in the first memory
partition on the system (Bank Zero for bank switched systems):
The
job
CDC21O
PERLOD
WNGLOD
2.1.2
HWKLOD
ICMLOD
SMDLOD
WNG21O
TRILOD
Commands that Destroy Disk Contents
CPY41D
DSKCPY
CPYSOO
CR1410
RAZA
SYSCPY
SYSACT (InitiaLize option)
NOTE:
The disk diagnostic commands DIAG2, RNDRED, and
the data on your disk.
2.1.3
You
MONTST
T8OLOD
REDALL
do
not
harm
Commands OnLy For the Use of the System Operator
must
commands:
be logged into the System Operator's account, [1,2], to run these
DSKANA
(changed 30 ApriL 1981)
SYSACT
Page 2—3
tNTRODUCTION TO AMOS COMMANDS
2.1.4
Access Limitations
These commands may onLy be used when no other job is running on the system:
CPY500
FMT400
FMT200
FMT500
FMT21O
DSKCPY (in fast Hawk mode)
These commands may only be used when no other user is accessing the affected
disk controller:
CPY41O
CRT41O
These commands may onLy be used when no other user is accessing the affected
disk(s):
DIRSEQ
COPY/P
DSKPAK
SYSCPY
MOUNT
SYSACT
DSKCPY (in aLL modes but Hawk fast copy)
Note a'so that never more than one user may access the same fiLe at the same
time.
2.1.5
commands for Experienced Users
In addition to the
commands
above,
the
commands
dangerous if used by inexperienced users:
2.2
ATTACH
JOBMEM
DSKDDT
FORCE
JOBPRI
MEMORY
QDT
SLEEP
SUSPND
below
are
especially
PRIVILEGED COMMANDS
manuaL contains a reference sheet for every command on the system. It
is important to emphasize that not aLL commands can or shouLd be used by the
genera' user of the system. You must be Logged into the system as System
Operator (i.e., in account DSKO:C1,2J) in order to use several of the
commands discussed in this manuat. That account is usuaLly protected with a
This
password.
(Changed 30 ApriL 1981)
INTRODUCTION TO AMOS COMMANDS
Page 2—4
Many of
the commands (e.g., a disk formatting program) can
be very
destructive to disk files if used reckLessly. Therefore, the System Operator
may
want to transfer to DSKO:E1,2] those
programs that he wants to reserve
for the use of privileged personneL (e.g., JOBPRI,
JOBMEM, EMT500, etc.). It
is the responsibility of the System Operator to restrict
the use of
dangerous commands
wise Ly.
2.3
to
those
users
knowledgeabLe
enough
to handle them
WILDCARD FILE COMMANDS
The reference sheets for severaL of the AMOS commands mention that those
commands are
"witdcard file commands." These commands are a special group
of commands that, even though they perform vastly different functions, alt
handLe
fiLe specification wildcards and defaults in the same way. Because
they have much more powerfuL abilities to process file specifications
than
other commands on the system, it's important that
you be aware of how they
handle fiLe specifications before you begin to use them extensively. They
do
not follow the standard system rules for specification defaults
and
wildcards. If you are not yet familiar with wiLdcard file commands,
read
Section 9.1,
Introduction to WiLdcard File Commands,' in the AMOS User's
Guide.
(Changed 30 ApriL 1981)
CHAPTER 3
FILE SPECIFICATIONS
3.1
INTRODUCTION
Most AMOS commands require that you suppLy one or more fiLe specifications
a
command
Line. The file specification identifies a fiLe to AMOS, and
on
takes this form:
Devn: Fi Lename.ExtensionEp,pnJ
where:
Three Letters and a number that seLect a Logical unit of a
physicaL device. This specification tells AMOS the device
the specified file resides
on.
The
device
and the filename are separated by a colon.
specification
Devn: usually identifies a disk (e.g., DSKO:, the System
Disk), but can identify a magnetic tape unit (e.g., MTU?':)
or a special device (such as system memory, RES:).
Several
commands also recognize a different type of device
called an 'ersatz device."
Ersatz
devices
identity
specific accounts on the System Disk. For example, the
ersatz device BAS: identifies the System BASIC Language
Library account, DSKO:E7,6J.
For more
information on
ersatz devices, refer to Section 9.1.5, 'Ersatz Devices' in
the AMOS User's
special
Guide,
devices,
(DWM—QO100—35).
turn
Devices," of that manual.
on
to
Section
For
information
6.1.1.1, "SpeciaL
FILE SPECIFICATIONS
Page 3—2
Filename
A one— to six—character file name. AMOS usualLy considers
upper and Lower case Letters in a fiLename to be the same,
but some programs require that you enter fiLenames as aLl
upper
case.
WARNING:
If you enter more than six
characters, AMOS may not (depending on the command you are
using) process any extension or PPN that folLows the name.
Extension
Zero
to three characters that folLow the filename and give
information to the command about the contents of the fiLe.
The
fiLename and extension are separated by a dot. For
information on the various extensions recognized by the
system,
refer to Chapter 6, "Identifying Files to AMOS" in
the AMOS User's Guide.
Lp,pnJ
Project—programmer number. Identifies the account in which
the file resides. When it is part of a file specification,
always encLose the PPN within square brackets.
For
information on PPNs, refer to chapter s, "Identifying
Yourself to AMOS" in the AMOS User's Guide.
An exampLe of a typicaL fiLe specification:
SMD5: PR OJ CT. TXT [100, 2
where: the device specification, SMD5:, telLs AMOS that the fiLe resides
on
that it contains text data); and the PPN C100,2J specifies
on
LogicaL unit SMD5 of the physicaL device SMD; the filename PROJCT identifies
the fiLe; the extension .TXT further identifies the fiLe (and teLls
AMOS
SMD5: where AMOS can find the fiLe.
the
account
CHAPTER 4
FILE SPECIFICATION DEFAULTS AND WILOCARD SYMBOLS
4.1
DEFAULTS
If you omit elements of a file specification, most commands can filL in some
the missing information for you. For example, if you omit the device
of
specification, most commands assume that you want to access a
device you are currentLy Logged into.
file
on
the
The assumptions that commands make ebout missing file
specification elements
are calLed defaults.
The
defaults that a command uses depends on the
specific command. Each reference sheet in this manual Lists
the
used by the command if they differ from the standard system defaults.defaults
4.1.1
ALL
Standard System Defaults
commands
AMOS
use
the
standard
file specification defaults beLow.
Several other commands (the wildcard fiLe commands) also
default information.
1.
If
assume
additional
omit
a device and unit number from a specification (e.g.,
unit number that
you are currently Logged into.
you
WORKER.BASL1OIJ,4J), AMOS assumes the device and
2.
If you omit the device unit number (e.g., DSK:WDOBJ.PRG[23,4]),
AMOS uses the default unit number zero. The specification above,
then, selects file DSKthWDOBJ.pRG[23,4J.
3.
If
you
omit the PPN, AMOS uses as the defauLt the account you are
currently Logged into.
FILE SPECIFICATION DEFAULTS AND WILDCARD SYMBOLS
Page 4—2
If you omit a tiLe extension, the default extension depends
4.
on
the
you are communicating with. For example, TXTFMT assumes
.TXT extension; ERASE assumes an empty extension.
command
IMPORTANT
NOTE:
The
wildcard
file
a
fiLe specification
rest of the commands on the
system. Refer to Section 9.1, Introduction to Wildcard FiLe Commands,'
in
the AMOS User's Guide for information on these commands.
defaults
4.2
This
a
than
commands
do
the
speciaL
symboLs
Little differentLy
handle
WILDCARD SYMBOLS
section
specifications.
discusses
the
The basic file specification
specification:
seLects
only
that
file.
one
appear
can
For
in
exampLe,
file
the
DSK1 :CRLF.MACL300,2J
the file CRLF.MAC on device DSK1: in account [300,2]. Wildcard
symbols allow one file specification to select several files. For example:
seLects
*.TXT
selects all files in the account and device you are Logged
into that have
regardless of name.
Not all AMOS commands recognize
All of the commands that are able to process wildcards
recognize the standard system wildcards.
In addition, wildcard file
commands have an advanced wildcarding ability not shared by the rest of the
extensions,
wildcard symbols.
.TXT
commands on the system.
4.2.1
standard System Wildcard Symbols
Below are the standard system wildcard symbols:
*
Matches
any
symbol
or
group
of
symbols
in
a
filename or extension. BOTANY.* selects all tiles
in
your
account that have the name BOTANY,
regardless of extension.
You may precede the *
with
one
or
more
symbols
(e.g., F1*.MAC), but within that name or extension,
no symbols may follow the *.
FILE SPECIFICATION DEFAULTS AND WILDCARD SYMBOLS
?
Matches
Page 4—3
any one symbol in a fiLename or extension.
selects PACDSK.MAC, DIRDSK.MAC,
and
???DSK.MAC
ARTDSK.MAC.
You may pace characters before or after ?s.
appear
If ?s
at the end of a filename or extension, that
many or fewer characters can match the ? symboLs;
otherwise, the number of characters that matches
these wiLdcard symboLs exactly equaLs the number of
?s.
For more information on witdcards, refer to Section 6.2, "Wildcard SymboLs,'
in the AMOS User's Guide.
IMPORTANT NOTE:
The witdcard fiLe commands handLe wi1dcards differentLy
than do the rest of the commands on the system. In addition to the standard
system wjtdcards (above) they aLso recognize several other symboLs.
For
example, these commands at Low you to use the wiLdcard symboL * in PPNs as
weLL
as in fiLenames and extensions. WiLdcard fiLe commands also recognize
the witdcard PPN symboL, 0, in file specifications.
(The 0
symbol,
equivaLent to [*,*], selects ALL accounts.) For more information on how
wildcard file commands process tiLe specifications containing wiLdcard
symboLs, refer to Section 9.1.1 .,"Wildcard SymboLs," in the AMOS User's
Guide.
CHAPTER 5
REFERENCE SHEET FORMAT
5.1
INTRODUCTION
The reference sheets that foLlow are designed to provide you with
the
information you need to use the commands of the AMOS system. The sheets are
each
in the same format and contain the same subheadings.
purpose of
this discussion is to guide you through the architecture of theThe
sheets whiLe
you gain famiLiarity with them so that
you can quickLy access the
information they contain.
discuss each subheading individualLy. Some of the subheadings do
not
appear in each reference sheet, but are only used occasionaLLy when needed.
These
exceptions are labeled "(as needed).
Most of the subheadings
on every sheet, however, so you can glance at any sheet and quickly appear
Locate
the topic you need.
We
5.2
REFERENCE SHEET SUBHEADINGS
Below
we discuss the reference sheet subheadings.
The form this discussion
takes is similar to that of an actual reference sheet.
FUNCTION:
Provides a brief statement of the purpose, use, and features of the
command.
It reports the action that takes place when you use the
command correctLy.
REFERENCE SHEET FORMAT
Page 5—2
HINTS/RESTRICTIONS:
This narrative portion describes the action of the command, how the
command
makes
decisions, and the consequences of the command. It
also suggests special uses of the command, helps you determine what
to
expect when using the command, and reminds you of other commands
you must use first.
This section refers you to other Alpha Micro documentation for more
information on the use and purpose of the command. it also heLps
you interpret the results of the command and suggests further steps
to you.
this
Within
IMPORTANT
section
you
These
NOTE:.
can aLso see paragraphs marked NOTE: or
subsections contain special
warnings.
also highlight important information, such as definitions of
terms used in the text.
An
IMPORTANT NOTE:
can
advise you of
potentially dangerous situations that can resuLt from improper
use
They
of the command.
For example, some commands may not
be
used while
Important warnings usually
the CHARACTERISTICS section near the end of the
other users are accessing the same disk.
also
appear
under
reference sheet.
DEFAULTS (as needed):
Every
command
has
a
set
of
file
specificaton
defauLts.
particular defaults used by a command depend upon that command. The
If
the defaults differ from the standard system defauLts, we List them
here -
OPTIONS (as needed):
Options are available with most commands; you may select the options
by
including switches on the command Line. This section describes
the options available with the command.
FORMAT:
The first line of this section is always a sample command line.
example:
For
.COMMAND {Filespec)(/5witch{fswitch}}
COMMAND is the AMOS command being discussed.
In the example above,
Filespec is the specification of the file you want the command to
act upon and /Switch is a switch that selects a command option.
The FORMAT section shows the syntax of the command; i.e., how
to
enter the command Line correctly. Notice that all command Lines
begin with the AMOS prompt, ., which is the indication that you
are
at
AMOS
command
level.
The
C)
symbols indicate that the
REFERENCE SHEET FORMAT
enclosed
Page 5—3
command
may
be
eLements
/Switches, above).
Line eLements are optional.
nested several, deep (as in
These
optionaL
case of the
the
A curLy arrow indicates the place in the command Line where you must
type a RETURN. The brief narrative following the sampLe command
Line identifies the elements of the
command Line and gives you
information on using the command or the options and switches.
OPERATION:
This section detaiLs the step—by—step function of the command. it
discusses aLl action that occurs between you and AMOS while you use
the command, including what happens when you use the avaiLabLe
options.
COMMAND SUMMARY (as needed):
few reference sheets contain summaries of the special symboLs you
can enter to the program invoked by the command.
A
ERRORS:
This section contains a List of all important error messages you can
see whiLe using the command.
The error messages are produced either
by the operating system or by the command itself.
Most
operating
system messages usually begin with a question mark and the word
Cannot.' For exampLe:
?Cannot OPEN Devn: — disk is not mounted
capitalized because it
the particular monitor caLl that failed. (For a List of
all operating system error messages, refer to Appendix A, "AMOS
The second word in this type of message is
designates
System Error Messages" in the AMOS User's Guide.)
command itself
generates the second type of error message.
These messages take different forms, depending on the command, but
usually begin with a special symbol such as a question mark, a
The
square bracket, a percent sign, etc.
A short paragraph
foLLows each error message.
These sentences
discuss the reasons for the appearance of the error message and give
suggestions for recovering from the error.
CHARACTERISTICS:
Summarizes
command.
in
several
brief statements the unique features of the
States which accounts or devices are affected by the command.
REFERENCE SHEET FORMAT
Page 54
Any warnings that appeared fl HINTS/RESTRICTIONS are restated here.
TeLls you where your terminaL is returned to after use of the
command.
For exampLe, this section may say: Returns your terminaL
to AMOS command Level.'
EXAMPLES (as needed):
include the subheading EXAMPLES if further
on command use seems necessary. The section contains a
series of definitions folLowed by examples and occasional comments.
For cLarity, we may
eLaboration
1
CHAPTER 6
THE AMOS SYSTEM COMMANDS REFERENCE SHEETS
6.1
INTRODUCTION
rest of this manuaL consists of reference sheets that briefLy summarize
the use of each command on the system,
We
have organized these sheets
aLphabeticaLly to heLp you access them quickLy. BeLow is an aLphabeticalLy
ordered list of aLL AMOS commands. We a'so provide a functional summary of
the AMOS commands, so that if you are not familiar with the name of a
The
specific command, but know its function, you will be able
6.2
to find it.
ALPHABETIC SUMMARY OF AMOS COMMANDS
Below is an alphabetic list of alt AMOS commands.
APPEND
ASCDMP
ATTACH
BADBLK
BASIC
BATCH
CDC21O
BAUD
BITMAP
BMVR
CAL12O
COM
CONT
CPMDIR
COMPIL
CPY41O
CREATE
CLKFRQ
CPMCPY
CRT41O
DATE
DDT
DEVTBL
DIR
DIAG2
DIRSEG
DIAG3
DIAG4
DO
DSKDDT
DYSTAT
DSKDMP
DSKFIL
EMAIL
DSKANA
DSKPAK
ERASE
DEL
DING
DSKCPY
COPY
EDIT
FILDMP
CPY500
DUMP
EXIT
rrx
FMTZOO
FT.LTAP
FMT21O
FMT400
FIXDVR
FMT500
FORCE
GLOBAL
GOTO
HASHER
HEDLOD
HELP
HWKLOD
IBMCPY
IBMDIR
ISMBLD
JOBPRI
ICMLOD
ISMCOM
ISMDMP
ISMFIX
JOBMEM
JOBS
KILL
LIe
LABEL
LINK
LISP
LOOKUP
MACRO
LOAD
MAKE
LOG
MAP
LOGOFF
MEMDEF
FILCOM
FIXMTM
(changed 30 April 1981)
THE AMOS SYSTEM COMMANDS REFERENCE SHEETS
MEMERR
Page 6—2
MEMORY
MONGEN
OPR
PARITY
MONTST
PASS
PCL
PCU
PDLFMT
PAUSE
PERLOD
NEWTRM
PPN
PRINT
PU
QUEUE
RE5
SAVE
REVIVE
SLEEP
SMDLOD
SYMBOL
SYSTEM
SYSACT
TAPE
PL
RAZA
REWIND
SET
SORT
SYSCPY
PRUN
QDT
SYSMEM
SYSTAT
TAPFIL
TIME
TRACE
TRMDEF
TRIDDT
TRIINI
TAPDIR
TRILOD
TXTFMT
TYPE
T8OINI
T8OLOD
U
VUE
WAIT
WNGLOD
WNG21O
PC
SEND
MOUNT
REDALL
RENAME
RNDRED
RUN
SIZE
SKIP
SRCCOM
SUSPND
TRISET
xv
6.3
FUNCTIONAL SUMMARY OF COMMANDS
BeLow is a functionaL summary of aLl AMOS system commands.
NOTE:
Those
commands that perform severaL functions anpear under more than one heading.
1.
2.
Disk Directory and Account Commands:
CPMDIR
DIR
DIRSEQ
IBMDIR
LOG
PASS
PPN
LOGOFF
SYSACT
File Commands:
APPEND
DSKFIL
ASCDMP
CREATE
DSKDMP
ERASE
MAKE
FILCOM
PRINT
RENAME
SIZE
SORT
SRCCOM
COPY
DIR
ERASE
PRINT
RENAME
COM
COPY
DIR
DUMP
FILDMP
TYPE
3.
WiLdcard FiLe Commands:
(changed 30 ApriL 1981)
THE AMOS SYSTEM COMMANDS REFERENCE SHEETS
4.
Page 6—3
Disk and File Copy Compands:
COPY
CPMCPY
CPY500
DSKCPY
CPY41O
IBMCPY
BMVR
DSKPAK
DO
EMAIL
FIXDVR
FIXMTM
MONGEN
MONTST
MOUNT
S Y Sc PY
5.
•
•
SpeciaL Commands:
NEWTRM
6.
7.
command File Commands:
BATCH
COM
CONT
EXIT
GOTO
LOOKIJP
PAUSE
TRACE
Text Processing Commands:
EDIT
PDLFMT
TXTFMT
VUE
8.
Language Processer Commands:
BASIC
COMPIL
GLOBAL
LINK
LISP
MACRO
PC
PCL
PCU
PL
PRUN
RUN
SYMBOL
LIB
PU
9.
Job and Terminal Handling Commands:
ATTACH
BAUD
DING
FORCE
JOBMEM
JOBPRI
JOBS
LOGOFF
SET
KILL
LOG
SEND
WAIT
XY
(Changed 30 April 1981)
REVIVE
SLEEP
SUSPND
THE AMOS SYSTEM COMMANDS REFERENCE SHEETS
10.
11.
12.
Memory Partition Commands:
DEL
JOBMEM
LOAD
MAP
MEMORY
RES
SAVE
SYSMEM
Disk AnaLysis and Certification Commands:
BADBLK
DSKANA
CR1410
01A62
HASHER
LABEL
RAZA
REDALL
RNDRED
Memory Diagnostic Commands:
DIAG3
13.
DIAG4
Disk Eormatting Programs:
FMT200
FMT500
14.
Page 6—4
FF11210
EMT400
Magnetic Tape Unit Commands:
FILTAP
SKIP
REWIND
SET
TAPE
TAPDIR
TAPFIL
15.
System Initiatization Commands:
BITMAP
16.
CLKFRG
JOBS
DEVTBL
HEDLOD
MEMERR
PARITY
QUEUE
SYSTEM
TRMDEF
KILL
System Information Commands:
ATTACH
DATE
HEDLOD
BITMAP
CLKFRQ
DYSTAT
JOBMEM
JOBPRI
DEVTBL
HELP
JOBS
PPN
QUEUE
SET
SYSMEM
SYSTAT
SYSTEM
TIME
TRMDEF
(changed 30 ApriL 1981)
MEMORY
THE AMOS SYSTEM COMMANDS REFERENCE SHEETS
17.
Page 6—5
ISAM Commands:
ISMBLD
ISMCOM
ISMDMP
CALl 20
DDT
DSKDDT
QDT
QDT
TRIDDT
I SM F IX
18.
•
19.
Debugging Commands:
Bootstrap Loader Commands:
CDC 210
HWKLOD
ICMLOD
SMDLOD
TRILOD
PERLOD
TSOLOD
WNGLOD
20.
Trident Hard Disk Initialization Commands:
TRIINI
6.4
TRISE1
T8OINI
THE COMMAND REFERENCE SHEETS
next section of the manuaL consists of the command reference sheets
themse'ves, one for each comnand on the system.
For information on the
format of these sheets, refer to the previous chapter, 'Reference Sheet
The
Format.'
(Changed 30 April 1981)
append
FUNCTION:
takes
the
contents of one or more source fiLes and Laces the
combined contents into a sinqle destination file.
APPEND
HINTS/RESTRICTIONS:
You may use APPEND to combine sequentiaL fiLes of any type.
You
can
append data onto the end of a fiLe by specifying the same specification
for the new file as one of the old files you are combining (e.g.,
BOOK.TXT=BOOK.TXT,BIBLIO.TXT).
APPEND
APPEND
does
not
change
the
contents of the oLd files (untess, of course, the new file has the same
name and extension as one of the oLd fiLes).
If
you do not
APPEND assumes
specify
the extension of the new fiLe specification,
that is. an extension with no
characters.
If you do not soecify the extension of the first oLd fiLe
specification, APPEND assumes that the first old file specification
nulL
a
extension;
the
same extension the new file specification has. SimiLarly, if
specify the extension of any subsequent
oLd
file
specification, APPEND assumes that that old file specification has the
same extension as the oLd fiLe specification immediateLy previous to
has
you
do
not
it.
FORMAT:
.APPEND Newfi Lespec=OLdfi LesoeclC,Otdfi tespec2,.
.Oldfi tespecN) ED
where NewfiLespec specifies the new fiLe that will hold the contents of
the combined fiLes, and Oldfilespecl
OLdfilespecN lists the one or
more files that you want to merge.
DEFAULTS:
APPEND assumes the account and device you are currentLy Logged into.
APPEND assumes a nulL file extension (i.e.,
for the new fiLe specification.
APPEND
assumes
the
extension
of
no—character
extension)
the new fiLe specification for the
first old file specification, and then
file
a
assumes for each subsequent
oLd
specification the actual or assumed extension of the previous oLd
fiLe specification.
(changed 30 April. 1981)
APPEND (Cont'd)
Paqe 2
OPERATION:
1.
Type APPEND foLlowed by the specification of the new file, an equaL
sign, and one or more specifications (separated by commas) of the
fiLes whose contents you want to merge. Now type a RETURN. For
exampLe:
.APPEND ASMBLR.MAC=PARSE.MAC,SCAN.MAC,TABLE.MAC,CNVRT.MAC @
When APPEND has written the combined contents of the oLd fiLes into
the new fiLe, you see the AMOS prompt symbol.
2.
tf you type:
.APPEND ASMBLR.MACWARSE,SCAN,TABLE,cf4vpT @ID
APPEND wiLL assume the default extension of .MAC for
fiLes PARSE, SCAN, TABLE and CNVRT because that
the new fiLe ASMBLR.
3.
of
each
the
is the extension of
If you tyDe:
.APPEND ASMBLR=PARSE.SCAN,TABLE,CNVRT ED
APPEND wiLl assume that the extension of the fiLe ASMBLER is a nulL
extension (ASMBLR_), or an extension having no characters. Then
APPEND will also assume, by defauLt, that the extensions of PARSE,
SCAN, TABLE and CNVRT wiLL aLso be null extensions.
4.
If you type:
.APPEND EXAMPL.TXT=INTRO.SAMPLI.BAS,SAMPL2,CLOSE.TXT
APPEND
wILL
create
the
new fiLe EXAMPL.TXT to include INTRO.TXT
(the extension is assumed to be the same as that of the
specification),
fl
SAMPLE1.BAS,
to be the same as that of the
new
fiLe
SAMPL2.BAS Cthe extension is assumed
previous
old
fiLe
specification,
SAMPL1.BAS)_ and CLOSE.TXT.
ERRORS:
U
?Command error
APPEND
did not recognize the characters on the command line
being in valid command format. For exampLe:
as
.APPEND VIEW.BAS=
Try again, making sure that you have remembered
sign and new and old fiLe specifications.
(changed 30 April 1981)
to
type
an
equaL
APPEND (Cont'd)
Page 3
?FiLe specification error
You
did
not
examp'e,
you
see
specification:
enter
this
a fiLe specification in proper form.
message
if
you
enter
a
nuLL
For
fiLe
.APPEND @10
Any of the standard system error messages may occur.
For exampLe:
?Cannot OPEN Filespec — fiLe not found
AMOS
cannot find the fiLe you specified. Make sure that you
entered the correct account and device specification, or that the
extension you alLowed by default is that of an existing fiLe.
?Cannot OPEN Fitespec — protection vioLation
are
You tried to create a tiLe in an account not in the project you
currentLy Logged into.
For exampLe, you are logged into
DSK0:L100,1J, but tried to create a fiLe in DSKO:140,1]. Make sure
that you are logged into the same project as the account in which
you are trying to create the new file.
CHARACTERISTICS:
Assumes nulL fiLe extensions.
Does not create a file in an account outside of the
currentLy Logged into.
project
you
are
the extension of the newfiLespec for the first oLdfitespec.
Assumes for each subsequent oLdfilespec the actual or assumed extension
Assumes
of
the previous oLdfilespec.
(changed 30 April 1981)
ascdmp
FUNCTION:
displays the data
dispLay in ASCII form.
ASCDMP
in
physicaL disk records on your terminaL
HI NTS / RESTRICTIONS:
ASCDMP tries to display aLL of the data in a record in ASCII
you've asked it to look at data that is not ASCII
Language program), the display won't make sense.
(e.g.,
form; if
a machine
Enter the number of the disk record you want to dispLay in the same
number base that the system is using for your numeric dispLays (usualLy
octal).
(You can
change this system display base to hexadecimal by
using the SET HEX command.)
FORMAT:
.ASCDMP Devn:nnnn
where Devn: specifies the LogicaL unit on which the record occurs and
nnnn is the number of the physicaL record on the disk that you want to
display.
OPERATION:
1.
Type ASCOMP foLLowed by a device specification and
record number. Then type a RETURN. For exampLe:
ohysical
.ASCDMP DSKD:200 ?
2.
teLls you what record it is accessing (ERECORD
nnnnJ), and then displays the contents of the physicaL disk
record on your terminal in ASCII form. (To find out what
records are contained in a specific fiLe
use the DSI(FIL
ASCDMP
command.
)
ERRORS:
generates no error messages of its own, but can dispLay some of
the standard system error messages. For example:
ASCDMP
?Cannot INIT Devn: — device does not exist
The system cannot find the logicaL unit you
your
speLLing
instead of DSK1:
(1
October 1979)
and
?)
try again.
specified.
Check
(For exampLe, did you enter DKS1:
ASCDMP (Coritd)
Page 2
?Cannot READ bevn: — disk not !gynted
You are trying to access a Logical unit that
is not
Use the MOUNT command to mount the disk and try again.
mounted.
CHARACTERISTICS:
accepts record numbers in the base that the system is using for
your numeric displays (usuaLly octal).
OnLy
Returns your terminal to AMOS command LeveL.
(1
October 1979)
attach
FUNCTION:
(that is, Links) a job to a terminal or tells you what jobs
and terminaLs are attached on the system.
Attaches
HINTS/RESTRICTIONS:
When the system is reset or powered up, it automaticaLly attaches the
first job and the first terminal defined in your SYSTEM.INI. Except
for that speciaL case, however, the system does not automatically
attach any jobs and terminaLs. If you want a job to be abLe to use a
terminal for input and output, you must expLicitly attach the job
and
the terminaL by using the ATTACH command.
If
you
want to attach a job and a terminal that are already Linked to
other units, the ATTACH command wi IL go ahead and detach
the
job
and
terminaL from their previous attachments. Then it wiLL attach the
freed job and terminaL to each other. This is the onLy way that you
can detach
jobs and terminals (i.e., by attaching them to something
the
eLse).
If you want to attach a terminal to a job that is Logged into an
ATTACH
asks you for the password of that account, if one
exists, before it attaches the specified job and terminaL.
account,
You can attach your terminaL to a job, but be careful that the job has
some
memory aLLocated
to it or you will not be able to ask for most
AMOS system commands.
A typical use for the ATTACH command might be to attach a printer to
job as a terminaL so that you can get hardcopy of program output.
a
FORMAT:
.ATTACH B
or:
.ATTACH Job @IJ
Or:
.ATTACH TerminaL,Job
ATTACH in the first format teLLs you what jobs and terminaLs are
attached to each other.
Using
Using ATTACH in the second format attaches the specified
terminaL.
(Charged
1
May 1980)
job
to
your
ATTACH (Cont'd)
Using
Page 2
the third format attaches the specified terminal and
in
ATTACH
job.
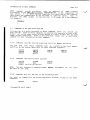
OPERATION:
1.
To find out what jobs
and terminals are
other, type ATTACH foLLowed by a RETURN:
attached
to
each
.ATTACH ED
fERMi
ATTACHED
ATTACHED
ATTACHED
TERM2
DUKE
2.
TO
TO
TO
JOBA
JOBC
SPOOL
attach your terminaL to a specific job, type ATTACH
foLlowed by a job name. Type a RETURN. (The job name is set
by
the JOBS command in the SYSTEM.INI. To see the names of
aLL of the jobs on the system, type SYSTAT foLLowed by a
To
RETURN.
The
lists the jobs.)
first column on the Left of the SYSTAT display
.ATTACH DUKE
3.
To attach a specific job to a specific terminal,
foLLowed by the
Type a RETURN.
terminaL
name,
type ATTACH
a comma, and the job name.
.ATTACH TERM1,JOB4
(The terminal names are set by the TRMDEF commands in the
To see the names of aLL of the terminals on the
SYSTEM_INI.
system, type TRMDEF foLLowed by a RETURN.
The
first
on the Left of the dispLay Lists alL of the terminaLs.)
4.
coLumn
if
you try to attach a terminaL to a job, and that job is
Logged into an account that has a password, ATTACH asks you
for the password before attaching the job and the terminaL.
For example:
.ATTACH MULTRM,JOB3 D
PASSWORD:
ERRORS:
?Nonexistent terminaL
You tried to attach a job to a terminaL that is not defined
in your SYSTEM.INI.
in
a
You can type TRMDEF foLLowed by a
RETURN to see a compLete List of aLL of the terminals defined on the
system.
TRMDEF
(Changed
1
command
May 1980)
ATTACH (Cont'd)
Page 3
?Nonexistent job
You tried to attach a terminaL to a job that is not defined in the
command in your SYSIEM.INI.
JOBS
of the jobs defined on the system.
Use the SYSTAT command to see a List
?Account not found on Login disk for specified job
You attempted to attach a terminaL to a job that is Logged into an
account which no Longer exists on the device.
This can happen if,
whiLe the job is Logged into the account, the disk that the account is
on is removed from the device or the account is deLeted from the disk
using SYSACT.
?Oad password
You aid not specify the correct password.
CHARACTERISTICS:
Allows
you
other job.
to
aetach
a
terminaL from a job by attaching it to some
Returns your terminaL to AMOS command LeveL.
(Changed
1
May 1980)
badblk
FUNCTION:
BADBLK aLlows you to see the contents of the fiLe BADBLK.SYSE1,2].
HINTS/RESTRICTIONS:
A
certification program analyzes a disk and identifies bad disk
Such a program creates account L1,2J on the disk to
certified and writes a List of the bad bLocks or tracks into the
disk
blocks or tracks.
be
fiLe BADBLK.SYSL1,2].
(See the CR1410 reference sheet for an exampLe
The output from BADBLK wiLL vary sLightly
on whether the particuLar BADBLK.SVS in question is bLock— or
of a certification program.)
rack—c r i en t e d.
depending
aLLows you to see the contents of BADBLK.SY5[1,2]_
verifies the BADBLK.SYS[1,2] hash totaL. (A hash totaL is
BADBLK
based on the contents of a file.
on the data in the fiLe.)
value
BADBLK aLso
a
computed
It serves as a validity check
FORMAT:
.BADBLK Devn:13fl
Devn:
where
specifies
the
LogicaL
BADBLK.SYSL1,2J fiLe you want to display.
unit
that
contains
the
OPERATION:
1.
Type
BADBLK foLlowed by the specification of the Logical unit
whose BADBLK.SYS fiLe you want to see.
For exampLe:
Then
type
a
RETURN.
.BADBLK SMD5:
2.
searches for
the specified device.
BADBLK
example:
the BADBLK.SYS fiLe in account DSKO:
If it finds it, it teLls you
so.
on
For
.BADBLK SMD4:R
SMD4: BADBLK.SYSL1,2J
3.
Next
it
teLLs you the seriaL number associated with that
and the number of bLocks or tracks marked as bad on
that
disk.
device
(Changed
1
May 1980)
For example:
BADBLK (Ccnt'd)
Page 2
SeriaL number: INVENTORY2
Number of bad bLocks: 3
or:
SeriaL number: BACKUPA
Number of bad tracks: 3
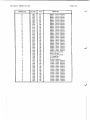
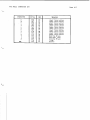
4.
If
there are any bLocks or tracks Listed in the BADBLK.SYS
fiLe, BADBLK Lists them for you. For exampLe:
Number of bad bLocks: 20
1035
1052
1067
1036
1053
1070
1041
1056
1073
1042
1057
1074
1043
1060
1045
1062
1046
1063
1047
1064
or:
Number of bad tracks:
15
5.
2
19
After dispLaying the numbers of the bad disk bLocks or tracks,
BADBLK exits and returns you to AMOS command leveL:
EXIT
•
BLock numbers are octal; track numbers are decimaL.
NOTE:
ERRORS:
You can see the folLowing BADBLK error messages:
?Fi te not found: Devn:BADBLK.SYS
BADBLK could not find the BADBLK.SYS file for the device you
Make
sure that the device you specified has been
specified.
certified by a disk certification program.
CAUTION: HASH TOTAL DID NOT VERIFY
The BADBLK.SYS fiLe contains a bad hash totaL. This indicates
the data in the fiLe is invalid. Use COPY to copy aLl files
off the LogicaL unit containing the bad GADBLK.SYS fiLe.
Then
that
re—certify the disk.
can also see several system error messages if you enter an invaLid
device specification. For exampLe:
You
(Changed
1
May 1980)
BADOLI< (Cont'd)
Page 3
?Cannot HilT Devn: — device does rot exist
The system did not recognize the device specification you
suppLied.
Check your speLling and try again. You can type DEVTBL
folLowed by a RETURN to see a list of vaLid system devices.
?Canrot READ Fi Lespec — disk not mounted
The sytem is unabLe to read the device you specified on the
command
Line because it is not mounted. Use the MOUNT
command to mount the LogicaL unit and try using BADBLK again.
BADOLK
CHARACTERISTICS:
For use on disks that have been processed
program that creates a BADBLK.SYSL1,2] tile.
Returns your terminal to AMOS command LeveL.
(Charged
1
May 1980)
by
a
disk
certification
1
0'
ba&c
FUNCTION:
AL Lows you to use the BASIC Language processor in interactive
mode.
HINTS/RESTRICTIONS:
is
BASIC
an easy—to—Learn programming Language.
This command invokes
both the compiler and runtime package portions of the BASIC language
processor.
Use this command when you want to use BASIC in interactive
mode.
Once "in' BASIC, you may use the BASIC LOAD and SAVE commands to
Load and save BASIC
programs.
For information On writing
compiler
(COMPIL.PRG)
separateLy,
BASIC
or
refer
the
(DWM—OQ100—o1).
is
BASIC.PRG
programs or on using either the
runtime package (RIJN.PRG) portions of
to
the
AlphaBASIC
User's
Manual,
BASIC
reentrant;
the System Operator may include it in system
in the system initialization command
fiLe.
However, because of the size of BASIC.PRG, this is not usuaLly
done unLess most users on the system wilL be doing extensive BASIC
memory via the SYSTEM command
program development.
NOTE: To exit from BASIC, enter BYE followed by
the execution of a program, type a Control—C.
FORMAT:
.BASIC
OPERATION:
1.
Type BASIC foLlowed by a RETURN:
.BASIC
You now see the BASIC prompt:
READY
You can either Load in a BASIC program:
LOAD PAYROL.BAS )
(1
October 1979)
a RETURN.
To interrupt
BASIC (Cont'd)
Page 2
or begin to create a new program:
10 PRINT "This program computes interest rates."
20 INPUT "Enter balance: $",BALANCE
2.
To
run
the program that is in memory, type RUN followed by a
RETURN:
RUN )
C OM P) L E
Compile time was 0.05 seconds
This program computes interest rates.
Enter baLance: $ 2000
Runtime was 1.71 seconds
READY
3.
To exit from BASIC, use the BYE command:
BYE
ERRORS:
You may see any of the standard BASIC error messages. For a List of
the BASIC messages, refer to the back of the AIphaBASIC Users's Manual.
CHARACTERISTICS:
Invokes the compiLer and runtime package portions of the BASIC language
processor.
(1 October 1979)
batch
FUNCTION:
Loads
commands
partition.
frequently
used
by
command
fiLes
into your memory
HINTS/RESTRICTIONS:
A command file executes faster if the programs that it accesses are
already Loaded into memory.
BATCH Loads into memory: GOTO, LOOKUP,
END. TRACE, PAUSE, and LOAD.
Using BATCH speeds up
the
execution
of
tiLe if that fiLe uses those programs. IncLude BATCH at
the front of the command file. (NOTE: GOTO, END, LOOKUP, TRACE, and
your
command
are re—entrant; the System Operator may pLace them into system
memory where they can be accessed by aLL users on the system.)
PAUSE
BATCH takes up about 11< of your memory partition.
(You may want to
incLude a DEL* command at the end of a command file that contains the
BATCH command, so that the programs loaded into your memory partition
wiLl be deLeted when you exit the command fiLe.) You may use BATCH at
AMOS command Level.
You wiLt probabLy find it especialLy usefuL within
BATCH is a command fiLe in the System
a command fiLe or DO file.
Command FiLe Library Account, DSKO:E2,2J.
FORMAT:
.BATCHJ
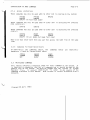
OPERATION:
1.
Use BATCH at AMOS command Level by typing BATCH and a RETURN:
.BATCH
2.
Use
BATCH from within a command tile by placing it at the front of
the fiLe.
ERRORS:
BATCH displays no error messages unless the programs it tries to Load
have been deteted from the System Disk, in which case you see the
standard AMOS error message: tile not found.
CHARACTERISTICS:
BATCH is a command fiLe in DSKO:[2,21.
Accepts no arguments or switches.
(30 April 1981)
baud
FUNCTION:
the baud rate (the data—transfer rate) that the system uses to
communicate with your terminal.
Changes
HINTS/RESTRICTIONS:
Works onLy with the AM—300 and AM—310
serial I/O boards.
Useful when changing from a CRT—type terminal to a hard—copy terminaL.
Make sure that your terminal is able to communicate at
specify to the BAUD command.
the
speed
you
The baud rates that the system supports are:
50
150
1200
4800
baud
baud
baud
baud
75
200
1800
7200
baud
baud
baud
baud
110
300
2400
9600
baud
baud
baud
baud
134.5 baud
600
3600
19200
baud
baud
baud
FORMAT:
.BAUD Baud—rate—specification
?
where
Baud—rate—specification is the baud rate at which you want your
terminaL to run (e.g., 1200 baud).
OPERATION:
1.
Type BALTh folLowed by a legal baud rate; then type
For example:
a
RETURN.
.BAUD 300 4)
ERRORS:
Baud rate nnnnn is not a LegaL baud rate
You
have specified an invalid baud rate; try again making sure
that the baud rate is correct.
CHARACTERISTICS:
Works only with the AM—300 and AM—310 I/O boards.
Returns your terminal to AMOS command Level.
(1
October 1979)
bitmap
FUNCTION:
As
part
of
the
system initialization command file, defines the disk
bitmap areas used by the operating system.
At
AMOS
command
LeveL,
BITMAP teLLs you what memory Locations are used by these bitmap areas.
HINTS/PESTRtCTTONS:
bitmap is a storage aLLocation map that teLLs the system which disk
records are free and which are in use.
A
You can onLy use BITMAP to alLocate disk bitmaps from within the system
initiaLization command fiLe.
You must have one BITMAP command in the SYSTEM.INI for each type of
disk device defined in the system device tabLe. (See the reference
sheet for DEVTBL.) Every time you add a new type of disk device to the
system, you must add a new BITMAP command to the SYSTEM.INI fiLe.
All Logical units of one
or
physicaL
each may have its own.
device may share, the same bitmap area
PLace aLL BITMAP commands before any SYSTEM
commands.
The size of the bitmap area depends on the device.
For example,
the
iP—meqabyte Hawk (a hard disk) needs a bitmap size of 606 words to keep
track of 9696 disk records. A singLe—density fLoppy disk in AMS format
needs a much smaLLer bitmap (39), since such a disk contains only 616
disk records. The FIXDVR program wilL teLl you the bitmap size you
need for any fLoppy disk device. To find out the bitmap size required
for a hard disk drive, refer to the document&tion accompanying that
d ev ce.
You
may
also
define the bitmap to be in switchabLe system memory via
the IS option. By placina the bitmap in switchabLe system memory, you
reduce the total resident monitor size. To use the /5 option, your
system initialization command fiLe, SYSTEM.INI, must define switchable
system memory via the SYSMEM command.
(See the SYSMEM reference
sheet.)
FORMAT:
.BJTMAP
to find out what areas of memory are used by the disk bitmaps, or:
BITMAP Dev,Size,Unitlçunit2,.. .UnitN)C/5}
(changed 30 ApriL 1981)
BITMAP (Cont'd)
Page 2
to define the disk bitmap areas from within the system initialization
command
file, where 'I)ev" specifies the device type (for example,
AMS, HWK, etc.); 'size is a decimal nLgnber that defines the size DSK,
(in
words) of the bitmap area you want to
reserve; and, "unit" specifies
the number of the Logical unit that wiLL be using the bitmap area.
(More
than
bitmap area.)
Logical
one
unit
of
the same device may share the
same
OPERATTON:
Using BITMAP as a user command at AMOS command
1.
level:
Type BITMAP followed by a RETURN:
.BTTMAP E
The dispLay you see teLls you what memory Locations have
been
assigned to the disk bitmaps that were defined at the time
of
system initialization For example:
DSKO:
3:31350—40450
3:31350—40450
3:31 350—40450
3:31 350—40450
3:31 350—40450
3:71350—40450
3:40476—43006
3:40476—43006
DSK1:
05K?:
DSK3:
DSK4:
DSK5;
HWK0:
HWK1:
:4304—4315p
:/43O34—4315p
STDO:
5101:
2.
Each line of
information:
Devn:
the
BITMAP
display
gives
you
the
foLLowing
Bank:Startpddress_EndAddress
where:
a.
b.
Dewn: is the device for which the bitmap is allocated.
Bank: is the memQry bank the bitmap
bitmap
is in switchable memory. (If it is isnotin, ifin the
switchabte
memory, this item is omitted.)
c.
StartAddress
bitmap area.
d.
EncjAddress
bitmap area.
(Changed 30 April 1981)
is
is
the
the
first
Last
memory
memory
location used by the
location
used
by
the
BITMAP (Cont'd)
If
Page 3
bitmap
areas are shared between units, those devices wilL
have the same Startftddress and EndAddress, because the devices
share the same area of memory for their bitmaps.
(Note that
DSKQ:DsK5: in the sampLe dispLay above share the same bitmap
area, as do HWKO:—HWK1: and STDO:—STD1:.)
Using BITMAP as a system initiaLization command:
1.
Type BITMAP folLowed by the three—character name of the device
for which you are defining a bitmap area, the size of the
bitmap area, and the one or more togica units that wiLL be
sharing that bitmap area.
For exampLe:
BITMAP AMS,39,0,1
The command above defines a hitma area of 39 words for device
AMS.
The two togicaL units that wiLL be sharing this bitmap
are drives zero and one (that is, AMSO: and AMS1:).
2.
Each LogicaL unit of a physicaL device may have its own bitmap
area. For exampLe, you couLd spLit the command above into:
BITMAP AMS,39,O
BITMAP AMS,39,1
3.
must have one BITMAP command in your system intialization
command file for each type of disk device defined in the
You
DEVTBL commands.
ERRORS;
?System memory not aLLocated — monitor memory wilL be used
You tried
to pLace a bitmap in switchable system memory, but
BITMAP was not abLe to find any such memory.
It therefore oLaced
the bitmap in the area of memory reserved for the monitor, thus
increasing the size of your monitor.
CHARACTERISTICS:
4cts both as a user command and as a system initiaLization command.
(Changed 30 April 1981)
bnvr
FUNCTION:
Programs
board.
??O8—type
EPPOMs
on
a
CROMEMCO
BYTESAVER PROM programmer
(EPROMs are Erasable, ProgrammabLe Read—Only Memories.)
HINTS/RESTRICTIONS:
Programs only one PROM at a time. Program must not be greater than
in size or it wilt, not fit in the PROM.
Enter
1K
the PROM address in the number base that the system is using for
your numeric dispLays (usuatly octaL), (Type SET folLowed by a RETURN
to see if the system is using octaL or hexadecimal for your numeric
dispLays.)
FORMAT:
.F3MVR
Fl Lespec 4)
PROM_ADDRESS: PROM—address ,
where FiLespec is the specification of the fiLe containing the program
that you want to burr into the PROM. PROM—address is the octaL address
of the PROI1 that is to be programmed.
DEFAULTS:
BMVR assumes a file extension of .PRG and it assumes the device and PPN
that you are logged into.
OPERATION:
1.
Type BMVR foLlowed by
a
tile specification; then type
a RETURN.
.BMVR
2.
RIIVR asks for the address of the PROM.
For exampLe:
.BMVR PERLOD
PROM ADDRESS: 160000 )
3.
(1
MVR now programs the PROM by writing the specified fiLe onto it 64
times.
October 1979)
BMVR (COntd)
4.
Page 2
BMVR verifies the PROM by comparing the orogram and the contents of
the PROM.
If the PROM boks OK, r'1VR telLs you so and exits:
.BMVR PERLOD ?
PROM ADDRESS: 160000
PROM VERIFIED OK
ERRORS:
THIS PROM NEEDS TO BE ERASED
BMVR
has
detected
alL bits are set.)
some data on the PROM.
(If
a PROM is erased,
nnnn VERIFICATION ERRORS
When BMVR compared the original program and the
it found some differences.
PROM,
nnnn.)
contents
of
the
(The number of verification errors is
PROGRAM WILL NOT FIT IN PROM
The program was larger than 1K and so would not fit in the PROM.
CHARACTERISTICS:
Programs 2708—type EPROMS.
The program you want to pLace in the PROM must not be larger than 1K.
Returns your terminaL to AMOS command LeveL
(1 October 1979)
caIl2D
FUNCTION:
ALlows you to caLibrate the AM—120 time—of—day cLock osciLlator.
HINTS/RESTRICTIONS:
This program is only for use by qualified maintenance personnel.
AM—120
board is shipped from the factory fuLLy calibrated.
Normally, you wiLl not need to re—calibrate the time—of—day clock. You
wilL only need to use this program if the time—of—day clock oscillator
is out of calibration when you initially install the AM—120 Auxiliary
I/O Controller board in the system, or during subsequent maintenance.
The
Requires the use
procedure.
of
a
high—precision
counter
for
the
calibration
CAL12O calibrates the first AM—121J board it finds in the system.
After you have completed the calibration procedure, you should reset
the AM—120 clock/calendar by using the TIME and DATE commands.
(See
the DATE and TIME reference sheets for information on using those
programs with the AM—120.)
CAL12O is both re—entrant and re—usable.
For further information on calibrating the
AM—120,
Installation Instructions AM—120, (PDI—00120—xX).
see
the
document
FORMAT:
CAL12O ED
OPERATION:
1.
After you have installed the AM—120 Auxiliary I/O Controller board
in your system, you may calibrate it by entering CALI?O followed by
a RETURN:
.CAL12O @D
2.
Now, adjust the
trimmer
calibration test point.
3.
capacitor
to
exactly
1024
Hz
at
the
when you have completed the calibration procedure, type a Control—c
to exit CAL1ZO.
(30 April 1981)
CAL12O (Cont'd)
Page 2
ERRORS:
You may see the foLtowing error message when using CAL12O:
?IJnabLe to locate AM—120 board
There is no AM—12O Auxiliary I/O ControLler board in the system
board's addressing jurnøers are incorrectLy set.
(For
information on how to physicatly address the AM—120 board, see the
or
the
document InstaLlation Tnstructions AM—120, (PDI—OO1?O—XX).)
CHARACTERISTICS:
ALLows you to calibrate the time—of—day cLock osciLLator on the first
AM—120 AuxiLiary I/O Controller board in the system.
CAL12O is re—entrant and re—usable.
(30 ApriL 1981)
cdc2lD
FUNCTION:
Bootstrap Loader program for a system that uses the CDC fLoppy disk
the System Device running under the AM—210 fLoppy disk controLLer.
as
HINTS/RESTRICTIONS:
The CDC21O program when contained on a 2716 PROM aLLows the system to
boot off a System Disk on a CDC fLoppy disk when a hardware reset
occurs (that is, when you hit the RESET button).
The program is aLso in account DSKO:E1,4J of the System Disk.
You may use CDC21Q at AMOS command LeveL to
System Device is a CDC floppy disk drive.
reset the
system
if
your
The memory partition of the
if
job that uses the CDC210 command MUST be in Bank Zero
your system
bank switches memory. (For information on bank—switched systems, refer
to the document Memory Management Option, (DWM—OO100—1O) in the
AM—100 documentation packet.)
You may use CDC21O to boot from doubLe— or singLe—sided diskettes that
are in singe— or doubLe—density STD format or doubLe—density AMS
format.
FORMAT:
.C DC 210
OPERATION:
1.
Type CDC210 foLLowed by a RETURN:
.CDC21O @!D
The system now resets itseLf by reading a copy of the
bootstrap program into system memory and executing it.
2.
CDC21O
invoked, the CDC21O program reads the operating system
skeLeton
monitor,
DSKO:SYSTEM_MONE1,4J,
into
memory.
SYSTEM.MON then brings up the system under the controL of your
Once
system initiaLization command file, SYSTEM.INI.
3.
Once the system is up and running, you see the AMOS prompt.
ERRORS:
generates no error messages.
However, if it does not
SYSTEM.MONL1,4J and SYSTEM.INIL1,4J, the start—up procedure faiLs.
CDC210
(1 May 1980)
find
CDC210 (Cont'd)
Page 2
CHARACTERISTICS:
Boots the system from an AMS— or SD—format CDC fLoppy disk if the CDC
disk drive is the System Device and runs under control of the AM—210
fLoppy disk controLLer.
Returns your terminal to
successfulLy.
(1
May 1980)
AMOS
command
leveL
if
the
system
resets
clkfrq
FUNCTION:
you
When
use
it within the system initialization
command fiLe, CLKFRQ
teLLs the system the frequency being appLied to the CPU real—time
clock.
When
you use it at AMOS command level, CLKFRQ teLls you the
frequency defined by the CLKERQ command in the SYSIEM.INI or resets
that. frequency.
HINTS/RESTRICTIONS:
part
of the system initiaLization command file, SYSTEM.INI, CLKFRQ
teLls the system the frequency (in Hz) that is being appLied to the
clock input line.
This gives the programs that access the CPU
reaL—time cLock a vaLue to use in converting cLock ticks to actuaL time
As
in seconds.
overseas
it
S Y STE N.h.
The usuaL frequency in the Uniteci States is 60 Hz;
is 50 Hz. Place CLKFRQ after aLL SYSTEM commands in the
Use CLKFRQ at AMOS command LeveL
to find out what frequency was definec
by the CLKFRQ command in the system initiaLizator command file.
You
can aLso charge the frequency set in the SYSTEF'l.INI by using CLKFRQ at
AMOS command Level.
NOTE: You must incLude the CLKFRQ command in the SYSTEM.INI.
It you do
not, the system stores a zero in the monitor Location reserved for the
dock frequency and those programs that refer to the real—time dock
(e.g., BASIC) wiLl not be abLe to calculate time correctly. Note that
CLKFRQ in no way affects the speed at which your system operates.
FORMAT:
CLKFRQ
or:
.CLKFRQ n
where
n
is the frequency in Hz that is being appLied to the input Line
of the Cpu reaL—time cLock.
OPERATION:
1.
At AMOS command leveL, to find out what value is being used as
the clock frequency, type CLKFRQ foLlowed by a RETURN:
.CLKFRQ
CURRENT CLOCK FREQUENCY VALUE SET FOR 60 HZ
(1
October 1979)
CLKFRQ (Conta)
2.
Page 2
To set the frequency used by the reaL—time cLock, use one of
the system text eaftors ana esit the SYSTENI.IFU file.
Enter
the CLKFRQ comrrland after aLl SYSTEM commands.
Type
CLKFRC
folLowed by the frequency (in Hz) being applied to the Cpu
real—time cLock Line. For exampLe:
CLKFRQ 60
3.
After the system is up and running, you can use CLKFRC to
change
the frequency previously set in the SYSTEM.JNI. Enter
CLKFRQ foLlowea by the number that selects the frequency being
applied to the dock line.
Type a RETURN.
For example:
.CLKFRQ 5U
ERRORS:
CLKFRQ generates no error messages.
CHARACTERJSTICS
You must include CLKFRQ in the SYSTEM.INI fiLe.
CLKFRQ is both a user command and a system initiaLization command.
Returns your terminaL to AMOS command Level.
(1 October 1979)
1
corn
FUNCTION:
Processes a fiLe based on its extension.
HtNTS/RESTRiCTIONS:
fiLe in the system Command FiLe Library Account,
It searches for a specified file, and then invokes the
For exampLe, if the specified file is a .BAS
appropriate processor.
You
fiLe (a BASIC program), COil invokes COMPIL to compiLe the fiLe.
may find COil especiaLly usefuL as a command file e'ement.
is
Coil
DO
a
DSKO:t2,2J.
FORMAT:
COil
Fi Lespec ED
where FiLespec specifies the tiLe you want to process. You may not
specify an extension, and the fiLe must be in the account you are
(The fiLe may appear on a different device, however, in
Logged into.
which case you wouLd include a device specification.)
DEFAULTS:
If you omit the device specification, Coil assumes the device you are
logged into. COil beqins to search for the fiLe in the foLlowing order:
2.
Is it
is it
3.
Is it a .PAS fiLe?
4.
Is
1.
a .MAC tiLe?
If yes, assembLe it with MACRO.
a .BAS fiLe?
If yes, compiLe it with COMPIL_
If yes, compiLe it with PRUN CMPILR.
it a .TXT file? If yes, format
it with TXTFMT.
OPERAT ION:
1.
At
AMOS
command
level, type Coil folLowed by the specification of
the fiLe you want to process; then type a RETURN.
For exampLe:
.COM SPRADD
COM searches for the fiLe in the order listed above in the DEFAULTS
section.
If the fiLe is found, COil processes it with the
appropriate processer based on the file's extension.
(Changed M) ApriL 1981)
COM (Cont'd)
Page 2
ERRORS:
If COM cannot find the file or if the tile does not have one of the
extensions listed above in the DEFAULTS section, COM dispLays the
message:
?FiLename is not a compiLable tile
where FiLename
you use COM in a
is the file you specified on the COM command tine.
command
file, if COM cannot find the fiLe
specified, the command file aborts operation.
If
you
CHARACTERISTICS:
a
fiLe with the proper processor;
processor is based on the file's extension.
Processes
COM is
the seLection of the
a DO file in DSKO:[2,21.
When specifying the file to be processed, you may not specify an
extension.
The tiLe must appear in the account you are Logged into.
If you omit the device specification, COM assumes the device you are
Logged into.
(Changed 30 ApriL 1981)
compil
FUNCTiON:
CompiLes BASIC programs.
HINTS/RESTRICTIONS:
Invokes
the
compiLer portion of the BASIC Language processor. The
program you compile is a program you have previously saved whiLe using
BASIC in interactive mode or is a program you have created using one of
the text editors. For information on COMPIL, writing BASIC programs,
using the BASIC runtime package (RUN.PRG) to execute programs, or using
BASIC in interactive mode (BASIC.PRG), refer to the ALphaBASIC User's
Manual, (DWM—OO100—O1).
is re—entrant; the System Operator may incLude it in system
memory (thus saving space in individuaL users' memory partitions) via
the SYSTEM command in the system initiaLization command file.
COMPIL
If COMPIL finds errors, it does not produce a .RUN file.
NOTE:
COMPIL
does
numbers.
not
require
that your BASIC program contain line
FORMAT:
LCOMPIL FiIespecC/switches)
where Filespec specifies the file that contains the program you want to
compiLe and /Switches seLects one
switches.
or
both
of
the
COMPIL
operation
DEFAULTS:
COMPIL assumes an extension of .BAS.
OPTIONS:
You
may
seLect
the foLLowing options by incLuding them at the end of
the COMPIL command line after a sLash, I.
/T
This switch is designed primariLy as a debugging tooL.
It
teLls COMPIL to display each Line of your source program as
COMPIL
scans the Line.
If an error occurs during
compi1ation, the use of this switch helps you to pinpoint the
program tine where the error occurred.
(Chanqed 30 ApriL 1981)
COMPIL (Cont'd)
/0
Pane 2
/0 switch teLls COMPIL to omit line number references
from the compiled code. This reduces the total size of your
compiLed program, but prevents compile or run—tine error
messaqes from reporting the number of the program tine where
The
the error occurred.
The
/M
/M
switch causes COMPIL to verify that each variable in
your program is mapped.
If
COMPIL
encounters
variabLe, an error message is dispLayed.
an
unmapped
OPERATION:
1.
Type COMPIL followed by the specification of the fiLe you want
to compiLe.
Then type RETURN.
For example:
.COMPIL PROJCT.BAS ED
2.
COMPIL
now
dispLays messages foLLowinq the command Line that
indicate the status of the program compilation.
For exampLe:
— InitiaL work memory is 2310 bytes
Phase Z — Adjust object tile and process errors
phase
1
ILLegaL MAP Level — 350 MAP FILL'7,S,2
Syntax error — 980 BALANCE = BALANCE
INTEREST
Memory usage:
Total work space — 4712 bytes
Label symbol tree — 322 bytes
Variable symbol tree — 1186 bytes
Data statement pool — 0 bytes
Variable indexinq area — 274 bytes
CompiLer work stack — 140 bytes
Excess available memory — 11918 bytes
End of compiLation
3.
when COMPIL finishes, and if it found no errors
(there
were
in the example above), it produces a tile containing a
compiled program. This file has the same name as the fiLe you
specified on the COMPIL command Line, but it has a .RUN
extension.
To
execute this fiLe, use the BASIC runtime
package via the RUN command.
two
ERRORS:
You may see the standard BASIC error messaqes. For a List of the BASIC
refer to the back of the
AIphaBASIC
User's
ManuaL
messaqes,
(DwM—00100—O1).
(Changed 30 April 1981)
COMPIL (Cont'd)
Page 3
CHARACTERISTtCS:
Assumes
an
extension.
input fiLe extension of .BAS.
(Chanqd 30 April 1981)
Produces a file with a .RUN
cant
FUNCTION:
you to resume execution of a command fiLe that was previousLy
interrupted by a PAUSE command.
ALlows
HINTS/RESTRICTIONS:
When you are using a command fiLe, and its execution is interrupted
because of a PAUSE command in that fiLe, you are then returned to AMOS
command LeveL. At that point, you can use other command fiLes, run
programs, use the text editor, etc.
When you are ready to resume
execution of the command fiLe, you may use the CONT command.
For more information on interrupting command fiLe execution, and on the
PAUSE and CONT commands, see New
Features of Command Fi Les and
the
User's Information" section of
AM—lOD documentation packet. ALso, see the PAUSE reference sheet
FiLes,
(DWM—DO100—63),
in
this manual.
DO
the
in
command fiLe execution is interrupted because of a PAUSE command,
PAUSE saves the remainder of the unexecuted command fiLe in a disk file
named CNT.CMD in the account the user of the command fiLe is Logged
into. CaNT Loads the CNT.CMD file into memory from the account you are
logged into and executes it. Therefore, do not erase CNT.CMD from your
account.
When
NOTE: If you do not type CONT after a PAUSEd command fiLe has returned
you to AMOS command
Leve', and you then invoke another command fiLe
that is also interrupted because of a PAUSE command, the contents of
the second command file are written into CNT.CMD, repLacing the
reniainder of the first command file. This does no harm, except that
you may not now resume execution of the first command fiLe.
FORMAT:
.CONT
OPERATION:
1.
To
resume
execution
of
a
command fiLe that has previousLy been
interrupted via the PAUSE command, type CONT at AMOS command LeveL;
then type a RETURN:
.CONT @D
After CONT Loads CNT.CMD into memory and processes it, CONT
the CNT.CMD fiLe from the disk.
(1 May 1980)
erases
CONT (Cont'd)
2.
Page 2
may
also include CONT within another command file, which then
resumes execution of the first command fiLe.
You
ERRORS:
If CNT.CMD does not exist in the account you are logged into, CONT
simply returns you to AMOS command level, since it is unabLe to resume
execution of a command fiLe; it then displays the message:
?Can't continue
Make sure that you are Logged into the account where the
you
command
file
want to continue was interrupted (i.e., that you are in an account
that contains a CNT.CMD file).
CHARACTERISTICS:
execution of a command
interrupted by the PAUSE command.
Resumes
Accepts no arguments or switches.
(1 May 1980)
file
that
has
previously
been
copy
FUNCTION:
Copies
one
or
more
between disks.
fifes: within
accounts,
between accounts, and
HINTS/RESTRICTIONS:
You may not copy to an account if it is not in the project you are
Logged into unLess you are Logged in as System Operator.
You may copy
fiLes into your account from any other account, regardLess of project
number.
may
use COPY to pack
the
However, do NOT pack the disk in
You
accessing the disk.
.COPY TRM:=FiLespecs
7copy MEM:=FiLespecs
.COPY =MEM:Filespecs
disk
this
if
way
you use the /PACK switch.
whiLe other users are
performs same function as: .TYPE FiLespecs
performs same function as: .LOAD FiLespecs
performs same function as: .SAVE Filespecs
COPY understands the ersatz devices.
NOTE ON DISK BACKUP:
If you are not logged in as System Operator, you may back uø files
in accounts that are within the same project.
For example:
_COPY DSK2:C]DSK1:[100,*j
copies aLt fiLes on DSK1: in Project 100 accounts over to the
accounts
on DSK2:.
same
(The wiLdcard PPN symboL, C], teLLs the system
to cooy the fiLes over to their corresponding accounts on D5K2:,
instead of just the account you are Loqqed into.) If you are ogqed
in as System Operator, you may back up aLt accounts, regardLess of
project number:
.COPY DSK2:DSK1:Ej @1D
(If you are loqged into the System Operators account,
Cl,?],
the
COPY command uses the C] symbol as the PPN defauLt on the left side
of the equaL sign.)
The file RADBLK.sYS[1,2] is created by a disk certification
program for certain kinds of disk devices. It contains a List of
the bad blocks or tracks on those devices. You must never destroy
or aLter the contents of a BADBLK.SYSE1,2] file.
To
protect the
integrity of a devices certification data, COPY wiLt not overwrite
NOTE:
(Changed 30 ApriL 1981)
COPY (Cont'd)
Page 2
fiLe BADBLK.SyS[1,2] on that device.
wiLL
the erase the BADBLK file.)
(However, note that ERASE
is a wildcard file command. Refer to Section 9.5, Copyina FiLes
(Copy)," in the AMOS User's
Guide,
(DWM—OO100—35),
for more
information on the use of COPY.
COPY
FORMAT:
.COPY CNewfilespec}={O1dfitespec1(,...oLdfi1especN}y{/switches)
Newfilespec is the specification of the file
where
is the one or more fiLes you
option request.
OldfiLespec
want
you want to create,
to copy, and Switch is an
DEFAULTS:
The initiaL defauLt OldfiLespec is *.* and the account and device you
are logged into.
The defauLt Newfilespec is *.* and the account and
device you are logged into unless you are Logged into C1,2J, in which
case it is *.*[J and the device you are Logged into.
The defauLt switches are: /DELETE/NOQUERY/NOPACK.
OPTIONS:
Use
the
switches
with a sLash.
beLow to select COPY ootions_ (Precede each switch
Remember that the placement of the switch on the command
Line modifies its effect.)
or /G
/QUERY
/NOQUERY
or /NOQ
/DELETE
or ID
/NODELETE or /NOD
Ask user for
confirmation
before
files
copying
(fiLe switch).
Don't ask for confirmation (default, file switch).
Copy over to an existing fiLe, thus deLeting it
(defauLt, fiLe switch).
Don't copy over to any existing fiLes (file
/PACK
or IF
switch).
AlLow COPY to copy fiLes over to themselves, thus
packing disk (operation switch).
/NOPACK
or /NOP
Don't
alLow
copying
files
(default, operation switch).
over
to
themselves
OPERATION:
1.
Type
COPY folLowed by the specification you want to assign to
fiLe.
specifications
the new
example:
(Changed 30 ApriL 1981)
Now
that
type
select
an
equaL
sign
foLlowed
by
the files you want to copy.
the
For
COPY (Cont'd)
Page 3
.COPY SORT.TXT=WRK1 .TXT
IRK1 .TXT to SORT.TXT
TotaL
fiLe transferred
1
2.
Remember that you can
use
wiLdcard
assumes certain Filespec defauLts.
symboLs
and
For example:
that
COPY
.COPY DSKI:*.OLD=*.t4EW
copies aLL fiLes with a .NEW extension from the account and
device you are Logged into over to the same account on DSK1:.
The new
fiLes have the same names, but have extensions of
.OLD.
3.
When you use the /Q switch, COPY asks for confirmation of each
transfer. (Remember, however, that the pLacement of the
switch on the command Line can affect which fiLes it affects.)
When
COPY
prompts you for confirmation, answer with a V for
Yes or an N for No.
For exampLe:
Do not type a RETURN after
your
answer.
.COPY SRCFIL[11O.2]WRKFIL/QUERY fr
WRKFIL.BAS to SRCFIL.BASC11O,23?Y
WRKFIL.LST to SRCFIL.LSTC11O,2J?Y
WRKFIL.RUN to SRCFIL.RUN[11O,2]?Y
WRKFIL.SEG to SRCFIL.SEQE11O,2J?N
TotaL of 3 tiLes transferred
You
may
transfers.
enter
a
Control—C
at
any time to prevent further
ERRORS:
?Cannot find DSKQ:SCNWLD.Sys[1,41 or MEM:SCNWLD.SYS
The COPY program needs this file to be abLe to process wiLdcard
in your fiLe specifications. This message can indicate that
SCNWLD.SYS doesn't exist, or that you do not have enough memory to Load
symboLs
the fiLe into your memory partition.
?Specification error
Your command Line is not in proper format.
The
symboL points to
the Location in the command Line that COPY does not understand.
?Cannot READ Devn — device does not exist
?Cannot READ Devn — device is not mounted
You tried to copy to or from a device that is not Listed in the
DEVTBL command in your SYSTEM.INI, does not have a driver in area [1,6:1
of the System Disk, is not fiLe—structured, or is not mounted.
(Devn:" is the device you specified.)
(Changed 30 ApriL 1981)
COPY (Cont'd)
Page 6
ZAccount does not exist — Lo,pnJ
The indicated PPN does not exist; to create it, you must be Logged
in under [1,21..
%No fiLe—oriented device corresponding to Devn: is mounted
You specified a device, but left off the unit number, COPY cannot
find a logicaL unit that matches your specification. Try mounting the
device.
?Missinq output specification
You
omitted
the
equaL
sign
in
couldn't tell which information was your
your COPY command Line; COPY
NewfiLespec and which your
OLdfi Lespec.
?More than one output specification
You may not supply more than one NewtiLespec.
?FiLes may not he transferred to RES:
You
may
onLy
add
programs to system memory by using the SYSTEM
command within your system initiatizaton command fiLe, SYSTEM.INI.
%Random fiLes can not be transferred to MEM:
You may only put sequential fiLes in your memory partition.
%Not copied — Destination fiLe already exists
You tried to copy to an existing fiLe whiLe the
was in effect.
/NODELETE
option
?You are not Logged in under E1,2J, can't create Ep,pnj
You
cannot copy from an account to a nonexistent account unLess
you are Logged in under [1,21. U you copy to a nonexistent account
whiLe logged under (1,21, COPY wiLt create the account with the same
password as the account copied from.
?Output MFD is fuLl
The Master File Directory onLy has room for 64 entries.
The
transfer in progress wouLd have created a new account, but there is no
room in the MFD.
?Device fuLL
There is no more room on the disk.
%Bypassing BADBLK.SYS[1 ,21
BADBLK.SYS exists to prevent bad blocks
on a device from being aLlocated, and
should never be directly accessed.
%No fiLes transferred
You tried to copy the fiLe BADBLK.SYS[1,21, which
aLtered, moved or destroyed.
(Changed 30 ApriL 1981)
must
never
be
COPY (Cont'd)
Page 5
CHARACTERISTICS:
Because
it
abi Lities.
is
a witdcard fiLe command, COPY has advanced wiLdcarding
You can use COPY to back up or pack entire disks if
as System Operator.
(changed 30 ApriL 1981)
you are
Logged
in
cpmcpy
FUNCTION:
Transfers a copy of a fiLe from a fLoppy diskette created under the
C/PM operating system to an AMOS file—structured device.
HINTS/RESTRICTIONS:
CPMCPY assumes that the data in the C/PM fiLe is
form; it does no transLation of the data.
in ASCII or binary
CPMCPY assumes that the C/PM
diskette is mounted on C/PM device B: Ci.e., AMOS device IMG1:). (C/PM
device A: is AMOS device IMGO:.) You must have a copy of the IMG.DVR
in area [1,6] of your System Disk. You must have the 1MG device
defined in your system device table (see the DEVTBL reference sheet).
If
you
are
using
an
MIS device, you shouLd not cony between fLoppy
devices that are attached to the same fLoppy controLLer.
The extension you provide in your C/PM fiLe specification must be three
characters. This means that if the C/PM extension is onLy two
characters, you must enter a space as the third character. If the
extension is a nuLl extension, you must enter three spaces for the
extension.
FORMAT:
.CPMCPY AMOSfi LespeccPMfi lespec{/B)
where
AMOSfiLespec is the FiLespec you want to assign to the file
copy
(e.g., DSK1:CBIOS.CPM[11O,3J)
and
CPMfilespec
gives
the
C/PM
specification of the file you want to copy (e.g., A:CBIOS.ASM). /B is
an optional switch that telLs CPMCPY that the data in the fiLe is in
binary form, not ASCII.
DELTS:
If
you
do
not specify an extension for the new fiLe, CPMCPY uses the
CPMCPY assumes that the file you are copying contains
.CPM extension.
ASCII data.
OPTIONS:
If you want to copy a file that contains binary data (rather than data
in ASCII form), use the /B switch on the command Line.
.CPMCPY DSKO:CRDR.PRGL1,4JA:CRDR.ASM/B
(1 October 1979)
For exampLe:
CPMCPY (Cont'd)
Page 2
OPERATION:
1.
Type CPMCPY folLowed by the AMOS specification of the new tile
you want to create. Then type an equaL sign foLLowed by the
C/PM
specification of the tile on the C/PM diskette. Type a
RETURN.
For exampLe:
.CPMCPY AMS1:FORMS.CPM=A:FORMS.ASM
2.
You now see a message that Looks something Like this:
Begin transfer....
83 Records read
20 Records written
Transfer completed
ERRORS:
You may see any of the standard system error messages that can resuLt
from invaLid device specifications. In addition, if CPMCPY cannot find
the specified C/PM file, you see:
Begin transfer
CPM fiLe not found in directory search.
CHARACTERISTICS:
Transfers data in either binary or ASCII form.
To
use
CPMCPY, you must have IMG.DVR in DSKO:[1,6] and the IG device
must be defined in your system device tabLe.
Returns your terminaL to AMOS command LeveL.
(1
October 1979)
cpmdir
FUNCTION:
Displays the directory of a C/PM diskette.
HINTS/RESTRICTIONS:
CPMDIR uses the IMG.DVR driver to access the data
on the C/PM diskette;
sure that you have a valid copy of that program
in
make
area [1,6] of
your System Disk.
The 1MG device must be defined in your system device
table. CPMDIR assumes that the diskette whose
directory you want to
see is mounted on C/PM device B:
(i.e.,
AMOS
device IMG1:). C/PM
device A: is AMOS device IMGO:.
FORMAT:
.CPMDIR Devn:
where Devn:
is the specification of the diskette (in C/PM format) whose
see.
directory you want to
OPERATION:
1.
Type CPMDIR foLlowed by the specification (in C/PM
the diskette you want to read. Then hit RETURN. format) of
For example
(if the C/PM specificatjo of the diskette is A:), enter:
.CPMDIR A:
2.
You now see a display that Looks something like this:
[FilenameJ
.VLJE
.EDIT
•
.APOLLO
End
[Exti
EExJ
. . .COM . . .0
. . .COM
. . .0
. . .ASC . . .0
of directory.
ERRORS:
You may see these error messages when using CPMDIR:
?Cannot READ IMG3:
— device does not exist
Make sure that 1MG is defined as a valid device on your
and that the IMG.DvR program exists in DSKO:L1,oJ.
(1 October 1979)
system
CPMDIR (Cont'd)
Page 2
?Cannot READ IMG1: — device not mounted
You
have tried to access a valid disk device, but the diskette
is not mounted.
Use the MOUNT command to mount the diskette.
CHARACTERISTICS:
Requires the IMG.DVR in area [1,6] of your System Disk. Also
that 1MG device is defined in your system device tabLe.
reference sheet on DEVTBL.)
Returns your terminaL to AMOS command Level.
(1 October 1979)
requires
(See the
op',410
FUNCTION:
an AMOS Version 4.4 System Disk update cartridge onto the first
fixed
Copiesplatter of a CDC Phoenix hard disk drive.
HINTS/RESTRICTIONS:
CPY41O is a command fiLe that certifies DSK1: of a Phoenix drive, and
copies the contents of DSKO: onto DSK1:. It destroys aLt data on
DSKI:, so make sure you make a back up of everything on DSK1: you want
to save before you use CPY41O.
You usuaLLy use it to update your
System Disk on the fixed disk by copying the contents of a new System
then
Disk cartridge down onto it.
onLy use CPY41D to copy an AMOS Version 4.4 or later
(The SYSTEM command wiLl teLL you which version of AMOS
You
may
System Disk.
you
NOTE:are running under.)
The
disk off of which the system is running (i.e., the System Disk) is
on
the system, if the
contains account E1,4J and the fiLes
SYSTEM.MQN[1,4] and SYSTEM.INIE1,4J, then the system uses the cartridge
as the System Disk. (In this case, the cartridge is DSKO: and the
first fixed disk becomes DSK1:.) If these fiLes do not appear on the
ALWAYS caLLed DSKD:.
cartridge
on
the
When you reset or turn
system
it
cartridge, the system tries to boot up off the first fixed disk; if
is successfuL, THAT disk becomes DSKO: and the cartridge becomes DSK5:.
If
the Phoenix disk drive contains a System Disk cartpidge, when you
reset or turn on the system, the system boots off that cartridge,
regardLess of whether or not the fixed disk is aLso a System Disk. In
this case, CPY410 copies the contents of the cartridge down onto the
first fixed disk, DSK1:.
Remember, when you mount the System Disk
cartridge and reset the system, the cartridge becomes DSKO: and the
fixed disk becomes DSK1:.
IMPORTANT NOTE:
If you bring up the system with a non—System Disk cartridge mounted
and then mount a
System Disk cartridge without resetting the
system, it continues to run off the fixed disk.
In this
case,
if
you use CPY410, it copies everything from fixed disk DSKO: to fixed
disk DSK1:, writing over aLL data on DSK1:.
Unless that is
preciseLy what you want to do, make very sure that you are running
off the cartridge before using CPY41O.
(Changed 1 May 1980)
CPY41O (Cont'd)
If
you
Page 2
are
not
sure
whether
or
not
are running off the
you
cartridge or the fixed disk, type SYSTEM foLLowed by a RETURN.
are running off the
DSKD:), SYSTEM telLs you so:
you
If
cartridge (that is, if the cartridge is
.SYSTEM
*** SYSTEM IS RUNNING FROM CARTRIDGE DISK ***
FORMAT:
.CPY4IO
OPERATION:
1.
PLace the System Disk update cartridge in the
Reset the system by pushing the RESET button.
2.
Type SYSTEM foLLowed by a RETURN.
Phoenix
drive.
If you do not see:
*** SYSTEM IS RUNNING FROM CARTRIDGE DISK ***
are running off the fixed disk; CPY41O wiLL copy from the
fixed disk DSKO: to fixed disk DSK1:. If are running off the
you
cartridge, type CPY41O foLLowed by
a RETURN:
.CPY41O@ID
3.
You
now
the foLlowing message.
see
(Type a RETURN when you
are sure that the cartridge is DSKO: and that aLL
that you want to save on DSK1; is backed up.)
inforiration
_LOG DSKO:E1,2J
This command tile WiLL certify DSK1
it.
and copy a system onto
The certification process destroys the contents of DSK1:.
When you are certain that everything is ready, type a return.
Now
CPY41O
certifies
DSK1:
by
using
the
4.
specifying a maximum of 15 bad tracks.
5.
After the certification, CPY41O displays this
CRT41O command,
message:
Starting COPY process
6.
Now CPY41O uses the DSKCPY program to copy alL
accounts from DSKO: to DSK1:.
7.
When
the copy
command LeveL.
(Changed 1 May 1980)
process
is
fiLes
in
aLL
done, CPY41O returns you to AMOS
CPY410 (Cont'ci)
Page 3
ERRORS:
has exceeded maximum number
The certification program,
?Deviceon DSK1:_
tracks
can
command.
You
of errors
CR1410,
found
more
than
CR1410 stops the certification process.
15
bad
also see any of the error messages generated by the DSKCPY
(See the DSKCPY reference sheet.)
CHARACTERISTICS:
CPY4IO is a command fiLe in the System Command
DSKO:L2,2J.
Destroys aLL data on DSK1:
the
DSKCPY
logicaL unit DSK1:.
Uses
(Changed
1
May 1980)
FiLe
Library
account,
in the process of certification.
command to copy aLL fiLes from LogicaL unit DSKO: to
Verifies the copy.
cpySOO
FUNCTION:
Copies
a
disk drive.
Disk cartridge onto the fixed platter of a Hawk hard
System
HINTS/RESTRICTIONS:
CPY500 is a command file that formats and initializes DSK1:.
uses the
DSK1:. It
Then
it
to copy the contents of logical unit DSKO: to
destroys all data on DSK1: before it copies the new data
COPY
command
over, so before you use CPYSOO make sure you make a backup copy of all
data on DSK1; that you want to keep.
Because CPY500 uses the COPY
command
(instead of DSKCPY) it is nch faster than SYSCPY. However,
unLike SYSCPY, CPY500 does NOT verify the disk copy.
The disk off of which the system is running
is
ALWAYS
calLed
DSKO:.
fixed platter.) When you reset the system or
turn it on for the first time, if the cartridge that is on the system
contains
account
[1,4]
and
the
files SYSTEM.MONI1,4] and
(DSKO:
is
usualLy
the
SYSTEM.INI[1,41, the system recognizes that cartridge as a System
(and therefore as DSKO:).
Disk
NOTE:
If the Hawk disk drive contains a System Disk cartridge when
you reset or turn on the system, the system boots off that
cartridge regardless of whether the fixed pLatter is also a
System Disk.
When
the system boots off a
cartridge, that cartridge is LogicaL unit DSKO:.
Because
the
System
Disk
CPY500 command copies the contents of DSKO: to DSK1:, you
can use it to update your fixed disk with a new software reLease by
copying from the System Disk update cartridge to the fixed pLatter
(your old System Disk). Remember, when you mount the System Disk
cartridge and reset the system, the cartridge becomes Dsi<O: and the
fixed platter becomes DSK1:. If you have any doubts about whether you
are
running
by a RETURN.
you so:
off the cartridge or the fixed disk, type SYSTEM foLlowed
If you are running off the cartridge, the system teLls
*** SYSTEM IS RUNNING FROM CARTRIDGE
DISK ***
(If you bring up the system with a data cartridge mounted and then
mount the System Disk update cartridge without resetting the system, it
continues to run off the fixed disk. In this case, if you use CPY500,
it copies everything from the fixed platter to the cartridge, wiping
out everything on the System Disk update cartridge. Be careful.)
(1
October 1979)
CPY500 (Cont'd)
Page 2
FORMAT:
.CPY500
OPERATION:
1.
Place the System Disk update cartridge in the
Reset the system by pushing the RESET button.
followed by a RETURN.
If you do not see:
drive.
Hawk
Type SYSTEM
*** SYSTEM IS RUNNING FROM CARTRIDGE DISK ***
you are running off the fixed disk.
If you
the cartridge, type CPY500 followed by
are
running
off
a RETURN:
1CPY5OO )
2.
Now when you see the following message, type
a RETURN:
This command reformats DSK1: then co_pies allot_DSKO:
It is normally used to transfer the system pack.
onto it.
Enter CR when ready to execute:
3.
CPY500
now
mounts
bSK1:
the FMTSOO program.
(the fixed disk) and formats it via
CPY500 initializes DSK1: and copies every
file on DSKO: over to DSK1:.
4.
When CPY500 has finished copying the disk, it signals you by
ringing your terminal bell five times.
Then you see the
message:
System pack transfer is complete
ERRORS:
If the system encounters a hard disk—error, you can
AM—500 error messages.
see
For example:
the
standard
?Cannot REAb bSKO:MOUNT.PRG[1,4] — device error
Check with the System Operator for help.
CHARACTERISTICS:
Use to update fixed disk on a Hawk hard disk drive by copying aLl files
from a System Disk update cartridge.
(1 October 1979)
CPY500 (Cont'd)
(You
Page 3
may aLso use CPY500 to copy aLt fiLes from the fixed disk over to
a cartridge if the system is running off the fixed disk rather than
cartridge.)
Returns your terminal to AMOS command Level.
(1
October 1979)
the
create
FUNCTION:
Creates a random file of specified size.
HINTS/RESTRICTIONS:
A
random
fiLe (aLso known as a contiguous fiLe) is one in which the
bLocks that make up the file physicali.y adjoin on the disk (as opposed
to a sequentiaL fiLe, in which the disk bLocks that make up the file
may be scattered across the disk). (See Chapter 5, "Introduction to
Files, in Introduction to AMOS, (DWM—OO100—65), for a discussion of
random and sequentia' fiLes.)
Since random files may not be pxpanded once they are aLtocated
on
the
disk, programs that increase the size of fiLes (such as text editors)
work onLy with sequentiaL fiLes. You wiLt be most tikeLy to use random
files for apoLications such as BASIC data files, which never need to
expand in size.
FORMAT:
.CREATE Filespec,Size
where FiLespec seLects the fiLe you want to create and Size is the
number of disk bLocks you wish to aLLocate to that file.
DEFAULTS:
If you omit portions of the fiLe specification, CREATE assumes
device and account you are ogqed into and a .DAT extension.
the
OPERATION;
1.
Type
CREATE
folLowed by the specification of the tiLe you want to
to that fiLe.
Then
create and the nij.,ber of bLocks to aLLocate
type a RETURN.
For exampLe:
CREATE CIJSIDX.NEW,1OEB
The command
above creates the fiLe CUSIDX.NEW in the account and
device you are Logged into. The fiLe is ten disk bLocks Long.
2.
when CREATE is finished creating the fiLe, it teLLs
exampLe:
(Changed 30 April 1981)
you
so.
For
CREATE (Cont'd)
Page 2
.CREATE DSK3:MTNDEWr11O,1TI,5
•
MTNDEW.DAT created
ERRORS:
If you do not enter the CREATE command Line in the prooer format (e.q.,
if you type CREATE foLLowed by a RETURN), you see:
?Cornmand error
You can aLso see standard AMOS error messages.
For exampLe:
?Cannot OPEN FiLespec — device fuLL
AMOS
wasn't abLe to find enouqh
contiguous disk b'ocks to
aLLocate your fiLe. Even though the totaL number of disk bLocks
free on the disk may be greater than the number of bLocks you want
to assign to your random fiLe, AMOS cannot create your fiLe unLess
it finds enough bLocks that physicaLLy adjoin on the disk. Ask the
System Operator to pack the disk to consoLidate the tree disk bLocks
into a contiguous group on the disk.
CHARACTERISTtCS:
Creates random fiLes of specified size.
If you omit portions of a file specification, CREATE assumes the device
and account you are Logged into and a .DAT extension.
(Changed 30 ApriL 1981)
cr1O
FUNCTION:
Certifies
the disk i,edia
AM—410 Hard Disk ControLLer.
of a device that runs under controL of the
/Uso
takes
the
pLace
of
the
FMT41O
command.
HINTS/RESTRICTIONS:
of the high data density of the disks that run with the AM—410
(e.g., the CDC Phoenix), media flaws are a more likeLy possibiLity than
on more conventional drives (e.g., the CDC Hawk). Therefore, you must
run CRT41O on each Logical unit of every device that runs under controL
Because
of the AM—410.
certifies a logicaL unit by writing and verifying data in every
CRT41O
bLock of the device, so make sure that you back up any data you need on
that device before you certify it. Because CRT41O destroys any data on
the disk it is certifying, CR1410 requires that you be Logged into the
System Operator's account, E1,2], before certifying a disk.
NOTE:
CR1410
takes
the pLace of the disk formatting program, FMT41O,
because it formats the disk as weLl as certifying it.
CR1410 creates account E1,2J on the disk you are certifying.
Then it
creates a fiLe BADBLK.SYSE1.2J that contains a List of alL bad disk
tracks on the certified device. CR1410 assigns aLternate tracks for
these bad tracks, thereby making the fact that some tracks are bad
compLete&y transparent' to the user of the device.
For information on
the program that you can use to dispLay the BADBLK.SYS
BADBLK reference sheet.
fiLe,
see
You do not have to mount a LogicaL unit before certifying it.
IMPORTANT NOTE:
You
may
run
under
use this certification program ONLY on devices that
controL
of
the
AM—410.
CRT41O
communicates
directLy with the AM—410 without going through the Phoenix
driver program. Therefore, you MUST NOT run CRT4W at the
same
time as other programs that access devices that run
under control of the AM—410.
FORMAT:
.CRT41O Devn: @1D
where Devn: is the specification of the device you want to certify.
(Changed
1
May 1980)
the
CR1410 (Cont'd)
Page 2
OPERATION:
7.
Type CRT41O foLLowed by the specification of the device
want to certify; then type a RETURN. For exampLe:
you
.CRT41O SMDS:
2.
CRT41D now warns you:
CAUTION: This program writes to aLL bLocks.
In
other words, make sure that you have backed up any data on
the disk that you may need; Cr410 destroys aLL data on the
disk. You can interrupt the program at this point by typing a
Control—C.
3.
CR1410 now creates a fiLe named BADBLK.SYS in account [1,2] of
the disk you are certifying. This fiLe wiLl hoLd a List of
aLL bad disk bLocks that CRT41O finds.
4.
Now CRT41O asks you severaL questions:
a.
Enter maximum acceptable number of bad tracks:
Give the number of bad tracks that you wi LI accept
the disk. When CR1410 finds more than this number,
teLls you so and returns you to AMOS command LeveL.
b.
on
it
DispLay current track? (V or N):
If you want CRT41O to ten you as it certifies each
track, enter V; otherwise,
enter
an
N.
NOTE:
Asking
the track that it is
verifying greatly increases the time it takes to certify a
to
CRT41O
dispLay
the
of
number
disk.
c.
Enter seriaL number (10 char. max):
You
may
optionaLLy
give
CR1410
ten—character
a
I.D. for the LogicaL unit it is certifying.
CRT41O writes this identifier into the BADBLK.SYS fiLe.
aLphnumeric
5.
After you answer the questions above, CRT41O begins to certify
the disk. You see this message:
Begin certification of Devn:
where Devn:
certifying.
6.
If
you
is
asked
the
specification of
the
device
Current track is: 12
1
May 1980)
are
CRT41O to teLl you its current track position,
you see a List of messages that take this form:
(Changed
you
CR1410 (Cont'd)
7.
Page 3
When CR1410 encounters a track it cannot verify, it teLls
so.
For exampLe:
you
?Track 79 did not verify
8.
it finishes certifying the disk, CR1410 telLs you how
many bad tracks it found. For exampLe:
when
?2 bad tracks detected
Certitication complete
9.
list of alL bad tracks into
CRT41C writes a
BADBLK.SY5C1,2)
in the fiLe a hash totaL for
(Other programs can check this hash totaL against
the contents of the fiLe to make sure that BADBLK.SYS contains
and computes
BADOLK.SYS.
and
stores
undamaged data.)
ERRORS:
You can see the foLLowing error messages when using CR1410:
?You must be Logged into PPN L1,2J to run CR1410.
Because it writes data into every bLock on the disk, CR1410 is
rather dangerous command to use.
a
Operator to use it.
You must be Logged in as System
?15 bad tracks is maximum
You tried to give a number Larger than 15 as the number of
tracks you will accept on the disk you are certifying.
?Irack 0 did not verify.
bad
(First track must verify.)
CR1410 could not verify track flu. Because the first track MUST
verify for the certification to continue, CR1410 now stops the
certification and returns you to AMOS command Level.
?Track n did not verify
CRT41O marked track fin as a bad track in the BADBLK.SYS ti Le.
?Device has exceeded maximum number of errors
CR1410 tound more bad tracks than the vaLue you specified as
the maximum number of bad tracks you wiLL accept. CR1410 now stops
the certification and returns you to AMOS command Level.
75100 data transfer error
An error occurred with the AM—410 controlLer. CR1410 stops the
certification and returns you to AMOS command leveL.
A
number of
these errors can indicate hardware probLems.
(Changed
1
May 1980)
CRT41O (Cont'd)
Page 4
?Nonexistent device
Your device specification on the CR1410 command Line is
invaLid. The system beLieves that the device does not exist. Check
your speLLing and try again.
?Certification incompLete
You typed a ControL—C or some other event happened to interrupt
CRT41U now intentionaLLy writes a bad hash totaL
to the BADBLK_SYS file so that other programs knew that the data in
the certification.
the fiLe is incompLete and not to be trusted.
CHARACTERISTICS:
directLy with the AM—410, so do not run at the same time
as other programs which access devices that run under controL of the
AM—41D.
Use onLy on devices that run with the AM—410.
Communicates
You must be Logged in as System Operator to certify a disk.
Creates
account L1,2J; then creates a fiLe
contains a List of aLL bad tracks on the disk.
BADBLK.SYSE1,2J
that
Returns your terminal to AMOS command LeveL.
l)
(Changed 1 May 1980)
date
FUNCTION:
Sets or dispLays the system date in American or European format.
If your system contains an AM—i2O AuxiLiary I/O Controfler board,
aLso reads and sets the c'ock/caLendar on the AM—120.
If used from within the system initiaLization command fiLe,
date from the Ar'l—120 Auxiliary I/O Controller
system
optionatLy seLects European date format and/or automatic date
at midnight.
sets
board
DATE
the
and
rolLover
HINTS/RESTRICTIONS:
To
set
the system date and to reset the date on the AM—120 board, you
must be Logged into the System Operator's account, 11,71, or must use
DATE
in response to a :K command that appears before the final SYSTEM
command in the system initiaLization command fiLe.
You must use DATE from within the system initiaLization command file to
set the system date from the AM—120 board.
You must be logged into the System Operator's account or use DATE from
within the system initiaLization command fiLe to request date rolLover
at midnight (avaiLable only if your system contains an AM—120 board) or
to seLect European date format.
DATE alLows you to set and dispLay the system date in
either American
or European format. (A date in American format Looks like this: January
1, 1982; a date in European format Looks Like this:
January 198?.)
1
functions (e.q., day of
require that your system contain an
Certain
board.
the week, automatic date rollover)
AM—120
AuxiLiary I/O ControlLer
The optionaL feature that teLls DATE to automaticalLy roLLover the date
at midnight requires approximateLy 35fl extra bytes of system memory.
Sets the date for the AlphaAccounting package.
but is re—usable.
(Changed 30 ApriL 1981)
DATE is not re—entrant,
DATE (Cont'd)
Paqe 2
FORMAT:
.DATE D
Or:
.DATE MM/DD/YYj.fl
or:
.DATE DD/MMIYY{/E} @JD
or:
DATEC/E{/R}J
The
first format dispLays the current system date (if it has been
previousLy set). You may use DATE in this format when you are Logged
into any account.
The second and third formats set the system date, where MM is month, DD
is day, and IV is year, and /E is an optional switch that tells DATE to
European format. (If your system contains an AM—120 AuxiLiary I/O
ControLler board, these formats also aLlow you to set the AM—120
caLendar.)
You must be logged into [1.21 to use DATE in these formats
use
or must be using the DATE command as response to a :1< command which
appears before the finaL SYSTEM command in the system initiaLization
command file.
You may use the fourth format from within your system initialization
command
fiLe to set the system date from the AM—120 board, and may
optionaLly specify switches that select European format for date
dispLay and automatic date rollover at midnight.
DEFAULTS:
If
the
system initiaLization command fiLe has not specified European
date format, the default dispLay mode is American format. You may use
the /E switch to change the display mode to European format if you are
Logged into [1,2J.
OPTIONS:
You may select the foLlowing
options
by
swi t c hes:
/E
specifying
the
appropriate
TelLs DATE to dispLay the date in European format, and that aLL
subsequent date entries wilL be in European format. Must be
Logged into [1.2) to use /E.
/R
Automatic rolLover.
TeLLs DATE to automaticalLy increment the
of the week at midnight.
For example, at
24:00:01, October 5th becomes October 6th, and Tuesday becomes
Wednesday.
Uses
an
extra 350 bytes of system memory for a
moduLe named DATROL.SYS.
You may only use the /R switch when
date
and
day
you use DATE from within the system initialization command file
before the final SYSTEM command.
(Changed 30 ApriL 1981)
DATE (Cont'd)
Page 3
OPERATION:
At AMOS command LeveL when Logged into any account:
1.
To
dispLay
the
date,
type
DATE foLLowed by a RETURN.
For
example:
.DATE @!'D
or:
ipriL 4, 1945
.DATE
ApriL 1945
If your system contains an AM—12fl board,
the day of the week.
DATE
a1so
displays
For exampLe:
Wednesday, November 26, 1980
At AMOS command leveL from account :1,2]:
1.
To set the day of the year, type DATE and the date in the form
given in FORMAT, above.
or:
Type a RETURN.
For exampLe:
.DATE 1O/21/84
.DATE 31/06/82 ED
(if European format mode has been set).
2.
If you want to specify European format, use the /E switch:
.DATE 31/05/B3/E@
3.
If your system contains an AM—120 board, after you have set
the system date, DATE asks:
Do you wish to reset the AM—120 board aLso?
Enter V or N foLLowed by a RETURN. If you enter N, DATE sets
the system date without changing the date stored by the AM—120
board. If you answer V, DATE asks for the day of the week:
Enter day of week (Mon=1, Tue2, etc.):
the appropriate singLe digit that seLects the current
day of the week. Then type a RETURN.
Enter
Within the SVSTEM.INI fiLe:
1.
To reset the system date from the AM—120 board every time the
system is rebooted, incLude the DATE command within your
(Changed 30 April 1981)
DATE (Cont'd)
Page 4
system initiaHzation command fiLe
command.
before
For exampLe:
the
finaL
SYSTEM
SYSTEM TRM_DVR
DATE
SYSTEM
if you wish DATE to dispLay and accept the date in European
format, incLude the /E switch.
If you wish DATE to
automaticaLly update the date and day of the week at midnight,
use the /R switch. For example:
2.
SYSTEM TRM.DVR
DATE/E/ P
SYSTEM
that the /R option is only availabLe when you are using
the DATE command from within the SYSTEM.INI fiLe.
3.
Note
ERRORS:
You may see the followinq error messages when usinq DATE:
?System date has not been set
You may not dispLay the date untiL an
entered using the DATE command.
initiaL
date
has
been
?LJse format MMIDD/YY
did
not enter the date in the proper format; refer to the
DATE is using American format for date entry
and display, so enter the date as month/day/year—— for exampLe:
You
FORMAT section, above.
.DATE 12/31/85
?lJse format DD/MM/YY
You did not enter the date in the proper format; refer to the
section, above.
DATE is using European format for
entry and display, so enter the date as day/month/year—— date
for
ex amp L e:
FORMAT
.DATE 31/11/82
?Day of week must be 1—7
You did not enter a niriber between
asked for the day of the week.
1
and
7 incLusive when DATE
?Ptease enter Y or N
You may only enter V or N to the question "Do you
the AM—120 board aLso?.
?You must be logged into £1.2] to reset the date
(Changed 30 ApriL 1981)
wish
to reset
DATE (Cont'd)
Page 5
You must be togged into the System Operator's account, C1,2J,
or must use DATE in response to a :K command that appears before the
finaL SYSTEM command in the system initialization command fiLe.
?The R option is vaLid onLy within the SYSTEM_INI file prior
to the tinaL SYSTEM command
You may not use the /R switch when you use DATE at AMOS command
teveL.
?
?Error occurred during GETMEM in roLL—over setup
There was not eriouqh memory avaiLabte to be abLe to aLlocate
the date rot lover modu'e in system memory.
Therefore, no date
roLLover at midnight wiLl occur. Check with the System Operator.
CHARACTERISTICS:
Sets and dispLays the system date in American or European format.
defauLt format is American.
The
If your system contains an AM—120 AuxiLiary I/O ControLLer board, DATE
makes avaiLabLe some extra features, such as automatic date roLLover at
midnight, day of the week, and so on.
DATE is not re—entrant, but is re—usabLe.
(Changed 30 ApriL 1981)
ddt
FUNCTION:
Symbolic
debugger.
ALLows
you
to examine and modify your assembLy
language program in memory as it executes.
HINTS/RESTRICTIONS:
NOTE: DDT echoes Escapes as doLLar signs.
In the discussions that
foLLow, we represent an Escape with a S symboL. For exampLe, when you
see the characters:
SB
you know that you are supposed to type an Escape foLLowed by a B.
DDT
does not use RETURNs as command deLimiters.
DDT
automaticaLly expands the program you are examininq to accommodate
patches.
Because DDT runs in terminal image mode, the standard AMOS tine editing
commands do not work when you are in DDT. (For example, a RUBOUT does
not erase the Last character; instead, a RUBOUT canceLs the entire
current command and echoes as an XXX foLlowed by a tab.)
Both input and output expressions may be either in symboLic or nuneric
form.
ALL numeric input is ALWAYS in octal. Use the SET HEX command
at AMOS command Level if you want to see data dispLayed in hexadecimaL
form.
may
reference LocaL symboLs.
First open the Locat ion of the
non—locaL symbol that occurs before the locaL symboL you want to
You
reference. Then reference the LocaL symbol.
aLLows you to singLe—step throuqh an assembLy languaqe program you
have previousLy assembled using MACRO. If you want to enter symbolic
DDT
input (e.g., LabeLs), you must create a symbol tabLe fiLe for your
assembled program using the SYMBOL program before you use DDT.
(See
the MACRO and SYMBOL reference sheets.)
information
refer to the AMOS
(DWM—00100—43).
For
instructions.)
(Changed 30 April 1981)
on
using
AssembLy
(Chapter
DDT,
MACRO, SYMBOL, 1dB, GLOBAL and LINK,
Language Programmer's Reference Manual,
13
of
that manuaL contains DDT operating
DOT (Cont'd)
Page 2
FORMAT:
Fi Lespec ED
.DOT
where FiLespec se'ects the fiLe that contains the program you
debug
to
want
-
DEFAULTS:
If you do not specify a file extension, DOT assumes that the file is
.PRG fiLe.
The default DOT mode is proqram—relative mode.
a
OPERAT tON:
1.
Type DOT foLlowed by the specification of the fiLe you
debuq.
want
For exaflipLe:
to
.DDT DSKO:CREATECIOO,21 ED
DOT toads the fiLe into your
memory
partition,
checks to see if the file is already in memory.
deLetes it and repLaces it with a fresh copy.
2.
3.
first it
If it is, DDT
but
DOT looks in the account in which your file resides for a
symboL table file for that program. If such a file exists,
ODT
Loads it
into memory (enabLing you to reference memory
addresses in symbolic rather than nuueric form).
Now
Next DOT dispLays the base memory address
For example:
bytes of the program.
and
size
the
in
PROGRAM BASE IS 56670
PROGRAM SIZE IS 2346
4.
Now
you
can begin to enter DOT commands.
Most entries to DOT
consist of a nu'ieric or symbolic argument followed
by
a
DOT
These commands are usually one or two symboLs such
as a slash, I, or an Escape foLlowed by a character (e.g.,
command.
SB).
To modify the contents of a location,
a command that "opens" it.
you must
first use
operates in severaL modes: 1. program—relative mode; 2.
absoLute mode; and, 3. register mode.
DOT
The default mode is program—relative mode.
This mode
that addresses are relative to the base address of the
you are debugging.
(Changed 30 ApriL 1981)
assq.res
program
Page 3
DDT (Cont'd)
assumes that aLl addresses are absoLute memory
Enter absoLute mode by typinq a TAB; Leave this
AbsoLute
mode
addresses.
mode by use the SR command.
Register mode assumes that expressions refer to the registers
instead of memory Locations. Enter register mode by using any
of the special symboLs that represent
the
registers:
RO—R5,
SP, or PC.
of
Any
these
symboLs
foLLowed
by
a
command that opens a
Location enter you into register mode. Leave register mode
by
using the SR command.
5.
To
exit,
type
a
ControL—C.
DDT
now returns you to AMOS
command LeveL:
—c
Your modified
program
is
stiLL
in
debugged program, use the SAVE command.
memory.
To
save
the
For exampLe:
.SAVE DSKO:CREATE.PRG IB
save a program that contains breakpoints.
a program couLd resuLt in severe oroblems.
NEVER
Running such
COMMAND SUMMARY:
/
Open Location or
RETURN
CLose
register
(can
take
arqument; e.g., n/, tag/, or req/).
a
specifying
numeric
or
symboHc
Location (can take numeric or symboLic argument
e.g., nRET(JRN,
data to pLace in Location;
tagRETURN)
Line—Feed
=
a
TAB
SC
$8
SX or
Open next Location.
(can take symbolic or numeric
vaLue in octaL
DispLay
argument).
Open previous Location.
Open Location indirectLy.
Open absoLute Location indirectLy. (Enter absoLute mode.)
Start program at reLative address zero. DDT waits for one
Line of input after the SC command, which it passes to the
program and then it executes the program.
Can
take numeric or symbolic
Set or List breakpoints.
argument (e.g., SB, SnB, tagtB, tagSnB).
take symbolic or numeric argument
Can
CLear breakpoints.
(e.g., SC, $nC, taqSC, tagSnC).
Proceed from a breakpoint.
Execute singLe instructions. Valid onLy after a breakpoint
has been reached.
(changed 30 ApriL 1981)
DOT (Cont'd)
Page 4
Enter program—reLative mode.
Display data in decimal.. Takes either argument specifyinq
SR
SD
how many locations to translate or an argument that gives the
expression to translate (e.g., 5*0 or exptD).
Display data in octal. Uses same format as SD command.
Display data in hex. Uses same format as SD command.
Display data in current Location in unpacked RAD5O.
Display data in current location as two ASCII characters.
DispLay data in current location as two eight—bit bytes.
Display a string of ASCII characters in current thcation or
at location of symboLic argument. (String ends with a nuLL
byte.)
Define new symboL. Value attached to symbo' is Last Location
examined (e.g., tag:).
Examine register contents. Takes register argument folLowed
by equal sign. (e.g., ZR0 ).
$11
SA
Exit DOT.
'C
Cancel current line of input.
RUBOUT
ERRORS:
If DOT does not understand a command, it displays a ? symboL. Comoare
your command with the instructions in the AMOS AssembLy Language
Programmer's Reference ManuaL, (DWM—OO100—43), section 9.4, to see if
the format you used was correct.
You can also see these error messages:
Filespec NOT FOUND
DOT wasn't abLe to find the fiLe you specified.
Check your
speLling and make sure you specified the correct device and account.
CAN'T SINGLE STEP THROUGH SVC
You cannot
use the SX
supervisor caLl..
You must
after the calL and
command to skip to that location.
breakpoint
single—stepping.
to singLe—step through a
over the caLl by placing a
its arguments. Then use the SP
At that point you can continue
command
skip
?DDT INTERNAL BUSERR
A bus error occurred within the DOT proçram itseLf.
was not caused by your program.
This error
?BUSERR AT MONITOR PC nnnn
bus error occurred, but was not caused by ODT. Your program
The nirber that appears in the message telLs
you what memory address was Loaded into the Program Counter when the
error occurred.
A
is probably at fault.
(Changed 30 April 1981)
DDT (Cont'd)
Page 5
CHARACTERISTICS:
you to set breakpoints, modify and examine contents
registers, program Locations and absoLute memory addresses.
ALLows
(Changed 30 ApriL 1981)
of
dS
FUNCTION:
Erases modules from your memory partition.
HINTS/RESTRICTIONS:
When
you load a file into memory from the disk (e.g., a program), that
copy in memory is calLed a moduLe.
DEL erases such moduLes
memory partition (NOT from the disk).
* and ? in your fiLe specifications.
from
your
You may use the wildcard symbols
FORMAT:
.DEL Fi espec1C,Fi Lesøec2
Fi Lespecw]
Filespecl,FiLespec2,... is a list of valid fiLe specifications
that select the moduLes you want to erase from your memory partition.
where
DEFAULTS:
DEL assumes a
fiLe extension of *.
OPERATION:
1.
Type DEL foLlowed by one or
type a RETURN.
more
fiLe
specifications;
then
For exampLe:
MEL CREATE
CREATE .PRG
CR E ATE . S YM
DEL
erases from your memory partition the moduLes selected by
your specifications; then it Lists them.
2.
You
can
use
specifications.
standard wildcard
For example:
symbols
in
your
tile
.DEL NEWPR*
NEWPR1 .SBR
NEWPRT.PRG
ERRORS:
displays no error messages. You'Ll know that it wasnt abLe to
find the modules you specified if it does not report back with a list
of moduLes that it erased.
DEL
(1 October 1979)
DEL CCont'd)
Page 2
CHARACTERISTICS:
When it erases moduLes, it shifts any remaining modules up in memory if
they have memory addresses greater than the deLeted moduLes.
Returns your terminaL to AMOS command Level.
(1
October 1979)
devtbl
FUNCTION:
As
part of the system initiaLization command fiLe, defines the devices
used on the system.
At AMOS
command
LeveL,
DEVTBL
teLLs
you
what
devices are defined in the system initiaLization command file.
HINTS/RESTRICTIONS:
When used in the system initiaLization command file, SYSTEM.INI, DEVTBL
teLLs the system which device driver programs to incLude in the system
As the system processes the DEVTBL command line, it bui Lds a
device tabLe in memory. The file system consuLts the device table for
device assignments. The DEVTBL command Line thus defines the devices
monitor.
that you can use on the system.
Every time you add a new device to the
system (e.g., a new type of disk), you must aad it to the system device
Remember to also define bitmaps in the SYSTEM.INI for every new
disk device (see the BITMAP reference sheet).
tabLe.
Several
NOTE:
system
commands require that you have both MEM and RES
defined in your SYSTEM.INI as devices.
Level, DEVTBL Lists the devices
teLls whether the devices are sharabLe or
nonsharabLe, and teLLs you if aLternate track tables are assigned for
those devices.
a user command at AMOS
defined on the system,
As
command
FORMAT:
.DEVTBL @
To find out what devices are defined on the system, or:
DEVTBL Devnl{,Devn2
DevnNJ
define the system device tabLe in the system initiaLization command
ti Le, where Devn is the one or more devices you want to incorporate
to
device drivers for in the system monitor.
OPERATION:
Using DEVTBL as a user command at AMOS command LeveL:
1.
Type DEVTBL foLLowed by a RETURN:
.DEVTBL
(Changed
1
May 1980)
DEVTBL (Cont'd)
Page 2
dispLay you see teLls you what devices have been defined on
the system. For example:
The
DSKO
DSK1
DSK2
DSK3
DSK4
DSK5
(sharab e)
(sharabLe)
(sharable)
(sharabLe)
(sharabLe)
MEMU
(sharab[e)
(sharable)
(sharabLe)
(sharab[iY
PESO
(sharabLe)
TRMO
(sharable)
HWKO
HWKI
(alternate)
(aLternate)
(aLternate)
(alternate)
(aLternate)
(alternate)
MIMU
SNDO
Assiqned to J083
where:
(sharable)
This means
sharabLe
that
the
device was defined as
the device can be accessed by
more than one user at a time; for exampLe, a
disk).
(NonsharabLe devices are those devices
that onLy one user can access at a time, such
(e.g.,
as a printer.)
(alternate)
This means that an alternate track tabLe has
been assigned. Certain disk devices, such as
the Phoenix, use an aLternate track table to
handle media fLaws.
assigned to
This
means
that a non—sharabLe device
currentLy being used by the specified job.
is
devices defined in the dispLay above are:
Logical devices zero through five of the System
The
Device (DSKO, DSK1, DSK2, DSK3, DSK4 and DSKS)
the System Device is a Phoenix disk
where
drive; logical devices HWKO and HWK1, where a
HAWK
drive is on the system; the MEM device
that alLows you to use your memory partition
much
as
if it were an ordinary device (MEMO);
the RES device (RESO) that aLLows you to refer
to system memory (e.g., .DXR RES:); the TRM
driver (TRMO) that aLLows you to use terminaLs
as
devices (e.g., .COPY TRM:TEXT.LST); a
printer (MTMO) that requires its own speciaL
device driver program; and SNDO, representing a
printer or any other nonsharabLe device that is
currentLy being used by a particuLar job.
(Changed
1
May 1980)
DEVTBL (Cont'd)
Page 3
a system initialization command:
Using DEVTBL as
1.
To
define
a
system device tabLe or to add items to the device
table, edit the system initiaLization command file,
with one of the text editors.
2.
the
PLace
DEVTBL
command
definition (TRMDEF) commands.
3.
Line
directLy
after
SYSTEM.INI,
the terminaL
The system aLready knows about device DSKO: (the device
off
of
the system booted), so do not inc'ude DSKO: in the system
device tabLe. Every other device for which the system uses a
device driver program (and each LogicaL unit of every device)
which
must have an entry on the DEVTBL command Line.
4.
Enter DEVTBL foL'owed by the List of devices you want to define
in the system device tabLe. Separate the entries with commas.
For exampLe:
DEVTBL DSK1,AMSO,AMS1,TRM,MEM,RES,/MTM
The first three Letters of
each
entry
identifies
the
device
driver program the system wi U use to access that device. The
optionaL fourth character of each entry identities the unit
number of that device.
The
corfimand
Line
above identifies a device tabLe for a System
that contains two LogicaL units, DSKO: and DSK1:.
(Remember that
the system Mready knows about DSKO:.) We also
define a two—drive (AMSO: and AMS1:) floppy device that uses the
AMS driver. We aLso teLL the system that we are going to want
to use the MEM driver (allowing us to use our memory partition
as another device), the TRM driver (aLlowing us to use a
terminal as a device), and the RES driver (aLLowing us to
reference system memory as a device). AU of these devices are
sharabLe (that is, more than one user can use them at the same
time). If you want to define any devices that are NOT sharabLe
Device
(e.g.,
a
printer or a paper tape punch), the entries for such
devices must appear at the end of the DEVTBL command Line, after
a singLe stash. (For example, the example above defines a
MuLtiterm printer, MTM, as a nonsharabte device. If you had
more nonsharabLe devices, you wouLd enter them after the MTh
entry.
5.
If you have more device table entries than wiLL fit on one Line,
you may include severaL DEVTBL command Lines in your SYSTEM.tNI.
These
DEVTOL
command
Lines
with no intervening commands.
(Changed
1
May 1980)
must follow one another directly,
DEVTBL (Cont'd)
Page 4
ERRORS:
?No device tabLe aLlocated
You tried to use DEVTBL at AMOS
initialization
command
Level,
but
the
system
fiLe for your system does not contain a DEVTBL
command line, so the system does not have a device table.
command
%Devjce driver xxx.DVR not found
The device driver DSKO:xxx.DVRE1,6] was not found.
This is
warning message intended to inform you that the device driver is not ina
the default Library. If you pLan to Load the device
driver into your
own memory partition or system memory, then you can disregard this
message.
If not, perhaps you misspelLed the device name in the DEVTBL
command Line.
CHARACTERISTICS:
Acts as both a user command and a system initiaLization command.
Returns your terminaL to AMOS command Level.
(Changed 1 May 1980)
diag2
FUNCTION:
Tests fLoppy disks by performing read/write tests.
HINTS/RESTRICTIONS:
This program tests a floppy disk device, the disk controlLer board, and
the diskette in the drive. For this test to be effective,
you must
know for certain that two of these pieces of equipment are good.
For
exampLe: to test a drive, make sure that
the controlLer and the
diskette you use are good. bIAG2 does NOT verify write operations and
it does not destroy the data on your diskette.
If
you
use the SET DSKERR command before running bIAG2, DIAG2 reports
aLl soft errors that occur; otherwise, it reports onLy hard errors.
(For information on hard and soft errors, and on hard and soft error
messages, see Section
Maintenance Procedures
4.0, "Disk
Diagnostic
Tests,"
in
Disk
for the System Operagr, (DWM—0O100—40), in
the System Operator's Information section of the AM—100 documentation
packet.)
FORMAT:
.DIAG2 Devn:
where Devn:
is the specification of the device you are testing.
OPERATION:
1.
Type
DIAG2
RETURN.
For
fotl,owed
by a device specification; then type a
example, to test a disk in Drive Zero of a fLoppy
device that handLes disks in AMS format, enter:
.DIAG2 AMSO:?
2.
DIAG2 waits until you tell, it that you are ready.
performs four different tests and lists any errors:
.DIAG2 STD1:
Hit return when ready
Test 1 — track 0 read/write
Test 2 — track 76 read/write
Test 3 — random seek—verify 500 times
Test 4 — speed seek tracks 0 and 76 10 times
EXIT
ERRORS:
Cl October 1979)
Then
it
DXAG2 (Cont'd)
Page 2
dispLays no error messages of its own, but you may see some of
the standard system error messages if you try to test a device that
does not exist or is not mounted.
DIAG2
DIAG2
reports
DSKERR command).
errors (and soft errors if you have used the SET
A hard error message takes the form;
hard
?Car,not READ FiLespec — device error
A soft error message may look something Like this:
CRC Error — AMS1: Record 145
CRC Error — AMS1: Record 145
CRC Error — AMSI: Record 145
CRC Error — AMS1 : Record 145
CRC Error — AMS1
Record 145
CRC Error — AMS1
Record 145
CHARACTERISTICS:
Assumes that two of the three
components
it
is
drive, the controLler, and the diskette) are good.
Returns your terminal to AMOS command Level.
(1 October 1979)
testing
(i.e.,
the
diag3
FUNCTION:
Tests
by writing patterns of ones and zeros into
memory and
reading them back, verifying the pattern as it does so.
DIAG3 aLso
memory
performs a Leak—down test.
HINTS/RESTRICTIONS:
ALLows
you
to specify which memory locations to test from above DIAG3
itseLf to the Last contiguous memory address in the block.
You may
restart the test by typing a Control—c. You may
onLy end the test by
resetting the computer.
DIAG3 performs a 10—second leak—down test on
is,
dynamic
memories.
That
it writes a bLock of ones into memory, waits a while, then returns
to that bLock to see if the ones are stiLl there.
FORMAT:
.DIAG3
DEFAULTS:
If you do not suppLy a starting address, DIAG3 begins at the first free
memory Location above itself; if you do not supply an ending address,
DIAG3 ends at the last contiguous memory address.
OPERATION:
1.
Type DIAG3 followed by
a RETURN:
.DIAG3 4
DIAG3
asks
you for the starting and ending addresses of
Then it repeats them back to you (or, if you
replied to its questions with carriage returns, it displays
the default addresses it is going to use).
now
the test area.
.DIAG3 ,
Starting address?2000Q
Ending addressi3ffoo
Starting address:2000
Ending address:3000
At the end of each pass, DIAG3 prints the number of the pass
and the number of errors that have occurred. For example
END OF PASS 1
Cl
October 1979)
— ERROR COUNT IS 0
DIAG3 (Cont'd)
2.
Page 2
interrupt the test and start it over, type a ControL—C
(hold down the CONTROL key while you type a C).
To end
the
To
test, reset the machine.
ERRORS:
lists the memory addresses where it finds errors. It aLso telLs
you the data that is in those addresses and the data that was supposed
to be there. For example:
DIAG3
END OF PASS 3 — ERROR COUNT IS 1
[ERROR AT ADDRESS 137776 — WAS 005420 SHOULD BE 005421]
CHARACTERISTICS:
You may only end DIAG3 by resetting the system.
DIAG3
can
test memory Locations outside of your memory partition from
the location of DIAG3 itself up to the Last contiguous memory address.
1
(1
October 1979)
diag4
FUNCTION:
Performs
a
thorough test of your memory partition by writing data
patterns into memory and then reading and verifying those patterns.
HINTS/RESTRICTIONS:
In addition to the normal memory testing procedure, DIAG4 performs a
teak—down test on dynamic
memories. (That is, it writes a block of
ones into memory, waits for a whiLe, and then returns to that bLock to
see if the ones are stiLL there. This checks to make sure that the
memory Locations have heLd their charge.)
FORMAT:
.DIAG4
DEFAULTS:
If you do not specify beginning and ending memory addresses, DIAG4 uses
the smallest and Largest addresses in your memory partition.
OPERATION:
1.
Type DIAG4 folLowed by a RETURN:
.DIAG4
2.
DIAG4 asks you for the starting and ending
of memory you want to test.
these addresses back to you:
the
block
.DIAG4?
What starting address? 140000Q
What ending address? 177376
Starting address: 140000
Ending address: 177376
END OF PASS
— ERROR COUNT IS 0
END OF PASS 2 — ERROR COUNT IS 0
(1
October 1979)
1
address of
DIAG4 then repeats
memory
DIAG4 (Cont'd)
3.
Page 2
If you do not specify a starting or ending address
(that
is,
you type a RETURN after each question), DIAG4 assumes that you
want to test your entire memory partition, and it uses the
minimum and maximum memory addresses in your memory partition:
.DIAG4
What starting address?
What ending address?)
Starting address: 55034
Ending address: 177376
-c
4.
Each time DIAG4 cycLes through memory it Lets you know that
has comp'eted a pass:
it
END OF PASS 34 — ERROR COUNT IS 0
5.
To end the test, type a ControL—C.
ERRORS:
BAD RANGE OF ADDRESSES
You did not suppLy proper memory addresses; make sure that the
you give are within your memory partition and that the
addresses
starting address is smaLler than the ending address.
END OF PASS n — ERROR COUNT IS
At the end of every pass through memory, DIAG4
number of the pass and the number of errors it found.
telLs
you
the
ERROR AT ADDRESS nnnnnnn — WAS Datal SHOULD BE Data2
When
DIAG4
finds an error, it telLs you the memory
Location that
Then it telLs you the data that it found
in that l.ocation (Datal), and the data that shouLd have been there
(Data?); this gives you an idea of what memory chip is bad.
contained the error (nnnnnn).
CHARACTERrSTICS:
In
addition
to
dynamic memory.
usual memory testing, it performs a Leak—down test on
Tests only the memory partition of the job running
DIAG4.
Returns your terminaL to AMOS command LeveL if you type a ControL—C.
(1 October 1979)
ding
FUNCTION:
Rings the terminal beLl.
HINTS/RESTRICTIONS:
DING
is
usefuL
in
a
command
fiLe for telling you that an input is
expected or that a process is finished.
FORMAT:
DING n
where n is the number of times you want to Sound the terminal beLL.
OPERATION:
1.
To ring your terminaL belL, type DING; then give the number of
times you want the terminal bell to ring.
example:
Type a RETURN.
For
.DING 5
2.
You will most often use the DING command in
Let
the
user
of
the
command
file
command
fiLes
to
that an event is
enter input.
For
know
finished or that he or she is expected to
example:
:T
:<Backup Project 100 accounts on DSK1: over to DSKO:>
COPY DSKO:[]=DSK1:L100,*]
I
:<FINISI1ED... Remove backup disk.>
DING 5
ERRORS:
DING generates no error messages.
CHARACTERISTICS
Used within command fiLe to get the attention of the user of the file.
Returns your terminaL to AMOS command leveL.
(1 October 1979)
—I
1
th
FUNCTION:
Produces a directory Listing for specific files or accounts.
HINTS/RESTRICTIONS:
can
to:
display the List of all fiLes in a specific
accounts and devices a particular file appears
find out the complete specification of a file, and place a copy of
You
use
DIR
account, teLL you
in,
what
a directory Listing into a fiLe.
.DIR MEM:Filespec
.DIR RES:
performs same function as:
performs same function as:
MAP Fitespec
.SYSTEM
(To use the two formats above, the devices MEM and RES must be
in your system device table.)
search for a particular file
accounts, use .DIR ALL:LJfilespec.
To
defined
on alL mounted devices and in aLL
If you use DIR to create a fiLe that hoLds a directory listing (and
you
use
if
the /DATA option) then BASIC
read the file specifications
in your file and you can use the file withcan
the OPEN statement.
To send a directory Listing directly to a printer, use TRM:xxx as your
Listfilespec, where xxx is the terminal name
associated with the
printer.
Use the /WIDE option to fit
display.
is
DIR
a
wiLdcard
a
Long directory listing
file command.
DIR, refer to Section 9.2, "Finding
(DIR)," in the AMOS User's
on
your
terminaL
For more information on the use of
Out What
FiLes
Are
on
the
Guide, (DWM—OQ100—35).
Disk
FORMAT:
.DIR {ListfiLespec=cFiLespec1{,FiLespec2
Filespecw}].(/Switches) ,3
where
FiLespec is one or more file specifications that select the
or files for which you want a directory Listing. If you don't want file
dispLay the directory listing on your terminaL, but instead want to
to
write it into a file, include a Listfilespec.
more option requests (/Switches).
(1 October 1979)
You may include
one
or
DIR (Cont'd)
Page 2
DEFAULTS:
If
you
don't
include a Filespec on the DIR command Line, DIR
that you want a directory Listing for alt of the fiLes in
the
assumes
account
currentLy logged into.
If you include fiLenames, but omit
device specifications and PPNs, DIR assumes the device and PPN you are
currentLy logged into.
The
defauLt switch is IWIDE:1/NOBASE_ The
you
are
defauLt fiLe specification is *.*.
The default Listfitespec (e.g., if
you say DIR
in the account and device you are Logged into.
fitespec) is DIRECT.LST
OPTIONS:
You may request the foLlowing options by including a slash (I) and
appropriate switch code in your DIR command tine:
or ID
/DATA
MULL
or 1K
/WIDE
or
Just
complete
FiLespecs,
line.
per
one
(Operation switch.)
DeLete and repLace existing ListfiLe if it has same
specifications as your Listfitespec.
(Operation
switch.)
Generate
directory
Listing
in four coLumns.
(Operation switch.)
Generate
directory
listing in n
coLumns.
(Operation switch.)
DispLays a hashmark for each fiLe (computed vaLue
/WIDE:n or IW:n
or /H
/HASH
list
the
characteristics of the file);
based on
help
/CONTIGUOu5 or IC
you
to
switch.)
Displays a 'Sc,, next to the extension of contiguous
files.
The
directory dispLay thus can tell you
which files are sequential
(contiguous).
IBASE or lB
serves
distinguish between fiLe versions. (File
and
which
are
(Operation switch.)
random
Displays the base disk address of the file (or base
memory
switch.)
address,
if
Turns off lB switch.
/NOBASE or /NOB
huLL or IF
(A file
you say DIR/B MEM:).
(A file switch.)
Same as saying: /HASH/BASE/CONTIGUOUS.
OPERATION:
1.
Type DIR optionalLy foLlowed by a ListfiLespec
sign
more
and
an
equaL
(if you want the directory listing in a file) and one or
fiLe
switches.
specifications.
Type a RETURN.
You
may
For example:
include
one
or
more
.DIR VRTUAL.PRGL11O,9],DPL.PRGEJ
2.
dispLays directory Listings for the fiLes you specified.
(See EXAMPLES, below.) It gives you the foLLowing information
DIR
(1 October 1979)
dirseq
FUNCTION:
ALphabetizes
unit.
the
entries in aLL of the directories on a given logicaL
HINTS/RESTRICTIONS:
ALphabetizes ALL directories on a disk. (NOTE: By alphabetizing, we
mean that DIRSEQ arranges the directory entries in order based on their
ASCII values.
This means that filenames that begin with numbers come
after fiLenames that begin with letters.)
IMPORTANT NOTE: Do not use DIRSEQ while other jobs
disk.
are
accessing
the
FORMAT:
.DIRSEQ Devn:
where
Devn:
specifies the logical unit containing the directories you
want to aLphabetize.
DEFAULTS:
If you do not supply a device, DIRSEQ uses the device you are currentLy
Logged into.
OPERATION:
7.
Type DIRSEO (optionalLy followed by
a
device
type a RETURN:
specification);
.DIRSEQ SMD1:?
2.
orders the entries in the directories on the disk.
When it is finished, it displays an AMOS prompt:
DIRSEQ
.DIRSEQ
Use the DIR command to see a display
ordered account directory.
of
your
aLphabeticalLy
ERRORS:
generates no error messages of its own, but you may see some of
the standard system error messages. For example:
DIRSEQ
(1 October 1979)
DIRSEQ (Cont'd)
Page 2
?Cannot INIT Devn: — device does not exist
The system cannot find the specified device.
Check your
spelling.
To
see a list of the valid system devices, type DEVTBL
folLowed by a RETURN.
?Cannot READ Devn: — disk is not mounted
The system cannot read the specitied device because it
mounted.
Use the MOUNT command to mount that logical unit.
is
not
CHARACTERISTICS:
Alphabetizes all directories on a specified disk.
DO NOT use DIRSEQ on a disk while other jobs are accessing that disk.
Returns your terminaL to AMOS command level.
1
(1 October 1979)
do
F uN C I t ON:
Executes DO fiLes
HINTS/RESTRICTIONS:
A
DO
fiLe
is
a
special,
information on command
and
extended
DO
fiLes,
type
of
see
the
command
AMOS
(DWM—OO100—35), Chapter 8, "Command Files and Do FiLes."
In
file.
LJsers
(For
Guide,
command
file is a text fiLe that contains system
You can invoke such a fiLe by entering its specification at
command
leveL.
A DO tile can contain alL of the elements of a
summary,
a
commands.
AMOS
command file,
the file by
in addition, a DO file allows you to
pass
arguilents
to
including parameter symbols in that file. You can then
specify the arguments to be substituted for those symbols when you
invoke the DO tile. Build a DO file by creating a text fiLe with one
of the system text editors.
NOTE:
If a DO fiLe has a .DO extension, you may invoke that fiLe simply
file at AMOS command Level,
providing that no .PRG or .CMD files of the same name exist in your
account or the system Library accounts. The system then caLls the DO
command for you.
If the fiLe does not have a .DO extension, you must
by entering the specification of that
use the DO command.
(When processing DO files, AMOS uses the program DSKO:MDO.PRG[1,4J;
not erase that fiLe from the System Disk.)
do
FORMAT:
.DO Fi lespec {Arql Arg2 ... ArgN)
Filespec seLects the DO file you want to invoke and Argi through
one or more text
items (separated by
spaces) that you wish to substitute for parameter symbols in the DO
where
ArgN is an optional List of
file,
DEFAULTS:
DO assumes a fiLe extension of .DO.
DO (Cont'd)
Paqe 2
OPERATION:
1.
Type DO
followed
optionalLy,
file
does
extension.)
U
a
the
by
List
of
specification of the DO file (and,
arguments required by that file). (If the
not have a .DO extension,
Type a RETURN. For exampLe:
you
must
specify
the
.DO WRITE.TXT RECRD1 RECRD2 @E
The command above telLs the system to execute the file WRITE.TXT as
a
DO
file. The system substitutes the two text arguments RECRD1
and RECRD2 for parameter symbols in the DO tile.
SYMBOL SUMMARY:
Besides aLL vaLid system commands, command file
special
symbols,
fiLe specifications, DO files can contain the foLlowing symbols:
Sn
SD
and
where n is a nuiber between 0 and 9, incLusive.
These
symbols are the parameter symbols into which DO substitutes
the arguments you specify on the DO command line.
The SD symboL identifies the default parameter List. SD
must begin in the first character—position on the first Line
of the DO fiLe. FoLlow it with the List of default text
for the parameter symboLs
on the DO command line. Separate
items you want DO to substitute
if
no
arguments
appear
the items with spaces.
$
NulL parameter symboL.
Useful in argument list on DO command
Line for specifying which parameter symbols associate with
which arguments and in default parameter list.
5:
Current device symboL.
SP
Current PPN symbot.
Represents device that user of the DO
file is currentLy Logged into.
Represents
file is currentLy Logged into.
account
that user of the DO
ERRORS:
?Cannot Locate FiLespec
DO
couLd not find the file you specified. Check the extension of
the file you want to use. For example, if DO says:
?Cannot Locate REMAKE.DO
does your DO file, REMAKE, have a .DO extension?
If not, you must
specify the extension on the DO command line. Make sure that you are
Logged into the correct account.
DO (Cont'd)
CHARACTERISTICS:
Assumes a tile extension of .DO.
Paqe 3
dekana
F UN C T ION
data on a disk, re—creating the disk bitmap and tracking
the
AnaLyzes
down Lost disk bLocks. Reports fiLe errors, inconsistent btock counts,
and bad bitmap hash totaLs.
HINTS/RESTRICTIONS:
You must be logged into account £1,2J to run DSKANA.
DSKANA reads every block on the disk.
bitmap
shouLd
It
compares that
and
run on
ShouLd be
be,
keeps
track
of
what
the
to what it actuaLLy is; then it
regular basis; redairns
a
rewrites the bitmap,
temporariLy allocated disk bLocks and cLeans up bitmap. Tells you if
more than one fiLe cLaims the same disk bLock, if there are illegal
block links in a fiLe, and if your bitmap has a bad hash totaL.
IMPORTANT
NOTE:
DO
NOT run DSKANA when other users are accessinq the
specified disk.
To see a summary of the
foLlowed by a RETURN.
DSKANA
switches
and
modes,
enter
DSKANA
NOTE TO PHOENIX DRIVE USERS: DSKANA checks the specified device for the
file BADBLK.SYSE1,2]. (This fiLe is created by CRT41O, the program that
certifies disks in devices that run under controL of the AM—410; the
fiLe contains a list of ML bad blocks or tracks on the certified
If BADBLK.SYS was written by a 4.4 ReLease or Later version of
disk.)
CRT41O, DSKANA ignores the BADBLK.SYS data.
If BAD8LK.SYS was written by a pre—4.4 version of CRT41O, DSKANA checks
If the
the BADBLK.SYS fiLe before proceeding with the disk anaLysis.
hash totaL for BADBLK.SYSC1.2J is bad, DSKANA teLLs you so:
CBADBLK.SYS contains a bad hash code]
You then know that the original certification was not aLLowed to finish
that the data in BADBLK.SYS has become darnaqed. ALthough DSKANA
continues with the disk analysis if BADBLK.SYS has a bad hash total,
or
you
should
DSKANA
is
integrity.
copy
using
For
Ml fiLes off the disk and then re—certify it, since
information in
information
more
eADBLK.SYS
on disk
reference sheets for BADOLK and CRT41O.
(Changed 30 Aprit. 1981)
4
that
is
of
certification,
doubtful
see
the
Paqe 2
DSKANA (Cont'd)
If you are using the IL switch, and if the the BADBLK.SYS hash totaL is
OK, DSKANA now prints the numbers of any bad blocks.
For example:
[bad disk blocks]
2035
2036
2042
2041
FORMAT:
.DSKANA (Fl lespec}aevn:C/switch} ED
where the optional Filespec selects a DSKANA output file. Devn: selects
the device that contains the disk you want to analyze; the optional
/switch selects either the /E (errors only) or IL (full listing)
options.
OPTIONS:
The IL switch:
The IL switch tells OSKANA to dispLay a full
PPNs;
2.
account
addresses of the bLocks that they occupy.
switch
from
the
listing of all:
1.
directories; and, 1. fiLes; aLong with the disk
DSKANA
command
line,
If
you
information or any specific file error messages,
you omit the IL
do not
see this
but you stilt see
the regular DSKANA messages.
The IE switch:
The IE switch tells OSKANA to list onLy the PPNs of the accounts on
the disk and those disk blocks in which errors occurred. For each
error you see the following information: 1. number of the block at
which the error occurred; 2. the appropriate file error message; 3.
the file, account, and device in which the error occurred.
OPERATION:
Using DSKANA without the /L or /E switches:
1.
OSKANA
followed by the specification of the device whose
contents you want to analyze; type a RETURN. DSKANA now tells you
that it is beginninq to analyze the disk. For example:
Type
.DSKANA 05K3: NE
tBegin analysis of DSK1J
2.
You see nothing more for some moments untiL DSKANA finishes reading
the disk, except the numbers of the PPNs as DSKANA progresses
through the disk accounts. For example:
[1,2]
[20,0]
C
20,1]
(changed 30 April 1981)
OSKANA (Cont'd)
3.
Page 3
when DSKANA finishes reading the disk, it
information:
dispLays
the
foLlowing
[The foLLowing bthcks were marked in use but not in a fiLe]
You may next
see a
List of bLock njnbers.
This is not
necessariLy anything to be aLarmed about; the system occasionaLly
temporarily aLlocates a disk bLock for some purpose, and then faiLs
to reclaim that block when finished with it.
up
the
Running DSKANA "frees
blocks listed under this messaqe by marking them free for
use.
[The folLowing bLocks were in a fiLe but not marked in use]
You may next see a List of block nu..bers (if you do not, then
there is nothing to worry about).
A
List of block numbers
following this message is an indication of something wrong—— for
exampLe, the linking structure of the disk has gone astray; you
must run DSKANA again, using the IL or
time
you
run
DSKANA,
IE
switches.
ERRORS, beLow, so that you can figure out what is
disk.
4.
The
second
Look for the fiLe error messages listed in
wrong
with
the
The
Last pieces of information that DSKANA displays on your
terminal are concerned with the bitmap and with fiLe errors.
To oerform a check on the vaLidity of the disk bitmap,
every
time
the system updates the bitmap it computes a hash totaL and compares
it with the previously stored value. DSKANA aLso computes a bitmap
hash total based on the blocks that it has processed; if this vaLue
does not match the officiaL bitmap hash totaL, you see this
message:
[BITMAP on disk had a bad hash total]
which lets you know that something was not quite right,
Whether
the bitmap hash totaL is correct or not, DSKANA always rewrites the
bitmap and you see:
[Rewriting BITMAPJ
Last line of data in the terminal dispLay teLLs you how many
fiLe errors were detected. If no fiLe errors were seen by DSKANA as
it read the disk, you see:
The
No file errors
(Changed 30 April 1981)
DSKANA (Cont'd)
Page 4
Otherwise, DSKANA teUs you how many fiLe errors were detected:
5 fiLe errors detected
(The messages Usted in ERRORS, beLow, tell you what kinds of fiLe
errors occurred.
Frequent file errors can indicate hardware
problems. To see these error messages, you must run DSKANA with
the IL or /E switches.)
If
you want to see more information about how DSKANA is proqressing
as
it analyzes your disk (or if DSKANA has reported file errors on your
disk and you want to find out where the errors occurred), use the IL or
/E switches:
1.
To
use the IL switch, enter DSKANA foLlowed by the specification of
the device that contains the disk you want to anaLyze.
IL foLlowed by a RETURN. For example:
Then enter
.DSKANA HWK3:/Lf
You now see alL of the information discussed in the paragraphs
above, pLus you also see a List of aLL PPNs, account di rectories,
fiLenames and extensions, and disk block nuribers for the specified
disk.
As
DSKANA
progresses through the disk, you m ight see a
dispLay that Looks something Like this:
EBegin anaLysis of DSK5:J
[1,4]
Directory
AMSORT
APPEND
OLD
144
PRG
151
145
146
If DSKANA finds an error, you see where on the
For exampLe:
BLock
2.
147
disk
150
it
occurred.
1703 — bLock creates endless Loop in file DSK5:MDO.PRG[1,4]
IE switch teLls DSKANA not to dispLay the account directories,
filenames and extensions, and block nuiibers of the disk as the
analysis proceeds unless an error occurs. You do see a list of the
The
PPNs as DSKANA reads through the disk.
For example:
.DSKANA DSK3:IEJ
tBegin analysis of DSK3I
UU,1J
BLock 0 — bLock reserved for system use onLy in DSK3:READ.PRGE1,4J
[40,1]
(Changed 30 April 1981)
DSKANA (Cont'd)
Page 5
To pace the DSKANA output into a file:
1.
or
whether
not you use the IL or IE switches, you can telL DSKANA
information that OSKANA usuaLly
your terminat screen. Include a fiLe specification
to create a file containing the
displays
on
foLLowed by an equaL sign on the DSKANA command Line.
U
For example:
.DSKANA DSKO:ERRQR.TXT=DSK1:/L
If the specified file aLready exists, DSKANA deLetes it before
the disk analysis. The first Line of the file incLudes
beginning
the date of the anaLysis.
on 4/17/80.)
(For exampLe: Disk
Analysis
List
fiLe
When DSKANA is finished, you may display the file by using the TYPE
command or you may print it via the PRINT command.
ERRORS:
There are a number of file error messaaes that you can see if something
is wrong on the disk. You onLy see these messages if you use the IL or
/E switches:
BLock used in previous fiLe
Last bLock in the fiLe where this message appears aso exists in
a previous fiLe. The system made an error when aLLocating blocks to
the files.
BLock marked as bad
A block marked as bad in the
been aLLocated to a fiLe.
Device error on Devn:
This bLock contains
recover from.
a
hard
BADBLK.SYS[1,21
error
that
fiLe
has
somehow
the system could not
tunable to Locate BITMAP for rewrite]
DSKANA couLdn't find the bitmap area in memory for
This means that the bitmap in memory may be invalid.
the
device.
BITMAP rewrite error code XXXXX
some reason, the bitmap couLd not be written back out to the
The number you see is the error code that indicates what the
For
disk.
problem
File
was.
Service
For a list of these error codes, see chapter 6, "The
in
the
AMOS
Monitor
CaLI.s
ManuaL,
System,'
(DWM—OO100—42).
This fiLe has a burn block count
The actuaL block count for the fiLe where this message appears
does not match the block count assumed by the file itseLf.
Once
again, an error has been made in allocating blocks to this file.
(Changed 30 ApriL 1981)
DSKANA (Cont'd)
Page 6
illegal bLock Link
A
Link in the fiLe where this message appears points to an
invalid block address (e.g., to a block that does not exist).
BLock reserved for system use onLy
A Link in the tiLe where this messaqe appears points to a bLock
that cannot be alLocated to a fiLe. Once again, an error has been
made in aLLocating bLocks to this file.
BLock creates endless Loop in file
The Linking structure of this fiLe is such
blocks point back to themselves.
BLock—B, which points back to Block—A.
alLocation.
that
eventuaLLy the
BLock—A points to
An error was made in bLock
That
is,
If you see any of these messages in the Listing of the blocks processed
DSKANA, you have serious probLems with the data on your disk. Your
best course is to delete the files affected, run DSKANA again, and
restore the deLeted files from your backup disk. (NOTE: You do not see
by
the messages above if you have not used the IL or IF option.)
Aside
from the bLock aLLocation and file errors that OSKANA itseLf
reports, you can aLso see the standard system error messages dealing
with invalid device specifications.
In addition, you can see:
?Must be Logged into PPN E1,21 to run DSKANA
You
must
Log
OSKANA.
into the System Operator's account, [1,2], to run
?Cannot output to device being anaLyzed
If you want DSKANA to write to an output
fiLe,
you
specify that the fiLe appear on the disk being analyzed.
may
not
?Device write protected — Please unprotect for retry
type RETURN when ready
Write—enabLe your disk and type a RETURN.
write on your disk to rewrite the disk bitmap.
DSKANA must be abLe to
CBADBLK.SYS has a bad hash code]
The
information
in
see if anything else is
continue;
BADBLICSYS is not complete. It you want to
wrong with the disk, Let the anaLysis
otherwise, type a Control—C.
and re—certify it.
Copy aLl files off the disk
CHARACTERISTICS:
Performs a thorough analysis of the block links of the specified
device.
You should run DSKANA reguLarLy to recLaim lost blocks and to
check the bitmap.
DO NOT run while other users are accessing
must be logged into [1,2J to run OSKANA.
(changed 30 April 1981)
the
specified
disk.
You
dskcpy
FUNCTION:
Creates
another.
a
backup disk by making a LiteraL image of one disk onto
Optionally generates a hash total for the backup disk.
HINTS/RESTRICTIONS:
You may use
DSKCPY on
any kind of disk device.
However, the
three—character device specification must be the same for both devices
you are copying between. For exampLe, if you want to make a copy of
the disk in device HWK1:, you may copy it to HWK2: or HWKO:, but you
may not copy it to AMSO: or STD3:.
Remember that DSKCPY makes a literal image of one disk onto another.
means that
any data on the disk
you are copying to wiLL be
irretrievably Lost after a disk copy is done. As of AMOS Version 4.4,
you may use DSKCPY on devices that run under the control of the
This
AM—4tOEard disk controller (e.g., the Phoenix drive).
"fast copy"
If you do not inhibit the Hawk fast
NOTE TO HAWK HARD DISK USERS: DSKCPY
for
Hawk
hard disk devices.
uses a speciaL
mode
copy
mode, no one eLse may run on the system whiLe you perform the Hawk
disk backup.
This is because this mode causes DSKCPY to communicate
directLy with the AM—500 controlLer instead of going through AMOS. See
OPTIONS, beLow, for information on the /0 switch, which teLls DSKCPY to
use the oLd disk cony method for copying between Hawk devices.
DSKCPY optionaLly generates a hash total for the backup
has finished the disk copy.
are
disk
when
This feature is especially useful when
it
you
making muLtipLe copies of a disk—— the hash totaL dispLayed at the
end of the disk copy should be the same for each disk copied. The hash
totaL gives you an extra way to verify that the copies made are
identicaL to the master disk, since two disks wiLt onLy have the same
hash total
if their contents are identicaL. (For information on
generating a hash total for a disk without using DSKCPY, see the HASHER
reference sheet in this manual.)
FORMAT:
.DSKCPY(/Switches} @j!
where Switches seLect optionaL DSKCPY features.
DEFAULTS:
If you enter just the unit numbers of the disks you want to copy
instead of a fulL device specification, DSKCPY asumes that you
between
(Changed 30 ApriL 1981)
DSKCPY (Cont'd)
Page 2
are copying between DSK devices. (For exampte, if you enter 1 and 0 as
the input and output drives, DSKCPY assumes that you want to copy from
DSK1: to DSKO:.)
If
you
are
copyinq
between
hard disks, and do not use the /0
Hawk
switch, DSKCPY automaticaLLy uses the Hawk fast copy mode.
No
other
user may run on the system while DSKCPY is using the fast copy mode to
backup Hawk disks.
OPTIONS:
may select the fotLowinq
switch codes:
You
options
by
specifying
Generates a hash totaL for the copied disk.
the Hawk fast copy" mode, DSKCPY gives you
the
appropriate
(If you use
different
hash total for the disk than if you use the oLd disk copy
mode.
See beow for information on inhibiting the fast
a
copy mode.)
TeLls DSKCPY to use the oLd disk copy method for copying
between Hawk hard disks. Even though this mode is much
slower than the default fast copy mode, you may want to
/0
use this switch if your system has more than one set of
disk drives, since the fast copy mode prevents any other
user from runninq on the system whiLe the disk copy is
taking pLace.
This switch has no effect
other disks.
if
you
are
copying
between
OPERATION:
To copy between fLoppy disks or Phoenix hard disks:
1.
Enter DSKCPY foLlowed by a RETURN:
.DSKCPY @_ED
If
your disk drive permits, you shouLd now write—protect the drive
you are copying from; this ensures that you won't accidentalLy copy
the backup disk onto your source disk.
DSKCPY asks you for the Input drive. Enter the specification of
the device you are copying from; type a RETURN. Now DSKCPY asks
you for the Output drive. Enter the specification of the device
you are copying to; type a RETURN. For example:
.DSKCPY ED
Tnput drive: AMSO: jD
Output drive: AMS1:1jiJ
(Changed 30 ApriL 1981)
Paqe 3
DSKCPY (Cont'd)
DSKCPY
makes a LiteraL image of the disk in device AMSO: onto
the disk in device AMS1:. DSKCPY telLs you when it is finished.
it copies and verifies, it telLs you how many bLocks it is
As
copying. (DSKCPY copies every bLock on the disk, even if some
bocks contain no data.)
Now
[Copyinn 500 bLocks]
[DupLication and verification compLeted)
amount of time it takes to perform this disk copy depends on
the device. An AMS—format diskette takes about two minutes to copy
and verity; a Phoenix hard disk takes about 28 minutes.
The
2.
If you want DSKCPY to generate a hash totM for the disk copied to,
use the /H switch. For examp'e:
.DSKCPY/H
Tnput drive: STDO: @D
Output drive: STD1: I
[Copying 500 bLocksl
fDupLication and verification completedj
Hash is 672
DSKCPY
dispLays
the hash totaL for disk after it has finished the
disk copy. You can now check this number against the hash totaL
for the source disk to make sure that a øerfect copy was done. To
generate a hash totaL for the source disk, use the HASIIER command.
(See the HASHER reference sheet in this manuaL.)
To copy between Hawk hard disks:
1.
Enter DSKCPY followed by a RETURN:
.DSKCPY RET
DSKCPY
asks you for the Input drive and the Output drive.
Enter the specifications of the devices that contain the disk you
want to copy from and the disk you want to copy to.
(You shouLd
Now
write—protect the disk you are
accidentaLLy write to it.)
When
copying
from
so
that
you
don't
you are copying between Hawk disks, DSKCPY automaticaLLy uses
the speciaL fast copy mode. Because this mode causes DSKCPY to
communicate directly with the AM—SIlO, no other users on the system
may run whiLe you are oerforrninq the disk copy. DSKCPY warns you
that it is suspending alL users whiLe the disk copy takes pLace:
ZALI other users wilL be suspended whiLe HAWK copy is running.
Hit return to continue or controL—C to abort:
(Changed 30 ApriL 1981)
DSKCPY (Cont'd)
Page 4
If any users are running on the system, type a ControL—C.
are sure that
command aqain.
When you
is running, you can use the DSKCPY
Remember that if the device specification of a Hawk
no
one
eLse
device is DSK, you can just enter the unit numbers of
you want to copy between. For exampe:
the
devices
.DSKCPY @1D
YALL
other users will be suspended while HAWK copy is running.
Hit return to continue or control—C to abort:
Input
Output
drive: OEJ
drive: ii!ifl
[Copying 9696 btocksJ
[Duplication and verification completed]
The fast copy takes about six minutes.
2.
If other users are running on the system, you may want to use the
oLd mode of disk copying.. This type of disk cony wilL take Longer
than the fast copy, but you can perform it while others are using
the system. Type DSKCPY folLowed by a /0; then type a RETURN:
.DSKCPY/0 D
input drive: HWK2: @ID
Output drive: HWK3: @D
rcopying 9696 btocksJ
[Duplication and verification completed]
The old Hawk disk copy mode takes about 13 minutes.
3.
To generate a hash totaL for the disk copied to, use the /H switch.
For exampLe:
.DSKCPYIH EflJ
or:
.DSKCPY/0/H @
ERRORS:
You may see the foLLowing errors when using DSKCPY:
?InvaLid switch, please use one or more of the following:
generate a hash code for the copied disk
/0
use oLd (slow) copy method for the AN—SOD
You specified a switch on the command Line other than /0 or /H.
Enter the command line again.
?Driver not found
DSKCPY
specified
couLdn't find
device.
non—OSK
(Changed 30 April 1981)
device driver program for
the
That means that the driver was not in
the
DSKCPY (Cont'd)
Page 5
system memory, user memory, or DSKO:[1,61.
Operator.
Check
with
the
System
?tnput and output devices must be the same
You entered device specifications in which the three—character
device code was different. (For example, you tried to copy 4WK1: to
AMS1:.) Remember that you may only copy between devices that use the
same device driver program; that is, devices that have the same
device codes.
size not defined in table
doesn't know the number of disk blocks per disk for the
devices you are trying to copy between. This means that you are
DSKCPY
copying between devices that DSKCPY doesn't know about.
the
System Operator for help.
?Disk
?Verificatior, error at bLock
Check with
nnn
disk bLock, it
This means that
the data chanqed between the time it was read on the source disk and
the time it was read on the output disk. Try usinq DSKCPY again.
If you see this message frequently, you may have hardware problems.
After DSKCPY copied the data in the specified
was not abLe to verify the data on the output disk.
There are a'so several AM—500 hard—disk controlLer "hard
error"
messages that it is possibLe but extremely unlikely that you wouLd ever
see.
(I-f any of these do occur, please contact ALpha Micro.)
?CouLd not find DEVTBL entry for disk mount
This error messaqe refLects an aLmost impossibLe set of
circumstances affecting the device tabLe. Please submit to Alpha
Micro, on a standard Software Performance Report, the detaiLs of
your use of DSKCPY if you ever see this message.
?Sector not found during disk copy — drive N bLock X
where drive N is a decimal number and bLock X is an octaL or
hexadecimaL number.
This can only happen when you are using the
fast copy mode of DSKCPY or HASHER on a Hawk hard disk system.
The
contents of a disk sector have become unformatted. Verify if there
is a probLem by using REDALL to diagnose the disk and report any
read errors.
(See the REDALL reference sheet for more information
about disk diagnostic tests.)
?CRC error during disk copy — drive N block X
where drive N is a decimaL number and block X is an octal or
hexadecimal number.
This can only happen when you are using the
fast copy mode of DSKCPY or -lASHER on a Hawk hard disk system.
The
CycLic Redundancy Check device on the AM—500 board has detected a
Droblem in data transmission.
First verify if there is a problem
by using REDALL to diagnose the disk and report any read errors.
(See the REDALL reference sheet for more information about disk
diagnostic tests.)
The problem can be fixed using DSKDDT, but the
(Changed 30 April 1981)
DSKCPY (Cont'd)
Page 6
data in the btock may be lost.
(For more information on DSKDDT, see
the DSKDOT reference sheet.)
?Sentinet fieLd error durinq disk copy — drive N block X
where drive N is a decimal ninnber and bLock X is an
octal or
This can only happen when you are using the
fast copy mode of DSKCPY or HASF4ER on a Hawk hard disk system.
The
contents of a disk block have become unformatted. Verify if there
hexadecimaL
number.
is a problem by using REDALI.. to diagnose the disk and report any
read errors.
(See the REDALL reference sheet for more information
about disk diagnostic tests.)
?Undefined error during disk copy — drive N block X
where drive N is a decimaL nimiber and block X is an octaL or
hexadecima' number.
This can only happen when you are using the
fast copy mode of DSKCPY or HASHER on a Hawk hard disk system.
A
hard error occurred which was not definable as any of the foregoing
AM—500 hard—disk controller errors.
Verify if there is a problem by
using REDALL to diagnose the disk and report any read errors.
the
REDALL
reference sheet for more information about
diaqnostic tests.)
See the documentation
that
accompanies
the
AM—500
board
information on these errors and the conditions they report.
for
(See
disk
more
CHARACTERISTICS:
Makes a literal image of one disk onto another. OptionaLly generates a
hash total for the disk copied to.
May
NOT
between.
while anyone is accessing
Assumes a device code of 05K.
be
run
the disks being copied
If used on Hawk hard disks, DSKCPY may be used either in fast copy mode
(with no other users running on the system) or in a slower copy mode
(which allows other users to run on the system). Other devices (floppy
disk drives and phoenix hard disk drives) may not use the Hawk fast
copy mode.
(Changed 30 April 1981)
clskdcft
FUNCTION:
ALlows you to examine and change data directLy on the disk.
HINTS/RESTRICTIONS:
UsefuL for restructuring fiLes and correcting ERROR 10 conditions.
The
record
number
you enter to DSKDDT must be in the number base the
system is currentLy using for your numeric dispLays (usuaLly octaL).
(See the SET reference sheet for information
on setting the dispLay
base.) The numbers you give to DSKDDT to teLL it which disk Locations
you want to examine and the repLacement data
for those locations must
be in octaL regardLess of the number base the system is using for
numeric displays.
FORMAT:
.DSKDDT Devn:Record 41
where Devn:
is the device containing the record you want to see, and
Record is the number of the disk record you want to examine and change.
OPERATION:
1.
Type DSKbDT foLlowed by a device specification
number; then type a RETURN. For example:
and
a
record
.DSKDDT DSK1:147
2.
DSKDDT
reads the record specified, lists any errors it finds,
and is then ready for you to modify the record.
3.
Use the DSKDDT commands Listed below. To see the contents of
the first Location, type a slash, /. To see the contents of
the next Location, type a Line—feed.
DSKDDT
dispLays two
bytes of data at a time.
The DSKDDT display might look
something Like this:
.DSKDDT DSK1:202
2/
4/
6/
00452
44510
52040
The number on the left of
the
slash
is
the
RELATIVE
location within the record that you want to examine.
given
(1 October 1979)
that
you
are
disk
That is,
examining record 202, the display above
DSKDDT Ccont'd)
Page 2
telLs you that the first two bytes in record #202 are 00452,
the second two bytes are 44510, and the the third two bytes
are 52040.
4.
After you finish using the DSKDDT commands, type E to exit
DSKDDT.
DSKDDT
then rewrites the record and takes your
terminaL back to AMOS command leveL.
COMMAND SUMMARY:
nnn/
Where nnn is the disk Location you want to examine.
(This
number is the reLative position of the Location from the
front of the record.
For example, 6/ dispLays the
contents of the sixth and seventh bytes in the record.)
the relative disk location you want to
examine (entered in octal), and NNN is the octaL data (two
bytes) with which you want to repLace the contents of
where nnn is
nnn/NNN
nnn.
Line—feed
DispLay the next two bytes of data in the record.
Display the previous Location.
/
DispLay Location zero in the record (that is, display
first two bytes of data in the record).
RETURN
No operation.
RUBOLIT
CanceL
TAB.
the
current command Line and display XXX folLowed by
a
Rewrite the modified record and exit.
E
Exit without updating record.
ERRORS:
The onLy DSKDDT error message is a backspace, question mark, and a tab.
This means that DSKDDT didn't understand your command.
You may aLso see some of the standard system error messages that resuLt
from an invaLid device specification. For example:
?Cannot READ Devn: — device does not exist
Check your speLLing. AMOS does not recognize the device
For exampLe, did you enter DKS1: instead of DSK1:?
specified.
?Cannot READ Devn: — disk is not mounted
DSKDDT
can't read the device because
the MOUNT command to mount the disk.
it is not mounted.
you
Use
N-I
(1 October 1979)
DSKDDT (Cont'd)
Page 3
CHARACTERISTICS:
ALLows you to examine and modify disk records.
Fixes most disk errors by rewriting the record and so
recomputing the
is a computed vaLue based on the
numeric data in the record; it is used to verify the contents of the
record.)
CycLic
Redundancy
Check.
(The CRC
Returns your terminal to the AMOS command LeveL.
(1
October 1979)
dskdmp
FUNCTION:
DispLays physical disk records on your terminaL in numeric form.
HINTS/RESTRICTIONS:
The
system internalLy represents aLl data in numeric form. The DSKDMP
display shows you the data in the number base that the system is
currently using for your numeric displays; enter record numbers in that
same
base.
(See the SET reference sheet for information on changing
the dispLay base.)
NOTE: You may freeze the display by typing a Control—s and resume it by
typing a Control—Q. To interrupt the dispLay, type a Control—c.
FORMAT:
.DSKDMP Devn:Record
where Devn: is the Logical unit that contains the data you want
to
display; Record is the number of the physicaL disk record you want to
see.
DEFAULTS:
If you do not supply a device specification, DSKDMP uses the
are currently logged into.
disk
you
OPERATION:
1.
DSKDMP
followed by a device specification and a disk
record number; then type a RETURN. For example:
Type
.DSKDMP DSK1:2Q24
2.
DSKDMP displays the entire record in the number base that the
system is currently using for your displays (usually octal,
base—B), with a message that tells you which record you are
seeing.
Each
line of the dispLay groups data into eight
groups of 16 bits:
.DSKDMP 3063
[RECORD 3063]
003101
052057
067157 023564
(1 October 1979)
046124
024544
042040
005015
045523
066057
046504
033040
020120
005015
041450
052506
DSKDMP (Cont'd)
Page 2
ERRORS:
?Cannot READ — ilLegal block number
You gave DSKDMP a record
number
that
does
e x amp l e:
not
exist.
For
.DSKDMP 3333333
tRECORD 1333333]
?Cannot READ — illegaL block number
may
aLso see some of the standard system error messages if
supply invaLid device specifications. For example:
You
?Cannot READ Devn: — device does not exist
Check your speLLing. The system does not recognize
you specified.
the
you
device
?Cannot READ Devn: — disk is not mounted
Use the MOUNT command to mount the disk you want to access.
CHARACTERISTICS:
DispLays
physicaL
dispLay.
disk
records
in
numeric
Returns your terminal to AMOS command level.
(1
october 1979)
form
on
your terminaL
dskf ii
FUNCTION:
TelLs you what disk records are used by the specified file.
HINTS/RESTRICTIONS:
numbers that you
previOusly used the SET
The
see
are
HEX
command),
octaL
addresses of the records in the file.
(or
and
hexadecimaL, if you have
give the physicaL disk
FORMAT:
.DSKFIL Filespec
where Filespec selects the file whose record numbers you want to see.
DEFAULTS:
Default file extension is .PRG
OPERATION:
1.
Enter
DSKFIL
and
the
specification
of the file whose disk
addresses you want to see; then type a RETURN.
For exampLe:
.DSKFIL SWITCH.TXT
2.
Now you see a list of octaL numbers.
These numbers
tell
you
what physicaL records on the disk are being used by your file:
.DSKFIL 8YTE.MAC
T164
1165
1166
2033
ERRORS:
You may see the standard system error messages when using this
the most common being:
command,
?File specification error
DSKFIL
did
not
DSKFIL and a RETURN).
understand your command Line (e.g., you typed
Retype the Line.
FiLespec NOT FOUND
DSKFIL was not abLe to find the file you specified. Check your
speLling, and make sure that you suppLied the proper account and
device specification.
(1
October 1979)
DSKEIL (Cont'd)
CHARACTERISTICS:
Lists disk records in use by the specified file.
The default fiLe extension is .PRG.
Returns your terminal to AMOS command Level.
(1 October 1979)
Page 2
clskpak
FUNCTION:
Allows
you
to
consolidate
or "pack" the contiguous file area of the
disk by moving contiguous files toward the end of the disk.
HINTS/RESTRICTIONS:
Use the DSKPAK program to avoid fragmentation
of
open
space
on
the
disk.
DSKPAK
consolidates the contiguous files on the disk and thus
reduces the number of smaLl free areas on the disk. This creates more
room on the disk for new contiguous files.
(For more information on
file allocation, refer to the document New Method of AlLocating
Contiguous
Files,
(DWM—OO100—23),
in
the
System
Information section of the AM—lOU documentation packet.)
Programmer's
NOTE: DSKPAI( onLy packs contiguous fiLes. To pack sequential fiLes,
use the COPY command with the /PACK option.
(See the COPY reference
sheet.)
FORMAT:
.DSKPAK Devn:
where Devn:
is the specification of the logical unit you want to pack.
OPERATION:
1.
Type DSKPAK followed by the device specification of
you want to pack. Type a RETURN. For example:
the
disk
.DSKPAK DSK1:
2.
DSKPAK
tells you that it is finished by returning you to AMOS
command level.
ERRORS:
If you suppLy an invalid device
system error messages.
specification,
For example:
you
can
see
several
?Cannot ACCESS Devn: — device does not exist
AMOS
does not recognize the device you specified.
spelling and retype the command line.
Check your
?Cannot ACCESS Devn: — disk is not mounted
DSKPAK cannot read the disk because it is not mounted.
MOUNT command.
(1 October 1979)
Use the
DSKPAK (Cont'd)
Page 2
?FiLe specification error
You probably forgot to incLude the device specification on
DSKPAK command tine.
the
Retype the command line.
CHARACTERISTICS:
the contiguous tiles on a disk together, reducing fragmentation
of open space on the disk.
Packs
Returns your terminal to AMOS command level.
(1
October 1979)
dump
FUNCTION:
on your terminaL the contents of memory, random and sequentiaL
disk fiLes, Master FiLe Directories, disk bitmaps, user directories,
and
disk bLocks.
Dispays
HINTS/RESTRICTIONS:
DUMP accepts different kinds of arguments, depending upon the
kind
of
to display. Give DUMP numbers in the same number base
(usuaLLy octaL) that the system is currentLy using for your displays.
data
you
want
(See
the
SET
reference
display base.)
sheet for information on changing the system
You may abbreviate the DUMP keywords (e.g., DI instead of
DIRECTORY).
is re—ent- it, and may be oaded into system memory by the System
more information on DUMP,
see The
DUMP Program,
(DWM—0O100—24), in the "User's Information'
section of the AM—lao
Operator.
F
documentation
packet.
DUMP
FORMAT:
There are six different formats for the DUMP command:
1.
To dispLay memory —
.DUMP Addressl Address2
Addressl is the first address of the memory block
want to dispLay and Address2 is the last.
where
2.
you
To dispLay a fiLe —
.DUMP Fi Lespec ED
where FiLespec is a vaLid fiLe specification of a random or
sequentiaL fiLe.
3.
a
To dispLay a disk bLock —
.DUMP BLOCK BLock—numberl {BLock—number2} {Devn:}fl
where
Block—numberl
is
the
number of the bLock you want to
see, and Devn: is the specification of the logicaL unit that
contains the bLock.
If you omit the device specification,
DUMP assumes the device you are Logged into.
(Changed
1
May 1980)
DUMP (Cont'd)
Page 2
If you give
DUMP disp'ays the data from the first to
may optionaLly suppLy a second bLock number.
two
bLock
numbers,
the
You second bLock, incLusive.
4.
To display a disk bitmap —
.DUMP BITMAP (Devn:}
where Devn: is the specification of the Logical unit whose
bitmap you want to see. If you omit the device specification,
DUMP assumes the device you are Logged into.
5.
To display the disk Master File Directory
—
MED {Devn:}
where Devn: is the specification of the LogicaL unit whose MFD
you want to see.
If you omit the device specification, DUMP
assumes
.OUMPthe device you are logged into.
6.
To dispLay a user's disk directory —
.DUMP DIRECTORY Ep,pnj (Devn:} @D
or:
.DUMP DIRECTORY BLock—number {Devn:)
where—— Devn: is the specification of the
contains
the
Logical unit that
user's directory you want to see; Lp,pn] is the
PPN associated with the user's directory; and, Block—number is
the starting bLock number of the user's directory.
If you
on,it the device specification, DUMP assumes the device you are
Logged into.
DEFAULTS:
DUMP assumes the device and PPN you are currently Logged into.
assumes a fiLe extension of .PRG.
It aLso
OPERATION:
1.
Type DUMP folLowed by the keyword and arguments required by
your particular appLication of the DUMP command. (See FORMAT,
above.)
Then type a RETURN.
For exampLe:
.DUMP BLOCK 16407 DSKO:
2.
To freeze a DUMP display, type a ControL—S; to resume it, type
a ControL—Q. To interrupt a display, type a Control—C.
(Changed 1 May 1980)
DUMP (Cont'd)
Page 3
for its dispLays,
the kind of data it is dispLaying. The bitmap,
NOTE: DUMP uses severaL different formats
depending
on
MFD and User's Fl Le Directory dispLays have their own format.
ALL
other displays show the data in both numeric and ASCII
form. The most common type of dispLay takes the form of the
example beLow, where the numeric form of the data
the Left of the dispLay and the character form of the data
(i.e., as ASCII characters) appears on the right.
.DUMP DSK1:DUMP.TXT @113
I
BLock number 12033 of DSK1:DUMP.TXT, next
005620:006562 020056 052040 062550 066400
005640:066555 067157 072040 070171 020145
005660:066160 074541 072040 065541 071545
0057C0:0,'1157 006555 067412 020146 064164
block Link is
071557 020164
063157 062040
072040 062550
020145 074145
6562
067543 rm. The most cc
071551 mmon type of dis
063040 pLay takes the -1
066541 orm.,of the exam
C
ERRORS:
DUMP dispLays two error messages
?ILlegaL user code
You
used the DUMP DIRECTORY [p,pnJ command.
to find that account on the specified device.
account exists on that device.
?Command
You
Make
DUMP was not abLe
sure that the
format error
probably made a typing error. Make sure that you have
foLlowed the proper DUMP format for your appLication of the command.
You can aLso see standard AMOS error messages
For example:
device or fiLe specifications.
if
you
suppLy
?Cannot OPEN H Lespec — fiLe not found
couldnht find the fiLe you specified.
The system
that your device and account specifications are correct.
invaLid
Make sure
?Cannot OPEN Fl Lespec — invaLid fi Lename
The system did not recognize the file specification you gave.
(For exampLe, you gave the device specification, but did not incLude
the fiLename.) Check your spelLing and try again.
?Cannot OPEN Ii Lespec — disk not mounted
You must use the MOUNT command to mount the device you want to
access.
(Changed
1
May 1980)
DUMP (Cont'd)
Page 4
?Cannot OPEN Fl Lespec — devi Ce does not exist
The system does not understand your device specification.
Check your speLling.
Did you type DKS1: instead of DSK1:, for
example?
?Fi Le specification error
You did not suppLy a proper fiLe specification on the DUMP
Line.
For exampLe, you see this message if you type DUMP
folLowed by a RETURN.
Check the
FORMAT
section
above
for
information on the vaLid formats of the DUMP command.
command
CHARACTERISTICS:
on your terminal the contents of memory, sequential and random
fiLes, disk bbcks, disk bitmaps, disk Master FiLe Directories,
DispLays
and
disk user fiLe directories.
disk
Returns your terminaL to AMOS command LeveL.
(Changed 1 May 1980)
dystat
FUNCTION:
monitor
Video
real—time
Status.
display
that gives information about
system
HINTS/RESTRICTIONS:
To use DYSTAT, your system must
board.
Both
have
a
memory—mapped
video
DSKO:TODCNV.PRG[1,4J and DYSTAT must be in system memory.
the SYSTEM.INI file to incLude:
dispLay
Change
SYSTEM TODCNV
SYSTEM DYSTAT
FORMAT:
.DYSTAT {Base—mem—addrs I/O—port) ,
where Base—mem—addrss is the beginning address of
the RAM associated
with the video board and I/O—port is the I/O port into which the video
board is connected.
DEFAULTS:
The default ase—mem—addrss is: 174000 (octal)
The defaidt I/O port is: 177710 (octal)
OPERATION:
1.
Type DYSTAT (optionalLy foLlowed by the memory addresses and
the I/O port associated with the video board); then type
RETURN:
.DYSTAT?
2.
Now you see a disoLay on the DYSTAT video monitor
that gives
you reaL—time information about the status of the system. You
one
Line of data for each job on the system; this line
contains the folLowing information about the job: 1. name of
the job; 2. the account the job is Logged in under; 3. the
job's priority LeveL; 4. the name of the Last program run by
see
the
job; and, 5. the current status of the job.
that give you information about job status
the
AMOS
Commands.")
(1 October 1979)
User's
Guide,
Chapter
12,
(The symboLs
are described in
"System Information
DISTAl
(Cont'd)
3.
Page 2
It the symbo's indicating current job status are
that
brackets,
square
job
is
encLosed
either by the user typing a ControVs or by using
command).
in
in a suspended state (caused
the
SUSPND
The dispLay aLso shows an arrow pointing to the job
that is currentLy active.
4.
IncLuded in the Left—hand corner of the display is the current
time in seconds.
5.
You
may run DISTAl at any time to reinitiaLize the dispLay or
to change the memory address or I/O
port
associated
video
the
'ast set of addresses
board.
DISTAl
remembers
entered.
with
the
when
you
ERRORS:
It the program DSKO:TODCNV.PRGE1,4J is not in system
memory
try to run DYSTAT, you see:
?TODCNV must be resident in system memory — change SYSTEM.IN!
CHPRACTERISTICS:
Requires that your system be equipped with a memory—mapped video board.
Requires that TODCNV.PRG and DYSTAT itseLf be in system memory.
AL Lows
ho a r d.
you to seLect the memory address and I/O port used by the video
Returns your terminaL to AMOS command LeveL.
(1
October 1979)
edit
FUNCTION:
AlLows you
to
create and edit text files.
HINTS/RESTRICTIONS:
EDIT is a character—oriented text editor. Use various editing commands
to moQe a pointer in your text. Other commands allow you to delete,
insert, and change characters at the Location of the text pointer.
Most EDIT commands are one— or two—characters. EDIT uses an Escape
(rather than a RETURN) as a command deLimiter, so you can enter RETURNs
as part of your commands. (EDIT echoes Escapes as dolLar signs, S.) To
exit, enter an E and type two Escapes:
* E$S
EDIT brings into memory a copy of the tile you want to edit. After
making your editing changes and insertions, EDIT renames your originaL
fiLe to a .BAK extension (to create a backup tile) and writes your
edited file out to the disk under the same name and extension as the
originaL file.
NOTE: Before you can edit a new file, you must first use the
command to create that tile. (See the MAKE reference sheet.)
For
information
on
MAKE
using EDIT and on the EDIT commands, refer to the
document EDIT — A Character—oriented Text
Aol) in the AM—100 documentation packet.
Editor,
(DWM—OO100—39,
Rev
FORMAT:
.EDIT FiLespec
where FiLespec selects the file you want to edit.
DEFAULTS:
EDIT assumes a fi1e extension of .MAC.
OPERATION:
1.
Type
EDIT
to edit.
folLowed by the specification of the fiLe you want
Then type a RETURN.
For example:
.EDIT MASTER .MAC
After a moment you see the EDIT prompt, a *.
(1
October 1979)
EDIT (Cont'd)
Page 2
2.
Now you can begin to enter EDIT commands. (See the summary,
below.) Commands may be either in upper or lower case. To
telL EDIT to execute a Line of commands, end that Line with
two Escapes.
3.
To
exit EDIT, enter the E command (or EQ, if you want to exit
without updating your originaL file) and two Escapes:
COMMAND SUMMARY:
The List beLow briefLy summarizes most of the EDIT commands.
For
explanation
of
the
commands,
see
the
document
EDIT
an
—
A
Character—oriented Text Editor, (DWM—OO100—39, Rev Aol), in
the
AM—lOU
documentation packet. To repeat a command, enclose the command
in angLe brackets preceded by the number of times you want to repeat
it.
For example: 30<1OC—2D>$$.
A
F
— Append file records.
— Print free memory.
Linefeed — Line advance and type.
UJ —
— Insert text.
nI — Insert speciaL char-
ZJ
acter (n is its ASCII
— Jump pointer to end
of buffer.
value.
S
Jump pointer to front
of buffer.
I
nJ — Jump pointer to nth
character in buffer.
Gx — Get auxiliary buffer.
Vx — Verify auxiLiary buffer.
— Search.
FS — Search and replace.
N
— Whole fiLe search.
HK — KiLl entire buffer.
1
Xx — Save auxiliary buffer.
HD — DeLete entire buffer.
EQ — Exit without updating.
E — Exit.
EG — Exit and go.
a numericaL argument. The argument selects
which text the command wilL affect. For example, for command "V,
the
command may take the folLowing forms:
The
commands
below
take
Affects the first character after
the text pointer or from the first character to
the end of the Line (depending on the command).
V — (No argument.)
ny — Affects
next n characters or lines (depending on
the command).
—Y — Affects
character
—nY — Affects
previous
(or line) just behind pointer.
n
characters (or Lines) just
(depending on command).
behind the text pointer
CV — Affects from beginning of line up to text pointer
or
moves
pointer back
(depending on command).
(1
October 1979)
to start of current line
1
EDIT (Cont'd)
Page 3
The commands:
— Character advance
K
— Kill Lines
R — Reverse character
— DeLete characters
L — Line advance
T — Type Lines
D
X — Save Lines in auxil-
advance
iary buffer
ERRORS:
can
You
see
specification.
the usual system messages if you supply an invalid file
For example:
?Cannot OPEN Filespec — fiLe not found
You did not specify a valid file.
Remember,
Check
spelLing.
your
if you want to create a new file, you have to "start' it
first by using the MAKE command.
?File specification error
The system does not understand your EDIT command line.
For
you entered EDIT folLowed by a RETURN (i.e., you did not
exampLe,
incLude a file specification on the EDIT command Line).
You can also see severaL EDIT messages once
file.
you
begin
to
edit
your
For exampLe:
[SEARCH FAILEDJ
You
asked
EDIT
to search for a group of characters that does
the portion of your
not exist in your tile (or, at least, not in
file that is in memory).
If you enter a command that EDIT does not recognize, EDIT
echoes the command back to you with a question mark. For example:
*ws$
CHARACTERISTICS:
Character—oriented text editor.
Creates a backup (.BAK) fiLe; assumes an input fiLe extension of .MAC.
Recognizes an Escape (which it echoes as a dollar sign)
deLimiter.
Returns your terminal to AMOS command Level.
(1 October 1979)
as
a
command
email
FUNCTION:
ALlows you to access ALphaMAIL, the ALpha Micro electronic mail system.
You
nay use
EMAIL to exchange messages with other AIphaMAIL users on
your computer system. You may also create messages, maintain your
incoming and outgoing mail List, and create an ALpha Micro Software
Performance Report (SPR)
HINTS/RESTRICTIONS:
You may onLy use EMAIL if you are an authorized user of AIphaMAIL.
ALphaMAIL Operator must assign you a user—ID and a password.
NOTE: To run EMAIL, the terminat you are using must be
job that has at Least 321< of memory.
attached
The
to
a
Make sure that your disk is not write—protected.
For
more
information on EMAIL, see the ALphaMAIL User's ManuaL,
(DSS—10000—O6).
For information on the program used by the ALphaMAIL
Operator to manage and maintain the AIphaMAIL system, see the OPR
reference sheet.
FORMAT:
.EMAIL ED
OPERATION:
7.
Log into the account you have set aside for using ALphaMAIL.
type EMAIL foLLowed by a RETURN:
Next,
.EMAIL
2.
Now the screen dears and EMAIL asks you for your password:
EMAIL Version 1.0
ENTER YOUR PASSWORD:
Enter your password (exactty five characters). You must enter it
exactLy as it was given to you by the AIphaMAIL Operator.
3.
When you have correctLy entered your password,
and you see the EMAIL main menu:
(30 ApriL 1981)
the
screen
dears
EMAIL (Cont'd)
Page 2
EMAIL Version 1.0
[new messages receivedj
COMMAND CODES:
DispLay command menu
M
Send mail and receive maiL
x
Return to AMOS
Incoming Mail:
List all messaaes
L
Tn
Pn
Fn
Read message #n
Print message #ri
Forward message #n to another user
Dn
Delete message #n from incoming mail List
Outgoing Mail:
List aLl messages
B
R
n
Read message #n
w
n
Print message #n
C
n
Delete message tin from outgoing mail list
Create new message
S
I
Create Software Performance Report
!4tt message tin
En
EML>
one of
the EMAIL commands by entering the appropriate
command code after the EMAIL prompt symbol, EML>. For exampLe, to
create a message:
Choose
EML>S D
4.
If
you
forget
what commands are availabLe, enter a question mark
foLLowed by a RETURN after the EMAIL prompt:
EML>? cy
and EMAIL wiLL display its command menu again.
5.
To exit, enter an X foLlowed by a RETURN after the EMAIL prompt:
EML>X
and EMAIL returns you to AMOS command LeveL.
(30 ApriL 1981)
N-)
EMAIL (Cont'd)
Page 3
ERRORS:
You may see the foLLowing error messages when using EMAIL:
?You must enter exactly five characters
When entering your EMAIL password, you entered more or Less
five characters.
than
If you don't remember your password, consuLt the
ALPhaMAIL Operator on your system.
?No user—ID defined for you, please contact your Operator
EMAIL did not recognize your password. Make sure that you are
entering the password with the proper spacing and punctuation, and
try again. If you sti It do not succeed, check with the AIphaMAIL
Operator on your system, who wilt Look up your password for you.
— Type ? for help
V
is the command you entered. EMAIL does not recognize
this command. Type a ? followed by a RETURN to see a menu of the
where
commands you may use.
?InvaLid message number
You tried to
deLete
or look at a message that does not exist.
Make sure that you did not specify a message on the outgoing mail
list when you wanted to look at a message on the incoming mail List,
or vice versa.
?Sorry — FILENAME is a random file
?Sorry — FILENAME is a binary file
where FILENAME is the name of the file you specified.
You tried
to look at a random or binary file. These files conventionally
do
not contain printable, ASCII characters, and you may not
look
at
them.
file.
This file is probably a machine language program
?'USERNAME' —
You tried
or
a
data
not in the User Directory
to send a message to someone, but EMAIL does not
recognize the user—ID you addressed the message to. Check with the
AIphaMAIL Operator for an up to date list of all AIphaMAIL users.
?"FILENAME" not found
An
error occurred when EMAIL transferred a message.
the AlphaMAIL Operator.
Check with
CHARACTERISTICS:
EMAIL is the interface to the AIphaMAIL system. Your memory partition
be
at least 32K to run EMAIL, and the disk must not be
must
write—protected.
EMAIL is re—entrant and re—usable.
To exit to AMOS level from EMAIL, use the X command.
main menu again, use the ? command.
(30 April 1981)
To see the
EMAIL
erase
FUNCTION:
DeLetes one or more fiLes from the disk.
HINTS/RESTRICTtONS:
may use the standard wildcard symbols in your fiLe specifications.
You
(ERASE is a witdcard fiLe command.
Refer to Section 9.4, "Erasing
FiLes (ERASE)," in the AMOS User's Guide, (DWM—OO100—35), for more
information on using ERASE.
recognizes the ersatz devices (for example, .ERASE
and the speciaL device MEM:. (MEM: must be defined in
your system device tabLe. See the DEVTBL reference sheet.)
NOTE:
ERASE
BAS:BADGER.SBR)
ExampLes of speciaL uses:
.ERASE MEM:Filespecs
performs
the
Ti Lespecs.
.ERASE
*.B4K*.MAC
erases
aLl
iccount if a .MAC file of the
account.
same
function
as
.DEL
.BAK (backup) fiLes in your
name
exists in that
same
If you are Logged in under [1,2], .ERASE ALL:[J*.BAK erases
aLL backup fiLes from aLL accounts on aLL fiLe—structured
devices that are mounted.
It is
very
important
that
you
do
it exists on a device, since it
NOTE:
certification data for that device.
BADBLK.SYS[1,2J if
not
erase
contains
the
fiLe
important
FORMAT:
.ERASE (Outfi Lespec=}Fi LespeclC,Fi Lespec2
Fl lespecw}C/Switch} @E
FiLespecs are one or more fiLes to be erased. The optional
OutfiLespec is a fiLe specification that acts as a quaLifier on the
fiLes that the FiLespecs select. /Switch is an option request. (See
where
OPTIONS.)
DEFAULTS:
are Logged into as defauLt file
specifications.
A
nuLl extension is the defauLt extension (i.e., an
extension zero characters Long). The defauLt switch is /NOQUERY.
ERASE uses the device and PPN you
(Changed 30 ApriL 1981)
ERASE (Cont'd)
Page 2
OPTIONS:
You may ask for the options beLow if you pLace a sLash (I)
appropriate option code (switch) on the ERASE command Line:
or /Q
/QLJERY
/NOQUERY
or /NOQ
and
the
Request confirmation to erase
Erase without asking for confirmation
OPERATION:
1.
Type ERASE (optionaLLy foLlowed by an Outfilespec and an equaL
sign). Now type the one or more fiLe specifications that
select the files you want to delete.
ERASE teLls you which files
bLocks were treed.
it
Type a RETURN.
deLeted
and
how
disk
many
.ERASE *.BAK,*.TXT NJD
KCCNT.BAI(
OE.TXT
TotaL of 2 files deLeted, 45 disk blocks freed
2.
if
you
deLetion:
use the /QUERY option, ERASE asks you to confirm each
.ERASE *.BAK/QUERY
ATH.BAK?Y
GEOM.BAK?Y
TotaL of 2 fiLes deLeted, 56 disk blocks freed
In response to the question mark, type a y for YES or
Do not type a RETURN after your answer.
n
for
You may type a
ControL—C at any time to prevent further deletions; you then
NO.
return to AMOS command leveL. The pLacement of the switch on
the command line affects the operation of ERASE.
(.ERASE
*.BAK/Q,*.TXT
only
asks you to confirm the .BAIC fiLe
deLetions; .ERASE/Q *.BAK,*.TXT asks for confirmation of aLL
deLetionsi
ERRORS:
?Cannot find DSKO:SCNWLD.SYSE1,4] or MEM:SCNWLD.SYS
ERASE
needs this fiLe to process wiLdcard
specifications.
memory,
or
in the fiLe.
The system cannot find the fiLe
symboLs in tile
in DSKO:[1,4J or
your memory partition does not have enough room to Load
?Specification error
Your command line is not in proper format; the symboL
to the Location on the Line that ERASE does not understand.
(changed 30 ApriL 1981)
points
ERASE (Cont'd)
Page 3
%No file—oriented device corresponding to Dev: is mounted.
You specified
a
device, but did not include a unit number.
ERASE was not abLe to find a mounted LogicaL unit matching that
sped tic at ion.
?Cannot READ Devn: — device does not exist
?Cannot READ Devn: — device is not mounted
You tried
to erase from a device that is not Listed in the
DEVTBL command in your SYSTEM.INI, does not have a driver in the
area [1,61 of the System Disk, is not fiLe—structured, or is not
mounted.
(Devn: is the device you tried to erase from.)
ZAccount does not exist — Ip,pnl
The indicated PPN does not exist; to create
Logged under E1,2J.
it,
(See the SYSACT reference sheet.)
you
must
be
?More than one output specification
You cannot
specify more than one output specification.
For
example, .ERASE *.BAK,*.TX1*.MAC is an ilLegaL command.
%No fiLes deleted
ERASE could find no files that had the names and extensions
specified.
you
C HA RA C TE P t ST t Cs
A wildcard file command.
Understands ersatz and speciaL devices.
switch is /NOQIJERY.
DefauLt fiLe specification
extension and account and device you are logged into.
DefauLt
(Changed 30 April 1981)
is
null
exit
FUNCTION:
Terminates
a
command
fiLe and (optionaLly) dispLays a message to the
user of the command fiLe.
HINTS/RESTRICTIONS:
May appear onLy in a command or DO file.
You
wiLL find EXIT most
useful in the case of conditional transfers within a command file,
where EXIT can be used to prevent user from falling into a segment of
the command file branched to by a GOTO statement. (See GOb
reference
sheet.)
more information on EXIT, see New Features in Command Files and DO
the "User's Information Section" of the
AM—laD
documentation packet.
For information on command files, see
Chapter 8, "Command Files and DO Files," in the AMOS User's Guide,
For
Fl tes, (DWM—0D100—63), in
(DWM—0D100—35).
FORMAT
EXIT (message)
may incLude an optionaL message on the EXIT command line, which is
displayed to the user of the command file when EXIT returns him or her
You
to AMOS command level.
OPERATION:
1.
Place
the EXIT statement in the command tile where you want to
terminate operation of that command file. (NOTE: The sampLe below
contains GOTO, PAUSE, and LOOKUP commands.
with GOb, PAUSE, and LOOKUP, you may
If you are not familiar
want to refer to the
reference sheets for those commands for additional information.)
(1 May 1980)
EXIT (Cont'd)
Page 2
Command fiLe to compi Le GLIDX.BAS
LOOKUP GLIDX.BAS/?FjLe does not exist.
6010 NOFILE; Oops. FiLe does not exist. Skip to NOFILE.
p
FiLe does exist, go ahead and compile it.
COMPIL GLIDX.BAS
RUN GLIDX.BAS
I
EXIT keeps user from dropping into NOFILE routine.
EXIT ***Returning you to AMOS command LeveL.***
;NOFILE
If fiLe doesn't exist, send user to text editor to create it.
PAUSE To create fiLe, hit RETURN; otherwise, type anything eLse.
VUE GLIDX.BAS
V
ERRORS:
EXIT dispLays no error messages.
CHARACTERISTICS:
May be used onLy in a command fiLe or DO file.
Terminates the processing of a command file and then
dispLays a message to the user of the command fiLe.
Returns the command fiLe user to AMOS command LeveL.
(1 May 1980)
(optionalLy)
filcon,
FUNCTION:
ALlows you to compare the contents of two files.
HINTS/RESTRICTIONS:
Al
numeric
dispLays are in octal
previously used the SET HEX command).
(or
hexadecimal,
if
you have
you
wart to
the Nth
FORMAT:
.FILCOM Fi lespecl,Fi lespec2 N
where Fi lespeci and
compare.
FILCOM
F i Lespec2
stops
the
specify
the two
comparison when
difference between the two files.
fiLes
it
reaches
DEFAULTS:
The default file extension is .PRG.
If you do not specify N, FILCOM compares every byte in the two files.
OPERATION:
1.
Type FILCOM folLowed by the specifications of the two fiLes
you want
to compare.
(Separate the two FiLespecs with a
comma). Now enter the number of
differences (a decimaL
number)
at which you want the comparison to stop. Hit a
RETURN:
.FILCOM DSKREDE1,4],DSKREDMOO,3] S
2.
Now you see a dispLay that lists
mismatch between the two fiLes.
gives the folLowing information:
(in
Lire for each data
Each Line of the dispLay
one
1.
the
address
of
the
number of bytes from the front of the fiLe); 2.
the specification of the first fiLe; 3. the data ir the first
fiLe at that position; 4. the specification of the second
fiLe; and, 5. the data in the second file at that position.
mismatch
For exampLe:
JI0M CRLF.MAC,WRKFTL.PIAC
o
2
6
CRLF.MAC 000000
CRLF.MAC 133700
CRLF.MAC 000116
WRKFIL.1AC 000204
WRKFIL.MAC 010527
WRKFIL.MAC_000054
The first Line of the dispLay above gives the reLative address
(1
October 1979)
FILCOrI (Cont'd)
Page 2
the first data mismatch (the first byte of the files; byte
number zero); the specification of the first file (CRLF.MAC);
of
data in that file at byte number zero (000000); the
specification of the second fiLe (WRKFIL..MAC); and the data in
that file at byte number zero (000204).
the
ERRORS:
You may see the usuaL system error messages when using this command; in
particuLar:
?Fit.e specification error
FILCOM doesn't understand your command line.
For exampLe:
.FILCOM S(JBJCT.OBJ,
IFiLe specification error
Check your command Line against the FORMAT section above.
Fi Lespec NOT FOUND
FILCOFI couLdn't find one or both of the fiLes you specified.
Check your speLLing; next check your account specifications (use the
DIR Fi LespecEJ command to find the location of the fiLes).
CHARACTLRISTICS:
Compares two fiLes and displays the data mismatches between them.
Returns your terminaL to AMOS command Level.
DispLays data in octaL form (or hexadecimal if SET HEX is in effect).
(1
October 1979)
fildmp
FUNCTION:
Displays the contents of a sequentiaL fiLe in numeric form.
HINTS/RESTRICTIONS:
DispLays the data in the fiLe in octaL form (or hexadecimal, if the SET
HEX command is in effect), 16 bytes per screen Line.
FORMAT:
.FILDMP FiLespec ND
where FiLespec specifies the file whose contents you want to see.
DEFAULTS:
defau[t file specification is the account
currentLy Logged into and a file extension of .OBJ.
The
and device you are
OPERATION:
1.
Type FILDMP foUowed by the specification of
data you want to see. I-fit a RETURN:
the
file
whose
.FILDMP INIT.PRGI:100,3] EID
2.
Now
you see a numeric display of the data in the file, 16
bytes per Line (3 digits per byte). For exampLe:
057 124 124 114 040 106 111 114 104 115 120 040 050 103 157 156
164 047 144 051 015 01? 1)57 114 040 066 1)15 012 106 1?5 116 103
-c
To freeze the dispLay, type a Control—S; to resume it, type
ControL—Q. To interrupt the display, type a Control—C.
a
ERRORS:
You
may
FILDMP.
see
several
of
the common system error messages when using
For exampLe:
?Cannot OPEN FiLespec — file not found
FILDMP cannot find the tiLe you specified.
and the account and device specification.
(Changed 30 ApriL 1981)
Check your spelLing
FILDMP (Contd)
Paqe 2
OPEN FiLespec — fiLe type mismatch
You tried to dump a random fiLe.
?Cannot
To dump a
the DUMP command.
random
file,
use
?Fie specification error
FILDMP did not
(e.g., .FILDMP ).
understand
the
format
of your command Line
CHARACTERISTICS:
Gives a numeric dispLay of the data in the specified sequentiaL file.
(Changed 30 April 1981)
filtap
FUNCTION:
Writes copies of
backup program.
disk
files to magnetic tape.
A fiLe—oriented disk
HINTS AND RESTRICTIONS:
Used for fiLe—oriented disk backup. Writes files to tape atong with
their device and account specifications. Also writes date and time of
backup. Used in combination with TAPFIL (to transfer fiLes from tape
back to disk) and TAPDIR (to see List of files on a tape). For more
information on FILTAP, TAPDIR, and TAPFIL, see The Magnetic Tape FiLe
Backup Programs, in the "System Operator's Information' section of the
AMOS Software Update Documentation Packet.
ALLows you to perform one backup on muLtipLe tape reels.
A wiLdcard file command.
the AMOS User's Guide
specific at ions.)
(See Chapter 9, "Witdcard FiLe Commands,' of
(DWM—OO100—35),
for information on wiLdcard
You may back up fiLes from any disk account onto tape
whether
or
not
the account is within the project you are logged into. ALthough FILTAP
writes the disk specification of the fiLe to the magnetic tape along
with the fiLe, it does not transfer any password that may be associated
with that disk account.
Always use the /NOAPPEND switch when you are writing to a blank (e.g.,
new)
tape.
(/NOAPPEND
teLLs FILTAP to start writing tiles at the
beginning of the tape; the /APPEND switch tells FILTAP to start writing
fiLes at the end of any existing files on the tape.)
Not for transferring data
between
AlQha
computers—— use TAPE for that purpose.
Because
FtLTAP
Micro
and
non—ALpha
Micro
(See the TAPE reference sheet.)
writes the date and tine of backup to the tape, before
you use FILTAP you shouLd remember to use the DATE and TIME programs to
make sure that the system date and time are set.
FORMAT:
.FILTAP FiLespecl{/switches}f,Filespec2{fswitches](,...) @
where FiLespec specifies the fiLes you want to back up onto
fswitches are option requests.
(30 April 1981)
tape,
and
FILTAP Ccont'd)
Page 2
DEFAULTS:
defauLt
The
fiLe
are Logged into.
specification is *.* and the account and device
The default switches are /NOQUERV and
default magnetic tape drive device specification is MTU.
/APPEND.
you
The
OPTIONS:
switches
the
Use
beLow
to
seLect FILTAP options.
Each switch must
on
the
begin with a slash; remember that the nlacement of the switch
command tine modifies its effect.
or /Q
/QUERY
Ask
for
confirmation
Don't ask for confirmation
/NOQLJERY or /NOQ
(default, file switch).
or IA
/APPEND
user
(file switch).
Write
before copying fiLes
before
copying
tiles
files to tape at the end of existing files
(defatAt, operation switch).
INOAPPEND or /NOA
Write
files starting
(operation switch).
with
beginning
of
tape
OPERATION:
1.
FILTAP
Type
followed by the specification se'ecting the files
want to back up onto tape; then type a RETURN.
you
For example:
.FILTAP MEMO.TXT,SCHDLE.TXTC31O.2]
Now FILTAP asks you:
Enter tape unit number:
Enter the device code and unit number of the magnetic tape drive
containing the tape reel you want to access. The default device
code is MU).
2.
Now FILTAP tells you what files it is transferring.
For example:
MEMO.TXT to MTU2:MEMO.TXT
SCHDLE.TXT[310,2] to MTU2:SCHDLE.TXT[310,21
Total of 2 files transferred
3.
can use wildcard file specifications.
For
examp'e, suppose you want to back up aLl .BAS files on the disk:
Remember that
you
.FILTAP *.BASEJ @D
(30 April 1981)
FILTAP (Cont'd)
4.
Page 1
When you use the /QLJERY switch, FILTAP asks for confirmation before
transfer.
each
Enter Y for yes, or N for no; do not type
after your answer.
switch on the
For example:
Remember
that
the
pLacement
of
a RETURN
the
/QUERY
command line can affect which files it applies to.
.FILTAP *.MAC,/QIjERY *.6AS,*.TXT,*.PRG/NOQUERY,*.LSTI
Thnter tape unit nui,ber: 1 ED
TERML.MAC to MTU1:TERML.MAC
C40.MAC to MTU1:C40.MAC
LSTSQR.BAS to MTU1:LSTSQR.BAs?y
NEW.TXT to MTU1:NEW.TXT?N
STATUS.PRG to MTU1:STATUS.PRG
NEW.LST to MTU1:NEW.LST?y
BMAC.LST to MTU1:BMAC.LST?y
Total of 6 fiLes transferred
You may enter a ControL—C at any time to prevent further transfers.
5.
If FILTAP cannot fit aL of the files you specified on one tape, it
wiLl permit you to continue the backup on another reeL.
When
the
current tape is fulL, FILTAP displays:
%Tape is full, pLease mount another tape then type RETURN to
X
continue, or type ControL—C to abort copy
If
you
wish to continue backinq up fiLes on another reeL of tape,
wait for the current tape to finish rewindinq, mount a new reeL
of
tape, then type RETURN on your teminat; the backup wiLL continue on
the new reeL. If you want to abort the backup, type a Control—C.
ERRORS:
?Cannot find DSI(O:SCNwLD.Sys[1,4J or MEM:SCNWLD.SYS
FILTAP
needs
this file to be able to process wiLdcard symbols in
your file specifications.
not
exist
This message can mean that
SCNWLD.SYS
does
or that you do not have enough memory to toad the file into
your partition.
?Cannot READ Devn: — device does not exist
?Cannot READ Devn: — device is not mounted
You tried to copy to or from a device that is
not listed in the
your SYSTEM.INI, does not have a driver in account
[1,6J of the System Disk, is not file—structured, or is not mounted.
(Devn: is the device you specified.)
DEVTBL
command
in
ZNo file—oriented device corresponding to Devn: is mounted
You specitied
a
device, but left ott the unit number. FtLTAP
tried to find a ogicat unit that matched the device code you
specified, but failed to do so. Try mounting the device.
(30 April 1981)
FILTAP (Cont'd)
Page 4
%Tape is fuEL, pLease mount another tape then type RETURN to
continue, or type ControL—C to abort copy
There is no more room on the current reet of tape. Mount another
reeL and type RETURN to continue the backup process, or type a
Control—c to abort the backup procedure.
Z
CHARACTERISTICS:
file—oriented disk backup program that aLlows you to copy disk
fiLes to magnetic tape. See reference sheets on TAPFIL and DIRTAP to
see how to transfer files from tape to disk, and to dispLay a directory
of a magnetic tape.
A
for transferring data between ALpha Micro and non—ALpha Micro
computers—— for that purpose, use the TAPE program.
Not
ALLows you to make one backup on muLtiple reels of tape.
Accepts wiLdcard file specifications.
DefauLt
file specification
is
*.* and device and account you are 'ogged into. DefauLt switches are:
/NOQLJERY/APPEND.
MTU.
DefauLt magnetic tape drive device
Writes date and time of backup to tape
(30 April 1981)
specification is
fix
FUNCTION:
debugger.
AlLows you to examine and execute your assembLy
Language program and data structures in a controLled manner.
Symbotic
HINTS / RESTRICTIONS
Its operation is very simiLar to
It has two modes, Display Mode and Command
FIX is a screen—oriented debugger.
the
VUE
screen
editor.
In Display Mode you can examine your program and data areas, and
you may single—step or proceed through portions of the program.
in
Command
Mode
you may examine and modify the AM—100 registers, examine
data structures, and set up the debugging environment. You may toggle
between the two FIX modes by pressing the ESCAPE key.
Mode.
Both input and output values may be either in symbolic or numeric form.
If FIX finds a .SYM fiLe for the program you are debugging, it wiLt
attempt to display aLL values in symboLic form. Either octaL or hex
form may be used for numeric vaLues; use the SET command in Command
Mode to change the current radix.
To access a local symbol, specify the non—local symbol that precedes
the LocaL symboL, enter a space, then enter the locaL symboL. For
exampLe, in using the Search command:
>LABEL 1O$
where LABEL is the non—locaL symboL that precedes the local symbol 10$.
For more information, see the AIphaFIX User's Manual, (DWM—OO100—69).
NOTE:
RETURN.
To exit FIX, enter Command Mode.
Now type a
Q
foLlowed
by
a
FORMAT:
.FIX Filespec
where Fitespec selects the fiLe that you want to debug.
DEFAULTS:
If you do not specify a file extension, FIX assumes that the file is
.PRG fiLe.
Other defauLts are set by the INI.FIX initiaLization fiLe.
(Changed 30 ApriL 1981)
a
FIX CCont'd)
Page 2
OPERATION:
1.
Type FIX folLowed by the specification of the file you want to
debug.
Then type a RETURN.
For example:
.FIX REMOVE@D
FIX Loads the fiLe into your memory partition (unless it is
already there). It aLso attempts to Locate the corresponding
.SYM file and Load it into memory.
2.
FIX then enters Command Mode, prints the FIX
AM—100
status and the
then prompts you with a right angle
You may now enter FIX commands, or press ESC to
registers.
bracket >.
It
enter DispLay Mode.
3.
To
exit
RETURN.
(incLuding
enter Command Mode and type a 0 followed by a
wiLt delete alL memory modules it created
the program you were debugging) and return you to
FIX,
FIX
AMOS command Level.
COMMAND SUMMARY:
a partial List of the FIX commands; refer to the
Manual for a full List of commands.
BeLow is
FIX
User's
Display Mode:
CONTROL—J
CONTROL—K
CONTROL—T
CONTROL—S
Move cursor down one instruction
Move cursor up one instruction
Move cursor down a page (24 instructions)
Move cursor to current PC location
CONTROL—X
Toggle Breakpoint
Proceed to Breakpoint
RETURN
Single—step
CONTROL—P
Command Mode:
Search for symbol
R
Modify register
HELP
Leave FIX
Display menu
SPEC
Set up command string
GO
Execute AMOS command
S
Q
ERRORS:
If FIX does not recognize
displays the message What?
(Changed 30 ApriL 1981)
one of your commands in Command Mode, it
FIX (Cont'd)
Page 3
CHARACTERISTICS:
to
breakpoints, modify and examine contents
registers, dispLay and execute an assembly language program.
At Lows
you
(Changed 30 ApriL 1981)
set
of
fixdvr
FUNCTION
Configures a fLoppy disk driver for a specific combination of fLoppy
disk format, disk drive, and disk controLler.
HINTS/RESTRICTIONS:
Because of the Large number of possibLe permutations of fLoppy disk
formats, drives and controLlers, it is no longer possible to provide a
separate disk driver program for each combination.
For information on
avaiLable,
refer
the
to
large number of fLonpy disk formats now
the
documents Disk Drivers and Formats,
(DWM—DO100—32), and Configuring FLoppy
Disk
in the AM—iQO documentation packet.
Drivers,
(DWM—OO100—47),
MUST
use FIXDVR to configure f'oppy disk drivers
for each
combination of format, drive and controLler you have on your system.
You
NOTE: You may not use single—density MIS format if you are going to
running the drive under control of the AM—210 disk controller.
Remember
file for
to
be
add a BITMAP command in the system initiaLization command
each new format/drive/controLler combination you create.
You
may aLso need to modify the DEVTBL command Line.
FORMAT:
.FIXDVR
OPERATION:
1.
Log into the system Device Driver Library account:
.LOG DSKO:rl,61 RET
2.
Type FIXDVR foLLowed by a RETURN:
.FIXDVR
3.
FIXDVR now begins to ask you a series of questions:
a.
Controfler type (A) AM—200, (B) AM—210, or (C) Icom:
Enter the Letter
or C to seLect the type of
fLoppy disk controLLer you are using for your floppy disk
A, ,
drive.
If you seLect the tcom controLLer, FIXDVR now
skips down to question d (see below).
(Changed 30 ApriL 1981)
FIXDVR (Cont'd)
b.
Page 2
Drive type (A) Persci, (B) Wangco, or (C) CDC:
Enter the Letter that selects the tyoe of disk drive
you are using.
AM—200 above.
c.
You may not seLect CDC if you seLected
Double—density?
FIXDVR asks this question onLy if you have aLready
the AM—211) as your disk controLLer. Enter a V
for Yes or an N for No, depending on whether or not you
want to use double—density disks.
seLected
d.
Format (A) STD, (B) AMS, or (C) 1MG:
Enter the Letter that seLects the disk format you
want the driver to use.
You may
not specify the AMS
format
it
if
or if
the driver is to use the Icom controLer
is to use single—density format on a drive runninq
under control of the 411—210 controlLer.
If you have
previously seLected the tcom controlLer, FIXDVR now skips
down to question #f.
e.
DoubLe—sided?
FIXDVR asks this question onLy if you have previousLy
selected the AM—210 controlLer. Enter a V for Yes or an N
for No, depending on whether you pLan to use the driver on
doubLe—sided disks.
f. Enter new driver name:
Enter the name you want to assign to the driver
program. Each driver must have a unique, three—character
name.
4.
After you have finished answering
contiqures the driver and says:
its questions,
New driver is now in memory, bitmap size is
where nn is the ni,nber of words you must assign to the
for the new device.
5.
ALthough
the disk.
FIXDVR
nn
bitmap
the new driver is in memory, it is not yet a file on
Save it to the disk by using the SAVE command.
For
e x amp L e:
.SAVE DDS_DVR @D
If you do not specify an extension, SAVE saves the file under
OUR extension (indicating a device driver program).
the
(Changed 30 ApriL 1981)
FIXDVR (Cont'd)
6.
Page 3
if
you
are
adding
a
new device to the system, remember to
to change the
and bitmap areas.
(See the reference
modify the system initialization command file
system device tabLe
sheets for DEVIBL and BITMAP.)
ERRORS:
?Could not find xxxxxx.DVR
FIXDVR couLdn't find the necessary file. If you are configuring a
driver for the AM—200, FIXDVR requires that 200DVR.DVR be
in
DSKO:C1,61;
for the AM—210 you need 21ODVR.DVR in DSKO:E1,6J; for the
Icon, controLler you need ICMDVR.DVR in DSKO:C1,6].
Please enter V or N
Several of the FIXDVR questions understand onLy an answer of V
N for Yes or No.
or
?InvaLid response
Several of the questions that FIXDVR asks require that you enter a
Check your typing.
Letter to select an option.
?InvaLid device
You have a bad version of 200DVR.DVR, 21ODVR.DVR, or ICMDVR.DVR in
DSKO:[1,6J.
?Icom does not support AMS format
You
tried to format an Icon fLoppy diskette in MIS format.
floppy drives only support STD and 1MG format.)
?AM—210 does not support single—density AMS format
You may not use single—density AMS format on a
under control of the AM—210 floppy disk controller.
You
?AM—200
device
that
(Icon,
runs
does not support CDC floppy disks
may only run CDC floppy disks under the control of the AM—210
floppy disk controller.
CHARACTERISTICS:
Requires that you be logged into DSKOE1,6].
Configures a new device driver in memory: use the SAVE command to
the driver as a disk file.
(Changed 30 April 1981)
save
fixmtm
FUNCTION:
Configures
the program that drives the MuLtiterm printer so that it
printer with a particuLar I/O interface controLler and
connected to a specific part on that board.
runs the
HINTSIRESTRICTIONS:
the MuLtiterm driver, DSKO:MTM.DVR[1,6], does not operate
through the terminal. service system, you must configure it to reflect
the particuLar I/O controLler and I/O port on which you are going to
Because
run the Multiterm printer.
You must be Logged into account DSKO:E1,63 to use
FIXMTM.
NOTE: When you are using MTM.DVR[1,6],
no other
device may use the
That means that no terminals or printers
may run on the AM—300 that the MuLtiterm is connected to when you are
printing on the MuLtiterm.
AM—300
interface controlLer.
FORMAT:
.FIXMTM
OPERATION:
1.
Log into account DSKO:[1,6]:
.LOG DSKO:1,6
2.
Enter FIXMTM folLowed by a RETURN:
.FIXMTM
3.
If the MTM driver exists in DSKO:[1,6], you now see a message
that teLls you how the MTM driver is currently configured
(that is, what I/O interface and what port of that interface
board the driver is set up to use). The interface board and
port number wild vary depending on your particuLar system, but
you might see a message something like this:
CURRENT DRIVER IS SET UP FOR AM—300 ON OCTAL PORT 375
ENTER C TO CHANGE IT OR L TO LEAVE IT ALONE:
Enter a C or an L.
(1
October 1979)
FIXMTM (Cont'd)
4.
Page 2
If you telL FIXMTM to leave the rUM driver aLone, FIXMTM
returns your terminaL to AMOS command leveL.
Otherwise, you
see:
ENTER P FOR 3P+S, S FOR Sb, OR A FOR AM—300 INTERFACE:
a
P, S, or A to select the specific I/O interface
controLler to which your MuLtiterm printer is going to be
Enter
connected.
5.
now
see a message asking you for the number of port (in
octaL) to which the printer is going to be connected:
You
ENTER OCTAL PORT ADDRESS OF INTERFACE (0—377):
6.
FIXMTM now modifies the driver
and
returns
tells you the configuration of the new driver.
a
message
that
For example:
MTM DRIVER MODIFIED TO RUN ON 3P+S ON OCTAL PORT 100
FIXMTM returns you to AMOS command leveL.
ERRORS:
If FIXMTM cannot find the file MTM.DVR, it teLls you:
CANNOT FIND MULTITERM DRIVER MTM.DVR
BE SURE YOU ARE LOGGED INIJNDER 1,6 AND TRY AGAIN
Either MTM.DVR is missing in account DSKO:L1,6J or you are not Logged
into DSKO:[1,6].
CHARACTERISTICS:
Requires that you be logged into DSKO:E1,6J.
Returns your terminaL to AMOS command leveL.
(1 October 1979)
fmt200
FUNCTION:
diskettes used in floppy disk devices
controL of the AM—200 FLoppy Disk ControLLer board.
Formats
that run under the
HtNTS/RESTRICTIONS:
IMPORTANT NOTE: When you run FMT200,
running on the system.
your job
must
be
the
onLy
job
selects the format to use based on the device specification you
For example, if you have previousLy configured a fLoppy disk
driver named AMS.DVR for a Persci device that uses AMS format, the
device specification of AMSO: tells FMT200 to use AMS format to format
the diskette in Drive Zero of that device.
(For information on
FMT?OD
provide.
configuring floppy disk drivers, see the document Configuring FLoppy
Disk Drivers in the "System Operator's Information' section of the
AMOS Software Update Documentation Packet.)
Before formatting, make sure that the format—enable switch on the
AM—200
is set to 'EN.
As it formats, FMT200 writes over any data
currentLy on the diskette.
FMT200 does not require that you mount a diskette before formatting it.
After formatting a diskette,
use the SYSACT command to
initiaLize
the
diskette (unLess you are qoinq to use DSKCPY to make a LiteraL image of
another diskette on the newLy formatted diskette).
FORMAT:
.FMT200 Devn: @D
where
Devn:
format.
specifies the
device
holding
the diskette you want to
OPERATION:
1.
Type FMT200
holding
the specification of the device
the diskette you want to format. Then type a RETURN.
foLLowed
by
For example:
.FMT200 STD1:
The command above telLs FMT200 to format the diskette in Drive
One of the fLoppy device that uses the STD driver program (and
therefore, to use the STD format).
(Changed 30 ApriL 1981)
Paqe 2
FMT200 (Cont'd)
2.
Now you see the message:
BEGIN FORMATTING
3.
when FMT200 is finished, you see the message:
EXIT
4.
FMT200 now returns you to AMOS command leveL.
ERRORS:
You may see the following error messages when using FMT200:
?Unit number must be 0—3
You specified a bad unit nimber.
?Invalid device
The device you specified is not a floppy disk device, or is not
compatibLe with the AM—200 Floppy Disk ControlLer.
(Error code x on track n]
A media, drive, or controlLer error occurred.
For information
on the error codes, refer to the hardware documentation accompanying
your disk devices.
CHARACTERISTICS:
Formats diskettes used in floppy disk devices that run under control of
the
AM—200
FLoppy Disk ControlLer board.
format—enable switch on the AM—200 is set.)
(Make
sure
that
the
Selects the disk format to use on the basis of the device specification
you provide.
you run FMT200, make sure that your job is the only one running on
the
Whensystem.
As it formats, writes over any data currently on the diskette.
(Changed 30 ApriL 1981)
fmt2lD
F Ii N C I t ON
diskettes used in fLoppy disk devices
controL of the AM—210 Fionpy Disk ControLler board.
Formats
that run under the
HINTS/RESTRICTIONS:
IMPORTANT NOTE: When you run FMT21O, your job
running on the system.
must
be
the
job
onLy
The
AM—210
FLoppy Disk ControlLer handles devices that use doubLe— or
singLe—density diskettes and singLe— or double—sided diskettes.
NOTE: The AM—210 controLler does not support single—density
AMS format.
FMT2IO
seLects the specific format to use based on
the device
specification you provide.
For example,
if
you have previousLy
configured a fLoppy disk driver named DDS.DVR for a Persci device that
uses double—sided, doubLe—density
STD format, the device specification
of DDSO: teLLs FMT21D to use STD format to format the diskette in
Drive
Zero of that device.
(For information on configuring floppy disk
drivers, see the document
Configuring
FLoppy
Disk Drivers,
(DwM—Oo100—4n, in the System Operator's Information
AMOS Software Update Documentation Packet.)
section
of
the
As it formats, FMT21O writes over any data currentLy on the diskette.
FMT21O does not require that you mount
a diskette before formatting it.
After formatting a diskette, use the SYSACT command
to initiaLize it
(unLess you are going to use DSKCPY to make a LiteraL image of another
diskette on the newLy formatted one).
FORMAT:
.FMT21O Devn:
where
Devn:
format.
specifies the
device
hoLding
the diskette you want to
OPERATION:
1.
Type FMT2IO
hoLding the
For exampLe:
folLowed by the specification of the device
diskette you want to format. Then type a RETURN.
.FMT21O DDA1: @3
(Changed 30 ApriL 1981)
FMT21O (Cont'd)
Page 2
The command above tells FMT21O to format the diskette in Drive
One of the floppy device that uses the DDA driver program (and
therefore, to use the APIS format). (The DDA driver handLes
diskettes in double—density, double—sided AMS format.)
2.
Now you see the message:
BEGIN FORMATTING
3.
when FMT21O is finished, you
see
the message:
EXIT
4.
FMT21O now returns you to AMOS command Level.
ERRORS:
You may
see the following error messages when using FMT21O:
?(Jnit nuiiber must be 0—3
You specified a bad unit nijiiber.
?Invalid device
The device you specified is not a floppy disk device, or is not
compatible with the AM—210 Floppy Disk ControLler board.
CError code x on track nJ
A
media, drive, or controller error occurred at track n of the
diskette. For information on the error codes, refer to the hardware
documentation that accompanied your disk device.
[No interrupt received after WRITE TRACK]
Indicates either a bad drive or a bad controller board.
CHARACTERISTICS:
Formats diskettes used in floppy disk devices that run under controL of
the AM—210 Floppy Disk Controller board.
When you run FMT21O, make sure that your job is the only one running on
the system.
Selects the disk format to use on the basis of the device specification
you provide.
As it formats, writes over any data currently on the diskette.
(Changed 30 April 1981)
fmt400
FUNCTION:
disks
Formats
used in hard disk devices that run under the control of
the AM—400 Hard Disk Interface (e.g., Century Data Trident).
HINTS/RESTRICTIONS:
Formats the disk into physicaL records of 512 bytes.
it formats the disk, FMT400 writes over any data currentLy
disk.
As
IMPORTANT
NOTE:
When
running on the system.
you
run
on
that
FF11400, your job must be the onty job
FMT400 does not require that you mount the disk before formatting it.
After formatting a disk, use the SYSACT command to initiaLize the disk
(unLess
you are going to use DSKCPY to make a LiteraL image of another
disk on the newly formatted disk.).
The AM—400 communicates with the Century Data 1150A Formatter.
Each
Century Data Trident contains a number of Logical units within one
physical device.
For example, the T—300 contains 19 LogicaL units
You must format each LogicaL unit separate'y as if it
were a separate disk.
(DSKIJ:—DSK18:)
.
If you are not
using the Trident hard disk as your System
reset or turn on the machine you must run the
appropriate initiaLization program (e.g., TSOINI or TRIINT) before
NOTE:
bevice,
when
you
using the device.
FORMAT:
.FMT400 Devn: RET
where Devn: specifies the device holding the disk you want to format.
OPERATION:
1.
Type
FMT400
foLLowed
by
the
specification
hoLdinq the disk you want to format.
example:
.FMT400 DSK1: NJ
(Chanqed 30 ApriL 1981)
of
the device
Then type a RETURN.
For
FMT400 (Cont'd)
Page 2
The command above tefls FMT400 to format the disk in Drive One
of the System Device.
2.
Now you see the messaqe:
BEGIN FORMATTING
3.
when FMT400 is finished, you see the message:
EXIT
4.
FMT400 now returns you to AMOS command Level.
ERRORS:
You may see the foLLowing error messages when using FMT400:
DRIVE NOT READY
Make sure that the drive has competed its power—up cycle.
CANNOT REZERO DRIVE
ERROR AFTER RLTRY
COMMAND STATUS ERROR FOR COMMAND n
DRIVE STATUS ERROR FOR COMMAND n
The messages above are
an
indication
specificalLy, drive or interface failure.
of
hardware
problems;
CHARACTERISTICS:
Formats disks used in hard disk devices that run under control of the
AM—400 Hard Disk Interface board.
As
it formats, writes over any data currentLy on the disk.
When you run FMT400, make sure that your job is the onLy one running on
the system.
(Changed 30 ApriL 1981)
fmt500
FUNCTION:
Formats disks used in hard disk devices that run under the controL of
the AM—500 Hard Disk ControlLer (e.g., COC Hawk hard disk).
HINTS/RESTRICTIONS:
Formats the disk into physicaL records of 512 bytes.
contains 9696 records.
Before you format a disk,
FMTSOO
requires that
command to mount that disk (e.g., .MOUNT 05K?:).
As
it
disk.
Each Logical unit
you
use
the
MOUNT
formats the disk, FMT500 writes over any data currently on that
IMPORTANT NOTE: When you run FMTSOO, your job
running on the system.
must
be
the
onLy
job
After formatting a disk, use the SYSACT command to initiaLize the disk
(unless you are going to use DSKCPY to make a LiteraL image of another
disk on the newly formatted disk.).
FORMAT:
.FMTSOO Devn: D
where Devn: specifies the device hoLding the disk you want to format.
OPERATION:
1.
FMTSOO
foLLowed by the specification of the device
hoLding the disk you want to format. Then type a RETURN. For
Type
e x amp I
.FMTSOO DSK1: @D
The command above teLls FMTSOO to format the disk in Drive One
of the System Device.
2.
Now you see the message:
BEGIN FORMATTING
(Changed 30 ApriL 1981)
FMTSOO (Cont'd)
3.
Page 2
when Ff11500 is finished, you see the messaqe:
EXIT
4.
FMT500 now returns you to AMOS command LeveL.
ERRORS:
You may see the folLowing error messages when using FMT500:
?Cannot WRITE Dew: — device not mounted
The device holding the disk you want to format is not
Mount the disk by using the MOUNT command (e.g.,
mounted.
.MOUNT 11WK3:).
?Cannot INIT Devn: — device does not existj
FF11500
cannot find the device you have specified. Use the
DEVTBL command to see if the device is Listed as a valid system
device.
?File specification error
You did not specify a device to the FMT500 command.
CHARACTERrSTICS:
Formats
disks
used in hard disk devices that run under control of the
AM—SOD Hard Disk ControLLer board.
When you run FMT500, make
the system.
sure that your job is the onLy one runninq on
Writes over any data currentLy on the disk.
(Changed 30 ApriL 1981)
force
FUNCTION:
ALLows you to send terminaL input to another job.
HINTS/RESTRICTIONS:
FORCE has two modes; singLe—line and muLti—Line.
careful when using
FORCE
to make sure that the job to whom youBe
are forcing input has
enough memory aLLocated to it to handle the task
you are giving it.
You wILL often use FORCE to force input to
a job that is attached to a
pseudo—terminal (for exampLe, to bring
up the Line printer spooLer
under controL of a pseudo—terminal)
FORMAT:
.FORCE Jobname Commands—and—data
or:
.FORCE Jobname
Commands—and—data
Commands—and—data
where Commands—and—data are any valid AMOS commands
or
can enter from the keyboard.
data
that
you
OPERATION:
1.
Type FORCE folLowed by the name of the job to whom you wish to
force input.
If you now type a RETURN, you inform AMOS that
you want to use FORCE in muLti—Line mode:
.FORCE JOB2
Now type one or more lines of commands and data. To end the
FORCE
command, enter two RETURNs (i.e_, make a bLank Line).
For exampLe:
.FORCE JOB3
tOG DSKO:11O,5
TXTFMT HEAbER
p
(1 October 1979)
FORCE (Cont'd)
2.
Page 2
To use FORCE in single—line mode, enter a singLe Line of
commands or data after the Jobname on the FORCE command line:
.FORCE J062 RUN SINE
ERRORS:
may
see any of the system error messages that can resuLt from the
commands and data that you've forced to the other job.
You
You may aLso see the foLlowing:
-
[NONEXISTENT JOBJ
FORCE doesnt recognize the name of the job to whom you are
force input.
Check your speLling; then use the SYSTAT
command to see what jobs are on the system.
trying to
[NO TERMINAL ATTACHED TO JOBJ
job
You need to use the ATTACH command to assign a terminaL to the
to
whom
you want to force
input.
You
can assign
a
pseudo—terminaL if you do not need to see any output from that job.
CHARACTERISTICS:
Forces input to another job on the system.
Make sure that the job to whom you are forcing input has enough
aLlocated to it to handle the tasks.
Returns your terminaL to AMOS command LeveL.
(1 October 1979)
memory
global
FUNCTION:
a group of assembly Language object (.OBJ) fiLes and produces an
aLphabetic cross reference which Lists alL globaL symboLs in the fiLes,
and shows which fiLes define them and which fiLes accept them as
Takes
externaLly defined symboLs.
HINTS/RESTRICTIONS:
The
Apha Micro macro—assembLer, MACRO, aLLows you to segment assembLy
Language programs. You can assembLe these segments separateLy, and
then Link them together with LINK, the linkage editor.
to reference symbols that occur in
accompLishes this by alLowing you to use
statements.
other
abLe
Let's
the
say that you define a symbol within a fiLe.
statement, you can make the symboL avai Lable
to
Each segment is
segments.
INTERN
and
MACRO
EXTERN
By using the INTERN
other segments that
wilL be Linked together with that file. Other fiLes that reference a
symboL defined in another segment must contain an EXTERN statement for
that symboL so that LINK knows that a definition for that symbol exists
in another segment.
MACRO aLso aLlows you to overLay a portion of a
program with a program from the disk; the OVRLAY statement accomplishes
this. For each OVRLAY statement, an INTERN statement must exist in
another
segment
segment.
GLOBAL produces a
which
identifies
the
start
of the overtay in that
listing fiLe that contains a cross reference
of
aLL
that have been referenced in an INTERN, EXTERN, or OVRLAY
statement, so that you can see in which segments those references
occur.
(For information on INTERN, EXTERN, OVRLAY, and MACRO, see
symboLs
AMOS AssembLy Language Programmer's Reference Manual, (DWM—OO100—43).
GLOBAL produces the Listing fiLe in the account and device you are
Logged into.
The Listing file bears a .GLB extensions and the name of
the first segment specified on the GLOBAL command Line.
FORMAT:
.GLOBAL{/switches} Fi(especl,FiLespec2{
FitespecNj
RET
where /switches are optional and affect format of the information in
the Listing fiLe.
FiLespecl...FiLespecN is a List of .OBJ files for
which you want a gLobaL cross reference. If there are too many fiLes
to fit on one command Line, you may end the command line with a comma.
Then you can resume the command Line on the next Line.
(1 May 1980)
GLOBAL CCont'd)
Page 2
You may enter as many lines of Fi lespecs as you wish, as
end each preceding line with a comma.
long
as
you
DEFAULTS:
It
you omit portions of a fiLe specification, GLOBAL assumes a fiLe
extension of .OBJ and the device and account you are Logged into.
OPTIONS:
You may request the folLowing options by incLuding the appropriate
switches on your command Line. (Each switch must begin with a sLash.)
Line width options (defauLt is 80 characters):
Listing (same as /w:130). Produces a Listing file
that may have up to 130 characters on a Line.
1W
Wide
/W:n
Characters per Line, where n
characters.
specifies
the
number
of
Page Length (default is 60):
IL
Long Listing (same as IL:80).
IL:n
Lines per page, where n specifies number of Lines.
OPERATION:
1.
GLOBAL
foLLowed by optional switches. Then suppLy a List of
the Filespecs that specify the segments for which you want a gtobal
cross reference. Type a RETURN. For exampLe:
Type
.GLOBAL/W/L MAIN,SUB1,SUB2 RET
2.
If you have more fiLe specifications than wilL fit on
Line,
the
end
asterisk:
Line with a comma.
one
command
GLOBAL now prompts you with an
.GLOBAL MAIN,SUB1,SUB2,SUB3,
*
Enter the next Line of fiLe specifications. You may enter as
Lines as you want, as Long as aLL preceding Lines end with
3.
GLOBAL
reads
each
file
you specify and buiLds a tabLe of gLobal
is
symbols in memory. As it works, GLOBAL tells you which fiLe it
processing. For example:
(1 May 1980)
many
a comma.
GLOBAL (Cont'd)
Page 3
PROCESSING MAIN.OBJ
PROCESSING SUA1.OBJ
PROCESSING 5U62.OBJ
4.
After processing alL fiLes, GLOBAL creates a disk fiLe that
contains the gLobaL cross reference. As it works, GLOBAL dispLays
name of the fiLe it is buiLding, and prints a dot each time it
outputs a disk block. For example:
the
BUILDING PIAIN.GLB
This fiLe has the same name as the first segment you
the GLOBAL command and a .GLB extension.
5.
specified
to
When GLOBAL is finished, it prints the foLlowing and returns you to
AMOS command leveb
GLOBAL FILE FINISHED
6.
Here is a portion of what a GLOBAL listing fiLe might Look like:
.TYPE MAIN.GLB 3
GLobal Cross—Reference (Version 1.0)
MSS
AUU
IBB
N12
ALPHA
BETA
ZETA
I E
I .
I
£
0
The Listing fiLe above teLLs us: 1) the symboL ALPHA appeared in an
statement in the tile MAIN and in an EXTERN statement in
file SUB1; 2) the symbol BETA appeared in an INTERN statement in
INTERN
MAIN and in an EXTERN statment in SUB2; 3) the symboL ZETA appeared
in an INTERN statement in MAIN and in an OVRLAY statement in SUB1.
ERRORS:
?Undefined switch /x — Ignored
You
specified an invaUid switch.
recognizes are the IL or 1W switches.
(1 May 1980)
The
onLy
switches GLOBAL
GLOBAL (Cont'd)
Page 4
CHARACTERISTICS:
Assumes a
fiLe specification extension of .OBJ.
Produces a listing fiLe with the same name
as the first fiLe specified
in the command tine and an extension of .GLB.
Returns your terminaL to AMOS command leveL.
(1 May 1980)
goto
FUNCTION:
ALLows transfer of controL within a command fiLe.
HINTS/RESTRICTIONS:
in combination with the LOOKUP and EXIT command fiLe commands,
GOTO aLLows you to set up conditionaL transfers within a command fiLe
Used
based
whether or not a specified fite exists.
on
EXIT reference sheets.)
You may
Command
use
onLy
information
on
FiLe 5
Information
GOTO
branching
and
DO
(See the LOOKUP and
within a command or DO fiLe.
For more
within a command file, see New Features of
FiLes,
(DwM—0U100—63),
in the
"User's
section ot the AM—100 documentation packet.
must precede the
LabeLs they branch to—— that
statements may only transfer forward in the command fiLe.
GOTOs
is,
GOTO
FORMAT:
GOTO Argument{;comment}
where Argument is the name of the Label that seLects the portion of the
command fiLe you want to branch to. The optional comment must begin
directLy after the Argument. (That is, there must be no space between
the end of the Argument and the semicolon that begins the comment.)
The Argument
must not end with trailing bLanks—— arguments must end
either with a RETURN or a semicoLon (which designates the start of a
comment).
The
LabeL
referenced by Argument must exist in a Later portion of the
The LabeL uses this format:
command fiLe.
LABEL
or:
;LABEL
The labeL must be the onLy thing on its command
Line.
If
the
LabeL
does not begin with a semicoLon, it is not a comment; therefore it must
be
an
executabLe command fiLe eLement (e.g., a program name or a
command fiLe specification). (NOTE: If the labeL is a comment, the
Argument on the GOTO command Line that referenced it must not begin
with a semicoLon, even though the LabeL does.)
(1 May 1980)
GOTO (Cont'd)
Page 2
You may begin a labeL with a semicoLon, spaces, or spaces foLLowed by a
semicoLon; these are aLl, ignored when GOTO compares the Argument to the
LabeL it seLects. (Remember that if a LabeL begins with a semicoLon,
must not pLace any spaces between the semicoLon and the characters
That is,
;NOFTLE" is a valid
NOFILE is not.)
LabeL, but
you
that make up the rest of the Label.
OPERATION:
1.
the pLace in your command fiLe where you want to transfer
controL, enter GOTO foLLowed by the argument that is the name of
the LabeL you want to branch to. For exampLe:
At
GOb
2.
At
NOFILE
a Later point in your command file, designate the portion of the
command fiLe you want to branch to by pLacing the appropriate Label
on the Line before that section.
For exampLe:
;NOFILE
:<CouLdn't find that file; enter RETURN to create it:>
3.
You wiLL
probabLy want to use the GOb command together with the
LOOKUP and EXIT commands to perform conditionaL branching within
the command fiLe. For exampLe:
LOOKUP INSTAL.MAC/?CouLdn't find fiLe
GOTO NOTFOUND
If couLdn't find fiLe, GUTO NOTFOUND error routine.
If did find it, assembLe it.
TRACE ON
MACRO INSTAL
LINK INSTAL,SUB1,SUB2
INSTAL.PRG
EXIT *Returning you to AMOS command LeveL*
;NOT FOUND
If you want to create the fiLe, type a RETURN;>
PAUSE Otherwise, type anything else.
VUE INSTAL.MAC
V
(1 May 1980)
GOTO (Cont'd)
Page 3
ERRORS:
If
the Label you suppLy is not a valid comment or executabLe command
fl Le eLement, GOTO resumes executing the command 11 Le after the LabeL.
If 6010 is not abLe to find the specified LabeL, you see:
?LabeL not found
and you are returned to AMOS command leveL
This message means that
did not suppLy a valid argument and/or Label. Make sure that your
argument matches the LabeL you want to branch to, and that the LabeL
and arguments are in proper form.
you
CHARACTERISTICS:
Allows transfer of controL within a command or DO fiLe.
When used with
LOOKUP and EXIT statements, permits conditionaL branching.
May be used only within a command fiLe Cr DO fiLe.
(1 May 1980)
1
hasher
FUNCTION:
Generates a hash totaL for a specified disk.
HINTS/RESTRICTIONS:
hash total is a number that is computed based on the characteristics
of a group of data; the hash totaL thus uniqueLy identifies that group
of data.
HASHER
generates a hash totaL for a disk; this number is
based on the contents of the disk. Therefore, two disks only have the
same hash totaL if they contain identicaL data.
A
HASHER
disk.
disk.
is especiaLly usefuL when you are making muLtipLe copies of a
You can use MASHER to generate the hash totaL of the source
Then, every time you use DSKCPY to make copies of that disk, you
can teLl
DSKCPY
to generate a hash total for the disk copied to. If
the hash totaL for the source disk does not match the hash totaLs for
the disks copied to, a probLem occurred during the disk copy.
NOTE FOR HAWK HARD DISK USERS:
Since you wilL often use HASHER
to generate a hash total that you
can compare against a hash total generated by DSKCPY, you should
remember that DSKCPY can generate two different hash totaLs for the
same
disk, dependinq on whether you teLl DSKCPY to use the fast
copy mode or the sLower (/0) copy mode.
To
be
compatibLe
with
DSKCPY,
HASHER
can
aLso
generate
two
different hash totals for a Hawk disk, using either the DSKCPY fast
copy mode or the DSKCPY /0 mode.
Therefore,
before using MASHER on a Hawk disk, you must decide
whether you want the hash totaL computed via the fast copy
technique or the /0 method. (The fast copy method is the defauLt;
to specify the /0 method, use the /0 switch on the MASHER command
Line.)
If you generate a hash totaL using the fast copy method,
no other users may run on the system whiLe the hash total is
being caLcuLated.
the DSKCPY reference sheet for more information on the two
DSKCPY copy modes for the Hawk device.
See
FORMAT:
.HASHER(/switch)
where /switch selects a special mode for Hawk devices.
(changed 30 April 1981)
flASHER (Cont'd)
Page 2
DEFAULTS:
you omit the optionaL /0 and you have specified a Hawk hard disk,
assumes that you wantThe hash totaL computed via the technique
DSKCPY uses when operatinq in Hawk fast copy mode. (The /0 switch has
tt effect when computing the hash totaL for other disks.)
no
HASHER
OPERATION:
1.
generate a hash totaL for a fLoppy disk or Phoenix hard disk,
first enter the command RASHER:
To
.HASHER
Now enter the specification of the device that contains
when you see:
that
disk
Input drive: PHO1:
As flASHER works, you see:
[Hashing nnnn bLocksJ
where
is
nnnn
the
finished, you see:
number
of
bLocks
on
the disk. When it is
Hash is nnn
where nnn is the computed hash total..
2.
To generate a hash totaL for a Hawk disk, enter
this
HASHER.
If
you
totaL to be computed in the same way that DSKCPY
generates a hash totaL when using the Hawk fast copy mode, do not
use the /0 switch; just type a RETURN. Then enter the input drive:
want
hash
.HASHER @D
Tnput drive: RWK1:
Now you see:
flIL other users wiLL be suspended whiLe HAWK hash is running.
Hit return to continue or controL—C to abort:
If any other user is running on the system, type a ControL—C to
exit flASHER. When you are sure no other users are on the system,
you may use flASHER again. For example:
(Changed 30 April. 1981)
Page 3
HASHER (Cont'd)
.HASHER RET
Input drive: UWK1:
ZALt other users wilL be suspended whiLe HAWK hash is running.
Hit return to continue or controL—C to abort:
EHashinq 9696 bLocksJ
Hash is 627
If you want HASHER to generate a hash totaL for a Hawk disk in the
same way that DSKCPY generates a hash totaL when using the /0 copy
Remember
mode, incLude the /0 switch on the flASHER command tine.
For
exampLe:
to end the command Line with a RETURN.
.HASHER/0 ED
Input drive: HWK3:J
[Hashing 9696 bLocks]
Hash is 432
ERRORS:
You may see the folLowing RASHER error messages:
?lnvatid switch, pLease use one or more of the folLowing:
use oLd (slow) copy method for the AM—SOD
the command Line other
Enter the command Line again.
/0
You specified a switch on
?Driver not found
RASHER
couLdn't
specified device.
memory,
for hetp.
find
the
than
/0.
driver program for the
driver was not in system
device
That means that the
user memory, or DSKO:C1,6].
Check with the System Operator
?Disk size not defined in tabLe
HASHER doesn't know the number of disk bLocks per disk for the
devices you are trying to copy between. This means that you are
Check with the
using a device that HASHER doesn't know about.
System Operator for heLp.
are atso severaL AM—SOG hard—disk controlLer "hard error"
messages that it is possible but extremeLy unLikeLy that you wouLd ever
see. (U any of these do occur, pLease contact ALpha Micro.)
There
?Sector not found during disk hash — drive N block X
where drive N is a decimaL number and bLock X is an octat or
This can only happen when you are using the
hexadecimaL number.
fast copy mode of DSKCPY or HASHER on a Hawk hard disk
(changed 30 April 1981)
system.
The
HASHR (Cont'd)
Page 4
contents of a disk sector have become unformatted.
is a probLem by using REDALL to diagnose the disk
errors. (See the REDALL
about disk diagnostic tests.)
read
Verify if there
report any
reference sheet for more information
and
?CRC error during disk hash — drive N bLock X
where drive N is a decimaL number and bLock X is an octal or
hexadecimal nisnber.
This can onLy happen when you are using the
fast copy mode of DSKCPY or FlASHER on a Hawk hard disk system.
The
CycLic Redundancy Check device on the AM—SOD board has detected a
probLem in data transmission.
First verify if there is a probLem
using REDALL to diagnose the disk and report any read errors.
(See the REDALL reference sheet for more information about disk
diagnostic tests.)
The probLem can be fixed usinq DSKDDT, but the
data in the bLock may be Lost. (For more information on DSKDDT, see
by
the DSKODT reference sheet.)
?Sentinel field error during disk hash — drive N bLock X
where drive N is a decimat ritinber and bLock X is an
octaL or
This can onLy happen when you are using the
fast copy mode of DSKCPY or HASHER on a Hawk hard disk system.
The
contents of a disk block have become unformatted, Verify if there
is a probLem by using REDALL to diagnose the disk and report any
hexadecimaL
number.
read errors.
(See the REDALL reference sheet for more information
about disk diagnostic tests.)
?Lindefined error during disk hash — drive N bLock X
where drive N is a decimaL nuiiber and block X is an octal or
hexadecimaL number.
This can only happen when you are usinq the
fast copy mode of DSKCPY or HASHER on a Hawk hard disk system.
A
hard error occurred which was not definabLe as any of the foregoing
AM—500 hard—disk controLler errors.
Verify if there is a probLem by
using REDALL to diagnose the disk and report any read errors.
the
REDALL
reference sheet for more information about
diagnostic tests.)
See the documentation
that
accompanies
the
AM—SOC
board
information on these errors and the conditions they report.
for
(See
disk
more
CHARACTERISTICS:
HASHER generates a hash totaL for a specified disk.
If
you want a hash total for a Hawk hard disk, HASHER can compute the
hash totaL using either the DSKCPY fast copy method or the DSKCPY /C
method,
If you use the Hawk fast copy mode (the default), no other
users may run on the system until HASHER is finished.
(Changed 30 April 1981)
hedlod
FUNCTION:
may optionaLLy use the HEDLOD command in the system initial.ization
command fiLe to set the head toad time for the AM—200 fLoppy disk
You
controtLer.
You may also use HEDLOD at AMOS command LeveL to telL
the head Load time set in the SYSTEM.INI.
you
HINTS/RESTRICTIONS:
When it appears in the system initialization command file,
command
the
HEDLOD
sets the number of reat—time cLock ticks that the AM—200 keeps
the disk drive heads Loaded after a data transfer.
The HEDLOD
command
must appear after alL SYSTEM commands in the SYSTEM.INI.
HEDLOD
command onLy affects disk drives that run under controL of
the AM—200 floppy disk controlLer and that support software controL of
head toad timing (Persci disks only).
The
FORMAT:
rHEDL0D ç
or:
HEDLOD
where
n seLects the number reaL—time clock ticks that the AM—200 keeps
the disk drive heads toaded after a data transfer.
OPERATION:
1.
Type HEDLOD foLtowed by a RETURN to find out the head Load
time set by the SYSTEM_INI for floppy disk drives that run
under the controL of the AM—200 and that support software
controLled head Load timing.
LHEDLOD
CURRENT HEAD LOAD TIMER IS 0 CLOCK TICKS
2.
define the head Load time, edit the SYSTEM.INI with one of
At any point after the last SYSTEM
command, enter HEDLOD foLLowed by the number of cLock ticks
To
the system text editors.
you want the AM—200 to keep the heads Loaded after
transfer. For example:
HEDLOD 1800
(1
October 1979)
each
data
HEDLOD (Cont'd)
The
Page 2
exampLe
heads Loaded
reaL—time
transfer.
telLs the
above
for
clock
system to keeo the disk drive
ticks (30 seconds when the
operating at 60 Hz) after each data
1800
is
cLock
ERRORS:
HEDLOD generates no error messages.
CHARACTERISTICS:
HEDLOD is both a user command and a system initialization command.
The use of HEDLOD in the system initialization
command
that the CLKFRQ command aLso be in the SYSTEM.INI.
Returns the terminaL to AMOS command Level.
(1 October 1979)
fiLe
requires
liSp
FUNCTION:
DispLays text fiLes on your terrnina that contain information about the
system.
HINTS/RESTRICTIONS:
The
HELP
operates
command
in
two
modes: 1. to teLl you what files
containing information on the system are available (.HLP tiles); and 2.
to dispLay a specific .HLP fiLe on your terminaL.
HELP Looks first for the specified .HLP file in the System HELP FiLe
Library, DSKD:[7,1J; next it searches in your project library account
([your—proj#,OJ), and if unsuccessfuL there,
account that you are currentLy Logged into.
it
Looks on the device and
FORMAT:
.HELP
or:
.HELP Topic
The first format teLls HELP to dispLay
which heLp is avaiLable.
The
second
format
tells
HELP
a
List of alL of the topics for
to dispLay the file that contains the
information on the requested topic. <The .HLP file bears the
the topic about which it contains information.)
name
of
OPERATION:
1.
Type
HELP foLLowed by a RETURN to see a
topics.
For example:
list of the avaiLable
.HELP
HeLp is avaiLable for:
APPEND BAUD
(1
October 1979)
COPY
DEL
ERASE
LOG
HELP (Cont'd)
2.
Page 2
HELP first Lists the .HLP fiLes in account DSKO:E7,1]; then it
prints a bLank Line and lists the .HLP files in the project
Library account for the account you are currently Logged into.
Last, it prints a blank Line and Lists the .HLP files in the
account you are Logged into.
Type HELP followed by the name of a specific topic to see
text fiLe associated with that topic.
the
.HELP VLIE
the screen clears and you see one or more screensfuL of
information on the topic you have chosen.
Now
ERRORS:
The onLy time that HELP generates an error message is
information on a topic that it knows nothing about; in
if you ask it for
says:
that
case,
it
I'm sorry, I can't heLp you.
Then it displays a list of the topics for which help is avaiLabLe.
CHARACTERISTICS:
DispLays
a
List
of topics about which it knows information, and when
asked for a specific topic, dispLays the text file that
information on that topic.
Returns your terminal to AMOS command leveL.
(1
October 1979)
contains
the
-1
hwklocl
F UN CT I ON
Bootstrap Loader program for a system that
Corporation Hawk hard disk as the System Device.
uses the ControL Data
HINTS/RESTRICTIONS:
The F4WKLOD program is embedded in the micro—code ROM
on
the AM—SOD,
which aLlows the system to boot off a System Disk on a Hawk hard disk
when a hardware reset occurs (that is, when you hit the RESET button).
if
You may use HWKLOD at AMOS command Level to reset the system
your
System Device is a CDC Hawk hard disk. The Hawk is a 10—megabyte hard
disk device (five—megabyte fixed, five—megabyte removable). The memory
partition of the job that
uses the HWKLOD command MUST be in Bank
if your system bank switches
systems,
refer
to
the
Zero
memory.
(For information on bank—switched
document
Memory
Management
Option,
(DWM—OO100—1o) in the AM—100 documentation packet.)
FORMAT:
.HWKLOD
OPERATION:
1.
Type HWKLOD foLLowed by a RETURN:
LHWKLOD ?
The system now resets itseLf by reading a copy of the
bootstrap program into system memory and executing it.
2.
HWKLOD
invoked, the HWKLOD program reads the operating system
skeleton
monitor,
DSKO:SYSTEM.MON[1,4],
into
memory.
SYSTEM.MON then brings up the system under the control of your
Once
system initialization command file, SYSTEM.INI.
3.
Once the system is up and running, you see the AMOS prompt.
ERRORS:
HWKLOD
generates no error messages.
If
SYSTEM.MON on the cartridge, HWKLOD searches
it is not abLe to find
the fixed disk. If -fWKLOD
doesn't find SYSTEM.MON [1,4], or if it does find
SYSTEM.INI, the bootup (start—up) procedure faiLs.
(1
October 1979)
SYSTEM.MON,
but
no
HWKLOD (Cont'd)
Page 2
CHARACTERISTICS:
Boots
the
Device.
system from a CDC Hawk hard disk if that disk is the System
Returns your terminal to
successfulLy.
(1 October 1979)
AMOS
command
leveL
if
the
system
resets
ibmcpy
FUNCTION:
Transfers a copy of a fiLe from an IBM 3740 diskette
(prepared on an
IBM data—entry station) to an AMOS device.
HINTS/RESTRICTIONS:
IBMCPY does not convert the fiLe into one of the formats used
by
AMOS
fiLes, it simpLy transfers the data from the diskette to an AMOS device
as is, except for transLating the characters from EBCDIC to ASCII.
IBMCPY
reads
IBM
3740
diskettes
80—byte records.
in
which
the data is arranged in
IBMCPY assumes that the IBM diskette is mounted on device IMG1:.
You
have a vaLid copy of the image driver (IMG.DVR)
in area [1,6] of
your System Disk, and you must have 1MG defined as a valid device on
your system.
(See the DEVTBL reference sheet for information on
must
defining devices.)
FORMAT:
.IBMCPY Fi Lespec
where Fl Lespec is the name (in IBM format) of the fiLe that you want to
copy.
OPERATION:
7.
Type IBMCPY foLLowed by the name of the fiLe on the IBM
diskette that you want to copy. Type a RETURN. For exampLe:
.IBMCPY DATAO9
2.
IBMCPY reads the fiLe from the IBM diskette and copies it over
to the device and PPN that you are Logged into. The name of
the new file is the first six characters
name; it has the extension .IBM.
3.
of
the
Since
fiLe's
each
Logical record in an IBM fiLe is 80 characters
Long, the new AMOS fiLe consists of a series of 80—character
Lines; each Line ends with a carriage return/Line feed
sequence.
4.
IBM
When IBMCPY is finished, it displays this message:
Copy complete
(1 October 1979)
IBMCPY (Cont'd)
Page 2
ERRORS:
File not found on IBM diskette
IBMCPY looked for the tile that you wanted to make a copy of,
but couldn't find it on the IM diskette. Make sure that you've
spet Led the name of the file correctly.
IBMCPY can aLso dispLay the
standard
system error messages
For exampLe:
provide an invalid device specification.
if
you
?Cannot READ IMG1: — device does not exist
Make
sure that 1MG is defined in your èystem device table as a
valid device. (To see a list of system devices, type DEVTBL
folLowed by a RETURN.)
Be sure to mount IMG1: before using IBMCPY.
CHARACTERISTICS:
that 1MG be a valid
exists on your System Disk.
Requires
system device, and that IMG.DVR[1,6]
For use on IBM 3740 diskettes that contain 80—byte records.
Returns your terminaL to AMOS command LeveL.
(1 October 1979)
ibmdir
FUNCTION:
Prints directory of
station.
3740
a
diskette
prepared on an IBM data—entry
HINTS/RESTRICTIONS:
IBMDIR uses the image driver
(IMG.DVR)
to
access
the
data
on
the
diskette; make sure that you have a vaLid copy of the image driver in
area [1,6] of your System Disk. IBMDIR assumes that the diskette is
mounted
on device IMG1:.
1MG must be a defined device on your system.
to the DEVTBL reference
(For information on defining devices, refer
sheet -
IBMDIR reads IBM 3740 diskettes that contain 80—byte records.
FORMAT:
.IBMDIR
OPERATION:
1.
Type IBMDIR foLLowed by a RETURN:
.IBMDIR
2_
IMDIR
IMG1:.
dispLays the directory of the IBM diskette mounted in
For example:
IBM 3740 Diskette Directory
FiLename
start
end
DATAIJ9
2 00
8 00
7 26
used
2 11
13
9 22
ORDER7S
11
Below are the eLements of the directory dispLay:
a.
FiLename — The name of the
IBM
file.
users
(IBM
recognize this as the dataset name.)
b.
Start
—
diskette.
sector 0.
c.
End
—
The
starting address of the
The first file, DATAO9 starts
The
address
file
at
of the Last sector of the fiLe.
ending address of DATAO9 is track 7, sector 26.
(1
October 1979)
on
track
wilL
the
2,
The
IBMDIR (Cont'd)
d.
Page 2
the tile that contains
In the case of DATAO9, the Last sector of the
Used — The Last disk address of
valid data.
file that contains valid data is sector 2, track 11.
ERRORS:
can see severat of the standard system error messages that result
from invaLid device specifications. For example:
You
?Cannot READ IMG1: —
device does not exist
You must define
1MG
as
a
system device.
Make sure
that
exists on your System Disk.
(For a list of vaLid
system devices, type DEVTBL foLLowed by a RETURN.)
IMG.DVR[1,6]
CHARACTERISTICS:
Requires that 1MG be a valid system device and that IMG.DVRI1,6]
on your Systen Disk.
Uses IBM 3740 diskettes that contain 80—byte records.
Returns your terminaL to AMOS command level.
(1 October 1979)
exist
nIod
FUNCTION:
Bootstrap Loader program for a system that uses the Pertec Icon,
fLoppy
disk as the System Device.
HINTS/RESTRICTIONS:
The ICMLOD program when contained on a 2716 PROM aLLows the system
to
boot off a System Disk on an Icom fLoppy disk when a hardware reset
occurs (that is, when you hit the RESET button).
The program is aLso in account DSKO:E1,4J of the System Disk.
You may use ICMLOD at AMOS command LeveL to reset the
System Device is an Icon, fLoppy disk drive.
the job that uses the ICMLOD
system
if
your
The memory partition of
command MUST
be
in Bank Zero if your
switches memory.
(For information on bank—switched
systems,
refer
to
the
document
Memory
Management
Option,
(DWM—OQ100—1o) in the AM—ThO documentation packet.)
system
bank
FORMAT:
.ICMLOD 4)
OPERATION:
1.
Type ICMLOD foLlowed by a RETURN:
.ICMLOD
The
now resets itseLf by reading a copy of the ICIILOD
bootstrap program into system memory and executing it.
2.
system
Once invoked, the ICMLOD program reads the operating system
skeLeton
monitor,
DSKO:SYSTEM.MONE1,4],
into
memory.
SYSTEM.MON then brings up the system under the control of your
system initiaLization command file, SYSTEM.INI.
3.
Once the system is up and running, you see the AMOS prompt.
ERRORS:
ICMLOD generates no error messages. However, if it is not abLe to find
SYSTEM.MON[1,4J and SYSTEM.INIL1,4], the start—up procedure faiLs.
(1 October 1979)
ICMLOD (Cont'd)
Page 2
CHARACTERISTICS:
Boots the system tram an Icom fLoppy disk if the Icon disk drive is the
System Device.
Returns your terminal to
successfuLly.
(1 October 1979)
AMOS
conmand
LeveL
if
the
system
resets
ismbld
FUNCTION:
Builds an ISAM index fiLe/data file combination
HINTS/RESTRICTIONS:
ISAM
(Indexed SequentiaL Access Method) is a method for organizing and
accessing data. An ISAM fiLe is an index fiLe/data fiLe combination.
The index file contains pointers to records in the data file. ISAM_PRG
quickly finds data records by searching the index tile instead of
searching the data fiLe itself.
ISMBLD has three functions: 1. create a new ISAM fiLe; 2. add data to
the new file or to an existing fiLe; and,
3. change the device
specification of a data fiLe.
You can use ISAM functions
within BASIC programs or assembly
For information on using ISAM, refer to the ISAM
(DWM—DOlOO—O6,
Rev
Aol), and the AIphaBASIC
User's ManuaL, (DWM—OD100—O1).
For the Latest information on ISAM
(e.g., the difference between ExcLusive Open Mode and Counted Update
Mode),
refer to the document Important Notice for ISAM Users,
from
programs.
System User's Guide,
Language
(DWM—DO100—36, Rev AOl), in the AM—lao documentation packet.
NOTE: Although you caLl ISAM
assembLy
Language programs,
functions
you
directly from AMOS command LeveL.
may
from within your BASIC or
not run the program ISAM.PRG
FORMAT
.ISMBLD Fi Lespec C/Switches)
where Filespec se'ects the name you want to assign to the
and .IDX (index) fiLes.
.IDA
(data)
DEFAULTS:
ISMBLD
assumes an extension of .SEQ when you specify a fiLe from which
to Load data.
OPTIONS:
You may seLect the options beLow by incLuding the proper switches on
the ISMBLD command Line. (For information on ExcLusive Open Mode and
Counted Update Mode, refer to the document Important Notice for ISAM
Users, (DWM—OOlOo—36, Rev Aol).
(1
October 1979)
ISMBLD (Cont'd)
Page 2
ID
Change the data fiLe device specification.
IN
Prevent ISMBLD from using ExcLusive Open Mode.
OPERATION:
1.
If
you want to use ISMULD to create a new ISAM file, type
ISMBLD foLlowed by the name you want to assign to the fiLe.
For example:
.ISMBLD LABELS
2.
create an ISAM fiLe in Counted Update Mode, use the IN
switch on the ISMBLD command Line (otherwise, ISMBLD uses the
To
ExcLusive
Open
exist, ISMBLD
parameters
series of questions; from the
ISMBLD generates a data fiLe/primary
a
suppLy,
you
index fiLe combination.
a.
If the tiLe you specify does not yet
Mode).
asks you
ISMBLD asks:
Size of key: — Enter the size of the desired key in
bytes.
When
you Later access the ISAM fiLe you are now
building, you must remember to pad with blanks or other
characters keys that are smalLer than this size.
b.
Position
the
of key:
record.
data
— Enter the Location of the key within
Enter
the
number
of
first
the
character—position in the record that the key occupies.
c.
Size
d.
Number
of
data
record: — Specify in bytes the size of the
records in the data file (or the maximum size in the case
of variable Length records).
of
records to aLlocate: — Number of records which
the data tiLe is to contain.
e.
Entries per index block: — Enter
per each index block.
f.
index bLocks to aLlocate: — Enter the number of
additionaL empty index bLocks you want to aLLocate.
g.
Primary
number
entries
of
Empty
Directory?
ndex
file/primary
enter N.
h.
the
Secondary
secondary
—
If
you
are
creating
a
data
fiLe combination, enter 1; otherwise,
to fiLe:
If you are creating a
index fiLe instead of a data fiLe/primary index
index
—
fiLe combination, ISMBLD prompts you for the specification
of the primary index fiLe to which this secondary index
fiLe cross—indexes.
After you suppy this information,
(1 October 1979)
ISMBLD (Contd)
Page 3
ISMBLD returns you to AMOS command leveL
i.
Data FiLe Device? — ISMBLD asks this question if you are
a
data fiLe/primary index file combination. If
creating
the index fiLe and data fiLe are to be on the same device,
enter just a RETURN; otherwise enter the specification of
the device on which the data fiLe is to reside.
3.
Once
ISMBLD
has
created
a
new
combination, it enters file Loading
data/primary
mode.
It asks:
index
fiLe
Load from fiLe:
You may enter either a RETURN (to create an empty data fiLe)
or you may specify a sequentiaL data file from which you want
to Load data. ISMBLD assumes a fiLe extension of .SEQ for
this data file. After Loading the data fiLe, ISMULD returns
you to AMOS command LeveL.
4.
If you are not creating
a
new
data/index tile combination
specified a tiLe to ISMBLD that already
exists), ISMALD goes directly into file Loading mode. Instead
of asking you the list of fiLe parameter questions above, you
(i.e.,
you
have
see:
[Processing existing fiLeJ
notifies you that you are in file loading mode, not fiLe
This
creation mode.
Now ISMBLD asks for the specification
file from which you want to Load:
of
the
Load from fiLe:
ISMBLD
assumes
a
fiLe extension of .SEQ for this sequential
data fiLe. You may enter RETURN to teLl ISMBLD not to Load
from a fiLe.
5.
To
change
the
data
file device after an ISAM fiLe has been
created, use the /D switch on the ISMBLD
example,
you want
DSKO: to DSK1:——
.ISMBLD MAIL/D
[Processing existing fiLeJ
Current device name is DSKO:
Enter new device name: DSK1:
(1 October 1979)
command
Line.
For
to change the device of the data fiLe from
ISMBLD (Cont'd)
Page 4
ERRORS:
BeLow we list severaL of the more common ISMBLD error messages you
see:
may
End of input fiLe in middLe of record
You
loaded an ISAM file with data from a sequential data file,
but the parameters you gave to ISMELD when you originaLly created
file did not exactLy match the data in the data file (e.g., the
record size in the data fiLe is not the same as the size you
the
specified to ISMBLD).
?ISBXFL Index file fulL
You
did
not
specify
enough additionaL index bLocks when you
buiLt the ISAM fiLe. When you Loaded the ISAM fiLe with data,
index was not Large enough to hoLd the necessary entries.
the
?ISBAFL Data file fuLl
You
did not specify enough
when you buiLt the ISAM
file, When you Loaded the ISAM file,records
the data fiLe was not large
enough to hold aLl of the data.
Duplicate secondary key Left out xxxxx
tried to use ISMBLD on a secondary index file—— the data
xxxxx is already in an index fiLe.
You
ZAttempt to add duplicate key xxxxx
sure
fiLe.
You tried to add duplicate data, xxxxx, to a data file.
Make
that you have not tried to Load data twice from the same data
CHARACTERISTICS:
Assumes a
.SEQ fiLe extension for the data
fiLe from which you are
Assumes you want to build an ISAM fiLe in ExcLusive Open
Mode unless you use the IN switch.
Loading data.
to see if the fiLe you specify on the ISMBLD command Line
aLready exists to decide whether to buiLd a new file or Load an oLd
Checks
one.
Returns your terminaL to AMOS command LeveL.
'-A
(1 October 1979)
ismcom
FUNCTION:
Compresses the upper leveL of an ISAM index file.
HINTS/RESTRICTIONS:
(Indexed SequentiaL Access Method) is a method for organizing and
accessing data. An ISAM fiLe is an index file/data file combination.
ISAM
The index fiLe contains pointers to records in the data fiLe. ISAM.PRG
quickLy finds data records by searching the index file instead of
searching the data fiLe itseLf.
NOTE: ALthough you can caLL ISAM functions from within your BASIC or
language programs, you nay not run the ISAM.PRG program
directLy from AMOS command leveL.
assembLy
For information on using ISAM, refer to the ISAM System User's Guide,
(DwM—OO100—06,
Rev
Aol),
and
the
ALphaBASIC
Llsers ManuaL,
(DWM—ODlO0—O1).
For the
Latest information on ISAM, consult the
Important Notice for ISAM Users, (DWM—OO100—36, Rev AOl), in
the AM—lDO documentation packet.
document
Use the ISMBLD command to
combination.
buiLd the originaL
(See the ISMBLD reference sheet.)
compresses
ISMCOM
the
upper
Level
of
the
data
ISAM
fiLe/index
fiLe
index file.
This
increases the speed with which you can access data in the ISAM fiLe and
recovers space in the index file.
FORMAT:
.ISMCOM FiLespec
where FiLespec selects the index fiLe you want to compress.
DEFAULTS:
ISMCOM assumes a file extension of .IDX.
OPERATION:
1.
Type ISMCOM folLowed by the specification of the file you want
to compress. (This fiLe is the index
fiLe.) Now type RETURN. For exampLe:
.ISMCOM DATA.IDX
Cl October 1979)
fiLe portion of
an
ISAM
ISMCOM (Cont'd)
2.
Page 2
now
prints a warning about fiLe access and then teLLs
you the compression factor it is pLanning to use.
ISMCOM
If the compression factor ISMCOM is going to use is not
acceptabLe, you can now enter another one.
ISMCOM now
computes the ACTUAL compression that wILL be accompLished if
it uses your vaLue and gives you the chance to enter a new
vaLue.
For exampLe:
.ISMCOM MAIL.IDX
NOBODY etse may use this fiLe whiLe I'm processing
it
I am pLanning to compress each bLock to at Least 90 percent fuLL
It that is not acceptabLe, enter the percentage you desire
It wiLL actuaLLy work out to be 80 percent fuLL
If that is not acceptabLe, enter the percentage you desire
3.
If the
actuaL
acceptabLe to
compression vaLue that ISMCOM computes is
you, enter a RETURN when it asks you for your
own compression factor. Otherwise, enter a new compression
factor and ISI'ICOM wiLL compute the actuaL compression that it
can achieve using that vaLue. (Do not enter the percent sign,
even though you are taLking about percentages.) When you enter
a compression factor that wiLL achieve the result you want,
type
a RETURN the next time ISMCOIM asks you for a compression
factor.
NOTE: A compression factor of 100% wiLL cause
the
next
time
a top Level index is created.
a
was chosen as the optimum compression factor for
You may not enter a vaLue of Less than 50.
4.
ISMCOM
now
prints
some
statistics that
compression was done and how much
exampLe:
good
it
block
spLit
The number 95%
most
fiLes.
teLL you how much
shouLd do.
For
No bLocks unchanged, No bLocks freed, No bLocks compressed
ISMCOM now returns you to AMOS command LeveL.
(1 October 1979)
ISMCOM (Cont'd)
Page 3
ERRORS:
?File specification error
?No attempt made to cLose and unLock tiLe
ISMCOM
does not understand the format of your command Line.
For
exampLe, you see this message if you do not
include
a
fiLe
specification on the command Line.
?Cannot RENAME FiLespec — fiLe not found
?No attempt made to cLose and unlock fiLe
ISMCOM
did not find the index fiLe you specified.
you suppLy the correct device and account specification.
CHARACTERISTICS:
Assumes a tile extension of .IDX for index fiLe.
Returns your terminaL to AMOS command Level.
(1 October 1979)
Make sure that
1
ismdmp
FUNCTION;
For
use
on
files; writes
ISAM
the
contents
sequentiaL file or dispLays the structure of
terminaL.
an
of a
index
data fiLe to a
file
on
your
HINTS/RESTRICTIONS:
ISAM
(Indexed
accessing data.
SequentiaL Access Method) is a method of organizing and
An ISAM fiLe is a data file/index file combination.
The index fiLe contains pointers to records in the data fiLe. ISAM.PRG
quickLy finds cata records by searching the index tiLe instead of
searching the data fiLe itself.
NOTE: ALthough you caLL
ISAM
functions
from
within
your
BASIC
or
assembLy Language programs, you may not run the program ISAM.PRG itseLf
directLy
from
ISMDMP,
refer
to
(DWM—OO100—06,
(DWM—OO100—Q1).
Rev
Important
AMOS
Notice
For
for
command Level. For information on using ISAM and
the
document
ISAM
System
User's
Guide,
Aol),
and
the
AIphaBASIC
User's ManuaL,
the Latest information on ISAM, consult the
ISAM
Users,
(DWM—OO100—36,
AM—lOD documentation packet.
Rev
401), in the
ISMDMP works in one of two modes: 1. it dispLays the
ISAM
index
structure of an
fiLe on your terminaL; or 2. it writes the data in an ISAM
data tile into an ordinary sequentiaL file.
The purpose of TSMDMP in display mode is to aid in debugging programs
that use ISAM. Much of the information in the dispLay is of help onLy
to the experienced systems programmer and some of the information is of
use only to programmers working on the actual ISAM program itself.
Dumping data to a sequential file can be useful for data backup.
FORMAT:
..ISMDMP filespecC/NJ
where FiLespec selects the ISAM data or index file you want to dump and
IN selects the Counted Update mode option.
DEFAULTS:
The default extension of the ISAM file that you want to dump is .IDX.
default extension of the tile that will contain the data in the
ISAM file is .SEQ.
The
(1 October 1979)
ISMDMP (Cont'd)
Page 2
OPTIONS:
You can prevent JSMDMP from using ExcLusive Open mode by including a IN
switch on the command Line. For exampLe:
.ISMDMP MAIL/N
teLLs ISMDMP to use Counted Update mode instead of Exclusive Open mode.
(For information on Counted Update mode and Exclusive Open mode, refer
to Important Notice for ISAM Users in the AM—100 documentation packet.)
OPERATION:
1.
Type
ISMDMP
folLowed
by
the specification of the ISAM fiLe
whose contents you want to see.
Type a RETURN. For exampLe:
.ISMDMP ADRSS
2.
Now ISMDMP asks you:
Output to:
If you want to see a dispLay of your
type TrY: folLowed by a RETURN.
If
index
file structure,
want to dump the contents of the data tile portion of
file to a sequentiaL file, enter a fiLe
specification. For example:
your
you
ISAM
Output to: DATA.SEQ
3.
If you enter a fiLe specification, ISMOMP writes the data in
teLLs you
the ISAM data file to the specified fiLe.
ISMDMP
how many data records it wrote to the fiLe. For exampLe:
Output to: LABELS.TXT
15 records dumped
You can now use TYPE or PRINT to dispLay the file.
4.
If
you
enter
TTY: to the output prompt, ISMDMP dispLays the
structure of your index fiLe on your terminaL screen.
(1 October 1979)
ISMDMP (Cont'd)
Page 3
The dispLay might Look something Like this:
Size of dir entry:
Size of dir block:
Size of key:
30
302
25
Type of key:
Entries per dir bLock:
Record key position:
BLocking factor:
IDA freeList pointer:
IDA freecount:
IDX freeList pointer:
IDX freecount:
Records aLlocated
Update counter:
Top dir bLk pointer:
0
10
1
7
0000000000517
45
000004
22
S
4
000001
000001:
000000000002
000000000000
000000000000
000000000000
000000000000
0000000ooooo
000000000000
000000000000
000000000000
000000
177777
000002:
000000000003
o00000000000
000000000000
000000000000
(Chapter 3, "Dumping an ISAM FiLe with ISMDMP,"
User's Guide discusses the eLements
System
dispLay in detail.)
in the ISAM
of the ISMDMP
SeveraL of the items of information in the
upper portion of
the display are parameters that you supply when you use ISMBLD
to
buiLd
the
key:, etc.).
dispLay are:
a.
(1 October 1979)
ISAM tile (e.g., Size of data record:, Size of
important eLements of this
Some of the other
of dir entry: — Amount of storage needed to store
key—— key (rounded up to even) + 4.
Size
ISMDMP (Cont'd)
b.
Page 4
Size of dir bLock: — (Number of entries per block
*
of dir entry) + 2.
c.
Type of key: — Always zero.
d.
Blocking
size
factor:
This value gives the number of
logicaL data records that fit into each physical disk
bLock. This number gives the bLocking factor for the data
—
file, and is thus 512/record size.
e.
IDA freelist pointer: — A byte pointer into the data fiLe.
f. IDA freecount: — Number of records free in data fiLe.
freeList pointer:
free block in index.
g.
IDX
h.
IDX freecount: — Number of free logical index bLocks.
i.
Records alLocated: — Number of data records used.
j.
Top dir bLk pointer: — BLock pointer to beginning
The
block
LogicaL
—
number of next
of
top
index bLock.
of the display contains debugging information about
This information is mostLy
rest
the structure of the index fiLe.
of
use
to
the
experienced
programmer
internal workings of ISAM.
who understands the
ERRORS:
No records dumped
You tried to dump data from an empty ISAM data fiLe.
?Cannot RENAME Filespec — file not found
ISMDMP couLd not find the ISAM fiLe you specified.
device and account specifications.
Check
your
CHARACTERISTICS:
The
.IDX.
defauLt
extension of the ISAM fiLe whose data you want to dump is
The defauLt extension of the file that will hold the contents of
the ISAM data fiLe is .SEQ.
file.
You can onLy dump
Returns your terminal to AMOS command LeveL.
(1 October 1979)
data
to
a
sequentiaL
ismf ix
FUNCTION:
RebuiLds ISAM fiLes to recover Lost indices.
HINTS/RESTRICTIONS:
4.2 contained a bug that, under certain circumstances,
resuLted in indices being hidden in an ISAM index file.
ISMBLD
Version
ISMFIX rebuilds ISAM fiLes processed by 4.2 ISAM and thus recovers
hidden indices.
You
must
run
ISMEIX
on aLL ISAM fiLes processed by 4.2 ISAM.
any
Using
ISMFIX does no harm if you run it on a file in which indices have not
been
Lost. ALso, rebuiLding a fiLe that has already been rebuiLt does
not harm that fiLe.
ISMFIX accepts a wiLdcarded fiLe specification. If aLL of your ISAM
fiLes (both the .IDA and the .IDX portions) are on—line at the same
time, you can rebuiLd aLL ISAM fiLes on the system by togging into
[1,2] and entering:
.ISMFIX ALL:.()
(It
not necessary to specify an .IDX extension, because ISMEIX only
processes .IDX files and, through them, the appropriate .IDA fiLes.)
ISMFIX processes aLL
ISAM
files it finds. If ISMEIX encounters a
is
primary index fiLe, but that fiLe's data fiLe is not on—Line and
ready
to access, an error occurs. You see a fiLe not found error message,
and ISMEIX goes on to the next ISAM fiLe.
DEFAULTS:
When you are Logged into the
System
Operator's
account,
[1,2],
the
specification is C (that is, [*,*])• When you are
Logged into an account other than [1,2), ISMFIX restricts itseLf to the
account you are Logged into. (Therefore, if you are Logged into [1,2],
and you want to restrict ISMEIX to just that account, be sure to
default
account
specify account C1,2J on the command Line.)
ISMEIX forces a .IDX extension.
FORMAT:
.ISMFIX Fi Lespec )
where Fi Lespec Se Lects the fi tes you want to rebui Ld.
ISMFIX (Cont'd)
Page 2
OPERATION:
1.
rebuild a specific file, enter ISMFIX foLLowed by the
specification of the fiLe you want to rebuild. Type a RETURN.
To
For example:
.ISMFIX DSKO:MAILQ
2.
ISMFIX Lists aLL restored indices as it re—positions
your
ISAM fiLe.
the indices.
3.
in
them
It aLso lists the relative record numbers of
You can suppLy wildcarded fiLe specifications.
For exampLe:
.ISMFIX DSK5:E1lO,*J
4.
If alL of your ISAM fiLes are on—line, you
aLL by logging into [1,2] and entering:
can
rebuiLd
them
.ISMFIX ALL:
ERRORS:
An
error occurs if both the .11Th and .IDX portions of an ISAM file are
not on—Line when you run ISMFIX on that ISAM file.
found error message.
If
you
if
ISMFIX
You see a fiLe
not
include a wildcarded PPN symboL, U, in your FiLespec, but are
not Logged into [1,2], you see a Protection vioLation error message
Logged into.
tries to re—write a fiLe that is not in the project you are
As ISMFIX re—positions re—discovered indices, ISAM errors can occur.
In this case, you see the standard ISAM error messages. (For example,
if ISMEIX relocates a key that you had already re—inserted in the index
fil.e yourseLf, you get a duplicate key error message. You might also
see an index fiLe full message.)
If you get an ISAM error, your best course is to re—build the ISAM fiLe
from scratch.
CHARACTERISTICS:
Understands the wiLdcard symbols *, 7, 0, and ALL:.
You
ISAM.
must
use
ISMFIX
on
aLt ISAM files that were processed with 4.2
-
jobmem
FUNCTION:
ALlows
to
you
determine what memory addresses are allocated to a job
For use in memory management
and aLLows you to change that alLocation.
systems (that is, systems that bank switch memory).
HINTS/RESTRICTIONS:
If you are not familiar with bank switching memory on the
system,
see
the
documents
Alpha Micro
Memory Management Option, (DWM—0O100—10),
and Setting Up MuLtipLe Piiceon 64K Memory Boards, (DWM—OO100-34), in
the System Operator's Information section of the AM—100 documentation
packet.
We wiLL not discuss here the mechanics of setting up a bank—switched
system, but briefly: bank switching memory alLows you to access more
than 64K of memory on your system (aLthough each individuaL user is
stilt limited to a maximum of 64K).
expects you to enter memory addresses in the number base the
system is currentLy using for your numeric dispLays (usualLy octal.).
(For
information
on
changing the dispLay base from octal to
hexadecimaL, refer to the SET reference sheet.)
JOBMEM
NOTE: The
first
switchabLe area.
16K
of
memory
cannot
be
at Located
It is reserved for the monitor.
Second 16K of memory:
16K of memory:
Fourth 16K of memory
Third
to
the
bank
40000—77776 (octaL)
100000—137776 (octal)
or
or
4000—7FFE (hex)
8000—BFFE (hex)
140000—177376 (octaL)
or
C000—FEFE (hex)
(minus last 256 bytes
for the I/O ports):
IMPORTANT
NOTE:
You
the 64K address space.
may
not aLlocate to a job the last 256 bytes of
That means that the highest memory address
you
to a job is 177376. (The memory addresses 177400—177777
are reserved by the system for the I/O ports.)
can
aLLocate
Make sure that memory addresses for different jobs do not overLap. For
exampLe, if the Last address you assign to one job is 13776, the first
address you assign to the next job in the bank may not be Less than
14000 (which is 13776 + 2). If the next job's memory partition were to
begin at 13776 or 13777, the two jobs wouLd be sharing a word of
memory.
FORMAT:
.JOBMEM {Jobname}
(1 October 1979)
JOBMEM (Cont'd)
Page 2
or:
.JOBMEM {Jobnarne} Bank—#:StartAddress—EndAddress
first format to find out what memory is alLocated to your job
the
Use
(omit Jobname from the
command
Line)
another job (specify the Jobname).
Use
JOBMEM
in
the
second
or
the
memory
alLocation
of
format to aLLocate memory to your own job
(omit the Jobname) or to another job (specify the Jobname).
Where:
Jobname
The name of the job for which memory is to
be alLocated (if omitted, JOBMEM uses your
job as the defauLt).
Bank—#
The number of the memory bank containing
the memory being at Located to the job.
StartAddress
The beginning address of the memory bLock
being aLLocated to the job.
EndAddress
The ending address of the memory block
being aLLocated to the job.
DEFAULTS:
If you omit a jobname, JOBMEM assumes the name of your job.
OPERATION:
1.
To find out what memory is aLLocated to your job, type
folLowed by a RETURN.
JOBMEM
For exampLe:
.JOBMEM )
CURRENT MEMORY ALLOCATION IS 0:32370—177376
The message above teLLs you that your memory partition is from
address 32370 to address 177376 in bank number zero, the first
bank of the system.
2.
To
find
out
what
memory
is aLLocated to another job, type
JOBMEM, the name of that job, and
a RETURN.
For exampLe:
.JOBMEM JOB4
CURRENT MEMORY ALLOCATION IS 1:40000—177376
3.
To allocate memory to
number,
RETURN.
(1 October 1979)
and
starting
your
and
own
job,
ending
type
memory
JOBMEM,
a
bank
addresses; type a
JOBMEM (Cont'd)
Page 3
.JOBMEM 2:140000—177376
4.
To aLLocate memory to another job, type JOBMEM, a jobname, a
number, and starting and ending memory addresses; type a
bank
RETURN.
.JOBMEM BG23 0:140000—177376 ,D
ERRORS:
?Memory allocation format error
JOBMEM doesn't understand the format of your command line.
exampLe, did you Leave out the coLon after the bank number?
For
?Non—existent job
You've specified a job that doesn't exist.
List of the jobs on the system.
Run SYSTAT to see a
?Non—existent bank number
You've given JOBMEM a bank number larger than the totaL
of MEMDEF statements in your SYSTEM.INI.
a bank that has not been defined.)
number
(That is, you've specified
?ALlocation overlaps monitor or system memory
The
monitor memory is used by the operating system and the
system memory is sharabLe by aLl users; you must not aLLocate any of
this memory to a user partition. You must either reduce the amount
of system memory or change your user memory alLocations.
?ILlegal memory range (end is below base)
Ending address must be greater than starting address.
?ALLocation is not within requested bank's defined memory
You've specified a valid bank number, but it is not addressed
for the memory addresses you've requested. Check the addressing of
your memory boards and the MEMDEF statements in your SYSTEM.INI.
?Requested aLlocation wouLd overLap job JOBNAM
You must be carefuL not to aLlocate a memory address to one job
that is aLready aLLocated to another. JOBNAM specifies the job
whose memory partition is being overlapped.
CHARACTERISTICS:
Used in systems that bank switch memory.
Returns your terminaL to AMOS command Level.
(1 October 1979)
jobp
FUNCTION:
ALlows
you to determine
the priority of your job, to change that
priority, and to examine and change the priorities of other jobs.
HINTS/RESTRICTIONS:
In a timesharing environment, each user receives a certain
number of
reaL—time cLock ticks before the CPU moves on to another job.
If you
increase this unit of time (cafled a quantum) for a particuLar user,
you speed up his job and, consequentLy, sLow down the jobs of the other
users on the system.
Increasing
the
number
of
quanta
the
CPU spends on a job is calLed
increasing the job's priority.
You
should not change your job's
priority or the priority of other jobs on the system unLess there is a
very good reason for it; indiscriminate changes in job priorities can
cause you to be unpopuLar with other users on the system.
priority is 65535; the minimum priority is zero. The
JOSPRI command vaLue telLs the system to add that many clock ticks to
the standard quantum for the specified job. If the JOBPRI command has
The
maximum
not been used to increase a job's priority, the priority for
is zero.
that
job
FORMAT:
.JOBPRI {Jobname}{Priority} )
where
jobname is the name of the job whose priority you want to change
and priority is the number of cLock ticks you want to add to the job's
quantum.
DEFAULTS:
If
you omit both the Jobname and the Priority, JOSPRI assumes that you
want to know the current priority of your job. If you omit just the
Jobname, JOOPRI assumes that you want to change the Priority of
your
job.
If you omit just the Priority,
JOBPRI assumes that
know the Priority of the job you've specified.
(1 October 1979)
you
want
to
JOSPRI (Cont'd)
Page 2
OPERATION:
1.
Type
JOBPRI
priority:
foLlowed
by
a
RETURN
find
to
out
your job
.JOBPRI
CURRENT PRIORITY Is 0.
2.
To find out the priority of a job other than
JOBPRI, the name of the job, and a RETURN.
your
own,
type
For example:
.JOBPRI ROBIN
CURRENT PRIORITY IS 100
3.
Type
JOBPRI,
job's priority:
a
priority number, and a RETURN to change your
.JOBPRI 1000
4.
To change the priority of another user's job, type JOBPRI, the
name of the
job,
a
priority
number,
example:
and
a
RETURN.
For
.JOBPRI DUKE 1000
ERRORS:
JOBPRI generates
no
error message except: NONEXISTENT
cannot find the job you've entered on the command Line.
CHARACTERISTICS:
Uses your jobname as the defauLt.
Returns your terminaL to AMOS command leveL
(1 October 1979)
JOB
if it
-S
FUNCTION:
use
it within the system initiaLization
fiLe, JOBS
defines the jobs that can run on the system. At AMOScommand
command
LeveL,
JOBS teLls you the name of your job.
When
you
HINTS/RESTRICTIONS:
At
the
time
of
initialization,
system
the
JOBS
command
in
the
SYSTEM.INI fiLe teLLs the system what jobs can run on the system.
For
information on using JOBS within the SYSTEM.INI, refer to Section 2.2,
ALlocating Jobs (The JOBS Command)," in the document The System
InitiaLization Command FiLe, (DWM—OO100—09, Rev AOl), in the System
Operator's Information section of the AM—lOD documentation packet.
When it begins to process the SYSTEM.IflI fiLe at the time of system
bootup, the system automaticaLly attaches the first
job Listed in the
JOBS command tine
and
the
terminaLs
defined
by
the
first
TRMDEF
The rest of the process of system initialization takes pLace
under control of that job. You must expLicitLy attach aLL other jobs
command.
terminaLs
and
command).
that you want to use on the system (via the ATTACH
The JOBS command must be the first command in the SYSTEM.INI
file after the optionaL :T
command.
Once the system is up and running, the JOBS command
function; it teLls you the name of your job.
There
are
takes
on
another
some functions that you might want to perform on the system
(e.g., attaching jobs to terminaLs) that require that you know the
of your job.
name
To find out what jobs are defined on the system, type SYSTAT folLowed
by a RETURN. The Left—most column of the
SYSTAT display lists the jobs
defined by the JOBS command in the SYSTEM.INI.
FORMAT:
.JOBS
or:
JOBS Jobl{,Job2,. . .JobN}
where
Jobl—JobN
are
one— to six—character names that define the jobs
that wilL run on the system.
(1 October 1979)
JOBS (Contd)
Page 2
OPERATION:
At AMOS command LeveL:
1.
Type JOBS foLLowed by a RETURN.
your job.
JOBS teLLs you
For example:
the
name
of
.JOBS
YOUR JOB NAME IS JOB5
Within the SYSTEM.INI:
1.
Type
JOBS foLLowed by a
on the system.
Length.
List of the jobs you want to alLocate
Each job name is
one
to
six
characters
in
For exampLe:
JOBS JOB1,PRINTR,JOB2,OPRTR,SPARE,SPOOLR
2.
If
you
have more jobs than wiLl fit on one Line, you may use
as many JOBS command lines as you want, as Long as they aLt
appear before the first TRMDEF statement. NOTE: Each job you
aLlocate takes up about 150 words of system memory.
3.
Remember to aLlocate memory and attach a terminaL to a job
before you try to use that job. (See the JOBMEM, MEMORY, and
ATTACH reference sheets.)
ERRORS:
JOBS generates no error messages.
CHARACTERISTICS:
JOBS is both a user command and a system initiaLization command.
The JOBS command must be the first command in your SYSTEM.INI after the
optional :T command.
Returns your terminal to AMOS command LeveL.
(1 October 1979)
kill
FUNCTION:
ALlows you to kitL the program currently being run by another job.
HINTS/RESTRICTIONS:
The
KILL
command
specified job.
kiLts
the
program currently being executed by the
If other programs are waiting in Line to
be
executed,
you must enter one KILL command for each program you want to halt.
stops the execution of a program by sending a Control—C to the
job; if the program running does not accept Control—cs, a KILL command
KILL
accompLishes no purpose.
NOTE TO THE SYSTEM OPERATOR:
To
properLy
initialize the jobs on the system, your system
initiaLization command file must contain one KILL command toy
each job defined on the system.
The KILL
command
for a
particular
job must appear after the ATTACH command that
terminaL to that job, but before any FORCE
commands
that force input to the job. DO NOT KILL the job
the system is coming up under (i.e., the first job in the
JOBS
command
Line).
Use a separate KILL command for each
attaches a
job.
FORMAT:
.KILL Jobname
where Jobname seLects the job you want to kiLt.
OPERATION:
1.
Type KILL and the name of the job whose program
kitL; then type a RETURN:
you
want
to
.KILL JOB4 D
ERRORS:
[NONEXISTENT JOB]
You
entered an invaLid job name. Check your speLling; then use
the SYSTAT command to see a List of the vaLid jobs on the system.
(1 October 1979)
KILL (Cont'd)
Page 2
CHARACTERISTICS:
You can use KILL either at AMOS command LeveL or within the
tiLe to send a Contro'—C to a job.
Returns your terminaL to AMOS command LeveL.
(1 October 1979)
S'YSTEM.INI
label
FUNCTION:
LABEL
program aLLows you to LabeL a disk with descriptive
information and to dispLay that information. LABEL maintains as part
of the LabeL the date the disk was Last mounted and the date the disk
The
was originaLLy LabeLed.
HINTSJRESTRICTIONS:
Disk Labels are stored in bLock zero of the disk and are used both to
aflow the operator to easiLy determine what disk is mounted, and to
alLow programs to verify that the correct disk has been mounted.
FORMAT:
.LABEL Dew,:
where Devn: specifies the device which you want to LabeL or
want the current LabeL dispLayed.
for
which
you
OPERATION:
1.
Type
LABEL
folLowed by the
For example:
wish to LabeL.
device specification for the disk you
.LABEL DSK4:
2.
If the disk you specified is aLready Labeed,
dispLay the current disk Label. For exampLe:
LABEL
wi LL
now
.LABEL DSK1:
PayrolL Data (PAYOO1)
Created on 1—Jan—80 at Computer Makers Inc. on System
Last access:
3.
1
by F. Smith
2—Apr—80
flow
asks for new contents for each of the LabeL fields. If
you do not wish to change the LabeL, type a ControL—C at this
point, which returns you to AMOS command LeveL. If you do wish to
change the LabeL, answer each of the foLLowing questions:
LABEL
a.
VoLume Name:
Enter the textuaL description of the disk.
This fieLd is
the operator to determine which disk is mounted. The
MOUNT program dispLays this fieLd whenever a disk is mounted.
This fieLd can be up to 40 characters long.
used
(1
May 1930)
by
LABEL (Cont'd)
b.
Page 2
VoLume ID:
Enter up to ten characters as the VoLume ID. This fie'd
may be used by programs to determine if the proper disk has
been mounted.
The XMOUNT subroutine (which can be caLLed from
ALphaBASIC) returns this fieLd.
The
MOUNT
program
aLso
dispLays this fieLd whenever a disk is mounted.
c.
InstaLLation:
Enter the name of your instaflation or company. This
field, which may be up to 30 characters Long, is used when
exchanging disks between different instaLLations and companies.
d.
System:
Enter
the
name
of the computer system that this disk is
created on. This fieLd, which can be up to 30 characters Long,
is used when a particuLar instalLation has more than one
computer system.
e.
Creator:
Enter the name of the person creating the disk.
field may be up to 30 characters Long.
This
ERRORS:
You may see the foLLowing error messages when using LABEL:
?Cannot INIT Devn: — device does not exist
The device specification you gave when giving the LABEL
command
is not valid.
Check the speLLing of the device
specification you gave.
?FiLe specification error
The format of your LABEL command Line was not vaLid.
(For
you typed LABEL foLLowed by a RETURN.) Try again, being
exampLe,
sure to pLace a coLon after the device specification.
CHARACTERISTICS:
ALLows you to labeL a disk with descriptive information.
Returns your terminal to AMOS command LeveL.
'-#9
(1
May 1980)
lib
FUNCTION:
is an object file Library generator, It combines separate .OBJ
fiLes into one Library (.LIB) fiLe. You may aLso use LIB to update an
existing .LIB tile.
LIB
HINTS/RESTRICTIONS:
lAbrary fiLe gives you a way to make availabLe to aLL programmers on
the system a standardized set of machine language routines.
It aLso
A
keeps
you
from
having to rewrite the same utiLity routines again and
again for muLtipLe programs.
At the time that you link your object fiLes into an executabLe
program
LINK or SYMBOL), you may incLude the specification of a Library
file on the command Line. tf the other fiLes specified on the command
line make use of a symboL defined in the Library tile, LINK or SYMBOL
wiLL process the routine within the Library fiLe that defines that
symboL, Linking it into your program fiLe.
(using
NOTE: Each object fiLe that is pLaced into the Library file should be a
separate
routine
because when your program references a symboL in the
library fiLe, LINK or SYMBOL Links in the entire object file required
to resolve the reference. For exampLe, if the Library fiLe tJTILIT.LIB
contains the object fiLes GETNUM, SIJBT, REAL, and BINWRT, and your
program references a routine contained in the GETNIJM tile, LINK or
SYMBOL links in the entire object file GETNUM from UTILIT.LIB even if
that fiLe contains more than one routine.
For
more
information
SYMBOL,
see
the
(DWM—OO100—43).
AMOS
on
Library tiles, and on LIB, MACRO, LINK, and
AssembLy
Lanquage
Proqrar'mer's
Manual,
FORMAT:
.LIB{/L) outputrinputl{,input2,... inputN)i
or:
.LIB{/L) inout{,input2,. . .inputN) D
output seLects the name of the Library fiLe you want to buiLd,
and input specifies the object tiLes that wiLL make up the Library.
The second format is equivalent to: LIB inout=inout{,inputl,...inputN).
(However, if you specify the IL switch, the second format is equivaLent
where
to: LIB/L TRM:inout(,inputl,...inputN).)
(30 April 1981)
LIB (Cont'd)
Page 2
The input specifications may take the foLlowing forms:
fi lespec
fit espec\ itemi
fit espec C it emi ,it em2C ,.. . it era))
fitespec(iteml,item2{,...itempo)
\
the
where
symboL
symboLs, see the section
If
you
an
exception, and the parentheses
(For more information on the use of these
designates
designate a group of files.
OPERATION,' below.)
to specify more fiLes than wilL fit on one command Line,
want
you may continue the command Line by ending the current tine with a
comma.
LIB wilL now dispLay an asterisk and you may continue enterinq
fitespecs. You may enter as many Lines of fiLe specifications
wish as Long as the preceding line ends with a comma.
as
you
DEFAULTS:
LIB
assumes
extension
an
of
extension for the input files.
.LIB
for
the
output fiLe and a .OBJ
If you do not include an account and device specification, LIB Looks
for the files specified in the account and device you are Logged into,
then it Looks in your project Library account, CP,OJ.
FinaLLy, LIB
Looks in the System MACRO Library account, DSK0:C7,7].
If
you do not incLude an output specification, LIB creates an output
fiLe with the same name as the first input specification. If you use
the /L switch to create a library listing, LIB uses the defauLt
extension .LST for that Listing outout fiLe. If you use the /L switch
and omit
an
output fiLe specification, LIB uses the defauLt output
specification TRM: (that is, it sends the tisting to your terminat
dispLay).
OPTIONS:
You
may
map
fiLe,
include
the /L switch on the LIB command Line to tell LIB to
create a library listing fiLe. This Listinq Looks similar to
and
a
load
Lists aLl object files in the Library and aLl INTERNed
symboLs.
OPERATION:
To create a Library file:
1.
Type LIB foLLowed by the specification of the Library fiLe you want
to create, type an equal sign, and then enter the specifications of
the object files you want to combine into a Library fiLe,
separating
exa1npLe:
(30 April 1981)
the
fiLespecs
with
commas.
Then type a RETURN.
For
LIB (Cont'd)
Page 3
.LIB MYLIB=ADNUM,RDBIN,WRTBtN,ASCCHK,SRCH5 ED
The command tine above causes 1.18 to create
an
output
MYLIB_LIB that contains the specified object fiLes.
2.
file
named
tf you want to enter more fiLe sQecifications than wilL fit on one
command tine, just end the first command tine with a comma, and LIB
wilt dispLay an asterisk on the next tine, prompting you to enter
more
file specifications. You may enter as many lines of fiLe
specifications as you want as Long as you end the preceding Line
with a comma.
3.
LtB
displays
several
messages as
For example:
it processes your object fiLes.
== Object FiLe Librarian Version 1.0 ==
Processing ADNLJM.OBJ
Processing RDBIN.OBJ
Processing WRTBIN.OBJ
Processing ASCCHK.OBJ
Processing SRCH5.OBJ
Library fiLe finished
4.
To see a listing of the contents
switch.
of
your
Library,
use
the
IL
For example:
.LIB/L NEWLIB
sends
the
listing to your terminaL dispLay.
the listing in a disk file, specify
switch (e.g., LIB/L LISTNEWLIB)
an
output
To teLL LIB to pLace
file
and
the
IL
To update a library file:
1.
To update an existing Library file, enter LIB, the Library fiLe you
want to modify, an equal sign, and the List of fiLespecs you wish
to add and/or delete.
or:
For exampLe:
.LIB UTILITUTILIT.LIB,NADDR @jJ
.LIB UTILIT,NADDR t!D
Both of these command lines teLl LIB to take the existing library
UTILIT.LIB and modify it by adding the object fiLe NADDR to it.
2.
You nay specify a group of fiLes by using the 0 incLusion symbols,
and
you may designate an exception by using the \ file restrictor
symbol.
(30 ApriL 1981)
For example:
LIB (Cont'd)
Page 4
.LtB NUMLIe\FORMAT N
This command Line tells LIB to process aLl of the object fiLes
the Library file NUMLIB, but to deLete the object file FORMAT.
in
The
command tine:
.LIB NEWLIB,MATH,\(BINADR,SMLLNUM,BINWRT)
teLls LIB to process the library NEWLIB, and to add the object file
MATH, but to deLete the object files BINADR, SMLLNUM, and BtNWRT.
3.
when
replacing an existing module in a library, do not just add a
new version of the module without first deLeting the originaL
module
of the same name.
Doing so can cause problems because both
versions wiLl stiLL be in the Library.
The
recommended procedure
to first deLete the moduLe and then to add the new version of
the moduLe. For exampLe, to repLace the object file KEYSUR:
is
.LIB MACLIB\KE?SUB,KEYSUB E1j
The command Line above first deLetes the existing moduLe
library and repLaces it with the new one.
from
the
ERRORS:
You may see the foLlowing error messages when using LIe:
?Command error
LIB did not
understand your
entered LIe folLowed by a RETURN.
command
tine.
For example, you
?Undefined switch /X — ignored
where X is the switch you specified.
LIB
onLy
recognizes
one
option switch, IL. Make sure that you did not accidently type a /
when you meant to type a backsLash.
?OBJ files are not Libraries —— they cannot be restricted by a modifier
You may only use the \ fiLe restr,ctor and the C) fiLe incLusion
symboLs if you are modifying a Library.
?Listing aborted
LIB
was not able to finish the library Listing.
error occurred while LIB was trying to access a fiLe.
?The foLLowing moduLe was not found — xxx
For examnoLe, an
You tried to modify an existing Library tile, but the object
fiLes you specified were not present in the Library tile. Make sure
that you did not accidentalLy use the \ restrictor symbol.
(30 April 1981)
LIB (Cont'd)
Paqe 5
?FataL error — xxx is an overLay
You may not
specify an overLay as an eLement of an object fiLe
Library.
CHARACTERISTICS:
and modifies an object tile Library.
support the use of Library files.
LIB creates
SYMBOL and LINK
LIB is re—entrant, and so may be loaded into system
serialLy re—usab'e.
memory.
both
It is also
LIB assumes an input fiLe extension of .OBJ, an output fiLe extension
of .LIB, and a Listing fiLe extension of .LST. It you omit account and
device specifications, US Looks for the specified fiLe in the account
and device you are Logged into; your project library account; and, the
System MACRO account, DSKO:r7,7J.
(30 ApriL 1981)
link
FUNCTION:
executable machine Language programs by Linking and resolving
one
Creates
or more assembLed object fiLes.
HINTS/RESTRICTIONS:
When you use MACRO to assembLe an assembLy Language program, the .OBJ
that results is in an intermediate form that is not ready for
file
execution. Separate .OBJ fiLes may contain symboL references to each
other that cannot be fully resolved because these files cannot be
assembled together.
LINK is a Linkage editor. That is, it Links together and resolves
severaL .OeJ fiLes to produce a .OVR or .PRG program file. If the
program that you assembLed with MACRO was made up of only one fiLe that
contains no internal or externaL symboL references, MACRO automatically
calls LINK for you as Phase 4 of the assembLy to produce a program
fiLe.
Otherwise, you must use LINK yourself to Link the .OBJ fiLes
that wild make up the singLe .PRG fiLe.
LINK Links files together in the order in which you specify them on the
LINK does not produce a program file if one or more
LINK command line.
of the files you specify is not found in its
assembled
object
(.OBJ)
form.
NOTE:
You may
use LINK to produce a symbol table fiLe. And, you may
use SYMBOL to oroduce a resoLved, executabLe program file.
See the
SYMBOL reference sheet. (By using the appropriate option requests, you
can make SYMBOL and LINK perform exactLy the same functions.)
LINK supports the use of object file Libraries.
sheet for information on library fiLes.)
(See the LIB reference
For more information on MACRO, LINK and SYMBOL, see the AMOS Assembly
Language Programmers Manual,
(DWM—QO100—43).
That
manual
also
contains information on library, optional, and Load map fiLes.
FORMAT:
C/switches )fi Lespecl{,fi lespec'
fi LespecN1-C/switches1-
where filespecs seLect the fiLes you want to link and /switch is an
option request. You may not specify an overLay or library file as the
first fiLespec on the command Line.
_LINK
(Changed 30 April 1981)
LINK (Cont'd)
Page 2
If
you have too many fitespecs to fit on one screen line, you may
continue the LINK command line by ending it with a comma. LINK accepts
as many Lines of fiLespecs as you wish, as long as you end the
preceding Line with a comma.
tf
/switch appears in front of a filespec (e.g., LINK MATH,/O
NUM,SUB), that option request becomes the default for the rest of the
command
line.
If a /switch foLLows a fitespec (e.g., LINK
MATH,NUM/O,SUB), it affects only that fiLespec. NOTE: Certain switches
(identified in the discussions below as "operation switches") affect
aLl fiLespecs on the command Line no matter how they are pLaced.
a
DEFAULTS:
default extension of .OBJ, unless you are specifying
library fiLe, in which case LINK uses the default extension of .LIB.
LINK
uses
the
a
If your filespec does not contain an account and device specification,
assumes that the file is in the account and device you are Logged
into. Next it Looks in your project Library account, CP,0J. FinaLly, it
LINK
Looks in the System MACRO account, DSKO:[7,71.
The default switches are /P (generate a program file) and /R (designate
a requi red fiLe)
OPTIONS:
You may select one of the options below by specifyinq
switch:
the
apDropriate
symbols in the symbols table fiLe.
use /E with the /M or /S switch.) (Operation switch.)
Designates a Library file.
IncLude
/E
IL
equated
(You must
Generate a Load map (.MAP) file. (Operation switch.)
IM
IN
/0
Suppress /P switch. (Operation switch.)
Designates an optionaL file.
/P
Generate program (.PRG
(Operation switch.)
or
file.
.OVR)
The
default
switch.
Designates a required file.
The defauLt switch. Cancels the IL
and /0 switches.
Generate a symbol table (.SYM) fiLe. (Operation switch.)
/R
/S
You
may
stash, /.
specify
multiple switches
by
preceding each switch with a
OPERATION:
Enter LINK followed by the specifications of the files you
link together. Then type a RETURN.
i.
For example:
.LINK/M VISFIL,VIS1,UTILIT.LIB/L
(Changed 30 April 1981)
want
to
c-I
LINK (Cont'd)
Page 3
Notice that the command line above specifies a library tile,
UTILIT_LIB. By using the /M switch, we are aLso asking LINK for a
Load map fiLe.
2.
If you have more file specifications than wiLl fit on one Line, end
current command line with a comma.
LINK now dispLays an
asterisk and you may continue your List of fiLe specifications.
the
You
may
enter as many Lines of fiLe specifications as you wish
long as you end the preceding command Line with a comma.
a RETURN at the end of the Last tine of fiLespecs.
3.
as
Type just
Now LINK displays severaL messaaes as it process the fiLes.
(The
exact messages you see depend on the options you have requested and
fiLes you have specified.)
For exampLe:
== Linkage Editor Version 2.0 ==
Processing VISFIL.OBJ [Base = 0, Size = 106. bytesi
Processing VtS1.OBJ [Base = 157, Size = 657. bytesI
—— Optional and Library Request ——
Processing UTILIT.LIB(GETADR) [Base 1373, Size = 292. bytes]
Program and Map files finished EProgram size = 1055. bytesi
4.
If
any
exampLe:
errors
occur
during
linking,
LINK
teLls
you so.
For
Program file finished, 4 errors exist [Program size = 1055. bytesi
ERRORS:
You can see the foLLowing error messages whiLe using LINK:
?Command error
There is something wrong with your command
Line.
For
example,
you tried to use LINK without specifying a file on which to Idork.
?FataL error — Insufficient memory
You must
increase the size of your memory partition; there was
not enough room to perform the procedure you specified.
?Undefined switch /x — iqnored
LINK did not recognize the switch /x you specified. Refer to the
OPTIONS,
above for information on the vaLid LINK switches.
section
(Changed 30 ApriL 1981)
LINK (Cont'd)
Page 4
?FataL error — OverLays of code are not oermitted
Next expected address is xxxx
OverLay code address is xxxx
Your program is tryinq to overLay previous code.
Check your
.MAC programs to make sure that your overLay references are correct.
?xxxx undefined
An
external symbol is undefined. This is a very common error.
You have referenced a symbol which has not previousLy been defined
(e.g.,
you
have
made a reference to a labeL that does not exist).
Make sure that an EXTERNed symbol in one segment is
INTERN statement in another segment.
defined
by
an
?FataL error — First file must not be a Library
To
enabLe LINK to correctLy
resolve external references to a
library, you must specify the program that references that Library
before you specify the Library fiLe itself.
?FataL error — Attempt to specify overLay xxx as optionaL
You may not use the /0 switch to designate a fiLe as optional if
that object fiLe is an overlay.
?FataL error — OverLay symbol
xxxx" in segment yyyy
was not defined in a previous input segment
You may not reference an undefined overLay. In other words,
LINK is trying to process a supposed overlay file, but has seen no
references to the overlay in a previous fiLe.
Without such a
reference, LINK cannot construct the overlay, so it aborts and
returns you to AMOS command leveL.
?Fatal error — First fiLe must not be an overlay
To enabLe LINK to correctLy resoLve externaL references to an
overLay, you must specify the program that references that overLay
before you specify the overLay fite itself.
?Fatal error — Expression stack error
An error occurred when LINK evaluated some expressions in your
You shouLd never see this error message—— it indicates an
fiLes.
internal error.
?FataL error — Expression stack overfLow
You exceeded the nunber of nested expressions that LINK can
handle.
Try to find the exceedingLy compLex expression in your
source file and simplify it.
(Changed 30 ApriL 1981)
LINK (Cont'd)
Page 5
CHARACTERISTICS:
LINK is re—entrant, and may be Loaded into system memory;
seriaL'y reusabLe.
Creates
an
executabLe
intermediate .OBJ fiLes.
program
fiLe
by
linking
it
and
is
also
resolving
DefauLt extension is .OBJ for regular fiLes and .LIB for library fiLes.
DefauLt switches are: /P and /R.
(Changed 30 April 1981)
hap
FUNCTION:
Invokes the LISP Language processor.
HI NIS / RESTRICTIONS:
LISP
(LISt
Processing
Language)
is
a
programming Language used most
often for applications that emphasize manipulation of string data
(e.g., relationaL data base programs or naturaL language simuLation
rather
programs)
computation.
The
than
programs
basic
that
perform
numerical
heavy
structure of a LISP program and data is the
List.
For
information on programming
ALphaLISP User's ManuaL, (DWM—OO100—O5).
in
is an interpreter and is reentrant.
incLude LISP in system memory via the SYSTEM
LISP.PRG
initiaLization command fiLe.
LISP,
see
the
manuaL
The System Operator may
in the system
command
NOTE: To Leave LISP, after the LISP prompt, *, enter:
(EXIT)
(Remember to enter the parentheses!)
FORMAT:
.LISP
OPERATION:
1.
Type LISP folLowed by a RETURN:
.LISP
2.
if the fiLe DSKO:LISP.LSPL1,4J is present
see the question:
on
your system, you
LOAD EXTENDED LIBRARY?
(If DSKO:LISP.LSP[1,4J is not present on your system, LISP
not ask this question, and does not Load the extended
Library.) Answer a V for Yes or an N for No; then type a
RETURN.
The extended Library is a Library of LISP functions.
does
(1 October 1979)
LISP (Cont'd)
Page 2
If
you do not Load the extended Library, you have more memory
space for your program, but you wiLt be missing some of the
standard features of LISP.
(Refer to the AtphaLISp User's
Manuat
for information on the contents of the extended
Library.)
3.
Now you see the LISP herald message that telLs you the version
number of the LISP you are running. For example:
"ALphaLisp 1.6 Version 1.0'
4.
At this time LISP dispLays the LISP prompt symboL:
*
Now you can start entering LISP commands.
For exampLe:
*(ADD 2 3)
5
*
5.
To Leave LISP, enter:
(EXIT)
Next you see the AMOS prompt.
ERRORS:
You
may
see any of the standard LISP error messages.
textbook for a list of LISP error messages.
CHARACTERISTICS:
Invokes LISP Language interpreter.
(1 October 1979)
Refer to a LISP
load
FUNCTION:
Loads disk fifes into your memory partition as memory modules.
HINTS/RESTRICTIONS:
You
may
use
LOAD
to
load
memory
modules
partition. You may use LOAD to load itseLf:
only in your own memory
.LOAD DSKO:LOAD.PRGE1,43
LOAD does not understand wildcard symbols.
LOAD understands ersatz devices.
For example:
.LOAD RAS:STRIP.SBR
loads STRIP.SBR from the BASIC library account, DSKO:E7,6J.
If you specify an ersatz device but omit a file extension, LOAD uses
the default extension for that ersatz device. For example, the default
extension for the BPS: account is _BAS. If you enter:
.LOAD BAS:NEWD
LOAD will try to Load in the fiLe NEW.BAS.
The ersatz device defauLt extensions are
Ersatz Device
Extension
BPS:
.BAS
.BOX
BOX:
CMD:
DVR:
.CI'ID
.DVR
HLP:
.HLP
LIE:
.PPG
LSP:
.LSP
MAC:
.MAC
app:
PAS:
SYS:
.PPC
.PAS
.PRG
VIJO:
.VliO
(Changed 30 April 1981)
LOAD (Cont'd)
Page
2
FORMAT:
.LOAD Ii tespec
where FiLespec seLects the disk fiLe you want to toad.
OPERATION:
1.
Type
LOAD
folLowed by the specification of the file
to Load into your memory partition; then type a
you want
RETURN.
exampLe:
For
.LOAD DSKO:ISAM.PRG[1,41 @!
2.
LOAD
does
not
teLL you what file it has Loaded into
You wiLL know that it was unsuccessfuL
message:
if it
memory.
dispLays
this
FiLespec NOT FOUND
was the specification you suppLied.
List of the memory modules in your partition, use
command.
(See the MAP reference sheet.)
where
FiLespec
To see a
the MAP
ERRORS:
FiLespec NOT FOUND
LOAD
was
not
abLe
to
find the file you specified.
spelLing and your device and account specification.
Check your
?Cannot READ FiLespec — device does not exist
LOAD did not recognize the device you specified. Use the DEVTBL
to see if the device exists. Then make sure the device is
command
mounted.
CHARACTERISTICS:
You may use LOAD to Load itseLf into memory.
Does not understand wiLdcard symboLs.
(Changed 30 ApriL 1981)
FUNCTION:
into an account so that you can access the fiLes in that
Once you are on the system, you can use LOG to tell you which
account you're Logged into and you can use LOG to transfer between
accounts and devices.
Logs
you
account.
HINTS/RESTRICTIONS:
onLy system commands that you may use if you are not Logged into
the system are: LOG, SYSTAT, MEMORY, ATTACH, SYSTEM, HELP and SET.
The
LOG recognizes the ersatz devices.
For example:
.LOG BAS: @
togged into BAS:
logs you into the System BASIC Language
Library Account, DSKO:C7,6J.
List of the ersatz devices avai labLe on the system, see Section
1.3 of this manual. If you do not use an ersatz device specification
to log into an account with which an ersatz device is associated, LOG
lets you know that such an ersatz device exists:
For
a
.LOG DSKO: [1,43 ED
togged into DSKO:[1,4J
Ersatz name is SYS:
Because they are such common typing mistakes, LOG treats the characters
and
as commas (e.g., the command .LOG iDOmi is transLated
into .LOG 100,1).
—
rn
You may be required to suppLy a password before the system wiLL Log you
into an account.
If
you have a
command fiLe
in your account named START.CMD, LOG
automaticaLLy runs that fiLe after it Logs you in. This command fiLe
contain AMOS system commands, program invocations, the names of
other command fiLes, etc. If you want to see the processing of the
can
command
fiLe
on
your command file.
the
AMOS
User's
command fiLes.)
your
terminaL, remember to include the :1 symboL in
Command FiLes and DO Files,
in
Guide, (DWM—O0100—35), for more information on
(See Chapter 8,
The System—Mail function that LOG performs (see OPERATION, #4), occurs
only when you Log into the system after having been Logged off; not
when you use LOG to transfer between accounts.
(Changed I May 1980)
LOG (Cant 'd)
Page 2
FORMAT:
.LOG {Devnd[p,pnJ NiL
or:
.LOG {Devn:}L,pnJ @i!J
.LOG {Devn:)[p,J (FE
Cr:
or:
.LOG
first format
project—programmer
into the system.
lp,pnj
is
the
that you want to Log in under. (The square
brackets encLosing the PPN are optional.) Devn: is the specification
of the device that hoLds the disk containing the account. If you are
The
Logs
you
number
aLready Logged into the system under a different PPN or device,
transfers you over to the device and PPN you've requested.
LOG
the second and third formats after you've already Logged into the
system and want to transfer to another account. Use the fourth format
after you've Logged into the system to find out what PPN you're Logged
in under.
Use
DEFAULTS:
If you omit a device specification when you first Log into the system,
LOG
uses DSKD: as a defauLt. If the account you have specified does
not appear on DSKO:, LOG searches the rest of the units of that device
(e.g., DSK1:, DSK2:, etc.) If you are aLready Logged in, but omit the
device specification, LOG uses as a defauLt the device you are Logged
into; if the account does not appear on that device, LOG searches the
rest of the units of that device, beginning with device unit kO.
If you use LOG when you are aLready Logged into the system, LOG uses
the project or programmer number of the account you are Logged into as
the defauLts. (For exampLe, .LOG L,3) Logs you into an account whose
PPN has the same project number as the account you are Logged into, and
a programmer number of 3.)
OPERATION:
1.
If you are aLready Logged into an account, type LOG foLLowed
by a RETURN to find out which PPN and device you are Logged in
under.
(Changed
1
May 1980)
For exampLe:
LOG (Cont 'd)
Page 3
.LOG E!J
turrent login is DSKO:L12,34]
2.
To Log into the system, type LOG (optionaLLy foLLowed by a
device specification) and a project—progranimer number. Type a
RETURN.
For exampLe:
.LOG DSK1:47,2F3
3.
the
exampLe above, LOG Looks on DSK1: for account £47,2J.
the account to see if a
password is required.
(Passwords are assigned by the System
In
If it finds it, it then Looks at
Operator in the interest of system security.)
.LOG AMSO:23,4Efl
Password:
The system does not dispLay your password on the terminaL as
you type
it; this prevents other users from seeing your
password. If AMOS recognizes the password, it Logs you into
the system.
4.
Once
you
are
logged onto the system, LOG dispLays a message
that telLs you which device and account you're Logged into.
If any other users are Logged into the same account, LOG warns
you about it:
.LOG L123,4J
tagged into DSKO:[123,4]
Caution — other jobs same PPN
next thing that LOG does is Look in area [7,2] of the
System Disk for a tile named MAIL.JNK. If it finds it, LOG
The
dispLays the first line of the file on your terminal:
.LOG 34.7 tEE
Cogged into DSKO:L34,7J
SYSTEM WILL BE DOWN FRI. 7—8 AM FOR MAINTENANCE.
5.
Last thing LOG does is Look for a command fiLe in your
account named START.CMD.
If
finds
the
fiLe, LOG
automaticaLLy runs it for you. This is usefuL if you want to
do something Like run a business program every time you Log
The
it
into
the system (but not when you use LOG to transfer between
accounts).
6.
Once you are Logged into
the
system,
you
can
foLLowed by the device and PPN that specifies the
which you wish to transfer; then type a RETURN.
(Changed
1
use
transfer yourseLf to other accounts on other disks.
May 1980)
LOG
to
Type LOG
account
to
LOG (Cont'd)
Page 4
.LOG 123,5 (ED
Transferred from DSKO:E100,1] to DSKO:[123,5]
ERRORS:
?Disk not mounted
The
disk on
which
LOG
is
mounted.
searching for the account is not
?Command format error
LOG did not recognize the characters that foLlowed LOG as being
in the proper format for device or PPN specifications.
?Account number invaLid
LOG doesn't recognize the PPN you've supplied. Make sure that
you've specified the correct device, and that the PPN is in the
proper form.
?Nonexistent device
You've tried to find an account on a device
that LOG cannot
is not defined in the DEVTBL command in your
SYSTEI.INI, does not have a driver program in area [1,63 of your
System Disk, or is not fiLe—structured.
access;
the
device
?Bad password
The
password
you gave LOG wasn't the correct one. Try again,
and be careful with your speLLing. If you stiLL have no success,
check with the System Operator for heLp.
ALready logged in under Devn:Cp,pn]
You've
tried to Log in, but you're aLready on the system
teLls you which
(Devn:Ep,pn]).
device
and
account
you're
Logged
in
LOG
under
Not Logged in
You've
typed
LOG and a RETURN to find out what account you're
Log
in foLLowing
Logged in under, but you haven't Logged in yet.
the procedure given above.
CHARACTERISTICS:
the ersatz devices. Uses as defauLts: a) the project or
programmer number of the account you are Logged into; and b) alL units
of the device you are Logged into (or aLl units of DSK:, if you are not
logged in).
Understands
AutomaticaLLy starts up any file named START.CMD in your account. If a
file named MAIL.JNK exits in area [7,2] of the System Disk, LOG
dispLays the first Line of that file.
Returns your terminaL to AMOS command LeveL.
(Changed
1
May 198D)
logoff
FUNCTION:
LOGOFF Logs you out of the account you were Logged into.
HINTS/RESTRICTIONS:
Use
LOGOFF
whenever
Leave your terminaL for any length of time;
you
this prevents other users from sitting
accessing the fiLes in your accounts.
down
at
your
terminaL
and
When you are Logged out you are off the system. The onLy AMOS commands
you may use when
Logged off are: ATTACH, SYSTEM, HELP, LOG, SYSTAT,
MEMORY, and SET.
NOTE: LOGOFF deLetes any memory moduLes in your memory partition as
togs you off the system.
it
FORMAT:
.LOGOFF
OPERATION:
1.
Type LOGOFF foLLowed by a RETURN:
LOGOFF D
2.
LOGOFF Logs you off the system and Lets you know which account
are Leaving. (The number it dispLays is the PPN of that
account.)
you
.LOGOFF
User 110,3 Logged off
ERRORS:
?Not Logged in
If you try to use LOGOFF when
system,
out of.
LOGOFF
cannot
you are not
logged into the
Log you out since it has nothing to Log you
CHARACTERISTICS:
Resets your defauLt device to DSKO:. (Therefore, if you don't incLude a
device specification the next time
you
use
LOG,
Looking for your account on the System Disk, DSKO:.)
(1 October 1979)
the
system
begins
LOGOFF (Cont'd)
Resets
Page 2
the fLags in your job table
and NOGIJARD_
flags.)
to ECHO, OCTAL, NODSKERR, NOVERIFY,
(See the SET reference sheet for an expLanation of
Returns your terminaL to AMOS command
Cl October 1979)
level.
these
lookup
FUNCTION:
to check for the existence of a fiLe from within
you
ALLows
a command
fl le, and then choose whether to continue or abort execution of the
command tiLe depending on whether or not the searched—for fi te exists.
HINTS/RESTRICTIONS:
May
with
be
the
used
GOb
onLy
in a command file or DO file.
command
file
command,
LOCKUP
conditional transfers within a command fiLe.
reference sheets.) For more information on
Features
Used in combination
you to make
aLLows
(See the GOTO and EXIT
refer
LOOKIJP,
to
New
in Command FiLes and DO Files, (DWM—0O100—63), in the "User's
Information' section of the AM—100 documentation packet.
FORMAT:
LOCKUP Fi1espec(/}(message)
where "P teLls LOOKUP not to abort the command fiLe it the FiLespec is
not found, but to skip over the next command fiLe Line. You may aLso
suppLy an optionaL niessage which LOCKUP dispLays if the file is not
found.
DEFAULTS:
If portions of the FiLespec are
omitted, LOOKUP assumes the account and
device you are Logged into and a .PRG extension. If you do not supply
a
message, LOOKUP alLows the appropriate AMOS error message to be
printed if FiLespec is not found.
OPTIONS:
/
If no "I"
appears
after LOCKUP, if FiLespec is not found,
AMOS aborts the command fiLe.
If a "I"
appears,
LOCKUP
directLy to the next line in the command fiLe if
FiLespec is not found; otherwise, AMOS skips over the
next line in the command tile after the LOCKUP command,
and continues execution at that point.
moves
message
(1 May 1980)
An optional message that LOCKUP dispLays if Fil.espec is
not found.
(It a "I" appears, the message must folLow
the sLash.) The message may be any text you wish, as
long as it fits on the command line.
LOOKUP (Cont'd)
Page 2
OPERATION:
1.
PLace
anywhere
LOOKUP
in
a command or DO file where you want to
check for the existence of a file. To abort the command fiLe
the specified fiLe does not exist, do not use the "I' symbol.
exampLe:
if
For
DO fiLe to copy a file into an archive account.
(NOTE: user of file must be Logged into a Project
2D0 account.)
If fiLe does not exist, abort command fiLe so
we don't copy everything into the archive
account instead. ($0 is the parameter supplied
by the user of the DO file when the DC fiLe is
; invoked.)
LOCKUP $0
?That file does not exist—— try again.
COPY DSK4:[200,34J=$0
2.
To continue execution of the command fiLe
does not exist, incLude the "I':
DO
if
the
specified
file
file to print a fiLe.
LOOKUP $0/?That file does not exist——no fiLe printed.
GOTO NOTFOUND;
Oops file not found.
Print the fiLe.
PRINT $0
EXIT flour fiLe has been printed.*
I
;NOT FOUND
:<If you wouLd Like to create the fiLe, type a RETURN;>
PAUSE It don't want to create it, type anything but a RETURN:
VUE $0
V
(For information on the EXIT, PAUSE, and GOTO statements, see the
reference sheets for those commands.)
(1 May 1980)
LOCKUP (Cont'd)
Page 3
ERRORS:
I-f it is not abLe to find the specified file, LOCKUP disp'ays the
message (if any) that appears on its command Line; if that message does
not
exist,
LOCKUP
displays
the appropriate AMOS error message.
For
e x amp L e:
?Cannot OPEN DSKO:LABDAT.TXT — tile not found
CHARACTERISTICS:
May appear onLy in a command fiLe or DO fiLe.
If portions of a fiLe specification
are omitted, LOCKUP assumes a
_PRG
extension and the account and device you are Logged into.
Returns
your
terminaL
to
AMOS
command
level, if I'
symboL
is not
incLuded on LOOKUP command Line and if specified file is not found.
(1 May 1980)
macro
FUNCTION:
Assembles
an
language program file into an unlinked machine
assembLy
Language fiLe.
HINTS/RESTRICTIONS:
MACRO is a fuLL macro—assembLer.
It assembLes a source text file (.MAC
fiLe) into an intermediate object form (.OBJ fiLe) that can
be
Linked
into an executabLe machine language program (.PRG or .OVR) fiLe. MACRO
understands nested macro calLs, nested conditionals, and program
segmentation (via overLay statements, AUTOEXTERN,
EXTERN,
and
INTERN
statements).
runs in five distinct phases, some of which are caLled in
response to optionaL switches or speciaL situations.
If your file
contains no internal or externaL references, MACRO automaticali.y calLs
the linkage editor to link your program as Phase 4 of the assembLy;
otherwise, you must expLicitLy use the LINK or SYMBOL commands to
create a resoLved, executable program from the .OBJ fiLe created by
MACRO
MACRO.
For
NOTE:
the
see
information on using the macro—assembLer, LINK, and SYMBOL,
manuaL
AMOS
AssembLy
Lanquage
Programmer's
ManuaL,
This manuaL also contains information on: the object
fiLe library generator, LIB; the globaL cross reference generator,
CDWM—OO100—43).
GLOBAL; and the dynamic symboLic debugger, DDT.
FORMAT:
.MACRO fiLespecC/switches}@
fiLespec seLects the source file you want to assembLe, and the
optional /switches seLects the MACRO options you want to use.
where
DEFAULTS:
assumes a fiLe extension of .MAC. unLess you specify one of
Listing switches, MACRO does not provide an assembLy listing.
If
you
omit
device
and
account specifications, MACRO looks for the
specified
file in the device and account you are logged into.
MACRO
(Changed 30 ApriL 1981)
the
MACRO (Cont'd)
Page 2
OPTIONS:
You may seLect one of the options below by specifying the appropriate
option request switch at the end of the MACRO command line. You may
specify muLtipLe switches by entering them after a singLe / symboL at
the end of the command tine.
lB text
/C
a
bottom footer titLe on every page of the listinq
using the rest of the text on the command tin as the title.
lB must be the last switch on the command Line.
Generate
IncLude
conditionals in the assembLy Listing.
are usualLy suppressed.)
(ConditionaLs
IF
Write to the assembLy listing onLy those Lines
an error.
/H
List binary code in hexadecimaL instead of octat form in the
assembly tistinq.
/L
Generate a
that
contain
Listing file by caLling Phase 3 durinq the
Creates the output fiLe with the same name as your
source fiLe but a .LST extension.
assembLy.
/0
Use the current object file by omitting
2.
assembLy Phases
1
and
Generate
a
symboL cross reference, which appears at the end
of the reguLar assembLy Listing.
IT
DispLay the assembLy Listing
writing it to a disk fiLe.
/VCa):X
on
your
terminaL
of
Ajows you to specify a vaLue on the MACRO command Line that
can be examined during the assembLy process,
a" identifies
the type of value specified, and 'X" is the vaLue. (See
Chapter 9 of the AMOS AssembLy Language
Programmer's
Manual
List in your assembLy Listing aLL macro expansions.
expansions are usuaLly suppressed.)
(Macro
for more information on this switch.)
1X
instead
OPERATION:
1.
Type MACRO folLowed by the specification of the
assemble.
Then type a RETURN.
For example:
file
you
want
to
.MACRO MATH.MAC
If you want to seLect one or more of the MACRO options, specify the
appropriate switches at the end of your command tine after a single
/ symbol (for example: MACRO MATH/RI).
(Changed 30 ApriL 1981)
MACRO (Cont'd)
U
2.
Page 3
it
As
assembLes
your
your
file,
MACRO
It tells you what
reports on the status of the
errors occurred, how Large
program is, whether it is COPYing from any copy files, and if
assembly process.
any symboLs have been automatically EXTERNed.
For example:
.MACRO SAVTXT.MAC/L ID
Macro Assemlñer Version 1.1 ==
Processing SAVTXT.MAC
Phase 1:
Copying from DSKO:SYS.MACC7,7J
Work area: 39162 bytes, 3614 used
Object file finished
Listing fiLe finished
Phase 2:
Phase 3:
Phase 4:
Program file finished
[Program size = 60. bytesj
MACRO produces a .OBJ fiLe of the same name as the fiLe you
specified on the MACRO command line. (You may modify this output
fiLe name by using the OBJNAM pseudo opcode in your source file.)
If MACRO does not automaticaLLy caLL Phase 4 to create an
executabLe .PRG file, you must use the Linkage editor, LINK (or
3.
SYMBOL).
ERRORS:
You can see the folLowing error codes in your assembLy Listing:
A
B
Branch address was out of the 127—word range.
Boundary error—— a word operand was on an odd byte address.
M
ConditionaL statement syntax error.
DupLicate user symbol. (SymboL was defined more than once.)
IlLegaL character in source line.
Missing term or operator in operand or expression.
N
Numeric
D
I
range.
P
Q
R
I
U
error which indicates a digit out of the current radix
An expression which had to be resoLvabLe on the first pass of
the assembLy couLd not be resolved.
QuestionabLe syntax. This is a generaL catch—aLL error code.
Register error—— a reqister expression was not in the range of
0—7.
Source line or operand terminated improperly.
Undefined user symboL durinq Pass 2.
V
Value of an absoLute parameter was out of its defined range.
X
AssembLer system error—— please notify Alpha Micro.
(Changed 30 April 1981)
MACRO (Cont'd)
Page 4
You may see the following error messages during the program assembLy:
Zlnvalid controL parameter vaLue
You used the /V assembly switch to specify a value on the MACRO
command
Line, but something was wrong with the format of the option
request. (For exampLe, the value after the /V switch was missing or
was incorrect.)
?Cannot OPEN Devn: — invalid file name
There is something wrong with the format of your command Une.
For example, you may have tried to use an assembly switch but forgot
to place it at the end of the fiLe specification.
appear at the end of the command line.
ALL switches must
?Fite specification error
There is something wrong with the format of your command Line.
For example, you typed MACRO foLlowed by a RETURN.
?MACn.OVR not found
where n is a nunber from 0 to 5.
that
overLays
are
a
fiLe is in DSKO:El,4].
MACRO cannot find one of the
part of MACRO. Make sure that the specified
If the fiLe is not there, contact the System
Operator.
?Copy fiLe fiLespec not found
where filespec is the tiLe specification you supplied to the COPY
For information on
opcode.
AssembLy Language Programmer's Manual.
pseudo
copy
files,
see
the
AMOS
?Expression stack error
This is an internaL MACRO error. You should never see it—— but,
if you do, check your source program to see if you made any errors
in specifying expressions.
NO ENDM STATEMENT
You
left off the
final statement, "ENOM', in a macro definition.
Check your source program.
(SYNC ERROR]
MACRO generates a listing fiLe by reading the source fiLe and the
object fiLe and synchronizing the two to cone up with the Listing
line data. If these two fiLes qet out of sync, there is no way that
the listing may proceed, and you see this error messaqe. MACRO then
cLoses
out
the
list file at the point of the sync error, but the
line that caused the error wilL not have been incLuded.
This
message probabLy means that you are using an object fiLe that was
generated by a different version of MACRO than the one you are using
now, and you have specified the 10 assembly
have
found
an
undiagnosed
assembler
bug.
switch.
If you
Or,
you
may
no obvious
program again
see
errors in your source file, try to re—assemble the
without specifying the /0 switch (thus building a new object file).
(Changed 30 April 1981)
MACRO (Cont'd)
Page 5
CHARACTERISTICS:
multi—pass macro assembler,
Provides options that aLLow you to
generate an assembly listing and a symboL cross reference.
MACRO
handles nested conditionals and nested macros. It also handles locaL
A
symbols.
MACRO is not re—entrant, and may not be Loaded into system memory.
The defauLt extension is .MAC; the defauLt device and account
ones you are logged into.
(Changed 30 April 1981)
are
the
1
make
FUNCTION:
Creates the first record of a sequential fiLe.
HINTS/RESTRICTIONS:
One
of the system text editors, EDIT.PRG, wiLL not aLlow you to edit a
file that does not yet exist. The MAKE command "starts' a sequential
fiLe by making an entry for the file in your User FiLe Directory and
creating an empty disk record for that fiLe.
Before editing a new fiLe with EDIT, create the
command.
fiLe
using
the
MAKE
FORMAT:
.MAKE Filespec ?
where FiLespec seLects the name, device, and account you want to assign
to the new file.
DEFAULTS:
MAKE assumes an extension of .MAC and the device and account into which
you are currentLy Logged.
OPERATION:
1.
Type
MAKE
to create.
foLLowed by the specification of the file you want
Then type a RETURN.
For exampLe:
.MAKE SRCFIL.BAS
2.
When MAKE is finished, you see the AMOS prompt.
ERRORS:
If you do not incLude a fiLe specification on
the
MAKE
(that is, you type MAKE foLLowed by a RETURN), you see:
?File specification error
CHARACTERISTICS:
Assumes an extension of .MAC.
Returns your terminat to AMOS command LeveL.
(1 October 1979)
command
Line
map
FUNCTION:
ALlows you to
system memory.
what modules are in your memory partition and in
ALso provides information about those memory moduLes.
see
HINTS/RESTRICTIONS:
When you load disk fiLes into your memory partition,
memory
are
cat Led
modules.
memory
those copies in
A memory moduLe retains the same
name and extension as its corresponding disk fiLe.
You may not use MAP to see information about memory
users' partitions.
in
modules
other
dispLays memory addresses in the number base the system is using
for your numeric dispLays (usuaLLy octaL). If you want MAP to dispLay
these memory addresses as hexadecimaL numbers, make sure that the HEX
option is in effect before using MAP. For information on changing the
MAP
number
base
the
reference sheet.
system
uses
for your numeric displays, see the SET
FORMAT:
.MAP {FiLespec)C/switches}
where
Filespec
information.
seLects
the
?
memory
moduLe
about
which
/Switches seLect various options (see beLow).
you
want
DEFAULTS:
If you do not specify a fiLespec, MAP assumes that you want information
on alL memory moduLes in your partition.
If
you do not specify switches, MAP assumes
that
information on aLL memory modules in your partition.
you want fuLL
The defauLt switches are: /FSBHMU.
OPTIONS:
You may choose among several MAP options by incLuding one or more of
the foLlowing switches at the end of the command Line foLLowing
a
stash. (MAP assumes that each character after the slash up
to the
at the end of the command line is a separate switch_)
switches are:
RETURN
(1 October 1979)
The MAP
MAP (cont'd)
Page 2
IF
FREE — Display number of free memory bytes avaiLabLe
decimaL). You must use with the IS switch.)
/5
SIZE — DispLay
module.
of
each
/8
BASE ADDRESS — Display octal base memory address for
each
number
of
bytes
(in
decimal)
moduLe.
/M
MODULES — Display information about moduLes.
Ri
USER MEMORY — Display
/R
RESIDENT MEMORY — Display information about
information
in your memory partition.
about modules that are
are in system memory.
/H
(in
modules
that
HASHMARK — Display hashmarks for each memory module.
The defauLt switches are: /FSBHMIJ.
OPERATION:
1.
To
what
see
modules
folLowed by a RETURN:
are in your memory partition, type MAP
.MAP
You see a
List
of
the
memory moduLes
currentLy in your
tine
of the dispLay contains this
information: 1. moduLe name; 2. extension; 3. size in bytes
(decimaL); 4. octaL base address (the memory address where the
module begins); and, 5. hashrnark (an identifying
code unique
partition.
Each
to that module).
many
bytes
are
The Last Line of the dispLay telLs
tree
you
how
in your memory partition and gives the
octal memory address of the first free memory Location.
For
exampLe:
CREAT
PRG
XCHG
PRG
QUBLK
PRG
FREE
566
1016
335
48416
033722
035022
037024
040736
167—536—542—221
513—543—124—555
435—713—521—434
second tine of the MAP display above
memory moduLe XCHG.PRG is in memory, that
it
The
bytes,
telLs us that the
takes
up
1016
that it begins at memory location 035022, and that its
hashmark is 513—543—124—555. The last tine of the dispLay
teLLs us that we have 48,416 bytes free and that the first
free memory Location is at address 040736.
(1 October 1979)
MAP (contd)
Page 3
2.
To see information about a particular memory modue, include a
fitespec on the MAP command line.
For exampLe:
.MAP LOG
tOG
3.
PRG
1016
030522
432—672—122—411
To see information about moduLes in system memory instead of
your own partition, use these switches: /RSI-IMF. For exampLe:
.MAP/RSHMF
TRM
DVR
252
552—107—745—717
ERRORS:
MAP generates no error messages.
CHARACTERISTICS:
DefauLt switches are: /FSBHMIJ.
Returns your terminaL to AMOS command LeveL.
(1 October 1979)
'-I
men,def
FUNCTION:
As part of the system initiaLization command fiLe, MEMDEF alLows you to
define
memory
banks on a system that uses memory management. At AMOS
command LeveL, MEMUEF dispLays the current memory configuration on your
system.
HI NTS / RESTRICTIONS:
If you are not familiar with bank switching memory on the
system,
refer
to
the
documents
Memory
ALpha
Micro
Management
Option,
(DWM—OC100—1O), and Setting Up MuLtiple Piiceon 64K Memory Boards,
(DWM—UO100—34),
in the System Operator's Information section of the
AM—iDa documentation packet.
We wiLL not discuss here the mechanics of setting up a bank—switched
system, but briefLy: bank switching memory aLlows you to access more
than 64K of memory on your system, aLthough each individuaL user is
stiLL restricted to a 64K maximum.
When
you
incLude
it
in
the
system
initialization
command
file,
SYSTEM.INI, MEMDEF alLows you to define the various banks of memory on
the system.
UnLess the SYSTEM.INI contains MEMDEF commands, the
operating system cannot recognize any memory beyond the first 64K (1K =
1024; 64K = 65536). With MEMDEF commands, the SYSTEM.INI is able to
define severaL different sets (or "banks") of memory, each of which may
up to 64K in size. The MEMDEF commands are entered into SYSTEM.INI
contiguousLy; the first command defines the memory configuration of the
be
first bank (bankO), the second command defines the second bank (banki),
and so on.
At AMOS command LeveL, MEMDEF dispLays the memory configuration of
system.
Use
the JOBMEM command to aLlocate memory to
bank—switched system.
(See the JOBMEM reference sheet.)
NOTE:
jobs
the
on
a
FORMAT:
.M EM bE F
or:
ME!4DEE Port—address,On—vaLue,Off—vatue
Use the first format at AMOS command level to find out your system's
memory
configuration.
Use the second format within the SYSTEM.INI to
define the system memory banks.
(1 October 1979)
MEMDEF (Contd)
Page 2
OPERATION:
At AMOS command LeveL:
1.
Type MEMOEF foLLowed by a RETURN:
.M EM D E F
2.
MENDEF now disptays the memory configuration of
(See EXAMPLES, beLow, for a typicaL dispLay.)
your
system.
In the system initiaLization command fiLe:
1.
One
MEMDEF
conmand
must
memory bank on the system.
appear
in the SYSTEM.INI for each
ALL MEMDEF
commands
before the DEVTBL and BITMAP commands.
2.
The
MEMDEF
defines
a
must
appear
memory bank by teLLing the system the
foLLowing inforoation for that bank:
a.
The I/O port address of the memory board used by the bank.
This vaLue is assigned to a specific memory board via
switches on that board, and serves to uniqueLy identify
that board to the system. Each memory board usuaLLy has
its own address. The address of the first memory board is
usuatLy 100, octaL.
b.
The
ON
and OFF constants.
These vaLues determine which
sections of memory on the memory boards are assigned to
the bank, and whether they are turned ON or OFF. One
vaLue specifies the number to be sent to the memory board
to turn those sections of memory ON; one specifies the
number to be sent to the meniory board to turn them OFF.
These
vaLues vary depending on the type of memory boards
you use. Refer to the documentation for that memory board
for this information.
3.
A typicaL MEMDEF statement might Look Like:
MEMOEF 100,0,14
where 100 seLects the I/O port address used by the memory
board that makes up the bank, 0 is the ON constant, 14 is the
OFF constant.
4.
Note that you may incorporate more than one memory board n
bank by incLuding the sLash symboL. For exampLe:
MEMDEF 100,1,0/101,1,0/102,1,0
(1 October 1979)
a
MEMDEF (Cont'd)
Page 3
defines
a
singLe memory bank that uses portions of three
different memory boards that are Located at I/O port addresses
100, 101, and 102.
ERRORS:
MEMDEF generates the folLowing error messages:
MEMORY MANAGEMENT NOT ACTIVE
You have used MEMDEF from AMOS command LeveL, but
your
does not bankswitch memory.
system
[FORMAT ERROR IN PARAMETER SEQUENCE)
MEMDEF
suppLied.
does
not
understand
the
MEMDEF
Line
you
constant,
and
command
Make sure that you are using the / symbols correctLy, and
that each MEMDEF Line contains I/O port address,
ON
OFF constant.
?ALL 64K appears to be sharabLe memory
set
Because of the way the address switches on the memory board are
up, the system believes that the entire bank is supposed to be
sharabLe (i.e., that there is no user
memory).
Check
board switches against the memory board documentation.
the
memory
?No switchabLe memory found
MEMDEF
Looks for the memory boards in the system.
If it can't
find any memory at the I/O ports you have specified, it is unable to
access the memory on the system.
Check your memory board I/O
address switches and make sure that the I/O port addresses in your
MEMDEF statements are good.
CHARACTERISTICS:
Serves both as a system initialization command and as a user command.
As part of the SYSTEM.INI, defines memory banks; however, DOES NOT
aLLocate memory to jobs. To aLLocate memory to jobs on a bank switched
system, use the JOBMEM command.
Returns your terminal to AMOS command leveL.
EXAMPLE:
you use MEMDEE at AMOS command leveL, you see a representation of
the memory banks on your system. This display differs depending on the
particular memory configuration of your system, but a typicaL dispLay
When
might Look something Like this:
(1 October 1979)
MEMDEF (Cont'd)
Page 4
BK
OK
I
16K
24 K
I
I
32K
40K
I
I
48K
56K
64K
I
I
BANK 0
BANK
1
MMMMMMMMMMMMMMMMBBBBBBBBBBBBBBBBBBBBBBBBBBBBBBBBBBBBBBBBBBBBBBBBBBBB
BANK 2 MMMMMMMMMMMMMMMMBBBBBBBBBBBBBBBBBBBBBBBBBBBBBBBBBBBBBBBBBBBBBBBBBBBB
BANK 3 MMMMMMMMMMMMMMMMBBBBBBBBBBBBBBBBBB
The
dispLay
(P0—3).
above
shows
a
system
that
contains four memory banks
The first 16K of each bank is used by the monitor; the rest is
avaiLabLe for jobs.
The actuaL aLLocation of the
memory
to
jobs
is
Left to the JOBMEM command.
stands for Monitor memory; B stands for
(Another symbol that can appear in this dispLay
M
memory.
SharabLe
memory
is that memory which aLl jobs can use, but
that is not aLlocatabte to a specific job.)
(1 October 1979)
Bank—switched memory.
is S. for SharabLe
memerr
FUNCTION:
EnabLes double—bit menory error detection.
HINTS/RESTRICTIONS:
The
Piiceon 32K—word memory boards have error correction and detection
capabilities.
MEMERR initializes the memory board by instructing it to
abort when a double—bit memory error occurs.
You may only
(SuperMen).
use
MEMERR
with
the
Piiceon
32K—word
memory
boards
sure that the memory board is properLy jumpered for the I/O port
you specify in the MEMERR command. The error interrupt—enable jumper
Make
(jumper 54) must be instalLed on the board.
You may assign the same I/O port to more than one memory board (you can
have severaL 32K—word boards in a bank—switched system), because the
system onLy issues write—status commands to the memory boards.
If you don't use MEMERR, the Piiceon 32K—memory board automatically
corrects singLe—bit errors, but ignores doubLe—bit errors. When you
use MEMERR, singLe—bit errors are stiLl corrected, but the system haLts
if a doubLe—bit error occurs. (At the time of a system halt, if MEMERR
is in effect, look at the Piiceon memory board. If the error light—— a
red LED—— is lit, the halt was the resuLt of a double—bit memory
error.)
wilL probably want to put MEMERR into your system initiaLization
command file, aLthough you may use it at AMOS command level. (Edit the
file DSKU:SYSTEM.INI[1,4J with one of the system text editors, VUE or
You
EDIT.
Place the MEMERR command after the TRMDEF commands.)
MEMERR
was
designed to be used with the AM—100/T CPU. If you
want to use your Piiceon 32K—word memory boards as 64K—byte memory
boards (i.e., you want to use the AM—100 CPU), you may do so by
seLecting a different error interrupt—enable jumper (jumper 54 is the
AM—bOlT interrupt
line), and enabLing that line on the AM—bOO CPU
board.
NOTE:
FORMAT:
MEMERR I/O—Port
where I/O—Port selects the port you have assigned to the memory board
error register.
(This I/O port is usually set to 250, octaL or AS,
hex.)
MEMERR (Cont'cJ)
Page 2
OPERATION:
1.
Use one of the system text editors
Place
the
MEMERR
command
exampLe:
to edit the SYSTEM.INI.
after the TRMDEF statements. For
JOBS JOB1,J082,SPOOL
TRMDEF TRM1,AM300=1,ADM3,100,100,200
TRMDEF TRM2,AM300=3,SOROC,100,100,130
MEMERR 250
2.
3.
If the system haLts, Look at the error
board; if it is Lit, this indicates
because of a doubLe—bit memory error.
Light
on
the
memory
that the system hatted
If frequent doubLe—bit memory errors occur, you
repLace the memory board at fauLt.
may
want
to
ERRORS:
MEMERR generates no error messages.
CHARACTERISTICS:
ShouLd be incLuded in your SYSTEM.INI if you are using Piiceon 32K—word
memory boards.
SignaLs double—bit memory errors by halting the system.
Returns your terminaL to AMOS command LeveL.
memory
FUNCTION:
ALLocates memory to your job.
HINTS/RESTRICTIONS:
IMPORTANT
NOTE:
Do
use
NOT
the
MEMORY command on systems that use
memory management (that is, systems that bank switch memory) unLess
your job is in Bank Number Zero of that system.
To aLlocate memory on
a bank—switched system, use the JOBMEM command.
(See
the JOBMEM
reference sheet.)
You
may
not increase your memory aLLocation beyond its current amount
uness you first use the MEMORY 0 command. If you aLLocate yourseU
zero
memory,
the
first time you try to run
a command or program AMOS
wifl reassign to you as much free memory as it has availabLe
memory partition.
You
cannot
increase
for
your
your memory aLlocation if the other users on the
memory;
that is, you
system have already been aLlocated the rest of
cannot take for yourself memory that has
eLsewhere.
already
been aLLocated
ALL memory Locations in your job's memory partition must be contiguous.
That is, if you want to aLlocate 16K more memory to your job, 16K of
memory
must
be
avaiLabLe beginning at the end or beginning of your
present memory partition. (By coordinated use of the MEMORY command,
users on the system can move their memory partitions about in memory to
rearrange the aLLocations for specific jobs.)
You must not use the MEMORY command to aLlocate memory in a system that
bank
switches
memory;
probLems couLd result.
rule is that a job in Bank
(The exception to this
Zero may use the MEMORY command.)
FORMAT:
.MEMORY
or:
.MEMORY Memory—alLocatjon(K}
Use the first format to teLl you how much memory is aLlocated
to
your
memory partition. The second format alLows you to change the amount of
memory
atLocated to your job, where Memory—alLocation is the amount of
memory (in bytes) you wouLd Like to aLlocate to your job.
(1 October 1979)
MEMORY (Cont'd)
Page 2
If you incLude a K after the amount, MEMORY muLtiplies the amount given
in your Memory—aLlocation by 1000. (For example, the command .MEMORY
16K telLs the system to give you 16000 bytes of memory.)
OPERATION:
1.
To
see
how
much memory has been aLLocated
For exampLe:
MEMORY foLlowed by a RETURN.
to your job, type
.MEMORY
CURRENT MEMORY ALLOCATION IS 42738 BYTES
2.
To aLlocate memory to your job, type MEMORY
amount
folLowed
by
the
of memory (in bytes) you want to aLlocate to yourself.
If you type a K after the amount, MEMORY multipLies the
by 1000.
amount
.MEMORY 32K
132000 BYTES ASSIGNED]
ERRORS:
MEMORY generates no error messages. However, if you try to alLocate a
very smaLL, nonzero amount of memory to your job, you wILL not have
room to Load the MEMORY command back into your partition to change that
aLlocation:
.MEMORY 10 )
110 BYTES ASSIGNED)
.MEMORY
Tlnsufficient memory for program Load
?MEMORY?
So, be carefuL to check your MEMORY command
Line to make sure that
ALso, be carefuL when attaching your terminal to
another job; make sure that the job has some memory alLocated to it, or
you wiLL run into the same kind of probLem.
you've made no typos.
CHARACTERISTICS:
Not for use on a system that uses memory management.
Returns your terminaL to AMOS command LeveL.
s)
(1 October 1979)
mongen
FUNCTION:
Generates a new system monitor.
HINTS/RESTRICTIONS:
Generates
a new system monitor by overLaying the specified disk driver
program into the existing monitor.
This new monitor alLows you to access any disk for
disk driver program as the System Device.
which
you
have
a
monitor that you wilL usualLy use is SYSTEM.MON in account
DSKO:[l,4]. The disk driver you wiLL use is one of the driver programs
in DSKO:[1,6]. MONGEN inserts the specified driver into the monitor
(overlaying the oLd driver) and then Leaves the new monitor in memory.
At that point you can save the new monitor (using the SAVE command) or
The
test it directly from memory (using the
information
reference sheets.
For
MONTST command).
SAVE,
refer to the MONTST and SAVE
information on MONGEN, refer to the
document
Monitors, (DWM—OOlOO—31), in the System
Operators Information section of the AM—lao documentation packet.
on
MONTST
and
For more
Generating System
DEFAULTS:
The default device and account specification for the
DSKO:Ll,4J.
The
default
DSKO:L1,6J.
monitor fiLe
The defauLt system monitor is DSKO:SYSTEM.MONE1,4J.
is
device and account specification for the disk driver is
The defauLt disk driver file extension is .DVR.
FORMAT:
.MONGEN
OPERATION:
1.
Type MONGEN foLLowed by a RETURN:
.MONGEN
2.
you for the
monitor you want to modify:
MONGEN now asks
INPUT MONITOR NAME:
(1 October 1979)
specification of
the
system
MONGEN (Cont'd)
Page 2
the fiLe specification of the monitor program you are
going to use. If you want to use DSKO:SYSTEM.MONL1,4J, you
may enter just a RETURN because that tUe specification is the
default.
The
default monitor device and account is
Enter
DSKO: [1,4J.
Locates the specified monitor and Loads it into your
partition.
Be
sure that you have enough memory to
accommodate the monitor and disk drivers as weLl as the MONGEN
program itseLf (usuall.y at Least 16K of memory).
MONGEN
memory
3.
Now MONGEN asks for the specification of the disk
want to insert into the monitor:
driver
you
NEW DISK DRIVER NAME:
Enter the fiLe specification of the correct disk driver
program. You may NOT enter just a RETURN. The defauLt device
and account specification is DSKO:[1,6].
The defauLt
fiLe
extension is .DVR.
4.
MONGEN asks for a name to be given to the new monitor:
NEW MONITOR NAME:
Enter
a
.MON).
5.
one— to six—character name (the defauLt extension is
This name is now the name of the new monitor.
You can now test the new monitor by using the MONTST program
you
can save the monitor as a disk fiLe by using the SAVE
or
command.
For exampLe:
.SAVE TRISYS.MON
does not affect the running monitor
efther in memory or on the System Disk. Nor does MONGEN test
the new monitor; it mereLy builds a new monitor as a module in
your memory partition.
Remember that MONGEN
ERRORS:
INPUT MONITOR FiLespec NOT FOUND
DISK DRIVER FiLespec NOT FOUND
MONGEN couLd not find the
specified
monitor
or
disk
driver
tUe.
Make
sure that you included the correct account and device
specification.
You can aLso see several system messages if your device
are invaLid.
(1 October 1979)
For exampLe:
specifications
MONGEN (Cont'd)
Page 3
?Cannot READ FiLespec — device does not exist
?Cannot READ FiLespec — disk not mounted
Make
sure that your fiLe specifications
specifications.
mounted
Check
message, use
want to access.
contains vaLid device
your speLLing.
If you see the disk not
the MOUNT command to mount the devices you
CHARACTERISTICS:
Generates a new monitor by overLaying the disk driver
new disk driver.
Returns your terminaL to AMOS command leveL.
(1 october 1979)
program
with
a
montet
FUNCTION:
a
new monitor or system initiaLization command fiLe by brinqinq
up the system under the controL of the new monitor or command tile.
Tests
HINTS/RESTRICTIONS:
Useful for testing the new monitor generated by the MONGEN command.
ALso usefuL for testing a newly modified system initiaLization command
fl Le.
IMPORTANT NOTE:
The
system monitor and the system initialization
command file you want to test, aLong with the the MONTST command itseLf
must
aLL
be Located on physicaL drive zero. (That is, for a CDC Hawk
hard—disk drive system these programs must be located
on
the
fixed—pLatter; for a fLoppy—disk system these programs must be Located
on the disk in the System Drive Zero.)
drive
You can aLso use MONTST with MONGEN to boot up on a fLoppy
if
even
your System Device is a hard disk. For exampLe, say that you use
MONGEN to buiLd a monitor (named WNGMON.MON) that contains the Wangco
floppy—disk device driver; you can use the MONTST command (.MONTST
WNGMON.MON,SYSTEM.INI
)
to boot the system up on the Wanqco driVe.
You may only use MONTST if your job is
running
in
the
first
partition of the system (Bank Zero for bank switched systems).
memory
FORMAT:
.MONTST Monitorspec,Command—tiLespec
where Monitorspec specifies the monitor you want to test (which must be
on
DSKO:)
and Command—fiLespec
specifies the system initiaLizaton
command fiLe you want to use (also on DSKO:).
DEFAULTS:
The default specification for the system initiaLization command ffle is
DSKD:SYSTEM.INII1,4J; the defauLt fiLe
extension
SYSTEM. ).
The defauLt monitor fiLe extension is .MON.
(Changed 30 ApriL 19S1)
is
nuLL
(that
is,
MONTST (Cont'd)
Page 2
OPERATION:
1.
Type MONTST folLowed by the specifications of the system
monitor and the system initiaLization command file under whose
control you want to bring up the system (separated by a
comma). Then type a RETURN.
For exa.nple:
.MONTST SYSTEM.MON,NEWSYS.INI @±D
ERRORS:
You may see any of
MONTST.
the
For exampLe:
standard
system
error
messages
using
when
filespec NOT FOUND
MONTST
couLdn't
find the monitor or the system initialization
command fiLe that you want to test.
?FiLe specification error
MONTST did not understand your command line.
For exampLe:
.MONTST @D
?File specification error
CHARACTERISTICS:
MONTST brings the system up under control of
monitor and system initialization command file.
Returns your terminaL to AMOS command leveL.
(Changed 30 April 1981)
the
specified
system
mount
FUNCTION:
can use MOUNT to mount a disk, tjr,mount a disk, or dispLay a List of
aLL
You mounted disks on the system.
HJNTS/RESTRICTIONS:
system
has
no way of knowing when you change disks in your disk
When you change disk cartridges in your hard disk system or
change fLoppy disks in your fLopppy disk drives, you must tell the
system that you have done so.
(Your SYSTEM.INI can be set up to
1nitiaLly mount your disks for you every time the system comes up, but
if you change any of your disks after the system is up and running, you
stiLL must expLicitLy mount them using the MOUNT command.)
The
drives.
If you do not mount a disk after you change it, when it comes time to
transfer data it is LikeLy that the system wilL write to the new disk
as if it had the same free and used Locations as the old disk.
(That
is, it wilL make its decision of where to write data to the disk based
on the bitmap of the oLd disk.) Using the MOUNT command teLLs the
system that you are changing disks and that the system must therefore
Look at the new disk to fetch the appropriate bitmap. (A disk bitmap
is a map of the disk; it tefls the system which disk bLocks are free
and which are used.)
NOTE:
accessing
that
diskH
IMPORTANT
Never
mount
or
unmount
a
disk
whiLe
someone
is
the disk; to do so can severely damage the file structure of
FORMAT:
.MOUNT {Devn:{/switch))
where Devn: is the specification of the device you want to mount.
If
you do not incLude a device specification, MOUNT displays a List of aLL
of the disks mounted on the system.
OPTIONS:
/U
The
switch
specified device.
telLs
MOUNT
that you want to unmount the disk in the
The /W switch teLLs MOUNT that you want to
device is ready before mounting the disk.
(Changed
1
May 1980)
wait
until,
the
specified
MOUNT (Cont'd)
Page 2
OPERATION:
1.
mount
a
disk,
enter MOUNT folLowed
specification; then type a RETURN. For exampLe:
To
by
a
device
.MOUNT DSK1:@jj
If MOUNT successfuLLy mounts the disk and that disk has a
labeL, MOUNT Lists the VoLume Name and VoLume ID of the disk
mounted.
For exampLe:
.MOUNT DSKS:
ackup Disk #3 (BACKUPC3) mounted
MOUNT dispLays the disk LabeL, so that you can verify that you
have mounted the proper disk.
2.
If you want to mount a disk, but you know that the device
containing the disk is not yet ready, use the /W switch.
MOUNT wiLL now wait until the devi Ce s ready before mounting
the disk.
For exampLe:
.MOUNT HWK3:/W
course, you wiLl onLy use the 1W option if you expect the
drive to be ready momentarily, since your termina' is tied up
unti L the device is ready and the disk can be mounted.
Of
3.
If
you
want
to
a
disk, type MOUNT, the device
Then type a RETURN. For example:
unmount
specification and a /U.
.MOUNT AMSO:/U
A.
To dispLay a List of the disks mounted
MOUNT foLLowed by a RETURN:
on
the
system,
type
.MOUNT
you see a List of the mounted disks.
MOUNT dispays the
VoLume Name and VoLume ID of each disk that contains a LabeL.
(For information on LabeLing a disk, and on the VoLume Name
and VoLume ID, see the LABEL reference sheet in this manuaL.)
Fo exampLe:
Now
(Changed
1
May 1980)
MOUNT (Cont'd)
Page 3
.MOUNT RET
Fisks mounted:
DSK1:
System Disk (SYSOC1)
PayroLL Data (PAYROLLO1)
HWKd:
Transfer Disk (TRANSOU1)
DSKO:
MISC:
AMS1:
Documentation Archives #1 (ARCHIVO1)
ERRORS:
?Nonexistent device
You
tried to mount a disk that AMOS cannot access; the device
is not defined in the DEVTBL command of your SYSTEM.INI, is not fiLe
structured, or does not have a driver program in area L1,6J of your
System Disk.
?No disk currently mounted
You
tried to unmount a disk that is not currently mounted.
Check your speLling to make sure that you specified the correct
logicaL unit.
?Device not ready
The
specified device is not ready. Try again when the device
has been fulLy cycLed up. If you wish MOUNT to wait untiL the
device is ready, use the 1W switch.
?WARNING — BADBLK.SYS has a bad hash totaL
When
reading in the aLternate track information for a device
that uses alternate tracks, MOUNT discovered that the BADBLK.SYS
fiLe had been damaged and did not have the correct hash total.
Check with the System Operator for instructions.
CHARACTERISTICS:
Allows you to mount and unmount disks.
mounted disks.
If
a
disk
Also dispLays
Returns your terminal to AMOS command Level.
1
List
of
aL,l
contains a LabeL, MOUNT dispLays part of the LabeL when it
mounts that disk.
(Changed
a
May 198D)
'—I
newtrm
FUNCTION:
Creates a standard terminal driver.
HINTS/RESTRICTIONS:
of the Large number of terminaLs availabLe for use with the
Alpha Micro Operating System, it is no Lonqer possibLe to provide a
separate driver program for each kind of terminaL. Alpha Micro does
provide terminal drivers for many popuLar terminals, which can be found
in the system disk account [1,61.
Because
a terminal driver program, or even modifying one,
Creatinq
has
aLways
required a great deal of programming experience and skiLt. Using
NEWTRM, you can create a terminaL driver for any terminal you choose,
impLementing aLL the features built into that terminal. No particuLar
expertise is required; NEWIRM buiLds the terminal driver in a standard
format
by
you a number of questions about the features of the
asking
terminaL.
Refer to the user's or operator's manual for the terminal to
information
capabilities.
NEWTRM
asks
you
about
the
terminaL's
find
features
the
and
Also, refer to the document BuiLdinq a Terminal Driver (The NEWTRM
Program) in the "System Operator's Information section of the AMOS
Software documentation packet for more information on NEWTRM, and how
to find and enter the terminal's various parameters in response to its
questions.
NEWTRM uses the foLlowinq files.
Do not erase or modify them.
DSKO:NEWTRM.PCF[7,51
DSKO:ECHO.MAC[1 ,6]
DSKO:TABDEF.MACC1 16]
DSKO:TDV1 .MACE1,6J
DSKD:TDV2.MAC[1,6J
DSKO:VARDEF.MACE1 161.
FORMAT:
.NEWTRM @D
OPERATION:
1.
Log into the system Device Driver Library account:
.LOG DSKO:[1,6] ED
(30 ApriL 1981)
NEWIRM (Cont'd)
2.
Page 2
Type NEWTRM folLowed by a RETURN:
NEWTRM tJD
NEWTRM qives you a set of instructions:
3.
Terminate aLt input Lines with carriaqe returns.
ALL ntmleric input is in decimal.
$eparate numeric answers on the same Line with spaces
AU NUMERIC answers defauLt to 0.
If you have any probLems, refer to the NEWTRM documentation.
4.
NEWIRM now beqins to ask
you
a
long
series
These questions are structured into four groups.
a.
NEWTRM
first
asks
of
questions.
questions generaLly applicable to aLL
terminaLs. First is the unique name you want to give to
the driver NEWTRM is about to buiLd. Enter just the name,
in six characters or Less.
Do not suppLy a fiLe name
extension.
What is the name of the driver? SOROC 1D
where SOROC is the
name
you
have
selected.
The
name
readily identify the terminal which the drive wilt
support.
You must
incLude this name in the system
shouLd
initialization command fiLe TRMDEF statement that defines
your terminal. (For further information on modifying the
system initialization command fiLe to add a new terminat
to your system, see The System InitiaLization Command
File in the "System Operator's Intormation" section of
the AMOS Software Update documentation packet.)
more questions of a generaL nature,
dealing with time deLays foLLowinq Linefeed and formfeed
commands from the driver to the terminal.
NEWTRM asks some
b.
NEWTRM then moves to the second group
of
questions,
and
accepts information which identifies the terminaL type and
capabiLities to the driver. The driver must know: if the
terminaL has a keyboard (that is, can be used for input as
wetL as output); if it has a video dispLay (via a CR1 or
other
video
dispLay
system) or is a "hard copy"
(printer—type) terminal; how much to offset the CRT screen
"cursor" from "home" when positioning it, and whether the
terminaL takes the row or the coLumn coordinate first; and
the ntmber of rows and the ntxnber of columns on the CRT
screen. If you are using NEWTRM to buiLd a "hard copy"
terminat driver, NEWTRM goes from this point to finaL
processing.
(30 ApriL 1981)
NEWIRM (Cont'd)
Page 3
c.
In the third group of questions, NEWTRM asks what speciaL
functions are imp'emented by the terminaL, and how the
driver can access them.
These questions ask
about
function characters, deLays between function characters,
characters to discard, and the function key Leadin code.
In this group, NEWTRM asks you a repetitive set of
questions about 28 separate commands. These commands are
the TCRT commands supported by ALpha Micro. The terminaL
driver buiLt by NEWTRM wILL support any or alL of these
features which your terminal impLements. (NOTE:
If you
wish to implement other commands, you must modify the
source file NEWTRM creates to contain those commands.)
d.
fourth
The
commands,
AiphaviJE.
transmitted
enter
qroup correLates your terminal's function
any, to the ALpha Micro text editor caLLed
First you enter the decimaL ASCII
value
if
the
a function key on your terminaL, then you
by
controL character you want to
Do NOT type a RETURN after enterinq the
NEWTRM Looks for a RETURN to terminate this
actuaL
VUE
correspond to it.
command.
VUE
series of questions, which you must enter after
you
have
correlated aLl the function keys to VUE commands.
5.
When
entered
have
you
The driver is compLete.
6.
Last return, NEWTRM creates the
Then you see:
You may assemble and test it now.
the
source fiLe for your terminaL driver.
Now you must assembLe the proqram by usinq the MACRO
Enter:
command.
.MACRO SOROC
where
SOROC"
is
the
terminal driver to build.
7.
name
you used in telIinq NEWTRM what
When MACRO finishes and returns you
rename
the
.PRG
extension, .TDV.
file it
to
produced
AMOS
to
command
leveL,
the terminal driver
.RENAME/D *.TDVSORQC.PRG &iD
have a finished terminat driver
SOROC.TDV, customized for your terminal.
program,
called
typed an answer that did not start with Y, y, N or n.
NEWTRM
You now
ERRORS:
?Bad answer — try aqain
You
accepts a number of yes or no answers, as well as
(30 April 1981)
numeric
ones.
You
NEWTRM (Cont'd)
may
Paqe 4
use an upper or tower case V or N, or speLL out the word, for your
answers.
CHARACTERISTICS:
Requires that you be Logqed into DSKO:t1,6].
Configures a standard terminal driver in the terminaL driver account by
asking you questions about the terminal's features and parameters.
When you are ready to use the terminaL, be sure to add the new terminaL
driver name in the system initialization command file TRMDEF statement
that defines your terminaL.
(30 April 1981)
opr
FUNCTION:
Allows
the
ALphaMAIL Operator to maintain and manage the system's
of AIphaMAIL, the Alpha Micro eLectronic mail system.
use
HINTS / RESTRICTIONS:
The
ALphaMAIL
Operator
creates
and
maintains
Directory for his or her computer system.
the
AIphaMAIL
User
The OPR program aLLows the ALph8MAIL Operator
to build and maintain the
Directory, to check the users' maiL boxes,
to receive messages,
and to distribute a message to mutipLe users (and to
specify how many
days that message is to be on hoLd).
For information on using OPR,
User
refer to the AIPhaMAIL User's ManuaL, (DSS—10000—06).
The ALphaMAIL Operator works in the ALPhaMAIL account,
DSKO:[7,2)_
This account shouLd have password protection to
protect
the
account
from unauthorized use.
OPR is ONLY for the use of the authorized ALPhaMAIL Operator.
Damage
to the ALPhaMAIL message system can occur if anyone but the AIphaMAIL
Operator is allowed access to OPR.
See the EMAIL reference sheet for information on how the
may access AIphaMAIL.
generaL
user
FORMAT:
-OPR lED
OPERATION:
1.
Log
into
DSKO:E7_2J
(which
Now, type OPR followed by
you
a RETURN:
.OPR IJ
You now see the OPR main menu:
(30 April 1981)
can also specify as BOX:).
OPR (Cont'd)
Page 2
OPR Version 1.0
COMMAND CODES:
Check maiL boxes
Distribute messages
C
D
Receive mal I
HoLding message maintenance
R
H
DispLay statistics (EPO Operator onLy)
S
DispLay command menu
Return to AMOS
x
OPR>
2.
SeLect one of the functions Listed in the menu by entering the
appropriate command code after the OPR
then
type
a
RETURN.
prompt
symbot,
OPR>;
For exampLe, to took at or change the
ALphaMAIL User Directory, use the A command:
OPR>A @
Now you see the Directory maintenance menu. Most of the OPR
commands wiLl cause a new menu to be displayed, along with the
prompt symboL for that particular portion of OPR.
For
exampLe, the Directory maintenance menu looks like this:
ACT Version 1.0
COMMAND CODES:
List User Directory
Print User Directory
L
P
A
D user name
M user name
V
Add new account to User Directory
DeLete this user's account from Directory
Modify this user's account in Directory
Verify User Directory
DispLay command menu
Return to OPR main menu
Return to AMOS
Q
X
ACT>
To return to the OPR main menu from any OPR submenu, enter a Q
foLLowed by a RETURN.
ACT>Q @ID
(30 ApriL 1981)
For exampLe:
ÔPR (Cont'd)
3.
Page 3
To exit from OPR or any OPR submenu, enter an X followed by
RETURN.
For example:
a
OPR>X
OPR now returns you to AMOS command Level.
ERRORS:
BeLow are some of the error messages you can see when using OPR:
?InvaLid command — Type ? for help
At any time you may ask ORP to re—dispLay the current
by
entering a ? foL'owed by a RETURN after the current prompt menu
symbol.
For example:
OPR>? EI
?Invalid entry — try again
The Directory maintenance portion of OPR did not recognize your
entry. For exampLe, you entered just a RETURN when OPR
asked you
for some information.
?You must enter Less than 20 characters
You
are trying to define a new user account or to modify an
existing one, but you entered a user—ID of more than 20 characters.
You wiLL have to shorten the user—ID to 20 characters or Less.
?You must enter exactLy 3 digits
You
are trying to define a new user account, but the box
you entered was not three numeric digits. Try again.
?This maiL box aLready exists — try again
Each user maiL box on your system must have
Pick another three—digit number and try again.
?USERNAME is aLready in the list
Each
user in the Directory
another name and try again.
a
unique
number
number.
must have a unique user—ID.
Pick
?USERNAME not found
You tried to modify an account for a nonexistent user.
User Directory for the Uist of all users.
(30 April 1981)
Check the
OPR (Cont'd)
Page 4
?User Directory not found
No User Directory yet exists.
You will need to build one. Check
Manual for
instructions on
building a User Directory. If you know that a User Directory does
already exist, then an error has occurred in the ALphaMAIL system.
Refer to the ALphaMAIL User's ManuaL troubleshooting section for
instructions.
Chapter 4
of
the
ALphaMAIL
User's
?FILENAME not found
An error has occurred within the AIphaMAIL system.
AIphaMAIL User's ManuaL for instructions.
Refer to
the
CHARACTERISTICS:
OPR
is used by the ALphaMAIL Operator to maintain and manage the Alpha
authorized
Micro electronic mail system. It is ONLY for the use of the
ALphaMAIL Operator.
displays one main menu and five submenus. To return to the main
menu from any submenu, use the Q command. To exit to AMOS from any
menu, use the X command. To see the current menu re—displayed, use the
OPR
? command.
OPR is re—entrant and reusable.
(30 April 1981)
parity
FUNCTION:
Initializes parity error detection for the
AM—lb
memory board.
HINTS/RESTRICTIOIS:
The
AM—?1O
128K
byte
memory
board
has
capability which you must enabLe by using
a
the
parity error detection
PARITY
command
within
your system initiaLization command fiLe.
(For information on the
AM—710 memory board, see the Alpha Micro Integrated Systems User's
Guide, CDWM—OO1Q1—O1). This manuaL teLLs you how to address your
AM—71O memory board, and gives bank switching information for the
board.)
If
you don't use the PARITY command, the AM—710 memory boards wiLL not
be able to detect and report parity errors.
Make sure that the memory boards are property jumpered for the I/O port
addresses you supply to the PARITY command.
For information on
addressing see the ALpha Micro Integrated Systems User's Guide.
You
wild probably want to put PARITY into your system
initiaLization command file, aLthough you may use it at AMOS command
LeveL.
(Ear information on editing the system initialization command
fiLe, see he System InitiaLization Command File in the "System
Operator's
Information'
section
of
the
AMOS
Software Update
NOTE:
documentation packet.)
See Software InstaLlation Instructions for the AM—710 Memory Board in
the "System Jperator's Information" section of the AMOS Software Update
documentatioi packet for more information on PARITY and memory board
error handLiig.
FORMAT:
PARITY I/O—portl{,I/O—port2,.. .I/O—portN}
where I/O—porfl through I/O—portN give the I/O port addresses you have
assigned to the AM—710 memory boards in your system.
(NOTE: This I/O
port address is three digits for octal numbers, or is
hexadecimaL
numbers.
two digits for
(Only enter hex numbers if you have used the SET
HEX command for your job.)
OPERATION:
1.
Use one of the system text editors to edit the SYSTEM.INI file.
PLace the PARITY command after the MEMERR command.
For exampLe:
(30 ApriL 1981)
PARITY (Cont'd)
Page 2
MEMERR
PARITY 101,102,103
2.
If
yoi have more I/O port addresses than wiLL fit on one command
Line, you may follow the first PARITY command with as many others
as you need.
For example:
PARITY 101,102,103
PARITY 104,105,106
3.
that AM—710 memory boards require the presence of the MEMERR
command as well as the use of the PARITY conmiand. If your system
contains only AM—71O memory boards, you may not include an argument
on
the MEMERR command Line. (See #1 above.) If your system also
contains other types of memory boards, you must include the proper
I/O error address for those boards. For example:
Note
MEMERR 250
PARITY 101,102,103
(See
the
Alpha
Micro
Integrated
information on the I/O error port
memory boards.)
Systems
address for
User's Guide for
Piiceon 32K word
ERRORS:
Your system can respond to a parity error in a number of ways depending
your system's hardware configuration. See the document Software
on
Installation Instructions for the AM—710 Memory Board
Operator's
Information"
section
of
the
AMOS
documentation packet for complete information on what
parity error occurs, arid how to handLe such an error.
The
PARITY
command
in
the "System
Software Update
happens
when
a
can itself generate several error messages if you
use the command improperLy:
?There is no AM—710 at port address xxx
Where xxx is an I/O port address you specified on your PARITY
tine.
This address did not match the jumpered I/O port
address of any of the AM—710 boards in your system.
Check the
PARITY command
Line to make sure that you entered the port address
correctly; then check the memory boards to make sure that their port
addresses are jumpered correctly.
command
?Command format error
You did not suppLy any I/O port addresses, or in some
used an improper format.
(30 April 1981)
other
way
PARITY (Cont'd>
Page 3
CHARACTERISTICS:
is re—entrant, reusabe, and may be oaded into system memory.
It may onLy be run with AMOS versions 4.5 and later.
PARITY
PARITY is only for use with AM—Yb
memory boards that are used with: 1)
AM—100/T CPU; or 2) an AM—lOD CPU and an AM—120.
(30 April 1981)
pause
FUNCTION:
causes a temporary interruption in the processing of the command
PAUSE
file in which it appears.
HINTS/RESTRICTIONS:
PAUSE may apoear onLy in
a
command
fiLe
or
DO
fiLe.
AMOS
stops
processing a command fiLe when it reaches the PAUSE statement. At that
time you may choose whether to return to AMOS command LeveL or to
continue execution of the command fiLe. (When the PAUSE command is
processed,
waits for you to enter a character: a RETURN teLLs
PAUSE to continue execution of the fiLe; any other character telLs
PAUSE
to aoort the command fiLe.) When you return to AMOS command
LeveL, you may perform a series of actions such as: running a program,
editing a text fiLe, using another command fiLe, etc. To resume
executing the command fiLe where it was interrupted, use the CONT
command at AMOS command LeveL.
you
When
(See the CONT reference sheet.)
iiterrupt execution of a command file via the PAUSE command,
of the command fiLe in the disk fiLe
This fiLe appears in the account and device you are Logged
PAUSE stores the remainder
CNT.CMD.
into.
When you use the CONT command to resume execution of the fiLe,
CNT.CMD
into your memory partition and processes it.
Therefore, do not erase the file CNT.CMD unless you do not want to
toads
CONT
resume execution of the command fiLe it contains.
For
FiLes
more
and
information
DO
Files,
on
PAUSE and CONT,
(DWM—OO100—63),
in
section of the AM—lop documentation packet.
see New Features of Command
the "User's Information"
FORMAT:
PAUSE {message}
may
optionalLy include a message which PAUSE displays to the user
of the command fiLe.
You
OPERATION:
1.
PLace PAUSE in a command file where you want that file to interrupt
execution. You may optionalLy include a message to be dispLayed to
the user of the command fiLe. For exampLe:
PAUSE To run the fiLe, type RETURN; otherwise, type X.
When a PAUSE command is reached, the user of the file may either
type a RETURN (to resume execution of the command fiLe) or any
(1 May 1980)
PAUSE (Cont'd)
Page 2
character but a RETURN (to temporarily interrupt the processing
of
the command fiLe).
2.
Once
3.
As an exampLe of the PAUSE command, Let's create
that aLLows you to compi Le and run BASIC programs:
a command tile is interrupted via the PAUSE command, the user
of the command fiLe is returned to AMOS command teve where he or
she may run any group of
programs or command fiLes. The CONT
command resumes execution of the fiLe.
a
command
fiLe
Command file to compile and run a BASIC program
; (MAIN.BAS).
F
TRACE OFF
LOOKUP MAIN.BAS/?MAJN.BAS does not exist
GOTO NOFILE; File doesn't exist; give user option to create
COMPIL MAIN.BAS
RUN MAIN.RUN
EXIT *Returning you to AMOS command LeveL*
;NOFILE
:<If you want to create MAIN.BAS, type a RETURN;>
PAUSE otherwise, type any other character:
TRACE ON
VUE MAIN.BAS
V
ERRORS:
PAUSE dispLays no error messages.
However, you can see the message:
%Supersedes existing file
if the foLlowing sequence of events occur:
1.
You
use
a
fiLe which contains a PAUSE command that
You
then return to AMOS
PAUSE writes the remainder of the command file
command
interrupts execution of the fiLe.
command LeveL.
into the disk file CNT.CMD.
2.
(1 May 1960)
You
then invoke another command fiLe which also interrupts
execution because of a PAUSE command. (However, you have not
yet typed a CONT to resume execution of the first command
fiLe.) PAUSE writes the remainder of the second fiLe into
CNT.CMD, thus overwriting the contents of first command fiLe.
PAUSE (Cont'd)
If
Rage 3
command fiLe is pending execution (that is, if CNT.CMD exists in
when another
command fiLe
uses PAUSE to interrupt
execution, PAUSE teLLs you so by dispLaying the above message. This
message does not indicate an error, but warns you that you cannot
the
a
account)
resume execution of the first command tUe because CNT.CMD now contains
another command fiLe.
CHARACTERISTICS:
Used only in a command fiLe or DO fiLe.
interruption of command fiLe execution. (You can
resume execution of that command fiLe by using the CONT command.)
Causes
temporary
May return your terminaL to AMOS command LeveL if you
command fiLe execution.
(1 May 1980)
choose
to
abort
pass
FUNCTION:
ALLows you to change your account password.
HINTS/RESTRICTIONS:
cannot change the password of an account on a write—protected
disk, so make sure that the correct device is write—enabLed.
PASS
A password mu;t be six characters or Less in Length; PASS does not
check the length of the password that you enter.
Remember that PASS
cuts your pas;word off at the sixth character. To use PASS, you must
Logged
into the system under the PPN whose password you want to
be
change.
FORMAT:
.PASS £Dvn:}
where Devn:
i
account.
the specification of the LogicaL unit that contains your
DEFAULTS:
PASS assumes :he LogicaL unit you are currently Logged into.
OPERATION:
1.
Type PASS, optionalLy foLLowed by
RETURN.
For example:
a
device
name.
Then
hit
.PASS DSK1:
2.
asks you for your oLd password and your new password.
Then it asks you to verify your new password (in other words,
PASS
to type your new password again):
.PASS
OLd password:
New password:
Verify password:
EXIT
PASS now changes your password, dispLays the EXIT message, and
takes you back to AMOS command LeveL.
(1 October 1979)
PASS (Cont'd)
3.
Page 2
that your password remains a secret to other users, PASS
does not dispLay your old or your new password as you type
So
them.
ERRORS:
You can encounter the folLowing error messages:
?Cannot WRITE Devn: — write—protected
You
tried to change the password
of an account on a
write—protected disk. Try again, but first write—enabLe the disk.
(Devn:
is
the
specification of
the
device
hoLding the
write—protected disk.)
Thad password
Either you entered your old password incorrectly or when
verify
new password you made a typing mistake.
case, PASS does not change your old password. Try again.
to
your
asked
In either
CHARACTERISTICS:
Protects system security by not dispLaying your oLd or new password.
Returns you' terminaL to AMOS command Level.
(1 October 1979)
PC
FUNCTION:
Compiles a PASCAL program by invoking the AIPhaPASCAL compiler, CMPILR.
HtNTS/RESTRICTJQNS:
PC
is
command
a
file
which makes the AIPh8PASCAL compiLer, CMPtLR,
easier to use in many applications.
It first invokes CMPILR, giving it
a fiLename you specify.
Then it tells
CMPILR
that you want the
diagnostic display on the screen as CMPILR compiLes the PASCAL program.
You
enter
may
a
complete
tile specification, including the device
specification, filename, extension and project—programmer number of the
PASCAL tile you wish to compile.
For more information on
AlphapASCAi
compiling
a
PASCAL
program,
refer
to
the
User's Manual, (DWM—OO100—O7).
FORMAT:
.PC Filespec EEfl
DEFAULTS:
If
you omit the device and account specifications, CMPILR assumes the
device and account you are logged into. It you omit the extension,
CMPILR assumes an extension of .PAS.
OPERATION:
1.
Type
PC
compile.
followed
by
the
Then type RETURN.
specification of the file you want to
For example:
.I'C SALES ED
The fi .e you specify must be a compilable PASCAL program.
2.
PC now invokes the AtPhaPASCAL compiler, CMPILR, which proceeds to
compile the program. PC causes CMPILR to display some diagnostic
status messages, so you see something like this:
(30 April 1981)
>
PC (Cont'd)
Page 2
PRIJN CMPILR
Ttbhapascal V2.'J
Silirce file name? SALES
ffThqnostic tile name (<return> for terminal?
ATj)hapascal Compiler Version 2.0
—
PROGRAM
<
C
17 tines
a>———
3
149.48 tines/minute
B6 compilation errors.
ZTh2 seconds,
For more in"ormation on CMPILR and what each tine of the display means,
see the ALphaPASCAL User's Guide, (DWM—OO100—08).
ERRORS:
messages itseLf.
However, you may see the
standard PASCAL error messages. For a list of those error messaqes,
see Appendi,: C of the ALPhaPASCAL User's Guide, (DWM—0O100—08)
PC generates no error
CHARACTERISTICS:
Invokes the PASCAL compiLer, CMPILR.
Causes one PASCAL program to be compiLed.
Causes CMPILR to send diaqnostic information to your terminal display.
(30 April 1981)
pci
FUNCTION:
and
links a PASCAL orogram by invoking
compiLer, CMPILR, and the ALphaPASCAL tinker, PLINK.
CompiLes
the ALphaPASCAL
HINTS/RESTRICTrONS:
PCL is a c:ommand file which makes the ALphaPASCAL compiler, CMPILR, and
the ALphaFASCAL tinker, PLINK, easier to use in many appLications.
PCL first invokes CMPILR, giving it a filename you specify.
Then it
teLls CMPILR that you want the diagnostic dispLay on the screen as
CMPILR compiLes the PASCAL program.
Then PCL invokes PLINK, giving it the fiLename you specify as its
fiLe.
PLINK
then
code
proceeds to link together the files with the code
fiLe name and the extensions .PO1, .PO2, and P03.
You may erter only the filename and device specification of the PASCAL
file you wish to Link. PCI assumes the device specification (if you do
not enter it) and PPN of the device and account you are logged into,
and the extension .PAS.
For more information on compiLinq and Linkinq program files,
refer
to
the AIphaFASCAL User's Manual (DWM—00100—O7).
DEFAULTS:
If
you
cmit
logged into.
the device specification, PCL assumes the device you are
FORMAT:
.PCL Fi1ename
OPERATION:
1.
Type PCI folLowed by the specification of the
compiLe.
Then type RETURN.
fiLe
you
want
to
For exampLe:
.PCL SALES
The file you specify must be a compitabte PASCAL program.
2.
PCL now invokes the ALphaPASCAL compiler, CMPILR, which proceeds to
compiLe the program. PCI causes CMPILR to dispLay some diagnostic
status messages, so you see something Like this:
(30 ApriL 1981)
>
PCL (Cont'd)
Page 2
PRLJN CMPILR
ALphaPascaL V2.O
Source file name? SALES
Diagnostic fiLe name ((return> for terminal?
Aiphapascal Compiler Version 2.0
0>———
C
C3
PROGRAM
112 tines
4.82 seconds,
149.48 Lines/minute
No compiLation errors.
For more information on CMPILR and what each Line
of
the
disptay
means, see the AIphaPASCAL User's Guide, (DWM—0Q100—08).
3.
PCL now invokes PLINK, and passes the fiLename SALES to PLINK. PCL
erases the file SALES.PCF if it exists in the account. You see
something Like:
ERASE SALES.PCF
Total of
4.
1
file deLeted, 2 disk bLocks freed
PLINK proceeds to Link the fiLes SALES.P01, SALES.P02 and SALES.P03
As PLINK proceeds, you see a
together into a new file SALES.PCF.
dispLay something Like this:
.PRUN PLINK
Alphapascal V2.0
Code file = SALES
Creating new code file SALES.PCF
Library code file for SALES.PCF = STDLIB
Please specify files to be Linked into SALES,
one per Line, ending in a blank tine
File
1
= SALES
File 2 =
Loading program and library dictionaries
Processing SALES
Linking in global func/oroc PROGRAM
Transterring temporary file to new code file
SALES completed
For
more
information
on
PLINK and what each line of the display
means, see the AIphaPASCAL User's Guide, (DWM—0O100—O8).
(30 April 1981)
PCL (Cont'd)
Page
3
ERRORS:
PCL generates no error messages itsetf.
However, you may see the
standard PASCAL error messages. For a List of those error messages,
see Appendix C of the AIphaPASCAL User's Guide, CDWM—OO100—08)
CHARACTERISTICS:
Creates ar executable .PCF file
source (.FAS) fiLe.
by
compiling
and
Linking
a
singLe
Invokes tFe PASCAL compiler, CMPILR.
Causes one PASCAL program to be compiLed.
Causes CMFILR to send diagnostic information to your terminaL dispLay.
Erases the .PCF version of the specified fiLe.
Invokes the
PASCAL
tinker, PLINK.
Links the compiled version
executabLe program file.
(30 ApriL 1981)
of
the
specified fiLe into a resoLved,
pcu
FUNCTION:
CompiLes and updates a PASCAL program by invoking the ALphaPASCAL
compiLer, CMPILR, to compiLe a specific module, and invokinq the
ALphaPASCAL Linker, PLINK, to Link the moduLe into the program fife.
HINTS/RESTRICTIONS:
PCU is a command file which makes the ALDhaPASCAL compiler, CMPILR, and
linker, PLINK, easier to use when compiLing a single
module arid updating a program fite.
the
AIphaPASCAL
You suppy PCU with the name of the moduLe
you
want
to
compiLe
and
link, to'. Lowed by the name of the .PCF file you want to Link the module
into.
invokes CMPILR, giving it the module name you specify.
CMPILR that you want the diagnostic dispLay on the screen
PCLJ
PCLJ telLs
as
compiLes the moduLe.
CMPILR
invokes PLINK, giving it the filename of the .PCF fiLe you specify
as its code fiLe. PCIJ telLs PLINK to update the .PCF fiLe.
PCU
PCU telLs PLINK not to change the standard Library code
.PCF fiLe whiLe updating it.
You
may
enter
a
compLete
fiLe
for the
file specification, including the device
specification, fiLename, extension and
the PASCAL moduLe you wish to compiLe.
project—programmer
For more information on compiLing and
ALphaPASCAL User's Manual (DWM—OO100—Q?).
of
number,
updating moduLes, refer to the
FORMAT:
PCII ModuLename Fl Lename flJ
where MociuLename is the name of the module
you
want
to
update,
and
FiLename is the name of the .PCF file you want to link the moduLe to.
DEFAULTS:
If you omit the device and account specifications, CMPILR and PLINK
assume the device and account you are Logged into.
If you omit the
extensior, CMPILR and PLINK assume an extension of .PAS.
(30 ApriL 1981)
)
PCU (Cont'd)
Page 2
OPERATION:
1.
Type PCU foflowed by the specification of the module you want to
compiL9, foLLowed by the name of the .PCF file you want to Link the
moduLe to.
Then type RETURN.
For exampLe:
.'CU COMPAR SALES
The file you specify must be a compiLable PASCAL program.
2.
PCU noj invokes the ALphaPASCAL compiler, CMPILR, which proceeds to
compib the program. PCL causes CMPILR to display some diagnostic
status messages, so you see something like this:
PWN CMPILR
JLphaPascal V2.O
S)urce fiLe name? COMPAR
5iagnostic file name (<return> for terminal?
JLphapascal CompiLer Version 2.0
<
NOGRAM
T Lines
0>———
<3
v.82 seconds, 149.48 Lines/minute
No compiLation errors.
For
mre
information
on
PLINK and what each Line of the display
means, see the ALphaPASCAL User's Guide, (DWM—OOOO—O8).
3.
PCLJ now invokes PLINK, and passes the filename SALES
to
PLINK
as
its cde file. As PLINK begins, you see a display something like
this:
."RUN PLINK
iLphapascaL V2.O
Code file = SALES
Do you wish to 1) repLace or 2) update SALES.PCF? 2
PCU
automatically
suppLies
the
2.
teLLing
PLINK
to
update
S ALE S . I'CF
4.
PLINK :ontinues:
The standard Library code file for SALES.PCF is STDLIB.PCF
Do you wish to change this? N
automaticaLly supplies the N, telling PLINK not to change the
standard library code file for SALES.PCF.
PCU
(30 ApriL 1981)
PCLJ (Cont'd)
5.
Paqe I
Now PLINK finishes:
PLease specify tiles to be Linked into SALES,
one per Line, ending in a bLank line
FiLe
1
= COMPAR
FiLe 2 =
_oading program and library dictionaries
<eeing globaL func/proc SALES
'rocessing COMPAR
Linking in globaL func/proc MAX
-
rransferrinq temporary fiLe to new code file
ALES compLeted
For m)re information on PLINK and what each
Line of the
means, see the ALphaPASCAL User's Guide, (DWM—0O100—08).
display
ERRORS:
qene-ates no error messages itseLf.
However, you may see the
standard PASCAL error messages. For a List of those error messages,
see Appendix C of the ALphaPASCAL User's Guide, (DWM—O0100—08)
PCu
CHARACTERISTIC;:
Updates
.PCF file.
.PCF fiLe by causing PLINK to Link an updated module to the
Invokes the PASCAL compiLer, CMPILR.
Causes one PASCAL moduLe to be compi ted.
Causes CMF'ILR to send diagnostic information to your terminal dispLay.
Invokes the PASCAL Linker, PLINK.
(30 ApriL 198E
pdlfmt
FUNCTION:
Transforms a text file into a program—design document.
HINTS/RESTRICTIONS:
The purpose o PDLFMT is to transform a program design into a formatted
design document.
produces a final document
design Listing; 3.
cross—referenc:e.
PDLFMT
2.
formatted
Create
text
a
that contains: 1. tabLe of contents;
reference
trees;
and,
4.
a
file using one of the system text editors.
PDLFMT commands in that fiLe.
After exiting the text editor,
invoke PDLFMT to format your file.
NOTE:
A
Insert the
you
demonstration fiLe, TLGRAM.PDL, is in account DSKO:L1,4J.
use it, enter:
can
To
.PRINT TLGRAM.PDL
.PDLFMT LGRAM
.PRINT TLGRAM ç)
PDLFMT transforms TLGRAM.PDL into TLGRAM.LST. For information on using
PDLEMT, refer to the document Program Design Language Formatting
System, (DWM—UO100—26), in the AM—100 documentation packet.
FORMAT:
.PDLFMT FiLespec
where FiLespec seLects the file you want to format.
DEFAULTS:
PDLFMT assumel; a fiLe extension of .PDL.
OPERATION:
one of
the text editors to create a text file that
contains your program design.
Insert into that file the
PDLFMT
commands
that mark the various document components.
(See beLow for a list of the PDLFMT commands.)
1.
Use
2.
Type PDLFMT foLlowed by the specification of the fiLe you want
tO format. Then type a RETURN. For example:
(1 October 1979)
PDLFMT (Cont'd)
Page 2
.PDLFMT DSPEC.TXT
PDLFMT assumes an extension of .PDL.
PDIFMT now creates a .LST file with the same name as the
specification you supplied on the PDLFMT command Line. This
3.
.LST file contains the formatted version of your text fiLe.
4.
PRINT or TYPE the .LST
document.
fiLe
to
see
your
formatted
design
COMMAND SUMMARY:
BeLow
are
the
PDLFMT commands you may insert in
your text fiLe.
ALL
commands must begin in the first character—position on the Line and
must start with a sLash, I. No Line of text that is not a command may
begin with a slash.
ALL
PDLFMT
commands
except /R take a text
argument.
/T text
TITLE — Specifies
the
name
of
the program design.
PDLFMT writes this titLe at the top of every page of
your .LST file. The titLe command must aLways be the
first command in the file and must aLways be present.
IS text
SECTION
NAME — Specifies
the start of a new section
of procedure designs. PDLFMT uses this name as a
subtitLe for every page in that section. After this
command, enter text that describes the section.
IP text
PROCEDURE NAME — Specifies the start of a procedure
design and assigns Procedure Name as the name of that
design.
Any
time the Procedure Name occurs as a
statement within a procedure design, PDLFMT considers
that occurrence a reference to the procedure design.
REFERENCE TREE — Specifies the start of a List of
procedure names on successive lines. Each procedure
name is a root of a reference tree Listing.
The
IR
command
is optional, but if it appears in your fiLe,
it must be the last command in the design.
ERRORS:
X IS AN ILLEGAL COMMAND — BYPASSING LINE
PDLFMT found a command IX in the
recognize.
design that it
The only LegaL commands are: IT, IS, /P, or /R.
does
not
REPEATED DEFINITION: xxxxxx, REFERENCES WILL BE TO LAST OCCURRENCE
xxxxxx is a section or procedure name that occurred in a section
or procedure command more than once.
(1 October 1979)
PDLFMT (Cont'd)
Page 3
CHARACTERISTICS:
Assumes a fiLe extension of .PDL.
Transforms a fiLe that you have previously created
text editors, Produces a .LST fiLe.
Returns your terminaL to AMOS command leveL.
(1 October 1979)
using
one
of
the
period
FUNCTION:
Bootstrap to'der program for a system that uses the Persci floppy disk
as the System Device.
HINTS/RESTRICTIONS:
The PERLOD program when contained on a 2716 PROM aLlows the system to
boot off a System Disk on a Persci floppy disk when a hardware reset
occurs (that -s, when you hit the RESET button).
The program i5 aLso in account DSKO:L1,4] of the System Disk.
You may use PERLOD at AMOS command level, to reset the system if your
System Device
is a Persci fLoppy disk drive. The memory partition of
the job that uses the PERLOD command MUST be in Bank Zero if your
system bank switches memory.
(For information on bank—switched
systems,
re1er
to
the
document
Memory
Management
Option,
(DwM—OO100—1O)
in the AM—100 documentation packet.)
You may use PE.RLOD to boot either from an AIMS— or STD—format diskette.
FORMAT:
.PERLOD
OPERATION:
1.
Type PERLOD folLowed by a RETURN:
.PERLOD
system now resets itself by reading a copy of the PERLOD
boottrap program into system memory and executing it.
The
2.
Once invoked, the PERLOD program reads the operating system
skeLeton
monitor,
DSKO:SYSTEM.MONE1,4J,
into
memory.
SYSTEM_MON then brings up the system under the controL of your
system initiaLization command fiLe, SYSTEM.INI.
3.
Once the system is up and running, you see the AMOS prompt.
ERRORS:
if
PERLOD generales no error messages.
However,
it cannot
SYSTEM.MONL1,L-] and SYSTEM.INI[1,4J, the start—up procedure faiLs.
(1 October 1979)
find
PERLOD (Cont'd)
Page
CHARACTERISTICS:
Boots
the system from a Persci fLoppy disk if the Persci disk drive is
the System Device.
Boots either from an AMS— or STD—format diskette.
Returns your terminaL to
successfuLLy.
(1 october 1979)
AMOS
command
level
if
the
system
resets
p1
FUNCTION:
Links a PASCAL program by invoking the AIphaPASCAL linker, PLINK.
HINTS/RESTRICTIONS:
PL
is a command file which makes the ALphaPASCAL linker, PLINK, easier
to use in tany appLications. If a .PCF version of the fiLe you specify
exists, PL erases it. Then PL invokes PLINK, giving it the filename
you specify as its code file. PLINK then proceeds to link together the
fiLes with the code fiLe name and the extensions .PO1, .P02, and P03.
You may onLy enter the fiLename of the PASCAL file you wish to Link.
PLINK assjmes
the device and account you are Loqged into, and the
extension .PCF.
For more information on Linking program
ALphaPASCAL User's ManuaL (DWM—OO100—07).
fiLes,
refer
to
the
DEFAULTS:
If
you
oiiit
a
device
specification,
PL assumes the device you are
Logged int).
FORMAT:
.PL FiLename
OPERATION:
1.
Type PL foLLowed by the name of the fiLe you want
type RETURN.
to
link.
Then
For exampLe:
.PL SALES @B
file you specify must be a PASCAL program that has been
previousLy compiled; that is, SALES.P01, SALES.P02 and SALES.P03
must exist.
The
2.
PL
erases the fiLe SALES.PCF if it exists in the account.
You see
something Like:
ERASE SALES.PCF
ItaL of
3.
1
fiLe deLeted, 2 disk bLocks freed
Pt. now invokes PLINK, and passes the filename SALES to PLINK.
PLINK aroceeds to Link the fiLes SALES.P01, SALES.P02 and SALES.P03
(30 April 1981)
PL (Cont'd)
Page 2
into a new fiLe SALES.PCF.
display something Like this:
togeth?r
As PLINK proceeds, you see a
.'RUN PLINK
iLphapascat V2.O
tjde tiLe = SALES
Creating new code file SALES.PCF
Library code file for SALES.PCF = SIDLIB
Pease specify files to be linked into SALES,
tine, ending in a bLank Line
TDne per
File 1
= SALES
FiLe 2 =
Ladinq program and library dictionaries
Pocessing SALES
Linking in globaL func/proc PROGRAM
Transferring temporary fiLe to new code file
FLES compLeted
For more information on PLINK and what each Line of the dispLay means,
see the ALphaPASCAL User's Guide, (DWM—O0100—08).
ERRORS:
generates no error messages itseLf.
However, you may see the
standard PSCAL error messages. For a List of those error messages,
PL
see Appendix C of the ALphaPASCAL User's Guide, (DWM—0O100—O8)
CHARACTERISTICS:
Links the specified compiled file into an executabLe progran.
Erases the file with the name you specify and the extension .PCF.
Invokes the PASCAL tinker, PLINK.
(30 April 1981)
ppn
FUNCTION:
PPN disptays a List of aLL of the project—programmer
numbers associated
with the user accounts on a specific LogicaL unit.
HINTS/REsTRICTIoN;:
device that
must be mounted.
The
hoLds
the Master FiLe Directory you want to dispay
FORMAT:
.PFN Devn: 4)
where Devn: seLects the device that hoLds the accounts whose
want to see.
PPNs
you
PPN foLLowed by a LegaL device name; type a RETURN.
For
OPERATION:
-
1.
Typ€
exanpLe:
PPN DDS1:
2.
The
PPN
dispLays
command
asscciated
the
project—programmer
numbers
with aLL of the accounts on that disk. PPN groups
then by project number (i.e., afl of the PPNs
beginning with
the same number are dispLayed as a group).
ERRORS:
You
may
encounter
one
of
the standard system error messages if you
suppLy an invaLid device specification.
For example:
?FILe specification error
PPN did not understand the device specification you suppLied.
For example, you see this error message if you enter PPN foLlowed by
a RETURN.
?Cannot READ Devn: — device does not exist
Check your
spelLing. The system did
specification you suppLied.
For
example,
instead of AMS1:?
CHARACTERISTICS:
Returns your terminat to AMOS command Level.
(1 October 1979)
not recognize the device
did
you
enter
ASMI:
print
FUNCTION:
ALLows you to send one or more fiLes to a orinter.
HINTS/RESTRIC1IONS:
The
PRINT
You
may
command
sends
a print request to the Line printer spooler
program; the spooLer places your request into a queue (or waiting
Line). hen a printer becomes avaiLable, the spooL er prints your fiLe.
have
severaL
availabLe printers.
requests
in
thp
orinter
queue
waiting for
For more information on using PRINT,
in the AMOS User's
PRINT recognizes ersatz devices and wiLdcard
PRINT is a wiLdcard file command.
refer to Chanter 9.6. 'Printing a
Guide,
(DWM—OO100—35).
Fl Le (PRINT) ,
symboLs.
define the type of form to be mounted on a
(See the SET reference sheet for
specific printer on the system.
information on setting forms.)
Use the SET command to
FORMAT:
.PRINT Cprinterspec) EE
to see if any print requests are currently in the queue of
printer or in the queues of aLL printers.
.PRINT
a
specific
Fi LespectC,Fi Lespec2. . .,Fi LesecN}C/SwitchC/Switch))
print one or more fiLes on the printer that has the least number of
bLocks waiting in the queue to be printed (or on the defauLt printer
set by the System Operator). A Switch is an option request.
to
_PRINT PrinterspecFi tespeclC,Fi Lespec2. . . ,Fi LespecN){/SwitchC/Switch)) @JD
where Printerspec specifies the particular printer on which you wish to
print the file(s) seLected by Fi Lespec.
DEFAULTS:
defauLt Printerspec is the printer with the Least number of bLocks
waiting in the queue to be printed (unLess the System Operator has used
the DEFALLT command in the spooler parameter fiLe to define another
The
printer default).
(Changed 30 April 1981)
PRINT (Cont'd)
The
used.
Page 2
default switch settings depend upon the specific printer being
(The defauLts for each printer are set by the System Operator.)
The defauLt filespec is a nuLl name and .LST extension.
The
initiaL
defauLt device and account is the account and device you are currentLy
Logged into.
OPTIONS:
You may seLect one or more
of the options below
appropriate switches on the PRINT command line:
/COPIES:n Dr /C:n
Number
switch.)
/DELETE or ID
of
copies
by
incLuding
you want to print. (A file
Delete the file after it is printed.
switch.)
INODELETE ,r INOD
IBANNER or Fe
(A
Print a banner (identifying) paqe at the front
listing.
the
See the AMOS User's Guide
for a full description of a banner page.
operation switch.)
Don't
print
a
switch.)
IHEADER or IH
file
Turn off the ID switch. (A fiLe switch.)
of
/NOBANNER or INOB
the
banner
page.
(An
(An operation
Print a page header at the top of every
page
of the Listing. Paqe headers give the name of
file being printed, the date, and the
current page nu.iber. (A fiLe switch.)
the
/NOIIEADER or /NOH
Don't print page headers. (A file switch.)
/FORMFEED or /FF
Print a final form feed at the
INOFORMFEEfl or INOF
Don't print a final form feed at the end of
each Listing. (A file switch.)
/LPP:n
Maximum ntjiber of lines to print on each page.
If IHEADER is set, PRINT prints a form feed
listing. (A file switch.)
end
of
each
when it outputs a full page and then it prints
a page header. (A file switch.)
IWIDTH:n or IWI:n
page width (in characters).
PRINT uses
this value in printing page headers.
IWIDTH
The
vaLue
must
be between 80 and 132, inclusive.
(A file switch.)
(Changed 30 ApriL 1981)
Paqe 3
PRINT (Cont'd)
If you try to enter more print requests into a
/WAIT or /WA
handle, PRINT
PRINT can
discards the extra print requests. The /WAIT
option teLLs PRINT not to discard the extra
printer queue than
requests, but to reinsert them into the
PRINT
finishes processing earlier
This option ties up your terminal
requests.
while it waits for room to be made in the
print
queue as
queue. (An ooeration switch.)
the form on which you want to
If that is not the form
defined as mounted on the printer, then PRINT
x
may he
asks you to mount the proper form.
any one to six character name you choose. You
can define the type of form to be mounted on a
TeLls
/FORMS:x or /FO:x
PRINT
print your file.
specific orinter by usinq the
(The
System
form—type for
Operator
sets
SET
the
printer during
initialization.) (A file switch.)
/KILL or
'IC
each
specified
the
queue.
1K is an operation switch; it
fiLespecs
on
initial
system
file from the printer
Delete
alL
command.
the command line.
affects
You may
not wildcard the specifications of fiLes to be
deLeted from the
PRINT
queue.
When
you
use
/K,
teLLs you which files were deleted from
the queue.
OPERATION:
1.
To find out if any print requests are waiting in
the
printer
queues, type PRINT and a RETURN:
.PRINT
Tiis command Lists the contents of the queues for all of the
pinters defined on the system.
If you wish to see the
of the queue for a sing'e printer, type PRINT
foflowed by the name of the printer whose queue you want to
contents
see, an equaL siqn, and a RETURN.
For exampLe:
PRINT MULTI=f!D
Tile
dispLay
you
see
tells you what files are waitinq to be
rrinted, what form—type they are to be printed on, how many
bocks total are in the queue, how many b'ocks remain for each
fiLe, how many conies of each file are to be orinted, and
which file is currenUy being orinterl.
(Changed 30 April 1981)
PRINT (Cont'd)
Page 4
It there are no print requests in the
queue,
qLeue is empty.
2.
you
see:
The
send
files to the printer that has the Least number of
blocks in its queue (or to the defauLt printer set by the
Tc
Operator),
System
simpl.y
type
PRINT
foUowed
specifications of the fiLes you want to print:
by
the
.PRINT *.LST@B
HEADER.LST
MN PA K . LS T
DSKCLR . LST
TotaL of 3 fiLes (134 blocks) in printer request
3.
If you wish to send files to a specific printer, type
by the name of the printer you want to use, an
sun, and your list of fiLespecs:
foLlowed
PRINT
equal
.PRINT QLJMEBACKUP.*,S?CFIL @I
BACKUP.MAC
BACKUP. TXT
S RC F IL • LST
S2CFIL.LST
TotaL of 4 fiLes (78 blocks) in printer request
ERRORS:
You may see any of the standard system error messapes that result from
invaLid deuce and account specifications.
In addition, you may
encounter tiese messages:
;LPTSPL -. Pease mount form Form—name on Printer—name
The SpooLer Operator job sees this messaqe if you specify a
form—typ? that is not defined as being mounted on the printer (e.g.,
FORMS
has
been
set
TI81OTR!EE.MAC/FO:CHECKS)
to
NORMAL.
but
you
type
PRTNT
;LPTSPL — Please mount form CHECKS on H810
The Spooer Operator job makes sure that the form CHECKS is indeed
on
the printer; then uses the SET command to inform PRINT that the
forms have been changed:
.SET FORMS 11810 CHECKS
?Output printer not found
You specified a printer that PRINT does not recognize.
Check
your speHinq; then ask the System Operator for a lAst of the vaLid
printers set up for the line nrinter spooLer.
(Changed 30 ApriL 1981)
PRINT (Cont'd)
Page 5
If you have more than one printer defined for use with the spooler
program, you can see a list of aLl of the printers by typing:
.PRINT ED
ZNo fiLes in print request
PUNT was not abLe to find the files you
command Line again, and
make
specifications are correct.
?Invalid argument for COPIES
/OPIES only understands
inadve-tentLy type a Letter.
sure
that
the
specified.
device and
Check the
account
ntxnbers; make sure that you did not
?InvaLid argument for LPP
YOU gave a non—nuileric argument to the Lines per page switch or
the format of your command was incorrect.
?Invatid argument for WIDTH
You gave a non—numeric arqument to the page width switch or the
format of your command was incorrect.
CHARACTERISTICS:
PRINT ls a wildcard fiLe command.
It understands ersatz devices.
AlLows you to specify specific printer, form—type,
banner
page,
page
header,
form
number of copies,
feed handLing, Lines per page, page
width, and whether to deLete the fiLe after it is printed.
(Chanqed 30 ApriL 1981)
prun
FuNd ION:
Executes compiled AIphaPASCAL oroqrams.
HINTS/RESTRICTIONS:
is the runtime portion of the AIphaPASCAL Lanquaqe orocessor. It
executes your oronram by interpretinq the .PCF fiLe created by the
PRUN
linker.
Use
PRUN only on proqrams that have previousLy
been compil?d via the CMPILR proqram and then Linked via the Linker,
PLINK.
Nee the PC, PCL, PL, PU, and PCU reference sheets for
AIphaPASCAL
information on command fiLes that heLp you to easily compile
PASCAL 0roqams.)
PRUN.PRG
is
re—entrant;
the
and
Link
System Oorator may load it into system
memory.
PRUN wi LI n)t execute a program that is not compatible with the current
external Library. That is, you may not run a proqram that was linked
with a ce-tam externaL Library with an oLder version of that Library
or with a compLeteLy different Library; instead, you must re—Link the
proqram with the current Library.
To
interrupt
information
on
program
execution,
interruotinq
croqram
type
a
Control—C.
execution,
Sep
(For more
OPERATIONS'
below •
NOTE: To coriniLe a PASCAL program (a .PAS fiLe), enter:
.PRUN CMPILP
Now
the
compiLer,
your oroqrari fiLe.
CMPILR,
asks you a series of questions concerninq
For fuLl inFormation on compiling and linking proqrams, see
of the ALobiPASCAL User's ManuaL (OWM—OO100—OB).
FORMAT:
.PRUN iLespec
where fiLesoec seLects the .PCF file you want to run.
(30 April 1Q81)
Chapter
4
PRUN (Cont'd)
Paqe 2
DEFAULTS:
uses
PR(JN
the default extension .PCF. U you do not specify a device
the specified fiLe in the dewir.p and
and account, PRUN Looks for
account
are
you
account, CP,D1.
toqqed into; next it looks in your oroject Library
FinaLLy, it searchs for the flle th the System PASCAL
Library account, DSKfl:[7,51.
OPERATION:
1.
To execute
a
compiLed and
Linked PASCAL proqram, enter PRIJN
followed by the soecification of the pronram file you want to
execute; then type a RETURN. For exampLe:
.PRUN SAL4RY
Now PRIJN dispLays this messane:
ALphaPascal V2.fl
and the, executes your oroqram.
2.
If you
wish
ControL-C.
to interrupt
You now see:
Interrupt
Now
YOU
RETURN.
execution
of
your
proqram,
type
a
(?=HeLp):
may enter one of tour codes: ?, Q, R, or 0. Then type a
For exanpie:
Interrupt
(?fieLo): ? ED
Q = Quit
B = Backtrace
P = Resume
Interrupt
A
('=He1p) Q@
' teLs PRIJN to disoLay a List of the codes you may enter, If you
enter Q. PRUN returns you to AMOS command LeveL; an R causes PRUN
to resune proqram execution, and a B teLLs PRUN to backtrace your
program. (To backtrace a pronram means to List in the order caLled
aLL proedures and functions invoked durinq oroqram execution up to
the point of interruption, with the Last—caLLed procedure or
function listed first, For mora inforrt,ation on backtracinq, see
chapter 4 of the ALpbaPASCAI. User's ManuaL.)
(3D ApriL 1981)
NUN (Cont'd)
Paqe 3
ERRORS:
You may see several error messaqes when using PRIJN_ The most serious of
these messacles has to do with library version checkinq:
?Wronq vErsion of xxxx for use with yyyy
where
xxxx
is the external Library and yyyy is the .PCF flip
want to €xecute.
A
program
that
was
Linked
with
one
you
external
library cannot be run with an older version of that library or with
different library; instead, you must re—Link the
program with the current external library you want to use.
a compLeteLy
Error messaces may aLso take the form:
Message in Function—or—procedure at IPC = xxx within Fi lespec
indicates the error that occurred, "Function—or—
procedur€" indicates the function or procedure in which the error
occurred, "IPC = xxx" indicates the Interpreter Proqram Counter
number (i.e., the place in the proqram) at which the error occurred.
LastLy, PRUN qives the "FiLespec,' the fiLe specification of the
where
'Message
proqram ou were executing. For exampLe:
?SQRT(x) where x < 0 in PROGRAM at IPC = 64 within TEST,PCF
a
List of the possibLe error messaqes, see the section titLed
'Error HandLinq Procedures and Variables,' in Chapter 14 of the
For
AIPhaPASCAL User's Manual.
You may aLso see standard AMOS monitor messaqes.
For example:
?Cannot OPEN fiLespec — file not found
PRUN
couLd not
find the program fiLe you specified. Make sure
that you are logqed into the proper account and device,
Check the
section titLed "DEFAULTS
above for information on the default
device and account specifications used by NUN.
?Cannot OPEN filespec — device does not exist
You incLuded a device spcification in your file specification,
that device does not exist. Make sure that you have correctly
specified the device (e.q., make sure that you did not type 'DKSl:'
instead of "DSKl :") . If you are sure you are specifying the device
correctLy, check with the System Operator to see why the device is
not available.
but
(30 April 1981)
PRIJN (Cont'd)
Paqe 4
CHARACTERISTICS:
PRUN execuves comoiLed and linked PASCAL programs.
the default extension .PCF. If you omit an account and device
specificat-on from your fiLe specification, PRUN searches in: the
account arid device you are logged into; your project Library account;
Assumes
and, the PhSCAL Library account, DSKfl:C7,51.
PRUN is re-entrant and seriaLly re—usabLe.
(30 April 1981)
Pu
FUNCTION:
(Jodates
iH Le.
a PASCAL program by Linkir,q a specific module into the program
MINTS/RESTRICTIONS:
Invokes the AIPhaPASCAL linker, PLINK, to Link a nodule into a proqrarn.
PU is a command file which makes the ALPhePASCAL Linker, PLINK, easier
to use in many appLications when Linking a single module into a
program.
You supply PU with the name of the moduLe you want to update, foLlowed
by the name of the .PCF fiLe you want to Link the moduLe into.
invokes
PU
PLINK,
qivinq it the name of the .PCF file you specify as
its code file. PU then teLls PLtNK to update the .PCF file.
PU telLs PLINK not to chanqe the standard library
.PCF file while updatinq it.
For
more
information
on
updatinq
a
PASCAL
AIPhaPASCAL User's Manual (DWM—000100—07).
code
file
proqram,
for
the
refer to the
FORMAT:
.PU Moculespec FiLespec
where Modulespec specifies the module you want to update. and
specifies the .PCF fiLe you want to link the moduLe into.
FilesDec
DEFAULTS:
If you omit the file extension, PU assumes the, extension
omit the device and account specifications. PU assumes the
account you are loqqed into.
.PCF.
If you
device
and
OPERATION:
1.
PU
followed by the name of the module you want to update,
folLowed by the name of the .PCF fiLe you want to Link the 'nodule
to. Then type RETURN. For example:
Type
(30 April 1981)
PU (Cont'd)
Paqe 2
.Fu COMPAR SALES RET
mcduLe
name you specify must be a PASCAL moduLe that has been
previoLsLy compiled; that
is, COMPAR.PO1. COMPAR.n02, and
COMPAR.Pfl3 must already exist.
The
2.
PU now invokes PLINK, and passes the fiLename SALES to PLINK
code file.
as
its
As PLINK beqins, you see a dispLay sometbina like this:
.PRUN PLINK
AiphaPascaL 'J2.O
Code fiLe = SALES
Do you wsh to 1) replace or 2) update SALES.PCF? 2
PU autciiaticaLly supplies the 2, telLinq PLINK to update SALES.PCF.
3.
PLINK continues:
The standard library code file for SALES.PCF is STDLIB.PCF
Do you wish to chanqe this? N
autmaticalLy supplies the N, teLLina PLINK not to chanqe the
standarj Library code fiLe for SALES.PCF.
Pu
4.
Now PLMK finishes:
PL?ase specify files to be Linked into SALES,
Dne per Line, ending in a b'ank lne
FiLe
1
= COMPAR
File 2 =
Loading nroqram and Library dictionaries
KEepinq qLobaL func/proc PALES
Processina COMPAR
T_inkinq in qLobal func/proc MAX
Tr3nsterrlnq temporary fiLe to new code fiLe
A1_ES completed
For more information on PLINK and what each line of the display
means,
see the ALphaPASCAL user's Guide, (DWM—OO1OO—D).
ERRORS:
generates no error messages itself.
standard PASCAL error messaqes. For a list
Pu
of
However, you may see the
those error messaqes,
see Appendi): C of the ALPhaPASCAL User's Guide, (DWM—OO100—08)
(30 April 1981)
PU (Cont'd)
Paqe 3
CHARACTERISTICS:
Updates
file.
a PASCAL program by Linking a specific module into the program
Invokes the PASCAL tinker, PLINK.
updates a .PCF file by causinq PLINK to Link a moduLe to the PCF. tUe.
(30 April 1981)
qdt
FUNCTION:
ALLows you to examine and modify locations in memory.
HINTS/RESTRICTIONS:
If
your
system
bank switches memory, you may only examine and change
Locations in your own memory bank and in system memory.
QOT understands onLy upper case letters.
All numeric input must ALWAYS
be in octal, even if the system is using hexadecimaL for
dispLays.
your
numeric
NOTE:
This is a very dangerous program to use, because you can easily
destroy the monitor in system memory. (Of course, you can reLoad a
vaLid copy by resetting the system.)
primary use for QDT is not to debug programs, but to examine the
contents of memory Locations in the monitor or at the Locations used by
The
the I/O ports.
177777.)
(I/O ports start at 177400 in memory and proceed up
to
can use QDT in much the same way that you would use DDT's absolute
mode, but QDT is much smaller than DDT and aLlows you to examine and
change memory Locations anywhere in memory.
You
FORMAT:
.QDT
OPERATION:
1.
Type QDT folLowed by a RETURN:
.QDT
2.
Now you can begin to enter QDT commands.
3.
To exit QDT, use the E command:
Unless you specify a
memory address, QDT assumes that the first memory Location you
want to display is at address zero.
E
QDT now returns you to AMOS command Level.
(1 October 1979)
QDT (Cont'd)
Page 2
COMMAND SUMMARY:
Change to byte mode so that you can modify singLe bytes.
The current location counter changes by one.
B
Change to word mode so that you can change full words.
The current location counter changes by two.
W
Exit from QDT.
E
DispLay the current word as two octal bytes.
TAB
Takes the contents of the current Location and uses
those contents as the address of the next location to be
displayed.
RIJBOUT
CanceLs
current
symbol to tell
ignored.)
•
command
you
that
or
the
number.
command
(DispLays an XXX
line is being
current Location to the one specified by the
octal number that precedes the slash. No change if you
Changes
do not incLude a number.
Stores
nRETURN
the
Location.
nLineFeed
specified
Works Like a RETURN,
but
counter.
Works
Like
counter.
Line—feed,
octal
number
increments
in
the
current
current
Location
but decrements current location
ERRORS:
If QDT does not understand a command, it echoes it back to you
question mark. For example:
with
a
V
CHARACTERISTICS:
UsefuL for testing devices on the S—lOU bus, by alLowing you to examine
and modify the memory Locations used by the I/O ports.
Returns your terminal to AMOS command Level.
(1 October 1979)
queue
FUNCTION:
within the system initialization command fiLe to increase the
number of bLocks alLocated to the monitor queue. Use at AMOS command
Level to find out how many monitor queue bLocks are avaiLabLe for use.
Use
HINTS/RESTRICTIONS:
Various portions of the system (e.g., the Line printer spooler) use the
monitor queue system. The monitor queue is also avaiLable for use by
user programs. The initial size of the queue is 20 eight—word blocks.
number
The
perform.
of
queue blocks you need depends on the tasks you need to
system initiaLization command fiLe to
monitor queue. (Remember, however, that
increasing the number of queue bLocks increases the amount of memory
Use the QUEUE command in the
increase the size of the
used by the monitor.)
To
find out how many queue blocks are avaiLabLe, use the QUEUE command
at AMOS command Level.
FORMAT:
.QUEUE
or:
QUEUE ii
OPERATION:
1.
To find out how many
queue bLocks are availabLe:
command level type QUEUE foLlowed by a RETURN:
at
AMOS
.QUEUE 4)
97 Queue bLocks availabLe
2.
increase the number of blocks in the queue, use one of the
system text editors to edit DSKO:SYSTEM.INI[1,4]. Before any
To
SYSTEM
commands, add one QUEUE command foLLowed by the number
For exampLe:
of bLocks that you want to add.
QUEUE 15
The exampLe above adds 15 eight—word bLocks to the
20
bLocks
initialLy assigned to the queue; this generates a queue of 35
blocks.
(1 October 1979)
QUEUE (Cont'd)
Page
2
ERRORS:
[No queue blocks aLLocatedJ
No queue bLocks are currentLy available for use.
CHARACTERISTICS:
QUEUE is both a user command and a system initialization command.
QUEUE returns your terminal to AMOS command level when you use it as
user command.
(1 October 1979)
a
raza
FUNCTION:
Performs a random write/read test on disk media.
HINTS/RESTRICTIONS:
NOTE: RAZA destroys the data on the disk you are testing.
tests your disk by randomLy writing and reading data on it;
therefore do not test a disk that contains data you want to keep!
If
RAZA
RAZA
to test DSKO:, it destroys your System Disk and you
cannot boot the system from that disk again until you copy new system
software over to it from another disk.
teLL
you
FORMAT:
.RAZA
OPERATION:
1.
Type RAZA fotLowed by a RETURN:
.RAZA
2.
RAZA
asks
you
want to test:
for the specification of the logical unit
you
.RAZA
DEVICE NAME (DSK,HWK,ETC): DSK?
DRIVE NUMBERS TO RAZA (D,2,3,ETC): 2
In the example above, we've asked RAZA to test
DSK2:. To end the test, type a ControL—C.
the
disk
in
ERRORS:
VERIFICATION ERROR FOR DRIVE n RECORD
If RAZA finds that any of the
data it has written does not
(e.g., DRIVE 2) holds the bad
record of the disk contains the error
verify, it tefls you which drive
disk,
and teLLs
you
(e.g., RECORD 1000).
which
CHARACTERISTICS:
Destroys any data aLready on the device.
ControL—C.
(1 October 1979)
Continues untiL
you
type
a
redall
FUNCTION:
Performs
a disk diagnostic test by reading alL (or a specified number)
of the records on a disk and reporting any read
errors.
HINTS/RESTRICTIONS:
REDALL does not harm the data on your disk.
FORMAT:
.REDALL Devn:N
where Devn: specifies the disk you want to read and N gives the number
of disk records you want to read, If you omit N, REDALL reads
alL
records on the disk.
OPERATION:
1.
Type REDALL folLowed by the specification of the
device you
want to test and the number of
records you want to read. DO
NOT separate the device specification and N with a
space.
Type a RETURN.
For example:
.REDALL DSK1:100
2.
REDALL
now telLs you the number of records it is reading. If
you omit a number after the device specification, REDALL reads
all records on the disk.
After it has finished,
an EXIT message and returns to the monitor level.
it
dispLays
.REDALL DSK1:
READING 9696 RECORDS
EXIT
3.
REDALL tells you if any read errors occurred by displaying the
appropriate error messages on the screen.
ERRORS:
You may see the standard system error messages that
resuLt from invalid
For example:
device specifications.
?Cannot READ Devn: — device does not exist
You
specified a device that REDALL does not
your spelLing. Then use the SYSTAT command to see recognize.
a List of
mounted devices on the system.
(1 October 1979)
Check
valid,
Page 2
REDALL (Cont'd)
?Cannot READ Devn: — disk not mounted
specified is
The device you
presently mounted.
a
vaLid device, but it is not
Use the MOUNT command.
CHARACTERISTICS:
Performs a disk—read diagnostic test that does not
your disk.
Returns your terminaL to AMOS command eveL.
(1 october 1979)
harm
the
data
on
rename
FUNCTION:
Renames one or more files that exist within the same account.
HINTS/RESTRICTIONS:
The new file specification you assign to a file cannot contain
a PPN or
a device specification. You can only rename files within an account.
RENAME recognizes speciaL devices.
For example:
.RENAME Newfi lespec=MEM:Oldfi Lespec
renames
tabLe.)
?
memory
modules.
(MEM: must be defined in your system device
RENAME also recognizes wild card symboLs and ersatz devices.
For exampLe:
.RENAME *OLDBAS:* SBR
each file in the BASIC Library Account, DSKD:C7,6], that has
.SBR file extension to a .OLD extension.
renames
a
You may use the standard wiLdcard symbols in your file specifications.
If you use wildcard symbols in your Newfilespec, the wiLdcard symbols
are replaced by
the
appropriate
elements
specified
by
the
OLdfilespec(s). For example:
.RENAME *.OLDa
renames the files
UNI.BAS to UNI.OLD.
BAS
TEST.BAS
RENAME is
to TEST.OLD, DIGIT.BAS to DIGIT.OLD, and
a
wildcard fiLe command.
For more
information on the use of RENAME, refer to Section 9.3, "Renaming Files
(RENAME),' in the AMOS User's Guide,
(DWM—OO100—35).
FORMAT:
.RENAME Newfilespec=OldfiLespec1coldfilespecN}{/Switch1{/Sithfl}
where
OldfiLespecl—OLdfilespecN seLects the one or more files that you
want to rename and Newfilespec determines their new names.
A
/Switch
is an option request (see OPTIONS).
DEFAULTS:
uses
the
device and PPN you are currently Logged into as file
Default switches are /NODELETE and /NOQUERY.
Defaults for unspecified fiLenames and extensions are *.*.
RENAME
specification defaults.
(1 October 1979)
RENAME (Contd)
Page 2
OPTIONS:
You
may
sdect
the
foLLowing
options
option code in your command Line:
/QUERY
/NOQUERY
or /14
or /NOQ
/DELETE
or ID
by including the appropriate
Request confirmation to rename.
Rename without asking for confirmation.
It tiLe with new name already exists,
deLete it before performing renaming.
It new name is in use, dont perform
/NODELETE or /NOD
renaming.
OPERATION:
1.
Type RENAME folLowed by a Newtilespec, an equaL sign, and
or more OLdfilespecs. Type a RETURN. For exampLe:
one
.RENAME TT Y?? .*DVR??.*
DVR12.PRG to TTY12.PRG
DVRAA.TXT to TTYAA.TXT
DVR67.MAC to TTY67.MAC
TotaL of 3 tiLes renamed
As RENAME renames the files, it tells you both the oLd and the
new
names
of the files. At the end of the process, it teL's
you how many files were renamed.
2.
It you use the IQUERY option, RENAME asks you to
renamings.
confirm
the
(To request confirmation of each renaming, place
the /Q option directLy after the RENAME command; to request
confirmation of the renaming of a particular fiLe, pLace the
/Q option after the specification of that file.)
IIRKFIL.BAS to BASTXT.BAS?Y
WRKFIL.RL)N
WRKTXT.TXT
WRKTXT.LST
to BASTXT.RLJN?Y
to BASTXT.TXT?I'I
to BASTXT.LST?Y
TotaL of 3 fiLes renamed
.RENAME *.FTX*.TXT,*.LST/Q
REPORT.TXT to REPORT.FTX
TABLE.TXT to REPORT.FTX
REPLST.LS T to REPLST.FTX?Y
TABLST.LS I to TABLST.FTX?Y
Total of 4 fiLes renamed
Answer the question mark with a V for YES, or an N for NO; do
not type a RETURN after your answer. You may type a ControL—C
to stop further renamings and return to AMOS command LeveL.
(1 October 1979)
RENAME (Cont'd)
Page 3
ERRORS:
?Cannot find DSKO:SCNWLD.SYS11,43 or MEM:SCNWLD.SyS
RENAME
needs this file to process wiLdcard symbols in file
specifications. The system can't find the file or you do not have
enough room in your memory partition to load the file.
?Specification error
RENAME
doesn't understand the format of your command Line; the
- symbol points to the Location of the item that confused it.
?Cannot READ Devn: — device does not exist
?Cannot READ Devn: — disk not mounted
The device specified by Devn: is not present in the DEVTBL
of the SYSTEM.INI, does not have a driver in area [1,6] of
the System Disk, is not file—structured, or is not mounted.
command
%No file—oriented device corresponding to Devn: is mounted
You specified a device, but did not include a unit number.
RENAME
is not able to find a logical unit that matches your
specification. Check your speLLing.
%Account does not exist — [p,pnJ
The indicated PPN does not exist; to create
SYSACT.
it
you
must
use
?More than one output specification
You can't rename a fiLe to two names; use only one NewfiLespec.
?Device or lp,pnJ specifications on output are ilLegal
Your OLdfiLespecs and Newfilespec must contain the same PPN and
device specifications.
?Missing output specification
You must give an output specification so that RENAME knows what
to use as the new names for your fiLes.
%No fiLes renamed
couldn't find any files that matched your Oldfilespecs
or wasn't abLe to carry out the renaming procedure because of an
error.
RENAME
?Cannot RENAME Otdfilespec — file already exists
You
tried to rename a fiLe, but a file of
exists.
If you want RENAME
renames, use the ID option.
to
delete
CHARACTERISTICS:
You can only rename files within the same account.
(1 October 1979)
that name already
existing
files
when
it
RENAME (Cont'd)
RENAME
is
Page 4
a
wildcard
file
ersatz devices, and wildcards.
command.
It recognizes special devices,
defauLt switches are /NOQUERY/NODELETE.
The
defauLt
fiLe
specifications are *.* and the account and device you are Logged into.
The
Returns your terminal to AMOS command leveL.
(1 October 1979)
FUNCTION:
18 frequentLy
from the System Disk.
Loads
used
system programs into your memory partition
HINTS/RESTRICTIONS:
RES.CMD is a command fiLe that toads into your memory
programs from account DSKO:C1,4]:
partition
these
LOG,
QDT,
SYSTAT,
SYSACT,
DSKDMP, DSKFIL, DSKANA, DSKCPY, MAP,
DIR, SCNWLD.SYS, DEL, REDALL, COPY, RENAME, ERASE, TYPE, MOUNT.
Users with fLoppy—disk based systems wilL use RES.CMD to Load important
programs into memory from their System Disk so that they can remove the
System Disk and stilL have the use of their system software.
NOTE: You can use one of the system text editors to create your
.CMD file to load into memory the specific programs you need.
own
FORMAT:
.RES ?
OPERATION:
1.
Type RES foltowed by a RETURN:
.RES
2.
The
RES command file uses the LOAD command
used programs into your memory partition.
to toad frequently
ERRORS:
For each program that RES tries to load
exist, you see this error message:
into
Filespec NOT FOUND
For example:
DSKO:QDT.PRG[1,4J NOT FOUND
RES then goes on to Load the next program.
(1 October 1979)
memory
which
does
not
RES Ccont'd)
Page 2
CHARACTERISTICS:
RES
is
a
DSKO:12,2].
command
fiLe
in
the system Command FiLe Library account,
Returns your terminaL to AMOS command level.
1
(1 October 1979)
revive
FUNCTION:
ALlows
you
command.
to
wake up a job that has been put to sleep by the SUSPND
FORMAT:
.REVIVE Jobname
where Jobname specifies the job you wish to return to active status.
OPERATION:
1.
Type REVIVE foLlowed by the name of the
awaken; then hit RETURN. For exampLe:
job
you
want
to
.REVIVE JOB?
ERRORS:
(NONEXISTENT JOBJ
You
entered an invalid job specification. (For example you
typed REVIVE foLlowed by a RETURN or you misspelLed the job name.)
Check your spelLing; if it is correct, use the SYSTAT command to see
List of vaLid jobs on the system.
a
CHARACTERISTICS:
Returns your terminaL to AMOS command LeveL.
(1 October 1979)
reAdnd
FUNCTION:
Rewinds a magnetic tape unit operating under the control of the AM—600.
HINTS/RESTRICTIONS:
IMPORTANT
NOTE:
DO
NOT use REWIND when another
Such an action causes unpredictable results.job is using the tape
unit.
You may specify one tape drive with a unit number of 0
MTIJO: or MTIJ5:).
The
to
7.
(e.g.,
magnetic tape unit you access must be defined in the system device
(See the DEVTBL reference sheet.) The program MTSTAT.SYS must
tabLe.
be
in
system
memory.
(Use
the
command within the system
initialization command file to incLude MTSTAT.SYS
in system memory.)
SYSTEM
NOTE: A magnetic tape is said to be at Load point when the metaLlic
film at the start of the tape is positioned at the read
head.
FORMAT:
.REWIND Devn:
where Devn: is the magnetic tape unit you want to rewind.
OPERATION:
1.
Make sure the tape you want to rewind is mounted.
2.
Type REWIND foLLowed by the specification of the magnetic tape
unit you want to rewind.
Then type RETURN.
For exampLe:
.REWIND MTLJ6:
3.
You now see one of the foLLowing REWIND messages:
a.
Tape is rewinding now
This message is
the most common and indicates that
The rewind wiLL
the tape is in the process of rewinding.
be finished in a moment.
b.
Tape is aLready rewindin9
are trying to rewind a tape that is already in
the process of rewinding. The rewind wiLL be finished in
You
a moment.
(1 October 1979)
REWIND (Cont'd)
c.
Page 2
Tape cannot be rewound — it is at Load point.
The
tape has aLready been rewound or has never been
moved from its initial position at Load point.
REWIND returns you to AMOS command level
stiLL rewinding.
whiLe
the
tape
is
ERRORS:
You can see the foLLowing system error messages:
?File specification error
REWIND
did
not
understand your command Line (e.g., you typed
Re—type the Line.
REWIND foLlowed by a RETURN).
?Cannot OPEN Devn: — device does not exist
REWIND did not recognize the magnetic tape unit you specified.
sure that the device you specified is defined in the system
device tabLe. (See the DEVTBL reference sheet.)
Make
You can also see the foLlowing REWIND error message:
Tape cannot be rewound — it is at Load point
The tape has aLready been rewound.
CHARACTERISTICS:
Requires the magnetic tape unit you access to be defined in your system
device table.
MTSTAT.sys must be in system memory.
(1 October 1979)
rndd
FUNCTION:
Performs a random—read disk diagnostic test.
HINTS/RESTRICTIONS:
RNDRED
randomLy
seLects
a
disk
track
operation on a random record on that track.
that it finds.
and performs a seek and read
It Lists any
read
errors
Runs untiL you type a Control—C or reset the system.
Does not harm the data on the disk.
FORMAT:
.RNDRED Devn: 4)
where Devn: specifies the device you want to test.
OPERATION:
1.
Type
RNDRED foLlowed by the specification of the Logical unit
you want to test. Type a RETURN. For exampLe:
.RNDRED AMS1 :
2.
4)
RNDRED dispLays no data unLess a read error occurs,
case it dispLays the appropriate error message.
in
which
ERRORS:
You
can
see
the
standard
invaLid device specification.
system error messages that result from an
For example:
?Cannot READ Devn: — device not mounted
The device you want to test is not mounted, and RNDRED cannot
read data on the disk untiL you mount it using the MOUNT command.
CHARACTERISTICS:
Does not harm the data on the disk you are testing.
Returns your terminal to AMOS command Level when you type a ControL—C.
(1 October 1979)
run
FUNCTION:
Runs compiled BASIC programs.
•H I NTS /R ESTR IC TIONS:
Invokes the runtime package portion of the BASIC Language processor.
RUN.PRG
is reentrant; the System Operator may incLude it in system
memory via the SYSTEM command in the system initialization command
file.
If RUN is in system memory, each user who wants to use it may
then use the copy in system memory instead of having to
his own memory partition.
Load
it
into
RUN
only on programs that you have previousLy compiled. For
information on writing BASIC programs, using BASIC in interactive mode
(BASIC.pRG), and using the compiler portion of the BASIC language
processor CCOMPIL.PRG), refer to the AIphaBASIC
User's
Manual,
Use
(DWM—OO100—O1).
FORMAT:
.RLJN FiLespec 4)
FiLespec
where
execute.
specifies
the
compiled
BASIC
program
you
want to
DEFAULTS:
Assumes a file extension of .RUN.
OPERATION:
1.
by
the specification of the file
contains the compiLed BASIC program you want to execute.
type a RETURN.
For example:
Type RUN folLowed
that
Then
.RUN INVOIC.RUN ?
(NOTE:
CompiLed programs usualLy have the .RUN extension.)
The BASIC runtime package now executes your program.
2.
To interrupt program execution, type a ControL—C.
.RUN ACCNT.RUN 4)
Enter new account number:
[You type a Control—c here)
Operator interrupt in AcCNT.RUN
(1 October 1979)
RUN CContsd)
Page 2
ERRORS:
You nay see any of the standard BASIC error messages.
Refer to the
back of the ALphaBASIC User's ManuaL for a List of the BASIC messages.
CHARACTERISTICS:
Assumes a file extension of .RUN.
(1 October 1979)
save
FUNCTION:
ALLows
you
to
save
memory
U Les.
modules in your memory partition as disk
HINTS/RESTRICTIONS:
Memory moduLes bear the same name and extension as their corresponding
fiLes on the disk. (Use the MAP command or DIR MEM: to find out what
moduLes are in your memory partition.) SAVE wilL not save moduLes as
disk fiLes in accounts or on devices other than the ones into which you
are currentLy Logged.
SAVE understands the witdcard symbols ? and *.
FORMAT:
.SAVE FiLespecl{,FiLespec2,...FilespecN)(/Rename—extension)
where Filespecs seLect the moduLes you want to save as disk files.
DEFAULTS:
assumes a
fiLe extension of *. If
SAVE saves aLt memory modules of that
SAVE
extensions.
you specify just a filename,
name
regardLess of their
OPERATION:
1.
Type SAVE folLowed by a
List of FiLespecs identifying the
memory moduLes you want to save. Then type a RETURN:
.SAVE *.SYS,*.PRG 4
SCNWLD.SYS
LOG.PRG
QDT.PRG
SAVE dispLays a list of the memory modules being saved as disk
files. These fiLes appear in the account into which you are
currentLy Logged.
2.
If you ask SAVE to transfer a copy of a module to your account
a
disk file of that name aLready exists, SAVE erases the
original disk fiLe and replaces it with a copy of the memory
and
module:
(1 October 1979)
SAVE (Cont'd)
Page 2
.SAVE TLC 4)
ERASE TLC.PRG, SAVE TLC.PRG
In
the exampLe above, a tiLe named TLC.PRG aLready existed in
the account; SAVE erased it before saving the memory module
TLC.PRG.
3.
If you do not want SAVE to erase an existing file, use the
rename option. FolLow the List of FiLespecs with a sLash and
any extension you choose.
Before saving any memory moduLes,
SAVE wilt rename to the new extension any existing fiLes with
the
same
names as those memory moduLes.
For exampLe, assume
that you have a file in your account named EXIT.SBR:
.SAVE EXIT.SBR/OLD 4)
RENAME EXIT.SBR,
SAVE EXIT.SBR
The example above
renames your existing fiLe EXIT.SBR to
EXIT.OLD; then it saves the memory module in your partition as
fiLe EXIT.SBR.
(It a fi Le named EXIT.OLD already exists in
the account, the example above erases it before renaming
EXtT.SBR to EXIT.QLD.)
ERRORS:
generates no error messages.
SAVE lists alL modules that it
saves; if you do not see such a list, it means that SAVE wasn't able to
save the modules you specified.
SAVE
CHARACTERISTICS:
AlLows you to rename an existing disk file if the moduLe you
the same specification as that disk fiLe.
Returns your terminaL to AMOS command LeveL.
(1 October 1979)
save
has
send
FUNCTION:
AlLows you to exchange messages between terminaLs on the same system.
HINTS/RESTRICTIONS:
TerminaLs which are not connected to the same computer may not exchange
messages and a
terminaL wilL onLy receive a message if it is not
protected by a "guard" program and if it is at AMOS command leveL or in
terminaL input mode. Messages cannot be Longer than one Line.
Your terminaL must be at AMOS command Levet if you want to use SEND.
FORMAT:
.SEND Jobname Message
where Jobname is the job to whom you want to send a Message.
OPERATION:
1.
Type SEND, the name of the job that you
with, and the message.
that you are Joel:
to communicate
For example, assume
want
Type a RETURN.
.SEND JOB3 HOW LONG IS THAT LISTING YOU'RE PRINTING?
2.
If the terminal attached to JOB3 is not guarded and is at AMOS
command LeveL or in terminal input mode, the message appears
on JOB3's terminaL:
JOB1
— HOW LONG IS THAT LISTING YOU'RE PRINTING?
(NOTE:
the name of the job that sent the message appears at
the front of the message.) Now JOB3 can return an answer by
aLso using the SEND command (e.g., .SEND Joel ABOUT 17 PAGES).
3.
when
SEND
is
command Level.
(1 October 1979)
finished,
it
returns
your
terminaL to AMOS
SEND (Cont'd)
Page 2
ERRORS:
You may see the folLowing error messages:
?Job not found
You tried to send a message to a nonexistent job.
Make
sure
that you speLLed the name of the job correctLy and that the job does
indeed exist on this system. (You can use the SYSTAT command to see
what other jobs are on the system.)
?Job specification error
SEND
is confused by the job name that you suppLied. For
exampLe, you see this error message if you type SEND foLlowed by a
RETURN.
?Busy
SEND
cannot send the message to the job you specified because
that job is not at AMOS command Level or is not in terminal input
mode.
?Job has no terminal attached
The
job
with
which
you
want
to
communicate
attached to a terminal; there is nothing on which
message.
to
has not been
dispLay your
?Guarded
You
are trying to send a message to a job that is protected by
a program that guards it from messages.
CHARACTERISTICS:
Requires that the job with whom you want to communicate be on the same
system as your terminaL, not be guarded, and be in terminaL input mode
or at AMOS command leveL.
Returns your terminaL to AMOS command Level.
(1 October 1979)
set
FUNCTION:
You
can use SET to choose various system terminaL—handLing options for
your terminaL or to view the options pre'iousy set. You can use SET
to specify the type of form that ouqht to be mounted on a specific
system printer. Using SET, you can aLso set the bits per inch rate for
reading or recording a specific magnetic tape unit.
HINTS/RESTRICTIONS:
SET sets various ftaqs in your job tabLe so that each user of the
system can choose different terminal—handLing options.
For exampLe.
the defauLt number base the system uses for numeric dispLay is octaL.
You can use the SET command to change the base that the system uses for
your job's numeric dispLays by using the .SET HEX or .SET OCTAL
commands.
—
—
You can aLso use SET to specify the kind of form you want mounted on a
printer. The PRINT command then checks to make sure that the form—type
specified by the user is the same as the type of form you have defined
with SET for that printer.
(See the PRINT reference sheet for
information on the PRINT/FORMS option.)
You can set the density at which data is read or recorded by a maqnetic
unit to either 800 or 1600 bits per inch (SRI) using the .SET
BR! command. This command sets a fLag in MTSTAT.SYS indicating the
desired density.
The density is actuaLLy set at the time of the next
I/O operation by the maqnetic tape unit driver.
tape
NOTE: An error occurs if you try to read a mannetic
is in
tape was recorded.
BPI
vaLue
taoe
when
SET
a
effect which is different than the aPI at which the
FORMAT:
.SET @D
to
dispLay the current options; or:
.SET Option !1
where
Option teLls SET which ftaq to modify in your job tabLe; or:
.SET FORMS Printer—name Form—name
where Form—name specifies the kind of form you
want
specific printer (specified by Printer—name); or:
(Chanqed 30 AoriL 1981)
to
assiqn
to
a
SET (Cont'd)
Paqe 2
.SET DPI Oevn:NNNN I±D
a device specification that selects a maqnetic tape unit
NNNN is the desired tape density of either 800
or 1600 bits per inch.
where Devii: is
(drives
0
through 7).
DEFAULTS:
The system comes up with the folLowing options as the defauLt: OCTAL,
ECHO,
NOVERIFY, NOGUARD, NODSKERR, CTRLC. The defauLt form—type for a
specific printer is set by the ørinter initialization fiLe for that
printer.
initial tape density at the time of system start—up is
The
1600 DPI.
OPTIONS:
The current options that you may choose are:
EnabLe Control—C (the user—interrupt command).
DisabLe ControL—C (the user—interrupt command).
DispLay aLL non—decimaL numeric dispLays in octaL.
Dispay aLt non—decimal numeric dispLays in hexadecimaL.
CTRLC
NOCTRLC
OCTAL
HEX
Display terminaL input.
SiLence terminal input.
ECHO
NOECHO
Report soft disk errors and retries that occur.
Silence reports of soft disk errors and retries.
Verify every write operation by re—reading the data
DSKERR
NODSKERR
it
and
making sure
has
a
correct checksum.
This does not
compare the written data with data in memory.
(OnLy
supported by the AM—SOD and AM—410.)
VERIFY
NOVERIFY
Don't verity write operations.
GUARD
Don't aLI.ow other terminaLs
terminal via the SEND command.
NOGUARD
ALLow other terminaLs to send messages to your terminaL.
to
send
messages
to
your
Specify the kind of form to assign to a specific printer.
Sets the magnetic tape unit bits
per inch rate for data
FORMS
BPI
reading or recording on tape.
Remember:
These options are onLy set for the job that used the SET command.
OPERATION:
1.
Type SET folLowed by a RETURN:
.SET D
Current settings are:
OCTAL
ECHO
DSKERR
NOVERIFY
NOGIJARD
SET displays the options currentLy in effect.
(Changed 30 April 1981)
CTRLC
s...)
Page 3
SET (Cont'd)
2.
To
the
change
options, type SET foLlowed by an option.
SET
Then type a RETURN.
For exampLe:
.SET HEXED
See OPTIONS, above, for a List of the options you may seLect.
3.
To assign a form—type to a printer, type SET FORMS foLLowed by
For
the name of the printer, the form—name, and a RETURN.
e x ampLe:
.SET FORMS QUME CHECKS D
The
command above assigns the form—type CHECKS to the printer
named QUME.
(for a List of names of printers on the system,
with the System Operator.) The form—type can be any
one— to six—character name you choose.
check
4.
set the recordinq density of a maqnetic tape, type SET BPI
folLowed by the device specification that seLects the magnetic
tape unit you want to access (drives 0—7) and the density
required (800 or 1600 BPI). For example:
To
.SET 13P1 MTU1:800ED
This command prepares MTUI to chanqe the read or write data at
a density of 800 bits oer inch. To find a List of magnetic
tape units on the system, type DEVTBL foLLowed by a RETURN.
The system wilL handLe a maximum of S maqnetic tape drives.
ERRORS:
(INVALID FUNCTION]
Check your
SET doesn't recognize the option you've chosen.
and retype the command line. If you are using the SET BPT
option, this message indicates that you have suppLied an invalid
device specification or that you have entered an invaLid BPI vaLue.
Make sure that you have designated the maqnetic tape unit correctLy
(For a List of
and that
you have specified a BPI of 800 or 1600.
speLLing
vaLid MTUs, type DEVTBI.. foLlowed by a RETURN.)
?Printer not found
You tried to use SET to associate a form—type with a printer,
but SET doesn't recognize the printer name you specified. Check
your speLLinq; then check with the System Operator for a List of
printers on the system.
(Changed
0 April 1Q81)
SET (Cont'd)
Page 4
CHARACTERISTICS:
AlLows you to: choosp various system output options for your job; see
the options currentty in effect; define a form—tyøe to be mounted on a
specific printer; or SET the rpad or record bits per inch rate on a
maqnetic tape unit.
(Changed 30 ApriL 1981)
size
FUNCTION:
TeLLs you the size (in bytes) of your disk file.
HINTS/RESTRICTIONS:
TeLLs you the number of bytes in the specified fiLe (in decimal).
FORMAT:
.SIZE FiLespec ,)
where Fitespec specifies the fiLe whose size you want to know.
DEFAULTS:
SIZE
assumes
the
extension of .PRG.
account
and
device you are Logged into and
a file
OPERATION:
Type SIZE folLowed by the specification of the fiLe whose size
1.
you want to see.
Then type a RETURN.
For example:
.SIZE FORM.TXT 4)
SIZE IS 1483 BYTES
ERRORS:
You may see several of the more common system error messages
use SIZE.
For exampLe:
when
you
?Cannot OPEN FiLespec — fiLe not found
SIZE
was
not able to find the fiLe you specified.
speLLing and make sure that the account
were correct.
and
device
Check your
specifications
?Cannot READ FiLespec — device does not exist
SIZE doesn't
recognize the device you specified. Check your
speLLing. To see a List of vaLid system devices, type DEVTBL
foLlowed by a RETURN.
CHARACTERISTICS:
Returns your terminaL to AMOS command Level.
(1 October 1979)
skip
FUNCTION:
Skips to the next fiLe mark on a tape mounted on a magnetic tape unit.
HINTS/RESTRICTIONS:
Use SKIP to skip over fiLes or a header bLock on a magnetic tape.
IMPORTANT
NOTE:
DO
specified tape drive.
NOT
use
SKIP white another job is accessing the
Such an action causes unpredictabLe resuLts.
You may specify 0 to 7 tape drives (e.g.,
MTUO:—MTU7:).
The magnetic tape drive you specify must be defined in the system
device table as an unsharabte device.
(See the DEVTBL reference
sheet.) The program MTSTAT.SYS must be in system memory.
(See the
SYSTEM
reference sheet for information on modifying the system
initiahzatjon command fiLe to inctude a program in system memory.)
FORMAT:
.SKIP Devn:
where Devn: specifies a magnetic tape drive.
OPERATION:
1.
Make sure that the tape you want to access is mounted.
2.
Type SKIP foLlowed by the specification of the tape
to access.
Then type RETURN.
you
want
For exampLe:
.SKIP MTU5:
3.
SKIP
issues a command to the magnetic tape driver to read
forward on the currently mounted tape until it detects a file
mark.
If the drive is positioned at the front of a fiLe, this
command causes the tape driver to skip to the next fiLe.
4.
when SKIP finishes, it returns you to AMOS command level.
ERRORS:
?Fie specification error
SKIP did not understand your device specification. Make sure that
the device you specified is defined in your system device tabLe. (Type
DEVTBL
folLowed by a RETURN for a List of the vaLid devices on the
system.)
(1 October 1979)
SKIP (Cont'd)
Page 2
CHARACTERISTICS:
Requires that MTSTAT.SYS be in system memory and that
want to access be defined in your system device table.
the
device
Do not use whiLe other jobs are accessing the specified device.
Returns your terminal to AMOS command Level.
(1
October 1979)
you
FUNCTION:
ALlows you to put your own job to steep for a specified amount of time.
HINTS/RESTRICTIONS:
The
number
you give SLEEP teLLs the operating system how many seconds
to keep your job inactive.
The SLEEP command is usefuL in
command
files for
inactive until another procedure completes.
keeping
your
job
FORMAT:
.SLEEP N
where
N
is
a decimal number that specifies the number of seconds you
want your job to stay inactive.
DEFAULTS:
If you do not specify an amount of time to the
SLEEP
command,
SLEEP
assumes a vaLue of 0 seconds.
OPERATION:
1.
Type SLEEP foLLowed by the number of seconds you want your job
to remain inactive.
Then type a RETURN.
For exampLe:
.SLEEP 60
2.
The
exampLe above teLLs AMOS to put your job to sleep for one
minute.
ERRORS:
SLEEP dispLays no error messages.
CHARACTERISTICS:
Puts your job into inactive status for a specified number of seconds.
Returns your terminaL to AMOS command LeveL.
(1 October 1979)
smdlcd
FUNCTION:
Bootstrap
program for a system that uses the ControL Data
Corporation Phoenix hard disk as the System Device.
Loader
HINTS / RESTRICTIONS:
The SMDLOD program when contained on a 2716 PROM aLLows the system to
boot off a System Disk on •a Phoenix hard disk when a hardware reset
occurs (that is, when you hit the RESET button).
The program is aLso in account DSKO:[1,4J of the System Disk.
You may use SMDLOD at AMOS command LeveL to
reset the
system
if
your
System Device is a CDC Phoenix hard disk. The Phoenix is a 90—megabyte
hard disk device (75—megabyte fixed, 15—megabyte removabLe). The
memory partition of the job that uses the SMDLOD command MUST be in
Bank
Zero if your system bank switches memory.
(for information on
bank—switched systems, refer to the document
Memory
Management
Option, (DWM—QO100—1O) in the AM—lOD documentation packet.)
FORMAT:
.SMDLOD
OPERATION:
1.
Type SMDLOD foLLowed by a RETURN:
.SMDLOD
system now resets itself by reading a copy of the SMDLOD
bootstrap program into system memory and executing it.
The
2.
Once invoked, the SMDLOD program reads the operating system
skeleton
monitor,
DSKO:SYSTEMJIONL1,4J,
into
memory.
SYSTEM.MON then brings up the system under the controL of your
system initiaLization command fiLe, SYSTEM.INI.
3.
Once the system is up and running, you see the AMOS prompt.
ERRORS:
SMDLOD generates
no
error
messages.
However,
if it
cannot
SYSTEM.MONL1,4J and SYSTEM.INIL1,4], the start—up procedure fails.
(1 October 1979)
find
SMDLOD (Cont'd)
Page 2
CHARACTERISTICS:
Boots
the
system
from
a
CDC
System Device.
Returns your terminaL to
successfuLLy.
(1 October 1979)
AMOS
Phoenix hard disk if that disk is the
command
Level
if
the
system
resets
sort
FUNCTION:
ALphabeticaLly
fiLe.
and numericaLly sorts data records in a sequentiaL text
HINTS/RESTRICTIONS:
Sorts onLy sequentiaL fiLes.
Sorts according to the ASCII vaLues of the characters in the data
records.
(Therefore all data records that begin with upper case
Letters wilL come before alt data records that begin with lower case
Letters—— or vice versa, depending on whether you are sorting in
ascending or descending order.)
You may sort a text fiLe that is too Large to fit into
One time.
all
memory
at
SORT does not understand wiLdcard symbols.
SORT
repLaces
the file you specify with another fiLe of the
in which the data are arranged in the proper order.
same name
For more information on SORT and for an example of its use, refer to
Section 10.4, "Sorting a FiLe (SORT)," in the AMOS User's Guide,
(DWM—O0100—35).
FORMAT:
.SORT FiLespec
where FiLespec seLects the fiLe you want to sort.
DEFAULTS:
FiLe specification defaults are a fiLe extension of .DAT (indicating
data file) and the account and device you are currentLy logged into.
a
OPERATION:
1.
To
sort a fiLe, type SORT, the specification of the file you
want to sort, and a RETURN. For exampLe:
.SORT LABELS.DAT
2.
SORT now asks you a series of questions:
a.
(1 October 1979)
Record size: — SORT recognizes
a
carriage
return
symbol
SORT (Cont'd)
Page 2
the end of each data record, but it also needs to know
it is going to be
deaLing with.
Enter the maximum size (in bytes) of the
logicaL data records in your file.
(Every character in
the record is one byte of data, incLuding spaces and
punctuation.
Exclude carriage return
and
tine—feed
bytes.)
as
the size of the largest data record
b.
size:
The
key is the fieLd in the logical record
on which you wish to sort (e.g., customer name).
SORT
asks this question once for each key that you define.
(You can define up to three keys.) If you want SORT to
use
Less
than three keys, answer this question with a
RETURN after you have defined alt of the keys you want to
Key
—
use.
c.
Enter the size (in bytes) of the key.
position:
Key
SORT asks this question for each of the
Enter the column number in the data
where the first byte of the sort key occurs. (The
—
keys you define.
record
first byte of a record is position 1.)
d.
this question for each of the
define. Enter an A if you want that key sorted
in ascending ASCII order or enter a D if you wish a
descending order sort.
Key order: — SORT asks
keys
3.
you
now
sorts the fiLe. After the sort has finished, SORT
reports back with some statistics:
SORT
a.
Sorted n records — This statistic
Logical records SORT processed.
b.
n
Runs
—
teLLs
you
how
many
SORT teLLs you how many passes it made through
the data to sort the file.
If the entire fiLe fits into
sort in memory and you see
RUN; if your fiLe is too Large to fit into memory aLL at
memory,
SORT
performs
the
time, SORT performs the sort on the disk (a modified
poLy—phase merge sort), and you see that SORT performed
its sort in more than one Run.
one
C.
Key comparisons,
many
comparisons
n
it
in
per
made
record — SORT teLLs you how
while doing the sort—— an
indication of how out of order the file
d.
Elapsed time, n ms per record — ELapsed time
than compute time) taken by the fiLe sort.
(Elapsed time wilL be affected by the number of other
users on the system, and on the type of processing they
hh:mm:ss
(rather
are doing.)
(1 October 1979)
was.
SORT (Cont'd)
Page 3
ERRORS:
You can see the foLlowing error messages when using SORT:
?Enter A Or D
SORT
wants to know whether you want to sort the key in
ascending (A) or descending (D) order based on the ASCII values of
the characters in the data record. You must enter an A or a D.
?Insutficient memory for sort
SORT
must
be
abLe
to fit at least five of your data records
into memory to perform a sort; if it cannot, you see this message.
?Record size must be >0
?Key size must be >0
?Key size must be Less than record size
SORT checks to see that you are giving it reasonabLe data.
If
you see any of these messages, it probabLy means that you made a
typing error. Key and record size must be at least one byte in
Length and (since the key is an eLement of the record) the key must
be smaLLer than the record.
?Entire key must be within record
of
If the L(start—position in the record of the key + the Length
key)—1]
is beyond the end of the record, you see this
the
message.
(The minus one comes from the fact that the first position
SORT thinks that the record
size you gave was too smaLl or that the key size was too big.
in the record is a one and not a zero.)
You can aLso see severaL system messages.
For example:
?Cannot DELETE Filespec — write protected
You have tried to sort a file on a write—protected disk.
SORT
replace your unsorted file with the new, sorted tile because
cannot
it cant write on the disk. Write—enable your disk and try again.
?Cannot OPEN Filespec — file type mismatch
You see this message if you try to sort a random file (that is,
a file that has been allocated contiguously on the disk).
You may
only sort sequential fiLes.
CHARACTERISTICS:
Sorts
logical
order.
records in a sequential file in ascending or descending
Allows you to specify up to three keys on which to sort.
Replaces your original file with a new, sorted file.
Returns your terminal to AMOS command level.
(1 October 1979)
CU _aI_a_1I I I
FUNCTION:
Compares two sequentiaL fiLes and lists the differences between them.
HINTS/RESTRICTIONS:
UsefuL
for distinguishing between two versions of the same program so
that you can determine what changes have been made.
FORMAT:
.SRCCOM {Li stfi LespecjOLdfi Lespec,Newfi lespec{/Switch} @iD
where OLdfi lespec and Newfi Lespec seLect the fiLes that you want to
compare and ListfiLespec is the fiLe that SRCCOM wiLL create to hoLd
the comparison. You may choose one of two switches (see OPTIONS).
DEFAULTS:
SRCCOM assumes a
C
fi Le extension of .MAC for OLdfi Lespec and Newli Lespec
ListfiLespec=' may be omitted, in
be dispLayed on the terminaL i.e., the
arid .LST for the ListfiLespec.
which case the Listing wi
defauLt ListfiLespec is TRM:).
L
OPTIONS:
You may choose one of the two options beLow by ending
command Line with a sLash (I) and the appropriate switch:
the
SRCCOM
quick Listing.
The comparison listing is in the same format
Listing, but SRCCOM Lists only the
differences between the two files.
as
the
standard
Brief listing. The comparison Listing is in the same format
as the Quick Listing, but aLL Line numbers are omitted.
OPERATION:
1.
Type SRCCOM foLLowed by the specification of the file you want
to create to hoLd the fiLe comparison. Now type an equaL sign
foLLowed by the specifications (separated by a comma of the
two fiLes you want to compare.
(If you want to as for a /B
or /Q option, enter it here.)
Type a RETURN.
.SRCCOM CMPARECTLOG1.TXT,CTLOG2.TxT
(Changed 1 May 1980)
For exampLe:
SRCCOM (Cont'd)
Page 2
After SRCCOM has made the comparison, it returns you to AMOS
command
leveL.
Now you can either print the comparison fiLe
2.
(your Listfile) or display it on the terminal.
When you dispLay the ListfiLe, you
3.
Like this:
see
a
display
something
SRCCOM Version 2.0 Comparison — .SRCCOM CMPARECTLOG1.TXT,CTLOG2.TXT
First line of text
00001
00002
00003
000U4
00005
00001
00003
Now
00006
00007
00005
00004
the same, but the line
is different between
+++++
00009
00002
So far, aLl the same.
2 Lines that occur
only in CTLOG1.TXT
00005
00006
00007
00008
the text is again
the two files.
H A Line onLy in CTLOG2.TXT I!
numbers on the Left of the dispLay are the Line numbers of
the OLdfi Le; the next coLumn of numbers are the Line numbers of
the NewfiLe. Th
symbols indicate a Line that does not
appear in the Newfi Le, but does appear in the Oldfi Le. The
++++ symboLs indicate a Line of characters that does not appear
in the Oldfile, but does appear in the NewfiLe. In the exampLe
The
above, the two files are exactLy the same untiL the third Line;
an
extra two Lines that the Newfi Le
files are again the same (aLthough their
Line numbers are now different) until the second from the Last
Line, where the NewfiLe has a Line that the OLdfiLe doesn't
then the OLdfi Le has
doesn't have.
The
have.
If you ask for the /Q option, the SRCCOM display Looks much
Like the one above, except that the ListfiLe contains onLy
Lines where differences occur. The lB option teLls SRCCOM to
create a ListfiLe just like the /Q comparison, but without Line
numbers.
ERRORS:
If you enter a Line that SRCCOM doesn't understand, it repLies:
or
or
.SRCCOM Li stfi Le=oldfi Le,newfi Le
.SRCCOM Li stfi LeoLdfi le,newfi Le/Q
.SRCCOM Li stfi LeoLdti Le,newti Le/B
(Ia produces a 'Quick' listing of differences only)
(lB
produces a 'Brief' Listing — quick and unnumbered)
?Enter:
(Changed 1 May 1980)
SRCCOM (ConVd)
You
may
Page 3
aLso
see the standard system error messages that resuLt from
invaLid fiLe or device specifications.
For example:
?Cannot OPEN H Lespec — fiLe not found
CHARACTERISTICS:
a fiLe extension of .MAC for OLdfitespec and NewfiLespec and
extension of .LST for Listfilespec.
TAM:.
Assumes
If you omit ListfiLespec,
Returns your terminaL to AMOS command Level..
(Changed 1 May 1980)
an
assumes
suspnd
FUNCTION:
ALLows
of time.
you
to suspend the operation of a job for an indefinite period
HINTS/RESTRICTIONS:
Use in combination with the REVIVE command to put a job in
suspension
and awaken
it again.
Once you use SUSPND, the specified job stays
inactive untiL
someone wakes it again.
FORMAT:
.SUSPND Jobname
where Jobname specifies the job you want to suspend.
OPERATION:
1.
Type SUSPND foLlowed by the
suspend.
name
of
the
job
you
want
to
.SUSPND J065 )
The job remains suspended until you issue a REVIVE command for
that job.
ERRORS:
[NONEXISTENT JOBJ
You
specified an invaLid job name. Check your speLLing. If
the job name looks aLL right, use the SYSTAT command to see a List
of vaLid jobs on the system.
CHARACTERISTICS:
Returns your terminaL to AMOS command 'eveL.
To wake up the job you suspended, use the REVIVE command.
(1 October 1979)
'-I
symbol
FUNCTION:
a
symboL
tabLe fiLe for one or more machine Language object
fiLes to aLlow you to reference user defined symbols when you use the
symboLic debugqinq programs DOT or AIphaFIX. Also provides severaL
options
Creates that et you generate a proqram fiLe or a Load map file.
HINTS/RESTRICTIONS:
The object files that MACRO (the assembLer) creates contain compLete
information about the symboLs used in your program, as weLL as the
actuaL generated code. To make this list of symbols avaiLabLe to the
debuqginq programs DOT and ALphaFIX, you must use the SYMBOL proqram to
generate a symbol tabLe fiLe.
Qrocesses fiLes in the order in which their specifications
appear on the command Line. You may not soecify an overLay or Library
SYMBOL
fiLe as the first file on the command Line.
NOTE:
You may
aLso use SYMBOL to generate a program fiLe. (And, you
may use LINK to produce a symboL tabLe fiLe. LINK and SYMBOL can be
to perform exactly the same functions if you use the appropriate
option requests.)
made
SYMBOL supports library and optionaL fiLes, and can generate a
file.
For information on Library, optional, and Load
map
Load map
see
fiLes,
the AMOS AssembLy Language Programmer's Manual, (DWM—O0100—43).
manual also contains information on SYMBOL, MACRO, LINK. GLOBAL,
and DDT.
This
LIB,
FORMAT:
.SYMBOL C/switches )-fi LespeclC,fi lespec?
fi lespecN)C/switches}
where fitespecs seLect the fiLes you want to process and /switch is an
option request. You may not specify an overLay or library fiLe as the
first fiLespec on the command line.
If
you
have
too
many
filespecs
to fit on one screen Line, you may
continue the SYMBOL command line by endinq it
accepts
with
a
comma.
SYMeOL
as many lines of filespecs as you wish, as long as you end the
preceding Line with a comma.
If a /switch appears in front of a fiLespec (e.q., SYMBOL MATH,/Q
that option request becomes the defauLt for the rest of the
command
Line.
If a /switch foLlows a fiLespec (e.g., SYMBOL
NIJM,SIJB),
MATI-I,NUM/O,StJB),
it affects only that fiLespec.
(Charmed 30 ApriL 1981)
NOTE: Certain switches
SYMBOL (Cont'd)
Page 2
in the discussions beLow as 'operation switches) affect
(identified
atL
filespecs on the command Line no matter how they are placed.
DEFAULTS:
SYMBOL uses the defauLt extension of .OBJ, unLess you are specifying
Library fiLe, in which case it uses the default extension of .119.
a
If your filespec does not contain an account and device specification,
the account and device you are
togged into. Next it Looks in your project Library account, (P,fl].
FinalLy, it Looks in the System MACRO account, DSKO:[7,7].
SYMBOL assumes that the fiLe is in
The defauLt switches are IS (generate
(designate a required fite)
a
symbol
fiLe)
tabLe
and
IR
OPTIONS:
You
may
switch:
select one of the options beLow by specifying the appropriate
IncLude equated symboLs in the symbol tabLe fiLe.
IE
(You may aLso
use /E with the Ill switch to tell SYMBOL to put equated symbols
in the Load map fiLe.) (Operation switch.)
Designates a Library file.
Generate a Load map (.MAP) fiLe. (Operation switch.)
Suppress IS switch. (Operation switch.)
Designates an optional fiLe.
Generate program (.PRG or .OVR) fiLe. (Operation switch.)
Designates a required fiLe. The defauLt switch. Cancels the IL
and /0 switches.
Generate a symbol table (.SYM) file.
The defauLt switch.
(Operation switch.)
IL
/M
IN
/0
/P
IR
IS
You may specify muLtiple switches
slash, I.
by
preceding
each
switch
with
a
OPERATION:
7.
Enter
SYMBOL
foLlowed by the soecifications of the fiLes you want
to process together; then type a RETURN.
For example:
.SYMBOL/M VISFIL,VIS1.UTILIT.LIA/LID
Notice that the
UTILIT.LIB/L.
command
Line above specifies a
By using the /M switch, we are also
for a Load map fiLe.
2.
library fiLe,
asking SYMBOL
If you have more file specifications than wiLl fit on one tine, end
the current command line with a comma.
SYMBOL
now dispLays
an
asterisk and you may continue your List of file specifications.
(Changed 30 April 1981)
SYMBOL (Cont'd)
Page 3
You may enter as many Lines of fiLe specifications as you
lonq as you end the preceding command Line with a comma.
3.
Now
dispLays
SYMBOL
(The exact
messages
severaL
messages as
wish
it processes the fiLes.
the options you
requested and the files you have specified.) For examp'e:
you
see
depend
as
on
have
== Linkage Editor Version 2.0 ==
Processing VISFIL.OBJ
Processing VISI.OBJ
—— OptionaL and Library Request ——
Processinq UTILIT.LIB(GETADR)
SymboL and Map files finished
4.
It
any
exampLe:
errors
occur
during
Linkinq,
SYMBOL teLLs you so.
For
Symbol fiLe finished. 4 errors exist
ERRORS:
You can see the foLLowing error messages whiLe using SYMBOL:
?Cornmand error
There is something wronq with your command
Line.
For
exampLe,
you tried to use SYMBOL without specifying a fiLe on which to work.
?FataL error — Insufficient memory
increase
the size of your memory partition; there was
not enough room to perform the procedure you specified.
You
must
?Lindefined switch /x — ignored
the
SYMBOL didn't recognize the switch, /x, you specified.
section
switches.
OPTIONS,'
above
Refer
to
for information on the vaLid SYMBOL
?Fatat error — OverLays of code are not permitted
Next expected address is xxxx
OverLay code address is xxxx
Your proqram is trying to overLay previous code.
Check your
.MAC programs to make sure that your overLay references are correct.
?xxxx undefined
An
external
is undefined. This is a very common error.
You have referenced a symbol which has not previously been defined
(Chanqed 30 ApriL 19B1)
symboL
Page 6
SYMBOL CCont'd)
(e.g.,
you
have
made a reference to a tabeL that does not exist).
Make sure that an EXTERNed symboL in one segment is
INTERN statement in another seqment.
defined
by
an
?EataL error — First fiLe must not be a Library
To enabLe SYMBOL to correctLy resoLve externaL references to a
Library, you must specify the proQram that references that library
before you specify the Library fiLe itseLf.
?FataL error — Attempt to specify overlay xxx as optionaL
You may not use the /0 switch to designate a file as optionaL if
that object fiLe is an overLay.
?FataL error — OverLay symbol
xxxx
in segment yyyy
was not defined in a previous input segment
You may not reference an undefined overLay. In other words,
SYMBOL is tryinq to process a supposed overLay fiLe, but has seen no
references to the overLay in a previous file.
reference, SYMBOL cannot construct the overLay, so
returns you to AMOS command leveL.
Without such a
aborts and
it
?FataL error — First file must not be an overLay
To
enabLe SYMBOL to correctLy resoLve externaL references to an
overLay, you must specify the program that references that overlay
before you specify the overLay fiLe itseLf.
?Fatal error — Expression stack error
An
files.
error occurred when SYMBOL evaluated some expressions in your
You shouLd never see this error message—— it indicates an
internaL error.
?Fatal error — Expression stack overflow
You
exceeded
the
number
of nested expressions that SYMBOL can
compLex expression
in your
Try to find the exceedinqLy
source fiLe and simplify it.
handLe.
CHARACTERISTICS:
is re—entrant, and may be loaded into system memory; it is also
seriaLLy reusabLe.
SYMBOL
Creates a symboL tabLe fiLe by Linking and resoLvinq intermediate
fiLes.
.OBJ
Default extension is .OBJ for reguLar fiLes and .LIB for Library fiLes.
Default switches are: IS and /R.
(Changed 30 April 1981)
sysact
FUNCTION:
SYSACT
to add or deLete user accounts on a specific disk, add or
change account passwords, or initiaLize a disk.
Use
HINTS/RESTRICTIONS:
You must be logged into account [1,2) to run SYSACT. SYSACT works by
modifying the Master File Directory of a specific disk. The MED
contains a lAst of aLL accounts on that disk (listed by their
project-programmer nunbers) and the password (if assigned) associated
with each one. You may add or deLete user accounts (by adding or
deleting Project—programmer numbers) and add or change passwords.
If
disk
a
has never been used before, you must first format the disk
(or certify it, in the case of hard disks that run under controL of the
Then use SYSACT to initialAze the disk. Next you
must establish the account structure on the disk by using SYSACT to add
AM—410 controLler).
PPNs to the disk's MFD.
project—programmer number that you assign to the user is in the
form of two numbers, each of which may range from 0 to 377, octaL. The
first number of the PPN is the project number; numbers 1 through 77 are
reserved by ALpha Micro for system use.
The
second number is the
The
programmer
number.
Accounts whose PPNs share the same project number
are said to be in the same project; users may transfer fiLes into
another account from his own if both accounts share the same project
number.
If while using SYSACI you decide that you've made a mistake, Leave
SYSACT
by typing a Control—C instead of using the SYSACT exit command;
the changes you've made wiLL not get written out to the Master Ei Le
Directory.
FORMAT:
.SYSACT Devn: @B
where Devn: is the specification of the Logical unit whose MFD you want
to modify.
OPERATION:
1.
SYSACT
foLlowed by the specification of LogicaL unit
whose MFD you wish to modify. Type a RETURN. Eor exampLe:
Type
.SYSACT DSK1:
(Changed
1
May 1980)
SYSACT (Cont'd)
2.
Page 2
The SYSACT prompt symboL is an asterisk: *.
If you forget
the SYSACT commands, type an H; SYSACT wilL List them for you.
(See beLow, COMMAND SUMMARY.)
COMMAND SUMMARY:
The SYSACT commands:
A p,pn
Add account p,pn to the disk. If the account does not aLready
exist, SYSACT adds it and then asks you for a password. If
you do not want the account to have a password, enter just a
RETURN.
Any password you enter must be six characters or
Less.
p,pn
Change the password of account p,pn. If the account exists,
SYSACT asks for a new password (0—6 aLphanumeric characters).
p,pn
Delete
account
p,pn.
D
files, SYSACT deletes it.
E
Exit to monitor.
before
changes,
LeveL.
If the account exists and it has
SYSACT rewrites the MFD, incorporating your
it takes your terminal back to AMOS command
H
Display a List of the SYSACT commands.
I
Initialize disk.
contents
of
SYSACT asks
no
Erases the data on the disk (incLuding the
fiLes and directories.
InitiaLizes bitmap.
you to confirm this command before
it wilt
initiaLize the disk: InitiaLizing the disk clears aLL fiLes
enter Y to confirm:
SYSACT
wiLt
not
UnLess
initiaLize
you
the
enter
a
Y
and
a
—
RETURN,
disk; instead it says: ZNo
initiaLization performed and prompts you for another command.
Display a List of aLL of the accounts in
L
and
their
tried to create an account that aLready exists.
Use L
passwords.
For example:
T,2
TiU,o
the
MFD
ROB
ERRORS:
?Account aLready exists
You've
to see what accounts aLready exist in the MED.
does not exist
You've tried to delete an account that doesn't exist or
tried
to change the password of a nonexistent account.
?Account
(Changed
1
May 1980)
you've
SYSACT (Cont'd)
Page 3
?ILlegaL account PPN — format is P,PN (P = octaL 0 to 377)
You've
parameter.
entered
a
bad
PPN
as
Add,
an
Check the number and enter it again.
Change,
or
DeLete
?Account has fiLes on it
You tried
to deLete an account that stiLL had fiLes in it.
Exit SYSACT, og into the account you tried to deLete, and erase aLl
.ERASE *.*)• Now, you can invoke SYSACT again and delete
fiLes
that acd6unt.
C
?SYSACT is a privUeged program (may onLy be run from PPN 1,2)
You must Log into account L1,di to run SYSACT.
?Invalid command — type H for heLp
SYSACT
did not understand the command you entered.
summary of aLl SYSACT commands, type H folLowed by a RETURN.
To see a
?MFD is fuLL — no new accounts may be added
than
disk.
The Master File Directory for each disk can contain no more
63
entries.
You
tried to alLocate the 64th account on the
?Account does not exist
You tried to change the password of
delete an account, but that account
an
account
or
does not exist.
command to see a List of aLt PPNs on the disk.
tried to
Use the L
CHARACTERISTICS:
If a disk has never been used before (and it does not run under controL
of the AM—410), after you format the disk you must use SYSACT to
initialize the disk.
Then use SYSACT to add accounts to the disk's
MED.
Returns your terminaL to AMOS command Level if you use the Exit command
(E) or a Control—C.
(Changed
1
May 198D)
syscpv
FUNCTION:
Copies aid fiLes from DSKO: to DSK1:.
HINTS/RESTRICTIONS:
SYSCPY is a command fiLe that uses the DSKCPY command to make a LiteraL
image of
DSKO:
onto DSK1:. DSKCPY verfies that copy by checking the
backup disk against the originaL.
IMPORTANT NOTE: Do NOT use on devices that run
under
controL
of
the
does
not
The Phoenix disk contains information about bad blocks on that
(the BADBLK.SYS(1,21 file); making a LiteraL copy of that disk
AM—410.
disk
transfers over that information to
appLy.)
writes over aLt
bLank or scratch disk.
SYSCPY
data
a
device
to
which
it
on DSK1:, so make sure that DSK1: is a
FORMAT:
SYSCPY ?
OPERATION:
1.
Make sure that DSK1: is a blank or scratch disk. If you are
using a Hawk—based system, make sure that you are not running
off the cartridge or you will erase alL data on the fixed
pLatter.
To see if you are running off the cartridge instead
of the fixed disk, type SYSTEM foLlowed by a RETURN.
If you
are running off the cartridge you see:
*** SYSTEM IS RUNNING FROM CARTRIDGE
If
you
do
not
DISK ***
see this message, enter SYSCPY foLLowed by a
RETURN:
.SYSCPY
2.
You see the message:
Insure scratch disk on drive 1 and hit RETURN:
Type RETURN after you have made sure that the scratch disk
in drive number one.
(1 October 1979)
is
SYSCPY (Cont'd)
3.
Page 2
Now you see:
[Begin copy and verify of system disk from drive 0 to drive 1J
4.
SVSCPY
now uses the DSKCPY command to make a literaL image of
When the copy is complete you see:
DSKD: onto DSK1:.
[Duplication compLeted]
[Verification compLeted]
Now SYSCPY teLLs you that the disk copy
your terminaL beLL five times.
is
done
by
ringing
ERRORS:
If
a
hard
disk—error
occurs
whiLe SYSCPY is using DSKCPY to make a
LiteraL image of DSKO:, you see a device error
the System Operator for heLp.
message.
Check
with
CHARACTERISTICS:
Command file uses DSKCPY to make LiteraL image of DSKO: onto DSK1:.
Verifies the copy.
Assumes that you are not running off the cartridge.
NOT
use on devices that run under controL of the AM—410 Hard Disk
ControLler or that have a file BADBLK_S'YS[1,2].
DO
Returns terminaL to AMOS command LeveL.
(1 October 1979)
sysmem
FUNCTION:
part of the system initiaLization command fiLe, defines which memory
Locations
memory.
command
system
As
wiLL be alLocated to the bank switchabLe area of system
(For use onLy in systems that bank switch memory.) At AMOS
Level, tells you what memory Locations are assigned to the
area of switchabLe memory.
HINTS/RESTRICTIONS:
Switchable system memory is used to aLLocate BITMAPs and
other
system
areas in bank switchabLe memory, reducing total resident monitor size.
SYSMEM
appears within the system initialization command fiLe, it
If
must appear after MEMDEF commands and before any BITMAP commands.
you are not famiLiar with bank switching memory on the ALpha Micro
User's
Guide,
Systems
system, see the ALpha Micro Integrated
(DWM—OD101—00).
When
will not discuss here the mechanics of setting up a bank—switched
system, but briefLy: bank switching memory alLows you to access more
than 64K of memory on your system (aLthough each individual user is
stiLL Limited to a maximum of 64K).
We
first 16k of memory cannot be allocated
switchabLe system area; it is reserved for the monitor.
NOTE: The
second 16K of memory:
Third 16K of memory:
Fourth 161< of memory
to
the
bank
40000—77776 (octaL)
100000—137776 (octaL)
or
or
4000—7FFE (hex)
B000—BFFE (hex)
140000—177376 (octal)
or
C000—FEFE (hex)
(minus Last 256 bytes
for the I/O ports):
may not aLLocate to switchabLe system memory the
You
NOTE:
Last 256 bytes of the 64K address space. That means that the highest
is 177376. (The memory addresses
can aLLocate
memory address you
177400—177777 are reserved by the system for the I/O ports.)
IMPORTANT
You may enter more than one SYSMEM command in
the
SYSTEM.INI
want to allocate more than one area of system switchabLe memory.
FORMAT:
.SYSMEM EEED
or:
SYSMEM Bank—#:StartAddress—EndAddress
(Changed 30 ApriL 1981)
if
you
SYSMEM (Cont'd)
Page 2
Use the first format to find out what memory is aLlocated to the system
area.
Use SYSMEM in the second format in SYSTEM.INI to aLlocate memory
to the system area, where:
Bank—/f
The number of the memory bank containing the
being aLLocated to the system area.
StartAddress
The
beginning
EndAddress
The
ending
memory
address of the memory bLock being
aLLocated to the system area.
address
of the
aLLocated to the system area.
memory
being
bLock
OPERATION:
1.
At the AMOS command LeveL, to find out what memory is aLLocated to
the system area, type SYSMEM foLlowed by a RETURN. For exampLe:
.SYSMEF1 N
Current system memory aLLocations are:
1:32370—177376
The message above telLs you that switchable system memory is from
address 32370 to address 177376 in Bank One, the second bank of the
system.
2.
To
aLLocate
memory
to the switchable system area from within the
system initialization command file, use SYSMEM, a bank number,
starting and ending memory addresses. For exampLe:
and
SYSMEM 4:100000—160000
expects you to enter the starting and ending memory
addresses in the number base the system is currentLy using for your
numeric dispLays. The defauLt number base (if you do not use the
SET
command)
is octal. (For information on changing the dispLay
base from octal to hexadecimal, refer to the SET reference sheet.)
SYSMEM
3.
If you want to aLlocate more than one
memory,
area to switchabte system
use more than one SYSMEM command. When you use the BITMAP
command in the SYSTEM.INI to aLLocate bitmaps, if you
use
the
/5
switch, the monitor wiLL try to place that bitmap in the switchabLe
area alLocated by the first SYSMEM; if there is not enough room
left in that area, the monitor wilt try the
area aLLocated
by
the
?Memory aLLocation format error
SYSMEM doesn't understand the format of your command Line.
For
second SYSMEM, and so on.
ERRORS:
exampLe, did you Leave out the coLon after the bank
(changed 30 ApriL 1981)
number?
SYSMEM (Cont'd)
Page 3
?Non—existent bank number
You've given SYSMEM a bank number Larger than the total number
of MEMDEF statements in your SYSTEM.INI. (That is, you've specified
a bank that has not been defined.)
?AlLocation overlaps monitor memory
The
monitor memory is used by the operating system. You must
not aLLocate any of this memory to switchabLe system memory.
You
must
either reduce the size of the monitor or change your user
memory allocations.
?ILLegaL memory range (end is below base)
Ending address must be greater than starting address.
?ALLocation is not within requested bank's defined memory
You've specified a vaLid bank number, but it is not addressed
for the memory addresses you've requested. Check the addressing of
your memory boards and the MEMDEF statements in your SYSTEM.INI.
?ALLocatjon overLaps memory previously aLlocated to a job.
You've tried to alLocate to switchabLe system memory an area
that has already been aLLocated (via the JOBMEM command) to a user
job. Check your bank number and memory addresses. If they're OK,
check the user memory partition aLLocation.
CHARACTERISTICS:
you to reduce the size of the resident monitor by defining an
area of switchabLe memory in which bitmaps can be ptaced. OnLy for use
ALLows
on systems that bank switch memory.
Acts both as a user command and as a system initiaLization command.
(Changed 30 ApriL 1981)
systat
FUNCTION:
Provides information about the jobs running on the system.
HINTS/RESTRICTIONS:
by any user on the system, whether Logged in or not.
job status codes which appear in the SYSTAT display are as foLLows:
May
be
TI
TO
run
TerminaL Input wait state
TerminaL Output wait state
SL
Program Load state
Steep state
DS
Disk access in progress
IC
EW
I/O access other than terminat or disk
External Wait state
RN
Running
SP
Suspended state
LD
The
ControL—C
For more information on job
status codes, see
Information Commands," in the AMOS User's Guide,
Chapter
12,
"System
(DWM—OO100—35).
SYSTAT dispLays memory addresses in the number base the system is using
for your numeric dispLays (usuaLLy octal). If you wish to see these
addresses as hexadecimaL numbers, make sure that the HEX option is set
before using SYSTAT. (See the SET reference sheet for information on
changing the numeric dispLay base.)
FORMAT:
where.SYSTAT{/switch)
the optionaL /switch requests a brief status dispLay.
OPTIONS:
may seLect a brief status dispLay by using the IN switch.
This
SYSTAT
to omit the List of devices and bLocks tree on
switch tefls
those
devices.
You
OPERATION:
1.
Type SYSTAT foLLowed by a RETURN:
.SYSTAT I3
(Changed
1
May 1980)
SYSTAT (Cont'd)
Page 2
see gives this information for each job
running on the system: 1. the name of the job; 2. the terminaL
to which the job is attached; 3. the device and account into
which the job is Logged; 4. the octaL memory address where the
Job ControL BLock for the job is Located; 5. the terminaL
status for that job; 6. the Last program run by the job before
The dispLay you
you
used the SYSTAT command; 7. the number of bytes of
memory
(in decimaL) aLLocated for that job; and, 8. the octaL memory
address at which the job's memory partition begins (incLuding
the bank number in which that partition resides, if the system
bank switches memory). SYSTAT aLso teLLs you which devices
are mounted on the system and how many bLocks on those devices
are free for use.
2.
If you wish a brief status dispLay, use the IN switch. This
telLs SYSTAT to omit the List of devices on the system and
bLocks free on those devices.
ERRORS:
SYSTAT generates no error messages.
CHARACTERISTICS:
Returns your terminaL to AMOS command LeveL.
'-.4
EXAMPLES:
A typicaL SYSTAT dispLay might Look Like this:
Status of AMOS Version 4.4
JOEl
JOB2
JOB3
SPOOL
TERM1
TERM3
TERM2
NULL
DSK4:310,2
023056
RN
not Logged in 023522
C
DSK1:20,1
DSKO:1,2
4 jobs on system
DSKO
DSK1
DSK2
DSK3
DSK4
DSKS
AMSO
AMSI
26254 BLocks free
29USd BLocks free
17121 BLocks free
16542 BLocks free
20795 BLocks free
3642 BLocks free
not mounted
not mounted
8 devices on system
(changed 1 May 1980)
024166
024632
SYSTAT
TI
VUE
EW
LPTSPL
50176 bytes at 0: 35400
48896 bytes at 1: 40000
48896 bytes at 2: 40000
4352 bytes at 3: 167000
SYSTAT (Cont'd)
Page 3
The first
line teLLs us about the first job on the system: 1. it's
named JOB1; 2. it is attached to terminaL TERM1; 3. it is Logged into
account DSK4:310,2; 4. its Job ControL BLock appears at memory address
23056; 5. it is in a RUN state; 6. it is running the SYSTAT program;
and 7.
it has 50176 bytes of memory in its partition which starts at
memory address 35400 in Bank Zero.
Note that JOB2 and JOB3 both have memory partitions that start at the
same
address; this is because the system represented above is a
"bank—switched' system. Both jobs' memory partitions start at the same
address but in different memory banks.
aLso see that devices DSKO: through
are not mounted.
AMSO:
and AMS1 :
We
(Changed
1
May 1980)
DSKS:
are
mounted.
Devices
1
system
FUNCTION:
As
part of the system initialization command fiLe, SYSTEM tells the
operatinq system what programs to include in system memory.
At
AMOS
command
evet, SYSTEM teLls you what programs currentLy reside in
system memory.
HINTS/RESTRICTIONS:
The
performs an important part
of
the
system
process by aLlowing you to add programs to the monitor
command
SYSTEM
initiaLization
at the time of system start—up. In addition to that function, a SYSTEM
command without a fife specification MUST appear within the SYSTEM.INI
to telL the system to cLose out the monitor expansion process that
takes
pLace
at
system
start—up.
(See
the
document
The
System
InitiaLization Command FiLe, in the AMOS Software Update documentation
oacket, for information on the system boot up process.)
After the system is up and running, the SYSTEM command takes on a new
it aLlows you to see what programs are resident in system
memory. If your System Device is a hard disk, SYSTEM aLso teLLs you if
purpose;
the system is running off the cartridge.
FORMAT:
.SYSTEM @JiB
or:
SYSTEM FiLespec
where FiLespec seLects the program to be
(You
may
onLy
incLuded
in
system
memory.
use the second format within the system initialization
command fiLe, SYSTEM.INI.)
DEFAULTS:
When you use SYSTEM within the system initiaLization command fiLe,
you
may optionaLLy incLude a file specification; the default fiLe extension
is .PRG and the default account is DSKO:C1,4J.
(Changed 30 Apr11 1981)
SYSTEM (Cont'd)
Paqe 2
OPERATION:
At AMOS command LeveL:
1.
SYSTEM now Lists aLL of the
programs that are currentLy in system memory and telLs you how
many bytes of memory are used by the monitor:
Type SYSTEM foLLowed by a RETURN.
The foLlowing programs are aLLocated in system memory:
VIlE
PRG
TRM
DYR
Total resident monitor size is 21607 bytes.
Monitor version is 4.5
2.
If there are no programs in system memory, SYSTEM says:
No pronranis alLocated in system memory
3.
tf
have
you
a hard—disk system, SYSTEM Lets you know if the
system is using your disk cartridge as the System Disk.
* * * System is runninq from cartridge disk * * *
Within the SYSTEMJNI:
1.
You can use one or more SYSTEM commands to tell the system to
include programs within system mPmory.
(Use one SYSTEM
command for each program.) FolLow the SYSTEM command with the
fiLe specification of the program you want to incLude.
For
e x ample:
SYSTEM RUN.PRG
programs that you incLude in the system monitor in this
way must be reentrant.
Any
2.
Ptace any SYSTEM commands after the TRMDEF, BITMAP, and DEVTBL
commands.
3.
whether or not you use SYSTEM to include programs in the
monitor area of memory, you MUST use a singLe SYSTEM command
without a fiLe specification after alt commands that expand
the monitor size (including any other SYSTEM commands that
include a file specification). For example:
QUEUE 10
SYSTEM RUN.PRG
SYSTEM BASIC.PRG
SYSTEM
(changed 30 April 1981)
SYSTEM (Cont'd)
Pa 3
ERRORS:
No error messages.
CHARACTERtSTICS:
Serves both as a system initiaLization command and as a user command.
MUST appear within the SYSTEM.INI to teLL the system to dose
monitor expansion that occurs at system start—up.
(changed 30 ApriL 1981)
out
the
tapdir
FUNCTION:
List of the files on a maqrretic tape reeL.
ALso aLlows you to create a disk file containinq the tape directory.
AUows
you
to
dispLay
a
HtNTS/RESTRICTIONS:
Used in combination with FILTAP (to write disk tiles to magnetic tape)
For more information on
and TAPFIL (to copy files from tape to disk).
these programs, see The Magnetic Tape File Backup Programs in the
'System
section
Information'
Operator's
of the AMOS Software Update
Documentation Packet.
The tape you read via TAPDIR must previously have been
FILTAP. (See the FILTAP and TAPFIL reference sheets.)
written
by
fuLL wildcard specifications, which seLect the fiLes to be
Listed in the directory. (The account and device portions of the
specifications refer to the disk account and device from which the
Accepts
files were oriqinaLl.y backed up.)
Chapter 9 of the AMOS User's
information
on
wiLdcard
fiLe
for
Guide,
(OWM—OO100—35),
SimiLar
in
use
to
DiR.
(See
the
DIR
reference
sheet.)
specifications.
TAPDIR is a witdcard
command.
See
FORMAT:
.TAPDIR (/switch){ListfiLespec=Hinspecl){,inspec2...,inspecN) @
/switch is
specifies a disk
where
an
option
request.
The
optionaL
ListfiLespec
file to contain the tape directory display.
specifies the fiLes on the tape whose directory Listing
you
tnspec
want
to
see.
DEFAULTS:
default ListfiLespec is DIRECT.LST in the account and device you
are Logged into. The default inspec is *.* and the account and device
magnetic tape drive device
The default
are Loqged into.
you
specification is MTU.
The
OPT IONS:
The sinqLe TAPDIR switch is /KILL: it telLs TAPDIR to deLete any
existing Listfile that matches the specified ListfiLespec before
creating the new ListfiLe. /KILL is an operation switch: it may
anywhere on the command Line.
(30 April 1981)
apoear
TAPDIR (Cont'd)
Page 2
OPERATION:
1.
Type
Then
foLlowed
TAPDIR
type
any
input
by an optiona' Listfilespec and equaL siqn.
specifications. Type a RETURN.
The
ListfiLespec specifies a disk file that wiLL contain the directory
dispLay. If you omit the ListfiLespec and the equaL sign, TAPDIR
sends the dispLay to your terminaL. If you omit the Listfilespec
and incLude the equal siqn, TAPDIR uses the defaut Listfilesoec
DIRECT.LST and the account and device you are logged into.
For example, to send a directory display of aLL the files on a tape
to your terminal, enter:
.TAPDIR ALL:D @!D
2.
asks you for the specification of the magnetic tape
drive that contains the tape you want to access:
Now
TAPDtR
Enter tape unit nuu,ber:
The defauLt device code is MTIJ, so to access a tape in drive MTtJ3:,
you can either enter "3' or "MTU3:".
3.
The display you see cooks something Like this:
.TAPDIR ALL:IJ*.DAT,*.MAC aD
rnter tape unit number: 0 @iD
DSKO: SYS
MAC
bSKO: NBSORT MAC
1
2
DSKD: FILTAP MAC
DSKO: JANE
DAT
6
7
TotaL of 4 fiLes in 142 bLocks
140,1
140,1
140,1
140.1
16 L
4L
Z3 L
14—May—80
99 C
14—May—80
14—May—80
14—May—SO
14:52:23
14:52:25
14:52:25
14:52:27
The first number on the tine telLs you the fiLe's relative position
on the tape. Next you see the device specification, the filename
and extension,
and the
account specification of the file as it
appeared on the disk it was beinq backed up from. The next number
teLLs you the number of disk blocks the fiLe takes up. TAPOIR now
teLls you whether the fiLe is a sequentiaL, or Linked fiLe ("L"),
or a random, or contiguous fiLe ("C"). FinalLy, TAPDIR gives the
date and time of the backup.
For example, in the dispLay above, TAPOIR telLs us
NBSORT.MAC
is
that
the
file
the second fiLe on the tape, that it was originaLLy
backed up from DSK0:E140,1J, that it contains 4 disk blocks, that
it is a Linked fiLe, and that it was backed up May 14th at
14:52:25.
At the end of the directory dispLay,
fiLes were listed in the dispLay.
(30 ApriL 1981)
TAPOIR
tells
you
how
many
TAPDIR (Cont'd)
4.
To
Paqe 3
create
ListfiLe.
a disk file containing the directory dispLay, specify a
For exampLe:
.TAPDIR = ALL:E]*.DATtJ
Inter tape unit number: MTU4: IJD
creates the fiLe DIRECT.LST in
the
account
and
device
you
are
Logged into that contains a directory display for aLL .DAT tiles on
the tape in drive MTU4:. (NOTE: If your printer has been defined
on your system as a terminal, you may send the display directLy to
a
printer by using an output specification of "TRM:Printer—name,
where printer—name is the name assigned to the printer by the
TRMDEF command in the system initialization command tile.)
ERRORS:
?Cannot find DSKO:SCNWLD.SYS(1,43 or MEM:SCNWLD.SYS
The TAPDIR program needs this fiLe to be able to process wildcarrd
in you fiLe specification.
This messaqe can indicate that
SCNWLD.SYS does not exist, ot that you do not have enouugh memory to
symbols
toad the tiLe into your partition.
?Cannot READ Devn — device does not exist
?Cannot READ Devn — device is not mounted
You tried to
copy to or from a device that is not Listed in the
DEVTBL command in your SYSTEM.INI, does not have a driver in area £1.6]
of the System Disk, is not fiLe—structured, or is not mounted. ('Devn:"
is the device you specified.)
%No fiLe—oriented device corresponding to Devn: is mounted
You specified a device, but Left off the unit number.
TAPDIR
cannot find a LogicaL unit that matches your specification. Try
mounting the device.
?Tape is not fiLe structured
The tape you are trying to read was not written by the FILTAP
program.
The TAPDIR proqrari can only read tapes written by FILTAP.
Check to make sure you have mounted the correct reel of tape.
?More than one output specification
You may not supply more than one output specification.
?Device fulL
There is no more room on the disk.
ZNo such files
TAPDIR
was
specification.
(30 April 1Q81)
unabLe
to
find
any
fiLes
matching
your
input
TAPDIR (Cont'd)
Page 4
CHARACTERISTICS:
A
file—oriented tape directory program that displays a directory of a
tape that was written by FILTAP. ALLows you to specify wildcard file
specifications.
Sends dispLay to your terminal, a disk fiLe, or a orinter_
Listfilespec is DIRECT.LST in the account and device you are
Logged into. DefauLt input file specification is *.* and the account
and device you are Logged into.
DefauLt
The device and account portions of the input fiLe specification soecify
the disk account and device from which the fiLes were originalLy backed
up by FILTAP.
(30 ApriL 1981)
tapf ii
FUNCTION:
fiLes from magnetic tape to disk.
fiLe—oriented disk backup from tape to disk.
Writes
ALLows you to restore
HINTS/REStRICTIONS:
Used in combination with FILTAP (to write disk files to the tape) and
(to see a list of fiLes on magnetic tape). (See the reference
sheets for TAPDIR and FILTAP.) OnLy reads tapes that have been written
via FILTAP.
Not for transferring data between ALpha Micro and
TAPDIR
non—Alpha Micro computers. (Use the TAPE program for that purpose—— see
the TAPE reference sheet.)
Use a separate TAPFIL command for each magnetic tape reel.
SimiLar to the COPY command. (See the COPY reference sheet.) You may
not copy to a disk account if it is not in the project you are copyinq
from unLess you are Logged into the System Operator's
or
are
Logged into the account you are writing to.
account,
(1.2],
If you are logged
into (1,23, the defauLt output account specification is 1], and if the
you are copying to does not exist, TAPEIL creates it. You may
account
copy fiLes into the account you are Logged into from any other account,
regardless of project number. TAPFIL is a witdcard file command. (See
Chapter 9 of the AMOS User's Guide, (DWM—OO100—35), for information
on using wiLdcard commands.)
The
input specification must qive the exact specification of the fiLes
you want to transfer from the tape, incLuding device and account
specifications of the files as they were written to the tape. The
output specification alLows you to specify the device and account the
files are to be written to on the disk, and to rename the fiLes as they
are written out to the disk.
FORMAT:
.TAPFIL{/switches)Cout spec)={inspecf/switches}{,inspec2{/swi tches}. .." EID
/switches specifies a TAPFIL option, outspec specifies the fiLes
to be created on the disk, and inspec specifies the fiLes to be
transferred from the tape (including the disk device and account
specifications originaLly associated with the files when they were
where
backed up onto tape by FILTAP.)
(30 prit 1981)
TAPFtL (Cont'd)
Paoe 2
DEFAULTS:
output specification defauLts to the input specification. If you
are Logqed into [1,21, the defauLt output account specification is 0.
The input specification defauLts to *.* and the account and device you
are Logqed into.
The defautt
switches are /NOQUERY/DELETE.
The
defauLt magnetic tape drive device specification is MTU.
The
OPTIONS:
the switches beLow to seLect TAPFIL options. Each switch must
begin with a sLash. Remember that the pLacement of the switch on the
command tine modifies its effect.
Use
or /Q
/QUERY
Ask
user
for
(fiLe switch).
confirmation before copying fiLes
/NOGUERY
or /NOQ
Don't ask for confir,ation before
(defauLt, file switch).
/DELETE
or ID
Copy
copying
fiLes
to an existinq fiLe, thus deLetinq it
(default, file switch).
INODELETE or /NOD
Don't
over
CODY
switch).
over
to
an
existing
tile
(fiLe
OPERATION:
1.
by the optionaL output specification. Then
specifications. Type a
RETURN.
The output specification assigns the specifications of the
new
files you are creating; the input specification seLects the
files to be copied. For example, to copy aLl .PRG files from the
Type
TAPFIL
fotLowed
type an equal sign folLowed by any input
tape that were originally backed up from account [110,2] on DSK2:
over to your current account DSK3:C110,5], enter:
.TAPFIL DSK3:[11O,5]=DSK2:*.PRGC11O,2J @
specification of the
drive that hoLds the tape reeL you want to read:
Now TAPFIL asks you for the
magnetic
tape
Enter tape unit nUmber:
TAPFIL
assumes a default device code of MTU.
in the magnetic tape drive Mliii:,
you
may
So, to read the tape
either enter "1
Or
'MTU1:'.
2.
Remember that
you may specify wildcard
fiLe specifications to
TAPFIL (as in the input specification *.PRG, above).
(30 ApriL 1981)
TAPFIL (Cont'd)
3.
Page
3
Use the /QUERY switch to ask for confirmation before each transfer.
Enter a V for Yes or an N for No after each TAPFTL prompt. Do not
type a RETURN after your answer. For exampLe, suppose you are
logged into DSK2:, and you are copying files from the maqnetic tape
drive MTUO:
.TAPFIL *.OLD[]DsK3:*.MAC[1Q,*i/QlJERV tD
Inter tape unit number: 0 ED
MTUO:DSK3:NEW.MAC[1O,3J to DSK2:NEW.OLDrIO,31?Y
MTUO:DSK3:B32.MAC[1O,4J to DSK2:832.OLD[1O,4J?Y
MTIJO:DSK3:SCRTCH.MACC10,61 to DSK2:SCRTCH.OLDI1O,61?N
Tota ot ? tiles transterred
You may enter a Control—C at any time to stop the file transfer.
Remember, the placement of the TAPFIL switches modifies their
effect 4.
As with the COPY command, you may not copy files into an account
that is outside of the project you are copying from unless you are
Logged into [1,2] or are logged into the account you are writing
to. If you are Logged into [1,2], TAPFIL will copy to any account,
and
wilL
create
the
account
you
are writinq to if it does not
already exist. When you are Longed into [1,1, the default output
account specification is C].
ERRORS:
7Cannot find DSKO:SCNWLD.SYSC1,41 or MEM:SCNWLD.SYS
TAPFIL needs this file to be able to process wildcard
your file specifications. This message can mean that
not
exist
symbols in
SCNWLD.SYS
does
or that you do not have enough memory to load the file into
your partition.
?Cannot READ Devn: — device does not exist
?Cannot READ Devn: — device is not mounted
You tried to copy to or from a device that is not
Listed in the
your SVSTEM.tNI, does not have a driver in account
[1,61 of the System Disk, is not file—structured, or is not mounted.
(Devn: is the device you specified.)
DEVTBL
command
in
%No file—oriented device corresponding to Devn: is mounted
You
specified a device, but tett off the unit number. TAFFIL
tried to find a logical unit that matched the device code you
specified, but failed to do so. Try mounting the device.
?Tape is not tile—structured
The tape you are trying to read was not written by FILTAP. TAPFIL
can only read taces written by FILTAP. Check to make sure you have
mounted the correct reel of tape.
(30 April 1981)
TAPFIL Ccont'd)
Page 4
?Missing output specification
You omitted the equal sign in the TAPFIL command
Line; TAPFIL
couLdn't telL which information was your input specification and which
was your output specification.
?More than one output specification
You may not supply more than one output specification.
?FiLes may not be transferred to RES:
You may onLy add programs to system mmory
command within your SYSTEM. INI.
by
usinq
the
SYSTEM
%Not copied — Destination file aLready exists
You tried
to copy to an existing fiLe whiLe the /NODELETE option
was in effect.
?You are not logged in under [1,21, can't create Cp,pnl
You cannot copy from an account to a nonexistent account unless
are Logged into the System Operator's account, [1,2]. tf you copy
to a nonexistent account while logged into [1,2], TAPFIL will create
the account for you.
you
?Output MFD is fuLL
The Master
FiLe Directory only has room for 64 entries. The
transfer in progress would have created a new account, but there is not
enough room in the MFD.
?Device full
No more room on the disk.
ZBypassinq BADBLK.SYSL1 ,2]
BADBLK.SYS exists to prevent bad bLocks
on a device from being aLlocated, and
should never be directLy accessed.
You cannot copy the BADBLK.SYSC1,2J fiLe, since this would Lead to
the corruption of the file system.
?Cannot OPEN Devn: — protection vioLation
You tried to copy into an account you are not logged into that
in the same project as the account you are copying from, and
are not Logged into [1,2). Either log into [1,2] or the account
want to write into, and try aqain.
not
(30 April 1981)
is
you
you
TAPFIL (Cont'd)
Paqe S
CHARACTERISTICS:
file-oriented proqram that transfers files from a maqnetic tape to
the disk. You must specify the account and device that the fiLes were
oriqinady backed up from. AlLows you to rename files beinq copied.
A
transferring
for
data between ALpha Micro and non—ALpha Micro
computers—— use the TAPE proqram for that Durpose.
Not
Accepts
fiLe specifications.
Output
file soecificaton
input file specification; input specification defauLts to
wiLdcard
defauLts
to
*.* and account and device you are Logged into. DefauLt switches
/NOQIJERY/DELETE.
DefauLt maqnetic tape drive device code is MTU.
(3D ApriL 19R1)
are:
-I
tape
FUNCTION:
Magnetic tape utility program that copies data from disk fiLes to tape
or vice versa.
HINTS/RESTRICTIONS:
TAPE copies data from disk fiLes to magnetic tape or from tape to disk
fiLes. It can perform ASCII to EBCDIC data conversion and vice versa.
If
are copying a magnetic tape created on another system, chances
you
are that the data is incompatible with the AMOS system.
AIphaBASIC
requires that aLL data records end with a carriage return/line—feed
pair. If these are not present, the BASIC may be unabLe to read the
mag
tape data you have written into a fiLe. The screen—oriented text
editor, VLIE, requires that each line end with a carriage
return/Line—feed pair, and that the Line be Less than 510 characters.
Beyond converting data from EBCDIC to ASCII or vice versa, the task of
modifying data so that it is compatible with the AMOS system is Left up
to you.
must
MTSTAT.SYS
be
system initiaLization
memory.)
If
you
in system memory. (Use the SYSTEM command in the
command
file to add this moduLe to system
are not sure whether or not MTSTAT.SYS is already in
system memory, type SYSTEM foLLowed by a RETURN.
moduLes are in system memory.
SYSTEM teLls you what
Make sure that the magnetic tape drives you want to access are defined
in your SYSTEM.INI device table. These devices are NOT sharabte, so
place them after a stash in the DEVTBL command Line. For example:
DEVTBL DSK1,STDO,STD1,MEM,RES,/MTUQ,MTU1,MTU2,MTU3
works with sequentiaL disk fiLes that
contain
data records. It does not support any random—access fiLe
format on the tape. Before you use TAPE, use the SET BPI command (see
NOTE:
TAPE
onLy
fixed—length
the
SET
are using.
reference sheet) to set the recording density of the tape you
Remember to make note of the size of the data records you write to tape
and the number of records you write per tape bLock; when you read the
data back to a disk fiLe, you wiLl need that information.
can read one fiLe after another on the magnetic tape by using TAPE
severaL times in a row without rewinding the tape. You can aLso use
the SKIP command to skip over files. See the SKIP reference sheet.
(NOTE: Some tapes contain a one—block header fiLe at the front of each
fiLe.
You
can skip over this header bLock by using TAPE once or via
You
(1 october 1979)
TAPE (Contd)
Page 2
the SKIP command.) To rewind tapes, use the REWIND command.
REWIND reference sheet.)
If
(See
the
at any time you make a mistake in answering TAPE questions, you may
type a ControL—C to exit TAPE and return to AMOS command Level..
FORMAT:
.TAPE
OPERATION:
1.
Type TAPE foLlowed by a RETURN:
.TAPE 4)
2.
Now the screen clears and TAPE
begins
to
ask
a
questions, cLearing the screen after each dispLay:
series
of
This is the magnetic tape program
It can copy fiLes from disk to tape or it can copy fiLes
from tape to disk.
*
*
*
Which do you want to do?
1— copy a fiLe from disk to tape
2— copy a fiLe from tape to disk
Type the number of the option you wish
Answer?
Enter
the
appropriate
number folLowed by a RETURN to seLect
the function you want to perform.
You may only enter a
or a
2; any other answer wiLL cause TAPE to display the message
above
again.
You may type a Control—C to interrupt the TAPE
1
command and return to AMOS command LeveL.
3.
Now you see:
Tape can do character code conversion
What type of conversion do you want to do?
1— None.
2— Convert the ASCII fiLe to an EBCDIC fiLe.
3— Convert the EBCDIC file to an ASCII file.
Type the number of the option you wish.
Answer?
Enter 1, 2, or 3 foLLowed by
conversion
(if
any)
wilL
a
be
RETURN.
Remember
that
the
done on the data going to the
'-A
(1 October 1979)
TAPE (Cont'd)
Page 3
output device. Whether this device is the disk or
depends on your answer to question #1, above.
4.
tape
unit
If you asked to copy a disk file to tape, TAPE begins to ask
new series of questions:
a.
a
requests
a
file specification (give the AMOS
specification of the fiLe you want to copy) and a device
specification (give the specification of the tape drive to
TAPE
which you want to copy).
b.
asks if you want to do rebLocking. (Reblocking
consists of specifying the number of file data records to
pLace
in each tape block.)
If you say no to this
question, TAPE assumes that each data record is 512 bytes
Now
TAPE
tong, and that the blocking factor is (that is, that you
to write one disk block of 512 bytes into one tape
block). If you telL TAPE that you want to do reblocking,
it asks you the size of the data records in the fiLe (in
bytes, including record delimiters) and the blocking
factor (the number of data records in each tape block).
1
want
c.
TAPE
now
displays
characters will
be
a
message
written
in
that
each
example:
tells
you how many
tape
For
block.
You are writing 20000 characters in a tape block
If this number is not satisfactory (e.g., it is zero), you
have made a mistake in answering the TAPE questions. Type
Control—c to return to AMOS command level and try using
a
TAPE again.
d.
Now TAPE is ready to write to the tape.
You see:
*
*
*
is the tape loaded?
Type return if it is
Make sure that the tape has been physically loaded
on
the
drive, and that the tape is at toad point (i.e., the
metallic film at the start of the tape is positioned at
tape
the read heads).
Type a RETURN when you are ready.
TAPE now dispLays this message:
Is the drive on—line?
Type return if it is
(1 October 1979)
TAPE (Contd)
Page 4
sure that the drive is on—Line.
ready to write, type a RETURN.
Make
e.
If the drive is
TAPE now transfers your file to the tape.
When
it is
finished, you see a message that teLls you how many blocks
were
written and how many errors were encountered. For
example:
There were 100 blocks written or read
There were 0 errors
5.
If you asked to copy data from tape to a disk file, TAPE
you a series of questions:
a.
asks
asks for a file specification (give the AMOS
specification of the file you want to create) and a device
specification (give the specification of the tape drive
TAPE
you want to use).
b.
must now supply bLocking information to TAPE.
Note
that when writing data from a disk fiLe to tape this
information is optionaL; in that case, TAPE has a defauLt
You
record size and blocking factor that it can use. However,
when writing from tape to a disk fiLe, you MUST suppLy
bLocking
information.
TAPE asks you the size of the data
records (in bytes, incLuding record delimiter characters)
and the number of data records in each tape block. (These
vaLues were estabLished when you first wrote the data onto
the tape.)
c.
TAPE now telLs you how many characters it is going to read
per tape bLock. For example:
You are reading 1000 characters in a tape block
If this number is not satisfactory (e.g.,
mistake
it
is zero), you
in answering the earLier TAPE questions.
Type a ControL—C to exit TAPE and return to AMOS command
Level. Then try using TAPE again.
made
d.
(1 October 1979)
a
now
asks you how many tape blocks you want to read.
When you enter this vaLue, remember that TAPE wiLl read
fewer bLocks than that it: 1. it finds an end—of—fiLe
marker; or 2. it reaches the end of the tape.
TAPE
TAPE (Cont'd)
Page 5
e.
TAPE now asks you to type RETURNs when the tape is
Loaded
when the drive is on—tine. After TAPE reads the data
from the tape, it displays a message that tells you how
and
many
tape
encountered.
bLocks
were
read
and
For example:
many errors were
how
There were 200 bLocks written or read
There were 0 errors
ERRORS:
You can see the standard system error messages if
fiLe or device specifications.
For exampLe:
you
?Cannot READ Devn: — device does not exist
Make
sure you have defined the magnetic
system device tabLe.
provide
invaLid
tape drive in your
You can also see the foLlowing TAPE message:
You are writing 0 characters in a tape block
This message indicates that you made an error in entering
vaLues to the TAPE questions that asked for
bLocking information.
Type a Control—c to exit to AMOS command level and
again.
try using
TAPE
CHARACTERISTICS:
MTSTAT.SYS must be in system memory.
sure that you convert the
compatible with the AMOS system.
Make
data
you
TAPE works only with sequential disk files
data records.
The
that
transfer
contain
default blocking factor and data record size for
so that
it
is
fixed—length
data from
file to tape is: blocking factor = 1; data record size writing
= 512 bytes.
Returns your terminal to AMOS command level.
(1 October 1979)
time
FUNCTION:
or
sets the system time of day and resets the time of day on
the
AM—120 AuxiLiary I/O ControlLer board.
DispLays
HINTS/RESTRICTIONS:
time in AM/PM format; aLlows you to set
that
format or in military (i.e., 24—hour) format.
Displays
the
either
time
in
Requires the fiLe TODCNV_PRG in account [1,4] of your System Disk.
Certain
features
are
enabLed
onLy if your system contains an AM—120
Auxiliary I/O ControlLer board. (The AM—120 board performs severaL
functions, incLudinn providing a battery—supported caLendar and clock
which maintain and update the date and time even when your system is
not on.) For information on the AM-120, see the document Software
InstaLLation Instructions for the AM—120
You may onLy set the system time and reset the AM—120 time if
Loqqed into the System Operator's account, C1,2J.
From
you
are
within the system initialization command file, TIME alLows you to
set the system time automaticaLly from the AM—120 cLock/caLendar.
TIME is not re—entrant, but is re—usabLe.
FORMAT:
.TIME
or:
.TIME HH:MM:S5(AM{PM}} ED
or:
TIME
where HH is hours, MM is minutes and SS is seconds.
You may optionaLLy
enter AM or PM it you do not use miLitary (i.e., 24—hour) format.
You may use the first format when Logged into any account.
displays the time (if it is set).
This format
You may only use the second format if you are Logged into the System
Operator's account, C1,2J, or if you are usinq TIME in response to a :1<
command
that
appears
before the finaL SYSTEM commmand in your system
This format sets the system time and
initialization command fiLe.
optionaLLy resets the time on the AM—120 board.
(Changed 30 ApriL 1981)
TIME (Cont'd)
Paqe 2
Use the third format from within the system initiaLization command file
to set the system time from the AM—121) AuxiLiary I/O Controller board.
DEFAULTS:
If you have entered the time in military form, TIME sets the display to
or PM as dictated by your entry; if you have not used miLitary
format, the default is AM.
AM
OPERATION:
At AMOS command level from any account:
1.
To see the time of day, type TIME followed by a
RETURN.
For
example:
.TIME E
T2:30:12 PM
At AMOS command level from the System Operator's account, [1,21:
1.
set the system time of day, type TIME followed by the time
(in the format IIH:MM:SS) optionally followed by an AM or PM.
(Remember: if you are using military format, do not include an
To
AM or PM on the TIME command line.)
or:
For example:
.TIME 03:12:56 PMI!jD
TIME 16:00:00 @
2.
The system time is now set. If your system contains an AM—120
AuxiLiary I/O Controller board, TIME now asks you if you want
to reset the time on the AM—120:
Do you wish to reset the AM—120 board also?
Answer by entering a V or an N folLowed by a RETURN.
If you
answer N. the system time is still set to the time you
specified, but the time is not changed on the AM—120 board.
In the SYSTEM.INI file:
1.
To automaticaLly set the system time of day from the AM—120
when
your system is rebooted, include the TIME command
in your system initialization command fiLe before the final
board
SYSTEM command but after the CLKFRQ command,
CLKFRQ 60
TIME
SYSTEM
(changed 30 April 1981)
for example:
TIME (Cont'd)
Page
NOTE: This feature requires that your system contain an AM—120
AuxiLiary I/O ControLler board.
ERRORS:
?CouLdn't Load TODCNV
find TODCNv.PRG in system memory, in your memory
TIME cou'dn't
Dartition, or in the disk account DSKO:E1,4J. Check your System Disk
to make sure that it contains TODCNV.PRG[1,4J. You may aLso see this
message if there is not enouqh room in your memory partition to Load
TODCNV.
You
can
use
the MAP command to see what moduLes are in your
memory partition; if there are modutes in your memory
that you don't
using the DEL command to delete them. Or,
check with the System Operator to see if you can expand the size of
your memory øartition.
need,
make
more
room
by
?Iiproper time format
You entered
the time of day in an iLLegaL format. (For example,
you may have used sLashes instead of colons.)
Look at the FORMAT
section above for information on the proper TIME command Line format.
?Pease enter V or N
You have entered an invaLid response to the question
to reset the AM—120 board aLso?". Enter onLy a V or an N.
Do you wish
?You must be Loqged in to [1,2] to reset the date
You may only use TIME to set the time if you are Loqged into ri,n
or if you are using TIME in response
to a :1< command that appears
before
fiLe.
the finaL SYSTEM commmand in your system initialization command
CHARACTERISTICS:
DispLays the time of day in AM/PM format.
If you are Loqqed into (1,2J, you can use TIME to change the system
of day usinq miLitary format or AM/PM format. ALso aLLows you to
reset the time stored by the AM—12C1 AuxiLiary I/O ControLler board.
time
From within the system initiaLization command fiLe, TIME alLows you
to
set the system time from the AM—120 board.
NOTE:
Some
features
require
that
your
Auxiliary I/O Controller board.
uses the TODCNV.PRG oroqram.
TIME is not re—entrant, but is re—usable.
(Changed 30 Apri 1981)
system
contain
an
AM—lW
trace
FUNCTION:
allows you to turn the command Ii Le trace flag on and off within
a command file, thus affecting what command file eLements the user of
TRACE
the command fl Le sees.
HINTS/RESTRICTIONS:
May
appear
in
onLy
a command file or DO fiLe. When the command fiLe
command
fiLe can see alL of the
trace flag is 'on," the user of
contents
of
command fiLe as the fiLe is processed; the user does
the
not see aLL of the contents if the trace flag is
off.'
(Even when
the
trace fLag is oft, certain speciaL items in the command fil.e can be
seen by the user of the fiLe—— e.g., messages to the user, program
output, etc.—— if you use the :R, :S, and :<) symboLs.)
For
information on setting up command fiLes, see Chapter 8, "Command FiLes
and
DO
Files,"
in the AMOS User's Guide, (DWM—OO100—35)_
detaiLed discussion of the command file trace fLag, see
of
Command
FiLes and DO Files, (DWM—OO100—63), in
Information" section of the AM—ba documentation packet.
TRACE allows you to turn the trace fLag on or off at
For a more
Features
the "User's
New
any
time
within
or
off,
or
the command fiLe, as many times as you want. You may also use TRACE to
switch the current state of the trace fLag, regardLess of what that
state may be. Note that the standard command fiLe symboLs :S, :R, and
:<> work with TRACE in the same way that they worked with :T (an
earlier predecessor of the TRACE command).
FORMAT:
TRACE Argument
where Argument teLls TRACE to turn the trace fLag
switch its current state.
on
to
DEFAULTS:
If
you do not
include an argument on the TRACE command Line, the
command is ignored. If no :T or TRACE command appears in the command
fiLe, the trace fLag is off.
(1 May 1980)
TRACE (Cont'd)
Page 2
OPTIONS:
TRACE takes one of three arguments:
ON
Turns the trace fLag on.
OFF
Turns the trace fLag off.
SWITCH
Switches (that is, reverses) the current state
of the trace fLag.
OPERATION:
1.
PLace
the
TRACE
command
anywhere in your command fiLe where you
want to affect the status of the trace fLag.
For exampLe:
Command tiLe to compile BASIC programs.
(Want user to see that we are using compiLer.)
TRACE ON
COMPIL ARTBL
COMPIL IDXGL
COMPIL OEMENU
TRACE OFF
Don't want user to have to see cLeanup.
ERASE *.BAK
COPY t11O,OJ*.OLD=*.BAS
ERRORS:
TRACE dispLays no error messages. If you
argument, the TRACE command is ignored.
do
not
suppLy
the
proper
CHARACTERISTICS:
three arguments (ON, OFF, and SWITCH) to turn on, turn off, or
switch state of command fiLe trace fLag.
Uses
May onLy be used in a command file or DO file.
(1 May 1960)
tricldt
FUNCTION:
Troubleshoots a Trident system by alLowing
you to communicate with the
Century Data 1150A Formatter.
HINTS/RESTRICTIONS:
Before trying to use
Instructions for the
the Installation and Operatin
System that accompanies the AM—400 Har
Disk Interface and read the Century Data 1150A Formatter manual.
TRIDDT,
read
AM—400
For information on the error and status codes returned by the Formatter
list of TRIDDT commands, refer to
3, 'Functional
Description," of the document Trident 1150 Section
Formatter Performance
Specification BuLLetin No. 346.
This document is available from
ALpha Micro, and shouLd be included with each Trident system.
and a
ALL
TRIDDT commands and status codes are in hexadecimal,
so be sure to
use the SET HEX command before using TRIDDT.
These
commands
and
statuses are those vaLues the system usualLy
uses
to
transfer
data
and
information between the computer system and the Century Data Formatter.
FORMAT:
TRIDDT
OPERATION:
1.
Type TRIDDT foLLowed by a RETURN:
.TRIDDT
2.
Now TRIDDT asks you for a command:
COMMAND:
Enter the appropriate
command
is
a
TRIDDT command.
sixteen—bit
For example, the 80
command whose lower byte contains
zeros in bits 7—4. Bit 3 of that command contains a zero if
we
are checking formatter status or a one if we are checking
drive status. To request information on drive status,
then,
enter an 8008 after the command prompt.
(1 October 1979)
For exampLe:
TRIDDT (Cont'd)
Page 2
.TRIDDT
COMMAND: 80D8
STATUS: OOCO
The status code that TRIDDT returns in the exampLe above telLs
us that the addressed drive (drive zero in this case) is READY
and ON—LINE.
3.
To exit TRIDDT, enter a ControL—C.
ERRORS:
UNKNOWN STATUS BYTE
You see this error message if the Trident encounters a status byte
from the AM—400 that it does not recognize.
CHARACTERISTICS:
ALLows
you
to
communicate
with
the Century Data 11SQA Formatter to
troubleshoot a Trident hard disk system,
Returns your terminal to AMOS command Level.
(1 October 1979)
triini
FUNCTION:
Performs initialization for Century Data 125, 150, arid 1200 hard disks.
HINTS/RESTRICTIONS:
If
you are using models 125, 150,
or 1200 of the Century Data Trident
series of hard disks as peripheral disk drives (that is, you are not
using
these drives as your System Device),
you must use the TRITNI
command every time you turn on or reset the system to initialize the
Century Data 1150A Formatter.
If
do not use the TRIINI command, the disk drive wiLt not be able
to be
NOT READY).
you
to achieve READY status (i.e., a SYSTAT command shows the drive
FORMAT:
.TRIINI 4)
OPERATION:
1.
Type TRIINI foLlowed by
a RETURN:
.TRIINI
The TRIINI command
2.
TRIINI
returns
the formatter.
a
initializes the 1150A formatter.
numeric code that identifies the status of
The message takes this form:
STATUS: n
where ii is a 16—bit status code.
For a
formatter
status
codes,
refer
to
accompanying the 1150A formatter.
discussion
the
of the
documentation
ERRORS:
TRIINI generates no error messages.
CHARACTERISTICS:
Communicates with a Century
Data
AM—400 Trident Hard Disk Interface.
uSDA
formatter
Returns your terminaL to AMOS command level.
(1 October 1979)
working
with
the
1
triad
FUNCTION:
Bootstrap
Loader program for a system that
the Century Data
Trident 125, 150, or 1200 hard disk as the System uses
Device.
HINTS/RESTRICTIONS:
The TRILOD program when contained on a 2716 PROM
boot off a System Disk on a 125, 150, or 1200 hardaLLows the system to
disk when a hardware
reset occurs (that is, when you hit the RESET button).
The program is aLso in account DSKO:[1,4] of the System Disk.
You
may
use
TRILOD at AMOS command
LeveL to reset the
system if your
System Device is a T25, T50, or T200 hard disk. The
memory
partition
of the job that uses the TRILOD
command
MUST
be
in
Bank
Zero
if your
system bank switches memory.
(For information on
bank—switched
the
document
Memory
Management
Option,
(DwM—QOIQO—1o) in the AM—iQO documentation packet.)
systems,
refer
to
TRILOD onLy tries to boot off surface Zero.
drive is write—protected
It wiU not operate if the
FORMAT:
.TRILOD
OPERATION:
1.
Type TRILOD foLLowed by a RETURN:
.TRILOD
The system now
resets itseLf by reading a copy of
bootstrap program into system memory and executingthe
it.
2.
TRILOD
invoked, the TRILOD program reads the
operating system
skeLeton
monitor,
DSKO:SYSTEM.MON[1,4J,
into
memory.
SYSTEM.MON then brings up the system under the controL of
your
system initiaLization command
Once
fiLe, SYSTEM.INI.
3.
Once the system is up and running, you see the AMOS prompt.
ERRORS:
TRILOD
generates
SYSTEM.MON(1,4J and
no
error message, but if it does not find
SYSTEM.INIL1,41, the start—up procedure faiLs.
TRILOD only tries to boot off surface Zero.
(1 October 1979)
-
TRILOD (Cont'd)
Page
CHARACTERISTICS:
Boots
the system from surface Zero of a Century Data Trident 125, 150,
or 1200 hard disk if that disk is the System Device.
Does not operate if the drive is write—protected.
Returns your terminaL to
successfuLLy.
(1 October 1979)
AMOS
command
LeveL
if
the
system
resets
tdset
FUNCTION:
InitiaLizes the Century Data 1150A Formatter
to handLe the specific
of Century Data hard disks on your system.
mix
HINTS/RESTRICTIONS:
The AM—400 Hard Disk Subsystem aLLows
you to run different Century
hard disks under controL of a single Century Data uSDA Formatter. Data
For
example, you can run T—25, 1—SO, T—BO, 1—200,
and
T—300
drives
on
the
same system in any mix, so long as you do not exceed
the maximum of
four drives per formatter. (with the optionaL USDA
you may
use eight
drives with one formatter.) NOTE: If you expansion,
do
mix
drives,
you
may reference only one type of drive as DSK.
The purpose of the TRISET command is to tell the
Century Data Formatter
the specific mix of
each
drives that it is handling.
time you reset or turn on the system.
command LeveL or you may incLude TRISET in
your
command file after the
Reference
each
SYSTEM commands,)
type of drive in the
different three—Letter code.
You
must
run
TRISET
(You can do this from
AMOS
initialization
system
DEVTBL and BITMAP commands with a
For example, the commands beLow set
up a
system that contains a T—300
(DSKO:—0SK18:, the System Device), a T—25
CTRA5:—TRA9:), a 1—50 (TRB1O:—TRB14:), and a 1—80 (TRC1S:—TRC19:):
DEVTBL DSKO,DSK1,DSK2,DSK3DSK4DSK5DSK6DSK?
DEVTBL DSKS,DSK9,DSK1O,DSK11DSK12DSK13DSK14
DEVTBL DSK1S,DSK1&,DSK17,DSK18
BITMAP DSK/1630,0,1,2,3
18
BITMAP TRA,562,5,6,7,5,9
BITMAP TRB,1022,1o,11,12,13,14
BITMAP TRC,1534,15,16,171819
Remember to rename the drivers in account DSKO:E1,6J
Data drives to the
three—letter names by which
for
the
Century
source
program
program
account
you referenced those
drives in the DEVTBL and BITMAP commands. For example,
in
sampLe
commands
above, we reference the T—50 drive as device TRB. the
Rename the
T—50 driver, DSKO:TRIT5O.DVR[1,6J, to DSKO:TRB.DvRC1,6J.
Before using
TRISET,
you
may
have
to
modify
the
to reflect the mix of drives on your system if that
is not already correctly set up. TRISET.MAC
is located in
TRISET.MAC
DSKO:L10,2].
(1 October 1979)
TRISET (Cont'd)
Page 2
For more
information on modifying TRISET.MAC and setting up
your system initiaLization command file to handLe a mix of Century Data
drives, refer to the document InstaLLation and Operating Instructions
for the AM—400 System, that accompanies your AM—400 Hard Disk
Interface.
NOTE:
The portion of code that you must modify is titled "Configuration
TabLe."
Each
Line in the tabLe below defines a type of Century Data
Trident drive being used on the system.
(The first
four entries
represent the four drive—types in the exampLe above.) The high byte of
the Last word in each entry represents the physical drive number of the
device.
For
exampLe, the last word of the fourth entry is 1400. If
you transLate this number into binary, the top byte (the top eight
bits) represents the number 3. The fourth entry, then, defines the
drive physicaLly addressed as drive #3 on the system.
A sampLe configuration table in TRISET.MAC:
CONFIGURATION TABLE FOR EIGHT DEVICES
(DRIVES 0—7)
THE SIXTH WORD IN EACH ENTRY IS THE
SECTOR—PER—TRACK CONSTANT
—— USE 26 FOR T25, T50, T200 DRIVES
—— USE 40 FOR T80 AND T300 DRIVES
THE LAST WORD IN EACH ENTRY IS THE DRIVE
NUMBER (HIGH BYTE).
CHGTBL: WORD
WORD
WORD
WORD
WORD
WORD
WORD
WORD
0,0,0,0,400,40,400,0
O,0,0,O,400,26,400,400
0,0,0,0,400,26,400,1000
0,0,0,0,400,40,400,1400
o,o,a,o,400,26,400,2000
0,0,0,0,400,26,400,2400
0,0,0,0,400,26,400,3000
0,0,0,0,400,26,400,3400
;
;
;
;
;
;
;
;
Drive C
Drive
1
Drive 2
Drive 3
Drive 4
Drive S
Drive 6
Drive 7
END
Use MACRO to re—assembLe the TRISET program after changing
the
Then repLace the version of TRISET.PRG aLready in DSKO:E1,4].
FORMAT:
.TRISET
OPERATION:
1.
Type TRISET foLtowed by a RETURN:
.TRISET
(1 October 1979)
table.
TRISET (Cont'd)
The
Page 3
TRISET command now tetis the Century Data uSDA Formatter
what kinds of Century Data Trident disks are hooked up to your
system.
TRISET
and the Trident
initiatization programs
(TSOINI and TRIINI) dispLay standard compLetion codes.
2.
Now
that the formatter is properLy initiaLized,
command to mount the devices you want to access.
use the MOUNT
ERRORS:
TRISET generates no error messages.
CHARACTERISTICS:
InitiaLizes the Century Data 11SOA Formatter to handLe the specific
of Century Data hard disks you have on your system.
mix
You may incLude TRISET in your system initiaLization command fiLe after
You must run TRISET each time you reset or turn
On your system.
any SYSTEM commands.
Returns your terminaL to AMOS command LeveL.
(1
October 1979)
C
trmdef
FUNCTION:
part of the system initiaLization command file, TRMDEF defines the
terminaLs to be used on the system. At AMOS command LeveL, it gives
you information about the system terminaLs.
As
HINTS / RESTRICTIONS:
the system is up and running, TRMDEF is used to find out
information about the terminaLs defined on the system. As part of the
system initiaLization command fiLe, the TRMDEF command actuaLly defines
those terminaLs.
(For information on defining terminaLs, see the
document The System InitiaLization Command File, (DWM—00100—09), in
the "System Operator's Information' section of the AM—100 documentation
packet.)
Each terminaL on the system must have its own TRMDEF command
Once
in the SYSTEM.tNI.
FORMAT:
.TRMDEF E
or:
TRIMDEF TerminaL—name, Interface=port#, In—width, In—buffer, Out—buffer
where the various parameters define the terminaL to the
OPERATION, beLow, for information on these parameters.)
system.
(See
OPERATION:
At AMOS command leveL:
1.
Type
TRMDEF
gives the
system:
foLLowed
folLowing
1.
by a RETURN. Each
about a
information
Line in the display
terminal on the
terminal name; 2. job to which it is attached; 3.
memory address (in octaL) at which the TerminaL Definition
BLock for that terminaL exists; 4. interface driver used by
the terminaL; 5. number of the port on the I/O board the
termina is using; 6. terminaL driver used by that terminaL;
and 7. terminaL parameters. For exampLe:
.TRMDEF
TRM1 JOB!
TRM2 JOB2
TRM3 JOB3
TRMÔ
QUME
NULL SPOOL
(Changed
1
May 1980)
025574
027764
030712
032306
033230
033646
AM300
AM300
AM300
AM300
AM300
1
SOROC
2
HAZEL
3
SOROC
PSEUDO
6
SOROC
5
TELTYP
0
NULL
100,100,100
100,100,100
100,100,100
50,50,50
50,50,100
17,17,2
TRMDEF (Cont'd)
Page 2
The example above shows that we have six terminals defined on
the system.
TRM
is attached to JOB1.
The
TerminaL
Definition Block for TRM1 appears at memory address 025574
(this address can be of use to system's programmers; the
generaL user may ignore it.) The type of interface driver
being used by TRM1 is the program that drives the AM—300
board. TRM1 is connected to port #1. TRill uses the terminaL
driver program for a SOROC terminaL.
The three terminal
parameters specify the size (in bytes) of the terminaL's input
buffer, type—ahead buffer, and output buffer.
Note that QUME in the example above is not attached to a job
(in fact, it is a printer). Also, the terminaL named NULL is
defined as a pseudo terminaL.
A
pseudo terminal (i.e., a
terminaL that uses the PSEUDO interface driver) is not an
actual hardware device, but is a software simuLation of a
terminaL. A pseudo terminaL alLows you to use jobs that don't
require terminaL I/O without tying up a reaL terminaL. The
job that runs the Line printer spooLer program,
generalLy uses a pseudo terminaL.
for example,
In the SYSTEM.INI fiLe:
1.
Before
AMOS
can
transfer data
between
the
system
and a
terminaL, AMOS must know that the terminal exists, what driver
program to use to access the device, what kind of terminal it
is, etc.
The TRMDEF
statement performs this terminaL
definition process.
The TRMDEF statements must appear directLy after the JOBS
statement in the SYSTEM.INI. Insert one TRMDEF statement for
each terminal you want to define.
2.
To enter a TRMDEF command Line, type: 1. TRMDEF; 2. a terminaL
name; 3. the name of the interface driver program the terminaL
uses; 4. the name of the terminaL driver program the terminaL
uses; 5. the maximum terminaL tine width; 6. the size of the
terminaL input buffer; and, 7. the size of the terminal output
buffer. Separate the items on the TRMDEF command Line with
commas.
For exampLe:
TRMDEF TERM5,AM3D02:6,SOROC,100,100,lOQ
next few
command line:
The
paragraphs
discuss the eLements of the TRMDEF
TerminaL—name — A one— to six—character name you want to
assign to the terminal.
(This is the name used by the
ATTACH and PRINT commands and any commands that specify the
TRM: device.)
(Changed
7
May 1980)
TRMDEF (Cont'd)
Page 3
Interface — Type of I/O board to which the terminaL is
connected. (For example, this might be an AM—300 or a P53.)
This teLls the system what kind of interface driver program
to Load in for the terminaL. (ALL terminal interface
drivers must be in account DSKO:C1,6J and have a file
extension of .IDV.)
After the Interface, enter an equaL
sign and the number of the port on the interface to which
the terminal is connected. For exampLe, AM3002 teLLs
the system that the terminaL is connected to port #2 on the
AM—300 interface board. The AM—300 board aLso alLows you
to incLude an optiona code that seLects the terminaL baud
rate. If you incLude the optionaL buad rate code, pLace it
after the I/O port number. Separate it from the I/O port
number by a coLon (e.g., AM3002:6). (The defauLt AM—300
baud rate code is 19200 baud.) For a List of the baud rate
codes used by the AM-300 and AM—310 interface drivers, see
The System InitiaLization Command FiLe,
in the
System Operator's Information'
AM—lOG documentation packet.
(DWMOQ100—09),
section
of the
Terminal — Type of terminaL. This teLls the system what
kind of terminaL driver program to toad in to access the
terminaL. The terminaL driver programs must be in account
DSKO:Ll,6J and have fiLe extensions of .TDV.
In—width
specifies the maximum number of characters per
—
Line before the system starts to discard characters.
In—buffer — Specifies number of characters system wi LI
store in input buffer before discarding characters. (ALso
known as 'type—ahead' buffer.) Sometimes the system cannot
process characters as quickly as you type them. The
in—buffer hoLds characters tiLL the system
to them.
can
get
around
Specifies size of the terminaL output buffer
(the buffer that hoLds the characters that the system sends
to the terminaL).
Out—buffer
—
ERRORS:
TRMDEF generates no error messages.
CHARACTERISTICS:
Serves both as a system initialization command and a user command.
One
TRMDEF statment MUST appear in the SYSTEM.INI for each terminaL you use
on the system.
Returns your terminal to AMOS command LeveL.
(Changed 1 May 1980)
txtfmt
FUNCTION:
Formats
fiLes.
files
text
as
directed
by
TXTFMT commands embedded in the
HINTS/RESTRICTIONS:
Use one of the system text editors to create a text fiLe. Enter TXTFMT
commands directLy into the text fiLe. (TXTEMT commands must be the
only text on a tine and must begin in the first character position at
the Left of the Line. You must precede each command with a sLash, I.)
After exiting the editor (i.e., you are at AMOS command leveL), you may
now invoke TXTFMT to format the text fiLe(s) you have created.
TXTFMT formats one or more text fiLes into a singLe, formatted fiLe.
formatted fiLe bears the same name as the first fiLe specified on
the TXTFMT command Line, but it has a .LST extension.
This
information on using TXTFMT and on the TXTFMT
commands,
For
TXTFMT
User's ManuaL, (DWM—00100—07, Rev. BOO).
refer
to
FORMAT:
.TXTFMT FiLespeclC,FiLespec2
FiLespecN}
where FiLespec seLects the text file(s) you want to format.
DEFAULTS:
TXTFMT
assumes
fiLe extensions of .TXT.
defauLt vaLues.
Refer to the
information on the TXTFMT commands.
have
Many of the TXTFMT commands
TXTFMT
user's
ManuaL,
for
OPERATION:
1.
Type TXTFMT foLLowed by the one or more fiLe specifications
that select the text fiLes you want to format. Then type a
RETURN.
For exampLe:
.TXTFMT HEADER,COPYRT,TITLE,PRFACE,MAJN
The
command
above
formats the fiLes HEADER.TXT, COPYRT.TXT,
and
MAIN.TXT into the single file
TITLE.TXT, PRFACE.TXT,
HEADER.LST.
(Changed 30 ApriL 1981)
TXTFMT Ccont'd)
2.
Pacie 2
TXTFMT telLs you as
it beqins to process each file:
.TXTFMT HEADER,MEMO ED
Processing HEADER.TXT
Processing MEMO.TXT
TXTFMT
has finished
formatting
specified, you see the AMOS prompt.
fiLes
3.
When
4.
To see your formatted fiLe, you can either print it (usinq the
PRINT command) or dispLay it on the monitor screen (via the
TYPE
command).
eoth PRINT and TYPE use the defauLt file
extension of .LST.
aLL
the
you
COMMAND SUMMARY:
BeLow is a List of some of the TXTFMT commands; for a fuLl list,
to the TXTFMT User's manual..
/LINESIZE n
Sets width of text Line
/BREAK
Start new Line
Indent Line
Right—justify
Begin new paqe
Set # of Lines per page
/PAGESIZE n
/MARGIN n
refer
Set margin
/INDENT n
/JIJSTIFY
/CENTER text
Center text Line
/PAGE
/TITLE text
Set page header
Set page number
Format text
/PAC,E n
If not n lines on
/1.1ST
Do not format text
/LE
Start new paragraph
Start new chapter
lEND LIST
Begin List
A list eLement
End the List
Mark as index entry
/NUMBER n
/FORMAT
/UNFORMAT
/PARAGRAPH
/CHAPTER
nape, begin new page
/INDEX
commands
at Low you to set the page number (Roman numeral lower,
Roman numeraL upper, chapter—oriented, absolute, etc.) for the top or
bottom of the pane.
You may also create
a
tabLe of contents,
appendices, an index with entries and sub—entries, double indents,
nested Lists whose eLements are numbered with Letters, Roman numerals,
etc. You can also reset pane numbers, header leveLs, and chapter and
Other
appendix numbers.
ERRORS:
BeLow
we
encounter.
List the TXTFMT error messaqes you are
For a fuLl list of TXTFMT error messages,
TXTFMT User's Manual.
(Changed 30 ApriL 1981)
most Likely to
refer to the
TXTFMT (Cont'd)
Page
?ILegat command X
fiLe.
TXTEMT did not recognize a command, X, that you had in the text
For example:
.TXTFMT SRCFIL.FNX
Vrocessing SRCFIL.FNX
?ILLegaL command /CHEPTER
inserts the iLLegaL command into your .LST tiLe so that you
can locate the probLem. Check your spettinq.
TXTFMT
tine too long — remainder of line ignored
TXTFMT found a Line in your text fiLe of more than
characters. It ignored everything past the 300th character.
You can aLso see the usua' system error messaqes.
301)
For exampLe:
?Cannot OPEN FiLespec — fiLe not found
You tried
to format a tile that does not exist. Check your
speLling. Make sure that you specified the proper account and
device.
CHARACTERISTICS:
Produces a formatted .LST fiLe; does not chanqe the input fiLes.
(changed 30 April 1981)
-J
type
FUNCTION:
Displays a text fiLe on your terminal screen.
HI NTS / RESTRICTIONS:
If the fiLe display covers
more than one screen page, type
a Control—s
to freeze the dispLay; type a ControL—Q to reLease the dispLay.
Type a
ControL—C to interrupt the display.
TYPE works onLy on sequential files.
Use TYPE onLy on fiLes in which the data is in ASCII form (i.e.,
files
with the extensions: .TXT, .LST, .BAS, .I'IAC,
.LSP, .HLP, .CMD, .DO,
etc.)
FORMAT:
.TYPE FiLespec 4)
where Filespec selects the file you want to see.
DEFAULTS:
TYPE assumes a fiLe extension of .LST.
OPERATION:
1.
Type TYPE foLlowed by the
to dispLay.
specification of the file
Then type a RETURN.
you
For example:
want
.TYPE PSTINV.BAS
You now see the file dispLayed on your terminal screen.
ERRORS:
?Cannot OPEN FiLespec — fiLe not found
TYPE
speLling.
wasn't
abLe
to find the fiLe you specified.
?Cannot INIT FiLespec — device does not exist
Check your
TYPE cannot find the device you specified in your fiLespec.
the SYSTAT command to see if the device is a vaLid, mounted
system device.
Use
(1 October 1979)
TYPE (Cont'd)
Page 2
?Cannot OPEN Filespec — disk not mounted
The system can't access the device specified by your
use the MOUNT command to mount the disk.
fiLespec;
?Cannot OPEN Filespec — tile type mismatch
You
tried
to display the contents of a random file.
You wiLL
have to use another method to dispLay the contents of that fiLe.
?FiLe specification error
TYPE did not understand the format of your command line.
your speLling and retype.
Check
?Cannot OPEN Filespec — iLlegaL user code
You've specified an account that does not exist.
Check your
typing.
If that's OK, check to see that you are trying to access
the proper device.
CHARACTERISTICS:
Assumes that the specified tile contains data in ASCII form.
You may not use TYPE to dispLay a random file.
Returns your terminal to AMOS command level.
(1 October 1979)
tBOini
FUNCTION:
Performs initiaLization for Century Data 180 and 1300 hard disks.
HINTS/RESTRICTIONS:
If
you are using models 180 or 1300 of the Century Data Trident series
of hard disks as peripheral disk drives (that is,
you are not using
your System Device), you must use the T8OINI command
every time you turn on or reset the system to initialize the Century
Data 115CM Formatter.
drives
these
as
If
you do not use the T8OINI command, the disk drive wiLL not be abLe
to achieve READY status (i.e., a SYSTAT command shows the drive to be
NOT READY).
FORMAT:
.1801N1
OPERATION:
1.
Type T8OINI foLlowed by a RETURN:
.T8OINI
The T8OINI command initializes the 1150A formatter.
2.
T8OINI
returns
the formatter.
a
numeric code that identifies the status of
The message takes this form:
STATUS: n
where n is a 16—bit status code.
For
a
formatter
status
codes,
refer
to
accompanying the 11SOA formatter.
discussion
the
of the
documentation
ERRORS:
T8OINI generates no error messages.
CHARACTERISTICS:
Communicates with a Century Data 11SOA
AM—400 Trident Hard Disk Interface.
formatter
Returns your terminaL to AMOS command LeveL.
(1 October 1979)
working
with
the
tSOIod
FUNCTION:
Bootstrap
loader program for a system that
Trident T80 or 1300 hard disk as the System Device.uses the Century Data
HINTS/RESTRICTIONS:
The TSOLOD program when contained on a 2716 PROM aLlows
system to
boot off a System Disk on a T80 or T300 hard disk when athe
hardware reset
occurs (that is, when you hit the RESET button).
The program is also in account DSKO:[1,41 of the System Disk.
You
use
may
T8OLOD at AMOS command LeveL
to reset the system if
System Device is a T80 or 1300 hard disk. The memory partition of your
the
job that uses the TSOLOD command MUST
be
in
Bank
Zero
if
your
system
bank switches memory. (For information on bank—switched systems, refer
to the document Memory Management Option,
(DWM—QO100—1o)
in the
AM—iDa documentation packet.)
FORMAT:
.TBOLOD 4)
OPERATION:
1.
Type TSULOD folLowed by a RETURN:
.T8OLOD 4)
The
system now resets itseLf by reading
copy of the T8OLOD
bootstrap program into system memory and aexecuting
it.
2.
Once invoked, the T8OLOD program reads
skeleton
monitor,
the
operating
system
into
memory.
SYSTEM.MON then brings up the system under the controL of your
system initialization command fiLe, SYSTEM_INI.
3.
DSKO:SYSTEM.MONE1,4J,
Once the system is up and running, you see the AMOS prompt.
ERRORS:
T8OL0D generates no error messsages.
However, if it cannot find
SYSTEM.MON[1,4] and SYSTEM.1N111,4], the start—up procedure fails.
(1 October 1979)
T8OLOD (Cont'd)
Page 2
CHARACTERISTICS:
Boots
the system from a Century Data Trident 180 or 1300 hard disk if
that disk is the System Device.
Returns your terminaL to
successfulLy.
(1 October 1979)
AMOS
command
Level
if
the
system
resets
U
FUNCTION:
ALlows
you
to temporariLy save AMOS command Lines and to Later invoke
them by typing a singLe character.
HINTS/RESTRICTIONS:
You can use the U command to temporarily save any AMOS command Line.
To invoke that command Line, type a U. For exampLe, rather than typing
the command line:
.ERASE *.BAK,*.OBJ,*.LST 4)
every
time you want to erase those types of fiLes, you can use the U
command to save that command Line and (Later) to invoke it.
U
saves
the command Line in your memory partition (in a memory module named
U.SCS), so when you cLear your memory partition or turn off the system,
the command Line you saved is gone.
FORMAT:
.U Command—Line 4)
where Command—tine is the AMOS command
Line that you want to save; or:
when you want to invoke the command line that you previousLy saved.
OPERATION:
1.
To save an AMOS
command
Line.
command
line
—
U
folLowed by the
The command line may be
Type
Then type a RETURN.
any LegaL AMOS command line (that is, it may contain an
command
with
tile specifications, a command
specification, etc.).
For exampLe:
AMOS
fiLe
.U PRINT/COPIES:2 *.LST,*.RST/WAIT/NOBANNER 4)
U remembers the command tine, but does not send it to AMOS.
To
change the saved command Line, use U again and enter a new
command Line.
2.
To invoke a command Line that you've saved — Type
by
a
RETURN.
previously saved.
(1 October 1979)
U
sends
to
AMOS
the
U
foLLowed
command Line you've
U (Cont'd)
Page 2
3.
To save more than one command tine at a time
Make
copies
of the U.PRG program under different names; then you can use
those programs to save command lines too.
—
For example, if you make a copy of U.PRG under the name A.PRG,
you can save an AMOS command line by typing:
.A Command—tine
The command line is now temporariLy saved in the memory module
A.SCS.
To invoke it, type:
You may copy (J.PRG under any name you choose; the new
builds
program
a memory module to hold the command Line you save that
has the same name as the program with an .SCS extension.
ERRORS:
[NO PREVIOUS COMMANDJ
You've typed U and a RETURN, but you have not previousLy
a command tine; LI has no command tine to repeat back to you.
saved
CHARACTERISTICS:
You
can
save as many command lines as you wish by making
copies of
U.PRG under different names, then using those copies of the program.
When you turn off or reset the system or when
you
erase
aLL
modules
from your memory partition, the command Lines you've saved disappear.
The U command returns your terminaL to AMOS command LeveL.
(1 October 1979)
we
FUNCTION:
Creates and edits text fiLes.
HINTS/RESTRICTIONS:
VIJE is a screen—oriented text editor. You see the text you are editing
displayed on the screen, and move the screen cursor to the Location in
your fiLe that you want to change.
In Command mode, VIlE aLLows you to search for specific strings of text,
perforni Local and gLobaL repLacements, move and deLete bLocks of text,
and change various editing parameters.
VIlE is re—entrant and may be
Loaded into system memory by the System Operator.
VUE copies into memory the fiLe you want to edit and makes a backup
fiLe by renaming the disk fiLe to a .BAK extension. When you exit VUE,
the new, edited version of the file goes out to disk under the originaL
name and extension of the file. You may edit a fiLe too big to fit
into your memory partition.
VIlE initiaLization fiLe, INI.VUE, alLows you to set your own default
editing parameters. Refer to the manual ALphaVUE User's ManuaL,
(DWM—OO100—15,
Revision BOO), for information on using VIlE and setting
A
up INI.VUE.
NOTE: To exit VUE, enter Command mode. (If you see a screenfuL of
asterisks or if you see your text, you are in Screen mode. Type an
Escape to enter Command mode.) Now type an F foLlowed by a RETURN to
exit and update your fiLe or type a Q folLowed by a RETURN if you want
to exit without updating.
FORMAT:
.VUE Fi lespec @E
where N Lespec seLects the fiLe you want to edit.
DEFAULTS:
The defauLts VUE uses (for exampLe, the default
set in the VIlE initiaLization fiLe, INI.VUE.
file
extension),
are
OPERATION:
1.
(Changed
1
Type VUE folLowed by the specification of the fiLe you want to
edit.
May 1980)
Then type a RETURN.
For exampLe:
VUE (Cont'd)
Page 2
.VUE XREF.BAS@ID
2.
If the fiLe you specify (in this case, XREF.BAS) does not yet
exist, you see:
XREF.BAS DOES NOT EXIST — CREATE IT?
Enter a V for Yes or an N for No.
If you enter N, VUE returns
If you enter Y, you see
a
screenfuL of asterisks; this teLLs you that VUE has created
an empty file, and that you can start to enter text.
Just
start typing, hitting a RETURN when you want to start a new
your terminaL to AMOS command LeveL.
You must not enter more
Line.
than
510
characters
between
RETURNS.
3.
If you are editing an existing fiLe, VIlE loads a copy of that
fiLe into memory and takes you directLy into Screen mode. Use
the cursor controL keys (LabeLed with arrows) to move the
cursor to the point in your text where you want to make
changes.
4.
To Leave Screen mode and enter Command mode, type
an
Escape.
see severaL lines of data. The cursor is waiting at
the VUE prompt symboL, >. This display might Look something
Like this:
Now
you
2.4
Editing
XREF.BAS
ALphavue
Status:
insert
space
34875 bytes free
fold
Margin 0
sbk
Page 3
>
Below this dispay you might aLso see a summary of VUE editing
commands.
(If the fiLe MENU, VUE exists in account DSKO:[7,OJ
or the account you are currently Logged into.) You may now use
various Command mode commands.
an Escape.
5.
exit
To re—enter Screen mode,
type
enter Command mode and type an F folLowed by a
your fiLe, enter Command
mode and type a Q foLlowed by a RETURN.
To
RETURN.
VIlE,
To exit without updating
-d
(Changed 1 May 1980)
VUE (Cont'd)
Page 3
COMMAND SUMMARY:
is a partial List of the VUE commands; refer to the VUE manual
for a fuLL List of commands. Some terminaLs aLlow you to use the
cursor control keys (marked with arrows) to move the cursor; others
require that you use ControL—J, Control—K, ControL—H, and ControL—L to
move the cursor. You may also use the RUBOUT key to deLete characters.
BeLow
ControL—A
Control—W
Control—U
Control—N
Control—R
Control—T
ControL—E
HOME
ControL—B
Control—F
Control—C
ControL—D
ControL-Y
Move cursor to front of Last word
Move cursor to front of next word
Move cursor to beginning of Line
Move cursor to end of tine
Move cursor to Last page
Move cursor to next page
Move cursor to end of fiLe
Move cursor to beginning of fiLe
Insert bLank Line
Insert space
Append lines
DeLete character and space
Delete text on Line to end of tine
Control—Z
DeLete line (including RETURN at end of line)
Control—RUBOUT
Same as ControL—U foLLowed by a Control—?.
Enter Command or Screen mode (toggle mode)
Escape
In Command mode:
Finish and update
a
COPY
Finish without updating
Copy block of text
S text
R text
Search for string
DELETE
DeLete block of text
Search and RepLace
ERRORS:
If you specify an invaLid command,
messages (e.g., fl Le not found).
VUE
you
can
itseLf
see the usuaL system
generate several
can
error messages:
Insuffi ci ent space to complete transfer!!!
Your file cannot fit into memory. Use the Unyank command to
write out the front part of the fiLe to disk.
Then you can use
the
Line over 510 characters tong!!
You
cannot enter a text Line of more than 510 characters.
the Control—B command to break up the line.
Use
Yank command to bring in more text.
Disc write—protected, pLease unprotect it
VUE cannot transfer your edited fiLe to the disk.
the disk and try again.
(Changed 1 May 1980)
Write—enable
VIlE (Cont'd)
Page 4
If for some reason VUE cannot transfer your file to the disk, it
the
moduLe
in memory IMAGE.VUE.
as a file in the account and device you are Logged into; then
edit it.)
names
(You can use SAVE to save the moduLe
You see the message:
you
can
MEMORY IMAGE STORED IN MEM:IMAGE.VUE
NOTE:
IMAGE.VUE
contains
no
Line—feeds.
after you have saved it via SAVE,
proper pLaces in the fiLe.
VUE
When you re—VUE the fiLe
re—inserts Line—feeds in the
CHARACTERISTICS:
Screen—oriented text editor.
Creates backup fiLe with .BAK extension.
Returns your terminaL to AMOS command LeveL
(Changed 1 May 1980)
wait
FUNCTION:
you to deLay the execution of any programs by your job untiL
another job compLetes its current task.
ALLows
HINTS/RESTRICTIONS:
A job's task is said to be compLeted when that job enters one of
following states: terminaL input, sLeep or externaL wait status.
the
FORMAT:
.WAIT Jobname
OPERATION:
1.
Type WAIT, the name of
a RETURN.
For example:
the job for whom you want to wait, and
.WAIT J083 <)
2.
When the specified job finishes its current task, you see
AMOS prompt.
Your job now proceeds.
the
ERRORS:
WAIT displays no error messages.
CHARACTERISTICS:
DeLays the execution of any program by your job untiL the specified job
has finished its current task.
Returns your terminaL to AMOS command LeveL.
(1 October 1979)
wnglod
FUNCTION:
Bootstrap loader program for a system that uses the Wangco
fLoppy disk
as the System Device.
HINTS/RESTRICTIONS:
The WNGLOD program when contained on a 2716 PROM at Lows
the
system to
off a System Disk on a Wangco fLoppy disk when a hardware
reset
occurs (that is, when you hit the RESET button).
boot
The program is aLso in account DSKO:L1,4J of the System Disk.
You may use WNGLOD at AMOS command Level to reset the
system
your
System Device is a Wangco floppy disk drive.
The
memory
partition
of
the job that uses the WNGLOD command MUST be in Bank
Zero
your
system bank switches memory.
(For information on bank—switched
systems,
refer
to
the
document
Memory
Management
Option,
if
if
(DWM—OO100—1O) in the AM—iQO
documentation packet.)
You may use WNGLOD either to boot from an AMS—
or STD—format diskette.
FORMAT:
.WNGLOD 4)
OPERATION:
1.
Type WNGLOD foLLowed by a RETURN:
.WNGLOD
The
system
now resets itself by reading a copy of the WNGLOD
bootstrap program into system memory and executing it.
2.
Once invoked, the WNGLOD program reads the operating system
skeLeton
monitor,
DSKO:SYSTEM.MONE1,4J,
into memory.
SYSTEM.MON then brings up the system under the controL of your
system nitiali2ation command file, SYSTEM.INI.
3.
Once the system is up and running, you see the AMOS prompt.
ERRORS:
WNGLOD generates no error messages.
SYSTEM.MONI1,4] and SYSTEM.INIL1,4J,
(1 October 1979)
However,
if it
does
not
the start—up procedure faiLs.
find
WNGLOD (COrlt'd)
Page 2
CHARACTERISTICS:
Boots
the
system from an MIS— or Sib—format Wangco floppy
Wangco disk drive is the System Device.
Returns your terminaL to
successfuLLy.
(1 October 1979)
AMOS
command
LeveL
if
the
disk if the
system
resets
wng2lO
FUNCTION:
Bootstrap
Loader program for a system that uses the Wangco fLoppy disk
as the System Device running under the AM—210 floppy disk controller.
HINTS/RESTRICTIONS:
The WNG21O program when contained on a 2716 PROM allows the system to
boot off a System Disk on a Wangco floppy disk when a hardware reset
occurs (that is, when you hit the RESET button).
The program is aLso in account DSKO:I:1,4] of the System Disk.
You may use WNG21O at AMOS command leveL to reset the
if
system
your
Device is a Wangco fLoppy disk drive. The memory partition of
the job that uses the WNG21O command MUST be in Bank Zero
your
system bank switches memory.
(For information on bank—switched
systems,
refer to the
document
Memory
Management
Option,
(DWM—OO1OD—1O) in the AM—100 documentation packet.)
System
if
may use WNG21O to boot from doubLe— or singLe—sided diskettes that
are in singLe— or doubLe—density AIlS format.
You
FORMAT:
.WNG2IO
OPERATION:
1.
Type WNG21D foLLowed by a RETURN:
.WNG21O
The system now resets itself by reading a copy of the
bootstrap program into system memory and executing it.
2.
Once
invoked,
the
WN6210
WNG21O program reads the operating system
monitor,
DSKO:SYSTEM.MONE1,4J,
into
memory.
SYSTEM.MON then brings up the system under the control of your
system initiaLization command fiLe, SYSTEM.INI.
skeLeton
3.
Once the system is up and running, you see the AMOS prompt.
ERRORS:
generates no error messages.
However, if it does not
SYSTEM.MONI1,4J and SYSTEM.INIE1,4J, the start—up procedure fai Ls.
WNG21O
(1 May 1980)
find
WNG21O (Cont'd)
Page 2
CHARACTERISTICS:
Boots the s,steoi from a Wangco fLoppy disk if th Wangco disk drive
the
System
controLler.
Device
and
Returns your terminaL to
successfuLly.
is
runs
under controL of the AM—210 fLoppy disk
AMOS
command
Leve'
if
the
system
resets
1
(1 May 1980)
xv
FUNCTION:
Allows you to position the screen cursor on your terminaL dispLay.
HINTS/RESTRICTIONS:
be
abLe to use the XV command, your terminal driver (the program
that takes care of the screen—positioning functions of your terminal)
To
must
aUow use of TCRT screen caLls. Use the XV command at the AMOS
command LeveL either directLy or within a command file.
You wiLl.
probabLy find this command most usefuL within a command fiLe; you can
use XV to heLp you position the dispLay of your command fiLe messages.
FORMAT:
.XV Row—number CoLumn—number
where Row—number is the horizontal position
verticat
between
position
1
and 24.
and
of the cursor on the screen.
Column—number
is
the
The Row—number may be
The CoLumn number may be between 1 and 80.
.XV = Screen—function
where Screen—function is the number of the screen function that you
want to perfor,n.
See
page 59 of the
AIphaBASIC User's Manual,
(DWM—OQ100—Ofl, for a List of the screen functions you can use.
(Also
see page 2 of the Addendum at the back of that manuaL.)
OPERATION:
1.
Type XV
foLlowed by the numbers of the screen row and column
where you want to position the cursor; next type a RETURN.
ExampLe:
.XY 12 40
This
positions the cursor to the 12th Line on the screen and
the 40th character position (about the middLe of the screen on
most terminaLs)
2.
Type XV, an equaL sign, and the number of the screen
you want to perform. Then type a RETURN. ExampLe:
=
This uses the screen function #0 to clear the screen.
(1 October 1979)
function
XY (Cont'd)
Page 2
ERRORS:
XV
generates no error messages. If you specify an invalid function
number or row and column numbers that are out of ran9e, Xv generalLy
ignores your command or performs some random function. So, be careful
to check for val.idity the vaLues that you give XY.
CHARACTERISTICS:
Requires that the driver program for your terrninat be able to use
TCRT
screen caLLs.
Returns your terminal to the AMOS command leveL.
U
(1 October 1979)
APPENDIX A — THE ASCII CHARACTER SET
'5)
U
APPENDIX A
THE ASCII CHARACTER SET
Many
of
the
commands in this manuaL display data in numeric form. In the
data encoded in ASCII, these commands
display the ASCII values of the data. (ASCII, American Standard Code
for
Information Interchange, provides a standard set of values for representing
case of text files that contain
text characters in numeric form.)
The
next
few pages contain charts that list the complete ASCII character
We provide both the octal and hexadecimal representations of the ASCII
vaLues. The number base in which you see data displayed is usually
octaL,
but you can telL the system to use hexadecimaL as your dispLay base.
(See
the SET reference sheet.)
set.
Note that the first 32 characters are non—printing ControL—characters.
THE ASCII CHARACTER
SET
Page A—2
'3
THE CONTROL CHARACTERS
CHARACTER
OCTAL
NULL
000
00
SOH
001
01
STX
02
03
04
BS
002
003
004
005
006
007
010
HT
011
LF
VT
ETX
ECT
MEANING
HEX
NuU. (tiLt character)
Start of Heading
Start of Text
End of Text
End of Transmission
05
Enquiry
06
07
08
09
AcknowLedge
012
013
014
OA
Line Feed
08
VerticaL Tab
DC
Form Feed
OD
Carriage Return
OE
Shift Out
SI
015
016
017
DLE
020
01
10
Dcl
021
11
DC2
12
CAN
022
023
024
025
026
027
030
EM
031
19
55
032
033
034
035
036
037
1A
Cancel
End of Medium
SpeciaL Sequence
lB
Escape
iC
File Separator
lb
Group Separator
Record Separator
ENO
ACK
BEL
IF
CR
SO
DC3
DC4
NAI(
SYN
ETh
ESC
ES
GS
RS
US
13
14
15
16
17
18
1E
iF
BeLt code
Back Space
Uorizonta Tab
Shift In
Data Link Escape
Device ControL 1
Device ControL 2
Device ControL 3
Device ControL 4
Negative Acknowledge
Synchronous IdLe
End of Transmission BLocks
Unit Separator
9
THE ASCII CHARACTER
SET
Page A—3
PRINTING CHARACTERS
CHARACTER
SP
$
Z
&
•
OCTAL
HEX
MEANING
040
20
Space
041
21
042
043
044
045
046
047
050
22
Exclamation Mark
Quotation Mark
23
24
25
26
27
Number Sign
DolLar Sign
Percent Sign
Ampersand
Apostrophe
051
29
Opening Parenthesis
CLosing Parenthesis
2A
Asterisk
28
PLus
2C
Comma
2D
Hyphen or Minus
Period
0
052
053
054
055
056
057
060
30
1
061
31
2
062
063
064
32
065
066
06?
35
)
*
+
•
/
3
4
5
6
7
8
9
070
071
28
2E
2F
33
34
36
37
38
39
=
072
073
074
075
>
076
3E
077
100
3F
C
3A
3B
3C
3D
40
Stash
Zero
One
Two
Three
Four
Five
Six
Seven
Eight
Nine
Colon
SemicoLon
Less Than
EquaL Sign
Greater Than
Question Mark
Commercial At
THE ASCII CHARACTER SET
Page A—4
CHARACTER
OCTAL
A
101
41
B
H
102
103
104
105
106
107
110
I
111
42
43
44
45
46
47
48
49
D
E
F
6
HEX
58
Upper Case Letter
Upper Case Letter
Upper Case Letter
Upper Case Letter
Upper Case Letter
Upper Case Letter
Upper Case Letter
Upper Case Letter
Upper Case Letter
Upper Case Letter
Upper Case Letter
Upper Case Letter
Upper Case Letter
Upper Case Letter
Upper Case Letter
Upper Case Letter
Upper Case Letter
Upper Case Letter
Upper Case Letter
Upper Case Letter
Upper Case Letter
Upper Case Letter
Upper Case Letter
Upper Case Letter
Upper Case Letter
Upper Case Letter
Opening Bracket
SC
Back Slash
4A
4B
P
112
113
114
115
116
117
120
Q
121
51
52
53
54
X
122
123
124
125
126
127
130
Y
131
59
1
SA
•
132
133
134
135
136
137
140
a
141
b
142
143
144
145
146
147
150
62
63
64
K
L
M
N
0
R
S
T
U
V
W
C
—
d
e
1
g
h
151
k
m
n
o
152
153
154
155
156
157
MEANING
4C
4D
4E
4F
50
55
56
57
58
SF
Closing Bracket
Circumflex
Underline
60
Grave Accent
61
Lower Case Letter
Lower Case Letter
Lower Case Letter
Lower Case Letter
Lower Case Letter
Lower Case Letter
Lower Case Letter
Lower Case Letter
Lower Case Letter
Lower Case Letter
Lower Case Letter
Lower Case Letter
Lower Case Letter
Lower Case Letter
Lower Case Letter
SD
SE
65
66
67
68
69
6A
68
6C
6D
6E
6F
THE ASCII CHARACTER
SET
Page A—S
CHARACTER
OCTAL
p
q
160
70
161
71
r
72
73
74
HEX
MEANING
x
162
163
164
165
166
167
170
y
171
79
z
172
173
174
175
176
177
7A
Lower Case Letter
Lower Case Letter
Lower Case Letter
Lower Case Letter
Lower Case Letter
Lower Case Letter
Lower Case Letter
Lower Case Letter
Lower Case Letter
Lower Case Letter
Lower Case Letter
7E3
Opening Brace
7C
VerticaL Line
7D
CLosing Brace
TiLde
Detete
s
t
U
v
w
C
I
}
DEL
75
76
77
78
TE
7F
'-I