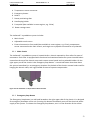
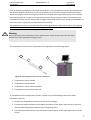
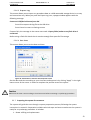
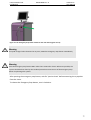
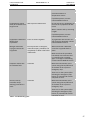
1
User Manual DSR3100000 rev. K Please read this document carefully before using the IceSense3™ cryoablation system. Do not attempt to perform any procedure before carefully reading all instructions. Always follow product labeling and manufacturer’s recommendations. If in doubt as to how to proceed in any situation, contact your IceCure Medical representative. IceCure Medical, Inc 10000 Cedar Ave, MS-13, 2nd floor Cleveland, OH 44106 [email protected] Toll-free 888-516-7389 Tel 216-929-5153 Fax 216-929-5143 IceCure Medical Ltd. HaEshel 7, 2nd floor Southern Industrial Park, Caesarea 38900, Israel [email protected] Tel: +972-4-623 0333 Fax: +972-4-623 0222 The information in this document is confidential and is intended only for use of the recipient. Unauthorized use, duplication, publication or disclosure is strictly prohibited. If you have received this document in error, please notify IceCure Medical immediately. 1 IceCure Medical Ltd. Confidential DSR3100000 rev. K IceSense3™ User Manual Table of Contents 1 OVERVIEW .................................................................................................................. 7 1.1 Introduction ............................................................................................................. 7 1.2 Intended use ............................................................................................................ 7 1.3 Indications for use ................................................................................................... 7 1.4 Qualified users ........................................................................................................ 8 1.5 Clinical decisions .................................................................................................... 9 1.6 Qualified technician ................................................................................................ 9 2 SAFETY NOTES ........................................................................................................ 10 2.1 Warnings and cautions .......................................................................................... 10 2.2 Basic safety principles........................................................................................... 10 2.2.1 Ownership ...................................................................................................... 10 2.2.2 Qualification .................................................................................................. 10 2.2.3 Training .......................................................................................................... 11 2.2.4 Clarity ............................................................................................................ 11 2.2.5 Clinical assessment ........................................................................................ 12 2.2.6 Installation and setup ..................................................................................... 13 2.2.7 Proper use ...................................................................................................... 14 2.3 Operating warning ................................................................................................. 16 2.4 Liquid nitrogen ...................................................................................................... 18 2.4.1 Danger - explosion and fire hazard ................................................................ 18 2.4.2 Opening the dewar compartment ................................................................... 18 2.4.3 Voltage and power ratings ............................................................................. 19 2.4.4 Liquid nitrogen Safety ................................................................................... 19 2.4.5 Burn hazards .................................................................................................. 20 2.4.6 Grounding ...................................................................................................... 21 2.4.7 Sterility........................................................................................................... 21 2.4.8 Mechanical handling of flexible hose and cryohandle .................................. 21 2.5 Emergencies and errors ......................................................................................... 22 2.5.1 Emergency Stop button .................................................................................. 22 2.5.2 Emergencies causing procedure halt .............................................................. 22 2.6 Adverse events ...................................................................................................... 23 2.7 Compliance ........................................................................................................... 23 2.7.1 Compliance with international safety standards ............................................ 23 2.8 Equipment classification ....................................................................................... 23 2.9 Accompanying labels ............................................................................................ 24 2.9.1 Important Symbols and Labels ...................................................................... 29 3 SYSTEM DESCRIPTION ........................................................................................... 32 3.1 Introduction ........................................................................................................... 32 3.2 Concept of operation ............................................................................................. 32 3.3 Major components ................................................................................................. 32 3.3.1 Main chassis ................................................................................................... 33 3.3.2 Emergency Stop button .................................................................................. 33 3.3.3 Flexible hose .................................................................................................. 34 3.3.4 Touch screen .................................................................................................. 34 2 IceCure Medical Ltd. Confidential 4 5 6 7 DSR3100000 rev. K IceSense3™ User Manual 3.3.5 Cryohandle and cryoprobe ............................................................................. 35 3.3.6 Handle plug holder......................................................................................... 36 3.3.7 Foot pedal ...................................................................................................... 36 3.3.8 Temperature sensor (TS) ............................................................................... 36 3.3.9 Dewar storage cases ....................................................................................... 38 3.4 Operational details ................................................................................................ 39 3.4.1 Starting the system ......................................................................................... 39 3.4.2 System pre-tests ............................................................................................. 40 3.4.3 Cryoablation procedure.................................................................................. 41 3.4.4 Warm step ...................................................................................................... 41 INSTALLATION AND SETUP ................................................................................. 42 4.1 Space and positioning requirements...................................................................... 42 4.2 Setup warnings and cautions ................................................................................. 42 4.3 Electrical requirements.......................................................................................... 43 4.4 Shipment components ........................................................................................... 43 4.5 Installation ............................................................................................................. 43 OPERATING THE SYSTEM ..................................................................................... 44 5.1 Procedure Overview .............................................................................................. 44 5.2 Pre-operational stages ........................................................................................... 44 5.2.1 Preparing the system for procedure ............................................................... 44 5.2.2 Preparing the patient for procedure ............................................................... 44 5.2.3 Switching on the IceSense3™ cryoablation system ...................................... 45 5.2.4 Cryohandle ..................................................................................................... 46 5.2.5 Show Last Treatment ..................................................................................... 47 5.2.6 General settings.............................................................................................. 48 5.2.7 Preparing the system for treatment ................................................................ 50 5.2.8 Treatment Selection ....................................................................................... 58 5.3 Operational stages ................................................................................................. 62 5.3.1 Preliminaries .................................................................................................. 62 Then, you may begin freezing. .................................................................................... 63 5.3.2 Freeze Cycle .................................................................................................. 63 5.3.3 Active warm process ...................................................................................... 67 5.4 Post-operational stages .......................................................................................... 73 5.4.1 Removing the temperature sensor from tissue ............................................... 73 5.4.2 Removing the cryoprobe from the cryohandle .............................................. 73 5.4.3 Disassembling the temperature sensor ........................................................... 74 5.4.4 Exiting the IceSense3™ cryoablation system treatment mode...................... 74 5.5 System failures ...................................................................................................... 75 5.5.1 IceSense3™ cryoablation system failure ....................................................... 75 5.5.2 IceSense3™ cryoablation system touch screen failure .................................. 76 COMPUTER INTERFACE ......................................................................................... 78 6.1 The technician menu ............................................................................................. 78 6.2 Reading the screen ................................................................................................ 78 6.2.1 Parts of the Screen ......................................................................................... 78 6.3 System messages ................................................................................................... 79 6.3.1 Status messages.............................................................................................. 79 6.3.2 Warning messages ......................................................................................... 79 6.3.3 Error messages ............................................................................................... 80 ACCESSORIES ........................................................................................................... 82 3 IceCure Medical Ltd. Confidential DSR3100000 rev. K IceSense3™ User Manual 7.1 Cryoprobe .............................................................................................................. 82 7.1.1 Single use sterile cryoprobe ........................................................................... 82 7.2 The foot pedal ....................................................................................................... 82 7.3 The temperature sensor ......................................................................................... 82 8 SYSTEM MAINTENANCE ....................................................................................... 83 8.1 General cleaning.................................................................................................... 83 8.2 Sterility .................................................................................................................. 83 8.3 Periodic servicing .................................................................................................. 84 9 TROUBLESHOOTING............................................................................................... 85 9.1 General .................................................................................................................. 85 9.2 Troubleshooting guide .......................................................................................... 85 10 IceSense3™ cryoablation system - Step-by-Step procedure ....................................... 88 11 SYSTEM SPECIFICATIONS ..................................................................................... 89 12 TEMPERATURE DISTRIBUTION ANALYSIS IN HOMOGENEOUS MEDIUM 90 13 LIMITED WARRANTY CERTIFICATE .................................................................. 92 14 CUSTOMER COMPLAINT FORM ........................................................................... 93 15 REPORT CUSTOMER COMPLAINT ....................................................................... 94 16 Manufacturer’s Declaration of the EUT ...................................................................... 95 Figures Figure 1: Label 1 - On/Off mechanical button - MLS1000002 Rev. B ............................... 25 Figure 2: Label 2 - Emergency Stop - MLS1000003 Rev. B .............................................. 25 Figure 3: Label 3 - Identification - MLS3180001 Rev. A ................................................... 25 Figure 4 Label 4 - Federal laws restriction - MLS1000004 Rev. B .................................... 25 Figure 5: Label 5 - Follow instructions for use - MLS1000005 Rev. C .............................. 26 Figure 6: Label 6 - High voltage caution - MLS1000006 Rev. B ....................................... 26 Figure 7: Label 7 - Line voltage danger - MLS1000007 Rev. B ......................................... 26 Figure 8: Label 8 - Foot pedal - MLS1000008 Rev. B ........................................................ 26 Figure 9: Label 9 - Risk of Explosion - MLS1000009 Rev. B ............................................ 26 Figure 10: Label 10 - Single use probe - MLP7000001 Rev. F........................................... 27 Figure 11: Label 11 - Single use temperature sensor - MLT8000001 Rev. F ..................... 27 Figure 12: Label 12 - Liquid nitrogen dewar - MLS1000001 Rev. D ................................. 27 Figure 13: Label 13 – Cold area - MLS1000010 Rev. B ..................................................... 28 Figure 14: Label 14- Empty LN2 dewars - MLS1000012 Rev. A ...................................... 28 Figure 15: Label 15- Applied parts - MLS1000014 Rev. A ............................................ 28 Figure 16: Label 16- Shipping Art Work............................................................................. 28 Figure 17: Front and back view of the IceSense3™ cryoablation system with numbered components ...................................................................................................... 32 Figure 18: The IceSense3™ transportation rollers & brakes............................................... 33 Figure 19: The Emergency Stop button ............................................................................... 34 Figure 20: The touch screen display during a cryoablation procedure ................................ 35 Figure 21: The flexible hose, cryohandle and connected cryoprobe ................................... 35 Figure 22: Handle plug holder ............................................................................................. 36 Figure 23: The foot pedal..................................................................................................... 36 Figure 24: The temperature sensor and its components ...................................................... 37 Figure 25: Temperature display of sensor in the procedure screen (green arrow) .............. 38 Figure 26: Dewar storage cases – the correct way to put the Dewars inside the storage cases. .................................................................................................................................... 38 4 IceCure Medical Ltd. Confidential DSR3100000 rev. K IceSense3™ User Manual Figure 27: The system is loading screen .............................................................................. 40 Figure 28: The Main Menu screen ....................................................................................... 40 Figure 29 : Schematic illustration of placement of the system and patient. ........................ 45 Figure 30: The system is loading screen .............................................................................. 46 Figure 31: The Main Menu screen ....................................................................................... 46 Figure 32: The Action button as displayed on screen (several of the options) .................... 47 Figure 33: The active Warm button as displayed on screen ................................................ 47 Figure 34: Last Treatment screen ........................................................................................ 47 Figure 35: Activating the Settings option from the Main Menu screen .............................. 48 Figure 36: The Settings screen............................................................................................. 48 Figure 37: The Change Workflow screen with two alternative workflow settings ............. 49 Figure 38: The Windows™ Date and Time Properties screen ............................................ 50 Figure 39: Preparing the system for treatment by pressing “Prepare for Treatment” (green arrow) on Main Menu screen ............................................................................................... 51 Figure 40: The dewar preparation screen ............................................................................ 53 Figure 41: Experiments in gel results .................................................................................. 53 Figure 42: The cryoprobe (the figure is for illustration only) .............................................. 54 Figure 43: Cryoprobe registration screen ............................................................................ 54 Figure 44: Cryoprobe connection screen ............................................................................. 55 Figure 45: Functional test screen ......................................................................................... 56 Figure 46: Functional test - visual inspection screen ........................................................... 57 Figure 47: Treatment Selection screen ................................................................................ 59 Figure 48: Define a treatment protocol by choosing Edit Presets on the Treatment Selection screen (green arrow) or in the Main Menu screen (yellow arrow) ...................................... 59 Figure 49: Editing an existing protocol (green arrow) or adding a new one (yellow arrow) ............................................................................................................................................. 60 Figure 50: Steps for adding a protocol................................................................................. 61 Figure 51: Edit Preset screen ............................................................................................... 61 Figure 52: Choosing the Manual Mode option (green arrow) ............................................. 62 Figure 53: Markings on the probe. Main marks indicate safety (thick mark on left), 5 cm (slightly thick third mark from the left) and 10 cm (double mark in circle). ....................... 63 Figure 54: Manual Mode screen: press on Freeze to start the freeze cycle. ........................ 64 Figure 55: Freeze screen in Manual Mode .......................................................................... 64 Figure 56: Thaw screen in Manual Mode ............................................................................ 65 Figure 57: Warm screen in Manual Mode ........................................................................... 65 Figure 58: Freeze screen in Automatic mode ...................................................................... 67 Figure 59: The Active warm screen during procedure ........................................................ 68 Figure 60: Protocol Completed Screen ................................................................................ 73 Figure 61: Protocol Completed screen. Pressing on the “Main Menu” icon (green arrow) will load the Main Menu screen. ......................................................................................... 74 Figure 62: The Main Menu screen. To exit the system, press on the “Exit” icon (green arrow). .................................................................................................................................. 75 Figure 63 : System Fail example screen .............................................................................. 76 Figure 64: The Emergency Stop button located on the main chassis (green arrow) ........... 77 Figure 65: A sample touch screen........................................................................................ 78 Figure 66: Status message example ..................................................................................... 79 Figure 67: Warning message format example ..................................................................... 80 Figure 68: Error message format example ........................................................................... 80 Figure 69: The cryoprobe components (the figure is for illustration only). ........................ 82 5 IceCure Medical Ltd. Confidential DSR3100000 rev. K IceSense3™ User Manual Figure 70: counter of the remaining procedure before maintenance (green arrow) at the bottom of the main menu screen. ......................................................................................... 84 6 IceCure Medical Ltd. Confidential 1 DSR3100000 rev. K IceSense3™ User Manual OVERVIEW 1.1 Introduction IceSense3™ cryoablation system is a comprehensive system for cryotherapy of human tissue based on IceCure Medical’s technology. All established cryotherapy techniques utilize a low temperature cryogen under pressure. The IceSense3™ cryoablation system utilizes liquid nitrogen that causes the cryoprobe to reach very low temperatures thereby freezing tissue with which it comes in contact. 1.2 Intended use IceSense3™ cryoablation system is intended for cryogenic destruction of tissue during surgical procedures by the application of extreme cold temperatures. The IceSense3™ cryoablation system is indicated for use as a cryosurgical tool in the fields of general surgery (including breast tissue), dermatology, thoracic surgery, gynecology, oncology, proctology, and urology (including kidney tissue). The IceSense3™cryoablation system may be used with an ultrasound device to provide real-time visualization of the cryosurgical procedure. The system is suitable for use in a number of cryotherapy applications. However, it is ONLY indicated for use in patients whom the practitioner has deemed eligible for cryotherapy. 1.3 Indications for use IceSense3™cryoablation system is indicated for use as a cryosurgical tool in the fields of general surgery, dermatology, thoracic surgery, gynecology, oncology, proctology, and urology as detailed below. The IceSense3™cryoablation system may be used with an ultrasound device to provide real-time visualization of the cryosurgical procedure. Urology The system may be used to ablate prostatic tissue. The system may be used to ablate kidney tissue including renal cell carcinoma. The system may be used for the ablation of prostate tissue in cases of prostate cancer and benign prostatic hyperplasia. Oncology 7 IceCure Medical Ltd. Confidential DSR3100000 rev. K IceSense3™ User Manual The system may be used for ablation of cancerous or malignant tissue. The system may be used for ablation of benign tumors. The system may be used for palliative intervention. Dermatology The system may be used for the ablation or freezing of skin cancers and other cutaneous disorders. Gynecology The system may be used for the ablation of malignant neoplasia or benign dysplasia of the female genitalia. General Surgery The system may be used for the ablation of leukoplakia of mouth, angiomas, sebaceous hyperplasia, basal cell tumors of the eyelid or canthus area, ulcerated basal cell tumors, dermatofibromas, small hemangiomas, mucocele cysts, multiple warts, plantar warts, hemorrhoids, anal fissures, perianal condylomata, pilonidal cysts actinic and seborrheic keratoses, cavernous hemangiomas, recurrent cancerous lesions. The system may be used for the destruction of warts or lesions. The system may be used for the palliation of tumors of the oral cavity, rectum, and skin. The system may be used for ablation of breast fibroadenomas. Thoracic Surgery The system may be used for the ablation of arrhythmic cardiac tissue. The system may be used for the ablation of cancerous lesions. Proctology The system may be used for the ablation of benign or malignant growths of the anus and rectum The system may be used for the ablation of hemorrhoids. The IceSense3™cryoablation system is indicated for patients whom the surgeon has designated as eligible for cryotherapy. 1.4 Qualified users You are a qualified IceSense3™ cryoablation system user only if you meet all of the following criteria: You are a board certified medical practitioner licensed in your country. 8 IceCure Medical Ltd. Confidential DSR3100000 rev. K IceSense3™ User Manual You have taken a certified IceSense3™ cryoablation system training course. You have read and understood all relevant material accompanying the IceSense3™ cryoablation system. Warning If you do not meet the above criteria, you should not use the IceSense3™ cryoablation system. Practitioners electing to be IceSense3™ cryoablation system users must attend a training course prior to using the system. The course is taught by IceCure Medical certified personnel. Warning Do not use this system if you have not been adequately trained in its use. 1.5 Clinical decisions The practitioner is solely responsible for all clinical use of the IceSense3™ cryoablation system and for any results obtained with the device. Cryotherapy is beneficial in a variety of applications. However, sole responsibility for determining when and how to use the system with a given patient and for a particular medical condition lies with the practitioner. Use of IceSense3™ cryoablation system in special populations, such as pregnant women, has not been established. For further details, refer to Section 1.3 – Indications for use. 1.6 Qualified technician Only a technician trained by IceCure Medical is qualified to service the IceSense3™ cryoablation system. Servicing includes periodic service and repair of the system. Warning Do not modify this equipment without authorization of the manufacturer 9 IceCure Medical Ltd. Confidential 2 DSR3100000 rev. K IceSense3™ User Manual SAFETY NOTES While this manual is designed to provide instruction in the use of the IceSense3™ cryoablation system, it is not intended to take the place of the user training course which must be completed before using the system. This chapter defines the different types of safety notices that appear in the manual. 2.1 Warnings and cautions Safety notices appear throughout the manual and take one of the following forms: Warning - this notice is called a Warning: it deals with danger to people. Warning It is dangerous for people to do this. Caution - this notice is called a Caution: it deals with danger to equipment and data. Caution It is dangerous for equipment and data to do this. 2.2 Basic safety principles All the safety issues explained in this manual are grouped within the following areas of responsibility: 2.2.1 Ownership Warning U.S. federal law restricts this device to sale by or on order of a physician. 2.2.2 Qualification Warning Any procedures using this system must be performed by licensed practitioners or board-certified doctors who are trained and experienced in the use of this system. 10 IceCure Medical Ltd. Confidential DSR3100000 rev. K IceSense3™ User Manual Warning Do not attempt to perform any troubleshooting or corrective action beyond those specified in the following guide. Any malfunction not listed in the guide, or one that persists after the recommended action has been taken, must be referred to IceCure Medical. Warning Never allow untrained personnel to operate the IceSense3™ cryoablation system. Warning Never enter the Technician mode screen. Only an IceCure technician or authorized representative is allowed to use the technician mode for maintenance or repair of the system. Warning Never open the console. Only an IceCure Medical technician or authorized representative is allowed to open the console for maintenance or to repair the system. 2.2.3 Training Warning Do not use this system if you have not been adequately trained. 2.2.4 Clarity Warning Do not use this system until you have read the User Manual in its entirety and fully understand its contents. While every effort has been made to make this User Manual comprehensive, certain sections may be unclear or difficult to understand depending on the user's background and experience. Do not use this system if there is any instruction, direction, precaution or note which you do not understand or which is unclear. If necessary, contact an authorized IceCure Medical representative for further information and clarification before using the system. 11 IceCure Medical Ltd. Confidential DSR3100000 rev. K IceSense3™ User Manual 2.2.5 Clinical assessment Warning Practitioners should be aware of the possibility of mammographic findings at the site of a cryoablated fibroadenoma. Practitioners should enquire if a patient has a history of cryoablation. Warning Exercise caution when treating patients who have had previous difficulty with surgical procedures or local anesthesia. Warning Safety and effectiveness of the IceSense3™ cryoablation system in pregnant women has not been established. Physicians should exercise caution when using IceSense3™ cryoablation system in pregnant women. Caution The handle and hose portions of the IceSense3™ cryoablation system may become cold during the cryoablation procedure. Operators should consider insulating these parts in order to prevent discomfort to the patient. Warning The supplier and manufacturer of the IceSense3™ cryoablation system do not claim that it will be useful for assisting with the treatment of any particular condition or set of circumstances. Full responsibility for assessing the potential benefit of the system for a given medical condition lies with the practitioner. While experience has shown that the system is useful for certain applications in cryosurgery, no representation or warranty is made that the system is useful for any specific person or condition. Warning For patients with breast implants, you must document that adequate distance exists between the lesion and the implant to ensure that the ablated lesion will not contact or jeopardize the implant 12 IceCure Medical Ltd. Confidential DSR3100000 rev. K IceSense3™ User Manual Warning Do not rely solely on the temperature sensor measurement. Always monitor the procedure using Ultrasound or other appropriate imaging system. Warning Temperature sensor insertion and navigation within tissue MUST be done under guidance of an appropriate imaging device. 2.2.6 Installation and setup Warning The IceSense3™ cryoablation system should be operated in an adequately ventilated room. Failure to do so may result in risk of suffocation due to increased levels of nitrogen in the room.. Caution After positioning the main chassis, lock the front roller brakes. Failure to do so may result in damage to the system or to other equipment in the clinic room. Caution The IceSense3™ cryoablation system must be unpacked, installed, and tested by an IceCure Medical authorized technician only and in accordance with the unpacking instructions manual. Caution There are no user-serviceable parts in the system. Refer all service issues to IceCure Medical’s Customer Service Department. Caution Make sure the time is set according to local time zone before executing a cryotherapy procedure. 13 IceCure Medical Ltd. Confidential DSR3100000 rev. K IceSense3™ User Manual 2.2.7 Proper use Caution Do not use the workstation or the liquid nitrogen dewar for any purpose other than operating the IceSense3™ cryoablation system. Caution The liquid nitrogen dewar supplied with the IceSense3™ cryoablation system is a dedicated system part and should not be used for any other purpose. Caution Dewars should always be stored with their lids in place. Caution Only dewars and lids supplied by IceCure Medical may be used with the IceSense3™ cryoablation system. Warning Always turn off the IceSense3™ cryoablation system and lock the wheels when not in use. Before you start a procedure lock two of the four wheels. Caution The IceSense3™ cryoablation system should be moved with care in order to avoid damage to the system or other clinical equipment. 14 IceCure Medical Ltd. Confidential DSR3100000 rev. K IceSense3™ User Manual Warning If one or more of the wheels is damaged, do not use the system. Warning Cryoprobes are fragile and can be damage if mishandled. Do not use a cryoprobe that has been bent, dropped, hit against a hard surface or compromised in any manner, as internal damage to the cryoprobe may have occurred. Caution Do not move the system when the dewar contains liquid nitrogen. Warning Removing the dewar, or placing it back within the system after refilling it must ONLY be done according to system instruction and with the carriage in the bottom position. If the carriage is not in the bottom position, liquid nitrogen may spill out. Caution Follow the detailed instructions on open the dewar storage- when you want to replace a dewar. Caution The system will not allow additional treatment when zero procedures left to maintenance. Make sure to call IceCure Medical service representatives in time. 15 IceCure Medical Ltd. Confidential DSR3100000 rev. K IceSense3™ User Manual 2.3 Operating warning Warning The cryoprobe tip must be covered when not within the target tissue. Warning Ensure that the cryoprobe is securely connected. Warning Ensure that the temperature sensor is securely connected. Warning Insertion of the cryoprobe into the target tissue is performed under the guidance of an appropriate imaging device and by an authorized practitioner trained by IceCure medical. Warning The probe tip must be IN THE TARGET TISSUE BEFORE starting the freeze treatment. Warning Do NOT allow the freeze process to start before the probe tip is actually within the target tissue. Warning The surgeon must hold the cryohandle for the duration of the cryoablation procedure. Warning If the procedure is not yet underway after a cryoprobe is screwed onto the cryohandle, hang the cryohandle in its holder to prevent a stabbing injury from the cryoprobe. Be sure to maintain sterility of the cryohandle and cryoprobe. 16 IceCure Medical Ltd. Confidential DSR3100000 rev. K IceSense3™ User Manual Warning Before removing the cryoprobe from the tissue, make sure that the freeze effect has been deactivated so that the probe can easily be removed from the tissue. Do not force removal of the cryoprobe from the tissue as it might increase the risk of hematoma. Continue the Warm step or wait for passive thaw until the cryoprobe can be withdrawn easily Warning Before removing the temperature sensor from the tissue, make sure the freeze effect has been deactivated and the sensor can be easily withdrawn. Never use excessive force to extract the temperature sensor. Warning DO NOT push the warm button when the cryoprobe is not within the target tissue, as skin burns could occur and not before the freezing protocol is completed, unless you want to shorten the procedure due to clinical judgment. Warning Never detach the cryoprobe from the cryohandle if you are not clearly required to unscrew or disengage it. Caution Verify cryoprobe S/N registration by double checking the serial number on the package and on the cryoprobe itself. Entering an incorrect cryoprobe S/N registration will result in probe nullification. Warning Do not allow any liquid to enter the cryohandle. Always keep the cover on the cryohandle. Warning In case of a total freeze time of less than 1:30 minutes, the active Warm process won't be available. Wait for passive Thaw. 17 IceCure Medical Ltd. Confidential DSR3100000 rev. K IceSense3™ User Manual Warning In case of frost on shaft, if possible start active Warm. If not, wait for passive Thaw. In both cases use skin protection techniques. 2.4 Liquid nitrogen Nitrogen gas is a potential asphyxiant. In the event of a large liquid nitrogen spill, personnel should adhere to a predetermined evacuation plan. Seek medical help immediately if breathing problems occur. Warning If a liquid nitrogen leak is detected at any time, PUSH the Emergency Stop button immediately. 2.4.1 Danger - explosion and fire hazard Warning The IceSense3™ cryoablation system includes electronic devices that may emit sparks and should therefore not be operated in the presence of ANY flammable material. IceSense3™ cryoablation system should be kept away from flammable fumes, e.g., flammable anesthetics or volatile substances. An easily accessible fire extinguisher in the vicinity of the unit is recommended. 2.4.2 Opening the dewar compartment Caution Never open the dewar compartment while running a cryoablation procedure. Do not use the system while the dewar compartment is open. Warning Do not transfer a dewar with Liquid nitrogen unless it is covered with a lid. 18 IceCure Medical Ltd. Confidential DSR3100000 rev. K IceSense3™ User Manual Caution Follow the specific instructions on how to fill and transfer a dewar as described in section 5.1.6.1 – Dewar. 2.4.3 Voltage and power ratings Caution Verify that the IceSense3™ cryoablation system complies with the local voltage line (115 VAC or 230 VAC). 2.4.4 Liquid nitrogen Safety Warning Liquid nitrogen may cause serious injury or burn if handled improperly. Local laws and safety rules regarding the maintenance and handling of liquid nitrogen dewars should always be observed. Maintenance of liquid nitrogen dewars should be performed by authorized personnel only. Warning Do not use a liquid nitrogen dewar if it is damaged. You can tell that a dewar is damaged if after filling it, frost appears on the outer wall of the container. Return the dewar to IceCure technician or an authorized distributor for inspection Standard guidelines for safe handling and storage of liquid nitrogen are available from the supplier and must be carefully observed. The following is a list of general safety points that should be followed at all times: Handle liquid nitrogen with care. Contact with skin may cause serious frostbite. Do not allow objects cooled by liquid nitrogen to touch your bare skin. Objects cooled by liquid nitrogen may stick to the skin and tear flesh when attempting removal. Protective clothing can reduce the hazards of handling liquid nitrogen. Insulated or heavy leather gloves should always be worn when handling any object that has been in contact with liquid nitrogen. Loose fitting gloves are recommended so that they may be discarded quickly in the event that any liquid nitrogen splashes into them. If you are working with open containers of liquid nitrogen, boots should be worn and trousers should not be tucked into boots, but worn outside. Personal protective equipment is essential and can save you from liquid nitrogen’s risks. Full face shield and safety glasses are recommended for eyes/face protection. Fill the container slowly to avoid the expansion stress that occurs as a result of the rapid cooling. Too much stress can damage the container. 19 IceCure Medical Ltd. Confidential DSR3100000 rev. K IceSense3™ User Manual Do not seal the containers tightly. The use of a tight-fitting stopper or plug that prevents the adequate venting of gas allows a build-up of pressure that could severely damage or even burst the container. Even an accumulation of ice or frost on the lid can interfere with proper venting. To assure safe operation, only use the original sponge lid supplied with the dewar. Liquid nitrogen containers should always be stored in an upright position. Tipping the container or letting it lie on its side can result in spillage and may damage the container. Dropping the container or subjecting it to severe vibration may damage the vacuum insulation system. Transfer liquid nitrogen with care. Spilling and splashing are the primary hazards of transferring liquid nitrogen from one container to another. NEVER overfill the containers. Filling above the specified level is likely to produce spillage when the lid is replaced. Transportation of liquid nitrogen must always be done in the original container and in accordance with local laws and safety rules. Do not attempt to dispose of residual or unused quantities of liquid nitrogen. For safe disposal contact your supplier. For emergency disposal, discharge slowly to the atmosphere in a wellventilated room or outdoors. If spilled liquid nitrogen causes a cloud to form, the room must be evacuated and ventilated immediately. Anyone experiencing headache, dizziness, difficulty breathing, or other symptoms of hypoxia should receive immediate medical attention. Do not use a liquid nitrogen dewar if it is damaged. You can tell that a dewar is damaged if after filling it, frost appears on the outer wall of the container. Return the dewar to an IceCure technician or an authorized distributor for inspection. Warning Before beginning a procedure on a new patient, the dewar MUST be completely refilled and placed in the system as described in section 5.1.6.1 of this manual. 2.4.5 Burn hazards The Cryoprobe tip can reach very low temperatures. Warning Portions of the cryoprobe, including the plastic cover that is located near the cryoprobe handle, other than the freeze zone, may become cold and cause tissue damage. If unwanted freezing occurs, immediately stop the freezing process. To prevent injury, cryoprobes must be closely observed during use for signs of unwanted freezing.. Warning Portions of the cryoprobe, including the plastic cover that is located near the cryoprobe handle, other than the freeze zone, may become cold and cause tissue damage. If unwanted freezing occurs, stop the pre test process by pressing "Cancel". 20 IceCure Medical Ltd. Confidential DSR3100000 rev. K IceSense3™ User Manual 2.4.6 Grounding Warning To avoid risk of electric shock, this equipment must only be connected to a supply main with protective earth. 2.4.7 Sterility Warning The cryoprobes and the temperature sensors are single use and are supplied in single use packaging. Never reuse a single-use cryoprobe, temperature sensor, or sterile sleeve. Reprocessing single use device (like the cryoprobe, temperature sensor) could affect the mechanical or performance or microbiological properties of the product. Warning After finishing the surgical procedure on a patient, remove and discard the single-use cryoprobe, temperature sensor, and sterile sleeve. Warning For each new patient, ensure that the previously used single-use cryoprobe, temperature sensor, and sterile sleeve have been removed and discarded. 2.4.8 Mechanical handling of flexible hose and cryohandle Warning Never use excessive force to insert or remove a cryoprobe from the cryohandle. If moderate force is not sufficient, contact IceCure Medical for advice. 21 IceCure Medical Ltd. Confidential DSR3100000 rev. K IceSense3™ User Manual Warning Do not pull the system by the cryohandle or flexible hose. 2.5 Emergencies and errors 2.5.1 Emergency Stop button Warning Only push the Emergency Stop button when there is NO other choice. Wherever possible, use Warm to release the probe from the tissue and use the standard shutdown procedure. Excessive use of the Emergency Stop button may damage the system. Warning If a liquid nitrogen leak is detected during the cryotherapy procedure, PUSH the Emergency Stop button immediately. 2.5.2 Emergencies causing procedure halt Warning When a procedure halts due to an error, switch off the system. Call IceCure Medical and describe the error shown on the screen as precisely as possible. Do NOT attempt to reuse the system before contacting IceCure Medical. Warning When an error message is displayed and a procedure is aborted, remove the probe ONLY after you are requested to do so by the software. Failure to do so will increase the risk of a liquid nitrogen related accident. 22 IceCure Medical Ltd. Confidential DSR3100000 rev. K IceSense3™ User Manual Warning In case of software crash, switch OFF the mechanical ON/OFF button and unplug the electrical cable. Call IceCure Medical for technical service before restarting the IceSense3™ cryoablation system. Warning When the system shuts itself down due to an error, contact IceCure Medical and describe the error message shown on the screen as precisely as possible. Do not attempt to reuse the system before contacting IceCure Medical. After reporting or making note of the error message, switch OFF the mechanical ON/OFF button and unplug the electrical cable. 2.6 Adverse events Warning Regulatory requirements mandate that serious adverse events be reported to the relevant regulatory authorities. Users must notify IceCure Medical of all serious adverse events including serious adverse device reactions no later than 24 hours following receipt of such information. 2.7 Compliance 2.7.1 Compliance with international safety standards The IceSense3™cryoablation system was designed and built in accordance with ASTM international standards, Designation F882-84 - Standard Performance and Safety Specification for Cryosurgical Medical Instruments (re-approved in 1996). EN 60601-1 Standard for safety of Medical equipment European MDD 93/42/EEC EN 60601-1-2 Standards for Electromagnetic compatibility of medical electrical equipment (See chapter 16 - Manufacturer’s Declaration of the EUT) 2.8 Equipment classification Electric shock protection: Class I, Type BF. 23 IceCure Medical Ltd. Confidential DSR3100000 rev. K IceSense3™ User Manual Protection against ingress of liquids: ordinary equipment. Not suitable for use in presence of flammable anesthetic mixture with air or nitrous oxide. 2.9 Accompanying labels Label 1 – On/off mechanical button on the console Label 2 – Emergency Stop button Label 3 – Identification with the manufacturer’s name and address, date of manufacture, unit model and serial number, and electrical specifications. Label 4 – CAUTION Federal (USA) law restricts this device to sale by or on order of a licensed practitioner. Label 5 – Read User Manual before use Label 6 – CAUTION HIGH VOLTAGE: Before working on this unit Switch off power supply Disconnect all plugs Label 7 – DANGER Line voltage Label 8 – Foot pedal (Not available in some regions, e.g. China) Label 9 – DANGER: Risk of explosion if used in the presence of flammable anesthetics. CAUTION: To reduce risk of electrical shock, do not remove cover. Refer servicing to qualified service personnel. Label 10 – Single use probe Label 11 – Single use temperature sensor Label 12 – Liquid Nitrogen Dewar Label 13 – COLD area Label 14- Empty LN2 dewars Label 15- Applied parts Label 16- Shipping Art Work There are additional labels inside the system that are not visible to the user. These labels are intended for the technician. 24 IceCure Medical Ltd. Confidential DSR3100000 rev. K IceSense3™ User Manual System Labels: Figure 1: Label 1 - On/Off mechanical button - MLS1000002 Rev. B Figure 2: Label 2 - Emergency Stop - MLS1000003 Rev. B Figure 3: Label 3 - Identification - MLS3180001 Rev. A Figure 4 Label 4 - Federal laws restriction - MLS1000004 Rev. B 25 IceCure Medical Ltd. Confidential DSR3100000 rev. K IceSense3™ User Manual Figure 5: Label 5 - Follow instructions for use - MLS1000005 Rev. C Figure 6: Label 6 - High voltage caution - MLS1000006 Rev. B Figure 7: Label 7 - Line voltage danger - MLS1000007 Rev. B Figure 8: Label 8 - Foot pedal - MLS1000008 Rev. B Figure 9: Label 9 - Risk of Explosion - MLS1000009 Rev. B 26 IceCure Medical Ltd. Confidential DSR3100000 rev. K IceSense3™ User Manual Figure 10: Label 10 - Single use probe - MLP7000001 Rev. F MLS1000010 Figure: Label 11 - Single use temperature sensor - MLT8000001 Rev. C Figure 11: Label 11 - Single use temperature sensor - MLT8000001 Rev. F Figure 12: Label 12 - Liquid nitrogen dewar - MLS1000001 Rev. D 27 IceCure Medical Ltd. Confidential DSR3100000 rev. K IceSense3™ User Manual Figure 13: Label 13 – Cold area - MLS1000010 Rev. B Figure 14: Label 14- Empty LN2 dewars - MLS1000012 Rev. A Figure 15: Label 15- Applied parts - MLS1000014 Rev. A Figure 16: Label 16- Shipping Art Work 28 IceCure Medical Ltd. Confidential DSR3100000 rev. K IceSense3™ User Manual 2.9.1 Important Symbols and Labels A number of internationally recognized symbols relating to safety requirements and standards are found on the IceSense3™ cryoablation system. These symbols are listed in the table below. Table 1.1 International Symbols on IceSense3™ cryoablation system Symbol Meaning Caution Applied parts CLASS 1 Class 1 Serial number Manufacturer Date of manufacture Do not reuse Use- by Date Catalogue number Do not resterilize Sterilized using ethylene oxide 29 IceCure Medical Ltd. Confidential Symbol DSR3100000 rev. K IceSense3™ User Manual Meaning Batch code Contains sufficient for <n> test The WEEE symbol indicates that this system contains electrical and electronic components that must be collected and disposed of separately. Never dispose of electrical and electronic components in general municipal waste receptacles. Electrical and electronic equipment contain hazardous substances which, when disposed of incorrectly, may leak into the ground. This can contribute to soil and water pollution which is hazardous to human health and endangers wildlife. Therefore, such equipment must not be disposed of in landfill sites or incinerators. Contact your local authority or place of purchase regarding responsible disposal/recycling. Fragile, handle with care Do not use if package is damaged Cold area Consult instructions for use Oxygen depleting 30 IceCure Medical Ltd. Confidential Symbol DSR3100000 rev. K IceSense3™ User Manual Meaning This side up Authorized representative in the European community CE mark- mandatory conformity mark for products placed on the market in the European Economic Area Transportation and storage atmospheric pressure limits Transportation and storage humidity limits Storage temperature limits Keep away from sunlight 31 IceCure Medical Ltd. Confidential 3 DSR3100000 rev. K IceSense3™ User Manual SYSTEM DESCRIPTION 3.1 Introduction This chapter contains the following: Concept of operation – IceSense3™ cryoablation system intention for use Major components – description of the main system parts Operational details – system processes that occur as a result of user actions 3.2 Concept of operation The IceSense3™ cryoablation system is intended for cryogenic destruction of tissue during surgical procedures. It is indicated for use as a cryosurgical tool in a number of medical fields. The system is designed to destroy tissue by the application of extreme cold temperatures. IceSense3™ cryoablation system is indicated for patients whom the practitioner has designated as eligible for cryotherapy. 3.3 Major components The following figure illustrates external features of the IceSense3™ cryoablation system: 1 2 3 8 4 9 5 6 7 10 0 Figure 17: Front and back view of the IceSense3™ cryoablation system with numbered components 1. Touch screen 2. Cryoprobe holder 3. Cryohandle 32 IceCure Medical Ltd. Confidential DSR3100000 rev. K IceSense3™ User Manual 4. Temperature sensor connector 5. Emergency button 6. Rollers 7. Dewar positioning door 8. Handle plug holder 9. Foot pedal (Not available in some regions, e.g. China) 10. Dewar storage cases The IceSense3™ cryoablation system includes: Main chassis Adjustable touch screen External accessories: foot pedal (Not available in some regions, e.g. China), temperature sensor connected to the main chassis, and single use cryoprobe connected to a cryohandle 3.3.1 Main chassis The IceSense3™ cryoablation system is housed within a chassis mounted on four rollers for ease of movement. Each roller is equipped with directional and rotational brakes for system immobilization. Located on the top of the chassis are a touch screen control panel and a cryohandle holder. On the right upper part of the chassis is the Emergency Stop button - a round red button that shuts down the system immediately in an emergency situation. On the back of the chassis are two hooks used for hanging the electric cable, and a grip handle for ease of system transportation. Figure 18: The IceSense3™ transportation rollers & brakes 3.3.2 Emergency Stop button The Emergency Stop button is a red knob located on the right upper side of the chassis. It is designed for emergency shutdown of the unit. Pressing this button immediately turns off the electrical power supply to the system. To release the Emergency Stop button, turn it in the direction of the arrows. 33 IceCure Medical Ltd. Confidential DSR3100000 rev. K IceSense3™ User Manual Figure 19: The Emergency Stop button Warning Only push the Emergency Stop button when there is NO other choice. Wherever possible, use Warm to release the probe from the tissue and use the standard shutdown procedure. Excessive use of the Emergency Stop button may damage the system . Warning If a liquid nitrogen leak is detected during the cryotherapy procedure, PUSH the Emergency Stop button immediately. 3.3.3 Flexible hose The flexible hose joins the cryohandle to the siphon inside the chassis. This permits nitrogen to flow from the main chassis to the probe. Warning Do not pull the system by the cryohandle or flexible hose. 3.3.4 Touch screen The touch screen is located on the top of the main chassis and allows for operating and monitoring of the system. It is designed for users and technicians. Do not connect any signal input/output port to the touch panel PC except medical certified equipment provided by IceCure Medical. A sample touch screen display is represented by the figure below. For further information about computer interface and operating the system, see Chapter 6. 34 IceCure Medical Ltd. Confidential DSR3100000 rev. K IceSense3™ User Manual Figure 20: The touch screen display during a cryoablation procedure 3.3.5 Cryohandle and cryoprobe The cryohandle is situated at the end of the flexible hose that projects through the upper area of the front panel of the IceSense3™ cryoablation system unit. The cryoprobe is connected to the cryohandle. The cryohandle allows for maneuvering of the cryoprobe within the target tissue. 4 7 5 3 2 1 6 Figure 21: The flexible hose, cryohandle and connected cryoprobe 1. Flexible hose 2. Cryohandle 3. Action button (allows the user to select actions that appears on the screen) 4. Warm button (activates/deactivates the warm function) 5. Cryoprobe insertion point 6. LED indicator displaying BLUE to indicate the freeze mode is ON 7. Cryoprobe 35 IceCure Medical Ltd. Confidential DSR3100000 rev. K IceSense3™ User Manual Warning Never reuse a single-use cryoprobe, temperature sensor or sterile sleeve. Warning At the conclusion of each patient session, remove and discard the single-use cryoprobe, temperature sensor and sterile sleeve. 3.3.6 Handle plug holder The handle plug holder is located on the top of the main chassis and allows a place for keeping the plug while performing the procedure. Make sure you close the plug after each procedure. Figure 22: Handle plug holder 3.3.7 Foot pedal (Not available in some regions, e.g. China) The pedal is an alternative to the Action button on the cryohandle; pushing the pneumatic foot pedal is identical to pushing the Action button. Figure 23: The foot pedal 3.3.8 Temperature sensor (TS) The temperature sensor is a single use accessory that provides real time temperature measurements when inserted in tissue. Use of temperature sensors is optional; the decision to use a temperature sensor must be made before the system pretest is initiated. 36 IceCure Medical Ltd. Confidential DSR3100000 rev. K IceSense3™ User Manual Prior to starting a procedure, the temperature sensor is connected to the system and inserted into the desired locations within the tissue. Insert the sensor at locations that give useful information about the progress of the freezing procedure. For example, the temperature sensor can be placed near the boundary of a tumor to ensure that the entire tumor has been frozen. Alternatively, the temperature sensor may be placed near an organ that should not be frozen during the procedure to ensure that the ice front has not advanced to this location. The temperature sensor is not indicated for measuring the body temperature, but only for getting temperature indication of some tissue during cryoablation. Warning Do not rely solely on the temperature sensor measurement. Always monitor the procedure using Ultrasound or other appropriate imaging system. The temperature sensor and its components are depicted in the following figure. 1 4 2 3 Figure 24: The temperature sensor and its components 1. Temperature sensor needle 2. Temperature sensor handle 3. Temperature sensor cable connector 4. Temperature sensor connection site If you decide to use a temperature sensor, connect it per the following instructions while maintaining sterility: 1. Remove the temperature sensor from the sterile package. 2. Connect the cable connector to the panel connector on the upper right corner of the main chassis while keeping the connector key facing the groove. 3. The measured temperature from the sensor tip will appear on the right lower corner of the screen. 37 IceCure Medical Ltd. Confidential DSR3100000 rev. K IceSense3™ User Manual 4. Under imaging guidance, insert the tip of the temperature sensor into the tissue you want to measure. 5. At the end of the procedure, gently remove the temperature sensor from the tissue and discard it. Figure 25: Temperature display of sensor in the procedure screen (green arrow) Warning Temperature sensor insertion and navigation within tissue MUST be done under guidance of an appropriate imaging device. 3.3.9 Dewar storage cases The Dewar storage cases are located at the back of the chassis. They provide storage for the Dewars. When placing the Dewars inside the storage cases make sure they are well in stored (see figure 24) Figure 26: Dewar storage cases – the correct way to put the Dewars inside the storage cases. 38 IceCure Medical Ltd. Confidential DSR3100000 rev. K IceSense3™ User Manual Safe transportation When moving the system from one location to another the Dewars should be empty. 3.4 Operational details This section describes the operational actions of the IceSense3™cryoablation system that support the functional operations described in Chapter 5. Order liquid nitrogen in advance based on projected case load. Industrial grade liquid nitrogen should be delivered to the user’s site in a standard cryogenic dewar. Follow standard guidelines for the safe handling and storage of the dewar. Warning Liquid nitrogen may cause serious injury or burn if handled improperly. Local laws and safety rules regarding the maintenance and handling of liquid nitrogen dewars should always be observed. Care must be taken when filling the system dewar. Standard guidelines for safe handling and storage of liquid nitrogen should be followed. These guidelines are available from the supplier. 3.4.1 Starting the system Before turning on the system, confirm the following conditions: Previously used cryoprobe, temperature sensors and sleeves have been removed and the system has been cleaned of any residue and dried off. The system is connected to the electrical outlet. To switch the system ON, turn on the mechanical button at the back of the system, the touch screen will turn on and the following screen will appear: 39 IceCure Medical Ltd. Confidential DSR3100000 rev. K IceSense3™ User Manual Figure 27: The system is loading screen Wait for the Main Menu screen to load. Figure 28: The Main Menu screen 3.4.2 System pre-tests As the system uploads, several pre-tests are performed automatically in order to verify that the system is intact. Several specific tests will be made upon visual inspection by the user, following instructions on the graphic interface. Each probe must be tested before use. 40 IceCure Medical Ltd. Confidential DSR3100000 rev. K IceSense3™ User Manual 3.4.3 Cryoablation procedure The cryoablation procedure can only be performed after the cryoprobe has been inserted in the target tissue. It can be activated by Manual mode (controlled by the user) or by Automatic mode (pre-programmed and monitored by the computer). During the freeze and the thaw cycles, the system continues its internal check. In case of system error, the user will be instructed as to the appropriate solution. 3.4.4 Warm step Warm is a process activated automatically by the system at the end of every automatic protocol, or manually by the user at any time in the process. During this process, the cryoprobe tip is heated by warmed gas, enabling fast and safe removal of the probe. 41 IceCure Medical Ltd. Confidential 4 DSR3100000 rev. K IceSense3™ User Manual INSTALLATION AND SETUP 4.1 Space and positioning requirements The work area for the unit should be prepared as per the dimensions described in the system specifications. In order to guarantee sufficient ventilation, always maintain a clearance distance of at least 0.5 meters (20 inches) between the unit and walls or other objects that may obstruct air flow. Adequate ventilation and air circulation are major considerations when working with liquid nitrogen. Warning Liquid nitrogen may cause serious injury or burn if handled improperly. Local laws and safety rules regarding the maintenance and handling of liquid nitrogen dewars should always be observed. 4.2 Setup warnings and cautions Warning If there is not sufficient ventilation in the room, the IceSense3™ cryoablation system cannot be used due to risk of suffocation due to increased levels of nitrogen in the room. Warning The IceSense3™ cryoablation system must be unpacked, installed, and tested by an IceCure Medical authorized technician only. Caution After positioning the main chassis, lock the front roller brakes. Failure to do so may result in damage to the system or to other equipment in the clinic room. 42 IceCure Medical Ltd. Confidential DSR3100000 rev. K IceSense3™ User Manual Caution Do not move the system when the dewar contains liquid nitrogen. 4.3 Electrical requirements The IceSense3™ cryoablation system is pre-wired for the local line voltage as specified by the user. Accordingly, the unit will require a line supply of 220-240 VAC, 50/60 Hz, 7A single phase. The unit is grounded through the power cable that is plugged into the wall power outlet. Good grounding is essential for safe operation. The main circuit breaker for the unit is 10 A. The circuit breaker is located in the main chassis. 4.4 Shipment components The IceSense3™ cryoablation system is packed and shipped in separate units as follows: Main system assembly User manual One or more empty dewars Accessories: foot pedal (Not available in some regions, e.g. China) , single use probe kit, temperature sensors Sterile sleeves and sterile cover for the cryohandle holder (to be ordered separately by the user) Liquid nitrogen – not supplied with the system - to be ordered separately by the user Disinfecting wipes – not supplied with the system- to be ordered separately by the user 4.5 Installation Warning The IceSense3™ cryoablation system must be unpacked, installed, and tested by an IceCure Medical authorized technician only and in accordance with the unpacking instructions manual. Any damage to the container or to the unit discovered upon unpacking, installing, or testing should be immediately reported to your IceSense3™ cryoablation system distributor. 43 IceCure Medical Ltd. Confidential 5 DSR3100000 rev. K IceSense3™ User Manual OPERATING THE SYSTEM This chapter explains how to use the IceSense3™ cryoablation system and includes pre-operational, operational and post-operational steps. Note: The User Manual describes how to operate the device with a percutaneous cryoprobe that requires ultrasound monitoring for its clinical application. The device can be used with a blunt cryoprobe for topical indications that are performed without ultrasound imaging. For topical applications the practitioner should follow standard clinical procedures that are not within the scope of this user manual. The device can also be used for open surgical applications performed without the use of ultrasound imaging. For these applications the practitioner should follow standard clinical procedures that are not within the scope of this user manual. TRAINING: Practitioners electing to be IceSense3™ cryoablation system users must attend a training course prior to using the system. The course is taught by IceCure Medical certified personnel. 5.1 Procedure Overview • Patient and system preparation • Probe selection • System set-up and pretest • Probe placement • Cryoablation cycle • End of procedure 5.2 Pre-operational stages 5.2.1 Preparing the system for procedure 1. If a probe is still connected to the cryohandle, remove and discard used probe from the handle. 2. Remove previously used single-use sterile sleeve from the cryohandle. 3. Close the cryohandle with the covering plug. 4. Arrange a sterile work environment in accordance with accepted standards. 5.2.2 Preparing the patient for procedure 1. Position patient comfortably so that the target area is easily accessible and trajectory of the probe is safe. For example: in the treatment of FA it is desirable that the probe will be placed parallel to the chest wall. 44 IceCure Medical Ltd. Confidential DSR3100000 rev. K IceSense3™ User Manual 2. Measure the lesion in all dimensions prior to procedure to determine long axis and point of entry. 3. See Figure below for a schematic illustration of the placement of the system and the patient in the treatment room. Figure 29 : Schematic illustration of placement of the system and patient. 5.2.3 Switching on the IceSense3™ cryoablation system Before operating the system, make sure the following conditions are in place: Ultrasound or other appropriate imaging system is available for monitoring the medical procedure. In case of open surgery or superficial cryotherapy, no external imaging device is required. The mechanical power switch is OFF. The cryohandle, flexible hose and cryoholder are all clean and dry. To Switch on the IceSense3™ cryoablation system: To switch the system ON, turn on the mechanical button at the back of the system, the touch screen will turn on and the following screen will appear: 45 IceCure Medical Ltd. Confidential DSR3100000 rev. K IceSense3™ User Manual Figure 30: The system is loading screen Wait for the Main Menu screen to load. Make sure the time is set according to local time zone before executing a cryotherapy procedure. Figure 31: The Main Menu screen 5.2.4 Cryohandle The cryohandle allows the user to easily and safely handle the cryoprobe. It also allows for several operational functions. The cryohandle parts are detailed in Chapter 3 - System description. 46 IceCure Medical Ltd. Confidential DSR3100000 rev. K IceSense3™ User Manual 5.2.4.1 Using the cryohandle Action button – this is a blue button on the inner side of cryohandle. It activates/deactivates the freeze cycle and confirms actions displayed on the screen with a blue circle icon: Figure 32: The Action button as displayed on screen (several of the options) Light status indicator – This is a BLUE LED which lights up around the Action button indicating the activity of a freeze cycle. Active warm button – this is a red button on the cryohandle. It activates the active warm process for fast and safe probe extraction from the target tissue. The active warm process can also be activated from the screen when displayed as a red circle icon (see below figure). Figure 33: The active Warm button as displayed on screen 5.2.5 Show Last Treatment The last treatment will be displayed by choosing “Show Last Treatment” icon on the Main Menu screen. This will open the next screen: Last Treatment Protocol Details Date: Jan 24, 2010 Time: 10:54 AM Treatment Mode: Preset Probe: IceSense 13 Figure 34: Last Treatment screen In this screen you can see details of the last procedure that was performed including date, time, treatment mode, and duration of treatment. 47 IceCure Medical Ltd. Confidential DSR3100000 rev. K IceSense3™ User Manual 5.2.6 General settings The system general settings and technician mode is available by choosing the “Settings” button on left lower corner of the touch screen (Fig. 27). Figure 35: Activating the Settings option from the Main Menu screen Choosing the “Settings” button (green arrow) will load the settings screen with four icons representing different options. Pressing any of these icons will open a new settings screen pertaining to that option. Figure 36: The Settings screen 48 IceCure Medical Ltd. Confidential DSR3100000 rev. K IceSense3™ User Manual 5.2.6.1 Change workflow IceSense3™ cryoablation system supports 2 alternative workflows, allowing the user to select a treatment protocol before preparing the system (filling Nitrogen, connecting probe, and testing it) or to prepare the system first and then select a treatment protocol. To set the preferred workflow, press Settings (in the main menu), followed by “Change Workflow”. Select the preferred workflow and press Back. Choosing the “Change Workflow” icon will load the screen below enabling two workflow alternatives: users can either Select Treatment mode first then Prepare System for use, or Prepare System for use then Select Treatment mode. Figure 37: The Change Workflow screen with two alternative workflow settings 5.2.6.2 Log-in to Technician mo de Choosing the “Technician Mode” icon will load a Technician Mode entry screen that is used for maintenance of the system. The technician mode can only be accessed by an IceCure Medical authorized technician and is restricted by a password. Warning Never enter the Technician mode screen. Only an IceCure technician or authorized representative is allowed to use the technician mode for maintenance or repair of the system. 49 IceCure Medical Ltd. Confidential DSR3100000 rev. K IceSense3™ User Manual 5.2.6.3 Export Log This screen allows you to export any procedure data to a USB removable storage device in an easy and convenient way. When you press the Export Log icon, a popup window appears with the following message: Connect a USB flash drive and press OK Press OK to export the log file to the USB drive Press Cancel to return to Settings screen If export fails, the message in the status area reads: Export failed; make sure a flash drive is connected. Before using a flash disk check that it contains enough free space for file storage. 5.2.6.4 Set time This screen allows you to set the date and time. Figure 38: The Windows™ Date and Time Properties screen Set the date and time according to your time zone and approve it by clicking “Apply” in the right lower corner of the screen. In order to complete the process restart the system. Caution Make sure the time is set according to local time zone before executing a cryotherapy procedure. 5.2.7 Preparing the system for treatment The system will guide the user through a system preparation process; following the system instructions is essential. Preparation includes technical steps and tests to make sure the system is ready for a cryotherapy procedure. It includes: 1. Dewar refilling and replacement 50 IceCure Medical Ltd. Confidential DSR3100000 rev. K IceSense3™ User Manual 2. Maintain Sterility (Use of sterile sleeves) 3. Cryoprobe registration and connection 4. System tests To prepare the system for treatment, choose the option “Prepare for Treatment” in the Main Menu as shown in the below figure. Figure 39: Preparing the system for treatment by pressing “Prepare for Treatment” (green arrow) on Main Menu screen 5.2.7.1 Dewar Prepare the dewar for treatment as per the following instructions and as detailed on the system screen (see Fig. 40). Filling the Dewar Open the dewar compartment door and take out the dewar. Carefully cover it with the sponge lid. Caution Follow the detailed instructions on open the dewar storage- when you want to replace a dewar. The dewar must be filled prior to each procedure and is never stored with liquid nitrogen inside the system at the end of the working day. For proper handling in order to ensure safety, please follow the cryogen supplier instructions. 51 IceCure Medical Ltd. Confidential DSR3100000 rev. K IceSense3™ User Manual Warning Liquid nitrogen may cause serious injury or burn if handled improperly. Local laws and safety rules regarding liquid nitrogen dewars should always be observed. Maintenance of liquid nitrogen dewars should be performed by authorized personnel only. Check that the dewar is fully filled (see the arrow in Fig. 40) and cover it with the sponge lid to transfer it back to the system. Check there is no frost on the dewar after you filled it. In the event that a dewar is damaged, use another dewar to continue the procedure. Warning Do not use a liquid nitrogen dewar if it is damaged. You can tell that a dewar is damaged if after filling it, frost appears on the outer wall of the container. Return the dewar to IceCure technician or an authorized distributor for inspection Warning Do not transfer a dewar with Liquid nitrogen unless it is covered with a lid. Take off the lid and place the dewar in its position into the system. Warning Removing the dewar, or placing it back within the system after refilling it must ONLY be done according to system instruction and with the carriage in the bottom position. If the carriage is not in the bottom position, liquid nitrogen may spill out. Close the compartment door and press the “Action” button on the cryohandle or “Next” on the screen. Dewar door is open If the system detects that the dewar compartment door is open when it tries to move the dewar carriage up or down, the following popup message will appear: Dewar door is open. Close the door to continue. 52 IceCure Medical Ltd. Confidential DSR3100000 rev. K IceSense3™ User Manual Figure 40: The dewar preparation screen 5.2.7.2 Cryoprobe Selection Select a cryoprobe according to your clinical judgment. Iceball Size (diameter) Probe Size Approximate Approximate Treatment Time Cycle Times Freeze 1 Thaw Freeze 2 ≤ 1.4 cm Cryoprobe S 3:00 min 1:00 min 1:00 min 1:00 min 1.5 - 2.0 cm Cryoprobe S 4:30 min 1:30 min 1:30 min 1:30 min 2.1 - 2.5 cm Cryoprobe S/L 6:00 min 2:00 min 2:00 min 2:00 min 2.6 - 3.0 cm Cryoprobe L 8:00 min 3:00 min 2:00 min 3:00 min 3.1 - 4.0 cm Cryoprobe L 12:00 min 4:00 min 4:00 min 4:00 min Figure 41: Experiments in gel results 5.2.7.3 Cryoprobe registration Identify the cryoprobe serial number (S/N). It appears on the cryoprobe package and on the cryoprobe plastic grip as shown in the figure below and on the screen. 53 IceCure Medical Ltd. Confidential DSR3100000 rev. K IceSense3™ User Manual Serial number Figure 42: The cryoprobe (the figure is for illustration only) Enter the serial number of the cryoprobe using the number icons on the screen. When done, confirm the number is correct and press the Action button on the handle or “Next” on the touch screen. Figure 43: Cryoprobe registration screen Caution Verify cryoprobe S/N registration by double checking the serial number on the package and on the cryoprobe itself. Entering an incorrect cryoprobe S/N registration will result in probe nullification. 5.2.7.4 Cryoprob e connection Connect the cryoprobe to the cryohandle as follows, while maintaining sterility of the probe: 54 IceCure Medical Ltd. Confidential DSR3100000 rev. K IceSense3™ User Manual Remove the plug that covers the probe connection point. Insert the cryoprobe into the insertion point in the handle as shown on screen and screw it until written message / light appears on screen to confirm that probe is in place. When done, press the Action button on the handle or “Next” on the touch screen. Figure 44: Cryoprobe connection screen Warning Never reuse a single-use cryoprobe or a single-use sterile sleeve. Warning Never “unscrew” the cryoprobe if you are not clearly required to unscrew or disengage it. After pressing Next, a “Do not disconnect” message will appear Warning After completion of all treatments of a given patient, make sure that the single-use cryoprobe and single-use sterile sleeve are removed and discarded. 55 IceCure Medical Ltd. Confidential DSR3100000 rev. K IceSense3™ User Manual Warning Before beginning treatment of a new patient, you MUST ensure that the previous singleuse cryoprobe and sterile sleeve have been removed. Warning Cryoprobes are fragile and can be damage if mishandled. Do not use a cryoprobe that has been bent, dropped, hit against a hard surface or compromised in any manner, as internal damage to the cryoprobe may have occurred. 5.2.7.5 Sterile sleeves After filling the dewar and placing it in its compartment, please work sterilely. Cover the touch screen and flexible hose with the suitable single-use sleeves, and the cryoprobe holder with a singleuse cover to ensure sterility. 5.2.7.6 System test Perform a functional test to ensure system efficacy and safety per the following instructions and per the screens presented in the figures below: Prepare a container full of sterile saline. Insert the cryoprobe into the container and press the Action button on the handle or “Test” on the touch screen. Figure 45: Functional test screen The system will check essential parameters. 56 IceCure Medical Ltd. Confidential DSR3100000 rev. K IceSense3™ User Manual A failure of any internal test will result in a message suggesting to perform another pre-test. Only if the second pre-test also fails, an error message will be displayed on screen. Please record the error number and follow system instructions until you are requested to remove the probe safely from the cryohandle and contact IceCure Medical. If you choose not to perform another pre-test press "Cancel" and follow system instructions until you are required to safely remove the probe from the cryohandle. You will then be returned to the Main Menu screen. Contact IceCure Medical technical service. If the internal test is successful, the system will display the visual inspection screen. You will be prompted to inspect the following: o The cryoprobe tip – make sure a small ice ball forms. o The cryoprobe shaft – check that there is no ice on it. o The saline – check that there are no bubbles. o The connections – make sure there is no foam (i.e., no leakage) or any unusual appearance. Illustrations of potential functional failures will appear on screen. Please refer to these illustrations while inspecting the cryoprobe. Figure 46: Functional test - visual inspection screen If a functional problem occurs or there is any unusual appearance (such as frost on the plastic cover near the cryohandle etc.) and it is not represented by one of the Illustrations, press "Cancel". Follow system instructions until you are required to safely remove the probe from the cryohandle. You will then be returned to the Main Menu screen. To start again Check that 57 IceCure Medical Ltd. Confidential DSR3100000 rev. K IceSense3™ User Manual the dewar is full and replace the probe. If the problem recurs, do not proceed with treatment. Turn off the system and contact IceCure Medical. If a functional problem occurs as represented by one of the pictures, press on the relevant picture. Follow system instructions until you are required to safely remove the probe from the cryohandle. You will then be returned to the Main Menu screen. Check that the dewar is full and replace the probe and start again. If the problem recurs do not proceed with treatment. Turn off the system and contact IceCure Medical. Choosing ”Success” will load the treatment selection screen. If for any other reason you decide to stop the procedure, press “Cancel”. Follow system instructions until you are required to safely remove the probe from the cryohandle. You will then be returned to the Main Menu screen. Warning In case of frost on shaft, if possible start active Warm. If not, wait for passive Thaw. In both cases use skin protection techniques. Warning During pre-test portions of the cryoprobe, including the plastic cover that is located near the cryoprobe handle, other than the freeze zone, may due to malfunction become cold . If unwanted freezing occurs, stop the pre test process by pressing "Cancel". 5.2.8 Treatment Selection The system allows you to choose between manual mode and automatic mode using preset protocols. To choose automatic mode, select one of the preset protocols from the Treatment Selection screen as shown below. Type of treatment is determined by the number and duration of freeze and thaw cycles. 58 IceCure Medical Ltd. Confidential DSR3100000 rev. K IceSense3™ User Manual Figure 47: Treatment Selection screen 5.2.8.1 Automatic freeze mode Each preset protocol icon displays the number and duration of freeze and thaw cycles as shown in Fig. 38. Select a protocol by pressing the desired icon on the touch screen. A procedure screen will open. After inserting the cryoprobe into the tissue, you will be able to start the cryoablation procedure. 5.2.8.2 Define treatment protocols IceSense3™ cryoablation system allows you to define specific treatment protocols by pressing the “Edit Presets” icon at the bottom of the Treatment Selection screen or in the Main Menu screen. Figure 48: Define a treatment protocol by choosing Edit Presets on the Treatment Selection screen (green arrow) or in the Main Menu screen (yellow arrow) 59 IceCure Medical Ltd. Confidential DSR3100000 rev. K IceSense3™ User Manual Choosing either option will open the “Preset Setup” screen and you will be able to add a specific protocol by pressing one of the empty Preset icons, or edit an existing protocol by pressing one of the pre-defined Preset icons. Figure 49: Editing an existing protocol (green arrow) or adding a new one (yellow arrow) 5.2.8.3 Adding a protocol If you choose to add a protocol, press one of the empty slots in the screen: the “Edit Preset” screen will load. Please follow the next steps: 1. Choose the number of freeze cycles in the upper left corner of the screen. 2. Decrease/increase the time for every cycle using +/- icons. Each step will increase/decrease 15 seconds of the cycle time. 3. Save the protocol by pressing the “Save” icon. 60 IceCure Medical Ltd. Confidential DSR3100000 rev. K IceSense3™ User Manual Edit Preset 7 1 2 3 Select the number of freeze cycles and set the times Figure 50: Steps for adding a protocol 5.2.8.4 Editing a protocol If you choose to edit an existing protocol, the “edit preset” screen will load. The process is very similar to that of adding a new protocol. Figure 51: Edit Preset screen 5.2.8.5 Manual freeze mode The manual freeze mode allows you to perform a cryotherapy procedure without setting its duration or the number of freeze-thaw cycles in advance. You can choose manual freeze mode by pressing the “Manual Mode” icon at the bottom of the “Treatment Selection” screen. 61 IceCure Medical Ltd. Confidential DSR3100000 rev. K IceSense3™ User Manual Figure 52: Choosing the Manual Mode option (green arrow) 5.3 Operational stages 5.3.1 Preliminaries Before operating IceSense3™ cryoablation system, make sure you have completed all preoperational stages. Warning Insertion of the cryoprobe into the target tissue is performed under the guidance of an appropriate imaging device and by an authorized practitioner trained by IceCure medical. Warning You must NOT allow the freeze process to start before the cryoprobe tip is actually within the target tissue. Before activating the freeze cycle, insert the cryoprobe into the target tissue under ultrasound guidance or other appropriate imaging device according to the following steps: 1. Plan the trajectory of the probe prior to placement. The probe shall be centered and along the longest dimension of the target tissue 2. In percutaneous procedures insert probe using ultrasound guidance: • Confirm longest dimension of the target tissue • Perform a 3 mm skin incision (for example using #11 blade) 62 IceCure Medical Ltd. Confidential • DSR3100000 rev. K IceSense3™ User Manual Position the tip of the cryoprobe at the distal end of the long axis of the target tissue, and not more than 5 mm beyond. The order in which you follow these steps is essential for maintaining sterility and patient safety. First, insert the probe tip into the target tissue. Be aware of the markings on the probe: the wide mark closest to the tip is the safety mark. In percutaneous procedures it must be completely inside the tissue to avoid skin burns. The rest of the marks indicate depth of probe insertion: each mark equals one centimeter with distinctive markings at 5 and 10 cm as shown in Fig. 44. 5 cm 10 cm Figure 53: Markings on the probe. Main marks indicate safety (thick mark on left), 5 cm (slightly thick third mark from the left) and 10 cm (double mark in circle). Then, you may begin freezing. 5.3.2 Freeze Cycle Selecting the type of treatment, Manual or Automatic, is discussed in section 5.1.7. Warning Portions of the cryoprobe, including the plastic cover that is located near the cryoprobe handle, other than the freeze zone, may become cold and cause tissue damage. If unwanted freezing occurs, immediately stop the freezing process. To prevent injury, cryoprobes must be closely observed during use for signs of unwanted freezing. Warning You must NOT allow the freeze process to start before the cryoprobe tip is actually within the target tissue. Warning The practitioner must hold the cryohandle for the duration of the cryoablation procedure. 63 IceCure Medical Ltd. Confidential DSR3100000 rev. K IceSense3™ User Manual 5.3.2.1 Manual freeze mode Choosing the Manual freeze mode will open the treatment screen for manual mode as show in Fig. 45. To activate the freeze cycle, press the Action button on the cryohandle and hold it for one second or press the “Freeze” icon on the screen. The BLUE LED will light up around the Action button. Figure 54: Manual Mode screen: press on Freeze to start the freeze cycle. Figure 55: Freeze screen in Manual Mode The “Freeze” icon will change to a “Thaw” icon and will allow you to move from freeze cycle to thaw cycle by pressing that icon or the Action button on the cryohandle. 64 IceCure Medical Ltd. Confidential DSR3100000 rev. K IceSense3™ User Manual Figure 56: Thaw screen in Manual Mode You can continue to move between cycles by the same method. To end the procedure, press the Warm button on the cryohandle or the “Warm” icon on the screen. Freezing will cease and the Warm screen will open. The BLUE LED on the cryohandle will turn off. Figure 57: Warm screen in Manual Mode During the manual procedure the system provides information regarding treatment progress: 65 IceCure Medical Ltd. Confidential DSR3100000 rev. K IceSense3™ User Manual The left side of the screen displays the Current Step (freeze, thaw or warm cycle) and time elapsed for this specific step. The right side of the screen displays information on the entire Protocol as total elapsed time and treatment format. If you perform more than 3 consecutive freeze/thaw cycles, the right side will only display the last 5 actions due to screen size limitation (3 freeze thaw cycles). 5.3.2.2 Automatic freeze mode Choosing one of the suggested protocols from the Treatment Selection screen will open the automatic protocol screen. To activate the freeze/thaw preprogrammed cycles, press the Action button on the cryohandle and hold it for one second or press the “Freeze” icon on the left lower corner of the screen. The BLUE LED will light up around the Action button. The “start” icon will change to a “Skip” icon. The skip icon enables the user to skip from the current step in the cycle to the next step as preprogrammed. Within a given protocol, if you want to increase/decrease the preprogrammed time of a cycle when the cycle has already started, use the +/- icons on the left side of the screen to add/subtract 15 seconds with each push. At the end of the last freeze step in automatic mode, the Warm step will begin and the Warm screen will be displayed. You can interrupt the automatic mode AT ANY TIME by pressing the Manual mode button on the screen. o If you do so, proceed as explained in section Manual freeze mode: press the Action button on the cryohandle to move from freeze to thaw and monitor the process under ultrasound. 66 IceCure Medical Ltd. Confidential DSR3100000 rev. K IceSense3™ User Manual Connected Probe: IceSense 13 Figure 58: Freeze screen in Automatic mode During the preprogrammed procedure the system provides information regarding treatment progress: The left side of the screen displays the Current Step (freeze, thaw, or warm cycle) and time left for this cycle. The right side of the screen displays information concerning the overall Protocol, including total protocol time, time elapsed, protocol format, and changes you have made, if any, to the preprogrammed protocol. Safe Operation in Percutaneous Procedures When performing percutaneous cryotherapy procedures, meticulous observation of the incision site and the skin overlying the treatment site is required. Skin protection techniques must be implemented to avoid thermal injury to the skin. Skin protection techniques include, but are not limited to: dripping room-temperature sterile saline on these areas; continuous monitoring of the growing ice ball by ultrasound; utilizing an external thermocouple to measure skin temperature; injecting sterile normal saline or local anesthetic between the skin and the ice ball formation; and placing moist gauze between the skin and the cryoprobe. 5.3.3 Active warm process The active warm step occurs at the end of every treatment. Its purpose is to allow you to remove the cryoprobe from the target tissue in the fastest and safest way. To activate the Active warm, press on the Active warm button on the cryohandle or the “Warm” icon on one of the freeze mode screens as previously shown. 67 IceCure Medical Ltd. Confidential DSR3100000 rev. K IceSense3™ User Manual The Warm screen will be displayed and a time count will appear. Wait until you can gently remove the cryoprobe (for example 40-50 seconds for 2cm iceball) from the target tissue, extract the probe, and then press Finish. Do not force removal of the cryoprobe from the tissue as it might increase the risk of hematoma. At the end of the warm step, a message will be displayed on screen informing the user that the warm cycle is done. If the cryoprobe cannot easily be extracted from the tissue, press the Active warm button on the cryohandle or “Warm” icon on screen to initiate another warm cycle. After the cryoprobe has been removed, apply momentary pressure to the insertion site. You may apply adhesive skin closure to the incision and cover it with a 4x4 gauze dressing.After the cryoprobe has been removed from the tissue, press the Action button on the cryohandle or the “Finish” icon on screen to complete the procedure. The system will then perform several steps and at the end it will inform you that it is safe to disengage the probe. Warm Elapsed: Press Finish AFTER extracting the probe Figure 59: The Active warm screen during procedure Instruct patients: o To remove gauze dressing after 24 hours; and to expect minimal discharge. Adhesive skin closure should be removed after 7 days if it has not already fallen off. o That they may need over-the-counter analgesics for mild discomfort after procedure. o That swelling and moderate ecchymosis may be present for several weeks. 68 IceCure Medical Ltd. Confidential DSR3100000 rev. K IceSense3™ User Manual Warning In case of a total freeze time of less than 1:30 minutes, the active Warm process won't be available. Wait for passive Thaw. Warning Before removing the cryoprobe from the tissue, make sure the freeze effect has been deactivated and the cryoprobe can be easily withdrawn. Never use excessive force to extract the cryoprobe. Warning DO NOT push the warm button when the cryoprobe is not within the target tissue, as skin burns could occur and not before the freezing protocol is completed, unless you want to shorten the procedure due to clinical judgment. 5.3.4 Replace the dewar during a cryo procedure In case you intend to do a long treatment that will freeze over 14 minutes you will need to replace the dewar during the thaw time of the procedure. First be always ready with an additional full dewar in case you consider you may need an additional dewar for a longer freeze time. In case you decide to replace the dewar be careful not to move the cryoprobe into the tumor as in all thaw period so you keep the location of the probe. Control the process under Ultrasound or any other imaging system. The system will automatically ask if you want to replace the dewar: (figure 60 below) . Figure 60: Replace dewar option question 69 IceCure Medical Ltd. Confidential DSR3100000 rev. K IceSense3™ User Manual If you answer "Cancel", you will stay in the "thaw" screen. If you press "OK" you will get the "Lowering the dewar message". (figure 61 below) Figure 61: Lowering the dewar The system will perform several steps and at the end it will inform you that it is safe to replace the dewar and you will get the "Replace dewar screen" (figure 62 below) Please enter the new dewar instead of the old one and press ok to continue. At the same time you will get an interactive update of the thawing time. 70 IceCure Medical Ltd. Confidential DSR3100000 rev. K IceSense3™ User Manual Figure 62: The replace dewar screen and press ok to continue After pressing the 'OK' button, the system will proceed and prepare the new dewar that was entered. The screen will show "Proceeding, please wait… " (figure 63 below) Figure 63: The replacement done follow up screen When preparation of the new dewar are complete, the system will come back to the Thaw cycle (figure 64) or to the next freeze cycle – if the time to complete the replacement exceeded the preset Thaw time (figure 65). 71 IceCure Medical Ltd. Confidential DSR3100000 rev. K IceSense3™ User Manual Figure 64: Replacement was completed before the Thaw ended Figure 65: Replacement was completed after the Thaw ended 72 IceCure Medical Ltd. Confidential DSR3100000 rev. K IceSense3™ User Manual 5.4 Post-operational stages 5.4.1 Removing the temperature sensor from tissue At the end of the cryotherapy procedure the temperature sensor should be removed from the tissue by carefully pulling on it. The extraction should be done only after a passive thaw of a few minutes since the temperature sensor can be surrounded by ice. Removing it too quickly before thawing can damage the target tissue. Warning Before removing the temperature sensor from the tissue, make sure the freeze effect has been deactivated and the sensor can be easily withdrawn. Never use excessive force to extract the temperature sensor. 5.4.2 Removing the cryoprobe from the cryohandle After removing the cryoprobe from the target tissue, and the message that it is safe to disengage the probe is displayed, detach the cryoprobe from the cryohandle as follows: 1. Carefully place the plastic cover on the tip of the cryoprobe. 2. Unscrew the used cryoprobe from the cryohandle and dispose of it appropriately. 3. Remove the single-use sterile cover from the cryohandle. 4. Close the cryohandle with the covering plug. Protocol Completed Protocol Details Safe to disengage the probe from the handle Figure 66: Protocol Completed Screen 73 IceCure Medical Ltd. Confidential DSR3100000 rev. K IceSense3™ User Manual Warning Dispose of the cryoprobe and cryohandle sleeve in accordance with institutional policy. Do not reuse, do not resterilize. 5.4.3 Disassembling the temperature sensor If a temperature sensor was used, pull the gray part of the cable connector backwards to release it, and then pull the cable connector away from the panel. 5.4.4 Exiting the IceSense3™ cryoablation system treatment mode At the end of the treatment and after removing and disassembling the cryoprobe and temperature sensor, return to the Main Menu screen by pressing the “Main Menu” icon on the right lower corner. Protocol Completed Protocol Details Safe to disengage the probe from the handle Figure 67: Protocol Completed screen. Pressing on the “Main Menu” icon (green arrow) will load the Main Menu screen. 74 IceCure Medical Ltd. Confidential DSR3100000 rev. K IceSense3™ User Manual Figure 68: The Main Menu screen. To exit the system, press on the “Exit” icon (green arrow). At the end of the last treatment of the day, Switch OFF the mechanical ON/OFF button and unplug the electrical cable. Clean the system following instructions in section 8.1 and move the system to its storage location. 5.5 System failures 5.5.1 IceSense3™ cryoablation system failure When the IceSense3™ cryoablation system detects an error, the following will occur: A failure message will appear. The procedure will be aborted. When the above occurs, take action as follows: 1. Write down the error message and number, follow the system instructions. 75 IceCure Medical Ltd. Confidential DSR3100000 rev. K IceSense3™ User Manual Headline User Instructions Error Number Figure 69 : System Fail example screen 2. If you are in the middle of a cryotherapy procedure, wait for passive thaw and then carefully remove the cryoprobe from the tissue. 3. Detach the cryoprobe from the cryohandle ONLY after the dewar carriage has returned to the lowest position and the system instructs you that it is safe to do so. 4. If system shut down is required, shut off the IceSense3™ cryoablation system by pressing the mechanical ON/OFF button on the main chassis and then remove the plug from the power supply. 5.5.2 IceSense3™ cryoablation system touch screen failure If the touch screen shuts down, you will need to shut off the system with the mechanical ON/OFF button and remove the plug from the power supply. This will end the cryotherapy procedure. Warning In case of software crash, switch OFF the mechanical ON/OFF button and unplug the electrical cable. Call IceCure Medical for technical service before restarting the IceSense3™ cryoablation system. 5.5.2.1 Emergency Stop button The fastest way to end a procedure is to press the Warm button in the handle or on the screen. However, in case of emergency, you may press the RED ROUND Emergency Stop button located on the right side of the main chassis. The Emergency Stop button is designed for emergency shutdown of the unit. Pressing this button immediately turns off the system. Switch OFF the mechanical ON/OFF button and unplug the electrical cable. 76 IceCure Medical Ltd. Confidential DSR3100000 rev. K IceSense3™ User Manual Figure 70: The Emergency Stop button located on the main chassis (green arrow) Warning If a liquid nitrogen leak is detected at any time, PUSH the Emergency Stop button immediately. Warning Push the Emergency Stop button ONLY when there is NO other choice. Wherever possible, the system should be shut down by the standard procedure. Excessive use of the Emergency Stop button may damage the system. After pressing the emergency stop button, wait for "passive thaw" before extracting the cryoprobe from the tissue. To release the Emergency Stop button, turn it clockwise. 77 IceCure Medical Ltd. Confidential 6 DSR3100000 rev. K IceSense3™ User Manual COMPUTER INTERFACE 6.1 The technician menu The technician menu/screen can be accessed by pressing the setting icon on the left lower corner of the main menu screen and then pressing the Technician icon. The technician mode can only be accessed by an IceCure Medical authorized technician and is restricted by a password. It is used for maintenance of the system. Warning Never enter the technician mode screen. Only an IceCure technician or an authorized representative can access this mode for maintenance or repair of the system. 6.2 Reading the screen The screen within the control panel is represented by the picture below: 2 1 3 4 5 6 Figure 71: A sample touch screen 6.2.1 Parts of the Screen The following key defines the numbered parts of the above figure: 1. Logo bar 2. System mode 78 IceCure Medical Ltd. Confidential DSR3100000 rev. K IceSense3™ User Manual 3. Wizard/Instruction area 4. Main interaction area 5. Icons 6. Status display 6.3 System messages Messages can appear in one of three modes: status, warning or error messages. 6.3.1 Status messages Information that is valuable to the user will appear in the status bar area at the bottom of the screen. External temperature sensor readout will be displayed in the right bottom corner. Other status messages, such as the type of cryoprobe currently connected will be displayed in the left bottom corner. For Example: Status message Figure 72: Status message example 6.3.2 Warning messages Critical information will appear as a pop-up dialog with an “OK” button for acknowledging the message. If a warning message appears during a treatment, it will appear in the following format: 79 IceCure Medical Ltd. Confidential DSR3100000 rev. K IceSense3™ User Manual Headline User Instructions Figure 73: Warning message format example 6.3.3 Error messages Information that prevents the user from continuing the operation of the system will appear as a dialog box that cannot be closed, stating the problem and possible solutions. When such a message appears, the user should carefully follow system instructions. If an error appears during a treatment, it will appear in the following format: Headline User Instructions Figure 74: Error message format example Pressing the OK button will indicate you have read this message and will dismiss this popup. 80 IceCure Medical Ltd. Confidential DSR3100000 rev. K IceSense3™ User Manual Warning When the system shuts itself down due to an error, contact IceCure Medical and describe the error message shown on the screen as precisely as possible. Do not attempt to reuse the system before contacting IceCure Medical. After reporting or making note of the error message, switch OFF the mechanical ON/OFF button and unplug the electrical cable. 81 IceCure Medical Ltd. Confidential 7 DSR3100000 rev. K IceSense3™ User Manual ACCESSORIES 7.1 Cryoprobe Distal Insertion part 7.1.1 Single use sterile cryoprobe Plastic grip Serial number Shaft Probe tip Figure 75: The cryoprobe components (the figure is for illustration only). Marks on cryoprobe shaft aid in determining the depth of probe insertion. The first mark (closest to the tip) is thicker and represents the minimum insertion depth of the cryoprobe for a percutaneous procedure. Before starting the freezing procedure, the user must verify that this mark is fully inserted into the skin. 7.2 The foot pedal (Not available in some regions, e.g. China) The foot pedal (Not available in some regions, e.g. China) is a pneumatic accessory, external to the main chassis and is not essential for normal functioning of the system. It serves as an alternative to the Action button on the cryohandle. To use the foot pedal (Not available in some regions, e.g. China), connect it to the console by plugging its cable into the footswitch connector located on the back panel. 7.3 The temperature sensor The temperature sensor is a single-use external accessory that can be connected to the main chassis if the user chooses to measure target tissue temperature during cryoablation. To use the temperature sensor, connect it to the panel connector on the right upper corner of the chassis according to instructions detailed in section 3.3.7 – Temperature sensor. 82 IceCure Medical Ltd. Confidential 8 DSR3100000 rev. K IceSense3™ User Manual SYSTEM MAINTENANCE 8.1 General cleaning Warning Do not allow any liquid to enter the cryohandle. Always keep the cover on the cryohandle. Following each cryosurgical procedure, discard the single use devices (single-use cryoprobe, single-use temperature sensor, cryohandle cover, and sleeves for the flexible hose and touch screen) and carefully clean the flexible hose and the cryohandle with a damp cloth. All single use devices are considered to be medical waste and must be disposed of in accordance with medical waste laws and hospital standards. Sharp objects such as the cryoprobe and temperature sensor must be disposed of in a sharps container. Following a cryosurgical procedure, it is recommended to wipe the pedal (Not available in some regions, e.g. China), with a damp cloth and warm soapy water to remove visible soil. Dry it with a clean cloth or with forced air and wrap it in another clean cloth until disinfecting it. Thoroughly clean the IceSense3™ cryoablation system unit with a damp cloth and warm soapy water. Dry it with a clean cloth. Clean the monitor screen with a soft cloth and a mild window cleaning solution. Take special care to avoid spilling liquid onto the system. Check the unit for any remaining blood or tissue. In case these remnants are detected, wipe the infected area with gauze Pads soaked with 70% alcohol. Verify that no visible remnants remain. Wipe the initially cleaned area with approved Medical professional surface disinfecting wipes and dry it in air. At the end of the day, carefully dry all items and store the system in an appropriate place. 8.2 Sterility Warning The cryoprobes and the temperature sensors are single use and are supplied in single use packaging. Never reuse a single-use cryoprobe, temperature sensor, or sterile sleeve. Reprocessing single use device (like the cryoprobe, temperature sensor) could affect the mechanical or performance or microbiological properties of the product. The sterile sleeves and covers are single-use and are supplied by IceCure Medical in single use packaging. The sleeves are used to cover the flexible hose up to the cryoprobe and to cover the touch screen; the cover is used for the cryohandle holder. 83 IceCure Medical Ltd. Confidential DSR3100000 rev. K IceSense3™ User Manual 8.3 Periodic servicing Warning The IceSense3™ cryoablation system is not user-serviceable. If there is any malfunctioning of the IceSense3™ cryoablation system, please contact IceCure Medical technical support. The technician should disconnect the system from the electrical outlet before removing external covers of the system. Periodic servicing will ONLY be performed by IceCure Medical authorized service representatives in compliance to the company service procedures and according to the procedure counter that can be seen in the bottom of the main menu screen (see figure below). Figure 76: counter of the remaining procedure before maintenance (green arrow) at the bottom of the main menu screen. Caution The system will not allow additional treatment when zero procedures left to maintenance. Make sure to call IceCure Medical service representatives in time. 84 IceCure Medical Ltd. Confidential 9 DSR3100000 rev. K IceSense3™ User Manual TROUBLESHOOTING 9.1 General Warning Do not attempt to perform any troubleshooting or corrective action beyond those specified in the following guide. Any malfunction not listed in the guide, or one that persists after the recommended action has been taken, must be referred to IceCure Medical. 9.2 Troubleshooting guide Problem Probable Cause Action Main chassis does not move Rollers are locked Unlock the rollers, transport the system and lock the wheels again. If the problem persists, contact IceCure Medical service. No system power AC power is not connected to the system; power supply malfunction Check that the power cable is connected to the inlet and the wall outlet. Check that main switch is ON. If still there is no power, contact IceCure Medical service. AC power is on but the Computer power supply screen does not turn on malfunction or computer error Check if the computer power cable is connected to the screen and turn the screen on. If the screen still does not turn on, contact IceCure Medical service. Dewar compartment door does not open Door held shut by magnet Try to open the door using reasonable force. If door will not open, contact IceCure Medical service. The door is open but the dewar is not visible Carriage is not in correct position. Turn the system off and try to restart the system. If the dewar is still in its upper position contact IceCure Medical service. 85 IceCure Medical Ltd. Confidential DSR3100000 rev. K IceSense3™ User Manual Problem Probable Cause Action Dewar is jammed and cannot be removed. Dewar is not in place or is blocked by an unknown object. Try tilting the dewar and pulling it out using reasonable force. If dewar cannot be removed, close the door and call IceCure Medical service. System provides “Wrong cryoprobe S/N” message. System identifies wrong or double use of the cryoprobe. Verify that the number you entered matches the one on the cryoprobe and the package. If S/N is correct, reenter it into the system. If the message reappears, change the cryoprobe or call IceCure Medical service. “Connect the probe” message displayed constantly on the screen Faulty microswitch Ensure that the probe is fully inserted (can’t screw it any more with reasonable force) If message still appears, change cryoprobe. If the problem persists, contact IceCure Medical service. Freeze/Warm icon does Faulty icon or operator misuse. not initiate the operation Try pushing the icon again. It is only activated if pushed for 1 second. Check the user manual to ensure that you can indeed use the icon in the present screen. If the problem persists contact IceCure Medical service. LED does not light up Burned out LED, or it should not be lighting up at given time. Check user manual to verity that the LED should light up. If yes, contact IceCure Medical service. Ice formation on the flexible hose Low temperature causes moisture to form ice particles. This is not an operational problem. Wipe off accumulated ice with clean sterile gauze. Nitrogen leaks from cryoprobe, cryohandle or system during the cryotherapy procedure. Cryoprobe is not well connected or pipes are faulty. Push the Emergency Stop button and contact IceCure Medical service. Unreasonable temperature readings of temperature sensor Temperature sensor or system malfunctions. Check that the temperature sensor is well connected. If so, change the temperature sensor. If temperature reading is still unreasonable, continue the 86 IceCure Medical Ltd. Confidential Problem DSR3100000 rev. K Probable Cause IceSense3™ User Manual Action procedure without a temperature sensor. If problem persists, contact IceCure Medical service. Cryoprobe tip cannot easily be removed from target tissue. Warm process malfunction Do not use force in attempting to remove the cryoprobe from the tissue. Wait 7 minutes and try removing it again. If problem persists, contact IceCure Medical service. Cryoprobe is difficult to detach from cryohandle. Parts are frozen together Try again after five minutes. If it still cannot be detached, contact IceCure Medical service. Nitrogen leak when trying to remove the cryoprobe Excess pressure on the pipes, main valve open, procedure not completed, or dewar relief valve malfunction. When initial leak is detected, screw the cryoprobe back in place. Unknown Mechanical shut down of the system using the On/Off switch at the back of the system or emergency stop. Computer failure due to hardware fault Make sure that the procedure has ended, wait 3 minutes and try removing the cryoprobe again. If nitrogen is still leaking contact IceCure Medical service. Then turn on the system (after releasing the emergency stop button, if pressed) and wait for computer re-boot. Screen is stuck/ Controller stops working/ Controller is stuck Unknown Mechanical shut down of the system using the On/Off switch at the back of the system or emergency stop. Then turn on the system (after releasing the emergency stop button, if pressed) and wait for computer re-boot. Table 1: Troubleshooting guide 87 IceCure Medical Ltd. Confidential DSR3100000 rev. K IceSense3™ User Manual 10 IceSense3™ cryoablation system - Step-by-Step procedure Before starting the procedure a Pre-Test must be carried out! System preparation and Pre-Test 1. 2. 3. 4. 5. 6. 7. 8. 9. Press Prepare for treatment. Remove the Dewar’s cap and fill the Dewar with liquid nitrogen in a safety manner. Place the Dewar inside the system and close the door. Press Next (by pressing the BLUE button on cryohandle OR by pressing on the console touch screen) Enter the probe serial number. Each procedure must be carried out with a new sterile probe. Press on the 'Next' button on the screen. Remove the handle’s cap, attach the probe to the handle and press Next. The next button will be shown only when the probe is connected properly. The following message will appear - “Please wait until the system is ready for test” When the system is ready, place the probe inside a sterile Saline cup. Press Test (by pressing the BLUE button on cryohandle OR by pressing on the console touch screen). Notice that you don’t see any bubbles, that the shaft is not frozen,and that a small ice-ball is created at the tip of the probe. If the test was successful press Success. If not start over with a new sterile probe. Procedure 10. Select treatment modality: Preset Cycles/ Manual Mode. You can modify the cycles as needed during procedure. 11. Insert the probe to the breast and navigate with the help of Ultrasound to stub through the lesion center. 12. Activate treatment cycle: Press FREEZE on the console touch screen, OR Press the BLUE button on cryohandle. Monitor ice-ball under ultrasound at all times. Inject saline buffer as needed to protect the skin. You may manually stop the first freeze cycle and start the Thaw process by pressing Skip. This is done by pressing the BLUE button on cryohandle OR by pressing on the console touch screen. You may manually stop the second freeze cycle and start the Warm process by pressing Warm. This is done by pressing the BLUE button on cryohandle OR by pressing on the console touch screen. 13. During the warm process gently remove the probe. When the warm process is finished you can press finish if you have manage to remove the probe from the body or continue the warm process by pressing Warm and try again to gently remove the probe. If you press Warm more than two times, the following message may appear “Unable to warm, Please wait for passive Thaw” In this case wait for passive thaw and gently extract the probe from the tissue. 14. Do not disengage the probe from the handle until the following message appears “Safe to disengage the probe from the handle” 15. After disengaging the probe, immediately replace the handle’s cap. Warning messages - Critical information will appear as a pop-up dialog with an “OK” button for acknowledging the message. Error messages- Information that prevents the user from continuing the operation of the system will appear as a dialog box that cannot be closed, stating the problem and possible solutions. When such a message appears, the user should carefully follow system instructions. 88 IceCure Medical Ltd. Confidential DSR3100000 rev. K IceSense3™ User Manual 11 SYSTEM SPECIFICATIONS Physical properties Dimensions (excluding the screen) Height: 120 cm (47.24 inches) Depth: 70 cm (27.56 inches) Width: 50 cm (19.68 inches) Weight 150kg Electrical requirements 220-240 VAC 7A 50/60 Hz, single phase Operating pressure Pressure range 0-100 psi Cryogen Liquid Nitrogen Boiling point: -196 C Type of cryometer Environmental conditions thermocouple type K Temperatures: Operating 10 C; +40 C (50 F; 104 F) Transportation and Storage 0 C; +70 C (32 F ; 158 F) Relative Humidity: Operating 0 up to 80% not condensing at room temperature Transportation and Storage 0 up to 90% not condensing Atmospheric pressure: Operating 700 hPa; 1060 hPa Transportation and Storage 500 hPa; 1060 hPa Temperature range of cryoprobe: -196 C to +40 C Pressure sensor Power supply 24 V Pressure range: 0.1 - 145 psi Accuracy 1% Repeatability ≤ ± 0.1 89 IceCure Medical Ltd. Confidential DSR3100000 rev. K IceSense3™ User Manual 12 TEMPERATURE DISTRIBUTION ANALYSIS IN HOMOGENEOUS MEDIUM A model of a homogenous medium, that freezes at 0°C, and is cooled with a round 3.4mm diameter cold finger is used in order to estimate the radial distance from the 0°C isotherm (border of ice ball) to the -20°C and -40°C isotherms respectively. The model that was used is a theoretical model with the following characteristics and assumptions: 1. Homogenous medium 2. The temperature cold finger surface is T(cf)=-170°C 3. The temperature of the homogenous medium is 37°C T(medium) = 37°C 4. A visible ice ball is created at the 0°C isotherm 5. Exponential temperature distribution according to: T(x) = T (medium) – (T (medium) - T (cf))*exp (-a*x) = 37-207*exp (-a*x) Where: X is the radial distance from the cold finger. With these assumptions calculations show: Examples: 1. If the diameter of the 0°C isotherm is measured to be 20mm, the diameter of the -20°C isotherm is estimated to be 15.8mm and the diameter of the -40°C isotherm is estimated to be 12.9. 90 IceCure Medical Ltd. Confidential DSR3100000 rev. K IceSense3™ User Manual 2. If one desires to obtain a diameter of 20.3 mm with -20°C, the estimated Ice ball diameter that is required is 26mm. 3. If one desires to obtain a diameter of 15.2 mm with -40°C, the estimated Ice ball diameter that is required is 24mm. 91 IceCure Medical Ltd. Confidential DSR3100000 rev. K IceSense3™ User Manual 13 LIMITED WARRANTY CERTIFICATE Terms and conditions for warranty of purchased medical equipment. Warranty Number: __________ Date of Issue: __________ We, as sellers of the equipment, warrant that for a period ending twelve (12) months from the date of supply of the equipment as stated below, the equipment shall be free from defects in material and workmanship. Our sole liability under valid warranty claims shall be limited, at our option, to repair or replace defective parts. All warranty replacement or repair of parts shall be limited to equipment malfunction which, in our reasonable opinion, are due and traceable to defects in original material and workmanship. In order to enable us to properly administer this warranty, buyer shall notify us promptly in writing of any claims and shall provide us with the opportunity to inspect and test each item claimed to be defective. Such inspection may be at our laboratory. Replacement or repair shall be contingent upon our examination, disclosing that defects have not been caused by misuse, abuse, improper application, improper electrical supply (as specified in the equipment’s official user manual), unauthorized transfer of ownership, unauthorized repair, alternation, accident or negligence. Geographic relocation of the equipment may, at our reasonably exercised option, result in exclusion of the equipment from warranty coverage. This warranty shall not apply to electron tubes, lamps, fuses, batteries and any other parts which carry separate warranties based upon usage. The warranties contained herein are in lieu of all other warranties, express or implied, as to the condition, merchantability, fitness for a particular purpose, or any other matter concerning the equipment or its use or performance. Buyer hereby waives any claim it may have against seller for any loss, damage, or expense of any kind whatsoever, caused by any defect therein, the use or maintenance thereof, or any servicing or adjustments thereto, not expressly covered by the warranties contained herein. Buyer further agrees that seller will not be liable for any incidental, consequential or special damages, for any lost profits, or for any claim or demand against the buyer by any other party. Seller’s liability for damages under this warranty shall in no event exceed the purchase price. Seller shall not be required to perform seller’s obligations under this agreement, or be liable for seller’s failure to perform, if non-performance is caused by an Act of God, war, civil disturbance, strike, work stoppage, transportation contingencies, power failures, laws, regulations, ordinances, acts or orders of any governmental agency of official thereof, or any cause not within the control of the seller. Warranty Number: Date of supply of equipment: Date of expiration of this warranty certificate: Buyer of the equipment: IceCure Medical representative:___________________________________ 92 IceCure Medical Ltd. Confidential DSR3100000 rev. K IceSense3™ User Manual 14 CUSTOMER COMPLAINT FORM Section 1: Customer complaint (To be filled by customer / complaint recipient) Complaint reported by: Phone Sales representatives Name: ________________ FAX Website Email Letter Other: __________________ Title / Position: __________________ Address: Phone: _____________________ Fax: ___________________ Product Name: Batch No. : Serial No. : Description of complaint: Initial consequences: Service (No Harm) Injury Death If death or injury occurred, please describe below: Complaint recorded by: Name: _________________ Title / Position: _______________ On Date: _______________ Time: ________________ Signature: _________________ ATTENTION! IF DEATH OR INJURY OCCURRED NOTIFY IMMEDIATELY TO ALL RELEVANT PERSONNEL ACCORDING TO PROCEDURES 93 IceCure Medical Ltd. Confidential DSR3100000 rev. K IceSense3™ User Manual 15 REPORT CUSTOMER COMPLAINT Send to: IceCure Medical, Inc. 10000 Cedar Ave, MS-13, 2nd floor Cleveland, OH 44106 [email protected] Toll-free 888-516-7389 Tel 216-929-5153 Fax 216-929-5143 OR: IceCure Medical Ltd. HaEshel 7, 2nd floor Southern Industrial Park, Caesarea 38900, Israel [email protected] Tel: +972-4-623 0333; Fax: +972-4-623 0222 MedNet GmbH – Authorized Representative of IceCure Medical Ltd. Borkstraße 10 48163 Münster Germany Tel +49 (0) 251 32266-0 Fax +49 (0) 251 32266-22 94 IceCure Medical Ltd. Confidential DSR3100000 rev. K IceSense3™ User Manual 16 Manufacturer’s Declaration of the EUT Guidance and manufacturer’s declaration-electromagnetic emission- for all EQUIPMENT AND SYSTEMS 1 Guidance and manufacturer’s declaration-electromagnetic emission 2 The model IceSense3 Cryotherapy product is intended for use in the electromagnetic environment specified below. The customer or the user of the model IceSense3 Cryotherapy product should assure that it is used in such an environment. Emissions test Compliance Electromagnetic environment - guidance 3 4 RF emissions CISPR 11 Group 1 5 6 7 RF emissions CISPR 11 Harmonic emissions EN 61000-3-2 Voltage fluctuations / flicker emissions EN 61000-3-3 The model IceSense3 Cryotherapy product uses RF energy only for its internal function. Therefore, its RF emissions are very low and are not likely to cause any interference in nearby electronic equipment. Class B Class A Complies 95 IceCure Medical Ltd. Confidential DSR3100000 rev. K IceSense3™ User Manual Guidance and manufacturer’s declaration-electromagnetic immunity- for EQUIPMENT and SYSTEM that are not LIFE-SUPPORTING Guidance and manufacturer’s declaration-electromagnetic immunity The model IceSense3 Cryotherapy product is intended for use in the electromagnetic environment specified below. The customer or the user of the model IceSense3 Cryotherapy product should assure that it is used in such an environment. Immunity test IEC 60601 test Compliance Electromagnetic environment- guidance level level Portable and mobile RF communications equipment should be used no closer to any part of the model IceSense3 Cryotherapy product, including cables, than the recommended separation distance calculated from the equation applicable to the frequency of the transmitter. Conducted RF 61000-4-6 Radiated RF EN 61000-4-3 EN 3 Vrms 150 kHz to 80 MHz 3V 3 V/m 80 MHz to 2,5 GHz 3 V/m Recommended separation distance where p is the maximum output power rating of the transmitter in watts (W) according to the transmitter manufacturer and d is the recommended separation distance in metres (m).b Field strengths from fixed RF transmitters, as determined by an electromagnetic site survey,a should be less than the compliance level in each frequency range.b Interference may occur in the vicinity of equipment marked with the following symbol: NOTE 1 At 80 MHz and 800 MHz, the higher frequency range applies. NOTE 2 These guidelines may not apply in all situations. Electromagnetic is affected by absorption and reflection from structures, objects and people. a Field strengths from fixed transmitters, such as base stations for radio (cellular/cordless) telephones and land mobile radios, amateur radio, AM and FM radio broadcast and TV broadcast cannot be predicted theoretically with accuracy. To assess the electromagnetic environment due to fixed RF transmitters, an electromagnetic site survey should be considered. If the measured field strength in the location in which the model IceSense3 Cryotherapy product is used exceeds the applicable RF compliance level above, The model IceSense3 Cryotherapy product should be observed to verify normal operation. If abnormal performance is observed, additional measures may be necessary, such as reorienting or 96 IceCure Medical Ltd. Confidential DSR3100000 rev. K IceSense3™ User Manual relocating the model IceSense3 Cryotherapy product. b Over the frequency range 150 kHz to 80 MHz, field strengths should be less than 3V/m. Recommended separation distances between portable and mobile RF communications equipment and the EQUIPMENT or SYSTEM- for EQUIPMENT and SYSTEMS that are not LIFE-SUPPORTING Recommended separation distances between portable and mobile RF communications equipment and the model IceSense3 Cryotherapy product The model IceSense3 Cryotherapy product is intended for use in an electromagnetic environment in which radiated RF disturbances are controlled. The customer or the user of the model IceSense3 Cryotherapy product can help prevent electromagnetic interference by maintaining a minimum distance between portable and mobile RF communications equipment (transmitters) and the model IceSense3 Cryotherapy product as recommended below, according to the maximum output power of the communications equipment. Separation distance according to frequency of transmitter m 150 kHz to 80MHz 80 MHz to 800 MHz 800 MHz to 2,5 GHz 0,01 0.12 0.12 0.23 0,1 0.38 0.38 0.73 1 1.2 1.2 2.3 10 3.8 3.8 7.3 100 12 12 23 Rated maximum output of transmitter W For transmitters rated at a maximum output power not listed above the recommended separation distance d in metres (m) can be estimated using the equation applicable to the frequency of the transmitter, where P is the maximum output power rating of the transmitter in watts (W) according to the transmitter manufacturer. NOTE 1 At 80 MHz and 800 MHz, the separation distance for the higher frequency range applies. NOTE 2 These guidelines may not apply in all situations. Electromagnetic propagation is affected by absorption and reflection from structures, objects and people. 97