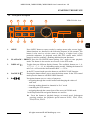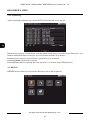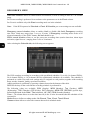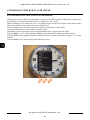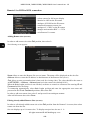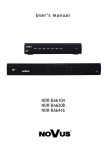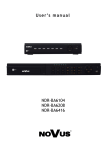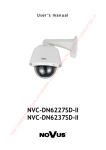
1
U s e r ’s m a n u a l
NDR-EA2104
NDR-EA2208
NDR-EA2416
NDR-EA2104 / NDR-EA2208 / NDR-EA2416 User’s manual ver. 1.0
INFORMACJE
IMPORTANT
SAFEGUARDS AND WARNINGS
EMC (2004/108/EC) and LVD (2006/95/EC ) Directives
CE Marking
Our products are manufactured to comply with requirements of following directives and national
regulations implementing the directives:
•
•
Electromagnetic compatibility EMC 2004/108/EC.
Low voltage LVD 2006/95/EC with further amendment. The Directive applies to electrical
equipment designed for use with a voltage rating of between 50VAC and 1000VAC as well
as 75VDC and 1500VDC.
WEEE Directive 2002/96/EC
Information on Disposal for Users of Waste Electrical and Electronic Equipment
This appliance is marked according to the European Directive on Waste Electrical and Electronic
Equipment (2002/96/EC) and further amendments. By ensuring this product is disposed of correctly,
you will help to prevent potential negative consequences for the environment and human health, which
could otherwise be caused by inappropriate waste handling of this product.
The symbol on the product, or the documents accompanying the product, indicates that this appliance
may not be treated as household waste. It shall be handed over to the applicable collection point for the
waste electrical and electronic equipment for recycling purpose. For more information about recycling
of this product, please contact your local authorities, your household waste disposal service or the shop
where you purchased the product.
RoHS Directive 2002/95/EC
Concerning for human health protection and friendly environment, we assure that our
products falling under RoHS Directive regulations, regarding the restriction of the use of hazardous
substances in electrical and electronic equipment, were designed and manufactured in compliance with
mentioned regulation. Simultaneously, we claim that our products were tested and do not contain
hazardous substances exceeding limits which could have negative impact on human health or natural
environment.
Information
The device, as a part of professional CCTV system used for surveillance and control, is not designed
for self installation in households by individuals without technical knowledge.
The manufacturer is not responsible for defects and damages resulted from improper or inconsistent
with user’s manual installation of the device in the system.
All rights reserved © AAT Holding sp. z o.o.
2
NDR-EA2104 / NDR-EA2208 / NDR-EA2416 User’s manual ver. 1.0
SAFETY REQUIREMENTS
ATTENTION!
PRIOR TO UNDERTAKING ANY ACTION THAT IS NOT PROVISIONED FOR THE GIVEN
PRODUCT IN ITS USER’S MANUAL AND OTHER DOCUMENTS DELIVERED WITH THE
PRODUCT, OR THAT ARISES FROM THE NORMAL APPLICATION OF THE PRODUCT, ITS
MANUFACTURER MUST BE CONTACTED OR THE RESPONSIBILITY OF THE
MANUFACTURER FOR THE RESULTS OF SUCH AN ACTION SHELL BE EXCLUDED.
1. The installation of NDR-EA2104, NDR-EA2208 and NDR-EA2416 DVRs should be made by a
qualified service person or a professional safety system installer.
2. Recorders mustn’t be placed in places where ventilating holes are partially or fully covered.
3. User’s interference inside the device is not allowed and is unnecessary as it does not have any
systems which require adjusting or which are suitable for self-repair. You mustn’t dismantle the
recorder or remove any single fastening screws. If any repairs are necessary contact the service.
The device must be take care of and protected against any mechanical damage.
4. The recorder has to be protected against humidity and dust. In case the recorder had a contact with
water react immediately: switch off the power supply and contact the authorised Novus service. If
the device gets dirty it might get damaged or electrocute someone.
5. The device can only be cleaned with a damp cloth after the power supply has been switched off.
Avoid strong detergents (liquids and sprays). Mild detergents can be used if the recorder becomes
very dirty.
6. Power supply unit cords and signal cords should be laid in a way that eliminates the risk of
mechanical damage; special attention should be paid to the plug. Be careful not to overload sockets
and extension cords so that there is no fire.
7. To avoid recorder’s damage vision and control signals should be equipped with systems protecting
against disturbances, over voltage and atmospheric discharge that are in compliance with Polish
regulations. It is also advised to use ground loop isolators.
8. The device mustn’t be used in conditions which do not fulfil operating requirements as far as power
supply, relative humidity or air temperature are concerned.
9. You cannot allow any metal objects get inside the recorder. It might cause serious damage. If a
metal object gets inside the device contact the authorised Novus service immediately.
10. The manufacturer does not bear responsibility for damage or loss of data stored on HDDs or other
media occurred during the usage of the product.
All rights reserved © AAT Holding sp. z o.o.
3
NDR-EA2104 / NDR-EA2208 / NDR-EA2416 User’s manual ver. 1.0
TABLE OF CONTENTS
CONTENTS ................................................................................................................................... 4
1. FOREWORD INFORMATION ............................................................................................. ..6
1.1. Main characteristics ............................................................................................................ 6
1.2. NDR-EA2104/NDR-EA2208/NDR-EA2416 recorders technical data ............................ ...7
2. STARTING THE DEVICE....................................................................................................... 8
2.1. Getting ready to work ........................................................................................................ 8
2.2. HDD mounting .................................................................................................................... 9
2.3.1. Electrical connection and other back panel elements NDR-EA2104 .................... 11
2.3.2. Electrical connection and other back panel elements NDR-EA2208
and NDR-EA2416 .................................................................................................. 13
2.4. Front panel description ...................................................................................................... 15
2.5. Connecting peripheral equipment ..................................................................................... 17
2.6. Controlling via IR remote controller ................................................................................. 18
2.7. Plugging in the power ....................................................................................................... 20
3. RECORDER'S MENU ............................................................................................................ 23
3.1. SYSTEM ........................................................................................................................... 23
3.1.1. Information ............................................................................................................ 23
3.1.2. Date /time .............................................................................................................. 25
3.1.3. User ....................................................................................................................... 27
3.1.4. Quick setup ............................................................................................................ 31
3.1.5. System log ............................................................................................................. 32
3.2. DEVICE ........................................................................................................................... 32
3.2.1. Camera .................................................................................................................. 33
3.2.2. Audio ..................................................................................................................... 35
3.2.3. Alarm .................................................................................................................... 36
3.2.4. Keyboard ............................................................................................................... 37
3.2.5. RS232 / RS485 ...................................................................................................... 38
3.3 DISPLAY .......................................................................... ........................................ .......39
3.3.1. Display................................................................................................................... 39
3.3.2. VGA ...................................................................................................................... 40
3.3.3. CVBS..................................................................................................................... 41
3.3.4. Digital Signage ...................................................................................................... 41
3.4 RECORD .......................................................................................................................... 43
3.4.1. Storage .................................................................................................................. 43
3.4.2. Record ................................................................................................................... 45
3.4.3. Utilities.................................................................................................................. 48
3.5 NETWORK....................................................................................................................... 50
3.5.1. Address.................................................................................................................. 50
3.5.2. DDNS .................................................................................................................... 52
3.5.3. Notification ........................................................................................................... 53
3.5.4. Transmission ......................................................................................................... 55
3.6 EVENT ............................................................................................................................. 56
3.6.1. Sensor. ................................................................................................................... 56
3.6.2. Motion ................................................................................................................... 59
3.6.3. Video loss.............................................................................................................. 60
3.6.4. Text-in ................................................................................................................... 61
3.6.5. System ................................................................................................................... 63
3.7. LOGOUT / SHUTDOWN ............................................................................................... 65
All rights reserved © AAT Holding sp. z o.o.
4
NDR-EA2104 / NDR-EA2208 / NDR-EA2416 User’s manual ver. 1.0
TABLE OF CONTENTS
4. OPERATING THE DVR .........................................................................................................66
4.1. Live monitoring ............................................................................................................... 67
4.2. Live audio ........................................................................................................................ 68
4.3. PIP (picture in picture)..................................................................................................... 69
4.4. Zoom function ................................................................................................................. 69
4.5. PTZ camera control ......................................................................................................... 69
4.6. Event monitoring ............................................................................................................. 70
4.7. Covert cameras ................................................................................................................ 70
4.8. Recording the video ......................................................................................................... 70
4.9. Audio recording ............................................................................................................... 70
4.10. Playback recorded data .................................................................................................. 71
4.11. Playback backup data .................................................................................................... 72
4.12. Video search .................................................................................................................. 72
4.12.1. Go to time .............................................................................................................. 73
4.12.2. Calendar search ..................................................................................................... 73
4.12.3. Event search .......................................................................................................... 75
4.12.4. Text-in search ........................................................................................................ 76
4.13. Backup ........................................................................................................................... 77
4.13.1. Copying*.exe oraz *.strg ....................................................................................... 78
4.13.2. *.mp4 copying ....................................................................................................... 79
4.14. Playback of copied materials ......................................................................................... 80
4.14.1. *.exe format playback ........................................................................................... 80
4.14.2. Playing back the *.m4v videos .............................................................................. 83
4.14.3. Playing back the *.strg recordings......................................................................... 83
4.15. WaterMark ..................................................................................................................... 83
4.16. Advertising function ...................................................................................................... 83
5. CONNECTING AND CONTROLLING PTZ CAMERAS ................................................. 84
5.1. Connecting NOVUS PTZ cameras .................................................................................. 84
6. CONNECTING EXTERNAL DEVICES TO ALARM INPUTS/OUTPUTS .................... 86
7. OPERATING THE DVR VIA SYSTEM KEYBOARDS .................................................... 88
7.1. Controlling the DVR via NV-KBD70 keyboard .............................................................. 88
7.2. Controlling the DVR via NV-KBD30 keyboard .............................................................. 89
8. CONTROLLING THE DVR VIA USB MOUSE ................................................................. 92
9. CONTROLLING THE DVR VIA INTERNET EXPLORER ............................................. 94
9.1. Minimum system requirements ........................................................................................ 94
9.2. Establishing a connection ................................................................................................ 94
9.3. Live monitoring interface ................................................................................................ 96
9.4. Overview of the user interface in search and playback modes ........................................ 97
9.5. Remote setup overview .................................................................................................... 98
10. Remote Live DVR to DVR connection ................................................................................. 99
Appendix 1 - preparing the advertising files ........................................................................... 102
All rights reserved © AAT Holding sp. z o.o.
5
NDR-EA2104 / NDR-EA2208 / NDR-EA2416 User’s manual ver. 1.0
FOREWORD INFORMATION
1.
FOREWORD INFORMATION
1.1. Main characteristics
• PENTAPLEX: simultaneous recording, live monitoring, playback/digital signage, backup and
networking
• Operating system based on Linux
• Real-time display
• Recording speed: up to 400 fps
• H.264 compression
• Recording resolution: - 704 x 576 - 704 x 288 - 352 x 288
• Independent display on two main monitors (e.g. live and playback or live and digital signage etc.)
• Supports up to 2 SATA HDDs*
• Recording resolution, speed and quality defined individually for each camera
• Advanced schedule recording & motion detection functions
• Pre- & post-alarm functions
• Recording time estimation function
• Up to 8-channel real-time audio recording
• External devices support (“Text-in” feature): ATM, POS, AC etc.
• Digital Signage function
• Preview on one DVR images from other DVRs connected to the network
• Advanced search functions of recorded images
• PTZ control directly from the device or through the network
• Protocols: N-Control, Pelco-D, Pelco-P and others
• NV-KBD70 & NV-KBD30 keyboards compatible
• Backup: onto HDD or USB Flash Memory through USB port & through the network
• Networking (simultaneous connections with multiple DVRs and alarm e-mail notification)
• Software: E-Viewer application for remote administration, live monitoring and recorded data search
with a built-in callback module (E-Viewer Callback), iMon2 application for live monitoring,
playback receiving information on alarm events, alarm output control, PTZ control, DVR
configuration from iPhone and Android OS devices
• Self-diagnostic functions with automatic notification
• User friendly multi-lingual OSD
• Covert camera function
• WaterMark function
• IR remote control and PC mouse control (in-set included)
• Power supply: 12 VDC (100 ~ 240 VAC/12 VDC PSU in-set included)
* The list of recommended disk models and their capacity is available on Novus Security website in the Compatible Disk file in the product tab
All rights reserved © AAT Holding sp. z o.o.
6
NDR-EA2104 / NDR-EA2208 / NDR-EA2416 User’s manual ver. 1.0
FOREWORD INFORMATION
1.2. NDR-EA2104 / NDR-EA2208 / NDR-EA2416 tech specification:
Model
NDR-EA2104
NDR-EA2208
Operation Mode
pentapleks
Operating System
Linux
Video Input
4 x BNC,
NDR-EA2416
8 x BNC, loop-through (option**)
16 x BNC, loop-through (option**)
Video output
Main Monitor (1 x BNC, 1 x VGA, independent display)
Alarm Input
4 (Including Emergency)
2 OC
Alarm Output
Audio Input
4 x RCA (Line-in)
8 x RCA (Line-in)
1 x RCA
Audio Output
Recording Speed
Up to 100 fps (352 x 288), up to 100 fps
(704 x 288), up to 50 fps (704 x 576)
Up to 200 fps (352 x 288), up to 200 fps
(704 x 288), up to 100 fps (704 x 576)
H.264
Compression
704 x 576, 704 x 288, 352 x 288
Recording Resolution
Time-lapse, Event (Alarm, Motion detection and/or “Text-in”)
Recording Mode
Display Speed
Display Screen
Motion Detection
Up to 400 fps (352 x 288), up to 200 fps
(704 x 288), up to 100 fps (704 x 576)
100 fps (real-time)
200 fps (real-time)
Full screen, 4, PiP, sequence, digital
Full screen, 4, 1 + 5, 9, PiP, sequence,
zoom of a chosen screen area: 8x, freeze digital zoom of a chosen screen area: 8x,
image function
freeze image function
400 fps (real-time)
Full screen, 4, 1 + 5, 9, 1 + 7, 1 + 12, 16,
PiP, sequence, digital zoom of a chosen
screen area: 8x, freeze image function
99 detection windows (9x11 grid) with sensitivity defined individually for each channel
Video Loss Detection
Yes
Schedule Recording
Individually adjustable for each day/specific days (holidays etc.) per camera, combination of individual recording modes possibility
Recorded Data Search
Event History Log
Time Synchronization
System Diagnostic
By date/time, events or “Text-in”
Up to 10 000 alarm events
Automatic time synchronization with NTP server
Automatic control of HDD bad sectors number (“Health”) & temperature status with local and network notification function
Storage
Supports up to 2 SATA HDDs*
Backup
Onto HDD or USB Flash Memory through USB port, through the network
External Ports
1 x Ethernet - RJ-45 interface, 10/100 Mbits/s,
2 x USB 2.0 for external drives (HDD, Flash Memory) or PC mouse
1 x RS-485 & 1 x RS-232 for PTZ cameras, NV-KBD70 & NV-KBD30 keyboards, POS, ATM, AC etc.
PTZ Control
Directly from the device or through the network
Protocol
N-Control, Pelco-D, Pelco-P and others
Control
Front panel, IR remote control (in-set included), Network (E-Viewer, IE, iMon2), NV-KBD70 & NV-KBD30 keyboards, USB PC
mouse (in-set included)
Set-up
Multi-lingual On Screen Display (OSD)
E-Viewer, iMon2
Software
User Authorization
Auto System Recovery
Power Supply
Power Consumption
Creation of user groups and accounts with diverse grants, password protection
Hardware WATCHDOG function
12 VDC (100 ~ 240 VAC/12 VDC PSU in-set included)
Approx. 40 W with 2 HDDs
5°C ~ 40°C
Operating Temperature
Relative Humidity
0% ~ 80% (non-condensing)
Dimensions (mm)
340 (W) x 67 (H) x 267 (D)
2 kg (without HDD)
Weight
*
The list of recommended disk models and their capacity is available on Novus Security website in the Compatible Disks file in
the product tab
**
Loop-through connection is performed via NDR-EA/LOOP cable, which needs to be purchased separately. Single
NDR-EA/LOOP cable supports up to 8 video channels.
All rights reserved © AAT Holding sp. z o.o.
7
NDR-EA2104 / NDR-EA2208 / NDR-EA2416 User’s manual ver. 1.0
STARTING THE DEVICE
2.
STARTING THE DEVICE
2.1. Getting ready to work
Unpack the device carefully.
After unpacking, please ensure that package contains the following items:
NDR-EA2104 or NDR-EA2208 or NDR-EA2416
Power supply
100~240 VAC/12 VDC
Audio cable
(only 8 and 16 channel
models)
Power cord
IR remote
CD with a full version of
user’s manual and software
tools and software
Mouse
User’s manual
(short)
If any of the elements has been damaged during transport, pack all the elements back into the original
packaging and contact your supplier.
CAUTION!
If the device was brought from a location with lower temperature, please wait until it reaches the
temperature of location it is currently in. Turning the device on immediately after bringing it
from a location with lower ambient temperature is forbidden, as the condensing water vapour
may cause short-circuits and damage the device as a result.
Note: Please familiarize yourself with description and functions of rear panel inputs.
All rights reserved © AAT Holding sp. z o.o.
8
NDR-EA2104 / NDR-EA2208 / NDR-EA2416 User’s manual ver. 1.0
HDD MOUNTING
2.2 HDD mounting
NDR-EA2104, NDR-EA2208 and NDR-EA2416 support up to two 3,5" SATA HDD.
Note:
Note:
Note:
Note:
Note:
In order to obtain info on latest compatible HDDs together with their capacities,
please contact your distributor or visit www.novuscctv.com website. AAT HOLDING
company does not bear responsibility for any issues arising from usage of
unsupported SD cards/HDDs.
List of compatible HDDs contains all disks supported by a given DVR model,
including desktop HDDs. However due to the fact that image recording prefers
reliability usage of 24x7 recording HDDs is therefore advised.
If a disk was used in another device, formatting becomes necessary. Please take it into
account due to the irrecoverable data loss resulting from said process.
All HDD mounted in the DVR should be exactly the same type.
Prior to removal of the HDD cover, unplug the power supply first!
If DVR is turned on please shut down the system prior to unplugging the device, by
selecting SHUTDOWN / LOGOUT.
In order to mount HDD please follow the instructions below:
Mount the mounting brackets to the HDD (HDDs), like on the picture below:
Please unscrew the screws as depicted below, then please remove the DVR's cover first by sliding into
the rear and then lifting it.
All rights reserved © AAT Holding sp. z o.o.
9
NDR-EA2104 / NDR-EA2208 / NDR-EA2416 User’s manual ver. 1.0
HDD MOUNTING
By default, 2 SATA as well as power cables are connected to the mainboard, ready for connecting
HDDs and recorder, as depicted below:
After removing top cover of the DVR, please mount the included HDDs using screws (4 screws for
each HDD), next, connect power and signal cables.
Below presents a picture of the DVR, with 2 HDDs mounted.
After connecting all devices, please put the top cover onto the DVR and turn the device (check chapter
2.6 Plugging in the power) on in order to check the operation of particular components and to format
the HDDs.
All rights reserved © AAT Holding sp. z o.o.
10
NDR-EA2104 / NDR-EA2208 / NDR-EA2416 User’s manual ver. 1.0
STARTING THE DEVICE
2.3.1 Electrical connection and other back panel elements of the NDR-EA2104 DVR
NDR-EA2104 view
9
7
1
2
3
4
5
6
8
11
10
12
1.
VIDEO IN:
4 video inputs for connecting video signal sources to the DVR.
Note: When using twisted pair cable counting several hundred meters in
length as a transmission medium and with low video signal strength,
small crosstalk may appear .
2.
AUDIO IN:
3.
NETWORK:
4.
VGA:
5.
CVBS:
4 audio mono inputs (RCA LINE IN type) for connecting microphones.
Note: Sound recording may be conducted only when legal regulations of
a given country allow for such activities.
RJ-45 connector for connecting the DVR to the computer network in
10/100Mb/s standard.
Main monitor connector, VGA type. Please use signal cable provided with
the monitor when using aforementioned connection type. VGA out works
simultaneously with the CVS video out.
Main monitor connector, Composite Video Signal (CVS). CVS out works
simultaneously with the VGA video out.
NOTE !
DVRs feature independent display on two monitors simultaneously. Operating the DVR is possible
only from one monitor at a time. By default VGA monitor output is enabled. In order to switch output
from VGA to BNC or from BNC to VGA please fallow instructions below.
- press and hold the DISPLAY button on the front panel (or IR remote) for about 3 seconds
- click both mouse buttons at the same time
- select Move Display Focus position from the menu available after pushing right mouse button or
ENTER.
Table containing options of independent dual display is presented on the next page. N/A description
means that the function can't be realized on the same time.
All rights reserved © AAT Holding sp. z o.o.
11
NDR-EA2104 / NDR-EA2208 / NDR-EA2416 User’s manual ver. 1.0
STARTING THE DEVICE
VGA Monitor
LIVE
PLAYBACK
PTZ
DIGITAL SIGNAGE
6.
AUDIO OUT:
7.
RS-485:
8.
ALARM:
9.
SENSOR:
10.
RS-232:
11.
12.
DC12V, 3.33A:
FAN:
BNC Monitor
LIVE
PLAYBACK
PTZ
DIGITAL SIGNAGE
LIVE
PLAYBACK N/A
PTZ
DIGITAL SIGNAGE N/A
LIVE
PLAYBACK
PTZ
DIGITAL SIGNAGE
LIVE
PLAYBACK N/A
PTZ
DIGITAL SIGNAGE
Audio output for connecting speakers and amplifier. Connecting the
speakers directly to the output is not advised.
RS-485 bus connector for connecting external keyboard, PTZ camera or any
devices that generate information in the ASCII standard (ATMs, cash
registers).
Note: Only one of the devices may be connected at a time.
The DVR is capable of activating external devices such as buzzers, halide
lamps, sirens etc. via its 2 open collector type outputs. Transmitter’s load
capacity is 30mA@12VDC. Outputs can be set from the menu as normally
open (N.O.) or normally close (N.C.)
4 alarm inputs, which may be set either as normal open (N.O.) or normal
closed (N.C.). Inputs described 1, 2, 3 are standard inputs and can be
assigned to the selected DVR function. Input described E can be used only
to activate Panic recording. In order to detect the alarm signal it should last
0.5sec at least. The ground of the alarm device needs to be connected to one
of the G connectors.
Allows to connect external keyboard, PTZ camera or any devices that
generate information in the ASCII standard (ATMs, cash registers).
Attention: Signal cable used for connecting the RS-232 port is not included
in the set. Make sure that the cable used is of DB9S female connector type.
Note: Only one of the devices may be connected at a time.
Power supply connector ( 100~240 VAC/12VDC PSU in-set included)
Cooling fan, do not cover!
All rights reserved © AAT Holding sp. z o.o.
12
NDR-EA2104 / NDR-EA2208 / NDR-EA2416 User’s manual ver. 1.0
STARTING THE DEVICE
2.3.2 Electrical connection and other back panel elements of the NDR-EA2208 and NDR-EA2416
NDR-EA2416 view
7
1
1.
VIDEO IN:
2.
AUDIO IN 1~8:
3.
NETWORK:
4.
VGA:
5.
CVBS:
14
2
13
4
6
5
9
8
10
3
11
12
16 or 8 (depending on the model) video inputs for connecting video signal
sources to the DVR.
Note: When using twisted pair cable counting several hundred meters in
length as a transmission medium and with low video signal strength,
small crosstalk may appear .
8 audio mono inputs (RCA LINE IN type on the additional cable in set
included) for connecting microphones.
Note: Sound recording may be conducted only when legal regulations of
a given country allow for such activities.
RJ-45 connector for connecting the DVR to the computer network in
10/100Mb/s standard.
Main monitor connector, VGA type. Please use signal cable provided with
the monitor when using aforementioned connection type. VGA out works
simultaneously with the CVS video out.
Main monitor connector, Composite Video Signal (CVS). CVS out works
simultaneously with the VGA video out.
NOTE !
DVRs feature independent display on two monitors simultaneously. Operating the DVR is possible
only from one monitor at a time. By default VGA monitor output is enabled. In order to switch output
from VGA to BNC or from BNC to VGA please fallow instructions below.
- press and hold the DISPLAY button on the front panel (or IR remote) for about 3 seconds
- click both mouse buttons at the same time
- select Move Display Focus position from the menu available after pushing right mouse button or
ENTER.
Table containing options of independent dual display is presented on the previous page.
N/A description means that the function can't be realized on the same time.
All rights reserved © AAT Holding sp. z o.o.
13
NDR-EA2104 / NDR-EA2208 / NDR-EA2416 User’s manual ver. 1.0
STARTING THE DEVICE
6.
AUDIO OUT:
7.
RS-485:
8.
ALARM:
9.
SENSOR:
10.
RS-232:
11.
12.
13.
DC12V, 3.33A:
FAN:
LOOP 1~8:
14.
LOOP 9~16:
Audio output for connecting speakers and amplifier. Connecting the
speakers directly to the output is not advised.
RS-485 bus connector for connecting external keyboard, PTZ camera or any
devices that generate information in the ASCII standard (ATMs, cash
registers).
Note: Only one of the devices may be connected at a time.
The DVR is capable of activating external devices such as buzzers, halide
lamps, sirens etc. via its 2 open collector type outputs. Transmitter’s load
capacity is 30mA@12VDC. Outputs can be set from the menu as normally
open (N.O.) or normally close (N.C.)
4 alarm inputs, which may be set either as normal open (N.O.) or normal
closed (N.C.). Inputs described 1, 2, 3 are standard inputs and can be
assigned to the selected DVR function. Input described E can be used only
to activate Panic recording. In order to detect the alarm signal it should last
0.5sec at least. The ground of the alarm device needs to be connected to one
of the G connectors.
Allows for connecting external keyboard, PTZ camera or any devices that
generate information in the ASCII standard (ATMs, cash registers).
Attention: Signal cable used for connecting the RS-232 port is not included
in the set. Make sure that the cable used is of DB9S female connector type.
Note: Only one of the devices may be connected at a time.
Power supply connector ( 100~240 VAC/12VDC PSU in-set included)
Cooling fan, do not cover!
Loop outputs connector.
Note: Connections must be made using a special NDR-EA/LOOP cable
which does not belong to the set and must be purchased separately.
Loop outputs connector (available only in 16 channel DVR)
Note: Connections must be made using a special NDR-EA/LOOP cable
which does not belong to the set and must be purchased separately.
All rights reserved © AAT Holding sp. z o.o.
14
NDR-EA2104 / NDR-EA2208 / NDR-EA2416 User’s manual ver. 1.0
STARTING THE DEVICE
2.4. Front panel description
1.
2.
3.
4.
5.
1
2
3
4
6
7
8
9
NDR-EA2416 view
5
10
11
12
12
Press MENU button to enter recorder’s settings menu (after correct login).
Menu functions are detailed in the following chapters of this manual. The
button is also used to exit the menu or going to a higher level of the
particular submenus. In playback mode and PTZ control mode, MENU
button is used for enabling / disabling additional menu functions.
PLAYBACK / PRESET Press the PLAYBACK button during “live” mode to enter playback
mode. The button is also used to save Presets in the PTZ mode.
DISPLAY /
Toggles between different display formats. The available formats are: 1, 4,
1 + 5, 9, 1 + 7, 1 + 12, 16, (depending on the model). Holding the button for
min.3 sec. will switch the main monitor BNC <-> VGA.
In the PTZ control mode press the button to call IRIS CLOSE function.
BACKUP /
Pressing the button allows you to enter the backup menu. In the PTZ control
mode press the button to call IRIS OPEN function.
MENU
►
Navigation buttons serve a variety of purposes:
- navigating through the recorder menus and changing the values of
each item
- choosing another channel or channels in “live” mode
- controlling the PTZ cameras
- navigating through the zoomed part of the screen in ZOOM mode
In the Playback mode navigation buttons are used for:
► - Press the button to playback images at normal speed. Subsequent
pressing switches the playback speed between PLAY, FFx2, FFx4,
FFx8, FFx16, FFx32.
All rights reserved © AAT Holding sp. z o.o.
15
NDR-EA2104 / NDR-EA2208 / NDR-EA2416 User’s manual ver. 1.0
STARTING THE DEVICE
6.
7.
8.
9.
10.
11.
12.
- Press the button to play video backward at regular speed. Pressing the
button again switches the playback speed between R.PLAY, RWx2,
RWx4, RWx8, RWx16, RWx32.
- Press the button to go to the next image.
- Press the button to go to the previous image.
! E.REC
Pressing !E.REC button starts recoding of all camera channels, and displays
icon on the main screen.
Note: !E.REC function depends of the settings in the RECORD ->
Record - > Use Emergency Record
ZOOM / MOVE Press the ZOOM button to zoom the current image on the screen. Pressing
arrow buttons navigates through the zoomed part of the screen. Function is
available only in full screen mode.
Press the button to move camera to selected Preset in the PTZ control
mode.
PTZ / (-)
Press the PTZ button to enter the PTZ (Pan/Tilt/Zoom) mode which allows
for controlling properly connected PTZ cameras. In the PTZ control mode
press the button to call ZOOM OUT function.
LOG
Press the button to display the system log menu that allows you to view and
export the system logs.
ENTER / PAUSE Pressing the ENTER button in the setup mode confirms the changes made
while in the "live" mode displays additional functions or Login window.
In the playback mode press the button to pause the playback screen.
LED
Flickering green HDD LED indicates that the recording or searching /
playback is in progress. Flickering green NETWORK LED means that
device is connected to the Ethernet. Solid red ALARM LED light means
that the system alarm event occurred (e.g. loss of video signal) and at
least one of the alarm outputs or buzzer is active.
USB
USB 2.0 port for external HDDs, Flash memory or for USB mouse
connection. The cable length connecting port to a device shouldn't exceed
than 30 cm.
All rights reserved © AAT Holding sp. z o.o.
16
NDR-EA2104 / NDR-EA2208 / NDR-EA2416 User’s manual ver. 1.0
STARTING THE DEVICE
2.5. Connecting of peripheral equipment to NDR-EA2104, NDR-EA2208 and NDR-EA2416
recorders
System connection should be performed only by qualified personnel. Please familiarize yourself with
the scheme located below, depicting possible implementation of the DVR in the system, before
installation.
Depending on requirements, each system will have different number of peripherals connected.
Monitors, cameras etc. should be purchased separately, depending on current needs.
All rights reserved © AAT Holding sp. z o.o.
17
NDR-EA2104 / NDR-EA2208 / NDR-EA2416 User’s manual ver. 1.0
STARTING THE DEVICE
2.6. Controlling via IR remote controller
The set includes an IR remote controller. Its range depends on battery status and may vary between
a few and few tens of meters. Single remote may control up to 99 DVRs. If an ID number of the
device equals 0, the IR remote control of that device is possible instantly, without any additional
setup (furthermore, simultaneous controlling of few DVRs with the same remote is possible).
To successfully control a DVR with its ID equal 1~99, please press ID button first. An ID selection
menu appears on the DVR screen. Please enter appropriate ID number in the Controller ID field,
corresponding to the ID set in the DVR. Confirm by pressing OK.
Picture of IR remote together with description of its button functions is presented below:
NDR-EA2xxx IR remote view
Button enabling/disabling emergency recording. Enabling it starts
recording all video signals from all channels and displaying the
icon
on the screen. Recording is realised with parameters defined in the
RECORD menu.
1.
Note: Operation of this function depends on settings in the RECORD
-> Record menu.
2.
1~0 Buttons
channel selection buttons: pressing a button displays picture from the
camera corresponding to it. Current channel number is displayed in a
blue rectangle located at the top right part of the screen. Channel
selection buttons are also used for entering digits in the recorder’s OSD.
pressing it while in live view opens the recorder’s menu (after logging
in). Menu is then displayed on the screen (its description being presented
in later parts of the manual). Additionally, button allows to exit the
menu, go a level up or turn the screensaver on. In playback and PTZ
control modes the button allows to enable/disable additional menus.
3.
4.
DISPLAY
toggles between different display formats. Press it and hold for about 3
seconds to change the output from VGA to BNC or from BNC to VGA.
5.
SEQUENCE
selecting displays live channels sequentially.
All rights reserved © AAT Holding sp. z o.o.
18
NDR-EA2104 / NDR-EA2208 / NDR-EA2416 User’s manual ver. 1.0
STARTING THE DEVICE
6.
navigation buttons used to:
- navigate through recorder’s menu and change parameter values.
- selection of successive channels (both in full– and split-screen modes,
live and playback view).
- control camera in PTZ mode
- selects part of the image to be magnified in digital ZOOM mode.
Enter button (in the middle) in OSD menu confirms a selection, while
pressing during live view displays additional function menu or login
window.
7.
opens the recording copy menu.
8.
pressing the button in „live” mode switches the recorder into playback
mode.
9.
in playback mode, button pauses the playback. In PTZ control the button
opens the menu that allows to save a preset.
10.
pressing the button displays the menu that allows to view and export system
logs.
11.
pressing the button in playback mode starts playback. Subsequent pressing
changes the playback speed by x1, x2, x4, x8, x16 and x32 respectively.
Pressing the button in PTZ mode executes IRIS OPEN command.
12.
pressing during playback starts playing the recordings backwards.
Subsequent presses speeds up the playback consecutively: R.PLAY, x2, x4,
x8, x16, x32. In PTZ mode the button decreases zoom factor.
13.
in playback mode each button pressing plays the recording forward, frame
by frame. Pressing the button in PTZ calls IRIS CLOSE function.
14.
in playback mode, button plays the recording frame-by-frame back. In PTZ
mode the button increases the zoom factor.
15.
pressing the button allows to select a PTZ camera (only one that has been
already properly set) and open its remote control menu.
All rights reserved © AAT Holding sp. z o.o.
19
NDR-EA2104 / NDR-EA2208 / NDR-EA2416 User’s manual ver. 1.0
STARTING THE DEVICE
16.
pressing the button in „live” or playback modes allows to enable digital
zoom function. Function becomes available only after switching a desired
channel into full-screen mode. In order to select a magnified area please use
navigation buttons.
17.
pressing the button displays menu that allows to enable/disable the PIP
function. If enabled, picture from one camera is displayed in a small
window superimposed onto a picture originating from a different camera.
18.
pressing the button in „live” or playback mode allows to select an audio
input (from active), which is then associated with output (built-in speakers).
19.
Consecutive presses cycle between the following OSD display modes: none/
only date, time and camera information/status info bar, as well as hour and
date (additionally, a “hide bar” function after a certain period of inactivity is
available).
20.
pressing the button displays menu that allows to set an ID address of the
DVR which is to be controlled.
2.7. Plugging in the power
Plugging in the power cable starts recorder operation. Device initialization takes about 30 seconds.
Functions shouldn’t be called and buttons pressed during this period. Turning the device off is
performed via menu.
CAUTION!
If the device was brought from a location with lower temperature, please wait until it reaches the
temperature of location it is currently in. Turning the device on immediately after bringing it
from a location with lower ambient temperature is forbidden, as the condensing water vapour
may cause short-circuits and damage the device as a result.
Note: Please get familiarized with description and functions of rear panel inputs/outputs.
All rights reserved © AAT Holding sp. z o.o.
20
NDR-EA2104 / NDR-EA2208 / NDR-EA2416 User’s manual ver. 1.0
RECORDER’S MENU
3.
RECORDER’S MENU
NDR-EA2104 / NDR-EA2208 / NDR-EA2416 recorders feature a multilingual OSD menu allowing
for adjusting the settings of the device. Available languages are: English, Polish, Korean, Spanish,
Slovak, Czech, Turkish, Dutch, Russian, Chinese, Chinese Simplified, Italian, French, Greek, Japanese,
German, Finnish, Portuguese and Thai.
The only difference between 4, 8 and 16- channel versions is in the number of video channels, alarm
inputs etc.
Prior to using DVR for the first time, initial setup is strongly advised. This includes setting such
parameters as time and date, language version, camera, audio, remote control, record mode, network
and password.
Press the MENU button or select MENU position from additional functions menu (available after
pressing the ENTER/PAUSE button) to enter the setup screen. The Login screen, depicted below
appears:
Select User and enter the password by pressing the appropriate combination of channel number
buttons or using a mouse, then confirm with OK button.
There is no default password when logging in for the first time as the admin user! Please leave
the password field void and select OK button.
Navigate around the menu using arrow buttons as described below:
►- right, - left, - up, - down.
To confirm your choice, to enter sub-menus and edit value fields use ENTER/PAUSE button.
Values may be changed by using the arrow buttons also.
To leave setup mode or to leave sub-menus and value editing use MENU button.
To set the same value for all fields available in one column highlight the desired column’s name with
the cursor and enter the required value.
Use the Top Menu to skip to a higher level menu.
All rights reserved © AAT Holding sp. z o.o.
21
NDR-EA2104 / NDR-EA2208 / NDR-EA2416 User’s manual ver. 1.0
RECORDER’S MENU
A virtual keyboard is available whenever the need for entering names and titles arises. Use the arrow
keys to highlight the desired character and press ENTER/PAUSE button. The selected character
appears in the title bar and the cursor moves to the next position. Pressing
toggles between the
upper and lower case letters,
serves as the backspace, and DEL deletes entered characters.
After pressing MENU/EXIT and a proper logging in a screen depicted below appears:
Main menu contains eight sub-menus corresponding to various system settings: SYSTEM, DEVICE,
DISPLAY, RECORD, NETWORK, EVENT, LOGOUT / SHUTDOWN.
Additional descriptions for particular sub-menus are displayed after selecting a submenu using
navigation keys or pointing them via mouse.
All rights reserved © AAT Holding sp. z o.o.
22
NDR-EA2104 / NDR-EA2208 / NDR-EA2416 User’s manual ver. 1.0
RECORDER’S MENU
3.1. SYSTEM
After selecting SYSTEM from the main menu, the window depicted below appears:
SYSTEM menu contains five sub-menus regarding the system settings.
3.1.1. Information
Selecting this sub-menu and pressing ENTER displays the following screen:
DVR Name field allows for entering the title associated with this DVR (e.g. its localisation).
MAC Address field contains the DVR’s MAC hardware address.
Version field displays current version number of the firmware.
All rights reserved © AAT Holding sp. z o.o.
23
NDR-EA2104 / NDR-EA2208 / NDR-EA2416 User’s manual ver. 1.0
RECORDER’S MENU
To update the firmware, please connect Flash type memory (containing a firmware appropriate for a
given recorder, in *.pkg format ) to the USB port and select Update.
After the update window is displayed, a proper file needs to be selected and the whole update process
confirmed. In case of installation failure, an appropriate message will be displayed.
After firmware upgrade (that may last up to a few minutes), the device reboots automatically. Please do
not press any buttons either on a DVR or its remote controller during the update.
Note:
Please consult your distributor prior to the firmware update.
Note:
Power outage, turning the device off or removing the Flash memory during update may
result in damage to the DVR and a necessity of service repair.
The producer isn’t responsible for any data loss resulting from firmware update.
Update field may be inactive in case when there is no free disk space left to save the
temporary system files. To prevent this, please format the disk prior to the upgrade.
Note:
Note:
Remote Controller ID field allows for assigning a unique address to the DVR, utilised in case of
controlling the DVR via IR remote. Address ,ranging from 1 to 99 is assigned via up - down
navigation buttons.
0 is the default address of the DVR, allowing instantaneous remote control via the IR.
Video type allows for selecting a desired television transmission standard: AUTO, PAL, NTSC
(AUTO mode is strongly advised).
Configuration field allows for importing (Import) or exporting (Export) DVR settings, using USB
Flash memory, or for restoring factory defaults (Default).
Note:
NETWORK and part of SYSTEM settings are skipped during the import and settings
restoring.
All rights reserved © AAT Holding sp. z o.o.
24
NDR-EA2104 / NDR-EA2208 / NDR-EA2416 User’s manual ver. 1.0
MENU
RECORDER’S
REJESTRATORA
MENU
3.1.2. Date & time
Selecting this sub-menu and pressing ENTER displays the following screen:
This submenu is responsible for adjusting the date and time using navigation and ENTER buttons.
Please select appropriate date/time format, adjust time settings and select time zone the DVR will work
in.
Note: Changes are applied at the moment of pressing OK button.
To automatically update time settings according to DST changes, please check the USE DAYLIGHT
SAVING TIME option. Additionally, a possibility to define the date of time change in the Begin and
End is possible.
NTP tab allows to define external time servers (via entering their IP/domain addresses), which then
update time and date of the DVR in desired intervals (from 30 minutes up to 1 day).
All rights reserved © AAT Holding sp. z o.o.
25
NDR-EA2104 / NDR-EA2208 / NDR-EA2416 User’s manual ver. 1.0
RECORDER’S MENU
MENU REJESTRATORA
Update allows server synchronization, therefore testing function’s operation. To activate it, please
check the Use NTP box.
Note: Time sync function is especially useful in dispersed systems, when a necessity of
synchronizing time with external devices (e.g. cash registers or ATMs) arises. When using
domain names, please adjust the DNS server settings accordingly.
HOLIDAY tab allows to define special days, e.g. holidays, when the DVR will be working in a
specially defined mode, other than the default one. Days described as holidays may be later used in
creating record schedule.
To add a holiday, please select + icon. Current date (as set in the DVR) should appear on the list.
Please select desired month and day using navigation buttons. By pressing
previously entered date
may be deleted. To erase all the entered holidays, please select the uppermost
.
Note: The list should be updated once a year due to the occurrence of movable holidays.
All rights reserved © AAT Holding sp. z o.o.
26
NDR-EA2104 / NDR-EA2208 / NDR-EA2416 User’s manual ver. 1.0
RECORDER’S MENU
3.1.3. User
Selecting this sub-menu and pressing ENTER displays the following screen:
This submenu allows to add, edit and assign passwords/privileges for users and groups.
Privileges are assigned to groups, with particular users being added to them.
Administrator and Guest groups together with Administrator and Guest users are the factory
defaults, therefore they cannot be deleted. By default, all Administrator group users have full admin
privileges while all Guest accounts are authorized only for basic functions like: live view, enable/
disable digital signage, change layout, OSD modification, screen freeze, audio channel selection,
enable/disable emergency recording, log view, remote live view or move display focus.
Highlighting and selecting any position in the User column displays a window allowing to change the
group assignment (Group) and password (after selecting Change). Password is entered analogically as
when adding a new user.
Highlighting and selecting the Group column allows to view privileges for the whole group, with
additional description of possible privileges presented further.
Auto Login allows to enable/disable auto logging selected user after start the system.
Auto Logout allows to enable/disable the auto logging out after a pre-defined period of user’s menu
inactivity. After selecting On additional field, allowing to set the inactivity threshold ranging from 1 to
60 min., becomes available.
All rights reserved © AAT Holding sp. z o.o.
27
NDR-EA2104 / NDR-EA2208 / NDR-EA2416 User’s manual ver. 1.0
RECORDER’S MENU
To add a user, please select the „+”. A window opens, as depicted below:
User name allows to enter the user’s name with the help of virtual keyboard.
Group allows to assign group for newly added user.
Password: Setup opens a new window, depicted below:
When adding a new user, the Current password field is inactive.
New password field requires entering a password for a new user via the front panel buttons or using a
mouse.
Confirm password requires the operator to re-type the password entered in New Password field.
After entering the passwords select OK. In case when New and Confirm password do not match, a
proper message will be displayed and the passwords need to be re-entered.
Note: Password may contain up to 8 digits.
Highlighting
and confirming deletes a particular user or a whole group, depending on the selection.
Uppermost
erases all settings in all groups.
All rights reserved © AAT Holding sp. z o.o.
28
NDR-EA2104 / NDR-EA2208 / NDR-EA2416 User’s manual ver. 1.0
RECORDER’S MENU
Selecting Group tab displays the following screen:
Selecting Group column displays window that allows to change group’s privileges (detailed
description described in further parts of the manual).
Note: Editing Administrator and Guest groups is not possible.
In order to create a new group please select „+”. A new window is opened:
Authority column contains 14 items. In the picture above items are displayed from 1 to 8. To view
items from 9 to 14 select the “>“ button. When selected, the window (depicted on subsequent page)
appears.
All rights reserved © AAT Holding sp. z o.o.
29
NDR-EA2104 / NDR-EA2208 / NDR-EA2416 User’s manual ver. 1.0
RECORDER’S MENU
Group Name field requires entering the group’s name with the help of virtual keyboard.
In order to define rights for a group, check desired parameters from available.
Camera column allows to select cameras for which privileges are to be applied.
Note: Assigning certain privileges is dependant on other settings, e.g. Backup privilege can be given
only after assigning Playback, etc.
Groups may be assigned with privileges as listed below:
•
System - allows to change settings in the DVR menu,
•
Format - allows to format DVR HDDs,
•
Upgrade - assigns system upgrade (remotely or locally) privileges,
•
PTZ - allows to control the PTZ cameras locally,
•
Playback - allows to play local recordings back,
•
Backup - allows to backup the local recordings,
•
Reset Alarm - allows to cancel alarms,
•
Shutdown - allows to shut down the system,
•
Network Live - allows to view the images live through the network,
•
Network PTZ - allows to control the PTZ cameras remotely,
•
Network Alarm Control - allows to control the alarm outputs remotely,
•
Network Playback - grants the rights for remote playback of the recordings,
•
Network Setup - allows to remote change settings in the DVR menu,
•
View Covert Camera - allows to view covert cameras,
To erase a group please highlight that group and select located next to the selected line. Uppermost
erases all settings in all groups.
Note: When erasing a group all users assigned to that particular group are also deleted.
Note: Please keep in mind, that assigning Setup privileges to a user gives him the possibility of
modifying the privileges for the rest of users.
All rights reserved © AAT Holding sp. z o.o.
30
NDR-EA2104 / NDR-EA2208 / NDR-EA2416 User’s manual ver. 1.0
RECORDER’S MENU
3.1.4. Quick setup
After selecting this sub-menu and pressing ENTER the following screen appears:
This submenu allows to configure basic DVR parameters. Moving to a next window is achieved via
clicking the “>>“ button. Quick setup allows to configure:
•
•
•
•
•
•
•
DVR name
Menu language
Administrator password
Date/time, time zone,
Network settings
Default recording parameters
HDD formatting
Changes made in particular tabs are saved in the moment of switching to another tab.
All options available from the quick setup menu are described in corresponding chapters.
All rights reserved © AAT Holding sp. z o.o.
31
NDR-EA2104 / NDR-EA2208 / NDR-EA2416 User’s manual ver. 1.0
RECORDER’S MENU
3.1.5. System Log
After selecting the submenu and pressing ENTER, the following screen appears:
Maximum log capacity is 5000 entries, with the oldest events being overwritten by the latest ones. Log
contains information about event type, as well as its date and time of occurrence.
Selection of previous/next event window is performed via > / < buttons.
Selecting Reload refreshes the event list.
Selecting Export allows exporting the event log to the *.csv format using USB flash drive.
3.2. DEVICE
DEVICE menu contains five sub-menus allowing to set-up the peripherals.
All rights reserved © AAT Holding sp. z o.o.
32
NDR-EA2104 / NDR-EA2208 / NDR-EA2416 User’s manual ver. 1.0
RECORDER’S MENU
3.2.1. Camera
After selecting this submenu and pressing ENTER the following screen appears:
First column allows for enabling/disabling desired camera inputs (enabling/disabling all of the cameras
is possible by checking/un-checking the boxes).
Title column allows for assigning title for each of the cameras (using virtual keyboard).
Selecting Setup in the Color allows for adjusting brightness, contrast, saturation and hue for each of
the cameras.
First page displays channels numbered 0 ~ 8. To view configuration of subsequent channels please go
to the next / previous page using > / < buttons.
After selecting the PTZ tab the following screen appears:
All rights reserved © AAT Holding sp. z o.o.
33
NDR-EA2104 / NDR-EA2208 / NDR-EA2416 User’s manual ver. 1.0
RECORDER’S MENU
To ensure a proper cooperation with PTZ cameras settings entered here should be in accordance with
ones entered in the PTZ cameras. When the system doesn’t employ PTZ or other cameras equipped
with RS-485 communication interface changing settings in this tab is not advised.
PTZ tab allows for defining the connection speed, the type of control protocol and the ID number of
particular speed dome camera.
First column allows for enabling / disabling the PTZ camera control possibility.
Model field allows for selecting the communication protocol from available (N-Control, Pelco-P i
Pelco-D) please note that the protocol selected here should be the same as one selected in the camera.
Address field allows for assigning a unique ID number to the camera in a system (using the same
address as the one set in the camera is strongly advised). Assigning the same number to more than one
camera is not advised.
Speed column allows for setting the camera control speed.
Note: Pelco-D (N) protocol is a special modification of Pelco-D protocol that allows control of
selected PTZ and box cameras with RS-485 Novus brand. Using this protocol setting minimum
and maximum speed values in the Speed column is not recommended.
Note: To enable the possibility of controlling the camera via N-Control protocol value in the Speed
column should exceed 5.
After selecting the Covert tab, the following screen appears:
This tab allows for enabling / disabling as well as programming up to 40 covert camera operation
schedules.
To add a schedule please select + button.
Day column allows for selecting the days that the schedule tasks will be performed. The following
values are available: SUN (Sunday), MON (Monday), Tue (Tuesday), WED (Wednesday), THU
(Thursday), FRI (Friday), SAT (Saturday), MON~FRI, SPECIAL (special days, defined beforehand in
the Date / Time submenu), All , SAT~SUN (Saturday-Sunday).
From ~ To column allows for setting the time interval (in the 15-min. increments) that the schedule
will be executed in.
Mode column allows for setting the covert mode for the cameras.
Off - function disabled
All rights reserved © AAT Holding sp. z o.o.
34
NDR-EA2104 / NDR-EA2208 / NDR-EA2416 User’s manual ver. 1.0
RECORDER’S MENU
Covert 1 - Picture from the particular camera is hidden in „live” viewing while camera title and status
icons remain visible,
Covert 2 - Both the picture and additional status information are hidden during „live” view.
To remove the schedule please select the X located next to the desired schedule. To remove all the
schedules please use the uppermost X button.
3.2.2. Audio
After selecting this submenu and pressing ENTER the following screen appears:
NDR-EA2416 and NDR-EA2208 digital video recorders feature the possibility of recording up to 8
audio channels while NDR-EA2104 are able to record up to 4 audio channels.
First column allows to enabling/disabling particular audio channels.
Title column allows to changing the audio channel’s title using virtual keyboard.
Camera column allows to define the cameras associated with audio channel.
Note: To playback recordings from a desired audio channel please select full-screen view of an
appropriate video channel.
Playing back the sound recordings is possible only during normal playback speed (i.e. neither
slowed-down or speeded-up playback play the associated audio track).
Audio channels the input signal should be pre-amplified before entering the audio input.
All rights reserved © AAT Holding sp. z o.o.
35
NDR-EA2104 / NDR-EA2208 / NDR-EA2416 User’s manual ver. 1.0
RECORDER’S MENU
3.2.3. Alarm
After selecting this sub-menu and pressing ENTER the following screen appears:
Alarm duration allows for setting the alarm output activation period, ranging 5 secs to 10 mins.
Title column allows for entering the title of a desired alarm output via the virtual keyboard.
Type column allows for setting the alarm output either as NC (normal closed) or NO (normal open).
Note: Outputs are of open collector type. Maximum capacity is 30mA@12VDC.
Selecting Schedule tab displays the following screen:
All rights reserved © AAT Holding sp. z o.o.
36
NDR-EA2104 / NDR-EA2208 / NDR-EA2416 User’s manual ver. 1.0
RECORDER’S MENU
Adding an alarm schedule is performed via the + button. Schedule may contain up to 10 positions.
Day define the days of the week the schedule is performed on. From ~ To column allows for setting
the time interval (in the 15-min. increments) that the schedule will be executed in.
Mode defines the alarm output operation mode: Events ( alarm outputs are activated only in case of
events), On (enabled in pre-defined time intervals) or Off (disabled in pre-defined time intervals).
Alarm column defines the alarm outputs as well as additional internal buzzer, that the schedule settings
are applied to.
3.2.4. Keyboard
After selecting this submenu and pressing ENTER the following screen appears:
Submenu allows for configuring keyboard control parameters.
Model field allows for selecting a control protocol (in accordance with the one selected in the
keyboard).
DVR ID field allows for setting the address (ranging from 0 to 999) of a given DVR (in accordance
with the one selected in the keyboard).
Note:
Note:
Note:
When using NV-KBD30 and NV-KBD70 keyboards select N-Control protocol.
The control is possible only with appropriate RS232 / RS485 submenu settings.
A detailed description of NV-KDB-30 and NV-KBD70 setup is presented in their manuals.
All rights reserved © AAT Holding sp. z o.o.
37
NDR-EA2104 / NDR-EA2208 / NDR-EA2416 User’s manual ver. 1.0
RECORDER’S MENU
3.2.5. RS232 / RS485
After selecting this submenu and pressing ENTER the following screen appears:
RS-232 and RS-485 may be configured in this submenu.
bps column allows for setting the transmission speed of RS232/RS-485 ports (with 300bps, 600bps,
1200bps, 2400bps, 4800bps, 9600bps, 19200bps, 38400bps, 57600bps, 115200bps values
available).
Subsequent three columns allow for configuring such parameters as Data Bit (number of data bits),
Stop Bit (number of stop bits) as well as parity.
Usage column allows for setting a mode for the selected port:
Text-In - port used for receiving ASCII-type data from peripherals such as ATMs, cash registers etc.
PTZ - port used for PTZ (or other RS-485-equipped cameras) remote controlling.
Keyboard - port used for controlling the DVR via a control keyboard.
Note:
Note:
Note:
Only one function may be assigned to a port at a time.
RS232 port has the ability to communicate with RS-485-equipped devices after purchasing a
separate adapter.
To establish a proper communication, both the DVR and camera RS232/RS485 settings
should be the same.
All rights reserved © AAT Holding sp. z o.o.
38
NDR-EA2104 / NDR-EA2208 / NDR-EA2416 User’s manual ver. 1.0
RECORDER’S MENU
3.3. DISPLAY
DISPLAY menu contains four sub-menus dealing with display settings.
3.3.1. Display
After selecting this submenu and pressing ENTER the following screen appears:
Language allows for changing the OSD menu language to one of the listed: English, Polish, Korean,
Spanish, Slovak, Czech, Turkish, Dutch, Russian, Chinese, Chinese Simplified, Italian, French,
Greek, Japanese, German, Finnish, Portuguese and Thai.
Hide status bar Enables or disables the function of hiding status bar after a pre-set (ranging from 5
sec to 1 minute) period of inactivity.
All rights reserved © AAT Holding sp. z o.o.
39
NDR-EA2104 / NDR-EA2208 / NDR-EA2416 User’s manual ver. 1.0
RECORDER’S MENU
3.3.2. VGA
After selecting this submenu and pressing ENTER the following screen appears:
Vertical OSD Margin margins for status information on VGA monitor may be set (to fit the screen
display) using this option.
Horizontal OSD Margin margins for status information on VGA monitor may be set (to fit the screen
display) using this option.
After selecting Monitoring tab the following screen appears:
Sequence Interval allows for setting time of auto-switching between the camera pictures on spot
monitor, ranging 1~60 sec.
Selecting Event Pop-up results in all events associated with a given camera being displayed
full-screen on the VGA monitor when event occurs.
Camera column allows for defining cameras that will display pictures from cameras in alarm mode on
the VGA monitor.
When an event occurs simultaneously on more than one camera, images from them are displayed in
split-screen mode.
Duration of displaying alarm images is equal to the time of post-alarm recording.
Selecting PIP tab enables the possibility of adjusting size and position of the picture in picture (PIP)
frame.
All rights reserved © AAT Holding sp. z o.o.
40
NDR-EA2104 / NDR-EA2208 / NDR-EA2416 User’s manual ver. 1.0
RECORDER’S MENU
3.3.3. CVBS
Settings referring to CVBS output are identical to those in chapter 3.3.2 (VGA menu).
3.3.4. Digital Signage
After selecting this submenu and pressing ENTER, the following screen appears:
DVRs feature the possibility of displaying ads during its operation. Files can be displayed either as
static images or videos (maximum speed for video is 15 images per second).
Initiate Digital Signage allows to enable or disable displaying digital signage after a certain time of
operator inactivity (ranging 1 to 60 mins).
Ads are saved on the DVR’s HDD. In order to import the files, please connect the memory device
containing the files to the USB port and select Import. Please note that in order to have the files
identified and imported, the DVR has to be properly configured.
Configuring files is described in Appendix1 position at the end of this manual.
Note: The function depends on the settings in the Schedule tab.
After selecting Schedule the following screen appears:
All rights reserved © AAT Holding sp. z o.o.
41
NDR-EA2104 / NDR-EA2208 / NDR-EA2416 User’s manual ver. 1.0
RECORDER’S MENU
This tab allows to enable/disable and configure up to 10 screen saver schedules.
Select + to add a schedule.
DAY sets the days of the week that the recording schedule is performed in.
From ~ To column allows to set the time interval (in the 15-min. increments) that the schedule is
executed in.
Display column allows to define the monitors that display digital signage in the selected time span:
VGA + CVBS (displaying digital signage on both monitors), VGA (displaying digital signage on VGA
monitor), CVBS (displaying digital signage on CVBS monitor),
In order to delete the schedule please select X located on the right side of the selected schedule.
In order to delete all schedules please select X located on the top.
All rights reserved © AAT Holding sp. z o.o.
42
NDR-EA2104 / NDR-EA2208 / NDR-EA2416 User’s manual ver. 1.0
RECORDER’S MENU
3.4. RECORD
RECORD menu consists of three sub-menus regarding recording and HDD settings.
3.4.1. Storage
Selecting this submenu and pressing ENTER displays the following screen:
Capacity displays the information on the capacity of mounted HDDs (when an optical drive is
installed, the N/A information is displayed instead).
Type column displays information about disk type currently connected to the DVR.
Usage column displays information on current disk operation mode. Record - HDD recording data,
(-) - HDD not ready for the recording, requiring format.
Status column displays HDD operating information: Good - proper HDD operation, Not formatted
- HDD is not ready for operation and requires formatting, Bad - HDD doesn’t operate properly, either
due to a possible HDD damage, lack of formatting or improper connecting.
Record field displays the current volume of recordings stored on the HDDs. Selecting the field
refreshes the data.
All rights reserved © AAT Holding sp. z o.o.
43
NDR-EA2104 / NDR-EA2208 / NDR-EA2416 User’s manual ver. 1.0
RECORDER’S MENU
To format the HDDs select Format. After that, the following screen appears:
Note: All data stored on the formatted HDDs are lost in the process!
To select an HDD for formatting please select it in the first column to the left.
Capacity column displays the information on HDDs total disk space.
Type column displays the information about the HDD. N/A means HDD is not installed.
Usage column displays information on current HDD operation mode. Record - HDD for recording
data, (-) - HDD not ready for the operation, requiring format, Read only - HDD contains recordings
that can be played back, recording on such an HDD is impossible.
Please select HDD(s) in the first column to the left, select Record in the Usage column, and finally,
press the Format. A window is then displayed, asking for confirmation, with formatting process taking
place after confirming. After confirmation, format is performed.
After selecting S.M.A.R.T. tab the following window appears:
Good - proper HDD operation, Bad - HDD doesn’t operate properly, either to the possible HDD
damage, lack of formatting or improper connecting. Fail - disk failure, (-) - lack of disk.
Note: In case of encountering Bad or Fail messages an instant check-up or HDD replacement os
strongly advised.
Temperature column displays information on temperature in centigrade or Fahrenheita (F). Update
refreshes the information.
All rights reserved © AAT Holding sp. z o.o.
44
NDR-EA2104 / NDR-EA2208 / NDR-EA2416 User’s manual ver. 1.0
RECORDER’S MENU
3.4.2. Record
Selecting this submenu and pressing ENTER displays the following screen:
Selecting Overwrite results in oldest video material being overwritten by most recent one during
recording process. Leaving the Overwrite box empty stops the recording as soon as the disk is full.
Emergency Record enables or disables the possibility to activate emergency recording.
Auto deletion allows to delete video recordings that are older than a defined period of time, regardless
of free space left on a HDD (working independently of Overwrite).
Auto deletion may be set from 1 to 180 days.
ips column allows to set the default recording speed ranging from 1 to 25 for Schedule, Event and
Emergency recording.
Quality column allows to select the default recording quality: VERY HIGH, HIGH, STANDARD,
LOW for Schedule, Event and Emergency recording.
Resolution column allows to select the default recording resolution: CIF (352x288), HalfD1 (704x288),
D1 (704x576) for Schedule, Event and Emergency recording.
Note:
Aforementioned parameters for Schedule and Event recording are valid only when Use
default settings is set in the schedule settings!!!.
Event tab displays the following screen:
All rights reserved © AAT Holding sp. z o.o.
45
NDR-EA2104 / NDR-EA2208 / NDR-EA2416 User’s manual ver. 1.0
RECORDER’S MENU
Pre-Event Duration allows to enable/disable said function, as well as setting its time in 5~30 seconds
range.
Pre-Event recording is performed in accordance to the parameters set in the Event column.
Pre-Event is available only with Event recording mode set in the schedule.
Note:
If the DVR operates in Schedule or Event & Schedule, pre-event settings are not available.
Emergency record duration allows to enable (Limit) or disable (No limit) Emergency recording
time limit. Limit may range from 5 secs to 30 mins. If Emergency recording mode needs to be
triggered manually via the E.REC button, No limit should be set.
Event record duration allows to set the post-event recording time (motion detection, alarm input
activation, signal loss etc.) ranging from 5 secs to 30 minutes.
After selecting the Schedule tab, the following screen appears:
The DVR conducts recording in accordance with predefined schedules. Up to 40 (16-channel DVRs),
20 (8-channel DVRs) or 10 (4-channel DVRs) sophisticated schedules are available. The schedule is
presented as a table. Day and week settings may be assigned to each position, together with recording
hours, modes, channels, quality speed and resolution.
Adding positions is performed by pressing + button located at the bottom of the table.
DAY sets the days of the week that the recording schedule is performed in.
The following values are available: SUN (Sunday), MON (Monday), Tue (Tuesday), WED
(Wednesday), THU (Thursday), FRI (Friday), SAT (Saturday), MON~FRI, SPECIAL (special days,
defined beforehand in the Date / Time submenu), All , SAT~SUN (Saturday-Sunday).
From ~ To column allows to set the time interval (in the 15-min. increments) that the schedule will be
executed in.
Mode allows to define recording modes: No Record, Time, Event, Time & Event.
Camera column allows to select the cameras that work in schedule mode.
All rights reserved © AAT Holding sp. z o.o.
46
NDR-EA2104 / NDR-EA2208 / NDR-EA2416 User’s manual ver. 1.0
RECORDER’S MENU
After selecting Setting, the following screen appears:
ips column allows to set the recording speed, ranging from 1 to 25 images per second for a given
schedule, both in Time and Event modes.
Quality column allows to set the recording quality for a given schedule, both in Time and Event
modes. Highest, High, Standard, Low qualities are available.
Resolution column allows to set the recording resolution for a given schedule, both in Time and
Event modes. CIF (352x288), Half D1 (704x288) and D1 (704x576) resolutions are available.
Use default setting changes current settings for a given schedule to default values located in Record
tab.
To remove schedule please select X.
Current recording mode is described via a number of status icons displayed on the screen. Their
descriptions are presented below:
- recording not performed (gray color)
- schedule recording (red color)
- emergency recording (video is recorded from all cameras with the speed and quality set in the
Record tab under Emergency recording (red color)
- Event recording (in accordance to the pre-defined parameters for a given schedule, located in the
Event), (red color)
- Pre-alarm recording (according to parameters defined in the Event sub-menu and time defined
in Pre-event duration), (blue color)
- motion has been detected
- alarm input has been activated (with their numbers correctly related to the video inputs)
- DVR receiving data in ASCII format (appearance of this icon superimposed on the picture from
the first camera indicates that the data are received via RS-232 port. Icon superimposed on the
picture from the second camera indicates that data are received via RS-485 port)
- quick copy of recordings is performed in the background (gray color)
- Mp4 recordings copy is performed in the background (blue color)
- record copying is performed in the background, (red color)
- lack of video signal
All rights reserved © AAT Holding sp. z o.o.
47
NDR-EA2104 / NDR-EA2208 / NDR-EA2416 User’s manual ver. 1.0
RECORDER’S MENU
Note:
Note:
When total recording speed set in the settings exceeds maximum available speed, the DVR
automatically records with the highest speed possible.
When more than one schedule has been set for the same period of time the recording is
performed according to the schedule with a higher number.
3.4.3. Utilities
After selecting this submenu and pressing ENTER, the following screen appears:
Table depicted above shows information on the current recording status of the DVR. Available
columns are: recording speed, quality (LOW - low, STD - Standard, HI - high HI + - highest),
resolution and audio. O marks the active audio channel while X marks channel’s inactivity in the
Audio column.
Selecting Reload allows to perform software update.
Note:
Maximum recording speed settings are shown in chapter 1.2.
Selecting Storage Capacity tab displays the following screen:
Size of the 24 hours
of the recordings
Estimated recording
time
All rights reserved © AAT Holding sp. z o.o.
48
NDR-EA2104 / NDR-EA2208 / NDR-EA2416 User’s manual ver. 1.0
RECORDER’S MENU
Submenu allows to estimate the time left until the disk is full basing on certain recording parameters.
Please set proper recording parameters in sections of this sub-menu and then please press Calculate.
An information on estimated HDD usage appears, as depicted above.
Note:
The estimation function shows only an approximate amount of recording time left due to the
fact that type of the screen observed has a huge impact on occupation of the disk space
(scenes with lots of changes in them will occupy much more space than low-change scenes).
All rights reserved © AAT Holding sp. z o.o.
49
NDR-EA2104 / NDR-EA2208 / NDR-EA2416 User’s manual ver. 1.0
RECORDER’S MENU
3.5. NETWORK
Network
settings.
menu contains four sub-menus dealing with network settings as well as remote notify
3.5.1. Address
After selecting this submenu and pressing ENTER, the following screen appears:
Type field allows to select a network address that DVR is operating under. Static IP (manual
parameter configuration), DHCP (default, automatic configuration).
Static IP address needs to be obtained from the network administrator: IP Address, Subnet Mask,
Gateway, DNS Server.
Default Static IP settings are described below:
IP Address:
192.168.1.127
Subnet mask:
255.255.255.0
Gateway:
192.168.1.1
DNS Server:
8.8.8.8
All rights reserved © AAT Holding sp. z o.o.
50
NDR-EA2104 / NDR-EA2208 / NDR-EA2416 User’s manual ver. 1.0
RECORDER’S MENU
DNS server address automatically position allows to enable/disable automatic detection of the DNS
servers. Function is not available when Static IP option is selected in the “Type” position.
After selecting Port tab, the following screen appears:
Port numbers used by particular services can be changed by user in certain ranges: Network Port
(Live): from 8000 to 12000, Web: 80~12000, Playback: 8001~12001, Setup: 8002~12002.
Playback (remote playback) and Setup (remote DVR setup) change automatically during port number
change (in Live field) to respectively 1 and 2 greater than the ones set under the Live tab, RTSP Port:
554 ~ 32000, iPhone Port: 1500 ~ 32000.
Table above displays certain set port numbers.
Default port settings are presented below:
Network Port:
Playback:
Setup:
RTSP Port:
iPhone Port:
Web Port:
Note:
10101 (remote live view )
10102 (remote playback)
10103 (remote DVR setup)
554 (video transmission for mobile devices).
10104 (data transmission for mobile devices)
80 (connection via IE)
Entering the same value for more than one port is impossible.
All rights reserved © AAT Holding sp. z o.o.
51
NDR-EA2104 / NDR-EA2208 / NDR-EA2416 User’s manual ver. 1.0
RECORDER’S MENU
3.5.2. DDNS
After selecting this submenu and pressing ENTER, the following screen appears:
DDNS address update is used for assigning a static name for dynamic IP address.
Note:
Note:
Note:
Although the DVR features the ability to manage dynamic IP addresses, activating the DDNS
service in a router connected to the DVR is advised.
Prior to configuring, please register the IP address using one of the DDNS servers available in
the DVR. www.dyndns.org server is advised.
Prior to configuring the DDNS function please contact your network administrator to obtain
the required network settings.
Hostname allows to enter the hostname previously registered in the selected DDNS server.
User Authentication box needs to be checked in order to enter the username and password.
ID allows to enter the username registered in the DDNS.
Password allows to enter user’s password from the DDNS server.
Selecting Update allows to update the IP address as well as checking the function operation. In case
when incorrect parameters are entered, an appropriate error message will be displayed.
All rights reserved © AAT Holding sp. z o.o.
52
NDR-EA2104 / NDR-EA2208 / NDR-EA2416 User’s manual ver. 1.0
RECORDER’S MENU
3.5.3. Notification
After selecting this submenu and pressing ENTER, the following screen appears:
Submenu depicted above allows to define up to 10 IP addresses for computers with E-Viewer software
installed, that will be able to receive information on pre-defined events such as motion detection, video
loss, S.M.A.R.T alarm or exceeding available storage space etc.
Callback Interval defines the time interval between sending subsequent event notifications, ranging
from 5 seconds to 10 minutes.
Desired positions should be activated in the first column.
Address field allows to enter IP addresses of the computers that will establish a connection with the
DVR.
Port column allows to set the port numbers used for communication between devices.
After selecting E-mail tab the following screen appears:
All rights reserved © AAT Holding sp. z o.o.
53
NDR-EA2104 / NDR-EA2208 / NDR-EA2416 User’s manual ver. 1.0
RECORDER’S MENU
Said sub-menu allows to define up to 5 e-mail addresses for sending the messages about pre-defined
events such as motion detection, video loss, S.M.A.R.T alarm or exceeding available storage space etc.
E-mail interval defines the time interval between sending subsequent event notifications, ranging from
5 seconds to 10 minutes.
Desired positions should be activated in the first column.
Recipient field allows to enter the e-mail addresses that messages are sent to.
After selecting SMTP , the following screen appears:
SMTP Server field allows to enter IP address of a mail server, or its domain name using virtual
keyboard.
Port position allows to enter default communication port for the service (port 25 being default for
outgoing mail).
Sender field requires entering the sender’s e-mail address.
ID allows to enter username of the e-mail account (account should be created earlier).
Password requires entering password to e-mail account.
Note:
In order to successfully enable callback and e-mail notify functions, they should be properly
configured earlier in the EVENT menu.
Note:
Operation of auto-connect function depends on settings made in E-Viewer software.
All rights reserved © AAT Holding sp. z o.o.
54
NDR-EA2104 / NDR-EA2208 / NDR-EA2416 User’s manual ver. 1.0
RECORDER’S MENU
3.5.4. Transmission
After selecting this submenu and pressing ENTER the following screen appears:
Limit bandwidth allows to enable (Limit) or disable (No Limit) function of limiting the bandwidth
used by the DVR during network transmission. After selecting Limit, a box that allows to limit the
bandwidth from 1 to 100 Mb/sec appears.
In the table each column for the Network Live line allows to define parameters of the image sent to the
PC with E-Viewer software or IE 7.0 (or later) web browser installed and phones equipped with
Android operating system as well.
Each column for the Mobile Live line allows to define parameters of the image sent to the iPhone type
mobile devices.
ips column allows to define the maximum transmission speed (images per second) for the remote live
view.
Resolution column allows to define the resolution for the remote live view.
Values that can be set in the ips and Resolution column are interdependent as described in the below
table:
Resolution
Note:
Maximum transmission speed (ips)
Network Live
Mobile Live
QCIF (144x176)
N/A
25
CIF (352 x 288)
50
5
Half D1 (704 x 288)
25
N/A
D1 (704 x 576)
12
N/A
Speeds values given above are maximal. Real transmission speed may be decreased depending
on the functions running on the DVR at that time.
Quality column allows to define the quality of the images for the remote live view. Low, Standard,
High, Very High quality levels are available.
All rights reserved © AAT Holding sp. z o.o.
55
NDR-EA2104 / NDR-EA2208 / NDR-EA2416 User’s manual ver. 1.0
RECORDER’S MENU
3.6. EVENT
EVENT menu contains five sub-menus covering event settings.
The DVR features ability to detect various event types. Depending on the settings, a desired action may
then be taken.
3.6.1. Sensor
After selecting this submenu and pressing ENTER, the following screen appears:
First table column allows to enable/disable desired DVR alarm inputs.
Name column allows to change titles of particular inputs, while the Type column allows to set their
mode of operation. NO is a normal-open type of input and NC is normally closed input.
Input E described can be used only to activate emergency recording function.
Note: Working of alarm input E described depends of the settings in the RECORD menu.
Note: The detailed description of connections between external devices and inputs is available in
chapter 6 of this manual.
All rights reserved © AAT Holding sp. z o.o.
56
NDR-EA2104 / NDR-EA2208 / NDR-EA2416 User’s manual ver. 1.0
RECORDER’S MENU
After selecting Record tab, the following screen appears:
The tab depicted above allows to set the DVR’s response to the activation of a desired alarm input.
Record column allows to assign cameras that start recording after an alarm event associated with them
occurs.
To the input E described are assigned all camera channels.
Note:
Picture recording is determined by the settings in the record menu. Selected cameras should be
set either to Event or Time & Event recording.
After selecting Alarm tab, the following screen appears:
Sensor column allows to assign any alarm output (or Buzzer) to any alarm input, with outputs
activated after occurrence of certain events.
Additional to the first alarm input can be assigned Shutdown function.
All rights reserved © AAT Holding sp. z o.o.
57
NDR-EA2104 / NDR-EA2208 / NDR-EA2416 User’s manual ver. 1.0
RECORDER’S MENU
After selecting Notification the following screen appears:
Notification column allows both to assign IP addresses to particular alarm inputs in order to enable
callback function as well as e-mail addresses that the notification messages are sent to after particular
alarm inputs become activated.
Note:
Only IP and e-mail addresses that were previously set and activated are available.
Po wybraniu zakładki PTZ pojawi się poniŜszy ekran:
PTZ column allows to program a set of commands (for a desired PTZ camera connected to the DVR)
and executed in case of an alarm activation for a desired input.
For each of the PTZ cameras, user may select a pre-programmed preset number that the camera moves
to after a certain alarm event (alarm input activation) occurs.
All rights reserved © AAT Holding sp. z o.o.
58
NDR-EA2104 / NDR-EA2208 / NDR-EA2416 User’s manual ver. 1.0
RECORDER’S MENU
3.6.2. Motion
After selecting Motion and pressing ENTER, the following screen appears :
Submenu allows to configure motion detection function of the DVR.
First column to the left allows to enable/disable the motion detection function.
Sensitivity column allows to set the motion detection sensitivity threshold for each of the inputs,
depending on the specification of an observed scene. Very low, Low, Normal, High, and Highest
sensitivity levels are available.
Area sets the motion detection zone for a given video input. Selecting Setup for a given input displays
9 x 11 motion detection grid as displayed below:
Fields in the motion detection grid are selected in groups of eight. Particular cells in the field are
selected by pressing camera selection buttons while activating/deactivating all cells in the field is
performed by pressing the ENTER button. Field selection frame is moved via the navigation buttons.
Cell marked with a white rectangle is an activated motion detection cell.
Using left mouse button it is possible to activating/deactivating each cell on by one or group of cell.
All rights reserved © AAT Holding sp. z o.o.
59
NDR-EA2104 / NDR-EA2208 / NDR-EA2416 User’s manual ver. 1.0
RECORDER’S MENU
Pressing MENU on the DVR’s front panel displays the detection field settings:
•
SELECT– selects all cells in the field,
•
CLEAR - clears all cells in the field,
•
SELECT ALL - selects all cells in the grid,
•
CLEAR ALL - deselects all cells in the grid,
•
CLOSE- saves changes and exits the menu
Note:
Settings in the Record, Alarm, Notification and PTZ tabs are identical to these in the
Sensor submenu.
3.6.3. Video Loss
After selecting this submenu and pressing ENTER the following screen appears:
Submenu allows to set the DVR to detect the video loss events at desired video inputs.
Note:
Settings in the Record, Alarm, Notification and PTZ tabs are identical to these in the
Sensor submenu.
All rights reserved © AAT Holding sp. z o.o.
60
NDR-EA2104 / NDR-EA2208 / NDR-EA2416 User’s manual ver. 1.0
RECORDER’S MENU
3.6.4. Text-in
After selecting this submenu and pressing ENTER, the following screen appears:
The DVR features simultaneous displaying of ASCII text (originating from ATMs, cash registers, PCs
with access control software installed) and a video image associated with it. Furthermore, device
supports up to 2 text-generating external devices connected to RS-232 and RS-485 ports.
Note: Cooperation with external devices requires knowledge of the format that the data is sent in. Text
data must be of ASCII type, the following setup applies to such devices. When working with
devices generating text in accordance with different protocols, adding the text is not possible.
Note: Adding text from more than one channel simultaneously may degrade system’s performance.
Text-in function may be associated only with two of the video inputs. RS-232 port is available for the
first channel, while RS-485 is available for the second.
To display the text both in playback and live modes, please check the option located under OSD
TEXT-IN (described in chapters 4 and 4.11 of this manual).
Note: When utilizing network connection all data on transactions are displayed only in playback.
During record copying, the transactions are copied only for the *.exe and *.strg recording
formats.
Note: When copying videos in Mp4 format the transactions associated with the picture are not copied.
All rights reserved © AAT Holding sp. z o.o.
61
NDR-EA2104 / NDR-EA2208 / NDR-EA2416 User’s manual ver. 1.0
RECORDER’S MENU
Leftmost column of the table allows to enable/disable the text-in function for desired ports (RS-232 or
RS-485).
Title column allows to change the title of a given port.
Selecting Setup displays the following screen:
In order to properly capture the text data, the parameters set in the menu above have to be in
accordance with the parameters of the data generated by external devices, as well as their
manufacturer’s specifications.
RS-232 and RS-485 configuration procedure is identical.
Transaction begin allows to set the first string of characters (via virtual keyboard) that are then
interpreted as the beginning of a transaction. When transaction starts with different characters, please
check the „Any Char.” box. If checked, the Transaction Begin field becomes inactive.
Transaction End allows to set the ending string for text (via virtual keyboard) that is then interpreted
as the end of a transaction. Please consult the manual or contact manufacturer of an external device in
order to obtain the end character marker.
Ignore String allows to set the ignored characters.
Line Delimiter allows to set the characters that are interpreted as end of the line and allowing to format
the text conveniently.
Available delimiters are:
LF - new line
CR - return to the beginning of the line.
Note:
Once RS-232 and RS-485 ports are set to text capture, they cannot be used for any other
function.
All rights reserved © AAT Holding sp. z o.o.
62
NDR-EA2104 / NDR-EA2208 / NDR-EA2416 User’s manual ver. 1.0
RECORDER’S MENU
Note: In order to enable said function, please adjust settings in DEVICES, and RS232/RS485
submenu.
The DVRs may be programmed, so the device starts a desired action (i.e. starts recording, enables
internal buzzer, activates relay outputs, or sends notifying messages) whenever it receives some predefined text string.
Note: Settings in the Record, Alarm and Notification tabs are identical to these in the Sensor
submenu.
A sample text captured by the DVR is presented below:
3.6.5. System
After selecting this submenu and pressing ENTER the following screen appears:
All rights reserved © AAT Holding sp. z o.o.
63
NDR-EA2104 / NDR-EA2208 / NDR-EA2416 User’s manual ver. 1.0
RECORDER’S MENU
The DVR may be configured to automatically diagnose its status and generate reports. S.M.A.R.T.
Threshold position allows to set the HDD temperature threshold that when exceeded generates a
notification message. 45˚C / 113˚F, 50˚C / 55˚C / 131˚F, 60˚C / 140˚F, 65˚C / 149˚F, 70˚C /
158˚F temperature values are available. Threshold should be set in accordance with the user’s guide
for a given HDD.
Recording Threshold (%) allows to set the disk space threshold which, when exceeded, generates a
system event.
Selecting Alarm displays the following screen:
Alarm column allows to assign certain action performed when events specified in the Event column
(such as HDD Bad, HDD Full, S.M.A.R.T. and No Record Storage) occur. Alarm may be
performed by activating desired alarm outputs, internal buzzer or displaying appropriate message on
the screen..
Notification tab allows to assign callback and e-mail notify for the alarm function.
Note:
Note:
HDDs are the most vulnerable part of the system, therefore constant monitoring of their status
is advised.
DVR must be installed in a place that provides adequate air circulation.
All rights reserved © AAT Holding sp. z o.o.
64
NDR-EA2104 / NDR-EA2208 / NDR-EA2416 User’s manual ver. 1.0
RECORDER’S MENU
3.7. LOGOUT/ SHUTDOWN
After selecting this submenu the following screen appears:
To log out a user please select LOGOUT, and press OK. Additional window prompting for
confirmation appears. To confirm, select YES.
To turn the DVR off, please select SHUTDOWN and select OK. Additional window prompting for
confirmation appears. To confirm, select YES.
Second way to shutdown the system is to activate alarm input defined as Shutdown in the EVENT
menu.
After system shutdown power cord can be disconnected.
CAUTION!
Shutting the system down in any other way than one described here is not allowed as data loss or
damage to the device may occur.
To exit the submenu select Cancel.
All rights reserved © AAT Holding sp. z o.o.
65
NDR-EA2104 / NDR-EA2208 / NDR-EA2416 User’s manual ver. 1.0
OPERATING THE DVR
4. OPERATING THE DVR
DVR control may be performed via front panel buttons (detailed button description can be found in
chapter 2.4 of this manual), USB mouse connected to the DVR as well as remote IR controller.
Additionally, the DVR features function menu that can be brought up during „live” view, allowing for
calling all the functions assigned to the front panel buttons using only arrow and ENTER buttons. To
bring up the menu, please press ENTER or right mouse button. Additional function menu is presented
below.
- name of the user currently logged in
- starts display advertise files
- selects camera for full screen display
- changes display mode
- identical to OSD on the IR remote
- freeze picture
- analogue of SEQUENCE button on the IR remote
- analogue of ZOOM on the IR remote
- analogue of PIP button on the IR remote
- analogue of AUDIO on the IR remote
- analogue of PTZ on the IR remote
- analogue of BACKUP on the IR remote
- analogue of PLAYBACK on the IR remote
- displays image form the other DVR via network
- analogue of ! E.REC on the IR remote
- analogue of LOG on the IR remote
- switches main monitor BNC -> VGA or VGA -> BNC
- enters the main menu of the DVR
Widok dla NV-DVR1600
All rights reserved © AAT Holding sp. z o.o.
66
NDR-EA2104 / NDR-EA2208 / NDR-EA2416 User’s manual ver. 1.0
OPERATING THE DVR
4.1. Live monitoring
As soon as the DVR completes its initialization process, it starts displaying live video via the
connected monitor.
DVRs feature independent display on two monitors simultaneously. Operating the DVR is possible
only from one monitor at a time. By default VGA monitor output is enabled. In order to switch output
from VGA to BNC or from BNC to VGA please fallow instructions below.
- press and hold the DISPLAY button on the front panel (or IR remote) for about 3 seconds
- click both mouse buttons at the same time
- select Move Display Focus position from the menu available after pushing right mouse button or
ENTER.
Table containing options of independent dual display is presented on the chapter 2.3.1.
N/A description means that the function can't be realized on the same time.
Displaying all cameras simultaneously is the default mode (4, 8 or 16 depending on the model). Press
a camera button to display this particular camera full screen. Pressing DISPLAY button cycles through
different display modes.
If images from 4 cameras are displayed simultaneously on the monitor use Left, Right, Up or Down
arrow buttons to switch between displayed cameras according to the following scheme:
Other view modes utilize similar way of switching between cameras.
In 5+1, 7+1 or 12+1 display modes, camera 1 is always displayed in the middle.
Press SEQUENCE button to enable full-screen or multi-camera sequence display. Any change of the
display mode or subsequent SEQUENCE button pressing turns off the sequential display.
Full screen display sequence skips past the channels without video signal connected. Sequence
switching time can be set in the DVR menu. Duration of sequence display is defined in the menu.
Press FREEZE button to freeze/unfreeze the currently displayed image.
A number of status messages displayed at the bottom of the screen informs about current DVR
operation status. The description is presented on the next site:
All rights reserved © AAT Holding sp. z o.o.
67
NDR-EA2104 / NDR-EA2208 / NDR-EA2416 User’s manual ver. 1.0
OPERATING THE DVR
10
1
1.
2.
3.
4.
5.
6.
7.
8.
9.
10.
2
3
9
4
5
6
7
8
Enters the main menu in „live” mode, opens additional function menu in playback mode.
Information about disk usage: data size / installed HDD size.
Blue color indicates active overwrite function, gray color indicates inactivity of the function.
Green color indicates active network connection, gray indicates inactive connection.
Orange color indicates active EMERGENCY recording, gray color indicates function inactivity.
Displays current date in live view or date of the recording in playback mode.
Displays current time in live view or time of the recording in playback mode.
Indicates readiness for remote IR controlling.
Orange color indicates that one of the alarm outputs or internal buzzer is active.
White color indicates that the sequence display is active. Gray color indicates inactivity.
icon in the top right corner of the screen indicates that the camera has been configured as a PTZ
Purpose of other status icons is explained further in chapter 3.4.2 of this manual.
4.2. Live audio
Recorders feature 8 or 4 audio inputs (depending on the model) and single audio output. „Live” mode
features the possibility of assigning any audio input to audio output, therefore listening to live audio
feed. Selection of audio channel is performed via pressing the AUDIO button on the front panel of the
DVR.
All rights reserved © AAT Holding sp. z o.o.
68
NDR-EA2104 / NDR-EA2208 / NDR-EA2416 User’s manual ver. 1.0
OPERATING THE DVR
4.3. PIP (picture in picture)
After pressing the PIP button in full screen, a menu allowing to select a camera appears. The selected
camera is then displayed in a window, superimposed on a full screen camera view. Disabling the
function is performed analogically. Changes in the size and position of the PIP window are made in the
DVR’s menu.
4.4. Zoom function
ZOOM button enlarges the selected part of the screen. Available zoom is x2, x4, x8. Selection may be
moved across the screen using navigation buttons. Subsequent pressing of the ZOOM button leaves the
mode.
4.5. PTZ camera control
Prior to controlling please establish a proper RS-485 connection between the DVR and camera(s).
Connection description is contained in chapter 5. After logging in, user with the PTZ control privileges
can control PTZ cameras using DVR front panel buttons. PTZ button starts the PTZ camera control
mode.
After pressing the PTZ button, cameras that are defined as PTZ are displayed on the screen. Camera
selection is performed via ▲▼ navigation buttons, confirmation via pressing the ENTER. Pressing (+)
zooms the picture in, while (-) zooms out.
buttons change the iris level of the camera
(Iris +, Iris -). To control a PTZ camera in both horizontal and vertical axis, please use the ▼▲◄►
buttons. Pressing PRESET and MOVE saves and calls presets respectively, ranging from 1 to 16.
To program a preset please point the camera to a desired scene, adjust the zoom and press PRESET .
After the PTZ window shows up, please select preset number, under which current scene will be saved.
Entering the title of preset is possible, via virtual keyboard.
To call a preset press MOVE, and select a desired number in opening window.
Pressing the MENU button while in PTZ mode displays the window of PTZ menu. Please select
desired function using navigation buttons. Functions available depend on camera model, selected
protocol and additional accessories.
PTZ camera control may also be performed via USB mouse and IR remote controller. Detailed
description is available in chapter 8.
All rights reserved © AAT Holding sp. z o.o.
69
NDR-EA2104 / NDR-EA2208 / NDR-EA2416 User’s manual ver. 1.0
OPERATING THE DVR
4.6. Event monitoring
If EVENT Pop-up is checked in the DVR’s menu, the picture from a selected camera will be
displayed on the selected main monitor.
Display mode depends on the amount of cameras associated with an event, and on the number of events
that are simultaneously taking place in the system.
If a single camera is associated, the picture from it is displayed in full-screen. If events are associated
with 2~4 cameras, the cameras participating in that event are displayed in quad mode.
5 ~ 8 cameras uses 3x3 display mode.
The display time matches the predefined time of panic recording. After the panic recording times out,
the monitor returns to its previous display mode. In order to return to previous display mode before
event monitoring times out, please press DISPLAY or any camera selection button.
4.7. Covert cameras
If the cameras were defined as COVERT 1, the picture from them isn’t displayed. For COVERT 1
cameras, both the camera name and status icons are displayed.
If the cameras were defined as COVERT 2, they aren’t displayed . For COVERT 2 cameras, only the
camera name is displayed.
4.8. Recording the video
Table below presents recording speeds for NDR-EA2104 / NDR-EA2208 and NDR-EA2416 for
different recording resolutions.
Maximum recording speed (PAL)
Resolution
NDR–EA2104
NDR–EA2208
NDR–EA2416
CIF - 352 x 288
100 ips
200 ips
400 ips
2 CIF - 704 x 288
100 ips
200 ips
200 ips
D1 - 704 x 576
50 ips
100 ips
100 ips
Note:
Note:
Note:
If the DVR isn’t working in overwrite mode and all available storage space has been already
exhausted, emergency recording is not performed.
Recording speed may decrease slightly if the DVR is performing some other tasks during that
time.
Recording settings are available in the RECORD menu.
4.9. Audio recording
If a DVR is set-up properly, audio recording may be performed from up to 8 or 4 channels (depending
on the model). If the recording speed is less than 1 fps, the sound won’t be recorded.
Note: Please check if audio recording is in accordance with your legal regulations.
All rights reserved © AAT Holding sp. z o.o.
70
NDR-EA2104 / NDR-EA2208 / NDR-EA2416 User’s manual ver. 1.0
OPERATING THE DVR
4.10. Playing recorded video
Users, that have the privileges to watch stored recordings, after logging in to the DVR may do so. To
start the playback, please press the PLAYBACK button. If the stored material is viewed for the first
time since the device power-up, latest recordings will be shown.
Note: Pictures from cameras set as covert are visible during playback.
- press the button to play video backward at normal speed. Press the button again to change
playback speed. The screen displays R.PLAY, RWx2, RWx4, RWx8, RWx16 and RWx32
respectively.
► - press the button to play video forward at normal speed. Press the button again to change playback
speed. The screen displays PLAY, FFx2, FFx4, FFx8, FFx16 and FFx32 respectively.
- press the button to go to the next image (frame by frame forward).
- press the button to go to the previous image (frame by frame backward).
- press the button to pause the playback.
Playback display mode change is performed exactly as in "live" mode, so does digital zoom function.
Press the MENU button during playback to display additional menu that allows to exit the playback
mode and enable /disable additional functions. The additional menu is shown below.
- information on currently logged-in user
- full screen display camera selection
- display mode change
- goes to the beginning/end or defined date of the recordings
- calendar records search
- event records search
- text in records search
- equivalent to the OSD button on the IR remote
- equivalent to the ZOOM button on the IR remote
- enables/disables audio playback
- equivalent to the BACKUP button on the IR remote
- playback storage selection HDD/Backup Data
- equivalent to the ! E.REC button on the IR remote
- equivalent to the LOG button on the IR remote
- switches main monitor BNC -> VGA or VGA -> BNC
- exits the playback mode
All rights reserved © AAT Holding sp. z o.o.
71
NDR-EA2104 / NDR-EA2208 / NDR-EA2416 User’s manual ver. 1.0
OPERATING THE DVR
4.11. Playing backup material
Recorders feature the function of playing back previously stored recordings. Only *. STRG format
recordings are recognized by the system during playback, without the player compiled. Playback
feature is enabled only if an external memory is connected.
In order to start playback call additional function menu in "live" mode by pressing ENTER button.
Then, select Playback position and Backup Data. A screen should appear, allowing you to select
desired storage device and recording from available. Use the navigation keys to select the desired file,
and then choose ENTER button to confirm. The methods of Backup video control are the same as in
Recorded video playback.
4.12. Searching video
Press the MENU/EXIT in the playback mode to start searching display menu. After selecting Go to
position, the following window is opened:
•
•
•
Go to Beginning - go to the beginning of recordings;
Go to End - go to the end of recordings;
Go to time - search by the date and time, or go to the beginning / end of recordings;
Below positions from additional menu are used for:
•
•
•
Calendar Search - searching the recordings with calendar use;
Event Search - searching the recordings events associated with;
Text-In Search - searching the recordings defined text associated with;
Note: When DVR is in playback mode the network transmission speed may decrease as a result.
During the recording playback/search there is a possibility of slight recording speed decrease.
All rights reserved © AAT Holding sp. z o.o.
72
NDR-EA2104 / NDR-EA2208 / NDR-EA2416 User’s manual ver. 1.0
OPERATING THE DVR
4.12.1. Go to time
After selecting Go to time the following menu appears:
To set the time and date, please select particular date/time values using navigation buttons. After
confirming via OK button, the images associated with selected time are displayed. If there are no
pictures for that time period, a proper message is displayed. Additionally, selecting Go to beginning
or Go to end skips to the beginning/ending of recording.
4.12.2. Calendar search
After selecting said function, the following screen appears:
Days of the month highlighted orange indicate available recordings that are associated with particular
day. Selecting desired day and confirming selection with ENTER switches the recording bar to that
day. Hours that the recording was performed during that day are highlighted green. Precise selection of
the records is performed by moving the red slider across the bar, using arrows. Selected time is visible
in the lower left corner of the field, selection of month and year is performed by changing values of two
fields located above the calendar.
All rights reserved © AAT Holding sp. z o.o.
73
NDR-EA2104 / NDR-EA2208 / NDR-EA2416 User’s manual ver. 1.0
OPERATING THE DVR
Note:
The day bar is divided into 1-hour segments. Highlighting of a segment doesn’t imply that the
recordings are available for the whole highlighted hour.
When date and time are changed (automatically or manually) a situation may emerge, in which two
video streams have the same time and date. Such recordings are marked orange in the day bar. To
resolve the situation, please select the proper video stream in the window that appears. The lower
segment number, the earlier the record is.
Pressing ENTER in the “day” bar or selecting Go to shifts the device into playback mode.
Selecting Detail allows to display the “day” bar with extended information on all cameras.
Note:
When there are no recordings visible on the screen, please skip to 3x3 display mode in order to
quickly search for recorded pictures.
All rights reserved © AAT Holding sp. z o.o.
74
NDR-EA2104 / NDR-EA2208 / NDR-EA2416 User’s manual ver. 1.0
OPERATING THE DVR
4.12.3. Event search
After selecting said function, the following screen appears:
All events are stored in the device’s log. Opening the log may be performed via pressing the LOG
button on the front panel of the DVR, or by selecting Event search in the extended menu..
Access to the event log cannot be restricted, however moving to the playback mode is allowed only if
the user has sufficient privileges to do so.
Selection of a given event and confirmation by pressing ENTER displays first picture associated with
that event.
Searching the log is performed using the listed buttons:
- displays 10 next log entries
- displays 10 previous log entries
- skips 100 entries forward
Searching the logs using mentioned buttons is available during a single day. Selecting a subsequent day
is performed in the Time column.
Event: allows to specify which events are taken into account during search. Following options are
available:
All
Motion
Sensor
Video loss
Text-in
Emergency
- searches for all events
- motion detection events
- alarms for specified alarm inputs
- video loss events
- text strings
- emergency recording events
All rights reserved © AAT Holding sp. z o.o.
75
NDR-EA2104 / NDR-EA2208 / NDR-EA2416 User’s manual ver. 1.0
OPERATING THE DVR
4.12.4. Text-in search
After selecting the text-in search submenu, the following window appears:
Text-in search allows to search a pre-defined range of records for string of characters associated with a
particular recording. Strings are generated by POS - class machines (ATMs, cash registers etc.).
FROM - TO fields define the time frame of search.
1 to 5 fields allow to enter a string of characters the function will be looking for. Entering the
characters is possible after selecting a particular line and pressing ENTER. To include the string in a
search, please check the box next to the searched string (position 1 depicted above).
Case Sensitive search differentiates between lower and upper case letters during search.
To start search, please press the OK.
After selecting a desired entry (using arrows) in the search results field and pressing ENTER the first
frame of the picture associated with that text is displayed.
All rights reserved © AAT Holding sp. z o.o.
76
NDR-EA2104 / NDR-EA2208 / NDR-EA2416 User’s manual ver. 1.0
OPERATING THE DVR
4.13. Backup
NDR-EA2104/NDR-EA2208 and NDR-EA2416 digital multiplexers provide a wide branch of methods
when it comes to copying the recordings.
User may copy recordings to external storage devices. The DVR features the possibility of copying the
recordings to an external HDD connected via the USB, or to copy the data onto Flash memories.
DVRs allow to copy the recordings in three available formats. Data format determines its later
playback and maximum file size. Following formats are available:
*.exe -
File size may not exceed 4 GB, both for FAT32 and NTFS. Number of channels that are
copied in the process is not restricted. The stored data may be played back on the PC with
Windows OS without installing additional software.
Note:
When copying *.exe files, FAT32 file system is recommended on the storage device. Using
NTFS-formatted storage device and exceeding maximum file size for that system (4GB) will
result in inability to playback the copied recordings as the copy process won’t stop after
exceeding max. file size.
*.strg -
Data are copied to *.strg format. File size may not exceed 4 GB for FAT 32 file system. In
case of NTFS file system, maximum file size is limited only to the NTFS maximum file size.
Maximum number of channels is also unrestricted. Data stored in this format may be played
back on PCs with E-Viewer installed, or by DVR.
*.mp4 - Data are copied to *.mp4 format. File size may not exceed 2 GB, both for FAT32 and NTFS.
Only one video channel is permitted during copy process. Recordings may be played back on
PCs with mp4-capable software installed.
Note:
Note:
Only FAT32 or NTFS file systems are supported on the storage devices.
When copying *.mp4 recordings maximum file size should not exceed 2GB.
All rights reserved © AAT Holding sp. z o.o.
77
NDR-EA2104 / NDR-EA2208 / NDR-EA2416 User’s manual ver. 1.0
OPERATING THE DVR
4.13.1 Copying *.exe and *.strg
In order to enter the backup mode please bring up function menu in „live” view, next, select Backup,
and again Backup. The following screen appears:
Source allows to select the disks that the data are copied from.
Record - internal HDDs set to recording mode, read-only HDD.
Device allows to set the device that the data are copied to. USB Storage (A-1) - external storage
device connected to a desired USB port.
File Name allows to name the copied file, using virtual keyboard.
From - To and Camera sets the time interval and cameras the recordings are copied from.
Devices that are not available or not included in the Device field are inactive.
DVRMediaPlayer allows to select the *.strg format (box unchecked) or *.exe (checked).
Status displays information on the storage device currently connected to the DVR. First value
describes the free space, while second value describes total space. Selecting Update refreshes the
information.
To start copy process, please select the Copy button.
Lacking available recording space, device stops the copy process and displays an appropriate message
about lack of free space on the destination device and amount of recordings copied.
Copy progress is displayed in the STATUS field as percentage %.
After finishing the copy process a proper message is displayed.
All rights reserved © AAT Holding sp. z o.o.
78
NDR-EA2104 / NDR-EA2208 / NDR-EA2416 User’s manual ver. 1.0
OPERATING THE DVR
4.13.2 *.mp4 copying
In order to enter the backup mode please bring up function menu while in „live” view, next, select
Backup and Clip Maker. The following screen appears:
*.m4v format differs from *.exe and *.strg only in the ability to copy only one channel (Camera field).
It is possible to use other functions of the DVR during copy process. Please select Close to use other
DVR functions. Returning to the copy window is possible anytime.
Note: Closing system and/or formatting the external drives is forbidden during the clip copy.
Note: During clip copy, disconnecting USB cable and/or power supply of the device is forbidden, as it
may cause the DVR to malfunction or damage the external device itself. During subsequent clip
copying, an information on system malfunction may be displayed. In order to restore the
situation to normal, please restart the DVR. When data located on the external memory devices
are damaged, please format the device or use data recovery software.
All rights reserved © AAT Holding sp. z o.o.
79
NDR-EA2104 / NDR-EA2208 / NDR-EA2416 User’s manual ver. 1.0
OPERATING THE DVR
4.14. Playback of copied materials
Playback depends directly on the format that recordings have been saved in.
4.14.1 *.exe format playback.
Recordings stored in this format may be played back on a PC without any additional software
installing.
Note: It is recommended, that system is equipped with Pentium III 1200MHz (or newer) and at least
1GB of RAM. If the clock frequency is less than stated above, video recorded in maximum quality or
watched with maximum speed may be played with decreased speed. In order to establish proper
operation, DirectX 7.0 (or newer) and a graphic card with 32MB of RAM is also recommended.
Double-clicking on the backup recording file starts the playback.
Note: Proper playback of the video recordings depends on the tech specification of the PC used.
When encountering problems with playback, please set the 32-bit colour palette in the Display
Properties.
All rights reserved © AAT Holding sp. z o.o.
80
NDR-EA2104 / NDR-EA2208 / NDR-EA2416 User’s manual ver. 1.0
OPERATING THE DVR
Next, select the ADVANCED button and TROUBLESHOOTING tab, then select the maximum value
of hardware acceleration.
To check version number of the libraries installed, please enter „dxdiag” in the RUN bar, located in the
START menu, and press ENTER.
In the DISPLAY please select DIRECT DRAW HARDWARE ACCELERATION and check if it’s
working properly.
Please update the video drivers to the newest ones recommended by the producer. When still having
problems with playback, please consider change of the video card.
All rights reserved © AAT Holding sp. z o.o.
81
NDR-EA2104 / NDR-EA2208 / NDR-EA2416 User’s manual ver. 1.0
OPERATING THE DVR
View of the playback software window is depicted below:
Clicking LMB on a selected picture displays it full screen, subsequent pressing returns to previous
display mode.
Description of the functions:
- skips to the beginning of the recording
- plays the recording backward with normal speed. Subsequent pressing changes the playback
speed by x1, x2, x4, x8, x16 respectively.
- moves to a previous frame of the recording
- STOP button, stops the playback (pause)
- moves to the next frame in the recording
- plays the recording forward with normal speed. Subsequent pressing changes the playback
speed by x1, x2, x4, x8, x16 respectively.
- skips to the end of the recording
- displays the picture from a selected (camera selection is performed via single LMB click on
a desired picture) camera full-screen.
- 2x2 display mode
- 3x3 display mode
- 4x4 display mode
- minimize
- close the window
All rights reserved © AAT Holding sp. z o.o.
82
NDR-EA2104 / NDR-EA2208 / NDR-EA2416 User’s manual ver. 1.0
OPERATING THE DVR
4.14.2 Playing back the*.mp4 videos.
To playback a recording on a PC please use any software able to play MP4 files.
4.14.3 Playing back the*.strg recordings.
Recordings in this format may be played back either via a PC computer or using DVR.
Playback procedure is described in chapter 4.11 of this manual.
Playing back using a PC computer is possible via the E-Viewer software. E-Viewer’s guide is a
separate document stored on a CD included in the package.
4.15. WaterMark
It is possible to check the authenticity of the *.exe and *.strg backup files using WMChecker software.
Software is available on the CD attached to the DVR and on the www.novuscctv.com web site in the
product tab.
4.16. Advertising function
DVR-s are equipped with the function of displaying advertising files in *. jpg format. Files can be
displayed as a movie (15 ips speed) or as static images at a speed ranging from 1 to 60 seconds. In
order to activate the function, select Digital Signage from the auxiliary function menu or re-configure
the digital signage function schedule (see section 3.3.4 and Appendix 1 of this manual).
All rights reserved © AAT Holding sp. z o.o.
83
NDR-EA2104 / NDR-EA2208 / NDR-EA2416 User’s manual ver. 1.0
CONNECTING AND CONTROLLING PTZ CAMERAS
5. CONNECTING AND CONTROLLING PTZ CAMERAS
NDR-EA2104, NDR-EA2208 and NDR-EA2416 feature the possibility of remote controlling of up to
4/8/16 cameras via the RS-485 bus, cascade connection. Cameras may be either speed domes, classic
cameras with optical/digital zoom or other cameras with proper protocols implemented. The control
over cameras is performed via buttons located on the front panel of the DVR, IR remote controller,
USB mouse, IE web browser, E-Viewer software and iMon2 software. To ensure the proper operation
of control protocols, please assign unique address (in a system) to each of the system cameras.
The DVR supports various control protocols, e.g. N-Control, Pelco-D, Pelco-P and others.
Note: All the cameras in one system should have the same control protocol and transmission speed set
in their menus (check the user’s manual of the camera for more details).
The description presented below is valid for Novus CAMA-III cameras. To connect cameras of other
manufacturers, please contact respective tech support and/or consult the user’s manuals for each of the
cameras in question.
Note: For speed dome camera control, RS-232 port may be used. RS-232 - RS-485 converter should
be used under such circumstances, e.g. NVPT-001RSC. Such connection is used when a
necessity of connecting a keyboard and speed dome cameras to one DVR arises.
Note: Pelco-D(N) protocol is a special modification of the Pelco-D protocol that enables PTZ control
for certain Novus cameras with RS-485 interface. Setting the minimum and maximum speed
values in the Speed column is strongly not recommended when using this protocol.
Furthermore, Preset96 function (former “ESC” command) is now assigned to Preset16,
effectively replacing it (i.e. Preset16 is now the proper ESC command).
5.1 Connecting NOVUS PTZ cameras.
Speed dome cameras are cascade connected using UTP cat. 5. Cameras are connected to a port marked
as RS-485. Maximum length of the wire shouldn’t exceed 1200m.
Telemetry junctions are located at the rear of the device, available as a terminal block. To ease the
connecting process, plugging the socket out of the terminal is possible. Please connect the wires
between the DVR and cameras in a way described below:
TRX + - please connect to the camera Rx + (Tx+)
TRX - - please connect to the camera Rx - (Tx-)
Detailed information regarding PTZ camera control are presented in chapters 3.2.1 (Cameras) and
3.2.5 (RS232/RS485).
Button functions, used for PTZ camera control, are further described in chapter 2.4 and 2.6 of this
manual (Controlling via IR remote controller).
All rights reserved © AAT Holding sp. z o.o.
84
NDR-EA2104 / NDR-EA2208 / NDR-EA2416 User’s manual ver. 1.0
CONNECTING AND CONTROLLING PTZ CAMERAS
Video Cable
Video Cable
NDR-EA2416 view
24VAC +
24VAC FGND
(RX+)
RX+(TX+)
RX-(TX-)
GND
24VAC24VAC+
24VAC +
24VAC FGND
(RX+)
RX+(TX+)
RX-(TX-)
GND
24VAC24VAC+
max 1,5 m
max 1,5 m
UTP 5 max 1200m
CAMA III nr 4/8/16
CAMA III nr 1
All rights reserved © AAT Holding sp. z o.o.
85
NDR-EA2104 / NDR-EA2208 / NDR-EA2416 User’s manual ver. 1.0
CONNECTING EXTERNAL DEVICES TO ALARM INPUTS/OUTPUTS
6. CONNECTING EXTERNAL DEVICES TO ALARM INPUTS/OUTPUTS
NDR-EA2104, NDR-EA2208 and NDR-EA2416 are equipped with 4 alarm inputs (including
emergency recording input), and 2 open-collector type alarm outputs.
Connectors are equipped with clamp-on terminals. Layout of particular connectors is presented in
chapter 2.3.1 oraz 2.3.2.
Note: Alarm inputs and outputs are not lightning-protected. User should protect the inputs against the
electric discharges that may damage the equipment.
Note: Alarm outputs are not protected against overload. User should protect the outputs.
Maximum current for open collector output should not exceed 30 mA for 12 VDC. If system needs
connecting devices with bigger current requirements, please use additional circuits, e.g. using relay.
Output may operate either as NO or NC type.
Alarm inputs implementation:
Alarm inputs operate in TTL/CMOS standard, therefore may be activated either by appropriate voltage
level or zero voltage. Appearance of high/low logical states on the input depends on settings in the
Sensors submenu.
Below is shown a diagram presenting the alarm input no.1 circuit. When alarm input mode in the
Sensors submenu is set to NO, closing the SW1 switch activates the alarm input.
All rights reserved © AAT Holding sp. z o.o.
86
NDR-EA2104 / NDR-EA2208 / NDR-EA2416 User’s manual ver. 1.0
CONNECTING EXTERNAL DEVICES TO ALARM INPUTS/OUTPUTS
Employing TTL alarm outputs:
TTL/CMOS alarm inputs are best implemented in circuits with low current devices, i.e. LEDs, relay
coils. An example of circuit implementing the TTL alarm output is presented below
All rights reserved © AAT Holding sp. z o.o.
87
NDR-EA2104 / NDR-EA2208 / NDR-EA2416 User’s manual ver. 1.0
OPERATING THE DVR VIA SYSTEM KEYBOARDS
7. OPERATING THE DVR VIA SYSTEM KEYBOARDS
Operating the DVR via NV-KBD30 and NV-KBD70 system keyboards.
NDR-EA2104, NDR-EA2208 and NDR-EA2416 may be remotely controlled using NV-KBD70
or NV-KBD30 keyboard. System is controlled either via RS-485 or RS-232 (after using an
appropriate adapter) port connection. Thanks to this, controlling large systems is possible (up to 9
DVRs with NV-KBD30 and up to 32 in case of NV-KBD70). The RS-485 wire length should not
exceed 1200m. In such a system, devices are cascade connected, with taps length not exceeding 1,5m.
Keyboards have their keys associated in accordance with respective buttons in the DVR, serving the
same function. Additional informative feature is the LCD display located in the keyboard, displaying
information about active functions, transmission parameters etc.
7.1 Controlling the DVR via KBD70 keyboard.
Connection diagram:
TRX +
RS-485 (-)
TRX -
RS-485
TRX -
TRX +
RS-485
RS-485 (+)
Main Menu
Network -> Set Port ->
Set Baud Rate -> Dome2: 9600
Main Menu
Network -> Set Port ->
Com Ports -> Dome2:NC DVR
RS-485
Sample configuration:
TRX -
TRX +
KBD 70 keyboard
Up to 31 DVRs connected as above
Note: Both the cameras, DVRs and keyboards in one system should have the same control protocol and
transmission speed set in their menus (check the user’s manual of the camera for more details).
All rights reserved © AAT Holding sp. z o.o.
88
NDR-EA2104 / NDR-EA2208 / NDR-EA2416 User’s manual ver. 1.0
OPERATING THE DVR VIA SYSTEM KEYBOARDS
7.2 Controlling the DVR via the KBD30 keyboard:
TRX +
RS-485 (-)
TRX -
RS-485
TRX -
TRX +
RS-485
RS-485 (+)
RS485(TX+)
styk 5
styk 4
RS-485
TRX -
TRX +
RS485 (TX-)
NV-KBD30
Up to 9 DVRs connected as shown
above
NV-KBD30 keyboard receive the commands with 9600 bps speed in the following standard: 8 data
bits / 1 stop bit / no parity check. Default control protocol is N-Control (assigned in keyboard’s
settings to number 4).
Note:
Both the cameras, DVRs and keyboards in one system should have the same control
protocol and transmission speed set in their menus (check the user’s manual of the camera
for more details).
Note:
Detailed information on NV-KBD30 and NV-KBD70 configuration are contained in their
respective manuals.
Tables presented on subsequent pages describe controlling the DVR via NV-KBD30 and
NV-KBD70 keyboards.
All rights reserved © AAT Holding sp. z o.o.
89
NDR-EA2104 / NDR-EA2208 / NDR-EA2416 User’s manual ver. 1.0
OPERATING THE DVR VIA SYSTEM KEYBOARDS
IR REMOTE
FUNCTION
10 ~ 16 channel
selection
BUTTON/COMBINATION OF NVKBD30 KEYS
BUTTON/COMBINATION OF NVKBD70 KEYS
1 + MAIN
1 + MAIN
2 + MAIN
2 + MAIN
3 + MAIN
3 + MAIN
4 + MAIN
4 + MAIN
5 + MAIN
5 + MAIN
6 + MAIN
6 + MAIN
7 + MAIN
7 + MAIN
8 + MAIN
8 + MAIN
9 + MAIN
9 + MAIN
1+0+MAIN = channel 10
:
1+6+MAIN = channel 16
1+0+MAIN = channel 10
:
1+6+MAIN = channel 16
JOG LEFT
JOG RIGHT
SHIFT + EXIT
CTRL + ESC
All rights reserved © AAT Holding sp. z o.o.
90
NDR-EA2104 / NDR-EA2208 / NDR-EA2416 User’s manual ver. 1.0
OPERATING THE DVR VIA SYSTEM KEYBOARDS
IR REMOTE
FUNCTION
BUTTON/COMBINATION OF
NV-KBD30 KEYS
BUTTON/COMBINATION OF
NV-KBD70 KEYS
1+
1+
SHIFT + SEQ
Image freeze
3+
3+
2+
2+
SHIFT + FREEZE
FRE
SHIFT + ZOOM
CTRL + ZOOM
SHIFT + PTZ / SEL
PTZ
PANIC
SHIFT + MENU
MENU (MACRO)
SHIFT + COPY
▼
ENTER + JOY DOWN
▲
ENTER + JOY UP
►
ENTER + JOY RIGHT
◄
ENTER + JOY LEFT
ENTER
4+
4+
5+
5+
All rights reserved © AAT Holding sp. z o.o.
91
NDR-EA2104 / NDR-EA2208 / NDR-EA2416 User’s manual ver. 1.0
CONTROLLING THE DVR VIA USB MOUSE
8. CONTROLLING THE DVR VIA USB MOUSE
DVR features the possibility of establishing control over the DVR using an USB mouse connected to
the USB port. Functions described below are available in „live” mode.
Double-clicking on any camera in 2x2 or 3x3 display mode switches the display to full-screen mode.
Subsequent double-click returns to previous display mode.
During configuration, selection of particular options is performed via the LMB.
Certain positions allow to select them via mouse scroll.
Depending on DVR operating mode, pressing RMB displays a proper function menu.
Pressing RMB in „live” mode displays additional menu described in chapter 4 of this manual.
Pressing RMB during playback displays additional function menu, described in chapter 4.11 of this
manual.
Pressing RMB in PTZ mode displays the following screen:
2
1
4
3
6
5
All rights reserved © AAT Holding sp. z o.o.
92
NDR-EA2104 / NDR-EA2208 / NDR-EA2416 User’s manual ver. 1.0
CONTROLLING THE DVR VIA USB MOUSE
Particular functions of the buttons presented on previous page are described below:
Auto pan
Tour
Pattern
Menu
Move to origin
- enables / disables no. 1 scan
- enables / disables no. 1 tour
- enables / disables no. 1 pattern
- enters menu of the camera
- moves the camera to home position
1
- decreases zoom factor
2
- increases zoom factor
3
- calls IRIS CLOSE function
4
- calls IRIS OPEN function
5
- saves preset 1 to 16
6
- calls preset 1 to 16
Camera control is performed via clicking LMB on one of the six arrows located around the picture
edges.
In ZOOM mode, arrows are used for moving around the zoomed-in picture.
If the DVR have turned on a Digital Signage function, click any mouse button will turn it off.
Click both mouse buttons at the same time switch main monitor CVBS <-> VGA.
All rights reserved © AAT Holding sp. z o.o.
93
NDR-EA2104 / NDR-EA2208 / NDR-EA2416 User’s manual ver. 1.0
CONTROLLING THE DVR VIA INTERNET EXPLORER
9. CONTROLLING THE DVR VIA INTERNET EXPLORER
NDR-EA2416, NDR-EA2208 and NDR-EA2104 digital multiplexers feature the possibility of
network operation using TCP/IP and Internet Explorer 7.0 (or newer) web browser.
Up to 4 simultaneous connections with the DVR are possible in „live” monitoring mode, up to 2
connections in playback mode, allowing to view recordings on remote terminals and 1 connection in
setup mode.
When using playback, all users (up to 2 at a time) connected to the DVR may watch desired
recordings.
Note:
Network administrator or user is the person responsible for proper network operation.
9.1 Minimum system requirements
9.2 Establishing a connection
CPU
Intel® Pentium® (Celeron) 2.4 GHz (or faster)
RAM
1024MB (or more)
Web Browser
Internet Explorer 7.0 (or higher), with Java Script enabled
Other
Graphic Card, 32MB (or better)
OS
Microsoft® Windows® XP™ / Vista / 7
Please use Internet Explorer web browser to establish a successful network connection.
Please enter the DVR’s IP address in the address bar. Additionally, if an HTTP port number differs
from the default value, please enter its number after a colon. Default port number is 80. Sample
addresses are presented below:
Default HTTP port
http://10.11.5.150
HTTP port 8000
http://10.11.5.150:8000
Note:
Note:
Network transmission speed is dependant on the settings made in NETWORK /
Transmission as well as active DVR functions at the time.
Resolution and the quality of transmitted picture is dependant on the settings made in
NETWORK / Transmission.
All rights reserved © AAT Holding sp. z o.o.
94
NDR-EA2104 / NDR-EA2208 / NDR-EA2416 User’s manual ver. 1.0
CONTROLLING THE DVR VIA INTERNET EXPLORER
If a given address is a proper one and the target device is currently reachable in the network, a
window allowing to log into the network interface is displayed:
ID field allows to enter the User’s name.
PASSWORD field allows to enter password of the account that user wants to log into. Default
administrator password is blank.
Port Number allows to enter port number that is later used for viewing video. The value should be
the same as in Network port (default 10101).
In order to log in, select either Live to watch „live” video, or Playback in order to switch to playback
mode.
If the mentioned data are correct, after selection of one of aforementioned positions a login procedure
takes place.
During connection, an applet controlling al. the network functions is downloaded from the device.
After a short while, a network interface should appear.
Depending on the security settings, acceptance of the unknown ActiveX formant may be required to
ensure proper applet operation. Please select Install or change the security settings of the web browser
in order to install the applet.
Note: Interface view shown in the chapters 9.3 and 9.4 refers to the NDR-EA2416. Differences of
interface view in case of NDR-EA2208 and NDR-EA2104 are caused by the lowers number of
channels.
All rights reserved © AAT Holding sp. z o.o.
95
NDR-EA2104 / NDR-EA2208 / NDR-EA2416 User’s manual ver. 1.0
CONTROLLING THE DVR VIA INTERNET EXPLORER
9.3
Live monitoring interface.
After successful logging into a user interface using IE web browser, the following window opens:
1
2
3
4
5
6
7
8
9
Web interface description:
1
2
3
4
5
6
7
8
9
DVR setup
Closes the browser window
Switches to playback mode
Number of active audio channel
Enables overlay display mode (please press ESC key on the PC keyboard to disable overlay)
4x4 display mode
3x3 display mode
2x2 display mode
displays selected camera
For PTZ cameras, immediate control over them is possible, once the full-screen view from them had
been enabled. Method of control is identical to the one presented in chapter 8.1.
All rights reserved © AAT Holding sp. z o.o.
96
NDR-EA2104 / NDR-EA2208 / NDR-EA2416 User’s manual ver. 1.0
CONTROLLING THE DVR VIA INTERNET EXPLORER
9.4
Overview of the user interface in search and playback modes.
- switches to „live” view
- selects camera to be displayed full-screen
- Searching the records using calendar as well as timeline at the bottom of the screen. Days
marked red indicate the presence of recordings for that day. Selection of a day is performed
via pressing the LMB. Green mark present on the timeline indicates the presence of
recordings for that time period. Selection of a time interval is performed via pressing the
LMB.
- „Search by event” function. After selecting this icon, a window allowing for selecting date,
cameras and event types becomes available. After selecting OK, calendar is replaced by a
window containing a list of found events. Clicking LMB on a selected event starts
playback.
- displays the picture from a selected (camera selection is performed via single LMB click on a
desired picture) camera full-screen, but inside the window.
- displays selected cameras in quad mode
- displays selected cameras in 3x3 mode
- displays selected cameras in 4x4 mode
- enables the full screen overlay mode. To disable the function, please press the ESC key on a
keyboard
- skips to a selected timeframe of recording
- skips to the end of recording
All rights reserved © AAT Holding sp. z o.o.
97
NDR-EA2104 / NDR-EA2208 / NDR-EA2416 User’s manual ver. 1.0
CONTROLLING THE DVR VIA INTERNET EXPLORER
- „Search by text” function. After selecting this icon, the following screen appears:
Date sets the date of search. Only the days that had a text-in event are available.
From ~ To sets the timeframe for searching the database.
Search Test allows for entering the string of characters that the database will be searched for. Next,
please select Add, to add the entered characters to the search list. Selecting a character string and
clicking Remove removes the string from the list.
Case Sensitive determines whether the character size is included in search parameters or not.
After setting the parameters stated above, please select OK. Calendar is then replaced by a window
containing a list of found events. Clicking LMB on a selected event starts playback.
9.5
Remote setup overview
After selecting SETUP during „live” display, the following setup window is opened. Setup methods
are identical to those describing setup via mouse.
Note: When configuring a DVR via HTTP certain functions are unavailable.
All rights reserved © AAT Holding sp. z o.o.
98
NDR-EA2104 / NDR-EA2208 / NDR-EA2416 User’s manual ver. 1.0
Remote Live DVR to DVR connection
10. Remote Live DVR to DVR connection
NDR-EA2416, NDR-EA2208 and NDR-EA2104 are equipped with the function of preview on one
DVR images from other DVRs connected to the network.
The table shown compatibility of the particular DVR models is shown below.
SERWER (sending images)
NDR-EA2104 NDR-EA2208 NDR-EA2416
KLIENT
(displaying
images)
NDR-EA2104
YES
NO
NO
NDR-EA2208
YES
YES
NO
NDR-EA2416
YES
YES
YES
Select Remote and Live in order to configure connection parameters and connect with the other
DVR. Option available is from the additional menu level that is shown after press the ENTER/PAUSE
button.
After selecting said function, the following screen appears:
It is possible to define up to 100 Remote Sites (DVR-s using as a image servers) using above menu.
In order to close the menu select Close. To open the above menu again select Connect position from
the additional menu that is shown after press the ENTER/PAUSE button or RMB.
Mentioned menu is described on the next site.
All rights reserved © AAT Holding sp. z o.o.
99
NDR-EA2104 / NDR-EA2208 / NDR-EA2416 User’s manual ver. 1.0
Remote Live DVR to DVR connection
- selects camera for full screen display
- identical to OSD on the IR remote
- analogue of ZOOM on the IR remote
- connects/disconnects remote site
- analogue of ! E.REC on the IR remote
- changes main monitor BNC <-> VGA
- exits Remote Live menu
Adding Remote sites (servers)
In order to add remote site select Edit position, then select +.
The following screen appears:
Name allows to enter the Remote Site (server) name. The name will be displayed on the sites list.
Address allows to enter the IP address or domain name of the Remote Site (server).
Port allows to enter port number that is later used for viewing video. The value should be the same as
in NETWORK -> Address ->Network port set in the remote site (default 10101).
When the Auto Login position is not checked, each time to connect to a Remote Site entering ID and
Password will be necessary.
To connecting automatically, select Auto Login position and enter the appropriate user name and
password in the ID and Password positions, then select OK.
In order to add next remote sites select + and proceed in an analogous manner.
After add all remote sites select Done.
Editing already added Remote Sites (servers)
In order to edit already added remote site select Edit position from the Remote Live menu, then select
remote site from the list.
One site displays up to 10 remote sites. To display next/previous site use < >.
All rights reserved © AAT Holding sp. z o.o.
100
NDR-EA2104 / NDR-EA2208 / NDR-EA2416 User’s manual ver. 1.0
Remote Live DVR to DVR connection
Connecting with the Remote Sites (servers)
In order to connect with the remote site select it from the list. When for the remote site Auto Login
option was enabled, entered parameters are correct and the network connection is available the images
from the remote site will displays as shown below.
When for the remote site Auto Login option wasn't enabled, enter user name and password will be
necessary to connect with the remote site.
After connecting images from the remote site will be displayed as shown below.
In order to disconnect remote site select Disconnect from the additional menu described on the
previous site.
Note: Resolution, quality and video transmission speed depends of the settings in the NETWORK ->
Transmission menu and of the other function currently realized by the DVR.
Note: Manufacturer reserves the right for updating technical parameters and documentation without
prior notification. Printing errors possible.
All rights reserved © AAT Holding sp. z o.o.
101
NDR-EA2104 / NDR-EA2208 / NDR-EA2416 User’s manual ver. 1.0
Appendix 1 - preparing the advertising files
Appendix 1
Preparing files to display in Image option:
Files must be placed in the advertise folder
The following file format must be maintained: filename_00001.jpg, filename_00002.jpg ....
filename_00689.jpg...
Images should be in 704 x 576 resolution
Single file size should be less than 256 KB
YCbCr SubSampling 4:2:0
Total file size shouldn’t exceed 1 GB
In order to import the files, plug in your USB device containing advert files (prepared in accordance
with the parameters above) to the USB port, and select Import from the MONITORS -> Digital
Signage menu. If the files have been prepared properly, begin the importing process. After completion
select OK.
Preparing files to display in Video option:
Files to be displayed in the Video option can be prepared using any dedicated software, e.g.
VirtualDub. Source files may be a movie in AVI format, for example.
In order to prepare the advertisement files using tools described above one should:
- run VirtualDub (program can be downloaded from the Internet, this manual is described basing on the
1.9.9 version ) For proper operation of the VirtualDub software installation of additional codec may
be required.
Successful installation displays the following screen:
All rights reserved © AAT Holding sp. z o.o.
102
NDR-EA2104 / NDR-EA2208 / NDR-EA2416 User’s manual ver. 1.0
Appendix 1 - preparing the advertising files
- Select File -> Open video file ..., then select a desired file in a AVI format, to export it to
advertisements files. Successful selection displays the following screen:
- Select Video -> Filters...-> Add.... which displays the following screen:
- Select resize and OK. The following window appears:
All rights reserved © AAT Holding sp. z o.o.
103
NDR-EA2104 / NDR-EA2208 / NDR-EA2416 User’s manual ver. 1.0
Appendix 1 - preparing the advertising files
- adjust settings according to the screenshot above, then select OK twice.
- select Video -> Frame Rate ... The following window appears:
- adjust settings according to the screenshot above (enter 15 in the marked position), and then select
OK.
- select File -> Export -> Image Sequence.... The following screen appears:
All rights reserved © AAT Holding sp. z o.o.
104
NDR-EA2104 / NDR-EA2208 / NDR-EA2416 User’s manual ver. 1.0
Appendix 1 - preparing the advertising files
- It is possible to change the filenames globally under Filename position. Please bear in mind however,
that a new filename requires the “ _” character succeeding it.
In the Minimum number of digits please enter 5 as above.
In the Directory to hold position please define the destination that files will be exported to. Please
select OK to apply changes made.
- After exporting files, please close the VirtualDub software. Next, connect USB memory already
including advertise folder with exported files to the DVR USB port and select Import from the
DISPLAY->Digital Signage->Digital Signage sub-menu. If the files were prepared properly
importing process will begin. Upon completion, please select OK.
Note: Single file size should be less than 256 KB. Total file size should be less than 1 GB. When total
file size exceeds 1 GB, DVR downloads maximum allowed amount and upon exceeding the
limit it displays a proper message and halts.
Note: Changing file resolution from 720x576 to 704x576 may cause objects’ edges to become jagged.
Note: Manufacturer reserves the possibility of errors and changes in specifications without prior
notice.
All rights reserved © AAT Holding sp. z o.o.
105
NDR-EA2104 / NDR-EA2208 / NDR-EA2416 User’s manual ver. 1.0
NOTES
Notes:
All rights reserved © AAT Holding sp. z o.o.
106
NDR-EA2104 / NDR-EA2208 / NDR-EA2416 User’s manual ver. 1.0
NOTES
Notes:
All rights reserved © AAT Holding sp. z o.o.
107
2011-09-09 MM
AAT Holding sp. z o.o., ul. Puławska 431, 02-801 Warszawa, Polska
tel.: 22 546 07 00, faks: 22 546 07 59
www.novuscctv.com