1
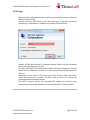
Thinstuff XP/VS Server
User Manual
Version 2.0.1
www.thinstuff.com
Thinstuff XP/VS Server User Manual – version 2.0.1
Table of Contents
1 Introduction......................................................................................................................4
1.1 General description....................................................................................................4
1.2 Manufacturer's notice................................................................................................4
2 Product features...............................................................................................................6
2.1 Basic features.............................................................................................................6
2.2 Optional features:......................................................................................................7
3 Server requirements.........................................................................................................9
3.1 Supported operating systems....................................................................................9
3.2 Hardware....................................................................................................................9
3.3 Application compatibility.........................................................................................10
3.4 Security.....................................................................................................................10
3.5 XP/VS Server in virtualized environments...............................................................11
4 Client requirements........................................................................................................12
5 Software installation and maintenance..........................................................................14
5.1 Requirements...........................................................................................................14
5.2 Installation...............................................................................................................14
5.3 Update......................................................................................................................19
5.4 Deinstallation...........................................................................................................20
6 Licensing .........................................................................................................................22
6.1 General.....................................................................................................................22
6.2 XP/VS Demo Licenses...............................................................................................22
6.3 XP/VS Full Licenses...................................................................................................22
6.4 Registration..............................................................................................................23
6.5 Coupons...................................................................................................................25
6.5.1 Redeem Coupon................................................................................................25
6.6 Activation.................................................................................................................25
6.6.1 Online Activation...............................................................................................25
6.6.2 Offline Activation..............................................................................................28
6.7 Licensing on virtual machines..................................................................................33
6.7.1 Change of the Primary Network Interface........................................................33
6.8 Reactivation.............................................................................................................35
6.9 Upgrade of Licenses.................................................................................................36
7 Usage of XP/VS Server....................................................................................................37
7.1 XP/VS Server Administrator Window......................................................................37
7.1.1 Menu Bar...........................................................................................................37
7.1.2 Selection Screen and Information Screen........................................................38
7.1.3 Status Line.........................................................................................................38
7.2 Function of Menu Bar .............................................................................................39
7.2.1 File ....................................................................................................................39
7.2.2 View...................................................................................................................40
7.2.3 Options..............................................................................................................40
7.2.4 Help ..................................................................................................................42
© 2006-2012 Thinstuff s.r.o
http://www.thinstuff.com
Page 2 of 56
Thinstuff XP/VS Server User Manual – version 2.0.1
7.3 Features in Selection- and Information-Screen......................................................42
8 TSX USB – Server.............................................................................................................45
8.1 TSX USB – Server Administrator Window................................................................45
8.1.1 Menu Bar...........................................................................................................45
8.1.2 Device Window.................................................................................................45
8.2 Enable/Disable the TSX USB Feature.......................................................................46
9 TSX USB – Client..............................................................................................................47
9.1 TSX USB - Device Sharing Window...........................................................................47
9.1.1 Menu Bar...........................................................................................................47
9.1.2 Device Window.................................................................................................48
9.2 How can I share an USB Device?..............................................................................48
10 TSX Session Broker........................................................................................................50
10.1 Requirements.........................................................................................................50
10.1.1 General............................................................................................................50
10.1.2 Supported operating systems.........................................................................50
10.2 Setup......................................................................................................................50
10.3 Usage......................................................................................................................52
11 Customer Support ........................................................................................................53
11.1 Non technical enquiries.........................................................................................53
11.2 Technical enquiries................................................................................................53
11.3 Online Resources...................................................................................................53
11.3.1 User Manuals..................................................................................................53
11.3.2 FAQ Page.........................................................................................................53
11.3.3 XP/VS Server Product Page.............................................................................53
11.3.4 XP/VS Server Price List....................................................................................53
11.3.5 Thinstuff Product Folder ................................................................................53
12 Legal Notices.................................................................................................................54
12.1 Copyright................................................................................................................54
© 2006-2012 Thinstuff s.r.o
http://www.thinstuff.com
Page 3 of 56
Thinstuff XP/VS Server User Manual – version 2.0.1
1 Introduction
1.1 General description
XP/VS Server is a cost effective multi-user Remote Desktop access solution for Windows
using the standard Microsoft Remote Desktop Protocol (RDP).
Installing XP/VS Server allows an unlimited number of users remote-access to all their
Windows desktops and applications simultaneously.
Please see the following screen-shot for details:
Because compatible Remote Desktop Connection client software is already pre-installed
on most devices and operating systems, seamless integration into existing networks
without any hardware or software changes is assured.
XP/VS Server is suitable for small and medium enterprises and offers premium support
services.
1.2 Manufacturer's notice
XP / VS Server allows simultaneous remote usage of applications. Some applications are
licensed for a single computer, while other applications may be licensed for single or
multiple users. It is always the liability of the purchaser/user to comply with the
licensing terms of any software that may be used with XP/VS Server.
© 2006-2012 Thinstuff s.r.o
http://www.thinstuff.com
Page 4 of 56
Thinstuff XP/VS Server User Manual – version 2.0.1
It is also the liability of the XP/VS Server purchaser/user to read an comply with the
licensing terms of the particular Windows operating system or to contact Microsoft for
clarification about those licensing terms.
All products mentioned in this document are copyrighted by their respective owners.
© 2006-2012 Thinstuff s.r.o
http://www.thinstuff.com
Page 5 of 56
Thinstuff XP/VS Server User Manual – version 2.0.1
2 Product features
2.1 Basic features
The following table shows the basic features of the 3 different XP/VS Server versions.
The latest online version of this feature comparison can be found at:
http://www.thinstuff.com/products/xpvs-server/#a1
© 2006-2012 Thinstuff s.r.o
http://www.thinstuff.com
Page 6 of 56
Thinstuff XP/VS Server User Manual – version 2.0.1
** only works if XP/VS Server is installed on Windows 7 or Server 2008 R2
2.2 Optional features:
The following table shows the optional features of the 3 different XP/VS Server versions.
The latest online version of this feature comparison can be found at:
http://www.thinstuff.com/products/xpvs-server/#a1
© 2006-2012 Thinstuff s.r.o
http://www.thinstuff.com
Page 7 of 56
Thinstuff XP/VS Server User Manual – version 2.0.1
For user manual please see 11.3.1 User Manuals
© 2006-2012 Thinstuff s.r.o
http://www.thinstuff.com
Page 8 of 56
Thinstuff XP/VS Server User Manual – version 2.0.1
3 Server requirements
3.1 Supported operating systems
Following table shows a list of supported server side operating systems for each XP/VS
Server version:
3.2 Hardware
Hardware requirements for XP/VS Server can vary depending on the used Windows
operating system and applications. So the following values are based on an average user
with office applications.
Minimum hardware requirements for the base system:
CPU: Pentium 4 1Ghz or similar
RAM: 512MB or more
Recommended hardware requirements for the base system:
CPU: Intel Core2 duo or similar
RAM: 1 GB or more
Recommended values for each additional RDP user:
approx. 128MB RAM and 100MHz CPU speed.
As 32-Bit Windows operating systems do not support more then max. 4 GB RAM you will
not be able to serve more then a maximum of approx. 20-30 concurrent RDP
connections.
© 2006-2012 Thinstuff s.r.o
http://www.thinstuff.com
Page 9 of 56
Thinstuff XP/VS Server User Manual – version 2.0.1
As 64-Bit Windows operating systems support more then 4GB RAM (up to 128GB or
more) and multiple physical CPUs you will be able to serve up to 100 or more concurrent
RDP connections.
e.g.: Windows 7 Business 64-Bit supports up to 128 GB of RAM and 2 physical processors
(e.g. with 2 physical Core2 Quad CPUs you will have a total of 8 logical CPU cores and
with 2 physical Quad Xeon CPUs you will even have a total of 16 logical CPU cores).
3.3 Application compatibility
Most modern Windows applications should also run with XP/VS Server if they are
compatible with Microsoft Terminal Services / Remote Desktop Services.
To verify if your application is compatible with Microsoft Terminal Services / Remote
Desktop Services please contact the software manufacturer.
For legacy applications XP/VS Server also offers a special "Application compatibility
mode" which behaves exactly like the Microsoft Terminal Server “Application
Compatibility Mode”. For details please see 7.1.7 Options
3.4 Security
To achieve the best compatibility with older Remote Desktop Connection clients XP/VS
Server is set to “allow connections from computers running any version of Remote
Desktop”.
Under Windows Vista and above it is possible to increase security by changing this
setting to “Allow connections only from computers running Remote Desktop with
Network Level Authentication”.
Please see the following screenshot for details:
© 2006-2012 Thinstuff s.r.o
http://www.thinstuff.com
Page 10 of 56
Thinstuff XP/VS Server User Manual – version 2.0.1
3.5 XP/VS Server in virtualized environments
XP/VS Server can also be installed on all supported virtualized Windows operating
systems running in virtualization environments as for instance XEN Server, XEN Desktop,
VMWARE Server, VMWARE Workstation, VMWARE View, Microsoft Hyper-V Server,
Microsoft Virtual PC, Windows 7 XP Mode, Virtual Box and others.
© 2006-2012 Thinstuff s.r.o
http://www.thinstuff.com
Page 11 of 56
Thinstuff XP/VS Server User Manual – version 2.0.1
4 Client requirements
To connect to XP/VS Server you need a Remote Desktop Connection software on the
client system which supports the standard Microsoft Remote Desktop Protocol (RDP).
RDP client software is already pre-installed or available on most devices and operating
systems, such as Microsoft Windows, Linux, Mac OS X, Java, Thin Clients, Android
devices (Smartphones, Tablets, Google TV, etc.), Apple iPhone OS (iOS) devices (iPhone,
iPod Touch, iPad), Handhelds, Notebooks, Netbooks, Tablet PCs.
On Windows XP and above the Microsoft Remote Desktop Connection client is already
pre-installed and can be found in Start Menu → All programs → Accessories → Remote
Desktop Connection.
To achieve the best results we recommend to always use the newest available Remote
Desktop Connection clients.
Following some Remote Desktop Connection (RDP) clients:
• Windows - Thinstuff TSX RDP 7 client
http://www.thinstuff.com/releases/ThinstuffTsxRemoteApp-latest.exe
• Apple iPhone OS (iOS) - Thinstuff iRdesktop RDP client
http://itunes.apple.com/app/irdesktop/id311467740?mt=8
• Windows - Microsoft RDP 7 clients
Windows XP x86(32Bit):
http://www.microsoft.com/downloads/en/details.aspx?
displaylang=en&FamilyID=72158b4e-b527-45e4-af24-d02938a95683
Windows Vista x86(32Bit):
http://www.microsoft.com/downloads/en/details.aspx?FamilyId=ac7e58f3-2fd44fec-abfd-8002d34476f4&displaylang=en
Windows Vista x64(64Bit):
http://www.microsoft.com/downloads/en/details.aspx?FamilyId=11e7a08122a8-4da7-a6c5-cdc1ac51a1a4&displaylang=en
• Max OS X - Microsoft RDP client
http://www.microsoft.com/downloads/en/details.aspx?FamilyID=68346e0d44d3-4065-99bb-b664b27ee1f0
• Mac OS X - Cord RDP client (based on rdesktop)
http://cord.sourceforge.net/
• Linux commandline - RDP clients
FreeRDP: http://www.freerdp.com/
rdesktop: http://www.rdesktop.org/
• Linux packages – RDP client packages for the major distros
Ubuntu: http://packages.ubuntu.com/maverick/freerdp-x11
Open SuSe: https://build.opensuse.org/package/show?
package=freerdp&project=X11:xfce:nilda
Fedora and Mandriva: http://rpmfind.net/linux/rpm2html/search.php?
query=freerdp&submit=Search+...&system=&arch=
© 2006-2012 Thinstuff s.r.o
http://www.thinstuff.com
Page 12 of 56
Thinstuff XP/VS Server User Manual – version 2.0.1
•
•
•
•
Debian: http://packages.debian.org/unstable/main/freerdp-x11
Gentoo: http://gpo.zugaina.org/net-misc/freerdp
FreeBSD: http://portsmon.freebsd.org/portoverview.py?
category=net&portname=freerdp
Linux GTK2+/Gnome GUI - RDP client frontends
FreeRDP: http://remmina.sourceforge.net/
rdesktop: http://tsclient.sourceforge.net/
Linux Qt/KDE GUI - RDP client frontends
rdesktop: http://krdesktop.sourceforge.net/
Android – RDP clients
http://www.xtralogic.com/rdpclient.shtml
Java - RDP clients
http://jrdesktop.sourceforge.net/
http://properjavardp.sourceforge.net/
© 2006-2012 Thinstuff s.r.o
http://www.thinstuff.com
Page 13 of 56
Thinstuff XP/VS Server User Manual – version 2.0.1
5 Software installation and maintenance
5.1 Requirements
Following requirements must be fulfilled for usage of XP/VS Server:
•
Grant users the right to connect to XP/VS Server
To grant users the right to connect to XP/VS Server remotely they have to be
added to the local “Remote Desktop Users” group on the server.
As there is no user interface to fulfil this task on Windows Home operating
systems XP/VS Server grants all Users (Administrators and Standard Users) this
right by default.
•
Firewall exceptions
At installation time XP/VS Server automatically adds an exception for incoming
TCP port 3389 in the Windows Firewall (called “Thinstuff XP/VS”).
If you use third party firewall solutions you can disable the automatic firewall
please consult the manufacturers manual for details on how to add exceptions
there.
•
Installing XP/VS Server on Microsoft Server operating systems
If you want to install XP / VS Server on a Microsoft server operating system,
please verify that the Microsoft Terminal Server Role and the Terminal Server
Licensing service is not installed.
Valid for all 32-bit (x86) and 64-bit (x64) versions of Microsoft Windows Server
2003, 2008 and 2008 R2
5.2 Installation
1. Please download the XP/VS Server installation package from
http://www.thinstuff.com/releases/ThinstuffXPVSServer-latest.zip
and execute the including XP/VS installer.
The installation package contains following files:
- XPVS Changelog.txt (XP/VS Server changelog)
- ThinstuffXPVSServer-X.X.XXX.exe” (XP/VS Server installer)
“X.X.XXXX” always shows the product version number.
- XP/VS Server Manual as .pdf file
During installation you will also have the possibility to download the additional
feature TSX RemoteApp. More details about this feature can be found in the TSX
RemoteApp Manual.
© 2006-2012 Thinstuff s.r.o
http://www.thinstuff.com
Page 14 of 56
Thinstuff XP/VS Server User Manual – version 2.0.1
2. Select your language. The language can also be changed at any time after
installation in the XP/VS Administrator GUI.
3. On the welcome dialogue, select “Next”
4. This screen shows the “End-user License Agreement”. Select
continue.
© 2006-2012 Thinstuff s.r.o
http://www.thinstuff.com
“I agree” to
Page 15 of 56
Thinstuff XP/VS Server User Manual – version 2.0.1
5. Select whether you want to install the server-part or the workstation-part of the
XP/VS Server. The workstation part is only required if you want to use the TSX USB
feature which is currently only supported with XP/VS Server Professional. It can not
be installed on the same machine as the XP/VS Server (client-part). Then select
“Next”.
© 2006-2012 Thinstuff s.r.o
http://www.thinstuff.com
Page 16 of 56
Thinstuff XP/VS Server User Manual – version 2.0.1
6. Select the destination folder for the XP/VS installation and then "Next".
7. In this step you can either select the XP/VS version you want to evaluate
(Professional, Standard or Lite)or, if you already own a valid license, select
“None, I do already have a valid license”. Then select “Next”.
© 2006-2012 Thinstuff s.r.o
http://www.thinstuff.com
Page 17 of 56
Thinstuff XP/VS Server User Manual – version 2.0.1
8. (Optional) Download TSX RemoteApp installer.
For further details please consult the TSX RemoteApp manual. Click “Next”
9. Select „Install“ to proceed
© 2006-2012 Thinstuff s.r.o
http://www.thinstuff.com
Page 18 of 56
Thinstuff XP/VS Server User Manual – version 2.0.1
10. In this step you can see the installation progress and the remaining installation
time.
11. To complete the installation, you must restart your computer! Select “Reboot
now” and then “Finish” to reboot your computer and complete the installation
process. Alternatively you can also choose “I want to manually reboot later” if
you do not wish to reboot now.
© 2006-2012 Thinstuff s.r.o
http://www.thinstuff.com
Page 19 of 56
Thinstuff XP/VS Server User Manual – version 2.0.1
5.3 Update
If you want to update your XP/VS Server installation you can download the latest
version here: http://www.thinstuff.com/releases/ThinstuffXPVSServer-latest.zip.
Up to version 1.0.406 you will have to uninstall the previous XP/VS version manually
before you can install the new version.
Since version 1.0.424 and above the installer will automatically uninstall the old version
and install the new version.
However, in both cases all your XP/VS licenses and settings will be preserved so you do
not have to worry about loosing them during the update process!
5.4 Deinstallation
If you want to uninstall XP/VS Server, do the following:
1. Click on the Start-Button, open the “Control Panel” and click “Programs”
2. Now click on “Uninstall a program” under “Programs and Features”
© 2006-2012 Thinstuff s.r.o
http://www.thinstuff.com
Page 20 of 56
Thinstuff XP/VS Server User Manual – version 2.0.1
3. Select “Thinstuff XP/VS Terminal Server ...”, and then “Uninstall”.
4. Select “Yes” in both following dialogues to complete the deinstallation process
and restart your computer. If you select “No” in the second dialogue you can
manually restart your computer later to complete the deinstallation process.
© 2006-2012 Thinstuff s.r.o
http://www.thinstuff.com
Page 21 of 56
Thinstuff XP/VS Server User Manual – version 2.0.1
© 2006-2012 Thinstuff s.r.o
http://www.thinstuff.com
Page 22 of 56
Thinstuff XP/VS Server User Manual – version 2.0.1
6 Licensing
6.1 General
Thinstuff XP/VS Server is always licensed per server, no matter if that server is a physical
computer or a virtual machine. XP/VS Server licenses allow a given number of
concurrent Remote Desktop connections to this server. Currently there are 1, 3, 5, 10
and unlimited connection licenses available. The console session is not a Remote
Desktop connection and therefore not counted in XP/VS Server licensing system. As
XP/VS Server uses its own licensing mechanisms no other licenses of similar products
can be used with XP/VS Server. In consequence - if XP/VS Server is installed without any
valid licenses, it will be impossible to establish any Remote Desktop connection.
6.2 XP/VS Demo Licenses
The XP/VS Server installer comes with a built-in 14-day demo license.
This demo-license - valid for 14 days after installation - may only be used for demo and
testing purposes.
If you register for a Thinstuff account here:
https://www.thinstuff.com/licensing/index.php?action=register
or if you have already registered at Thinstuff website you can create one additional 14day demo license and extend your demo period.
XP/VS demo licenses can be used on multiple computers at the same time.
Demo licenses must not be activated.
XP/VS demo licenses offer exactly the same features as full licenses, but at each login to
your terminal server you will receive the following demo message:
© 2006-2012 Thinstuff s.r.o
http://www.thinstuff.com
Page 23 of 56
Thinstuff XP/VS Server User Manual – version 2.0.1
6.3 XP/VS Full Licenses
Full (bought) XP/VS Server licenses have to be activated within 14 days after installation.
For details about activation please see 6.6 Activation.
After the successful activation process XP/VS licenses can not be moved to another
computer, you will get an error “Invalid hardware Key” which refuses all remoteconnections.
In that case send a request to Thinstuff to release your XP/VS license for reactivation:
email to [email protected] with the license ID and the reason for reactivation.
Full XP/VS licenses are dedicated to one single Thinstuff webshop account and can not
be moved to another account.
6.4 Registration
As registered user you have several possibilities in your “Thinstuff Account”:
•
•
•
redeem “Thinstuff Coupons” and transfer them into valid “Thinstuff XP/VS
Server-Licenses” (full version), activate and download.
manage and activate licenses
create second, additonal 14-day trial licenses for XP/VS Server (first license
included in the activation package)
To register, please proceed with the following:
1. Open your web browser and go to:
https://www.thinstuff.com/licensing/index.php?action=login
2. Now click on “Create new account”:
© 2006-2012 Thinstuff s.r.o
http://www.thinstuff.com
Page 24 of 56
Thinstuff XP/VS Server User Manual – version 2.0.1
3. Select whether you want to register as a company or as a private person. For
reason of precaution you may change this selection in the next step. You will be
redirected automatically to the next registration step.
4. To create a valid “Thinstuff Account” please fill the mandatory fields, marked
with “*” and select “Sign Up”.
5. Now you have successfully created your “Thinstuff Account”, and within a short
time you will receive an email with your password.
6. Now you can sign in your “Thinstuff Account” with your entered user-name and
password.
© 2006-2012 Thinstuff s.r.o
http://www.thinstuff.com
Page 25 of 56
Thinstuff XP/VS Server User Manual – version 2.0.1
6.5 Coupons
A "Thinstuff Shop Coupon" is a voucher code which can be redeemed into full valid licenses
in your “Thinstuff Account”.
Thinstuff Shop Coupons consist of 24 digits (6 blocks of 4 digits separated with hyphens) e.g.
„6220-0540-6299-4397-2460-9030“, which you receive from your reseller or with your
invoice.
First of all the coupon must be converted into a valid license!
If you purchase in our web-shop directly as an end-customer, the license will be
created in your Thinstuff account after successful payment (no coupon code).
If your XP/VS License has been purchased through Thinstuff partner, you will
receive a “Coupon”.
You will find your purchased license files in your Thinstuff Account, right beside
the relating shop-product.
6.5.1 Redeem Coupon
You can redeem your coupon directly during the activation and convert it into a valid
license, please proceed as described in chapter “6.6 Activation“
© 2006-2012 Thinstuff s.r.o
http://www.thinstuff.com
Page 26 of 56
Thinstuff XP/VS Server User Manual – version 2.0.1
6.6 Activation
6.6.1 Online Activation
1. Open the program “Thinstuff XP/VS Administrator” and click in the menu bar
“File” and subsequent “Add/Activate License”
2. Now it will open the activation-window. Please select “Add licenses/ Start
internet activation...”
3. In the next step, please log into your “Thinstuff Account”. Further information
concerning registration you will find in chapter “6.4 Registration”.
fig.1 Your web browser will be opened and you have to login with your user
name and your password.
© 2006-2012 Thinstuff s.r.o
http://www.thinstuff.com
Page 27 of 56
Thinstuff XP/VS Server User Manual – version 2.0.1
4a. If you have bought a license directly in our web shop
fig.1 You have to select “activate” next to your license (checkbox) and then click
“Activate/download selected license”
4b. (OPTIONAL) If you have redeemed a coupon from a Thinstuff Partner
fig.1 Enter your coupon-code and click „Convert this Coupon!“.
fig.2 Your coupon will be converted into a valid license. You have to select
“activate” and afterwards click “Activate/download selected license”.
5. Download activated License
fig. 1 Click now on the newly activated license below the item “Activated
licenses”.
© 2006-2012 Thinstuff s.r.o
http://www.thinstuff.com
Page 28 of 56
Thinstuff XP/VS Server User Manual – version 2.0.1
6. Import the license
In the following dialogue please select „Open with : Thinstuff XP/VS Terminal
Server Administrator” and “Open”, the license will be imported automatically
into your XP/VS Server Administrator.
7. Activation completed
After the successful import of the license file you will get confirmation message
“License imported successfully”
fig.1 As shown in the window, the license appears now as valid in your XP/VS
Server Administrator.
© 2006-2012 Thinstuff s.r.o
http://www.thinstuff.com
Page 29 of 56
Thinstuff XP/VS Server User Manual – version 2.0.1
6.6.2 Offline Activation
You have also the possibility of offline-activation of your XP/VS license by copying the
need information from your computer without internet access to pc with internet
access.
1. On your computer without internet access, where you have installed XP/VS
Server
fig.1 To get the activation information please open the program XP/VS Terminal
Server Administrator and select “File” and “Add/Activate License”. Subsequently
click the button “Copy hardware key to clipboard”
2. Paste the text into a text editor (e.g. Notepad), save it locally (e.g. xxx-hwkey.txt)
and copy this text-file to your computer with internet access.
3. On your computer with internet access:
fig.1 Please log into your Thinstuff-Account
© 2006-2012 Thinstuff s.r.o
http://www.thinstuff.com
Page 30 of 56
Thinstuff XP/VS Server User Manual – version 2.0.1
4a. If you have bought a license directly in our web shop
fig. 1 Switch into your account to “Overview” and click on “Activate” next to
your favoured license.
fig. 2 Please select your text file, which you have created previously based on
the activation-information.
fig. 3 Now click on „Activate license“.
4b. (Optional) If you have redeemed a coupon from a Thinstuff Partner
fig.1 If you have successfully logged into your Thinstuff Account, select
“Add/Manage a shop coupon” on the very right pane of “Overview”.
© 2006-2012 Thinstuff s.r.o
http://www.thinstuff.com
Page 31 of 56
Thinstuff XP/VS Server User Manual – version 2.0.1
fig. 2 Enter your coupon-number and click on “Add this coupon”
fig. 3 Now you have to confirm the transformation of the coupon into the
license. By doing this your coupon is not valid any more and you'll get a full valid
license instead of it.
fig. 4 The transaction was successful. Please click on „Continue to your account
overview..“.
© 2006-2012 Thinstuff s.r.o
http://www.thinstuff.com
Page 32 of 56
Thinstuff XP/VS Server User Manual – version 2.0.1
fig. 6 Please select your text file, which you have created previously based on
the activation-information.
fig 7 Now click on „Activate license“.
5. Download activated license
fig. 1 Click now on the newly activated license below the item “License file to
download an re-import”.
© 2006-2012 Thinstuff s.r.o
http://www.thinstuff.com
Page 33 of 56
Thinstuff XP/VS Server User Manual – version 2.0.1
fig. 2 In the following dialogue please select „Save“ to save the license file
locally.
6.
Copy the license file (license_XXXXX.tlic) on that computer, where XP/VS Server
is installed.
7. Import the license
fig. 1 Open the XP/VS Server Administrator on the your server machine and click
in the menu bar “File” → Import license from file in the menu bar.
fig 2 Now select your license file (.tlic) and click „Open“.
© 2006-2012 Thinstuff s.r.o
http://www.thinstuff.com
Page 34 of 56
Thinstuff XP/VS Server User Manual – version 2.0.1
8. Activation completed
fig.1 Now you receive a notice, that your license has been successfully imported,
please confirm this dialogue with “Ok”. As shown in the window, the license
appears now as valid in your XP/VS Administrator.
6.7 Licensing on virtual machines
On virtual machines the XP/VS license is always bounded on the MAC address of the
primary Windows network interface.
In following cases this may cause following problems with XP/VS licensing:
A) If you try to move or copy a virtual machine e.g. on VMWARE and select "create new
identifier" a new MAC address is created.
B) Also changing the order of the network interfaces in Windows (if. e.g. another
network interface is added - e.g. a VPN connection ...) causes the MAC address of the
primary Windows network interface to change.
C) Some visualization solutions (e.g. HyperV, Xen, etc.) will create a new MAC-address
for every new Guest OS.
In all of this cases the XP/VS license becomes invalid (“invalid hardware key”)
To avoid please make sure that the MAC address of the primary Windows network
interface does not change on virtual machines.
In case B) you can fix your problem by recreating the initial order of the Windows
network interfaces.
In case C) can be avoided by assigning a static MAC-address.
If you use a visualization platform (e.g. VMWare, HyperV, Xen, etc.), please assign a
static MAC-Address to your Virtual Guest Computers before you install XP/VS Terminal
Server.
© 2006-2012 Thinstuff s.r.o
http://www.thinstuff.com
Page 35 of 56
Thinstuff XP/VS Server User Manual – version 2.0.1
6.7.1 Change of the Primary Network Interface
Please follow the steps below to change your network adapter:
1. Go to “Start” and open “Control Panel”
2. Open in the preference window “Network and Internet” and click to “Network
and Sharing Center”
3. There you will find "Change Adapter Settings" next to the point that you open.
4. By default the menu bar is hidden, but it can be shown by “Organize → Layout
→ Menu bar”
© 2006-2012 Thinstuff s.r.o
http://www.thinstuff.com
Page 36 of 56
Thinstuff XP/VS Server User Manual – version 2.0.1
5. Now please open the "Advanced SeXngs", click to Advanced → Advanced
Settings.
6. To change the priority of a network adapter, please select the favoured adapter
from and move with the arrow key on the right. Subsequently click OK.
6.8 Reactivation
XP/VS licenses are bounded by activation to the hardware of the respective computer.
If the hardware has changed significantly (replacement of motherboard or of the entire
computer ...), in the XP/VS Server Administrator of your physical machine will be
displayed the error message "Invalid hardware key”.
For virtual machines, this case occurs, when the MAC-address of the primary Windows
network interfaces has changed (see 6.7 Licensing on virtual machines)
In such a case please contact your trader or send us an email:
[email protected]
IMPORTANT! Please let us know your customer number, license number, and the reason
for the reactivation.
After approval of reactivation by Thinstuff your license can be reactivated (see 6.6
Activation).
© 2006-2012 Thinstuff s.r.o
http://www.thinstuff.com
Page 37 of 56
Thinstuff XP/VS Server User Manual – version 2.0.1
6.9 Upgrade of Licenses
You can upgrade your XP/VS license at any time after purchase directly in our web-shop
at https://www.thinstuff.com/licensing/.
Just press the “Upgrade” button and then follow the instructions.
The upgrade price is always the price difference + EUR 10,-- / US$ 15 upgrade fee.
© 2006-2012 Thinstuff s.r.o
http://www.thinstuff.com
Page 38 of 56
Thinstuff XP/VS Server User Manual – version 2.0.1
7 Usage of XP/VS Server
7.1 XP/VS Server Administrator Window
The XP/VS Server Administrator window is divided into the following four areas:
Menu Bar
Selection Screen
Information Screen
Status Line
The respective areas of the XP/VS Server window will be described more detailed
in the following sections:
7.1.1 Menu Bar
The menu bar allows to access many function and commands of the XP/VS
Server.
If a menu item is greyed out, then this item is currently unavailable. Maybe a
local or a general group policy (if your computer belongs to a domain) for this
element is set, or not available for your license version.
© 2006-2012 Thinstuff s.r.o
http://www.thinstuff.com
Page 39 of 56
Thinstuff XP/VS Server User Manual – version 2.0.1
The following table provides an overview of the structure of the menu bar:
File
Import License From File
Add/Activate License
Exit
View
Status Bar
Options
Allow logins with blank password
Enable Application Compatibility mode
Restrict Terminal Services users to a single remote session
Disable automatic Firewall Configuration
TSX USB Server Administrator
Session Directory Configuration
Language
Help
About Thinstuff XP/VS Terminal Server
Visit the Thinstuff XP/VS Website....
Configure Product Evaluation Version ...
The various functions of the individual elements are explained in Chapter “7.1.4
Function of Menu Bar “.
7.1.2 Selection Screen and Information Screen
The main part of the XP/VS Server Administrator is represented by this two
panes – the “Selection Screen” and the “Information Screen”.
In the “Information” window will be displayed a general overview about the
currently selected item of the “Selection” window.
The various functions of each element will be explained in chapter “7.1.9
Features in Selection- and Information-Screen“.
© 2006-2012 Thinstuff s.r.o
http://www.thinstuff.com
Page 40 of 56
Thinstuff XP/VS Server User Manual – version 2.0.1
7.1.3 Status Line
In the status line you will get additional information or description of the current
item. To hide the status line, please open “View” and disable “Status Bar”
An example is shown in the following image:
7.1.4 Function of Menu Bar
7.1.5 File
Import License From File
… you can add the XP/VS Server-licenses (*.tlic)
Add/Activate License
This feature allows to activate the license and accordingly copy the hardware key
of a computer to the clipboard (see 6.6 Activation).
© 2006-2012 Thinstuff s.r.o
http://www.thinstuff.com
Page 41 of 56
Thinstuff XP/VS Server User Manual – version 2.0.1
Exit
The XP/VS Server Administrator window can be closed by choosing this menu
item (an alternative to the shortcut "ALT + F4").
7.1.6 View
Status Bar
In the status line you will get additional information/ description of the current
item. To hide the status line, please open “View” and disable “Status Bar”
7.1.7 Options
Allow logins with blank password
This item will allow those users remote access, whose password is not set.
This feature is - for security reasons - by default disabled.
Enable Application Compatibility mode
Microsoft designates this feature in Terminal Server "Application compatibility
mode".
This mode is supported by Thinstuff XP/VS Terminal Server, like in Terminal
Server from Microsoft.
To activate this option, check “Enable Application Compatibility mode” in
“Options”.
When enabled XP/VS Terminal Server behaves as MS Terminal Server.
The user-specific win.ini should be created in the user directory.
Further details on the "Application Compatibility Mode" is available here:
http://support.microsoft.com/kb/186498/en-us
http://support.microsoft.com/kb/186499/en-us
Restrict Terminal Services users to a single remote session
By default users are limited to one simultaneous Remote Desktop Connection.
You may permit several concurrent remote desktop connections for one user by
disabling this menu item.
Disable automatic Firewall Configuration
RDP and Session Directory exceptions in the Windows Firewall will be created
automatically during installation of XP/VS Server.
© 2006-2012 Thinstuff s.r.o
http://www.thinstuff.com
Page 42 of 56
Thinstuff XP/VS Server User Manual – version 2.0.1
XP/VS Server will also verify these exceptions at every system reboot and will
correct them automatically if any changes are detected.
You can disable this feature in the menu, if you prefer managing your Windows
firewall manually or if you are using any other third party firewall products.
TSX USB Server Administrator
You are able to start “TSX USB Server Administrator” via this item or,
alternaZvely, by “Start” → “All Programs” → “Thinstuff” → “Thinstuff TSX USB
Server Administrator”.
“TSX USB” is only available in XP/VS Server Professional.
TSX USB allows to forward client attached USB devices (which cannot be
forwarded with existing RDP mechanisms) over RDP to your XP/VS Server. These
devices seem to be connected locally on the server.
Thinstuff TSX USB Client is required on client-side.
During the installation proceed as described in chapter “5.2 Installation“, but at
point 5 – you have to enable the client-part instead of the server-part.
More informations about TSX USB can be found here:
8 TSX USB – Server
9 TSX USB – Client
Session Directory Configuration …
TSX Session Broker is a feature integrated into XP/VS Server (Standard and
Professional) which allows the XPVS-pc to take part in a load balanced Terminal
Server farm based on Microsoft Session Directory (Windows Server 2003) or
Session Broker (Windows Server 2008).
(see chapter 3.1 Supported operating systems)
More informations about TSX Session Broker can be found at chapter 10 TSX
Session Broker!
Language
Here you can change the interface language of XP/VS Server. Currently the
following languages are available:
• English
• German
• Spanish
The change-over of the language of XP/VS Server will be executed by restarting
the application.
© 2006-2012 Thinstuff s.r.o
http://www.thinstuff.com
Page 43 of 56
Thinstuff XP/VS Server User Manual – version 2.0.1
7.1.8 Help
About Thinstuff XP/VS Terminal Server
Program-version of XP/VS Server is shown. This information can be useful for
support proposes.
Visit the Thinstuff XP/VS Website
This menu item opens the XP/VS Server product page in your default web
browser.
Configure Product Evaluation Version
If you are in a trial period, by dint of this menu item you can switch between the
versions of XP/VS Server. Consequently this is the best way to find out, which
version will suite your needs. If you have changed the evaluation version, you
have to restart your operating system.
7.1.9 Features in Selection- and Information-Screen
The Selection- and Information-Screen form a unit. So you are able to view e.g.
general information about your licenses by selecting on the left pane “Terminal
server” (Selection Screen).
Right below “Terminal Servers” of your domain will be listed. If you select the
server's name of your computer, on the right pane you will see the information
of the logged in users.
© 2006-2012 Thinstuff s.r.o
http://www.thinstuff.com
Page 44 of 56
Thinstuff XP/VS Server User Manual – version 2.0.1
Mark one favoured user on the right pane with a right-click, now you can select
between the following options:
Send Message
Connect
Disconnect
Log Off
Remote Control
Send Message: by choosing this option you are able to send a message to
connected remote-users. If you leave this field blank, the remote-user will get
the message “Error”.
Connect: you are able to reconnect to a disconnected remote desktop session.
Disconnect: with this option you may disconnect the session for the selected
Remote-Desktop-user.
Log off: You can log off the connected Remote-Desktop-user.
Remote Control: by using this option you can mirror connected RemoteSessions. This feature may be useful for support purposes.
© 2006-2012 Thinstuff s.r.o
http://www.thinstuff.com
Page 45 of 56
Thinstuff XP/VS Server User Manual – version 2.0.1
8 TSX USB – Server
The TSX USB feature is only integrated in the Professional version of the XP/VS
Server. So you need a valid XP/VS Professional license on your server machine to
use that feature. There are no separate licenses for TSX USB available. You will
find this licensing information in chapter 6 Licensing !
8.1 Enable/Disable the TSX USB Feature
Before you want to use the TSX USB feature you have to enable on server-side!
To enable the TSX USB feature on your XP/VS Server machine please do the
following :
1. Run “XP/VS Server Administrator” , click "Options" and afterwards "TSX USB
Server Administrator"or open the TSX USB – Server Administrator directly.
2. The TSX USB Server Administrator window will open.
3. Click "Options" and "TSX USB Configuration".
© 2006-2012 Thinstuff s.r.o
http://www.thinstuff.com
Page 46 of 56
Thinstuff XP/VS Server User Manual – version 2.0.1
4. Mark checkbox "Enable USB Device Redirection" field and choose one of the two
options :
• Connect to any devices
to see all USB devices which are redirected from your clients
• Only connect to the following USB devices
only devices with specific vendor and device IDs will be redirected to your
server machine
More informations about the client-side configuration you will find at chapter 9
TSX USB – Client!
8.2 TSX USB – Server Administrator Window
8.2.1 Menu Bar
The following table provides an overview of the structure of the menu bar:
File
Exit
View
Refresh
Options
TSX USB Configuration
Allow Non-Admins to launch this utility
Help
About...
© 2006-2012 Thinstuff s.r.o
http://www.thinstuff.com
Page 47 of 56
Thinstuff XP/VS Server User Manual – version 2.0.1
8.2.2 Device Window
The “Device Window” offers an overview which devices can be redirected within
the RDP session to your server machine.
You are able to disconnect these redirected devices from your server and call up
USB device-properties.
With a right-click on a device you'll see the available functions for this hardware.
The 'Properties' window will display several information of your USB device:
© 2006-2012 Thinstuff s.r.o
http://www.thinstuff.com
Page 48 of 56
Thinstuff XP/VS Server User Manual – version 2.0.1
9 TSX USB – Client
9.1 TSX USB - Device Sharing Window
9.1.1 Menu Bar
The following table provides an overview of the structure of the menu bar:
File
Exit
View
Refresh
Options
Allow Non-Admins to launch this utility
Help
About...
9.1.2 Device Window
The Device Window gives you an overview which devices are physically
connected to the client machine and which are shared to a server machine
within a remote desktop session.
As shown in figure above those devices are listed which are connected locally
and labelled separately which are redirected over RDP to the server.
© 2006-2012 Thinstuff s.r.o
http://www.thinstuff.com
Page 49 of 56
Thinstuff XP/VS Server User Manual – version 2.0.1
This device cannot be shared, you need to controll your local computer
(available, any error already on local side, etc.)
9.2 How can I share an USB Device?
Before you connect to the Server per RDP please do the following :
1. Make sure that your device is working properly on the client computer!
2. Run the "TSX USB Client" on the client machine.
3. Click with the right-mouse-button on the device you want to share and click
“Share USB Device”.
4. The Device is now released to redirect – shown with 'hand' icon.
5. When you connect to your server via RDP your shared device will appear in the
TSX USB Server Administrator.
© 2006-2012 Thinstuff s.r.o
http://www.thinstuff.com
Page 50 of 56
Thinstuff XP/VS Server User Manual – version 2.0.1
Keep in mind that everybody can access the device because for the server it's
like locally connected device. Please make sure that you have enabled the TSX
USB redirection on the server-side - otherwise the redirection will not work!
© 2006-2012 Thinstuff s.r.o
http://www.thinstuff.com
Page 51 of 56
Thinstuff XP/VS Server User Manual – version 2.0.1
10 TSX Session Broker
10.1 Requirements
10.1.1 General
•
•
•
The TSX Session Broker feature requires a XP/VS Standard or Professional license
(more information about installing and configuring the XP/VS Server can be
found at chapter 5 - Software installation and maintenance- page 14)
The computer with XP/VS Terminal Server installed must be joined to a Windows
Server Domain.
Please note that Windows 2003/2008/2008-R2 Server is required, session
directory/broker service enabled and running.
The session directory/ broker services are included in all Windows Server
2003/2008/2008-R2 Editions (even Small Business Editions).
10.1.2 Supported Operating Systems
TSX Session Broker is supported on following x86 (32 Bit) and x64 (64 Bit)
versions of the server-side operating systems :
• Windows XP x86 Professional
• Windows XP x64
• Windows Vista Business/Ultimate/Enterprise
• Windows 7 Professional/Ultimate/Enterprise
• Windows Server 2003 R2 SBS/Standard/Enterprise (SP1/SP2)
• Windows Server 2008 R2
10.2 Setup
1. Enable Session Directory Service
If you are using a Windows 2003 Server with Session Directory:
Open "Services" from "Administrative Tools" and locate the service
called "Terminal Services Session Directory"
If you are using a Windows 2008/2008-R2 Server with Session Broker:
Open the Server Manager and install the TS Session Broker Role Service
from the Terminal Services Roles.
© 2006-2012 Thinstuff s.r.o
http://www.thinstuff.com
Page 52 of 56
Thinstuff XP/VS Server User Manual – version 2.0.1
2. Define which member servers are allowed to join your Session
Directory/Broker
In order to allow a Terminal Server to join a Session Directory or Session Broker
you have to add the computer to a local group called "Session Directory
Computers". This local user group is basically used to define a list of Terminal
Server computers that can join Session Broker/Directory.
On the Windows Server computer running the Session Directory or Session
Broker service:
• Open "Local Users and Groups"
• Locate the group called "Session Directory Computers"
• Add all participating XP/VS Terminal Server Computers to this group
3. Join all required XP/VS Terminal Servers
On each single XP/VS Terminal Server that will participate in the Session
Directory / Session Broker:
•
•
•
•
•
•
Open Thinstuff XP/VS Terminal Server Administrator
Select "Session Directory Configuration ..." - menu bar “Options”
Activate the check box "Join a TS Session Directory or TS Session Broker"
Enter the name of the Windows Server 2003/2008 computer running the Session
Directory / Session Broker service
Enter a common name for your farm/cluster (e.g. "myfarm1").
Unless you know what you're doing please enter exactly the same string on all
your XP/VS Terminal Servers!
And - unless you know better - enable the check box "Use IP address redirection"
4. Load Balancing
If you want to use Round robin DNS load balancing:
•
•
Add the farm name (e.g. "myfarm1") as a second hostname (A entry) for each
XP/VS Terminal Server participating in the load balanced Terminal Server farm
Don't forget that the Remote Desktop Clients must be configured to connect to
this farm name (e.g. "myfarm1") instead of connecting to a hostname or IP
address of a specific Terminal Server!
© 2006-2012 Thinstuff s.r.o
http://www.thinstuff.com
Page 53 of 56
Thinstuff XP/VS Server User Manual – version 2.0.1
10.3 Usage
After you have configured the server machines you are able to connect with your
Remote Desktop Client.
Connect with your RDP Client to the farm name (e.g. "myfarm1") instead of
connecting to a hostname or IP address of a specific Terminal Server.
Because of DNS Round Robin the Remote Desktop Clients will get distributed
equally among the member servers.
On Logon the XP/VS Terminal Server will consult the Session Directory or Session
Broker server to determine if there is an existing disconnected RDP session for
that user .
Depending on the result of that query the XP/VS Terminal Server will either
accept the connection or redirect the RDP client to the server running the
previously disconnected RDP session.
The XP/VS Terminal Servers will automatically update the session's state
(connected, disconnected, deleted) on the Session Directory / Session Broker.
© 2006-2012 Thinstuff s.r.o
http://www.thinstuff.com
Page 54 of 56
Thinstuff XP/VS Server User Manual – version 2.0.1
11 Customer Support
11.1 Non technical enquiries
Non technical enquiries should be addressed to [email protected]
11.2 Technical enquiries
Technical enquiries should be addressed to [email protected] together with
the following information:
•
•
•
XP/VS License-ID
Email address of your Thinstuff account
installed Thinstuff components
11.3 Online Resources
11.3.1 User Manuals
All user manuals can be found here:
http://www.thinstuff.com/downloads-support/downloads/
11.3.2 FAQ Page
On this page you will find answers to the most frequently asked questions.
http://www.thinstuff.com/faq/
11.3.3 XP/VS Server Product Page
The XP/VS Server product page can be found here:
http://www.thinstuff.com/products/xpvs-server/
11.3.4 XP/VS Server Price List
The complete price list of various editions of XP/VS Server can be found here:
http://www.thinstuff.com/releases/pricelist/PL-XPVS-Enduser-E-USD-latest.pdf
http://www.thinstuff.com/releases/pricelist/PL-XPVS-Enduser-E-EUR-latest.pdf
11.3.5 Thinstuff Product Folder
All Thinstuff Product folders can be found here:
http://www.thinstuff.com/downloads-support/downloads/
© 2006-2012 Thinstuff s.r.o
http://www.thinstuff.com
Page 55 of 56
Thinstuff XP/VS Server User Manual – version 2.0.1
12 Legal Notices
12.1 Copyright
© 2012 Thinstuff s.r.o. All rights reserved.
Thinstuff XP/VS Server User Manual for Windows
Thinstuff logos and trademarks are trademarks (the "Marks") of Thinstuff. You
are not permitted to use the Marks without the prior written consent of
Thinstuff.
All other marks and names mentioned here in may be trademarks of their
respective companies.
A detailed description can be found here:
https://www.thinstuff.com/licensing/index.php?action=termsandconditions
© 2006-2012 Thinstuff s.r.o
http://www.thinstuff.com
Page 56 of 56