1
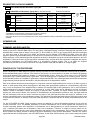
Immucor Transplant Diagnostics, Inc. 550 West Avenue, Stamford, CT 06902 USA Tel: (203) 328-9500 or (888) 329-0255, Fax: (203) 328-9599 WWW.IMMUCOR.COM Product Documentation and Translations available at: www.Immucor.com PRODUCT INSERT LIFECODES ® HLA Null Allele SSO TYPING KIT For In Vitro Diagnostic Use TABLE OF CONTENTS Definition of Symbols…………………….. Reagents by Catalog Number…………... Intended Use………………………………… 1 2 2 Directions for Use………………………… Summary and Explanation………………. Principles of the Procedure…………..... 2 2 5 Reagents…………………………………….. 3 C. Hybridization………………………….. D. Analyze sample with Luminex Instrument.......................................... Results………………………………………. A. Identification………………………….. B. W arnings and Cautions……………… C. Storage Instructions…………………. D. Purification or Treatment for Use.... E. Instability Indications………………… Instrument Requirements……………….. Specimen Collection and Preparation.. Procedure……………………………………. 3 3 3 3 3 3 3 4 Quality Control……………………………. Limitation of the Procedure……………. Troubleshooting………………………….. Expected Values………………………….. 7 7 8 8 A. Materials Provided…………………… 4 Specific Performance characteristics. References…………………………………. Limited License…………………………… Trademarks Used…………………………. Appendix A…………………………………. Gel Electrophoresis…………………….. 8 8 8 9 9 9 Gel Interpretation……………………….. 9 B. Materials required, but not Provided... 4 C. Additional Materials to be Provided by the User…………………................. A. Purify Genomic DNA………………… B. Amplification………………............... 4 4 4 6 6 4 DEFINITION OF SYMBOLS (Product Labels and Supplemental Documents) Batch Code Catalog Number Temperature Limitation Upper Limit of Temperature Use By Date Keep away from light Sufficient for N Tests Do Not Freeze Caution – See instructions for Use Consult instructions for use Manufacturer Authorized Representative in the European Community Danger Page 1 of 9 LC1437CE.3 (05/15) REAGENTS BY CATALOG NUMBER LCT -N LIFECODES HLA-Null Allele SSO Typing Kit Product #628939 LC-N LIFECODES HLA-Null Allele Typing Kit for use with Luminex Reagent Product # 629100-50 Product Number Fill volume Storage MX-N1 LIFECODES Null Allele Class 1 Master Mix 629001 870 µL 2 to 8°C MX-N2 LIFECODES Null Allele Class 2 Master Mix 629002 870 µL 2 to 8°C BM-N LIFECODES Null Allele Probe Mix 629003 810 µL x 2 2 to 8ºC Protect From Light DS Dilution Solution 628515 19.7 mL 18 to 30ºC TAQ LIFECODES Taq Polymerase 628075 25 µL x 2 -10ºC to -30ºC ‡ 50 Sufficient for 50 tests ‡ Probe Mixes are light sensitive: keep exposure to light at a minimum. CAUTION: Do not use components past their expiration dates. CAUTION: Deviations from recommended protocol and required materials including LIFECODES Taq Polymerase have not been validated. INTENDED USE DNA Typing of Class I and Class II Alleles in conjunction with LIFECODES HLA SSO Typing kits. SUMMARY AND EXPLANATION DNA-based HLA typing using PCR amplified DNA is a common laboratory procedure. PCR amplification of DNA is used as the means to enrich for a selected DNA region. For HLA typing, a subsequent assay is utilized to determine the properties of the amplified DNA. Several types of assays, such as SSP (1), direct SSOP (2), RFLP (3) and reverse SSOP dot blot technologies (4), have been used in HLA typing. Like SSOP and reverse dot blot methods, LIFECODES HLA-SSO Typing kits utilize sequence-specific oligonucleotides (SSOs) to identify which HLA alleles are present in a PCR amplified sample. It is the set of SSOs employed, not the methodologies that determines the ability to distinguish among the various alleles present in the PCR amplification. Whereas reverse dot blot and SSOP methods employ enzyme labels and colorimetric substrates that require subsequent development, the LIFECODES assay is a homogenous multiplex system. That is, all SSOs are analyzed simultaneously and the entire assay is carried out in a single reaction vessel with the addition of a single reagent. PRINCIPLES OF THE PROCEDURE The LIFECODES HLA-SSO Typing procedure is based on the hybridization of labeled single stranded PCR product to SSO probes. Amplification of DNA using PCR typically employs equimolar amounts of both forward and reverse primer to generate a double-stranded DNA product. However, if the amount of one primer is in excess relative to the other, the reaction will generate some single-stranded DNA product in addition to double-stranded product. During the initial cycles of the LIFECODES amplification step, double-stranded DNA is generated. Once the limiting primer is exhausted, the remaining primer uses the double-stranded product as a template for generation of single-stranded DNA. This method generates both double stranded and single stranded products that upon denaturation, will both participate in the hybridization reaction. Each of the different probes may be homologous to a sequence within the amplified DNA that is unique to an allele or group of alleles. In other words, these probes are designed so that each probe preferentially hybridizes to a complementary region that may or may not be present in the amplified DNA. In addition, the amplified DNA is also hybridized to one or more Consensus probes homologous to sequences present in all the alleles of a locus. SSO Typing can be affected by the type of biological material, method of purification, amount and integrity of genomic DNA. Therefore, the signal obtained for the Consensus probe(s) can serve as an indicator of the success of the amplification and hybridization procedures. Also, the signal obtained with the Consensus probe can be used to normalize the signal of the allele specific probes and correct for variations in the amount of amplified product in the hybridization reaction. The analysis of the results generated from the SSO typing can be used to determine the presence or absence of particular DNA sequences in amplified DNA and to identify the possible alleles in the sample. For the LIFECODES HLA-SSO Typing procedure, probes are attached to Luminex Microspheres designed for use with the Luminex Instrument. Up to 100 different populations of Luminex Microspheres can be mixed together and analyzed by the Luminex Instrument because each population of microspheres can be distinguished by its unique fluorescence signature or color. A different SSO probe can be attached to each color microsphere. Therefore, a mixture of several probes can be distinguished from each other by virtue of their association with particular color microspheres. The Luminex Instrument is also able to quantify the relative amounts of labeled PCR product hybridizing to each Luminex Microsphere. Therefore, the relative signal obtained with the SSO probes in the LIFECODES assay, as with other SSOP methods, can be used to assign the probes Page 2 of 9 LC1437CE.3 (05/15) as having positive or negative reactivity with the amplified DNA sample (see Results section). This in turn provides the information needed to determine the HLA phenotype of the sample. Null 1 is used as a complementary assay to increase the resolution of LIFECODES HLA-A, HLA-B, HLA-C assays, solving the allelic ambiguity between A*24:02/24:09N, B*51:01/ 51:11N, and C*04:01/04:09N. Null 2 is used as a complementary assay to increase the resolution of LIFECODES HLA-DRB3,4,5 assay, solving the allelic ambiguity between DRB4* 01:03/ DRB4* 01:03:01:02N, and DRB5*01:02/DRB5*01:08N. Merging of the information from the Null 1 or 2 assay with the corresponding locus-specific LIFECODES SSO Typing kit assay results to generate a suggested typing of a sample can be conducted through manual analysis or software analysis. For manual analysis, the output of the Null 1 or 2 assays identifies the presence of absence of specific null alleles. The result from the corresponding locus-specific LIFECODES SSO typing kits may carry ambiguities involving these null alleles (e.g., A*24:02/24:09N, B*51:01/ 51:11N, C*04:01/04:09N, DRB4* 01:03/ DRB4* 01:03:01:02N, or DRB5*01:02/DRB5*01:08N). If the null allele is identified with the Null product, all allele combinations that do not include the null allele can be eliminated from the results obtained from the corresponding locus-specific LIFECODES SSO typing kit. If the null allele is absent based on the Null product result, all allele combinations that include the Null allele can be eliminated from the results obtained from the corresponding locus-specific LIFECODES SSO typing kit. In the product insert and in the software, this process of combining the results of the two products is referred to as merging the results. REAGENTS A. Identification See tables in Reagents by Catalog Number section for complete listing of catalog numbers. B. Warnings or Cautions 1. For In Vitro Diagnostic Use. 2. Separate pipettes should be designated for Pre-PCR manipulations as well as for Post-PCR manipulations. 3. Biohazard: All biological and blood samples should be treated as potentially infectious. Use Universal Precautions when handling. 4. Dilution Solution, Probe mixes, TAQ Polymerase and R-Phycoerythrin Conjugated Streptavidin contain hazardous compounds. Avoid contact with skin and eyes and dispose of all materials after use according to local regulations. See Material Safety Data Sheets for additional information. C. Storage Instructions 1. Refer to kit component packaging label for proper storage temperatures. 2. Probe mixes and R-Phycoerythrin Conjugated Streptavidin are light sensitive, KEEP FROM LIGHT; DO NOT FREEZE. 3. Do not use components past their expiration date. D. Purification or Treatment Required for Use See “Specimen Collection and Preparation.” E. Instability Indications 1. If salts have precipitated out of solution during shipping or storage, resolubilize completely prior to use by vortexing at room temperature (18 to 30°C). 2. Do not use R-Phycoerythrin Conjugated Streptavidin that has been frozen during shipment or storage. INSTRUMENT REQUIREMENTS 1. Luminex Instrument and XY Platform (Product Number 888300, 888310) 2. The following Thermal Cyclers have been validated: 96-Well GeneAmp® PCR System 9700 set to MAX mode (Base Cat # N8050200, Gold Block Cat #4314878), Veriti™ 96-Well Thermal Cycler set to 9700 MAX mode (Cat #4375786). Refer to Table 2 for maximum ramp speeds. Caution: Other thermal cyclers and ramp speeds have not been validated. SPECIMEN COLLECTION AND PREPARATION A. Human DNA can be purified from Whole blood, Buffy coats and Buccal swabs using a validated method that meets the criteria below. DNA extracted from blood preserved in EDTA and ACD (Acid Citrate Dextrose) have been tested and shown to perform in this assay. B. DNA extracted from blood preserved in heparin cannot be used in this assay. Other preservatives have not been tested. C. The isolated DNA should be in 10 mM TRIS, pH 8.0-9.0, or in nuclease free water. If a chelating agent such as EDTA is present the final concentration of the chelating agent should not exceed 0.5 mM. D. The presence of alcohol, detergents or salts may adversely affect DNA amplification. E. Final DNA concentration should be 10 to 200 ng/µL. F. Absorbance measurements of the DNA sample at 260 and 280nm should give a ratio of 1.65 to 2.0. G. DNA can be used immediately after isolation or stored at –20ºC for up to 1 year. Repeated freeze/thawing should be avoided since this can result in DNA degradation. Page 3 of 9 LC1437CE.3 (05/15) PROCEDURE Caution: Deviations from recommended protocol and required materials have not been validated A. Materials Provided (See tables in Reagents by Catalog Number section for specific information) • • • Appropriate Master Mix (MX) Appropriate Probe Mix (BM) Dilution Solution (DS) • • Threshold Table(s), Probe Hit Chart(s) LIFECODES Taq Polymerase* (LIFECODES Cat. No 628075) x 2 B. Materials, Required, but Not Provided The following materials were used in the validation of the kit: Luminex Sheath Fluid (1x LIFECODES Cat. No. 628005) Nuclease-free water (LIFECODES Cat. No. 757003; 20mL) ® PCR tubes and caps - Corning Thermowell Tube Strips (Costar® Cat. No. 6542, LIFECODES Cat. No. 888640) or Corning® Thermowell PCR 96 well plates (Cat. No. CLS6551) or Themoscientific AB Gene® Superplate 96-well PCR plate (Cat. No. AB-2100) • • • • • • • Costar® plate (Costar® Cat. No. 6509, LIFECODES Cat. No. 888630) Thermowell Clear Polyethylene Tape (Costar® No. 6524 (LIFECODES Cat. No. 888635) R-Phycoerythrin Conjugated Streptavidin (SA-PE), 1mg/mL (LIFECODES Cat No. 628511) Luminex Calibration Kits (Luminex 100/200 Calibration Kit, Luminex 100/200 Performance Verification Kit, LIFECODES Cat. Nos. 628018 and 628019 respectively) C. Additional materials to be provided by the user • • • • • • • • • • Vortex Mixer Silicone compression Mat. Axygen Scientific # CM-FLAT or equivalent Bath Sonicator Microcentrifuge Barrier filter tips Pipettors, Multichannel pipettors and tips (1-20µL, 20-200µL,1000µL) Spreadsheet analysis software Heat Block 70% Isopropanol or 20% Bleach Retainer tray – Applied Biosystems #403081 (for use with the 9700 thermal cycler only) DIRECTIONS FOR USE NOTES: • Probe mixes and SA-PE are light sensitive: keep away from light and do not freeze. • Warm beads at 55º to 60ºC for at least 5-10 minutes to thoroughly solubilize components in probe mixture. • Sonicate briefly (~15 sec), then vortex probe mix for about 15 seconds to thoroughly suspend the beads. • Take extreme caution in the aliquoting process, using calibrated pipettes. Failure to do so may result in reagent loss and sample failure. • All temperatures must be precisely maintained. Fluctuations as little as +/- 0.5°C can affect results. • At the hybridization stage, samples should not remain in the diluted state at 56°C for more than 5 minutes (see Results section). It is recommended to assay the amplified samples as soon as possible. If the samples cannot be run on the Luminex Instrument the same day, the amplified product can be stored up to 3 days at 2-8ºC prior to use. For longer storage, store at –20ºC up to one week until ready to assay. The amplified product can only be frozen and thawed once. Repeated freezing and thawing will result in degradation of amplified samples and will yield poor results if assayed. A. Purify genomic DNA, using method of choice; final concentration should be 10 to 200 ng/µL. Adjust, if necessary, with nuclease free water. Keep all samples at similar concentrations. B. DNA amplification (PCR) 1. Allow the Master Mix to warm to room temperature (18 to 30°C). 2. Gently vortex for approximately 10 seconds. This will ensure the salts are in solution. Spin briefly (5 – 10 seconds) in microcentrfuge to bring contents to the bottom of the tube. 3. Using Table 1 below, prepare the components for amplification for n+1 reactions using the indicated amount of each component per reaction (except for DNA). Bring to a final volume of 20µL per reaction with nuclease free water. Gently vortex. 4. Pipette the appropriate amount of Genomic DNA (40 to 120ng) into the PCR tubes. 5. Aliquot the amplification mix into the PCR tubes containing the genomic DNA. (The total volume of amplification mix and genomic DNA should equal 20µL for each sample reaction.) 6. Cap tubes tightly to prevent evaporation during PCR. Page 4 of 9 LC1437CE.3 (05/15) 7. Place samples in the thermal cycler and run program, see Table 2 and 3. Table 1. Reaction Components for Amplification Component Amount per PCR sample reaction LIFECODES Master Mix 6µL Genomic DNA 10-200ng/µL Total of ~80ng LIFECODES Taq Polymerase 0.2µL (1U) Nuclease-free water To 20µL final volume Table 2. Thermal Cycler Conditions for Amplification Thermal Cycler GeneAmp® PCR System 9700 Veriti™ 96-Well Thermal Cycler Mode (Ramp speed) MAX mode (3.9°C/sec) 9700 MAX mode (3.9°C/sec) Table 3. Thermal Cycler Conditions for Amplification Step Temperature and Incubation Time # of Cycles 1 95º C for 3 min 1 95º C for 15 sec 60º C for 30 sec 2 12 72º C for 30 sec 95º C for 10 sec 63º C for 30 sec 3 28 72º C for 30 sec 4 72º C for 2 min 1 5 4º C forever 1 Note: To be sure of sample amplification, refer to Product Gel Electrophoresis (Appendix A). C. Hybridization Be sure hybridization buffer components of the LIFECODES probe mix are solubilized and that the beads are thoroughly suspended. • Turn on the Luminex Instrument and XY Platform to allow for 30 minute warm-up. 1. Warm probe mix in a 55º to 60ºC heat block for at least 5 -10 minutes to thoroughly solubilize components in probe mixture. 2. Sonicate briefly (~15 sec), then vortex probe mix for about 15 seconds to thoroughly suspend the beads. 3. Combine 15 µL of the appropriate probe mix with 5 µL of locus specific PCR product into each well of a thermal cycler 96 well plate • (Costar® No. 6509). When aliquoting probe mix to more than 10 wells, gently vortex probe mix after each set of ten. Seal plate with polyethylene tape (Costar® No. 6524). Place silicone compression mat on top of plate prior to hybridization. 4. 5. Hybridize samples under the following incubation conditions: Table 4. Thermal Cycler Conditions for Hybridization 97ºC for 2 minutes 47ºC for 10 minutes 56ºC for 8 minutes 56ºC HOLD Ensure that the detection laser on the Luminex Instrument is turned on at least 30 minutes before the hybridization ends. 6. While the samples are hybridizing, prepare a 1:200 SA-PE mixture / Dilution Solution. Combine 170µL Dilution Solution (DS) and 0.85 µL 1mg/mL SA-PE per sample. It is recommended to make enough Dilution Solution Mixture for n+1 samples to account for pipetting loss. (See Table 5) 7. Keep Dilution Solution/ SA-PE mixture in the dark, at room temperature; SA-PE is light sensitive! The Dilution Solution may be warmed at 45ºC for 5 minutes and vortexed upon arrival to ensure all components are in solution. Dilution Page 5 of 9 LC1437CE.3 (05/15) solution must be at room temperature (18 to 30°C) before making the mixture. Prepare prior to use and discard any remaining portion. Table 5. Dilution Solution Preparation Volumes # of Samples Dilution Solution (DS) SA-PE 1 5 10 20 50 170µL 850µL 1700µL 3400µL 8500µL 0.85µL 4.25µL 8.5µL 17µL 42.5µL Note: DO NOT CANCEL HYBRIDIZATION PROGRAM BEFORE REMOVING THE TRAY FROM THE THERMAL CYCLER! 8. At the 56ºC hold, while the tray is on the thermal cycler, dilute each sample with 170µL of the prepared Dilution Solution/ SA-PE mixture. It is critical to dilute all samples within 5 minutes (following the 8 minute 56°C HOLD step). 9. Remove the sample tray from the thermal cycler and place in the Luminex Instrument. D. Analyze sample using the Luminex Instrument* For best results, assay the samples immediately using the Luminex Instrument. 1. Turn on the Luminex Instrument between 30 minutes and 4 hours before assaying the samples. 2. Prior to analyzing the samples on the Luminex Instrument, set up a Batch Run by which the samples will be analyzed. a) Select Create a New Batch from the File menu. • For example, if analyzing for Null Class I, add Batch for Null Class I • The Batch Template is provided on website and is named, in this case, Null1 xxxxxx (lot#). • Please note that the template versions are lot number specific and correspond to the probe mix lot numbers. • Follow the stepwise instructions that appear on the screen for creating batches. • When naming the batch, do not include commas in the name because information after a comma will be lost upon exportation of the data. • For further instructions on creating batches and multibatches, refer to the Luminex User’s Manual b) Click the eject icon to eject the plate holder. Place the 96 well thermal cycler plate containing the samples in the XYP heater block present on the plate holder. c) Click the Retract icon. The samples are now ready to be analyzed. A prime step should be performed before starting the run. d) After the samples have been run through the instrument, a sanitization step with 70% Isopropanol or 20% household bleach should be performed followed by two wash steps. The instrument can be turned off at this point if it is not going to be used for the remainder of the day. 3. After a batch is complete, the data is exported as a comma separated values (csv) file. These files are named ‘OUTPUT.CSV’ and saved in a folder with the Batch Name. This data is then available for making typing assignments as described below. *Refer to Luminex User’s Manual for instrument operation, including daily startup, calibration, maintenance, and shutdown procedures. RESULTS Sample typing can be done as follows: The generated CSV files can be opened and the data processed with common spreadsheet programs such as Microsoft Excel, Lotus 123, Corel Quattro Pro, or similar software. Analysis is comprised of the following steps: 1) Verify that the Number of Events for each SSO in each sample is at least 60. This information is found in the DataType: Count section of the CSV file. 2) Determine that the values for the Consensus probes for each sample are above their minimum Median Fluorescent Intensity or MFI. The minimum thresholds are lot specific and can be found in the Threshold Table. Caution: • To obtain reliable results, there must be sufficient data gathered by the Luminex Instrument. • Collect at least 60 events for each SSO. 3) Subtract the Background Control value for each probe from the sample values producing the background corrected data set. Background Control values are found in the Threshold Table and are lot specific. Background values are average MFI values for each bead to compensate for background noise due to bead variation. Page 6 of 9 LC1437CE.3 (05/15) 4) For each sample, divide the background-corrected data for each probe by the background-corrected value for the corresponding consensus probe producing the normalized data set. MFI (Probe) – MFI (Control blank for probe) MFI (Consensus) – MFI (Control blank for consensus) 5) For each probe, record the normalized value on the Threshold Table Worksheet. 6) Once all values have been assigned, the probe hit pattern (i.e., the combination of all positive and negative assignments for a given sample) can be compared with the Probe Hit Chart (LC1024) provided on website. Caution: • There is a separate threshold table for each locus. • These threshold tables are Lot-specific; be certain that the Lot # on the threshold tables matches the Lot # in the typing kit. • If a normalized value for a particular probe falls above the maximum threshold for a negative assignment and below the minimum value for a positive assignment, the sample should be considered as indeterminate for this probe. The sample should be typed, first assuming the value to be negative and then again assuming the value to be positive. • See EXPECTED VALUES section for further information on threshold values. QUALITY CONTROL It is recommended that one negative and positive control be run with each test, such as a water blank and a previously typed sample respectively. Consensus SSO probes, listed on the Threshold Table, hybridize to their respective locus specific alleles. Values obtained with the Consensus SSOs from positive controls should exceed the threshold value for the SSO as set forth in the Threshold Table Worksheet. The LIFECODES Probe Mix(es) contain one or more consensus SSO probes identified in the typing kit worksheets. These consensus probes hybridize to all alleles and act as internal controls to verify amplification and to confirm that hybridizations occurred. If the minimum value is not obtained for these SSOs, the sample may not produce the correct typing and the sample test should be repeated. The assay should be run as recommended in the package insert as well as performed with any other quality control procedures that are in accordance with local, state, federal and/or accreditation agencies requirements. LIMITATIONS OF THE PROCEDURE The PCR conditions and assay conditions described require precisely controlled conditions. Deviations from these parameters may lead to product failure. All instruments must be calibrated according to manufacturer’s recommendations and operated within manufacturer’s prescribed parameters. 1) Beads must be pre-warmed and well suspended prior to use. This ensures that the hybridization buffer components are in solution. 2) 47ºC and 56ºC incubations require a high degree of accuracy (+/- 0.5ºC). A thermal cycler should be employed. Temperature should be verified, within wells of the 96 well thermal cycler plate, using a thermocouple (e.g., Bio-Rad, Model VPT-0300 or equivalent). The temperature within wells and among wells should not vary more than +/- 0.5ºC. 3) Time at 56ºC is critical and should not exceed a total of 13 minutes. This includes the 8-minute incubation plus no more than 5 minutes to dilute all the samples with Dilution Solution/ SA-PE mixture. 4) Once diluted, sample analysis must be complete within 1 hour (protect from light). 5) Do not mix components from other kits and lots. Due to the complex nature of HLA typing, qualified personnel should review data interpretation and typing assignments. Page 7 of 9 LC1437CE.3 (05/15) TROUBLESHOOTING PROBLEM Low Bead Count POSSIBLE CAUSE Probe Mix not well suspended Instrument not functioning properly Low DNA SOLUTION Prewarm, sonicate and vortex probe mix and repeat assay. Calibrate Instrument. (Refer to Luminex IS User’s manual.) Remove and sonicate needle. Perform backflush. Call Immucor Transplant Diagnostics, Inc. if problem persists. (888) 329-0255 Check DNA concentration and purity. Salts in Master Mix are out of solution Heat Master Mix at 37ºC for 5 minutes, vortex gently and spin down briefly. Poor Taq Polymerase Use validated LIFECODES Taq Polymerase Catalog # 628075. Run Thermal profile on Thermal cycler to verify parameters are within specified parameters. Warm dilution solution at 45ºC for 5 minutes before use and vortex. Store at room temperature. Replace R-Phycoerythrin Conjugated Streptavidin. Out of Calibration Sample flow path blocked CON Threshold Failure Sample failed to amplify or amplified poorly* Amplification conditions not within specific parameters Low Median Fluorescent Intensity Value (MFI) Multiple SSO failures or sample fails to yield a HLA typing result Allele specific amplification Amplification conditions not within specific parameters Run Thermal profile on Thermal cycler to verify parameters are within specified parameters. DNA sample contaminated Re-isolate DNA from Blood sample. DNA partially degraded Evaporation during hybridization step If not using an entire plate, leave one row empty on each side of samples to be assayed to allow plate to be sealed tightly. * PCR amplification can be verified by gel electrophoresis (See Appendix A). EXPECTED VALUES Each Locus has one CON probe and two SSO probes. If a sample contains one of the loci being assayed, the consensus probe and at least one of the SSO probes for that locus should be positive. Probe values typically can be resolved as positive and negative. In some rare instances, a value may fall between the positive and negative cutoff values and therefore is considered to be indeterminate. If a sample contains indeterminate values for a particular SSO probe, the sample should be typed with the probe as a negative and again with the probe as a positive. If two SSO probes for a locus are indeterminate, the sample cannot be typed and should be re-assayed. • As noted in the Limitations of the Procedure section, it is critical to precisely follow the protocol. Any deviations can lead to sample typing failure. SPECIFIC PERFORMANCE CHARACTERISTICS When LIFECODES HLA SSO Null Allele Typing Kits are used according to the procedure described in the product insert, the Class I and Class II HLA type of DNA samples can be determined. The HLA -Null Allele Class 1 (Null1) assay shows 100% agreement (97.4% lower boundary of 95% Confidence Interval) for A locus, 100% agreement (97.4% lower boundary of 95% Confidence Interval) for B locus, and 100% agreement (97.4% lower boundary of 95% Confidence Interval) for C locus in 139 samples evaluated when compared to results obtained with bi-directional sequencing. The HLA -Null Allele Class 2 (Null2) assay shows 97.1% agreement (92.7% lower boundary of 95% Confidence Interval) for DRB 4 locus, and 98.5% agreement (94.8% lower boundary of 95% Confidence Interval) for DRB 5 locus in 137 samples evaluated when compared to results obtained with bi-directional sequencing. REFERENCES 1. Olerup, O., et al. (1992) Tissue Antigens 39:225 2. Saiki, RK., et al. (1986) Nature 324: 163 3. Maeda, M., et al. (1989) Tissue Antigens 34: 290 4. Bugawan, TL., et al. (1990) Immunogenetics 32: 231 LIMITED LICENSE Taq polymerase is manufactured for Immucor Transplant Diagnostics by Promega Corp. It is licensed to Promega under U.S. Patent Nos. 5,338,671 and 5,587,287 and their corresponding foreign patents. The purchase of this product includes a limited, non-transferable license under U.S. patent 5,981,180 or its foreign counterparts, owned by Luminex Corporation, to perform multiplex analysis of clinical specimens for HLA typing. Page 8 of 9 LC1437CE.3 (05/15) Manufacturer: Immucor Transplant Diagnostics, Inc., 550 West Avenue, Stamford, CT 06902 USA. Phone: 203-328-9500, 888-329-0255 Fax: 203-328-9599 Authorized Representative: Immucor Medizinische Diagnostik GmbH , Adam-Opel-Strasse 26A Rodermark 63322, Germany Phone: (+49) 6074-84 20 -0, Fax: (+49) 6074-84 20-99 European Technical Service: Phone: +32/3 385 4791 This document last revised and issued: Rev: 3, 2015-05-15 TRADEMARKS USED AB Gene® Costar® Microseal™ IDNA™ Agarose GelStar™ AB Gene House Corning Incorporated Bio-Rad Laboratories, Inc. Lonza Group, Ltd. Lonza Group, Ltd. Luminex® Gene Amp® Veriti™ ® LIFECODES Luminex Corporation Roche Molecular System Applied Biosystem Immucor Inc. APPENDIX A Gel Electrophoresis The PCR reactions performed in the LIFECODES HLA-SSO Typing Kits are designed to produce both double and single stranded products, which are the predominant products that hybridizes to the SSOs. For quality assurance or to trouble shoot an experiment it might be necessary to perform gel electrophoresis to examine the PCR reaction for the presence of amplified DNA. Materials Required (as listed or equivalent) • Electrophoresis Grade Agarose (Lonza Group, Ltd. IDNA® Agarose No. 50170) • Electrophoresis apparatus/power supply • 1X Gel Buffer (40xTAE, Promega No. V4281) • • • GelStar® Nucleic Acid Gel Stain (Lonza Group, Ltd. No. 50535) UV Transilluminator (ChromatoVUE, UVP Inc. Model TM36) Photographic imaging system The relative migration of the single stranded product is dependent upon the gel concentration and buffer system employed. Approximate migrations for each amplification are listed below for samples run in a 2% Agarose gel in 1X TAE buffer. Electrophoresis Conditions 1. Remove GelStar® Nucleic Acid Stain (Lonza Group, Ltd. No 50535) from freezer to thaw. Keep in dark. 2. The gel used for this procedure must be 2%, i.e. for a 200ml gel bed use 4 grams of agarose to 200mL 1X TAE (Dilute from 40X TAE). Add 10µL GelStar® Nucleic Acid Stain to the molten agarose. When pouring the gel be sure to leave ample room for DNA to run a significant distance (1 to 2 inches). USE CAUTION: GelStar® is a potential Carcinogen. NOTE: It is possible to run gels with 20µL of 10mg/mL Ethidium Bromide in place of GelStar® Nucleic Acid Stain. Product band intensity will be less in gels containing Ethidium Bromide than in gels containing GelStar®. USE CAUTION: Ethidium Bromide is a known Carcinogen. 3. Keep gel in dark and allow to solidify. 4. Load a mixture of 2.5µL of each PCR product and 2.5µL 2X loading buffer with visible dye per sample, per amplification. Let gel run in the dark at approximately 160 volts for 45 minutes or until sample runs far enough to see separate bands for single and double stranded product (bromophenol blue band or other visible marker migrates 1 to 2 inches from wells). 5. Photograph using UV Transilluminator accompanied by a GelStar® Yellow Photographic Filter (Cambrex No 50536). CAUTION: Wear protective equipment when handling GelStar® Nucleic Acid Stain or Ethidium Bromide and when photographing gel using UV Transilluminator. 6. Gel analysis Null Null Class1 Class2 ~210, ~180, Double Strand(s) (bp) ~280 ~280 ~150,~180 ~140,~180 Single Strand(s) (bp) Gel Interpretation Amplification Non-amplification Well Double Stranded DNA Single Stranded DNA --------(Bright) --------(less bright) Primer Band Page 9 of 9 LC1437CE.3 (05/15)