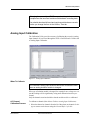
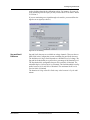
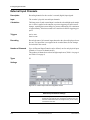
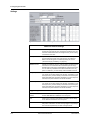
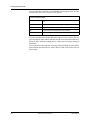
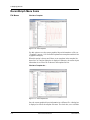
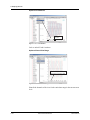
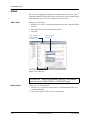
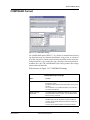
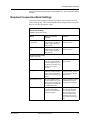
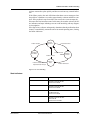
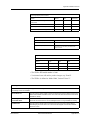
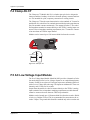
1
TESLA 3000 Disturbance Recorder User Manual Version 2.6 Rev 1 Preface Information in this document is subject to change without notice. © 2013 ERLPhase Power Technologies Ltd. All rights reserved. Reproduction in any manner whatsoever without the written permission of ERLPhase Power Technologies Ltd. is strictly forbidden. This manual is part of a complete set of product documentation that includes detailed drawings and operation. Users should evaluate the information in the context of the complete set of product documentation and their particular applications. ERLPhase assumes no liability for any incidental, indirect or consequential damages arising from the use of this documentation. While all information presented is believed to be reliable and in accordance with accepted engineering practices, ERLPhase makes no warranties as to the completeness of the information. All trademarks used in association with B-PRO, F-PRO, iTMU, L-PRO, ProLogic, S-PRO, T-PRO, TESLA, TESLA Control Panel, Relay Control Panel, RecordGraph and RecordBase are trademarks of ERLPhase Power Technologies Ltd. Windows® is a registered trademark of the Microsoft Corporation. HyperTerminal® is a registered trademark of Hilgraeve. Modbus® is a registered trademark of Modicon. Contact Information ERLPhase Power Technologies Ltd Website: www.erlphase.com Email: [email protected] Technical Support Email: [email protected] Tel: 1-204-477-0591 D01721R02.61 TESLA 3000 User Manual i Table of Contents Preface ......................................................................................i Contact Information ...................................................................i Table of Contents .................................................................... iii Using This Guide .................................................................... vii Version Compatibility ............................................................... ix 1 Overview ................................................................. 1-1 TESLA System Description.............................................. 1-1 TESLA 3000 Features ..................................................... 1-2 Front Panel ...................................................................... 1-4 Rear Connections ............................................................ 1-5 2 Connection and Power Up .................................... 2-1 Mounting .......................................................................... 2-1 Power Supply................................................................... 2-1 Signal Connections .......................................................... 2-2 3 TESLA Control Panel Installation ......................... 3-1 PC System Requirements................................................ 3-1 Installing TESLA Control Panel........................................ 3-2 Installation on Windows XP or Windows 7....................... 3-3 First Time Start-Up......................................................... 3-11 4 Communicating with the Recorder....................... 4-1 Communication Ports....................................................... 4-1 Ethernet LAN Link............................................................ 4-2 Direct Serial Link.............................................................. 4-4 Modem Link ..................................................................... 4-5 Modem LAN Gateway...................................................... 4-8 Accessing SCADA Services ............................................ 4-9 Setting Windows Serial Port Parameters....................... 4-12 Communication Port Details .......................................... 4-13 5 Working with TESLA Control Panel ..................... 5-1 Recorder Workspace ....................................................... 5-1 Adding/Editing a Recorder Workspace Definition ............ 5-3 Online and Offline Operation ........................................... 5-5 Navigating in TESLA Control Panel ................................. 5-6 6 Metering Display .................................................... 6-1 D01721R02.61 TESLA 3000 User Manual iii Table of Contents 7 Recorder Setup Utilities ........................................ 7-1 Unit Identification ............................................................. 7-2 Communication Port Settings .......................................... 7-3 Recording Control Settings .............................................. 7-6 Time Display and Settings ............................................... 7-9 Analog Input Calibration................................................. 7-11 Notify.............................................................................. 7-13 Password Protection ...................................................... 7-15 8 Configuring the Recorder..................................... 8-1 Managing Configuration Files .......................................... 8-1 Configuration Editor ......................................................... 8-4 Identification..................................................................... 8-5 Channels and Triggers..................................................... 8-8 Analog Input Channels................................................... 8-15 External Input Channels................................................. 8-20 Summation Channel ...................................................... 8-22 Sequence Component Channels ................................... 8-25 Impedance Channels ..................................................... 8-28 Watts and Vars Channels .............................................. 8-31 Frequency Channels...................................................... 8-34 Logic Functions.............................................................. 8-36 Fault Locator Functions ................................................. 8-38 Power Factor Functions ................................................. 8-40 Meter Groups ................................................................. 8-42 Trend Logging................................................................ 8-43 Printing........................................................................... 8-45 9 Record and Log Management............................... 9-1 Records............................................................................ 9-1 Trend Log......................................................................... 9-4 Event Log......................................................................... 9-6 10 Continuous Disturbance Recording................. 10-1 11 Graphing Records.............................................. 11-1 Getting Started............................................................... 11-1 RecordGraph Menu Items.............................................. 11-6 Views ........................................................................... 11-32 Graphs ......................................................................... 11-34 Templates .................................................................... 11-56 iv TESLA 3000 User Manual D01721R02.61 Table of Contents View and Graph Titles.................................................. 11-62 Readouts and Measurements...................................... 11-64 Calculated Channels.................................................... 11-71 Exporting Views ........................................................... 11-72 Exporting Channel Data............................................... 11-73 Record Summary ......................................................... 11-75 Digital Channel Status Indicator................................... 11-75 IRIG-B Input Status Display ........................................ 11-76 Derived Digital Swing Channels for TESLA Swing Recordings................................................................... 11-76 Derived Channels for L-PRO, F-PRO High Speed Recordings................................................................... 11-76 COMTRADE Import ..................................................... 11-77 Print Options ................................................................ 11-79 12 Record Export Utility ......................................... 12-1 COMTRADE Format ...................................................... 12-3 PTI Format .................................................................... 12-5 Excel (CSV) Format ....................................................... 12-7 13 Cooperative Recorder Group............................ 13-1 How A Cooperative Recorder Group Works .................. 13-1 Setting Up a Cooperative Recording Group .................. 13-3 Working With Records From a Cooperative Recording Group ........................................................................... 13-10 Required Cooperative Mode Settings .......................... 13-11 14 Maintenance Menu and Error Handling ........... 14-1 Maintenance Menu ........................................................ 14-1 Error Handling................................................................ 14-4 15 PMU - Optional Software Module...................... 15-1 Overview ........................................................................ 15-1 TESLA 3000 PMU Features .......................................... 15-2 Communication with the PMU........................................ 15-6 Identifying the PMU Module Support ............................. 15-6 Setting up PMU Communication Mode.......................... 15-7 PMU Configuration....................................................... 15-10 PMU Metering .............................................................. 15-15 Maintenance and Error Handling ................................. 15-16 Appendix A Specifications............................................ A-1 D01721R02.61 TESLA 3000 User Manual v Table of Contents Appendix B TESLA Hardware Description.................. B-1 Appendix C Glossary .................................................. C-1 Appendix D Modbus Functions ................................... D-1 Appendix E DNP3 Reference...................................... E-1 Appendix F Input Modules .......................................... F-1 AC Voltage Input Module ................................................. F-1 AC Current Input Module ................................................. F-3 Split Core CT ................................................................... F-5 Clamp-On CT................................................................... F-6 AC Low Voltage Input Module ......................................... F-6 DC Input Module .............................................................. F-8 Appendix G Recommended Spare Parts List .............G-1 Appendix H TESLA Handling and Disposition ............. H-1 Appendix I TESLA 3000 Drawings............................... I-1 Index ..........................................................................................I vi TESLA 3000 User Manual D01721R02.61 Using This Guide This User Manual describes the installation and operation of the TESLA disturbance recorder and the accompanying TESLA Control Panel user interface software. It is intended to support the first time user and clarify the details of the equipment. The manual uses a number of conventions to denote special information: D01721R02.61 Example Describes Start>Settings>Control Panel Choose the Control Panel submenu in the Settings submenu on the Start menu. Right-click Click the right mouse button. Recordings Menu items and tabs are shown in italics. service User input or keystrokes are shown in bold. Text boxes similar to this one Relate important notes and information. .. Indicates more screens. TESLA 3000 User Manual vii Version Compatibility TESLA 3000 Version Compatibility TESLA 3000 Firmware Setting Version TESLA 3000/4000 Control Panel v2.6 204 4000 v1.3 and greater v2.5a 204 4000 v1.3 and greater v2.5 204 4000 v1.2a and greater v2.4 203 4000 v1.1 and greater v2.3d 203 v2.3 and greater v2.3c 203 v2.3 and greater v2.3b Beta 203 v2.3b Beta v2.3a 203 v2.3 or greater v2.3 203 v2.3 or greater v2.2a 202 v2.2 or greater v2.2 202 v2.2 or greater v2.1 Beta 202 v2.1 v2.0a 201 v2.0a or greater v1.0e 201 v1.0a or greater v2.0 201 v2.0 v1.0d 201 v1.0a or greater v1.0c 201 v1.0a or greater v1.0b 201 v1.0a or greater v1.0a 201 v1.0a or greater v1.0 201 v1.0a or greater Please contact ERLPhase Customer Service for complete Revision History. D01721R02.61 TESLA 3000 User Manual ix 1 Overview TESLA System Description The TESLA Disturbance Recorder is a multi-time frame recording system used to monitor electrical power systems. It can record up to 36 analog channels and 64 digital (status) channels and store up to 1000 recordings. Up to four recorders can be operated as a cooperative group to achieve greater numbers of channels. The TESLA can record data simultaneously in three time domains: high speed transient fault (seconds), low speed dynamic swing (minutes), and continuous trend (10 second to 1 hour intervals). A wide variety of triggers are available to initiate recording. An optional PMU software module enables the TESLA to transmit Synchrophasors to a PDC as per IEEE C37.118 standards. The TESLA system consists of a recorder, analog input isolation modules and the TESLA Control Panel user interface software.There are various analog input isolation modules available to interface to signal sources. Modules are available to connect to standard signals found in a typical electric power substation including secondary ac voltage and current and low level dc voltage and current signals. These modules can generally be installed up to 1120 meters from the recorder unit, allowing them to be located near the source of the signals being monitored. TESLA Control Panel user interface software provides tools to configure the recorder, retrieve and manage records and display real time measured values. Control Panel also includes RecordGraph, a graphical record display and analysis software tool. An optional central station program - RecordBase - is available to automatically collect and store records from multiple recorders. RecordBase provides fast network-based access to collected records through distributed RecordBase View desktop clients. D01721R02.61 TESLA 3000 User Manual 1-1 1 Overview AC Current Input Modules Analog Inputs LAN, Modem or Serial Link AC Voltage Input Modules TESLA Recorder LAN or Modem DC Input Modules Digital Inputs Split Core CTs and Clamp-on CTs TESLA Control Panel Software RecordBase Central Station Software LAN Status Outputs RecordBase View Software RecordBase View Software RecordBase View Software Figure 1.1: TESLA System Overview TESLA 3000 Features Installation • 19" rack-mount format • Small 3U footprint • Analog input isolation modules for ac and dc input signals are DIN-rail mounted to minimize rack usage and can be located up to 300 meters from the main unit for flexible installation • Analog input modules interface with standard signals: 1A/5A nominal ac currents, 69V (120/Root3) nominal ac voltages, dc current or voltage Data Acquisition • Up to 36 analog input channels, 16 bit resolution each channel • Up to 64 external (digital) input channels • Simultaneous operation in transient fault, dynamic swing and long term trend time frames • User-selectable sample rates for transient fault recording: 32, 64, 96, 128, 256 and 384 samples per cycle • 60 samples/second (1 sample/cycle) dynamic swing recordings • Continuous trend logging at sample intervals from 10 seconds to one hour • Continuous disturbance recording at rates from 6 samples/second to 60 samples/second • Calculated channels: summations, watts, vars, power factor, positive, negative and zero sequence components, impedance, THD, frequency and harmonics Optional PMU Module • Transmits 12 user-selectable phasors as individual phase quantities or threephase positive, negative or zero sequence phasors or summated phasors • Transmits up to 12 analog quantities of Watts, VARS and VA 1-2 TESLA 3000 User Manual D01721R02.61 1 Overview • Transmits up to 64 digital (Status) values Triggers • Rates and level triggering on all input and calculated channels with individual controls for delay, logging, record initiation and alarm contact activation • Configurable logic can be applied to digital inputs and internal trigger states • User-assigned trigger priorities help identify critical events and records • Centralized cross-triggering of dynamic swing recordings through RecordBase Central Station Records • Transient fault records from 0.2 to 15.0 seconds with automatic record extension up to 30.0 seconds under multiple trigger conditions • Dynamic swing record from 10 seconds to 15 minutes with automatic record extension up to 30 minutes under multiple trigger conditions • Combined transient and swing records can capture a fault and the resultant system dynamic response • Record compression to reduce record size, maximize storage capacity and minimize transmission time Cooperative Group • Up to 4 recorders can be operated as a cooperative group • Automatic cross triggering over a LAN with IRIG-B synchronized time stamps • Automatic record retrieval with consolidation into a single group record Logging • 250 day entry event log (circular) • 90 day analog measurement trend log (circular or alarm when full) • 90 day long-term event log (circular or alarm when full) • Voltage sag and swell logging Fault Location • Automatic fault location on up to 10 lines. • Fault location data available in the event log, in recordings and through SCADA User Interface • Intuitive power system element model simplifies complex configurations • Integrated record and configuration management tools • Offline mode allows records to be viewed and configurations created without connecting to the recorder • Record display shows record summaries with trigger event lists so that a preliminary evaluation can be made before the record is transferred • Real-time metering display shows all input and calculated quantities in usercustomizable layouts Analysis Tools • Recorder configuration and relevant event information is embedded in each record • Record graphics provide a flexible multi-page interactive display and measurement of all channels including calculated ones • COMTRADE record export facility D01721R02.61 TESLA 3000 User Manual 1-3 1 Overview Output Contacts • Up to 6 user-configurable output contacts can be activated by triggers • Cross-trigger contact can activate other devices • Failure / Service Required contact Communication • Integrated 10/100 BaseT • Optional internal modem • Standard TCP/IP communication protocol used to communicate with Control Panel and RecordBase software • SCADA (Supervisory Control and Data Acquisition Systems) protocols. DNP3 and Modbus. DNP3 over Ethernet is supported Time Coordination • IRIG-B time code input - modulated or unmoduled. Supports IEEE 1344 extensions • 1ms event timetagging of events and records • Time synchronization indicator on front panel and in each record Reliability • Self-monitoring supervisory software with hardware self-checking circuit and failure contact ensures reliable operation • FLASH memory for record storage with separate FLASH memory for program storage • Compliance with IEC standards for temperature range, transient withstand and RF immunity Front Panel TESLA Recorder Functional Disturbance Recorder Model 3000 IRIG-B Functional Recorder Triggered Records Stored Test Mode Alarm Port 1 1. Status LEDs 2. Port 1: EIA 232 Serial Connection for PC 1 2 Figure 1.2: Front Panel 1-4 TESLA 3000 User Manual D01721R02.61 1 Overview Rear Connections 11 12 External Inputs (1-32) Output Contacts (1-4) External Inputs (33-64) Output Contacts (5-8) Analog Inputs (±2.5V) Analog Inputs (1-36) 3 4 5 6 7 8 9 10 3. IRIG B External Clock, modulated or unmodulated 4. Port 2: EIA 232 Serial Connection for PC or an external modem 5. Port 3: EIA 232 SCADA Communication (DNP 3 and Modbus) 6. Internal Modem (option) 7. 10/100 Base T Ethernet Network 8. Analog Input Channels (18 or 36). Non-isolated 9. Power Supply (40-300Vdc). Handles 48,125 or 250 Vdc or 120 Vac nominal 10. Chassis Ground 11. External (digital) Input Channels (32 or 64) 12. Output Contacts (4 or 8) Figure 1.3: Rear Connections D01721R02.61 TESLA 3000 User Manual 1-5 2 Connection and Power Up For drawings, see “TESLA 3000 Drawings” in Appendix I. Mounting The recorder is designed to be mounted in a standard 19-inch equipment rack. It is 3 rack units (5.25 inches) high and 11.5 inches deep. An additional 3 inches of depth is required for rear connections and cables. Case Grounding WARNING! To ensure safety and proper operation you must connect the recorder’s grounding terminal to the station ground. Do not rely on the rack mounting screws to provide case grounding. Ground the recorder even when testing. Power Supply ERLPhase recorders come with a wide range power supply (40-300 Vdc) that can be used with 48, 125 or 250 Vdc nominal systems or with standard 120 Vac power. To protect against possible short circuit in the supply use an in-line fuse or circuit breaker with a 5 A rating. Make the chassis ground connection to ensure proper operation and safety. The recorder does not have a power switch; the unit will start as soon as voltage is applied to the power supply input. D01721R02.61 TESLA 3000 User Manual 2-1 2 Connection and Power Up Signal Connections Analog Input Channels and Input Modules The recorder’s 18 or 36 analog inputs are generic, low level (5.5 V pp) nonisolated signal inputs. They take their input from external interface modules that provide scaling, isolation and surge protection. The external input modules accept conventional substation voltage and current signals and convert them into low level voltages that are fed into the recorder’s analog inputs. The modules are mounted on DIN rails to make wiring easier and minimize rack space requirements. Modules can be located up to 1220 meters (4000 feet) from the recorder. The wire used for the connection between the modules and the recorder can range in size from 16 to 20 AWG.It is highly recommended that twisted-shielded wire be used for cables that are run outside of the panel in which the TESLA is located, noting that the shield should be grounded only at the recorder. Belden 9388, or its equivalent, is an example of an acceptable cable that can be used. Any of the recorder’s analog input channels can be connected to any of the available input modules. The software configuration identifies the type of input module associated with each channel. Input module channels can be connected to only one recorder input. Source and load impedance matching are used to minimize noise susceptibility; connecting to two channels will produce incorrect readings. All input modules must be grounded via the ground stud on the module. Re-calibration is required whenever an input module is replaced or moved to a different channel (see “Analog Input Calibration” on page 7-11) Input Module Types For further information on the input modules, see “Input Modules” in Appendix F. AC Voltage Input Module This 3 channel ac voltage input module (Model 401006) provides isolation and scaling for standard voltage signals. The nominal signal level is 69 V RMS (120/Root 3). The module has a dynamic range that can measure 2X nominal voltages. AC Current Input Module This 4 channel ac current input module provides isolation and scaling for standard current signals.The module’s channels are connected in series with the current signal source. All models have a dynamic range that can pass 20x nom- 2-2 TESLA 3000 User Manual D01721R02.61 2 Connection and Power Up inal currents. The module can withstand 20x nominal for 1 second and has a maximum thermal rating of 400A for 1 second. Model 401014 has a nominal signal level of 5 A RMS Model 401020 has a nominal signal level of 1 A RMS Split Core CT The Split Core CT is designed to clamp around the secondary circuit wires of a primary current transformer. It is intended for situations where an outage is not possible to connect an in-line CT. The outputs from the CT are impedance matched to connect directly to the TESLA’s analog input connectors. All models have a dynamic range that can pass 20x nominal currents continuously. Model 401013 has a nominal signal level of 5 A RMS Model 401017 has a nominal signal level of 1 A RMS Clamp-on CT The Clamp-on CT (Model 401012) is a clothespin style device designed to clamp around the secondary circuit wires of a primary current transformers. It is intended for quick, temporary connection to existing circuits. The outputs from the CT are impedance matched to connect directly to the TESLA’s analog input connectors. The Clamp-on CT has a nominal signal level of 5A RMS and can pass 20x nominal currents continuously. DC Module The DC input module (Model 401016) provides dc-coupled isolation and scaling for four independent dc or ac voltage or current channels. DC module channels have a dc to 2 kHz bandwidth, but the bandwidth may be further limited by the recorder’s input filters, depending on the sample rate. Externally mounted resistors set the input type and full scale range. AC Low Voltage Input Module This 4 channel isolated ac voltage input module (Model 401022) provides isolation and scaling for low level voltage. The nominal input voltage is 4 Vrms with a 7 Vrms full scale capability. Maximum input level is 12 Vrms continuous or 15 Vrms for 10 seconds. External Input Channels The recorder’s external inputs are dry inputs intended for use with signals from a 48-250 Vdc station battery. The external inputs are isolated and protected against transient surges. They activate at approximately 32 Vdc. Alarm Contacts The alarm contacts on the rear of the unit are dry contacts. They are isolated and protected against transient surges. The contacts are designated as follows: For 18/32 channel units: 1 Recorder fail. Closed on failure 2 User-configurable 3 User-configurable 4 Cross-trigger, Channel Group 1 Additional, for 36/64 channel units: D01721R02.61 TESLA 3000 User Manual 2-3 2 Connection and Power Up 5 User-configurable 6 User-configurable 7 User-configurable 8 User-configurable The Cross-trigger contact is used to initiate recording on another recorder when this unit triggers. When activated, the cross-trigger contacts close for 0.10 seconds, regardless of the duration of the triggering condition. This ensures that the cross-trigger function does not become blocked by a continuous trigger condition. The user-configurable alarm contacts can be defined for use as part of the recorder’s trigger configuration. IRIG-B Time Signal The BNC connector on the rear of the unit accepts either modulated or unmoduled IRIG-B time signals, with or without the 1344 extensions. Communication Ports See "Communicating with the Recorder" on page 4-1. Startup Sequence On Power Up Front panel Test Mode LED turns on to indicate the presence of power ~40 seconds after Power Up Test Mode LED starts to blink at 2-3 second intervals ~90 seconds after Power Up Test Mode LED stays on. The Records Stored LED turns on if records are present ~100 seconds after Power Up Recorder Functional LED turns on The Test Mode LED remains on At this point, you can log into the recorder ~105 seconds after Power Up Test Mode LED turns off Recorder Functional LED remains on Front Panel LEDs 2-4 Front Panel LED Indications Recorder Functional Normally active green LED that is turned on approximately 100 seconds after power up, indicating the unit is functional. If an internal fault is detected, the LED is turned off. The LED state corresponds directly with the Failure Contact IRIG-B Functional Green LED that is active when a valid external time synchronizing signal is detected on the IRIG-B port Recorder Triggered Green LED that is active while the recorder is in the process of creating a record Records Stored Green LED that turns on when there are records stored in the recorder’s memory. The LED will flash to indicate the Storage Alarm limit has been reached if so configured TESLA 3000 User Manual D01721R02.61 2 Connection and Power Up D01721R02.61 Front Panel LED Indications Test Mode Normally inactive red LED that turns on immediately on power up and blinks during start-up until the self-test has been completed (approximately 105 seconds) Alarm Normally inactive red LED that indicates a failure has been detected by the software. The presence of the Alarm LED means much of the system is functioning and can be accessed for diagnosis TESLA 3000 User Manual 2-5 3 TESLA Control Panel Installation Installation of TESLA Control Panel software may require changes to your Windows system configuration for proper operation. Please review the instructions in this chapter to ensure proper setup. The TESLA 3000 CD-ROM contains the following: • TESLA Control Panel: interface software • Firmware update with installation instructions • User Manual in PDF format • Mechanical drawings in electronic format PC System Requirements The minimum hardware requirements are: • • • • 1 GHz processor 2 GB RAM 20 GB available hard disk space Serial communication port A serial port, modem or Ethernet LAN connection is required if communication with a TESLA recorder is desired. Operating System The following software must be installed and functional prior to installing the applications: • Microsoft Windows XP Professional Service Pack 3 or • Microsoft Windows 7 Professional Service Pack 1 32-bit or 64-bit D01721R02.61 TESLA 3000 User Manual 3-1 3 TESLA Control Panel Installation Installing TESLA Control Panel You must be logged on to the target computer as a user with local administrator privileges to install TESLA Control Panel. Once installed, you may be logged in as a Limited User, as administrator privileges are not generally required for operation of the program. The exception to this is the ability to communicate with TESLA recorders through Modem-LAN Gateway (see "Modem-LAN Gateway" on page 4-8) Overview Instructions for installing TESLA Control Panel and configuring Windows for its use are covered in the following sections. Separate instructions for each version of Windows Operating System are provided for the above steps. Use the one that is appropriate for your computer. The procedure has the following parts: 1 Install TESLA Control Panel. 2 Install the Null Modem driver. 3 Create Windows Dial-Up Network definitions for modem and direct serial connections. Once these steps are complete, go to the First Time Start-Up section for details on launching TESLA Control Panel (see “First Time StartUp” on page 3-11) Anti-virus/Anti-spyware Software If an anti-virus/anti-spyware software on your local system identifies any of the ERLPhase applications as a “potential threat”, it will be necessary to configure your anti-virus/anti-software to classify it as “safe” for its proper operation. Please consult the appropriate anti-virus/anti-spyware software documentation to determine the relevant procedure. 3-2 TESLA 3000 User Manual D01721R02.61 3 TESLA Control Panel Installation Installation on Windows XP or Windows 7 Step 1: Install TESLA Control Panel Software from CD-ROM 1 Insert the TESLA CD-ROM in your drive. 2 The CD-ROM should start automatically. If it doesn’t, go to Windows Explorer and run the “CD.exe” file at the root of the CD-ROM directory. 3 To install TESLA Control Panel software on your computer, select the TESLA Disturbance Recorder icon, then the Install TESLA Control Panel. The installation program starts automatically, but may take a few minutes to begin. 4 During installation a prompt appears asking whether your TESLA recorders are 50 Hz or 60 Hz units. For proper operation it is important to select the correct one. If you need to change this in the future, re-install TESLA Control Panel. 5 When the installation is complete, a TESLA Control Panel icon is placed on your desktop. Use the icon to launch Control Panel. If you prefer, you can start Control Panel through Windows Start menu (Start>Programs>NxtPhase/TESLA Control Panel). Step 2: Installing Null Modem Driver Software A virtual software modem called a “Null Modem” must be set up for direct serial cable communication between this computer and a TESLA recorder. A Null Modem driver is provided with the TESLA installation CD-ROM. This section provides step by step instructions on how to install the Null Modem driver. 1 Start Windows Control Panel by going to Start>Control Panel. 2 Double-click the Phone and Modem Options icon. 3 Select the Modems tab. Select Add to open the Add Hardware Wizard. 4 Select Don't detect my modem; I will select it from a list, then select the Next button D01721R02.61 TESLA 3000 User Manual 3-3 3 TESLA Control Panel Installation Step 1 - Start>Settings>Control Panel. Step 2 - Double-click Modems icon. Step 3 - Add Step 4 - Select Don't detect my modem; I will select it from a list. Select Next. Figure 3.1: Null Modem Driver Installation 5 Select the Have Disk button, select Browse. To find the file go to c:\Program Files\NxtPhase\TESLA Control Panel\Null_Mdm.Inf. Select OK. This is the default location for TESLA Control Panel. If you selected a different location to install TESLA Control Panel, you will find the Null Modem driver (Null_Mdm.Inf) in that directory. Figure 3.2: Browse for Null_Mdm.Inf 3-4 TESLA 3000 User Manual D01721R02.61 3 TESLA Control Panel Installation 6 Select the Generic Null Modem driver and select Next. If you are given more than one option, select the one that has the most recent date associated with it. 7 Select the serial port you wish to use. You are setting up a serial port to be used for a direct cable connection to a TESLA. Typically COM1 or COM2 are available on a PC for this purpose. Select Next. Figure 3.3: Select Serial Port In Windows XP, you may get a message stating that the Null Modem “has not passed Windows Logo testing” and asking “Do you want to continue the installation?” Select Continue Anyway to continue. 8 Select Finish and close the Phone and Modem Options and Control Panel dialog boxes. Step 3: Dial-up Network Connections (DUN) Windows’ Dial-Up Networks (DUN) are used to communicate with a recorder through your computer’s modem or serial port. This section takes you through the steps required to create two Dial-Up configurations: • APT_SERIAL for communication with a recorder via a serial cable (using the Null Modem installed in the previous section). • APT_MODEM for communication with a recorder via your computer’s modem. APT_SERIAL Dial-Up Network To set up APT_SERIAL Dial-Up Networking: 1 Double-click the My Computer icon on your desktop, double-click the Control Panel icon, then double-click the Network Connections icon. 2 Double-click the New Connection Wizard icon to bring up the New Connection Wizard dialog box, click Next. D01721R02.61 TESLA 3000 User Manual 3-5 3 TESLA Control Panel Installation 3 Select Connect to the network at my workplace and click Next. 4 Select Dial-up Connection and click Next. 5 Enter the name APT_SERIAL exactly, click Next. Figure 3.4: Windows XP Network Connection Type 6 When prompted for a phone number, enter 1 and click Next. 7 For Connection Availability select Anyone’s use and click Next. Figure 3.5: Windows XP Connection Availability 8 When the Completing the Network Connection Wizard dialog box appears, click Finish. 3-6 TESLA 3000 User Manual D01721R02.61 3 TESLA Control Panel Installation Figure 3.6: Windows XP Completing the New Connection Wizard 9 A Connect APT_SERIAL dialog box appears; select Cancel to close the box. 1 Figure 3.7: Windows XP Connect APT_SERIAL 10 In Network Connections>APT_SERIAL, right-click to bring up the Properties dialog box. D01721R02.61 TESLA 3000 User Manual 3-7 3 TESLA Control Panel Installation 1 Figure 3.8: Windows XP Select Modem 11 With Generic Null Modem highlighted, select Configure to view the Generic Modem Configuration dialog box and set the maximum speed to 38,400. Select OK. This sets up the baud rate for the null modem. The baud rate can be set at rates up to 115,200; 38,400 is the default baud rate of the recorder’s front panel. If you wish to change baud rates in the future, both the baud rate specified here and that set on the recorder must be changed (see “Communication Port Settings” on page 7-3). 12 Select the Options tab of Figure 3.8.. 3-8 TESLA 3000 User Manual D01721R02.61 3 TESLA Control Panel Installation Figure 3.9: Windows XP Options 13 Select the Security tab, check the Run Script box; in the Run Script list select the file tesla.scp. Figure 3.10: Windows XP Security D01721R02.61 TESLA 3000 User Manual 3-9 3 TESLA Control Panel Installation 14 Select the Networking tab. Select Internet Protocol (TCP/IP) and press the Properties button. Configure the settings as shown in Figure 3.11. Figure 3.11: Windows XP Internet Protocol Settings 15 Press the Advanced button and configure the settings as shown in Figure 3.12 . Figure 3.12: Windows XP Advanced TCP/IP Settings 16 Click OK to apply the setting to APT_SERIAL properties and close the APT_SERIAL dialog box. 3-10 TESLA 3000 User Manual D01721R02.61 3 TESLA Control Panel Installation First Time Start-Up Starting TESLA Control Panel To start TESLA Control Panel, double-click the TESLA Control Panel icon placed on your desktop by the installation process or select Start>Program Files>NxtPhase>TESLA Control Panel. Data Location TESLA Control Panel uses a data location on your computer to store records and settings from your recorders. By default it is C:\Program Files\NxtPhase\Data, although you may change this later by using the File\Data Location command from the Main Menu. When you change the data location, previously configured IEDs will not be affected. Only newly created IEDs will use the new data location. To edit the data location of existing IEDs use the Main Menu Edit button. Figure 3.13: Data Location D01721R02.61 TESLA 3000 User Manual 3-11 4 Communicating with the Recorder Communication Ports The TESLA recorder has multiple communication ports for local and remote access to its user interface and SCADA services. For port pin-out and cabling information see “Communication Port Details” on page 4-13. Port Location Description Port 1 Front RS-232 Data Communication Equipment (DCE) female DB9. Used for user interface access via a direct serial connection. Default Setting: 38,400 baud, 8 data bits, no parity, 1 stop bit. Port 2 Rear RS-232 DCE female DB9. Used for: • User interface access via a direct serial connection. • User interface access via an external modem. The optional ERLPhase Modem Adapter converts this port to a Data Terminal Equipment (DTE) to simplify connection to an external modem. Default Setting: 38,400 baud, 8 data bits, no parity, 1 stop bit. N.B. Port 2 is disabled if the recorder is equipped with an internal modem. Port 3 Rear RS-232 DCE female DB9. Used for SCADA communication. Default Setting: 19,200 baud, 8 data bits, no parity, 1 stop bit. Internal Modem Port Rear RJ-11 receptacle. Used for user interface access via the optional internal modem. Network Port Rear RJ-45 receptacle for 10/100 Base-T Ethernet Default IP address: 192.168.1.100 Used for: • User interface access. • DNP SCADA access. • Cooperative mode operations. External converters may be used to convert communication ports and increase the options available for connection to devices and networks. (See Appendix G for optional devices available) D01721R02.61 TESLA 3000 User Manual 4-1 4 Communicating with the Recorder Ethernet LAN Link PC with TCP/IP TCP/IP Network 10/100BaseT Ethernet Network Port TESLA Disturbance Reorder Model 2000 Recorder Functional IRIG-B Functional Records Stored Test Mode Alarm Figure 4.1: Ethernet LAN Link Recorder Setup 1 Connect recorder’s Ethernet port to the Ethernet LAN hub using an appropriate 10/100BaseT cable. 2 Modify the IP address, if necessary. • The default IP address is 192.168.1.100. • To modify or view the IP address, use the recorder’s Maintenance menu, for details see 14 Maintenance Menu and Error Handling on page 1. • The IP address must not conflict with other devices on your network and must be accessible from the computer(s) on which run TESLA Control Panel and RecordBase Central Station. If you are unsure what IP address to use, consult your network administrator. 3 Modify the Default Gateway and Network Mask, if necessary. • The Default Gateway may need be changed if the recorder and the central control station (Control Panel or RecordBase) are on different but connected networks. The default setting is No Default Gateway. • The Network Mask may need to be changed if the recorder and the central control station are on different subnets. The default setting is 255.255.255.0. • To modify the Default Gateway and/or Network mask, use the recorder's Maintenance Menu, command 1 - Modify IP Address. • If unsure of the use of these settings, consult your network administrator. TESLA Control Panel Setup 1 Ensure that the computer running TESLA Control Panel has access to the Ethernet network to which the recorder has been connected. 2 Start TESLA Control Panel. 3 Choose the target recorder from the Select IED list in TESLA Control Panel’s Main Menu. 4-2 TESLA 3000 User Manual D01721R02.61 4 Communicating with the Recorder • If there is not already an entry for this recorder, create one using the Add New button Main Menu Select IED List Edit button Edit IED dialogue box Figure 4.2: Edit IED • The method of communication with the recorder is specified as part of its IED definition. Use the Edit button to view or change this information. Ensure the Network Link option is selected and the recorder’s IP address is entered. • For details on IED definitions see “Working with TESLA Control Panel” on page 5-1. 4 Initiate the connection by selecting the Connect button. • A dialog box will appear to show connection progress. D01721R02.61 TESLA 3000 User Manual 4-3 4 Communicating with the Recorder • The connection state and the current IED you are connected to is shown on the Windows status bar Figure 4.3: Connect Button Dialog Box Direct Serial Link Your PC must be appropriately configured for serial communication (see “TESLA Control Panel Installation” on page 3-1). Port 2 - direct/modem TESLA Disturbance Reorder Model 2000 Recorder Functional IRIG-B Functional Records Stored Test Mode Alarm Port 1 Serial Extension Cable Port 1 or rear Port 2 to DB-9 female (laptop) Laptop PC Figure 4.4: Direct Serial Link 1 Create a direct serial connection between the computer’s serial port and the recorder’s Port 1 or Port 2. • Use a standard straight through male-to-female serial cable (provided with the recorder). For port pin-out and cabling information see “Communication Port Details” on page 4-13. • Port 2 may not be used if the recorder has an internal modem installed unless the modem is disabled via the Maintenance Menu, for details see 14 Maintenance Menu and Error Handling on page 1. 2 Ensure the recorder port and your PC’s port have the same baud rate and communication parameters. • The recorder’s Port 1 and Port 2 serial ports are fixed at 8 data bits, no parity and 1 stop bit and have a default baud rate of 38,400. 4-4 TESLA 3000 User Manual D01721R02.61 4 Communicating with the Recorder • The baud rate and communication parameters of your computer’s serial port is set through the APT_SERIAL Dial-Up Network (see “Setting Windows Serial Port Parameters” on page 4-12). 3 Choose the target recorder from the Select IED list in TESLA Control Panel’s Main Menu. • If there is not already an entry for this recorder, create one using the Add New button. • The method of communication with the recorder is specified as part of its IED definition. Use the Edit button to view or change this information. Ensure the Direct Serial Link option is selected. • For details on IED definitions see “Working with TESLA Control Panel” on page 5-1. 4 Initiate the connection by selecting the Connect button. • A dialog box will appear to show connection progress. • The connection state and the current IED you are connected to is shown on the Windows status bar at the bottom of the screen. Status Bar shows TESLA Control Panel software is connected to the recorder and the name of the Current IED. Figure 4.5: Status Bar If the connection fails, check the following: • The APT_SERIAL dial-up network has been created and has the correct settings (see “TESLA Control Panel Installation” on page 3-1). • The communication parameters are the same on both ends (see Step 2 above). • The correct serial port has been selected on your computer. Some newer laptop computers do not have serial ports. A USB serial converter adapter can provide a surrogate serial port for a direct connection to the TESLA recorder. The Edgeport USB Serial Adapter, model # Edgeport/1, from B&B Electronics (www.bbelec.com) is an example of such a device. Modem Link External Modem Your PC must be appropriately configured for modem communication (see “TESLA Control Panel Installation” on page 3-1). D01721R02.61 TESLA 3000 User Manual 4-5 4 Communicating with the Recorder Modem Adapter www.nxtphase.com Modem Cable (as supplied with modem) Analog Telephone Line Port 2 - Direct/Modem TESLA Disturbance Reorder Model 2000 Telephone System Recorder Functional Analog Telephone Line IRIG-B Functional Records Stored Test Mode Alarm External Modem Desktop Computer Modem Adapter part # 101629 Can be ordered separately DB-9-Male-Male Figure 4.6: Modem Link - External Recorder Setup 1 Connect a PC-compatible external serial modem to Port 2 on the rear of the recorder. • The cable between the recorder and the modem requires a crossover and a gender change as both devices are configured as RS-232 DCE ports. • You can use the ERLPhase Modem Port Adapter (part # 101629) to make the recorder’s Port 2 appear as a DTE (like a PC serial port). A standard modem cable can then be used to connect to the recorder. • For port pin-out and cabling information see “Communication Port Details” on page 4-13. • If the unit has an internal modem, Port 2 will be disabled and an external modem will not work. 2 Connect the modem to an analog telephone line or switch and turn it on. • A standard telephone cable with an RJ-11 connector is used. 3 Configure the recorder’s Port 2 to work with the modem. • Port 2 settings are accessed through the recorder’s standard user interface. a Establish a network or a direct serial connection between your computer and Port 1 on the recorder, run TESLA Control Panel software and initiate a connection to the unit. b When connected, select Utilities in the Main Menu list, and go to the Communication tab to access the Port 2’s settings. 4-6 TESLA 3000 User Manual D01721R02.61 4 Communicating with the Recorder From Main Menu select Utilities, then the Communication tab. Set Baud rate. Enable modem. Figure 4.7: Communications Setup Utility c Set the Baud Rate. This will be the rate at which the recorder will communicate with the external modem. It does not control the rate at which the modems communicate with each other. Unlike a direct serial link, there is no need for this baud rate to match that of the remote computer. A rate faster than the modem’s top speed is recommended to take full advantage of the modem’s compression capabilities. d Select External Modem e The Modem Initialization String lets you set any special command codes required by your modem. The factory default for this field is “M1” for external modems. These default values are all that are required for most modems. f Save your changes, close the Utilities tab and disconnect. TESLA Control Panel Setup 1 Configure your computer to work with its modem. Refer to your computer and modem documentation. 2 Ensure that an APT_MODEM dial-up network has been created on your computer (see “TESLA Control Panel Installation” on page 3-1). 3 Choose the target recorder from the Select IED list in TESLA Control Panel’s Main Menu. • If there is not already an entry for this recorder, create one using the Add New button. D01721R02.61 TESLA 3000 User Manual 4-7 4 Communicating with the Recorder • The method of communication with the recorder is part of each IED’s definition. Use the Edit button to view or change this information. Ensure the Modem Link option is selected and the telephone number of the recorder’s modem is entered. • For details on IED definitions see “Working with TESLA Control Panel” on page 5-1. 4 Initiate the connection by selecting the Connect button • A dialog box will appear to show connection progress. • The connection state and the current IED you are connected to is shown on the Windows status bar. Internal Modem Modem Port - RJ-11 TESLA Disturbance Reorder Model 2000 Analog Telephone Line Telephone System Analog Telephone Line Recorder Functional IRIG-B Functional Records Stored Test Mode Alarm Desktop Computer Figure 4.8: Modem Link - Internal An optional internal modem is available for the TESLA recorder. Setup for the internal modem is the same as for an external modem (see previous section) with the following notes: • The modem is internal to the recorder, so there is no external modem to connect to Port 2. • Connect the telephone switch cable to the recorder’s internal modem through the Modem Port. • Internal modem configuration is done in the same way as for an external modem. Modem Initialization String which is “M1” for internal modems (see Figure 4.7: Communications Setup Utility on page 7). • If the internal modem was installed at the factory, it will already be appropriately configured. When an internal modem is installed, Port 2 is disabled Modem LAN Gateway Recorders on a LAN can be remotely accessed through a modem on a designed master recorder. The master acts as a gateway to the LAN, providing a route for IP communication between Control Panel or RecordBase and other TESLA 3000 recorders to the network. Although commonly used as a part of a cooperative group configuration, a gateway modem can also be used simply as a means to communicate with networked recorders. 4-8 TESLA 3000 User Manual D01721R02.61 4 Communicating with the Recorder 1 Connect the recorders to the LAN and set their IP addressed. See "Setting Up a Recorder Network" on page 4-8. 2 Configure one of the recorders (now designated the master recorder) with an internal or external modem (see Modem Link - External or Modem Link - Internal). 3 Set up TESLA Control Panel to communicate with the master recorder via the PC’s modem and create and configure an appropriate IED Definition for it (see Modem Link - External, TESLA Control Panel Setup). 4 Create an (or modify existing) IED Definition for each recorder to be accessed through the gateway (not including the master recorder). Under Communication, select Connect Through IED and pick the master IED created in the previous setup. 5 To initiate communication with any of the recorders, choose the target recorder from the Select IED list in TESLA Control Panel’s Main Menu and use the Connect button. Note: To connect to recorders through a modem gateway, you must be logged into Windows with local administrator privileges on the computer running Control Panel or RecordBase. Administrator privileges are required to handle updates to the network routing table. Accessing SCADA Services The recorder supports DNP3 (Level 2) and Modbus SCADA protocols as standard features. This section describes how to connect and configure the services. Protocol details, including point lists, are provided in the appendices. Serial Port Connection Both DNP3 and Modbus protocols are available on the recorder’s serial Port 3, an RS-232 DCE port with a female DB9 connector. The port is wired to support a connection to a PC serial port (or equivalent) using a standard straightthrough male to female serial cable. An external RS-232 to RS-485 converter can be used to connect to an RS-485 network. For port pin-out and cabling information see “Communication Port Details” on page 4-13. Ethernet Connection The DNP protocol can also be available over Ethernet using TCP or UDP. A standard 10/100BaseT Ethernet cable is required. The Ethernet port can support DNP SCADA and user interface access via TESLA Control Panel at the same time. For details on setting the recorder’s IP address, for details see 14 Maintenance Menu and Error Handling on page 1. Protocol Settings Configuration of the SCADA protocol and communication parameters is done through the recorder user interface. Use TESLA Control Panel to connect to the recorder, then go to the SCADA section of the Utilities>Communication tab. Setting descriptions follow. D01721R02.61 TESLA 3000 User Manual 4-9 4 Communicating with the Recorder From Main Menu select Utilities, then the Communication tab. Port 3 - SCADA Figure 4.9: SCADA Protocol Settings SCADA Protocol Settings 4-10 Mode Select one of the available SCADA modes. Baud Rate Port 3 serial baud rate. Default is 19,200. Parity Port 3 serial parity. Note: When parity is set to “None” and a Modbus protocol is selected, the number of stop bits automatically is set to 2, as per the Modbus standard. Stop Bits (Automatic setting). Always set to 1 stop bit except as noted in Parity setting above Data Bits (Automatic setting) The number of data bits is controlled by the selected protocol mode. Modbus ASCII: 7 data bits Modbus RTU: 8 data bits DNP 3: 8 data bits Slave Address Identifies the unit to the SCADA master. Datalink Timeout (DNP) Specifies the time in which the recorder expects a response from the SCADA master to primary frame messages. If a response is not received in this time, the recorder will re-transmit the message. The timeout is usually set to 0 milliseconds per DNP3 Technical Bulletin 9804-002. This document is available from the DNP3 User's Group (www.dnp.org) For UDP and TCP modes, the timeout is not settable and is automatically set to 0 milliseconds. TESLA 3000 User Manual D01721R02.61 4 Communicating with the Recorder SCADA Protocol Settings Diagnostics D01721R02.61 Master IP Address (DNP TCP or UDP) Defines the IP address of the master SCADA device that will be polling the TESLA. This prevents unauthorized master devices from communicating with the TESLA. Note: This setting does not control IP address of the TESLA’s Ethernet card. That is done through the recorder's Maintenance Menu. Make sure the Master IP Address is different from the TESLA IP Address. Port DNP TCP or UDP) Defines the TCP or UDP port on which the DNP service may be accessed. Usually set to 20000. Protocol monitor utilities are available to assist in resolving SCADA communication difficulties such as incompatible baud rate or addressing. The utilities can be accessed through the Maintenance user interface, for details see 14 Maintenance Menu and Error Handling on page 1. TESLA 3000 User Manual 4-11 4 Communicating with the Recorder Setting Windows Serial Port Parameters To achieve a direct serial link between a serial port on the recorder and one on your PC, both ports need to be running with the same communication parameters. This section describes how to change the baud rate of your computer’s serial port. Direct Serial Link The recorder’s Port 1 and Port 2 communication parameters are: • 8 bit data, no parity and 1 stop bit (non-configurable). • Hardware or software flow control (automatically handles either). • The default baud rate of Port 1 and Port 2 is 38,400. The baud rate for these ports is configured through the recorder’s user interface via TESLA Control Panel software (see “” on page 4-4). The computer’s serial port communication parameters are set through the APT_SERIAL Dial-Up Network, which was created as part of the installation of Control Panel software. Windows XP/7 Access the Network and Dial Up Connections function through Windows Control Panel. 1 Bring up the APT_SERIAL properties control by right-clicking on the APT_SERIAL icon and selecting Properties 2 Select Modem - Generic Null Modem from the Connect using modem list and select the Configure button. 3 Set the desired baud rate in the Maximum Speed field. 4 Select OK to save changes NB. Other communication parameters such as the number of data bits cannot be set here. The recorder’s communication parameters are standard (8, N, 1), so changes to these parameters on your computer’s port are unlikely to be needed. If you do need to view or modify them, use the Phone and Modem Options function found in Windows Control Panel, and go to the Modems tab. 4-12 TESLA 3000 User Manual D01721R02.61 4 Communicating with the Recorder Communication Port Details All recorder serial ports (Ports 1, 2 and 3) are configured as EIA RS-232 DCE devices with female DB9 connectors. This allows them to be connected directly to a PC serial port with a standard straight-through male-to-female serial cable. A modem adapter (part #101629) is available to convert a port into a DTE device, equivalent to the serial port on a PC. The adapter allows you connect an external modem to the recorder’s Port 2 using a standard modem cable. The TESLA 3000 Power System Monitoring Recorder has been factory configured to communicate with peripheral software tools and devices using communications Port 2000. The TESLA 3000 Power System Monitoring Recorder (V2.6 or better) has provisions available to reconfigure this communication port to use the ERLPhase registered IANA Port 7631. This operation may be enabled through the TESLA 3000 Maintenance Menu (“Maintenance Menu and Error Handling” on page 14-1). TESLA Recorder Serial Ports Port Location Function 1 Front Panel Serial port for direct connection to a computer. Default baud rate set at 38,400 baud. 2 Rear Panel Serial port for connection to an external modem or for direct connection to a computer (configurable). Default baud rate set at 38,400 baud. This port is unused when the recorder is equipped with the optional internal modem unless the modem is disabled via the Maintenance Menu. 3 Rear Panel Connection to SCADA (DNP3 or Modbus) interface. Default baud rate set at 19,200 baud. Direction PC<->IED Pin # on the IED Port DCD 1 RxD 2 TxD 3 DTR 4 Signal Name Common D01721R02.61 5 DSR 6 RTS 7 CTS 8 TESLA 3000 User Manual 4-13 4 Communicating with the Recorder Direction PC<->IED Signal Name Pin # on the IED Port No connection 9 Notes: • IED is DCE, PC is DTE. • Pins 1 and 6 are tied together internal to the IED. Male DB-9 Cable End for IED Port Female DB-9 Cable End for Computer Port Pin # on Cable Pin # on Cable 1 1 2 2 3 3 4 4 5 5 6 6 7 7 8 8 9 9 Direction Modem <-> IED Pin # on the Modem Adapter DCD 1 RxD 2 TxD 3 DTR 4 Signal Name Common 5 DSR 6 RTS 7 CTS 8 No connection 9 Notes: • IED (with modem adapter) is DTE, modem is DCE. • Pins 1 and 6 are tied together internal to the IED. 4-14 TESLA 3000 User Manual D01721R02.61 5 Working with TESLA Control Panel Recorder Workspace TESLA Control Panel supports multiple recorders. Each recorder has its own workspace within Control Panel that stores its communications parameters, records and configuration files. Workspaces for both TESLA 2000 and TESLA 3000 recorders can be maintained. A separate workspace should be created for each recorder on your system to store its configuration files and records. When first installed, TESLA Control Panel includes a workspace for a recorder called TESLA 3000 Demo Unit. It contains sample records and configuration files and is configured for network connection with an evaluation unit. Selecting A Recorder Workspace To work with a particular recorder, select it from the Select IED box on the Main Menu tab. If you are already connected to an IED you will not be able to select a different IED until you disconnect. Main Menu Select IED TESLA Demo Unit Connect - connect to a recorder. Edit - change recorder information. Delete - delete recorder from list. Add New - add new recorder to list Current IED Connection Status Connected or Not Connected Figure 5.1: Selecting a Recorder Workspace D01721R02.61 TESLA 3000 User Manual 5-1 5 Working with TESLA Control Panel The Current IED Selecting a recorder sets TESLA Control Panel’s focus to that recorder’s workspace, known as the Current IED. The records and configuration files belong to the selected recorder. If you initiate a connection using TESLA Control Panel, it connects to the current IED using the communication parameters specified for this IED. The name of the Current IED is always displayed in the Status Bar at the bottom of the TESLA Control Panel window (see Figure 5.1). TESLA Control Panel assumes that the recorder it is communicating with is the one identified as the Current IED. Forcing a connection with a different recorder (i.e. moving the serial cable without telling Control Panel to disconnect), can cause the records and configuration files of that recorder to be mixed with those of the Current IED. 5-2 TESLA 3000 User Manual D01721R02.61 5 Working with TESLA Control Panel Adding/Editing a Recorder Workspace Definition Recorder workspaces are added, modified or deleted from the TESLA Control Panel Main Menu using controls in the Select IED dialog box (see Figure 5.1) The Edit button displays the selected recorder’s definition screen. The Add New button is used to create a new recorder definition. The IED definition is shown in Figure 5.2 and the settings are described in the following table. Figure 5.2: Recorder Workspace Definition IED Workspace Settings IED Definition D01721R02.61 TESLA 3000 User Manual 5-3 5 Working with TESLA Control Panel IED Name The IED Name is the name you assign to this recorder’s workspace. It appears in the IED selection and the Current IED display at the bottom of the TESLA Control Panel window. We recommend that you use the same name for this workspace as the Unit Name given to the recorder (“Unit Identification” on page 7-2). Comments User-defined, for your reference only. Location User-defined, for your reference only. IED Serial Number Enter the IED Serial Number to match the serial number of the actual recorder. Model TESLA 2000 or 3000, 18 or 36 channel, or TESLA 3000 - Cooperative IED IP Address IP address of the recorder. The recorder’s default factory IP address is 192.168.1.100. It is changed through the recorder’s Maintenance Menu, “Maintenance Menu” on page 14-1. Get Information from IED Connects to the recorder and retrieves its configured name, location and serial number. The corresponding fields in the IED Definitions are overwritten. Communication Direct Serial Link Connect to this recorder through a serial cable. Modem Link Connect to this recorder via a telephone link. Phone Number Recorder’s telephone number. Can contain numbers plus standard modem dial characters (e.g. comma represents a pause). Network Link Connect to this recorder via a TCP/IP network. Connect Through IED Connect to this recorder through another recorder that is providing a modem-Lan gateway. An IED Definition for the selected recorder must already exist. For details on setting up a modem-Lan Gateway “Modem LAN Gateway” on page 4-8) Folder Placement The Default Folder directory applied to new IED definitions can be modified with the File>Data Locations command from the Main Menu. Recordings Folder The directory where the IED’s retrieved records are stored. Configs Folder The directory where the IED’s configuration files are saved. You can share configuration files and records with other TESLA Control Panel users by using common folders 5-4 TESLA 3000 User Manual D01721R02.61 5 Working with TESLA Control Panel Online and Offline Operation TESLA Control Panel can be used with or without a connection to the selected recorder. Both offline and online modes work within the selected Current IED workspace. Offline (Not Connected) In Offline mode, you can manage and display a recorder’s local (previously uploaded) records and create and edit configuration files without being connected to the unit. Online (Connected) In Online mode you are connected to the recorder and have access to both local and remote data and functions: • Records (both local and on the recorder) • Event log • Metering (realtime readings of input and calculated channels) • Channel and trigger configurations (the one presently active in the recorder and any saved ones you may have created) • Setup utilities and record configuration screens • Record graphics display • Trend logs Connection Status The Status Bar at the bottom right side of the TESLA Control Panel window shows if you are presently online or offline. D01721R02.61 TESLA 3000 User Manual 5-5 5 Working with TESLA Control Panel Navigating in TESLA Control Panel TESLA Control Panel uses a split screen format. The left pane is used for navigation or selection. The right pane is the working area for each of the program’s main sections. To bring up the Control Tabs, shown below, you must select the appropriate item on the Navigation Tree by double-clicking. Select Item Navigation Tree Working Area Re-Size Bar Control Tabs Status Bar Figure 5.3: TESLA Control Panel Display Sections Navigation Tree The left pane provides a means of moving between TESLA Control Panel functions or selecting items within a function (e.g. channels from a record). TESLA Control Panel functions—Records, Trend, Events, Metering, Utilities and Configuration are activated by a double-click. You can optimize the screen space between the tree and the working area to create a larger working area. Some screens have a Hide Tree button to maximize the working area. Working Area The Working Area on the right pane of the display represents the main working area of each section of the TESLA Control Panel. Control Tabs The Control Tabs are a row of selection tabs near the bottom of the screen. Each time you start a function, a corresponding tab is created. Select the control tabs to navigate from one screen to another or the Main Menu item. Use the Close button to close the screen. Status Bar The Status Bar at the bottom of the TESLA Control Panel displays the name of the selected recorder workspace and the status of the connections. 5-6 TESLA 3000 User Manual D01721R02.61 6 Metering Display The recorder has a full set of real-time metering displays that provide present readings from the analog and digital input channels, and the calculated channels. The Metering display is accessed through the Metering item in the Main Menu tab’s function list. Figure 6.1: Metering Display Standard Metering Screens The Metering display provides tabs at the bottom to select among multiple display screens. The first two tabs, Analogs and Digitals are the default tabs and present the readings from the analog inputs and external inputs. User-Defined Metering Screens You can define an additional ten user-defined metering screens. Setup of these additional screens is part of the recorder’s configuration (see “Meter Groups” on page 8-42). Primary/Secondary Metered values can be shown as either system primary or secondary quantities. Display Zoom The magnification of metering screens can be adjusted using the Zoom Level (%) control. This allows the display to be enlarged for easy viewing while commissioning or testing. Freeze The Freeze button provides a way to temporarily stop the update of the display. It can be used to ensure a synchronized set of readings for documentation purposes. The metering display can be exported to another program using Windows built-in Alt PrintScreen key and standard paste functions. D01721R02.61 TESLA 3000 User Manual 6-1 6 Metering Display Phase angle readings displayed in meter groups are based on the configured Phase Angle Reference Channel (see “Phase Angle Reference Channel” on page 8-11). 6-2 TESLA 3000 User Manual D01721R02.61 7 Recorder Setup Utilities The TESLA recorder has global setup parameters that establish its identity and define its operation. Setup parameters define: • Unit identification • Communication port parameters • Record length and mode settings • Time display and settings • Analog input calibration • Central Station trigger and record notification • Passwords Figure 7.1: Recorder Setup Utilities The setup parameters are accessed through the Utilities tab on TESLA Control Panel. You must be communicating with the IED for the Utilities tab to be available. For details on connecting to the recorder using TESLA Control Panel software see “Communicating with the Recorder” on page 4-1. D01721R02.61 TESLA 3000 User Manual 7-1 7 Recorder Setup Utilities Unit Identification The Unit Identification tab identifies a particular recorder and its records. Double-click Utilities to bring up the tabs; select Unit Identification. Figure 7.2: Recorder Setup Utilities - Unit Identification Unit Identification Settings Identification Serial Number Read-only field, displays the serial number of the TESLA unit currently connected. Unit ID User-entered field that identifies the unit. It is part of the name given to records produced by the unit to identify their origin. By convention, this name should be the same as the "IED Name" assigned to the recorder and recorder’s workspace. The name must not contain the following: “,” “/” “\” “:” or any other character not valid for a Windows file name. IED Firmware Version Read-only field that displays the firmware version of the currently connected TESLA unit. Required Settings Version Describes the version of the settings file required by the connected recorder. Control Panel is capable of creating older versions of settings files for use with recorders whose firmware has not been updated (see “Managing Configuration Files” on page 8-1). Communication Version Read-only field that displays the version of the communications protocol used by the currently connected TESLA unit. System Frequency Read-only field that displays the assumed power system frequency of the recorder, This is a factory setting. Station 7-2 Station Name User-defined, for your reference only. Station Number User-defined, for your reference only. Location User-defined, for your reference only. TESLA 3000 User Manual D01721R02.61 7 Recorder Setup Utilities Communication Port Settings The Communication settings control the modes and baud rates of the recorder’s three serial communication ports and defines the SCADA communication mode. Figure 7.3: Recorder Setup Utilities - Communication Ports Communication Settings Service Port The Service Port is Port 1 on the front of the recorder. It can be used for direct serial connection with TESLA Control Panel or a terminal program (to access the Maintenance Menu). Baud Rate Sets the baud rate of the recorder’s serial port. The default baud rate is 38,400 baud. Note: The baud rate must match that of the serial port of the computer connected to this port. For details about changing the baud rate see “Setting Windows Serial Port Parameters” on page 4-12. For best results, use the maximum baud rate that your communication link and equipment can sustain. D01721R02.61 TESLA 3000 User Manual 7-3 7 Recorder Setup Utilities Direct/Modem Port The Direct/Modem Port refers to either the recorder’s rear panel Port 2 or its (optional) Internal Modem port, depending on the Port Select setting. Port Select Direct Serial: Port 2 is enabled for a direct serial connection with TESLA Control Panel or a terminal program (to access the Maintenance Menu). External Modem: Port 2 can be used to connect to an external modem through a serial link. Internal Modem: Enables a modem connection through the recorder’s rear panel RJ-11 Internal Modem Port. Requires that the recorder has the internal modem option installed. Port 2 is automatically disabled when the internal modem is installed and enabled. The internal modem can be disabled through the Maintenance Menu. Baud Rate Sets the baud rate of the recorder’s port 2. The default baud rate is 38,400 baud. For a direct serial connection on Port 2, the baud rate must match that of the serial port of the computer connected to this port. For details about changing the baud rate see “Setting Windows Serial Port Parameters” on page 4-12. When configured for an internal or external modem, the baud rate specifies the rate at which the recorder communicates with the modem. The actual communication rate between modems is less than or equal to this setting, depending on what the modems can negotiate over the phone line. For best results, use the maximum baud rate that your communication link and equipment can sustain. Modem Initialization String When using an internal or external modem, a modem initialization string can be entered containing modem control codes. The factory default for this field is "M1". Refer to the modem manual for details. SCADA The SCADA protocols can be accessed via either the serial Port 3 SCADA Port or the Network Port. Modbus ASCII, Modbus RTU or DNP3 Level 2 is selected, Port 3 is used. If DNP3 Level 2 - TCP or DNP3 Level 2 - UDP are selected, SCADA can be accessed via ethernet. The factory configuration for SCADA is 19,200 baud, no parity, Modbus ASCII mode, Slave Address 1. The number of data bits is determined by the protocol and mode: Modbus ASCII used 7 bits, Modbus Binary and DNP3 Level 2 use 8 bits. The number of stop bits is always 1 except when a Modbus protocol is selected. In that case, the number of stop bits is 2, as per the Modbus standard 7-4 Mode Serial (Port 3) Modbus ASCII: Modbus SCADA protocol, ASCII mode Modbus RTU: Modbus SCADA protocol, RTU mode DNP Level 3: DNP 3 SCADA protocol, Level 2, serial Ethernet (Network Port) DNP Level 3: DNP 3 SCADA protocol, Level 2, TCP DNP Level 3: DNP 3 SCADA protocol, Level 2, UDP Baud Rate and Parity Must be set the same as the master device on the SCADA network. The number of data bits is determined by the protocol and mode; Modbus ASCII uses 7 bits, Modbus Binary and DNP3 Level 2 use 8 bits. Slave Address The slave address must be set to an unused address value on the SCADA network and is used by the master to communicate with the TESLA. The slave address range is automatically adjusted to the valid range for the protocol selected. TESLA 3000 User Manual D01721R02.61 7 Recorder Setup Utilities Datalink Timeout Used only for DNP3 Level 2. This sets the timeout for the DataLink layer of the DNP protocol. Although configurable, the timeout should be disabled (set to 0 milliseconds) as per the DNP Users Group “Technical Bulletin 9804-002 DNP Confirmation and Retry Guidelines”. The DataLink Timeout is automatically disabled when using either DNP3 Level 2 - TCP or UDP. Master IP Address For either DNP3 Level 2 - TCP or UDP, the Master IP Address must be set to the IP address of the master device that will be polling the TESLA. This prevents unauthorized master devices from communicating with the TESLA. Note: This setting does not control the IP address of the recorder’s Ethernet port. That is done through the recorder’s Maintenance Menu. Make sure the Master IP address is different from the recorder’s IP address Port For either DNP3 Level 2 - TCP or UDP, the Port is the TCP or UDP port that the DNP service may be accessed at and is usually set to 20000. For details regarding the data and functions available on the TESLA recorder’s SCADA port see “Modbus Functions” in Appendix D and “DNP3 Reference” in Appendix E. D01721R02.61 TESLA 3000 User Manual 7-5 7 Recorder Setup Utilities Recording Control Settings The Recording Settings control the parameters of the High Speed Recording, Low Speed Recording and Trend Logging. For High Speed and Low Speed Recording the TESLA recorder can create up to three records simultaneously. The TESLA employs sophisticated trigger combination algorithms used to combine data from multiple events into a single record and also to reduce the amount of redundant data in the records. In addition, the TESLA will combine data captured using multiple time-frames into a single record. In the TESLA there are two modes of capturing data; Edge Recording and Duration Recording. Both modes are available for High Speed Recording, only Edge Recording is available for Low Speed Recording. Edge Mode Figure 7.4: Recorder Setup Utilities - Edge Recording In Edge Recording, the rising edge of the trigger is used to create a record that has a set amount of pre-trigger data and a set amount of post-trigger. This is known as a normal length record. If another trigger is processed while the record is being created, the record may be extended to the full normal length of data associated with the new trigger. Multiple extensions can occur up to the Maximum Record Length limit. Records with combined High Speed and Low Speed data can only be extended during the High Speed data capture portion of the record. Edge Recording mode tends to create smaller records that contain useful fault data around the start of the trigger, but may not capture data for the entire duration of the trigger. To enable record auto-extension for multiple triggers, the Maximum record Length must be larger than the Normal Record Length At least small amount of pre-trigger time is recommended to ensure the triggering event is included in the records. 7-6 TESLA 3000 User Manual D01721R02.61 7 Recorder Setup Utilities Duration Mode Figure 7.5: Recorder Setup Utilities - Duration Recording In Duration Recording, the duration of the trigger determines the record length. The record stores the configured amount of pre-trigger data, continues to record while the trigger is active and then records a configured amount of posttrigger data. If a trigger remains active, the TESLA stops recording once the Maximum Record Length limit is reached. If a subsequent trigger occurs while a record is being created, it will be combined with the first trigger using a logical OR operation as long as it is not near to the maximum record length limit. If the trigger is processed near the end of the record, a new overlapping record will be created instead of combining the triggers. Records with combined High Speed and Low Speed data can only be combined during the High Speed data capture portion of the record. Duration Recording mode captures all the data during the fault trigger, but tends to create larger records that may contain unimportant data. Recording Settings High Speed Recording D01721R02.61 Trigger Mode Select Edge or Duration mode. See above for descriptions. Sample Rate Displays the configured high speed sample rate. The sample rate is set in the configuration file downloaded to the recorder. (See “Sample Rate” on page 8-5) Pre-trigger Time The length of data that is recorded prior to the trigger time. At least 0.1 seconds of pre-trigger time is recommended to ensure the triggering event is included in the records Normal Record Length Normal Record Length (Edge Mode) is the total length of the record, including pre-trigger data, without any record extension TESLA 3000 User Manual 7-7 7 Recorder Setup Utilities Recording Settings Post-Trigger Time Post Trigger Time (Duration Mode) is the length of data that is captured after the falling edge of trigger event Maximum Record Length Edge Mode: The maximum length of the record including pre-trigger, post-trigger and extensions. To enable record auto-extension for multiple triggers, the Maximum record Length must be larger than the Normal Record Duration Mode: The maximum length of the record including pretrigger, trigger and post-trigger. Low Speed Recording Sample Rate Samples at 50 or 60 samples/second (1 sample/cycle) producing record lengths of a few minutes to capture slower system dynamic swings. The sample rate for low speed recording is based on the recorder’s system frequency which is a factory setting. Pre-trigger Time The length of data prior to the trigger time that is included in the recording. Normal Record Length The total duration of each recording under single trigger conditions. Includes the pre-trigger time. Max. Extended Record Length The maximum length of the record including pre-trigger, post-trigger and extensions. To enable record auto-extension for multiple triggers, the Maximum Record Length must be larger than the Normal Record. Trend Recordings Sample Rate Read-only display of the trending interval in seconds. The trend logging rate is configured in the recorder’s setting file (see “Trend Logging” on page 8-43). Continuous Disturbance Recording (CDR) Sample Rate Read-only display of the recording rate in RMS samples/second/ channel. The rate is configured in the recorders setting file, for details see “Continuous Disturbance Recording” on page 10-1 Storage 7-8 High/Low Speed Accumulation Mode Selects whether to overwrite the oldest transient or swing records when the storage space is full or the 1000 record limit has been reached or to stop storing new records. The Storage Alarm can be used in conjunction with the Stop setting to provide notification in advance of the full condition. High/Low Speed Storage Alarm Limits When enabled, you can enter a limit giving the percentage of recording space that causes an alarm. Enter a number between 60 and 90. The storage alarm condition is indicated by flashing the front panel "Record Storage" LED and activating a selected alarm contact. Note: the alarm contact assigned to this is displayed as a read-only value. It’s set as part of the recorder’s configuration (see “Storage Alarms” on page 8-7). Trend Accumulation Mode Selects whether to overwrite the oldest trend data when the 90 day storage limit has been reached or to stop trend. The Storage Alarm can be used in conjunction with the Stop setting to provide notification in advance of the full condition. TESLA 3000 User Manual D01721R02.61 7 Recorder Setup Utilities Recording Settings Trend Storage Alarm Limits When enabled, you can enter a limit giving the number of days of accumulated trend information that causes an alarm condition. Enter a number of days between 10 and 90. The storage alarm condition is indicated by flashing the front panel "Record Storage" LED and activating a selected alarm contact. Note: the alarm contact assigned to this is displayed as a read-only value. It’s set as part of the recorder’s configuration (see “Storage Alarms” on page 8-7). CDR Accumulation This is a read-only indicator set to Recycle when Continuous Distubance Recording is enabled. Time Display and Settings The Time Control tab displays the recorder’s current time and provides controls to describe the IRIG-B time signal input. In the absence of an IRIG-B input there is a facility to set the time manually. Figure 7.6: Recorder Setup Utilities - Time Control When the time is changed manually or by the application of IRIG-B, any existing trend and continuous disturbance recording data will be compromised. You should erase this data after performing the time change. Displayed Time D01721R02.61 Time is maintained in UTC format on the recorder (i.e.: without a time zone offset or daylight savings time applied). If the clock feeding the IRIG-B time signal to the recorder is sending local time, the recorder converts it to UTC internally. The time displayed in the Time Control screen above is determined by the adjacent time display settings. The recorder will automatically convert from its internal UTC time as required. The Recorder Time Zone Setting determines the offset between Local time and UTC. DST will automatically add 1 hour to the offset if appropriate. TESLA 3000 User Manual 7-9 7 Recorder Setup Utilities Event and Record Timestamps Event timestamps in the recorder’s Event Log are also controlled by the above time display settings. They will be displayed as UTC or local times as configured here. Record timestamps shown in Control Panel’s Records tab are handled a bit differently. Record times are converted from UTC using the Windows Time and Date settings of the PC running Control Panel. This enables records from multiple time zones to be normalized to a common time zone and format. . Time Settings IED Time is displayed as 7-10 UTC Sets the time display and the Event Log timestamps to Universal Coordinated Time (UTC). Note that UTC time is not affected by the Recorder Time Zone setting or Daylight Savings Time. Local Time Sets the time display and the Event Log timestamps to Local Time. Local time is converted to UTC using the Recorder Time Zone setting. Local Time with DST Same as Local Time, except Daylight Savings Time (DST) is factored into the time conversion. Daylight Savings Time is assumed to be in effect from 2 AM on the first Sunday in April until 2 AM on the last Sunday in October. Present Time Display When connected to a recorder, the recorder’s present time is shown and continually updated. The specified time settings (e.g. Local Time) are applied to the displayed time. Sync/No Sync Display Indicates that the recorder is synchronized to an IRIG-B time signal input. Incoming IRIG Signal Properties These settings determine how the recorder responds to IEEE 1344 information in the IRIG-B time signal and manually define the format of the incoming time if IEEE 1344 data is not available. Use IEEE 1344 If Present If Use IEEE 1344 if Present is checked and the source clock generates IEEE 1344 data, the recorder: • uses the time zone offset from the IEEE 1344 data embedded in the IRIG-B time signal • reads the IEEE 1344 data to determine the mode of the incoming IRIG signal (UTC, Local, Local with DST) Otherwise, the recorder uses the manually entered time zone offset and clock source mode settings. Do not use IEEE 1344 If Do Not Use IEEE 1344 is selected, the recorder will ignore any IEEE 1344 data in the IRIG-B signal and use the manually entered time zone offset and clock source mode settings. IRIG Source Specifies the mode of the incoming clock signal. Ignored if IEEE 1344 data is present in the IRIG-B time signal and the Use IEEE 1344 If Present setting is enabled. Manually Set IED Time Allows the recorder’s clock to be manually set if an IRIG-B signal is not present. If an IRIG-B signal is present, but does not contain IEEE 1344 data, the year can be set manually. Recorder Time Zone Setting Provides the offset from local time to UTC in hours. For example, Central Time has a +6 hour offset from UTC. This setting is ignored if IEEE 1344 data is present in the IRIG-B time signal and the Use IEEE 1344 If Present setting is enabled. TESLA 3000 User Manual D01721R02.61 7 Recorder Setup Utilities Changing time manually or IRIG-B re-synchronizing to the recorder compromises the trend and continuous disturbance recording data. You should download all trend and continuous disturbance records before you change the time in the Utilities, Time tab. Analog Input Calibration The Calibration Utility provides a means of calibrating the recorder’s analog input channels. It is accessed through the TESLA Control Panel’s Utilities tab as Analog Input Calibration. Figure 7.7: Analog Input Calibration When To Calibrate The recorder’s analog input channels should be re-calibrated whenever an analog isolation module is changed. If the type of isolation module is changed, for example from a voltage to a current the readings will be significantly wrong until calibration has been performed. Only the channels associated with the altered module need be re-calibrated. AC Channel Calibration Process D01721R02.61 To calibrate a channel (Main Menu>Utilities>Analog Input Calibration): 1 Select the channel or channels from the list. More than one channel of voltage or current can be chosen using the Control/Shift + left-click. TESLA 3000 User Manual 7-11 7 Recorder Setup Utilities It is possible to calibrate multiple channels simultaneously by using the mouse to select a set of channels from the list. Multiple channels can be selected using standard Windows selection methods. All channels in the selected set must have the same type of input module. 2 Enter the voltage or current magnitude that is applied to the isolation module associated with the channel Applied Signal field. The signal magnitude level should be measured with a precision calibrated instrument. 3 Press the Calibrate Offset and Gain button. If a channel has not yet been configured, only Calibrate Offset will be displayed. 4 Under the Offset and Gain columns the line of the channel being calibrated OK or No will be displayed (see “Analog Input Calibration” on page 7-11). 5 Repeat for all other channels being used. 6 Use the Save button to load the new calibration to the recorder. DC Channel Calibration Process The dc calibration procedure is a two-step procedure. When one or more compatible dc channels are selected, two calibration areas appear on the screen. You may calibrate the points in either order as is convenient. DC calibration is not complete until both points have been calibrated, and the associated offset and gain values accepted. Out of Range An error message is displayed if the applied signal as seen by the recorder differs from the value entered in the Applied Signal field by more than 10%. This helps to prevent erroneous calibration. If you change the type of isolation module associated with a channel, you must specify the new module type in the input channel's configuration before calibrating. 7-12 TESLA 3000 User Manual D01721R02.61 7 Recorder Setup Utilities Notify The TESLA recorder can call a ERLPhase RecordBase Central Station via modem or LAN to notify it of selected events. Notification is used for two purposes: 1 To initiate cross-triggering of dynamic swing records on other recorders 2 To initiate record transfer to RecordBase when a new record is created The Notify tab of the Utilities screen contains settings to control the dial-out process and the initiation of record transfers. Automatic Record Transfer You can control which records are automatically transferred to the RecordBase Central Station by specifying the required record priority. The setting ranges from 0 (all records) to 3 (highest priority only) and provides an option to disable automatic record transfers completely. Record priority is determined by the highest priority trigger included in the record. Trigger priority is set as part of each channel’s configuration. Cross-Trigger Notification A Notification call to RecordBase to trigger swing recordings on other recorders can be initiated by any of the recorder’s triggers. Cross-trigger notification is selected as part of each channel’s configuration. Determine Recording Priority Figure 7.8: Notify Communication Strategy D01721R02.61 TESLA 3000 User Manual 7-13 7 Recorder Setup Utilities Notify Settings 7-14 Connect Using The TESLA recorder can be set to notify a RecordBase Central Station via modem or LAN, or to not notify at all. These 3 options are mutually exclusive. Note that the availability of these controls is dependent on the hardware options and configuration of the recorder. Modem If Modem is selected, enter the telephone number of the RecordBase call-in modem. All standard modem dialing characters are supported (e.g. a comma is used to specify a pause in the dialing sequence). LAN If LAN is selected, enter the IP address of the computer running RecordBase Central Station. Do Not Connect If Do Not Connect is selected, the TESLA recorder will not notify RecordBase Central Station of new records or cross triggers. This is a global setting and can be used to temporarily disable notification. Retry Attempts These rules are applied when the TESLA recorder fails to establish communication with RecordBase Central Station (i.e. if the phone line is busy, or if the network is down). Maximum Attempts When the TESLA recorder fails to establish contact with RecordBase central station, this is the maximum number of attempts it will make before giving up. Delay Between Attempts Specifies the delay, in seconds, that the TESLA will wait before making another notification attempt. Notify on creation of new Recording if Priority is at least Controls which records, if any, are automatically transferred to the RecordBase Central Station. When a record is created with a priority equal to or greater than the specified value, the recorder sends a New Record Created notification message to RecordBase. The setting can range from 0 (all records) to 3 (highest priority only). Selecting Do Not Notify disables automatic record transfers completely. Record priority is determined by the highest priority trigger included in the record. Trigger priority is set as part of each channel’s configuration. TESLA 3000 User Manual D01721R02.61 7 Recorder Setup Utilities Password Protection Access to various TESLA functions can be protected through the use of passwords. Figure 7.9: Passwords There are three user access levels: VIEW, CHANGE and SERVICE. Setting Passwords Passwords can be viewed and set through the Passwords tab of TESLA Control Panel’s Utilities screen. You have the option of explicitly disabling the password protection for each access level. Leaving the VIEW access level password disabled, for example, will allow free use of the TESLA for read-only operation. The Password tab can only be accessed when connected via direct serial link through the recorder’s service port (Port 1). This provides protection from unauthorized remote access while ensuring that onsite staff can freely use the recorder. D01721R02.61 TESLA 3000 User Manual 7-15 7 Recorder Setup Utilities Function Required Access Level Display Record List from IED VIEW Delete Record from IED CHANGE Create Fault or Swing Record VIEW Rename Local Record None Display Local Record List None Delete Local Record None Delete Trends (local) None Delete Trends on IED CHANGE Download Trends VIEW Display Trends None Event Log VIEW Display Event Log VIEW Erase Event Log CHANGE Metering Metering Display VIEW Utilities Display Unit Identification VIEW Set Unit Identification CHANGE Display Communication Settings VIEW Set Communication Settings CHANGE Display Recording Settings VIEW Set Recording Settings CHANGE Display Time & Settings VIEW Set Time & Settings CHANGE Display Calibration VIEW Save Calibration Changes SERVICE Display Configurations (Online) VIEW Display Configurations (Offline) None Load Configuration to IED CHANGE Save Local Configuration None Delete Local Configuration None Records Trends Events Configuration 7-16 TESLA 3000 User Manual D01721R02.61 8 Configuring the Recorder Where the Setup Utilities of the previous chapter specify the recorder’s global characteristics, it is the recorder’s Configuration File that defines its individual channels and recording triggers. The configuration file identifies and adjusts the recorder’s input channels, derived (calculated) channels, record triggers, metering displays and trend logs. It also specifies how the recorder handles record storage and excessive trigger conditions. Configuration files are created and managed by TESLA Control Panel and loaded into the recorder’s non-volatile memory through the communications link. Managing Configuration Files TESLA Control Panel’s Configuration Manager creates and manages configuration files and handles transfer to and from the recorder. To open the Configuration Manager screen, double-click the Configuration line in the left pane of the Main Menu screen. The configurations shown in the Configuration Manager screen are specific to the selected Current IED. To work with configurations from another recorder, you must first select that unit as the Current IED (from the Main Menu). Figure 8.1: Configuration Manager If a communication link to the Current IED is available, you can work directly with the recorder’s configuration by either double-click on the Present Settings item in the list or by selecting Present Settings and using the Edit button. This will read the configuration from recorder and displays it in the Configuration Editor. D01721R02.61 TESLA 3000 User Manual 8-1 8 Configuring the Recorder Editing a Recorder’s Present Configuration Present Settings Figure 8.2: Present Configuration When you close the Configuration Editor, you are given the option of loading the configuration back into the recorder. This gives you a quick way to make changes on the fly. You can also transfer the recorder’s present configuration to a saved file in Control Panel using the Get from IED button. When transferred, the configuration appears in the Saved Settings list. Saved Configuration Files Saved Settings New Configuration Figure 8.3: Saved Configurations Saved configuration files are shown under the Saved Settings heading in the list. Control Panel can store many saved configuration files, limited only by hard disk and Windows operating system constraints. Saved configuration files can be created, displayed and modified, copied, renamed, deleted or loaded into the recorder. Click the desired configuration from the Saved Settings list, then select the appropriate action button on the right of the screen. Double-clicking on a configuration is equivalent to clicking the Edit button. 8-2 TESLA 3000 User Manual D01721R02.61 8 Configuring the Recorder It is recommended that you maintain a copy of each recorder’s current configuration as a Saved Setting for a backup. It can be loaded into a replacement recorder if the unit ever needs to be serviced. Loading a Saved Configuration Note: A configuration file must be compatible with the firmware on the recorder in order to be loaded. Compatibility is defined by the Settings Version, a number which identifies the version of configuration file a given version of firmware requires. Control Panel will either prevent incompatible configuration files from being loaded or will offer to make the configuration compatible before it loads it. To load a configuration file from the Saved Settings list into the Current IED, you must be communicating with the recorder. Initiate the load by selecting the desired configuration file and clicking the Load to IED button. The recorder will immediately load and run the new configuration. Complex configurations can take a few minutes to transfer and load, depending in part on communications rate. The recorder will acknowledge the new settings back to Control Panel. Note: The recorder will automatically go through a reset when loaded with a configuration that changes its sample rate. This will add approximately two minutes to the load time. Creating a New Configuration Use the New button to create a new configuration file. New configuration files are compatible with the latest Setting Version by default. The Setting Version can be changed if desired to create new configuration files for older recorders. The fixed information in the Device Configuration screen is derived from the IED Definition (“Adding/Editing a Recorder Workspace Definition” on page 5-3). Using Another Recorder’s Configuration as a Starting Point You can use the Copy from Other IED button to create a configuration for the current recorder based on an existing one from another recorder. The configuration can be chosen from a list of the saved settings of the other IEDs defined in Control Panel. D01721R02.61 TESLA 3000 User Manual 8-3 8 Configuring the Recorder Configuration Editor The Configuration Editor provides the means to create, display and modify configurations for the recorder. To start the editor from the Configuration Manager screen, either double-click on a configuration file or select it and click on the Edit button. The sample screens shown are from the TESLA 3000 Demo configuration. 96 Figure 8.4: TESLA Configuration Editor Navigation Tree The right-side pane of the Configuration Editor window provides a navigation tree to access the various sections of the configuration. Selecting an item in the tree shifts the large right pane view to the appropriate topic.Double-clicking on a tree branch in the left pane that has a small “+” to its left or selecting on the “+” itself expands or collapses the tree. Right-Click Menu A right-click in the editor provides you with options appropriate to your present context. For example, you can create a new element by selecting the appropriate channel group, right-clicking and selecting Add Element. Alternatively, the same function is in the Config menu. Closing The Close button is available to you when you are finished viewing or making changes to the Settings. If you made changes, the text on the Close button changes to Save/Close as a reminder that Control Panel gives you an opportunity to save your changes to a file (or send them to the IED) before closing the Configuration Editor. To close without saving changes, use the Save/Close button and then select Exit Without Saving and Discard on the subsequent screens. 8-4 TESLA 3000 User Manual D01721R02.61 8 Configuring the Recorder Identification Device Configuration The Device Configuration screen is displayed when you select the Identification item in the Navigation Tree (“TESLA Configuration Editor” on page 8-4). It provides information about the selected IED and the particular configuration file being edited. Most of the information is drawn from the IED Definition and identifies the target recorder (“Adding/Editing a Recorder Workspace Definition” on page 5-3). The Device Configuration screen has three configuration variables that are detailed below. Settings Version Recorders with older firmware may require older versions of configuration files. Compatibility between a configuration file and firmware versions is defined by the Settings Version. The Settings Version required by a TESLA recorder is shown on the Unit Identification screen of the Utilities menu (“Unit Identification” on page 7-2). You must be connected to the recorder to view this information. Settings Version requirements are also listed in the compatibility table at the front of this User Manual and are identified in each version’s Release Notes. TESLA 2000 recorders use Setting Versions 1 through 7. TESLA 3000 Setting Versions start at 201 to distinguish them from those used by TESLA 2000. The version of a configuration file is controlled through the Settings Version field in the main identification screen (see: “TESLA Configuration Editor” on page 8-4). Changing the setting automatically converts the configuration file to the selected Settings Version. If the conversion results in the loss of settings from the file (i.e. the target version does not support functions which were enabled in the original), a list of the affected settings is displayed and you have the choice of cancelling the conversion or continuing. If the conversion results in the addition of new functionality, the settings for the new functions will be in a default or disabled state. If you choose to close the configuration file without saving, the conversion is also abandoned. A new configuration file is set to the latest Setting Version by default. To create a new configuration file for a recorder with older firmware, change the Setting Version appropriately after creating the new configuration. TESLA Control Panel 3000 can work with configuration files of any Setting Version, including those for TESLA 2000 recorders, creating, editing, storing and transferring them to and from a recorder as needed. Note: TESLA Control Panel should be updated as needed whenever you update the firmware on your recorders. This will ensure it can generate configuration files with the latest Settings Version. Since Control Panel can work with back versions of configuration files and can communicate with recorders with older firmware, the newest version of Control Panel can always be safely installed. Sample Rate D01721R02.61 The Sample Rate setting controls the rate at which the TESLA 3000 reads its analog and digital input channels. The setting determines the number of samples per second stored in high speed fault records and used to display calculatTESLA 3000 User Manual 8-5 8 Configuring the Recorder ed high speed channels. The sample rate does not affect the data rate of’downstream’ calculations that generate data for low speed swing recordings, low speed calculated channels, the metering display update rate or the trending rate. The Sample Rate will also determine the number of channels the recorder can record. For sample rates up to 128 samples/cycle (7680 samples/second on a 60Hz system frequency), the recorder supports all its channels - 36 analog and 64 digital. For sample rates above 128 samples/cycle, the number of channels is reduced proportionally. Channel reductions always take place starting from the highest numbered channels. The numbers of available calculated channels (e.g. watts) is not affected by the sample rate. The Sample Rate also determines the frequency response of the front-end antialiasing filters and therefore the bandwith of the analog channels. See the following tables. Table 8.1: Sample Rates (60Hz System Frequency) Samples / Second Samples / Cycle Analog Channels External Channels Highest Harmonic* Approx. Record Size** (kbytes) 1,920 32 36 64 8 50 3,840 64 36 64 16 100 5,760 96 36 64 25 150 7,680 128 36 64 33 200 15,360 256 18 32 66 200 23,040 384 9 32 100 200 Table 8.2: Sample Rates (50Hz System Frequency) Samples / Second Samples / Cycle Analog Channels External Channels Highest Harmonic* Approx. Record Size** (kbytes) 1,600 32 36 64 8 50 3,200 64 36 64 16 100 4,800 96 36 64 25 150 6,400 128 36 64 33 200 12,800 256 18 32 66 200 19,200 384 9 32 100 200 *Limited by the anti-aliasing filters **For a 1 second fault record assuming typical compression Note: 18 channel models are limited to a maximum of 18 analog channels and 32 external channels Comments 8-6 In the Comments section you can enter a description of the configuration for reference purposes. This description is also displayed in the configuration management screen to identify saved configuration files. TESLA 3000 User Manual D01721R02.61 8 Configuring the Recorder Chatter Limits The Limits screen, accessed by expanding the Identification branch in the Navigation tree, lets you define how the recorder behaves when dealing with numerous, repetitive triggers. The chatter limit settings specify the time window (Chatter Detection Window) in which the chatter detector works. The detector limits the number of triggers that can occur - on the same channel and of the same trigger type -within the window. Four External Input triggers and two analog or calculated channel triggers are allowed in the window. If this number is exceeded, the trigger is automatically disabled until the trigger rate falls to less than that number for the specified number of seconds (Recovery Time). This prevents the recorder from being overloaded by nuisance triggers and automatically re-enables the trigger when conditions return to normal. Note: Although an External Input triggers may be disabled by a chatter limit function, the recording will contain the original External Input data. Storage Alarms The Storage Alarms screen, accessed by expanding the Identification branch in the Navigation tree, lets you select the output contact to be closed when the memory for triggered records or long term trend logs is nearly full. The accumulation mode (recycle of stop-when-full) and the level at which to alarm are set in the Recording tab of the Utilities screen (“Recording Control Settings” on page 7-6. The record and trend storage alarm condition can also be accessed via the SCADA protocols. D01721R02.61 TESLA 3000 User Manual 8-7 8 Configuring the Recorder Channels and Triggers The Channels and Triggers branch of the Navigation tree is where you define the recorder’s input channels, calculated channels and triggers. It is significant tool with a variety of views and displays to help manage complex recorder’s configurations. Channel Grouping and Naming With the large number of input and calculated channels available, it is worthwhile to apply consistent channel organization and naming conventions in your configuration. This section describes how the record handles channel names. An effective way to organize the many channels available on the recorder is to group them by the power system element they are monitoring. With the Configuration Editor, you can identify each monitored element and use its name to group and identify the analog, digital and calculated channels associated with it. For example, if you have a transmission line named #1, you can define an element and name it “Line #1.” The channels associated with that element might then be: Line #1:Va Line #1:Vb Line #1:Vc Line #1:Ia Line #1:Ib Line #1:Ic External (digital) inputs can also be reasonably associated with the Line #1: Line #1:EI:BRKR1_a Line #1EI:21N_Trip Calculated channels fit the model as well: Line #1:W/V (watts and vars) Line #1:Iseq (current channel sequence components) Channel Types and Naming Channel names consist of three parts: the Element Name, the Channel Type and an optional Descripton field. These fields are combined to produce the full channel name in the format: Element:Type:Description e.g Line #1.EI.BRKR1_a This is the name that will appear beside a channel when it is displayed in a graph or a log. For example the recorder’s Event Log might contain this entry for a change in state of a external input: 2005 Jan 12 20:44:33.672 Line #1.EI.BRKK1_a open. Details on the channel name components are given in the following table. 8-8 TESLA 3000 User Manual D01721R02.61 8 Configuring the Recorder Element Name (10 chars) Free-form text describing the power system element associated with this channel (e.g. Line #1). Channels that are logically related can be grouped through the use of the same element name. Channel Type Standardized channel type descriptors are automatically generated when you select the channel type. Examples Description (optional) (12 chars) D01721R02.61 Va Phase A voltage Ic Phase C current In Neutral current Vac Generic AC voltage DC DC voltage or current EI External inputs Vseq Sequence component set (pos, neg, zero) VaSum Summation of Phase A voltages W/V Watts/vars set PF Power factor Z1 Impedance Logic Logic function FLoc Fault locator Frequency Frequency (one per channel group) Often the combination of the Element Name and the Channel Type is sufficient to fully identify a channel (e.g. Line #1:Va). In other cases, the Description is required to clarify the channel name. (e.g. You might name an external input channel as “Line #1:EI:BRKR1_a). TESLA 3000 User Manual 8-9 8 Configuring the Recorder Element and Channel Tree Views The Config Editor can display recorder channels in two distinct views - Element View and Channel View. The title at the top of the tree pane indicates the present viewing mode. The button at the bottom of the tree pane lets you switch to the other viewing mode. Element Tree The Element Tree View organizes channels by the element names you create. In the following figure, Element "Line #1" has been expanded to show some of the channels associated with it, such as Va. Present viewing mode Element Tree. Switch between Channel Tree and Element Tree. Figure 8.5: Element Tree View Channel View The Channel Tree View displays the same configuration organized by channel type. You can use this view to gain an overview of channel usage. Although you can chose to work in either view, the Element View is recommended for most operations as it provides an automatic way of grouping related channels. 8-10 TESLA 3000 User Manual D01721R02.61 8 Configuring the Recorder Element Overview Figure 8.6: Element Overview Screen An overview of the configured elements is available by selecting an element or the channel group heading in the Navigation tree. The last row of the display shows the channels and functions that are unassigned and available. Phase Angle Reference Channel The Element Overview screen, displayed by selecting Channel Group 1 in the Navigation tree, is where you select the analog input channel to be used as the reference channel for angle measurements. All channels use the same reference to provide relative angle calculations. Typically, a phase A voltage channel is used as the reference. D01721R02.61 TESLA 3000 User Manual 8-11 8 Configuring the Recorder Channel Overview An overview of the configured channels is available by selecting the associated channel type heading from the Navigation tree. For example, selecting Analog Inputs displays a table of all defined analog channels. Figure 8.7: Channel Overview Screen Channel settings can be edited in the Channel Overview display, providing an alternate way to enter channel settings that helps maintain consistency between channels. The column width can be adjusted on the overview tables to optimize the layout for the particular configuration. Individual Channel Screens Detailed channel configuration is displayed on an individual channel basis. The settings for each channel can be displayed in individual screens by selecting the specific channel in the Navigation. Each channel type has its own configuration screen with parameters appropriate for its type. Figure 8.8: Individual Channel Configuration Screen 8-12 TESLA 3000 User Manual D01721R02.61 8 Configuring the Recorder Adding an Element To create a new element you must be in the Element Tree view (“Element and Channel Tree Views” on page 8-10): 1 Select the Channel Group heading or an existing element in the Element Tree. 2 Right-click and select Add Element or Insert Element from the shortcut menu. Add Element creates the new element at the end of the present Element list. Insert Element creates the new element above your current selection. 3 Type the element name and Enter. The typed text replaces the New Element text. Step 1 - Select desired channel group in tree. Step 2 - Right-click and select Add Element. Step 3 - Name element and select Enter. Figure 8.9: Add an Element Deleting an Element To remove an element from the tree, select it and press the <Del> key or rightclick and select Delete Element from the shortcut menu. Adding a Channel Channels can be created in either the Element Tree view or the Channel Tree View (“Element and Channel Tree Views” on page 8-10). To create a new channel in the Element Tree view 1 Select the desired element in the tree. 2 Right-click and select the desired channel type. If appropriate, choose the type that matches the input you are monitoring (e.g. Va). For an ac signal that has no specific phase designation you can select New AC Voltage or New AC Current. If you chose New Ia, Ib, Ic or New Va, Vb, Vc, three entries are created and the configuration screen for the first is displayed. The new channel(s) will be inserted automatically in the list. To create a new channel in the Channel Tree view 1 Select the desired element in the tree. D01721R02.61 TESLA 3000 User Manual 8-13 8 Configuring the Recorder 2 3 4 5 Expand the branches in the tree to show the channels for each group. Select the channel number and an input screen appears on the right side. Type in the information required to configure the channel. When you close the screen, you are asked to save the configuration to the recorder. Select Save to Recorder. Step 1 - Select Analog Input. Step 2 - Right-click and select New Analog Input. Step 3 - Choose type. Figure 8.10: Adding Analog Input Channels from the Element Tree Deleting a Channel 8-14 To remove an channel from the tree, select it and press the <Del> key or rightclick and select the appropriate Delete entry from the shortcut menu. TESLA 3000 User Manual D01721R02.61 8 Configuring the Recorder Analog Input Channels Description Basic recording channels for the recorder’s analog input signals. Input The recorder’s physical analog input channels. Calculation The RMS amplitude of the fundamental is calculated using a DFT function. The resultant phasors are used for rate and level triggers, metering, low speed recording, trending and sag/swell detection. The single harmonic and THD detectors are calculated directly from the input samples. Triggers High & low magnitude Negative and positive rate of change Single harmonic magnitude THD magnitude Sag and swell To prevent multiple triggers on threshold conditions, an hysteresis of 2% of setting is applied to magnitude triggers. Recording High Speed: records the samples generated from the A / D converters at the selected sample rate. Low Speed: records the calculated phasors at a rate of one phasor per cycle. Number of Channels Up to 36 Analog Input Channels can be defined, one for each physical input (limited to 18 on an 18 channel model). The numbers of channels are reduced at high sample rates (see: Table 8.1 on page 6 and Table 8.2 on page 6) Types Specific: Va, Vb, Vc, Ia, Ib, Ic, In (use where appropriate) Generic: Vac, Iac, DC Note: the DC type indicates that a DC Input Isolation Module is used on this channel. This module can in fact be used with either ac or dc signals. Notes The Analog Input Channel also produces THD and Single Harmonic readings that are available to the metering display, SCADA and the long term trending function. D01721R02.61 TESLA 3000 User Manual 8-15 8 Configuring the Recorder Settings Figure 8.11: Analog Input Channel Configuration Screen Analog Input Channel Settings 8-16 Element Identifies the group to which this channel belongs. The Element forms the first part of the channel name. The Element is selected when the channel is created and is fixed once assigned when you are working in the Element Tree view. Type Identifies the type of signal being applied to this input channel. The Type forms a part of the channel name (Element:Type:Description). Selecting the appropriate Type can simplify channel naming by eliminating the need for the optional Description field (e.g. Line #1:Va uniquely defines the channel). Initially set when the channel was created, the Type can be changed to refer to a different phase as needed. Description Optional field (12 characters). Provides an additional description of the channel that forms part of the channel name. Use if Element Name and channel Type do not sufficiently identify the channel. (“Channel Grouping and Naming” on page 8-8). Channel Identifies the physical input used by this channel. This number is identified on the rear of the TESLA chassis. The list shows only inputs not assigned to other channels. To get an overview of channel assignments, switch to the Channel Tree view and look at the Analog Channel list. Module Type Indicates the type of external input isolation module used with this channel. The list is limited to those modules appropriate for the selected channel type. The module defines input scaling information to the system. View/Set Scale Sets the primary to secondary scale factor. See details below. TESLA 3000 User Manual D01721R02.61 8 Configuring the Recorder Analog Input Channel Settings Angle Offset Specifies a phase angle offset to be applied to the channel. The offset is included in: • Meter readings • Trigger calculations • Low speed recordings (phasors) • Trend channels • Output to calculated channels (watts, vars, Impedance, Summations, Sequence components, etc.) that use this channel as their input. High speed recordings of this channel will not have the phase angle applied as they are basic representations of the individual sampled points. When the Angle Offset is used on a channel that has been designated as the reference channel, it affects the angle measurement of all other channels. (See: “Phase Angle Reference Channel” on page 8-11). Trigger Settings Rate of Change Interval Specifies the period of time over which both positive and negative rate of change is measured. 0.5 to 8.0 cycles. Single Harmonic Number Selects the harmonic of fundamental frequency that will be used by the Single Harmonic trigger. 2 to the highest harmonic allowed, which is defined in Table 8.1 and Table 8.2 on page 6. Nominal Level Provides a nominal level for the sag and swell detectors. Available on voltage channels only. See sag and swell detector details below. Limit Specifies the trigger levels for the magnitude, single harmonic, THD, sag and swell triggers. Specifies the magnitude portion of the rate for rate of change triggers. Delay Specifies how long the trigger condition must be present before a trigger is declared. Magnitude and Rate of Change triggers: 0 to 1,200 seconds in halfcycle increments. Single harmonic and THD triggers: 1 to 10,000 seconds in 1 second increments. Trigger Actions D01721R02.61 Enable Enables or disables the associated trigger. A trigger can be disabled without altering the rest of its settings. Fault Initiates a fault (high speed) recording when triggered. Swing Initiates a swing (low speed) recording when triggered. If both Fault and Swing are enabled, the recorder will attempt to create a combined record. Log Logs a message in the Event Log when triggered. Notify Contacts the RecordBase Central Station when triggered. Can be used to initiate wide area swing recordings and/or automated record transfer (“Notify” on page 7-13) Cross Trigger Activates the cross-trigger contact (#4) to trigger another device. Priority Specifies the priority to be assigned to records created by this trigger. The priority is used to determine Central Station notification. 1 - 3 (3 is the highest priority). (“Notify” on page 7-13). TESLA 3000 User Manual 8-17 8 Configuring the Recorder Analog Input Channel Settings Alarm Contact Scaling Input Channels Specifies a rear panel contact to be closed when triggered. Contacts are closed momentarily for one second. Contact assignment is not exclusive, allowing multiple triggers to activate the same contact. Available contacts: 2, 3, 5, 6, 7 or 8 on a 36 channel model and 2 or 3 on an 18 channel model. Contacts 1 and 4 are reserved for Recorder Functional and Cross-Trigger respectively. Contacts assigned for storage alarms (“Storage Alarms” on page 8-7) will not be available for use here. AC Scaling When you select the View/Set Scale button on the Analog Input form for an ac channel, Control Panel displays the Scaling dialog box (Figure 6.12). The scaling factor represents the turns ratio of the primary transducer (CT or PT). The nominal secondary value is used as the default calibration level for the channel. If you are using an ac module to measure the ac quantity, Control Panel sets the Full Scale quantity appropriately; if you are using the DC input module enter the Full Scale value associated with the values of the scaling resistors Rsh, Rin and Rfb as listed in “Input Modules” in Appendix F. Figure 8.12: AC Scaling DC Scaling 8-18 When you select the View/Set Scale button on the Analog Input form for a DC channel, Control Panel displays the DC Scaling dialog box. You must set the Full Scale value, which can be determined from the scaling resistors attached to the module. For DC channels, TESLA uses two-point scaling, whereby the conversion process performs a linear transformation between two points. The secondary values are the default calibration points for the channel. The terms Primary and Secondary are used in the case where a measurement transducer is applied and the output of the transducer is routed to the input of the dc module. In this case, Secondary refers to the output of the transducer; Primary refers to the scale and units of the signal measured by the transducer. The “Scaling Resistors attached to the module” are the Rsh, Rin and Rfb values referred to in “DC Input Module” in Appendix F. Enter the associated Full Scale value from the table as the Full Scale (Secondary) value. If you are measuring a DC voltage or current directly, enter the same values as Primary and Secondary for each of Points 1 and 2. The specific values for Point 1 and 2, provided they are reasonably separated, are not significant, except that they are TESLA 3000 User Manual D01721R02.61 8 Configuring the Recorder used as default values for the calibration activity. For instance, if you are directly measuring a 48 Vdc input, you may wish to enter 0 V for Point 1 and 48 V for Point 2. If you are monitoring an ac signal through a dc module, you must define the signal as an ac signal (see above). Figure 8.13: DC Scaling Sag and Swell Detectors D01721R02.61 Sag and Swell detectors are available on voltage channels. There are three related fields in the Configuration screen controlling Sag and Swell detectors. The definition of a Sag or Swell depends on a Nominal Level of voltage. The Sag and Swell thresholds are expressed as a percentage of the Nominal Level. The Sag threshold is configurable between 50% and 90% of Nominal. The minimum Sag level is fixed at 10% of Nominal. The Swell threshold is configurable between 110% and 150% of Nominal. The maximum Swell level is fixed at 180% of Nominal. The duration of a Sag or Swell is fixed at any value between 0.5 cycle and 1 minute. TESLA 3000 User Manual 8-19 8 Configuring the Recorder External Input Channels Description Recording channels for the recorder’s external (digital) input signals. Input The recorder’s physical external input channels. Calculation The binary state of each external input is read at the selected high speed sample rate. A filter is applied to the samples to prevent triggering on spurious state changes, requiring that a state change be present continuously for a minimum of approximately 700 microseconds to be considered valid for triggering purposes. Triggers Active state Inactive state Recording Records the state of all external input channels at the selected high speed sample rate. The input filter is not applied to the recorded data; all state changes are included in the records. Number of Channels Up to 64 External Input Channels can be defined, one for each physical input (limited to 32 on an 18 channel model). The numbers of channels are reduced at high sample rates (Table 8.1 on page 6 and Table 8.2 on page 6) Types EI Settings Figure 8.14: External Input Channel Configuration Screen External Input Channel Settings Element 8-20 Identifies the group to which this channel belongs. The Element forms the first part of the channel name. The Element is selected when the channel is created and is fixed once assigned when you are working in the Element Tree view. TESLA 3000 User Manual D01721R02.61 8 Configuring the Recorder External Input Channel Settings Description Optional field (12 characters). Provides an additional description of the channel that forms part of the channel name. Should always be used with External Input channels to uniquely name the channel. (“Channel Grouping and Naming” on page 8-8). Channel Identifies the physical External Input used by this channel. This number is identified on the rear of the TESLA chassis. The list only shows inputs which have not been assigned to other channels. To get an overview of channel assignments, switch to the Channel Tree view and look at the External Channel list. Trigger Settings Definite Delay Specifies how long the trigger condition must be present before a trigger is declared. Settable from 0 to 5,000 ms in eighth cycle increments. The delay setting is in addition to the pickup delay imposed by the input "glitch" filtering, which is approximately 700 microseconds. Label Text to designate the active and inactive states. Default is "on" and "off". Maximum 8 characters. Trigger Actions D01721R02.61 Enable Enables or disables the associated trigger. A trigger can be disabled without altering the rest of its settings. Fault Initiates a fault (high speed) recording when triggered. Swing Initiates a swing (low speed) recording when triggered. If both Fault and Swing are enabled, the recorder will attempt to create a combined record. Log Logs a message in the Event Log when triggered. Notify Contacts the RecordBase Central Station when triggered. Can be used to initiate wide area swing recordings and/or automated record transfer (“Notify” on page 7-13). Cross Trigger Activates the cross-trigger contact (#4) to trigger another device. Priority Specifies the priority to be assigned to records created by this trigger. The priority is used to determine Central Station notification. 1 - 3 (3 is the highest priority). (“Notify” on page 7-13). Alarm Contact Specifies a rear panel contact to be closed when triggered. Contacts are closed momentarily for one second. Contact assignment is not exclusive, allowing multiple triggers to activate the same contact. Available contacts: 2, 3, 5, 6, 7 or 8 on a 36 channel model and 2 or 3 on an 18 channel model. Contacts 1 and 4 are reserved for Recorder Functional and Cross-Trigger respectively. Contacts assigned for storage alarms (“Storage Alarms” on page 8-7) will not be available for use here. TESLA 3000 User Manual 8-21 8 Configuring the Recorder Summation Channel Description Summation Channels combine up to three analog inputs to create a summed channel. Each input can be scaled and rotated before it is summed. Previously combined summation channels can be used as an input to a new summation channel. Note: Summation Channels are handled as phasor sums for triggering, metering, low speed recording and trending. Both the Scale Factor and Angle Offset settings are applied for these uses. For high speed recording, Summation Channels are displayed as the sum of the individual data samples with only the Scale Factor setting applied. High speed Summation channels are not recorded if a non-zero Angle Offset has been specified. Input Analog Input Channels or other Summation Channels can be used as inputs to a Summation Channel. The summation can have two or three inputs. If a Summation Channel is used as an input, it must have a lower Summation Index. Calculation Each input is converted to a phasor using a DFT function and is scaled and rotated using the Scale Factor and Angle Offset settings.The resulting phasors are added to form the summation. The high speed recording of a Summation Channel is created by adding the individual data points from the input channels. The Scale Factor is applied to each channel before the addition. Triggers High & low magnitude Negative and positive rate of change To prevent multiple triggers on threshold conditions, an hysteresis of 2% of setting is applied to magnitude triggers. Recording High Speed: generates a channel that is the sum of the individual data samples with the Scale Factor applied. A high speed channel is not generated if a nonzero Angle Offset has been specified on any of the summation’s input channels. Low Speed: generates a channel that is phasor sum of the input channels at a rate of one phasor per cycle. Number of Channels 30 Summation Channels are available. Types Specific: Va, Vb, Vc, Ia, Ib, Ic, In (use where appropriate) Generic: Vac, Iac Notes The primary to secondary scale factor used by the Summation Channel is the same as that of its first input channel. 8-22 TESLA 3000 User Manual D01721R02.61 8 Configuring the Recorder Settings Figure 8.15: Summation Channel Configuration Screen Summation Channel Settings D01721R02.61 Element Identifies the group to which this channel belongs. The Element forms the first part of the channel name. The Element is selected when the channel is created and is fixed once assigned when you are working in the Element Tree view. Type Identifies the type of signal being applied to this input channel. The Type forms a part of the channel name (Element:Type:Description). Selecting the appropriate Type can simplify channel naming by eliminating the need for the optional Description field (e.g. Line #1:IaSum uniquely defines the channel). Initially set when the channel was created, the Type can be changed to refer to a different phase as needed. Description Optional field (12 characters). Provides an additional description of the channel that forms part of the channel name. Use if Element Name and channel Type do not sufficiently identify the channel. (“Channel Grouping and Naming” on page 8-8). Summation Index Identifies the summation channel. Unlike the analog and external input channels, this is not associated with a hardware input, but simply identifies which of the internal virtual summation channels will be used. You can select any available channel; the only restriction is that nested summations require the input summation to have a lower Summation Index. If the only option is “undefined”, you have already used all available channels. Input 1, Input 2, Input 3 Identifies the channels to be used in the summation. The available list includes all previously defined analog channels and any summation channel with a lower summation index number. The list grows automatically as you define new channels. Scale Factor Specifies a multiplier for each of the inputs. The scale factor is applied in the secondary domain. Angle Offset Specifies a phase angle shift to be applied to each of the inputs. Note that when an offset is specified, a high speed summation recording - which uses sample by sample addition rather than phasor addition - is not generated. All other functions, including low speed recording, are available and will reflect the offset. TESLA 3000 User Manual 8-23 8 Configuring the Recorder Summation Channel Settings Trigger Settings Rate of Change Interval Specifies the period of time over which both positive and negative rate of change is measured. 0.5 to 8.0 cycles. Limit Specifies the trigger levels for the magnitude triggers and the magnitude portion of the rate for the rate of change triggers. The period portion of the rate is specified by the Rate of Change Interval. Delay Specifies how long the trigger condition must be present before a trigger is declared. 0 to 1,200 seconds in half-cycle increments. Trigger Actions 8-24 Enable Enables or disables the associated trigger. A trigger can be disabled without altering the rest of its settings. Fault Initiates a fault (high speed) recording when triggered. Swing Initiates a swing (low speed) recording when triggered. If both Fault and Swing are enabled, the recorder will attempt to create a combined record. Log Logs a message in the Event Log when triggered. Notify Contacts the RecordBase Central Station when triggered. Can be used to initiate wide area swing recordings and/or automated record transfer (“Notify” on page 7-13) Cross Trigger Activates the cross-trigger contact (#4) to trigger another device. Priority Specifies the priority to be assigned to records created by this trigger. The priority is used to determine Central Station notification. 1 - 3 (3 is the highest priority). (“Notify” on page 7-13). Alarm Contact Specifies a rear panel contact to be closed when triggered. Contacts are closed momentarily for one second. Contact assignment is not exclusive, allowing multiple triggers to activate the same contact. Available contacts: 2, 3, 5, 6, 7 or 8 on a 36 channel model and 2 or 3 on an 18 channel model. Contacts 1 and 4 are reserved for Recorder Functional and Cross-Trigger respectively. Contacts assigned for storage alarms (“Storage Alarms” on page 8-7) will not be available for use here. TESLA 3000 User Manual D01721R02.61 8 Configuring the Recorder Sequence Component Channels Description Sequence Component Channels calculates positive, negative, and zero sequence components in one step. The positive sequence component may also be used as an input to a watts/vars or impedance function. Input Analog Input Channels or Summation Channels can be used as inputs to a Sequence Component Channel. Calculation The sequence component algorithm is applied to produce positive, negative and zero sequence components. Triggers Positive sequence high and low magnitude Positive sequence negative and positive rate of change Negative sequence high magnitude Zero sequence high magnitude To prevent multiple triggers on threshold conditions, an hysteresis of 2% of setting is applied to magnitude triggers. Recording High Speed: Positive, negative and zero sequence values at a rate of eight values per cycle (regardless of the system sample rate). Low Speed: Positive, negative and zero sequence values at a rate of one value per cycle. Number of Channels 12 Sequence Component Channels are available. Types Vseq, ISeq Notes The primary to secondary scale factor used by the Sequence Component Channel is the same as that of the selected Phase A channel. Settings Figure 8.16: Sequence Channel Configuration Screen D01721R02.61 TESLA 3000 User Manual 8-25 8 Configuring the Recorder Sequence Component Channel Settings Element Identifies the group to which this channel belongs. The Element forms the first part of the channel name. The Element is selected when the channel is created and is fixed once assigned when you are working in the Element Tree view. Type Identifies the type of signal being applied to this input channel. The Type forms a part of the channel name (Element:Type:Description). Selecting the appropriate Type can simplify channel naming by eliminating the need for the optional Description field (e.g. Line #1:VSeq uniquely defines the channel). Initially set when the channel was created, the Type can be changed to refer to a different phase as needed. Description Optional field (12 characters). Provides an additional description of the channel that forms part of the channel name. Use if Element Name and channel Type do not sufficiently identify the channel. (“Channel Grouping and Naming” on page 8-8). Sequence Index Identifies the Sequence Component channel. Unlike the analog and external input channels, this is not associated with a hardware input, but simply identifies which of the internal virtual summation channels will be used. You can select any available channel without restriction. If the only option is “undefined”, you have already used all available channels. Phase A, Phase B, Phase C Identifies the channels used to create the sequence set. The list is limited to channels of the correct type (voltage or current) and includes analog input or summation channels which have already been defined. The list grows automatically as you define new channels. Trigger Settings Rate of Change Interval Specifies the period of time over which both positive and negative rate of change is measured. 0.5 to 8.0 cycles. Limit Specifies the trigger levels for the magnitude triggers and the magnitude portion of the rate for the rate of change triggers. The period portion of the rate is specified by the Rate of Change Interval. Delay Specifies how long the trigger condition must be present before a trigger is declared. 0 to 1,200 seconds in half-cycle increments. Trigger Actions 8-26 Enable Enables or disables the associated trigger. A trigger can be disabled without altering the rest of its settings. Fault Initiates a fault (high speed) recording when triggered. Swing Initiates a swing (low speed) recording when triggered. If both Fault and Swing are enabled, the recorder will attempt to create a combined record. Log Logs a message in the Event Log when triggered. Notify Contacts the RecordBase Central Station when triggered. Can be used to initiate wide area swing recordings and/or automated record transfer (“Notify” on page 7-13). Cross Trigger Activates the cross-trigger contact (#4) to trigger another device. TESLA 3000 User Manual D01721R02.61 8 Configuring the Recorder Sequence Component Channel Settings D01721R02.61 Priority Specifies the priority to be assigned to records created by this trigger. The priority is used to determine Central Station notification. 1 - 3 (3 is the highest priority). (“Notify” on page 7-13). Alarm Contact Specifies a rear panel contact to be closed when triggered. Contacts are closed momentarily for one second. Contact assignment is not exclusive, allowing multiple triggers to activate the same contact. Available contacts: 2, 3, 5, 6, 7 or 8 on a 36 channel model and 2 or 3 on an 18 channel model. Contacts 1 and 4 are reserved for Recorder Functional and Cross-Trigger respectively. Contacts assigned for storage alarms (“Storage Alarms” on page 8-7) will not be available for use here. TESLA 3000 User Manual 8-27 8 Configuring the Recorder Impedance Channels Description Impedance Channels calculate impedance from voltage and current inputs. The channel can produce either single phase or three phase values. Triggering is based on the rate of impedance within a defined impedance circle centered around the origin. Input Analog Input Channels, Summation Channels or Sequence Component channel can be used as inputs to an Impedance Channel. Using Sequence Component as an input results in a three-phase impedance. Calculation The impedance calculation continuously recalculates the apparent impedance from the selected voltage and current signals, then subtracts an earlier calculated value (determined by the “Rate of Change Interval” setting). The impedance trigger operates if the difference is between the “Minimum Change” and “Maximum Change” settings, and the calculated impedance is within “Circle Radius” of the origin. Triggers Rate of impedance within a defined impedance circle. Recording Low Speed: Impedance magnitude at a rate of one value per cycle. Number of Channels 18 Impedance Channels are available. Types Z1 (impedance) Notes The impedance magnitude and angle readings are also available to the metering display, SCADA and the long term trending function. Settings Figure 8.17: Impedance Channel Configuration Screen 8-28 TESLA 3000 User Manual D01721R02.61 8 Configuring the Recorder Impedance Channel Settings Element Identifies the group to which this channel belongs. The Element forms the first part of the channel name. The Element is selected when the channel is created and is fixed once assigned when you are working in the Element Tree view. Description Optional field (12 characters). Provides an additional description of the channel that forms part of the channel name. Use if Element Name and channel Type do not sufficiently identify the channel. (“Channel Grouping and Naming” on page 8-8). Impedance Index Identifies the Impedance channel. Unlike the analog and external input channels, this is not associated with a hardware input, but simply identifies which of the internal virtual impedance channels will be used. You can select any available channel without restriction. If the only option is “undefined”, you have already used all available channels. Voltage Input, Current Input Identifies the channels to be used to create the impedance. If you select analog or summation channels as inputs, the impedance channel calculates single-phase impedance; if you select sequence channels, it calculates three-phase impedance.The list is limited to channels of the correct type (voltage or current) and includes analog input or summation channels which have already been defined. The list grows automatically as you define new channels. Trigger Settings Rate of Change Interval Specifies the period of time over which both positive and negative rate of change is measured. 0.5 to 8.0 cycles. Circle Radius Specifies the radius of the impedance circle in secondary ohms. Minimum Change Specifies the minimum impedance change to be detected. Maximum Change Specifies the maximum impedance change to be detected. Definite Delay Requires the element to be energized before an active state is determined. Settable from 0 to 1,200 seconds in half-cycle increments. Trigger Actions D01721R02.61 Enable Enables or disables the associated trigger. A trigger can be disabled without altering the rest of its settings. Fault Initiates a fault (high speed) recording when triggered. Swing Initiates a swing (low speed) recording when triggered. If both Fault and Swing are enabled, the recorder will attempt to create a combined record. Log Logs a message in the Event Log when triggered. Notify Contacts the RecordBase Central Station when triggered. Can be used to initiate wide area swing recordings and/or automated record transfer (“Notify” on page 7-13) Cross Trigger Activates the cross-trigger contact (#4) to trigger another device. Priority Specifies the priority to be assigned to records created by this trigger. The priority is used to determine Central Station notification. 1 - 3 (3 is the highest priority). (“Notify” on page 7-13). TESLA 3000 User Manual 8-29 8 Configuring the Recorder Impedance Channel Settings Alarm Contact 8-30 Specifies a rear panel contact to be closed when triggered. Contacts are closed momentarily for one second. Contact assignment is not exclusive, allowing multiple triggers to activate the same contact. Available contacts: 2, 3, 5, 6, 7 or 8 on a 36 channel model and 2 or 3 on an 18 channel model. Contacts 1 and 4 are reserved for Recorder Functional and Cross-Trigger respectively. Contacts assigned for storage alarms (“Storage Alarms” on page 8-7) will not be available for use here. TESLA 3000 User Manual D01721R02.61 8 Configuring the Recorder Watts and Vars Channels Description The Watts/Vars Channels calculate apparent power (volt-amps), real power (watts) and reactive power (vars) from voltage input and current inputs. The channel can produce either single phase or three phase values. Input Analog Input Channels, Summation Channels or Sequence Component channel can be used as inputs to a Watts/Vars Channel. Using a Sequence Component as an input results in three-phase Watts and VARs. Calculation Voltage and current are multiplied to calculate apparent power, real power and reactive power. Triggers Watts: high and low level (2) Watts: positive and negative rate of change (2) Vars: high and low level Vars: positive and negative rate of change Dual triggers for Watts allows fault and swing recordings to be triggered by different settings (e.g. Rate of Change Interval), if desired. To prevent multiple triggers on threshold conditions, an hysteresis of 2% of setting is applied to magnitude triggers. Recording High Speed: Watt and VAR values at a rate of eight values per cycle (regardless of the system sample rate). Low Speed: Watt and VAR values at a rate of one value per cycle. Number of Channels 18 Watts/Vars Channels are available. Types W/V Notes The primary to secondary scale factor used by the Watts/Vars Channel is based on those of its voltage and current input channels. Watts, VARs, and Volt-Amp magnitudes are also available to the metering display, SCADA and the long term trending function. D01721R02.61 TESLA 3000 User Manual 8-31 8 Configuring the Recorder Settings Figure 8.18: Watts/Vars Channel Configuration Screen Watts/Vars Channel Settings Element Identifies the group to which this channel belongs. The Element forms the first part of the channel name. The Element is selected when the channel is created and is fixed once assigned when you are working in the Element Tree view. Description Optional field (12 characters). Provides an additional description of the channel that forms part of the channel name. Use if Element Name and channel Type do not sufficiently identify the channel. (“Channel Grouping and Naming” on page 8-8). Watts/Vars Index Identifies the watts/vars channel. Unlike the analog and external input channels, this is not associated with a hardware input, but simply identifies which of the internal virtual watts/vars channels will be used. You can select any available channel without restriction. If the only option is “undefined”, you have already used all available channels. Voltage Input Identifies the voltage channels to be used to create the watts and vars. These can be either analog input channels, summations or positive sequences. If you select analog or summation channels as inputs, single phase watts and vars will be calculated; if you select sequence channels, three-phase watts and vars will be calculated. Current Input Identifies the current channels to be used to create the watts and vars. These can be either analog input channels, summations or positive sequences. If you select analog or summation channels as inputs, single phase watts and vars will be calculated; if you select sequence channels, three-phase watts and vars will be calculated. Trigger Settings 8-32 Watts 1, Watts 2, Watts 3 Period of time over which both positive and negative rate of change for each Watts Detector is measured. 0.5 to 8.0 cycles. Vars Period of time over which both positive and negative rate of change for Var Detector is measured. 0.5 to 8.0 cycles. Limit Specifies the trigger levels for the magnitude triggers and the magnitude portion of the rate for the rate of change triggers. The period portion of the rate is specified by the Rate of Change Interval. TESLA 3000 User Manual D01721R02.61 8 Configuring the Recorder Watts/Vars Channel Settings Delay Specifies how long the trigger condition must be present before a trigger is declared. 0 to 1,200 seconds in half-cycle increments. Trigger Actions D01721R02.61 Enable Enables or disables the associated trigger. A trigger can be disabled without altering the rest of its settings. Fault Initiates a fault (high speed) recording when triggered. Swing Initiates a swing (low speed) recording when triggered. If both Fault and Swing are enabled, the recorder will attempt to create a combined record. Log Logs a message in the Event Log when triggered. Notify Contacts the RecordBase Central Station when triggered. Can be used to initiate wide area swing recordings and/or automated record transfer (“Notify” on page 7-13). Cross Trigger Activates the cross-trigger contact (#4) to trigger another device. Priority Specifies the priority to be assigned to records created by this trigger. The priority is used to determine Central Station notification. 1 - 3 (3 is the highest priority). (“Notify” on page 7-13). Alarm Contact Specifies a rear panel contact to be closed when triggered. Contacts are closed momentarily for one second. Contact assignment is not exclusive, allowing multiple triggers to activate the same contact. Available contacts: 2, 3, 5, 6, 7 or 8 on a 36 channel model and 2 or 3 on an 18 channel model. Contacts 1 and 4 are reserved for Recorder Functional and Cross-Trigger respectively. Contacts assigned for storage alarms (“Storage Alarms” on page 8-7) will not be available for use here. TESLA 3000 User Manual 8-33 8 Configuring the Recorder Frequency Channels Description The Frequency Channels measure the frequency on their assigned input channel. Input Any Analog Input Channel. A voltage channel is recommended for best results. Calculation Frequency is measured over a multi-second time window to improve resolution and accuracy. The frequency measurement operates in a band that is approximately +/-15% of the nominal frequency. Triggers High & low magnitude Negative and positive rate of change To prevent multiple triggers on threshold conditions, the frequency magnitude triggers have a fixed 0.02 Hz hysteresis. Recording Low Speed: Frequency measurements at a rate of one value per cycle. Number of Channels 2 Frequency Channels are available. Types Freq Notes Frequency channels are not associated with particular Elements. Their names are fixed as Frequency 1 and Frequency 2. Settings Figure 8.19: Frequency Channel Configuration Screen Frequency Channel Settings Frequency derived from 8-34 Identifies the analog input channel on which to measure frequency. A voltage channel is recommended for best results. TESLA 3000 User Manual D01721R02.61 8 Configuring the Recorder Frequency Channel Settings Trigger Settings Rate of Change Interval Specifies the period of time over which both positive and negative rate of change is measured. 0.5 to 8.0 cycles. Limit Specifies the trigger levels for the magnitude triggers and the magnitude portion of the rate for the rate of change triggers. The period portion of the rate is specified by the Rate of Change Interval. The high magnitude limit is 7/6 x nominal frequency, low magnitude limit is 5/6 x nominal frequency. Delay Specifies how long the trigger condition must be present before a trigger is declared. 0 to 1,200 seconds in half-cycle increments. Trigger Actions D01721R02.61 Enable Enables or disables the associated trigger. A trigger can be disabled without altering the rest of its settings. Fault Initiates a fault (high speed) recording when triggered. Swing Initiates a swing (low speed) recording when triggered. If both Fault and Swing are enabled, the recorder will attempt to create a combined record. Log Logs a message in the Event Log when triggered. Notify Contacts the RecordBase Central Station when triggered. Can be used to initiate wide area swing recordings and/or automated record transfer (“Notify” on page 7-13.) Cross Trigger Activates the cross-trigger contact (#4) to trigger another device. Priority Specifies the priority to be assigned to records created by this trigger. The priority is used to determine Central Station notification. 1 - 3 (3 is the highest priority). (“Notify” on page 7-13). Alarm Contact Specifies a rear panel contact to be closed when triggered. Contacts are closed momentarily for one second. Contact assignment is not exclusive, allowing multiple triggers to activate the same contact. Available contacts: 2, 3, 5, 6, 7 or 8 on a 36 channel model and 2 or 3 on an 18 channel model. Contacts 1 and 4 are reserved for Recorder Functional and Cross-Trigger respectively. Contacts assigned for storage alarms (“Storage Alarms” on page 8-7) will not be available for use here. TESLA 3000 User Manual 8-35 8 Configuring the Recorder Logic Functions Description Logic Functions are boolean logic statements that can be applied to External Input Channels and trigger detectors from other channels. You can choose up to 5 inputs, each of which may be inverted, and specify a chain of logic operations to be performed on each. Input Up to 5 inputs. Each can be an External Input Channel or the output of a trigger detector from any channel, including other Logic Functions with lower Indexes. Calculation Boolean logic is applied to each input in succession. Triggers Active state Inactive state Recording Logic Functions are not recorded. Number of Channels 30 Logic Functions are available. Types Logic Notes The output of the Logic functions is available to the metering display, SCADA and the long term trending function. Settings Figure 8.20: Logic Function Configuration 8-36 TESLA 3000 User Manual D01721R02.61 8 Configuring the Recorder Logic Function Settings Element Identifies the group to which this channel belongs. The Element forms the first part of the channel name. The Element is selected when the channel is created and is fixed once assigned when you are working in the Element Tree view. Description Optional field (12 characters). Provides an additional description of the channel that forms part of the channel name. Use if Element Name and channel Type do not sufficiently identify the channel. (“Channel Grouping and Naming” on page 8-8). Logic Function Index Identifies the logic funtion.You can select any available function; the only restriction is that nested logic functions require the input logic to have a lower Logic Function Index. If the only option is “undefined”, you have already used all available channels. Inputs 1–5 Selects the source of the input state for each stage of the boolean calculation. External Input Channels, trigger detectors from other channels and previously-defined Logic Functions are available. Inversion Blocks Allows the input state to be inverted. Click to activate and move mouse to select option before releasing. Logic Gates NOT, AND, NAND, OR, NOR, Exclusive OR, and Exclusive NOR. Click to activate, scroll window to display, click icon to select Delay Module Assert: delays the output for the specified time. Deassert: locks in the output state for the specified time. 0 to 1,200 seconds in half-cycle increments. Trigger Action D01721R02.61 Enable Enables or disables the associated trigger. A trigger can be disabled without altering the rest of its settings. Fault Initiates a fault (high speed) recording when triggered. Swing Initiates a swing (low speed) recording when triggered. If both Fault and Swing are enabled, the recorder will attempt to create a combined record. Log Logs a message in the Event Log when triggered. Notify Contacts the RecordBase Central Station when triggered. Can be used to initiate wide area swing recordings and/or automated record transfer (“Notify” on page 7-13.) Cross Trigger Activates the cross-trigger contact (#4) to trigger another device. Priority Specifies the priority to be assigned to records created by this trigger. The priority is used to determine Central Station notification. 1 - 3 (3 is the highest priority). (“Notify” on page 7-13). Alarm Contact Specifies a rear panel contact to be closed when triggered. Contacts are closed momentarily for one second. Contact assignment is not exclusive, allowing multiple triggers to activate the same contact. Available contacts: 2, 3, 5, 6, 7 or 8 on a 36 channel model and 2 or 3 on an 18 channel model. Contacts 1 and 4 are reserved for Recorder Functional and Cross-Trigger respectively. Contacts assigned for storage alarms (“Storage Alarms” on page 8-7) will not be available for use here. TESLA 3000 User Manual 8-37 8 Configuring the Recorder Fault Locator Functions Description Fault Locator Functions produce distance-to-fault informations based on the impedance measured on the specified voltage and current channels. The information is logged and available through SCADA. Input Initiating Event: any External Input Channel or trigger detector from any other channel or function. Voltage Channels: must be Analog Input Channels monitoring voltage. Current Channels: can be Analog Input Channels or Summation Channels monitoring current. The correct phases must be selected to achieve the desired results. In most cases, the Initiating Event input should be delayed by 1.5 cycles to obtain accurate fault location information. The delay can be set in the source detector or a Logic Function can be used as an intermediary to insert the delay. Calculation When a user-configurable event occurs, the fault locator assesses the distance to fault using the user-supplied line parameters. If one or more of the impedances is consistent with a fault on the line, fault identification (e.g. B-G) and location information is generated in the form of an event message. Triggers N/A Recording Fault Locator Functions are not recorded. Number of Channels 10 Fault Locator Functions are available. Types FLoc Notes When a Fault Locator Function is triggered, it writes a message into the Event Log identifying the time, the Element, the faulted type (e.g. A-B, B-G...) and the distance to fault. The output of the Fault Locator Function is available through SCADA. It cannot be metered or trended. 8-38 TESLA 3000 User Manual D01721R02.61 8 Configuring the Recorder Settings Figure 8.21: Fault Locator Function Configuration Fault Locator Function Settings D01721R02.61 Element Identifies the group to which this channel belongs. The Element forms the first part of the channel name. The Element is selected when the channel is created and is fixed once assigned when you are working in the Element Tree view. Description Optional field (12 characters). Provides an additional description of the channel that forms part of the channel name. Use if Element Name and channel Type do not sufficiently identify the channel. (Ref: “Channel Grouping and Naming” on page 8-8). Fault Locator Index Identifies the Fault Location function. You can select any available function. If the only option is “undefined”, you have already used all available channels. Initiating Event Any External Input Channel or trigger detector from any other channel or function. Note that the initiating Event typically requires a 1.5 cycle delay to obtain accurate fault location information. TESLA 3000 User Manual 8-39 8 Configuring the Recorder Power Factor Functions Description Power Factor Functions monitor the real and reactive power values calculated by a Watts/Vars Channel and trigger depending on total power level. Inductive power factor is defined as a situation where the calculated reactive power is positive. Capacitive power factor is defined as a situation where the reactive power is negative. Input A previously-defined Watts/Vars Channel. Calculation The Power Factor Detector monitors the watts, vars, and volt-amps values computed by its input channel and operates when the power factor is less than a user-specified threshold. Separate detectors allow separate thresholds for lagging (inductive) and leading (capacitive) power factors. To reduce the incidence of nuisance operations, you may specify a minimum volt-amps setting. Triggers Inductive power factor – Low magnitude Capacitive power factor– Low magnitude To prevent multiple triggers on threshold conditions, the power factor triggers have a fixed hysteresis of 0.05. Recording Power Factor Functions are not recorded. Number of Channels 18 Power Factor Functions are available. Types PF Notes Power factor readings are available to the metering display, SCADA and the long term trending function. Settings Figure 8.22: Power Factor Function Configuration 8-40 TESLA 3000 User Manual D01721R02.61 8 Configuring the Recorder Power Factor Function Settings Element Identifies the group to which this channel belongs. The Element forms the first part of the channel name. The Element is selected when the channel is created and is fixed once assigned when you are working in the Element Tree view. Description Optional field (12 characters). Provides an additional description of the channel that forms part of the channel name. Use if Element Name and channel Type do not sufficiently identify the channel. (“Channel Grouping and Naming” on page 8-8). PF Detector Index Identifies the Power Factor funtion.You can select any available funtion. If the only option is “undefined”, you have already used all available channels. Watts/Vars function to monitor Specifies which Watts/Vars channel to use as input. Must be previously defined. Trigger Settings Disable detector if VA less than Allows the trigger to be supervised by a minimum VA level. Can be set in primary or secondary units. Limit Power factor trigger level. 0 to 1 in 0.001 increments. Delay Requires the element to be energized before an active state is determined. Settable from 1 to 10,000 seconds in 1 second increments. Trigger Action D01721R02.61 Enable Enables or disables the associated trigger. A trigger can be disabled without altering the rest of its settings. Fault Initiates a fault (high speed) recording when triggered. Swing Initiates a swing (low speed) recording when triggered. If both Fault and Swing are enabled, the recorder will attempt to create a combined record. Log Logs a message in the Event Log when triggered. Notify Contacts the RecordBase Central Station when triggered. Can be used to initiate wide area swing recordings and/or automated record transfer (“Notify” on page 7-13). Cross Trigger Activates the cross-trigger contact (#4) to trigger another device. Priority Specifies the priority to be assigned to records created by this trigger. The priority is used to determine Central Station notification. 1 - 3 (3 is the highest priority). (“Notify” on page 7-13). Alarm Contact Specifies a rear panel contact to be closed when triggered. Contacts are closed momentarily for one second. Contact assignment is not exclusive, allowing multiple triggers to activate the same contact. Available contacts: 2, 3, 5, 6, 7 or 8 on a 36 channel model and 2 or 3 on an 18 channel model. Contacts 1 and 4 are reserved for Recorder Functional and Cross-Trigger respectively. Contacts assigned for storage alarms (“Storage Alarms” on page 8-7) will not be available for use here. TESLA 3000 User Manual 8-41 8 Configuring the Recorder Meter Groups Figure 8.23: Meter Group Configuration Screen A Meter Group is a collection of measured and calculated values that are presented as a group by the Control Panel’s Metering function. Metering Groups are referred to by a user-specified name, and the name of the Metering Group appears on the tab in the Metering display. There are two default metering groups and ten user-defined groups for a total of twelve metering groups. The Metering display has fixed displays for analog and external input channels. You may add additional displays containing any set of channels, organized as you wish. 1 To create a meter group, right-click on the Meter Groups entry in the Configuration menu. 2 Select Add Meter Group. A New Meter Group line appears, and the New Meter Group text is selected. 3 Type the Meter Group name, then Enter. The text you type replaces the New Meter Group text. 4 In the meter group screen, you can place any defined channel in any cell. The resultant meter group display will show the desired channels in the specified place on the screen. Phase angle readings displayed in meter groups are based on the configured Phase Angle Reference Channel “Phase Angle Reference Channel” on page 8-11. 8-42 TESLA 3000 User Manual D01721R02.61 8 Configuring the Recorder Trend Logging Figure 8.24: Trend Log Configuration The TESLA recorder can log periodic measurements over an extended period of time. Up to 60 values can be logged at intervals ranging from 10 seconds to one hour. All recorder channels and calculated values are available for trending. Event messages can also be stored in the trend log, allowing them to be saved from the normal circular overwrite of the Event Log. The trend log accumulates data for up to 90 days. When it is full, it can either be set to automatically overwrite the oldest data or to stop logging. A ’near full’ alarm function is available. The accumulation settings are defined in the recorder’s Utilities menu (see “Recording Control Settings” on page 7-6). To configure trend logging select either New Trend from the Config menu or New Trend from the right-click context menu in either the Channel Tree or Element Tree. The Scan Interval determines the frequency of data logging. It can be set from 10 seconds to 3,600 seconds (one hour). Choose channels to be trended by clicking on one of the (larger) spaces in the trend grid. Clicking on the arrow that appears, lists all the available channels in the list box that appears adjacent to the space you originally clicked. Alternatively, use the selection tree that appears to the immediate left of the trend grid. Use the tree’s expansion buttons to locate the desired channel, then drag and drop your selection on the grid. D01721R02.61 TESLA 3000 User Manual 8-43 8 Configuring the Recorder You can control how the data is accumulated between logged values for each trended value. The Process Options are as follows: Trend Accumulation Modes: Damped (default) Logs a value representative of the measurements during the interval. Undamped Logs the last value measured during the interval. Avg Logs the average measured value over the interval. Min Logs the minimum measured value over the interval. Max Logs the maximum measured value over the interval. You can record the same channel with more than one Process Option, but you can not record the same channel with the same Process Option more than once. When you have defined a trending process, a long-term event log is started automatically. If you wish to have the long-term event log without trending any data, define a trend without any channels in it. A daily limit of 1000 events can be stored in the trend log. 8-44 TESLA 3000 User Manual D01721R02.61 8 Configuring the Recorder Printing Printing a Configuration Figure 8.25: Print a Configuration Generate a Configuration print at any time by selecting Print Settings from the File menu. The printed output follows the same general layout as the Element Tree. Where applicable, the settings are given in secondary units. The exception is the Fault Location parameters which are given in primary units. You can preview the printed output by selecting Print Preview from the File menu. Print Config function is also available under the Config menu. Printing a SCADA Address List MODBUS The MODBUS address equivalents shows all of the functions defined in the TESLA recorder (see “Modbus Functions” in Appendix D). Selecting the Print MODBUS settings item from the File menu generates a listing that is configurable—listing the full function names in Element-Function-Description format along with the equivalent MODBUS addresses. You can preview the printed output by selecting Print MODBUS Preview from the File menu. Print MODBUS function is also available under the Config menu. DNP The DNP point list shows all of the functions defined in the TESLA recorder, (see “DNP3 Reference” in Appendix E) Selecting the Print DNP settings item from the File menu generates a listing that is configurable—listing the full function names in Element-Function-Description format along with the equivalent DNP points. You can preview the printed output by selecting Print DNP Preview from the File menu. Print DNP function is also available under the Config menu. D01721R02.61 TESLA 3000 User Manual 8-45 9 Record and Log Management Records The Record management services are available from the Records tab, accessible from the Main Menu. Figure 9.1: Record Listing Record Lists The left side of the Records tab shows lists of records for the current IED organized by date. Expanding a date entry shows On IED and Local headings. Records presently on the recorder are shown under the On IED heading. Records that have been previously transferred to TESLA Control Panel are shown under the Local heading. Records on the IED that have not been transferred to Control Panel are shown in bold-face. If working offline, only local records are shown. Record Filter The list of records displayed is controlled by the Record Filter control. The filter applies to both On IED and Local record lists. The time taken to access the directory can be controlled by selecting an appropriate number of records in the Record Filter. Note that if additional recordings are created through the Trigger Fault, Trigger Swing or Trigger Both buttons, these new records do not displace the earliest fetch/displayed file records in the tree. Record timestamps are received from the recorder are in UTC and are converted to local time using the Time Zone and Daylight Saving settings of the computer running TESLA Control Panel Record Summary D01721R02.61 The right side of the Records tab shows summary information on the selected record. The summary includes the list of events which occurred during the time-span of the record from the recorder’s event log. TESLA 3000 User Manual 9-1 9 Record and Log Management For cooperative group records, the event list cannot be displayed until the records have been transferred to TESLA Control Panel and combined. Get Remote Summaries/Get Remote Events When both Get Remote Summaries and Get Remote Events options are checked, Control Panel accesses and displays the corresponding recording information in the Record Summary and Events sections of the right-hand pane. You may eliminate the delay involved in accessing this information by disabling the corresponding check-boxes. Autopoll/Autoprint When Autopoll is checked, Control Panel will periodically (default 60 seconds) poll the connected TESLA recorder for new record files and automatically transfer them to the local computer. Newest records will be transferred first, and only one new record will be transferred at each poll. Checking Autoprint will cause each transferred (via Autopoll) record file to be automatically printed on the default Windows printer using RecordGraph’s default template. Note that the Autopoll and Autoprint states are not persistent; if Control Panel is disconnected from the recorder, both Autopoll and Autoprint become unchecked. Graph Records can be viewed with RecordGraph, ERLPhase’s interactive graphing software. To launch RecordGraph, select one or more local records and select the Graph button. Get from IED Selecting a recorder file under On IED and then selecting the Get from IED button causes a record file on the IED to be transferred from the recorder to your local computer. More than one file can be transferred at the time using Windows file selection function (Control/Shift + left-click). This action will not delete the record on the IED. Get from IED and Delete The Get From IED and Delete button erases the records on the recorder after they have been transferred to Control Panel and verified. When connected to a cooperative group, Get From IED automatically transfers the corresponding record from each group member and combines them into a single group record (“Record Export Utility” on page 12-1). Save As Selecting a local record and selecting the Save As button copies a record to a specified file. The .tlr file suffix should be retained. Export Selecting a local record and selecting the Export button launches the Export Utility. Records can be exported in common formats such as COMTRADE for use in other software or playback, for details see 12 Record Export Utility on page 1. Delete The Delete button can be used to delete records on the IED or locally. More than one file can be deleted at a time using Windows file selection functions (Ctrl/Shift + left-click). Rename Select Rename to allow a local record file to be renamed. Records on the recorder cannot be renamed. 9-2 TESLA 3000 User Manual D01721R02.61 9 Record and Log Management Refresh Selecting Refresh updates the Recordings screen. It checks the local directory and the remote IED (if connected) for new and stored files, updates Control Panel’s records database and refreshes the screen. Trigger Fault/Swing/ Both The recorder can be manually triggered to generate different types of records. Trigger Fault creates a high speed transient recording. Trigger Swing creates a low speed swing recording. Trigger Both creates a combined record. Note the Swing records may take up to 15 minutes to generate depending on the recorder’s settings. Recordings on IED Shows the number of records stored on the recorder and percentage of recording space used. File>Select Remote This function is available through the On IED menu. If you are online with your TESLA, this function selects all of the recording files displayed in the record list that have not yet been transferred to your local Recordings directory. You may then perform whatever command is appropriate for the selection set, such as a Get from IED or a Get and Delete from IED Command. D01721R02.61 TESLA 3000 User Manual 9-3 9 Record and Log Management Trend Log The trend manager services are available from the Trend item, accessible from the Main Menu. Figure 9.2: Trend Listing Range of Dates Set the time range using the two date control boxes, From and To. The initial setting is for the previous three days. When you change these settings, the remainder of the display updates to show data pertinent to your chosen period. If you are connected to a TESLA, both local and remote data are combined in the tree; otherwise, the display shows only data resident on your local computer. Trended Channel The tree on the left side of the screen shows the channel names of the trended data available for the period you have selected. You may select any number of channels from the tree for further operations. Select more than one channel by using the Ctrl and Shift keys in conjunction with mouse clicks and arrow keys. Trend Summary The Trend Summary section of the screen shows statistical information about the files you have selected. Local Files indicates the amount of space used by the selected trend files on your local computer. Remote Files indicates the amount of space used by the selected trend files on the IED. Transfer refers to files that are on the IED, but not on your local computer, and represents the total amount of bytes in stored trend files that would be transferred before further processing takes place. Events The Events section of the display shows all the events recorded during the period of interest set with the range of dates 9-4 TESLA 3000 User Manual D01721R02.61 9 Record and Log Management Get, Get/Delete When you click Get all of the trends not previously transferred are transferred to your computer. If you select Get/Delete, all files successfully transferred from the IED will also be deleted from the IED. Graph The trend data selected in the Trended Channels list is viewed with RecordGraph, ERLPhase’s interactive graphing software, for details see 11 Graphing Records on page 1. Any selected trend data not already in your computer is transferred prior to graphing. Delete The trend data selected in the Trend Channel list is removed from your computer. If you are currently connected, you have the option of removing the data on the IED files as well. Get Events Each time you change the Range of Dates, the list of events on the right side of the screen is updated. If you are not interested in this action, remove the check mark from the checkbox. Today’s Trends If the Range of Dates includes data that is currently being recorded, some of the data may not be in a form suitable for transfer to Control Panel. If this checkbox is selected, Control Panel will send a request to the IED to convert the most recent data so that it can be transferred. The time that this takes may be significant, and if you do not have a need for this data, the feature may be disabled by removing the check mark from the check box. Print Events The list of events in the Events portion of your screen is printed. D01721R02.61 TESLA 3000 User Manual 9-5 9 Record and Log Management Event Log The event log services are available from the Events tab, accessible from the Main Menu. Figure 9.3: Event Log Display The recorder maintains a log of time-stamped events. Event messages can be produced by any of the recorder’s detectors if configured to do so. Event messages can also be viewed in the Record Summary and Trend Summary displays Circular Storage The Event Log stores up to 250 events with automatic overwrite of the oldest event. For greater event storage, or to prevent automatic overwrite, the recorder’s trending function can also be used to store event messages. Event Messages The text of an event message is derived from the configuration of the detector that generates it. The general format for event message is: Date Time ElementName.Type.Description Detector State where: • ElementName is the user-assigned name of the element associated with this channel • ChannelType describes the member of the element or the type of channel which the detector is monitoring • Description is user-assigned text available to further identify the detector • Detector is the type of detector • State indicates whether the detector is picking up or dropping out. In the case of external inputs this text is user-assigned to accommodate different external devices. 9-6 TESLA 3000 User Manual D01721R02.61 9 Record and Log Management Example of an event message from an External Input detector 2005 Jan 12 20:44:33.672 Line #1.EI.BRKRI-a open Example of an event message from a high analog level detector: 2005 Jan 12 20:44:33.650 Line #1.Va.High Mag active Printing Event Log You may print or copy to clipboard all the events that are in the Event Log. Right-click or choose from the menu bar to print event logs while connected to the IED. Controls The event display is a static snapshot of the contents of the event log. You can use the buttons at the bottom or a right-click to access these functions. In addition, print commands are available under the File menu, a copy command is available under the Edit menu, and a refresh command is available under the View menu. D01721R02.61 Copy Copies the event list to clipboard for pasting to other programs, Refresh Updates Event List by getting a new list from remote IED and updates the Event List screen. Erase Removes all events from remote IED. Print (bottom button only) Prints all the events (up to 250 events) to a local printer. TESLA 3000 User Manual 9-7 10 Continuous Disturbance Recording Continuous Disturbance Recording (CDR) implemented in the TESLA 3000 recording system allows you to gather power system disturbance data to review and analyze transmission and generation protection systems. The TESLA 3000 recording system incorporated CDR for NERC standards requirements, including user-selectable recording channels and user-selectable recording sample rate. NERC Standards: 1 Standard PRC-018-1 – Disturbance Monitoring Equipment Installation and Data Reporting 2 Standard PRC-002-1 – Define Regional Disturbance Monitoring and Reporting Requirements The CDR feature incorporated in the TESLA 3000 Recording System meets and exceeds the requirements of NERC Standards as represented in the following table. The continuous disturbance recording data retention period depends on the number of selected channels and on the selected sample rate. Estimated continuous disturbance recording data retention periods (in days) for various combinations of channel numbers and the sampling rates are shown in for details see Figure 10.2: Configuring Continuous Disturbance Recording on page 2. The general configuration screen is reached from the Configuration branch in the main screen; the main Continuous Recording screen is reached from the Continuous Recording branch, see for details see Figure 10.1: Main Screen showing the Continuous Recording Branch on page 1. Figure 10.1: Main Screen showing the Continuous Recording Branch Configuration D01721R02.61 Selecting Configuration from the main menu of the TESLA Control Panel shows a configuration view. If the Continuous Disturbance Recording is not configured, right-click and select New CDR to display the continuous disturbance recording channel configuration view. TESLA 3000 User Manual 10-1 10 Continuous Disturbance Recording Figure 10.2: Configuring Continuous Disturbance Recording Select channels from the tree view by dragging the channel name and dropping it on the selected channels grid view on the right hand side or by selecting a channel from the list in the grid view - a maximum of 36 channels can be selected. Select the continuous disturbance recording rate from the Sample Rate list box. Depending on the system frequency, the list box is filled with available sample rates. Selecting channels based on the current Sample Rate, displays available data retention period in the read-only Estimated retention period (days) display box. CDR Sampling Rates The following table shows the available sampling rates at the corresponding system frequency. System Frequency Continuous disturbance recording sample rates (RMS records/ second/channel) 60 Hz 6 10 12 15 20 30 60 50 Hz 5 - 10 - - 25 50 Number of Continuous Disturbance Recording Channels The number of continuous disturbance recording channels is user-configurable and limited only by the number of analog inputs available at any given time according to the analog input sampling rate as shown above. Only analog input data and frequency channels are stored; use RecordGraph software for derived channels, such as watts, vars, etc. Data Storage and Retention Period A 4-gigabyte flash drive is required for continuous disturbance recording to work. If TESLA 3000 firmware with continuous disturbance recording support 10-2 TESLA 3000 User Manual D01721R02.61 10 Continuous Disturbance Recording is installed on a unit without the designated continuous disturbance recording partition, continuous disturbance recording will be disabled. Continuous disturbance recording data retention period depends on the number of selected channels and on the selected sample rate. Estimated continuous disturbance recording data retention periods (in days) for various combinations of channel number and sampling rate are displayed in TESLA Control Panel’s Configuration screen, for details see Figure 10.2: Configuring Continuous Disturbance Recording. After all storage space designated for the continuous recording data is consumed, the oldest data is automatically deleted and released storage space is reused to store newly accumulated data. There is no indication about recycling of the continuous disturbance recording data storage space provided. Continuous Disturbance Recording Status The status of continuous disturbance recording and the time interval for each unit that has continuous recording data accumulated is displayed in TESLA Control Panel’s Continuous Recording and Utlities>Recording screens. The following Status types are possible: • NOT SUPPORTED: TESLA does not have enough storage to support CDR • NOT CONNECTED: not connected to TESLA • ACTIVE: CDR active, normal operation • DISABLED: CDR is not configured • ALARM: CDR storage corruption In the case of the Alarm status of continuous recording, an appropriate message is logged to the Event Log. Continuous Recording Screen Selecting the Continuous Recording branch in the left-hand side tree brings up the Continuous Recording Screen below: Figure 10.3: Continuous Disturbance Recording Screen D01721R02.61 TESLA 3000 User Manual 10-3 10 Continuous Disturbance Recording 10-4 Get Entering appropriate parameters in the Record Retrieval Request section and selecting the Get button retrieves and saves a CDR record to the local disk. Erase Selecting the Erase button erases all CDR data on the TESLA recorder. A confirmation dialog is displayed before this action is carried out. Record Retrieval Request Enter year, month, day, hour and minute information in the start date Section, and a Length for the requested record. These fields are prefilled with a time that is computed from the To time minus the initial Length value. Graph Launch RecordGraph with the selected record or records. Save as Brings up a dialog to save the selected record with a new name and/or location. Export Brings up the Export utility to export the selected record in a different format. Delete Deletes the selected records from the local file system. Rename Allows the user to rename the record keeping the original file extension. TESLA 3000 User Manual D01721R02.61 10 Continuous Disturbance Recording Safe Shutdown Mode Since data is being continuously written to the storage device, it is important to follow a safe shutdown procedure. This will ensure data integrity. A new command Safe Shutdown Mode is added to the maintenance menu and to the TESLA Control Panel Utilities screen. Figure 10.4: Utilities The command Safe Shutdown Mode is available only at the service access level for TESLA Control Panel or via Port 1 login for maintenance utilities. When the command Safe Shutdown Mode is used, all TESLA 3000 application tasks are stopped ensuring all accumulated data are written out to the flash drive, all open files are closed and the file system status is updated. The front panel Test Mode and Alarm LEDs start blinking indicating that it is safe to turn off the unit. The unit stays in the safe shutdown mode for 15 minutes and then is rebooted automatically. The Event Log will maintain a record of all received Safe Shutdown commands. Handling Configuration Changes D01721R02.61 All accumulated continuous disturbance recording data is discarded every time new settings with modified continuous recording configuration are loaded on TESLA 3000. Continuous recording configuration includes sample rate, analog input configuration, continuous recording channel selection and order. if changes to existing settings are made and user attempts to load them into the TESLA, the following dialog will appear: TESLA 3000 User Manual 10-5 10 Continuous Disturbance Recording Figure 10.5: Utilities Screen showing Safe Shutdown button 10-6 TESLA 3000 User Manual D01721R02.61 11 Graphing Records Getting Started RecordGraph is a tool used to display and analyze records from ERLPhase relays and recorders. Use it to graphically view the data recorded during fault, swing and trend modes. RecordGraph is integrated with TESLA Control Panel. Launch RecordGraph from TESLA Control Panel Method 1: Records 1 Open TESLA Control Panel by double-clicking on the TESLA icon on your desktop. If the application is not installed, install the application and then proceed. 2 Double-click on the Records item in the tree list or select Records and use the Enter key. 3 Using the Records tab, select a local record from the tree list. 4 Click the Graph button. Double-click Records or use Enter key. In the Records tab, select a local record from the tree list. Click on Graph button to launch RecordGraph. Figure 11.1: Launching RecordGraph from TESLA Control Panel When the Graph button is clicked from the TESLA Control Panel, RecordGraph is launched with the selected record. D01721R02.61 TESLA 3000 User Manual 11-1 11 Graphing Records Method 2: Auto Print If the Auto Print option is checked (enabled) in the Records list view, then RecordGraph will be automatically launched and prints the channels directly on to the Default printer. The layout and channel information is predefined in the <Default> or User-defined template. Method 3: Trends 1 Double-click Trends from the Main Menu. 2 Select the record from the list. To select multiple records, press Ctrl key and click on the desired records. 3 Select the Graph button at bottom of screen. Double-click Logging (Trends/Events) from Main Menu. Select a record. Click the Graph button. RecordGraph Window Figure 11.2: Launch from Logging (Trends/Events) 11-2 TESLA 3000 User Manual D01721R02.61 11 Graphing Records Launch RecordGraph from Windows Explorer 1 Open Windows Explorer. 2 Select a record. (It should have valid extensions, *.lpr, *.lpl, *.tpr, *.tpt, *.tlr, *.bpr, *.bpl, *.fpr.) 3 Right-click the selected record. 4 Choose, the RecordBaseView>Launch Graph option. Select a record (should have valid extensions: *.lpr, *.lpl, *.tpr, *.tpt, *.tlr, *.bpr,*.fpr). Right-clicking on the record brings up the context menu with the RecordBase View item. Figure 11.3: Launching RecordGraph from Windows Explorer D01721R02.61 TESLA 3000 User Manual 11-3 11 Graphing Records RecordGraph Components • Main menu items • Tool bar buttons • A drop-down box lists the templates associated with the current record’s IED • A left-hand side pane (LHS) or tree view lists the names of records to be displayed or analysed • A right-hand side pane (RHS) displays the graphs in various views. Initially a single blank screen appears. • A right-click context menu on both the LHS and RHS pane. • RecordGraph version is displayed in the Help>About RecordGraph. Main Menu Template List Tool Bar LHS pane (Tree View) lists records RHS Pane shows graphic display Figure 11.4: Components of RecordGraph Window 11-4 TESLA 3000 User Manual D01721R02.61 11 Graphing Records Menus RecordGraph File View Graph Measure Scale Options Help Graph View File Save Template Save Template As... Template Manager... Print... Print Direct Print All Print Preview... Export... Delete Show Record Summary. Import... Exit Add... Delete Rename Tab Titles... Copy to Clipboard Save as Metafile... Show Channel List Line Toolbar Set Graphs Per Page Add Analog Graph Add Digital Graph Delete Graph Move Copy Trace Paste Trace Delete All Traces Copy Trace Data to Clipboard Change Trace Color... Active Trace Information... Measure Markers CrossHairs Primary Secondary Time Alignment Absolute Time Fundamental RMS True RMS Harmonics Symmetrical Components Help User Manual About RecordGraph... Show Hotkeys... Scale Zoom X Axis + Zoom X Axis Zoom Y Axis + Zoom Y Axis Undo Zoom Reset Zoom Change Scale (Y-Axis) Options Calculate Derived Channels Now... Show Grid Show X Axis Ticks Show Legends Show Trigger Markers Lock Markers Extend Print Range Set Phase Colors... Set Precision Figure 11.5: Menus D01721R02.61 TESLA 3000 User Manual 11-5 11 Graphing Records RecordGraph Menu Items File Menus File>Save Template Figure 11.6: Save Template Use this option to save the current graphical layout information to a file (see “Templates” on page 11-56 for further explanations on templates and their role in graphical analysis). When this option is chosen and if there are no templates in the template list, then a Save As Template dialog box is displayed. Otherwise, the current layout information is saved in a file as shown in the template list box. File>Save Template As… Figure 11.7: Save Template As Save the current graphical layout information in a different file. A dialog box is displayed to choose the template file name. The check box, save as default 11-6 TESLA 3000 User Manual D01721R02.61 11 Graphing Records template, if checked, saves the current template as a user-defined default template (see “Templates” on page 11-56). File>Template Manager Figure 11.8: Template Manager Rename, duplicate, save as, import or delete template files. A dialog box is displayed to manage the template files (see “Templates” on page 11-56). File>Print Figure 11.9: Print Print the active (visible) view. Use this option to select the type of the printer and other configurations associated with it through the standard print dialog box options. D01721R02.61 TESLA 3000 User Manual 11-7 11 Graphing Records File>Print Direct Figure 11.10: Print Direct Send the active view directly to the default printer. When this option is chosen, the standard print dialog box is not displayed. The active view is sent directly to the default printer for printing, but you can cancel the printing if the print status dialog box is displayed. File>Print All Multiple Views Figure 11.11: Print All Send all the pages of all the views to the default printer. Select this option to print multiple views (visible and invisible) to the default printer. 11-8 TESLA 3000 User Manual D01721R02.61 11 Graphing Records File>Print Preview Figure 11.12: Print Preview Display the print preview window of the active view page. File>Export Figure 11.13: Export Export the selected record to a user-defined format, for details see 12 Record Export Utility on page 1. File>Delete Delete the currently selected record from the tree view. This option does not clear the view associated with the record. D01721R02.61 TESLA 3000 User Manual 11-9 11 Graphing Records File>Show Record Summary Figure 11.14: Show Record Summary Display the record summary and the event list of the active record in a dialog box. File>Import Figure 11.15: Import Choose this option to import a COMTRADE file and display a standard open file dialog box to select *.cfg COMTRADE files. File>Exit Exit the RecordGraph application. Save your graphical layout information before selecting this option. 11-10 TESLA 3000 User Manual D01721R02.61 11 Graphing Records View Menus View>Add Create a new view and add it to the existing layout (see “Views” on page 1132). View>Delete Figure 11.16: Delete Delete an active view from the layout. When you select this option, a dialog box appears to confirm the deletion of the view. If accepted, the current view is deleted from the layout. View>Rename Tab Renames this tab Figure 11.17: Rename Tab Replaces the name on the active view tab with one of your choice. A dialog box appears to enter the name. D01721R02.61 TESLA 3000 User Manual 11-11 11 Graphing Records View>Titles Figure 11.18: Titles Select graph and view titles options to compile titles and various options (see “View and Graph Titles” on page 11-62). View>Copy to Clipboard Copy an active view to the clipboard for import to another program such as MS Word or Excel, for details see 12 Record Export Utility on page 1. View>Save As Metafile Save an active view page as a Windows metafile, for details see 12 Record Export Utility on page 1. 11-12 TESLA 3000 User Manual D01721R02.61 11 Graphing Records View>Show Channel List Figure 11.19: Show Channel List Hide or show the channel list displayed in the tree view. View>Line Figure 11.20: Line Place a reference line on the graph (for Impedance and Differential views only). Use Line in conjunction with the CrossHair measurement for quick readouts. When you choose this option free form zooming is disabled. Clear the line to enable free form zooming. View > Tool Bar Show or hide tool bar from the main window. D01721R02.61 TESLA 3000 User Manual 11-13 11 Graphing Records Graph Menus Graph>Set Graphs Per Page Figure 11.21: Set Graphs Per Page Set up the number of graphs per view; up to eight graphs are allowed using the Set Graphs Per Page option. Timeline, Overlay and Trend Views allow a maximum of 36 graphs. Use Add Analog Graph or the Insert key to add one graph at a time. Graph>Add Analog Graph Figure 11.22: Add Analog Graph Add an analog graph to the existing view or use the Insert key. 11-14 TESLA 3000 User Manual D01721R02.61 11 Graphing Records Graph>Add Digital Graph Figure 11.23: Add Digital Graph Add a digital graph to the existing view. This graph shows the digital status information in the form of thick or thin stacked traces. You can plot up to 32 traces in a single graph. Graph>Delete Graph Figure 11.24: Delete Graph Delete an active graph (click any graph to make it active) from the existing view or use the Delete key. D01721R02.61 TESLA 3000 User Manual 11-15 11 Graphing Records Graph>Move Figure 11.25: Move Rearrange the relative position of the graphs in the active view page. First select the graph and use either the Move>Up or Move>Down option to change the position of the graph. Graph>Copy Trace Copies this trace Figure 11.26: Copy Trace Copy an active trace from the selected graph. Use this option in conjunction with the paste trace option. You need at least one channel on a graph to use the copy operation. 11-16 TESLA 3000 User Manual D01721R02.61 11 Graphing Records Graph>Paste Trace Trace copied Trace pasted Figure 11.27: Paste Trace Add or replace an existing trace in the selected graph. In Timeline View an analog graph supports one trace per graph. In an Overlay View you can select up to 32 traces per graph. If you use the paste operation in Timeline View, and if the graph has a trace, it is replaced with the one just copied or adds the trace if there is no trace. In Overlay View it adds the trace to the existing graph. Graph>Delete Trace Delete Trace removes this trace from the graph Figure 11.28: Delete Trace Select a graph and the trace to be deleted and use Delete Trace to delete from the active graph. In the case of Overlay View a graph can have multiple traces. You can select a trace by clicking on the channel name and use delete trace option to delete the selected trace. D01721R02.61 TESLA 3000 User Manual 11-17 11 Graphing Records Graph>Delete All Traces All traces are removed from the graph Figure 11.29: Delete All Traces Deletes all the traces from the active graph. In an Overlay view this action removes all the traces. Graph>Copy Trace Data to Clipboard Copy trace data from the active graph to the clipboard (see “Exporting Channel Data” on page 11-73). Graph>Change Trace Color Color of this trace is changed Figure 11.30: Change Trace Color Change the trace color of the selected trace. In the Overlay View this option only changes the color of the active trace. 11-18 TESLA 3000 User Manual D01721R02.61 11 Graphing Records Graph>Active Trace Information Figure 11.31: Active Trace Information Display the trace information of the active graph. Measure Menus Measure>Markers Amplitude readouts corresponding to X & O Time display corresponding to X & O Figure 11.32: Markers Set or clear markers X and O on all graphs in the active view. If the markers are out of range, double-click the time axis to bring them back into the view. When markers are placed, depending on the type of measurements option, readouts appear on the right hand side as shown corresponding to the positions of X and O marker. In case of multiple traces, the readout refers to the currently active (selected) trace. D01721R02.61 TESLA 3000 User Manual 11-19 11 Graphing Records Measure>CrossHair CrossHair measurements Figure 11.33: CrossHair Set or clear crosshair cursor measurement by dragging the mouse (left-click and move) anywhere on the graph to display the readout. The difference between the marker and crosshair readout is that the marker values correspond to the data values, whereas the crosshair measurement corresponds to the x and y coordinates. When this option is selected, you can measure coordinates of any graph in the active view. Measure>Primary Primary Scale Figure 11.34: Primary Set scale to primary values (depending on the scale factors CT/PT ratios) on all the graphs in the currently active view. The current choice (primary or secondary) is displayed on the status bar. 11-20 TESLA 3000 User Manual D01721R02.61 11 Graphing Records Measure>Secondary Secondary Scale Figure 11.35: Secondary Set scale to secondary values (depending on the scale factor of CT/PT ratios) on all the graphs in the currently active view. The current choice (primary or secondary) is displayed on the status bar. Measure>Time Alignment Offset X axis (trigger time alignment) for the currently active trace on the graph (see “Readouts and Measurements” on page 11-64). Measure>Absolute Time Display absolute time (actual recorded time) measurements for the active trace of the graph (see “Readouts and Measurements” on page 11-64). Measure>Fundamental RMS Display fundamental RMS measurement for the active trace of the graph (see “Readouts and Measurements” on page 11-64). Measure>True RMS Display true RMS measurement for the active trace of the graph (see “Readouts and Measurements” on page 11-64). Measure>Harmonics Display harmonics measurement – up to 5th order and THD expressed in percent with reference to the fundamental (the highest order harmonic included in THD depends on the sample rate). See table 7.1 and 7.2 on page 7-6) for the active trace of the graph (see “Readouts and Measurements” on page 11-64). Measure>Symmetrical Components Display symmetrical components measurement for the active graph. You must select a, b and c phase quantities in Overlay View to enable this option (see “Readouts and Measurements” on page 11-64). D01721R02.61 TESLA 3000 User Manual 11-21 11 Graphing Records Scale Menus Scale>Zoom X Axis + Figure 11.36: Zoom X Axis + Select this option to decrease the x axis range by 25% of the current zoom range. Scale>Zoom X Axis - Figure 11.37: Zoom X Axis - Select this option to decrease the x axis range by 25% of the current zoom range. 11-22 TESLA 3000 User Manual D01721R02.61 11 Graphing Records Scale>Zoom Y Axis + Figure 11.38: Zoom Y Axis + Select this option to decrease the y axis range by 25% of the current zoom range. Scale>Zoom Y Axis - Figure 11.39: Zoom Y Axis - Select this option to increase the y axis range by 25% of the current zoom range. D01721R02.61 TESLA 3000 User Manual 11-23 11 Graphing Records Scale>Undo Zoom Figure 11.40: Undo Zoom Display the previous zoom level. Scale>Reset Zoom Reset zoom levels Figure 11.41: Reset Zoom Reset the graphs to the initial zoom level. 11-24 TESLA 3000 User Manual D01721R02.61 11 Graphing Records Scale>Change Scale (Y Axis) Figure 11.42: Change Scale (Y Axis) Change Y axis to a desired minimum and maximum value using the dialog box to set the new values. If the manual scale option is checked, the y axis is not rescaled to new data values; the trace is displayed within the selected range. You can set the desired scaling, save the options in the template and recall the template for other recordings (see “Templates” on page 11-56). D01721R02.61 TESLA 3000 User Manual 11-25 11 Graphing Records Options Menus Options>Calculate Derived Channels Now Use this option to calculate the derived channels and append to the record as virtual channels. For TESLA records the data is written back to the original record so that the next time the record is viewed all the derived channel information is readily available (see “Calculated Channels” on page 11-71). Options>Show Grid Figure 11.43: Show Grid Turn grid on or off on all graphs. Options>Show X Axis Ticks Figure 11.44: Show X Axis Ticks Show X axis ticks on all graphs. 11-26 TESLA 3000 User Manual D01721R02.61 11 Graphing Records Options>Show Legends Figure 11.45: Show Legends Show or hide legends on all the graphs. Options>Show Trigger Marker Figure 11.46: Show Trigger Marker Show or hide trigger marker on the active graph and active curve. D01721R02.61 TESLA 3000 User Manual 11-27 11 Graphing Records Options>Lock Markers X and O markers are locked Figure 11.47: Lock Markers Lock or unlock X and O markers. Options>Extend Print Range Entire data is printed in multiple pages at the current zoom level Figure 11.48: Extend Print Range Print all the channels of the view for the entire data range in the current zoom level. 11-28 TESLA 3000 User Manual D01721R02.61 11 Graphing Records Options>Set Phase Colors Figure 11.49: Set Phase Colors Use this option to select user-defined colors for A, B and C phase voltages and currents. When the colors are selected, the channels are automatically identified based on the color. The default values for A, B and C phase quantities are red, blue and green respectively. Options>Set Precision These readouts have 4 decimal places Figure 11.50: Set Precision Set the precision (number of decimal places) for the readouts. In Symmetrical Component and Harmonic Views, the phase angle readout precision is always zero (no decimal places are used). D01721R02.61 TESLA 3000 User Manual 11-29 11 Graphing Records Help Menus Help>User Manual Select to display an electronic version of the user manual. Help>About RecordGraph Display program information, version number and copyright. Help>Show Hot Keys Lists the available hot keys or short cuts. Tool Bar Buttons Titles Markers Set Graphs Per Page Add Digital Graph Zoom X Axis + Zoom Y Axis + Reset Zoom Move Graph Down Change Scale (Y-Axis) Line Paste Trace Trace Information Increase Left Margin Show Record Summary Print RecordGraph File View Graph Measure Scale Options Help <Default> Export... Save Template Decrease Left Margin Show/Hide Tree View (Channel List) Show/Hide Legends Copy Trace CrossHair Time Alignment Move Graph Up Zoom Y Axis Zoom X Axis Delete Graph Add Analog Graph Show/Hide Trigger Marker Recorder Data and Impedance Options Add a View Figure 11.51: Tool Bar Buttons In the Tree View, you can expand a loaded record to identify the recorded and calculated channels (if configured). A right-click menu is available to manipulate the tree items. Most of the tool bar buttons work in a similar way to that of the menu items explained in the previous sections. Tool Bar Buttons 11-30 Save Template Save template file on the disk. Show Record Summary Displays record summary (events, trigger time, etc.) Export Brings up export module. TESLA 3000 User Manual D01721R02.61 11 Graphing Records D01721R02.61 Print Prints record. Add a View Adds a graph view that displays the fault information. Titles Places a title above graph for all views (see Figure 11.88: View Title Options). Impedance Creates an R-X plot before, during and after fault. Markers Displays vertical lines "x" and "o" to find the coordinate values on the graph. Show/Hide Trigger Marker Displays/hides zero trigger marker. Set Graphs Per Page Sets number of graphs per page. Add Analog Graph Add an analog graph. Add Digital Graph Add a digital graph. Delete Delete a graph. Zoom X Axis + Enlarges the trace range on X axis. Zoom X Axis - Reduces the trace range on X axis. Zoom Y Axis + Enlarges the trace range on Y axis. Zoom Y Axis - Reduces the trace range on Y axis. Reset Zoom Resets zoom control. Move Graph Up Vertically moves graph upwards. Move Graph Down Vertically moves graph downwards. Time Alignment Offset X axis time value. Change Scale (Y Axis) Scale Y axis minimum and maximum range. CrossHair Displays X and Y coordinate values. Line Available only for impedance view, draws a reference line. Copy Trace Copies a trace to another location. Paste Trace Pastes a trace. Show/Hide Legends Displays/hides legends the traces. Trace Information Displays/hides channel information: Date, Station Name, RecordName, Channel Name. Show/Hide Tree View Channel List Expands and minimizes RHS of the screen. Decrease Left Margin Decreases left margin. Decrease Right Margin Decreases right margin. TESLA 3000 User Manual 11-31 11 Graphing Records Views The view screen graphically displays information from the record. A view is associated with a tab at the bottom of the screen which can be renamed using the Rename tab. You can create a maximum of 30 view tabs. Add a View Add new view to layout. 1 Select the View>Add... from the top menu bar or the Add... button from the tool bar. 2 Select the desired view from the shortcut menu. 3 Click OK. Select desired view and select OK. Select View>Add... or click the Add button to create a view type. View Tabs Figure 11.52: Add a View The Add View… option lists Impedance View only if the selected record is from an L-PRO, TESLA or COMTRADE record. Delete a View 11-32 Clears active view from layout. 1 Select the View>Delete from top menu bar. A shortcut menu asks you to confirm the deletion. 2 Click OK to confirm. Click Cancel to stop deletion. TESLA 3000 User Manual D01721R02.61 11 Graphing Records Rename a View Use this option to rename the active tab which is displayed at the bottom of the view. 1 Select the View>Rename Tab from top menu bar or right-click on the graph to bring up the context menu and select Rename Tab. 2 A dialog box appears with the old name. Modify and click OK to rename the view. Figure 11.53: Rename Dialog Box Show Channel List Displays or hides the channel list on the left-hand side of the screen to allow more space for the graphs. Toolbar Displays or hides the toolbar on the left-hand side of the screen to allow more space for the graphs. D01721R02.61 TESLA 3000 User Manual 11-33 11 Graphing Records Graphs The graph is an area or space in a view where each channel of analog or digital information is shown. The information is shown as X-Y data with X = time and Y = magnitude. Adding Graphs 1 Select Graph>Set Graphs Per Page or right-click on the graph to bring up the context menu and select Set Graphs Per Page to add selected number of graphs to the Timeline View. 2 Select Graph>Add Analog Graph or right-click on the graph to bring up the context menu and select Add Analog Graph to add an analog graph to the Timeline View. 3 Select Graph>Add Digital Graph or right-click on the graph to bring up the context menu and select Add Digital Graph to add an digital graph to the Timeline View. Adding Channels 1 Click the desired channel to be displayed on the graph. OR 2 Drag a channel and drop it onto the desired graph. 3 Depending on the view type following action takes place: • In a Timeline View the existing channel is replaced and only one channel is allowed per graph. • In an Overlay View up to 32 traces can be placed per graph. • In a Trend View the existing channel is replaced and only one channel is allowed per graph. • External or digital channel should be placed on a digital graph to stack the traces. A maximum of 32 traces can be specified per graph. Channel Tool-tip 11-34 When the cursor is moved over the channel name, following information is displayed in the tool-tip window. • Device – name of the device (example, TESLA) • Record – name of the record • Channel – name of the channel • Max – channel maximum value along with the unit • Min – channel minimum value along with the unit • X – Offset-whether the x-axis has offset (time alignment) • Samples – number of samples • Sample rate –samples /second • IRIG-B status indicator TESLA 3000 User Manual D01721R02.61 11 Graphing Records Tool-tip window Figure 11.54: Tool-Tip Zoom Using the Mouse 1 Left-click on any graph and drag to form a small box around the graph area. 2 When you release the mouse, the trace assumes new zoom position determined by the area of the zoom coordinates. Drag a box around the graph area to be zoomed. Figure 11.55: Select a Section of the Graph to Zoom D01721R02.61 TESLA 3000 User Manual 11-35 11 Graphing Records Figure 11.56: Portion of Zoomed Graph Follow the procedure 1 and 2 for further zooming. Zoom Using the Tool Buttons You can also use Zoom X axis +, Zoom X axis -, Zoom Y axis + and Zoom Y axis - on the tool bar buttons to quick zoom in and zoom out (25%). Repeat step 1 to zoom further. Zoom only X or Y Axis To zoom only the X axis, select Ctrl key and use the mouse to draw a box on the graph. To zoom only the Y axis, select shift key down and use mouse to draw a box on the graph. Undo Zoom on Graphs 1 2 3 4 11-36 Right-click on the graph to the context menu. Select the UndoZoom option. Graphs are redrawn to the previous zoom level. Select Reset Zoom option to reset the graphs to the initial zoom level. This can be chosen at any stage. TESLA 3000 User Manual D01721R02.61 11 Graphing Records Pan Graph Zoom the graph (if not zoomed) to a required zoom level. You should hold the “Thumb track” and move it along the scroll bar. To have fine control click on the right arrow scroll bar button or press Shift and click on the right arrow scroll button. Thumb Track - move right/left to pan graph Figure 11.57: Thumb Track Keyboard Functions The keyboard is also available for zooming, setting markers and positioning graphs. To display the keyboard hot key menu right-click on the graph and bring up the context menu, select Show Hotkeys option. Figure 11.58: Hot Keys D01721R02.61 TESLA 3000 User Manual 11-37 11 Graphing Records Right-click Context Menu Figure 11.59: Right-Click Context Menu 11-38 TESLA 3000 User Manual D01721R02.61 11 Graphing Records Timeline View Channel Information Record Information Read-out Markers Tool Tip Figure 11.60: Timeline View • Timeline View is designed to “stack” channels and has single time line axis common for all the graphs. • Each analog graph in this view can hold only one trace. • Each digital graph in this view can hold 32 traces (8 traces are preferred). • Selecting a channel from the LHS tree view while the same graph is active replaces the existing channel with the currently selected one. • A maximum of 32 graphs (analog and digital) can be added per view. • You can mix and match channels from different records and/or IEDs. • Time line view displays read-out (if markers are on) on the RHS and channel information on its LHS. • Read-out corresponds to the currently selected channel type and the scale (primary/secondary) which is displayed on the status bar. D01721R02.61 TESLA 3000 User Manual 11-39 11 Graphing Records Overlay View Channel Information Record Information Figure 11.61: Overlay View • Overlay View is designed to “overlay” channels and has single time line common axis for all the graphs. • Each analog graph in a overlay view can hold 32 traces (3 traces are preferred). • Each digital graph in this view can hold 32 traces (8 traces are preferred). • Selecting a channel from the LHS tree view while the same graph is active overlays the channel on the selected graph. • A maximum of 32 graphs can be added per view. • You can mix and match channels from different records and/or IEDs. Time line view displays read-out (if markers are on) on the RHS and channel information on its LHS. • Read-out corresponds to the currently selected channel type and the scale (primary/secondary) which is displayed on the status bar. 11-40 TESLA 3000 User Manual D01721R02.61 11 Graphing Records Symcom View Record Title Channel Names Instantaneous Channel Amplitude Display A, B, C Phase Analog Channels Time Display Markers locked one cycle apart Phasor and Symmetrical Component Graph Diplay of Phases (A, B, C) Figure 11.62: Symcom View • Symcom View is designed to analyse symmetrical components of voltage or current channels. • You must load 3 voltage or current channels to view the components and associated phasor plots from the same record. • The view displays: analog channels, positive, negative, zero sequence phasors and corresponding table which contains numerical values of these components and phase angle. • All the components are calculated in RMS values. • Channel instantaneous values are displayed on the RHS of the analog graph. • Markers are permanently set on the graph one-cycle apart. • Grab the marker and move (on the time line axis) to display new set of components and phasor values. D01721R02.61 TESLA 3000 User Manual 11-41 11 Graphing Records Harmonic View Record Title Channel Names Instantaneous Channel Amplitude Analog Graph Time Display Markers locked one cycle apart Bar Graph of Harmonics Amplitude Table displays Harmonic Amplitude with corresponding Phase Angles Figure 11.63: Harmonic View • Harmonic View is designed to analyse harmonics associated with analog channels. In order to view harmonics, markers should be enabled by selecting Measure>Markers. • A maximum of 3 traces can be analysed per view. • The view displays: analog channels, a bar graph of harmonics and a table which contains RMS values of the harmonics with phase angle. • The maximum number of 25 harmonics (order) displayed is based on the sample rate. See Table 7.1 and 7.2 on page 7-6. • Channel instantaneous values are displayed on the RHS of the analog graph. • Markers are permanently set on the graph one-cycle apart. • Grab the marker and move (on the time line axis) to display a new set of harmonics. All harmonic phase angles are referenced with respect to A-phase voltage in a configured channel in TESLA recorder. For COMTRADE records the first A-phase voltage is considered as the reference phase. 11-42 TESLA 3000 User Manual D01721R02.61 11 Graphing Records Impedance View Impedance View is an R-X plot. The R-X quantities are calculated over the entire data range from the recorded analog voltage and current channels. R-X plot is useful in analyzing the performance of L-PRO relays and swing disturbances from the TESLA recorders. Since the information to be displayed involves time as a third dimension, this view provides meticulous cursor and zoom control over the data points being viewed. Optionally it supports superposition of the relay characteristics (Zone 1, Zone 2, Line, Blinders, etc.) from L-PRO records or files generated from any L-PRO Offliner settings program. The following table summarizes the types of channels from which impedance (R and X values) is derived along with the supported product. RecordGraph displays these channels on the left hand side in the tree view. Depending on the product, the following basic quantities are used the respective impedance channels. In an impedance calculation, a threshold limit is used based on the fundamental RMS value of the current to include or exclude the R and X values for plotting. This limit depends on the CT module used for the relay or recorder application. For 1A CT module, 0.02 A is the limit whereas for a 5A CT module, 0.1 A is used as the limit. When the data is copied to the clipboard, the discarded values of R and X values are not exported. Sl. No. Channel Types Quantities Supported Products 1 High Speed (HS) Voltage and Current L-PRO, TESLA, COMTRADE 2 High Speed (HS) Positive Sequence Voltage and Current TESLA 3 Low Speed (LS) Voltage and Current TESLA 4 Low Speed (LS) Watts, Vars and Voltage (Phase and Sequence) L-PRO, TESLA 5 Low Speed (LS) Positive Sequence Voltage and Current L-PRO, TESLA 6 Low Speed (LS) Impedance (Phase and Sequence) L-PRO, TESLA To add an Impedance view select View>Add. or the Add a View tool bar button. From the dialog box select Impedance View. D01721R02.61 TESLA 3000 User Manual 11-43 11 Graphing Records Figure 11.64: View>Add> Impedance The Add View… dialog box lists the Impedance View only if the selected record is from L-PRO or TESLA or COMTRADE records depending on the record type. When the Impedance View option is selected, the Impedance screen is displayed. The components and controls associated with this screen are described below. (2) Basic channel names and derived impedance type (1) View Title (3) Graph Zoom control (x-y axis zooming) (5) Time Window width and position control (4) Time Window (6) X and O markers Figure 11.65: Opening Impedance Screen 11-44 TESLA 3000 User Manual D01721R02.61 11 Graphing Records Components and Controls (1) A text component displays the title at the top of the Impedance View shown in Figure 11.65: Opening Impedance Screen. The title is compiled from items in the Title Options dialog box. Default title is the file name and trigger event. (2) The basic channel names are displayed below the title. (3) The graph zoom is controlled using the sliding control on the right side of the window. The R-X plot aspect ratio is maintained under all zooming tools. The graph zoom control offers a 10x zoom factor between minimum and maximum amplitude of the data (R and X coordinates). (4)The Time Window control provides a means to select the range of data for better presentation of R-X values. For example, if the voltage and current channels are recorded from 0.0 to 0.2 seconds with 1000 data points, using this control, you can choose to view only 0.1 second data (500 points). (5) Time window width and position control can be used for the precise data analysis. (6) Control the X and O markers. Create Impedance View with an TESLA Record 1 Launch RecordGraph with an TESLA high speed (fault) record and expand the channels in the tree view. 2 Create an Impedance View using View>Add… or use the tool bar option. 3 Select line voltages A, B and C, and corresponding line currents A, B and C from the tree view. Impedance (R and X) corresponding to Zab, Zbc and Zca phase-phase are calculated internally and displayed. Actual channel names (as selected from the tree view) Phases of the basic voltage and currents Graph Zoom Resolved impedance name Time Window Figure 11.66: Create Impedance View with a TESLA Record D01721R02.61 TESLA 3000 User Manual 11-45 11 Graphing Records Each channel name is divided into three parts: • the basic quantity (voltage or current) used in the calculation of the impedance. • the name of the actual channel selected. • the resolved impedance name with the configuration (phase-phase or phase-ground). The Time Window control shows the minimum and maximum time of the data viewed. In the above example, the full range data is viewed. Use the graph zoom control to zoom the x and y axis. The thumb track is moved from top to the position indicated and the traces are zoomed in. Figure 11.67: Example of Graph Zoom Control When you move the mouse near the edge of the Time Window control, the cursor shape changes from normal arrow to two headed arrow as shown in the diagram. Now you can resize the thumb track to a desired level of data range. In the example, the data starts at position -0.200 and ends at (-0.200 + 1.383), where 1.383 is the width (total data range). Therefore, only small portion of the data can be viewed. 11-46 TESLA 3000 User Manual D01721R02.61 11 Graphing Records Time Window control is resized to include only portion of the data Time Window enlarged Figure 11.68: Example of Using Time Window Control If you move the thumb track (not resize) to the extreme end, then the traces are rendered in the new data range. Time Window control is moved to include different range of the data Time Window enlarged Figure 11.69: Time Window Control Moved to New Location In the above case, the data is included from range 0.007 to 0.007 + 1.176, where 1.176 is the data width. The 1.176 width remains same. If you resize the D01721R02.61 TESLA 3000 User Manual 11-47 11 Graphing Records thumb track, then the width can be controlled; or you can double-click near the number 1.176 to get a dialog box to enter the data range precisely. A dialog box pops-up to enter the width or data range indicated by the size of the thumb track. The scale indicates the step by which the data is incremented. Figure 11.70: Indicate Data Range A dialog box appears to enter the width or data range, which is indicated by the size of the thumb track. The scale indicates the step by which the data is incremental. For example, when the spin control arrow is clicked (after closing the dialog box), if an up arrow is clicked, the data is incremental from present position to present position + 5%. On the other hand, if the down arrow is clicked, the data is decremented by 5%. Example to Superimpose the L-PRO Relay Characteristics Click this button to apply L-PRO relay characteristics through the impedance options dialog box Figure 11.71: Superimpose the L-PRO Relay Characteristics When you select the Relay data & impedance options button, a dialog box appears. The parameter required, such as k0 factor, the line sequence impedance values, the system voltage data and the other required information is initialized through this dialog box initialization. All these values are read from the settings file opened through the impedance option dialog box. 11-48 TESLA 3000 User Manual D01721R02.61 11 Graphing Records Relay data and impedance options L-PRO settings file Radio button to select relay characteristics from the current record. If an L-PRO record is selected, this button is enabled. Current record If a TESLA or COMTRADE record is selected, this button is enabled. File Displays the settings file (full path name) from which the relay data is extracted to plot the impedance characteristics. Browse Gives an option to select the settings file from any other location. The file type filter reads or selects only *.lps file type, if L-PRO setting file is selected. Impedance Options Impedance configuration option includes a number of other options, such as, Phase-Phase, Phase-Neutral, radio button. Depending on this option and the type of channel, different impedance options (check buttons) are enabled. Configuration Zpos (positive sequence impedance 3 phase basis). Zan, Zbn or Zcn. Zab, Zbc, or Zca. Other Impedance Z-Line Displays the line angle (can be checked or unchecked). Z-Load Displays the coordinate of the load impedance (can be checked or unchecked). Blinders Available only if the Phase-Phase option is chosen. Directional Displays the directional characteristics. Zones to display Phase-Ground or Phase-Phase. Zone 1 to 4 Zone1-Zone4 displays the respective zones impedance characteristics (can be checked or unchecked). Apply Redraws the display with the currently selected options. Launch Launches the setting file through the Offliner settings program. Note that the L-PRO Offliner setting program should be installed for this to work successfully. Close Closes the dialog box. In the Relay data and impedance options dialog box check the Zone 1 to Zone 4 boxes and select the Apply button. All the four zone characteristics are superimposed on the calculated phase impedances (note that the characteristics are zoomed using free-form zoom to get a better resolution). D01721R02.61 TESLA 3000 User Manual 11-49 11 Graphing Records Figure 11.72: Example Superimposing the Zone Characteristics In the above example phase-phase impedances Zab, Zbc and Zca are selected, indicated by a check mark, but only Zca is in the zoom range. All the four zones mho characteristics are superimposed. You can see that the Zca impedance has entered the Zone 2 and Zone 3. You can use a combination of zoom and time window control to analyze the precise time at which the impedance enters the zones. Line Impedance Blinder Impedance Figure 11.73: Example Showing the Line and Blinder Impedances Check the Z-Line and Blinder boxes; then select the Apply button to superimpose the line and blinder impedances. 11-50 TESLA 3000 User Manual D01721R02.61 11 Graphing Records Select this button to enable CrossHair measurement feature CrossHair measurements Figure 11.74: Example Illustrating the Use of the CrossHair Measurement Select the CrossHair button. When you drag the mouse (left button down and move) on any point on the trace, the R, X and the Z corresponding values are displayed. You can move the cursor anywhere on the graph to get the measurement. When this feature is enabled, free form zooming is disabled; but you can use the graph zoom control to get a closer look at the trace. Select this button to set an arbitrary line Arbitrary line for the reference purpose Figure 11.75: Example of the Line Feature Set a reference line to measure the data using the Line feature. This line is a reference line and not associated with the data values. When the line option is enabled, the free form box zooming is disabled. Disable the CrossHair measurement to resize and move the reference line; then en- D01721R02.61 TESLA 3000 User Manual 11-51 11 Graphing Records able the CrossHair option to measure the values. Select the line option again to remove the line from the graph. Legend feature button Legend box with all the relay characteristics impedance names Figure 11.76: Example of the Legends Feature Use the legend feature to distinguish relay characteristics from the calculated impedances. You can move the legend box and resize to the desired level. You can hide the legend box by re-selecting the legend option again. Resized legend box showing all the relay characteristics impedance names Figure 11.77: Legends Features Moved and Enlarged 11-52 TESLA 3000 User Manual D01721R02.61 11 Graphing Records Marker button Cursor corresponding to marker X Select channel name Cursor corresponding to marker O Marker X and O Marker X and O readouts Figure 11.78: Example Illustrating the Use of Data Markers Select the marker option to set the markers. Select the desired channel name for the required measurement. For example, the channel associated with Zca is chosen (click this channel name for the selection). Move the marker by sliding it to the desired location. When you change the data range (using Time Window control), the cursors may disappear from the traces indicating that the markers are always associated with the data. Positive sequence impedance trajectory Figure 11.79: Example of TESLA Swing Record Choosing Positive Sequence Voltage and Current Select a TESLA swing record and expand the channels. Click the positive sequence voltage and current; RecordGraph automatically calculates and displays the positive sequence impedance. D01721R02.61 TESLA 3000 User Manual 11-53 11 Graphing Records Positive sequence impedance trajectory Figure 11.80: Example of TESLA Swing Record Choosing Watt, Var and Positive Sequence Voltage Channels Select an TESLA swing record and expand the channels as shown. Click the watt, var and positive sequence voltage; RecordGraph automatically evaluates and displays the positive sequence impedance. Positive sequence impedance trajectory Figure 11.81: Example of TESLA Swing Record Choosing Impedance Channel Select an TESLA swing record and expand the channels as shown. Click the impedance channel; RecordGraph automatically displays the positive sequence impedance trajectory. As you select the desired channels, the impedance (R-X characteristics) are superimposed on the existing relay characteristics. To select new set of voltage and current channels use the Delete trace(s) option from the right-click context menu and select new channels. If desired, you can modify or re-apply the impedance options. Drag the thumb track on the scroll bar to zoom in or zoom out the axis range. In the Time Window control + click the arrow buttons or drag the thumb track to scroll the window of visible data in the time domain. 11-54 TESLA 3000 User Manual D01721R02.61 11 Graphing Records To place the X and O markers use the tool bar or the right-click context menu or the View>Markers option, dragging a marker to the right or left moves corresponding marker. If the Time Window control does not show the data, then the markers are shown as small triangles on the left or right sides. If you click the triangle, corresponding data cursor is displayed and the time range is automatically adjusted. You can save all the impedance display options to a template file (File> Save template Trend View Figure 11.82: Trend View • Trend View is designed to display “trend” data. • It has a special x-axis, common to all the graphs to display the data in the “date” format. When zoomed, the scale automatically changes depending on the date range. (For example: years/months or months/days or days/ hours or hours/minutes or minutes/seconds). • Each analog graph in a trend view can display one trace. • A maximum of 32 graphs can be added per view. D01721R02.61 TESLA 3000 User Manual 11-55 11 Graphing Records Templates Templates associated with a record. Left Margin Figure 11.83: Template List Template contains user-defined layout information including: • Views – graphs and their location along with the traces (channels) • Markers position (X, O and trigger marker, T) • Views and graphs title options • X axis scaling (zooming information) • Y axis scaling (zooming information) • X axis shift (time alignment) of each channel • Measurement (readout) options • Left Margin Template stores the easy-to-manage layout information in a file based on product type (B-PRO, F-PRO, L-PRO, T-PRO, TESLA, COMTRADE). When the template information is stored, it can be applied to any recording (normally from same IED or product) for which the template is valid. For example, if a template has 3 views with 3 graphs per view, and has 1, 2 and 3 analog channels displayed with various options, this information can be applied to any record with that common framework. The concept is to re-use the common layout information and update the data information with the new recorded channels thus reducing the graph re-creation processing time. These flexible and user-defined templates can be shared among different users. Normally (under default installation options), templates are stored on the local hard disk in a sub-folder where the RecordGraph application resides, for example, c:\Program Files\NxtPhase\RecordGraph\template 11-56 TESLA 3000 User Manual D01721R02.61 11 Graphing Records The template graphical layout file contains information about fixed views, graphs, traces, marker positions, read-out, scaling and zoom range. You can analyze a system disturbance recorded at different times and at different locations using the template. When a template is opened, the predefined layout information is automatically applied based on the new record (or set of records). You can save time by viewing the data recorded without manually loading the traces again. Templates are the first step in generating a visual report. You automatically form a template when you create views and graphs. To reapply the template to a different recording from the same or different recorder, you must save this layout information in a file. You can extend or alter templates by manipulating views, graphs and traces. Templates are not saved automatically, but must be saved using the File>Save Template option. Template files can be shared and customized. The list of templates is dynamically created and displayed in the tool bar. When a record is added to RecordGraph, an automatic scan search is done to list the templates corresponding to the record loaded. This list may have both single or multi-record templates, if the record loaded is a part of multi-recorder template. If no match is found, a <Default> template is loaded. You can define any number of templates based on a single recorder or multiple recorders. Default Templates D01721R02.61 Hard coded, static default templates are created whenever you open the RecordGraph application. These are not stored in the file, but are dynamically created and displayed as <Default> in the list box. You can override this <Default> template by saving any other template as a default template. The user-defined default template path is stored in the registry key based on the product and the type of recording (applicable for all products). For example: • TESLA/HS - high speed • TESLA/LS - low speed • TESLA/Trend - slow recordings TESLA 3000 User Manual 11-57 11 Graphing Records Managing Template Files Whenever a new record file is loaded into the RecordGraph, it automatically loads the relevant template file names in a list box attached to the main tool bar. The template files are filled or updated based on certain rules: • Templates are stored based on product type. • If a user-defined default template is available, it is loaded as the first item in the list box, otherwise, a static <Default> template is listed as the first item. • Template files are matched based on IED (serial number) in the case of TESLA recorders and are common in case of relay products (B-PRO, FPRO, L-PRO, T-PRO. If template files for a TESLA recorder are created and stored (for example, with serial number TESLA-2000-981103-07), these template files can not be applied to another recorder with different serial number such as TESLA-2000981103-08. On the other hand, if template files are created for relay products such as L-PRO, this template can be applied to any relay IED B-PRO, F-PRO, L-PRO or T-PRO). Hence, templates are IED-based (serial number-based) in case of recorders and product-based in case of relays. Double-click (or use the Enter key) on the currently active record in the RecordGraph tree list (displayed in bold) to apply the template or pick any desired template from the template list box. Templates can be renamed, duplicated or deleted using template manager from within the RecordGraph. There is no limitation on the number of template files used (as long as the hard disk space is available). Create New Template File 1 Modify the existing template layout information and save the modified template into a new file. 2 Create new views and graphs by deleting the views from the existing layout and saving new ones into a new the template file. If the template file is created from multiple records, all the records should be pre-loaded into RecordGraph to successfully apply the layout information. Layout information is applied one at a time. If the template involves more than one record, apply template (double-click on each record) to fill respective channels. The name of the recorder IED in the template file are displayed in the tool-tip list box window when the mouse cursor is moved over it. The tool-tip also displays the product name and the user-defined default template file name, if one exists. 11-58 TESLA 3000 User Manual D01721R02.61 11 Graphing Records Templates Menus Save Template Displays a dialog box only if <Default> template is currently displayed in the template list box. Since <Default> template name is reserved for hard coded templates, you must save the template information with a new name. If any other template file name is displayed, other than <Default>, the layout information is updated without the dialog box being displayed. Save Template As... Displays a dialog box to save the template. The option Save as default template, if checked, saves the template as user-defined default template. Refer previous section for more explanation on the user defined default template. Template Manager... Figure 11.84: Template Manager Brings up the template manager dialog box which lists all the templates currently available. Rename Renames the currently selected template. Duplicate Copies the contents of the selected template into another file. Delete Deletes currently selected template. Save As… Saves the selected template file from the template files list to the desired location. D01721R02.61 TESLA 3000 User Manual 11-59 11 Graphing Records Import… Imports a file from any location to the current template location and registers the template as a high, low speed or trend default template (if one of the option is chosen). Browse… Sets the new template location. This folder stores all the template files available for the analysis based on the recorder (refer Templates section under Graphing Records for detailed explanations). Close Saves the current information of the template manager, refresh the template list box and exit the session. Template - Tool Tip Template Tool Tip Figure 11.85: Template Tool Tip Information Displays: • IED name • User-defined default template associated with that IED • Serial number of the IED which is used as the unique feature to match the templates. Template - Single IED 11-60 1 Open a record from the desired IED (B-PRO, F-PRO, L-PRO, T-PRO or TESLA). 2 Create or modify the existing layout information. 3 Use Save Template as... option to save the new layout information with a desired template name. TESLA 3000 User Manual D01721R02.61 11 Graphing Records A single IED Template is saved/matched based on its serial number. Any record from the IED with the same serial number can use or share the template (layout) information. A single IED template is saved/matched based on the product (not on the serial number) and hence once the template file is created for one of the IED, it can be shared by all the IEDs irrespective of whether they have the same or different serial number or from different recordings. Template - Multiple IED Figure 11.86: Multiple IEDs 1 Open records from two or more desired IEDs (different TESLAs or different relays). 2 Create or modify the existing layout information (create graphs by selecting channels from different IEDs). 3 Use Save Template as... option to save the new layout information with a desired template name. When all IED records are pre-loaded into the RecordGraph, multiple IED templates are saved/matched based on serial number. If the record is loaded one at a time, then double-clicking on each record reapplys the template filling the respective channels. D01721R02.61 TESLA 3000 User Manual 11-61 11 Graphing Records View and Graph Titles When a new record is loaded, the information corresponding to the options selected is compiled and the updated information is displayed in the View Title. GraphTitle View Title Figure 11.87: View and Graph Titles View Title 11-62 View Title is the title on the top of each record view. When a new record is loaded, the information corresponding to the options selected is compiled and the updated information is displayed in the View Title. You can choose any of four options by clicking the arrows to move the items in the list. The option is saved into the template. This option is not available for the Symcom or Harmonic Views. The option choices are: • Record Name • Station Name • Location • Trigger Time • UnitID or Recorder • Product Type • Serial Number • Trigger Event • System Frequency • Priority TESLA 3000 User Manual D01721R02.61 11 Graphing Records Figure 11.88: View Title Options Graph Title Graph Title is the information that appears on the left margin of each graph. Graph Title is a combination of various options. When a new record is loaded, the information corresponding to the options selected is compiled and the updated information is displayed in the Graph Title dialog box. You can choose any four options by clicking the arrows to move the items in the list. The option is saved into the template. This option is not available for the Overlay View. The option choices are: • Channel name • Trigger time • Station name • Record name • Location • UnitID or recorder • Sample rate • Equipment ID Figure 11.89: Graph Title Options D01721R02.61 TESLA 3000 User Manual 11-63 11 Graphing Records Readouts and Measurements The Measure menu consists of the following: • Markers • Primary/Secondary • Time Alignment • Absolute Time • Fundamental RMS • True RMS • Harmonics • Symmetrical Components Time Alignment Absolute Time Fundamental RMS True RMS Harmonics Trigger Markers Figure 11.90: Readouts and Measurements Markers Selecting Measure>Markers or using the tool bar button places the “X” and “O” markers on the graph, as well as, automatically placing markers on all new graphs. If the markers are out of view range, double-click on the timeline graph to bring back the markers to the desired location. Marker positions are saved into the template. Readout corresponding to the option chosen is displayed on the right side of the graph. Selecting trigger marker, T, displays the trigger time of the record. Primary Selecting Measure>Primary multiplies the channel data by the primary scaling factor and redraws the y-axis for all graphs. Secondary Selecting Measure>Secondary multiplies the channel data by the secondary scaling factor and redraws the y-axis of all graphs. 11-64 TESLA 3000 User Manual D01721R02.61 11 Graphing Records Time Alignment Use this option to offset or align the trigger time of channels (normally from different locations) or shift the x-axis time. This feature offsets the x-axis time data by a precise value as desired. 1 A trace (channel) must first exist on the graph. Click the graph that you want to show time alignment. 2 Select the Measure>Time Alignment menu option or the Time Alignment button on the tool bar. 3 Use the “spin” control (up and down arrows) to increase or decrease the offset. 4 Double-click the value to bring up a dialog box to enter the new offset value and offset scale. Offset scale is the percent by which the increment is required. 5 Clear this option, by a second click on the Time Alignment button on the tool bar or by selecting the Graph>Time Alignment menu option a second time. Spin control to quickly vary the offset value Time alignment toolbar button Edit box to change the offset value. Note: Double-click here to change the offset value and the offset scale (increment) Figure 11.91: Time Alignment D01721R02.61 TESLA 3000 User Manual 11-65 11 Graphing Records Absolute Time This option displays the absolute time—the actual time of the recorded channels. 1 A trace (channel) must first exist on the graph. Click the graph that you want to show absolute time measurement. 2 Select the Measure>Markers menu option or the Markers button on the tool bar to place the markers on the graph. Markers are automatically placed if not selected. 3 Select Measure>Absolute Time menu option. 4 Readout corresponding to the markers is displayed on the right-hand side of the graph including: • Year, Month, Day of the recording (yyyy/mm/dd) • Absolute Time corresponding to marker X • Absolute Time corresponding to markers O • Difference in the Absolute Time between marker X and marker O Absolute Time Figure 11.92: Absolute Time 11-66 TESLA 3000 User Manual D01721R02.61 11 Graphing Records Fundamental RMS This option displays the RMS measurement of the fundamental (60 or 50 Hz) between the two markers (X and O) of the selected channel. 1 A trace (channel) must first exist on the graph. Click the graph that you want to show absolute time measurement. 2 Select the Measure>Markers menu option or the Markers button on the tool bar to place the markers on the graph. Markers are automatically placed if not selected. 3 Select Measure>Fundamental RMS menu option. 4 Readout corresponding to the markers is displayed on the right-hand side of the graph including: • RMS (fundamental frequency) Title • Minimum RMS • Maximum RMS • Average RMS Fundamental RMS Figure 11.93: Fundamental RMS D01721R02.61 TESLA 3000 User Manual 11-67 11 Graphing Records True RMS This option displays true RMS measurement values of all the harmonics (up to 25 order—including the fundamental), depending on the sample rate of the recorded channel. 1 A trace (channel) must first exist on the graph. Click the graph that you want to show absolute time measurement. 2 Select the Measure>Markers menu option or the Markers button on the tool bar to place the markers on the graph. Markers are automatically placed if not selected. 3 Select Measure>True RMS menu option. Readout corresponding to the markers is displayed on the right-hand side of the graph including: • True RMS Title • Minimum True RMS • Maximum True RMS • Average True RMS True RMS Figure 11.94: True RMS 11-68 TESLA 3000 User Manual D01721R02.61 11 Graphing Records Harmonics This option displays the harmonic contents (magnitude) of the desired channel along with the Total Harmonic Distortion (THD) in percentage. 1 A trace (channel) must first exist on the graph. Click the graph that you want to show absolute time measurement. 2 Select the Measure>Markers menu option or the Markers button on the tool bar to place the markers on the graph. Markers are automatically placed if not selected. 3 Select Measure>Harmonics menu option. 4 Readout corresponding to the markers is displayed on the right-hand side of the graph including: • Harmonics Title • 2nd Harmonic • 3rd Harmonic • 4th Harmonic • 5th Harmonic • THD% of fundamental (the number of harmonics included in THD) depends on the sample rate. See Table 7.1 and 7.2 on page 7-6. Harmonics Figure 11.95: Harmonics D01721R02.61 TESLA 3000 User Manual 11-69 11 Graphing Records Symmetrical Components This measurement option displays the magnitudes of the positive, negative and zero sequence components of 3-phase voltage or current channel. 1 Create an Overlay View— you must have a 3-phase voltage or current channel. 2 Place three phase voltage or current channels on the graph. 3 Select the Measure>Symmetrical Components menu option. 4 Readout corresponding to the markers is displayed on the right-hand side of the graph including: • SymCom Title • Positive sequence component magnitude • Negative sequence magnitude • Zero sequence magnitude Symmetrical Components Figure 11.96: Symmetrical Components 11-70 TESLA 3000 User Manual D01721R02.61 11 Graphing Records Calculated Channels Calculated channels are virtual channels derived from the original recorded channels. They are calculated based on the configuration information. In the TESLA recorder, all the calculated channels are added to the original record only once, but are available any time to view with the RecordGraph application. Calculated channels differ widely depending on the product. They are classified under high and low speed categories. High Speed Calculated channels • • • • • Summation Positive sequence Negative sequence Zero sequence Watts (single and three phase) Low Speed Calculated channels • Summation • Positive sequence • Watts (single or three phase) • Vars (single or three phase) • Impedance • External Type and number of channels available for the view depends on the configuration information. Choose Options>Calculate Derived Channels Now to add the calculated channels. If this option is disabled, then the calculated channels are already available. Calculated Channels Figure 11.97: Calculated Channels D01721R02.61 TESLA 3000 User Manual 11-71 11 Graphing Records Exporting Views Export active visible views to windows standard clipboard or to an enhanced metafile. Following options are available: • Copy To ClipBoard • Save As MetaFile Copy to Clipboard Save to Metafile Figure 11.98: Export Views Copy to Clipboard Copies view to the clipboard in order to copy into another document, for example Microsoft Word. 1 To copy to clipboard select View>Copy to Clipboard or right-click on the graph to bring up the context menu and select Copy to Clipboard. 2 Open any other software package, which supports the “pasting” facility from the clipboard (for example Excel or Microsoft Word) and paste the view. Save View as Metafile Saves the view to a Metafile format *.emf. 1 To save to as a Metafile select View>Save to Metafile... or right-click on the graph to bring up the context menu and select Save to Metafile. 2 A dialog box appears prompting you to save the file in a selected folder. Figure 11.99: Save to Metafile 11-72 TESLA 3000 User Manual D01721R02.61 11 Graphing Records Exporting Channel Data Any channel data can be exported to the clipboard from the active view. If a graph has multiple channels, all the channel data is exported to the clipboard. This option copies the trace data to the clipboard and using Edit>Paste to paste into other applications like Microsoft Word or Excel. Copy Trace Data to Clipboard Figure 11.100: Copy Trace to Clipboard Pasting exported data using Microsoft Excel 1 Open Microsoft Excel. 2 Choose Edit>Paste Special. Figure 11.101: Paste Special Using Excel D01721R02.61 TESLA 3000 User Manual 11-73 11 Graphing Records Pasting exported data using Microsoft Excel Choose CSV (comma separated variable) format and click OK. Figure 11.102: Choose CSV Pasting exported data using Microsoft Excel Domain: normally time data, it can be date YYYY/mm/dd in case of trend data. Figure 11.103: Paste to Excel 11-74 TESLA 3000 User Manual D01721R02.61 11 Graphing Records Record Summary 1 Click the record name to enable this feature. 2 Choose File>Show Record Summary… to display the record summary. Figure 11.104: Show Record Summary Digital Channel Status Indicator Highlight digital channel which change state (with different icons), and list only configured channels in the tree view. A mimic screen shot of the icons is shown below. The <default> template automatically displays the digital channels which changes the state. Icon with changes in the digital status Icon with no changes in the digital status Figure 11.105: Digital Channel Status Indicator D01721R02.61 TESLA 3000 User Manual 11-75 11 Graphing Records IRIG-B Input Status Display IRIG-B input status (synchronized, unsynchronized or not available) is displayed in the tool tip window when you place the mouse on the channel name or use Active Trace Information. IRIG-B status indicator Figure 11.106: IRIG-B Input Status Indicator Derived Digital Swing Channels for TESLA Swing Recordings TESLA recordings do not record External Input channels for the swing records. A facility to view these channels in the RecordGraph is provided. RecordGraph automatically displays these channels (if configured) under low speed channel group. Events with the same element are grouped together to form a channel. This facility is backward compatible. Derived Channels for L-PRO, F-PRO High Speed Recordings For L-PRO and F-PRO high-speed records, Main and Aux individual phase summation channels are added to the existing derived summation channels. This facility is backward compatible. 11-76 TESLA 3000 User Manual D01721R02.61 11 Graphing Records COMTRADE Import COMTRADE (Common Format for Transient Data Exchange) is an industry standard record format used to share data between tools and to replay faults through a test set. The import utility supports viewing of both ASCII and binary COMTRADE formats (1991, 1999 and 2000). When the COMTRADE file is imported into the RecordGraph, all its functionality can be seamlessly used to analyze the record. 1 RecordGraph application must be running to access this facility. If not, launch RecordGraph via TESLA Control Panel, RecordBase View or Windows Explorer. 2 Choose File>Import. 3 Browse to select desired file. 4 Double-click on the COMTRADE record to apply <Default> template or select it from the templates list box. Import file Figure 11.107: Import COMTRADE File D01721R02.61 TESLA 3000 User Manual 11-77 11 Graphing Records Choose COMTRADE File Figure 11.108: Select COMTRADE File Figure 11.109: Apply <Default> Template 11-78 TESLA 3000 User Manual D01721R02.61 11 Graphing Records Print Options The following options are available: • Print... – pops-up a print option dialog box to select paper size, orientation and other options. • PrintDirect – sends active view directly to the default printer. • PrintAll – sends all the views directly to the default printer. • Print Preview…– displays standard preview window. D01721R02.61 TESLA 3000 User Manual 11-79 12 Record Export Utility The record export utility lets you convert records into different formats for use with other software tools. COMTRADE Common Format for Transient Data Exchange (COMTRADE) is an industry standard record format used to share data between tools and to replay faults through a test set. The export utility supports both ASCII and binary COMTRADE formats and creates output that complies with the latest (1999) or older version (1991) of the standard. PTI Power Technologies Incorporated (PTI) produces widely used power system modelling tools. TESLA records can be exported in a PTI-compliant format for import into PTI tools. The export utility supports ASCII format and creates output that complies with PTI version 1 or version 2 formats. Excel (CSV) TESLA records can be exported in basic comma separated values (also known as comma-delimited) ASCII format suitable for importing into standard tools such as Microsoft Excel. D01721R02.61 TESLA 3000 User Manual 12-1 12 Record Export Utility Launch the Export Utility To launch the export utility: 1 Double-click Records from the Main Menu. 2 Select a local record from the record list. 3 Select the Export button to launch the Export window. 4 Select the desired export output format and select OK. Step 2: Select a record from the list. Step 3: Click on the Export button to launch export window. Step 4: Choose export type and OK. Step 1: Double-click Records from the Main Menu Figure 12.1: Select Export File Type 12-2 TESLA 3000 User Manual D01721R02.61 12 Record Export Utility COMTRADE Format Figure 12.2: COMTRADE Settings The COMTRADE format (IEEE C37.111) defines a common format for storing digital data records of transient and dynamic swing events. It consists of up to four output files with the same base name and different file extensions: configuration files (.cfg), header files (.hdr), data files (.dat) and optional information files (.inf). The COMTRADE Export Utility produces the configuration, header and data files. With reference to Figure 12.2: COMTRADE Settings, COMTRADE Export Settings D01721R02.61 Name Function Export to... The base filename and directory of the output files are set using the Export to. option. By default the base filename is the same as the record you are exporting. You can edit this or use the Browse button to set a new directory and/or base filename. Station Name and Identification The Station Name and Identification fields are set by default using information from this recorder. They are written as the first line in the.cfg output file. Header Text The Header Text field contains the text written into the COMTRADE header (.hdr) file. By default, the field contains the Location, Name, Number and the Unit ID of the unit that produced the record. This text can be modified, deleted or extended as desired. TESLA 3000 User Manual 12-3 12 Record Export Utility COMTRADE Export Settings 12-4 Name Function Version The Version field lets you select the revision of COMTRADE standard to produce. COMTRADE has been an evolving standard and a number of changes have been made over the years. 1991 and 1999 COMTRADE versions are supported. Format The Format field specifies that the data in the COMTRADE file (ASCII or BINARY format). ASCII data has the advantage of being usable by simple text editor and spreadsheet programs, but results in a significantly larger record relative to binary format. BINARY format is therefore recommended if the software package you will be using the data in supports binary format COMTRADE. Selecting Channels (Exported Channels) You must select the channels from the record that you want to include in the output file. For convenience, the digital data recorded is classified into: • High Speed : Analog and external digital input channels sampled at the high speed transient data rate. • High Speed (480/sec): Analog and internal logic channels produced 8 times per cycle. • Low Speed (60/sec): Analog input channels sampled at the low speed swing data rate. Select the desired channel from the list with a left-click. Multiple channels can be selected using standard Windows selection actions (click + Ctrl or Shift keys). > Place selected channels in the Exported Channels list box. >> Place all channels into the Exported Channels list box. < Delete a channel from the Exported Channel list box. << Delete all channels from the Exported Channel list box. Offset negative start times to begin at zero When checked, this option shifts the negative time to start from zero. TESLA 3000 User Manual D01721R02.61 12 Record Export Utility PTI Format Figure 12.3: PTI Settings The PTI file format is used to import records into the Power Technologies Incorporated system modelling software. Output File PTI export produces a single output file with an .asc extension. PTI Settings D01721R02.61 Name Title Export to... The base filename and directory of the output files are set using the Export to.. option. By default the base filename is the same as the record you are exporting. You can edit this or use the Browse button to set a new directory and/or base filename. Station Name and Identification The Station Name field is set by default using the unit’s Station Name setting. It is written as the third line in the output file. If desired, you can edit this text. The Identification field is not written to the PTI output file. Header Text The Header Text field contains the text that is written as a single line in the fourth line in the output file. By default, the field contains the Location, Name, Number and Unit ID of the recorder that produced the record. This text can be modified, deleted or extended as desired. Version The Version field lets you select between PTI version 1 and version 2. Please refer to PTI documentation for details on the differences of these versions. Format Only ASCII format output files are available. Format ASCII is the only format option for PTI. TESLA 3000 User Manual 12-5 12 Record Export Utility PTI Settings 12-6 Name Title Channel Selection Use Channel Selection to select channels to export. You must select the channels from the record that you want to include in the output file. For convenience, the digital data recorded is classified into: • High Speed : Analog and external digital input channels sampled at the high speed transient data rate. • High Speed (480/sec): Analog and internal logic channels produced 8 times per cycle. • Low Speed (60/sec): Analog input channels sampled at the low speed swing data rate. Select the desired channel from the list with a left-click. Multiple channels can be selected using standard Windows selection actions (click + Ctrl or Shift keys). > Place selected channels in the Exported Channels list box. >> Place all channels into the Exported Channels list box. < Delete a channel from the Exported Channel list box. << Delete all channels from the Exported Channel list box. Offset negative start times to begin at zero When checked, this option shifts the negative time to start from zero. TESLA 3000 User Manual D01721R02.61 12 Record Export Utility Excel (CSV) Format Figure 12.4: Excel (CSV) Settings The Excel CSV (Comma Separated Value) format is used to import records into a Microsoft Excel spreadsheet. This format is also known as comma delimited ASCII and can generally be used by most programs that import data arrays. Excel CSV export produces a single output file with a .csv extension, which is recognized by Excel. Excel is automatically launched when you double-click on file. CSV Export Settings D01721R02.61 Name Function Export to... The base filename and directory of the output files are set using the Export to... option. By default the base filename is the same as the record you are exporting. You can edit this or use the Browse button to set a new directory and/or base filename. Station Name and Unit ID The Station Name and Identification fields are not written to the Excel CSV format output file. Header Text There is no header text written to the Excel CSV format output file. Version There are no version options for the Excel CSV output. Format ASCII is the only format options for the Excel CSV output. TESLA 3000 User Manual 12-7 12 Record Export Utility CSV Export Settings 12-8 Name Function Channel Selection You must select the channels from the record that you want to include in the output file. For convenience, the digital data recorded is classified into: • High Speed : Analog and external digital input channels sampled at the high speed transient data rate. • High Speed (480/sec): Analog and internal logic channels produced 8 times per cycle. • Low Speed (60/sec): Analog input channels sampled at the low speed swing data rate. Select the desired channel from the list with a left-click. Multiple channels can be selected using standard Windows selection actions (click + Ctrl or Shift keys). > Place selected channels in the Exported Channels list box. >> Place all channels into the Exported Channels list box. < Delete a channel from the Exported Channel list box. << Delete all channels from the Exported Channel list box. Offset negative start times to begin at zero When checked, this option shifts the negative time to start from zero. TESLA 3000 User Manual D01721R02.61 13 Cooperative Recorder Group A cooperative recorder group consists of up to four TESLA 3000 recorders working together to form a larger virtual recorder. The recorders are connected through an Ethernet LAN and are accessed as a single "Cooperative Group " from Control Panel. With a cooperative recorder group you can: • Automatically trigger synchronous recordings on all group members whenever any member recorder is triggered. • Transfer the resulting records from all group members to Control Panel and combine them into a single record. Recorder group members also function as individual recorders. They are configured as stand-alone units and retain their normal recording capabilities. Instructions for setting up recorders to operate in a cooperative recording group are provided later in this chapter. How A Cooperative Recorder Group Works Local Network A cooperative recorder group is comprised of two to four TESLA 3000 recorders, typically located in a substation control house. The recorders communicate with each other through an Ethernet LAN which allows cross-triggering between recorders along with the normal record transfer, user interface and SCADA functions. The cooperative recorder group can have its own network or can be connected to a larger network in the substation. Remote Access There are two ways to remotely access a cooperative recorder group: 1 Over a wide area network, if a network link to the substation is available. 2 Via a modem connected to one of the group recorders. Master Recorder One member of the cooperative recorder group is designated as the Master Recorder. The Master Recorder is the primary interface between the cooperative recorder group and TESLA Control Panel. In addition to its normal recording role, the Master Recorder: • Maintains the list of group recordings. • Provides IP address information about the other group members. • Acts as the communication gateway for remote access when a modem link is used. Cooperative Group IED Within Control Panel a special Cooperative Group IED is created to work with the cooperative recording group. When the Cooperative Group IED is set as the Current IED, Control Panel functions are applied to the group of recorders rather than an individual one. Records from the cooperative recorder group are transferred, combined and viewed in this way. D01721R02.61 TESLA 3000 User Manual 13-1 13 Cooperative Recorder Group Triggering and Recording In a cooperative recorder group a trigger detected by any recorder results in time-synchronized recordings on all group members. These records are retrieved and combined into a single record by TESLA Control Panel. Cross-triggering between group members takes place over the LAN. The trigger message includes the timestamp of the initiating trigger to allow each recorder to capture data from the same time period. Sample clock coordination among the group recorders, derived from the IRIG-B clock signal, ensures that the data points from all the recorders are synchronous. All cooperative group recorders must be synchronized from a common external IRIG-B time source. The trigger message also specifies the type of recording to be created. If the initiating trigger was configured to produce a transient recording, a swing recording, or both, the receiving units will create the same type of record or records. If multiple recorders detect a trigger during the same disturbance, each will send a trigger message to the others. A trigger buffer is used by each recorder to sequence overlapping triggers and produce a single record whose trigger time is that of the first detected event. Record Collection and Consolidation Records are retrieved from cooperative group members and combined into a single group record by TESLA Control Panel. When you initiate a record transfer from the group's Master recorder, Control Panel automatically transfers the corresponding records from the other group members and combines them into a single record. Within Control Panel, the resultant record is stored under group's Cooperative Group IED record list. It is possible in some circumstances for a record from a group member to be omitted from the combined record. This could be caused by a settings mismatch, network communication problem or loss of the IRIG B time signal. If the record was captured by the recorder it can still be retrieved and viewed as a single record from the individual recorder using standard (i.e. non-cooperative mode) methods. For further details on cooperative group records, see “Working With Records From a Cooperative Recording Group” on page 13-10. RecordBase Central Station RecordBase Central Station v2.0 and above can work with a TESLA 3000 cooperative recording group. RecordBase can: • Automatically collect records from group members and combine them into a single record. • Issue swing record cross-trigger commands to the group. • Communicate with individual group members via WAN or a modem on the Master recorder. 13-2 TESLA 3000 User Manual D01721R02.61 13 Cooperative Recorder Group Setting Up a Cooperative Recording Group Telephone Switch Cooperative Group Rec 1 Master Recorder Ethernet Switch Rec 2 Remote Access Rec 3 See Figure 3.6 Cooperative Mode Setup Screen See Figure 3.7 Records Display Rec 4 Direct Serial Link On-Site Access Figure 13.1: Cooperative Recording Group with Remote Access via Modem D01721R02.61 TESLA 3000 User Manual 13-3 13 Cooperative Recorder Group There are three main steps to setting up a cooperative recording group: 1 Set up the network in the substation. 2 Configure the individual recorders. 3 Configure the Cooperative Recording Group. These steps are covered in detail in the following sections. Step 1: Set up the Network You will need to create IED definitions for each of the group recorders, and a special one for the cooperative group itself. Example IED definitions are shown in Figure 13.1 on page 13-3; general instructions on how to create IED definitions are available in “Adding/Editing a Recorder Workspace Definition” on page 5-3 1 Connect the LAN port on each recorder to the Ethernet switch. An industrial-quality 100Base-T Ethernet Switch is recommended for best performance, although a standard IEEE 802.3 10Base-T Ethernet hub can be used. Cable should be Type CAT 5 with maximum segment lengths of 100 meters as per the standard. Where a group consists of only two recorders, a cross-over Ethernet network cable can be used instead of an Ethernet switch. When connected to a larger network consideration should be given to overall network load. Although the recorders are designed to tolerate considerable delay in the delivery of inter-recorder trigger messages (up to 4 seconds for transient recording triggers and 25 minutes for swing triggers), connection to a network segment with heavy traffic may result in missed triggers. Conversely, the network load resulting from the transfer of possibly large records may impact other devices on the network. 2 Assign IP addresses. Each recorder must be assigned a unique IP address. The IP address is viewed and modified through the recorder’s Maintenance Menu, for details see 14 Maintenance Menu and Error Handling on page 1. The factory default IP address is 192.168.1.100. All recorders in the group must be assigned IP addresses that belong to the same local network. The permissible address range of a local network depends on the value of the first term of the IP address as shown in the following table. 13-4 IP address range (first term) IP addresses on the same local network 1-126 ---.xxx.xxx.xxx 128-191 ---.---.xxx.xxx 192-223 ---.---.---.xxx 0, 127, 224, 255 Reserved TESLA 3000 User Manual D01721R02.61 13 Cooperative Recorder Group If network access to the recorder from a different network or subnet is intended, it may be necessary to change the recorder's default gateway and/or its network mask. By default the recorder has no default gateway and a network mask of 255.255.255.0. These settings can be changed through the recorder's Maintenance Menu. A note on PPP addresses: TESLA uses 3 pairs of IP addresses for its serial PPP (point to point protocol) communication; one for the front serial port, one for the rear serial / modem port, and one for communication with RecordBase Central Station. These IP addresses can be viewed and changed through the recorder's Maintenance Menu. To assist in verifying and troubleshooting network connections, an IP "Ping" function is available through the recorder's Maintenance Menu. In addition, a communications status indicator is available in Control Panel (see the Check button on the Cooperative Mode Setup screen, Figure 13.2 on page 13-8). 3 Configure the Master Recorder’s modem and connect to the telephone switch This step is only required if remote access to the recorders will take place through modem rather than a wide area network. The set-up of both internal and external modems is described in “Communicating with the Recorder” on page 4-1. To make use of a modem link connection to multiple recorders, the Control Panel user must be logged into Windows with local administrator privileges. This is required to permit temporary access to the computer's network routing table. Step 2: Set Up the Individual Recorders 1 Create an IED Definition in TESLA 3000 Control Panel for the Master Recorder The Master Recorder is a recorder in the group designated as the primary interface between the recorder group and Control Panel. In addition to its role as a recorder, the Master Recorder maintains the list of group records and provides the IP addresses of the other group members to Control Panel. If remote access to the recorder group will be through a modem, the Master Recorder must be the recorder with the modem. The following table provides a setting guide for the Master Recorder’s IED definition. IED Definitions for the Master Recorder D01721R02.61 IED Name • Should identify both the recorder and its cooperative group. • Should have the same name as the recorder’s Unit ID. (The Unit ID is configured in the recorder through the Utilities menu. See “Unit Identification” on page 7-2). Comment Should indicate that the IED is the Master Recorder for the group. TESLA 3000 User Manual 13-5 13 Cooperative Recorder Group Location Should be the name and/or location of the Substation. IED Serial Number Can be left blank if the unit’s serial number is not known. The serial number can also be automatically obtained from the recorder later using the Get Information from IED button (see below). Model Select TESLA 3000 – 36 Channels or TESLA 3000 – 18 Channels as appropriate to the hardware model. IP Address Must be the same IP address configured in the recorder in Step 1. Communication Must reflect the method of remote access to the cooperative recording group. • Select Modem Link if a modem is used. Specify the appropriate telephone number. • Select Network Link if the group will be accessed through a network. Get Information from IED (optional): If a communications link is available to the recorder, this button can be used to retrieve the recorder’s name, location and serial number information. Any information in the corresponding fields of the IED Definition will be overwritten and saved if you exit with OK. These values are configured on the recorder as part of its Unit Identification. 2 Create IED Definitions for each of the other group recorders Once an IED definition for the Master Recorder has been created, you can create IED definitions for the remaining group members. The group can have up to four recorders. The following table provides a setting guide for the IED definitions of group members.. IED Definitions for the Other Group Recorders 13-6 IED Name • Should identify both the recorder and its cooperative group. • Should have the same name as the recorder’s Unit ID. (The Unit ID is configured on the recorder through the Utilities menu. See “Unit Identification” on page 7-2). Comment Should indicate that the IED is a group member. Location Should be the name and/or location of the Substation. IED Serial Number Can be left blank if the unit’s serial number is not known. The serial number can also be automatically obtained from the recorder later using the Get Information from IED button (see below). Model Select TESLA 3000 – 36 Channels or TESLA 3000 – 18 Channels as appropriate to the hardware model. IP Address Must be the same IP address configured on the recorder in Step 1. The IP address is required regardless of the Communications mode. Communication Indicates how to communicate with the IED as an individual recorder. • Use Network Link if the recorder can be directly reached over the network. • Use Connect Through IED and select the Master Recorder from the pick list to allow a telephone connection to the recorder (through the Master Recorder). • Use Direct Serial Link if you are working in the substation and intend to connect directly to the recorder through a serial cable. Get Information from IED (optional): If a communications link is available to the recorder, this button can be used to retrieve the recorder’s name, location and serial number information. Any information in the corresponding fields of the IED Definition will be overwritten and saved if you exit with OK. These values are configured on the recorder as part of its Unit Identification. TESLA 3000 User Manual D01721R02.61 13 Cooperative Recorder Group 3 Configure the individual recorders Each recorder must be configured as a stand-alone unit with its channels and triggers defined. Chapter 7: Recorder Setup Utilities and Chapter 8: Configuring the Recorder cover this in detail. Important Certain settings must be the same on all recorders for cooperative mode to function correctly. See “Required Cooperative Mode Settings” on page 13-11 for the list. Step 3: Configure the Cooperative Recording Group 1 Create a Cooperative Group IED Definition in TESLA 3000 Control Panel Within Control Panel, a special Cooperative Group IED is created to work with the cooperative recording group. When the Cooperative Group IED is selected, Control Panel functions are applied to the group of recorders rather than an individual one. Records from the cooperative recorder group are transferred, combined and viewed in this way The following table provides a setting guide for the Cooperative Group IED definition.. IED Definitions for the Cooperative Group IED IED Name Should identify this as the Cooperative Group IED. Comment Should indicate that this IED represents the whole group. Location Should be the name and/or location of the Substation. IED Serial Number blank Model Must be TESLA 3000 – Cooperative. IP Address Blank Communication Must be Connect Through IED with the Master Recorder specified. 2 Select the cooperative recording group members A setup screen associated with the Cooperative Group IED lets you specify which recorders are part of the cooperative group and provides group control and status information. To access the Cooperative Mode Setup screen: a Connect to the Cooperative Group IED by selecting the it from the IED list on the Main Menu tab and pressing Connect. b Select the Utilities screens by double-clicking on Utilities in the Main Menu tree. c You are now in the Utilities – Cooperative Mode Setup screen as shown in Figure 13.2. D01721R02.61 TESLA 3000 User Manual 13-7 13 Cooperative Recorder Group Figure 13.2: Cooperative Mode Setup Screen d Check the Enable Cooperative Mode box. Note: To exit Cooperative Mode, this box must be unchecked, and the chosen recorders (in part e) must also be unselected. User must choose Save to complete disabling Cooperative Mode. e Select the recorders you want to be part of the cooperative group using the pick lists. The Master recorder is automatically assigned as Member 1. Note: If an expected recorder does not appear in the Member pick list, check the recorder’s IED Definition for errors. This list also determines the order in which records are combined. The member number shown here is pre-pended onto each analog and digital channel in the combined record to identify which recorder it came from. 3 Enable cooperative recording group operation a Click Save. TESLA Control Panel will connect to each member recorder to provide member IP addresses and enable cross-triggering. Progress information is displayed as each member recorder is updated. When the update is finished the status of each Member recorder should say Connected. b Click Close. The cooperative recording group configuration is now complete and cross-triggering, record collection and combining of member records are enabled. 13-8 TESLA 3000 User Manual D01721R02.61 13 Cooperative Recorder Group The Check button beside the member recorder names in Figure 13.2 initiates a status check of the communications between the member recorders. It can be used at any time. Working with Control Panel in the Substation In the substation you can connect to the recorders through the LAN if a spare port is available on the Ethernet switch. Alternatively, a direct serial connection with each recorder can be used. (You may need to alter the Communication mode settings in a recorder's IED Definition). D01721R02.61 TESLA 3000 User Manual 13-9 13 Cooperative Recorder Group Working With Records From a Cooperative Recording Group Records from a cooperative recording group are managed in TESLA 3000 Control Panel in the same manner as records from individual recorders (see Chapter 9: Record and Log Management). To access a group's records, select its Cooperative Group IED (Select IED on the Main Menu tab) and use the Connect button to establish a link with the group's Master recorder. Once connected, double-click Records in the menu tree to open the Records screen. If you only want to access previously downloaded records, the connection to the Master Recorder is not necessary. Figure 13.3: Records display Records shown as being on the recorder (On IED branch) are on the Master Recorder. When you initiate record transfer, Control Panel automatically retrieves records with the same timestamp from all group members and combines them into a single group record. The record also combines event data from all recorders in the group, chronologically sorted. Records listed under the Local branch have already been transferred and combined. To eliminate naming ambiguity and identify the data associated with each recorder, channel names and event entries in the combined record are prefixed with "1: ", "2: ", "3: ", and "4: ". These prefixes correspond to the member number defined in the Cooperative Mode Setup screen. Calculated channels are automatically generated when the records are transferred to Control Panel. This differs from individual recorder records where calculated channels are generated when the record is first displayed by RecordGraph. The displayed record summary information is derived from the Master Recorder. The preview of events cannot be shown until the combined record has been generated, so the event list is only displayed for records that have already been transferred. Record deletion for a Cooperative Group IED is handled the same way as record transfer. Deleting a record from the On IED branch of a Cooperative Group IED automatically deletes the associated record from each group member. If the group record is not deleted, the individual records can be retrieved 13-10 TESLA 3000 User Manual D01721R02.61 13 Cooperative Recorder Group and viewed from a group member using standard (i.e. non-cooperative mode) methods Required Cooperative Mode Settings Cooperative mode operation requires key settings to be consistent on all recorders in the group. This section identifies those settings and provides guidelines for selecting appropriate values. Time Control Settings (Utilities->Time setup screen Effect on Cooperative Operation Setting Guideline Incoming IRIG Time Signal Properties May cause a UTC time mismatch between recorders that results in trigger messages being rejected Setting should be the same on all group members Recorder Time Zone Setting May cause a UTC time mismatch between recorders that results in trigger messages being rejected Setting should be the same on all group members Recording Control Settings (Utilities->Recording D01721R02.61 Trigger Mode In Duration mode, triggers from other recorders result in a record of Maximum Record Length as their duration is not evident to the receiving recorder Setting should be Edge on all group members Pre-Trigger Mode Records with a pretrigger time different from that of the Master Recorder’s record will be left out of the combined group record Setting must be the same on all group members. At least 0.1 seconds of pre-trigger is recommended Normal Record Length Records of different duration can be combined into a group record. The group record can be displayed, but not exported in COMTRADE format Settings should be the same if COMTRADE export of the combined record is desired Maximum Record Length Controls the capability of each recorder to automatically extend a recording to include subsequent triggers A minimum of 0.1 second of auto-extension (Maximum Record Length > Normal Record Length) is recommended to avoid multiple overlapping records in the case of near-coincident triggers. TESLA 3000 User Manual 13-11 13 Cooperative Recorder Group TESLA Device Configuration (Identification screen in the Configuration editor) Setting Sample Rate 13-12 Effect on Cooperative Operation Guideline Records with a sample rate different from that of the Master Recorder’s record will be left out of the combined record group Setting must be the same on all group members TESLA 3000 User Manual D01721R02.61 14 Maintenance Menu and Error Handling Maintenance Menu TESLA has a set of utilities that provide diagnostic, recovery and TCP/IP services. These utilities are available through the Maintenance Menu accessed with a VT-100 terminal connection to the recorder’s serial ports, modem or Ethernet LAN. For security purposes any utilities that can modify the TESLA are disabled when connecting remotely. To access these utilities you must connect to the recorder using Port 1 on the unit’s front panel. Any terminal program that fully supports VT-100 emulation and provides zmodem file transfer services can be used. HyperTerminal, which is included in Windows XP and is also available separately as HyperTerminal PE, is used here as an example. 1 Determine how you want to connect to the recorder. • A direct serial link connects your computer’s serial port to the recorder’s front panel Port 1. Port 1 is set up so that a standard, straight-through, male-to-female serial cable can be used. • If both the recorder and your computer have modems, you can access the Maintenance Menu through the telephone system. • If both the recorder and your computer are on the same LAN or WAN, you can access the Maintenance Menu through your network. 2 Configure your terminal program as described in the table below. • For a direct serial link, the baud rate must be same as that of the recorder’s serial port. The default baud rate for Port 1 is 38,400. The baud rate can be viewed and changed in the Utilities>Communication tab of TESLA Control Panel. • For a modem link, the baud rate and other communication parameters only determine how your computer talks to your modem. Usually, the fastest possible baud rate is chosen to maximize your modem's compression capabilities. • For a network link, only the Emulation and Font settings from the table are relevant. Terminal Program Setup D01721R02.61 Baud rate For a direct serial link, the baud rate must match that of the recorder serial port. Port 1 default baud rate is 38,400. For a modem link, the baud rate refers only to the link between your computer and its own modem. Data bits 8 Parity None Stop bits 1 TESLA 3000 User Manual 14-1 14 Maintenance Menu and Error Handling Terminal Program Setup Flow control Hardware or Software. Hardware flow control is recommended. The recorder automatically supports both on all its serial ports. Function, arrow and control keys Terminal keys Emulation VT100 Font A font that supports line drawing (e.g. Terminal or MS Line Draw). If the menu appears outlined in odd characters, the font you have selected is not supporting line drawing characters. 3 Select the device on your PC you will communicate through. In HyperTerminal, this is done in the Connect Using field of its Properties control. • For a direct serial link, select an available serial port • For a modem link, select the appropriate modem • For a network link, select “TCP/IP (Winsock)” (available with HyperTerminal v1.2 or greater) 4 Initiate the connection. The TESLA will respond with a login prompt • In HyperTerminal, use the Call button or menu command to initiate the connection. 5 At the login prompt, log in as “maintenance” • Lower case • No password is required. If you are asked for one, there is a mistake in the login name. Press Enter to get another Login prompt and try again. Figure 14.1: Maintenance Menu 14-2 TESLA 3000 User Manual D01721R02.61 14 Maintenance Menu and Error Handling Maintenance Menu Commands D01721R02.61 1 Modify IP Address, subnet mask and default gateway Modify the LAN IP address, default subnet mask and default gateway. 2 View system diagnostic Displays the TESLA’s internal status log. 3 Retrieve system diagnostics Automatically packages up the internal status log plus setting and setup information and downloads it in compressed form to your computer. This file can then be sent to ERLPhase customer support to help diagnose a problem. 4 Restore ALL default settings Restores ALL factory defaults including settings, calibration and setup parameters. 5 Restore only default recorder configuration settings Restores the default settings that define channels, sample rates and triggers. 6 Restore only default system setup Restores the default values for the setup parameters including communication settings, record controls and time controls. 7 Force hardware reset Manually initiates a hardware reset. Note that the communication link is immediately lost and cannot be re-established until the unit completes its start-up. 8 Network utilities Enter network utilities sub-menu. 9 Monitor SCADA Shows real time display of Modbus or DNP 3 data. 10 Enable/Disable internal modem Enables or disables the optional internal modem. Allows an internal modem to be disabled so that an external modem can be used. 11 Save recent trend data Saves any accumulated Trend Data that hasn’t yet been saved to disk. This should be executed prior to [7] Force Hardware Reset if trend logging is enabled. 12 Storage memory utilities Enter storage memory utilities sub-menu. 13 Enter safe shutdown mode Suspends TESLA application and stops FLASH Drive operations. This should be executed prior to cycling power to the unit to prevent accidental FLASH Drive corruption. 14 Modify point-to-point IP addresses Modify point-to-point addresses used for TCP/IP communication over serial or modem connection. 15 Monitor PMU Displays outgoing PMU data frames in real time. 16 Calibrate DSP clock Performs DSP clock calibration. 17 Exit Logs off as Maintenance user. TESLA 3000 User Manual 14-3 14 Maintenance Menu and Error Handling Network Utilities Menu Commands 1 View protocol statistics View IP, TCP and UDP statistics. 2 View active socket states View current states of active sockets. 3 View routing tables View routing tables. 4 View MAC address View MAC address. 5 Flush gateway entries Flush the routing tables of all gateway entries. 6 Ping Check network connection to given point. 7 Enable or disable port 2000 Toggle port 2000/port 7631 configuration. 8 Exit network utilities Exit network utilities menu and return to maintenance menu commands. Storage Memory Utilities 1 Repair record storage Attempts to repair a corrupted FLASH or Hard Drive partition used to store transient and swing records, trend data, event log, etc. 2 Repair CDR data storage Attempts to repair a corrupted FLASH or Hard Drive partition used to store Continuous Recording Data. 3 Activate storage memory Activates newly installed pre-formatted FLASH or Hard Drive to be used on the unit. Any pre-existing data are deleted. Exit storage memory utilities Exit storage memory utilities and return to maintenance menu commands. Error Handling The recorder has hardware and software self-check capabilities that work to keep it operational and provide an indication if a failure occurs. Failure Contact Output Contact #1 on the rear panel is a normally open contact that closes to indicate a problem with the device. The contact is controlled by a hardware watchdog circuit, ensuring a failure is reported even if the unit’s processors are not functional. The state of the Failure Contract is mirrored by the front panel Recorder Functional LED. Failure Handling Supervisory software continually checks all system processes. If a failure is detected an attempt is made to correct the problem through a software restart. A 14-4 TESLA 3000 User Manual D01721R02.61 14 Maintenance Menu and Error Handling software restart takes place quickly and does not activate any external indicators. If the failure persists, the unit will initiate a hardware reset to attempt to clear the problem. A hardware reset takes approximately a minute and half to complete. If the problem is not cleared after four consecutive reset attempts, the unit enters the Persistent Error state. In this state, the recorder activates its failure indicators and stops initiating resets to avoid interfering with any diagnostic investigation. If the Supervisory software subsequently determines that the problem has been cleared, it automatically returns the unit to its normal operating state, clearing the failure indicators. Problem Cleared Normal Operation Persistent Error Mode First Detected Error Problem Cleared Problem Cleared Problem Persists After Repeated Reset Attempts Software Restart Hardware Reset Problem Still Present Figure 14.2: Error Handling State Indicators D01721R02.61 Recorder State Indicators Normal Recorder Functional LED ON Failure Contact OPEN Software Reset Recorder Functional LED ON Failure Contact OPEN Hardware Reset Recorder Functional LED ON Test Mode LED ON Failure Contact OPEN Persistent Error Recorder Functional LED OFF Alarm LED ON Failure Contact CLOSED TESLA 3000 User Manual 14-5 14 Maintenance Menu and Error Handling Diagnostic Tools 14-6 The recorder has an internal log file to aid in problem diagnosis. The log can be viewed from the Maintenance Menu (see below). As well, a full diagnostic information package can be generated and uploaded to your PC, where it can be e-mailed to ERLPhase customer support for analysis. The Maintenance menu also has tools to help diagnose SCADA problems and network communication problems. TESLA 3000 User Manual D01721R02.61 15 PMU - Optional Software Module This chapter describes the installation and operation of the TESLA 3000 PMU module. It supports the first time user and clarifies details of the equipment. Overview Phasor Measurement Unit (PMU) Description D01721R02.61 PMU functionality is an optional software product feature on the TESLA Disturbance Recorder Model 3000. The PMU module can be installed as a field upgrade. The PMU functionality complies with the IEEE C37.118 - 2005 standard Synchrophasors for Power Systems. You can transmit up to 12 user selectable phasors as individual phase quantities or three-phase positive, negative or zero sequence phasors or summated phasors, via Ethernet, serial port or modem at rates up to 60 frames each second. You can also transmit to the PDC 12 Analog quantities of Watts, VARS, and VA and all 64 digital (status) quantities available from a 36/64 channel TESLA recorder. The PMU functionality does not affect the existing TESLA 3000 features; it is designed to work simultaneously with the existing features such as triggering, recording, and trending. Synchrophasors - phasor measurements with angles referenced to a global time standard have been used in limited scope by electric power utilities in North America for well over a decade as a means of measuring and predicting dynamic stability of the power grid. Recently, a growing concern about the stability of the power system has increased interest in the use of synchrophasors on a broader scale. The formulation of a new standard to define the calculation and transmission of synchrophasors (IEEE C37.118 - 2005) and the launch of a major synchrophasor project on the eastern north American power grid (North American Synchro Phasor Initiative (NASPI) - formerly EIPP) have solidified the requirement for devices which can provide synchrophasor measurements in real time. To transmit the PMU data reliably, you must connect to the IRIG-B signal from a Global Positioning System (GPS) clock or receiver to the TESLA Disturbance Recorder Model 3000 as described in the TESLA User Manual. The GPS signal must comply with the specification as mentioned in the IEEE C37.118 standard. . TESLA 3000 User Manual 15-1 15 PMU - Optional Software Module TESLA 3000 PMU Features Phasor Estimation Assuming IRIG-B signal from a reliable GPS receiver as per C37.118 standard Annex E section E1, the PMU functional module estimates the phasor using the DFT algorithm. The phasor magnitude and phase angle, once estimated, is compensated for the frequency variation over a wide range (+ / -60% of the nominal system frequency). Phasor Reporting Phasor data is transmitted in polar form (magnitude and phase angle) using Ethernet (TCP/IP or UDP), modem or serial communication. The phase angle is referenced to the absolute time of the GPS (IRIG-B signal) as per C37.118. The time stamp is based on the UTC time. Number of Synchrophasors For a 36 channel TESLA recorder, up to 12 phasors (combination of any of 36 discrete phasors (any analog channel input) and/or any of 12 sequence phasor channels and/or summation channels). For 18 channel TESLA recorder, 12 phasors (combination of any of 18 discrete phasors (any analog channel) and/or any of 12 sequence phasor channels and/ or summation channels). Phasors selection is user configurable via TESLA 3000 Control Panel software. Number of Frequency Channels One frequency channel (user configurable using TESLA 3000 Control Panel software) per recorder. Rate of change of frequency information (DFREQ) reported will be based on the frequency channel as configured by the user. The frequency estimation is accurate over +/- 60% of nominal system frequency. Analog Data There are 12 PMU Analog channels per TESLA 36 analog channel recorder that can be streamed to a remote PDC (PMU Data Concentrator). The quantities are MWatts, MVars and MVA. Digital Status data There are 64 digital (contact) channels or statuses pre TESLA 3000 recorder that can be streamed to a remote PDC (PMU Data Concentrator. PMU Reporting Rate PMU Reporting Times 15-2 System Frequency 60 HZ Reporting rate - frames per second 10 50 HZ 12 15 20 30 60 5 10 25 50 For a reporting rate N frames per second, the reporting times are evenly spaced through each second with frame number 0 (numbered 0 through N-1 coincident with UTC second rollover (usually the 1 second PPS provided by GPS). These reporting times (time-tags) are to be used for determining the instantaneous values of the synchrophasor. This is illustrated below in Figure 1, where the reporting times are a 0, T0, 2T0, 3T0, 4T0, etc (as per IEEE C37.118 standard). TESLA 3000 User Manual D01721R02.61 15 PMU - Optional Software Module PMU Response Time The response time is the interval of time between the instant the step change is applied and the time-tag of the first phasor measurement for which the TVE (total vector error) enters and stays in the specified accuracy zone corresponding to the compliance level (1%) - (as per IEEE C37.118 standard). PMU Accuracy Signal Frequency Variation Total Vector Error: (TVE) < 1% (as per C37.118 standard). As per IEEE C37.118 standard - Level 1, for details see Table 15.1: PMU Standard - Level 1 on page 15-4. Signal Magnitude As per IEEE C37.118 standard - Level 1, for details see Table 15.1: PMU Standard - Level 1 on page 15-4. Phase Angle As per IEEE C37.118 standard - Level 1, for details see Table 15.1: PMU Standard - Level 1 on page 15-4. Total Harmonic Distortion (<0.2%) (<0.2%): As per IEEE C37.118 standard - Level 1, for details see Table 15.1: PMU Standard - Level 1 on page 15-4. Out-Of-Band Frequency Deviation As per IEEE C37.118 standard - Level 1, for details see Table 15.1: PMU Standard - Level 1 on page 15-4. D01721R02.61 TESLA 3000 User Manual 15-3 15 PMU - Optional Software Module Influence Quality Reference Conditions Range of influence quantity change with respect to reference and maximum allowable TVE in percent (%) for each compliance Level Level 1 Range TVE (%) Signal Frequency Fnominal ±0.5 Hz 1.0 Signal magnitude 100% rated 10.0% to 120% rated 1.0 Phase angle 0 radians Harmonic distortion <0.2% of (THD) 10.0%%, any harmonic up to 50th 1.0 Out-of - Band interfering signal, at frequency fi where |fi - f 0 | > Fs / 2, Fs = phasor reporting rate F0 = F nominal <0.2% of input signal magnitude 10.0% of input signal magnitude 1.0 ± radians 1.0 Table 15.1: PMU Standard - Level 1 PMU Module Requirements PMU module functionality is an optional feature available with the TESLA Disturbance Recorder Model 3000. In order to have PMU module on an existing TESLA the following firmware revisions are necessary. Firmware Release vX.XX The firmware is available through the accompanying CD titled TESLA 3000 Disturbance Fault Recorder vX.XX and the corresponding TESLA 3000 Disturbance Fault Recorder User Manual. The instructions to update to the latest version of the firmware are found in the TESLA 3000 Firmware Update Instructions document. Firmware Versions To install the PMU module The TESLA 3000 Disturbance Fault Recorder unit must have a firmware version 2.1 or later. Please refer to the website for the latest versions of the TESLA 3000 Disturbance Fault Recorder firmware and the TESLA 3000 PMU Module firmware. Calibration TESLA Disturbance Recorder Model 3000 voltage and/or current input modules are optional and a variety of input modules for voltage and current inputs are available, therefore, you must calibrate the input modules. The PMU calibration requires both the magnitude and phase angle calibration at nominal signal level. This is very important in order to meet the TVE < 1% as per C37.118. 15-4 TESLA 3000 User Manual D01721R02.61 15 PMU - Optional Software Module Test Set Requirements You must have an accurate calibration test set to achieve high accuracy. Any calibration test set which generates GPS controlled signal with the accuracy as specified in the standard C37.118 is a good candidate. ERLPhase recommends Doble test set F6150 with the associated GPS equipment. Magnitude Calibration This process is similar to that as described in the TESLA User Manual. Magnitude calibration is required whenever the input module and /or the TESLA recorder sample rate are changed. Angle Calibration You must carry out the magnitude calibration as explained in the previous section before the phase angle calibration. Phase angle calibration is achieved by comparing the known applied phase angle from the test set and the phase angle reported in the TESLA PMU module metering screen see “Metering Display” on page 6-1. For example, if the test set is applying a sinusoidal signal at nominal voltage of 69 Vrms at 0 degree phase angle at nominal system frequency, its cosine referenced signal will be 69 Vrms at -90 degrees. The PMU should report 69 Vrms at -90 degrees. If the PMU reports -89.5 degrees, there is a difference of -0.5 degrees with respect to the applied signal (assuming that the test set phase angle is accurate with in tolerable limits as per C37.118). This phase angle offset can be introduced in the analog channel configuration as shown “Setting up angle calibration offset through analog channel configuration” on page 15-5. . Figure 15.2: Setting up angle calibration offset through analog channel configuration Once this phase angle offset is incorporated in the configuration, reload the configuration back to the TESLA recorder. Apply the known signal at any phase angle, and PMU should report the phase angle with the accuracy to meet the TVE < 1% as per C37.118 standard. Phase angle calibration is required for all analog channels used in the PMU phasor configuration. Phase angle calibration is required when ever the input module and / or the TESLA recorder sample rate are changed. D01721R02.61 TESLA 3000 User Manual 15-5 15 PMU - Optional Software Module Communication with the PMU PMU data can be transmitted via serial port, modem or Ethernet. Serial communications will be available on the TESLA’s rear panel Port 2. When in use for synchrophasor transmission, Port 2 is not be available for any other TESLA function. However, it is possible to use an internal modem to provide normal user interface access when Port 2 is in use for synchrophasor transmission. It is possible to transmit synchrophasors via one modem and have another modem provide normal user interface access. In such a situation, one modem is internal and the other is external and connected to Port 2. Either modem is usable for either role. TCP and UDP options are available for Ethernet communication. PMU communication is initiated by the receiver. PMU communication setup is done through TESLA 3000 Control Panel software. For the PMU, you must set the rate at which the data needs to be transferred, and the communication mode such as TCP/IP, UDP, modem or serial communication. You must also setup the Phasor Data Concentrator (PDC) information to transfer the data. First connect to the TESLA 3000 DFR and check whether it has PMU capabilities. Identifying the PMU Module Support Open TESLA 3000 Control panel software. Connect to the TESLA 3000 DFR unit. Double-click on the Utilities item in the tree view. Select the Unit Identification tab - the PMU information is displayed as shown below. If the unit has PMU capability, the PMU version information will be displayed. Figure 15.3: PMU Module feature identification on the TESLA unit using Unit Identification screen If the unit does not have the PMU capability, it displays PMU Not Installed. 15-6 TESLA 3000 User Manual D01721R02.61 15 PMU - Optional Software Module Figure 15.4: Example of Unit Identification display when PMU Module feature is not installed Setting up PMU Communication Mode Connect to a TESLA unit that has PMU features. Click on the Communication tab. Figure 15.5: PMU communication setup screen Use this view to set up the TESLA and PMU communication. • Service Port (Port 1) settings do not change with the PMU functionality as Port 1 is not available for PMU reporting. Setting of this parameter is similar to the existing TESLA unit. • Port 2 is a new group available for Direct Serial or External Modem communication. Port 2 can be selected for PMU reporting. Port 2 Baud rates D01721R02.61 TESLA 3000 User Manual 15-7 15 PMU - Optional Software Module available are 1200, 2400, 9600, 19200, 38400, and 57600. The initial value is set based on the information available from the TESLA unit current setting information. • Internal Modem group is a new group available for modem communication using a TESLA unit in which the internal modem is installed. If the internal modem is not available, then this group will be disabled. • If the internal modem is available, then the Baud rate and the modem initialization string can be set for this group. The Baud rates available are, 1200, 2400, 9600, 19200, 38400, and 57600. The initial value will be set based on the information available from the TESLA unit current setting information. • PMU group is a new group available to set the PMU identification and communication. ID control of the PMU group allows setting PMU identification number (16 bit integer). Mode control of the PMU group allows selecting communication mode for the real time transfer of the PMU data. The following commination options are available for the selection via the Mode control: • Do Not Transmit: With this choice, no PMU data is reported to the DC. Useful for maintenance purposes. • Internal Modem: PMU data reporting is done using Internal Modem. Baud rate and the modem configuration are obtained from the Internal Modem group settings. • Port 2: PMU data reporting is done using Port 2 parameter setting information. The settings information is obtained from the Port 2 group settings • Network (TCP): This choice transmits the PMU data using network communication link (as set by the user in the IED settings) and using TCP protocol. The port number of the DC is required to set this communication choice. • Network (UDP): This choice transmits the PMU data using network communication link (as set by the user in the IED settings) and using UDP protocol. IP address and the port number of the DC are required to set this communication choice. The initial values of the above controls are based on the data received from the unit on connect. The Notify screen is affected based on the Internal Modem or Port 2 choice, which will be explained later in the Notify view user interface descriptions. 15-8 TESLA 3000 User Manual D01721R02.61 15 PMU - Optional Software Module Figure 15.6: Setting up PDC communication information PDC options under PMU are: • IP Address of DC: This option is enabled only if the Mode is either Network (TCP) or Network (UDP) otherwise it is disabled. This choice allows you to configure the IP address of the DC (required for the Network (UDP) only). • Port of DC: This option is enabled only if the Mode is either Network (TCP) or Network (UDP) otherwise it is disabled. This choice allows you to configure the port number of the DC to connect via the network link. D01721R02.61 TESLA 3000 User Manual 15-9 15 PMU - Optional Software Module If the TESLA unit does not support the PMU functionality, then the following screen will be presented with all PMU controls disabled. Figure 15.7: Disabled PMU communication controls when PMU feature is not installed PMU Configuration Configuration settings specific to PMU takes place in a single PMU configuration view. PMU settings utilize the existing TESLA configuration. For example, a positive sequence synchrophasor is selected from the list of configured Sequence Component calculated channels rather than re-specified based on individual input channels. Default names for the PMU channels are those of the underlying selected TESLA channel in the element: type: description format, truncated if necessary to meet the 16 character limit defined in the C37.118 standard. you can enter a user specified name to over-ride the default. For offline use, the Edit IED option in the main menu provides means to configure PMU configuration settings from TESLA Control Panel. Downloading a setting file that contains PMU settings to a recorder that does not have the PMU option installed will be prevented and a warning/explanation message displayed. Configuring PMU from a New Setting File 15-10 Before setting up PMU configuration, you must set up the desired analog and/ or summation and/or sequence channels as explained in the Configuring the Recorder section of the TESLA User Manual. Once the channels are defined, the procedure as explained in “PMU Configuration” on page 15-10 can be followed to define PMU phasors. TESLA 3000 User Manual D01721R02.61 15 PMU - Optional Software Module Configuring PMU Phasors with Existing Settings To configure PMU phasors offline, the following check must be performed in the Main Menu’s Select IED view. Open TESLA Control Panel software and click on the Edit option to open the following screen. Figure 15.8: Enabling PMU Module configuration support through Edit IED dialogue To allow PMU configuration you must check the PMU Module in the Edit IED dialog box enabling the TESLA Control Panel configurator. If the PMU Module option is unchecked, the configurator will not allow PMU configuration. After you check the PMU Module, select Save IED definition to accept the changes, then select the Configuration option to open the configuration view. Select an existing configuration file by double-clicking on the file and the following screen appears. Figure 15.9: Setting version conversion view If the Setting Version is older than setting version 202 the PMU feature will not be available. Therefore the current setting file must be converted to setting version 202. This is done by selecting the Setting Version to 202. You must do this to add the PMU configuration to the existing setting file. when the setting file is converted to the latest setting version, right-click on the Channel Group 1 to display the choice to add a PMU as shown below. D01721R02.61 TESLA 3000 User Manual 15-11 15 PMU - Optional Software Module Figure 15.10: Invoking PMU configuration through right-click menu Select the PMU choice and the following screen appears allowing you to select the Phasors. Figure 15.11: PMU configuration screen with preconfigured analog, sequence and summation channels In the above PMU Definition Screen, Analog Inputs (voltage & currents), Summations and Sequence Functions channels are available for PMU Phasors reporting. You can select up to 12 phasors by dragging and dropping the chan- 15-12 TESLA 3000 User Manual D01721R02.61 15 PMU - Optional Software Module nels on the Selected Channels list or by selecting the phasors from the Combo Box as shown below. In addition 12 PMU Analogs, which are the Watt, Var and VA quantities to be also, streamed with the PMU phasors at the same time to the Phasor Data Concentrator (PDC). You can also stream with the PMU phasors and the PMU analogs, the 64 PMU Digitals (breaker contacts) to the PDC from a single TESLA 36/64. Figure 15.12: Phasor selection for PMU reporting The following features can be observed with the PMU Definition configuration screen: A PMU item appears on the left hand side tree view. On the right hand side the PMU Definition Configuration screen displays the following configuration items: • Sample Rate - sample rate for the PMU to report. The default setting is set to 10 frames per second. Different samples rates can be chosen: 10, 12, 15, 30 or 60 frames per second for the 60 Hz power system. For the 50 Hz power system the sample rates are 10, 25, 50 frames per second. Selection is by drop down selection. • Header Frame Text - You can enter comments up to 80 characters using this option by default the value is blank. The lower part of the PMU Definition screen is made up of two sections. To the left is the selection tree. To the right are the placement columns where the quantities are dragged to from the left selection tree or selection can be done by the drop down columns in each of the right hand columns. The right hand PMU Definition screen is made up of three sections, Selected Channels: PMU Phasors, PMU Analogs, PMU Digitals. D01721R02.61 TESLA 3000 User Manual 15-13 15 PMU - Optional Software Module PMU Phasors Section (Selection Channel Column) • PMU Phasor section allows 12 PMU Phasors to be selected from the Phasor Options left hand tree by selecting from the tree, drag and drop into one of the 12 rows under PMU Phasor column. User can also use the row drop down selection tool. A PMU Phasor can be; an analog voltage or current phasor, a summated voltage or current phasor or a voltage/current sequence component (Pos., Neg., or a Zero sequence) phasor. • PMU Analog allows 12 PMU Analogs to be selected from the Analog Options left hand tree by selecting from the tree, drag and drop into one of the 12 rows under PMU Analog column. User can also use the row drop down selection tool. A PMU Analog can be MWatts, MVars and/or MVA values. • PMU Digital allows up to 64 Digital (contacts) inputs per TESLA recorder. When you configure a digital channel it will be automatically placed in the PMU Digital section of the PMU Definition. Full Scale Column (PMU Phasor section) • This column's values are automatically calculated and inserted. These values are derived by the full scale of the input device (voltage or current modules, split core CTs) times the PT or CT ratio. - Voltage module's full scale is 138 volts - Current module's full scale is 1 amp module/split core = 20 amps. 5 amp module/split core = 100 amps. Example: voltage Full scale = PT ratio = 2000:1, full scale of voltage module is 138 - CT ratio = 2000:1 (1.0 amp module), therefore the full scale in the PMU Definition screen: Full Scale = PTratio x PT module full scale Fs = 2000 x 138 = 276,000 Full Scale = CTratio x CT module full scale Fs = 2000 x 20 = 40,000 Full Scale Column (PMU Analog section) • This column's value have a default value which is calculated by multiplying the full scale values of the voltage and current from the PMU Phasors' section. - Full Scale watts = Full scale volts = 276,000, Full scale amps = 40,000. Therefore the full scale watts; Fs volts x Fs amps = 276,000 x 40,000 = 33,120,000,000 Watts or 33,120 MW. This number is large but the user can edit this column to put a more practical scale (use nominal values). Unit Column (PMU Phasors and Analog sections) • This column will automatically place the primary unit scale of the voltage and current phasors in the PMU Phasors Section • In the PMU Analog section column will automatically place the primary unit scale of the Watts (MW), Vars (MVAR) and VoltAmps (MVA) 15-14 TESLA 3000 User Manual D01721R02.61 15 PMU - Optional Software Module Active Column (PMU Phasors, Analog and Digitals) • This column shows check boxes, where you can enable or disable the PMU streaming of these PMU quantities to the Data Concentrator. A check will enable this PMU channel. Name to Report (PMU Phasors, Analog and Digitals) • This column allow the user to re-name the streaming PMU channel that will be reported to the remote Data Concentrator PMU Metering PMU metering does not require any special configuration settings. Once the PMU phasors are defined as explained in the previous section, the PMU metering automatically displays the metering screen through a separate PMU tab. Phasor magnitude and respective phase angles are displayed in primary or secondary units. All the user interface and update features available for the normal metering are also available for the PMU metering. In addition to the phasor channels configured in the PMU configuration, a frequency channel will also be displayed, if one is already configured. A typical PMU metering screen is as shown below. Figure 15.13: Typical PMU metering screen Note that the PMU metering is a default metering view, and is considered the 10th user defined metering group. This means, if the setting file already has 10 user defined Metering groups, the PMU metering replaces the last (10th) metering group. Hence the total number of user defined Metering groups available will be 9 instead of 10. D01721R02.61 TESLA 3000 User Manual 15-15 15 PMU - Optional Software Module Maintenance and Error Handling Any Phasor Data Concentrator (PDC) program which can communicate with the PMU is a good starting point for the trouble shooting. Use the TVA’s (Tennessee Valley Authority) free PMU Connection Tester program (PDC) developed to support the Eastern Interconnect Phasor Project (EIPP) to check the basic communications with the PMU. Download the TVA tester program and the installation procedure from the following web site: http://phasors.pnl.gov Downloads can be found under Resources/Tool’s. for details see 14 Maintenance Menu and Error Handling on page 1 describes a set of utilities that provide diagnostic, recovery and TCP/IP services. Diagnosing the PMU Functionality The following procedure helps in diagnosing the PMU functionality. Select the device on your PC you communicate through. In HyperTerminal, this is done in the Connect Using field of its Properties control. • For a direct serial link select an available serial port • For a modem link select the appropriate modem • For a network link select TCP/IP (Winsock) (available with HyperTerminal v1.2 or greater) When you initiate the connection, the TESLA responds with a login prompt. • In HyperTerminal use the Call button or menu command to initiate the connection. At the login prompt, log in as maintenance • Lower case • No password is required. If you are asked for one, there is a mistake in the login name. Select Enter to get another login prompt and try again When you get the display of maintenance menu choice, choose 15 for PMU diagnostics as shown below. Figure 15.14: Terminal User Interface depicting options under Maintenance 15-16 TESLA 3000 User Manual D01721R02.61 15 PMU - Optional Software Module When you select enter, data frame stream is displayed as shown below in hexadecimal format. Figure 15.15: Display of PMU Data Stream in hexadecimal format If the data transmission is disabled from a PDC program (example, TVA Connection Tester Program), following response is displayed. Figure 15.16: Response of terminal user interface when PDC requests to disable data transmission With data transmission disabled, the PDC program can request for the configuration frame, which will be displayed as shown: D01721R02.61 TESLA 3000 User Manual 15-17 15 PMU - Optional Software Module Figure 15.17: Diagnostic response to Configuration frame request from the PDC The C37.118 standard protocol itself has number of diagnostics and/or health check messages, which can be read and analyzed. The description of these diagnostic fields is found in C37.118 standard 15-18 TESLA 3000 User Manual D01721R02.61 Appendix ASpecifications TESLA 3000 Disturbance Recorder Item Quantity/Specs Note General: Weight 12.4 lbs Dimension 3U high (5.25"), 19" wide, 12" deep Nominal Frequency 50 or 60 Hz Power Supply 40-300 Vdc, suitable for 48 Vdc, 125 Vdc, 250 Vdc nominal systems. Also accepts 30-200 Vac Burden is less than 15W Available Recording Channels Available Analog and External input channels Sample Rate Analog External 32 / cycle 36 64 64 / cycle 36 64 96 / cycle 36 64 128 / cycle 36 64 256 / cycle 18 32 384 / cycle 9 32 18 channel model is limited to a maximum of 18 Analog and 32 External input channels. Alarm Contacts 8 or 4, depending on model Sample Rate Samples per cycle and per second (60 / 50 Hz) 32 samples / cycle (1,920 / 1,600 Hz) 64 samples / cycle (3,840 / 3,200 Hz) 96 samples / cycle (5,760 / 4,800 Hz) 128 samples / cycle (7,680 / 6,400 Hz) 256 samples / cycle (15,360 / 12,800 Hz) 384 samples / cycle (23,040 / 19,200 Hz) Measurement Accuracy Amplitude Measurement Accuracy: ± 0.01% of full scale ± 0.5% of reading (above 1% of full scale) Phase Measurement Accuracy: ± 0.5 degrees at system frequency Frequency Measurement Accuracy: ± 0.001 Hz at system frequency Frequency Response The following are the highest harmonics of the fundamental frequency (60 Hz / 50 Hz) that can be passed at the available sample rates: Sample Rate Harmonic 1,920 / 1,600 Hz 8th (480/400HZ) 3,840 / 3,200 Hz 16th (960/800HZ) 5,760 / 4,800 Hz 25th (1500/1250HZ) 7,680 / 6,400 Hz 33rd (1980/1650HZ) 15,360 / 12,800 Hz 66th (3960/3300HZ) 23,040 / 19,200 Hz 100th (6000/5000HZ) Noise Signal to Noise ratio: 70 dB at full scale Common mode rejection: 70 dB at full scale Crosstalk: -07 dB Sample Skew All channels sampled simultaneously D01721R02.61 TESLA 3000 User Manual Rack mount Appendix A-1 Appendix A Specifications TESLA 3000 Disturbance Recorder Item Quantity/Specs Note Transient Fault Maximum 15 second nominal, 30 second extended At any selected system sample rate Dynamic Swing Maximum 15 minute nominal, 30 minute extended Event Logging 250 Events in the regular log, 1000 events in long term log Long term event logging is part of the trending function Record Storage Up to 1000 records 1 Gigabyte FLASH drive standard. 2 Gigabyte FLASH drive available Available trend channels Any of the recorder’s existing configured analog channels (input or calculated) can be trended. Evaluated phasor magnitude and angle quantities will be recorded as separate channels. Accumulation mode Minimum, maximum, average, damped or undamped. Sample Interval User selectable sample interval from 10 seconds to 1 hour in 1 second increments. All channels produce trend data simultaneously at the selected rate. Maximum number of channels Up to 60 channels can be trended simultaneously. A channel with multiple accumulation modes is treated as multiple channels (e.g. the trending of minimum, maximum and average readings of a selected input would require 3 trend channels). Trend storage The recorder can store 90 days of data from each trend channel, regardless of the sample rate or the number of configured trend channels. This is a non-configurable parameter. Analog Inputs High and low threshold, positive and negative rate of change, harmonic level, THD level, sags, swells All triggers have independent controls for delay, logging, transient or swing record initiation, alarm contact activation and cross triggering. Summations High/low threshold, +/- rate of change 2 or 3 input channels Positive Sequence High/low threshold, +/- rate of change Negative Sequence High level Zero Sequence High level Watts/VARs High/low threshold, +/- rate of change Frequency High/low threshold, +/- rate of change Impedance Positive sequence circle External Inputs (digital) Rising edge, falling edge or both Recording and Logging: Trending Channels and Triggers: Appendix A-2 TESLA 3000 User Manual D01721R02.61 Appendix A Specifications TESLA 3000 Disturbance Recorder Item Quantity/Specs Note Logic Rising edge, falling edge or both Fault Locator Triggered by internal or external events Sags and Swells Sag and swell detection can be enabled on any analog input channel configured as a voltage. Interface & Communication: Front Panel Indicators 6 LEDs Recorder Functional, IRIG-B Functional, Recorder Triggered, Records Stored, Test Mode, Alarm Serial User Interface Port 1 and 2 RS-232 ports to 58K baud Port 2 can support an external modem Internal Modem 33.6 Kbps, V.32 bis Optional Network 10/100BaseT Ethernet port standard SCADA Interface DNP3 (RS-232 or Ethernet) or Modbus (RS-232) Rear port Configurable Alarms 6 contacts Normally open Cross-trigger 1 contacts (#4) Normally open Self Checking/Recorder Inoperative 1 contact (#1) Normally closed Time Sync IRIG-B, BNC connector Modulated or unmodulated Ratings: Analog Input Channels ac Voltage Module: Nominal Input: Vn=69 V RMS (120/ Root 3) Full Scale / Continuous: 138V RMS Burden: < 0.15 VA @ 69 V RMS ac Current Modules Nominal Input: In = 5 A or 1A RMS Continuous: 3x In Full Scale: 20x In for 1 second Thermal: 400A RMS for 1 second Burden: < 0.25 VA @ 5 A External Inputs (digital) Will turn on: >=38 Vdc Will not turn on: <=25 Vdc Maximum input: <300 Vdc Burden: >10 kilo-ohm Externally wetted Alarm Contacts Make: 8 A Vdc Carry: 8 A Vdc Break: 0.15 A at 125 Vdc 0.10 A at 250 Vdc Cross trigger contact (#4) - Pick-up <10 ms, latch 100 ms User-definable contacts - Pick-up <1.0 s, latch 1.0 s Environmental: D01721R02.61 TESLA 3000 User Manual Appendix A-3 Appendix A Specifications TESLA 3000 Disturbance Recorder Item Quantity/Specs Note Ambient Temperature Range IEC 60068-2-1/IEC 60068-2-2 -10°C – 55°C Humidity IEC 60068-2-30 Up to 95% without condensation Insulation Test (Hi-Pot) IEC 60255-5 Power supply, analog inputs (through external isolation modules), external inputs, output contacts -1.5 kV, 50/60 Hz, 1 second. Electrostatic Discharge IEC 61000-4-2 Level 4, IEEE C37.90.3, IEC 6025522-2 Level 4 Voltage Dips, Interruptions, Variations IEC 6100-4-11, IEC 60255-11 Conducted RF Immunity IEC 61000-4-6 Level 3, IEC 60255-22-6 Level 3 Radiated RF Susceptibility EC 61000-4-2 Level 3, IEC 60255-22-3 Level 3 Electrical Fast Transient/ Burst IEC 61000-4-4 Level 3, IEC 60255-22-4 Class III Oscillatory Transient ANSI/IEEE C37.90.1-1989, IEC 61000-4-12 Level 3, IEC 60255-22-1 Level 3 Oscillatory Vibration IEC 60068-2-6, IEC 60255-21-1 Class 1 Seismic IEC 60068-3-3, IEC 60255-21-3 Class 1 Shock and Bump IEC 60255-21-2 Class 1 Appendix A-4 TESLA 3000 User Manual 200ms Interrupt D01721R02.61 Appendix B TESLA Hardware Description The TESLA is a modular high-quality power system recording system. It is available in 18 and 36 channel models. Main Processor Board The Main Processor Board consists of a DSP, a 586 processor, serial ports, an Ethernet port, an IRIG B processor, a watchdog and a power supply that supplies the other boards. All other boards are connected to the MPB as I/O. The MPB has a socket for an optional internal modem. External Input Boards #1 and #2 The 18 channel TESLA has 32 external inputs and 4 contact outputs, provided by External Input Board #1. Inputs are optically isolated and accepts up to 300 Vdc. The 36 channel TESLA has a second bank of 32 external inputs and 4 contact outputs provided by External Input Board #2 for a total of 64 external inputs. Rear panel connection to the board is provided by removable screw terminal strips. Terminal strips are keyed to ensure that the correct terminal strip is installed into the correct bank. Analog Input Board The TESLA’s analog input channels to the recorder are provided by the Analog Input Board. The 18 channel TESLA has only half of the board populated. Rear panel connection to the board is provided by removable screw terminal strips which are keyed, to ensure that the correct terminal strip is installed into the correct bank. Comm Board The Comm Board provides the TESLA with two RS-232 ports, IRIG-B time synchronization input, network or telephone connection. The RS-232 ports are female DB-9S connectors, IRIG-B is a male BNC, the telephone jack is an RJ11 and the modem jack is an RJ-45. Power Supply The Power Supply conditions and converts the input power for use by the internal electronics. The wide input voltage provides the TESLA with the ability to operate from 40 to 300 Vdc or 120 Vac. Storage Disk Data storage for the TESLA recorder is a 1 GB solid state FLASH IDE drive. Other options are available. Front Panel Board The Front Panel Board provides visual indication of the status of the TESLA recorder and a front-panel RS-232 port. D01721R02.61 TESLA 3000 User Manual Appendix B-1 Appendix C Glossary AC Analog Input AC Analog Summation AC Input Module COMTRADE Cooperative Recording Group DC Input Module An ac current or voltage that is obtained from a current transformer or a voltage transformer connected to an element on the power system. Configuration of TESLA allows two AC analog quantities to be summed. For example, currents from two parallel lines can be summed to produce a set of combined currents. This device takes in the voltage or current quantities (4 currents or 3 voltages, dependent on model), modifies these input quantities into low level signals that are suitable for input into the TESLA recorder back panel. The conversion ratio is stated on the module. Outputs from these modules can be connected to any of the Analog Input terminals on TESLA Common Format for Transient Data Exchange. IEEE standard C37.111-1991, IEEE Standard Common Format for Transient Data Exchange (COMTRADE) for Power Systems, which describes a common format for exchange of recorded power systems data between different manufacturers’ recorders. A set of TESLA 3000 recorders that work together to form a larger virtual recorder. An external input module that can be scaled to accept a wide range of voltage or current signals. The model provides galvanic isolation and accepts DC signals or AC signals up to 2 kHz. DCE Data Communications Equipment, an RS-232 term for modems and similar equipment. DCEs generally have a female DB connector. DST Daylight Savings Time. A seasonal adjustment of time applied in many jurisdictions to compensate for varying day lengths. Most often, an hour is added to the system time to begin on the second Sunday in March and end the first Sunday in November. DTE Data Terminal Equipment, an RS-232 term for a terminal or computer. DTEs generally have a male DB connector. DUN Dial-Up Networking, a facility in Windows providing dial-up access to Internet and other networks. DUN is provided with the Windows distribution. EIA RS-232C Electronics Industries Association recommended standard 232, revision C, Interface between Data Terminal Equipment and Data Communication Equipment Employing Serial Binary Data Interchange. Defines the most popular electrical connection for serial binary data interchange, available on almost all computer systems. Element A component in the power system that conveys bulk power within the power system. Control Panel provides for a naming convention that groups real and calculated channels with a given element name. Has three voltages and three currents associated with it. For example, a transmission line, or a transformer. External Input A contact status brought into TESLA from the outside world. This contact must be externally wetted with a voltage from 30 to 150 Vdc. Correct polarity must be observed. D01721R02.61 IED Intelligent Electronic Device, referring to a power system substation device which communications on a substation network, such as Modbus. IEEE 1344 IEEE 1344 is an enhancement to the basic IRIG-B time code that embeds information such as the year, the UTC/local offset (under certain conditions only) and daylight savings time into the time stream. IEEE standard 1344-95, IEEE Standard for Synchrophasors for Power Systems, outlines the implementation and use of accurate time standards for power systems relaying and recording. Annex F describes an IRIG-B extension (using previously unused control bits in the signal) which provides extensive information beyond that of standard IRIG-B. TESLA 3000 User Manual Appendix C-1 Appendix C Glossary IRIG-B Master Recorder Modbus PTI Trigger UTC Appendix C-2 Inter-Range Instrumentation Group time code format type B, see Range Commanders Council Telecommunications and Timing Group, IRIG standard 200-95, IRIG Serial Time Code Formats. Describes an implementation for distribution of precise timing information, especially to power systems relays and recorders. IRIG-B is typically provided by a satellite clock (e.g. GPS or GOES). A member of a Cooperative Recording Group selected to be the primary interface between the recorder group and TESLA Control Panel or RecordBase Central Station. Modbus is a network using a master/slave protocol often used in power system substations. Its function was developed and is defined by Modicon, Inc., North Andover, MA, USA. Refer to Modbus Protocol Reference Guide, Modicon document PI-MBUS-300. Power Technologies Incorporated A situation that can initiate a recording. Universally Coordinated Time. Approximately equivalent to Greenwich Mean Time (GMT). A universal time maintained by time standards bodies worldwide. All local times are expressed as an offset from UTC. TESLA 3000 User Manual D01721R02.61 Appendix D Modbus Functions The TESLA recorder operates as a slave device on the Modbus network, with an address of 1 to 247 (decimal), 0x01 to 0xF7. The Point List can be printed through TESLA Control Panel to display the point names as they are configured. Please refer to “Printing a SCADA Address List” on page 8-45. For further information on Modbus, please refer to your Modbus master device manual, or obtain Modicon’s Modbus Protocol Reference Guide, document PIMBUS-300. Read Coil Status (Function Code 01, 0X References) D01721R02.61 Channel Address Value Hold Readings 00001 0: Readings not held Reserved 00257 Reserved Contact 2 00513 0: Contact open (inactive) 1: Contact closed (active) Contact 3 00514 0: Contact open (inactive) 1: Contact closed (active) Contact 4 00515 0: Contact open (inactive) 1: Contact closed (active) Contact 5 00516 0: Contact open (inactive) 1: Contact closed (active) Contact 6 00517 0: Contact open (inactive) 1: Contact closed (active) Contact 7 00518 0: Contact open (inactive) 1: Contact closed (active) Contact 8 00519 0: Contact open (inactive) 1: Contact closed (active) Logic Detector 1 00769 0: Off (inactive) 1: On (active) Logic Detector 2 00770 0: Off (inactive) 1: On (active) Logic Detector 3 00771 0: Off (inactive) 1: On (active) Logic Detector 4 00772 0: Off (inactive) 1: On (active) Logic Detector 5 00773 0: Off (inactive) 1: On (active) Logic Detector 6 00774 0: Off (inactive) 1: On (active) Logic Detector 7 00775 0: Off (inactive) 1: On (active) Logic Detector 8 00776 0: Off (inactive) 1: On (active) Logic Detector 9 00777 0: Off (inactive) 1: On (active) Logic Detector 10 00778 0: Off (inactive) 1: On (active) Logic Detector 11 00779 0: Off (inactive) 1: On (active) Logic Detector 12 00780 0: Off (inactive) 1: On (active) Logic Detector 13 00781 0: Off (inactive) 1: On (active) Logic Detector 14 00782 0: Off (inactive) 1: On (active) Logic Detector 15 00783 0: Off (inactive) 1: On (active) Logic Detector 16 00784 0: Off (inactive) 1: On (active) Logic Detector 17 00785 0: Off (inactive) 1: On (active) Logic Detector 18 00786 0: Off (inactive) 1: On (active) Logic Detector 19 00787 0: Off (inactive) 1: On (active) TESLA 3000 User Manual 1:Readings held Appendix D-1 Appendix D Modbus Functions Logic Detector 20 00788 0: Off (inactive) 1: On (active) Logic Detector 21 00789 0: Off (inactive) 1: On (active) Logic Detector 22 00790 0: Off (inactive) 1: On (active) Logic Detector 23 00791 0: Off (inactive) 1: On (active) Logic Detector 24 00792 0: Off (inactive) 1: On (active) Logic Detector 25 00793 0: Off (inactive) 1: On (active) Logic Detector 26 00794 0: Off (inactive) 1: On (active) Logic Detector 27 00795 0: Off (inactive) 1: On (active) Logic Detector 28 00796 0: Off (inactive) 1: On (active) Logic Detector 29 00797 0: Off (inactive) 1: On (active) Logic Detector 30 00798 0: Off (inactive) 1: On (active) High/low speed recording active 01025 0: Off (inactive) 1: On (active) High/low speed recording space nearly full alarm 01026 0: Off (inactive) 1: On (active) Trend Recording Active 01281 0: Off (inactive) 1: On (active) Trend Recording Accumulation Alarm 01282 0: Off (inactive) 1: On (active) Read Input Status (Function Code 02, 1X References) Appendix D-2 Channel Address Value External I/P 1 10001 0: Off (inactive) 1: On (active) External I/P 2 10002 0: Off (inactive) 1: On (active) External I/P 3 10003 0: Off (inactive) 1: On (active) External I/P 4 10004 0: Off (inactive) 1: On (active) External I/P 5 10005 0: Off (inactive) 1: On (active) External I/P 6 10006 0: Off (inactive) 1: On (active) External I/P 7 10007 0: Off (inactive) 1: On (active) External I/P 8 10008 0: Off (inactive) 1: On (active) External I/P 9 10009 0: Off (inactive) 1: On (active) External I/P 10 10010 0: Off (inactive) 1: On (active) External I/P 11 10011 0: Off (inactive) 1: On (active) External I/P 12 10012 0: Off (inactive) 1: On (active) External I/P 13 10013 0: Off (inactive) 1: On (active) External I/P 14 10014 0: Off (inactive) 1: On (active) External I/P 15 10015 0: Off (inactive) 1: On (active) External I/P 16 10016 0: Off (inactive) 1: On (active) External I/P 17 10017 0: Off (inactive) 1: On (active) External I/P 18 10018 0: Off (inactive) 1: On (active) External I/P 19 10019 0: Off (inactive) 1: On (active) TESLA 3000 User Manual D01721R02.61 Appendix D Modbus Functions D01721R02.61 External I/P 20 10020 0: Off (inactive) 1: On (active) External I/P 21 10021 0: Off (inactive) 1: On (active) External I/P 22 10022 0: Off (inactive) 1: On (active) External I/P 23 10023 0: Off (inactive) 1: On (active) External I/P 24 10024 0: Off (inactive) 1: On (active) External I/P 25 10025 0: Off (inactive) 1: On (active) External I/P 26 10026 0: Off (inactive) 1: On (active) External I/P 27 10027 0: Off (inactive) 1: On (active) External I/P 28 10028 0: Off (inactive) 1: On (active) External I/P 29 10029 0: Off (inactive) 1: On (active) External I/P 30 10030 0: Off (inactive) 1: On (active) External I/P 31 10031 0: Off (inactive) 1: On (active) External I/P 32 10032 0: Off (inactive) 1: On (active) External I/P33 10033 0: Off (inactive) 1: On (active) External I/P 34 10034 0: Off (inactive) 1: On (active) External I/P 35 10035 0: Off (inactive) 1: On (active) External I/P 36 10036 0: Off (inactive) 1: On (active) External I/P 37 10037 0: Off (inactive) 1: On (active) External I/P 38 10038 0: Off (inactive) 1: On (active) External I/P 39 10039 0: Off (inactive) 1: On (active) External I/P 40 10040 0: Off (inactive) 1: On (active) External I/P 41 10041 0: Off (inactive) 1: On (active) External I/P 42 10042 0: Off (inactive) 1: On (active) External I/P 43 10043 0: Off (inactive) 1: On (active) External I/P 44 10044 0: Off (inactive) 1: On (active) External I/P 45 10045 0: Off (inactive) 1: On (active) External I/P 46 10046 0: Off (inactive) 1: On (active) External I/P 47 10047 0: Off (inactive) 1: On (active) External I/P 48 10048 0: Off (inactive) 1: On (active) External I/P 49 10049 0: Off (inactive) 1: On (active) External I/P 50 10050 0: Off (inactive) 1: On (active) External I/P 51 10051 0: Off (inactive) 1: On (active) External I/P 52 10052 0: Off (inactive) 1: On (active) External I/P 53 10053 0: Off (inactive) 1: On (active) External I/P 54 10054 0: Off (inactive) 1: On (active) External I/P 55 10055 0: Off (inactive) 1: On (active) External I/P 56 10056 0: Off (inactive) 1: On (active) External I/P 57 10057 0: Off (inactive) 1: On (active) External I/P 58 10058 0: Off (inactive) 1: On (active) External I/P 59 10059 0: Off (inactive) 1: On (active) TESLA 3000 User Manual Appendix D-3 Appendix D Modbus Functions Appendix D-4 External I/P 60 10060 0: Off (inactive) 1: On (active) External I/P 61 10061 0: Off (inactive) 1: On (active) External I/P 62 10062 0: Off (inactive) 1: On (active) External I/P 63 10063 0: Off (inactive) 1: On (active) External I/P 64 10064 0: Off (inactive) 1: On (active) External I/P1 Change latch 10257 0: Off (no change) 1: On (change) External I/P 2 Change latch 10258 0: Off (no change) 1: On (change) External I/P 3 Change latch 10259 0: Off (no change) 1: On (change) External I/P 4 Change latch 10260 0: Off (no change) 1: On (change) External I/P 5 Change latch 10261 0: Off (no change) 1: On (change) External I/P 6 Change latch 10262 0: Off (no change) 1: On (change) External I/P 7 Change latch 10263 0: Off (no change) 1: On (change) External I/P 8 Change latch 10264 0: Off (no change) 1: On (change) External I/P 9 Change latch 10265 0: Off (no change) 1: On (change) External I/P 10 Change latch 10266 0: Off (no change) 1: On (change) External I/P 11Change latch 10267 0: Off (no change) 1: On (change) External I/P 12 Change latch 10268 0: Off (no change) 1: On (change) External I/P 13 Change latch 10269 0: Off (no change) 1: On (change) External I/P 14 Change latch 10270 0: Off (no change) 1: On (change) External I/P 15 Change latch 10271 0: Off (no change) 1: On (change) External I/P 16 Change latch 10272 0: Off (no change) 1: On (change) External I/P 17 Change latch 10273 0: Off (no change) 1: On (change) External I/P 18 Change latch 10274 0: Off (no change) 1: On (change) External I/P 19 Change latch 10275 0: Off (no change) 1: On (change) External I/P 20 Change latch 10276 0: Off (no change) 1: On (change) External I/P 21 Change latch 10277 0: Off (no change) 1: On (change) External I/P 22 Change latch 10278 0: Off (no change) 1: On (change) External I/P 23 Change latch 10279 0: Off (no change) 1: On (change) External I/P 24 Change latch 10280 0: Off (no change) 1: On (change) External I/P 25 Change latch 10281 0: Off (no change) 1: On (change) External I/P 26 Change latch 10282 0: Off (no change) 1: On (change) External I/P 27 Change latch 10283 0: Off (no change) 1: On (change) External I/P 28 Change latch 10284 0: Off (no change) 1: On (change) External I/P 29 Change latch 10285 0: Off (no change) 1: On (change) External I/P 30 Change latch 10286 0: Off (no change) 1: On (change) External I/P 31 Change latch 10287 0: Off (no change) 1: On (change) External I/P 32 Change latch 10288 0: Off (no change) 1: On (change) External I/P 33 Change latch 10289 0: Off (no change) 1: On (change) External I/P 34 Change latch 10290 0: Off (no change) 1: On (change) External I/P 35 Change latch 10291 0: Off (no change) 1: On (change) TESLA 3000 User Manual D01721R02.61 Appendix D Modbus Functions External I/P 36 Change latch 10292 0: Off (no change) 1: On (change) External I/P 37 Change latch 10293 0: Off (no change) 1: On (change) External I/P 38 Change latch 10294 0: Off (no change) 1: On (change) External I/P 39 Change latch 10295 0: Off (no change) 1: On (change) External I/P 40 Change latch 10296 0: Off (no change) 1: On (change) External I/P 41 Change latch 10297 0: Off (no change) 1: On (change) External I/P 42 Change latch 10298 0: Off (no change) 1: On (change) External I/P 43 Change latch 10299 0: Off (no change) 1: On (change) External I/P 44 Change latch 10300 0: Off (no change) 1: On (change) External I/P 45 Change latch 10301 0: Off (no change) 1: On (change) External I/P 46 Change latch 10302 0: Off (no change) 1: On (change) External I/P 47 Change latch 10303 0: Off (no change) 1: On (change) External I/P 48 Change latch 10304 0: Off (no change) 1: On (change) External I/P 49 Change latch 10305 0: Off (no change) 1: On (change) External I/P 50 Change latch 10306 0: Off (no change) 1: On (change) External I/P 51 Change latch 10307 0: Off (no change) 1: On (change) External I/P 52 Change latch 10308 0: Off (no change) 1: On (change) External I/P 53 Change latch 10309 0: Off (no change) 1: On (change) External I/P 54 Change latch 10310 0: Off (no change) 1: On (change) External I/P 55 Change latch 10311 0: Off (no change) 1: On (change) External I/P 56 Change latch 10312 0: Off (no change) 1: On (change) External I/P 57 Change latch 10313 0: Off (no change) 1: On (change) External I/P 58 Change latch 10314 0: Off (no change) 1: On (change) External I/P 59 Change latch 10315 0: Off (no change) 1: On (change) External I/P 60 Change latch 10316 0: Off (no change) 1: On (change) External I/P 61 Change latch 10317 0: Off (no change) 1: On (change) External I/P 62 Change latch 10318 0: Off (no change) 1: On (change) External I/P 63 Change latch 10319 0: Off (no change) 1: On (change) External I/P 64 Change latch 10320 0: Off (no change) 1: On (change) Read Holding Register (Function Code 03, 4X References Channel Address Value Scaled up by Tesla Clock Time (UTC). Read all in same query to ensure consistent time reading data D01721R02.61 Milliseconds Now 40001 0-999 1 Seconds Now 40002 0-59 1 Minutes Now 40003 0-59 1 Hours Now 40004 0-23 1 Day of Year Now 40005 1-365 (up to 366 if leap year) 1 TESLA 3000 User Manual Appendix D-5 Appendix D Modbus Functions Years since 1900 40006 90-137 1 Sync’d to IRIG-B 40007 0: No, 1: Yes 1 Time of Acquisition (UTC). Read all in same query to ensure consistent time reading data Milliseconds Acquisition 40008 0-999 1 Seconds Acquisition 40009 0-59 1 Minutes Acquisition 40010 0-59 1 Hours Acquisition 40011 0-23 1 Day of Year Acquisition 40012 1-365 (up to 366 if leap year) 1 Years since 1900 40013 90-137 1 Acquisition Time Sync’d to IRIG-B 40014 0: No 1: Yes 1 Offset of UTC to IED Local Time 40015 2’s complement half hours, North America is negative 1 Analog Magnitude and Angle Metering Channels Appendix D-6 Channel Address Value Scaled up by AI1 Magnitude 40257 0 to 3276.7 units 10 AI1 Angle 40258 -180° to 180° 10 AI2 Magnitude 40259 0 to 3276.7 units 10 AI2 Angle 40260 -180° to 180° 10 AI3 Magnitude 40261 0 to 3276.7 units 10 AI3 Angle 40262 -180° to 180° 10 AI4 Magnitude 40263 0 to 3276.7 units 10 AI4 Angle 40264 -180° to 180° 10 AI5 Magnitude 40265 0 to 3276.7 units 10 AI5 Angle 40266 -180° to 180° 10 AI6 Magnitude 40267 0 to 3276.7 units 10 AI6 Angle 40268 -180° to 180° 10 AI7 Magnitude 40269 0 to 3276.7 units 10 AI7 Angle 40270 -180° to 180° 10 AI8 Magnitude 40271 0 to 3276.7 units 10 AI8 Angle 40272 -180° to 180° 10 AI9 Magnitude 40273 0 to 3276.7 units 10 AI9 Angle 40274 -180° to 180° 10 AI10 Magnitude 40275 0 to 3276.7 units 10 AI10 Angle 40276 -180° to 180° 10 AI11 Magnitude 40277 0 to 3276.7 units 10 AI11 Angle 40278 -180° to 180° 10 AI12 Magnitude 40279 0 to 3276.7 units 10 TESLA 3000 User Manual D01721R02.61 Appendix D Modbus Functions D01721R02.61 AI12 Angle 40280 -180° to 180° 10 AI13 Magnitude 40281 0 to 3276.7 units 10 AI13 Angle 40282 -180° to 180° 10 AI14 Magnitude 40283 0 to 3276.7 units 10 AI14 Angle 40284 -180° to 180° 10 AI15 Magnitude 40285 0 to 3276.7 units 10 AI15 Angle 40286 -180° to 180° 10 AI16 Magnitude 40287 0 to 3276.7 units 10 AI16 Angle 40288 -180° to 180° 10 AI17 Magnitude 40289 0 to 3276.7 units 10 AI17 Angle 40290 -180° to 180° 10 AI18 Magnitude 40291 0 to 3276.7 units 10 AI18 Angle 40292 -180° to 180° 10 AI19 Magnitude 40293 0 to 3276.7 units 10 AI19 Angle 40294 -180° to 180° 10 AI20 Magnitude 40295 0 to 3276.7 units 10 AI20 Angle 40296 -180° to 180° 10 AI21 Magnitude 40297 0 to 3276.7 units 10 AI21 Angle 40298 -180° to 180° 10 AI22 Magnitude 40299 0 to 3276.7 units 10 AI22 Angle 40300 -180° to 180° 10 AI23 Magnitude 40301 0 to 3276.7 units 10 AI23Angle 40302 -180° to 180° 10 AI24 Magnitude 40303 0 to 3276.7 units 10 AI24 Angle 40304 -180° to 180° 10 AI25 Magnitude 40305 0 to 3276.7 units 10 AI25 Angle 40306 -180° to 180° 10 AI26 Magnitude 40307 0 to 3276.7 units 10 AI26 Angle 40308 -180° to 180° 10 AI27 Magnitude 40309 0 to 3276.7 units 10 AI27 Angle 40310 -180° to 180° 10 AI28 Magnitude 40311 0 to 3276.7 units 10 AI28 Angle 40312 -180° to 180° 10 AI29 Magnitude 40313 0 to 3276.7 units 10 AI29 Angle 40314 -180° to 180° 10 AI30 Magnitude 40315 0 to 3276.7 units 10 AI30 Angle 40316 -180° to 180° 10 AI31 Magnitude 40317 0 to 3276.7 units 10 AI31 Angle 40318 -180° to 180° 10 AI32 Magnitude 40319 0 to 3276.7 units 10 TESLA 3000 User Manual Appendix D-7 Appendix D Modbus Functions AI32 Angle 40320 -180° to 180° 10 AI33 Magnitude 40321 0 to 3276.7 units 10 AI33 Angle 40322 -180° to 180° 10 AI34 Magnitude 40323 0 to 3276.7 units 10 AI34 Angle 40324 -180° to 180° 10 AI35 Magnitude 40325 0 to 3276.7 units 10 AI35 Angle 40326 -180° to 180° 10 AI36 Magnitude 40327 0 to 3276.7 units 10 AI36 Angle 40328 -180° to 180° 10 Total Harmonic Distortion, Single Harmonic Level, DC Metering Channels * not supported yet Appendix D-8 AI1 THD 40513 0 to 327.67% 100 AI1 SHL 40514 0 to 327.67% 100 AI1 DC* 40515 -3276.8 to 3276.7 units 10 AI2 THD 40516 0 to 327.67% 100 AI2 SHL 40517 0 to 327.67% 100 AI2 DC* 40518 -3276.8 to 3276.7 units 10 AI3 THD 40519 0 to 327.67% 100 AI3 SHL 40520 0 to 327.67% 100 AI3 DC* 40521 -3276.8 to 3276.7 units 10 AI4 THD 40522 0 to 327.67% 100 AI4 SHL 40523 0 to 327.67% 100 AI4 DC* 40524 -3276.8 to 3276.7 units 10 AI5 THD 40525 0 to 327.67% 100 AI5 SHL 40526 0 to 327.67% 100 AI5 DC* 40527 -3276.8 to 3276.7 units 10 AI6 THD 40528 0 to 327.67% 100 AI6 SHL 40529 0 to 327.67% 100 AI6 DC* 40530 -3276.8 to 3276.7 units 10 AI7 THD 40531 0 to 327.67% 100 AI7 SHL 40532 0 to 327.67% 100 AI7 DC* 40533 -3276.8 to 3276.7 units 10 AI8 THD 40534 0 to 327.67% 100 AI8 SHL 40535 0 to 327.67% 100 AI8 DC* 40536 -3276.8 to 3276.7 units 10 AI9 THD 40537 0 to 327.67% 100 AI9 SHL 40538 0 to 327.67% 100 AI9 DC* 40539 -3276.8 to 3276.7 units 10 AI10 THD 40540 0 to 327.67% 100 AI10 SHL 40541 0 to 327.67% 100 TESLA 3000 User Manual D01721R02.61 Appendix D Modbus Functions D01721R02.61 AI10 DC* 40542 -3276.8 to 3276.7 units 10 AI11 THD 40543 0 to 327.67% 100 AI11 SHL 40544 0 to 327.67% 100 AI11 DC* 40545 -3276.8 to 3276.7 units 10 AI12 THD 40546 0 to 327.67% 100 AI12 SHL 40547 0 to 327.67% 100 AI12 DC* 40548 -3276.8 to 3276.7 units 10 AI13 THD 40549 0 to 327.67% 100 AI13 SHL 40550 0 to 327.67% 100 AI13 DC* 40551 -3276.8 to 3276.7 units 10 AI14 THD 40552 0 to 327.67% 100 AI14 SHL 40553 0 to 327.67% 100 AI14 DC* 40554 -3276.8 to 3276.7 units 10 AI15 THD 40555 0 to 327.67% 100 AI15 SHL 40556 0 to 327.67% 100 AI15 DC* 40557 -3276.8 to 3276.7 units 10 AI16 THD 40558 0 to 327.67% 100 AI16 SHL 40559 0 to 327.67% 100 AI16 DC* 40560 -3276.8 to 3276.7 units 10 AI17 THD 40561 0 to 327.67% 100 AI17 SHL 40562 0 to 327.67% 100 AI17 DC* 40563 -3276.8 to 3276.7 units 10 AI18 THD 40564 0 to 327.67% 100 AI18 SHL 40565 0 to 327.67% 100 AI18 DC* 40566 -3276.8 to 3276.7 units 10 AI19 THD 40567 0 to 327.67% 100 AI19 SHL 40568 0 to 327.67% 100 AI19 DC* 40569 -3276.8 to 3276.7 units 10 AI20 THD 40570 0 to 327.67% 100 AI20 SHL 40571 0 to 327.67% 100 AI20 DC* 40572 -3276.8 to 3276.7 units 10 AI21 THD 40573 0 to 327.67% 100 AI21 SHL 40574 0 to 327.67% 100 AI21 DC* 40575 -3276.8 to 3276.7 units 10 AI22 THD 40576 0 to 327.67% 100 AI22 SHL 40577 0 to 327.67% 100 AI22 DC* 40578 -3276.8 to 3276.7 units 10 AI23 THD 40579 0 to 327.67% 100 AI23 SHL 40580 0 to 327.67% 100 AI23 DC* 40581 -3276.8 to 3276.7 units 10 TESLA 3000 User Manual Appendix D-9 Appendix D Modbus Functions AI24 THD 40582 0 to 327.67% 100 AI24 SHL 40583 0 to 327.67% 100 AI24 DC* 40584 -3276.8 to 3276.7 units 10 AI25 THD 40585 0 to 327.67% 100 AI25 SHL 40586 0 to 327.67% 100 AI25 DC* 40587 -3276.8 to 3276.7 units 10 AI26 THD 40588 0 to 327.67% 100 AI26 SHL 40589 0 to 327.67% 100 AI26 DC* 40590 -3276.8 to 3276.7 units 10 AI27 THD 40591 0 to 327.67% 100 AI27 SHL 40592 0 to 327.67% 100 AI27 DC* 40593 -3276.8 to 3276.7 units 10 AI28 THD 40594 0 to 327.67% 100 AI28 SHL 40595 0 to 327.67% 100 AI28 DC* 40596 -3276.8 to 3276.7 units 10 AI29 THD 40597 0 to 327.67% 100 AI29 SHL 40598 0 to 327.67% 100 AI29 DC* 40599 -3276.8 to 3276.7 units 10 AI30 THD 40600 0 to 327.67% 100 AI30 SHL 40601 0 to 327.67% 100 AI30 DC* 40602 -3276.8 to 3276.7 units 10 AI31 THD 40603 0 to 327.67% 100 AI31 SHL 40604 0 to 327.67% 100 AI31 DC* 40605 -3276.8 to 3276.7 units 10 AI32 THD 40606 0 to 327.67% 100 AI32 SHL 40607 0 to 327.67% 100 AI32 DC* 40608 -3276.8 to 3276.7 units 10 AI33 THD 40609 0 to 327.67% 100 AI33 SHL 40610 0 to 327.67% 100 AI33 DC* 40611 -3276.8 to 3276.7 units 10 AI34 THD 40612 0 to 327.67% 100 AI34 SHL 40613 0 to 327.67% 100 AI34 DC* 40614 -3276.8 to 3276.7 units 10 AI35 THD 40615 0 to 327.67% 100 AI35 SHL 40616 0 to 327.67% 100 AI35 DC* 40617 -3276.8 to 3276.7 units 10 AI36 THD 40618 0 to 327.67% 100 AI36 SHL 40619 0 to 327.67% 100 AI36 DC* 40620 -3276.8 to 3276.7 units 10 Summation Metering Channels Appendix D-10 TESLA 3000 User Manual D01721R02.61 Appendix D Modbus Functions D01721R02.61 SUM1 Magnitude 40769 0 to 3276.7 units 10 SUM1 Angle 40770 -180° to 180° 10 SUM2 Magnitude 40771 0 to 3276.7 units 10 SUM2 Angle 40772 -180° to 180° 10 SUM3 Magnitude 40773 0 to 3276.7 units 10 SUM3 Angle 40774 -180° to 180° 10 SUM4 Magnitude 40775 0 to 3276.7 units 10 SUM4 Angle 40776 -180° to 180° 10 SUM5 Magnitude 40777 0 to 3276.7 units 10 SUM5 Angle 40778 -180° to 180° 10 SUM6 Magnitude 40779 0 to 3276.7 units 10 SUM6 Angle 40780 -180° to 180° 10 SUM7 Magnitude 40781 0 to 3276.7 units 10 SUM7 Angle 40782 -180° to 180° 10 SUM8 Magnitude 40783 0 to 3276.7 units 10 SUM8 Angle 40784 -180° to 180° 10 SUM9 Magnitude 40785 0 to 3276.7 units 10 SUM9 Angle 40786 -180° to 180° 10 SUM10 Magnitude 40787 0 to 3276.7 units 10 SUM10 Angle 40788 -180° to 180° 10 SUM11 Magnitude 40789 0 to 3276.7 units 10 SUM11 Angle 40790 -180° to 180° 10 SUM12 Magnitude 40791 0 to 3276.7 units 10 SUM12 Angle 40792 -180° to 180° 10 SUM13 Magnitude 40793 0 to 3276.7 units 10 SUM13 Angle 40794 -180° to 180° 10 SUM14 Magnitude 40795 0 to 3276.7 units 10 SUM14 Angle 40796 -180° to 180° 10 SUM15 Magnitude 40797 0 to 3276.7 units 10 SUM15 Angle 40798 -180° to 180° 10 SUM16 Magnitude 40799 0 to 3276.7 units 10 SUM16 Angle 40800 -180° to 180° 10 SUM17 Magnitude 40801 0 to 3276.7 units 10 SUM17 Angle 40802 -180° to 180° 10 SUM18 Magnitude 40803 0 to 3276.7 units 10 SUM18 Angle 40804 -180° to 180° 10 SUM19 Magnitude 40805 0 to 3276.7 units 10 SUM19 Angle 40806 -180° to 180° 10 SUM20 Magnitude 40807 0 to 3276.7 units 10 SUM20 Angle 40808 -180° to 180° 10 TESLA 3000 User Manual Appendix D-11 Appendix D Modbus Functions SUM21 Magnitude 40809 0 to 3276.7 units 10 SUM21 Angle 40810 -180° to 180° 10 SUM22 Magnitude 40811 0 to 3276.7 units 10 SUM22 Angle 40812 -180° to 180° 10 SUM23 Magnitude 40813 0 to 3276.7 units 10 SUM23 Angle 40814 -180° to 180° 10 SUM24 Magnitude 40815 0 to 3276.7 units 10 SUM24 Angle 40816 -180° to 180° 10 SUM25 Magnitude 40817 0 to 3276.7 units 10 SUM25 Angle 40818 -180° to 180° 10 SUM26 Magnitude 40819 0 to 3276.7 units 10 SUM26 Angle 40820 -180° to 180° 10 SUM27 Magnitude 40821 0 to 3276.7 units 10 SUM27 Angle 40822 -180° to 180° 10 SUM28 Magnitude 40823 0 to 3276.7 units 10 SUM28 Angle 40824 -180° to 180° 10 SUM29 Magnitude 40825 0 to 3276.7 units 10 SUM29 Angle 40826 -180° to 180° 10 SUM30 Magnitude 4827 0 to 3276.7 units 10 SUM30 Angle 40828 -180° to 180° 10 SEQ1 Positive 41025 0 to 3276.7 units 10 SEQ1 Negative 41026 0 to 3276.7 units 10 SEQ1 Zero 41027 0 to 3276.7 units 10 SEQ2 Positive 41028 0 to 3276.7 units 10 SEQ2 Negative 41029 0 to 3276.7 units 10 SEQ2 Zero 41030 0 to 3276.7 units 10 SEQ3 Positive 41031 0 to 3276.7 units 10 SEQ3 Negative 41032 0 to 3276.7 units 10 SEQ3 Zero 41033 0 to 3276.7 units 10 SEQ4 Positive 41034 0 to 3276.7 units 10 SEQ4 Negative 41035 0 to 3276.7 units 10 SEQ4 Zero 41036 0 to 3276.7 units 10 SEQ5 Positive 41037 0 to 3276.7 units 10 SEQ5 Negative 41038 0 to 3276.7 units 10 SEQ5 Zero 41039 0 to 3276.7 units 10 SEQ6 Positive 41040 0 to 3276.7 units 10 SEQ6 Negative 41041 0 to 3276.7 units 10 SEQ6 Zero 41042 0 to 3276.7 units 10 SEQ7 Positive 41043 0 to 3276.7 units 10 Sequence Metering Channels Appendix D-12 TESLA 3000 User Manual D01721R02.61 Appendix D Modbus Functions SEQ7 Negative 41044 0 to 3276.7 units 10 SEQ7 Zero 41045 0 to 3276.7 units 10 SEQ8 Positive 41046 0 to 3276.7 units 10 SEQ8 Negative 41047 0 to 3276.7 units 10 SEQ8 Zero 41048 0 to 3276.7 units 10 SEQ9 Positive 41049 0 to 3276.7 units 10 SEQ9 Negative 41050 0 to 3276.7 units 10 SEQ9 Zero 41051 0 to 3276.7 units 10 SEQ10 Positive 41052 0 to 3276.7 units 10 SEQ10 Negative 41053 0 to 3276.7 units 10 SEQ10 Zero 41054 0 to 3276.7 units 10 SEQ11 Positive 41055 0 to 3276.7 units 10 SEQ11 Negative 41056 0 to 3276.7 units 10 SEQ11 Zero 41057 0 to 3276.7 units 10 SEQ12 Positive 41058 0 to 3276.7 units 10 SEQ12 Negative 41059 0 to 3276.7 units 10 SEQ12 Zero 41060 0 to 3276.7 units 10 WV1 P 41281 -3276.8 to 3276.7 W 10 WV1 Q 41282 -3276.8 to 3276.7 Var 10 WV1 S 41283 0 to 3276.7 VA 10 WV2 P 41284 -3276.8 to 3276.7 W 10 WV2 Q 41285 -3276.8 to 3276.7 Var 10 WV2 S 41286 0 to 3276.7 VA 10 WV3 P 41287 -3276.8 to 3276.7 W 10 WV3 Q 41288 -3276.8 to 3276.7 Var 10 WV3 S 41289 0 to 3276.7 VA 10 WV4 P 41290 -3276.8 to 3276.7 W 10 WV4 Q 41291 -3276.8 to 3276.7 Var 10 WV4 S 41292 0 to 3276.7 VA 10 WV5 P 41293 -3276.8 to 3276.7 W 10 WV5 Q 41294 -3276.8 to 3276.7 Var 10 WV5 S 41295 0 to 3276.7 VA 10 WV6 P 41296 -3276.8 to 3276.7 W 10 WV6 Q 41297 -3276.8 to 3276.7 Var 10 WV6 S 41298 0 to 3276.7 VA 10 WV7 P 41299 -3276.8 to 3276.7 W 10 WV7 Q 41300 -3276.8 to 3276.7 Var 10 WV7 S 41301 0 to 3276.7 VA 10 WV8 P 41302 -3276.8 to 3276.7 W 10 Watts/Vars Metering Channels D01721R02.61 TESLA 3000 User Manual Appendix D-13 Appendix D Modbus Functions WV8 Q 41303 -3276.8 to 3276.7 Var 10 WV8 S 41304 0 to 3276.7 VA 10 WV9 P 41305 -3276.8 to 3276.7 W 10 WV9 Q 41306 -3276.8 to 3276.7 Var 10 WV9 S 41307 0 to 3276.7 VA 10 WV10 P 41308 -3276.8 to 3276.7 W 10 WV10 Q 41309 -3276.8 to 3276.7 Var 10 WV10S 41310 0 to 3276.7 VA 10 WV11 P 41311 -3276.8 to 3276.7 W 10 WV11 Q 41312 -3276.8 to 3276.7 Var 10 WV11S 41313 0 to 3276.7 VA 10 WV12 P 41314 -3276.8 to 3276.7 W 10 WV12 Q 41315 -3276.8 to 3276.7 Var 10 WV12S 41316 0 to 3276.7 VA 10 WV13 P 41317 -3276.8 to 3276.7 W 10 WV13 Q 41318 -3276.8 to 3276.7 Var 10 WV13S 41319 0 to 3276.7 VA 10 WV14 P 41320 -3276.8 to 3276.7 W 10 WV14 Q 41321 -3276.8 to 3276.7 Var 10 WV14S 41322 0 to 3276.7 VA 10 WV15 P 41323 -3276.8 to 3276.7 W 10 WV15 Q 41324 -3276.8 to 3276.7 Var 10 WV15S 41325 0 to 3276.7 VA 10 WV16 P 41326 -3276.8 to 3276.7 W 10 WV16 Q 41327 -3276.8 to 3276.7 Var 10 WV16S 41328 0 to 3276.7 VA 10 WV17 P 41329 -3276.8 to 3276.7 W 10 WV17 Q 41330 -3276.8 to 3276.7 Var 10 WV17S 41331 0 to 3276.7 VA 10 WV18 P 41332 -3276.8 to 3276.7 W 10 WV18 Q 41333 -3276.8 to 3276.7 Var 10 WV18S 41334 0 to 3276.7 VA 10 Channel Group 1 Frequency 41537 5/6 f_nominal to 7/6 nominal frequency 100 Channel Group 2 Frequency 41538 5/6 f_nominal to 7/6 nominal frequency 100 Impedance 1Magnitude 41793 0 to 3276.7 ohm 10 Impedance 1 Angle 41794 -180° to 180° 10 Impedance2 Magnitude 41795 0 to 3276.7 ohm 10 Frequency Metering Channels Impedance Metering Channels Appendix D-14 TESLA 3000 User Manual D01721R02.61 Appendix D Modbus Functions D01721R02.61 Impedance 2 Angle 41796 -180° to 180° 10 Impedance 3 Magnitude 41797 0 to 3276.7 ohm 10 Impedance 3 Angle 41798 -180° to 180° 10 Impedance 4 Magnitude 41799 0 to 3276.7 ohm 10 Impedance 4 Angle 41800 -180° to 180° 10 Impedance 5 Magnitude 41801 0 to 3276.7 ohm 10 Impedance 5 Angle 41802 -180° to 180° 10 Impedance 6 Magnitude 41803 0 to 3276.7 ohm 10 Impedance 6 Angle 41804 -180° to 180° 10 Impedance 7 Magnitude 41805 0 to 3276.7 ohm 10 Impedance 7 Angle 41806 -180° to 180° 10 Impedance 8 Magnitude 41807 0 to 3276.7 ohm 10 Impedance 8 Angle 41808 -180° to 180° 10 Impedance 9 Magnitude 41809 0 to 3276.7 ohm 10 Impedance 9 Angle 41810 -180° to 180° 10 Impedance 10 Magnitude 41811 0 to 3276.7 ohm 10 Impedance 10 Angle 41812 -180° to 180° 10 Impedance 11 Magnitude 41813 0 to 3276.7 ohm 10 Impedance 11 Angle 41814 -180° to 180° 10 Impedance 12 Magnitude 41815 0 to 3276.7 ohm 10 Impedance 12 Angle 41816 -180° to 180° 10 Impedance 13 Magnitude 41817 0 to 3276.7 ohm 10 Impedance 13 Angle 41818 -180° to 180° 10 Impedance 14 Magnitude 41819 0 to 3276.7 ohm 10 Impedance 14 Angle 41820 -180° to 180° 10 Impedance 15 Magnitude 41821 0 to 3276.7 ohm 10 Impedance 15 Angle 41822 -180° to 180° 10 Impedance 16 Magnitude 41823 0 to 3276.7 ohm 10 Impedance 16 Angle 41824 -180° to 180° 10 Impedance 17 Magnitude 41825 0 to 3276.7 ohm 10 Impedance 17 Angle 41826 -180° to 180° 10 Impedance 18 Magnitude 41827 0 to 3276.7 ohm 10 Impedance 18 Angle 41828 -180° to 180° 10 Event Information (See Accessing TESLA Event Information below) 42052 – 42144 Length (in 16 bit registers) of the current event message 42052 Event Identification 42053 Event Message 42054–42137 Fault Locator ID 42138 Fault Type 42139 TESLA 3000 User Manual Appendix D-15 Appendix D Modbus Functions Fault Distance 42140 10 Fault Time 42141 – 42144 Power Factor Function 1 Level 42305 0.0 to 1.0 100 Power Factor Function 2 Level 42306 0.0 to 1.0 100 Power Factor Function 3 Level 42307 0.0 to 1.0 100 Power Factor Function 4 Level 42308 0.0 to 1.0 100 Power Factor Function 5 Level 42309 0.0 to 1.0 100 Power Factor Function 6 Level 42310 0.0 to 1.0 100 Power Factor Function 7 Level 42311 0.0 to 1.0 100 Power Factor Function 8 Level 42312 0.0 to 1.0 100 Power Factor Function 9 Level 42313 0.0 to 1.0 100 Power Factor Function 10 Level 42314 0.0 to 1.0 100 Power Factor Function 11 Level 42315 0.0 to 1.0 100 Power Factor Function 12 Level 42316 0.0 to 1.0 100 Power Factor Function 13 Level 42317 0.0 to 1.0 100 Power Factor Function 14 Level 42318 0.0 to 1.0 100 Power Factor Function 15 Level 42319 0.0 to 1.0 100 Power Factor Function 16 Level 42320 0.0 to 1.0 100 Power Factor Function 17 Level 42321 0.0 to 1.0 100 Power Factor Function 18 Level 42322 0.0 to 1.0 100 High/low speed recording space used 42561 0.0 to 100.0 10 Trend Recording Days Accumulated 42817 0 to 90 1 Read Input Register (Function Code 04) No input registers supported. Response from IED indicates “ILLEGAL FUNCTION.” Force Single Coil (Function Code 05) Only the “hold readings” coil can be forced. When active, this coil locks all coil, input and holding register readings simultaneously at their present values. When inactive, coil, input and holding register values will read their most recently available state. Appendix D-16 Channel Type Address Value Hold Readings Read/Write 01 0000: Readings update normally (inactive) FF00: Hold readings (active) TESLA 3000 User Manual D01721R02.61 Appendix D Modbus Functions Preset Single Register (Function Code 06) Channel Address Event Information (See Accessing TESLA Event Information, below) 42099 – 42051 Refresh event list 42049 Value Scaled Up By No data required N/A Acknowledge the current event and get the next event 42050 No data required N/A Get the next event (without acknowledge) 42051 No data required N/A Diagnostic Subfunctions (Function Code 08) Return Query Data (Subfunction 00) This provides an echo of the submitted message. Restart Comm. Option (Subfunction 01) This restarts the Modbus communications process. Force Listen Only Mode (Subfunction 04) No response is returned. IED enters “Listen Only” mode. This mode can only be exited by the “Restart Comm. Option” command. Report Slave ID (Function Code 17/0x11) A fixed response is returned by the IED, including system model, version and issue numbers. Channel Type Bytes Value Model Number Read Only 0 and 1 0x07D00 = 2000 decimal Version Number Read Only 2 and 3 Version number Issue Number Read Only 4 and 5 Issue number • The TESLA IED model number is 3000. • Version and issue will each be positive integers, say X and Y. • The TESLA is defined as “Model 3000, Version X Issue Y” Accessing TESLA Event Information All TESLA detector event messages displayed in the Event Log are available via Modbus. This includes fault location information. The following controls are available. Refresh Event List (Function Code 6, address 42049): Fetches the latest events from the TESLA's event log and makes them available for Modbus access. The most recent event becomes the current event available for reading. Acknowledge Current Event and Get Next Event (Function Code 6, address 42050): Clears the current event from the read registers and places the next event into them. An acknowledged event is no longer available for reading. Get Next Event (Function Code 6, address 42051): Places the next event in the read registers without acknowledging the current event. The current event will reappear in the list when Refresh Event List is used. D01721R02.61 TESLA 3000 User Manual Appendix D-17 Appendix D Modbus Functions Size of Current Event Message (Function Code 3, address 42052): Indicates the number of 16 bit registers used to contain the current event. Event data is stored with two characters per register. A reading of zero indicates that there are no unacknowledged events available in the current set. (NB. The Refresh Event List function can be used to check for new events that have occurred since the last Refresh Event List.) Fault Location Event Preset When Set to 0x464C (Function Code 3, address 42053): Identifies fault location events. These events are identified by “FL” (0x464C) in this register. Non-fault location events contain “ ” in this location. Read Event Message (Function Code 3, addresses 42054 - 42137): Contains the current event message. Two ASCII characters are packed into each 16 bit register. All unused registers in the set are set to 0. Fault Location – Fault Locator ID (Function Code 3, address 42138): If the current event is a fault location event, this register contains the ID of the fault locator. The numbers from 1 to 5 are used for 18-channel recorders; the numbers from 1 to 10 are used for 36-channel recorders. Fault Information – Type (Function Code 3, address 42139): If the current event is a fault location event, this register contains the type of the fault. The following type bitmap: 0x0001 - Phase A 0x0002 - Phase B 0x0004 - Phase C 0x0008 - Ground Any number of the flags may be set for a given fault. If recorder could not determine the fault type, then the register will not have any flags set and will read 0x0000. Fault Information – Fault Distance (Function Code 3, address 42140): If the current event is a fault location event, this register contains the distance to the fault. It is scaled up by a factor of 10. The units are the same as the units set in the relay configuration. Fault Information –Time of Fault (Function Code 3, addresses 42141 and 42144): If the current event is a fault location event, these registers contain the time of the fault in seconds since 1970. Each of these 16-bit registers contains an 8-bit portion of a 32-bit time value. Register 42141 contains the upper 16 bits, register 42144 contains the lower 16 bits. Register Appendix D-18 Value Meaning High Byte Low Byte 42052 0x00 0x1B Event text size = 27 (0x1B hex) 42053 0x46 0x4C ‘F,L’ - Fault locator event 42054 0x32 0x30 ‘2’, ‘0’ 42055 0x30 0x30 ‘0’, ‘0’ 42056 0x53 0x65 ‘S’, ‘e’ 42057 0x70 0x32 ‘p’, ‘2’ 42058 0x31 0x20 ‘1’, ‘ ’ 42059 0x32 0x30 ‘2’, ‘0’ 42060 0x3A 0x31 ‘:’, ‘1’ 42061 0x36 0x3A ‘6’, ‘:’ 42062 0x31 0x36 ‘1’, ‘6’ 42063 0x2E 0x39 ‘.’, ‘9’ TESLA 3000 User Manual D01721R02.61 Appendix D Modbus Functions D01721R02.61 Register Value Meaning 42064 0x36 0x36 ‘6’, ‘6’ 42065 0x20 0x3A ‘ ’, ‘:’ 42066 0x20 0x4C ‘ ’, ‘L’ 42067 0x69 0x6E ‘i’, ‘n’ 42068 0x65 0x20 ‘e’, ‘ ‘ 42069 0x31 0x36 ‘1’, ‘6’ 42070 0x3A 0x46 ‘:’, ‘F’ 42071 0x4C 0x6F ‘L’, ‘o’ 42072 0x63 0x20 ‘c’, ‘ ‘ 42073 0x42 0x47 ‘B’, ‘G’ 42074 0x20 0x33 ‘ ’, ‘3’ 42075 0x39 0x2E ‘9’, ‘.’ 42076 0x37 0x20 ‘7’, ‘ ‘ 42077 0x6D 0x69 ‘m’, ‘i’ 42078 0x6C 0x65 ‘l’, ‘e’ 42079 0x73 0x00 ‘s’ TESLA 3000 User Manual Appendix D-19 Appendix E DNP3 Reference The SCADA port supports DNP3. All metering values available through the terminal user interface are available by DNP3 protocol. Included are the device profile, implementation table and the point list for the DNP3 protocol. Device Profile Vendor Name: ERLPhase Power Technologies Device Name: Recorder Model # Highest DNP Level Supported: Device Function: For Requests: 2 _ Master For Responses: 2 x Slave Maximum Data Link Frame Size (octets): Transmitted: 292 Maximum Application Fragme Size (octets): Transmitted: 2048 Received: 292 Received: 2048 Maximum Data Link Re-tries: Maximum Application Layer Re-tries: _ None x None x Fixed at 3 _ Configurable, range __ to __ _ Configurable, range __ to __ Requires Data Link Layer Confirmation: Requires Application Layer Confirmation: _ Never _ Never _ Always _ Always (not recommended) _ Sometimes x When reporting Event Data (Slave) x Configurable, either always or never x When sending multi-fragment responses (Slave) _ Sometimes _ Configurable Timeouts (in seconds) while waiting for: Data Link Confirm __None x Fixed at 2 Complete Application Fragment x None __Fixed at 2 Application Confirm __None x Fixed at 5 Complete Application Response x None __Fixed at 2 Others__________________________ Select to execute delay __None x Fixed at 10 Sends/Executes Control Operations: WRITE Binary Outputs x Never __Always SELECT/OPERATE __Never x Always DIRECT OPERATE __Never x Always DIRECT OPERATE No ACK __Never x Always Count > 1 x Never __Always Pulse On __Never x Always Pulse Off x Never __Always Latch On __Never x Always Latch Off __Never x Always Queue x Never __Always Clear Queue x Never __Always Maximum number of control objects per request: 16 Notes: Control Trip/Close - Code Combination supported: Latch On/NUL Latch Off/NUL Pulse On/NUL (Pulse duration fixed at 1 s) Report Binary Input Change Events when no specific variation requested: D01721R02.61 Reports time-tagged Binary Input Change Events when no specific variation requested __Never __Never __Only time-tagged x Binary Input Change with Time x Only non-time-tagged _ Binary Input Change with Relative Time _ Configurable to send both, one or the other _ Configurable Sends Unsolicited Response: Sends Static Data in Unsolicited Responses: x Never x Never _ Configurable _ When Device Restarts _Only certain objects _ When Status Flags Change _ Sometimes No other options are permitted. TESLA 3000 User Manual Appendix E-1 Appendix E DNP3 Reference _ ENABLE/DISABLE UNSOLICITED Function codes supported Default Counter Object/Variation: Counters Roll Over at: x No Counter Reported x No Counters Reported _ Configurable _ Configurable _ Default Object ________________ _ 16 Bits _ Default Variation _______________ _ 32 Bits _ Point-by-point list attached _ Other Value __________________ _ Point-by-point list attached Implementation Table Object Request Response Grp Var Description Function Codes Qualifier Codes Function Codes Qualifier Codes 1 0 Binary Input -All Variations 1(read) 0x00, 0x01, 0x06, 0x07,0x08, 0x17,0x28 1 1 Binary Input (default) 1(read) 0x00, 0x01, 0x06, 0x07,0x08, 0x17,0x28 129 (response) 0x00 1 2 Binary Input with status 1(read) 0x00, 0x01, 0x06, 0x07,0x08, 0x17,0x28 129 (response) 0x00 2 0 Binary Input Change - All Variations 1(read) 0x06, 0x07,0x08 2 1 Binary Input Change without Time 1(read) 0x06, 0x07,0x08 129 (response) 0x17 2 2 Binary Input Change with Time (default) 1(read) 0x06, 0x07,0x08 129 (response) 0x17 2 3 Binary Input Change with Relative Time 1(read) 0x06, 0x07,0x08 129 (response) 0x17 10 0 Binary Output - All Variations 1(read) 0x00, 0x01, 0x06, 0x07,0x08, 0x17,0x28 10 2 Binary Output Status (default) 1(read) 0x00, 0x01, 0x06, 0x07,0x08, 0x17,0x28 129 (response) 0x00 30 0 Analog Input - All Variations 1(read) 0x00, 0x01, 0x06, 0x07,0x08, 0x17,0x28 129 (response) 0x01 30 1 32-bit Analog Input 1(read) 0x00, 0x01, 0x06, 0x07,0x08, 0x17,0x28 30 2 16-bit Analog Input 1(read) 0x00, 0x01, 0x06, 0x07,0x08, 0x17,0x28 129 (response) 0x01 30 3 32-bit Analog Input without flag 1(read) 0x00, 0x01, 0x06, 0x07,0x08, 0x17,0x28 129 (response) 0x01 30 4 16-bit Analog Input without flag (default) 1(read) 0x00, 0x01, 0x06, 0x07,0x08, 0x17,0x28 129 (response) 0x01 32 0 Analog Input Change Event - All Variations 1(read) 0x06, 0x07,0x08 129 (response) 0x28 32 1 Analog Input Change Event - 32-bit without Time 1(read) 0x06, 0x07,0x08 129 (response) 0x28 32 2 Analog Input Change Event - 16-bit without Time 1(read) 0x06, 0x07,0x08 129 (response) 0x28 32 3 Analog Input Change Event - 32-bit with Time 1(read) 0x06, 0x07,0x08 129 (response) 0x28 32 4 Analog Input Change Event - 16-bit with Time (default) 1(read) 0x06, 0x07,0x08 129 (response) 0x28 51 1 Time and data CTO 129 (response) 0x07, quantity=1 52 1 Time Delay Coarse 129 (response) 0x07, quantity=1 60 1 Class 0 Data 1(read) 0x06 60 2 Class 1 Data 1(read) 0x06, 0x07,0x08 Appendix E-2 TESLA 3000 User Manual D01721R02.61 Appendix E DNP3 Reference Object Request Response Grp Var Description Function Codes Qualifier Codes 60 3 Class 2 Data 1(read) 0x06, 0x07,0x08 80 1 Internal Indications 2 (write) 0x00, index=7 110 0 Octet String 1 (read) 111 0 Octet String Change Event 1 (read) No Object 14(warm start) Point List Function Codes Qualifier Codes 0x06 129 (response) 0x07 0x06 129 (response) 0x07 The Point List can be printed through TESLA Control Panel to display the point names as they are configured. “Printing a SCADA Address List” on page 8-45. Binary Inputs (Obj 1, 2) Static Points Change Event Points Object group 1 2 Object variation 1 - Binary Input (default) 1 - Binary Input Change without Time 2 - Binary Input with Status 2 - Binary Input Change with Time 3 - Binary Input Change with Relative Time Class 0 1 Change Event Buffer Size Name D01721R02.61 200 Point Index Change Event Class External Input 1 0 1 External Input 2 1 1 External Input 3 2 1 External Input 4 3 1 External Input 5 4 1 External Input 6 5 1 External Input 7 6 1 External Input 8 7 1 External Input 9 8 1 External Input 10 9 1 External Input 11 10 1 External Input 12 11 1 External Input 13 12 1 TESLA 3000 User Manual Appendix E-3 Appendix E DNP3 Reference Name Appendix E-4 Point Index Change Event Class External Input 14 13 1 External Input 15 14 1 External Input 16 15 1 External Input 17 16 1 External Input 18 17 1 External Input 19 18 1 External Input 20 19 1 External Input 21 20 1 External Input 22 21 1 External Input 23 22 1 External Input 24 23 1 External Input 25 24 1 External Input 26 25 1 External Input 27 26 1 External Input 28 27 1 External Input 29 28 1 External Input 30 29 1 External Input 31 30 1 External Input 32 31 1 External Input 33 32 1 External Input 34 33 1 External Input 35 34 1 External Input 36 35 1 External Input 37 36 1 External Input 38 37 1 External Input 39 38 1 External Input 40 39 1 External Input 41 40 1 External Input 42 41 1 External Input 43 42 1 External Input 44 43 1 External Input 45 44 1 External Input 46 45 1 External Input 47 46 1 External Input 48 47 1 External Input 49 48 1 External Input 50 49 1 External Input 51 50 1 TESLA 3000 User Manual D01721R02.61 Appendix E DNP3 Reference Name Point Index Change Event Class External Input 52 51 1 External Input 53 52 1 External Input 54 53 1 External Input 55 54 1 External Input 56 55 1 External Input 57 56 1 External Input 58 57 1 External Input 59 58 1 External Input 60 59 1 External Input 61 60 1 External Input 62 61 1 External Input 63 62 1 External Input 64 63 1 Fault Information Available for Fault Locator 1 64 1 Fault Information Available for Fault Locator 2 65 1 Fault Information Available for Fault Locator 3 66 1 Fault Information Available for Fault Locator 4 67 1 Fault Information Available for Fault Locator 5 68 1 Fault Information Available for Fault Locator 6 69 1 Fault Information Available for Fault Locator 7 70 1 Fault Information Available for Fault Locator 8 71 1 Fault Information Available for Fault Locator 9 72 1 Fault Information Available for Fault Locator 10 73 1 Binary Outputs (Obj 10) Static Points Change Event Points Object Group 10 Not Applicable Object Variation 2 – Binary Output Status (default) Not Applicable Class 0 Not Applicable Note: Binary outputs are scanned with 500 ms resolution. No change event buffer. D01721R02.61 TESLA 3000 User Manual Appendix E-5 Appendix E DNP3 Reference Appendix E-6 Name Point Index Change Event Class Logic 1 0 N/A Logic 2 1 N/A Logic 3 2 N/A Logic 4 3 N/A Logic 5 4 N/A Logic 6 5 N/A Logic 7 6 N/A Logic 8 7 N/A Logic 9 8 N/A Logic 10 9 N/A Logic 11 10 N/A Logic 12 11 N/A Logic 13 12 N/A Logic1 4 13 N/A Logic 15 14 N/A Logic 16 15 N/A Logic 17 16 N/A Logic 18 17 N/A Logic 19 18 N/A Logic 20 19 N/A Logic 21 20 N/A Logic 22 21 N/A Logic 23 22 N/A Logic 24 23 N/A Logic 25 24 N/A Logic 26 25 N/A Logic 27 26 N/A Logic 28 27 N/A Logic 29 28 N/A Logic 30 29 N/A Output Contact 2 30 N/A Output Contact 3 31 N/A Output Contact 4 32 N/A Output Contact 5 33 N/A Output Contact 6 34 N/A Output Contact 7 35 N/A TESLA 3000 User Manual D01721R02.61 Appendix E DNP3 Reference Name Point Index Change Event Class Output Contact 8 36 N/A High/low speed recording active 37 N/A High/low speed recording space nearly full alarm 38 N/A Trend Recording Active 39 N/A Trend Recording Accumulation Alarm 40 N/A Retrieve Next Fault Information Event for Fault Locator 1 41 N/A Retrieve Next Fault Information Event for Fault Locator 2 42 N/A Retrieve Next Fault Information Event for Fault Locator 3 43 N/A Retrieve Next Fault Information Event for Fault Locator 4 44 N/A Retrieve Next Fault Information Event for Fault Locator 5 45 N/A Retrieve Next Fault Information Event for Fault Locator 6 46 N/A Retrieve Next Fault Information Event for Fault Locator 7 47 N/A Retrieve Next Fault Information Event for Fault Locator 8 48 N/A Retrieve Next Fault Information Event for Fault Locator 9 49 N/A Retrieve Next Fault Information Event for Fault Locator 10 50 N/A Analog Inputs (Obj 30, 32) Static Points Change Event Points Object group 30 32 Object variation 1 - 32-bit Analog Input 1 - Analog Input Change - 32-bit without Time 2 - 16-bit Analog Input 2 - Analog Input Change - 16-bit without Time (default) 3 - 32-bit Analog Input without flag 3 - Analog Input Change - 32-bit with Time 4 - 16-bit Analog Input without flag (default) 4 - Analog Input Change - 16-bit with Time 0 2 Class Change Event Buffer Size Name D01721R02.61 200 Point Index Units Scale Change Event Class 10 2 Analog Input 1 Magnitude 0 Analog Input 1 Angle 1 degrees 10 2 Analog Input 1 THD 2 % 100 2 Analog Input 1 SHL 3 % 100 2 Analog Input 1 DC 4 10 2 TESLA 3000 User Manual Appendix E-7 Appendix E DNP3 Reference Name Appendix E-8 Point Index Units Scale Change Event Class 10 2 Analog Input 2 Magnitude 5 Analog Input 2 Angle 6 degrees 10 2 Analog Input 2 THD 7 % 100 2 Analog Input 2 SHL 8 % 100 2 Analog Input 2 DC 9 10 2 Analog Input 3 Magnitude 10 10 2 Analog Input 3 Angle 11 degrees 10 2 Analog Input 3 THD 12 % 100 2 Analog Input 3 SHL 13 % 100 2 Analog Input 3 DC 14 10 2 Analog Input 4 Magnitude 15 10 2 Analog Input 4 Angle 16 degrees 10 2 Analog Input 4 THD 17 % 100 2 Analog Input 4 SHL 18 % 100 2 Analog Input 4 DC 19 10 2 Analog Input 5 Magnitude 20 10 2 Analog Input 5 Angle 21 degrees 10 2 Analog Input 5 THD 22 % 100 2 Analog Input 5 SHL 23 % 100 2 Analog Input 5 DC 24 10 2 Analog Input 6 Magnitude 25 10 2 Analog Input 6 Angle 26 degrees 10 2 Analog Input 6 THD 27 % 100 2 Analog Input 6 SHL 28 % 100 2 Analog Input 6 DC 29 10 2 Analog Input 7 Magnitude 30 10 2 Analog Input 7 Angle 31 degrees 10 2 Analog Input 7 THD 32 % 100 2 Analog Input 7 SHL 33 % 100 2 Analog Input 7 DC 34 10 2 Analog Input 8 Magnitude 35 10 2 Analog Input 8 Angle 36 degrees 10 2 Analog Input 8 THD 37 % 100 2 Analog Input 8 SHL 38 % 100 2 Analog Input 8 DC 39 10 2 Analog Input 9 Magnitude 40 10 2 Analog Input 9 Angle 41 10 2 TESLA 3000 User Manual degrees D01721R02.61 Appendix E DNP3 Reference Point Index Units Scale Change Event Class Analog Input 9 THD 42 % 100 2 Analog Input 9 SHL 43 % 100 2 Analog Input 9 DC 44 10 2 Analog Input 10 Magnitude 45 10 2 Analog Input 10 Angle 46 degrees 10 2 Analog Input 10 THD 47 % 100 2 Analog Input 10 SHL 48 % 100 2 Analog Input 10 DC 49 10 2 Analog Input 11 Magnitude 50 10 2 Analog Input 11 Angle 51 degrees 10 2 Analog Input 11 THD 52 % 100 2 Analog Input 11 SHL 53 % 100 2 Analog Input 11 DC 54 10 2 Analog Input 12 Magnitude 55 10 2 Analog Input 12 Angle 56 degrees 10 2 Analog Input 12 THD 57 % 100 2 Analog Input 12 SHL 58 % 100 2 Analog Input 12 DC 59 10 2 Analog Input 13 Magnitude 60 10 2 Analog Input 13 Angle 61 degrees 10 2 Analog Input 13 THD 62 % 100 2 Analog Input 13 SHL 63 % 100 2 Analog Input 13 DC 64 10 2 Analog Input 14 Magnitude 65 10 2 Analog Input 14 Angle 66 degrees 10 2 Analog Input 14 THD 67 % 100 2 Analog Input 14 SHL 68 % 100 2 Analog Input 14 DC 69 10 2 Analog Input 15 Magnitude 70 10 2 Analog Input 15 Angle 71 degrees 10 2 Analog Input 15 THD 72 % 100 2 Analog Input 15 SHL 73 % 100 2 Analog Input 15 DC 74 10 2 Analog Input 16 Magnitude 75 10 2 Analog Input 16 Angle 76 degrees 10 2 Analog Input 16 THD 77 % 100 2 Analog Input 16 SHL 78 % 100 2 Name D01721R02.61 TESLA 3000 User Manual Appendix E-9 Appendix E DNP3 Reference Name Appendix E-10 Point Index Units Scale Change Event Class Analog Input 16 DC 79 10 2 Analog Input 17 Magnitude 80 10 2 Analog Input 17 Angle 81 degrees 10 2 Analog Input 17 THD 82 % 100 2 Analog Input 17 SHL 83 % 100 2 Analog Input 17 DC 84 10 2 Analog Input 18 Magnitude 85 10 2 Analog Input 18 Angle 86 degrees 10 2 Analog Input 18 THD 87 % 100 2 Analog Input 18 SHL 88 % 100 2 Analog Input 18 DC 89 10 2 Analog Input 19 Magnitude 90 10 2 Analog Input 19 Angle 91 degrees 10 2 Analog Input 19 THD 92 % 100 2 Analog Input 19 SHL 93 % 100 2 Analog Input 19 DC 94 10 2 Analog Input 20 Magnitude 95 10 2 Analog Input 20 Angle 96 degrees 10 2 Analog Input 20 THD 97 % 100 2 Analog Input 20 SHL 98 % 100 2 Analog Input 20 DC 99 10 2 Analog Input 21 Magnitude 100 10 2 Analog Input 21 Angle 101 degrees 10 2 Analog Input 21 THD 102 % 100 2 Analog Input 21 SHL 103 % 100 2 Analog Input 21 DC 104 10 2 Analog Input 22 Magnitude 105 10 2 Analog Input 22 Angle 106 degrees 10 2 Analog Input 22 THD 107 % 100 2 Analog Input 22 SHL 108 % 100 2 Analog Input 22 DC 109 10 2 Analog Input 23 Magnitude 110 10 2 Analog Input 23 Angle 111 degrees 10 2 Analog Input 23 THD 112 % 100 2 Analog Input 23 SHL 113 % 100 2 Analog Input 23 DC 114 10 2 Analog Input 24 Magnitude 115 10 2 TESLA 3000 User Manual D01721R02.61 Appendix E DNP3 Reference Point Index Units Scale Change Event Class Analog Input 24 Angle 116 degrees 10 2 Analog Input 24 THD 117 % 100 2 Analog Input 24 SHL 118 % 100 2 Analog Input 24 DC 119 10 2 Analog Input 25 Magnitude 120 10 2 Analog Input 25 Angle 121 degrees 10 2 Analog Input 25 THD 122 % 100 2 Analog Input 25 SHL 123 % 100 2 Analog Input 25 DC 124 10 2 Analog Input 26 Magnitude 125 10 2 Analog Input 26 Angle 126 degrees 10 2 Analog Input 26 THD 127 % 100 2 Analog Input 26 SHL 128 % 100 2 Analog Input 26 DC 129 10 2 Analog Input 27 Magnitude 130 10 2 Analog Input 27 Angle 131 degrees 10 2 Analog Input 27 THD 132 % 100 2 Analog Input 27 SHL 133 % 100 2 Analog Input 27 DC 134 10 2 Analog Input 28 Magnitude 135 10 2 Analog Input 28 Angle 136 degrees 10 2 Analog Input 28 THD 137 % 100 2 Analog Input 28 SHL 138 % 100 2 Analog Input 28 DC 139 10 2 Analog Input 29 Magnitude 140 10 2 Analog Input 29 Angle 141 degrees 10 2 Analog Input 29 THD 142 % 100 2 Analog Input 29 SHL 143 % 100 2 Analog Input 29 DC 144 10 2 Analog Input 30 Magnitude 145 10 2 Analog Input 30 Angle 146 degrees 10 2 Analog Input 30 THD 147 % 100 2 Analog Input 30 SHL 148 % 100 2 Analog Input 30 DC 149 10 2 Analog Input 31 Magnitude 150 10 2 Analog Input 31 Angle 151 degrees 10 2 Analog Input 31 THD 152 % 100 2 Name D01721R02.61 TESLA 3000 User Manual Appendix E-11 Appendix E DNP3 Reference Point Index Units Scale Change Event Class Analog Input 31 SHL 153 % 100 2 Analog Input 31 DC 154 10 2 Analog Input 32 Magnitude 155 10 2 Analog Input 32 Angle 156 degrees 10 2 Analog Input 32 THD 157 % 100 2 Analog Input 32 SHL 158 % 100 2 Analog Input 32 DC 159 10 2 Analog Input 33 Magnitude 160 10 2 Analog Input 33 Angle 161 degrees 10 2 Analog Input 33 THD 162 % 100 2 Analog Input 33 SHL 163 % 100 2 Analog Input 33 DC 164 10 2 Analog Input 34 Magnitude 165 10 2 Analog Input 34 Angle 166 degrees 10 2 Analog Input 34 THD 167 % 100 2 Analog Input 34 SHL 168 % 100 2 Analog Input 34 DC 169 10 2 Analog Input 35 Magnitude 170 10 2 Analog Input 35 Angle 171 degrees 10 2 Analog Input 35 THD 172 % 100 2 Analog Input 35 SHL 173 % 100 2 Analog Input 35 DC 174 10 2 Analog Input 36 Magnitude 175 10 2 Analog Input 36 Angle 176 degrees 10 2 Analog Input 36 THD 177 % 100 2 Analog Input 36 SHL 178 % 100 2 Analog Input 36 DC 179 10 2 Summation 1 Magnitude 180 10 2 Summation 1 Angle 181 10 2 Summation 2 Magnitude 182 10 2 Summation 2 Angle 183 10 2 Summation 3 Magnitude 184 10 2 Summation 3 Angle 185 10 2 Summation 4 Magnitude 186 10 2 Summation 4 Angle 187 10 2 Summation 5 Magnitude 188 10 2 Summation 5 Angle 189 10 2 Name Appendix E-12 TESLA 3000 User Manual degrees degrees degrees degrees degrees D01721R02.61 Appendix E DNP3 Reference Name D01721R02.61 Point Index Summation 6 Magnitude 190 Summation 6 Angle 191 Summation 7 Magnitude 192 Summation 7 Angle 193 Summation 8 Magnitude 194 Summation 8 Angle 195 Summation 9 Magnitude 196 Summation 9 Angle 197 Summation 10 Magnitude 198 Summation 10 Angle 199 Summation 11 Magnitude 200 Summation 11 Angle 201 Summation 12 Magnitude 202 Summation 12 Angle 203 Summation 13 Magnitude 204 Summation 13 Angle 205 Summation 14 Magnitude 206 Summation 14 Angle 207 Summation 15 Magnitude 208 Summation 15 Angle 209 Summation 16 Magnitude 210 Summation 16 Angle 211 Summation 17 Magnitude 212 Summation 17 Angle 213 Summation 18 Magnitude 214 Summation 18 Angle 215 Summation 19 Magnitude 216 Summation 19 Angle 217 Summation 20 Magnitude 218 Summation 20 Angle 219 Summation 21 Magnitude 220 Summation 21 Angle 221 Summation 22 Magnitude 222 Summation 22 Angle 223 Summation 23 Magnitude 224 Summation 23 Angle 225 Summation 24 Magnitude 226 TESLA 3000 User Manual Units degrees degrees degrees degrees degrees degrees degrees degrees degrees degrees degrees degrees degrees degrees degrees degrees degrees degrees Scale Change Event Class 10 2 10 2 10 2 10 2 10 2 10 2 10 2 10 2 10 2 10 2 10 2 10 2 10 2 10 2 10 2 10 2 10 2 10 2 10 2 10 2 10 2 10 2 10 2 10 2 10 2 10 2 10 2 10 2 10 2 10 2 10 2 10 2 10 2 10 2 10 2 10 2 10 2 Appendix E-13 Appendix E DNP3 Reference Point Index Units Scale Change Event Class Summation 24 Angle 227 degrees 10 2 Summation 25 Magnitude 228 10 2 Summation 25 Angle 229 10 2 Summation 26 Magnitude 230 10 2 Summation 26 Angle 231 10 2 Summation 27 Magnitude 232 10 2 Summation 27 Angle 233 10 2 Summation 28 Magnitude 234 10 2 Summation 28 Angle 235 10 2 Summation 29 Magnitude 236 10 2 Summation 29 Angle 237 10 2 Summation 30 Magnitude 238 10 2 Summation 30 Angle 239 10 2 Sequence Function 1 Positive 240 10 2 Sequence Function 1 Negative 241 10 2 Sequence Function 1 Zero 242 10 2 Sequence Function 2 Positive 243 10 2 Sequence Function 2 Negative 244 10 2 Sequence Function 2 Zero 245 10 2 Sequence Function 3 Positive 246 10 2 Sequence Function 3 Negative 247 10 2 Sequence Function 3 Zero 248 10 2 Sequence Function 4 Positive 249 10 2 Sequence Function 4 Negative 250 10 2 Sequence Function 4 Zero 251 10 2 Sequence Function 5 Positive 252 10 2 Sequence Function 5 Negative 253 10 2 Sequence Function 5 Zero 254 10 2 Sequence Function 6 Positive 255 10 2 Sequence Function 6 Negative 256 10 2 Sequence Function 6 Zero 257 10 2 Sequence Function 7 Positive 258 10 2 Sequence Function 7 Negative 259 10 2 Sequence Function 7 Zero 260 10 2 Sequence Function 8 Positive 261 10 2 Sequence Function 8 Negative 262 10 2 Sequence Function 8 Zero 263 10 2 Name Appendix E-14 TESLA 3000 User Manual degrees degrees degrees degrees degrees degrees D01721R02.61 Appendix E DNP3 Reference Name D01721R02.61 Point Index Units Scale Change Event Class Sequence Function 9 Positive 264 10 2 Sequence Function 9 Negative 265 10 2 Sequence Function 9 Zero 266 10 2 Sequence Function 10 Positive 267 10 2 Sequence Function 10 Negative 268 10 2 Sequence Function 10 Zero 269 10 2 Sequence Function 11 Positive 270 10 2 Sequence Function 11 Negative 271 10 2 Sequence Function 11 Zero 272 10 2 Sequence Function 12 Positive 273 10 2 Sequence Function 12 Negative 274 10 2 Sequence Function 12 Zero 275 10 2 Watts/Vars Function 1 P 276 MW 10 2 Watts/Vars Function 1 Q 277 MVAR 10 2 Watts/Vars Function 1 S 278 MVA 10 2 Watts/Vars Function 2 P 279 MW 10 2 Watts/Vars Function 2 Q 280 MVAR 10 2 Watts/Vars Function 2 S 281 MVA 10 2 Watts/Vars Function 3 P 282 MW 10 2 Watts/Vars Function 3 Q 283 MVAR 10 2 Watts/Vars Function 3 S 284 MVA 10 2 Watts/Vars Function 4 P 285 MW 10 2 Watts/Vars Function 4 Q 286 MVAR 10 2 Watts/Vars Function 4 S 287 MVA 10 2 Watts/Vars Function 5 P 288 MW 10 2 Watts/Vars Function 5 Q 289 MVAR 10 2 Watts/Vars Function 5 S 290 MVA 10 2 Watts/Vars Function 6 P 291 MW 10 2 Watts/Vars Function 6 Q 292 MVAR 10 2 Watts/Vars Function 6 S 293 MVA 10 2 Watts/Vars Function 7 P 294 MW 10 2 Watts/Vars Function 7 Q 295 MVAR 10 2 Watts/Vars Function 7 S 296 MVA 10 2 Watts/Vars Function 8 P 297 MW 10 2 Watts/Vars Function 8 Q 298 MVAR 10 2 Watts/Vars Function 8 S 299 MVA 10 2 Watts/Vars Function 9 P 300 MW 10 2 TESLA 3000 User Manual Appendix E-15 Appendix E DNP3 Reference Point Index Units Scale Change Event Class Watts/Vars Function 9 Q 301 MVAR 10 2 Watts/Vars Function 9 S 302 MVA 10 2 Watts/Vars Function 10 P 303 MW 10 2 Watts/Vars Function 10 Q 304 MVAR 10 2 Watts/Vars Function 10 S 305 MVA 10 2 Watts/Vars Function 11 P 306 MW 10 2 Watts/Vars Function 11 Q 307 MVAR 10 2 Watts/Vars Function 11 S 308 MVA 10 2 Watts/Vars Function 12 P 309 MW 10 2 Watts/Vars Function 12 Q 310 MVAR 10 2 Watts/Vars Function 12 S 311 MVA 10 2 Watts/Vars Function 13 P 312 MW 10 2 Watts/Vars Function 13 Q 313 MVAR 10 2 Watts/Vars Function 13 S 314 MVA 10 2 Watts/Vars Function 14 P 315 MW 10 2 Watts/Vars Function 14 Q 316 MVAR 10 2 Watts/Vars Function 14 S 317 MVA 10 2 Watts/Vars Function 15 P 318 MW 10 2 Watts/Vars Function 15 Q 319 MVAR 10 2 Watts/Vars Function 15 S 320 MVA 10 2 Watts/Vars Function 16 P 321 MW 10 2 Watts/Vars Function 16 Q 322 MVAR 10 2 Watts/Vars Function 16 S 323 MVA 10 2 Watts/Vars Function 17 P 324 MW 10 2 Watts/Vars Function 17 Q 325 MVAR 10 2 Watts/Vars Function 17 S 326 MVA 10 2 Watts/Vars Function 18 P 327 MW 10 2 Watts/Vars Function 18 Q 328 MVAR 10 2 Watts/Vars Function 18 S 329 MVA 10 2 Group 1 Frequency 330 Hz 100 2 Group 2 Frequency 331 Hz 100 2 Impedance Function 1 Mag 332 ohms 10 2 Impedance Function 1 Angle 333 degrees 10 2 Impedance Function 2 Mag 334 ohms 10 2 Impedance Function 2 Angle 335 degrees 10 2 Impedance Function 3 Mag 336 ohms 10 2 Impedance Function 3 Angle 337 degrees 10 2 Name Appendix E-16 TESLA 3000 User Manual D01721R02.61 Appendix E DNP3 Reference Point Index Units Scale Change Event Class Impedance Function 4 Mag 338 ohms 10 2 Impedance Function 4 Angle 339 degrees 10 2 Impedance Function 5 Mag 340 ohms 10 2 Impedance Function 5 Angle 341 degrees 10 2 Impedance Function 6 Mag 342 ohms 10 2 Impedance Function 6 Angle 343 degrees 10 2 Impedance Function 7 Mag 344 ohms 10 2 Impedance Function 7 Angle 345 degrees 10 2 Impedance Function 8 Mag 346 ohms 10 2 Impedance Function 8 Angle 347 degrees 10 2 Impedance Function 9 Mag 348 ohms 10 2 Impedance Function 9 Angle 349 degrees 10 2 Impedance Function 10 Mag 350 ohms 10 2 Impedance Function 10 Angle 351 degrees 10 2 Impedance Function 11 Mag 352 ohms 10 2 Impedance Function 11 Angle 353 degrees 10 2 Impedance Function 12 Mag 354 ohms 10 2 Impedance Function 12 Angle 355 degrees 10 2 Impedance Function 13 Mag 356 ohms 10 2 Impedance Function 13 Angle 357 degrees 10 2 Impedance Function 14 Mag 358 ohms 10 2 Impedance Function 14 Angle 359 degrees 10 2 Impedance Function 15 Mag 360 ohms 10 2 Impedance Function 15 Angle 361 degrees 10 2 Impedance Function 16 Mag 362 ohms 10 2 Impedance Function 16 Angle 363 degrees 10 2 Impedance Function 17 Mag 364 ohms 10 2 Impedance Function 17 Angle 365 degrees 10 2 Impedance Function 18 Mag 366 ohms 10 2 Impedance Function 18 Angle 367 degrees 10 2 Power Factor Function 1 Level 368 100 2 Power Factor Function 2 Level 369 100 2 Power Factor Function 3 Level 370 100 2 Power Factor Function 4 Level 371 100 2 Power Factor Function 5 Level 372 100 2 Power Factor Function 6 Level 373 100 2 Power Factor Function 7 Level 374 100 2 Name D01721R02.61 TESLA 3000 User Manual Appendix E-17 Appendix E DNP3 Reference Name Point Index Units Scale Change Event Class Power Factor Function 8 Level 375 100 2 Power Factor Function 9 Level 376 100 2 Power Factor Function 10 Level 377 100 2 Power Factor Function 11 Level 378 100 2 Power Factor Function 12 Level 379 100 2 Power Factor Function 13 Level 380 100 2 Power Factor Function 14 Level 381 100 2 Power Factor Function 15 Level 382 100 2 Power Factor Function 16 Level 383 100 2 Power Factor Function 17 Level 384 100 2 Power Factor Function 18 Level 385 100 2 High/low speed recording space used 386 per 10 2 Trend Recording Days Accumulated 387 days 1 2 Fault Locator 1 Fault Information - DNP Time - High 16 bits 388 N/A 1 2 Fault Information - DNP Time - Middle 16 bits 389 N/A 1 2 Fault Information - DNP Time - Low 16 bits 390 N/A 1 2 Fault Information - Fault Distance 391 User-specified 10 2 Fault Information - Type (see below for definition) 392 N/A 1 2 Fault Locator 2 Fault Information - DNP Time - High 16 bits 393 N/A 1 2 Fault Information - DNP Time - Middle 16 bits 394 N/A 1 2 Fault Information - DNP Time - Low 16 bits 395 N/A 1 2 Fault Information - Fault Distance 396 User-specified 10 2 Fault Information - Type (see below for definition) 397 N/A 1 2 Fault Locator 3 Fault Information - DNP Time - High 16 bits 398 N/A 1 2 Fault Information - DNP Time - Middle 16 bits 399 N/A 1 2 Fault Information - DNP Time - Low 16 bits 400 N/A 1 2 Fault Information - Fault Distance 401 User-specified 10 2 Fault Information - Type (see below for definition) 402 N/A 1 2 Fault Locator 4 Appendix E-18 Fault Information - DNP Time - High 16 bits 403 N/A 1 2 Fault Information - DNP Time - Middle 16 bits 404 N/A 1 2 Fault Information - DNP Time - Low 16 bits 405 N/A 1 2 Fault Information - Fault Distance 406 User-specified 10 2 TESLA 3000 User Manual D01721R02.61 Appendix E DNP3 Reference Name Point Index Fault Information - Type (see below for definition) 407 Units N/A Scale Change Event Class 1 2 Fault Locator 5 Fault Information - DNP Time - High 16 bits 408 N/A 1 2 Fault Information - DNP Time - Middle 16 bits 409 N/A 1 2 Fault Information - DNP Time - Low 16 bits 410 N/A 1 2 Fault Information - Fault Distance 411 User-specified 10 2 Fault Information - Type (see below for definition) 412 N/A 1 2 Fault Locator 6 Fault Information - DNP Time - High 16 bits 413 N/A 1 2 Fault Information - DNP Time - Middle 16 bits 414 N/A 1 2 Fault Information - DNP Time - Low 16 bits 415 N/A 1 2 Fault Information - Fault Distance 416 User-specified 10 2 Fault Information - Type (see below for definition) 417 N/A 1 2 Fault Locator 7 Fault Information - DNP Time - High 16 bits 418 N/A 1 2 Fault Information - DNP Time - Middle 16 bits 419 N/A 1 2 Fault Information - DNP Time - Low 16 bits 420 N/A 1 2 Fault Information - Fault Distance 421 User-specified 10 2 Fault Information - Type (see below for definition) 422 N/A 1 2 Fault Locator 8 Fault Information - DNP Time - High 16 bits 423 N/A 1 2 Fault Information - DNP Time - Middle 16 bits 424 N/A 1 2 Fault Information - DNP Time - Low 16 bits 425 N/A 1 2 Fault Information - Fault Distance 426 User-specified 10 2 Fault Information - Type (see below for definition) 427 N/A 1 2 Fault Locator 9 Fault Information - DNP Time - High 16 bits 428 N/A 1 2 Fault Information - DNP Time - Middle 16 bits 429 N/A 1 2 Fault Information - DNP Time - Low 16 bits 430 N/A 1 2 Fault Information - Fault Distance 431 User-specified 10 2 Fault Information - Type (see below for definition) 432 N/A 1 2 Fault Locator 10 D01721R02.61 Fault Information - DNP Time - High 16 bits 433 N/A 1 2 Fault Information - DNP Time - Middle 16 bits 434 N/A 1 2 Fault Information - DNP Time - Low 16 bits 435 N/A 1 2 TESLA 3000 User Manual Appendix E-19 Appendix E DNP3 Reference Point Index Units Scale Change Event Class Fault Information - Fault Distance 436 User-specified 10 2 Fault Information - Type (see below for definition) 437 N/A 1 2 Name Appendix E-20 TESLA 3000 User Manual D01721R02.61 Appendix E DNP3 Reference Object 110, 111 - Octet String for Event Log access Object 110 and Object 111 are Octet String objects used to provide access to the Event Log text of the TESLA. These objects are described in Technical Bulletin 9701-004.zip_71 available from the DNP user group web page (www.dnp.org). Object 110 always contains the most recent event in the TESLA. Object 111 is the corresponding change event object. As stated in the DNP technical bulletin, the variation of the response object represents the length of the string. The string represents the ASCII values of the event text. The first 2 characters in the string can be used to quickly identify fault location events. Fault locator events begin with the characters “FL” (0x46, 0x44 hex). The following example shows a fault distance event returned through either of the octet string objects. DNP Example: Event Message “2000Sep21 20:16:16.966 : Line 16:FLoc BG 39.7 miles” DNP Octet string object contents: D01721R02.61 0x46 0x4C 0x32 0x30 0x30 0x30 0x53 0x65 0x70 0x32 0x31 0x20 0x32 0x30 0x3A 0x31 0x36 0x3A 0x31 0x36 0x2E 0x39 0x36 0x36 0x20 0x3A 0x20 0x4C 0x69 0x6E 0x65 0x20 0x31 0x36 0x3A 0x46 0x4C 0x6F 0x63 0x20 0x42 0x47 0x20 0x33 0x39 0x2E 0x37 0x20 0x6D 0x69 0x6C 0x65 0x73 TESLA 3000 User Manual Appendix E-21 Appendix F Input Modules F.1 AC Voltage Input Module The AC Voltage Input Module (Model 401006) provides 4 channels of isolation and scaling for standard secondary voltage. Inputs are ac coupled through transformers. The nominal signal level is 69 V RMS (120/Root 3) with a fullscale 2x over-range capability that can be sustaining continuously. Output from the module is scaled to connect directly to the TESLA’s analog input terminals. Due to impedance matching requirements, module channels cannot be connected to more than one TESLA input channel. Modules can be located up to 1220 meters (4000 feet) from the recorder. The wire used for the connection between the modules and the recorder can range in size from 16 to 20 AWG.It is highly recommended that twisted-shielded wire be used for cables that are run outside of the panel in which the TESLA is located, noting that the shield should be grounded only at the recorder. Belden 9388, or its equivalent, is an example of an acceptable cable that can be used. D01721R02.61 TESLA 3000 User Manual Appendix F-1 TESLA 3000 User Manual A Power Technologies Ltd. PHASE 1 THE INFORMATION CONTAINED IN THIS DRAWING IS THE SOLE PROPERTY OF ERLPHASE. ANY REPRODUCTION IN PART OR WHOLE WITHOUT THE WRITTEN PERMISSION OF ERLPHASE IS PROHIBITED. 138 Vrms continuous 207 Vrms for 10 seconds www.erlphase.com ERL (4.45")113.0 mm 2 (2.65")67.2 mm 2 INPUT 1 V1 2 3 V2 REV. 01 4 3 6 7 DESCRIPTION 8 Unused Update logo to ERLPhase 5 V3 (6.77") 171.9 mm 3 REVISIONS DATE 02/05/08 Ground APPROVED USED ON 4 APPLICATION NEXT ASSY 4 Unused V3 V2 7 8 5 6 3 4 2 Max: B C Power Technologies Ltd. V1 Appendix F-2 PHASE FINISH MATERIAL .XX ± .01 .XXX ± .005 .X ± .05 DECIMALS ± 1 .XX ± .25 .X ± .5 NO DEC ANGLES UNLESS OTHERWISE SPECIFIED DIMENSIONS ARE IN INCHES TOLERANCES ARE: 1 ERL OUTPUT D 1 2350 APPL ENG CHECKED 2 CHECKED 1 E. Paryzek DRAWN BY J. Zimmer APPROVALS DESIGNED BY A. Sljivic 02/05/08 02/05/08 06/14/05 DATE DO NOT MANUALLY UPDATE CAD GENERATED DRAWING, Power Technologies Ltd. PHASE www.erlphase.com ERL HWK SCALE 8:1 SIZE DWG. NO. B 5 CAD FILE: TESLA 3000, PT Input Module TITLE 127.3 mm(5.01") B 5 Gen. --SHEET 1 OF 1 A B C D Appendix F Input Modules Model: 401006 TESLA Input Module S/N: AC 3 Channel Isolated Voltage Input Module Nominal: 69 Vrms Ratio (1KW load): 138 Vrms : 1.675 Vrms Figure F-1 AC Voltage Input Module D01721R02.61 Appendix F Input Modules F.2 AC Current Input Module The AC Current Input Module provides 4 channels of isolation and scaling for standard secondary current signals. Inputs are ac coupled through transformers. The module is available in 1A nominal (Model 401020) and 5A nominal (Model 401014) versions and has a dynamic range of 20x nominal. The module can withstand 20 A continuously and 100 A for 1 second. Output from the module is scaled to connect directly to the TESLA’s analog input terminals. Due to impedance matching requirements, module channels cannot be connected to more than one TESLA input channel. Modules can be located up to 1220 meters/4000 feet from the recorder. Shielded wire (e.g. Belden 9728 or 9730) is recommended for connection to the recorder’s inputs. The ground cable should be attached only at the recorder end. D01721R02.61 TESLA 3000 User Manual Appendix F-3 TESLA 3000 User Manual A B C Power Technologies Ltd. PHASE 1 THE INFORMATION CONTAINED IN THIS DRAWING IS THE SOLE PROPERTY OF ERLPHASE. ANY REPRODUCTION IN PART OR WHOLE WITHOUT THE WRITTEN PERMISSION OF ERLPHASE IS PROHIBITED. 15 Arms continuous 200 Arms for 1 second www.erlphase.com ERL (4.45")113.0 mm 2 (2.65")67.2 mm 2 Input 1 I1 2 3 3 I2 REV. 01 4 3 6 7 I4 8 DESCRIPTION Update logo to ERLPhase 5 I3 (6.77") 171.9 mm REVISIONS DATE 02/05/08 Ground APPROVED USED ON 4 APPLICATION NEXT ASSY 4 I4 I3 Max: I2 Appendix F-4 PHASE I1 ERL 1 2 3 4 5 6 7 8 FINISH MATERIAL .XX ± .01 .XXX ± .005 .X ± .05 DECIMALS ± 1 .XX ± .25 .X ± .5 NO DEC ANGLES UNLESS OTHERWISE SPECIFIED DIMENSIONS ARE IN INCHES TOLERANCES ARE: Output D 1 2350 APPL ENG CHECKED 2 CHECKED 1 E. Paryzek DRAWN BY J. Zimmer APPROVALS DESIGNED BY A. Sljivic 02/05/08 02/05/08 06/14/05 DATE DO NOT MANUALLY UPDATE CAD GENERATED DRAWING, Power Technologies Ltd. PHASE www.erlphase.com ERL HWK SCALE 8:1 SIZE DWG. NO. B 5 CAD FILE: TESLA 3000, CT Input Module TITLE 127.3 mm(5.01") B 5 Gen. --SHEET 1 OF 1 A B C D Appendix F Input Modules Power Technologies Ltd. Model: 401014 S/N: TESLA Input Module AC 4 Channel Isolated Current Input Module Nominal: 5 Arms Ratio (1KW load): 100 Arms : 1.580 Vrms Figure F-2 AC Current Input Module D01721R02.61 Appendix F Input Modules F.3 Split Core CT The Split Core CT is designed to clamp around the secondary circuit wires from the primary current transformers. It is intended for situations where an outage is not possible to connect an in-line CT. The Split Core CT has the same characteristics as the standard AC Current Input Module. It is available in 1A nominal (Model 401017) and 5A nominal (Model 401013) versions with a dynamic range that can pass 20x nominal currents continuously. The outputs from the CT are scaled and impedance matched to connect directly to the TESLA’s analog input connectors. Due to impedance matching requirements, the CT cannot be connected to more than one TESLA input channel. The Split Core CT can be located up to 1220 meters/4000 feet from the TESLA. 0.4"/1.016 cm ID 2.47"/6.274 cm 8'/2.438 m Twisted .9"/ 2.286 cm 2.1"/5.334 cm Figure F-3 Split Core CT Current Flow from main CT to measuring device From Polarity of main CT To Polarity of Measuring Device (Relay) in Panel Optional Split Core CT Leads to the Input of the TESLA Recorder - White lead to dot (polarity mark) of TESLA Recorder Analog input - Black lead to non-polarity mark of TESLA Recorder Analog input Figure F-4 Split Core CT Connection D01721R02.61 TESLA 3000 User Manual Appendix F-5 Appendix F Input Modules F.4 Clamp-On CT The Clamp-on CT (Model 401012) is a clothes-pin style device designed to clamp around the secondary circuit wires from the primary current transformers. It is intended for quick, temporary connection to existing circuits. The Clamp-on CT has the same characteristics as the standard AC Current Input Module. It is scaled for a 5A nominal current with a dynamic range that can pass 20x nominal currents continuously. The outputs from the CT are scaled and impedance matched to connect directly to the TESLA’s analog input connectors. Due to impedance matching requirements, the CT cannot be connected to more than one TESLA input channel. Modules can be located up to 1220 meters/4000 feet from the recorder. Model 401012 .827 cm/2.1 cm .945"/2.4 cm Figure F-5 Clamp-on CT F.5 AC Low Voltage Input Module The Low Voltage Input Module (Model 401022) provides 4 channels of isolation and scaling for low level ac voltages. Inputs are ac coupled through transformers. Scaling is set so that a 4 Vrms input represents a nominal signal level with a 2x over-voltage full scale range. The inputs can withstand 12 Vrms continuously and 15 Vrms for 10 seconds. Output from the module is scaled to connect directly to the TESLA’s analog input terminals. Due to impedance matching requirements, module channels cannot be connected to more than one TESLA input channel. Modules can be located up to 1220 meters/4000 feet from the recorder. Shielded wire (e.g. Belden 9728 or 9730) is recommended for connection to the recorder’s inputs. The ground cable should be attached only at the recorder end. Appendix F-6 TESLA 3000 User Manual D01721R02.61 TESLA 3000 User Manual Power Technologies Ltd. PHASE 1 THE INFORMATION CONTAINED IN THIS DRAWING IS THE SOLE PROPERTY OF ERLPHASE. ANY REPRODUCTION IN PART OR WHOLE WITHOUT THE WRITTEN PERMISSION OF ERLPHASE IS PROHIBITED. Low Range: 350Vdc / 250Vac continuous High Range: 1000Vdc / 700Vac continuous www.erlphase.com ERL (4.45")112.8 mm Power Technologies Ltd. A B C PHASE 2 (2.65")67.2 mm 2 RSH RIN Channel 1 RFB RSH RIN RFB 200 201 202 203 204 205 206 207 208 209 HIGH LOW NC COM RANGE RANGE Channel 3 100 101 102 103 104 105 106 107 108 109 HIGH LOW NC COM RANGE RANGE REV. 01 3 111 RSH RIN Channel 2 RFB RSH RIN RFB DESCRIPTION REVISIONS DATE 02/05/08 210 211 212 213 214 215 216 217 218 219 Channel 4 112 113 114 115 116 117 118 119 HIGH LOW NC COM RANGE RANGE 110 HIGH LOW NC COM RANGE RANGE Update logo to ERLPhase INPUT & CONFIGURATION INPUT & CONFIGURATION (6.77") 171.9 mm 3 APPROVED 4 120 121 122 123 124 125 126 127 USED ON APPLICATION NEXT ASSY 4 V4 V3 V2 V1 OUTPUT D01721R02.61 221 Max: Power Supply Nominal 48-250Vdc / 120Vac FINISH MATERIAL .XX ± .01 .XXX ± .005 .X ± .05 DECIMALS ± 1 .XX ± .25 .X ± .5 NO DEC ANGLES UNLESS OTHERWISE SPECIFIED DIMENSIONS ARE IN INCHES TOLERANCES ARE: + 220 ERL Ground D 1 2350 APPL ENG CHECKED 2 CHECKED 1 E. Paryzek DRAWN BY J. Zimmer APPROVALS DESIGNED BY A. Sljivic 02/05/08 02/05/08 06/14/05 DATE DO NOT MANUALLY UPDATE CAD GENERATED DRAWING, Power Technologies Ltd. PHASE www.erlphase.com ERL HWK SCALE 8:1 SIZE DWG. NO. B 5 CAD FILE: TESLA 3000, DC Input Module TITLE 127.3 mm(5.01") B 5 Gen. --SHEET 1 OF 1 A B C D Appendix F Input Modules Model: 401016 TESLA Input Module S/N: DC 4 Channel Isolated Input Module Figure F-6 AC Low Voltage Input Module Appendix F-7 Appendix F Input Modules F.6 DC Input Module The DC Input Module (Model 401016) provides DC-coupled isolation and scaling for four independent dc or ac voltage or current channels. Dc module channels have a dc to 2 kHz bandwidth, but the bandwidth may be limited by the recorder’s input filters, depending on the sample rate. Externally mounted resistors set the input type and full scale range. Output from the module is scaled to connect directly to the TESLA’s analog input terminals. Due to impedance matching requirements, module channels cannot be connected to more than one TESLA input channel. Modules can be located up to 1220 meters/4000 feet from the recorder. Shielded wire (e.g. Belden 9728 or 9730) is recommended for connection to the recorder’s inputs. The ground cable should be attached only at the recorder end. Input and Range Configuration Resistors mounted on each channels input connector set the channel's input range. Up to three resistors are used, depending on the type and level of the signal to be applied. The input signal is applied to low or high range terminals, as appropriate for the selected input range. The following tables give resistor values and wiring examples for different applications. For applications that are not in these tables, contact ERLPhase. All resistors must be rated for ¼ watt or more, unless otherwise specified. Unless otherwise noted, the RIN resistor must be rated to handle the full input voltage, which may require a physically larger resistor be used. This is generally true of any application that has an input in excess of 50 V peak. The resistor values specified are precision values as per the E48 standard series of resistance values in a decade. See the section L.3 Input and Range Configuration for the full table of standard values. It is possible to use other available values, although range and resolution may be compromised. Always select RIN of equal or greater value to that shown, and select RFB of equal or lesser value to that shown. The Vishay CCF-2 series resistors in ±1% precision, or equivalent, are recommended for this application. These metal film flameproof resistors are rated for industrial power applications at up to 2 watts dissipation and up to 350 volt drop. Values of 4.99 to 1 M are available in this series - for higher values, use two resistors of appropriate value in series. Appendix F-8 TESLA 3000 User Manual D01721R02.61 TESLA 3000 User Manual Power Technologies Ltd. PHASE 1 THE INFORMATION CONTAINED IN THIS DRAWING IS THE SOLE PROPERTY OF ERLPHASE. ANY REPRODUCTION IN PART OR WHOLE WITHOUT THE WRITTEN PERMISSION OF ERLPHASE IS PROHIBITED. Low Range: 350Vdc / 250Vac continuous High Range: 1000Vdc / 700Vac continuous www.erlphase.com ERL (4.45")112.8 mm Power Technologies Ltd. A B C PHASE 2 (2.65")67.2 mm 2 RSH RIN Channel 1 RFB RSH RIN RFB 200 201 202 203 204 205 206 207 208 209 HIGH LOW NC COM RANGE RANGE Channel 3 100 101 102 103 104 105 106 107 108 109 HIGH LOW NC COM RANGE RANGE REV. 01 3 111 RSH RIN Channel 2 RFB RSH RIN RFB DESCRIPTION REVISIONS DATE 02/05/08 210 211 212 213 214 215 216 217 218 219 Channel 4 112 113 114 115 116 117 118 119 HIGH LOW NC COM RANGE RANGE 110 HIGH LOW NC COM RANGE RANGE Update logo to ERLPhase INPUT & CONFIGURATION INPUT & CONFIGURATION (6.77") 171.9 mm 3 APPROVED 4 120 121 122 123 124 125 126 127 USED ON APPLICATION NEXT ASSY 4 V4 V3 V2 V1 OUTPUT D01721R02.61 221 Max: Power Supply Nominal 48-250Vdc / 120Vac FINISH MATERIAL .XX ± .01 .XXX ± .005 .X ± .05 DECIMALS ± 1 .XX ± .25 .X ± .5 NO DEC ANGLES UNLESS OTHERWISE SPECIFIED DIMENSIONS ARE IN INCHES TOLERANCES ARE: + 220 ERL Ground D 1 2350 APPL ENG CHECKED 2 CHECKED 1 E. Paryzek DRAWN BY J. Zimmer APPROVALS DESIGNED BY A. Sljivic 02/05/08 02/05/08 06/14/05 DATE DO NOT MANUALLY UPDATE CAD GENERATED DRAWING, Power Technologies Ltd. PHASE www.erlphase.com ERL HWK SCALE 8:1 SIZE DWG. NO. B 5 CAD FILE: TESLA 3000, DC Input Module TITLE 127.3 mm(5.01") B 5 Gen. --SHEET 1 OF 1 A B C D Appendix F Input Modules Model: 401016 TESLA Input Module S/N: DC 4 Channel Isolated Input Module Figure F-7 DC Input Module Appendix F-9 Appendix F Input Modules DC Voltage Input Input Resistance RIN () Feedback Resistance RFB () Input Impedance () ± 0.1 332 open 10 k ± 0.2 0 422 k 10 k ± 0.5 0 100 k 10 k ±1 0 40.2 k 10 k ±2 0 13.3 k 10 k ±5 1.40 k 0 11 k ± 10 13.3 k 0 22 k ± 20 38.3 k 0 47 k ± 25 51.1 k 0 60 k ± 50 121 k 0 120 k ± 100 287 k 1/2 W 0 240 k ± 150 511 k 1 W 0 350 k ± 200 825 k 1 W 0 450 k ± 350 0 10.0 k 1.5 M ± 500 0 3.48 k 1.5 M ± 880 1 MW 0 2 M Full Scale (V dc) Low Range 0.1 V to 200 V dc FS NC NC RIN Input RFB High Range 350 V to 880 V dc FS NC Input Appendix F-10 Shunt Resistance RSH () NC RIN RFB TESLA 3000 User Manual D01721R02.61 Appendix F Input Modules AC Voltage Input Input Resistance RIN () Feedback Resistance RFB () Input Impedance () 0.1 0 1.00 M 10 k 0.2 0 237 k 10 k 0.5 0 64.9 k 10 k 1 0 23.7 k 10 k 2 0 6.19 k 10 k 5 6.19 k 0 16 k 10 23.7 k 0 33 k 20 59.0 k 0 66 k 50 178 k 1/2 W 0 160 k 100 464 k 1 W 0 320 k 150 (for 69 V) 909 k 2 W 0 490 k 200 0 15.4 k 1.5 M 250 (for 120 V) 0 9.53 k 1.5 M 500 (for 240 V) 121 k 0 1.6 M 600 750 k 1 W 0 1.9 M Full Scale (V rms) Low Range 0.1 V to 150 V rms FS NC NC RIN Input RFB High Range 200 V to 600 V rms FS NC Input D01721R02.61 NC RIN Shunt Resistance RSH () RFB TESLA 3000 User Manual Appendix F-11 Appendix F Input Modules DC Current Input (External Shunt Optional) 1 mA to 500 mA dc FS NC RSH Input RIN RFB OR or NC + NC External R SH Current RIN - Full Scale (mA dc) Shunt Resistance RSH () Input Resistance RIN () Feedback Resistance RFB () Full Scale Voltage Drop (V) 1 100 332 open 0.1 2 100 0 422 k 0.2 5 100 0 100 k 0.5 10 100 0 40.2 k 1.0 20 100 0 13.3 k 2.0 25 (for 4-20 mA) 100 0 8.25 k 2.5 50 10 0 100 k 0.5 100 1 332 Open 0.1 200 1 0 422 k 0.2 500 1 W 0 100 k 0.5 RFB External shunt with value of RSH may be used as shown instead of RSH on the terminal block. AC Current Input (with External Shunt) Full Scale (V rms) output of shunt 0.1 V to 1 V rms FS NC Input Resistance RIN () Feedback Resistance RFB () Input Impedance (±10%) 0.1 0 1.00 M 10 k 0.2 0 237 k 10 k 0.5 0 64.9 k 10 k 1.0 0 23.7 k 10 k Shunt Resistance RSH () NC External Shunt RIN RFB Current Appendix F-12 TESLA 3000 User Manual D01721R02.61 Appendix F Input Modules Standard Series of Values in a Decade The following tables show the standard values of resistance available in a decade. The lower numbered series are more common and easier to obtain, while the higher numbered series provide more resolution. In general, it is best to use the lowest numbered series which provides acceptable resolution, since this will be the easiest and least expensive to obtain. Most often, distributors stock ±2% and ±5% resistors in the E24 series, 1% resistors in the E96 series, and ±0.1%, ±0.2% and ±0.5% in the E192 series. The values are not linear, but are instead approximately equal percentages apart from each other. Each value is related to the next by a ratio of approximately the Nth root of 10, where “N” is the series number (3 to 192). D01721R02.61 TESLA 3000 User Manual Appendix F-13 Appendix F Input Modules Appendix F-14 TESLA 3000 User Manual D01721R02.61 Appendix G Recommended Spare Parts List TESLA Model 3000 Recommended Spare Parts List Part Number Part Description Quantity 106406 TESLA Model 3000 System Unit - 36 Analog Channels, 64 Digital Channels * 107052 TESLA Model 3000 System Unit - 18 Analog Channels, 32 Digital Channels * 101754 CT Isolation Module, four (4) current inputs rated 5 Amp each * 101955 CT Isolation Modules, four (4) current inputs rated 1 Amp each * 101756 PT Isolation Modules, three (3) voltage inputs rated 69 Volts RMS (120/Root3) * 102079 LEA (Low Energy Analog) PT Module, three (3) voltage inputs rated 4 Volts RMS * 106243 DC Module, four (4) isolated inputs * 101783 Split-core current transducer rated 5 Amp * 101784 Split-core current transducer rated 1 Amp * 101850 Digital Input Shorting Bar, 8 inputs * 106791 Users Manual in Binder * 106724 One (1) GigaByte Flash Drive * 107054 Two (2) GigaByte Flash Drive * 107055 Sixty (60) GigaByte Hard Disk * 106230 USB (Personal Computer) to DB9M Serial (TESLA) Cable * 101787 DB9F Serial (Personal Computer) to DB9M (TESLA) Cable * 101629 Modem adapter for use with 101787 Serial Cable * 102404 RS232 to RS485 Converter, Optically Isolated, DIN Rail Mounting * 102406 Power Supply for 102404, 120VAC to 12VDC, DIN Rail Mounting * 107051 RS232 Serial to Parallel Port Converter * Note: * = One of each component used D01721R02.61 TESLA 3000 User Manual Appendix G-1 Appendix H TESLA Handling and Disposition Unpacking To unpack a TESLA System Unit • open the bottom of the box • place the box on the floor or a secure table • lift the box off of the unit leaving the TESLA and packing material standing intact • remove the packing material from the TESLA • dispose of the packing materials and box in a manner consistent with local waste disposal procedures and regulations. We recommend recycling the box. Long Term Storage For long term storage: • store the TESLA system unit in original packing container • protect any of the components not in original from dust accumulation and moisture • store all components indoors and protect from moisture accumulation Final Disposition D01721R02.61 Regulations governing disposal of electronics are rapidly being adopted and are constantly changing. We recommend that local electronics disposal regulations be reviewed prior to disposal of a TESLA system when it has reached the end of it’s useful life. The TESLA system unit contains a battery that should be disposed of separately and may contain other electronic components that are potentially subject to specific disposal instructions. Use a local electronics recycler who is familiar with local regulations. TESLA 3000 User Manual Appendix H-1 Appendix I TESLA 3000 Drawings This appendix contains mechanical and connection drawings for the TESLA 3000. TESLA 3000 Mechanical Overview (2) TESLA 3000 Rear Panel View TESLA 3000 AC Input Module Connection TESLA 3000 DC Input Module Connection Electronic versions of the drawings in both PDF and DWG formats are available on the TESLA 3000 CD in the Manuals directory. The PDF documents are scaled for 11" x 17" printing for improved readability. D01721R02.61 TESLA 3000 User Manual Appendix I-1 Appendix I TESLA 3000 Drawings 8 7 4 5 6 3 2 1 (17.43") 442.7mm D D C C (.22") 5.6mm (18.31") 465.1mm (.34") 8.6mm TESLA Recorder Functional Disturbance Recorder Model 3000 B (11.60") 294.6mm IRIG-B Functional B Recorder Triggered (5.19") 131.8mm Records Stored (4.75") 120.6mm (5.19") 131.8mm Test Mode Alarm ERL PHASE Port 1 Power Technologies Ltd. www.erlphase.com Ø.20" 5.1mm (.16") 4.1mm (12.28") 311.9mm (19.00") 482.6mm A UNLESS OTHERWISE SPECIFIED DIMENSIONS ARE IN INCHES TOLERANCES ARE: A ANGLES DECIMALS .X ± .05 NO DEC ± 1 .X ± .5 .XX ± .01 .XXX ± .005 ERL PHASE Power Technologies Ltd. www.erlphase.com 8 THE INFORMATION CONTAINED IN THIS DRAWING IS THE SOLE PROPERTY OF ERLPHASE. ANY REPRODUCTION IN PART OR WHOLE WITHOUT THE WRITTEN PERMISSION OF ERLPHASE IS PROHIBITED. REV. Update logo to ERLPhase DATE 7 APPROVED NEXT ASSY USED ON 4 4 5 ERL DATE PHASE Power Technologies Ltd. www.erlphase.com 14/06/05 TITLE DRAWN BY J. Zimmer CHECKED 1 E. Paryzek 23/01/08 TESLA 3000 Mechanical Overview 05/02/08 CHECKED 2 Gen. SIZE DWG. NO. B FINISH D00984R01.00-REL APPL ENG APPLICATION 5 6 .XX ± .25 MATERIAL 23/01/08 DESCRIPTION REVISIONS 6 7 8 01 CAD GENERATED DRAWING, DO NOT MANUALLY UPDATE APPROVALS DESIGNED BY A. Sljivic CAD FILE: SCALE 4:1 --- D00984R01 3 2 1 3 2 1 SHEET 1 OF 2 D D (18.31") 465.1mm (17.68") 449.1mm C (5.21") 132.3mm C L C (4.75") 120.6mm C L Ø.20" 5.1mm (.16") 4.1mm B B PANEL CUT OUT TEMPLATE A UNLESS OTHERWISE SPECIFIED DIMENSIONS ARE IN INCHES TOLERANCES ARE: A DECIMALS .X ± .05 .XX ± .01 .XXX ± .005 ERL PHASE Power Technologies Ltd. www.erlphase.com 8 THE INFORMATION CONTAINED IN THIS DRAWING IS THE SOLE PROPERTY OF ERLPHASE. ANY REPRODUCTION IN PART OR WHOLE WITHOUT THE WRITTEN PERMISSION OF ERLPHASE IS PROHIBITED. 7 01 REV. Update logo to ERLPhase MATERIAL 23/01/08 DATE DESCRIPTION APPROVED 5 USED ON 4 .X ± .5 .XX ± .25 CAD GENERATED DRAWING, ERL DO NOT MANUALLY UPDATE DATE APPROVALS DESIGNED BY A. Sljivic Power Technologies Ltd. TITLE 23/01/08 TESLA 3000 Mechanical Overview 05/02/08 CHECKED 2 Gen. SIZE DWG. NO. B D00984R01.00-REL APPL ENG SCALE 4:1 3 PHASE www.erlphase.com 14/06/05 DRAWN BY J. Zimmer CHECKED 1 E. Paryzek FINISH APPLICATION REVISIONS 6 NEXT ASSY ANGLES NO DEC ± 1 CAD FILE: 2 --- D00984R01 SHEET 2 OF 2 1 Figure I.1: TESLA 3000 Mechanical Overview - Dimensions Appendix I-2 TESLA 3000 User Manual D01721R02.61 D01721R02.61 TESLA 3000 User Manual A B C D Power Technologies Ltd. PHASE 8 www.erlphase.com ERL 8 2 + - 3 + - 4 + - 5 + - 6 + - 7 + - 8 + - 34 + - 35 + - 36 + - 37 + - 38 + - 39 + - 40 + - 2 3 4 5 6 7 8 PORT 2 DIRECT/MODEM 7 THE INFORMATION CONTAINED IN THIS DRAWING IS THE SOLE PROPERTY OF ERLPHASE. ANY REPRODUCTION IN PART OR WHOLE WITHOUT THE WRITTEN PERMISSION OF ERLPHASE IS PROHIBITED. IRIG-B 300 301 302 303 304 305 306 307 308 309 310 311 312 313 314 315 1 200 201 202 203 204 205 206 207 208 209 210 211 212 213 214 215 + - 33 100 101 102 103 104 105 106 107 108 109 110 111 112 113 114 115 1 + - 7 10 + - 11 + - 12 + - 13 + - 14 + - 42 + - 43 + - 44 + - 45 + - 46 + - 10 11 12 PORT 3 SCADA 6 50 + - 51 + - 13 14 15 16 REV. 01 INTERNAL MODEM 5 DESCRIPTION Update logo to ERLPhase NETWORK 20 + - 21 + - 22 + - 23 + - 24 + - 52 + - 53 + - 54 + - 55 + - 56 + - 18 19 20 21 22 23 24 REVISIONS DATE 23/01/08 4 APPROVED 26 + - 27 + - 3 28 + - 29 + - 30 + - 31 + - 32 + - 58 + - 59 + - 60 + - 61 + - 62 + - 63 + - 64 + - 26 27 28 29 30 31 32 USED ON 3 FINISH MATERIAL .XX ± .01 .XXX ± .005 .X ± .05 DECIMALS ± 1 .XX ± .25 .X ± .5 NO DEC ANGLES UNLESS OTHERWISE SPECIFIED DIMENSIONS ARE IN INCHES TOLERANCES ARE: 2 - APPL ENG CHECKED 2 CHECKED 1 E. Paryzek DRAWN BY J. Zimmer 2 3 + - 4 + - 5 + - 6 + - 7 + - Output Contacts (5-8) 8 + - 34 35 36 DATE 02/05/08 02/05/08 06/14/05 Power Technologies Ltd. PHASE SCALE 8:1 1 CAD FILE: D01001R01 1 TESLA 3000 Rear Panel View www.erlphase.com ERL D01001R01.00-REL SIZE DWG. NO. B TITLE Case Ground 364 365 366 367 368 369 370 371 33 264 265 266 267 268 269 270 271 DO NOT MANUALLY UPDATE APPROVALS DESIGNED BY A. Sljivic 2 + - 164 165 166 167 168 169 170 171 1 + - Output Contacts (1-4) CAD GENERATED DRAWING, + Power Supply Nominal 48 - 250 Vdc 120 Vac 348 349 350 351 352 353 354 355 356 357 358 359 360 361 362 363 25 248 249 250 251 252 253 254 255 256 257 258 259 260 261 262 263 57 + - 148 149 150 151 152 153 154 155 156 157 158 159 160 161 162 163 25 + - APPLICATION NEXT ASSY 332 333 334 335 336 337 338 339 340 341 342 343 344 345 346 347 17 Analog Inputs ( ± 2.5V ) System Frequency 50/60Hz 316 317 318 319 320 321 322 323 324 325 326 327 328 329 330 331 9 19 + - 232 233 234 235 236 237 238 239 240 241 242 243 244 245 246 247 External Inputs 48-125VDC 47 48 49 + - + + - 216 217 218 219 220 221 222 223 224 225 226 227 228 229 230 231 41 + - 18 + - 4 132 133 134 135 136 137 138 139 140 141 142 143 144 145 146 147 External Inputs 48-125VDC 15 16 17 + - + + - 5 116 117 118 119 120 121 122 123 124 125 126 127 128 129 130 131 9 + - 6 Gen. --SHEET 1 OF 1 A B C D Appendix I TESLA 3000 Drawings f Figure I.2: TESLA 3000 Rear Panel Appendix I-3 Appendix I TESLA 3000 Drawings Figure I.3: TESLA 3000 AC Input Module Connection Diagram Appendix I-4 TESLA 3000 User Manual D01721R02.61 D01721R02.61 TESLA 3000 User Manual A B C D + NC Input NC Input Current NC Current NC NC NC NC RSH NC NC NC NC RIN - RIN RIN RIN RIN RIN RIN RFB RFB RFB RFB RFB RFB RFB (Bottom View) Power Technologies Ltd. PHASE www.erlphase.com ERL 1 THE INFORMATION CONTAINED IN THIS DRAWING IS THE SOLE PROPERTY OF ERLPHASE. ANY REPRODUCTION IN PART OR WHOLE WITHOUT THE WRITTEN PERMISSION OF ERLPHASE IS PROHIBITED. 2 3 REV. 01 Power Supply 48-250 V dc or 120 V ac 3 REVISIONS DATE 02/05/08 Power Supply (Terminals on bottom row not shown) DESCRIPTION Update logo to ERLPhase Phoenix SMSTB 2,5/8-ST terminal blocks accept 12-28 ga. stranded wire #10 Ground Stud Phoenix SMSTB 2,5/8-ST terminal blocks accept 12-28 ga. stranded wire 4x shielded twisted pair (eg. Belden 9728) Shield grounded at TESLA end only Plugs into Analog Inputs (2nd row from bottom) APPROVED 4 4 USED ON APPLICATION NEXT ASSY Phoenix SMSTB 2,5/8-ST terminal blocks accept 12-28 ga. stranded wire Phoenix SMSTB 2,5/16-ST terminal blocks accept 12-28 ga. stranded wire Recording Signals using DC Input Module Phoenix MC 1,5/2-STF-5,08 terminal blocks accept 16-28 ga. stranded wire 401016 DC 4 Channel Isolated Input Module Up to 4 Inputs per Module AC Current (with External Shunt) 0.1 V to 1 V rms FS DC Current 1 mA to 500 mA dc FS AC Voltage High Range 200 V to 600 V rms FS AC Voltage Low Range 0.1 V to 150 V rms FS DC Voltage High Range 350 V to 880 V dc FS DC Voltage Low Range 0.1 V to 200 V dc FS DIN rail mount External R SH R SH Input Input NC Input NC 2 Notes: 1. For ranges and corresponding resistor values, see the DC Input Module appendix of the TESLA 3000 User Manual. AC current with external shunt DC Instrumentation (up to 500mA current loop) AC Voltage with PT (up to 700VRMS) DC Transducer (up to 1000V) 1 FINISH MATERIAL .XX ± .01 .XXX ± .005 .X ± .05 DECIMALS ± 1 .XX ± .25 .X ± .5 NO DEC ANGLES UNLESS OTHERWISE SPECIFIED DIMENSIONS ARE IN INCHES TOLERANCES ARE: CAD GENERATED DRAWING, APPL ENG CHECKED 2 CHECKED 1 E. Paryzek DRAWN BY J. Zimmer APPROVALS DESIGNED BY A. Sljivic 02/05/08 02/05/08 06/14/05 DATE DO NOT MANUALLY UPDATE Power Technologies Ltd. PHASE www.erlphase.com ERL HWK SCALE 8:1 5 CAD FILE: D01004R01 SIZE DWG. NO. B D01004R01.00-REL TESLA 3000, DC Input Module Typical Connection Schematic TITLE 2350 TESLA Recorder Top View B 5 Gen. --SHEET 1 OF 1 A B C D Appendix I TESLA 3000 Drawings s Figure I.4: TESLA 3000 DC Input Module Connection Diagram Appendix I-5 Index Index A absolute time 11-21, 11-64, 11-66 AC 8-18 ac current input module 2-2, F-3 ac low voltage input module 2-3 AC scaling 8-18 ac scaling 8-18 ac voltage input module 2-2, F-1 Accessing TESLA Event Information D-17 active trace information 11-19, 11-76 alarm contacts 2-3, A-1, A-3 analog graph 11-14, 11-31, 11-34, 1139, 11-40, 11-41, 11-42, 11-55 analog input 7-11 analog input channels 2-2, 8-15, 8-16 automatic record transfer 7-13 autopoll 9-2 autoprint 9-2 data acquisition 1-2 dc module 2-3 dc scaling 8-18 diagnostics 4-11 digital graph 11-15, 11-31, 11-34, 11- 39, 11-40 direct serial link 4-4, 4-12 DNP 8-45, E-1 E edit configuration 8-2 element tree 8-10, 8-11 ethernet LAN link 4-2 event log 9-6 event messages 9-6 external input channels 2-3, 8-20, 821 F fault location 1-3 fault locator C calibration analog input 7-11 dc channel 7-12 CDR configuration 10-1 configuration changes 10-5 data storage 10-2 number of channels 10-2 safe shutdown mode 10-5 sampling rates 10-2 channel grouping 8-8 channel view 8-10, 8-12 clamp-on CT 2-3, F-6 communication 1-4 communication ports 4-1, 4-13 configuation editor 8-4 configuration manager 8-1, 8-2, 8-3 connection status 5-5 continuous disturbance recording 101 control tabs 5-6 cooperative group 1-3 cooperative recorder group 13-1 configure recording group 13-7 network 13-4 recorders 13-5 records 13-10 settings 13-11 setup 13-3 cross-trigger notification 7-13 D01721R02.61 D TESLA User Manual 3000 functions 8-38, 8-39 settings 8-39 fetch remote summary 9-2 frequency channels 8-34, 8-35 front panel 1-4 front panel LEDs 2-4 fundamental RMS 11-21, 11-43, 11- 64, 11-67 G get from IED 9-2 graph 9-2 measure menus 11-19 graphs absolute time 11-66 add 11-34 add analog 11-14 add channels 11-34 add digital 11-15 calculated channels 11-71 COMTRADE import 11-77, 11-78 COMTRADE inport 11-77 delete 11-15 digital channel status 11-75 export file 11-9 exporting channel data 11-73 exporting views 11-72 fundamental RMS 11-67 graph title 11-63 harmonic view 11-42 harmonics 11-69 I Index impedance view 11-43, 11-44, 1145, 11-46 IRIG-B input status 11-76 keyboard functions 11-37, 11-38 menus 11-14 move 11-16 overlay view 11-40 pan 11-37 print 11-78 record summary 11-75 records 11-1 reouts and measurements 11-64 superimpose L-PRO characteristics 11-48, 11-49, 11-50, 1151, 11-52, 11-53 symcom view 11-41 symmetrical components 11-70 templates 11-56, 11-57, 11-58, 1159, 11-60, 11-61 TESLA swing record 11-53, 11-54 timeline view 11-39 trace 11-16, 11-17, 11-18 trend view 11-55 true RMS 11-68 view and graph titles 11-62 view menus 11-11 view title 11-62 window time control 11-47 zoom 11-35 H harmonics 11-21 I identification 8-5 impedance channel 8-29 impedance channels 8-28 install on Windows XP 3-3 installation 1-2 installing TESLA 3-2 IRIG-B time signal 2-4 L logging 1-3 logic functions 8-36, 8-37 N navigating TESLA 5-6 notify 7-13 notify settings 7-14 O offline operation 5-5 online operation 5-5 options menus 11-26, 11-27, 11-28, 11-29 out of range 7-12 output contacts 1-4 P parameters direct serial link 4-12 Windows XP/7 4-12 password protection 7-15 setting 7-15 phase angle reference channel 8-11 PMU module, communication 15-6 PMU module, configuration 15-10 PMU module, error handling 15-16 PMU module, features 15-2 PMU module, maintenance 15-16 PMU module, metering 15-15 PMU module, overview 15-1 PMU module, setup communication 15-7 PMU module, support 15-6 power factor functions 8-40, 8-41 settings 8-41 power supply 2-1 print configuration 8-45 SCADA address list 8-45 printing 8-45 R M maintenance menu 14-1 maintenance menu, commands 14-3 maintenance menu, error handling 14-4 measure menus 11-20, 11-21 meter groups 8-42 metering 6-1 MODBUS 8-45 modem external 4-5 internal 4-8 II LAN gateway 4-8 modem link 4-5 mount TESLA recorder 2-1 TESLA User Manual 3000 rear connections 1-5 record filter 9-1 lists 9-1 summary 9-1 recorder workspace 5-1 RecordGraph components 11-4 graphs 11-34 help menus 11-30 import file 11-10 launch 11-3 D01721R02.61 Index menus 11-5, 11-6 print 11-7, 11-8, 11-9 tool bar 11-30 view add 11-32 view delete 11-32 view rename 11-33 views 11-32 RecordGraph, launch 11-1 records 1-3, 9-1 refresh 9-3 rename 9-2 S sag and swell 8-19 SCADA protocol settings 4-10 SCADA services 4-9 scale menus 11-22, 11-23, 11-24, 1125 sequenc component channel 8-26 sequence component channels 8-25 setting Windows serial port parameters 4-12 show record summary 11-10 signal connections 2-2 specifications A-1 split core CT F-5 split-core CT 2-3 start-up 3-11 startup sequence 2-4 status bar 5-6 storage alarms 8-7 summation channel 8-22, 8-23 symmetrical components 11-21 system requirements 3-1 T template manager 11-7 time coordination 1-4 trend log 9-4 trend logging 8-43, 8-44 trigger fault 9-3 trigger swing 9-3 triggers 1-3 true RMS 11-21 U user interface 1-3 V view channel list 11-13 W watts and VARS channels 8-31, 8-32 workspace 5-6 add/edit 5-3 settings 5-3 D01721R02.61 TESLA User Manual 3000 III