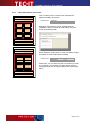
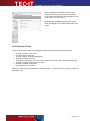
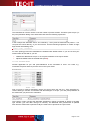
1
TFORMer Designer Label and Report Designer V ers io n 5 .1 User Manual 21 J an u ar y 2 00 8 T EC- IT Da te n v er arb e it un g G m bH W agners tr as s e 6 A- 44 0 0 S te yr , A us t ri a t + + 43 ( 0)7 2 52 72 7 20 f + + 43 ( 0)7 2 52 72 7 20 77 of f ic e @ tec - i t.c om ww w. tec - i t.c om T FO RM er D e sig ne r U se r M anua l 1 Content 1 1.1 1.2 2 3 2 6 6 Disclaimer 7 3.1 3.2 3.3 3.4 3.4.1 3.4.2 3.4.3 Introduction Professional Documents Created With Ease TFORMer Basics Output Formats System Requirements Operating Systems Memory Disk Space 8 8 8 9 10 10 10 10 4.1 4.2 4.2.1 4.2.2 4.2.3 4.2.4 4.2.5 4.2.6 4.2.7 4.2.8 4.2.9 4.3 4.4 4.5 4.6 4.7 4.8 User Interface Main Window Menu File Edit Insert Layout Data Tools View Window Help Toolbars Design Window Design Tree Window Properties Status Bar Document Window Controls 11 11 12 12 12 13 13 13 13 13 13 13 14 15 16 17 18 18 5.1 5.2 5.3 5.4 5.5 5.5.1 5.5.2 5.5.3 5.5.4 Printing Concept and Workflow Introduction Printing Concept Overview Data Source Concept Reading a Data-Source and Printing Bands Typical Workflow Identify Dynamic Data Form Design Provide Data Generate Output 19 19 19 20 21 22 22 22 22 22 4 5 6 Content Table of Figures List of Tables Forms 6.1 Introduction 6.2 Basic Operations 6.2.1 Open an Existing Form 6.2.2 Create a New Form 6.2.2.1 Custom Report 6.2.2.2 Custom Label 6.2.3 Page Setup Wizard 6.2.4 Save a Form 6.2.5 Switch between Forms 6.2.6 Form Selection 6.2.7 Close a Form 6.3 Form Properties 6.3.1 Page Setup via Form Properties 6.3.1.1 Page Margins 6.3.1.2 Rows and Columns 6.3.1.3 Form Width 6.3.2 Label-Specific Properties 6.3.2.1 Row Height and Column Width 6.3.2.2 Row and Column Spacing 6.3.2.3 Printing Order 6.3.3 Watermark 6.3.4 Document Name 6.4 Form Layout Schemes 6.4.1 Reports 23 23 23 23 23 24 25 26 26 26 27 27 28 28 28 28 29 29 29 29 29 29 29 30 30 Page 2 of 99 T FO RM er D e sig ne r U se r M anua l 6.4.2 6.4.3 6.4.4 6.4.5 6.4.6 7 Labels Labels with Headers and Footers Reports in Labels Report with Multiple Columns Labels with Multiple Columns 31 32 33 34 34 Bands Introduction Band Types Basic Operations Insert Band Band Selection Expanded/Collapsed View of Bands Adjust Band Properties Change Size Change Band Printing Order Delete Bands Printing Conditions Pre- and Post-Evaluations 35 35 35 36 36 36 37 37 37 37 37 37 37 8 Elements 8.1 Introduction 8.2 Basic Operations 8.2.1 Insert Element 8.2.2 Element Selection 8.2.2.1 Examples 8.2.3 Change Element Size 8.2.4 Move Elements 8.2.5 Element Properties 8.2.6 Positioning and Measuring 8.2.7 Delete Elements 8.2.8 Printing Condition 8.2.9 Assign Elements to a Printing Layer 8.2.10 Design Functions for Elements 8.2.10.1 Alignment 8.2.10.2 Size 8.2.10.3 Z-Order 8.2.10.4 Spacing 8.3 Text Elements 8.3.1.1 Edit 8.3.1.2 Expressions 8.3.1.3 Text Formatting 8.3.1.4 Source View 8.4 Barcode Elements 8.4.1 Dynamic Barcode Content 8.4.2 Static Barcode Content 8.5 Picture Elements 8.5.1 Dynamic Pictures 8.5.2 Static Pictures 38 38 38 38 39 40 40 41 41 41 41 41 41 42 42 42 42 43 43 44 44 44 45 45 45 45 45 46 46 9 Data-Fields 9.1 Introduction 9.2 Basic Operations 9.2.1 Create Data-Field Definitions 9.2.1.1 Create Data-Field Definitions Manually 9.2.1.2 Create Data-Field Definitions Automatically 9.2.2 Data-Field Properties 9.2.3 Use Data-Fields in Form Designs 9.2.3.1 Element Content 9.2.4 Rename Data-Fields 9.2.5 Delete Data-Fields 47 47 47 47 48 48 48 48 49 49 49 7.1 7.2 7.3 7.3.1 7.3.2 7.3.3 7.3.4 7.3.5 7.3.6 7.3.7 7.3.8 7.3.9 10 10.1 10.2 10.3 10.3.1 10.4 10.5 Expressions Introduction Expression Builder Expressions in Text Elements Example for HTML Formatted Expressions Evaluation Order Errors 50 50 50 52 52 53 55 11.1 11.2 11.2.1 11.2.2 11.2.3 Smart Layouts Introduction Printing Conditions Edit Printing Conditions Visual Cues for Printing Conditions Examples 56 56 56 56 57 57 11 Page 3 of 99 T FO RM er D e sig ne r U se r M anua l 11.2.3.1 Different Headers or Footers 11.2.3.2 Alternating Background Colors 11.3 Printing Layers 11.3.1 Create Layer 11.3.2 Assign Design Elements to a Layer 11.3.3 Display Layer Colors 11.3.4 Hide Layer Contents 11.4 Pre-Evaluation and Post-Evaluation 11.4.1 Edit Pre- and Post-Evaluations 11.4.2 Visual Cues for Pre- and Post-Evaluations 11.4.3 Examples 11.4.3.1 Consecutive Numbering (Serial Numbers) 11.4.3.2 Calculate Sums 11.4.3.3 Calculate Page Sums 11.5 Invisible Bands 11.6 Tray Control 11.6.1 Create Tray Mappings 11.6.2 Configure Tray Mappings 11.6.3 Tray Selection in the Form Layout 11.6.3.1 Example 11.6.4 Select the Tray Mappings for Printing 57 57 57 58 58 59 59 59 60 60 60 60 61 62 62 62 63 64 64 64 65 12 Providing External Data 12.1 Introduction 12.2 Providing Data Manually 12.2.1 The Data Wizard 12.2.2 Auto-Generate 12.2.3 Enter Data Manually 12.2.4 Import from Database (ODBC) 12.2.5 Import from Files 12.2.5.1 Import Data-Field Definitions 12.3 Creating CSV Files with Microsoft® Excel® 12.4 Providing Data Programmatically 66 66 66 66 67 67 68 69 69 70 70 13 Printing 13.1 Introduction 13.2 Printing Manually 13.2.1 Output Format and Device 13.2.1.1 Printing to PostScript and ZEBRA printers 13.2.2 Pages and Copies 13.2.3 Data 13.2.4 Advanced Settings 13.2.4.1 Tray Mappings 13.2.4.2 Start Row and Start Column 13.3 Printing Programmatically 71 71 71 71 72 72 72 72 72 72 73 14 Repositories 14.1 Introduction 14.1.1 Stand-Alone Forms 14.1.2 Repositories 14.2 Basic Operations 14.2.1 Open an existing Repository 14.2.1.1 Demo Repository 14.2.2 Create a New Repository 14.2.3 Save a Repository 14.2.4 Import a Stand-alone Form into a Repository 14.2.5 Export a Form from the Repository 14.2.6 Close a Repository 14.3 Working with a Repository 14.3.1 Projects 14.3.2 Insert Forms 74 74 74 74 75 75 75 75 75 75 76 77 77 77 77 15 15.1 15.1.1 15.1.2 15.1.3 15.1.4 15.1.5 15.1.6 15.1.7 15.1.8 15.1.9 General Settings Options Dialog General Grid Design-Tree PDF-General PDF-Images HTML Settings Postscript Image Printer ZEBRA (ZPL) 79 79 79 80 80 80 80 80 80 80 81 16.1 Licensing License Types 82 82 16 Page 4 of 99 T FO RM er D e sig ne r U se r M anua l 16.2 16.2.1 16.3 17 Entering your License Data License Dialog Notes Contact and Support Information 82 82 82 83 Appendix A : Properties A.1 Form Properties A.1.1 Common A.1.2 Advanced A.1.3 Watermark A.1.4 Position A.1.5 Margins A.2 Band Properties A.2.1 Common A.2.2 Advanced A.2.3 Position A.3 Element Properties A.3.1 Common A.3.1.1 Text Elements A.3.1.2 Barcode Elements A.3.1.3 Line, Rectangle, Ellipse A.3.1.4 Picture A.3.2 Advanced A.3.3 Position A.3.4 Margins A.4 Layer Properties A.4.1 Common A.4.2 Advanced A.5 Data-Field Properties A.5.1 Common A.5.2 Advanced A.5.3 Validation A.6 Tray Mapping Properties A.6.1 Common A.6.2 Advanced A.6.3 Trays A.7 Repository A.8 Tray Mapping Properties (Repository) A.9 Global Data-Fields (Repository) A.10 Projects (Repository) A.10.1 Common A.10.2 Advanced 84 84 84 84 85 85 85 86 86 86 87 88 88 88 88 88 89 89 90 91 91 91 91 91 91 92 92 92 92 92 92 93 93 93 93 93 93 Appendix B : Supported HTML Tags and Entities B.1 HTML Tags B.2 Named Entities 94 94 94 Appendix C : Function Reference C.1 Functions C.2 System Data-Fields C.3 Constants 95 95 97 97 Appendix D : Advanced Configuration D.1 Template File Path D.2 Configuration File TFORMer.xml 98 98 98 Keyboard Shortcuts Page 5 of 99 T FO RM er D e sig ne r U se r M anua l 1.1 Table of Figures Figure 1: Architectural Overview 9 Figure 2: User Interface 11 Figure 3: Design Window 15 Figure 4: Design Tree Window 16 Figure 5: Properties Window 17 Figure 6: Status Bar 18 Figure 7: Document Window Controls 18 Figure 8: Printing Concept 19 Figure 9: Printing Concept in Detail 20 Figure 10: Data Source Concept 20 Figure 11: Create New Form 23 Figure 12: Custom Report – Design View 24 Figure 13: Custom Report – Print Preview (10 Data Records) 24 Figure 14: Custom Label – Design-View 25 Figure 15: Custom Label – Print Preview (15 Data Records) 25 Figure 16: Page Setup (Reports and Labels) 26 Figure 17: Form Selection 27 Figure 18: Form Properties 28 Figure 19: Default Report Configuration 30 Figure 20: Default Label Configuration 31 Figure 21: Labels with Headers and Footers 32 Figure 22: Reports in Labels 33 Figure 23: Report with Multiple Columns 34 Figure 24: Report with Multiple Columns 34 Figure 25: Rendering Scheme for Bands (Report) 35 Figure 26: Form Design 36 Figure 27: Design Window 38 Figure 28: Element Selection 40 Figure 29: Design Toolbar 42 Figure 30: Text Element 43 Figure 31: Edit Text Dialog 43 Figure 32: Edit Text Dialog: Toolbar 44 Figure 33: Barcode Elements 45 Figure 34: Picture Elements 46 Figure 35: Data-Fields as Part of the Printing Concept 47 Figure 36: Drag and Drop Data-Field 49 Figure 37: Expression Builder 51 Figure 38: Expressions in Text Elements 52 Figure 39: Evaluation Order 54 Figure 40: Select Tray Mappings in the Print Dialog 65 Figure 41: Data Wizard 66 Figure 42: Edit Data Manually 67 Figure 43: Print Dialog 71 Figure 44: Repository in the Design Tree 75 Figure 45: Options Dialog 79 1.2 List of Tables Table 1: Functions 96 Table 2: System Data-Fields 97 Table 3: Constants 97 Page 6 of 99 T FO RM er D e sig ne r U se r M anua l 2 Disclaimer The actual version of this product (document) is available as is. TEC-IT declines all warranties which go beyond applicable rights. The licensee (or reader) bears all risks that might take place during the use of the system (the documentation). TEC-IT and its contractual partners cannot be penalized for direct and indirect damages or losses (this includes non-restrictive, damages through loss of revenues, constriction in the exercise of business, loss of business information or any kind of commercial loss), which is caused by use or inability to use the product (documentation), although the possibility of such damage was pointed out by TEC-IT. We reserve all rights to this document and the information contained therein. Reproduction, use or disclosure to third parties without express authority is strictly forbidden. Für dieses Dokument und den darin dargestellten Gegenstand behalten wir uns alle Rechte vor. Vervielfältigung, Bekanntgabe an Dritte oder Verwendung außerhalb des vereinbarten Zweckes sind nicht gestattet. © 1998-2008 TEC-IT Datenverarbeitung GmbH Wagnerstr. 6 A-4400 Austria t.: +43 (0)7252 72720 f.: +43 (0)7252 72720 77 http://www.tec-it.com Page 7 of 99 T FO RM er D e sig ne r U se r M anua l 3 Introduction 3.1 Professional Documents Created With Ease Many thanks for evaluating TFORMer! The TFORMer product family represents a lean, powerful output and reporting solution for arbitrary documents. Professional design features are combined with versatile output capabilities. The integrated bar-code generator, full-featured UNICODE support, direct PDF generation and the possibility for client as well as server side use qualifies TFORMer as multi-purpose, multi-platform report generator. The functionality of TFORMer is available for end-users as well as for software developers. Users benefit from the graphical layout editor with instant output capabilities: TFORMer Designer offers outstanding design and printing features for documents like reports, tables, lists, serial letters, industry forms, vouchers and barcode labels. Especially the ready-to-use industry labels (e.g. VDA4902, Odette, Galia, AIAG, …) save time. Software developers use TFORMer Runtime as reporting tool for direct printing, PDF generation, PostScript-, HTML, image or ZPL-II output. Form layouts are designed graphically with TFORMer Designer, TFORMer Runtime is then used to provide dynamic data for these layouts and to generate the output. It represents the core printing functionality and it is available for all major operating systems. 3.2 TFORMer Basics In contrast to a word processor which is mostly used for static content, TFORMer generates output based on dynamic data. Examples for dynamic contents are article-numbers used in product labels or addresses used in serial letters. Dynamic content is provided by external data-sources like a database, an arbitrary application or by the user. Such an external data-source is read by TFORMer during printing. So-called data-fields are used to access the external data. They serve as placeholders for dynamic content in the form layout. This data-centric output scheme is maintained in all cases. Even when printing pure static documents (like personal address labels) a data-source is required for controlling the number of printed labels. Page 8 of 99 T FO RM er D e sig ne r U se r M anua l Design (.ttf, .tfr) Data Generate automatically Enter manually Import from File Import from Database Output Preview Printer PDF PostScript® HTML Text Figure 1: Architectural Overview Form layouts created with TFORMer Designer are able to perform computations and to react on the values of data-fields. Thus, TFORMer enables you to embed the complete logic of the layout into the documents. 3.3 Output Formats Once a form layout was designed it produces identical results across printer models, operating systems and formats. The following formats are supported: Direct Printing ® ® Print form layouts directly on all printers supported by Microsoft Windows . ® ZEBRA ZPL-II compatible output for ZEBRA printers is available on all platforms, no special printer drivers are needed. PDF PDF export with full-featured bar-code support. ® PostScript Used for printing under Linux/UNIX and for pre-press applications. HTML The built-in HTML output is ideal for previewing and for web-based applications. Image Formats The built-in image output supports BMP, GIF, JPG, PCX, PNG and TIF formats. ASCII Pure ASCII output without any graphics for special purpose requirements. Page 9 of 99 T FO RM er D e sig ne r U se r M anua l 3.4 System Requirements 3.4.1 Operating Systems TFORMer Designer requires one of the operating systems listed below. The application was built for 32-bit operating systems, but also runs on 64-bit systems. ® ® Microsoft Windows 2000 ® ® Microsoft Windows XP ® ® Microsoft Windows Vista ® ® Microsoft Windows Server 2003 (including Terminal Server) TFORMer Designer includes the output kernel TFORMer Runtime. This output kernel is available ® ® for Linux and UNIX as well. For details check out the Developer Manual. 3.4.2 Memory 512 MB RAM is the recommended minimum (1 GB for Windows Vista). Actual memory requirements depend on the type and size of the generated output. 3.4.3 Disk Space TFORMer needs approximately 30 MB on disk. When using the .NET based API of TFORMer Runtime or the printing utility TFORMer QuickPrint please also consider .NET 2.0 requirements. Page 10 of 99 T FO RM er D e sig ne r U se r M anua l 4 User Interface This chapter will give you an overview of the TFORMer user interface. 4.1 Main Window Figure 2: User Interface The main window is divided into the following areas: Menu (see 4.2). Toolbars (see 4.3). Design Window (see 4.4). Tree View Window (see 4.5). Properties (see 4.6). Status Bar (see 4.7). Document Window Controls (see 4.8). Page 11 of 99 T FO RM er D e sig ne r U se r M anua l 4.2 Menu The menu gives you access to the following functions: 4.2.1 File New Form… Create a new form. Choose a layout template and adopt it to your needs. Shortcut: Ctrl+N Open… Open an existing form (or repository). Shortcut: Ctrl+O Save Save the current form. Shortcut: Ctrl+S Save as… Save the current form with a new name. You can also save forms into ZIP-files. Close Form Close the current form. TFORMer will prompt you to save any unsaved changes. Shortcut: Ctrl+W or Ctrl+F4 Templates Templates can be used as basis for new forms. Save as Template… Save the current form as template. Organize Templates… Organize the templates in a hierarchical structure. Edit Data… Generate, edit or import data from external data-sources. This data will be used for printing the current form. Shortcut: Ctrl+D Page Setup… Choose the margins and the orientation of the page. Printer Setup… Choose a printer and edit the printer properties. Print Preview Open the print preview. Shortcut: Ctrl+Space Print… Print the document on a printer of your choice, or generate file output (PDF, PostScript®, HTML, Text). Shortcut: Ctrl+P Repository A repository is a central location which references multiple form layouts in a structured way (see chapter 14). New Repository… Create an empty repository. Open Repository… Open an existing repository. Close Repository Close an open repository. Exit Exit TFORMer. TFORMer will prompt you to save any unsaved changes. 4.2.2 Edit Undo Revert the last change. Shortcut: Ctrl+Z Redo Revert the last Undo. Shortcut: Ctrl+Y Cut Copy all selected objects (rectangles, texts, printing bands, data-field definitions, ...) to the clipboard and remove them from the form. Shortcut: Ctrl+X Copy Copy all selected objects to the clipboard. Shortcut: Ctrl+C Paste Insert the content of the clipboard. Shortcut: Ctrl+V Delete Remove all selected objects. Keyboard: Del Element-Content… Edit the content of a text, barcode or picture element. Shortcut: Double-Click the Element or press F2 Printing-Condition… Edit the printing condition for the selected band or element (see also section 11.2). Group-By… Edit the group-by expression for the selected “group header” or “group footer”. Pre-Evaluation… Edit the pre-evaluations for the selected band (see also section 11.4). Post-Evaluation… Edit the post-evaluations for the selected band (see also section 11.4). Page 12 of 99 T FO RM er D e sig ne r U se r M anua l 4.2.3 Insert Project Insert a new project into the repository. Form… Insert a new form into the repository. Data-Field… Insert a new data-field (see also chapter 9). Tray-Mapping Insert a new tray mapping (see also section 11.6). Layer… Insert a new layer (see also section 11.3). Band Insert a new band (page header, detail band, …) – see also chapter 7. Element Insert a new element (text, barcode, line, …) – see also chapter 8. 4.2.4 Layout Z-Order Overlapping elements can be re-ordered: Send the selected element(s) to the front or to the back. Align Align two (or more) selected elements. Size Adjust two (or more) selected elements in size. Horizontal Spacing Enlarge or reduce the horizontal distance between elements (within a selection). Vertical Spacing Enlarge or reduce the vertical distance between elements (within a selection). Band Order Re-arrange the order of selected bands. Shortcuts: Alt+ and Alt+ 4.2.5 Data Edit Data… Open the Data Wizard (see also section 12.2). New Data-Field Insert a new data-field (see also chapter 9). 4.2.6 Tools Customize… Customize the toolbar (not available in this version). Options… Open the options dialog window (see also chapter 15). 4.2.7 View Layer Colors Toggle the display color of the elements between layer colors and element colors. Status Bar Show or hide the status bar. Properties Show or hide the properties window (see Figure 2, ). Design-Tree Show or hide the tree view window (see Figure 2, ). Toolbar Show or hide toolbars. Zoom Select the zoom factor. You will find the selected zoom factor shown next to the zoom symbol in the status bar: Shortcut: Ctrl++, Ctrl+– or Ctrl+Mousewheel 4.2.8 Window Cascade Arrange all open documents in cascading order. Tile Tile all open documents inside the design view area. Arrange Icons Line up the icons of minimized windows inside the design view area (if available). Document List At the bottom of the Window menu all open documents are listed with their names. To show one of the documents, just click the appropriate menu entry. Alternatively, you can switch documents by clicking the tabs at the bottom of . 4.2.9 Help TFORMer Help Display TFORMer help. Keyboard: F1 TEC-IT Website Open a browser and navigate to http://www.tec-it.com. Page 13 of 99 T FO RM er D e sig ne r U se r M anua l Licensing… License dialog for TFORMer Designer. About TFORMer… Display information about TFORMer Designer and the program version. 4.3 Toolbars The most commonly used program functions are accessible via toolbars. Each of the toolbars can be shown or hidden (menu View ► Toolbar). The following toolbars are available: Default (New/Open/Save File, Print, Print Preview, Edit Data, …) Repository (Printers, Projects and Data-Fields) Layout (Alignment, Size, Z-Order, Spacing) Format (Font settings, Colors, Line style, …) Elements (Insert graphical Elements and Data-Fields) Bands (Insert different kinds of bands: Report Header, Page Header, Detail Band, …) Content and Expressions (Element-Content, Printing-Condition, Group-By, Pre-Evaluation, Post-Evaluation) Page 14 of 99 T FO RM er D e sig ne r U se r M anua l 4.4 Design Window In the design window all form layouts can be edited. Figure 3: Design Window The design window is divided into the following areas: Worksheet. Horizontal and vertical rulers. File tab(s). Markers showing the horizontal and vertical mouse position. On the worksheet you can place all kinds of graphical elements (text elements, lines, rectangles, barcodes, images). You can move, resize or delete elements. And you can add and remove bands. For more information on how to design forms, please refer to the chapters 6 to 11. The rulers are located on the left and upper margins of the design window. They assist you when positioning elements. After starting TFORMer Designer for the first time, the measuring unit is set to ”System (Default)”. You can change this value in the options dialog (menu Tools ► Options…). Inside the rulers the position of the mouse cursor is marked with a small vertical and horizontal line (). The file tabs allow you to switch quickly between open files. Page 15 of 99 T FO RM er D e sig ne r U se r M anua l 4.5 Design Tree Window The Design Tree window shows a structured view of the document (or of the repository). It lists all objects in a single place and allows the selection of objects by mouse click. You can also use the design tree to locate elements, which are occluded in the design window. Figure 4: Design Tree Window The design tree lists all objects in an hierarchical tree structure: you can expand single branches of the tree by clicking the symbol and you can collapse them by clicking the symbol. To select an object, click on it with the left mouse button. Hold down the Shift key or the Ctrl key for multiple selections. If you right-click on one of the objects, a context menu appears. In the figure above a text element is selected (). By navigating in the tree from the selection up to its root, you will find that this element is part of the “Page Header” band in the form layout named “Picklist_10.ttf”. If a repository is used (see chapter 14), a second tab will be shown next to the ”Design” tab . Clicking this tab switches to the tree view of the repository. Button maximizes the design tree window within the right side pane. Click this button again to restore the previous window state. Page 16 of 99 T FO RM er D e sig ne r U se r M anua l 4.6 Properties The functionality of TFORMer is adjusted via object properties. The properties window is used for modifying all such properties in a central location. Figure 5: Properties Window The upper part of the window shows the name of the selected object. The properties of the following objects can be modified: Form Band Element (graphical design element) Data-Field Layer Tray-Mapping Project (Repository) All properties are grouped into categories (like “Common”, “Advanced” or “Position”, see ). These categories help you to locate properties more easily. Properties are accessible as “field:value” pairs. E.g. the field “Text” currently holds the value “Express”, the color of the text (“Fore Color” ) is set to red. Additionally to the various category tabs an “All” tab is accessible. It contains all properties of the object in one single list. The area shows information on the selected property. By clicking button the properties window can be detached from the right side pane. Click the button again to re-attach the window. Button maximizes the properties window within the right side pane. Click again to restore the previous window state. ► TFORMer Designer supports multiple selections of objects: properties can also be changed if more than one object is selected. The change will be applied to all objects in the selection. Page 17 of 99 T FO RM er D e sig ne r U se r M anua l 4.7 Status Bar The status bar displays information about position, measurement and zoom factor. Figure 6: Status Bar shows the coordinates of the upper left corner of the selected element (or of the element with the mouse focus). shows the dimensions of the selected element (or of the element with the mouse focus). ► The measuring unit used for displaying positions or dimensions can be selected in the options dialog (menu Tools ► Options…). shows the current zoom factor used for displaying the content of the design window. The zoom factor can be adjusted via the menu (View ► Zoom) or by holding down the Ctrl key on the keyboard and by simultaneously turning the mouse wheel. 4.8 Document Window Controls The document window controls allow you to minimize (), restore () and to close () the current form. These functions are also available in menu . Figure 7: Document Window Controls Page 18 of 99 T FO RM er D e sig ne r U se r M anua l 5 Printing Concept and Workflow 5.1 Introduction TFORMer uses one universal output concept to produce all different kinds of outputs like: Reports – a table, a list or a letter usually spanning multiple pages. Labels – a layout which is printed repeatedly row- and column wise. Hybrid Layouts – a mix of the two variants above. This is achieved by logically separating a form layout () into different printing areas (e.g. a report header, page header, detail area, page footer and report footer). Such a printing area is called band. Each of these bands fulfills a specific purpose. By combining the bands within one form layout, and by adjusting their properties, different layout schemes can be produced. In the example below a simple list is printed – see . Design Output Dynamic Content Input Data with Data-Fields Figure 8: Printing Concept In contrast to a word processor which is mostly used for static content, a report generator like TFORMer generates output based on dynamic data. Good examples for dynamic contents are article-numbers used in product labels, addresses used in serial letters or product descriptions in invoices. Dynamic content is provided by an external data-source . A text-file, a database, an arbitrary application or manual specified user-data may serve as such a date-source. 5.2 Printing Concept Overview A form layout uses different design elements like text elements, barcode elements, shapes and pictures which are placed on bands (see Figure 9, ). When generating the output, each of the bands will be rendered repeatedly: Usually a detail band is rendered for each single record (see Figure 9, ) of the data-source. The page header and the page footer are rendered at the top respectively bottom of each page automatically (see Figure 9, ). Page 19 of 99 T FO RM er D e sig ne r U se r M anua l Design Output Barcode Text Shape Dynamic Content Picture Text [ArticleName] (No. [ArticleNo]) Page Header Page Header Detail Expression [ArticleNo] [ArticleName] (No. [ArticleNo])] Input Data with Data-Fields [ArticleNo] Page Footer Page Footer Figure 9: Printing Concept in Detail Text, barcode and image elements can use data-fields via expressions. Expressions are used to evaluate data-fields, system fields (e.g. the page number) and functions (e.g. the current date) as well as to perform arbitrary computations. Expressions are also used to control the output behavior of a form layout via printing-conditions. Text elements embed expressions into the text via placeholders like “[]” (see ), while barcodes and images are using expressions directly (). 5.3 Data Source Concept For generating output TFORMer requires external data in each case. The records and the datafields control the content and appearance of the output. As a rule of thumb TFORMer prints one detail band per record of the data-source. Please note, that this data-centric output scheme is maintained in all cases, even when printing pure static documents like personal address labels. In this case the number of records controls the number of printed labels. A data-source can be seen as a simple table, which is read row by row (record by record) by TFORMer during printing. Each record is divided into data-fields. These data-fields are used as placeholders for dynamic content in the form layouts. Data Fields Records Figure 10: Data Source Concept The figure above shows a data-source with three data-fields (named “ArticleName”, “ArticleNo” and “ArticlePrice”) and eight rows (records). Page 20 of 99 T FO RM er D e sig ne r U se r M anua l 5.4 Reading a Data-Source and Printing Bands TFORMer processes an output request in the following way: A data-source is read record by record in the native order of the data-source. TFORMer does not change the order of the records. After starting a print-job the first data record is loaded. If no record exists TFORMer does not produce output. Then, for each available data record, TFORMer internally iterates through all bands of the form design. Whether a band should be printed on the current printing position on the output page depends on the following rules: If the current record is the first record of the input data, all defined report headers are printed. If the current record is the first record within a group, all defined group headers are printed. All defined detail bands are printed for the current record. If the current record is the last record within a group, all defined group footers are printed. If the current record is the last record of the input data, all defined report footers are printed. Printing of page headers and page footers is triggered automatically. It works completely independent from the current record. ► Keep in mind that TFORMer supports multiple bands of the same type in one layout (e.g. multiple page headers). Whether a specific band is printed or not can be controlled via printing conditions. Page 21 of 99 T FO RM er D e sig ne r U se r M anua l 5.5 Typical Workflow The typical workflow when designing a new form layout is as outlined below. 5.5.1 Identify Dynamic Data The first step before creating a form layout is to identify the static and dynamic content of the layout. Dynamic content is usually provided by the user or by external data-sources via placeholders. These placeholders are called data-fields and are filled with current values during print-time. 5.5.2 Form Design To create the design, you either modify one of the numerous available templates, or you create your own form. Forms are composed of different logical areas called bands. When designing a form layout you can combine different bands to create different layouts schemes. Each band can contain different graphical elements (text elements, barcode elements, shapes and images). Dynamic features (e.g. printing conditions) give you additional control over the output. For more information on designing forms, please refer to chapters 6 to 11. 5.5.3 Provide Data Before you can generate any output you have to specify the data to be printed. The data can be provided in different ways: It can be generated automatically. It can be edited manually. It can be imported from an external file or from a database. It can be provided programmatically via TFORMer Runtime. For more information on providing data, please refer to chapter 12. 5.5.4 Generate Output Once you have designed your form layouts, all you have to do is to apply different data to generate output with different content. For details, please refer to chapter 12.3. Page 22 of 99 T FO RM er D e sig ne r U se r M anua l 6 Forms 6.1 Introduction The graphical design of the required output is named form (or form layout). A form contains datafields, tray mappings, layers and bands. Bands divide a form layout into vertical areas and hold all graphical design elements. 6.2 Basic Operations 6.2.1 Open an Existing Form To open an existing form select File ► Open… from the menu (or press the “Open” icon in the toolbar). You can also press the keyboard shortcut Ctrl+O. Then select the requested file and press OK to confirm. ® Alternatively you can double-click on the .tff file in the Windows Explorer, or you can drag the file from the Explorer to the TFORMer window. 6.2.2 Create a New Form To create a new form select File ► New Form… from the menu (or press the “New” icon toolbar). You can also press the keyboard shortcut Ctrl+N. The following wizard will appear: in the Figure 11: Create New Form In this wizard you can select the template that you want to start with. Choose between: Custom report (see section 6.2.2.1). Custom label (see section 6.2.2.2). Ready-to-use label or report templates for industry and logistics. Sample and overview layouts, demonstrating the functionality of TFORMer. First select the desired template. Then click Finish () to open the form in the design window. The form can then be adapted to your needs by adding, removing or modifying bands and design elements. Page 23 of 99 T FO RM er D e sig ne r U se r M anua l 6.2.2.1 Custom Report If you want to design your own report, choose “Custom Report” and then click Next. The following wizard will appear: In this dialog you can specify the page margins and the page orientation. Click Finish to open the form in the design window. Reports typically have a report header, a page header, followed by a list of data records (detail bands), a page footer and a report footer: Figure 12: Custom Report – Design View Figure 13: Custom Report – Print Preview (10 Data Records) Page 24 of 99 T FO RM er D e sig ne r U se r M anua l 6.2.2.2 Custom Label If you want to design your own label, choose “Custom Label” and then click Next. The following wizard will appear: In this dialog you can specify the page margins and the page orientation. Click Next to proceed. Use this page to specify the label dimensions, the row- and column-spacing and the printing order of the labels. Click Finish to open the form in the design window. Labels typically use the detail band only: Figure 14: Custom Label – Design-View Figure 15: Custom Label – Print Preview (15 Data Records) Page 25 of 99 T FO RM er D e sig ne r U se r M anua l 6.2.3 Page Setup Wizard The page setup wizard is opened automatically upon creation of a new form (see sections 6.2.2.1 and 6.2.2.2), but it is also available for forms, which are already opened in the design window. It helps you to adjust the most important output parameters like page margins and page orientation. For labels you can additionally adjust the row- and column- settings and the print order (“Across, then Down”, “Down, then Across”). To open the page setup wizard select File ► Page Setup… from the menu. Margin Top Margin Top Detail Band Label (Detail Band) Label (Detail Band) Column Width Detail Band Label (Detail Band) Row Height Margin Left Margin Left Detail Band Label (Detail Band) Detail Band Detail Band Label (Detail Band) Label (Detail Band) Label (Detail Band) Margin Right Margin Right Row Spacing Label (Detail Band) Column Spacing Detail Band Report Margin Bottom Margin Bottom Figure 16: Page Setup (Reports and Labels) 6.2.4 Save a Form To save an open form select File ► Save or File ► Save As… from the menu. File ► Save saves the form with the current file name. Instead of selecting File ► Save you can also press the “Save” icon in the default toolbar, or you can press the keyboard shortcut Ctrl+S. Choosing Save As… allows you to specify a file name before saving the file. 6.2.5 Switch between Forms To switch between open forms click on the appropriate tabs in the design window (see section 4.4). Alternatively you can select the desired form in the Window menu. Or you can press Ctrl+Tab to switch to the next open form (or Ctrl+Shift+Tab to switch to the previous open form). Page 26 of 99 T FO RM er D e sig ne r U se r M anua l 6.2.6 Form Selection Figure 17: Form Selection A form can be selected by clicking with the left mouse button in the upper left corner of the design window (or anywhere inside the gray area ). Alternatively you can select the form by choosing the top level element in the design tree (see ). A square (on XP: ; on Vista: ) in will indicate, that the form is selected. 6.2.7 Close a Form There are various ways to close an open form: Select File ► Close Form from the menu. Click on the small in the document window controls (see section 4.8). Select the form (either in the design window or in the tree view), right-click with the mouse and select Close Form from the pop-up menu. Page 27 of 99 T FO RM er D e sig ne r U se r M anua l 6.3 Form Properties Using the properties window you can adjust all form related settings. You can adjust all properties for page setup (page margins, orientation, rows and columns, …). Most of these properties can be adjusted via the Page Setup Wizard as well. apply a background image (watermark), specify a name which will be used for the generated output or spool file. Figure 18: Form Properties First select the form (see section 6.2.6). Thereafter the form properties can be adjusted in . 6.3.1 Page Setup via Form Properties The most common properties are described below. For a detailed description of all form properties, please refer to Appendix A.1. 6.3.1.1 Page Margins The page margins (Margin Left, Right, Top and Bottom) confine the printing area on the output page. They can be adjusted in the Margins tab. Page margins are given in respect to the physical borders of the output page. 6.3.1.2 Rows and Columns These two properties are used to adjust the number of rows and columns for label printing or to switch between label- and report-style output. Rows and columns are adjusted in the Advanced tab. Page 28 of 99 T FO RM er D e sig ne r U se r M anua l Whenever both values are equal to 1 TFORMer assumes it is printing a report. All detail bands are printed using the whole page. Using greater values than one means that the page will be divided into the given number of rows and columns (label printing). For detailed information on layout schemes, please refer to section 6.4. 6.3.1.3 Form Width The form width specifies the horizontal space, which is available in the form design. It defines the width of all bands (see also section 7.3.5). For reports the form width is usually set to the width of the output page. When printing labels the width of one label (see ) is given through the column width property (see below). The form width can either be entered in the Position tab, or it can be changed per mouse: Just click and drag the confining border in the desired direction. 6.3.2 Label-Specific Properties 6.3.2.1 Row Height and Column Width In order to produce label-style output you have two options: Set the number of rows and columns to specific values. Set the number of rows and columns to ”auto” and set the Row Height and the Column Width to specific values. In the second case TFORMer computes the number of rows and columns that fit on the used output page: such a form layout may be printed on different paper sizes (e.g. A4, A5) and TFORMer takes care of the correct number of rows and columns automatically. The slash-dotted red line marks the column width (= the label width). The line is only visible, if a value other than ”auto” was entered. The column width can be changed with the mouse (click and drag), or it can be edited in . It applies to all bands which are printed on labels (e.g. detail bands). Headers and footers usually use the whole width of the form. The gray area between and marks the gap between the column width and the form width. This area will be cut off in the output. 6.3.2.2 Row and Column Spacing The Row-Spacing and the Column-Spacing are the distances that are left empty between labels vertically and horizontally. The spacing can be adjusted in the Advanced tab. 6.3.2.3 Printing Order The Printing Order (“Across, then Down” or “Down, then Across”) specifies the order in which labels are being printed. The Printing Order property can be adjusted in the Common tab. 6.3.3 Watermark The Watermark is an image which is used as background for each page. The image file name (or an expression which computes the file name during print-time), size and position can be adjusted in the Watermark tab. 6.3.4 Document Name The Document Name is used as name for the generated output file or spool file. If left blank, the file name of the form layout is used. The document name can be adjusted in the Advanced tab Page 29 of 99 T FO RM er D e sig ne r U se r M anua l 6.4 Form Layout Schemes When printing, TFORMer fills each physical page with page headers, detail bands, page footers, etc. If no space is left a new physical page is started. TFORMer offers the possibility to divide a physical page into multiple logical areas (also called “labels”). When doing this, each logical area (label) is treated like a physical page. This behavior is controlled via the row and column properties of the form layout: Label-style output is archived by dividing the physical page into multiple rows and columns. Report-style output is archived otherwise. The approach is best explained with the following examples, demonstrating the most common layout schemes. Figure 19 to Figure 23 use the following color keys for bands: The output is controlled by TFORMer. Depending on their properties TFORMer prints the bands using the complete “Page” area or only the “Label” area. These bands are printed per record of the data-source. 6.4.1 Reports The “Custom Report” template (see section 6.2.2.1) adjusts the form and band properties as follows: Report Header Page Header Form: Detail Band Detail Band Detail Band Advanced Columns Rows Column Width Row Height Column Spacing Row Spacing 1 1 [auto] [auto] 0.000 mm 0.000 mm Common Page Break Row/Column Break None None Detail Band Detail Band Report Footer Page Footer Detail Band: The settings for rows and columns are both set to one. Therefore the physical page is not divided into sub-areas. The detail bands are printed below each other without any intermediate page or column breaks. Figure 19: Default Report Configuration Page 30 of 99 T FO RM er D e sig ne r U se r M anua l 6.4.2 Labels The “Custom Label” template (see section 6.2.2.2) adjusts the form and band properties as follows: Detail Band Detail Band Form: Detail Band Detail Band Detail Band Detail Band Detail Band Detail Band Figure 20: Default Label Configuration Detail Band: Advanced Columns Rows Column Width Row Height Column Spacing Row Spacing [auto] [auto] 50.000 mm [auto] 0.500 mm 0.500 mm Common Page Break Row/Column Break None After this Band Rows and Columns are set to “auto”: Therefore TFORMer computes the maximum number of labels per physical page automatically: The number of columns is calculated based on the width of the paper, the page margins, the column width () and the column spacing (). The number of rows is calculated based on the height of the paper, the page margins, the row spacing () and the height of the detail bands. Page 31 of 99 T FO RM er D e sig ne r U se r M anua l 6.4.3 Labels with Headers and Footers This is a variant of the “Custom Label” template with additional headers and footers. Report Header Page Header Header/ Footer: Detail Band Advanced Output-Area Page Detail Band Detail Band Detail Band Detail Band Detail Band Setting the Output-Area to “Page” (default) instructs TFORMer to print the header or footer bands using the whole physical page width. Report Footer Page Footer Report Header Page Header Page Header Page Header Detail Band Detail Band Page Footer Page Footer Page Header Page Header Detail Band Detail Band Page Footer Page Footer When setting the Output-Area to ”Label” TFORMer will print the header or footer bands within the labels. Header/ Footer: Advanced Output-Area Label Please note: You can add more than one header (or footer) to your design. (For example, one page header which is printed per page and one page header which is printed per label.) Report Footer Page Footer Figure 21: Labels with Headers and Footers Page 32 of 99 T FO RM er D e sig ne r U se r M anua l 6.4.4 Reports in Labels Report Header Page Header Detail Band Detail Band Detail Band Detail Band Detail Band Detail Band Detail Band Detail Band Detail Band Detail Band Detail Band Detail Band Report Footer To print multiple detail bands inside one label you have to do the following: Beginning with the “Custom Label” template set a specific Row Height and remove the Row/Column Break for all detail bands. This will make TFORMer print as many detail bands as possible for the given row height. Form: Detail Band: Page Footer Advanced Columns Rows Column Width Row Height Column Spacing Row Spacing [auto] [auto] 50.000 mm 40.000 mm 0.500 mm 0.500 mm Common Page Break Row/Column Break None None Again, headers and footers may be added as required (see section 6.4.3). Report Header Page Header Page Header Page Header Detail Band Detail Band Detail Band Detail Band Page Footer Page Footer Page Header Page Header Detail Band Detail Band Detail Band Detail Band Page Footer Page Footer Report Footer Page Footer Figure 22: Reports in Labels Page 33 of 99 T FO RM er D e sig ne r U se r M anua l 6.4.5 Report with Multiple Columns Apart from dividing the page into multiple rows and columns, the detail bands may be printed in multiple columns within one single logical area as well. Report Header Page Header Detail Band Detail Band Detail Band Detail Band Detail Band This layout is based on the “Custom Report” template: The number of columns is adjusted in the properties of the detail band, in the Columns tab. The print order is always across, then down. Detail Band: Report Footer Page Footer Figure 23: Report with Multiple Columns 6.4.6 Columns Columns Gap Width 2 0.000 mm (auto) Hint: When using a fixed number of columns and Width=”auto”, the available horizontal space is divided equally. Otherwise all bands are printed from left to right, without any additional horizontal spacing. Labels with Multiple Columns To print multiple columns per labels, you can use the following settings: This layout is based on the “Custom Label” template. In the form properties specify the row height or the number of rows (or both). Report Header Page Header Detail Band Detail Band Detail Band Detail Band Form: Detail Band Detail Band Detail Band Detail Band Detail Band Detail Band Detail Band Detail Band Detail Band: Report Footer Page Footer Figure 24: Report with Multiple Columns Advanced Columns Rows Column Width Row Height Column Spacing Row Spacing [auto] [auto] 50.000 mm 30.000 mm 0.500 mm 0.500 mm Columns Columns Gap Width 2 0.000 mm (auto) Then set the number of columns in the properties of the detail band in the Columns tab. Please, make sure to remove any intermediate page or column breaks for all bands on one label. Page 34 of 99 T FO RM er D e sig ne r U se r M anua l 7 Bands 7.1 Introduction A form layout consists of one or more bands. Each band is a vertical section, which contains graphical elements like text elements, lines or barcodes. Each band fulfills a specific purpose and is printed in a clearly defined position and sequence. Bands may also be used for computations and controlling the output behavior (see chapter 11). 7.2 Band Types TFORMer supports the following band types: Report Header This band is printed at the top of the first page of the output. Alternatively it can also be printed at the top of the first label. This band is optional. Page Header This band is printed at the top of each page (on the first page after the report header). Alternatively it can also be printed at the top of each label. This band is optional. Group Header This optional band is printed before a group starts. A group is defined by an expression specified in the “Group-By” property of the band. Whenever this expression changes, a group is started. Detail Band This band is printed for each single record. Group Footer This optional band is printed after a group. A group is specified by a “Group-By” expression. Page Footer This band is printed at the bottom of each page (on the last page before the report header). Alternatively it can also be printed at the bottom of each label. This band is optional. Report Footer This band is printed on the last page of the report (after the last data record). Alternatively it can also be printed at the bottom of the last label. This band is optional. First page Intermediate pages Report Header Page Header Last page Page Header Page Header Detail Band Group Footer Group Header Detail Band Group Header Detail Band Detail Band Detail Band Detail Band Detail Band Detail Band Detail Band Group Footer Detail Band Group Footer Detail Band Report Footer Page Footer Group Header Detail Band Detail Band Detail Band Page Footer Page Footer Figure 25: Rendering Scheme for Bands (Report) Page 35 of 99 T FO RM er D e sig ne r U se r M anua l When printing labels, typically no page- and report headers/footers are required. The detail bands will be arranged differently (see also section 6.4). 7.3 Basic Operations 7.3.1 Insert Band Figure 26: Form Design To insert a band click on the appropriate icon in the toolbar or select Insert ► New Band from the menu. The selected band will be inserted as a vertical section on the worksheet. 7.3.2 New Report Header Add a new report header to the form design. New Page Header Add a new page header to the form design. New Group Header Add a new group header to the form design. For each group header you have to define a group-by expression. New Detail Band Add a new detail band to the form design. New Group Footer Add a new group footer to the form design. For each group footer you have to define a group-by expression. New Page Footer Add a new page footer to the form design. New Report Footer Add a new report footer to the form design. Add Layer Add a new layer to the form design. For more information on layers, please refer to section 11.3. Band Selection To select a band, click on the band header (or on an empty area inside the band). You can also select a band in the design tree. Once a band is selected, it can be copied, deleted or its properties may be adjusted. Page 36 of 99 T FO RM er D e sig ne r U se r M anua l 7.3.3 Expanded/Collapsed View of Bands Bands can be displayed in expanded or in collapsed view. The collapsed view is used to hide all contents of a band during form design. The resulting output is NOT influenced! Click on the 7.3.4 symbol to expand, or click on the symbol to collapse the band view (see ). Adjust Band Properties To adjust the band properties, first select the band. Then the properties can be edited in the properties window. For a list of available properties, please refer to Appendix A.2. 7.3.5 Change Size The size of a band can be changed by clicking and dragging its confining borders at the right and at the bottom of the band. Alternatively you can enter the dimensions in the Position tab in the properties window (see Figure 26, and ). Please note: The width property will be applied to all bands in the form design (= same as the form width, see 6.3.1.3). 7.3.6 Change Band Printing Order If your design contains more than one band of the same type (e.g. three detail bands), TFORMer processes them from top to bottom. The printing order of bands can be changed: Select the band that you want to move and choose Layout ► Band Order from the menu. You can also right-click on the band and then select Band Order from the pop-up menu. Alternatively use the keyboard shortcuts Alt+ and Alt+. 7.3.7 Delete Bands Select the band that you want to delete, and then press the Del key. Alternatively you can click on the icon in the ”Default” toolbar or press the right mouse button and select Delete from the popup menu. 7.3.8 Printing Conditions For each band you can specify a printing condition. A printing condition decides at print-time whether a band will be printed or not. For more details on printing conditions, please refer to section 11.2. 7.3.9 Pre- and Post-Evaluations For each band you can specify pre-evaluation and post-evaluation expressions. These expressions will be evaluated before and after the band is printed. For more details on pre- and post-evaluations, please refer to section 11.4. Page 37 of 99 T FO RM er D e sig ne r U se r M anua l 8 Elements 8.1 Introduction Elements (or graphical design elements) are all sorts of printable shapes like texts, barcodes, lines, rectangles, circles and pictures. They are placed on the bands to create the actual form design. 8.2 Basic Operations 8.2.1 Insert Element Figure 27: Design Window To insert an element (e.g. a barcode) into your form, first click on the appropriate symbol in the toolbar (). Then place the element on one of the bands inside the design area (). You can place elements in two different ways: A single mouse click on the worksheet will insert the element with its default size. If you want to insert an object with custom size, drag the mouse pointer diagonally (while holding down the mouse button). A frame will be drawn. Once the mouse button is released, the element is inserted in the given dimensions. Select Elements Select existing elements (or bands) inside the design window. This tool is enabled by default. New Text Create a new text element. A text element may contain formatted text and dynamic content. Dynamic content is used via expressions which are embedded in the text. See also sections 8.3 and chapter 10. Page 38 of 99 T FO RM er D e sig ne r U se r M anua l New Barcode Create a new barcode. The barcode data is specified as an expression (see section 8.4). New Line Create a new line. New Rectangle Create a new rectangle. New Ellipse Create a new ellipse. New Picture Create a new picture. The name of the file to be displayed can be specified directly or via an expression (see section 8.5). New Data-Field Create a new data-field. Data-fields are no graphical elements. You will find them inserted in the tree view of your form only. The content of a data-field can be displayed as text or as barcode element, or it can be used as source for image file names (see below). For more information on element properties, please refer to Appendix A.3. 8.2.2 Element Selection On the worksheet you can select elements in various ways: Click with the left mouse button on an element. You can hold down the Shift button or the Ctrl button for multiple selections. Click in an empty area of the design window and hold down your left mouse button to drag a selection frame. Then release the mouse button. Depending on the direction, in which you have dragged the selection frame, different selection criteria are used: - Drag frame from left to right: Only objects that are entirely overlapped by the frame will be selected. - Drag frame from right to left: All objects that are entirely or partially overlapped by the frame will be selected. A thin border with small black rectangles (sizing handles) on its corners and on its sides indicates that an element is selected. ► To start a selection frame over an existing graphical element try to hold down the Shift or the Ctrl key. This will prevent other elements (which might be under the mouse pointer) from being moved. Page 39 of 99 T FO RM er D e sig ne r U se r M anua l 8.2.2.1 Examples Figure 28: Element Selection This element has the mouse focus (dotted outline). If you click your left mouse button, it will be selected. This element is part of a selection. Because it does not have the selection focus its draw sizing handles are drawn unfilled ( ). This element is part of a selection and has the selection focus, this is indicated by solid draw sizing handles ( ). If you adjust the size or the alignment of two or more elements (see sections 8.2.10.1 and 8.2.10.2), the focused element will act as “master”. This means its properties (or property changes) will be applied to the rest of the selection. The last element that is added to the selection always receives the selection focus. You can set the focus within a selection by clicking on the required element. Do NOT hold down any modifier keys, like Shift or Ctrl! This element is not selected. 8.2.3 Change Element Size After selecting an element, you can change its size by clicking and dragging the sizing handles. If you do not want the mouse to snap to the grid, press the Alt key while dragging. Another possibility to change the size of an element is to edit the width and the height property in the properties window. Please note: If the selection contains more than one element, all selected elements will be resized simultaneously. Page 40 of 99 T FO RM er D e sig ne r U se r M anua l 8.2.4 Move Elements An element can be moved by clicking and dragging. While dragging you can use the following modifier keys: Modifier Key Description Shift Snap to axis. The movement of the element will be restricted to the horizontal and vertical axis. Ctrl Copy mode. A copy of the original element(s) will be created on the release position. In copy mode the mouse pointer changes its shape to . Alt Fine positioning. Elements can be positioned off the grid, without having to necessarily turn off the grid. 8.2.5 Element Properties To change the properties of a selected object, you can either: 8.2.6 Edit the desired properties in the properties window. Use the format toolbar (see section 4.3) to change frequently used settings like font style, background color, etc. Positioning and Measuring The rulers and the status bar assist you with measuring and positioning of inserted elements. When entering measurement values manually TFORMer interprets such values as specified in mm or in inch (depending on your system settings). For your convenience you may use common abbreviations for measurement units (mm, cm, inch, mil). 8.2.7 Delete Elements You can delete selected elements in various ways: Press the Del key on the keyboard. Right-click on the element. Then select Delete from the pop-up menu. Select Edit ► Delete from the menu. Click the delete symbol 8.2.8 in the toolbar. Printing Condition For each element you can specify a printing condition. A printing condition decides at print-time whether the element will be printed or not. For more details, please refer to section 11.2. 8.2.9 Assign Elements to a Printing Layer A printing layer provides a printing condition, which decides whether elements assigned to this layer will be printed or not. By default, only one layer (the “Base” layer) is available. Newly created elements are assigned to the “Base” layer by default. The printing layer does NOT affect the z-order, in which the elements are printed! For more details on printing layers, please refer to section 11.3. Page 41 of 99 T FO RM er D e sig ne r U se r M anua l 8.2.10 Design Functions for Elements These functions simplify layout tasks: You can make all selected elements the same size, you can adjust the spacing between selected elements, and more. The following properties can be adjusted: Alignment Size Z-Order Spacing horizontal and vertical) The design functions are available through the toolbar (see Figure 29) or through the Layout menu. Alignment Size Z-Order Spacing Figure 29: Design Toolbar ► When changing the alignment or the size of selected elements, the element with the selection focus acts as master: all selected elements will be changed according to its values (see 8.2.2.1, )! 8.2.10.1 Alignment Select at least two elements. Then choose one of the following functions: Align Left The selected elements will be aligned left. Shortcut: Ctrl+ Align Right The selected elements will be aligned right. Shortcut: Ctrl+ Align Bottom The selected elements will be aligned at the bottom. Shortcut: Ctrl+ Align Top The selected elements will be aligned at the top. Shortcut: Ctrl+ Align Vertically The selected elements are center-aligned vertically. Align Horizontally The selected elements are center-aligned horizontally. 8.2.10.2 Size Select at least two elements. Then choose one of the following functions: Make same Width The width of the selected elements is set to the width of the focused element. Make same Height The height of the selected elements is set to the height of the focused element. Make same Size The size of the selected elements is set to the size of the focused element. 8.2.10.3 Z-Order Select at least one element. Then choose one of the following functions: Move to Top The selected elements will be moved in front of all other elements. Move to Bottom The selected elements will be moved behind all other objects. Move Up The selected elements will be moved up one level. Page 42 of 99 T FO RM er D e sig ne r U se r M anua l Move Down The selected elements will be moved down one level. 8.2.10.4 Spacing Select at least two elements. Then choose one of the following functions: Make Horizontal Spacing Equal Ensure equal horizontal spacing between the selected elements. Increase Horizontal Spacing Increase the horizontal spacing between the selected elements. Decrease Horizontal Spacing Decrease the horizontal spacing between the selected elements. Make Vertical Spacing Equal Ensure equal vertical spacing between the selected elements Increase Vertical Spacing Increase the vertical spacing between the selected elements. Decrease Vertical Spacing Decrease the vertical spacing between the selected elements. 8.3 Text Elements Text elements are used for providing formatted text: Figure 30: Text Element This formatted text is edited via the dialog as shown below. When inserting a new text element or when double-clicking an existing text element this dialog is opened automatically. Alternatively you can select the element and press F2 or right click on the element and select Element-Content… from the pop-up menu. Figure 31: Edit Text Dialog The Edit Text dialog allows you to edit text, apply different formatting (single phrases, words and characters may be formatted individually) and insert expressions (see chapter 10). If you want to, you may edit the content of the text element as HTML source. Expressions which are embedded in the text are displayed between square brackets “[]“ () or angle brackets “<>”. Page 43 of 99 T FO RM er D e sig ne r U se r M anua l Square brackets indicate that the result of the expression will be inserted as is. Angle brackets indicate that the result of the expression will be interpreted as HTML source. This allows you to specify dynamic content with additional formatting! ► Please note: Expressions must always be inserted using the expression builder! The expression-start- and the expression-end-markers (brackets) can NOT be entered via the keyboard! All text formatting is done with this toolbar: Undo/Redo Expressions Data Fields Text Formatting Expr. Highlight HTML Source View Figure 32: Edit Text Dialog: Toolbar 8.3.1.1 8.3.1.2 8.3.1.3 Edit Undo Revert the last change. Shortcut: Ctrl+Z Redo Revert the last Undo Shortcut: Ctrl+Y Expressions Insert Expression Open the Expression-Builder (see section 10.2). The Expression-Builder is used for editing expressions. It can also be opened by double-clicking on an existing expression within the text. Insert Data-Field Open the Select Data-Field dialog. The Select Data-Field dialog is used for creating or selecting data fields. Highlight Expressions Highlight all embedded expressions. Text Formatting Font Name Select the typeface. Font Size Select the font size (in points). Bold Toggle bold text on/off. Shortcut: Ctrl+B Italic Toggle italic text on/off. Shortcut: Ctrl+I Underline Toggle text underline on/off. Shortcut: Ctrl+U Strike Through Toggle text strike through on/off. Font Color Select the font color. Align Left Align the text left. This alignment is applied to the whole text element and not for single lines or paragraphs. (Same as the Text Alignment property “Top, Left”.) Center Center the text. This property is applied to the whole text element and not for single lines or paragraphs. (Same as the Text Alignment property “Top, Center”.) Align Right Align the text right. This alignment is applied to the whole text element and not for single lines or paragraphs. (Same as the Text Alignment property “Top, Right”.) Page 44 of 99 T FO RM er D e sig ne r U se r M anua l 8.3.1.4 Source View HTML Source TFORMer internally uses a subset of HTML (see Appendix B). With this button you can toggle between the WYSIWIG view and the HTML source view. In the HTML source view the text may be edited as well. 8.4 Barcode Elements Barcode elements encode the given data in a machine readable form. Please note: The barcode preview in the design window does not match the data to be encoded. The correct barcode is computed during print-time. Figure 33: Barcode Elements The Barcode Data is specified via an expression (see chapter 10). When inserting a new barcode element or when double clicking on an existing barcode the Expression-Builder is opened automatically. Alternatively you can select the barcode and press F2 or right click on the barcode and select Element-Content… from the pop-up menu. The Barcode Type and other barcode specific settings are adjusted in the properties window. You can choose from 1D, 2D and composite barcode symbologies. Depending on the selected barcode type additional property tabs may be available. For more information on available barcode types and their possible adjustments, please refer to the “Barcode Reference” which is available for download on www.tec-it.com. 8.4.1 Dynamic Barcode Content Dynamic barcode content is provided via expressions. A good example is the encoding of a datafield value (see ). 8.4.2 Static Barcode Content Static content (character data) within an expression must be enclosed in quotation marks (e.g. “AaBb12” – see ). Otherwise TFORMer will treat the character sequence as data-field name. 8.5 Picture Elements Picture elements are used for embedding images into a form layout. Supported image formats are BMP, GIF, JPG, PCX, PNG, TGA and TIF. Page 45 of 99 T FO RM er D e sig ne r U se r M anua l Figure 34: Picture Elements The displayed image is either selected via the Open File dialog or via the Expression-Builder (see section 10.2). This depends on whether you are using static or dynamic pictures (see below). When inserting a new picture or when double-clicking on an existing picture the appropriate dialog will be opened automatically. Alternatively you can select the picture and press F2 or right click on the picture and select Element-Content… from the pop-up menu. You can use absolute file names (e.g. “C:\sample.jpg”) or relative file names (e.g. “sample.jpg” or “img\sample.jpg”) for pictures. Relative file names are treated relative to the base path of the layout file. 8.5.1 Dynamic Pictures A dynamic picture (see ) is a picture which depends on a data-field value (more general on the value of an expression – see also chapter 10). To use a dynamic picture set the property PictureSource to “Expression”. The file name of the image is then computed via the expression which is entered in the property “File”. 8.5.2 Static Pictures A static picture (this is the default setting, see ) always uses the same image file every time the band is printed. To use a static picture set the Picture-Source property to “File”. The file name of the image is chosen via a file selection dialog (property “File”). Page 46 of 99 T FO RM er D e sig ne r U se r M anua l 9 Data-Fields 9.1 Introduction For providing dynamic content TFORMer uses so called data-fields. These data-fields serve as placeholders for the actual data. With the help of expressions (see chapter 10), data-fields may be printed as text, as barcode and they may be used to provide the file name for picture elements (dynamic logos). A data-field must be defined before it can be used. This definition takes place directly in the form layout or in a repository (see chapter 14). One form layout can use an arbitrary number of datafields (0..n). Design Output Barcode Text Shape Picture Dynamic Content Text [ArticleName] (No. [ArticleNo]) Expression Page Header [ArticleNo] Page Header Detail [ArticleName] (No. [ArticleNo])] [ArticleNo] Input Data with Data-Fields Page Footer Page Footer Figure 35: Data-Fields as Part of the Printing Concept During design-time TFORMer displays the underlying data-field in square brackets “[]” (or angle brackets “<>”) – see . The current value of a data-field is available only during print-time (). The value of a data-field is either provided by an external data-source (e.g. imported from a database – see chapter 12), provided by the user (see chapter 12), computed during print-time (pre- and post-evaluation of bands – see section 11.4) or provided programmatically by a software developer (see section 12.4), If no value was loaded (or computed), the data-field returns its default value (see section A.5). 9.2 Basic Operations 9.2.1 Create Data-Field Definitions Data-field definitions can be created manually, or they can be imported from a data-source. Page 47 of 99 T FO RM er D e sig ne r U se r M anua l 9.2.1.1 Create Data-Field Definitions Manually You can define data-fields using one of the following methods: Select Insert ► New Data-Field from the menu. Click on the “New Data-Field“ icon in the toolbar. Right-click on the form, on a band, or on the “Data-Fields“ entry in the design tree window and select New Data-Field from the pop-up menu. The “New Data-Field“ dialog will appear. Once the data-field is inserted you will find the appropriate entry in the design tree (). 9.2.1.2 Create Data-Field Definitions Automatically This feature may be used to create numerous data-field definitions based on existing datasources automatically. Data-field definitions can be created automatically (see sections 12.2.4 and 12.2.5) by importing a data-source. All data-fields in the data-source which are not already defined in the current form layout (or repository) are suggested for import by TFORMer. The data type “String” is assigned automatically. 9.2.2 Data-Field Properties The data-field properties can be edited in the properties window, or they can be edited in the “Edit Data-Field” dialog (see ). For a description of data-field properties, please refer to section A.5. 9.2.3 Use Data-Fields in Form Designs Once a data-field was defined it can be used as part of text-content, printed as barcode, used as file-name for images (dynamic logos), or used in expressions (see chapter 10). Page 48 of 99 T FO RM er D e sig ne r U se r M anua l 9.2.3.1 Element Content For use as element content data-fields are assigned in either of these two ways: 1. Right click on the element and select Element-Content… from the pop-up menu. The datafield will be assigned using the expression builder (see chapter 10). 2. Drag and drop the data-field from the design tree to the design window (see below). The left or right mouse button may be used for the drag and drop operation. When using the right button additional insert options are provided. Figure 36: Drag and Drop Data-Field ► Hint: In the design tree all unused (= unreferenced) data-fields are displayed in gray. Used data-fields are displayed in black. 9.2.4 Rename Data-Fields To rename a data-field select it in the design tree und thereafter press F2 or click again on the datafield (with the left mouse button). Now you can enter a new name for this data-field. Renaming datafields is also possible in the property window. ► Hint: When renaming a data-field TFORMer does not automatically correct expressions (embedded in text elements, pre-evaluations, post-evaluations, printing-conditions, …) which are using this data-field. This has to be done manually (see section 10.5). 9.2.5 Delete Data-Fields You can delete data-fields in various ways: Select the data-field in the design tree and press the Del key on the keyboard. Alternatively you can use Delete in the pop-up menu, the delete symbol in the toolbar or Edit ► Delete from the menu. ► Hint: When deleting a data-field TFORMer does not submit a warning if the data-field is used (embedded in text elements, pre-evaluations, post-evaluations, printing-conditions, …). Expressions using unknown data-fields are treated as errors (see section 10.5). Page 49 of 99 T FO RM er D e sig ne r U se r M anua l 10 Expressions 10.1 Introduction Expressions are used for computing element content or controlling output behavior during printtime. Expressions can be used as dynamic content in text, barcode and image elements (see sections 8.3 to 8.5). as printing conditions for bands and graphical elements (see section 11.2). as printing conditions for layers (see section 11.3). for pre- and post-evaluations in bands (see section 11.4). to compute the name of the generated output or spool file (see section 6.3.4). to filter the input data (see section 13.2.3). The syntax used by TFORMer is similar to the programming language C. Example: This text element contains the fixed text “Current Date: “ and an expression which is marked with square brackets “[Now()]“. The system function Now() returns the current date. Date: 02.05.2007 During print-time the expression is evaluated: The expression [Now()] is replaced with the current date. 10.2 Expression Builder Expressions can be entered directly or they can be edited using the Expression Builder: Page 50 of 99 T FO RM er D e sig ne r U se r M anua l Figure 37: Expression Builder Field shows the current expression. To extend the expression in you can select one of the predefined Data-Fields The data-fields available in your form design. Constants True, False and Linefeed (“\n”). System Data-Fields Data-fields that are maintained by TFORMer automatically (the current page number, the band name, …) Functions Mathematical functions, conversion functions, string manipulation, … Formats Common formats for numbers, date and time values. Common Expressions Frequently used expressions like page numbering (“Page N of M”), the current date and time, currency formatting, … First select the category in . Then mark the required item in and click Insert (or just doubleclick on it). The item will be inserted at the actual cursor position in . Text area shows additional information on selected items. If you click OK the expression will be validated. Only expressions with a correct syntax are accepted. A list of all available functions, constants and system data-fields can be found in Appendix C. For text elements, additionally the button is available. When pushed, the evaluated expression in will be interpreted as HTML. Thus formatted text may be provided. HTML-formatted expressions are marked with angle brackets “<>” (see below). Page 51 of 99 T FO RM er D e sig ne r U se r M anua l 10.3 Expressions in Text Elements In text elements expressions are used in-line with the formatted text (). They are marked with square brackets “[]” or angle brackets “<>” (see also section 8.3): Figure 38: Expressions in Text Elements ► Please note: In text elements the expressions must always be inserted using the expression builder via the button! ► If you enter the expression markers [] (or <>) directly, they will be printed as typed on the keyboard. The expression will not be evaluated in such a case! The format for these in-line expressions (font size, color, etc.) is usually applied with the format toolbar (as it is applied for the rest of the text as well). However, you also have the possibility to provide the format within the expression itself: 10.3.1 Example for HTML Formatted Expressions Whenever an expression is marked as HTML expression (push button ), its result is interpreted as HTML. This feature allows you to control the appearance of a text element during print-time. Page 52 of 99 T FO RM er D e sig ne r U se r M anua l In this example the data-fields “ColorOn” and “ColorOff” are used for dynamic text formatting. They contain HTML tags for selecting the font color (<font color=xxx> and </font>). When printing, TFORMer evaluates the expressions and applies the contained HTML tags to the output. 10.4 Evaluation Order The over-all evaluation order for expressions is defined as follows (see also figure below): 1. Printing Condition of the band 2. Pre-Evaluation of the band (Can be used for computing data-fields.) 3. Printing Conditions of layers (These are computed for every band, the results are used later when printing the elements) 4. Printing Condition of elements in the band 5. Dynamic contents for elements 6. Post-Evaluation of the band Steps 2 to 6 will only be performed if the band is printed – in other words: if the printing condition of the band is true. Page 53 of 99 T FO RM er D e sig ne r U se r M anua l Process all Elements of Band Process Band False False Printing Condition of Band Unprocessed Elements left? True True Process Pre-Evaluation Printing Condition of Layer False True Process Printing Conditions of Layers Printing Condition of Element False True Process Post-Evaluation(s) Calculate Dynamic Content of Element Print Element Band finished Figure 39: Evaluation Order Page 54 of 99 T FO RM er D e sig ne r U se r M anua l 10.5 Errors If an expression yields a syntax error (e.g. by renaming or deleting a data-field which is used in expressions) all concerned objects are marked with red color. In this sample the data-field ”Quantity” was renamed to “Quantity_renamed”. The original data-field name is used in various expressions. Therefore syntax errors are marked with red color (). To retrieve more detailed information regarding the errors hover the mouse over objects marked with red. TFORMer displays a tooltip providing a short error description. Page 55 of 99 T FO RM er D e sig ne r U se r M anua l 11 Smart Layouts 11.1 Introduction TFORMer offers a number of features, which give you additional flexibility for formatting the output: Printing Conditions (Control whether single bands or elements are printed) Printing Layers (Assign elements to layers and control printing via printing conditions) Pre- and Post-Evaluations (Perform computations like sums, average values, …) Invisible Bands (Control special document layout features) Tray Control (Switch printer trays – even within a print job) 11.2 Printing Conditions ► Printing conditions are used to control the visibility of elements, layers or bands during printtime. A printing condition is an expression (see chapter 10) which returns either true or false. Printing conditions can be assigned to elements (text elements, lines, …), to entire bands and to printing layers (see below). If a printing condition returns false the corresponding object will not be printed. Please Note: The result of a printing condition will be converted to the data type ”Long” (numerical value) if required. A value of 0 is interpreted as false. 11.2.1 Edit Printing Conditions If you want to edit a printing condition select the object (e.g., the page header). Then go to the properties window: Activate the Advanced tab and click anywhere in (or on the button) to open the Expression Builder (see Section 10.2). Alternatively you can also use the icon in the toolbar, or right-click on the element and select Printing Condition… from the pop-up menu. Page 56 of 99 T FO RM er D e sig ne r U se r M anua l 11.2.2 Visual Cues for Printing Conditions If you have applied a printing condition, the band or the element will be marked with a small red dot: Bands are marked in the design window () and in the design tree (). Graphical elements are marked in the design tree only (). 11.2.3 Examples 11.2.3.1 Different Headers or Footers To print different headers and footers create at least two bands of the same type. Then use the printing condition to decide which band shall be printed. E.g., create one page header for odd pages and one page header for even pages. The expressions “IsOdd(Page)” respectively “IsEven(Page)” will serve as printing condition. 11.2.3.2 Alternating Background Colors To print rows with alternating background colors draw a filled rectangle in the background of the detail band. Then set the printing condition to “IsOdd(Record)”. 11.3 Printing Layers ► Printing layers are used to control the visibility of multiple elements during print-time with a single printing condition. The printing condition of the layer decides whether all design elements assigned to that layer will be printed. By default only one printing layer, the “Base” layer, is defined. Newly inserted design elements are always added to this layer. Please note: One element can be assigned to one printing layer only. Layers do not influence the z-order of elements! Page 57 of 99 T FO RM er D e sig ne r U se r M anua l Elements assigned to a printing layer may still use additional element-specific printing conditions. 11.3.1 Create Layer You can create a new printing layer using either of the following methods: Select Insert ► New Layer from the menu. Click on the “Add Layer“ icon in the toolbar. Right-click on the form, on a band, or on the “Layers“ entry in the design tree and select New Layer from the pop-up menu. The “New Layer“ dialog will appear. For a description of the layer properties, please refer to Appendix A.4. Once the printing layer is inserted you will find the appropriate entry in the design tree (). 11.3.2 Assign Design Elements to a Layer To assign design elements to a specific layer, perform the following steps: First select all elements that you want to assign to the printing layer. Then select the layer in the toolbar (). Alternatively you can right-click on the selection and then select Assign Layer ► MyLayer from the pop-up menu. Page 58 of 99 T FO RM er D e sig ne r U se r M anua l 11.3.3 Display Layer Colors If you want to see which design elements are assigned to which layer, you can turn on the display of layer colors: By default all design elements are displayed in their printing color (as shown on the left). Click on the “Toggle Display Color” icon in the toolbar, or select View ► Display Layer Colors from the menu to change the display mode. If the display of layer colors is enabled, all design elements are drawn in the color as adjusted in the layer properties (see on page 58). Click the icon again to switch back to normal. 11.3.4 Hide Layer Contents To hide all elements which are assigned to one layer, first select the layer in the design tree and then use one of the following methods: In the properties window go to the Common tab and set the property Visible to “False”. Right-click on the layer in the design tree and select Visible from the pop-up menu. Double-click on the layer in the design tree. 11.4 Pre-Evaluation and Post-Evaluation ► The pre- and the post-evaluation can be used to compute data-fields during print-time. With this type of evaluation each band can perform arbitrary computations. You have the choice between computations before a band is printed (Pre-Evaluation) and computations after a band was printed (Post-Evaluation). If the band is not printed at all (= if the printing condition of the band returns false), no evaluations are performed. Usually pre- and post-evaluations are used for printing serial numbers implementing counters calculating sums formatting data prior printing For example, the pre-evaluation of the report header may be used to evaluate one or more expressions at the “beginning” of the report. Please note: Data-fields which are computed in the pre- or post-evaluation are not imported from a datasource and are excluded from data input. You can read the value of such a data-field but you cannot modify it. Use an extra data-field to store intermediate results. Page 59 of 99 T FO RM er D e sig ne r U se r M anua l 11.4.1 Edit Pre- and Post-Evaluations Right-click on the required band and select PreEvaluation… or Post-Evaluation… from the pop-up menu. Alternatively you can use the toolbar icons and . The following dialog will appear: First select the data-field that you want to compute in . Then enter an expression in . Click on the button to open the Expression Builder (see section 10.2). Computations are evaluated in the order as they appear in the dialog from top to bottom. If you want to change the computation order or if you want to delete a computation, use the buttons in . The Advanced tab in the properties window of the band shows all data-fields calculated in the preevaluation (). The post-evaluation () is empty. No data-fields are computed. 11.4.2 Visual Cues for Pre- and Post-Evaluations If you have entered a pre- or a post-evaluation expression, the band will be marked with a small red sigma symbol in the design window () and in the design tree () 11.4.3 Examples 11.4.3.1 Consecutive Numbering (Serial Numbers) To create consecutive numbering, you have to create a new data-field (e.g. “Count”) with the numeric data type ”Long” (): Page 60 of 99 T FO RM er D e sig ne r U se r M anua l This data-field can now be used to count the number of printed records. Therefore open the pre- (or the post-)evaluation dialog of the detail band and enter the following expression: In this example the data-field “Count” is increased by 1 every time the detail band is printed. – You can print the counter directly, or you can format it. Use the following expression to create an eight digit number with leading zeros: Format (Count, "00000000") For each printing process the data-fields are initialized with default values. If you do not want your serial number to start with 0, you can initialize the data-field in the pre- or in the post-evaluation of the report header. adjust the default value of the data-field (see ). 11.4.3.2 Calculate Sums Another application for pre- and post-evaluations is the calculation of sums. You could, e.g., summarize all prices and then print this sum in the report footer: First you have to create a data-field in which you want to store the sum (e.g. “Sum_ArticlePrice”). Use the data type ”Double” for numbers with decimal digits. In the pre- (or in the post-)evaluation of the detail band you perform the calculation: The Function “CDbl” converts the data-field ”ArticlePrice” (which is imported as string) to the data type ”Double” (you can’t add a string to a number!). The data-field “Sum_ArticlePrice” is updated each time the detail band is printed. Finally the result can be printed in the report footer. Page 61 of 99 T FO RM er D e sig ne r U se r M anua l 11.4.3.3 Calculate Page Sums For implementing page sums make sure to reset the data-field that holds the sum value either in the post-evaluation of the page footer or in the pre- or post-evaluation of the page header. If your report does not contain (or print) page headers or page footers, feel free to add an invisible band (see below) which is used for resetting the page sum only. 11.5 Invisible Bands ► Invisible bands are used to perform computations or to control the output behavior of the form layout. An invisible band is a band with zero height. It does not contain any graphical elements like text or lines, and therefore nothing is being printed. Please note: If a printing condition for such a band returns false, the band will not be printed: This means, no pre- and post-evaluations are performed, no page- or column breaks are inserted and no tray will be selected. Invisible bands can be used for: Computations (pre- and post-evaluation). You can initialize a data-field in the report header (at the beginning of the printing process). Feed Control (insert page- or column-breaks, triggered by printing conditions). Tray Control (see section 11.6). 11.6 Tray Control ► Tray control is used to select or switch printer trays during print-time. For every single page of the output, you can dynamically select a tray on the target printer. This is useful for printing the first page of an invoice on a letterhead, or for adding an envelope to your printout. You could also print a number of labels, and add a cover sheet which is printed on nonsticky paper. In TFORMer all this can be done in one single print-job. The selection of the trays is performed during print-time. The tray selection works completely device-independent: TFORMer uses logical tray numbers (tray 1 to tray 10). Thus it is possible to select trays without having to take care for the actually used hardware or printer driver. You select the tray by its logical number. The mapping of the tray numbers to device-dependent printer trays is then done in the Tray Mappings. These tray mappings have to be pre-configured and can then be selected when generating the output. Page 62 of 99 T FO RM er D e sig ne r U se r M anua l Example: Assume you are printing one form layout to two different printer models (Printer A and Printer B): Name Description Tray 1 Tray 2 Tray 3 Tray 4 … Tray 10 Tray Mappings for Printer A Name Automatically Select Upper Paper Tray Manual Paper Feed Envelope, Manual Feed A4 Description Tray 1 Tray 2 Tray 3 Tray 4 … Tray 10 Tray Mappings for Printer B Auto Tray 1 Tray 1 (Manual) Envelope Feeder A4 The first page of the form layout should be printed using the manual paper feed which is named differently for both devices (caused by different names in the printer driver). Due to the tray mappings, as shown above, the tray number 3 can be assigned in both cases. When printing, take care to select the tray mappings which are suitable for the actual output device. The following steps are necessary for tray control: Create and configure the tray mappings. Perform the tray selection in the band properties. Select the tray mappings for printing. Please note: The “_Default_” tray mapping is always available. You can define as much tray mappings as required (this is useful when printing one form layout on different printers). When using form names (e.g. A4 or Letter) in the tray mappings, be careful to configure your printer drivers correctly. Otherwise the mapping between a form name and the correct printer tray will not work. 11.6.1 Create Tray Mappings To create a new tray mapping, right-click on the “Tray Mappings” folder in the design tree and select New Tray Mapping from the pop-up menu (see ). A new entry “New_Tray_Mapping_0” will be created. To rename the tray mapping, select the entry in the design tree. Then, again, click on it with the left mouse button (or press the F2 key). Alternatively you can edit the name in the ”Common” tab in the properties window. Page 63 of 99 T FO RM er D e sig ne r U se r M anua l 11.6.2 Configure Tray Mappings For each tray mapping ten logical trays can be mapped to device specific physical trays. The trays are assigned as follows: Enter the name of the logical tray directly () or select it from the list provided by the printer driver: Click on the button to open the following dialog. First select the target printer in . Then select one of the listed entries: You can choose between ”Tray Names” () and ”Form Names” (). Finally click OK to assign the physical tray name (or paper format name) to the logical tray number. 11.6.3 Tray Selection in the Form Layout To select a tray in the form layout simply enter the required tray number (1 to 10) in the Tray property of the band. By default “Tray 0 - (Default)” is pre-selected for every band. This means, the settings of the current printer driver are used for printing. ► Tray 0 (default) uses the settings of the current printer driver. ► Tray 1 to 10 can be pre-configured in the tray mappings. ► The first band that is printed on a page (e.g. the page header), performs the tray selection. Tray settings of subsequent bands which are printed on the same page are ignored. 11.6.3.1 Example If you want to print the first page of a report on a letterhead, you can assign the tray that holds the letterhead to the report header. After the first page you have to switch back to normal paper. Therefore enter a different tray number in the tray property of the page header. Page 64 of 99 T FO RM er D e sig ne r U se r M anua l 11.6.4 Select the Tray Mappings for Printing Figure 40: Select Tray Mappings in the Print Dialog When printing, select one of the pre-configured tray mappings in . For a more detailed description of the print dialog, please refer to chapter 12.4. Page 65 of 99 T FO RM er D e sig ne r U se r M anua l 12 Providing External Data 12.1 Introduction TFORMer requires external input data before a print-job is started. External data can be provided by several means: Automatically generated test-data. (only used for form development) Data entered manually by the user. (this is useful for manual triggered output or ad-hoc printing requests) Data imported from an ODBC database. Data imported from files. (CSV-files and XML-files are supported) Data provided programmatically. (see section 13.3) Please note: TFORMer internally stores the input data of the last recent print-job automatically. This data is automatically available when re-printing the form in the future. 12.2 Providing Data Manually 12.2.1 The Data Wizard To provide the data, which will then be available via data-fields during print-time, you can use the Data Wizard: Select Data ► Edit Data… from the menu (or press the icon in the ”Default” toolbar). You can also press the keyboard shortcut Ctrl+D. The following dialog will appear: Figure 41: Data Wizard The input data is provided using one the following methods: Page 66 of 99 T FO RM er D e sig ne r U se r M anua l Auto-generate All data-fields are filled with default values (same value for every record). Enter data manually This option allows you to edit every single data value manually. Database (ODBC) The data will be imported from an ODBC connection. Import data from file The data will be imported from a text file or from a XML file. Depending on your selection, the data wizard navigates you through different wizard pages. The wizard always closes with the “Edit Data Manually” page (see 12.2.2). This page allows you to inspect and to edit the current data. 12.2.2 Auto-Generate Specify the number of records that you want to create. Then click Next. All data-fields will be filled with default values (see Appendix A.5, property ”Default Value”). 12.2.3 Enter Data Manually Figure 42: Edit Data Manually The “Enter Data Manually” page allows you to view and to edit the current data. All records are listed below each other. Single records can be viewed in detail (expanded) by clicking the symbol and collapsed by clicking the symbol. Field (next to “Record n”) determines, how often a record is printed. For single records a different number of copies can be specified. The default value is 1. In you can edit the data-field values. Buttons , , , and allow you to add a new data record (), to delete a selected data record (), to move a selected data Record up () or down () one record. Button opens the data as XML-file. If you have finished editing, click Finish to confirm. Page 67 of 99 T FO RM er D e sig ne r U se r M anua l 12.2.4 Import from Database (ODBC) To import data from a database, select ”Database (ODBC)” and click Next. The following page will appear: Specify the database connection: Select the ”Data Source”, the database ”User” and enter the ”Password”. By clicking button you can select any ODBC data-source as defined under Windows (Control Panel ► Administrative Tools ► Data-Sources (ODBC)). Click Next to continue. TFORMer displays all tables and views which are defined in the specified database. Select the table (or view), from which you want to import the data. Click Next to continue. By means of the SQL-statement in TFORMer retrieves the records from the database. The SQLstatement determines the order of the records and therefore also the printing order. Whenever you press the tab key, TFORMer refreshes the resulting data-set in . A check mark in tells TFORMer to translate escape sequences (see Developer Manual). Click Next to continue. If the SQL-statement returns unknown column names (=unknown data-fields), the ”Import DataFields” page will appear (see also 9.2.1.2). Select the data-fields that you want to import. Click Next or Finish to continue. Page 68 of 99 T FO RM er D e sig ne r U se r M anua l 12.2.5 Import from Files To import data from files, select ”Import data from”, choose the file and the file type, and then click Next. For a description of the recognized file formats, please refer to the Developer Manual. A sample which demonstrates how to generate CSV files with Microsoft Excel is outlined below. Depending on the file type one of the following pages (either A or B) will appear: A) Importing Text or CSV Files Specify the (column) ”Separator” and the ”Text Qualifier” , which are required for reading the input file. Usually the “Copies per Record” settings are not changed. If required, select a column which determines how often each record shall be printed (). A preview of the import data will be shown in . A check mark in tells TFORMer to translate escape sequences (see Developer Manual). Click Next to continue. B) Importing XML Files Usually the “Copies per Record” settings are not changed. If required select the XML element containing the record-copy counter in . The import data will be shown in . A check mark in tells TFORMer to translate escape sequences (see Developer Manual). Click Next to continue. 12.2.5.1 Import Data-Field Definitions If the selected file contains unknown column names (=unknown data-fields), the page ”Import DataFields” (see also 9.2.1.2) will appear. If required, select the data-fields that you want to import. Click Next or Finish to continue. Page 69 of 99 T FO RM er D e sig ne r U se r M anua l 12.3 Creating CSV Files with Microsoft® Excel® ® ® In order to create a CSV file with Microsoft Excel , please follow these steps: First create a table with the desired data. Make sure that every column has a column name (see ). The column names must match the names of the data-fields used in the form layout. Then select File ►Save As… from the menu. Navigate to the desired output folder, enter a file name (e.g., “Data”). Under choose “CSV (Comma delimited) (*.csv)”. Then click Save. The completed CSV file should appear in a text editor as shown. Columns are separated by a semicolon. 12.4 Providing Data Programmatically See section 13.3. Page 70 of 99 T FO RM er D e sig ne r U se r M anua l 13 Printing 13.1 Introduction The term printing in the context of this document incorporates generating output in general. Besides direct printing (via a printer-driver on Microsoft Windows), TFORMer supports the creation of PDF documents, HTML files, PostScript files, image output, ZPL-II output (for ZEBRA printers ) and ASCII output. rd All output formats are supported directly. There is no need for 3 party software. This is especially of interest with PostScript or ZEBRA output (see below). 13.2 Printing Manually To open the print dialog press Ctrl+P or select File ► Print… from the menu. The following dialog will appear: Figure 43: Print Dialog In this dialog you specify all output parameters as discussed below. Click OK to start the print-job (or to create the output file). 13.2.1 Output Format and Device In the output format is selected: Preview Printer (via a printer driver) PDF PostScript HTML Text (pure ASCII) BMP, GIF, JPG, PCX, PNG, TGA, TIF or multipage TIF ZEBRA (ZPL-II) Depending on your selection in different target devices are available in . Page 71 of 99 T FO RM er D e sig ne r U se r M anua l 13.2.1.1 Printing to PostScript and ZEBRA printers TFORMer generates PostScript or ZEBRA output directly. This means that you can use such printers without any proprietary printer driver – you have two options: Print via a generic ASCII printer driver (dumb driver) Print via a PostScript or ZEBRA driver In both cases the printer driver is only used to send the data generated by TFORMer to the device in question (comparable to pass through mode). No typical driver functionality is used or required by TFORMer. 13.2.2 Pages and Copies In you specify the range of output pages (e.g. from “1” to “1” prints the first page only) and in the number of copies per page. 13.2.3 Data Click on to edit the input data (this button will open the Data Wizard – see section 12.2.1). For the input data an additional filter can be applied (see ). The filter is specified via an expression: Only records for which the expression returns true are printed. All other records are ignored. Examples for ”Filter” expressions: Record <= 3 prints the first three data records only. ArticleName="Desk" prints only data records, where the value of the data-field “ArticleName” is “Desk”. 13.2.4 Advanced Settings 13.2.4.1 Tray Mappings In you select one of the defined tray mappings (see section 11.6.1). 13.2.4.2 Start Row and Start Column The “Start Row” and the “Start Column“ () can be specified for label printing: If you do not want to print the first label in the upper left corner of the paper, you can specify the start row and the start column. Example: Start Row=2 Start Column=0 Columns Print order “Down, then Across:. The first two labels in the left column will be left empty. Rows Rows Columns Print order “Across, then Down”: The first two rows will be left empty. Page 72 of 99 T FO RM er D e sig ne r U se r M anua l 13.3 Printing Programmatically Software developers can print form layouts created with TFORMer Designer as part of their applications with the help of TFORMer Runtime. TFORMer Runtime is available for Microsoft Windows and for virtually all Linux and UNIX platforms. It can be used as: Command line based printing application (TFPrint) Software component (DLL, COM component, .NET component and shared library) For details, please refer to the Developer Manual or to the API References of TFORMer Runtime. Page 73 of 99 T FO RM er D e sig ne r U se r M anua l 14 Repositories 14.1 Introduction TFORMer offers two different possibilities for organizing form layouts: 14.1.1 Stand-Alone Forms ► Stand-alone forms are the simplest way to layout and to print forms. Each stand-alone form layout designed with TFORMer can be used on its own. A stand-alone form contains all the necessary information which is required for printing (image files are stored as reference on the file-system). As long as no repository is used, TFORMer always creates stand-alone forms when selecting File ► New from the menu. A stand-alone form is using the file extension *.tff. Organizing multiple stand-alone forms in the file system is completely up to the user. 14.1.2 Repositories If you prefer to organize your form layouts and data-fields in a structured way or if you plan to create multiple form layouts which share the same data basis (same data-fields) the use of a so-called repository is recommended. A repository is a central database for form layouts, data-field definitions and tray-mappings. Form layouts and data-field definitions are stored within a repository on a per “Project” base. A project defines data-fields and holds (better: refers) form layouts. Each of the data-fields defined in a project is accessible within every form layout contained in that project. A repository can contain multiple projects and one special global project. Data-fields defined within the global project (global data-fields) may be used by all form layouts in all projects. ► A repository is used for organizing multiple form layouts within a structured data-base. Such a repository holds tray-mappings and is divided into projects. A project stores data-field definitions and references form layouts. A repository is stored with the file extension *.tfr. All projects are stored in subdirectories. Please, take care to maintain this directory structure. Page 74 of 99 T FO RM er D e sig ne r U se r M anua l In a repository you will find the following entries: Tray Mappings These tray mappings are available for all forms in all projects. Global Data-Fields These data-fields are available for all forms in all projects. Projects A collection of forms and data-fields. Data-field definitions are only valid within forms of the project they are defined in. Figure 44: Repository in the Design Tree 14.2 Basic Operations 14.2.1 Open an existing Repository To open a repository select File ► Repository ► Open Repository… from the menu. Then select the repository file and press OK to confirm. Alternatively you use the menu File ► Open…. TFORMer allows you to open both, .tff-files (stand-alone forms) and .tfr-files (repositories). Once opened, the repository is displayed in the design tree in the ”Repository” tab – see the figure above. 14.2.1.1 Demo Repository The TFORMer installation includes a demo repository. This repository is named “Demos.tfr” and can be opened by selecting All Programs ► TEC-IT TFORMer 5 ► Examples ► Demo Repository from the Windows Start Menu. 14.2.2 Create a New Repository Select File ► Repository ► New Repository… from the menu. A file dialog will appear. Enter a suitable filename. Then click Save. The new repository will be displayed in the design tree. ► Important: Each repository has to be stored in a separate folder! When creating a new repository, first create a folder, then save the repository there. If you save more than one .tfr file in the same directory, you will experience problems using either of these repositories. 14.2.3 Save a Repository Select the repository inside the design tree and press Ctrl+S (or select File ► Save from the menu). 14.2.4 Import a Stand-alone Form into a Repository You can import existing stand-alone forms into the repository by following these steps: Page 75 of 99 T FO RM er D e sig ne r U se r M anua l In the design tree locate the project, in which you want to import the form. Right-click on the project and select Import Form… from the pop-up menu. The dialog below appears. Select the file that you want to import in . Then click Next or Finish. If you click Next, you can assign a name and a description for the form in the repository. By default the name of the imported file will be used as form name, and the description will be left empty. 14.2.5 Export a Form from the Repository Exporting a form layout from a repository creates a stand-alone form layout. In the design tree locate the project, from which you want to export the form. Then right-click on the form and select Export Form… from the pop-up menu. An alternative method is to open the form by double-clicking it in the design tree. Thereafter select File ► Save as…. Page 76 of 99 T FO RM er D e sig ne r U se r M anua l 14.2.6 Close a Repository Mark the repository in the design tree, right-click on the root entry and select Close Repository from the pop-up menu. Alternatively use the menu: File ► Repository ► Close Repository. 14.3 Working with a Repository 14.3.1 Projects Before you can add forms and data-field definitions, you first have to create a project: Right-click on the repository in the design tree. Then select New Project from the pop-up window. Alternatively use the menu: Insert ► Project. The name and the description for the project can be edited in the properties window or using the F2 key. 14.3.2 Insert Forms Select File ► New… from the menu (or right-click on any “Forms” item in the design tree and selecting New Form… from the pop-up menu) to open the following wizard: In this dialog you select, whether you want to create a new stand-alone form (), or if you want to add a form to a repository (). To insert the new form into the repository select option . Then select the repository in . Then click Next. The following dialog will appear: Select the project in . Then click Next. Page 77 of 99 T FO RM er D e sig ne r U se r M anua l In this dialog (see also section 6.2.2) dialog you can finally select one of the available templates (“Custom Report”, “Custom Report” or any other). Click Finish to accept. The selected form template will be added to the selected project in the repository. If you click Next, you can assign a name and a description for the form in the repository. By default the name of the imported file will be used as form name, and the description will be left empty. Page 78 of 99 T FO RM er D e sig ne r U se r M anua l 15 General Settings 15.1 Options Dialog In the options dialog you can customize common TFORMer settings. To open the dialog select Tools ► Options… from the menu. Figure 45: Options Dialog 15.1.1 General Measurement system The measurement system. Can be either: System (Default) Uses the measurement system that is specified in the regional options of your operating system. Metric (mm) U.S.-System (inch) Show Info-Dialog before print preview (y/n) When opening the Print Preview, an information dialog will be shown. This dialog gives you the possibility to open the print preview. open the print-dialog (change printer settings). cancel the print preview. Uncheck this option to skip the dialog. By default this option is enabled. Use Automatic Zoom for new views (y/n) If enabled, all files that are opened will be set to “Automatic” zoom level (= fit the width of the design window). By default this option is disabled. Edit content of elements after insertion (y/n) If enabled, a dialog for editing the content will be opened automatically upon insertion of a new text, barcode or picture element. Depending on the type of the element this may either be the Edit Text dialog (see section 8.3), the Expression Builder (see section 10.2) or the Open File dialog. By default this option is enabled. Show tooltips in Design (y/n) If enabled, TFORMer will display tooltips when hovering the mouse cursor over design elements or bands. These tooltips show information about assigned data, comments and printing conditions. Page 79 of 99 T FO RM er D e sig ne r U se r M anua l 15.1.2 Grid Grid visible (y/n) Show or hide the grid in the design window. Keyboard shortcut: Ctrl+G Width The vertical resolution of the grid. Height The horizontal resolution of the grid. Snap to grid (y/n) If enabled, every graphical element that is inserted or moved will be positioned on the grid. Keyboard shortcut: Ctrl+R Hint: If this option is enabled you may position elements off the grid as well: Just press the Alt key during a drag and drop operation. 15.1.3 Design-Tree Locate in Design-Tree (y/n) When selecting an object in the design window, TFORMer will automatically locate that element in the design tree. By default this option is enabled. Show all open Forms (y/n) If enabled, the design tree shows the contents of all open documents. By default, the design tree is populated with the contents of the current form only. 15.1.4 PDF-General Page Layout The default settings for page size (Letter, A4, …) and orientation (portrait or landscape) for PDF output. Color mode Color mode for the PDF output: “color”, “grayscale” or “black & white”. Embed fonts (y/n) If this option is enabled, all used fonts will be embedded within the PDF file. This option ensures, that the PDF document is always displayed correctly, even if the required fonts are not installed on the system where the document is viewed. Embedding fronts increases the size of the generated PDF document. By default this option is enabled. Embed fonts as Type3 (y/n) If this option is enabled, all used fonts will be embedded within the PDF file as Type3 fonts. Type3 fonts should only be used when printing the resulting PDF on high resolution devices. By default this option is disabled. Simulate bold fonts if not available (y/n) If this option is enabled, bold fonts are simulated in the resulting PDF file. By default this option is enabled. 15.1.5 PDF-Images Resolution The resolution (in dpi) that is used for storing images in the PDF output. Compression Select the compression method that is used for storing images in the PDF output: Zip, Jpeg or Auto. If “Auto” is selected, all images which are provided as jpeg will be embedded as they are. All other pictures (.bmp, .tif, …) will be compressed with the Zip method. If “Jpeg” is selected, all images are embedded as JPEG and compressed using the selected compression quality. 15.1.6 HTML Settings Page Layout The default settings for page size (Letter, A4, …) and orientation (portrait or landscape) for HTML output. Output Resolution The output resolution (in dpi) for rendering HTML pages. Default value is the screen resolution (96 dpi). Optimal Barcode Resolution (y/n) If enabled, the module width of barcodes will be optimized for the (rather small) output resolution of HTML pages. As a result the size of the barcode may be reduced. This option guarantees optimal barcode readability. 15.1.7 Postscript Page Layout The page size (Letter, A4, …) and the orientation (portrait or landscape) for PostScript output. Color mode Color mode for the PostScript output: “color”, “grayscale” or “black & white”. 15.1.8 Image Printer Page Layout The page size (Letter, A4, …) and the orientation (portrait or landscape) for image output. Output Resolution The output resolution (in dpi) for rendering images. Page 80 of 99 T FO RM er D e sig ne r U se r M anua l Default value is the screen resolution (96 dpi). Color mode Color mode for the image output: “color”, “grayscale” or “black & white”. Font Antialiasing (y/n) If enabled, all fonts are anti-aliased. By default this option is enabled. TIFF Compression Selects the compression method that is used for creating TIFF output. Compression Selects the compression method that is used for creating JPEG output. 15.1.9 ZEBRA (ZPL) Page Layout The page size (Letter, A4, …) and the orientation (portrait or landscape) for ZPL-II output. Resolution The resolution (in dpi) of the used printer. Default value is 8 dots per inch resulting in 203 dpi. Scaling Selects the scaling factor of the output. Switch to Double if the resulting output is half of the required size. Normal (this is the default) Doubled Please check out your ZPL-II manual for the ^JMA and ^JMB commands for details. Compression Selects the compression method that is used for compressing the bitmap send to the ZEBRA printer. The following options are available: None (the bitmap is sent uncompressed, may be very slow but is supported by all ZEBRA models) RLE (the bitmap is sent RLE compressed, this option is supported by most ZEBRA models and is the default) PNG (the bitmap is sent as PNG, this option is supported by newer ZEBRA models or with newer ZEBRA firmware versions) Dither-Mode Selects the method used for simulating color output on a black & white printer. The following options are available: Scatter (greyscale simulation method 1, this is the default) Ordered (greyscale simulation method 2) Threshold (no grayscale pattern, just black or white) Do not dither Text (y/n) If enabled, colored text is never dithered. By default this option is enabled. ► Settings 15.1.4 to 15.1.9 are not stored permanently! ► The default settings are taken from the configuration file “TFORMer.xml” (see Appendix D.2). Page 81 of 99 T FO RM er D e sig ne r U se r M anua l 16 Licensing 16.1 License Types Please check out http://www.tec-it.com/order for available license types and pricing. Workstation licenses are bound to exactly one machine. If you are interested in a workstation license, please tell us the so-called ”System ID” of the target computer. You can find the System ID in the licensing dialog (see below). 16.2 Entering your License Data ► Please enter the license data exactly as you received it from TEC-IT! Spacing and upper/lower case letters are to be considered. To avoid typing errors, it is recommended to use “copy and paste” whenever possible: Copy the data from the email you received from TEC-IT and paste it in the license dialog. 16.2.1 License Dialog Select Help ► Licensing… from the menu. The following dialog will appear: This is the System ID of your Computer. Under ”Product” select “TFORMer”. In the field ”Licensee” enter the name that you entered as licensee at the time of your purchase (or the name that was assigned to you when the license key was forwarded). Under ”Kind of License” select the kind of license that you have purchased. You can select: Workstation (Single License) Site (Site License) Under ”Number of Licenses” enter the number of licenses that you have purchased. In the field ”Your license-key” enter the license key exactly as you received it from TEC-IT. 16.3 Notes TFORMer stores the license data in the registry of the current user (HKEY_CURRENT_USER\ Software\TEC-IT\TFORMer\5.0). For workstation wide licensing copy this license data to the corresponding HKEY_LOCAL_MACHINE registry path. Another possibility to register TFORMer is to use a license file named ”TFORMer.ini”. This file must be stored in the same directory as “TFORMer.exe”. For details, please contact TEC-IT. Page 82 of 99 T FO RM er D e sig ne r U se r M anua l 17 Contact and Support Information TEC-IT Datenverarbeitung GmbH Address: Phone: Fax: Email: Web: Wagnerstr. 6 AT-4400 Steyr Austria/Europe +43 / (0)7252 / 72 72 0 +43 / (0)7252 / 72 72 0 – 77 mailto:[email protected] http://www.tec-it.com AIX is a registered trademark of IBM Corporation. HTML, DHTML, XML, XHTML are trademarks or registered trademarks of W3C, World Wide Web Consortium, Laboratory for Computer Science NE43-358, Massachusetts Institute of Technology, 545 Technology Square, Cambridge, MA 02139. JAVA® is a registered trademark of Sun Microsystems, Inc., 901 San Antonio Road, Palo Alto, CA 94303 USA. JAVASCRIPT® is a registered trademark of Sun Microsystems, Inc., used under license for technology invented and implemented by Netscape. Microsoft®, Windows®, Microsoft Word®, Microsoft Excel® are registered trademarks of Microsoft Corporation. Navision is a registered trademark of Microsoft Business Solutions ApS in the United States and/or other countries. Oracle® is a registered trademark of Oracle Corporation. PCL® is a registered trademark of the Hewlett-Packard Company. PostScript is a registered trademark of Adobe Systems Inc. SAP, SAP Logo, R/2, R/3, ABAP, SAPscript are trademarks or registered trademarks of SAP AG in Germany (and in several other countries). All other products mentioned are trademarks or registered trademarks of their respective companies. If any trademark on our web site or in this document is not marked as trademark (or registered trademark), we ask you to send us a short message (mailto:[email protected]) Page 83 of 99 T FO RM er D e sig ne r U se r M anua l Appendix A: Properties A.1 Form Properties A.1.1 Common Print Order The print order for the detail band. You can choose between the following settings: Across, then Down Down, then Across The printing order will be applied only, if the number of Columns, the number of Rows, the Column Width or the Row Height are adjusted to produce a printout with multiple rows and columns (label printing). For reports the number of columns and the number of rows are set to 1 by default. In this case the print order is irrelevant. Orientation The orientation for the printout: Portrait Landscape Printer Default (uses the orientation, which is adjusted in the printer driver) A.1.2 Advanced Columns The number of columns per printed page (labels). 0 = auto If set to auto, the number of possible columns will be calculated automatically, based on paper width, margins, column spacing and the column width. If set to any other value than auto, TFORMer will print the specified number of columns – no matter, if the width of the paper is sufficient or not. Rows The number of rows per printed page (labels). 0 = auto If set to auto, the number of possible rows will be calculated automatically, based on paper height, margins, row spacing and the height of the bands. Use this setting only if the label contains exactly one band (detail band) or if the row height is given. If set to any other value than auto, TFORMer will print the specified number of rows – no matter, if the height of the paper is sufficient or not. Column Width The column width (label width). 0 = auto If set to auto, the width of the worksheet (see A.1.4) will be used as column width. If set to any other value than auto, TFORMer will use the specified column width – no matter, if the width is sufficient for the label or not. The column width will be marked with a red, slash-dotted vertical line in the design window (see Figure 18, ). This value only affects the width of one column. The width of the worksheet can be adjusted independently. So you can create a Label-print (using rows and columns) with a page header over the entire width of the page (see section 6.4.3). Row Height The row height (label height). 0 = auto If the row height is set to auto, TFORMer automatically calculates the height of the labels according to the height of the detail band (and the group headers/footers). Use this setting only if the label contains exactly one band (detail band) or if the number of rows is given. If set to any other value than auto, TFORMer will use the specified row height – no matter, if the height is sufficient for the label or not. When using label templates (e.g. Zweckform ® or Avery®) you can input the manufacturer’s label specifications here. Column Spacing The column spacing (labels). When using label templates (e.g. Zweckform) you can input the manufacturer’s label specifications here. Row Spacing The row spacing (labels). When using label templates (e.g. Zweckform) you can enter the manufacturer’s label specifications here. Document Name This expression will be used as name of the generated output or spool file. If left blank, the file name is used. Page 84 of 99 T FO RM er D e sig ne r U se r M anua l Comment An arbitrary comment. For documentation purposes. Rotation Output rotation (0, 90, 180 or 270 degrees, counter clockwise). A.1.3 Watermark The watermark is a background picture which is printed per output page. Picture Source The picture source. See section A.3.1.4. File Name The image file name. See section A.3.1.4. Mode The output mode. See section A.3.1.4. Alignment The alignment of the picture on the printed page. See section A.3.1.4. A.1.4 Position Width A.1.5 The form width. Margins Margin Left The page margins are used to confine the printing area on the output page. Margin Top Margin Right Margin Bottom Page 85 of 99 T FO RM er D e sig ne r U se r M anua l A.2 Band Properties A.2.1 Common The Common tab is available for all bands except the page header and the page footer. Group By1 The records of a data-source will be grouped based upon this expression: Every time, the computed value of the expression changes, a new group will be started. Group-by expressions do not change the order of the records in the data-source. Group headers are printed when a group starts, group footers are printed after a group ends. Page Break Determines, whether a page break will be inserted before and/or after this band. Possible values: None Before this Band After this Band Before and After this Band Row/Column Break Determines, whether a row/column break will be inserted before and/or after this band. Possible values: None Before this Band After this Band Before and After this Band A.2.2 Advanced Name The name of the band. (Used for display only) Printing Condition The printing condition decides at print-time, whether the band is printed or not (see section 11.2) Tray For every single page of the output you can dynamically select a tray on the target printer. E.g., this might be useful for printing the first page of an invoice on a letterhead. The tray selection is performed by the first band on a new page (e.g. by the page header). The tray that is entered in the property of this band will be selected: Tray 0 is the default tray (uses the setting of the current printer driver). Tray 1 to 10 can be pre-configured (Tray Mappings ► Trays). For more details, please refer to section 11.6. Pre-Evaluation This expression will be evaluated before the band is printed (see section 11.4). Post-Evaluation This expression will be evaluated after the band is printed (see section 11.4). Type The band type (Report Header, Page Header, …). Output Area2 The area, in which the band shall be printed: Page Label Print at Bottom3 By default, the report footer will be printed directly after the last detail band. By setting this value to True, the report footer will be printed at the bottom of the page (before the page footer). Comment An arbitrary comment. For documentation purposes. 1 For group header and group footer. For report header, page header, page footer and report footer. 3 For report footer. 2 Page 86 of 99 T FO RM er D e sig ne r U se r M anua l A.2.3 Position Height The band height. Width The band width. Same as the form width (see section A.1.4). Can Grow Specifies, whether the height of the band is increased if required. This is useful if the band contains elements with dynamic size (possible for text and picture elements). Allowed values are: No Height Can Shrink Specifies, whether the height of the band is decreased if possible. This is useful if the band contains elements with dynamic size (possible for text and picture elements). Allowed values are: No Height Page 87 of 99 T FO RM er D e sig ne r U se r M anua l A.3 Element Properties A.3.1 Common A.3.1.1 Text Elements Text The text to be printed. Font Selects the font style and size. Auto Font Size If set to True, TFORMer automatically selects the biggest possible font size, which allows the text to fit into the bounding rectangle without being cropped. Auto Font Size Minimum Specifies the lower font size limit (in percent), if Auto Font Size is enabled. Auto Font Size Maximum Specifies the upper font size limit (in percent), if Auto Font Size is enabled. Fore Color The color of the text. Fill Color The color and the pattern of the text background. Line Color The color and the pattern of the bounding rectangle. Line Width The width of the bounding rectangle. Line Style The line style for the bounding rectangle (solid, dashed, …). Text Alignment The alignment of the text within the bounding rectangle. The following values are possible: Top, Left Top, Center Top, Right Center, Left Center Center, Right Bottom, Left Bottom, Center Bottom, Right Justify Turn justify on/off. Word-Wrap If enabled, line-breaks will be ignored. Text Rotation Text rotation (0, 90, 180 or 270 degrees, counter clockwise). A.3.1.2 Barcode Elements Barcode Data The data which is encoded as barcode symbol. The barcode data is specified via an expression. An expression may contain static data and/or dynamic data (e.g. data-fields). In order to specify a fixed character sequence in the expression editor you have to use enclosing double quotes (“fixed data”). Barcode Type The barcode type (symbology). Check Digit Selects the check digit computation. Barcode Color The color of the bars. Font Selects the font style and size. Fore Color The color of the text. Fill Color The color and the pattern of the background. Human Readable Text The position of the human readable text (Above, Below, No). Human Readable Text Distance The distance between the barcode and the human readable text. Rotation Barcode rotation (0, 90, 180 or 270 degrees, counter clockwise). A.3.1.3 Line, Rectangle, Ellipse Fill Color The color and the pattern of the text background. (This property is not available for line elements.) Line Color Line color and pattern. Line Width The line width. Line Style The line style (solid, dashed, …). Page 88 of 99 T FO RM er D e sig ne r U se r M anua l A.3.1.4 Picture Picture Source The picture-source: File Use this option for static pictures. The File Name is selected via the file selection dialog. Expression Use this option for dynamic pictures. The File Name is specified as an expression (via the expression builder), and the expression is evaluated during print-time. File Name The image file name. The following file formats can be used: .bmp, .gif, .jpg, .pcx, .png, .tga, .tif. File names can be specified using one of the following formats: Windows file format (e.g. “C:\temp\sample.png”) URL style format (only available under windows!) (e.g. “http://www.tec-it.com/pics/sample.png”) You can use absolute file names (e.g. “C:\sample.jpg”) or relative file names (e.g. “sample.jpg” or “img\sample.jpg”). As base for relative path specifications the path of the TFORMer file (.tff or .xmd) is used. Alignment The alignment of the picture within the bounding rectangle. The following values are possible: Top, Left Top, Center Top, Right Center, Left Center Center, Right Bottom, Left Bottom, Center Bottom, Right Rotation Picture rotation (0, 90, 180 or 270 degrees, counter clockwise). Mode The output mode: Clip (The picture will be printed in its original size and might be clipped by the bounding rectangle.) Stretch (The picture will be stretched to fit the bounding rectangle, regardless of its aspect-ratio.) Zoom (The picture will be enlarged to its maximum possible size within the bounding rectangle, keeping its original aspect-ratio.) Tile (The picture will be replicated row- and column-wise inside the bounding rectangle.) Transparent Color All regions in the image that are filled with the selected color, will be printed transparently. A.3.2 Advanced Name The name of the element. Printing Condition The printing condition decides at print-time, whether the element will be printed or not (see section 11.2). Layer Assign the element to one of the predefined layers (see section 11.3). 4 Optimize Spaces If enabled, only one single space will be printed instead of multiple consecutive spaces. Sample: “TFORMer Designer ” will be printed as “TFORMer Designer ”. Suppress Blank Lines4 If enabled, empty lines in a multi line text will not be printed. Sample: “TFORMer will be printed as “TFORMer Designer” Designer” Line-Spacing4 The spacing between text lines. Escape Sequences5 Turn the translation of escape sequences on/off. 5 Format The format property is used for formatting the utilizable data of the barcode. It is specified via a string that operates with substitute symbols to indicate how the data shall be structured. Specifying a format string, you can: Select subsets for Code 128 and UCC/EAN-128. Define the desired Start/Stop characters for CODABAR. 4 For text element. For barcode element. For more information, please refer to the Barcode Reference which is available for download on www.tec-it.com. 5 Page 89 of 99 T FO RM er D e sig ne r U se r M anua l Reposition the Check-Digit (in special cases). Encode the date, preamble, service class, postal and country code into the barcode data (MaxiCode). Bearer Width5 Adjust the horizontal lines above and below the barcode: 0 inch (or mm) … no line x inch (or mm) … use the specified line width Module Width5 The module width is the width of the narrowest bar segment. Notch Height5 The notch height specifies, how far the synchronization bars should jut out from the remaining barcode field. (E.g., the EAN code has synchronization bars on the left, in the middle, and on the right.) Bar:Space Ratio5 This property is used to specify the relationship between the widths of the single bars and spaces of a barcode. The input format depends on the selected barcode type. – For Code 2OF5 Interleaved you could specify the ratio “1:2:1:2”, e.g. Suppress Error Messages5 In case of an error during the output of a barcode (e.g. wrong input data), an error message will be printed. This option allows you to suppress such error messages. The space will be left blank instead. Optimal Resolution5 Automatically adjust (increase) the module width of the barcode to avoid aliasing problems on the output device. The module width becomes a multiple of the smallest available printing unit. Bar-Width Reduction5 When printing on inkjet printers, the ink that is absorbed by the paper tends to diffuse. Setting the bar width reduction allows you to work against this spreading of ink. The bar width reduction can be specified in percent of the module width. Thus when set to 20 all bars will be narrowed by 20 percent of the module width. Comment An arbitrary comment. For documentation purposes. A.3.3 Position Left The left most coordinate of the element. Top The top most coordinate of the element. Right The right most coordinate of the element. Bottom The bottom most coordinate of the element. Width The width of the element. Height The height of the element. 6 6 Can Grow Specifies, whether the dimensions of the element may be adjusted according to its content. E.g.: If a text cannot be rendered without clipping and this property is set to “Width” the width of the text element is increased as required. Allowed values are: No Height Width Height and Width If the height of the band which contains this element should grow accordingly, enable the “Can Grow” property of the band. Can Shrink6 Specifies, whether the dimensions of the element may be adjusted according to its content. Allowed values are: No Height Width Height and Width If the height of the band which contains this element should shrink accordingly, enable the “Can Shrink” property of the band. Flush Top Adjust the top position to the specified band border. Useful for drawing column separators in tables. Allowed values are: No Last Printed Band Flush Bottom Adjust the bottom position to achieve a common baseline. Useful for aligning an element to the bottom position of the band or other elements. Allowed For text and picture elements Page 90 of 99 T FO RM er D e sig ne r U se r M anua l values are: No Elements Band Flush Right Adjust the right position to achieve a common vertical line to the right. Useful for aligning the right border of an element to the right position of the band or other elements. Allowed values are: No Elements Band Shift Mode This property is used to move elements relative to other growing or shrinking elements. “Always” considers size-changes of other elements immediately. “When overlapped” only avoids intersections. Allowed values are: Always Don’t shift When overlapped A.3.4 Margins These properties are available for Text Elements only: Margin Left These margins are used to confine the printing area within a text element. Margin Top Margin Right Margin Bottom A.4 Layer Properties A.4.1 Common Display Color If Display Layer colors ( ) is enabled, all elements, which are assigned to that layer, will be drawn in the specified color. Visible Here you can toggle all elements of one layer visible or invisible. Note: This is for editing purposes only! – The output will not be affected. A.4.2 Advanced Name The name of the layer. Description A simple description. For documentation purposes. Printing Condition The printing condition decides at print-time, whether the elements, which are assigned to that layer, will be printed or not (see section 11.2). Comment An arbitrary comment. For documentation purposes. A.5 Data-Field Properties A.5.1 Common Name The name of the data-field. This name can be used to address the data-field in expressions. Data-Type You can choose between the following data-types: String Long Double We recommend the use only the data-type "String". Default Value Here you can specify a default value for the data-field. This value will be assigned, if no other value is given. When generating the input data automatically (see section 12.2.2) this value Page 91 of 99 T FO RM er D e sig ne r U se r M anua l will be used for the data-field by default. A.5.2 Advanced Caption Description These properties may be queried with the TFORMer Runtime API. They have no functionality for printing. Display Order Comment A.5.3 An arbitrary comment. For documentation purposes. Validation Validation Rule This rule will be verified when importing data. Validation Message If the validation-rule is violated, this message will be prompted. A.6 Tray Mapping Properties A.6.1 Common Name A.6.2 The name of the tray mapping. Advanced Description A simple description. For documentation purposes. Comment An arbitrary comment. For documentation purposes. A.6.3 Tray 1 … Trays For each of the 10 logical trays in TFORMer you can assign a device-dependent printer tray. You can assign tray names or paper format names. Tray 10 Page 92 of 99 T FO RM er D e sig ne r U se r M anua l A.7 Repository Description A simple description. For documentation purposes. Comment An arbitrary comment. For documentation purposes. A.8 Tray Mapping Properties (Repository) Same as the Tray Mapping Properties described in A.6. A.9 Global Data-Fields (Repository) Same as the Data-Field Properties described in A.5. A.10 Projects (Repository) A.10.1 Common Name The name of the project. A.10.2 Advanced Description A simple description. For documentation purposes. Comment An arbitrary comment. For documentation purposes. Page 93 of 99 T FO RM er D e sig ne r U se r M anua l Appendix B: Supported HTML Tags and Entities B.1 HTML Tags Tag Description <p> Paragraph. <p> starts a new paragraph. </p> ends the paragraph. <br> Line break. Inserts a line break. <b>, <strong> Bold text. Everything between the start tag <b> and the end tag </b> is rendered bold. <i> Italic text. Everything between the start tag <i> and the end tag </i> is rendered italic. <u> Underlined text. Everything between the start tag <u> and the end tag </u> will be underlined. <strike> Strike through text. Everything between the start tag <strike> and the end tag </strike> will be striked through. <font> Font. The following attributes are supported: color Only hexadecimal values, no color names. E.g. <font color=”#ff0000”>. name Selects a typeface. E.g. <font name=”Helvetica”> size Use one of the predefined HTML font sizes within the range from 1 to 7. E.g. <font size=”2”> style Supports the “font-size” attribute only. E.g. <font style="font-size: 12pt"> <a> Anchor. Used for embedding links. Only the href attribute is supported. E.g. <a href=”http://www.google.com”>Link to Google</a> <Expr> Used by TFORMer internally. This tag embeds expressions. <HtmlExpr> Used by TFORMer internally. This tag embeds expressions, which are returning HTML. B.2 Named Entities Named Entity Description > ">" character (greater than). < "<" character (less than). & "&" character (ampersand). &nbps; Non breaking space. Page 94 of 99 T FO RM er D e sig ne r U se r M anua l Appendix C: Function Reference C.1 Functions Return Function Description long Abs («Number») Returns the absolute value of a number. long Asc («Text») Returns the ASCII value of a given character or of the first character of ”text”. char CDate («Text») Converts the string ”text“ to a date. Provides the current date (Now ()) if no conversion is possible. double CDbl («Expr») Converts any value to a double value (floating-point notation). The result is 0.00 when a conversion is not possible. long CheckDP («Text») Returns the Deutsche Post check-digit (Leitcode, Identcode) of the specified value as long. long CheckMod10 («Text») Returns the Modulo 10 check-digit of the specified value as long. char CheckMod36 («Text») Returns the Modulo 36 check-digit of the specified value as character. char CheckMod43 («Text») Returns the Modulo 43 check-digit of the specified value as character. char Chr («Number») Returns the corresponding character for the specified ASCII value ”Number“. long CLng («Expr») Converts any value into a whole number. If a conversion is not possible, the result is 0. string CStr («Expr») Converts a value into a text. long Day («Date») Determines the day of the month [1..31]. long DayOfWeek («Date») Returns the day of the week of a specified date [1..7]. 1=Sunday, 2=Monday, ... double DayOfYear («Date») Returns the day of the year of a specified date [1..366]. double Exp («Number») Returns the value e"Number", where e is the base of the natural logarithms. double Exp10 («Number») Returns the 10"Number". long Find («Text», «SearchText», «nStart») Searches the string "Text" for "SearchText" starting from Position "nStart". Returns the position of the string or -1. The first character of a string is located at position 0. long FindReverse («Text», «SearchText», «nExclude») Searches the string "Text" for "SearchText" in reverse order excluding "nExclude" characters at the end. Returns the position of the string or -1. The first character of a string is found at position 0. string Format («Number», «Pattern») Formats "Number" according to the specified pattern string “Pattern“. Format placeholders: # digit or no value, 0 '0' or digit . decimal point , comma + sign double Fract («Number») Returns the fractional unit long Hour («Date») The hour of a specified date [00..23]. string IIf («Condition», «TrueExpr», «FalseExpr») Returns the value of «TrueExpr» if «Condition» is evaluated as (TRUE or not equal to 0) . Returns the value of «FalseExpr» if «Condition» is evaluated as (FALSE or equals 0). long IsEmpty («Text») Test whether the string "Text" is empty or not. long IsEven («Number») Returns TRUE if "Number" is even. long IsLastPage () Returns TRUE if the page being printed is the last page of the document. bool IsLeapYear («Date») Returns TRUE if the specified date occurs within a leap year. long IsOdd («Number») Returns TRUE if "Number" is uneven. string LastValue («DatafieldName») Returns the last value of a given data-field (the value of the data-field from the previous record). Page 95 of 99 T FO RM er D e sig ne r U se r M anua l string Left («Text», «nLength») Returns the first characters "nLength” of a string. long Len («Text») Returns the length of the given string. double Log («Number») Returns the natural logarithm of "Number". double Log10 («Number») Returns the logarithm of “Number”. string Mid («Text», «nStart», «nLenght») Returns the substring of string "Text" starting at position "nStart" with length "nLength". The first character of a string is located at position 0. long Minute («Date») The minutes of a specified date/time [00..59]. long «a» % «b» Modulo operator: Remainder of the integer division a / b long Month («Date») The month of the specified date [1..12]. date Now () The actual date and time. double Pow («Number», «Power») Returns the result of “Number” raised to the power of “Power”. string Replace («Text», «SearchText», «ReplaceText») Replaces each occurrence of "SearchText" in string "Text" with "ReplaceText". string Right («Text», «nLength») Returns the last characters "nLength" of a string. double Round («Number», «Precision») Returns “Number“ rounded using precision digits. If 0 is “Precision“ the result will be rounded to a whole number. long Second («Date») The second of a specified date/time [00..59]. double Sqrt («Number») Returns the square root of “Number“. long SumOfDigits («Number») The sum of all digits of “Number“. long SumOfDigits1 («Number») Returns the one digit sum of all digits of “Number“. string ToLower («Text») Converts all character in the string “Text“ to lower case. string ToUpper («Text») Converts all character in the string “Text“ to upper case. string Trim («Text») Removes leading and trailing spaces. string TrimLeft («Text») Removes leading spaces. string TrimRight («Text») Removes trailing spaces. double Value («Text») Converts “Text“ to a double value. long WeekOfYear («Date») The calendar week of a specified date/time [1..52]. Long Year («Date») The year of the specified date/time. Table 1: Functions Page 96 of 99 T FO RM er D e sig ne r U se r M anua l C.2 System Data-Fields Function Description BandName The name of the current band. BandType The type of the current band. Column The current column number (label printing) [0..x]. ComputerName The name of the computer (hostname). Copy The actual number of copies [1..NumCopies] Device The name of output device (Printer). Device Type The type of the output device (usually Winspool). Form The name of the current form. LogPage The number of the current logical page7 [1...NumLogPages]. Several logical pages can be printed per physical page. NumCopies The count of all copies [1..x]. NumLogPages The count of all logical pages2 [1...x]. Several logical pages can be printed per physical page. NumPages The count of all physical pages (sheets) [1..x]. NumRecordCopies The number of copies of the actual record. NumRecords The count of all input-records. Page The actual page number [1..NumPages]. Every printed physical page (sheet) increases the page number by 1. Project The name of the current project. ProjectDir The directory of the current project. Record The actual record number [1..NumRecords]. RecordCopy The actual number of record copy. Repository The name of the current repository. RepositoryDir The directory of the current repository. Row The current row number (by Label print) [0..x]. tfDocumentName This name will be used for the spool-job under Microsoft Windows. Can be set via an expression. tfServerJobFile The job file of TFORMer Server. tfServerJobID The job ID of TFORMer Server. tfServerJobTimesPrinted For TFORMer Server only: How often has this server job already been printed. XResolution Horizontal device resolution in dots per inch (25.4 mm). Horizontal and vertical resolution are usually identical for most printers. YResolution Vertical device resolution in dots per inch (25.4 mm). Horizontal and vertical resolution are usually identical for most printers. Table 2: System Data-Fields C.3 Constants Function Description False Logical value FALSE. This value is usually the result of a condition. If the condition is not fulfilled the resulting value is FALSE. True Logical value TRUE. This value is usually the result of a condition. If the condition is fulfilled the resulting value is TRUE. "\n" Linefeed. Table 3: Constants 7 A logical page is usually the area of a label on the output page. Every forced or automatic Row/Column Break starts a new logical page. Page 97 of 99 T FO RM er D e sig ne r U se r M anua l Appendix D: Advanced Configuration D.1 Template File Path The file path for the template files can be set in the windows registry. You can find the appropriate settings either under HKEY_CURRENT_USER or under HKEY_LOCAL_MACHINE: [HKEY_CURRENT_USER\Software\TEC-IT \TFORMer\5.0\Directories] TemplateDir="Some directory where the templates are stored" When storing the setting under HKEY_LOCAL_MACHINE then it is valid for all users on the computer: [HKEY_LOCAL_MACHINE\Software\TEC-IT\TFORMer\5.0\Directories] TemplateDir="Some directory where the templates are stored" D.2 Configuration File TFORMer.xml TFORMer Runtime uses a configuration file which holds basic output settings suitable for most requirements. This configuration file is named TFORMer.xml and is installed automatically. After installation it can be adjusted to meet customized output needs. For details, please refer to the Developer Manual. Page 98 of 99 Keyboard Shortcuts T FO RM er D e sig ne r U se r M anua l Files New ................................ Open .............................. Save ............................... Close .............................. Editing Ctrl+N Ctrl+O Ctrl+S Ctrl+W, Ctrl+F4 Switch between open files Use the file tabs , select the file from the Window menu, or use the following shortcuts: Element content Next File ......................... Ctrl+Tab Previous File .................. Ctrl+Shift+Tab Edit the content of selected text, barcode and picture elements ...... Printing Print ............................... Ctrl+P Print Preview .................. Ctrl+Space Edit Data ........................ Ctrl+D Right Click - Context Menu Editor Customization Grid Visible (on/off) ......... Snap To Grid (on/off) ...... Zoom In .......................... Zoom Out ....................... Zoom In/Out ................... Undo .............................. Ctrl+Z, Alt+Backspace Redo .............................. Ctrl+Y Cut ................................. Ctrl+X Copy .............................. Ctrl+C Paste .............................. Ctrl+V Delete............................. Del Select all Elements ......... Ctrl+A Ctrl+G Ctrl+R Ctrl++ Ctrl+Ctrl+Mousewheel Window Selection Design Window .............. Alt+1 Property Window ............ Alt+2 Design Tree ................... Alt+3 If you are unsure which operations can be performed on selected elements or tree view entries, just open the context menu by clicking the right mouse button – see . Renaming To change the name of a data-field, tray mapping, layer, band or design element, select the entry in the tree view. Then, again, click on it with the left mouse button (or press the F2 key). The name will become editable. Text properties Bold................................ Ctrl+B Italic ............................... Ctrl+I Underline ........................ Ctrl+U Alignment (if two or more elements are selected) Align Left ........................ Align Right ...................... Align Top ........................ Align Bottom ................... Ctrl+ Ctrl+ Ctrl+ Ctrl+ Band Order (if a band is selected) Alt+ Alt+ Layers Move Up ......................... Move Down .................... Double-click on the layer-icon in the design tree to toggle the visibility. Drag Modifiers Default Element Properties While dragging elements with the mouse you can use the following modifier keys: Miscellaneous Open Help ...................... F1 Cancel operation ............ ESC F2 You can save the currently used format styles (font style, color, line width, …). These styles will be applied automatically when inserting a new element. Use the context menu (right mouse button) to: Set Default Properties (based on current selection) Apply Default Properties (to current selection) Snap to horizontal and vertical axis..................... Copy Mode ..................... Fine Positioning .............. Shift Ctrl Alt Page 99 of 99