1
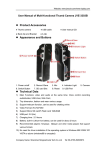
A JVE-3303B típusú többfunkciós minikamera felhasználói kézikönyve
– A kütyü tartozékai
Mini kamera, USB kábel, Kézikönyv CD
,Hátsó csipesz és tartó, Csíptető
– Kinézet és kezelőszervek
1. Ki/be kapcs 2. Felvétel/mentés 3. Mikrofon 4. Jelzőlámpa 5. Kamera 6.
Kapcsológomb
7. SD kártya nyílás 8. Reset 9. USB Port
– Műszaki adatok
1) Fő funkciók: video és audio egyidejűleg; Audio&video hangvezérelt
felvétele; USB drive; Web
Cam;
2) Parányi méretek, divatos megjelenés
3) Webkamera funkciót támogatja, online csetelésre is alkalmas
4) Video Formátum: AVI,720*480
5) Támogat:Micro SD card/T-Flash card 1GB-8GB
6) USB port: 2.0 (Hs)
7) öltési idő : 2-3 hours
8) Aksi: beépített Lithium-ion. Használható kb 2 óráig
9) Javasolt lejátszó: KmplayerMplayer és más media player, amelyik
többféle formátumot támogat
10) Windows ME/ 2000/ XP/ VISTA vagy e feletti oprendszerekhez nem kell
meghajtó program
(windows98 kivételével)
Működtetés
- Bekapcsolás
1) Bekapcsolás előtt illesszen be egy Micro SD kártyát óvatosan
kattanásig betolvaa helyére.
Kártya nélkül bekapcsolva a piros lámpa folyamatosan világít, a kék
villog. A készülék nem
működik, és 30 s. után kikapcsol.
2) Kikapcsoláshoz nyomja meg a power off/on gombot. A kék fény
folyamatosan világít, a piros
kettőt villan majd kialszik, jelezve a standby üzemmód elérését.
- Video és audio felvétel
1) Standby üzemmódban nyomja meg egyszer a record/save gombot. A kék fény
folyamatosan
ég, és a piros fény villogása jelzi az audio&video felvételt.
2) Nyomja meg újra a record/save gombot. A piros lámpa kialszik, a kék
égve marad. Leáll a
felvétel, elmenti az adatokat.
- Hang-vezérelt felvétel
1) Standby üzemmódban nyomja meg a kapcsoló gombot. Ekkor átvált hangvezérelt módba. A
kék fény folyamatosan világít, a piros pedig gyorsan villog. Hangvezérelt
felvétel üzemmód
standby állapotába kerül a kütyü.
2) Amikor a hangszint meghaladja a 60DB-t, a kék fény folyamatos, a piros
pedig lassan villog.
Elindul az automatikus felvétel
3) 60DB-es hangszint alatt visszatér standby módba és elmenti az
adatokat.
4) 2 percnyi felvétel után, és ha a hangszint meghaladja a 60DB-t a
berendezés folytatja a
felvételt.
- Kikapcsolás
Bármelyik üzemmódban az on/off gomb néhány másodpeces megnyomásával
kikapcsolható,
ezt a lámpák kialvása is jelzi.
A következő körülmények az adatok elmentéséhez és kikapcsolásához
vezettek.
1) Felvételkor ha az aksi gyengül.
2) A memória tele van:A fények rövid ideig villognak, a kamera elmenti az
adatokat és kikapcsol.
- Resetelés
Hibás működés esetén reset-re lehet szükség. Csak nyomja meg a reset
gombot a mellékelt
eszközzel kattanásig, és olyan jó lesz a kütyü, mint újonnan.
- Használat webkamera-ként
1) Telepítse a CD-ről az “SPCA1528 PC Driver.exe” nevű szoftvert. Kövesse
az utasításokat.
2) Kapcsolja be a kütyüt, majd csatlakoztassa a PC-hez. Egy szabványos
video berendezés
jelenik meg a gépben, ezután webkameraként használható.
3) Akár ki- vagy bekapcsolva csatlakoztassa a kütyüt a PC-hez USB
kábellel. Ekkor USB
üzemmódba áll és webkamera-módba kapcsolható.
- Töltés
1) Kikapcsolt állapotban csatlakozzon a PC-hez, vagy a töltőhöz. A piros
lámpa folyamatosan
világít, a kék villog a töltést jelezve. Teljes töltöttségnél mindkét
lámpa folyamatosan világít.
2) Az aksi kimerülése során a kütyü önvédelmi módba kerül. Kérjük,töltse
fel.
- Lejátszás
Felvétel után csatlakoztassuk Usb cserélhető lemezként és a fájlok
médialejátszóval
lejátszhatók.
- Időbeállítás
1) Csatlakoztassuk a kamerát PC-hez
2) Hozzon létre egy” .TXT” fájlt a kamera főkönyvtárában, majd nevezze át
„TAG”-nak
3) Nyissa meg a „TAG” fájlt, szerkessze meg az dátumot a fájlban (pl:
DATE,2009/12/12 aztán
váltson sort és szerkessze az időt12:12:12 ). Mentse el a fájlt, másolja
a fő könyvtárba és lépjen
ki, ha sikeresen beállította az időt.
4) Legközelebb használva a kamerát az idő aktualizálva lesz.
- Figyelem!
1) Ha felvétel során merül le a telep, kikapcsolódás előtt az adatokat
elmenti a kütyü.
2) A felvételt ciklikusan leállítva/elindítva újabbés újabb video fájl
jön létre.
3) Használja megfelelő fényviszonyoknál, függőlegesen, szilárdan. 50
méterig optimális a felvétel.
4) A mentéshez idő kell. Adatmentés során ne készítsen felvételt.
5) A kütyü beépített nagykapacitású polymer lithium-ion aksijában nem lép
fel memória-hatás.
Az első öt ciklusban használjuk teljes kimerülésig. Ezután éri el a max.
kapacitást.
6) A PC-re másolt anyagot játsszuk le, mert a kütyüből játszva szaggat.
Fordította: Fazekas
Javította: Sylka Modellsport Team www.sylkamodell.hu
User Manual of Multi-functional Thumb Camera JVE-3303B
. Product Accessories
. Thumb camera . USB cable . User manual CD
. Back clip and Bracket . A clip
. Appearance and Buttons
1. Power on/off 2. Record /Save 3. Mic 4. Indicator Light 5. Camera
6. Switch Button 7. SD card Slot 8. Reset 9. USB Port
. Technical Data
1) Main Functions: video and audio at the same time; Voice control
recording
audio&video; USB drive; Web Cam;
2) Tiny dimension, fashion and wear various usage
3) Support webcam function, can be used for chatting online
4) Video Format: AVI,720*480
5) Support Micro SD card/T-Flash card 1GB-8GB
6) USB port: 2.0 (Hs)
7) Charging time : 2-3 hours
8) Battery: built-in Lithium-ion battery, can be used for about 2 hours
9) Recommended players: Kmplayer.Mplayer and other media players that
support
various formats
10) No need for driver installation if the operating system is Windows
ME/ 2000/ XP/
VISTA or above (windows98 is excepted)
. Operation
. Switch on
1) Before switch on it, please insert Micro SD card by pushing it firmly
into the slot
until it clicks into place. If without Micro SD card, when the camera is
on, the red
light will keep on and the blue light will be twinkling, then it can not
be operated,
30seconds later, it will be power off.
2) Under power off mode, press power off/on button, the blue light keeps
on and the
red light will twinkles two times then off, indicating it enters standby
mode.
. Recording Video and Audio
1) Under standby mode, press record/save button one time, the blue light
keeps on
and the red light will be twinkling, indicating that it is recording
audio&video
2) Press record/save button again, the red light is off and the blue
light keeps on, it
stops recording and saves the data.
. Voice control recording
1) Under standby mode, press switch button, it will switch to voice
control recording
mode, the blue light keeps on and the red light twinkles quickly. It
enters standby
mode of voice control recording.
2) When the voice is higher than 60DB, the blue light keeps on and the
red light
twinkles slowly. It starts recording automatically.
3) Without voice or not up to 60DB,the device will be back to the standby
mode and
save the data.
4) If it records for 2 minutes, and the voice outside is also higher than
60DB,the
device will last recording.
. Switch off
Under any mode, push power on/off button for several seconds, the lights
are off,
indicates it is power off.
In the following circumstances, the camera will save the data and power
off.
1) Lacking of electricity when recording: the camera will save the data
automatically
and power off.
2) The memory is full: the lights twinkles for short time, then the
camera will save the
data and power off.
. Retting
You need to reset the device when it doesn’t work because of misoperation. Just
press the reset button with the clip once, the device will be as good as
original.
. Used as a web camera
1) Install a driver in the user manual CD, the name of driver is
“SPCA1528 PC
Driver.exe”,Follow the installation steps to complete installation .
2) Switch on the device then connect to the computer, a standard video
equipment
will appear in the computer, now the device can be used as a webcam.
3) Under power on or off mode, connect the device to the computer by USB
cable,
the mode is USB mode, now it can be switch it to webcam mode.
. Charging
1) Under power off mode, connect the camera to the computer by USB cable
or
charged by a charger, the red light keeps on and the blue light is
twinkling,
indicating it is being charged. The blue light stops twinkling and the
red light
keeps on, indicating it is full of electricity.
2) When it is lack of electricity, the device will enter the protective
mode directly, it
can not be switched on. Now please charge it.
. Playback
After recoding, connect the camera to the computer by USB cable, click
the
removable disc, and select the record files and double click, then the
files can be
played in the computer. Before connecting please make sure the computer
has been
installed the related playing software.
. Setting Time
1) Connect the camera with computer
2) Create a new “.TXT” file in the root of the disk of the camera, then
rename it
“TAG”
3) Open the “TAG” file, edit the time in the file. (for example:
DATE,2009/12/12 then
change a line and edit time12:12:12 ), save this file, copy it to the
root disk and
exit, after that the time is set successfully
4) When starting the camera again next time, the time will be
simultaneous as the
time file.
. Attention
1) When recording, if it is lack of electricity, the device will save the
data before
power off;
2) When every recording, start or stop cyclely recording every time , the
device will
set a new video file;
3) Please use it in the environment with enough light, and keep the
device vertical
and stable, and keep it far away from the view more than 50meters.then it
can get
a best recording.
4) It needs some time to save the data, so do not operate it repeatedly
when saving
data. Otherwise the data cannot be saved smoothly, or make the data
incomplete.
5) The device built-in high capacity polymer lithium-ion battery, no
remember
function, can be rechargeable. In the first five usage, please charge it
when it is
power off, can charge it to saturation. Then can activate the max
capacity and get
the standard time.
6) Please copy or shear the video files to the computer then play them.
If play the
video files in the device directly, it may be played un-smoothly because
the data is
too large.