1
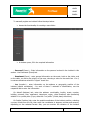
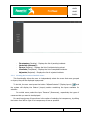
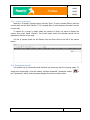
Water Application User Manual Decisional Module MMSC ANPM ANAR INHGA TABLE OF CONTENTS 1 INTRODUCTION................................................................................................ 6 2 Operational Module........................................................................................... 7 2.1 Map operation ........................................................................................... 7 2.1.1 Independently switching layer display on the map ........................................... 7 2.1.2 Navigating between frames ........................................................................... 7 2.1.3 Zoom in/Zoom out ........................................................................................ 8 2.1.4 Measuring the distance between points .......................................................... 8 2.1.5 Measuring the surface ................................................................................... 9 2.1.6 Measuring a circle ........................................................................................10 2.1.7 Adding a point of interest (PoI)......................................................................11 2.1.8 Moving the map ..........................................................................................13 2.1.9 Displaying a full frame .................................................................................13 2.1.10 Full screen display ....................................................................................14 2.1.11 Dynamic editing with zonal selection ..........................................................14 2.2 Operating incidents ..................................................................................14 2.2.1 Registering an incident .................................................................................14 2.2.2 Closing an incident.......................................................................................16 2.2.3 Viewing the list of incidents ..........................................................................16 2.2.4 Viewing the location of mobile crews .............................................................17 2.2.5 Search a transport .......................................................................................18 2.3 Automatic match ......................................................................................18 2.4 Interrogating data ....................................................................................20 2.4.1 Viewing the list of resources .........................................................................20 2.4.2 Search/Display the address, street, intersection, locality, point of interest.........21 2.4.3 Calculating the optimum path .......................................................................23 2.4.4 Printing .......................................................................................................25 3 Logistics provision module ................................................................................25 3.1 Managing materials and means of intervention ...........................................25 2/80 MMSC ANPM ANAR INHGA 3.1.1 Managing lodging locations for evacuated individuals .....................................25 3.1.2 Allocating evacuated individuals ...................................................................25 3.2 Managing dangerous materials ..................................................................26 3.2.1 Managing the dangerous materials module ....................................................26 3.2.2 Registering the owners of dangerous materials ..............................................27 3.2.3 Search for owners of dangerous materials .....................................................29 3.2.4 Edit owners of dangerous materials ...............................................................29 3.2.5 Delete owners of dangerous materials ...........................................................30 3.2.6 Registering dangerous materials ...................................................................30 3.2.7 Searching dangerous materials .....................................................................32 3.2.8 Editing dangerous materials..........................................................................33 3.2.9 Delete dangerous materials ..........................................................................34 3.2.10 Managing stocks of dangerous materials ....................................................34 3.2.11 Registering dangerous materials owned .....................................................35 3.2.12 Searching for stocks of dangerous materials owned .....................................36 3.2.13 Editing the stocks of dangerous materials owned ........................................36 3.2.14 Deleting the stocks of dangerous materials owned ......................................37 3.2.15 Exporting the stocks of dangerous materials owned ....................................37 3.2.16 Importing the stocks of dangerous materials owned ....................................38 4 5 Alert module ....................................................................................................38 4.1 Alerts ......................................................................................................38 4.2 Managing contacts ...................................................................................39 4.3 Notifications .............................................................................................40 Risk Register Module ........................................................................................41 5.1 Adding risks .............................................................................................41 5.1.1 Affected areas .............................................................................................42 5.1.2 Risk details..................................................................................................43 5.1.3 Documents..................................................................................................44 5.1.4 Risk matrix ..................................................................................................44 5.2 Editing risks .............................................................................................45 3/80 MMSC ANPM ANAR INHGA 5.3 6 Deleting risks ...........................................................................................46 Management module for materials and means of intervention (CAPAR) ................46 6.1 Gestiune (Management)............................................................................46 6.1.1 Adding means / materials .............................................................................46 6.1.2 Changing means / materials .........................................................................48 6.1.3 Deleting a means / material..........................................................................48 6.1.4 Allocating a means / material........................................................................48 6.2 Necesar (Need) ........................................................................................48 6.2.1 Adding means / materials .............................................................................49 6.2.2 Changing means / materials .........................................................................49 6.2.3 Deleting a means / material..........................................................................49 6.3 Allocation history ......................................................................................50 7 Interventions module .......................................................................................50 7.1 Managing interventions .............................................................................50 7.1.1 Adding an intervention .................................................................................51 7.1.2 Changing an intervention .............................................................................52 7.1.3 Deleting an intervention ...............................................................................53 7.1.4 Filtering interventions ..................................................................................53 8 Personnel module ............................................................................................53 8.1 Truancies.................................................................................................53 8.1.1 Managing truancies ......................................................................................53 8.1.2 Adding truancies ..........................................................................................54 8.2 Managing shifts ........................................................................................55 8.2.1 Viewing a shift.............................................................................................56 8.2.2 Editing a shift ..............................................................................................58 8.2.3 Generating a report .....................................................................................59 9 User settings module ........................................................................................59 9.1 Despre (About) ........................................................................................60 9.2 Setări Utilizator (User settings) ..................................................................60 10 Admin module .................................................................................................61 4/80 MMSC ANPM ANAR INHGA 10.1 General settings .......................................................................................61 10.2 Roluri (Roles) ...........................................................................................62 10.2.1 Adding a role ...........................................................................................63 10.2.2 Changing roles .........................................................................................64 10.2.3 Deleting roles ...........................................................................................64 10.2.4 Filtering roles ...........................................................................................65 10.3 Utilizatori (Users)......................................................................................65 10.3.1 Adding users ............................................................................................65 10.3.2 Changing users ........................................................................................66 10.3.3 Deleting users ..........................................................................................67 10.3.4 User filtering ............................................................................................67 10.4 Schedules ................................................................................................67 10.4.1 Equipment ...............................................................................................67 10.4.2 Resources ................................................................................................67 10.4.3 Categories of resources.............................................................................68 10.4.4 Managing measurement units ....................................................................69 10.4.5 Support institutions ..................................................................................70 10.4.6 Owners....................................................................................................71 10.4.7 Managing means ......................................................................................72 10.4.8 Managing materials ..................................................................................73 10.4.9 Dangerous materials .................................................................................74 10.4.10 Employees ...............................................................................................75 10.4.11 Personnel roles ........................................................................................76 10.4.12 Communication channels ..........................................................................77 10.4.13 Means of communication ..........................................................................78 10.5 Logos ......................................................................................................79 10.6 Errors ......................................................................................................80 5/80 MMSC ANPM ANAR INHGA 1 INTRODUCTION This manual is intended for the operators of the Decisional Module of the Water application installed. The instructions on how to use the system's functionalities for each module are detailed hereafter. 6/80 MMSC ANPM ANAR INHGA 2 Operational Module 2.1 Map operation 2.1.1 Independently switching layer display on the map This functionality allows the user to independently select the elements of interest and the elements that were grouped on layers; they will be displayed superposed. To do this, the user must press the button “Arata/ascunde fereastra de selectare a straturilor afisate” (Show/hide the selection window of the displayed layers) , and the system will display the Straturi (Layers) section containing the layers available for selection. To select a layer, select the name of the layer, and the elements in the respective layer will be displayed superposed on the map. For each layer/group of layers there is the option of selecting its transparency, by sliding the button from left to right for a transparency as low as possible. 2.1.2 Navigating between frames This functionality allows the user to return directly to the frame previously viewed without dragging the map, as the system memorized the frames that were the area of interest so that switching multiple areas of interest is made as easily and rapidly as possible, removing the need for manually re-center a frame that was viewed. 7/80 MMSC ANPM ANAR INHGA To navigate between frames, use the buttons to navigate to the previous frame, respectively to the next frame (functionality that can be applied only if you navigated to a previous frame). 2.1.3 Zoom in/Zoom out This functionality allows the user to zoom in the area of interest, enlarging or reducing the image so that it includes the surface and the elements desired in the frame. To zoom in an area, use the buttons “Mărește imaginea” (Enlarge image) respectively “Micșorează imaginea” (Reduce image) system zooms in the image. , , then select the desired area; the Also, to zoom in you can use the scroll button of the mouse, as well as the direct selection of the zoom in level by clicking with the mouse on the divided vertical line. 2.1.4 Measuring the distance between points This functionality allows the user to measure the distance between 2 points on the map. To do this, select the “Măsurare distanță” (Distance measurement) tool in the General folder of the menu located in the lower right corner of the page, then follow the steps below: - Click the map where the measurement start point will be; Click (do not hold) another point on the map, and the system will display the distance between the two points. Right click another point, and the system will display the total distance in km. Example shown in the following image: 8/80 MMSC ANPM ANAR INHGA 2.1.5 Measuring the surface This functionality allows the user to measure the surface of an area. To do this, select the “Măsurare suprfață” (Surface measurement) tool in the General folder of the menu located in the lower right corner of the page, then follow the steps below: - Click the measurement start point; Reposition the cursor (do not hold the mouse button) and a red straight line will mark the 2 points, and a click will mark the 2nd point. Repeat steps 1 and 2 considering the previous point as start point; the system will draw a polygon of n sides on the screen. To complete the flow, right click in the final point; the total surface in hectares will be displayed next to it. Example shown in the following image: 9/80 MMSC ANPM ANAR INHGA 2.1.6 Measuring a circle This functionality allows the user to measure the surface of a circle. To do this, select “Unelată de măsurare arie” (Surface measurement tool) in the General folder of the menu located in the lower right corner of the page, then follow the steps below: - Click the measurement start point; Right click (do not hold) in another point; the system will draw a circle on the map, displaying the radius length and the circle surface. 10/80 MMSC ANPM ANAR INHGA 2.1.7 Adding a point of interest (PoI) To add a PoI, press the Adaugă PDI (Add PoI) button in the General folder located in the lower right corner of the page, then right click on the map in the desired point; the system will open the option “Adaugă PDI aici” (Add a PoI here), and the user must fill in the fields Denumire (Name), Categorie (Category) and Descriere (Description). 11/80 MMSC ANPM ANAR INHGA The field Localitate (Locality) will be automatically filled in with the name of the locality where the user intended to create the objective. Depending on the category of objectives selected, the objective will be plotted on the map with the pictogram of the respective category, configured in the application configuration area. To cancel the operation, press the Închidere (Close) button, and the system will not save the information. To edit a PoI, right click on the symbol corresponding to the respective PoI, and the system will open the option Editează Punct de Interes (Edit the point of interest). 12/80 MMSC ANPM ANAR INHGA To delete a PoI, right click on the symbol corresponding to the respective PoI, and select the option Șterge Punct de Interes (Delete the point of interest). 2.1.8 Moving the map This functionality allows the user to view areas of the map that are not included in the frame. To perform this operation, left click on the mouse and, while holding the left button of the mouse pressed, the mouse will move and the map will move with it; the new areas displayed are centered on the screen allowing the user to view the area of interest. 2.1.9 Displaying a full frame This functionality allows the user to view the entire map of the area managed in a single frame; the system performs this operation automatically when you press the button “Afișarea întregii hărți” (Display the entire map) . 13/80 MMSC ANPM ANAR INHGA 2.1.10 Full screen display This functionality allows the user to view only the application on the entire computer screen, the system automatically removing the visible items in the browser or windows frame. To do this, press the button “Afișați pe întreg ecranul” (Full screen display) the General folder. , in 2.1.11 Dynamic editing with zonal selection This functionality allows you to select a part of the map and to display points of interest in that area as shown in the images below. To do this, press the button “Editare dinamiză cu selecție zonală” (Dynamic editing with zonal selection) in the General folder. 2.2 Operating incidents The purpose of this module is to register and monitor the evolution of incidents and to manage as efficiently as possible the resources within their solution process. 2.2.1 Registering an incident Incident occurrences within the application is handled as follows: The incident is manually registered by filling in the information on the respective incident in the case sheet (event description, date/hour of the incident, information on the victim, etc.). 14/80 MMSC ANPM ANAR INHGA To manually register an incident follow the steps below: Access the functionality for creating a case folder: A window opens; fill in the required information - Persoană (Person) - Enter information on the persons involved in the incident in this section - the Eveniment (Event) tab. - Eveniment (Event) - enter general information on the event, both on the victim, and on the caller, as well as the priority of the case, choosing a value on the scale from 1 to 4; in extreme situations select the “Urgent” check box. - Loc (Location) - enter information on the address or geographic position of the incident (spatial coordinates) - for each of these 2 methods of identification, use the respective tab to enter the information. On Adresă (Address) tab, enter the address: municipality, locality, street, number, building, entrance, floor, apartment, interphone, region, route directions, also mentioning whether it is a public place (if yes, select the “Loc public” (Public place) check box). On Poziție (Position) tab, enter the spatial coordinates of the incident position, selecting a proper format from the list, then enter the coordinates in degrees, minutes and seconds, depending on the selected format. Also, you can monitor the variation of the incident 15/80 MMSC ANPM ANAR INHGA position for a mobile event; to do this, in the field “Modificare poziție” (Modify position) select the date when the new coordinates are available, so that the coordinates will be calendar correlated to facilitate the detection of the incident trajectory. - Informatii suplimentare (Additional information) - enter information on the identifying and monitoring the evolution of the case, such as: type, state, ID, priority, call center, comments on the surveillance in time, date and user who registered the case, as well as the organizations involved in solving the incident (to add an organization, select the one you want from the combo box field, then press the Adaugă (Add) button. Also, to delete an organization, select the one you want from the list of organizations involved and press the Șterge (Delete) button). - Comentarii (Comments) - enter the comments you consider relevant for the current case. - Cautare in index (Search the index) - this section allows you to search for an incident by its name. To do this, enter the incident name, and the system will filter the list of incidents upon each character entered, automatically displaying the filtered list. To complete the flow for adding a new case, press the Salvează (Save) To delete the case, press the Șterge (Delete) button. button. 2.2.2 Closing an incident To close an incident, press the button for closing the case in the case sheet: 2.2.3 Viewing the list of incidents This functionality alows the user to view the list of all incidents. Access the “Liste” (Lists) button in the upper right of the page. 16/80 MMSC ANPM ANAR INHGA - În așteptare (Pending) - Displays the list of pending incidents Personale (Personal) În curs (Ongoing) - Displays the list of incidents being solved. Finalizate (Completed) - Displays the list of completed incidents. Rejectate (Rejected) - Displays the list of rejected incidents. 2.2.4 Viewing the location of mobile crews This functionality allows the user to independently select the crews that were grouped on layers; they will be displayed superposed. To do this, the user must press the button “Afișează straturi” (Display layers) , and the system will display the Straturi (Layers) section containing the layers available for selection. For mobile crews, select the layer “Resurse” (Resources), respectively the types of resources that you want to be displayed. For each layer/group of layers there is the option of selecting its transparency, by sliding the button from left to right for a transparency as low as possible. 17/80 MMSC ANPM ANAR INHGA 2.2.5 Search a transport When the “Transport” window opens, the field “De la” (From) is already filled in with the current date, and the field “Până la” (To) is already filled in with the date one week from the current date. To search for a travel, to begin select the period for which you want to display the travels, then press Caută (Search). The travels made within the selected period will be displayed in the list on the page. The list of travels found can be filtered using the filter field to the left of the search button. 2.3 Automatic match The system has a functionality that matches the resources with the ongoing cases. To access this functionality, press the button „Asociere automată“ (Automatic match) the “Operational” folder, and the system displays the window shown below: in 18/80 MMSC ANPM ANAR INHGA This screen is divided into 3 sections, each section allowing you to filter the results. To apply a filter, click the symbol located on the applicable column, and the system opens the corresponding window where you can fill in the filtering criteria. To apply the filter, press the Filtrează (Filter) button. To delete the filter, press the Șterge filtru (Delete filter) button. To match the resource with a case, first access “Cazuri” (Cases), the “Liste” (Lists) tab, then the button “În curs” (Ongoing). In the new window displayed, check the option Trimite cazuri automat (Send cases automatically), as shown in the image below: 19/80 MMSC ANPM ANAR INHGA Ensure this option is selected, then return to Asociere automată (Automatic match), select the desired case from the section in the lower left of the window and the required resource from the lower right of the window, then press the button Asociază resursă la caz (Match resource with case). 2.4 Interrogating data 2.4.1 Viewing the list of resources This functionality offers the user possibility to view all the resources registered in the application, in the form of a table, with the possibility to filter the columns in order to easily find the resource desired. To access the list of resources, press the button Listă resurse (List of resources) and the system will open the following window: , 20/80 MMSC ANPM ANAR INHGA 2.4.2 Search/Display the address, street, intersection, locality, point of interest The system provides a unique point of search where you can find the following: - Street Address Intersection Point of interest Locality Marking on the map To perform a search, fill in the search criteria in the search section located in the upper right, then press Enter or the button: 21/80 MMSC ANPM ANAR INHGA To search for: - a STREET, enter the name of the street. The system will return a list of all the streets that correspond to the search criteria in the Srăzi (Streets) section. The operator will select the desired street from this list, and the system will mark the street on the map, along with the zip codes. At the same time, following the selection of a street in the list of results, all the addresses on that street will be displayed in the Adrese (Addresses) section. - an ADDRESS: enter the name and number of the street The system will return a list of all the addresses that correspond to the search criteria in the Adrese (Adresses) section. The operator will select the address in this list, and the system will mark it on the map by a blue dot. - a LOCALITY, enter the name of the locality. The system will return a list of all the localities that correspond to the search criteria in the Localități (Localities) section. The operator will select the locality in this list, and the system will mark the center of that locality on the map by a blue dot. - Point of Interest (PoI): enter the name of the point of interest. 22/80 MMSC ANPM ANAR INHGA The system will return a list of all the PoIs that correspond to the search criteria in the PDI-uri (PoIs) section. The operator will select the PoI in this list, and the system will mark the location of that PoI on the map by a blue dot: - INTERSECȚIE (Intersetion): enter the search criteria in the form: "<Street name 1> + <Street name 2>" The system will return a list of all the intersections that correspond to the search criteria in the Intersecții (Intersections) section. The operator will select the intersection in this list, and the system will mark it on the map by a yellow dot. In case you do not want the system to return results in all the lists, select only the lists you need. Similarly, you have the possibility to search only in a certain locality or county, by selecting the required values in the list. 2.4.3 Calculating the optimum path This functionality allows the user to find the optimum path, both in terms of time, and of the minimum distance traveled from the departure point to the arrival point. To do this, press the button Drum optim (Optimum path) the system will open the following window: in the General folder, and To perform a calculation you must select a departure point and an arrival point, by right clicking on the map for each part and choosing the corresponding option: Adăugați punct de plecare (Add a departure point) point) , respectively Adăugați punct de sosire (Add an arrival . 23/80 MMSC ANPM ANAR INHGA Also, you can add blockages (Blocaje) or intermediate points (Puncte intermediare) along the path; the system will take them into consideration and will calculate the optimum path avoiding the blockages and passing trough the selected intermediate points. The symbol for an intermediate point has the number of the intermediate point. The blockages are attached to the nearest streets and the system marks the nearest street as being blocked. To change the parameters of the path, depending on the parameter, follow the steps below: - - - To reposition the departure point: right click on the map in a different point and select the option Adăugați punct de plecare (Add a departure point) again; the system repositions the departure point. To reposition the arrival point: right click on the map in a different point and select the option Adăugați punct de sosire (Add an arrival point) again; the system repositions the arrival point. To remove a blockage: left click on the map on the symbol of a blockage; the system deletes the blockage from the map. To remove an intermediate point: left click on the map on the symbol of an intermediate point; the system deletes the point from the map. To remove all the parameters of the path, select the option Șterge toate (Delete all). To find the optimum path in terms of time, select the radio button “Pentru timp minim” (For minimum time), respectivelly the radio button “Pentru distanță minimă” (For minimum distance) to find the optimum path in terms of travelled distance, then press Calculează (Calculate). To calculate the optimum path, the system marks it in blue on the map and displays the total time (in minutes) to travel the path, and the total distance (in kilometers) to be traveled. 24/80 MMSC ANPM ANAR INHGA 2.4.4 Printing To print the current work screen, press Tipărire (Print) in the General folder, then select the printer you want to use to print the current image. 3 Logistics provision module 3.1 Managing materials and means of intervention 3.1.1 Managing lodging locations for evacuated individuals The lodging management sub-module for evacuated individuals is accessible by pressing the Tevac button in the “Tevac” folder. 3.1.2 Allocating evacuated individuals Access the allocation tab having an ongoing incident open and positioned on the map. To allocate the evacuated individuals, seelct the evacuation, the building and the individuals you want to allocate, then press the automatic allocation button: 25/80 MMSC ANPM ANAR INHGA After the automatic allocation, the system displays the individuals allocated to each bed. In case you want to move a certain individual to another bed, select that individual and drag it (drag-and-drop method) over the new bed/room. When an individual leaves the lodging location, you have the possibility to mark the lodging location as available, by filling in the date and hour of departure of that individual. 3.2 Managing dangerous materials 3.2.1 Managing the dangerous materials module Managing this submodule means to: • Manage the owners of dangerous materials 26/80 MMSC ANPM ANAR INHGA • Manage dangerous materials The user has the role of administrator. By accessing the item Deținători (Owners) from the management area > Nomenclatoare (Schedules), and the system displays the list of owners defined within the system. Figure 2.1: Owners of dangerous materials 3.2.2 Registering the owners of dangerous materials To add a new owner, press Adaugă (Add) and fill in the following fields: Nume (Name) CUI (Sole Registration Number) Tip deținător (Type of owner) (select from list) Țara (Country) (select form schedule) Județ (County) (select form schedule) 27/80 MMSC ANPM ANAR INHGA Localitate (Locality) (select form schedule) Strada (Street) Număr (Number) Persoană Contact (Contact person) E-mail Telefon (Telephone) Nume de utilizator (User name) To place the owner on the map, right click on the map an select the option Adaugă locație deținător (Add owner location). After filling in these fields, you have the option to save or cancel the operations performed. After saving, the newly created owner appears in the list of owners. 28/80 MMSC ANPM ANAR INHGA 3.2.3 Search for owners of dangerous materials To search for an owner, select the column you want to filter the search by in the list of owners by pressing the filtering button 3.2.4 and fill in one of the available options. Edit owners of dangerous materials To edit an owner, select an owner from the list and press Editează (Edit). The system opens the owner's file for editing. 29/80 MMSC ANPM ANAR INHGA 3.2.5 Delete owners of dangerous materials To delete an owner, select an owner and press Șterge (Delete). : 3.2.6 Registering dangerous materials By accessing the item Materiale periculoase (Dangerous materials) from the management area > Nomenclatoare (Schedules), and the system displays the list of owners defined within the system. 30/80 MMSC ANPM ANAR INHGA To add a dangerous material, press the add material button and fill in the following fields: Nume (Name) Descriere (Description) Număr fișă (File number) Nume fișă (File name) Toxic la inhalare (Toxic upon inhalation) (check box) Reacționează în contact cu apa (Reacts in contact with water) (check box) Unitate de măsură (Measurement unit) 31/80 MMSC ANPM ANAR INHGA To upload the file of the dangerous material press the Upload button and select the file in txt format. The file uploaded is visible in the field Fișă (File) in the Adaugă material (Add material) window. 3.2.7 Searching dangerous materials To search for a dangerous material, select the column you want to filter the search by in the list of materials by pressing the filtering icon and fill in the search criteria. 32/80 MMSC ANPM ANAR INHGA 3.2.8 Editing dangerous materials To edit a dangerous material, select the material in the list, then press the edit button. 33/80 MMSC ANPM ANAR INHGA 3.2.9 Delete dangerous materials To delete a dangerous material from the list, select the material, then press the delete button. The window with delete or cancel options displays on screen. 3.2.10 Managing stocks of dangerous materials This module is accessible by pressing the button in the > Hazmat menu. 34/80 MMSC ANPM ANAR INHGA The user has the role of operator. The system displays the Materiale periculoase (Dangerous materials) window. 3.2.11 Registering dangerous materials owned The user has the possibility to manually enter the stocks of dangerous materials. Press the Adăugare (Add) button. The import file contains the following columns: name of material, materials. 35/80 MMSC ANPM ANAR INHGA 3.2.12 Searching for stocks of dangerous materials owned On the list of materials you can apply a filter for the displayed data. The user applies this filter by clicking on the filtering icon . Figure 3.2.1: Filtering the dangerous materials owned 3.2.13 Editing the stocks of dangerous materials owned The system allows you to update the information on the dangerous materials owned by the economic operators. You can update the following information by clicking on the Editare (Edit) button: 36/80 MMSC ANPM ANAR INHGA Name of the material Quantity owned The system saves the updated data and the date they were changed in the system. 3.2.14 Deleting the stocks of dangerous materials owned The system allows you to delete the stocks of dangerous materials owned by the economic operators. Press the Ștergere (Delete) button to remove the dangerous material selected from the list. 3.2.15 Exporting the stocks of dangerous materials owned The system allows you to export the stocks of dangerous materials. 37/80 MMSC ANPM ANAR INHGA The file generated after the export contains the following columns: name of material, name of institution/economic operator and quantity. 3.2.16 Importing the stocks of dangerous materials owned The system allows you to import the stocks of dangerous materials owned by economic operators. To import stocks of dangerous materials use a template that contains the following information: Name of material -> selection from the list of dangerous materials Code of the institution/economic operator Quantity owned -> numerical field 4 Alert module 4.1 Alerts Alerte (Alerts) section is accessible by pressing the Alerte (Alerts) button in the folder with the same name. In this section you can create new alerts by accessing the button “Crează alertă nouă” (Create new alert) and you can view the alerts sent, saved or being sent, as shown in the image below: 38/80 MMSC ANPM ANAR INHGA Also, you can refresh the list of alerts by accessing the button “Reîncărcare alerte” (Reload alerts) in the upper right corner of the window. 4.2 Managing contacts The section for managing contacts can be accessed by pressing the button “Gestiune contacte” (Contact management) in the Alerte (Alerts) folder. In this section you can create a new contact by pressing the Persoană nouă (New person) button, you can change a contact by using the Editează persoană (Edit person) button, or you can delete a contact by pressing the Șterge persoană (Delete person) button, as shown in the image below: 39/80 MMSC ANPM ANAR INHGA Also, in the Liste de contacte (Lists of contacts) tab, you can create a new list by pressing the Listă nouă (New list) button, you can change a list by using the Editează listă (Edit list) button, or you can delete a list by pressing the Șterge listă (Delete list) button, as shown in the image below: There is also the possibility to search for a list by filling in the field “Listă de contacte Descriere” (List of contacts Description) and the possibility to search for a list by persons if you access the “Selectează contact” (Select contact) button. 4.3 Notifications This functionality allows the user to view the active notifications, the notification archive, as well as details on each notification by pressing the Vezi detalii (See details) button next to the notification. 40/80 MMSC ANPM ANAR INHGA 5 Risk Register Module The purpose of this module is to register and change risks. 5.1 Adding risks This functionality allows the user to register the risk areas and their information. After saving, the selected area is marked on the map by the color obtained in the risk matrix. In the “Adaugă registru riscuri” (Add a risk register) window, choose the institution and the category of the register, as shown in the image below: 41/80 MMSC ANPM ANAR INHGA 5.1.1 Affected areas In this tab, select the affected areas by pressing the “Adaugă localitate” (Add locality) button. In the new window displayed, search for and select the localities you want, then press the “Adaugă localități selectate” (Add selected localities) button. The localities selected are now available in the “Zonă” (Area) field in the “Zone afectate” (Affected areas) tab, as shown in the image below: 42/80 MMSC ANPM ANAR INHGA 5.1.2 Risk details In this tab, fill in the following fields with the required information: Clasificare (Classification), Cauze (Causes), Consecințe (Consequences), Analiză de risc și clasificarea priorității (Risk analysis and priority classification), Grad de expunere la risc (Degree of risk exposure), Persoane responsabile (Persons in charge), Dependențe între activități (Dependencies between activities), Grafic de timp (Schedule), Termene de realizare (Completion deadlines), Resurse necesare (Required ressources). 43/80 MMSC ANPM ANAR INHGA 5.1.3 Documents 5.1.4 Risk matrix In this tab fill in the Probabilitate (Probability) and Impact fields with values from 1 to 100, choose the matrix size, and the application will establish the level of risk by placing the box inside the matrix as shown in the image below: 44/80 MMSC ANPM ANAR INHGA After saving, the selected area is marked on the map by the color obtained in the risk matrix. 5.2 Editing risks This functionality allows you to change the information of a risk case already created. Select the risk case to change and press Editează (Edit). After changing the information press Salvează (Save). 45/80 MMSC ANPM ANAR INHGA 5.3 Deleting risks This functionality allows you to delete a risk case already created. To delete a risk case select that risk case and press Șterge (Delete), then confirm the operation in the confirmation window. 6 Management module for materials and means of intervention (CAPAR) This module allows you to manage materials and means of intervention. It includes 3 sections: Alocare (Allocation) Gestiune (Management) Necesar (Need) 6.1 Gestiune (Management) This section allows you to add an owner by using the Caută (Search) button. After you select the owner, you can manage (Adaugă (Add), Modifică (Change), Șterge (Delete) and Alocă (Allocate)) the materials and means. 6.1.1 Adding means / materials To add a means / material press Adaugă (Add) in the Gestiune (Management) section. 46/80 MMSC ANPM ANAR INHGA In the window displayed fill in the following fields: Cantitate (Quantity) – enter the quantity Lot (Batch) – enter the acquisition batch Fond de achiziție (Acquisition fund) – select form list Unitate de masură (Measurement unit) – select form list Observații (Remarks) – enter remarks as needed Dată achiziție (Date of acquisition) – select the date Durată normată (Rated duration) – enter the duration Data expirării (Expiration dare) – changes automatically depending on the acquisition date and rated duration After you fill in the fields, choose a means / material from the available list. The search can be performed using the 3 filters. 47/80 MMSC ANPM ANAR INHGA 6.1.2 Changing means / materials To change a means / material, choose the means / material you want to change, then press Editare (Edit). In the window displayed change the fields you want and then press Salvează (Save). 6.1.3 Deleting a means / material To delete a means / material, choose the means / material you want to delete, then press Ștergere (Delete). In the confirmation window displayed, press OK. 6.1.4 Allocating a means / material To allocate a means / material, choose that means / material, then press Alocare (Allocate). In the window displayed fill in the following fields: Cantitate alocată (Quantity allocated) – enter the allocated quantity Tip alocare (Type of allocation) – select form list At the end press Salvează (Save). 6.2 Necesar (Need) This section allows you to add an owner by using the Caută (Search) button. 48/80 MMSC ANPM ANAR INHGA 6.2.1 Adding means / materials To add a means / material press Adaugă (Add) in the Necesar (Need) section. In the new window displayed, select that means / material from the bottom of the page. After selecting the means / material, fill in the following fields: Cantitate necesară (Required quantity) Cantitate normativă (Rated quantity) Descriere (Description) At the end press Salvează (Save). 6.2.2 Changing means / materials To change a means / material, choose the means / material you want to change, then press Editare (Edit). In the window displayed change the fields you want and then press Salvează (Save). 6.2.3 Deleting a means / material To delete a means / material, choose the means / material you want to delete, then press Ștergere (Delete). In the confirmation window displayed, press OK. 49/80 MMSC ANPM ANAR INHGA 6.3 Allocation history This functionality is accessible in the Alocare (Allocation) tab and allows you to view the materials / means allocated. This section allows you to add an owner by using the Caută (Search) button; then, the means / materials allocated can be viewed. 7 Interventions module 7.1 Managing interventions This functionality allows you to view interventions and to add, change, and delete an intervention. 50/80 MMSC ANPM ANAR INHGA 7.1.1 Adding an intervention To add a new intervention, press Adaugă (Add) in the Intervenții (Interventions) window and enter the required information: 51/80 MMSC ANPM ANAR INHGA 7.1.2 Changing an intervention To change an intervention, select the intervention to be changed and press Editează (Edit). 52/80 MMSC ANPM ANAR INHGA After completing the change press Salvează (Save). 7.1.3 Deleting an intervention To delete an intervention select the intervention to be deleted and press Șterge (Delete), then confirm the operation in the new confirmation window displayed. 7.1.4 Filtering interventions This functionality allows the user to filter the interventions in the list by certain criteria. To apply a filter, fill in the fields in the image below: 8 Personnel module This module allows you to manage truancies and shifts. 8.1 Truancies 8.1.1 Managing truancies This section intends to manage personnel truancies. To access the module, press the icon. A truancy management window will display where you can add, edit or delete truancies. 53/80 MMSC ANPM ANAR INHGA 8.1.2 Adding truancies To add a truancy, press Adaugă (Add). The Detalii absență (Truancy details) window opens. 54/80 MMSC ANPM ANAR INHGA Press Caută (Search) to select an employee, select the hour range of the truancy and press the save button. 8.2 Managing shifts This section intends to manage personnel shifts. To access the module, press the icon. A shift management window opens. 55/80 MMSC ANPM ANAR INHGA 8.2.1 Viewing a shift To view a shift, select the shift in the list and press the view button. The Detalii tură (Shift details) window opens. 56/80 MMSC ANPM ANAR INHGA The Dispecerat (Dispatch) tab contains information on the dispatch designated to the respective shift. The Echipaje (Crews) tab contains information on the crew designated to the respective shift. 57/80 MMSC ANPM ANAR INHGA To close the window, press the cancel button. 8.2.2 Editing a shift To edit a shift, select the respective shift and press Editare (Edit). The Detalii tură (Shift details) window opens, where you can change the name of the shift, the dispatch, or the crew of that shift. 58/80 MMSC ANPM ANAR INHGA 8.2.3 Generating a report To generate a report, select one of the predefined templates from the list of reports and press Generează (Generate). 9 User settings module This module contains 2 sections: Despre (About) and Setări Utilizator (User settings). 59/80 MMSC ANPM ANAR INHGA 9.1 Despre (About) Despre (About) section allows you to view information on the application. To access the information, press the Despre (About) icon. The Despre (About) window opens where you can view information on the application, user and location. 9.2 Setări Utilizator (User settings) Setări Utilizator (User settings) section allows you to view and change the settings of the current user. To access the settings, press the Setări Utilizator (User settings) icon. The Setări Utilizator (User settings) window opens. In this window you can select the language from the Limba interfeței (Interface language) list menu. 60/80 MMSC ANPM ANAR INHGA To enable or disable one of the 5 options (Afișare chei limbă (Display language keys), Folosește pseudo-localizare (Use pseudo-localization), Salvează fișiere localizare mobilă (Save files mobile localization), Grupare resurse (Group resouces), Vizibilitatea echipajelor active (Visibility of active crews)), select the check box next to each option. To save the changes press Salvează (Save). 10 Admin module 10.1 General settings To access the general settings of the application, press the Administrare (Management) button in theGeneral tab, the Setari generale (General options) option. This window allows you to edit the values of the variables used in the emergency situations management application. The screen is as follows: 61/80 MMSC ANPM ANAR INHGA 10.2 Roluri (Roles) This functionality is accessible from the Administrare (Management) menu, Administrare generală (General management) sub-menu. This functionality allows you to create, change, delete and filter user roles. 62/80 MMSC ANPM ANAR INHGA 10.2.1 Adding a role To add a new role, press Adaugă (Add) button in the lower part of the window. In the new window displayed, fill in the Nume (Name) and Descriere (Description) fields, and select the rights to be allocated to the created role from the Acțiuni asignare (Actions assigned) list. To complete the operation press Salvează (Save). 63/80 MMSC ANPM ANAR INHGA 10.2.2 Changing roles To change a role, select the respective role and press Editează (Edit) in the lower part of the page. In the new window displayed change the fields you want and then press Salvare (Save). 10.2.3 Deleting roles To delete a role, select the respective role and press Ștergere (Delete) in the lower part of the window. A confirmation message appears; press OK to confirm. 64/80 MMSC ANPM ANAR INHGA 10.2.4 Filtering roles To filter roles, enter a keyword in the field Filtru (Filter) at the top of the window, then press the Caută (Search) button. 10.3 Utilizatori (Users) This functionality is accessible from the Administrare (Management) menu, Administrare generală (General management) sub-menu. This functionality allows you to create, change, delete and filter users. 10.3.1 Adding users To add a new user, press Adaugă (Add) button in the lower part of the window. In the new window displayed, fill in the fileds: Nume de utilizator (User name), Nume (Last name), Prenume (First name), Domeniu (Field) and Organizație (Organization). In the 65/80 MMSC ANPM ANAR INHGA Conturi (Accounts) tab, press Adaugă (Add) and select the agency needed. In the Roluri (Roles) tab, press Adaugă (Add) and select the role for the user. To complete the operation press Salvează (Save). 10.3.2 Changing users To change a user, select the respective user and press Editează (Edit) in the lower part of the page. In the new window displayed change the fields you want and then press Salvare (Save). 66/80 MMSC ANPM ANAR INHGA 10.3.3 Deleting users To delete a user, select the respective user and press Ștergere (Delete) in the lower part of the window. A confirmation message appears; press OK to confirm. 10.3.4 User filtering To filter roles, enter a keyword in the field Filtru (Filter) at the top of the window, then press the Caută (Search) button. 10.4 Schedules 10.4.1 Equipment This functionality allows you to add, change, delete and filter the equipment in different organizations. Also, you can export the equipment added, by selecting the desired export format in the lower right of the window. 10.4.2 Resources This functionality allows you to add, change, delete and filter the resources in different agencies. 67/80 MMSC ANPM ANAR INHGA 10.4.3 Categories of resources This functionality allows you to add, change, delete and filter the categories of resources in different agencies. 68/80 MMSC ANPM ANAR INHGA 10.4.4 Managing measurement units This functionality allows you to add, change, delete and filter the measurement units used within the application. 69/80 MMSC ANPM ANAR INHGA 10.4.5 Support institutions This functionality allows you to add, change, delete and filter the support institutions used within the application. 70/80 MMSC ANPM ANAR INHGA 10.4.6 Owners This functionality allows you to add, change, delete and filter the owners of materials and the means of intervention within the application. 71/80 MMSC ANPM ANAR INHGA 10.4.7 Managing means This functionality allows you to add, change, delete and filter the means within the application. 72/80 MMSC ANPM ANAR INHGA 10.4.8 Managing materials This functionality allows you to add, change, delete and filter the materials within the application. 73/80 MMSC ANPM ANAR INHGA 10.4.9 Dangerous materials This functionality is divide into 2 sections. Listă materiale (List of materials) and Parametrii materiale (Material parameters). In the section Listă materiale (List of materials) you can add, delete, change and filter bills of materials. In the section Parametrii materiale (Material parameters) you can add, delete, change and filter material parameters. 74/80 MMSC ANPM ANAR INHGA 10.4.10 Employees This functionality allows you to add, change, delete, filter and import employees. Also, there is a template for adding a list of employees, available by pressing the button Descarcă model import (Download import template) at the bottom of the window. 75/80 MMSC ANPM ANAR INHGA 10.4.11 Personnel roles This functionality allows you to add, change, delete and filter roles. 76/80 MMSC ANPM ANAR INHGA 10.4.12 Communication channels This functionality allows you to add, change, delete and filter the communication channels. 77/80 MMSC ANPM ANAR INHGA 10.4.13 Means of communication This functionality allows you to add, change, delete and filter the means of communication. 78/80 MMSC ANPM ANAR INHGA 10.5 Logos To access this functionality, press the Logouri (Logos) button in the General folder. This functionality allows the user to view details on the sessions of each user. Also, it allows the user to apply a filter on the logos, by Operator, Stație (Station), Organizație (Organization), Dată (Date), as well as a keyword. 79/80 MMSC ANPM ANAR INHGA 10.6 Errors To access this functionality, press the Erori (Errors) button in the General folder. This functionality allows the user to view the errors occurred during the session. 80/80